- Manuals
- Brands
- Alesis Manuals
- Drums
- COMPACTKIT 7
- User manual
-
Contents
-
Table of Contents
-
Bookmarks
Quick Links
User Guide
Guía del usuario
Español ( 9 – 14 )
Guide d’utilisation
Français ( 15 – 20 )
Guida per l’uso
Benutzerhandbuch
Appendix
English ( 33 – 37 )
Related Manuals for Alesis COMPACTKIT 7
Summary of Contents for Alesis COMPACTKIT 7
-
Page 1
User Guide English ( 3 – 8 ) Guía del usuario Español ( 9 – 14 ) Guide d’utilisation Français ( 15 – 20 ) Guida per l’uso Italiano ( 21 – 26 ) Benutzerhandbuch Deutsch ( 27 – 32 ) Appendix English ( 33 –… -
Page 3: English
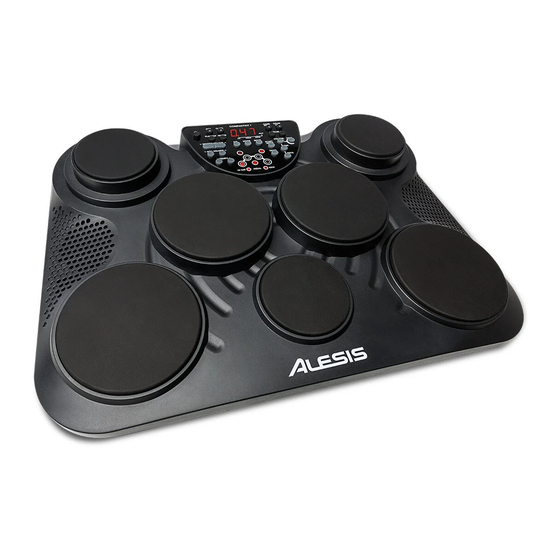
1. Speakers: Sound will play out of these speakers. When headphones are connected to the headphone output, these speakers will be muted. 2. Pads: Hit these pads to play CompactKit 7. 3. Control Panel: This panel contains the controls and display of CompactKit 7. See the following Control Panel…
-
Page 4
Control Panel 13 14 15 1. Power Button: Press this button to power CompactKit 7 on or off. 2. Display: This LCD shows information relevant CompactKit 7’s current operation. 3. Master Volume Down/Up: Use these buttons to adjust the master volume. -
Page 5
1/8” (3.5 mm) stereo cable (not included). 6. USB Port: Connect this port to a USB port on your computer using a standard USB cable (not included). This will let you use CompactKit 7 as a USB MIDI controller. See the Operation > USB MIDI… -
Page 6
Kits Selecting CompactKit 7 has several different drum kits. Each kit is a collection of sounds that make up a typical drum set. To select a kit, press Kit and then use the Value Down/Up buttons to select the kit number (Preset Kit 001–045 or User Kit 046–050). -
Page 7
Saving After making changes to a kit, remember to save it. This prevents your changes from being lost when you select a different kit or when you power CompactKit 7 off. To save a kit: 1. Select the kit you want to save by pressing Kit and then using the Value Down/Up buttons to select the kit number. -
Page 8
To play back your recorded performance, press Play/Stop. USB MIDI When CompactKit 7 is connected to your computer’s USB port, you can use it as a USB MIDI controller. In this scenario, the metronome, song, and kit sounds will not be recorded. Instead, you can play the pads and footswitches, each of which will send MIDI note messages to your computer (e.g. -
Page 9: Español
2. Pads: Golpee estos pads para tocar el CompactKit 7. 3. Panel de control: Este panel contiene los controles y la pantalla del CompactKit 7. Para aprender más sobre esto, consulte la sección Panel de control a continuación.
-
Page 10
Panel de control 13 14 15 1. Botón de encendido: Pulse este botón para encender y apagar el CompactKit 7. 2. Pantalla: Este LCD muestra información relevante sobre el funcionamiento actual del CompactKit 7. 3. Subir/bajar volumen maestro: Utilice estos botones para ajustar el volumen maestro. -
Page 11
6. Puerto USB: Conecte este puerto USB a un puerto USB libre en el ordenador mediante un cable USB estándar (no incluido). Esto le permitirá utilizar el CompactKit 7 como un controlador USB MIDI. Para aprender más sobre esto, consulte la sección Funcionamiento >… -
Page 12
Funcionamiento Kits Selección El CompactKit 7 tiene varios kits de batería diferentes. Cada kit es una colección de sonidos que conforman una batería típica. Para seleccionar un kit, pulse Kit y luego utilice los botones Value Down/Up para seleccionar el número de kit (kit preseteado 001–045 o kit de usuario 046–050). Aparecerá un punto en la pantalla encima de Kit para indicar que está… -
Page 13
4. Pulse Save. El número de kit dejará de parpadear y se seleccionará ese kit. Canciones CompactKit 7 tiene diversas canciones que consisten en partes de batería y acompañamiento. Puede reproducir la canción con o sin el acompañamiento. Cada canción tiene su tempo y kit predeterminados. -
Page 14
Para reproducir su interpretación grabada, pulse Play/Stop. USB MIDI Cuando el CompactKit 7 se conecta al puerto USB de su ordenador, puede utilizarlo como un controlador USB MIDI. En este escenario, no se grabarán el metrónomo, la canción ni los sonidos del kit del CompactKit 7. -
Page 15: Français
1. Enceintes : Le son sera diffusé par ces enceintes. Lorsqu’un casque d’écoute est branché à la sortie casque, ces enceintes sont désactivées. 2. Pads : Frappez ces pads pour jouer la CompactKit 7. 3. Panneau de commande : Ce panneau contient les commandes et l’écran d’affichage de la CompactKit 7.
-
Page 16
Panneau de commande 13 14 15 1. Touche d’alimentation : Cette touche permet de mettre la CompactKit 7 sous et hors tension. 2. Écran : Cet écran ACL affiche les opérations en cours de la CompactKit 7. 3. Touches Master Volume : Ces touches permettent de régler le volume principal. -
Page 17
3,5 mm (non inclus). 6. Port USB : Ce port USB permet de brancher un ordinateur en utilisant un câble USB standard (non inclus). Ceci vous permet d’utiliser la CompactKit 7 comme contrôleur MIDI USB. Veuillez consulter la section Fonctionnement >… -
Page 18
Ensembles de sons (kits) Sélection La CompactKit 7 dispose de plusieurs kits de batterie. Chaque kit est un ensemble de sons qui composent un ensemble typique de batterie. Pour sélectionner un kit, appuyez sur la touche Kit puis utilisez les touches Value afin de sélectionner un numéro de kit (kits prédéfinis 001–045 ou kits utilisateur 046–050). -
Page 19
Sauvegarde Après avoir modifié un kit, pensez à l’enregistrer. Ceci empêche vos modifications d’être perdues lorsque vous sélectionnez un autre kit ou lorsque vous mettez la CompactKit 7 hors tension. Pour sauvegarder un kit : 1. Sélectionnez le kit que vous souhaitez sauvegarder en appuyant sur la touche Kit puis utilisez les touches Value afin de sélectionner un numéro de kit. -
Page 20
Pour activer et désactiver la partie batterie de la chanson, appuyez sur la touche Drum Off. Réverbération Vous pouvez appliquer un effet de réverbération au son de la CompactKit 7. Cela affectera le kit sélectionné ainsi que la chanson en cours. -
Page 21: Italiano
1. Casse: il suono viene riprodotto tramite queste casse. Quando le cuffie sono collegate all’uscita cuffie, le casse verranno silenziate. 2. Pad: battere questi pad per suonare il CompactKit 7. 3. Pannello di controllo: questo pannello contiene i comandi e il display del CompactKit 7. Si veda il paragrafo Pannello di controllo…
-
Page 22
Pannello di controllo 13 14 15 1. Tasto di alimentazione: premere questo tasto per accendere e spegnere il CompactKit 7. 2. Display: questo LCD mostra informazioni relative all’operazione corrente del CompactKit 7. 3. Volume Master giù/su: servirsi di questi tasti per regolare il volume principale (master). -
Page 23
3,5 mm (1/8”) (non in dotazione). 6. Porta USB: collegare questa porta a una porta USB libera del computer servendosi di un cavo standard USB (non in dotazione). Questo consentirà di utilizzare il CompactKit 7 come controller USB MIDI. Si veda il paragrafo Operazione >… -
Page 24
Operazione Scelta Il CompactKit 7 presenta vari kit batteria diversi. Ciascun kit è una collezione di suoni che costituisce un set batteria tipico. Per selezionare un kit, premere Kit e servirsi dei tasti Valore giù/su per selezionare il numero di kit (Kit predefiniti 001–045 o Kit utente 046–050). Un puntino comparirà a display sopra al kit per indicare che questo è… -
Page 25
Salvataggio Dopo aver apportato modifiche a un kit, ricordarsi di salvarlo. Così facendo, i cambiamenti non andranno persi quando si seleziona un kit diverso o quando si spegne il CompactKit 7. Per salvare un kit: 1. Selezionare il kit che si desidera salvare premendo Kit e utilizzando poi i tasti Valore giù/su per selezionare il numero di kit. -
Page 26
Per attivare o disattivare la parte di batteria della canzone, premere Drum Off. Riverbero Al suono del CompactKit 7 può essere applicato un effetto di riverbero. Questo influenzerà il kit selezionato nonché la canzone corrente. Per regolare la quantità di riverbero, premere Reverb, e servirsi dei tasti Valore giù/su per selezionarne il livello (r-0 –… -
Page 27: Deutsch
1. Lautsprecher: Der Ton wird von diesen Lautsprechern ausgegeben. Wenn Kopfhörer an den Kopfhörerausgang angeschlossen sind, sind die Lautsprecher stummgeschaltet. 2. Pads: Schlagen Sie diese Pads an, um das CompactKit 7 zu spielen. 3. Bedienfeld: Dieses Paneel enthält die Bedienelemente und das Display des CompactKit 7.
-
Page 28
Bedienfeld 13 14 15 1. Netz-Taste: Drücken Sie diese Taste, um CompactKit 7 ein- oder auszuschalten. 2. Display: Das LCD-Display zeigt Informationen, die für den aktuellen Betrieb des CompactKit 7 relevant sind. 3. Master-Lautstärke senken/erhöhen: Verwenden Sie diese Tasten, um die Master- Lautstärke einzustellen. -
Page 29
Fußschalter an diesen Eingang an. Wenn Sie den Fußschalter betätigen, wird CompactKit 7 die Nachricht genau wie bei der Betätigung eines Pads erhalten. 3. Hi-Hat-Eingang: Schließen Sie einen der mitgelieferten Fußschalter an diesen Eingang an. Wenn Sie das Hi-Hat-Pad betätigen während Sie den Fußschalter drücken, wird ein geschlossener Hi-Hat-Sound erzeugt. -
Page 30
Betrieb Kits Auswählen CompactKit 7 hat verschiedene Drum-Kits. Jedes Kit ist eine Sammlung an Sounds, die ein typisches Drum-Set ausmachen. Um ein Kit auszuwählen, drücken Sie Kit und verwenden dann die Tasten Wert reduzieren/erhöhen, um die Kit-Nummer auszuwählen (Preset-Kit 001-045 oder Benutzer-Kit 046-050). -
Page 31
4. Drücken Sie Speichern. Die Kit-Nummer hört auf zu blinken und das Kit ist nun ausgewählt. Songs CompactKit 7 hat mehrere Songs, die aus Drum-Parts und der Begleitung bestehen. Sie können den Song mit oder ohne Begleitung spielen. Jeder Song hat sein eigenes Standardtempo und ein Standard-Kit. -
Page 32
Zur Wiedergabe der aufgezeichneten Performance drücken Sie Wiedergabe/Stopp. USB-MIDI Wenn CompactKit 7 mit dem USB-Anschluss des Computers verbunden ist, können Sie es als USB-MIDI-Controller verwenden. In diesem Szenario werden Metronom, Song und die Kit- Sounds des CompactKit 7 nicht aufgenommen. Stattdessen können Sie die Pads und Fußschalter betätigen, die MIDI-Noten-Nachrichten an Ihren Computer senden (z.B. -
Page 33
Appendix (English) Sounds Fusion Snare Acoustic Tom 6 Kick (Bass) Drum 22” Acoustic Kick Big Band Snare Brush Tom 2 24” Standard Kick Vintage Snare Brush Tom 3 Brush Kick Live Snare Brush Tom 4 Rock Kick Reggae Snare Brush Tom 5 Jazz Kick R&B Snare 1 Brush Tom 6… -
Page 34
Toms Crash Percussion (continued) 106 Lo-Fi Tom 1 141 16” Acoustic Crash Nan Bang 107 Lo-Fi Tom 2 142 16” Acoustic Crash Edge Da Mu Yu 108 Lo-Fi Tom 3 143 16” Rock Crash Xiao Bo 109 Lo-Fi Tom 4 144 16”… -
Page 35
Vibraphone Gb5 Orchestra Timp Bb2 Percussion (continued) Vibraphone D4 Vibraphone G5 Orchestra Timp B2 Vibraphone Eb4 Vibraphone Ab5 Orchestra Timp C3 Vibraphone E4 Vibraphone A5 Orchestra Timp Db3 Vibraphone F4 Vibraphone Bb5 Orchestra Timp D3 Vibraphone Gb4 Vibraphone B5 Orchestra Timp Eb3 Vibraphone G4 Vibraphone C6 Orchestra Timp E3… -
Page 36
Songs Blues Funk Dance 2 Country Blues Nu-Jazz Funk DnB 2 Ballad 1 Funk 1 DnB 3 Brit Pop Funk 2 Breakbeat 2 8-Beat Pop 1 Funk 3 Classic Rock ‘60s Pop Funk 4 Heavy Rock 8-Beat 1 Pop Funk 1 Rock Ballad 8-Beat 2 Pop Funk 2… -
Page 37: Technical Specifications
Specifications are subject to change without notice. Trademarks and Licenses Alesis is a trademark of inMusic Brands, Inc., registered in the U.S. and other countries. All other product or company names are trademarks or registered trademarks of their respective owners.
-
Page 40
Manual Version 1.1…
Посмотреть инструкция для Alesis CompactKit 7 бесплатно. Руководство относится к категории без категории, 1 человек(а) дали ему среднюю оценку 7.9. Руководство доступно на следующих языках: английский. У вас есть вопрос о Alesis CompactKit 7 или вам нужна помощь? Задайте свой вопрос здесь
Не можете найти ответ на свой вопрос в руководстве? Вы можете найти ответ на свой вопрос ниже, в разделе часто задаваемых вопросов о Alesis CompactKit 7.
Инструкция Alesis CompactKit 7 доступно в русский?
Не нашли свой вопрос? Задайте свой вопрос здесь
- В избранное
- Сравнить
ALESIS COMPACTKIT 7 портативная настольная ударная установка, 7 чувствительных к силе удара пэдов с реалистичным отскоком, 2 педали в комплекте: hi-hat, kick drum, 45 заводских пресетов, 5 пользовательских, библиотека из 256 звуков, 100 предустановленных песен для сольной игры, функция записи, встроенный метроном, функция Hand Percussion позволяет использовать руки вместо палочек, USB-MIDI выход для подключения к DAW системам, питание от 6 батареек 6С (приобретается отдельно)
- Описание
- Технические характеристики
- Где купить
- Задать вопрос
ALESIS COMPACTKIT 7 – компактная электронная барабанная установка с семью высококачественными чувствительными к скорости нажатия пэдами. Эта модель выдает очень натуральный звук и прекрасно передает ощущения, возникающие при игре на настоящей акустической ударной установке. Установка ALESIS COMPACTKIT 7 очень удобна и проста в использовании, она прекрасно подойдет для начинающих, обучающихся игре на ударных инструментах, а также для тех, кто не является и не планирует стать профессиональным барабанщиком. Модель оснащена контрастным светодиодным дисплеем, на котором наглядно отображаются текущие настройки, также есть дополнительные светодиоды, показывающие, по какому из пэдов Вы ударяете. Предусмотрено 45 пресетов плюс пять пользовательских, библиотека включает 256 вариантов перкуссионного звучания и 100 композиций, под аккомпанемент которых Вы можете играть. Играть можно не только палочками, но и руками, используя опцию «Hand Percussion». Есть встроенный метроном, а также возможность записывать свою игру. Записи сохраняются даже после отключения установки. Для соединения с компьютером и работы с записями в DAW приложениях предусмотрен разъем USB-MIDI.
-
Онлайн
Интернет-магазины наших дилеров -
Офлайн
Магазины дилеров в Вашем городе -
Список городов с офлайн магазинами
Вы можете задать любой интересующий вас вопрос по товару или работе магазина. Наши квалифицированные специалисты обязательно Вам помогут.
Смотреть руководство для Alesis CompactKit 7 ниже. Все руководства на ManualsCat.com могут просматриваться абсолютно бесплатно. Нажав кнопку «Выбор языка» вы можете изменить язык руководства, которое хотите просмотреть.

MANUALSCAT | RU
Вопросы и ответы
У вас есть вопрос о Alesis CompactKit 7, но вы не можете найти ответ в пользовательском руководстве? Возможно, пользователи ManualsCat.com смогут помочь вам и ответят на ваш вопрос. Заполните форму ниже — и ваш вопрос будет отображаться под руководством для Alesis CompactKit 7. Пожалуйста, убедитесь, что вы опишите свои трудности с Alesis CompactKit 7 как можно более детально. Чем более детальным является ваш вопрос, тем более высоки шансы, что другой пользователь быстро ответит на него. Вам будет автоматически отправлено электронное письмо, чтобы проинформировать вас, когда кто-то из пользователей ответит на ваш вопрос.
Задать вопрос о Alesis CompactKit 7
- Бренд:
- Alesis
- Продукт:
- без категории
- Модель/название:
- CompactKit 7
- Тип файла:
- Доступные языки:
- английский, немецкий, французский, испанский, итальянский
Сопутствующие товары Alesis CompactKit 7
1
7
3
4
1. Power Button: Press this button to power CompactKit 7 on or off.
2. Display: This LCD shows information relevant CompactKit 7’s current operation.
3. Master Volume Down/Up: Use these buttons to adjust the master volume.
4. Acc. Volume Down/Up: Use these buttons to adjust the volume of the accompaniment
(everything but the drum sounds in a song).
5. Tempo Down/Up: Use these buttons to adjust the tempo.
6. Click: Press this button to activate or deactivate the metronome («click»).
7. Play/Stop: Press this button to start or stop playback of your recording.
8. Rec: Press this button to start or stop recording.
9. Reverb: Press this button to change the reverb level. See
how to do this.
10. Hand Perc: Press this button to select Song 077 and Kit 015 instantly. Kit 015 uses
sounds from hand percussion instruments rather than standard drums.
11. Drum Off: Press this button to activate or deactivate the drum part of a song.
12. Value Down/Up: Use this buttons to adjust the setting shown in the display. See
Operation
to learn more.
13. Kit: Press this button, and then use the Value Down/Up buttons to select a drum kit. See
Operation > Kits
14. Voice: Press this button, and then use the Value Down/Up buttons to select a voice for a
pad. See
Operation > Kits
15. Song: Press this button, and then use the Value Down/Up buttons to select a song. See
Operation > Songs
16. Start/Stop: Press this button to start or stop the current song.
17. Demo: Press this button to start or stop the demo song.
18. Save: Press this button to save the current kit to a User Kit.
4
8 9
6
13 14 15
5
to learn more.
to learn more.
to learn more.
10
2
16
22
17
11
12
18
19
20
21
Operation > Reverb
to learn