- Manuals
- Brands
- King Long Manuals
- Other
- XMQ6127DYW Series 2019
- Operation manual
-
Contents
-
Table of Contents
-
Troubleshooting
-
Bookmarks
Related Manuals for King Long XMQ6127DYW Series 2019
Summary of Contents for King Long XMQ6127DYW Series 2019
-
Page 1
OPERATION MANUAL Vehicle Model: XMQ6127DYW (C12HD) Vehicle No.: KDM00001 Country: UK File Version: NO.1 Editor: Ms Lin Date: 21.06.2019 Xiamen King Long United Automotive Industry Co., Ltd. -
Page 2: Foreword
Improper usage and repair may have a strong impact on service performance of the complete vehicle, and thus the manufacturer, Xiamen King Long United Automotive Industry Co.,Ltd. will not takes the responsibility for the damages caused by them.
-
Page 3: Table Of Contents
5 . DPF switches (diesel particulate filter) ………………..24 6. Lane departure warning system (LDWS)………………..27 7. Gearbox Operation……………………..28 8. Introduction of KING LONG integrated A/C system …………….33 9. AEBS driving system operation instruction……………….. 44 10. Tire pressure monitoring system introduction (TPMS)……………..49 11.
-
Page 4
25. VDO CAN module……………………..67 26. Switch control box (Model: JKH2028)………………..67 27. Engine compartment fire extinguisher operation……………… 68 Chapter III Vehicle Starting and Driving………………….70 1. Check daily, before turning engine on…………………70 1.1 Check oil level of the engine………………….70 1.2 Check level of the coolant…………………. -
Page 5
1. General knowledge……………………..87 2. King-long Bus General Maintenance…………………. 87 3. Maintenance of engine and chassis assembly………………87 4. Body maintenance……………………… 87 5. ABS system maintenance and service…………………87 6. Electrical system maintenance and service………………… 88 7. Tire transposition……………………….. 88 8. Adjustment of the brake pedal free play………………..89 9. -
Page 6: Chapter I Technical Parameters And Vehicle Description
Chapter I Technical Parameters and Vehicle Description 1. Technical parameters (vehicle No: KDM00001) Product model XMQ6127DYW(C12HD) Engine model ISL9E6C 400 Engine type In-line six-cylinder water-cooling direct-injection diesel engine Cylinder bore ×stroke (mm) 114X145 Displacement (ml) 8900 Compression ratio 16.6:1 Rated power / rotational speed (kw/rpm) 298/2100 Max.
-
Page 7: Introduction To Data Plate
2. Introduction to data plate Bus data plate for reference The bus data plate may be affixed to either the upside of the front passenger door frame or to the side of the front passenger door step (the position may vary with vehicle model). There are many parameters on the plate, such as vehicle model, gross mass, vehicle serial number, vehicle capacity, VIN (short for vehicle identification number), chassis serial number, engine…
-
Page 8: Product Quality Assurance
TV, guide seat, etc. 5.8 Air-conditioning system Cooling system: KING-LONG top mounted dependent air-conditioning system. Heating system: heater, and natural heat sink. Defroster: King Long cooling/heating defrosting device.
-
Page 9
5.9 Door The door adopts the full aluminum remote control out-swing pneumatic doors. The out-swing door adopts the advanced electrically aerodynamic theory design, with the motion of opening and closing placidly, agile, safe, lock credible and anti-clamp function. A. Basic function a. -
Page 10: Chapter Ii Operation Instruction
4.Engine cabin extinguisher operation button 5.Wiper control handle 6.Combination instrument 7.Horn button 8.Steering wheel 9.Light operation handle 10.Reversal monitor 11.Tire Pressure Monitoring System (TPMS) 12.VDO travelling data recorder 13.DVD player 14.KING LONG A/C operation panel 15.Variable speed operation control panel…
-
Page 11: Multi-Function Steering Wheel Button Function
2. Multi-function steering wheel button function 2.1 Feature overview Multi-function steering wheel buttons are distributed on the left and right sides, 7 keys on the left and 7 keys on the right, as shown below. Multi-function steering wheel main functions: (1) Operation control player volume, anthem, sound source;…
-
Page 12
Function when controlling the Icon Function Control of the player’s features Remarks instrument Arrow key — Right/ Press it in short time to switch Press it in short time, the instrument Next song the next song or channel + display flipping pages, next page Direction key-Left/ Press it in short time to switch… -
Page 13: Instruction Of Instrument (Vdo Edition)
3. Instruction of instrument (VDO EDITION) Function Description ABS indicator ABS work/warning High beam indicator When High beam is switched on Left turning indicator When Left turning/hazard switch is turned on Severe error When the electrical system has severe error General error When the electrical system has general warning Right turning indicator…
-
Page 14
3.1 Severe error conditions EDC red lamp; ECAS red lamp; EBS red lamp; coolant level low; battery not charging (after engine starts); worn brake shoes; brake circuit 1/2 pressure low; coolant temperature high; catalyst level low; engine cabin temperature high; oil pressure low (after engine starts). 3.2 General error conditions Hammer not at right position;… -
Page 15
Engine wait to start (do not start the engine Rear fog light working until this symbol disappear) Brake light working EBS red lamp warning Lift-axle lock EBS amber lamp warning Steering oil level low ECAS status Battery not charging (indicate charging error if Steering oil pressure low this symbol still exist after engine starts) Coolant temperature high… -
Page 16
① Transmission gear Display : current gear is «neutral»; : current gear is «forward»; : current gear is «reverse»; ② Time This information comes from DTCO. ③ System voltage This value shows the battery voltage when generator is not working; and shows the voltage by generator after engine starts. -
Page 17
(2) Error display Page Figure -2 text error If there is error exists, this page will show after driving information page when you press the page change button. Pictogram : object name; Text: detailed description of the error; Errors can be displayed in this page Communication Error: EDC, EBS, TCO, AC, Front node, Top node, Cabin node, Rear node;… -
Page 18
(4) Air conditioner status This page will appear is air conditioner is working and the communication is right. A/C mode include: ventilation; heating; cooling; demist/defrost; auto mode; off Set temp: the temperature currently set to be; Room temp: the real ambient temperature in the bus; Outer temp: outside temperature;… -
Page 19: Illustration Of Switch And Indicator
4. Illustration of switch and indicator Number of switches, indicators and each own position may vary with the vehicle model and configuration state, please refer to the flowing sheet: Switch Name Function Notes Pressed on top: turn off defrosting function. Rearview mirror Pressed on bottom: turn on the defrosting defrosting switch…
-
Page 20
Automatic Pressed on top: headlamp OFF. headlamp Pressed on bottom: headlamp ON. switch Pressed on top: the sunshade will be raised Front windshield sunshade switch Pressed on bottom: the sunshade will be descended down. Pressed on top: the electric horn is turned Electric horn/air horn change Pressed on bottom: the air horn is turned… -
Page 21
Rear fog lamp Pressed on top: the rear fog lamp OFF. switch Pressed on bottom: the rear fog lamp ON. Fire extinguisher This switch is only used when the engine pushbutton 1. Open the lid compartment is on fire and the switch 2. -
Page 22
Pressed on top: turn off the hill holder Hill Holder function. Hill Holder function switch Pressed on bottom: turn on the hill holder function. KNEELING Pressed on top: the vehicle will return to the Kneeling/ normal height. Restoration Pressed on bottom: the vehicle will start to switch kneel. -
Page 23
Pressed on top: switch on the high shift High/low shift mode. mode selection Pressed on bottom: switch on the low shift switch mode. CRUISE Pressed on top: engine cruise function is Engine cruise turned off. function switch Pressed on bottom: engine cruise function is turned on. -
Page 24: Dpf Switches (Diesel Particulate Filter)
5 . DPF switches (diesel particulate filter) DPF switches Continuously and without driver intervention, the exhaust system is performing active regeneration of the diesel particle filter (DPF), in order to adapt to the emission regulations and to clean the filter itself at the same time.
-
Page 25
at a safe distance from the exhaust system and first open the side gate where particulate filter (DPF) and catalyst (SCR) are found. When you park for regeneration through the DPF regeneration start switch, try to find a clear spot where there is no flammable element nearby. (2) Active regeneration in second level If instead of performing active regeneration as described in the preceding paragraph, (that is to… -
Page 26
(4) Active regeneration in fourth level If after all these notices, we continue to drive the vehicle without forcing the regeneration of the particle filter(DPF), according to the steps described above, then the particulate filter will be so dirty (stopped) that we won’t be able to clean it. -
Page 27: Lane Departure Warning System (Ldws)
6. Lane departure warning system (LDWS) 6.1 Important notes on the lane departure warning system (LDWS) The lane departure warning system (LDWS) warns the driver of the unintentional drift of the vehicle out of its travel lane. The position of the bus in relation to the road markings on either side is monitored continuously by means of a camera behind the windscreen.
-
Page 28: Gearbox Operation
7. Gearbox Operation ② PushButton Illumination 7.1 Introduction Brightness levels 1(low) and 2(high) are available The EcoLife transmission is connected to the vehicle for push-button illumination. electrics via the vehicle CAN; and via the ZF CAN with the Turning the vehicle key into driving position range selector, the optional E-module, and the diagnosis causes the system to perform an automatic tool.
-
Page 29
① Standard Gearshifts are only executed at shift points defined by Accelerator pedal in idling position the electronic control unit. Manual intervention in the automatic shifting process (shifting through driving < 900 rpm ranges) is not expedient. Vehicle standstill … -
Page 30
(8) Kickdown (Forced Downshift) (5) Starting To utilize maximum engine power, higher shift After selecting the appropriate driving range, wait points can be realized via the kickdown switch (see for approx. 1 to 2 seconds, then release the brake illustration) or the CAN system (for acceleration or and accelerate. -
Page 31
When the maximally permitted oil temperature is Transmission with function “Automatic Idle Shift” approached the defined, the retarder’s performance (AIS) will be reduced or the retarder will be disabled by The automatic electronic gear change unit will set the electronic control unit. the transmission to “Neutral”… -
Page 32
Exception: In a dangerous situation, towing without (13) Status Monitoring / Warning Lamps separation of the drive train is permitted until the The diagnostics system of the electronic control unit vehicle has left the danger area (e.g. intersection, monitors the transmission status every time the tunnel, etc.). -
Page 33: Introduction Of King Long Integrated A/C System
8. Introduction of KING LONG integrated A/C system 8.1 Operation guide (1) Working state illustration Sleeping working state: o nly battery could supply power, ignition switch located in“OFF”place, and engine stops working; Wakening working state: both battery and ignition switch could supply power, ignition switch located in“ON”…
-
Page 34
Sleeping Name Icon working Wakening working state Activity working state state Once switch key lies in “ON” state while turning off last time, in that way, switch key will lie in “ON” state when entering Display “OFF” through screen into activity mode; Once switch key lies in “OFF” state while by key (pressing more than 2 turning off last time, thus, switch key will lie in “OFF”… -
Page 35
Inlet air mode in driver zone could be changed by pressing the key, inlet air mode indicates on display screen. After inlet air mode in driver zone was adjusted by manual style, automatic VENT setting key VENT outlet is closed and not mode in driver zone will void and change into manual mode. -
Page 36
original value set temperature in passenger zone is as follows: If TP>TC+3,TP=TC+3; If TP<TC-3,TP=TC-3. The set temperature value in driver zone indicate the display screen. When pressing down left key, decrease ventilation fan speed; WIND increasing when pressing down right key, thus increase ventilation fan key in passenger speed, ventilation fan’s speed could be set in scope of 1-5 zone… -
Page 37
Each in theses two pictures both indicate a flame icon, with figure” 1” or “2”, “date”, “hour”, “minute”, and “ AUTO” as well as “ OFF” state, could choose week/days or a whole week individually. Use TEMP rotary knob in driver zone to select the fields required, use TEMP rotary knob in passenger zone to add the data required. -
Page 38
If auxiliary heating lies in direct control mode, the figure located at top left corner show surplus minute number, the symbol such as “AUTO”,“ON”and “OFF”appear on display screen. Select the auxiliary heating state, such as ON, OFF and AUTO by TEMP rotary knob in driver zone, choose by TEMP rotary knob in passenger zone from following values, “25”, “50”, “75”, “100”… -
Page 39
(3) Display screen icon LCD screen divide into two zone: driver zone-A/C control located on left side in screen, and passenger zone -A/C control located on right side in screen. Please see the following tables: Icon in driver zone Icon Meaning Exterior temperature Setting temperature in driver zone… -
Page 40
Fresh air (exterior circulation) Icon in passenger zone Icon Meaning Setting temperature in passenger zone Compressor in working state Interior circulation Exterior circulation Speed indication 1 gears- evaporator blower Speed indication 2 gears- evaporator blower Speed indication 3 gears- evaporator blower Speed indication 4 gears- evaporator blower Speed indication 5 gears- evaporator blower Auxiliary heating in working state(program1 or program 2) -
Page 41
Use TEMP rotary knob in driver zone, between ON and OFF, change the states of front step radiator and additional radiator in driver zone; Use TEMP rotary knob in passenger zone, between ON and OFF, change the state of rear step radiator. Press blower speed boosting key (less than 2Sec.) in driver zone once more, exit from manual control interface. -
Page 42
8.3 Fault diagnosis Press clock key (more than 2 Sec.), enter into diagnosis mode; press clock key (less than 2 Sec.), exit from diagnosis mode; use temperature rotary knob in passenger zone, may look up the fault codes in driver zone and passenger zone. -
Page 43
SPHEROS fuel heater-flame burning abnormal SPHEROS fuel heater-input detector damaged SPHEROS fuel heater-temperature sensor overheating protection damaged SPHEROS fuel heater-solenoid valve damaged SPHEROS fuel heater-fan motor damaged SPHEROS fuel heater-water pump damaged SPHEROS fuel heater-temperature switch void or overheating SPHEROS fuel heater-input ignition sensor void SPHEROS fuel heater-failed in view of repetitive faults or repetitive ignition 6 times Fault codes table in passenger zone Code… -
Page 44: Aebs Driving System Operation Instruction
9. AEBS driving system operation instruction (AEBS: Advanced Emergency Braking System) 9.1 Engine speed increase (option) In the following situations, you should brake the bus manually using the service brake: If the distance warning icon appears on the display screen.
-
Page 45
9.3 Activating/deactivating AEBS AEBS is activated automatically With every engine start. AEBS is deactivated automatically If the chassis frame is not at normal level (raised lowered), In the event of a malfunction in the AEBS electronics system, In the event of a malfunction in the vehicle’s … -
Page 46
Danger. AEBS may not always detect vehicles in front unequivocally at entry sliproads or where other vehicles are driving on a different line or cut in. The distance sensor may react too late to vehicles that are driving on a different line or that suddenly cut in. -
Page 47
Danger. For these reasons, pay even closer attention to traffic conditions when cornering and when approaching standing objects because no automatic braking will be initiated. Snaking roads Danger. On snaking roads, AEBS may not always detect vehicles in front unequivocally. The distance sensor may not detect that the vehicles in front is in the same lane as Vehicles on entry and exit sliproads or intersections you. -
Page 48
Danger. Danger. In instances where the vehicle in front pulls out of your Unfavourable weather conditions, such as snow, slush, lane, it is common for the speed of this vehicle to heavy rain or heavy soiling of the windscreen, may decrease before it has fully arrived in the adjacent lane. -
Page 49: Tire Pressure Monitoring System Introduction (Tpms)
10. Tire pressure monitoring system introduction (TPMS) Application: Truck and bus with 6 or 8 wheels. After turning the ACC on, the display could show the pressure and temperatures of each tire in real time whether the vehicle is in the static or driving state, the driver can know the real-time situation of tires. Moreover, the warning can be given if the abnormal pressure or temperature occurs.
-
Page 50
The functions of SET key: I. To enter into the product parameters setting operation, thus entering the corresponding interface, for time adjustment, standard pressure value setting, temperature warning value setting, transmitter replacement and tires rotation; B. Month Setting II. When the system alerts, press SET key to turn on and off Short-press the SET key again on the Year setting the sound. -
Page 51
E. Minute Setting G. Tires Rotation Setting Under the hour setting interface, short-press the SET key On the wireless code-connection display interface, to enter into the minute setting interface, as shown in the short-press the SET key again to enter into the tires following figure, thus the hour value twinkling stops. -
Page 52
Attention B. High Pressure Warning After the completion of setting the temperature warning When tire’s pressure is 1.25 times higher than the value, if short-press the SET key, the interface will return standard atmospheric pressure, the High Pressure to the Year setting state. Warning occurs: ①… -
Page 53
G. Wireless code-connection and standard value setting Under minute setting interface, short-press SET key to enter into transmitter wireless code-connection state. Both the pressure and temperature values are blank at this time. Press the direction key to select the tires to be re-set. -
Page 54
10.5 Trouble Shootings J. Beeper Warning When the system alerts, the corresponding warning icon lit Problem Possible Cause Solution up, and the beeper will chirp for 0.5s and stop 2s until the Display shows 1.Antenna falls off Parking at the warning disappears. -
Page 55
10.7 Tires Rotation 10.6 Transmitter Replacement When your tires wear to a certain extent, the tires rotation When the transmitter in your wheel is damaged and needed will be needed. The one-to-one correspondence between to be replaced, the one-to-one correspondence between ID the original display and transmitter will be disrupted. -
Page 56
10.8 Parameters Transmitter Battery voltage: 2.1 ~ 3.6V Transmitter power: >-3dBm Transmission frequency: 433.92MHz Weight: 70 g Dimensions: 8.3 x 3.1 x 2.5 cm Available temperature range: -40~ 257℉ Temperature error: ± 37~39℉ Battery life: 5 years Absolute pressure: 199Psi Frequency: 433MHz Display Supply Voltage: 24V… -
Page 57: Ecas Introduction
. ECAS introduction 11.1 ECAS introduction The name ECAS stands for Electronically Controlled Air Suspension. ECAS is an electronically controlled air suspension system with a large number of functions. Air suspension systems have been used in motor vehicles since the mid 50s-especially in buses. Air suspension systems are used in them as a standard and are increasingly being used in trucks and trailers.
-
Page 58
• Operating switches • Sidewalk detector 11.2 ECAS system structure and features (1) Height adjustment(auto): once the speed is over the pre-setting threshold, it will return to the normal height. (2) Special Height. (3) Kneeling function is optional. (4) Safety concept and diagnostic function. ①… -
Page 59: Open/Close The Passage Door
12. Open/close the passage door If need open the passage door, please use the key to open it. Firstly insert the key into the hole 1 and clockwise rotate it about 90°, then clockwise rotate handle 2. It’s for unlocking the door lock, following you can press the button 3 of the door remote controller to open the door.
-
Page 60: Door Emergency Switch
13. Door emergency switch The door emergency switch is located on upside of the gate ingress or behind of passenger door in side panel. Operation tips: 1) Pull down the red switch cover 2) Open the bonnet 3) Turn the knob 4) Push the passenger door 5) Reposition after use valve…
-
Page 61: Horn Button
15. Horn button It is on the steering wheel. The horn is hooting when pressing the button 1. The type of steering wheel may vary with vehicle model. Please use the horn only when strictly necessary to warn other drivers and pedestrians. 16.
-
Page 62: Ignition Switch
17. Ignition switch Position of the ignition key is shown in figure. 1.»L» LOCK: Insert or remove the key in this position. 2.»A» ACC: Power supply of the instrument is switched on 3.»O» ON: Normal driving position 4.»S» START: Initiating position of the engine, and the key may rebound to the «ON»…
-
Page 63: Lamplight Operating Handles
18. Lamplight operating handles The lamplight operating handle is located on left underside of the steering wheel, which control the front small light, headlamp, headlamp dimming, etc OFF: Indicating that the headlamp and the small lamp are all off. is the small lamp indication. The small lamp, the instrument light and the side indicator lamp will all be turned on when anti-clockwise rotating the handle to position of this identification.
-
Page 64: Retarder Operation
20. Retarder operation The handle can be mounted under the steering wheel or built into the dashboard. This manual control mode generally has 5 control positions: Position 0: off Position 1: 25% Position 2: 50% Position 3: 75% Position 4: maximum braking effect An indicator light is lit when the retarder is in use.
-
Page 65: Safety Hatch
22. Safety hatch The safety hatch is located on ceiling of the vehicle. Please open the safety hatch according to the following diagrammatic representation and illustration to escape for fear of danger. Steps to open the safety hatch (the following safety hatch is an example): 1.
-
Page 66: Vdo Module Function Description
ACC electric power relay, air condition relay and four UPL system’s relay. Their names have been marked on the wire. The capacity and the name of fuses also could be found on the fuse box cover or the King Long Instrument Wiring Harness.
-
Page 67: Vdo Can Module
25. VDO CAN module VDO CAN module located in a tool box at the top of luggage cabin. 26. Switch control box (Model: JKH2028) Switch control box located in side battery cabin…
-
Page 68: Engine Compartment Fire Extinguisher Operation
27. Engine compartment fire extinguisher operation (1) Pipe network type extinguisher introduction The device is composed of ultrafine dry powder extinguishant, driven medium, extinguishant tank, constant-pressure release valve, conveyor pipe assembly, trigger assembly (including thermal triggering & electric triggering), etc. A certain concentration extinguishant is given eruption from nozzle of conveyor pipe in a specific time to the protected area after the extinguisher is ignited.
-
Page 69
Hence, recommend to check the production date stated in the extinguisher device regularly, once find it’s using time nearly it’s own life cycle, even if the appearance on it keeps a good condition, should also be replaced immediately; otherwise, for the resulting loss, KING LONG will not be undertaken. -
Page 70: Chapter Iii Vehicle Starting And Driving
Chapter III Vehicle Starting and Driving 1. Check daily, before turning engine on 1.1 Check oil level of the engine The warning “Engine oil pressure” is displayed as a signal item on the combination instrument when the oil pressure is too low, Oil level the alarm buzzer sounds, the warning light STOP comes on, dipstick…
-
Page 71: Check Level Of The Coolant
1.2 Check level of the coolant The coolant level is automatically monitored. If coolant level gets too low, the digital indicator displays a driver information on the combination instrument. In this case, park vehicle in a safe place as traffic conditions permit, stop engine and visually check the coolant level.
-
Page 72: Fuel Pre-Filter With Water Separator (Drain Accumulated Water)
1.3 Fuel pre-filter with water separator (drain accumulated water) Model for Euro II Draining accumulated water On a daily basis, check the lower cup of the water separator. If there is water in the cup, unscrew the draining plug one or two turns, to drain the accumulated water.
-
Page 73: Check Fuel Level
1.4 Check fuel level Turn the ignition key to drive position (on). Check the fuel level on the indicator. If necessary, fill up the fuel tank. (but direct viewing by open the tank cover is preferred). Eliminate deposite water in diesel filter in time and check fuel pipe for no leakage.
-
Page 74: Check The Level Of Adblue And The Daily Maintenance Of Scr System
1.6 Check the level of AdBlue and the daily maintenance of SCR system SCR=Selective Catalytic Reduction. Use of chemistry to reduce vehicle emissions. Urea dosing system is a reductant dilivery system that accurately injects a 32.5% solution of urea in water, also known as Diesel Exhaust Fluid(DEF) into the exhaust.
-
Page 75: Check Daily After Turning Engine On
2. Check daily after turning engine on: 2.1 Check engine oil pressure Run the engine. The information on engine oil pressure can be requested through the driver information digital display. If the oil pressure is too low, the oil pressure is automatically shown on the combination instrument. Indication of the oil gauge will show a high value after the cold start of the engine and then it should be kept within the range of 0.3-0.5Mpa (3- 5kg/cm ) along with the increment of the oil temperature as well as the…
-
Page 76: Check Steering Play
2.4 Check steering play Steering wheel play Run the engine at idle gear and straighten the front wheels forwards. Turn the steering wheel alternatively to the right and to the left. The steering play (free movement of the steering wheel) is measured on the perimeter of the steering wheel and should be between 20 and 30 mm.
-
Page 77: Check Air Cleaner (Activate The Dust Discharge Valve To Loosen Accumulated Dust)
3.2 Check air cleaner (activate the dust discharge valve to loosen accumulated dust) Model I The maintenance of the air cleaner is made up of the substitution of the filtering elements and should be done only when the maintenance indicator indicates the saturation of the element. The cleaning of the main and safety filtering elements is not recommended.
-
Page 78: Check General Leakages (Water, Oil, Fluids And Fuel)
3.3 Check general leakages (water, oil, fluids and fuel) Check the engine, the transmission, the driving axle, the steering system, the cooling system and the oil pipeline, the air pipeline of the complete vehicle for their leakage. 3.4 Check fastening and state of seat belts Check buckle of the safety belt of the driver seat for normal and ensure for its lockup under the following situations when fastening the safety belt.
-
Page 79: Inspection Every Two Weeks Before And After Driving
4. Inspection every two weeks before and after driving Model 1 4.1 Power steering Ensure that all the maintenance service jobs on the steering system be carried out at the intervals recommended in the maintenance manual to guaranty total efficiency and safety. If any working abnormality in the steering is noticed, immediately supply the necessary repairs.
-
Page 80: General State And Tension Of All Drive Belts
4.2 General state and tension of all drive belts Check the tension of engine belt, fan belt and compressor belt, if loose, tension it; if damaged, replace it. Do not start up the engine without the drive belts. In the case of one of the belts breaking, immediately stop the engine and have a new belt put in.
-
Page 81
Air conditioning compressor drive belt The pneumatic tensioning system keeps the tension of air conditioning compressor drive belt correctly adjusted and do not need to be adjusted periodically. Adjusting method of the air conditioner belt is shown in the figure 1. -
Page 82
Replac Replace Remove the belt. The belt tensioner winds in the same direction that the spring latch is bent over the tensioner body. To loosen the tension on the belt, rotate the tensioner to wind the spring tighter. Pivot the tensioner in the direction of the spring latch. Install Install the belt. -
Page 83: Check Level Of Battery Electrolyte
4.3 Check level of battery electrolyte Open the battery cover to check level of electrolyte, if the level is lower than scale marked on the battery, please add it in time. Note: During adding electrolyte, never start engine. Battery The battery compartment is located at the second compartment of left or right rear side. battery main power switch switch control box…
-
Page 84: Engine Start Up And Shut Down
5. Engine start up and shut down 5.1 Procedures for engine start up Activate parking brake. Place the gear box lever in neutral. Start up is not possible in gear position. Turn the ignition key into gear position. Start up without stepping on the accelerator. If the engine does not work after about 20 seconds, interrupt the start up process and wait at least 15 seconds before activating start again.
-
Page 85: Engine Start Up And Shut Down In The Engine Compartment
5.3 Engine start up and shut down in the engine compartment Model 1 Park the vehicle and activate the parking brake. Put the gear box lever or the automatic transmission selector in neutral (dead point). If the transmission is in gear position, the start up with in the engine compartment will not work.
-
Page 86: Parking The Vehicle
5.5 Parking the vehicle The parking brake should be always applied when the vehicle is parked. Additionally, in some countries, it is determined by law that a vehicle parked on a slope must have at least one of its wheels wedged, to prevent its accidental moving. In this case, always keep an appropriate wedge available for this purpose aboard the vehicle.
-
Page 87: Chapter Iv Vehicle Maintenance And Service
Chapter IV Vehicle Maintenance and Service 1. General knowledge King Long recommends that the bus be maintained according to the Maintenance Schedule in this section. Perform maintenance at whichever interval occurs first. At each scheduled maintenance interval, perform all previous maintenance checks they are due for scheduled maintenance.
-
Page 88: Electrical System Maintenance And Service
When maintain the brake shoe,do not damage the ring gear and sensor, clean the ring gear and sensor at the same time. after maintenance ,do remember to put the sensor to the limited position along the ring gear direction. Make sure that the power is in off position when remove and install the components, keep the components clean and dry.
-
Page 89: Adjustment Of The Brake Pedal Free Play
Tire transposition diagram(three axles) 8. Adjustment of the brake pedal free play Loosen locknut of brake pedal push rod and adjust adjusting nut, and then measure the vertical distance from pedal free position to the position where pressing resistance increases apparently when depressing pedal. The value should be between 8mm and 12mm.
-
Page 90: Cleaning The Air Filter
10. Cleaning the air filter Hint: Please replace filter element under such conditions: it has been washed 5 times; filter element has been damaged; filter element is clogged excessively; after changing the engine oil .When air filter indicator on combination instrument lights, clean the air filter or replace the element.
-
Page 91: Cleaning Outside Of The Radiator
11. Cleaning outside of the radiator Keep outside of radiator clean. Compressed air current can eliminate all the dirt blocking air flow. For vehicle equipped with intercooler, please keep air radiator fin clean. If there is hard dirt in radiator fin, blow fan side and then the other side with compressed vapor current.
-
Page 92: Fuel Recommendation
13. Fuel recommendation 1. Diesel oil (only apply to diesel vehicle) : only diesel oil of which cetane value is not less than 45 according to GB252 standard can be used. Sulfur content should not be more than 0.2%. 2. No. 0 light diesel oil: Suitable for the zone where venture rate is 10% and minimum temperature is higher than 4°C.
-
Page 93
Recommended gear oil is Ecofliud A+. Apply gear oil in accord with SAE90 API GL-5 grade. Recommended gear oil viscosity grade is related to ambient temperature, as shown in figure. Please see the King Long Bus Maintenance & Service Guider to choose your recommended ZF gearbox oil, o visit the website www.zf.com. -
Page 94: Introduction About The Lubricate Points In Kl Bus
15. Introduction about the lubricate points in KL bus At least every 5000 km, all these lubricating points should be lubricated. There are five lubricate zones in bus 1 Steering drag link 2 Steering knuckle kingpin, front brake self-adjusting arm in front axle. 3 Rear brake self-adjusting arm in rear axle.
-
Page 95
Part 2 Steering knuckle kingpin, front brake self-adjusting arm in front axle Both left side and right side have four lubricate points. Two are for steering knuckle kingpin lubricating, the other two are for front brake adjusting arm lubricating. Right side front tire Left side front tire Part 3 Lubricate points in the rear brake self-adjusting arm in rear axle Both left side and right side of rear axle have two lubricate points. -
Page 96
Part 4 Lubricate points in the propeller shaft There are three lubricate points in the propeller shaft. Part 5 Lubricate points in engine bin You may find 2 lubricating points when open the engine cabin,one si for A/C bracket,anohter is for A/C middle idle pulley shaft.There will be not these 2 points if there is no A/C on bus. -
Page 97: Breaking-In Of New Vehicle Maintenance
16. Breaking-in of new vehicle maintenance Engine of new vehicle should be sure not to operate at the maximum power output during the breaking-in period to keep best performance and superior efficiency as well as guarantee durable service life. Please drive cautiously and pay more attention to abnormal phenomenon occurred during breaking-in period.
-
Page 98: Daily Maintenance Operation
17. Daily Maintenance Operation System Item Operation Technical requirement No leakage, damage, and crack. Air cleaner Check Clips without looseness. Fuel-water separator Drain Release the water and fouling Do not pull or lever the cooling fan for starting the engine. Cooling fan Inspect No crack, looseness, bend or damage.
-
Page 99
Maintenance period chart 1 、 1st line is the item of break-in of new vehicle (prescript items completed after driving 5000KM or the day of registration vehicle) 2、Other items are compulsion maintenance program (the circulation is 80000KM/12 months) 3、For engine、axle、transmission please refer to producer’s maintenance manual, if without special maintenance period, please refer to this manual for maintenance information. -
Page 100
Maintenance period chart 1 、 1st line is the item of break-in of new vehicle (prescript items completed after driving 5000KM or the day of registration vehicle) 2、Other items are compulsion maintenance program (the circulation is 80000KM/12 months) 3、For engine、axle、transmission please refer to producer’s maintenance manual, if without special maintenance period, please refer to this manual for maintenance information. -
Page 101
Maintenance period chart 1 、 1st line is the item of break-in of new vehicle (prescript items completed after driving 5000KM or the day of registration vehicle) 2、Other items are compulsion maintenance program (the circulation is 80000KM/12 months) 3、For engine、axle、transmission please refer to producer’s maintenance manual, if without special maintenance period, please refer to this manual for maintenance information. -
Page 102
Maintenance period chart 1、1st line is the item of break-in of new vehicle (prescript items completed after driving 5000KM or the day of registration vehicle) 2、Other items are compulsion maintenance program (the circulation is 80000KM/12 months) 3、 For engine、 axle、 transmission please refer to producer’s maintenance manual, if without special maintenance period, please refer to this manual for maintenance information. -
Page 103
Maintenance period chart 1 、 1st line is the item of break-in of new vehicle (prescript items completed after driving 5000KM or the day of registration vehicle) 2、Other items are compulsion maintenance program (the circulation is 80000KM/12 months) 3、For engine、axle、transmission please refer to producer’s maintenance manual, if without special maintenance period, please refer to this manual for maintenance information. -
Page 104: Chapter V Common Trouble And Its Elimination
Chapter V Common Trouble and Its Elimination Different vehicles, different configuration, please check the following information according to the actual configuration of the vehicle, the common faults and troubleshooting methods can be used for reference. If you encounter a practical problem that is not clear or can not be resolved, please contact our after-sales personnel immediately.
-
Page 105
Diesel engine power deficient Possible causes Remedies 1) Intake blocked 1) Check the air cleaner, intake pipe, and clean or replace the air cleaner filter elements. 2) High exhaust back pressure 2) Check the valve timing, adjust it if necessary; Clean the exhaust pipe. -
Page 106
Abnormal noise during engine operation Possible causes Remedies 1) Connecting rod bearing bushing and main 1) Dismantle and check the bushing and, if necessary, bearing bushing are worn-out and clash voice replace it and keep the reasonable clearance as appears in the crankcase. required. -
Page 107
Exhaust with black smoke Possible causes Remedies 1) Intake clogged 1) heck and clean the air cleaner and intake passage. 2) Poor fuel quality 2) Use prescribed fuel. 3) Incorrect distribution timing 3) Adjust the distribution timing according to the instruction. 4) Bad atomization of injector 4) Check and repair or replace 5) The injector spray too much fuel… -
Page 108
Too low oil pressure Possible causes Remedies 1) Diluted or incorrectly selected 1) Select the proper oil. 2) Inner and outer rotors of oil pump 2) Replace the oil pump. worn-out or too large 3) Oil filter choked 3) Replace the whirling type filter element. 4) Failure of oil filter pressure control 4) Repair it. -
Page 109: Propeller Shaft Common Trouble And Its Elimination
2. Propeller shaft common trouble and its elimination Fault symptom Possible cause Eliminating method Propeller shaft sliding yoke assembled Remove and let the sliding yoke and incorrectly the fixing yoke on the same plane The propeller shaft is distortion or bending Adjust or replace the propeller shaft The universal-joint journal or the needle Replace the bearing…
-
Page 110: Transmission Common Trouble And Its Elimination
3. Transmission common trouble and its elimination Fault symptom Possible cause Eliminating method Control mechanism 1) Improper height of the control 1) Adjust the control hinge hinge 2) Correct or replace the parts 2) There has clearance between the 3) Correct or replace the control hinge control hinge connection 3) The control hinge bend Transmission…
-
Page 111: Rear Axle Common Trouble And Its Elimination
4. Rear axle common trouble and its elimination Fault symptom Possible cause Eliminating method When the vehicle is starting Excessive clearance between the 1) Adjust the clearance differential gear 2) Adjust the clearance Excessive clearance between the driving 3) Tighten it to specified torque and the driven gear 4)…
-
Page 112: Front Axle And Steering System Common Trouble And Its Elimination
Fault symptom Possible cause Eliminating method 5. Blocking or damage of the ventilation Clean or replace the ventilation plug plug Repair or replace the axle housing 6. Axle housing cracks Adjust or replace the coupling flange 7. Damageor distortion of the coupling Replace the bearing Leakage of the rear flange sealing surface…
-
Page 113
Fault symptom Possible cause Eliminating method 6) Fatigue of the front leaf spring, looseness 6) Replace the faulted parts of the «U» -bolt or damage of the central bolt The steering system 1) Difficulty in the gear engagement 1) Adjust the gear engagement 2) Malfunction of power steering system 2)… -
Page 114
Fault symptom Possible cause Eliminating method Others 1) Correct the driving pattern Misproportion or 1) Breakdown caused by the abrupt 2) Make the loading according to the untimely tire wear starting or the emergent braking specified capacity 2) Overloading Too low oil level Add the lubricant to the given level Lubricant deterioration or Replace the lubricant… -
Page 115: Braking System Common Trouble And Its Elimination
6. Braking system common trouble and its elimination Fault symptom Possible cause Eliminating method There has compressed air inside Check and adjust the exhaust valve of the braking chamber the quick releasing valve Improper lubrication of the Adjust the faulted parts camshaft or improper return of Replace the faulted parts the adjusting arm…
-
Page 116
Fault symptom Possible cause Eliminating method Tire pressure uneven or tire Operate as required dimension different Tighten the locknut of the brake Improper installation of the brake shoe supporting pin and replace the shoe or damage of the return return spring spring Adjust the friction lining Improper engagement of the… -
Page 117: Common Trouble And Troubleshooting Of Electrical Equipment And Starting System
7. Common trouble and troubleshooting of electrical equipment and starting system Fault symptom Possible cause Eliminating method The belt is of over loose or excessive abrasion There has abnormal sound with the shaking during the running Adjust the belt and replace the during the generator Bearing failure or oversize clearance bearing…
-
Page 118: Common Trouble And Troubleshooting Of Air Conditioner System
8. Common trouble and troubleshooting of air conditioner system The remedy and trouble analysis under abnormal pressure Pressure Description Analysis Remedy There is bubble in the inspection glass;the cold air in the bus Check the system for the The refrigerant The high and low insufficient;…
-
Page 119: Electric System Trouble And Remedy
Pressure Description Analysis Remedy The high pressure is higher The air sent to the bus Too much water than the normal value and Change the desiccators sometime cold and in the system desiccators the low pressure is nearly and make the vacuum sometimes warm and the reaching the saturation to zero or negative value…
-
Page 120
working sensor failure; item 2; relay failure; change sensor or sensor connection fuse burnt; cable; battery not charge or connection loose; change the relay or repair the relay of harness connection not tight; the connecting harness; air blower connection loose; change the fuse;… -
Page 121: Chapter Vi Appendix
Chapter VI Appendix 1. Driver tools table(one each) Part name Part name Tool box Slip joint pliers 8” Combination wrench 8 Nipper pliers 6” Combination wrench 10 Tire pressure gauge 0-1.4MPa Combination wrench 12 Valve core wrench Combination wrench 13 Filter wrench (φ66-φ110) Combination wrench 14 Pry bar also used as rocker lever 55cm…
-
Page 122
Flat-tip screwdriver 6*100MM Jack 12.5t Hammer 1 pound Special tool box The special tools above are applied when Dong Feng axles used, while other axles are applied, the driver tools may vary as below. Name Cancel Number Axle manufacturer Wrench for front 70mm hexagon 60X72 mm foursquare ZF Front axle… -
Page 123: Tightening Torque Of Main Bolts And Nuts
2. Tightening torque of main bolts and nuts Position Tightening torque(N·m) Propeller shaft bolt M16×1.5×L 270~330 (Bolt grade: 10.9 G) lock nut, steering knuckle limiting bolt(M16) 80~100 Fixing nut, upper knuckle(M20) 280~350 Binding nut, tie rod(M12) 75~100 fixing nut, ball pin of steering drag rod(M24) 280~300 Lock nut, steering wheel (M18) 60~80…
-
Page 124
Driven bevel gear bolt (M20X1.5) 580~680 Lock nut, front and rear steel plate pin 55~70 Lower slotted nut, front damper (M20) 100~120 Lower slotted nut, rear damper (M20) 100~120 Bolt, bearing cap (M22X1.5) 440~490 Axle shaft bolt (M16X1.5) 140~180 Fixing bolt, bracket of brake chamber (M14X1.5) 90~120 Oil level hole plug (M24X2) 130~150… -
Page 125: Bolts Torque Table
3. Bolts torque table Torques for bolts with metric unified threads Torques N.m*(ft-lb) Dimension of bolt 10.9 12.9 3(2) 5(3) 5(4) 6(4) 9(7) 10(7) 10(7) 15(11) 18(13) 25(18) 35(26) 45(33) 50(37) 75(55) 83(61) 88(65) 123(91) 147(108) 137(101) 196(145) 235(173) 211(156) 300(221) 358(264) 290(213)
Холодильник в автомобиле. Необходимость или ненужная вещь в атопутешествиях?
Автомобильный холодильник личный опыт эксплуатации. Какие бывают холодильники. Какой использую я. Характеристики. Так ли он необходим в путешествиях на своём авто?
Данная статья не является рекламой какого-либо бренда или производителя. Это мои «пять копеек» по поводу использования автомобильного холодильника. Итак…

Сейчас, когда я пишу эту статью – далеко не жаркий период времени. Но, как говорится, готовь сани летом. Может быть, мой отзыв поможет кому-то определиться в вопросе «стоит ли приобретать для путешествий подобное устройство?».
Какие бывают автомобильные холодильники
Условно, я бы разделил сам термин «автомобильный холодильник» на три категории.
Первая:
Это — ёмкости (сумки, боксы) с хорошей специальной изоляцией. По сути — обычная переносная тара. Которую с трудом можно назвать настоящим холодильником. Долгое хранение охлаждённых продуктов в них, конечно же, невозможно. А время, в течение которого внутри подобной тары продукты сохраняются охлаждёнными, обусловлено температурой окружающей среды. А также наличием и количеством охлаждающих элементов внутри ёмкости. Ну и степенью охлаждения самих продуктов на момент упаковки в сумку. Можно подобную сумку использовать только для очень ограниченного времени хранения охлаждённых продуктов. Почему нет? Например, для выездов на пикник.
У меня есть удобная небольшая термо-сумка, которую я использую, скорее, как обычную. Но с всё же с учётом её теплоизоляционных свойств. Сумка компактная и очень лёгкая. В ней я обычно размещаю свою аптечку. Которую в любом путешествии неплохо иметь под рукой. На всякий случай. Также, сюда же, помещаю то, до чего нужно периодически быстро добраться. Что необходимо для личного и ежедневного использования. Например, зубную пасту, жидкое мыло и т. д. и т.п. Теплоизоляционные свойства сумки не дают ей прогреваться достаточное время до температуры окружающей среды. Спрятав её подальше от прямых лучей солнца, в багажник (к примеру) можно вполне быть уверенным в том, что между не слишком длинными перегонами, зубная паста не превратится в «прожаренный» гель.
Вторая:
Боксы и сумки, которые питаются от внешних источников (АКБ авто, сеть 12/220 В). В подобные холодильники встроены блоки вентиляции. Радиаторы с вентиляторами. Которые служат для дополнительного охлаждения ёмкости. Более распространены подобные устройства с жёстким каркасом — боксом. Но есть подобные обычным сумкам и рюкзакам.
(Такие боксы, могут как охлаждать холодильную камеру, так и нагревать. На многих подобных холодильниках есть блоки регулировки и переключений режимов. Правда, я что-то не очень себе представляю для каких ситуаций нужно находящиеся в таком холодильнике продукты нагревать. Пользуюсь только функцией охлаждения).

Эти устройства можно назвать «настоящими» холодильниками. Но с некоторой оговоркой. Нужно понимать, что в них не используется компрессор с хладагентом. Как в стационарных, бытовых холодильниках. Подобные переносные боксы требуют использования дополнительных охлаждающих элементов.
Поэтому, такие устройства, во всяком случаете, те, что относятся к бюджетному сегменту (50-100 у.е.), могут охлаждать внутреннее пространство своей камеры (как правило) в пределах 12-18 градусов ниже окружающей среды. И без дополнительного «помощника», охлаждающего элемента, также не способны сохранять низкие температуры в своей камере достаточно долгое время. Но всё же…
Нужен ли холодильник такого типа, или нет – вопрос риторический. Во всяком случае, я подобный — использую. Но не беру его во всякое своё автопутешествие. Почему? Об этом ниже, в описании опыта эксплуатации подобного устройства. А пока о третьей разновидности, категории автохолодильников.
Третья категория:
К этой категории относятся полноценные автомобильные холодильники. Которые, как и бытовые, стационарные, оборудованы компрессором с хладагентом. Такие боксы могут поддерживать отрицательную температуру и даже замораживать продукты в своих камерах. И не требуют дополнительных «аккумуляторов» холода. Но о подобном гаджете я бы стал задумываться только в случае, когда вы – владелец автодома на колёсах (кэмпера). Или, хотя бы, у вас микроавтобус. А также вы путешествуете на маршрутах, удалённых от благ цивилизации. И ваше путешествие рассчитано на длительную автономность. Обычно, подобные холодильники имеют приличный вес и размеры. А в силу их технического оснащения – очень и очень значимую разницу в цене (в «плюс») по сравнению с предыдущей категорией. Цена на такой, полноценный, холодильник может достигать нескольких тысяч у.е.
Автомобильный холодильник. Опыт эксплуатации. Описание, особенности, нюансы
В своих путешествиях я использую автохолодильник достаточно давно. И по ряду причин.
Согласитесь, что всегда хорошо, когда под рукой свежие, охлаждённые продукты, а ты хочешь сделать остановку, перекусить — на берегу красивой реки, на какой-то лесной поляне, вдали от автобанов с трафиком, забитых стоянок АЗС. Кроме того, я предпочитаю достаточную свободу и автономность в своих маршрутах. А желание где-либо остановиться не всегда хочется привязывать к какому-то населённому пункту. Или планировать из-за этого свой маршрут по определённому расписанию. Нет, когда развита придорожная инфраструктура, это, конечно же, хорошо. А если её нет? Или вы в дороге с детьми? Да и просто ощущение большей свободы, в конце-концов…
Конечно же, в силу определённой громоздкости, занимаемого им места в салоне, а также длительности путешествия, сезона, брать или не брать в дорогу автомобильный холодильник, решение — абсолютно ситуативное.
В путешествиях в холодный период года — я его с собой не беру. Путешествия зимой — отдельная специфика. Не нужен автомобильный холодильник и в коротких поездках — если я отправляюсь в путешествие на неделю, две, или на меньшее время. А если я выезжаю на месяц и более, если отправляюсь в путь летом, а особенно — в южные регионы (Средняя Азия, Средиземноморье и т.д. и т.п.), то моё решение очевидно. Холодильник с продуктами – у меня в машине.
Несколько слов о том холодильнике, который используя я
Сейчас, если я не ошибаюсь, именно подобной модели уже нет на рынке. Но очень много схожих, практически «один-в-один» с моей.
Габариты моего автохолодильника:
Вес: 4,1 кг. Размеры: высота — 40 см, ширина — 43 см, глубина камеры – около 30 см. Объём камеры — 24 литра. Внутри холодильника есть съёмная перегородка, которой можно разделить пространство на секции.
Марка производителя — «Supra MFC — 24». Очень простой и достаточно надёжный девайс

У него жёсткий пластиковый бокс. С встроенным в крышку радиатором с вентиляторами. Сама крышка при закрытии фиксируется замком. Ручка для переноса холодильника – это и есть привод замка. При переноске бокса держа за ручку, бокс также находится в закрытом состоянии. Чтобы его открыть, ручку нужно опустить полностью к задней стенке каркаса. Для закрытия – переместить ручку к фронтальной стенке каркаса. На лицевой панели, в самом верху корпуса — блок управления. Здесь можно переключить тип питания. Холодильник работает как от питания бортовой сети авто (12 в, от прикуривателя), так и от сети 220 в. Удобно.

По паспортным данным, охлаждение внутри бокса может достигать до 12°-13°С ниже окружающей среды. Это не так много, казалось бы. Но.
Как я уже упоминал, я использую дополнительно аккумуляторы холода. Вот такие специальные боксы:

Перед поездкой я помещаю их на несколько часов в морозильную камеру бытового холодильника. После их заморозки укладываю с продуктами в бокс автомобильного. Такие аккумуляторы достаточно долго служат дополнительным источником холода. Внутри таких коробочек – специальный гель. Подвергать заморозке и разморозке такие аккумуляторы можно бесконечное количество раз. Они, практически, вечные.
Продукты, которые я собираюсь перевозить охлаждёнными, я также перед выездом помещаю в бытовой холодильник. Фрукты, овощи, различную сырную и мясную нарезку, йогурты, сок, воду.
Отмечу, что высота моего бокса не такая большая. И в него не поместить высокие бутыли с жидкостями. Но тара до литра – вмещается прекрасно.
Ну а теперь — ответ на главный, пожалуй, вопрос: насколько на практике такой холодильник держит низкую температуру в своей камере?
Насколько долго сохраняется низкая температура продуктов в автохолодильнике подобного типа?
Отмечу, что я встречал в Сети рекомендации по дополнительной герметизации подобных боксов. Народ оборудует специальными материалами и прокладками стенки и крышку камеры. Я же не делал никакой дополнительной теплоизоляции. И эксплуатирую холодильник в том виде, в каком и приобрёл. Итак…
Если я помещаю в камеру холодильника пять-шесть предварительно замороженных аккумуляторов холода. Размещаю в бокс продукты, которые также предварительно находились некоторое время в обычном бытовом холодильнике, то вот как всё выглядит в путешествии:

Даже через сутки, к вечеру вторых, а то и к утру третьих – продукты в камере тактильно прилично ниже окружающей температуры. Для полноты картины добавлю, что холодильник не включен в бортовую сеть все 24 часа. На ночь я его вообще отключаю. А по ходу движения, периодически, также выключаю питание, для разгрузки автомобильной сети. Внешняя температура при этом (бокс преимущественно находится в багажнике или салоне авто) постоянна, около 24-25 градусов.
Но, стоит уточнить. Что температура в камере холодильника не достигает околонулевых значений. И, скажем, не стоит наивно полагать, что мороженое, размещённое в такой холодильник и при тех условиях, что я описал, не растает. Ещё как растает. Но не так быстро, как находясь в естественных условиях. А чуть дольше)
Подобный автомобильный холодильник не является средством для заморозки или хранения быстропортящихся продуктов длительное время. Но служит неплохим средством сохранять охлаждёнными продукты в течение длительного автономного путешествия.
Вот одна из ситуаций (в подобной я бывал не раз) для наглядности…
Средняя Азия. Степи Казахстана. Конец июля. Температура за «бортом» — около +45 в тени. С включённым кондиционером в салоне авто – около 25 или чуть выше. А продукты, которые находятся в автомобильном холодильнике (аккумуляторы холода, при этом, уже давно перестали ими быть, как таковыми) – охлаждены до 13-15 градусов. Как думаете, если выйти на улицу в это пекло, и отпить глоток воды из бутылки, что находится в холодильнике, будет она ощущаться прохладной или нет? Ответ – очевиден.
Выбрать Автомобильный холодильник
Группа Автопутешествия и приключения Drunky Horse в ВК здесь: Паблик Дранки в ВК».
Оставить комментарий или подписаться на обновления сайта можно ниже:
Подписаться на новые статьи на сайте:
Даже если Вы приобрели дорогую модель автохолодильника от брендов Dometic, Libhof или Alpicool, неправильная эксплуатация способна быстро вывести агрегат из строя.

Первое, и самое важное правило: компрессорный автохолодильник работает намного эффективнее, если его рабочая камера заполнена равномерно и максимально одновременно. Это объясняется довольно просто: бутылка воды, полуфабрикат, баночка консервов, охлаждаясь, передаёт тепло «соседу». Поэтому, чем плотнее друг к другу лежат продукты в рабочей камере, тем быстрее они охлаждаются.
ТОП-5 ошибок при эксплуатации автохолодильника
Ошибки, которые чаще всего приводят не только к выходу из строя агрегата, но и поломке бортовой сети автомобиля, выглядят следующим образом:
-
подключение автохолодильника к прикуривателю через низковольтный разъём;
-
перемещение агрегата из салона на улицу под открытые солнечные лучи;
-
попытка установить в рабочую камеру дополнительный генератор холода, например, сухой лёд;
-
неправильное размещение продуктов в холодильнике. Если продукты неправильно размещены, то это может привести к блокировке воздушного потока и, как следствие, к неравномерному охлаждению.
-
непрерывная эксплуатация устройства без технологических перерывов. Режим работы любого холодильника – повторно-кратковременный. Его ни в коем случае нельзя оставлять постоянно включённым в бортовую сеть. Он не только «высосет» аккумулятор за 5-7 часов, но и способен спровоцировать короткое замыкание электропроводки.
Правила эксплуатации автохолодильника
Установка холодильника в автомобиле
Автохолодильник необходимо устанавливать на ровной и жёсткой поверхности, исключив его вибрацию и крены при движении автомобиля. Лучше всего для этих целей подходит багажный отсек. Агрегат можно придвинуть вплотную к спинке заднего дивана и зафиксировать накидным ремешком или специальной сеткой.
Не нужно пытаться зафиксировать устройство на тоннеле между передними и задними сиденьями. При резком торможении или другой внештатной ситуации холодильник обязательно «слетит» со своего места, отвлечёт внимание или, ещё хуже, помешает управлению автомобилем.
Подключение к источнику электропитания
Чтобы избежать аварий в низковольтной цепи автомобиля, необходимо правильно пользоваться автохолодильником. Его следует подключать только к бортовым розеткам напряжением 12 или 24 В и ни в коем случае напрямую к аккумулятору. Бортовая сеть любого автомобиля защищена реле и предохранителями, поэтому при любом броске напряжения питание просто отключится. Электропроводка и холодильник останутся целыми.
Подключение напрямую к аккумуляторной батарее – это неоправданный риск.
Как ухаживать за автохолодильником

Ряд простых правил позволит обеспечить надёжную и безотказную работу автохолодильника:
-
Регулярно осматривайте открытую электропроводку. Пластиковая тара с острыми кромками или вакуумная упаковка с жёсткими краями могут повредить изоляцию.
-
Не допускайте резкого перепада температур: не несите холодильник из охлаждённого климат-контролем салона на летнюю жару и наоборот. Температура корпуса агрегата должна выравниваться плавно.
-
Следите за чистотой автохолодильник от грязи и пыли. Чистите его мягкой тканью и теплой водой, не используя абразивные средства или растворители. Старайтесь очищать узел охлаждающего кулера с помощью пылесоса. Вентилятор засасывает всю мелкую пыль из салона и багажника, что существенно затрудняет его работу.
-
Правильно размещайте продукты в холодильнике. Размещайте продукты таким образом, чтобы не блокировать воздушный поток, который обеспечивает равномерное охлаждение.
-
Проверяйте состояние дверцы холодильника. Убедитесь, что дверца холодильника тесно закрывается, и нет никаких повреждений, которые могут привести к потере холода.
И, самое главное, перед покупкой обратите внимание, на какое напряжение бортовой сети рассчитан автохолодильник.
Как заполнять портативный холодильник продуктами
-
Перед заполнением холодильника продуктами, убедитесь, что автохолодильник включен и достигнута необходимая температура.
-
Распределите продукты равномерно по всему объему холодильника, не перегружая его.
-
Разместите более крупные продукты внизу, чтобы обеспечить правильный воздушный поток.
-
Убедитесь, что продукты хорошо упакованы и запечатаны, чтобы избежать загрязнения холодильника.
Относитесь к автохолодильнику бережно и аккуратно, и агрегат будет служить Вам верой и правдой не один год.
Казалось бы, что тут сложного. Купил, поставил и радуешься. Но оказалось, что тут есть несколько нюансов, о которых лучше знать заранее.
Данным холодильником пользуюсь с весны. Пришло время написать об опыте эксплуатации.
В наших климатических условиях такая вещь как холодильник совсем не роскошь, но и обязательным аксессуаром не назовёшь. Тем не менее, пару раз в месяц он необходим, хотя бы чтобы не получилась такая ситуация.
Выбрал средний размер объёмом 24 литра.
Модель AVS CC-24WBC.
Артикул: A80972S
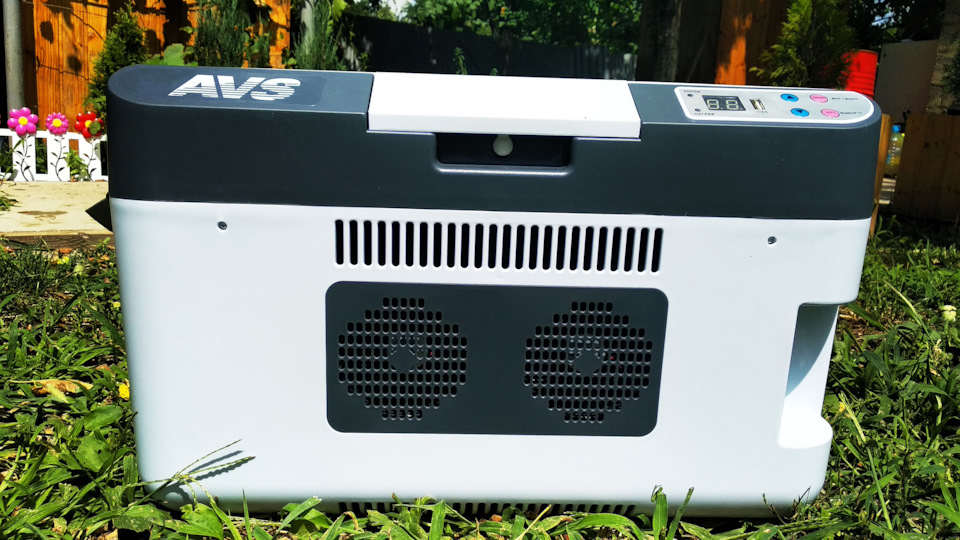
Характеристики
•Питание: 12 В(24 В)/220 В;
•Мощность в режиме охлаждения: 66 Вт;
•Мощность в режиме нагрева: 54 Вт;
•Емкость: 24 л;
•Размеры: 540*340*330 мм;
•Вес: 8,6 кг;
•Работает по принципу эффекта Пельтье;
•Максимальное охлаждение: 22-25 С от температуры окружающей среды;
•Минимальная температура: -2 С (при температуре окружающей среды не выше +23 С и непрерывной работе не менее 3-х часов);
•Максимальный нагрев: +65 С;
•LED дисплей.

Корпус пластиковый. Поддон герметичный. Даже если что-то растает и протечёт – всё останется внутри, а не на обивке автомобиля.
Основное его назначение — это перевезти продукты из точки А в точку Б без промежуточных остановок.
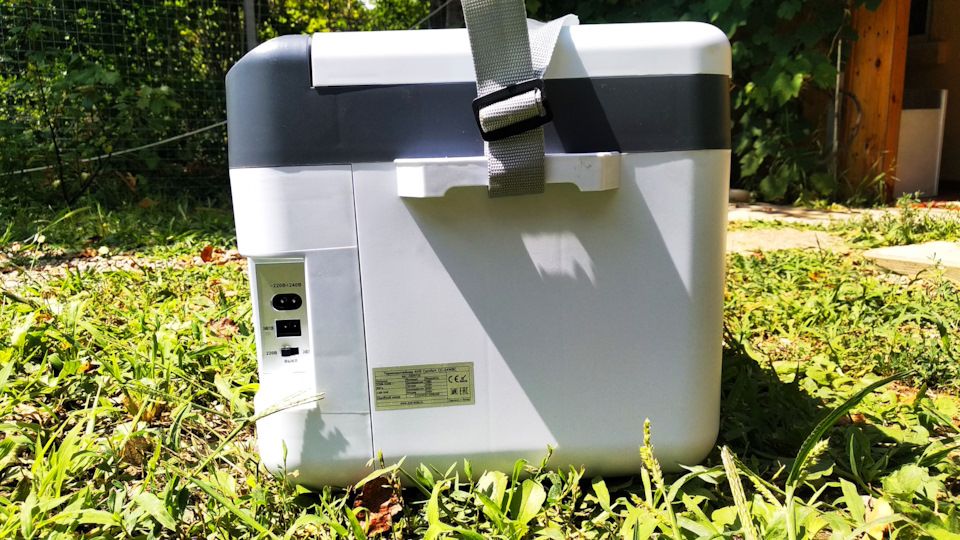
По бокам две транспортировочные ручки, к которым можно прицепить наплечный ремень. Но тащить полный холодильник на плече, то ещё удовольствие. Лучше за ручки.

В комплекте два шнура. Один от прикуривателя 12/24 В, а другой от сети 220В. Выбор питания переключается соответствующим тумблером на боковой панели.


Температура внутри контейнера зависит напрямую от температуры снаружи. Он может остудить максимум на 20 градусов. Если холодильник поставить сразу в разогретый на солнце автомобиль (а температуре в салоне может достигать 80 градусов), то охладить продукты он не сможет. Перед установкой холодильника в автомобиль, его нужно подготовить. Охладить по максиму дома, загрузить продукты и желательно кинуть парочку аккумуляторов холода. Перед поездкой желательно охладить салон и только потом устанавливать его в автомобиль.
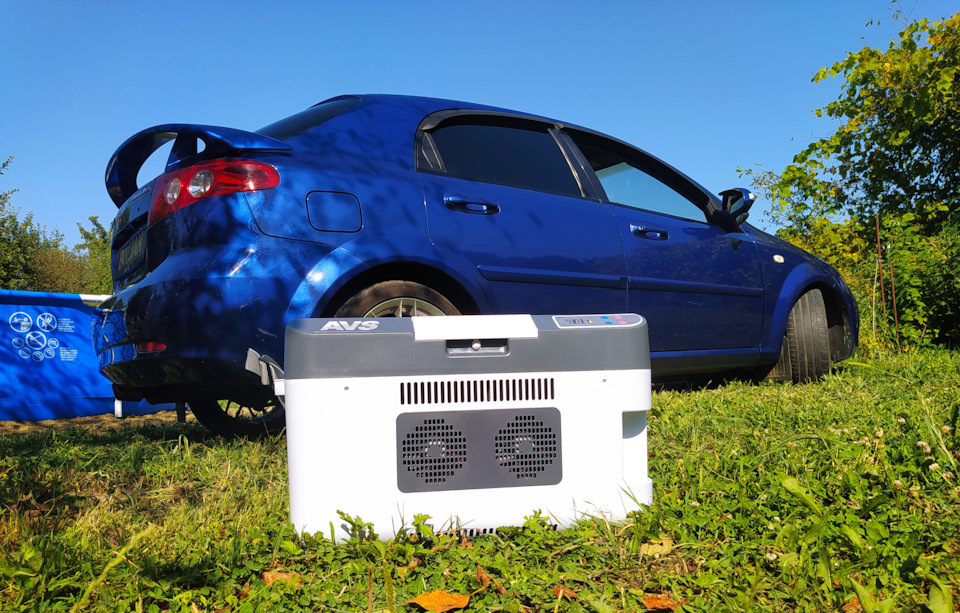
В идеале размещать его в самом прохладном месте. На полу переднего пассажира или на заднем сиденье. Чтобы он не кувыркался можно пристегнуть ремнем безопасности.
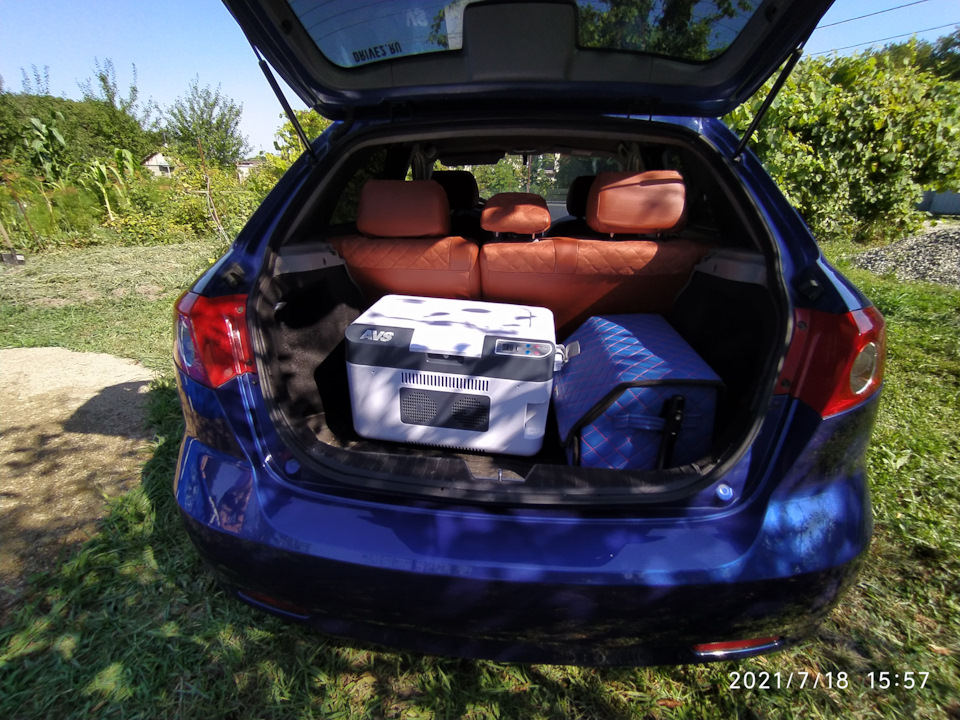

В багажнике он чувствует себя не очень комфортно.
Во первых длина шнура 2,5 м это мало – напрямую от прикуривателя до багажника остается кусок 20 см. Подключить можно, но открыть холодильник без отключения кабеля не получится. К тому же натянутый через весь салон шнур, по которому будут прыгать дети, рано или поздно выскочит из холодильника, и никто это не увидит пока не заглянешь в багажник.
Во вторых там самая высокая температура и кондиционер туда не дует.
В третьих – контроль работы. Кнопка включения без фиксациии. Это единственный минус. Если по дороге заехали на заправку или в магазин, то после каждого запуска двигателя нужно включать холодильник с кнопки. Это не удобно и за этим нужно следить.

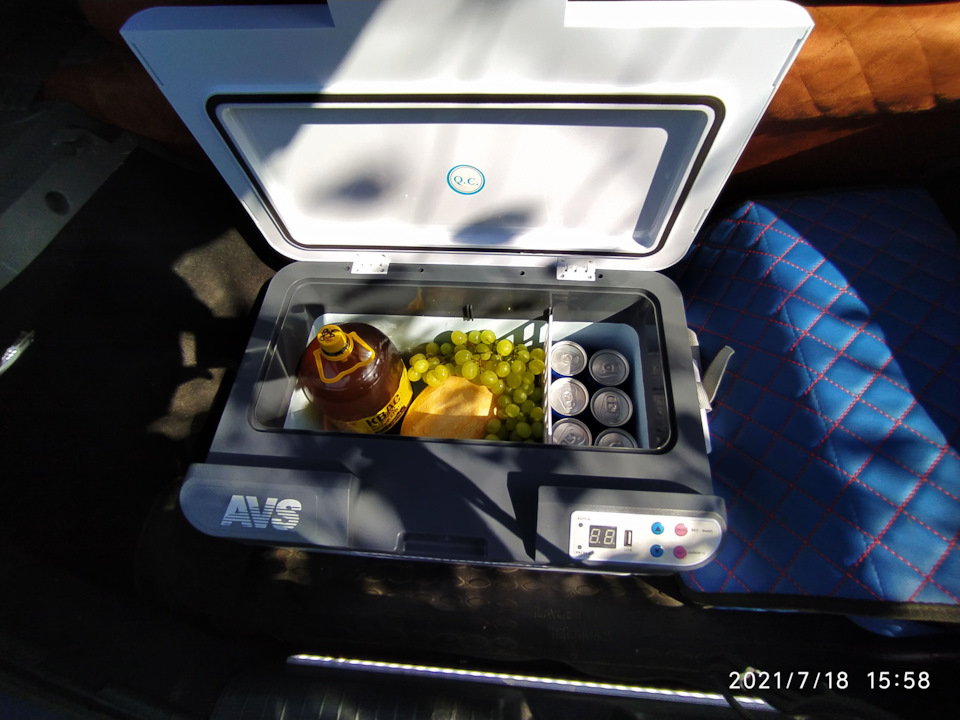
Скорость охлаждения около 1 часа. За это время охладит с +30 до +10 градусов. Самая низкая температура, которую мне довелось увидеть – это +7 градусов.
Самый большой пробег с холодильником 110 км до Туапсе около 2 часов в дороге. По пути остановка на часик для водных процедур в море и соответственно один раз открывали контейнер. Температура +12 градусов. Напитки холодные, но мороженное растаяло. Приехав в место назначения, я совсем забыл про холодильник и вспомнил про него через 3-4 часа. На удивление напитки были всё ещё прохладными. Замер не делал, но думаю 15-16 градусов. Аккумуляторы холода не использовал, с ними результат был бы ещё лучше.
Вывод: со своей задачей вполне справляется, если подходить с умом.


Самый кайф – это когда стоишь пару часов в пробке в 3-4 ряда и тут ты выходишь из машины, открываешь багажник и достаешь из холодильника 3-4 запотевшие баночки пепси и садишься обратно, провожаемый десятками завистливых взглядов измученных туристов.

PS: Также он имеет функцию нагрева до 65 градусов, но об этом я расскажу зимой…
Технологичное, современное устройство небольших размеров, незаменимое в долгих, дальних поездках, выездах на природу. Задача всех холодильников для автомобилей поддерживать низкие температуры герметичной камеры, где хранятся охлажденные продукты питания, напитки. Однако с различными типами охлаждающей техники эта цель достигается разными способами.
Холодильники для автомобилей по сложности конструкции, стоимости, принципам, характеристикам работы подразделяются на четыре основных типа:
- компрессорные.
- термоэлектрические.
- абсорбционные.
- сумки-холодильники.
Последний вид не относится к технике и предназначен для поддержания температуры заранее охлажденных продуктов. Как работают автохолодильники остальных категорий, рассматривается подробнее в рамках этой статьи.
Как работает холодильник без компрессора
К холодильникам, работающим без применения компрессоров, относятся агрегаты абсорбционного и термоэлектрического типов. Их действие основано на использовании принципиально отличающихся способов: с помощью хладагента или элементов Пельтье.
Принцип действия абсорбционной охлаждающей установки
Охлаждающий эффект достигается с помощью постоянной циркуляции хладагента – раствора аммиака. При этом вещество поочередно подвергается нагреву и охлаждению. Холодный состав поступает в систему испарителя холодильной камеры, охлаждает ее, испаряется. Его пары поглощаются водой (абсорбируются) и снова отправляются к трубопроводу испарителя. Абсорбер всасывает раствор, а термический насос – создает давление в системе.
Установка состоит из:
- теплообменника, охлаждающего раствор;
- испарителя для аммиака;
- емкости, вмещающей хладагент;
- дефлегматора, собирающего абсорбированную смесь.
Принцип работы автохолодильника без компрессора абсорбционного типа основан на охлаждении, происходящем в момент поглощения аммиака водой. Его использование позволяет изготовителям выпускать модели, поддерживающие температурный режим от -5°С до +3°С, работающие от электричества, сжиженного газа, без вибрации, шума, экономно.
Как работают термоэлектрические холодильники
Работа холодильных установок этого типа основана на эффекте Пельтье. Постоянный ток подается на батарею, составленную из двух проводников, соединенных последовательно. При подаче тока на стыке элементов выделяется, поглощается и переводится тепло. При этом одна часть батареи нагревается, другая охлаждается.
Пластины, которые охлаждаются, размещают внутри холодильной камеры. Нагревающиеся элементы монтируют снаружи корпуса. Для стабильной работы устройство оснащается вентиляторами, охлаждающими нагревающуюся часть батареи. Возможна установка дополнительного вентилятора. Он монтируется возле охлажденных пластин, способствует циркуляции холодного воздуха внутри герметичной камеры.
Принцип работы термоэлектрического автохолодильника позволяет выпускать модели:
- компактные;
- бесшумные;
- надежные;
- долговечные;
- без хладагентов, изнашиваемых деталей;
- с питанием от сети 12В.
Термоэлектрические холодильники не боятся тряски, ухабов, крена. Работают как охлаждающая и нагревающая техника. Могут устанавливаться горизонтально или вертикально. Однако не дают сильного охлаждения, зависят от температуры за бортом (до 25°С разницы), имеют ограничения по объему камеры.
Особенности автомобильных холодильников, работающих от прикуривателя
Автовладельцы используют установки, продуцирующие холод тремя способами, упомянутыми выше и выбирают холодильное оборудование в зависимости от:
- возможностей транспортного средства, вместительности салона или багажника;
- длительности поездок, количества людей, участвующих в них;
- температурных характеристик, времени, требуемого для набора нужной температуры;
- состояния покрытия автодорог, по которым зачастую приходится ездить;
- стоимости хладотехники.
Выбираемые агрегаты компрессорного, абсорбционного либо термоэлектрического типа, объединяет возможность их подключения к прикуривателю автомобиля. При этом электричество, питающее установку, поступает от аккумулятора. Особенность принципа работы автохолодильника от прикуривателя заключается в наличии дополнительного электрооборудования в схеме и специального провода для подключения.
Если вы выбираете готовую модель любого типа, необходимо обратить внимание, есть ли в ее комплектации специальный соединительный шнур, какой он длины. Идеальным сочетанием является работа хладотехники от прикуривателя и стандартной сети 220В. Такую технику можно использовать в дороге и дома. Длину провода важно учитывать для того, чтобы устанавливать холодильник в салоне или багажнике.