Благодарим за выбор Daiichi First 7.
Содержание
1 Безопасное использование автокресла
1.1 Требования к ребенку
2 Перед установкой автокресла в автомобиль
2.1 Автомобильные сиденья, на которых возможна установка
2.2 Автомобильные сиденья, на которых невозможна установка
2.3 Типы автомобильных ремней, используемых при установке
2.4 Выбор направления установки автокресла
2.5 Предупреждения
3 Элементы автокресла
4 Регулировка
4.1 Регулировка угла наклона автокресла
4.2 Регулировка высоты плечевых ремней
4.3 Использование замка
4.4 Использование блокировочного рычага
4.5 Регулировка высоты подголовника
5 Использование автокресла в режиме Baby
5.1 Возраст, вес и рост ребёнка
5.2 Регулировка наклона автокресла
5.3 Затягивание плечевых ремней
5.4 Регулировка высоты подголовника
5.5 Использование подушки
5.6 Внутреннее кресло со вставкой
5.7 Установка автокресла (против хода движения / заднее сиденье)
5.8 Проверка установки
6 Использование автокресла в режиме Toddler
6.1 Возраст, вес и рост ребёнка
6.2 Регулировка наклона автокресла
6.3 Регулировка высоты плечевых ремней
6.4 Использование накладок плечевых ремней
6.5 Регулировка высоты подголовника
6.6 Внутреннее сиденье со вставкой
6.7 Установка автокресла (по ходу движения / переднее сиденье)
6.8 Проверка установки
7 Использование автокресла в режиме Child
7.1 Возраст, вес и рост ребёнка
7.2 Отсоединение и хранение элементов автокресла
7.3 Установка автокресла (использование ремня безопасности автомобиля)
7.4 Проверка установки
8 Техническое обслуживание и уход
8.1 Снятие подголовника
8.2 Снятие чехла
1 Безопасное использование автокресла
Данное автокресло представляет собой детскую автомобильную систему безопасности, которая ослабит удар ребёнка в случае аварии. Эта система не может гарантировать 100% безопасность ребёнка во всех авариях. Будьте осторожны за рулем, чтобы избежать аварий.
Внимание! Перед установкой и использованием автокресла внимательно ознакомьтесь с данной инструкцией.
Инструкция для автокресла Daiichi First 7
1.1 Условия использования (Требования к ребёнку)
Запрещается использовать данное автокресло, если ребенок не соответствуют следующим условиям.
Внимание! Данное автокресло предназначено для детей от рождения и до 25 кг.
| Режим автокресла | Условия использования | Особенности |
|---|---|---|
| Режим Baby | Группа 0+ Вес: 0 — 13 кг Возраст: от 0 до 12 — 15 мес |
Установка автокресла против хода движения автомобиля защитит голову ребёнка. |
|
Режим Toddler |
Группа 1 Вес: 9 — 18 кг Возраст: 9 месяцев — 4 года |
Используйте этот режим при установке автокресла по ходу движения автомобиля. Макушка ребёнка не должна находиться выше верхнего края спинки автокресла. |
| Режим Child | Группа 2 Вес: 15 — 25 кг Возраст: 4 — 6 лет |
Снимите внутреннее сиденье и 5-точечные ремни и используйте автомобильный ремень безопасности. |
2 Перед установкой автокресла в автомобиль
2.1 Автомобильные сиденья, на которых возможна установка
Более подробное описание установки см. в разделах, посвященных установке автокресла в каждом из режимов.
Детское автокресло можно устанавливать как на передних, так и на задних сиденьях автомобиля. Рекомендуется устанавливать автокресло на заднем сиденье, так как это более безопасно.

Опасность! Не устанавливайте автокресло на автомобильных сиденьях с подушкой безопасности. Срабатывание подушки безопасности может стать причиной смерти или серьезной травмы ребёнка.
Опасность! Автокресло, установленное на переднем сиденье в положении против хода движения автомобиля, может создавать неудобства водителю. Поэтому рекомендуется устанавливать автокресло на заднем сиденье.
2.2 Автомобильные сиденья, на которых невозможна установка
Опасность! Если автокресло невозможно установить на автомобильное сиденье в соответствии с данной инструкцией из-за того, что автомобильное сиденье имеет другую форму или тип ремней безопасности, установите автокресло на другое сиденье. Неправильная установка автокресла вопреки данной инструкции может стать причиной смерти или серьезной травмы ребёнка в случае аварии или резкой остановки автомобиля.
- Сиденья с подушкой безопасности (срабатывание подушки безопасности может стать причиной смерти или серьезной травмы ребёнка)
- Сиденья без ремня безопасности (автокресло не может быть зафиксировано)
- Боковые сиденья и сиденья, установленные против хода движения автомобиля (сложность поглощения силы удара)
- Сиденья, ширина и длина которых 45 см или менее (надежность установки автокресла не обеспечивается)
- Передние центральные сиденья и любые другие сиденья, установка автокресла на которых будет создавать неудобства водителю (и нарушать безопасность пассажиров)
- Сиденья с ремнями безопасности по центру (надежное пристегивание автокресла не обеспечивается), см. рисунок 1
- Сиденья с высоко расположенными замками ремней безопасности (пристегивание автокресла невозможно) см. рисунок 2
- Сиденья с 2-точечным ремнем безопасности (пристегивание автокресла невозможно) см. рисунок 3

2.3 Типы автомобильных ремней, используемых при установке
Прежде всего проверьте, каким типом ремней безопасности оснащен ваш автомобиль.
Используйте автокресло только с 3-точечным автомобильным ремнем безопасности, который соответствуют требованиям Положения № 16 ЕЭК или другого эквивалентного стандарта. Запрещается устанавливать данное автокресло с помощью 2-точечного ремня безопасности.
Совет! Автокресло First Seven Touch-FIX может фиксироваться 1 с помощью автомобильного ремня безопасности, 2 с помощью основы isofix, 3 с помощью основы isofix и автомобильного ремня безопасности одновременно.
Опасность! Если автомобиль оснащен подушкой безопасности и ребенок весит менее 13 кг, автокресло необходимо установить на заднее сиденье.
2.4 Выбор направления установки автокресла
Выберите направление установки в зависимости от веса ребёнка
| Классификация | Особенности | Меры предосторожности при установке | Возможность установки |
|---|---|---|---|
| ELR — ALR 3-точечный ремень безопасности (Ремень с натяжителем, который обеспечивает возможность установки автокресла) |
Автокресло может быть установлено в режиме инерционной блокировки натяжителя (ELR). Далее для активации режима автоматической блокировки натяжителя (ALR), который препятствует произвольному ослаблению ремня, необходимо полностью вытянуть ремень из катушки. Чтобы выйти из режима ALR, необходимо позволить ремню полностью втянуться. | Надежно пристегните автокресло, далее полностью вытяните ремень безопасности, чтобы активировать режим ALR Внимание! Перед установкой ознакомьтесь с инструкцией к автомобилю. |
Да |
|
ELR |
Ремень свободно втягивается и вытягивается и блокируется только в случае резкого движения (например, резкой остановки). | Надежную фиксацию автокресла обеспечивает блокирующий рычаг. | Да |
| ALR 3-точечный ремень безопасности Автоматическая блокировка натяжителя |
Если, вытаскивая ремень, вы остановитесь, он заблокируется без возможности дальнейшего вытягивания. | Для фиксации автокресла вытяните нужную длину ремня одним движением. Далее зафиксируйте автокресло с помощью блокирующего рычага. | Да |
| ELR Ремень безопасности |
Ремень безопасности с инерционной блокировкой натяжителя (ELR) без плечевой части. | Установка автокресла невозможна. | Нет |
| NLR 2-точечный ремень безопасности (Ремень безопасности без натяжителя) |
Ремень без натяжителя, длина ремня регулируется после полного вытягивания. | Установка автокресла невозможна. | Нет |
| Автоматический ремень безопасности | Система автоматически блокирует ремень при закрытии двери и разблокирует при открытии. | Установка автокресла невозможна. | Нет |
| NR 2-точечный ремень безопасности (ручная регулировка) |
Ремень безопасности без натяжителя | Установка автокресла невозможна. | Нет |
| Любые другие ремни безопасности | Все остальные типы автомобильных ремней безопасности, не указанные в данной таблице. | Установка автокресла невозможна. | Нет |
Опасность! Если автомобиль оснащен подушкой безопасности и ребенок весит менее 13 кг, автокресло необходимо установить на заднее сиденье.
2.4 Выбор направления установки автокресла

Выберите направление установки в зависимости от веса ребёнка.
2.5 Предупреждения
Сохраните инструкцию на будущее.
Опасность
Автокресло должно быть установлено в соответствии с инструкцией. Если автокресло установлено неправильно, ребенок может выпасть из автокресла или удариться о стекло в случае аварии или резкой остановки, что может стать причиной смерти или серьезной травмы.

Установка автокресла возможна в автомобиле с 3-х точечными ремнями безопасности, соответствующим требованиям Положения № 16 ЕЭК или другого эквивалентного стандарта, а также в автомобиле с системой isofix.

Усадив ребёнка в автокресло, потяните регулировочный ремень, чтобы надежно зафиксировать ребёнка с помощью ремней автокресла. Неправильное использование ремней может привести к смерти или серьезной травме ребёнка.

Крышка ременного отсека используемого автокресла должна быть закрыта. Неправильное использование крышки ременного отсека может стать причиной смерти или серьезной травмы ребёнка.

Если автокресло долгое время подвергается прямому воздействию солнечных лучей, металлические и пластмассовые элементы могут нагреваться. Проверьте их перед тем, как усаживать ребёнка в автокресло. Летом и при сильном воздействии солнца паркуйте автомобиль в тени или накрывайте автокресло полотенцем.

Если нет возможности накрыть автокресло, не подвергайте его воздействию солнца. Автокресло может сильно нагреться и обжечь ребёнка.

Запрещается устанавливать автокресло на автомобильное сиденье с подушкой безопасности. Срабатывание подушки безопасности может стать причиной смерти или серьезной травмы ребёнка.

Следите за тем, чтобы ребенок не нажимал кнопку замка. Регулярно проверяйте, не расстегнут ли замок. Расстегнутый замок может стать причиной смерти или серьезной травмы ребёнка в случае аварии или резкой остановки автомобиля.

Если автокресло попало в аварию, его необходимо заменить.

Если автокресло не используется, храните его в безопасном месте. Не кладите в автокресло тяжелые предметы.

Не оставляйте ребёнка в автокресле без присмотра.

Предупреждение
Автокресло, установленное на переднем пассажирском сиденье, может мешать водителю переключать передачи или использовать ручной тормоз. При возникновении таких неудобств необходимо воздержаться от использования автокресла на переднем пассажирском сиденье и установить его на заднем сиденье. Такие неудобства могут стать причиной опасных ситуаций на дороге.

Запрещается устанавливать автокресло на переднее пассажирское сиденье 2-дверного или 3-дверного автомобиля, а также дополнительное сиденье однообъемного автомобиля и минивэна, если на заднем сиденье находится пассажир. Автокресло может препятствовать аварийному выходу.

При отсутствии ребёнка в автомобиле храните автокресло в багажнике или надежно пристегнутым к автомобильному сиденью. Движения плохо пристегнутого автокресла могут создавать неудобства водителю.

Запрещается регулировать автокресло во время управления автомобилем (например, регулировка ремней, регулировка угла наклона). Перед регулировкой автокресла припаркуйте автомобиль в безопасном месте. Регулировка автокресла водителем во время движения автомобиля может спровоцировать опасную ситуацию или аварию.

Запрещается изменять конструкцию автокресла без разрешения производителя или соответствующего органа.

При перевозке в автокресле новорожденного ребёнка (мене 1 месяца) в автомобиле помимо водителя должен находиться пассажир, который будет следить за ребенком. Для детей от рождения до 6 месяцев старайтесь избегать ситуаций, когда ребенок находится в автокресле более одного часа без перерыва, это тяжело для ребёнка.

Внимание
Перед поездкой с ребёнком всегда проверяйте надежность фиксации автокресла на автомобильном сиденье. Также проверяйте автокресло во время и после поездки, чтобы убедиться в отсутствии проблем (перед проверкой припаркуйте автомобиль в безопасном месте).

Запрещается устанавливать или снимать автокресло, когда в нем находится ребёнок.

Не позволяйте ребёнку баловаться в автокресле. Не позволяйте ребёнку использовать автокресло в качестве игрушки.

Надлежащим образом зафиксируйте все предметы, которые могут стать причиной травмы в случае столкновения.

3 Элементы автокресла


Аксессуары

Внутреннее сиденье может отличаться в зависимости от модели.
Опция


Основание isofix, которое входит в комплект автокресла First7 Touch-FIX, не может использоваться с автокреслом First7.
4 Регулировка
Предупреждение! Перед любой регулировкой остановите автомобиль. Регулировка автокресла водителем во время движения может стать причиной аварии.
4.1 Регулировка угла наклона автокресла
Автокресло имеет 4 положения наклона. Если автокресло устанавливается по ходу движения, используйте положения наклона 1, 2 или 3. Используйте положение наклона 4 только при установке автокресла против хода движения.

Выбор положений наклона 1–3 определяется наклоном спинки автомобильного сиденья.
Регулировка наклона автокресла для установки против хода движения (Для детей весом 13 кг и меньше)
Если автокресло устанавливается против хода движения автомобиля, используйте положение наклона 4.
Потяните и удерживайте рычаг регулировки угла наклона автокресла.

Установите корпус автокресла в положение наклона 4 (самый низкий уровень).
(Проверьте правильность выбора положения наклона с помощью стрелки сбоку на корпусе.)
Регулировка наклона автокресла для установки по ходу движения (Для детей весом от 9 до 25 кг)
При установке автокресла по ходу движения выберите положения наклона 1, 2 или 3.

Потяните и удерживайте рычаг регулировки угла наклона автокресла.

Выберите положение наклона, соответствующее наклону автомобильного сиденья (положения наклона от 1 до 3). (Проверьте правильность выбора положения
наклона по стрелке сбоку на корпусе.)
4.2 Регулировка высоты плечевых ремней
Предупреждение! Перед любой регулировкой остановите автомобиль. Регулировка автокресла водителем во время движения может стать причиной аварии.

Снимите крышку ременного отсека со спинки автокресла, снимите плечевые ремни с соединительной пластины.
Внимание! Если соединительная пластина плечевых ремней не видна, вытяните плечевые ремни с лицевой стороны автокресла так, чтобы показалась соединительная пластина, далее отрегулируйте положение плечевых ремней.

Усадите ребёнка в автокресло и проденьте плечевые ремни в прорези для плечевых ремней, которые располагаются ближе всего к ребенку.

Надев плечевые ремни на соединительную пластину, установите крышку ременного отсека.
Опасность! Перед использованием автокресла установите крышку ременного отсека. Неправильное функционирование ремней может стать причиной смерти или серьезной травмы ребёнка.
4.3 Использование замка
Опасность! Не используйте автокресло после расстегивания замка. Это очень опасно.
Расстегивание замка

Нажмите кнопку на пряжке под чехлом замка и вытащите соединенные язычки замка.

Рассоедините язычки замка.
Застегивание замка

Соедините язычки замка.

Вставьте соединенные язычки замка в пряжку так, чтобы они зафиксировались со щелчком.

Убедитесь, что язычки замка надежно зафиксировались в пряжке.
Использование замка

Перед тем как усаживать ребёнка в автокресло, расстегните замок и уложите ремни на подлокотники. Так будет легче усадить ребёнка.
4.4 Использование блокировочного рычага

- Блокировочный рычаг обеспечивают надежную фиксацию автокресла в автомобиле. Обязательно его используйте.
- Автокресло имеет 2 блокировочных рычага: по одному с каждой стороны корпуса.
Опасность! Блокировочный рычаг и направляющая ремня обеспечивают надежную фиксацию автокресла с помощью штатного ремня безопасности автомобиля. Обязательно используйте их. В противном случае при столкновении или резком торможении фиксация автокресла может быть нарушена.
Опасность! Сначала проверьте возможность установки автокресла на сиденье автомобиля (существуют сиденья, на которые установка данного автокресла невозможна, см. стр. 2). Не пытайтесь зафиксировать автокресло, если вы не можете установить его в соответствии с данной инструкцией. В таком случае надлежащее функционирование автокресла не обеспечивается, что может привести к неожиданным последствиям.
Внимание! Будьте внимательны, чтобы не прищемить пальцы блокировочным рычагом.
Блокировка

Откройте блокировочный рычаг.

Потяните плечевую часть автомобильного ремня безопасности, чтобы его максимально затянуть, и вставьте ремень в блокировочный рычаг. Отпустите рычаг и нажмите на него для фиксации.
Против хода движения.

Зафиксируйте ремень с помощью блокировочного рычага, как показано выше, далее максимально натяните ремень и зацепите его за направляющую ремня.
Разблокировка

Отстегните автомобильный ремень безопасности.

Откройте блокировочный рычаг и вытащите автомобильный ремень безопасности.
4.5 Регулировка высоты подголовника
Опасность! Не используйте автокресло после расстегивания замка. Это очень опасно.


Отрегулируйте высоту подголовника (поднимите или опустите его), взявшись за регулировочную ручку на обратной стороне подголовника. Подголовник имеет 7 положений высоты.


Нижний край подголовника должен располагаться максимально близко к плечам ребёнка.
Внимание! Положение подголовника должно соответствовать росту ребёнка. В противном случае автокресло не сможет обеспечить максимальную безопасность.
5 Использование автокресла в режиме Baby
5.1 Возраст, вес и рост ребёнка

Режим Baby предназначен для детей возрастом от 0 до 1 года весом не более 13 кг.
Если в комплект вашего автокресла входит основание isofix, используйте его для установки автокресла.
5.2 Регулировка наклона автокресла
Выберите положение наклона 4, предназначенное для установки автокресла против хода движения.

Потяните и удерживайте рычаг установки против хода движения (рычаг регулировки угла наклона автокресла).
Установите корпус автокресла в положение наклона 4 (самый низкий уровень). (Проверьте правильность выбора положения наклона по стрелке сбоку на корпусе.)
5.3 Затягивание плечевых ремней
Опасность! Усадив ребёнка в автокресло, потяните регулировочный ремешок, чтобы надежно зафиксировать ребёнка с помощью ремней автокресла. Ненадлежащее функционирование ремней может стать причиной смерти или серьезной травмы ребёнка.

Расстегните замок. Нажмите кнопку регулировки ремней и вытяните плечевые ремни. (См. раздел «Использование замка»)

Усадите ребёнка и наденьте плечевые ремни. Не забудьте отрегулировать положение плечевых ремней в соответствии с высотой плеч ребёнка. (См. раздел «Регулировка высоты плечевых ремней»).

Застегните замок.

Потяните регулировочный ремешок, одновременно нажимая кнопку регулировки ремней, чтобы надежно зафиксировать ребёнка.
Внимание! Между ребенком и плечевыми ремнями должна входить ладонь взрослого.
5.4 Регулировка высоты подголовника
Внимание! Верхний край подголовника должен находиться на 3 см выше макушки ребёнка.

Отрегулируйте высоту подголовника (поднимите или опустите его), взявшись за регулировочную ручку на обратной стороне подголовника.

Нижний край подголовника должен располагаться максимально близко к плечам ребёнка.
5.5 Использование подушки
Данная подушка обеспечивает комфортный угол наклона спины ребёнка. Длина подушки регулируется в зависимости от роста ребёнка.

Совет! Подушка может использоваться от рождения ребёнка до 7 лет. Для регулировки длины подушки складывайте ее по направляющим на обратной стороне.
5.6 Внутреннее кресло со вставкой

Если ребёнок весит более 10 кг и испытывает дискомфорт при использовании внутреннего сиденья, вытяните вставку из внутреннего сиденья.

В режиме Baby используйте внутреннее сиденье со вставкой как можно дольше.
5.7 Установка автокресла (против хода движения / заднее сиденье)
Как установить автокресло против хода движения с помощью основания isofix.

Опасность! Способ установки и фиксации автокресла зависит от типа автомобильного ремня безопасности. Проверьте, возможна ли установка автокресла на сиденье, далее надлежащим образом установите автокресло.
Предупреждение! Если ваш автомобиль оснащен 3-точечными ремнями ELR/ALR, переключитесь в режим ALR после установки. Не затягивайте плечевой ремень слишком сильно. Если вы затянули ремень так, как показано на рисунке, начните установку с начала.
Внимание! Будьте внимательны, чтобы не прищемить пальцы блокировочным рычагом.
- Установите спинку в полностью вертикальное положение.

- Отрегулируйте высоту плечевых ремней и подголовника в соответствии с ростом ребёнка.

- Установите корпус автокресла в положение наклона 4, используя рычаг регулировки наклона.

- Поставьте автокресло в положение против хода движения автомобиля. Убедитесь, что нижняя часть автокресла плотно прилегает к автомобильному сиденью, как показано на рисунке.

- Пододвиньте автокресло к спинке автомобильного сиденья до касания и вытяните автомобильный ремень безопасности. Протяните вытянутый ремень вместе с пряжкой через направляющую ремня в спинке автокресла.


Внимание! Убедитесь, что автомобильный ремень безопасности не перекручен.
Если в комплект вашего автокресла входит основание isofix, автокресло может фиксироваться 1 с помощью автомобильного ремня безопасности, 2 с помощью основания isofix, 3 с помощью основания isofix и автомобильного ремня безопасности одновременно. Как установить автокресло против хода движения автомобиля с помощью основания isofix.
- Застегните автомобильный ремень.

Внимание! Убедитесь, что автомобильный ремень безопасности не перекручен.
- Откройте блокировочный рычаг на противоположной замку автомобильного ремня стороне.

- Потяните плечевую часть автомобильного ремня безопасности, чтобы его максимально затянуть, и вставьте в блокировочный рычаг. Закройте рычаг и нажмите на него до фиксации. (Убедитесь, что ремень походит внутри блокировочного рычага, далее сильно нажмите на рычаг, чтобы надежно зафиксировать ремень.)

Внимание! Поясной автомобильный ремень безопасности должен быть максимально затянут.
- Протяните плечевой ремень безопасности автомобиля через блокировочный рычаг. Надавив своим весом на автокресло, сильно потяните плечевой ремень, нажимая на блокировочный рычаг для фиксации ремня.

- Зацепите ремень за направляющую. На ремне образуется складка, она не нарушит безопасность.
5.8 Проверка установки
Установленное автокресло — вид с улицы

Установленное автокресло — вид с другой стороны автомобиля

После завершения установки проверьте себя по контрольному списку.
- Соответствует ли высота плечевых ремней и подголовника росту ребёнка?
- Надежно ли пряжка автомобильного ремня безопасности пристегнута к замку?
- Не перекручен ли автомобильный ремень безопасности?
- Достаточно ли затянут автомобильный ремень безопасности?
- Надежно ли автомобильный ремень безопасности закреплен блокировочным рычагом?
- Убедитесь, что автокресло нельзя сдвинуть более чем на 3 см в любом направлении.
Проверьте себя по контрольному списку. Если автокресло можно сдвинуть более чем на 3 см в любую сторону, проведите установку повторно в соответствии с указаниями выше.
6 Использование автокресла в режиме Toddler
6.1 Возраст, вес и рост ребёнка

Режим Toddler предназначен для детей от 1 до 4 лет весом от 9 до 18 кг.
Если в комплект вашего автокресла входит основание isofix, используйте его для установки автокресла.
6.2 Регулировка наклона автокресла


Потяните и удерживайте рычаг регулировки угла наклона автокресла.

Выберите положение наклона, соответствующее наклону автомобильного сиденья (1, 2 или 3).
6.3 Регулировка высоты плечевых ремней
Внимание! Высота плечевых ремней должна соответствовать росту ребёнка. В противном случае автокресло не сможет обеспечить максимальную безопасность.

Снимите крышку ременного отсека со спинки автокресла и снимите плечевые ремни с соединительной пластины.
Внимание! Если соединительная пластина плечевых ремней не видна, вытяните плечевые ремни с лицевой стороны автокресла так, чтобы показалась соединительная пластина, далее отрегулируйте положение плечевых ремней.

Усадите ребёнка в автокресло, вставьте плечевые ремни в самые близкие к ребенку прорези для плечевых ремней.

Наденьте плечевые ремни на соединительную пластину и установите крышку ременного отсека.
Опасность! Перед использованием автокресла установите крышку ременного отсека. Неправильное функционирование ремней может стать причиной смерти или серьезной травмы ребёнка.
6.4 Использование накладок плечевых ремней

Снимите плечевые накладки с соединительной пластины плечевых ремней за спинкой автокресла. Вставьте плечевые накладки в прорези для плечевых ремней с обратной стороны автокресла. (См. раздел «Регулировка высоты плечевых ремней в режиме Toddler»)

Совет! Плечевые накладки легче продевать через прорези внутренней стороной, как показано на рисунке.

Проденьте плечевые накладки через прорези для плечевых ремней, соответствующие росту ребёнка. Внешняя сторона плечевых накладок должна быть развернута от ребёнка (см. рисунок).
Плечевые ремни должны проходить через прорези, которые находятся на уровне или немного выше плеч ребёнка, как показано на рисунке.
Предупреждение! Резиновая сторона плечевой накладки должна плотно прилегать к ребенку.
Внимание! Плечевые ремни должны проходить через прорези на одной высоте.
Плечевая накладка имеет внешнюю и внутреннюю стороны.

Матерчатая сторона — это верх, резиновая — это низ.
Совет! Чтобы облегчить продевание плечевых ремней, проталкиваете их большим пальцем.

Проденьте плечевые ремни через плечевые накладки.

Плечевые ремни с плечевыми накладками должны проходить через прорези в спинке автокресла.

Наденьте плечевые ремни на соединительную пластину.

Внимание! Плечевые ремни не должны быть перекручены. Они должны быть полностью надеты на соединительную пластину.
Предупреждение! Усадите ребёнка в автокресло, потяните за ремешок регулировки натяжения ремней, чтобы зафиксировать ребёнка (см. раздел «Затягивание плечевых ремней в режиме Baby»). Неправильное функционирование ремней может стать причиной смерти или серьезной травмы ребёнка.
Предупреждение! Перед использованием автокресла установите крышку ременного отсека. Неправильное функционирование ремней может стать причиной смерти или серьезной травмы ребёнка.
6.5 Регулировка высоты подголовника
Внимание! Верхний край подголовника должен находиться на 3 см выше макушки ребёнка.

Отрегулируйте высоту подголовника (поднимите или опустите его), взявшись за регулировочную ручку на обратной стороне подголовника.

Нижний край подголовника должен располагаться максимально близко к плечам ребёнка.

Используйте внутренний подголовник.
Внимание! Положение подголовника должно соответствовать росту ребёнка. В противном случае автокресло не сможет обеспечить максимальную безопасность.
6.6 Внутреннее сиденье со вставкой


Если автокресло стало слишком узким для ребёнка в режиме Toddler, достаньте вставку или снимите внутреннее сиденье.
6.7 Установка автокресла (по ходу движения / переднее сиденье)
Опасность! Не устанавливайте автокресло на автомобильные сиденья с подушкой безопасности. Срабатывание подушки безопасности может стать причиной смерти или серьезной травмы ребёнка.
Предупреждение! Автокресло, установленное на переднем пассажирском сиденье, может причинять неудобство водителю при переключении передач и использовании ручного тормоза. В таком случае установите автокресло на заднем сиденье. Продолжать движение с автокреслом, установленным на переднем сиденье, опасно!
Предупреждение! Автокресло, установленное на переднем сиденье, может закрывать правое боковое зеркало и блокировать видимость водителю. В таком случае установите автокресло на другое сиденье.
Предупреждение! Запрещается устанавливать автокресло на заднее боковое сиденье 2-дверных, 3-дверных и однообъемных автомобилей, а также на складывающиеся сиденья минивэнов, автокресло может препятствовать аварийному выходу.
Установите спинку в полностью вертикальное положение

Для облегчения установки сдвиньте вперед переднее сиденье.

Отрегулируйте высоту плечевых ремней и подголовника в соответствии с ростом ребёнка.

Поставьте автокресло в положение по ходу движения автомобиля.

Вытяните автомобильный ремень безопасности и протяните его через направляющую в спинке автокресла.


Внимание! Убедитесь, что автомобильный ремень безопасности не перекручен.

Застегните автомобильный ремень.
Внимание! Убедитесь, что автомобильный ремень безопасности не перекручен.
7 Откройте блокировочный рычаг на противоположной замку автомобильного ремня стороне.

8 Потяните плечевую часть автомобильного ремня безопасности, чтобы его максимально затянуть, и вставьте в блокировочный рычаг. Закройте рычаг и нажмите на него до фиксации. (Убедитесь, что ремень походит внутри блокировочного рычага, далее сильно нажмите на рычаг, чтобы надежно зафиксировать ремень.)
Внимание! Поясной автомобильный ремень безопасности должен быть максимально затянут.

9 Убедитесь, что автомобильный плечевой ремень безопасности надлежащим образом проходит через блокировочный рычаг. Надавив своим весом на автокресло, сильно потяните плечевой ремень, нажимая на блокировочный рычаг для фиксации ремня.
6.8 Проверка установки


После завершения установки проверьте себя по контрольному списку.
- Соответствует ли высота плечевого ремня и подголовника росту ребёнка?
- Надежно ли пряжка автомобильного ремня безопасности пристегнута к замку?
- Не перекручен ли автомобильный ремень безопасности?
- Достаточно ли затянут автомобильный ремень безопасности?
- Надежно ли автомобильный ремень безопасности закреплен блокировочным рычагом?
- Убедитесь, что автокресло нельзя сдвинуть более чем на 3 см в любом направлении.
7 Использование автокресла в режиме Child
Как перевести в группу 2. Инструкция Автодети
7.1 Возраст, вес и рост ребёнка

Режим Child предназначен для детей в возрасте от 3 до 7 лет весом от 15 до 25 кг.
7.2 Отсоединение и хранение элементов автокресла
В режиме Child неиспользуемые ремни, замок и плечевые накладки можно хранить внутри автокресла.

Поднимите подголовник на максимальную высоту и снимите его. (Подробные инструкции по снятию подголовника)

Снимите плечевые ремни с соединительной пластины за спинкой автокресла.


Полностью расстегните замок и снимите язычки замка с плечевых ремней.

Снимите внутреннее сиденье со вставкой. Снимите чехол с нижней части автокресла.

Скрепите оба язычка замка резинкой или шнурком и поместите в отсек для хранения, как показано на рисунке.

Снятие наполнителя (пены с эффектом памяти) может привести к повреждению автокресла. Поэтому посмотрите на расположение отсеков для хранения и поместите снятые элементы автокресла под наполнитель. Производитель не несет ответственности за повреждение наполнителя в процессе складывания элементов автокресла.

6 Смотайте освобожденные от язычков замка плечевые ремнии закрепите резинкой или шнурком. Храните плечевые ремни в специальном отсеке, как показано выше.

7 Снимите чехол замка и поместите замок в специальный отсек, как показано на рисунке выше.

8 Вставьте соединительную пластину плечевых ремней в прорезь для плечевых ремней с обратной стороны автокресла. Потяните регулировочный ремешок спереди, чтобы полностью вытянуть соединительную пластину на лицевую сторону.

9 Поместите регулировочный ремешок в отсек, отмеченный на рисунке выше.

10 Поместите чехол замка и плечевые накладки в отсек в верхней части спинки.
7.3 Установка автокресла (использование ремня безопасности автомобиля)
Использование автомобильного ремня безопасности.

1 Вытяните автомобильный ремень безопасности, как показано выше.

2 Протяните автомобильный ремень безопасности по диагонали под подголовником и подлокотником и пристегните к замку, как показано выше.
7.4 Проверка установки
Послезавершения установки проверьте себя по контрольному списку.
- Сняли ли вы ремни автокресла перед использованием?
- Соприкасается ли спинка автокресла со спинкой автомобильного сиденья?
- Проходит ли автомобильный ремень безопасности по центру груди и по бедрам ребёнка?
- Находится ли верхняя часть ремня безопасности на достаточном расстоянии от шеи ребёнка?
- Соответствует ли высота подголовника росту ребёнка?
- Проходит ли верхняя часть автомобильного ремня безопасности за подголовником?
Проверьте себя по контрольному списку. Если автокресло можно сдвинуть более чем на 3 см в любую сторону, проведите установку повторно в соответствии с указаниями выше.
8 Техническое обслуживание и уход
8.1 Снятие подголовника

1 Поднимите подголовник на максимальную высоту.

2 Потяните ручку подголовника вверх, одновременно раздвигая влево и вправо боковые рычаги на обратной стороне автокресла, снимите подголовник.

3 Чтобы установить подголовник, совместите крепления и прижмите подголовник к автокреслу.
8.2 Снятие чехла
Чтобы надеть чехол, выполните указания ниже в обратном порядке.
Предупреждение! Не снимайте ремень с замком и не разбирайте корпус. Это может привести к поломке автокресла.

1 Снимите подголовник.

2 Снимите чехол с подголовника.

3 Снимите крышку ременного отсека со спинки автокресла и снимите плечевые ремни с соединительной пластины. Вытащите снятые плечевые ремни через прорези. Снимите плечевые накладки и язычки замка с плечевых ремней.
Примечание. Если вы не видите соединительную пластину плечевых ремней.
Вы не видите соединительную пластину плечевых ремней, потому что она находится внутри автокресла. Вытяните плечевые ремни, одновременно нажимая на рычаг регулировки плечевых ремней. Соединительная пластина покажется на обратной стороне автокресла (см. стр. 9).

Вытащите плечевые ремни и отстегните скобы чехла.

5 Снимите чехол снизу вверх.

6 Снимите чехол с направляющей ремня.

Предупреждение. Не снимайте предупреждающую желтую этикетку спереди автокресла. Производитель не несет ответственность в случае ее повреждения.

- Manuals
- Brands
- DAIICHI Manuals
- Car Seat
- First7
- Manual
-
Contents
-
Table of Contents
-
Bookmarks
Quick Links
Related Manuals for DAIICHI First7
Summary of Contents for DAIICHI First7
-
Page 1
First 7 Car-seat Manual… -
Page 3
First 7 Car-seat Manual… -
Page 4: Table Of Contents
Table of contents For safe use About Indicative Marks Conditions of children, who can use this product Before installing safety seat in your car 2 ~ 5 Seats that can install the safety seat Seats that cannot install the safety seat Types of seatbelts for installation Deciding direction of safety seat 4 ~ 5…
-
Page 5: For Safe Use
For safe use This product is safety equipment for children used in cars, which will reduce shocks to children in case of accidents. However, it cannot perfectly (100%) save children from some cases, so please drive safely to not to cause any accident.
-
Page 6: Before Installing Safety Seat In Your Car 2
Before installing the seat in your car Seats that can install the safety seat For more detailed installing method, please refer to method for each mode. Rear seat Front seat (arrow shows the driving direction) (arrow shows the driving direction) Rear facing Forward facing Rear facing…
-
Page 7: Types Of Seatbelts For Installation
Types of seatbelts for installation ☆ First of all, please check the type of seat belt in the car. Please use it only for 3-point seat belt that is approved by ECE NO16 or same regulation. This safety seat cannot be equipped with 2-point seat belt. Possibility Classification Special features…
-
Page 8: Notes 4
Caution The user manual needs to be kept well and read accordingly when necessary. Danger The infant safety seat needs to be attached according to the user The product should not be used for manual. If the seat is attached the seats with an airbag.
-
Page 9
Warning When the infant safety seat is installed While driving, you should not operate on the passenger’s seat, it may cause the infant safety seat(Belt adjustment some interference, leading to inconve /Angle adjustment, for example). nience in operating the transmission The car should be parked in a safe gear or the side brake. -
Page 10: Name Of Each Part
Name of each part Front of safety seat Shoulder belt holes ( 4 levels ) Head seat Shoulder pad Fastening plate buckle Seat cover Shoulder belt Belt length adjusting lever Base Angle adjusting lever Rear facing lever Accessories ☆ Design of the inner seat can be different according to types of models. Manual Head inner seat Inner seat…
-
Page 11
Back of safety seat Belt guide ( for rear facing only ) Belt cover Sun visor ratch frame Belt locking lever When taking off the belt cover ( For both directions ) Shoulder belt hanger Belt path Shoulder belt hanger is required when the height of shoulder belt is adjusted. -
Page 12: Adjustment Method
Adjustment method Please stop the car to adjust each function. Warning Adjusting the safety seat during driving will interrupt your driving and might cause accidents. How to adjust angle Forward facing You can adjust angles in 4 different levels. For forward facing, use levels 1~3 and level 4 is only for facing to rear.
-
Page 13: How To Adjust Shoulder Belt
How to adjust shoulder belt Please stop the car to adjust each function. Warning Adjusting the safety seat during driving will interrupt your driving and might cause accidents. Shoulder belt hanger Belt cover Take off the belt cover at the back of main body to pull out the shoulder belt from its hanger. When you cannot see the shoulder belt hanger, pull out the front belt Caution so shoulder belt hanger at the back can come out to front to adjust height of belt.
-
Page 14: How To Use Buckle
How to use buckle Danger Using the safety seat without buckle is very dangerous, so do not use the seat after unfastening buckle. Unfastening Fastening plate Buckle Click Fastening plate Press button Button cover Press the press button inside buckle Separate joined fastening plate into upper of button cover to take off fastening plate.
-
Page 15: How To Use Locking Lever
How to use locking lever Locking lever is an equipment to securely install the child safety seat into your car. Please use it. You will find 2 locking levers, one on each side of the main body. Please use it according to location of installment. locking lever Locking lever and belt guide are equipments for secure installment of child safety seat with car’s seat Danger…
-
Page 16: How To Adjust Height Of Headrest
How to adjust height of headrest Using the safety seat without the buckle is very dangerous, so do not use the seat after unfastening Danger the buckle. Pull up adjusting lever in the middle of backside of headrest to adjust height (up and down). Headrest can be adjusted in 7 different levels.
-
Page 17: How To Use Baby Mode 13
First 7 How to use BABY MODE Baby Mode is designed for children aged 0 to 1 with maximum weight of 13kg.
-
Page 18: Angle Adjustment Of Back Support At Baby Mode
How to Use Baby Mode Angle adjustment of back support at Baby Mode Forward facing Rear facing Lay down the main body of the seat to level 4 (lowest level). Pull out rear facing lever Set the child safety seat to angle of level 4, To check the right angle, (angle adjusting lever)
-
Page 19: Height Adjustment Of Headrest At Baby Mode
Height adjustment of headrest at Baby Mode Caution Headrest should have a room of 3 cm higher from top of the baby. Pull up adjusting lever in the middle Lower part of headrest should be in the of backside of headrest to adjust height closest location from baby’s shoulder.
-
Page 20: How To Install Baby Mode ( Forward Facing / Front Installment ) 16
How to install Baby Mode ( Rear facing/rear installment ) According to types of car’s seat belt, installment and fixing methods vary. Please refer to check possible Danger and impossible seats for installment on p. 3 and then install child safety seat in a right way. For ELR/ALR 3-point safety belt, switch to ALR function after installment.
-
Page 21
Shoulder belt of car Push the safety seat to contact the back of seat and then pull out the car’s seat belt. Belt path Then, let the pulled out belt and fastening plate of the belt to pass through belt path in the backside of main body. Caution Be careful not to twist the car’s seat belt. -
Page 22: Checklist For Baby Mode
Firstly, make sure whether shoulder belt of car is properly inserted into the locking lever. Put your weight to the safety seat, and then strongly pull the shoulder belt of car while pushing belt locking lever on side to fix it. Shoulder belt of car For double fixation, hang the fixed belt inside belt guide.
-
Page 23: How To Use Toddler Mode 19
First 7 How to use TODDLER MODE Toddler mode is designed for children aged 1 to 4 with weight from 9 to 18kg.
-
Page 24: Angle Adjustment Of Back Support At Toddler Mode
How to Use Toddler Mode Angle adjustment of back support at Toddler Mode Forward facing Rear facing Adjust the main body according For Toddler Mode, angle of safety seat should be adjusted Pull out the angle adjusting lever to seat’s angle of the car from level 1 to 3.
-
Page 25: How To Use Shoulder Pad At Toddler Mode 21
How to use shoulder pad at Toddler Mode Caution Shoulder pad for toddler should be used for the toddler mode only (For 9kg or above and forward facing) Take off existing shoulder pad, put out shoulder belt from shoulder belt hanger of the backside. From back of the safety seat, put shoulder pad for toddler into shoulder belt hole.
-
Page 26
Shoulder belt will get through smoothly Advice if you push it gently with your thumb. Shoulder belt with the shoulder pad should Insert shoulder belt into shoulder pad for toddlers. be inserted into shoulder belt hole at the back of safety seat. Completed! Inner side Put shoulder belt into shoulder belt hanger. -
Page 27: Height Adjustment Of Headrest At Toddler Mode
Height adjustment of headrest at Toddler Mode Caution Headrest should have a room of 3 cm higher from top of the baby. Pull up adjusting lever in the middle Lower part of headrest should be of backside of headrest to adjust height in the closest location from baby’s shoulder.
-
Page 28: How To Install Toddler Mode ( Rear Facing / Rear Installment ) 24
How to install Toddler Mode ( Forward facing /front installment ) ☆ With 3-point car’s seat belt, install the baby seat forward facing. Do not install in the seats with airbag. Danger Due to operation of the airbag you might lose your child’s life or seriously injured. When the baby seat is installed on side seat of driver, it might be difficult to change gears or side Warning break.
-
Page 29
Put the main body in same direction (forward facing) as driving. Belt Path Pull out car’s seat belt and then let it go through the belt path, which is located in the backside of the main body. Be careful not to twist the car’s seat belt. Caution Belt Path Belt Path… -
Page 30: Checklist For Toddler Mode
Push the locking lever located on the opposite side of fastening plate to open. Pull shoulder part of car’s seat belt to make it tight as much as possible and insert it into locking lever. Then, pull the lever to opposite direction and push to lock. (Make sure to put the belt inside the locking lever and then push the lever strongly, so it can hold the belt tightly.) Waist belt of car should be fastened up to the…
-
Page 31: How To Use Child Mode 27
First 7 How to use CHILD MODE Child mode is designed for children aged 3 to 7 with weight from 15 to 25kg.
-
Page 32: Separation And Storage For Child Mode 28
How to Use Child Mode Separation and storage for Child Mode ☆ To easily use child mode, First Seven will let you to safely store unused belt, buckle and pad inside the safety seat. Pull up the back lever of headrest to the maximum height.
-
Page 33
☆ Taking off sponge (memory foam) might damage your safety seat, so please just look at different storage spaces as shown in the above diagram and put things under the sponge. This company does not take any responsibilities of sponge damage that is made during this process. Shoulder belt strap without buckle should be rolled up, and then tie it up with rubber band or string. -
Page 34
Back part Front part of safety seat of safety seat Shoulder belt hanger should be fixed at the entry of shoulder belt at backside of the safety seat as shown above. Then, push belt adjustment belt in the front to pull it completely. Button cover and shoulder pad should be stored Store belt strap in the location shown above. -
Page 35: How To Install Child Mode ( How To Use Seat Belt )
How to install Child Mode ( How to use seat belt ) Pull the belt in diagonal direction to pass through underneath headrest and below armrest, Pull out car’s seat belt loosely as shown above. and then fasten it with buckle as shown above. Checklist for Child Mode ☆…
-
Page 36: Maintenance And Management 32
Maintenance and management How to detach headrest Side levers located inside the seat As you pull out the lever of headrest, push right and left side levers located Pull out the headrest to the highest position. on the backside of safety seat at the same time in order to separate headrest.
-
Page 37
Belt cover Take off belt cover at the back of main body, and then take off shoulder belt from its hanger. Taken off belt should be pulled out from shoulder belt hole. Take out shoulder pad and fastening plate from shoulder belt. Shoulder belt [ Note ] If you cannot see shoulder belt hanger ☆… -
Page 38
MEMO…
Similar to DAIICHI First7 Manuals, User Guides and Instructions:
-
Baninni Arona Isofix BN2001
C hild Safety R estraint INSTRUCTION MANUAL OF CHILD RESTRAINT 9KG-18KG.Itemnummer: BN2001Imported by Unitra Int.Voortstraat 122490 Balen BelgiumTel. +32 14 41 25 04 — Fax. +32 14 81 44 82BN2001-1 …
Arona Isofix BN2001 Car Seat, 11
-
BEBE CONFORT FamilyFix
GB GB GBDRU1096www.bebeconfort.comBébé Confort FamilyFixENCongratulations on your purchase. For the maximum protection and comfort of your child, it is essential that you read through the entire manual carefully and follow all instructions. FRNous vous félicitons pour votre achat. Pour une protection maximale et u …
FamilyFix Baby Accessories, 42
-
Graco ISPB053HA
1LAPB0014A03.44.164LAPB0034A03.44.165LAPB0014A03.44.164LAPB0034A03.44.165READ THIS MANUAL. LIRE CETTE NOTICE.LESEN SIE DIESE BEDIENUNGSANLEITUNG DURCH.LEA ESTE MANUAL.LEES DEZE AANWIJZINGEN !LEGGERE QUESTO MANUALE.LEIA ESTE MANUAL. OLVASSA EL A KÉZIKÖNYVETPREČÍTAJTE SI TÚTO PRÍRUČKULÆS DENNE BRUGERVEJL …
ISPB053HA Car Seat, 100
-
JANE Concord iKOAL
iKOALESPAÑOLENGLISHFRANÇAISITALIANOPORTUGUÈSDEUTSCHPOLSKIČESKYNEDERLANDS NORSK SVENSKAiKOALIM 2263,01JANÉ, S.A. — Pol. Industrial Riera de CaldesC/Mercaders, 34 — 08184 Palau Solità i Plegamans (BARCELONA) SPAINTelf. +34 93 703 18 00email: [email protected]>75% recycled paper>75% papier re …
Concord iKOAL Car Seat, 94
-
Britax BOB B-SAFE E9LT34A
Consumer Services: 1-833-474-7016 Page 1 of 4Britax Child Safety, Inc., 4140 Pleasant Road, Fort Mill, SC 29708, U.S.A© 2017 Britax Child Safety, Inc. All rights reserved.P08452100_A:06.17B-SAFE® 35 / B-SAFE® 35 ELITEInstructions / Instructions / InstruccionesBritax has received reports that the center tab can break …
BOB B-SAFE E9LT34A Car Seat, 4
-
KIDDY ENERGY
Stand 01/2010 Booklet 1DEU BedienungsanleitungENG Directions for useNL GebruiksaanwijzingFR Notice de l’utilisateurSLO Otroški varnostni avto sedežDK BetjeningsvejledningES Instrucciones de operaciónPL Instrukcja Obsługi …
ENERGY Other, 97

First 7
Car-seat Manual
First 7
Car-seat Manual
Table of contents
For safe use
1
About Indicative Marks
Conditions of children, who can use this product
1
1
Before installing safety seat in your car
Seats that can install the safety seat
Seats that cannot install the safety seat
Types of seatbelts for installation
Deciding direction of safety seat
Notes
Name of each part
Adjustment method
How to adjust angle
How to adjust shoulder belt
How to use buckle
How to use locking lever
How to adjust height of headrest
How to Use Baby Mode
Age, weight and height of baby for Baby Mode
Angle adjustment of back support at Baby Mode
Height adjustment of shoulder belt at Baby Mode
Height adjustment of headrest at Baby Mode
Back support cushion and inner seat at Baby Mode
How to install Baby Mode (Forward facing / front installment)
Checklist for Baby Mode
How to Use Toddler Mode
Age, weight and height of baby for Toddler Mode
Angle adjustment of back support at Toddler Mode
Height adjustment of shoulder belt at Toddler Mode
How to use shoulder pad at Toddler Mode
Height adjustment of headrest at Toddler Mode
Back support cushion and inner seat at Toddler Mode
How to install Toddler Mode (Rear facing / rear installment)
Checklist for Toddler Mode
How to Use Child Mode
Age, weight and height of baby for Child Mode
Separation and storage for Child Mode
How to install Child Mode (How to use seat belt)
Checklist for Child Mode
Maintenance and management
How to detach headrest
How to take off seat cover
2~5
2
2
3
3
4~5
6~7
8 ~ 12
8
9
10
11
12
13 ~ 18
13
14
14
15
15
16 ~ 18
18
19 ~ 26
19
20
20
21 ~ 22
23
23
24 ~ 26
26
27 ~ 31
27
28 ~ 30
31
31
32 ~ 35
32
32 ~ 33
* Warning : Warning label (yellow label) stuck in the front of sewing work cannot be detached.
This company does not take any responsibilities for its detachment.
For safe use
This product is safety equipment for children used in cars, which will reduce shocks to children in case of
accidents. However, it cannot perfectly (100%) save children from some cases, so please drive safely to not to
cause any accident.
Caution To install it correctly and use it effectively, please read this manual thoroughly before installation or usage.
About Indicative Marks
To use it safely, this manual has specified important indications to follow with marks. Since it is for your safety,
please follow instructions;
Danger
If you do not follow given instructions, you might lose your life or seriously injured.
Warning
If you do not follow given instructions, you might be seriously injured.
Caution
If you do not follow given instructions, you might be insured or cause an accident.
tion
ple d
Comhecke
C
Advice
A checklist that must be checked for safety.
Basic instructions for safe and pleasant usage.
Application condition (children who are suitable for this product)
Do not use this product for children who cannot fulfill following conditions.
Caution This safety equipment is designed for children from birth to those with weight of 25kg or under.
Classification
Application condition
Other conditions
Baby Mode
Weight : 0~13kg (Group 0)
Target age : Newborn infant
Protect head of the baby by installing rear facing.
Toddler Mode
Weight : 9~18 kg (Group 1)
Target age : 12 months
~ 5 years old
Use for forward facing.
Baby’s head should not go out the back of seat
when the baby seats on the safety seat.
Child Mode
Weight : 15~25 kg (Group 2)
Target age : 4 ~ 7 years old
Take off inner seat and 5-point belt of the child
safety seat and then use belt of the car.
1
Before installing the seat in your car
Seats that can install the safety seat
For more detailed installing method, please refer to method for each mode.
Rear seat (arrow shows the driving direction)
Rear facing
Forward facing
Front seat (arrow shows the driving direction)
Rear facing
Forward facing
Child safety seat can be installed in both front and rear seats, but it is recommend to install in the rear seat
for better safety.
Danger Do not install in the seats with airbag.
Due to operation of the airbag you might lose child’s life or seriously injured.
Danger When you equip the seat at front seat in rear facing, it might interfere your driving.
Please use it at the rear seat.
Seats that cannot install the safety seat
If you cannot install the safety seat as the given instruction due to different belt type or seat’s shape,
Danger please install it at other seats. When the safety seat is not properly installed as the instruction,
you might lose child’s life or seriously injured when the car crashes or suddenly stops.
Seats with airbag (when airbag comes out, you might lose your child’s life or seriously injured)
Seats without seatbelt (Child safety seat cannot be fastened)
Seats placed in sideways or opposite directions from driving directions (Difficult to absorb crash impact)
Width and length of seat is 45 cm or less (Child safety seat will be installed unstably)
Front center seats and any other seats that may interfere with driving when the safety seat is installed
(In some cases, it is hard to guarantee safety of passengers)
Seats with seat belt located in the middle of the seat
(Child safety seat cannot be fastened strongly) refer to drawing①
Seats with belt buckles that are highly placed and are unable to fasten the child safety seat
(Child safety seat cannot be fastened) refer to drawing②
Seats with 2-point seatbelt (Child safety seat cannot be fastened) refer to drawing③
①
2
②
③
Types of seatbelts for installation
☆ First of all, please check the type of seat belt in the car.
Please use it only for 3-point seat belt that is approved by ECE NO16 or same regulation.
This safety seat cannot be equipped with 2-point seat belt.
Classification
Special features
ELR.ALR
In general, ELR belt will fix the safety seat, but if
you take out the entire belt, ALR function will be
started, which will be automatically fastened.
Also, when all the belts are fastened, ELR
function will start.
Fasten the child safety seat firmly, and then
take out all the seatbelt to start ALR function.
In general, belt will fasten and unfasten freely,
but the belt will not move when it detects any
shock (such as sudden stop).
Child safety seat should be tightly fastened
with locking lever.
If you stop your hand while taking out the belt,
the belt will be automatically locked up and will
not be pulled out.
In order to fix child safety seat, take out the belt
as much as required at once. Then, secure
child safety seat with locking lever.
ELR safety belt without shoulder part.
Cannot install the child safety seat.
No fastening option, but instead, adjust the
length of belt after pulling out the whole belt.
Cannot install the child safety seat.
A system that will automatically fasten up the
belt when the door is closed and unfasten
when the door is open.
Cannot install the child safety seat.
2-point safety belt
( manual )
Safety belt without fastening function.
Cannot install the child safety seat.
All other seatbelt
All other types of seatbelt that are not stated in
this table.
Cannot install the child safety seat.
3-point safety belt
(
Precautions for installation
Belt fastening equipment
with safety seat installation
function
)
ELR
3-point safety belt
(
Automatic belt fastening
equipment
(
Automatic belt fastening
equipment
)
ALR
3-point safety belt
)
ELR
Safety belt
NLR
2-point safety belt
( Non-fastening belt )
Automatic seat belt
NR
Caution
Possibility
of installation
Before starting installation, read
manual of the car.
Danger For cars with airbags, children who weigh 13kg or under should be seated in the rear seat.
We recommend those children between 9 to 25kg to seat in the rear side as well.
Deciding direction of safety seat
☆ Choose direction of installation according to weights of children.
Weight
birth ~ 13kg or under
Rear facing
(refer to p.16~18)
Weight
9 ~ 25kg or under
Forward facing
(refer to p. 22~24)
Range of child’s
weight
3
Caution
The user manual needs to be kept well and read accordingly when necessary.
Danger
사용
서
설명
The infant safety seat needs to be
attached according to the user
manual. If the seat is attached
inappropriately, the infant maybe
loosened from the car or hit the
glass, for example, during the crash
or the ab the abrupt stopping, risking
his or her life, or suffering serious
damage.
Only suitable for use in the listed
vehicles fitted with 3-point with
retractor safety-belts, approved to
ECE Regulation No.16 or other
eauivalent standards.
(strike out what dies not apply)
Every time the infant is seated the
adjusting belt should be pulled to
seat the baby tightly. If the shoulder
belt can not function as originally
designed, the infant may risk his or
her life, or suffering critical damage.
당긴다
The product should not be used for
the seats with an airbag. When
activated, the airbag may cause the
infant to risk his or her life, or suffer
serious damage.
Be careful not to allow the infant to
push the press button of the front
pad. The fastening plate needs to be
checked for any loosening frequently.
When the plate is loosened, the infant
may risk his or her life, or suffer
critical damage when a crash or an
abrupt stopping occurs.
It shall be recommended that the
device should be changed when it
has been subject to violent stresses
in an accident.
The belt cover should be attached
for use. If the belt cover can not
function as originally designed, the
infant may risk his or her life, or
suffering critical damage.
If the infant safety seat is exposed to
direct sunlight for long hours, metal
and PVC parts may get heated. The
guardian needs to check it before
seating the infant. In summer or
when sunlight is strong, the car
needs to be parked in a shady lot, or
a towel, for example, can be used for
coverage.
When the chair is not provided with a
textile cover, it shall be recommended
that the chair should be kept away
from sunlight, otherwise it may be
too hot for the child’s skin.
4
Store the child seat in a safe place
when it is not being used.
Avoid placing heavy objects on the
top of the child seat.
It shall be recommended that children
are not left in their child restraint
system unattended.
Warning
When the infant safety seat is installed
on the passenger’s seat, it may cause
some interference, leading to inconve
nience in operating the transmission
gear or the side brake.
When such inconvenience arises,
you need to refrain from using the
product for the passenger’s seat, and
rather use it for the backseats.
When such inconvenience is caused,
it may interfere with operating the
transmission gear or the side brake,
leading to a highly risky situation.
When there is a passenger in the
back seat, the safety seat should not
be fastened to the passenger seat of
a 2-door or 3-door vehicle, or the
secondary seat near the access area
for ascending and descending in
case of the one box type vehicle or a
mini-van, in order to secure the
emergency exit.
When there is no infant in the vehicle,
the infant safety seat needs to be
stored, for example, in the trunk, or
fastened strongly within in a car.
When fastened insufficiently, the
safety seat may be shaking, causing
interference with driving.
While driving, you should not operate
the infant safety seat(Belt adjustment
/Angle adjustment, for example).
The car should be parked in a safe
place first before you operate the
safety seat. If you operate the safety
seat while driving, it is highly dangero
us, because your driving will be
interfered with, possibly leading to an
accident.
Never try to modify the children seat
without authorization by the manufac
turer or the approving authority.
When using the product for a new born baby (Younger than 1 month
after birth), a fellow passenger, not
just the driver, needs to get on the
vehicle to pay attention to the baby.
Avoid using the product for longer
than one hour consecutively, in case
of infants ranging from newborn
babies to ones younger than 6
months, considering the burden on
them.
Caution
When you need to ride together with
an infant, you should check the
attachment of the safety seat again
before driving the vehicle.
The safety seat needs to be checked
for any problems during or after the
driving (The vehicle should be parked
in a safe place first before the check
ing).
The safety seat should not be
installed or removed while the infant is
on it.
Be careful not to allow the infant to
play on the safety seat. You should
not allow the infant to use it as a play
apparatus.
It shall be recommended that any
luggage or other objects liable to
cause injuries in the event of a
collision shall be properly secured.
5
Name of each part
Front of safety seat
Shoulder belt holes
(4 levels)
Head seat
Shoulder pad
Fastening plate
buckle
Seat cover
Shoulder belt
Belt length
adjusting lever
Base
Angle adjusting lever
Rear facing lever
Accessories
☆ Design of the inner seat can be different according to types of models.
Manual
6
Head inner seat
Inner seat
Shoulder pad for toddler
Back of safety seat
Belt guide
(for rear facing only)
Belt cover
Sun visor ratch
frame
Belt locking lever
(For both directions)
When taking off the belt cover
Shoulder belt hanger
Belt path
Shoulder belt hanger is required
when the height of shoulder belt is
adjusted.
MEMO
7
Adjustment method
Warning
Please stop the car to adjust each function.
Adjusting the safety seat during driving will interrupt your driving and might cause accidents.
How to adjust angle
Forward facing
Rear
facing
You can adjust angles in 4 different levels. For forward facing,
use levels 1~3 and level 4 is only for facing to rear.
Levels 1~3 should be adjusted according to seat’s angle of the car.
Angle adjustment for rear facing
For child with weight of 13 kg or under
When you set your child safety seat to rear facing, please adjust the angle to level 4.
1
2
Pull out the angle adjusting lever
and then push it to the back.
Lay down the main body
of the seat to level 4 (lowest level).
(To check the right angle,
refer to the arrow on the side of the main body.)
Angle adjustment for forward facing
For child with weight from 9 to 25 kg
When you set your child safety seat in forward facing, adjust angles between level 1 and 3.
1
2
Pull out the angle adjusting lever
and then push it to the back.
8
Adjust the main body according to seat’s angle
of the car from level 1 to 3.
(To check the right angle,
refer to the arrow on the side of the main body.)
How to adjust shoulder belt
Warning
Please stop the car to adjust each function.
Adjusting the safety seat during driving will interrupt your driving and might cause accidents.
1
Shoulder belt
hanger
Belt cover
Take off the belt cover at the back of main body to pull out the shoulder belt from its hanger.
Caution
When you cannot see the shoulder belt hanger, pull out the front belt
so shoulder belt hanger at the back can come out to front to adjust height of belt.
2
Put baby in the seat and
then insert the belt to the nearest shoulder belt hole.
3
After inserting the belt into its hanger, put on the belt cover.
Danger
Belt cover should be attach ed for use.
If the belt cannot perform its function properly, it might risk a life or serious injury.
9
How to use buckle
Danger Using the safety seat without buckle is very dangerous, so do not use the seat after unfastening buckle.
Unfastening
1
Fastening plate
2
Buckle
Click
Fastening plate
Press button
Button cover
Press the press button inside buckle
of button cover to take off fastening plate.
Separate joined fastening plate into upper
and lower units.
Fastening
1
2
Fastening plate
Click
Buckle
Fastening plate
3
Click
Press button
Chec
k!
Button cover
Put two fastening plates together,
one in below other on top.
Insert the joined fastening plate
into the buckle until
you hear ‘click’ sound.
Make sure the fastening
plate is securely fastened.
How to use buckle fastening magnet
Side (Buckle fastening magnet)
Before putting your baby into the seat, unfasten buckle and put it on the armrest part
– it will be easier to let your baby to seat.
10
How to use locking lever
Locking lever is an equipment to securely install the child safety seat
into your car. Please use it.
You will find 2 locking levers, one on each side of the main body.
Please use it according to location of installment.
locking lever
Danger
Locking lever and belt guide are equipments for secure installment of child safety seat with car’s seat
belt. Please use it. If you do not use it, safety seat might be in danger, as it would not be tightened
up for shocks and abrupt stop.
Danger
Firstly, check if your car seat can install this child safety seat (refer to p.2 as some seats are not allowed
to install this product). If you cannot install safety seat as shown in this manual, do not force it to fasten up.
In this case, the safety seat might not work properly and cause unexpected accident.
Caution When you adjust locking lever, please be careful not to jam your finger.
1
Fastening
Push the locking lever to the side.
2
Pull shoulder part of car’s seat belt to make it tight
as much as possible and insert it into locking lever.
Then, pull the lever to opposite direction and push to lock.
Shoulder belt of car
3
Belt guide
For rear facing
As shown above, fix the belt with locking lever,
and then pull out the belt as much as possible
and hang it on belt guide
Unfastening
1
Unfasten buckle of car’s seat belt.
Locking lever
2
Push locking lever to the side
and then separate car’s belt.
11
How to adjust height of headrest
Using the safety seat without the buckle is very dangerous, so do not use the seat after unfastening
Danger the buckle.
1
Pull up adjusting lever in the middle of backside of headrest to adjust height (up and down).
Headrest can be adjusted in 7 different levels.
2
Lower part of headrest should be in the closest location from baby’s shoulder.
Please adjust location of headrest according to size of the baby.
Caution Otherwise, safety seat might not give the best result.
12
First 7
How to use
BABY MODE
Baby Mode is designed for children
aged 0 to 1 with maximum weight of 13kg.
How to Use Baby Mode
Angle adjustment of back support at Baby Mode
Forward facing
1
2
Rear
facing
Set the child safety seat to angle
of level 4,
which is for rear facing.
Pull out rear facing lever
(angle adjusting lever)
and then push it to the back.
Lay down the main body
of the seat to level 4 (lowest level).
To check the right angle,
refer to the arrow on the side
of the main body.
Tight attachment of shoulder belt at Baby Mode
Danger Whenever you seat the baby in the safety seat, pull out adjustment belt to tightly buckle up the baby.
If the belt cannot perform its function properly, it might risk a life or cause serious injury.
1
2
Unfasten buckle of front pad.
Pull out shoulder pad while pressing
adjustment button of the belt.
Seat the baby and then put on shoulder belt.
Remember to adjust height of shoulder belt
according to height of your baby’s shoulder.
(Refer to ‘How to use buckle’ on p.10)
(Refer to ‘Height adjustment of shoulder belt’ on p.9)
3
4
“Click”
to fasten
Fasten up front pad and buckle.
Pull
Pull out adjustment belt while pressing
adjustment button to securely
fasten up shoulder belt to the baby.
Caution Between the belt and the baby, make a gap that allows adult’s hand to move around
14
Height adjustment of headrest at Baby Mode
Headrest should have a room of 3 cm higher from top of the baby.
Caution
1
2
Pull up adjusting lever in the middle
of backside of headrest to adjust height
(up and down).
Lower part of headrest should be in the
closest location from baby’s shoulder.
3
Head inner seat
Please adjust location of headrest
Caution according to size of the baby.
Otherwise, safety seat might not give
the best result.
Use head inner seat of headrest together.
Back support cushion and inner seat at Baby Mode
1
Inner seat
2
Back support cushion
If your child weighs over 10kg and feels
uncomfortable with inner seat,
remove back support cushion inside inner seat.
At Baby Mode,
use both back support cushion
and inner seat as much as possible.
15
How to install Baby Mode (Rear facing/rear installment)
Danger
According to types of car’s seat belt, installment and
fixing methods vary. Please refer to check possible
and impossible seats for installment on p. 3 and then
install child safety seat in a right way.
For ELR/ALR 3-point safety belt, switch to ALR
Warning function after installment. Do not fasten up shoulder
belt too tightly. If you have tightened up like shown
on the diagram, please re-start installment from start.
Caution
When you adjust locking lever, please be careful not
to jam your finger.
1
Pull the seat back to full upright position.
2
Adjust height of shoulder belt and headrest according
to the baby.
3
With angle adjusting lever,
change angle of the main body to level 4.
4
16
Put main body in opposite direction (rear facing) of driving.
Make sure the bottom of safety seat to closely touch
car’s seat as shown on the diagram.
5
Shoulder belt of car
Belt path
Push the safety seat to contact the back of seat
and then pull out the car’s seat belt.
Then, let the pulled out belt and fastening plate of the
belt to pass through belt path in the backside of main body.
Caution Be careful not to twist the car’s seat belt.
Belt path
Belt path
6
Fasten the fastening plate into the buckle.
Fastening
plate of car
Caution Be careful not to twist the car’s seat belt.
Buckle of car
Car’s seat belt
7
7
Push the locking lever located on the opposite side of
fastening plate to open.
8
Pull shoulder part of car’s seat belt to make it tight as much as
possible and insert it into locking lever.
Then, pull the lever to opposite direction and push to lock.
8
(Make sure to put the belt inside the locking lever and then push the lever strongly,
so it can hold the belt tightly.)
Waist belt of car should be tightened up to the
Caution maximum for firm fixation, so it would not swing.
17
9
Firstly, make sure whether shoulder belt of car is properly
inserted into the locking lever.
Put your weight to the safety seat, and then strongly pull
the shoulder belt of car while pushing belt locking lever
on side to fix it.
10
Shoulder belt of car
For double fixation, hang the fixed belt inside belt guide.
You will get crease on the belt, but there is no problem
with safety.
Belt guide
Locking lever
Checklist for Baby Mode
☆ Please check the below list after completing the installation.
Installment
diagram viewed
from outside
the car
Installment
diagram viewed
from inside
the car
Base
Base
Are height of shoulder belt and headrest of safety seat suitable?
Are fastening plate and buckle of car’s seat belt securely fastened up?
tion
ple ed
Comheck
C
Is not car’s seat belt twisted?
Is car’s seat belt tightly fastened up?
Is shoulder belt of car fastened strongly inside the locking lever?
Does the main body swing more than 3cm when you shake it?
☆ Check the above list and if the main body swings more than 3cm, please re-install it according to above instruction.
18
First 7
How to use
TODDLER MODE
Toddler mode is designed for children
aged 1 to 4 with weight from 9 to 18kg.
How to Use Toddler Mode
Angle adjustment of back support at Toddler Mode
Forward facing
1
2
Rear
facing
For Toddler Mode, angle
of safety seat should be adjusted
from level 1 to 3.
Adjust the main body according
to seat’s angle of the car
from level 1 to 3.
Pull out the angle adjusting lever
and then push it to the back.
Height adjustment of shoulder belt at Toddler Mode
Please adjust location of shoulder belt according to size of the baby.
Otherwise, safety chair might not give the best result.
Caution
1
Shoulder belt
hanger
Belt cover
Take off belt cover from back of the main body, and then take out shoulder belt from its hanger.
If you cannot see shoulder belt hanger, pull out the front belt and shoulder belt hanger
Caution will come out from the back. Then, you can adjust height of the belt.
2
3
Put the baby in safety seat,
insert the belt into the nearest
shoulder belt hole.
Danger
20
Insert the belt into belt hanger and then put on the belt cover.
Belt cover should be attached for use.
If the belt cannot perform its function properly, it might risk a life or cause serious injury.
How to use shoulder pad at Toddler Mode
Shoulder pad for toddler should be used for the toddler mode only (For 9kg or above and forward facing)
Caution
1
Take off existing shoulder pad, put out shoulder belt from shoulder belt hanger of the backside.
From back of the safety seat, put shoulder pad for toddler into shoulder belt hole.
(Refer to height adjustment of shoulder belt at Toddler Mode on p. 20)
2
As shown in the diagram,
insert the shoulder belt at the same level
as baby’s shoulder or a little above.
Inner side
Outer side
As shown on the diagram,
if you insert shoulder pad with twisted side,
Stitched side
Advice it will get through smoothly.
At this stage, put shoulder pad for toddler into shoulder belt hole that is similar in height of your baby.
Stitched side should face ground. (Refer to above diagram)
Warning Rubber part should be closely attached to the baby.
Caution
Shoulder pad should be inserted into holes in the same height.
Front
Outer
side
Inner
side
Back
☆ Shoulder pad has inner and outer sides.
☆ Cotton part is front and rubber part is back for shoulder pad.
21
3
Shoulder belt will get through smoothly
Advice if you push it gently with your thumb.
Insert shoulder belt into shoulder pad for toddlers.
Shoulder belt with the shoulder pad should
be inserted into shoulder belt hole
at the back of safety seat.
Completed!
Inner side
Put shoulder belt into shoulder belt hanger.
Outer side
Caution
Shoulder belt should not be twisted and hanged on the shoulder belt hanger.
Seat the baby into safety seat, pull out lower adjustment belt to make baby
Warning to seat firmly (refer to Tight attachment of shoulder pad at Baby Mode on p.14).
If the belt cannot perform its function properly, it might risk a life or serious injury.
Warning Belt cover should be attached for use.
If the belt cannot perform its function properly, it might risk a life or serious injury.
22
Height adjustment of headrest at Toddler Mode
Caution Headrest should have a room of 3 cm higher from top of the baby.
1
2
Pull up adjusting lever in the middle
of backside of headrest to adjust height
(up and down).
Lower part of headrest should be
in the closest location from baby’s shoulder.
3
Caution
Please adjust location of headrest
according to size of the baby.
Otherwise, safety chair might not
give the best result.
Use head inner seat of headrest together.
Back support cushion and inner seat at Baby Mode
Inner seat
Back support cushion
If the safety seat is narrower compared to baby’s size at Toddler Mode,
take off back support cushion and inner seat.
23
How to install Toddler Mode (Forward facing /front installment)
☆ With 3-point car’s seat belt, install the baby seat forward facing.
Danger
Do not install in the seats with airbag.
Due to operation of the airbag you might lose your child’s life or seriously injured.
When the baby seat is installed on side seat of driver, it might be difficult to change gears or side
Warning break. In this case, do not install it on side seat of driver, and install it at the back seat. It will be very
dangerous if you continue to drive with these difficulties of gear change or side break.
When the baby seat is installed in front, it might cover side mirror on the right door, which will block
Warning out driver’s sight. In this case, install the baby seat in other seats.
When it is installed at the back seat, make sure not to install at side seat of 2 & 3-door vehicles and
Warning 1 box car and folding seats of mini van, since it will block out exit for the case of emergency.
1
Pull the seat back to full upright position.
2
For easier installation, push the front seat to the front.
3
Adjust height of shoulder belt and headrest according
to the baby.
24
4
Put the main body in same direction (forward facing) as driving.
5
Belt Path
Pull out car’s seat belt and then let it go through the belt path,
which is located in the backside of the main body.
Caution Be careful not to twist the car’s seat belt.
Belt Path
Belt Path
6
Fasten the fastening plate into the buckle.
Fastening
plate of car
Caution Be careful not to twist the car’s seat belt.
Car’s seat belt
Buckle of car
25
7
7
Push the locking lever located on the opposite side of
fastening plate to open.
8
Pull shoulder part of car’s seat belt to make it tight as much as
possible and insert it into locking lever.
Then, pull the lever to opposite direction and push to lock.
(Make sure to put the belt inside the locking lever and then push the lever strongly,
so it can hold the belt tightly.)
8
Waist belt of car should be fastened up to the
Caution maximum for firm fixation, so it would not swing.
9
Firstly, make sure shoulder belt of car is properly inserted
into the locking lever. Put your weight to the safety seat,
and then strongly pull the shoulder belt of car while pushing
belt locking lever on side to fix it.
Checklist for Toddler Mode
☆ Please check the below list after completing the installation.
Installment
diagram viewed
from outside
the car
Installment
diagram viewed
from inside
the car
Base
Base
Are height of shoulder belt and headrest of safety seat suitable?
Are fastening plate and buckle of car’s seat belt securely fastened up?
tion
ple ed
Comheck
C
Is not car’s seat belt twisted?
Is car’s seat belt tightly fastened up?
Is shoulder belt of car strongly fixed inside the locking lever?
Does the main body swing more than 3cm when you shake it?
☆ Check the above list and if the main body swings more than 3cm, please re-install it according to above instruction.
26
First 7
How to use
CHILD MODE
Child mode is designed for children
aged 3 to 7 with weight from 15 to 25kg.
How to Use Child Mode
Separation and storage for Child Mode
☆ To easily use child mode, First Seven will let you to safely store unused belt,
buckle and pad inside the safety seat.
1
2
Pull up the back lever of headrest
to the maximum height.
By using the lever at the back,
take off headrest.
Separate the belt strap from shoulder hanger
of the backside of the safety seat.
(For detailed detachment method, refer to p.32)
3
Unfasten all buckles of sabelt, and then take out buckle from the belt strap.
4
Remove inner seat and back support cushion.
Then, take cover off from bottom.
28
5
By using rubber band or string,
tight up fastening plate of buckle
and then store it in the hidden space
just as shown in the diagram.
6
7
5
9
☆ Taking off sponge (memory foam) might damage your safety seat, so please just look at different storage spaces as
shown in the above diagram and put things under the sponge. This company does not take any responsibilities of
sponge damage that is made during this process.
6
Shoulder belt strap without buckle should be rolled up, and then tie it up with rubber band or string.
Then, store it in hidden storage space as shown above.
7
Front pad, which is lower part of the buckle, should be separated from belt cover and then stored
in the hidden space as shown above.
29
8
Back part
of safety seat
Front part
of safety seat
Shoulder belt hanger should be fixed at the entry of shoulder belt at backside
of the safety seat as shown above.
Then, push belt adjustment belt in the front to pull it completely.
9
Store belt strap in the location shown above.
MEMO
30
10
Button cover and shoulder pad should be stored
inside hole above the back support part.
How to install Child Mode (How to use seat belt)
1
2
Pull out car’s seat belt loosely as shown above.
Pull the belt in diagonal direction to pass
through underneath headrest and below armrest,
and then fasten it with buckle as shown above.
Checklist for Child Mode
☆ Please check the below list after completing the installation.
Is safety belt of the safety seat removed before use?
Does the backside of safety seat contact the car’s seat?
tion
ple ed
Comheck
C
Does safety belt is crosses child’s center of chest and rests on the tops
of the thighs?
Isn’t upper part of car’s seat belt too close from your child’s neck?
Is position of headrest appropriate according to your child’s head?
Is upper part of car’s seat belt inserted in home of car’s seat belt,
which is located above head protector?
☆ Check the above list and if the main body swings more than 3cm, please re-install it according to above instruction.
31
Maintenance and management
How to detach headrest
1
2
Side levers located
inside the seat
Pull out the headrest to the highest position.
As you pull out the lever of headrest,
push right and left side levers located
on the backside of safety seat
at the same time in order to separate headrest.
3
Pull!
When you attach headrest again, as you pull headrest lever,
set each side rail in the right position and then push it.
How to take off seat cover
☆ When you put the seat cover on, follow below instruction in opposite order.
Warning
Do not detach front pad and the main body. This might cause breakdowns.
1
2
Side levers located
inside the seat
Take off headrest.
32
From the backside of headrest to side,
take off the seat cover.
3
Belt cover
Take off belt cover at the back of main body,
and then take off shoulder belt from its hanger.
Taken off belt should be pulled out from shoulder belt hole.
Take out shoulder pad and fastening plate from shoulder belt.
Shoulder belt
☆[Note] If you cannot see shoulder belt hanger
You cannot see shoulder belt hanger because it is pushed inside.
In this case, extend shoulder belt while pressing shoulder belt
adjusting lever and you will see the hanger coming up
from the back. (refer to p.9)
Shoulder belt hanger
Seat clip
4
Seat cover
Main body
Take out shoulder belt,
and then take off seat clip of seat cover.
5
6
Take off seat cover from bottom to top.
For belt guide, open the sit to right
and left as it is still attached.
Warning Warning label (yellow label) attached in the front of sewing work cannot be detached.
This company does not take any responsibilities for its detachment.
33
MEMO
34
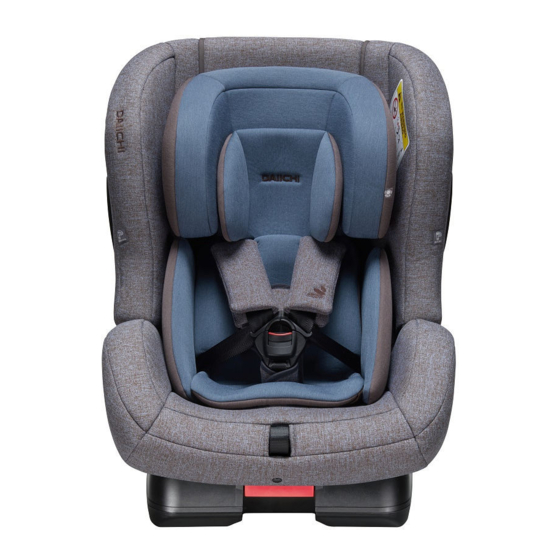
- Manuals
- Brands
- DAIICHI Manuals
- Car Seat
- First7+
- User manual
-
Bookmarks
Quick Links
ROMÂNĂ . ENGLISH
FABRICAT ÎN COREA
MADE IN KOREA
Manual de utilizare pentru echipamente
de siguranță pentru copii
User manual
WWW.BABYSEAT.NET
WWW.BABYSEATMALL.NET
|
for child safety equipment
Related Manuals for DAIICHI First7+
Summary of Contents for DAIICHI First7+
-
Page 1
ROMÂNĂ . ENGLISH FABRICAT ÎN COREA MADE IN KOREA Manual de utilizare pentru echipamente de siguranță pentru copii User manual WWW.BABYSEAT.NET WWW.BABYSEATMALL.NET for child safety equipment… -
Page 2
INFORMARE 1. Acesta este un dispozitiv de fixare „universal” pentru copii. Este omologat în conformitate cu Regulamentul nr. 44, seria 04 de modificări, pentru uz general în vehicule și se va potrivi cu cele mai multe banchete auto, dar nu cu toate. 2. -
Page 3
Cuprins / Table of contents Informații referitoare la siguranță / Safety Informations Instrucțiuni de siguranță / Safety Instructions Acest produs este un echipament de siguranță pentru copii, folosit în mașini, care va reduce șocurile resimțite de copii în caz de accident. Simboluri / About Indicative Marks Cu toate acestea, în unele cazuri, nu oferă… -
Page 4
Înainte de instalarea scaunului în mașină / Before Installing the Seat in Your Car Banchetele pe care se poate instala scaunul auto / Seats that can install the safety seat Tipuri de centuri de siguranță pentru instalare / Types of seatbelts for installation Pentru o metodă… -
Page 5
Atenție / Caution ☆Manualul de utilizare trebuie păstrat în siguranță și consultat ori de câte ori este necesar. The user manual needs to be kept well and read accordingly when necessary. Pericol / Danger Avertisment / Warning Atunci când scaunul auto pentru sugari este instalat Scaunul auto pentru sugari trebuie să… -
Page 6
Denumirea fiecărei componente / Name of each part Partea din față a scaunului auto / Front of Safety Seat Partea din spate a scaunului auto / Back of Safety Seat Manetă-opritor în tetieră Stopper lever in headrest Ghidaj pentru reținerea centurii Tetieră… -
Page 7
Modalitate de reglare / Way of adjustment Modul de reglare a unghiului / How to Adjust Angle Modul de reglare a centurii pentru umeri / How to Adjust Shoulder Belt Avertisment Opriți mașina pentru a regla fiecare funcție. Reglarea scaunului auto în timpul condusului vă va distrage de la condus și puteți provoca accidente. Avertisment Opriți mașina pentru a regla fiecare funcție. -
Page 8
Modul de utilizare a cataramei / How to Use Buckle Modul de utilizare a manetei de blocare / How to Use Locking Lever Maneta de blocare este un echipament pentru instalarea în siguranță a scaunului auto pentru copii în mașină. Vă rugăm să o folosiți. Folosirea scaunului auto fără… -
Page 9
Grupa 0+ / Group0+ Modul de reglare a înălțimii tetierei / How to Adjust Height of Headrest Modul Baby (Bebelus) Folosirea scaunului auto fără cataramă este foarte periculoasă, de aceea, nu folosiți scaunul după desfacerea cataramei. Pericol Using the safety seat without the buckle is very dangerous, so do not use the seat after unfastening the buckle. Danger Baby Mode 11 trepte… -
Page 10
Utilizarea modului Baby (Bebeluș) How to Use Baby Mode Reglarea unghiului spătarului în modul Baby (Bebeluș) / Angle Adjustment of Back Support at Baby Mode Reglarea înălțimii tetierei în modul Baby (Bebeluș) / Height Adjustment of Headrest at Baby Mode Orientare spre față… -
Page 11
Instalarea în modul Baby (Bebeluș) How to Install Baby Mode (Orientare spre spate, instalare în spate / Rear facing, rear installment) ☆ Consultați pagina 38 cu privire la modul de montare a dispozitivului ISOFIX cu orientare spre față. Refer to p.38 for how to mount ISOFIX forward facing. Centura de siguranță… -
Page 12
Grupa 1 / Group1 Modul Toddler (Copil mic) Mai întâi, verificați dacă centura pentru umeri a mașinii este introdusă corect în maneta de blocare. Lăsați-vă cu toată greutatea pe scaunul auto, apoi trageți puternic centura pentru umeri a mașinii, în timp ce împingeți în lateral maneta de blocare a centurii pentru a o fixa. -
Page 13
Utilizarea modului Toddler (Copil mic) / How to Use Toddler Mode Reglarea unghiului spătarului în modul Toddle (Copil mic) Modul de utilizare a pernuței de protecție pentru umeri / Usage Way of Safety Shoulder Pad Angle Adjustment of Back Support at Toddler Mode Orientare spre față… -
Page 14
Reglarea înălțimii tetierei în modul Toddler (Copil mic) / Height Adjustment of Headrest at Toddler Mode ③ Atenție Tetiera trebuie să aibă un spațiu de 3 cm pe înălțime față de creștetul bebelușului. Caution Headrest should have a room of 3 cm higher from top of the baby. ①… -
Page 15
Instalarea modului Toddler (Copil mic) How to install Toddler Mode (Orientare spre față, instalare în față / Forward facing, front installment ) Consultați Modul de instalare a dispozitivului ISOFIX cu orientare spre față de la pagina 39. ☆ Please check how to install ISOFIX forward facing at page 39. Cu ajutorul centurii de siguranță… -
Page 16
Grupa 2 / Group2 ⑦ Apăsați maneta de blocare situată în partea opusă a plăcii de fixare pentru a o deschide. Modul Child (Copil) Push the locking lever located on the opposite side of fastening plate to open. Trageți de partea din zona umerilor a centurii de siguranță a mașinii pentru a o strânge cât se poate de mult, apoi introduceți-o în maneta de blocare. -
Page 17
Utilizarea modului Child (Copil) / How to Use Child Mode Desfacerea și depozitarea pentru modul Child (Copil) / Detachment and Storage for Child Mode ☆ First Seven poate depozita în siguranță centura, catarama și pernuțele amovibile în interiorul scaunului auto pentru o utilizare confortabilă… -
Page 18
Instalarea în modul Child (Copil) / How to Install Child Mode Partea din față a scaunului auto ⑧ (Modul de utilizare a centurii de siguranță / How to use seat belt) Front part of safety seat ① Partea din spate a scaunului auto Back part of safety seat Agățătoarea centurii pentru umeri trebuie fixată… -
Page 19
Întreținerea și gestionarea / Maintenance and Management Modul de detașare a tetierei / How to Detach Headrest ③ Capacul centurii Belt cover ① ② Scoateți capacul centurii din partea din spate a corpului principal, apoi scoateți centura pentru umeri din agățătoarea dedicată. Centura scoasă… -
Page 20
Modul de utilizare a pernei interioare a scaunului și spătarului How to use inner seat and cushion Recomandare La nou-născuți, gâtul, coloana vertebrală și spațiile goale de pe ambele părți ale corpului sunt susținute ferm și confortabil, Advice datorită faptului că pernele pot fi atașate sau detașate simplu, în 4 trepte diferite, în funcție de dimensiunile copilului. Easily either attach or detach in 4 different steps according to baby’s growth due to support and comfort neck, spine, and space of body in both in period of newborn. -
Page 21
Denumirea fiecărei componente / Name of Each Part Metoda de instalare a bazei ISOFIX / ISOFIX Base Installation Method ① Bază ISOFIX / ISOFIX Base Trageți în sus maneta de deschidere a piciorului de sprijin ISOFIX pentru deschidere și fixați piciorul de sprijin. Pull ISOFIX support leg open lever Dispozitiv de blocare upward to open and fix support leg. -
Page 22
Instalarea scaunului auto pe baza ISOFIX Installation of Carseat Onto ISOFIX Base Instalarea cu orientare spre spate Orientare spre față, instalare în față Pentru copii cu greutatea de maxim 13 kg Pentru copii cu greutatea cuprinsă între 9 și maxim 25 kg Rear facing installation For child with weight of 13 kg or under Forward facing, front installment… -
Page 23
Separarea scaunului auto de baza ISOFIX Metoda de desfacere a bazei ISOFIX Separating Car Seat from ISOFIX Base ISOFIX base detachment method ① ① ② ② Strângeți și trageți butonul manetei de control din partea de sus a bazei ISOFIX, scoateți bara de conexiune cât se poate de mult din dispozitivul de ancorare din bancheta spate. -
Page 24
note / memo ③ Desprindeți baza din ancora ISOFIX, trăgând simultan maneta de eliberare ISOFIX de la stânga la dreapta bazei. Detach base form ISOFIX anchor by pulling ISOFIX release lever from left and right side of the base at the same time. ④…