Doona Car Seat & Stroller
-
English (EU version)
-
English (US Version)
-
Español (EU Version)
-
Español (US Version)
-
Français
-
Italiano
-
Deutsch
-
Português
-
Русский
-
Dansk
-
Norsk
-
Türkçe
-
Svenska
-
中文
-
Nederlands
-
Polski
-
עברית
-
العربية
-
Ελληνικά
-
Hrvatski
-
Қазақша
-
Українська
-
日本語
-
Česky
-
Slovenčina
-
한국어
-
Română
Open User Guide

Liki Trike
-
English (US Version)
-
English (EU version)
-
Español (US Version)
-
Español (EU version)
-
Français (US Version)
-
Français (EU version)
-
Deutsch
-
Nederlands
-
Türkçe
-
العربية
-
Português
-
Polski
-
Română
-
Русский
-
Dansk
-
Norsk
-
Svenska
-
עברית
Open User Guide

LATCH Base
-
English
-
Español
Open User Guide
ISOFIX Base
-
Car Fitting List
-
Català
-
Deutsch
-
English
-
Français
-
Italiano
-
Nederlands
-
Português
-
Русский
-
中文
-
Dansk
-
Norsk
-
Svenska
-
Polski
-
עברית
-
Türkçe
-
العربية
Open User Guide
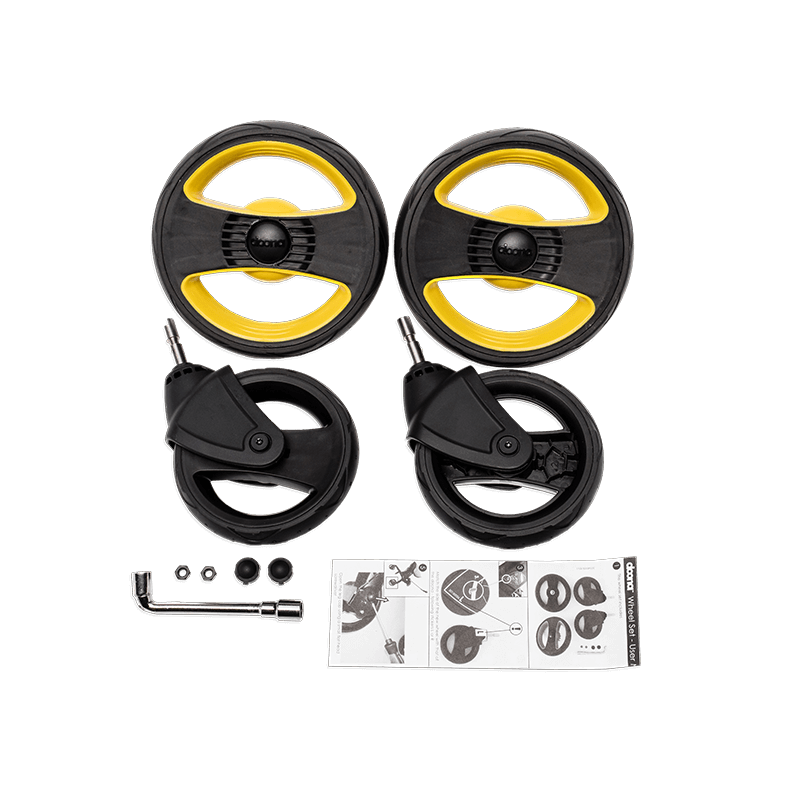
Spare parts
-
Fabric installation and removal
Open User Guide
![]()
Installation on aircrafts
-
English (EU)
-
English (US)
-
Deutsch
-
Français
-
Italiano
-
Español
-
Nederlands
-
Português
-
Русский
-
עברית
Open User Guide

SenaAlert
-
English
-
Italiano
Open User Guide

- Manuals
- Brands
- doona Manuals
- Stroller
- doona+
- User manual
-
Contents
-
Table of Contents
-
Bookmarks
Quick Links
User Guide
Group 0+
Weight: 4-35 lbs (1.8-15.8 kg)
Height: 32 inches (81 cm) or less
Language: English
KEEP THIS USER GUIDE in its storage
compartment at the back of the
product.
Related Manuals for doona doona+
Summary of Contents for doona doona+
-
Page 1
User Guide Group 0+ Weight: 4-35 lbs (1.8-15.8 kg) KEEP THIS USER GUIDE in its storage compartment at the back of the Height: 32 inches (81 cm) or less product. Language: English… -
Page 2
7.1. Adjusting the rotation angle of the handle……19 7.2. Extending and retracting the handle……..20 7.3. Rear wheels brakes…………..21 7.4. Changing between modes……….21 08/ Securing Your Child in the Doona Car Seat……27 8.1. Infant Insert use…………..29 8.2. Head Support use…………..30 8.3. Harness use…………….32 8.4. -
Page 3
13.3. Seat Pad Re-fitting……………69 13.4. Sunshade Re-fitting…………..67 13.5. Cleaning the Seat Pad…………71 13.6. Care for the harness straps harness buckle harness adjuster strap…………72 13.7. Cleaning the Doona Car Seat accessories……72 13.8. Replacement parts…………..72 13.9. Storage………………72 14/ Accessories…………….73 15/ Two-Year Warranty…………..74 16/ Warranty Card……………..75… -
Page 4
Congratulations for choosing Doona’s Car Seat as your child’s safety and mobility solution. In order to protect your child, the Doona Car Seat must always be used and installed as described in this user guide. IMPORTANT! Keep this user guide for future use. Store in compartment at back of product. -
Page 5
Doona Car Seat. • NEVER allow others to use or install the Doona Car Seat before they read the instructions in this user guide and the child restraint installation instructions in their vehicle manual. -
Page 6
• The Doona Car Seat is not suitable for use while running or skating. • DO NOT USE the Doona Car Seat if it has been involved in a crash. • DO NOT USE the Doona Car Seat if it is damaged or broken. -
Page 7
• NEVER leave your child in the Doona Car Seat in the vehicle. Vehicle interior temperatures can rise or drop to dangerous levels very quickly. -
Page 8
The Doona Car Seat conforms to all applicable approved Federal Motor Vehicle Safety Standards. Vehicle Types. The Doona Car Seat is certified for use in all passenger cars, including SUV’s, crossovers, vans, and light trucks. Registered patents. US Patent No. 8,801,028 US Patent No. -
Page 9
Before arriving at the aircraft with the Doona Car Seat, please contact the airline regarding suitability and transport conditions in advance. The use of the Doona Car Seat is allowed only on a plane with a 2-point seat belt. Do not use the Doona Base on an aircraft, only the Doona carrier is certified for aircraft use. -
Page 10
For recall information, call the U.S. Government’s Vehicle Safety Hotline at 1-888-327-4236 (TTY:1-800-424-9153), or go to http://www.NHTSA.gov Also check the Doona website at: www.doona.com THE N EX T G EN ER AT I O N C A R SEA T… -
Page 11
35 lbs (15.8 kg), or if the top of the child’s head is less than 1 inch (2.5 cm) from the top edge of the Doona Car Seat or if your child’s height is over 32 inches (81.3 cm). -
Page 12
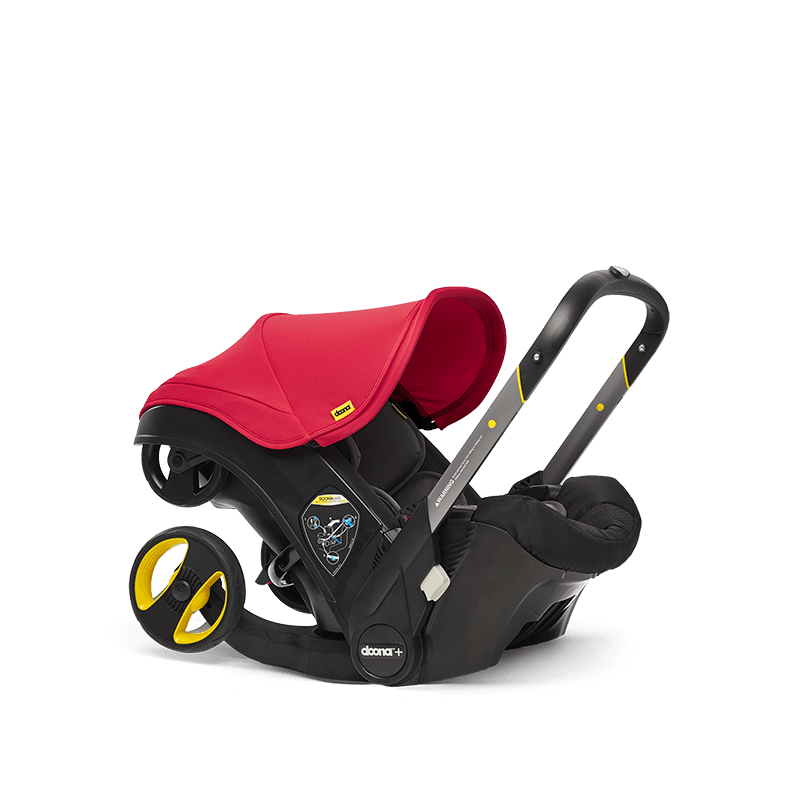
6 / Product Overview. 1. Handle extension button 8. Shoulder straps 2. Handle 9. Buckle tongues 3. Lap belt guides 10. Buckle release button 4. Sunshade 11. Chest clip 5. Handle rotation buttons 12. Harness buckle 6. Front wheels 13. Harness adjustment button 7. -
Page 13
15. Brake lock pedal (red) 22. Metal bar 16. Brake release pedal (green) 23. Head support 17. Stroller wheel release 24. Shoulder strap pads 18. Safety lock 25. Lap straps 19. Vehicle shoulder belt guide 26. Infant insert 20. Shoulder strap slots 21. -
Page 14
27. Vehicle shoulder belt 33. Sunshade hinge 28. Vehicle lap belt 34. Seat pad ring 29. Vehicle seat belt buckle 35. Seat pad pin tongue 36. Seat pad 30. Vehicle seat buckle 37. Lap strap slot 31. Sunshade spine 38. Hook 32. -
Page 15
P R O D U CT O V E RV IE W… -
Page 16
11 or 12 for instructions on how to install the Doona Car Seat in a vehicle) Carrier Mode For use of the Doona Car Seat outside of the vehicle, place the handle in position B to carry it or position A to store it out of the way when placing your child into or removing them from the carrier. -
Page 17
• NEVER place or hang accessories which are not intended for use with the Doona Car Seat. • Remove all bags and accessories from the Doona Car Seat before transitioning between modes. 7.1. Adjusting the rotation angle of the handle You can engage the handle (#2) in three different positions: A, B, or C. -
Page 18
7.2. Extending and retracting the handle IMPORTANT! The handle can only be extended or retracted when it is in position C. Handle extension or retraction is NOT possible when the handle is in positions A or B. To extend the handle (#2) to its maximum length, press the handle extension button (#1) and pull the handle up until you hear a “click”… -
Page 19
7.3. Rear whees brakes Always engage the brakes when placing a child in Doona Car Seat or removing a child from the Doona Car Seat. To apply the brakes on both rear wheels (#7), step on the red brake lock pedal (#15) located next to the right rear wheel. -
Page 20
STEP 2. Push in the red safety lock (#18) of the stroller wheel release (#17) at the back of the Doona Car Seat, and squeeze it up, to unfold the wheels. You should hear a “click” sound when the legs are fully opened and locked. -
Page 21
STEP 5. Extend the handle (#2) to its maximum length by pressing the handle extension button (#1) and pulling the handle up. You should hear a “click” sound when the handle is locked and fully extracted. IMPORTANT! The handle can only be extended or retracted when it is in position C. -
Page 22
STEP 2. Press the handle extension button (#1), to retract the handle (#2) by pushing it down until it locks at its minimum length. STEP 3. Press the handle rotation buttons (#5) on both sides simultaneously and rotate the handle (#2) to the upright position B. STEP 4. -
Page 23
STEP 5. Use one hand (same side as the foot blocking the rear wheel) to hold the handle (#2) and with the other hand grab the stroller wheel release (#17) at the back of the Doona Car Seat. Push in the red safety lock (#18) and squeeze the wheel release handle up. -
Page 24
The Doona Car Seat can be folded into carrier mode ONLY when all of the following actions are done simultaneously: • Blocking the rear wheel (#7) • Pressing the safety lock (#18) • Squeezing the stroller wheel release (#17) • Leaning the Doona Car Seat against the… -
Page 25
Doona Car Seat. • Failure to follow the information provided on the Doona Car Seat or in the user guide, could result in DEATH or SERIOUS INJURY. • NEVER allow others to restrain a child… -
Page 26
• The Doona Car Seat does not replace a crib, a bed, a play yard or a bassinet. Should your child need to sleep, it is recommended to place the child in a suitable crib, play yard, bed, or bassinet •… -
Page 27
8.1. Infant Insert use ALWAYS secure your child in the Doona Car Seat WITH the Infant Insert (#26) if your child weighs below 11lbs (5 kg) or if your child’s shoulders, when sitting in the Doona Car Seat without the Infant Insert, are below the lowest shoulder strap slots (#20). -
Page 28
8.2. Head Support use • NEVER place your child in the Doona Car Seat without the Head Support. • Keep using the Head Support in the Doona Car Seat even after removing the Infant Insert. THE N EX T G EN ER AT I O N C A R SEA T… -
Page 29
Ensure the head support straps are wrapped around the shoulder straps (#8) and connected to the button snaps, at the back of the head support. IMPORTANT! Ensure the shoulder straps (#8) are inserted through the shoulder strap slots (#20) at or just below the child’s shoulders. S E C UR I N G Y O U R CH IL D IN T H E D O O N A CAR S E AT… -
Page 30
Fully restrain the child even when carrier is used outside the vehicle • Snugly adjust the harness of the Doona Car Seat around your child. A snug strap should not allow any slack. It lies in a relatively straight line without sagging. -
Page 31
Adjusting the Harness Loosening the shoulder straps Press the harness adjustment button (#13) while pulling both shoulder straps (#8) toward you. Tightening the shoulder straps Gently pull the harness adjustment strap (#14) until both the lap straps (#25) and the shoulder straps (#8) are snug around your child’s body. Make sure that both the shoulder portion and the lap portion of the harness have been tightened. -
Page 32
Periodically, check that the straps are routed through the correct slots for your child. STEP 1: Place the child in the Doona Car Seat and locate the correct shoulder strap slots (#20) for your child’s height. Remove your child from the Doona Car Seat. -
Page 33
IMPORTANT! Make sure the shoulders straps are routed between the seat body and the metal bar (#22) at the back of the Doona Car Seat. No part should go in front of the metal bar. STEP 4: Attach the shoulder straps (#9) to the metal harness plate (#21). -
Page 34
Prevent risk of ejection in a crash. • Make sure that the shoulder straps are not twisted and are threaded through the shoulder strap slots at the same height. • The shoulder straps and metal harness plate MUST rest between the metal bar and the seat body. -
Page 35
8.5. Chest clip use To release the chest clip (#11), press the chest clip release button and pull apart the two parts. To fasten the chest clip (#11), slide the two parts together until a “click” sound is heard. IMPORTANT! Adjust the chest clip to the child’s arm-pit level. S E C UR I N G Y O U R CH IL D IN T H E D O O N A CAR S E AT… -
Page 36
8.7. Securing your child with the harness STEP 1: Place your child in the Doona Car Seat with their rump against the seat back and bottom as shown. STEP 2: Position the shoulder strap pads (#24) above the child’s shoulders. -
Page 37
STEP 5: Tighten the harness straps until they are snug around your child’s lap and body. • Snugly adjust the harness of the Doona Car Seat around your child. A snug strap should not allow any slack. It lies in a relatively straight line without sagging. -
Page 38
• IMPORTANT! Prevent damage to your Doona Car Seat and your vehicle; Check that all Doona Car Seat parts are installed as instructed to prevent them from getting caught in doors or moving seats. THE N EX T G EN ER AT I O N C A R SEA T… -
Page 39
12 years old and under are safer when properly restrained in rear seating positions than in front seating positions. • NEVER install the Doona Car Seat on a vehicle seat that is facing the rear or side of the vehicle. -
Page 40
1 0/ Vehicle Seat Belts. 10.1 Compatible Vehicle Belts Doona Infant Car Seat must stay securely installed. If Doona Infant Car Seat cannot be installed securely or will not stay securely installed, try installing in a different vehicle seating position or with the base and LATCH system. -
Page 41
3. Inflatable lap-shoulder belts in Ford and Lincoln vehicles can be used to secure the Doona Infant Car Seat. For Installation without base, follow instructions for lap-shoulder belt standard installation in section 12.2. -
Page 42
For vehicle seats with side airbags, please observe the instructions in your vehicle manual. Inflatable Vehicle Seatbelts: The Doona can be installed with a Ford/Lincoln inflatable seatbelt. Installation without base: Follow instructions for lap- shoulder belt standard installation. -
Page 43
10.2 Incompatible Vehicle Belt. NEVER install the Doona Infant Car Seat in a vehicle with the following types of vehicle belts. Check your vehicle manual for information about the vehicle’s seat belt type. 1. Vehicle belts that are attached to the door in any way. -
Page 44
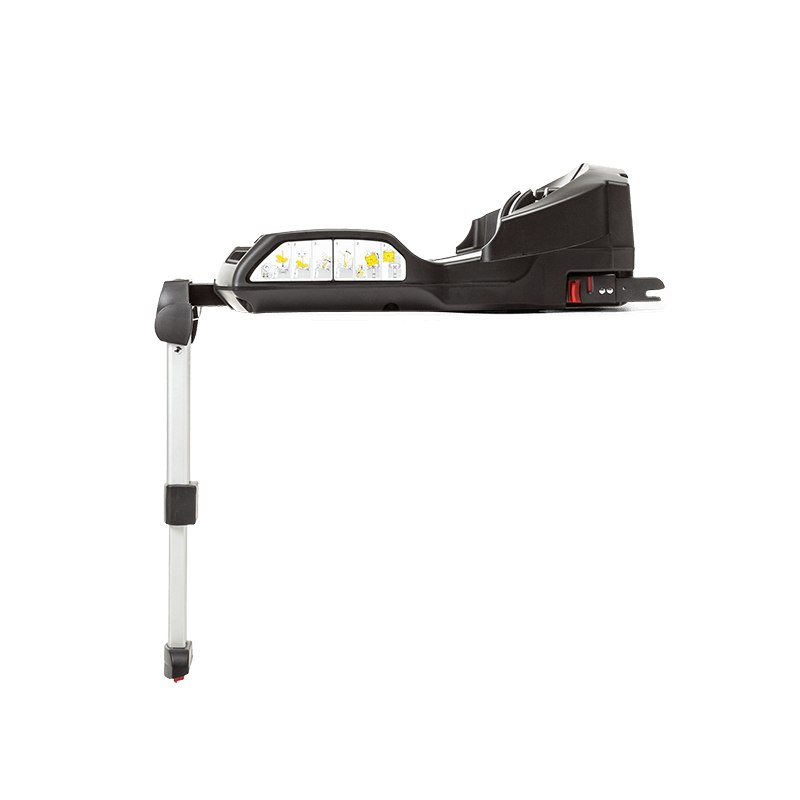
Car Seat with a Base. This user guide does not include instructions for installation with a base. For detailed instructions on how to install the Doona Car Seat with the Doona Base, refer to the user guide provided with the Doona Base. -
Page 45
12.2: Lap-Shoulder Belt Standard Installation: Follow this method if installing with an inflatable vehicle seatbelt or if the shoulder belt is not long enough to wrap around the back of the Doona carrier. 12.3: Lap Belt Installation: Only in vehicle seats without shoulder belt and Aircraft. -
Page 46
Ensure correct installation • Make sure that the Doona Car Seat position C. • When installed without a base, adjust the Doona Car Seat position and angle according to the red level line that appears on the side sticker. The red line should be parallel to the ground. -
Page 47
ALWAYS check that the Doona Car Seat is secured when it is in the vehicle, even if no child is being transported. • To protect your vehicle — Some vehicle seat covers, made from sensitive materials (e.g. -
Page 48
Doona Base. STEP 1: Place the Doona Car Seat rear-facing on the vehicle seat (child is facing backwards). NOTE: Doona recommends installing the Doona Car Seat only in a rear vehicle seating position. If you must install your seat in a front vehicle seating position, check your vehicle manual to verify that it is safe to install a child restraint in this position. -
Page 49
STEP 2: Place the handle (#2) in car seat mode, position C. STEP 3: Make sure that the vehicle belt is not twisted and then buckle it. STEP 4: Route the lap portion of the vehicle belt (#28) through the lap belt guides (#3) located on both sides of the handle . -
Page 50
IMPORTANT! • Vehicle seat belt must lock, otherwise use a locking clip. • If the shoulder belt is not long enough to go around the back of the Doona, please use the Lap Shoulder Belt Standard Installation method. • After completing installation, check that the red level line on the side of the seat is still level to ground. -
Page 51
Doona Base. STEP 1: Place the Doona Car Seat rear-facing on the vehicle seat (child is facing backwards). NOTE: Doona recommends installing the Doona Car Seat only in a rear vehicle seating position. -
Page 52
STEP 2: Place the handle (#2) in car seat mode, position C. STEP 3: Make sure that the vehicle belt is not twisted and then buckle it. STEP 4: Route the lap portion of the vehicle belt (#28) through the lap belt guides (#3) located on both sides of the handle . -
Page 53
Check for a secure installation: grasp the Doona Car Seat at or near the lap belt path and push side to side and front to back. The car seat should not move more than 1” in any direction. -
Page 54
Doona Base. STEP 1: Place the Doona Car Seat rear-facing on the vehicle seat (child is facing backwards). STEP 2: Place the handle (#2) in car seat mode, position C. -
Page 55
STEP 4: Route the lap vehicle belt through the lap belt guides (#3) on both sides of the handle (#2). STEP 5: position the Doona Car Seat so the red level line on the side is level to ground(#28). I NS T A L L I NG T HE D O O N A CA R S E AT W I T H O U T A B AS E… -
Page 56
• Make sure ONLY the lap belt section of the vehicle belt is routed through both lap belt guides located on the handle of the Doona Car Seat. • Make sure the red level line on the side sticker on the Doona Car Seat is parallel to the ground when installed without the base. -
Page 57
• Regularly check all parts for damage. Ensure the correct operation of all mechanical components. • Do not use the Doona Car Seat if it is damaged or broken. • DO NOT use the Doona Car Seat without its seat pad. -
Page 58
13.1. Sunshade Removal. STEP 1: Pull out the 3 sunshade snaps (#33) at the back of the sunshade (#4). STEP 2: Pull out the sunshade spine (#31) from the sunshade hinges (#33). STEP 3: Remove the fabric from the spine. THE N EX T G EN ER AT I O N C A R SEA T… -
Page 59
13.2. Seat Pad Removal. STEP 1: Loosen the Shoulder Straps (#8) completely. STEP 2: Release the Harness Buckle (#12) and the Chest clip (#11). STEP 3: Disconnect the shoulder straps (#8) from the metal harness plate (#21) located at the back of the car seat. C AR E AN D M AIN T E NA N CE… -
Page 60
STEP 4: Pull out the shoulder straps (#8) from the front and remove the shoulder strap pads (#24) from them. STEP 5: Release the seat pad from the 4 hooks (#38) behind the head area of the car seat. STEP 6: Snap out the seat pad pins (#35) of both sides of the seat pad. THE N EX T G EN ER AT I O N C A R SEA T… -
Page 61
STEP 7: Remove the seat pad from both sides, as shown below. STEP 8: Snap out the sead pad pins (#35) of the seat pad. STEP 9: Pull up the seat pad from around the harness adjustment button (#13) and the harness buckle (#12) to remove the seat pad completely. -
Page 62
13.3. Seat Pad Re-fitting. STEP 1: Thread the shoulder straps (#8) through the slots in the lap area of the seat pad. STEP 2: Thread the harness buckle (#12) through the designated slot in the seat pad and pull it out from the other side. THE N EX T G EN ER AT I O N C A R SEA T… -
Page 63
STEP 3: Re-fit the seat pad around the harness adjustment button (#13). STEP 4: Snap in the lower seat pad pin (#35) at the bottom of the car seat. STEP 5: Snap in the seat pad pins (#35) on both sides. C AR E AN D M AIN T E NA N CE… -
Page 64
STEP 6: Tuck in the seat pad around the bottom part of the car seat. STEP 7: Tuck in the seat pad on both sides, as shown below. THE N EX T G EN ER AT I O N C A R SEA T… -
Page 65
STEP 8: Tuck in the seat pad pins (#35) on both sides of the car seat body and push in until they snap into place. STEP 9: Thread the 4 seat pad rings (#34), attached to the head area of the seat pad, through the slots in the upper part of the car seat, and attach them to the hooks (#38). -
Page 66
STEP 10: Thread the shoulder straps (#8) through the appropriate shoulder strap slots (#20). IMPORTANT! Shoulder straps must be routed at the same height or slightly below the child’s shoulders. STEP 11: Reconnect the shoulder straps to the metal harness plate (#21) at the back of the car seat. -
Page 67
13.4. Sunshade Re-fitting. STEP 1: Re-fit the fabric on the sunshade spine (#31). STEP 2: Hook in the sunshade spine (#31) into the sunshade hinges (#33). C AR E AN D M AIN T E NA N CE… -
Page 68
STEP 3: Reconnect the 3 sunshade pins (#32) at the back of the sunshade (#4). Correct installation • Make sure the harness straps are not twisted and are correctly routed through the shoulder strap slots. • Make sure that the shoulder straps are correctly reconnected to the metal harness plate. -
Page 69
• NEVER remove the buckle tongues (#9) from the straps. • Always use only genuine seat pads, since the seat pad is an integral part of the Doona Car Seat system. • Non-regulated products, which are not designed for use with the Doona Car Seat, can impair the safety and performance of the seat in use or in a crash. -
Page 70
NEVER use a washing machine or a dryer to clean the harness, harness buckle, and harness adjuster. NEVER iron the harness webbing. If the harness of the Doona Car Seat must be cleaned, wipe it with a damp cloth or rinse it thoroughly with clean, warm water. NEVER disassemble the harness. -
Page 71
14 / Accessories. Doona offers various accessories which have been tested to ensure that their use does not impair the safety or proper function of the Doona Car Seat. Instructions and warnings are provided with each accessory. • DO NOT use the Doona Car Seat accessories before reading all warnings and instructions provided with them. -
Page 72
US safety standards and regulations, and that it meets the highest standards of quality. For the Doona Car Seat, we provide a 2-year limited warranty against manufacturing and material defects. The warranty period is effective from the day of purchase. -
Page 73
16 / Warranty Card. Warranty card: Name: Address: Zip code: City/Town: State: Telephone no. (including area code): E-mail address: Product serial number : Retailer (store where purchased): Receipt number: Note: Keep the receipt together with the warranty card. W AR R A N T Y C AR D…
Коляска-автокресло Doona
Liki Trike
Мир Doona
Аксессуары
Поддержка
История компании
Знаменитости
![]()
Коляска-автокресло Doona
Liki Trike
Мир Doona
Аксессуары
Поддержка
![]()
Особенности безопасности Doona.
Установка Doona
Установка и вопросы по базе Doona
Обслуживание и аксессуары Doona
Общие вопросы по Doona
Путешествия с Doona
Контрольные вопросы при установке
Наши продукты
Коляска-автокресло Doona
Liki Trike
Аксессуары
Все товары
Мир Doona
Наша история
Знаменитости
Поддержка
Центр поддержки
Видеоинструкции
FAQ
Связаться с нами
Doona, является дальновидной компанией, стремящейся улучшить и упростить жизнь родителей и детей, представляя продукты, которые предоставляют практические решения для жизни в дороге. Инновации, качество, безопасность и дизайн находятся на переднем крае разработки нашей продукции. Их официальный webсайт doona.com.
Каталог руководств пользователя и инструкций для продуктов doona можно найти ниже. Продукция doona запатентована и зарегистрирована под торговой маркой Йоав МАЗАР.
Контактная информация:
Адрес: Гонконг, Гонконгский карьер, Гонконг
Тел:
- 1-786-542-6775
- 1-844-477-9539
Найти
SensAlert Child Car Seat Alert Solution — это устройство с поддержкой Bluetooth, которое предупреждает пользователей, когда они случайно оставляют своего ребенка в машине. Это руководство пользователя содержит подробные инструкции по настройке и использованию продукта, включая уровни сигналов тревоги и технические характеристики. Обеспечьте безопасность вашего ребенка с помощью SensAlert.
Откройте для себя руководство по эксплуатации детского автокресла и коляски doona, чтобы путешествовать с малышом было удобно. Это исчерпывающее руководство охватывает все, от установки до использования, с указанием последних номеров моделей для удобства. Держите вашего ребенка в безопасности и комфорте в пути с doona.
В этом руководстве пользователя содержатся инструкции по технике безопасности и рекомендации по техническому обслуживанию трайка Doona S1 Liki Trike, включая предупреждения о присмотре взрослых, ограничениях по весу и правильном использовании. Не подходит для высокоскоростных действий или коммерческого использования. Держите подальше от огня и вешайте сумки только на специальные крючки для принадлежностей. Убедитесь, что продукт находится вне досягаемости, когда он не используется.
Будьте в безопасности и будьте в курсе с руководством пользователя для складного трехколесного велосипеда премиум-класса B07V6K3GL5 Liki Trike и детского трехколесного велосипеда от Doona. Узнайте о правильном использовании, функциях безопасности и инструкциях по техническому обслуживанию. Постоянно требуется наблюдение взрослых, и этот продукт не подходит для использования вблизи автомобилей, улиц, бассейнов, холмов, ступеней или подъездных дорог с уклоном. Убедитесь, что ваш ребенок носит защитную одежду и шлем, и помните, что этот продукт предназначен только для частного использования в жилых помещениях.
Обеспечьте безопасность своего ребенка с помощью складного трехколесного велосипеда Doona 337966 S1 Liki. В этом руководстве содержится важная информация о правильном использовании, мерах безопасности и инструкциях по техническому обслуживанию моделей S3 и S5. Зарегистрируйте свой продукт для получения критических обновлений. Предупреждение: требуется присмотр взрослых, не подходит для высокоскоростного использования.
Руководство пользователя Doona S5 Liki Trike содержит важную информацию для родителей, чтобы обеспечить безопасность их ребенка при использовании изделия. Этот трехколесный велосипед с максимальной нагрузкой 20 кг/44 фунта рассчитан на возраст от 10 месяцев до 3 лет и поставляется с предупреждениями о правильном использовании и инструкциями по техническому обслуживанию. Не подходит для высокоскоростного использования или коммерческого/общественного использования. Зарегистрируйте продукт, чтобы получать важную информацию о безопасности.
Это руководство пользователя содержит важные предупреждения и инструкции по технике безопасности для компактного складного велосипеда doona Liki Trike, включая ограничения по весу и возрасту, использование защитного снаряжения и правильную сборку. Всегда контролируйте детей и следуйте инструкциям по безопасному использованию этого продукта.
инструкцияSimpleParenting Doona

User Guide
ECE R04/44
EN 1888:2012
Group +0
Up to 13kg
Language: English
Important – Keep these instructions
for future reference
Посмотреть инструкция для SimpleParenting Doona бесплатно. Руководство относится к категории коляски, 2 человек(а) дали ему среднюю оценку 8.5. Руководство доступно на следующих языках: английский. У вас есть вопрос о SimpleParenting Doona или вам нужна помощь? Задайте свой вопрос здесь
- Doona_User_Guide_EN-cover
- Doona_User_Guide_EN
Нужна помощь?
У вас есть вопрос о SimpleParenting а ответа нет в руководстве? Задайте свой вопрос здесь Дай исчерпывающее описание проблемы и четко задайте свой вопрос. Чем детальнее описание проблемы или вопроса, тем легче будет другим пользователям SimpleParenting предоставить вам исчерпывающий ответ.
Количество вопросов: 0

Главная
Не можете найти ответ на свой вопрос в руководстве? Вы можете найти ответ на свой вопрос ниже, в разделе часто задаваемых вопросов о SimpleParenting Doona.
Какой коляска подходит для новорожденного ребенка?
Как долго следует пользоваться коляской?
Безопасно ли ребенку спать в коляска?
Инструкция SimpleParenting Doona доступно в русский?
Не нашли свой вопрос? Задайте свой вопрос здесь