-
Contents
-
Table of Contents
-
Troubleshooting
-
Bookmarks
Quick Links
Automatic Machine for Espresso Coffee
UK
WARNING: This instruction manual is intended exclusively for personnel with adequate expertise.
Related Manuals for Saeco IDEA RST
Summary of Contents for Saeco IDEA RST
-
Page 1
Automatic Machine for Espresso Coffee WARNING: This instruction manual is intended exclusively for personnel with adequate expertise. -
Page 2: Main Parts
English MAIN PARTS Mod. LUXE / Mod. COFFEE / Mod. CAPPUCCINO / Mod. CAPPUCCINO USA / Mod. POWER STEAM / Mod. SELF Left panel 15 Door Cup shield 16 Coffee grounds drawer Rear panel 17 Steam wand (except for COFFEE set-up) Cup warming surface 18 Power button Pre-ground coffee door (except for CAPPUCCINO USA set-up)
-
Page 3
English Mod. DUO Left coffee bean hopper Left grinder adjustment knob Left coffee grinder group… -
Page 4
English SAFETY INSTRUCTIONS For professional use only. If the power cord is damaged, it must be replaced by the manufacturer, its service The professional appliance cannot be centre or by adequately qualified personnel installed outdoors. Do not place it in areas in order to avoid any risks. -
Page 5: Table Of Contents
English CONTENTS MAIN PARTS 1 INTRODUCTION TO THE MANUAL 1.1 PREAMBLE 1.2 ICONS USED 2 INFORMATION ABOUT THE MACHINE 2.1 INFORMATION FOR THE USER 2.2 INTENDED USE OF THE APPLIANCE 2.3 APPLIANCE IDENTIFICATION 2.4 TECHNICAL SPECIFICATIONS 3 SAFETY 3.1 PREAMBLE 3.2 GENERAL SAFETY INSTRUCTIONS 3.3 OPERATOR REQUIREMENTS 3.4 SAFETY DEVICES…
-
Page 6: Introduction To The Manual
SaGa Coffee S.p.A. is the guarantor of The content of the manual is exclusively the product. Saeco is a registered trademark of Koninklijke Philips N.V. and its use is licensed by Koninklijke Philips N.V. meant to guarantee the use of the machine in the safest way for the users, the machine and the environment.
-
Page 7: Icons Used
English Icons Used Various kinds of warnings are contained in this manual to highlight the different hazard or competence levels. Each icon is followed by a message describing the procedure and providing useful information. Warning Information about user safety and machine integrity. Prohibition It is used to highlight actions/operations not to be performed.
-
Page 8: Information About The Machine
English INFORMATION ABOUT THE MACHINE Information for the User Misuse voids all forms of warranty, releasing the Manufacturer from any The appliance must be installed in a well-lit, responsibility for damage to property sheltered and dry place and on a counter and/or personal injury.
-
Page 9: Technical Specifications
English Brew group When contacting the technical service, always refer to this plate by indicating the technical data shown on it. In case of any request to the Authorised Service Centres, indicate model and serial number. Technical Specifications Brew group The position of this group can be adjusted according to the height of the container used.
-
Page 10: Safety
In accordance with the applicable standards and regulations, SAECO • use original spare parts; VENDING has prepared a technical file relating to the Idea RST • carefully read the instructions contained in this manual and in the appliance at its premises, acknowledging the following standards in attached documents;…
-
Page 11: Operator Requirements
English Operator Requirements Residual Risks Two operators with different skills are required in order to guarantee the appliance’s safety: Only use containers made of materials that are suitable “for food”. User Person in charge of using and attending the appliance. The user is technical specifications allowed to: start the appliance, adjust the operating parameters, stop…
-
Page 12: Handling And Storage
English HANDLING AND STORAGE Unloading and Handling Unloading from the transport vehicle and handling operations of the appliance must be carried out by qualified personnel only and using suitable equipment. The appliance must always be kept in upright position. Do not: •…
-
Page 13: Installation
English INSTALLATION Cautions If the appliance needs to be positioned close to a wall, it is necessary to leave a space of at least 8 cm between the appliance’s back and the wall, in order to make sure that the air outlet grill at the back of the The appliance cannot be installed in appliance is unobstructed.
-
Page 14: Unpacking And Positioning
English Unpacking and Positioning Lift the pallet in order to remove the fixing screws. Screw the 4 supporting feet. On receipt of the appliance, make sure that it has not suffered any damage during transport or that the packaging has not been unduly opened with consequent stealing of the components contained in it.
-
Page 15: Connection To The Water Network
English Connection to the Water Network • Connect the filter to the water network. Before connecting the appliance to the water network, please read and follow the applicable regulations in force in your country. Make sure the water network provides drinking water, with pressure ranging between 0.15 MPA and 0.8 MPA (1.5 and 8 bars).
-
Page 16: Connection To The Electric Network
English Connection to the Electric Network — Power cord type H07RNF section 4×2.5 mm2 The Maintenance Technician, who is in charge of the appliance’s installation, shall make sure that: • the power supply system complies with the safety instructions in Neutral –…
-
Page 17: Description Of Controls
English DESCRIPTION OF CONTROLS Controls 6.1.2 Control panel The appliance is equipped with the following controls: The control panel comprises a touch keypad and a display showing • Power button messages during normal operation, programming and maintenance phase. • Control panel 6.1.1 Power button The function of some buttons changes…
-
Page 18
English 6.1.3.1 OK Button 6.1.3.3 Automatic steam wand function Press the OK button to select the pre-ground coffee or the coffee (for models with automatic steam wand only) bean hopper according to the machine version. (except for DUO Press the button shown in the figure for 2 seconds to activate the model) steam by means of the automatic steam wand. -
Page 19: Supply And Start Up
English SUPPLY AND START UP Coffee Bean Supply Temperature Adjustment • Remove the container cover. milk used • Pour the coffee beans into the hopper. Cappuccinatore must be stored in a fridge • Put the cover back on the container. at a temperature not higher than 4°…
-
Page 20: Coffee Grind Adjustment
English Coffee Grind Adjustment First Appliance Start-up • Check if the removable components are correctly placed and if the Regardless of the coffee blend, a very fine door is closed. grind (notch on low values) increases the Otherwise, when the machine is switched-on, the display will indicate density, the crema quantity and the which component is in the wrong position.
-
Page 21: Programming And Maintenance Menu
English PROGRAMMING AND MAINTENANCE MENU Programming Menu This chapter contains instructions on how to set and change the programming The structure of the programming menu is indicated in section parameters of the appliance. «Structure of the Programming Menu». The section «Description of Messages in the Programming Menu» describes all the items in the programming menu.
-
Page 22
English 8.2.2 Structure of the Programming Menu Standard High 7.2. WATER QUANTITY GENERAL SETTING 27…2702 OPTION NO. MENU ITEM 7.3. MILK QUANTITY Language 3…180 ITALIANO Latte Macchiato DEUTSCH 8.1. GRINDER SETTING ENGLISH FRANÇAIS Standard ESPAGNOL High PORTUGUES 8.2. WATER QUANTITY NEDERLANDS 27…2702 한국어… -
Page 23
English Left Right 5.1. TOTAL COFFEE User 5.2. TOTAL WATER 1.6.5 Cold water (mod.Korea) Technical 0…15 OPTION NO. MENU ITEM 1.6.6 Mixing Water % (mod.no Korea) BEVERAGES SETUP 10…100 Espresso macchiato 1.1.1 Water quantity 1.7.1 MIlk quantity 27…2702 3…180 1.1.2 Grinder 1 setting 1.7.2 Water quantity… -
Page 24
English 000000 6.15 Water boiler lt. 40…500 000000 1.12.6 Grinder selection 6.16 Steam boiler lt. Left 000000 Right 6.17 Total group rinsing User 000000 1.12.7 Mixing Water % 6.18 Grounds 10…100 6.17.1 Visualize after 1.13 HOT WATER 0…150 1.13.1 Water quantity 6.17.2 Stop after 24…2487… -
Page 25
English Luxe Korea Luxe Cappuc.Kor Cappuccino Coffee Kor coffee Duo Korea Power Steam Korea Power Steam Cappuccino USA Self STEAMING OUT 10.1 Start 10.2 Stop CHANGE PASSWORD 11.1 Technical password 11.2 User password AUTOM.SWITCH MENU Deact. Act. PROGR. QUANTITY Deact. Act. -
Page 26
English 8.2.3 Description of Messages in the Programming Menu GENERAL SETTING OPTION NO. DISPLAY Description Language Press “OK” from the “LANGUAGE” menu to select the language. ITALIANO DEUTSCH ENGLISH FRANÇAIS ESPAGNOL PORTUGUES NEDERLANDS 한국어 Polski CUP WARMING SURFACE % (except for DUO model) 0..100% This function allows you to activate the cup warming surface by adjusting it from 0 to 100% at intervals of 10. -
Page 27
English Standard High 6.2. WATER QUANTITY 27…2702 macchiato For beverages with coffee and milk it is possible to change the quantity of milk to be used during the dispensing process 7.1. GRINDER SETTING Standard High 7.2. WATER QUANTITY 27…2702 7.3. MILK QUANTITY 3…180 Latte Macchiato… -
Page 28
English Deact. “OFF”, NO hot water is added to the beverage. Act. “ON”, the mixing is performed NOTE If the function is disabled the programmed values remain unchanged and can be used again when the function is re-activated. Power Steam The steam dispensing end temperature can be set. -
Page 29
English 1.1.5 Mixing Water % The “MIXING WATER %” option represents the water percentage that is mixed with the coffee. The 80% value basically corresponds to one coffee brewing, where the 80% value is pure coffee and the remaining 20% is coffee mixed with hot water. The total amount is the one set out with the option “WATER”. -
Page 30
English 40…500 Default: 1.5.5 Double coffee Grinder 2 Setting Default: 40…500 1.5.6 Grinder selection Left Right User 1.5.7 Mixing Water % Default: 10…100 100% “2 WATER FACTOR” is the coefficient which is multiplied by the dose of programmed water in the carafe, when the appliance automatically brews a double 1.5.8 2 Hot water dose. -
Page 31
English 1.8.4 Grinder 1 setting 40…500 Default: 1.8.5 Grinder 2 setting Default: 40…500 1.8.6 Grinder selection Left Right User 1.8.7 Mixing Water % Default: 10…100 100% Cappuccino 1.9.1. Type coffee+milk — coffe+milk: coffee is brewed before milk milk+coffee — milk+coffee: milk is dispensed before coffee high speed — high speed:… -
Page 32
English 3…180 1.12.3 Water quantity 27…2702 Default: 1.12.4 Grinder 1 setting Default: 40…500 1.12.5 Grinder 2 setting Default: 40…500 1.12.6 Grinder selection Left Right User 1.12.7 Mixing Water % 10…100 Default: 100% 1.13 HOT WATER The “HOT WATER” option sets the amount dispensed, by pressing the “Hot water” button. If the above mentioned function is disabled, dispensing must be interrupted by pressing the button again. -
Page 33
English 0…8 Default: 1 sec. Cleaning sec. The “CLEANING” option shows the length of steam washing, which is performed at the end of any milk dispensing. It can be set from 1 to 8 seconds. Default: 1…8 3 sec. The “CAPPUCCINAT. RINSING” option shows that you can set a programmed rinse for the Cappuccinatore. Cappucinat.Rinsing This option can be set for a span of time that ranges from 10 to 120 minutes with 10 minutes step. -
Page 34
English 0…65500 Default: 65500 Stop after The “STOP AFTER” option shows the number of cycles after which the “SERVICE MESSAGE” is displayed and the appliance is blocked. 0…65500 By resetting the current counter (“ACTUAL COUNT”), the machine is unlocked. Then, the date of the service will be automatically Actual count updated (“SERVICE”) within the “SYSTEM DATA”… -
Page 35
English SERVICE dd.mm.yyyy By updating the Service and Descaling dates, the corresponding counters in the “SERVICE” and “DESCALING” options will not be reset. Today 9.3.2 Reset Descaling dd.mm.yyyy By updating the Service and Descaling dates, the corresponding counters in the “SERVICE” and “DESCALING” options will not be reset. Today 9.4.2 Reset… -
Page 36
English 15.4 Coffee x2 15.5 LARGE COFFEE 15.6 AMERICANO/JUG 15.7 macchiato 15.8 Latte Macchiato 15.9 Cappuccino 15.10 Caffelatte 15.11 milk 15.12 FLAT WHITE Not selectable 15.13 HOT WATER 15.14 Power Steam Grinder Setup Set the counter method of the grinder turns. If the value is 0, the grinding stops when it reaches the number of the actual turns set in the “Grinder Setting”… -
Page 37
English follow instructions (contact an authorised service centre for detailed information on the tablets). Procedure: The process starts from “GROUP RINSING” Press the «Enter» button; the display shows “PUT THE TABLET INTO THE GROUP” Remove the brew group; the display shows “INS. BREW GROUP” Insert the tablet into the brew group and put the brew group back in its place;… -
Page 38
English 8.2.4 MILK PROGRAMMING “MILK PROGRAMMING” is a direct control allowing to program and store the milk quantity for the beverage chosen. The display shows the Select “MILK programming icon (1) PROGRAMMING” Press and hold the button The machine starts dispensing corresponding to the milk only beverage to be… -
Page 39
English Select the available port (COM3) and press «OK». 8.2.7 FUNCTIONAL TESTING 8.2.7.1 PRELIMINARY INFORMATION During the testing, 7 menu pages can be selected with the UP and DOWN buttons. The number of the selected page is shown on the top right part of the display. -
Page 40
English 8.2.7.2 TESTING PROCEDURE The «Test menu» pages are as follows: M1-6 PAGE: microswitches status shows which buttons among A, B, C and D is pressed Shows the coffee boiler temperature M0 PAGE: shows the number of the grinder turns. Shows the Test menu page number (0-6) In menu 1, the coffee grinder motor is activated by pressing the D button reference of the brewing buttons pressure:… -
Page 41
English The testing procedures are summed up in the following table, where the tests for each menu page are shown after pressing the A, B, C and D buttons. Menu Page A button B button C button D button The gearmotor of the group is The gearmotor of the group is The Red LED light is The coffee grinder motor is turned on and the number of… -
Page 42: Operation And Use
English OPERATION AND USE Programmed Automatic Start-up Before using the machine, read this manual carefully and make sure users are familiar This start-up is possible when the machine is in “STANDBY” mode with the machine. and the function “AUTOMATIC START-UP” is active. The machine will switch-on at the programmed time.
-
Page 43
English Press the button corresponding to the beverage required. Press brew buttons for approx. 1 second. BREWING TABLE Brewing Button sequence Q.ty Level Description Coffee The machines are delivered with factory standard Brewing obtained from settings. instantly-ground coffee high high This kinds of brewing are programmed for a Pre-ground Coffee C + E… -
Page 44: Steam
English Brew Buttons Programming Although buttons previously programmed on standard values, check if The beverage quantities associated to the corresponding buttons, can the dispensed beverage has the desired be directly programmed through the keypad. To program and re-program the buttons, follow the instructions features.
-
Page 45: Display Messages
English Display Messages Maintenance interventions are set according to the machine working cycles and can be programmed by the maintenance technician. A list of alarms (in addition to those Switching Off the Machine explained before) that can be displayed Programmed automatic switching-off and the relative machine conditions is given This is possible when the function “Automatic start-up”…
-
Page 46: Cleaning And Maintenance
English CLEANING AND MAINTENANCE If the Cappuccinatore (CAPPUCCINO set-up) is not used for more Before performing any maintenance and/or than an hour, carry out a cleaning cycle of the spouts before re-using cleaning operations, turn off the appliance it (see chapter “Cleaning the Cappuccinatore”). by setting the switches to the “OFF”…
-
Page 47
English 10.2.1 Maintenance Schedule COMPONENT TO BE CLEANED Maintenance Coffee dispensing spout See section “Cleaning the Coffee Dispensing Spout”. Brew group See section “Cleaning the Brew Group”. Drip tray and relative grill See section “Cleaning the Drip Tray and Relative Grill”. Coffee grounds drawer See section “Cleaning the Coffee Grounds Drawer”. -
Page 48
English 10.2.2 Cleaning the Coffee Dispensing Spout 10.2.3 Brew group cleaning 10.2.2.1 Manual Coffee Dispensing Spout Cleaning 10.2.3.1 Manual Cleaning of the Brew Group The following parts can be removed: Cleaning must be carried with no coffee • the upper protection cover of the dispensing spout, by pulling it outwards; beans in the machine. -
Page 49
English 10.2.3.3 Cleaning Every 1000 Cups of Coffee 10.2.4 Cleaning the Drip Tray and Relative Grill • Refer to the operation and maintenance manual to clean the brew Remove the drip tray from the machine and wash it under running group using cleaning tablets. -
Page 50
English 10.2.9 Cleaning of the Cappuccinatore The following images show the correct disassembly sequence of the Cappuccinatore. To reassemble, follow the previous instructions in reverse order. Never clean the Cappuccinatore when the machine is in “STANDBY” mode. CAPPUCCINATORE must cleaned every time it is used, to avoid the solidification of deposits. -
Page 51: Unscheduled Maintenance
English Mod. LUXE / Mod. COFFEE / Mod. CAPPUCCINO / Mod. CAPPUCCINO Cleaning Cycle of the Tubes USA / Mod. POWER STEAM / Mod. SELF To perform a cleaning cycle of the tubes, follow the instructions below: • immerse the milk suction tube into a container with water Do not use hot water.
-
Page 52
English Mod. LUXE / Mod. COFFEE / Mod. CAPPUCCINO / Mod. CAPPUCCINO • Remove the screws. USA / Mod. POWER STEAM / Mod. SELF • Remove the gearwheel. Mod. DUO screws gearwheel • Unscrew and remove the adjustment ring nut and clean both grinders with a vacuum cleaner and a brush. -
Page 53: Troubleshooting
English TROUBLESHOOTING A list of the possible machine faults is given below. The icon of the Maintenance Technician in the “Notes / Recommended Intervention” box means that the operation must be carried out by the Maintenance Technician only. Fault Cause Notes / Recommended Intervention The machine does not turn on No voltage…
-
Page 54: Storage — Disposal
English STORAGE — DISPOSAL 12.1 Location Change Should the machine be placed in a different location, it is necessary • disconnect the appliance from the supply network; • carry out the general cleaning of the appliance as indicated in chapter «Cleaning and Maintenance»;…
-
Page 55: Instructions For End Of Operational Life Disposal
English INSTRUCTIONS FOR END OF OPERATIONAL LIFE DISPOSAL INFORMATION FOR THE USER in compliance with art. 13 of the Italian Legislative Decree dated 25 July 2005, no. 151 «Implementation of the directives 2002/95/EC, 2002/96/EC and 2003/108/EC on the restriction of the use of certain hazardous substances in electrical and electronic equipment, as well as waste disposal».
-
Page 56
English… -
Page 57
English… -
Page 58
English… -
Page 59
English… -
Page 60
English… -
Page 61
English… -
Page 62
English… -
Page 63
English… -
Page 64
English… -
Page 65
English… -
Page 66
English… -
Page 67
English… -
Page 68
English… -
Page 69
English…
Форум о кофемашинах — ремонт, обслуживание, использование кофемашин, выбор кофе и кофемашины

Пожалуйста, войдите или зарегистрируйтесь.
- Документация
- Кофе и кофемашины
- Карта сервисов
- Магазин запчастей
- Инструкции
- Ремонт
-
Начало
-
Помощь
-
Поиск
-
Вход
-
Регистрация
- Форум о кофемашинах — ремонт, обслуживание, использование кофемашин, выбор кофе и кофемашины
рейтинг кофемашин » Saeco-Philips
| Обзор кофемашины | |
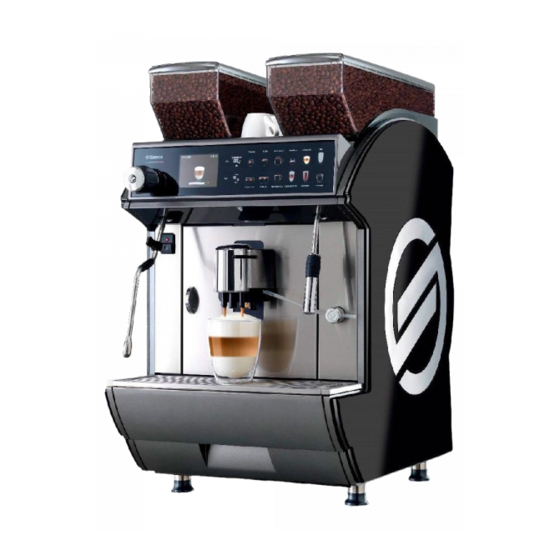
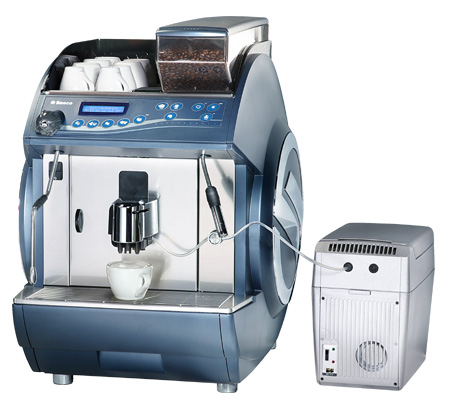
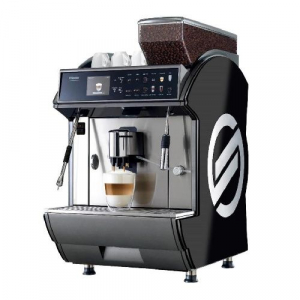
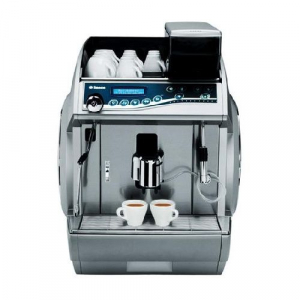
Кофемашина Saeco Idea Cappuccino Характеристики и функцииНастройкиТехническое обслуживание и уходОсновные компонентыТехнические условияДругоеДизайн и ценаОписание |
|
| Руководство пользователя, инструкция схемы для Кофемашина Saeco Idea Cappuccino | |||
| Имя файла | Тип файла | Размер файла | |
|
|
Заварное устройство Saeco в разборе |
|
21.6 KB |
|
|
Инструкция для кофемашины Saeco Idea Cappuccino (англ.) |
|
1705.8 KB |
|
|
Сервисное обслуживание ЗУ (ЦБ) кофемашин Saeco |
|
1824.6 KB |
|
|
Характеристики кофемашины Saeco Idea Cappuccino |
|
991.8 KB |


| Вопросы для голосования | Пользователи | Специалисты | |
| Качество приготовления кофе |
|
|
Для оценки этой машины, пожалуйста, авторизуйтесь. Впервые на сайте? Зарегистрируйтесь сейчас, бесплатно! |
| Внешний вид, дизайн |
|
|
|
| Сервисное обслуживание и уход |
|
|
|
| Надежность и ремонтопригодность кофемашины |
|
|
|
| Рекомендуете купить? |
|
|
|
| Цена кофемашины |
|
|
| Новый отзыв |

|

|
Деталировки и инструкции к кофемашинам

На этой странице размещены деталировка и инструкция к Saeco Idea. Также возможно наличие документации по настройке и файлов с наклейками к данному аппарату.
Инструкция и деталировка предложена на русском языке, но возможно наличие документации и на других языках.
Используя оригинальную инструкцию, вы сможете без особых усилий овладеть нюансами управления и эксплуатации данного оборудования.
Документация на
украинском
русском
английском
А используя деталировку Saeco Idea, подобрать на нашем сайте необходимые вам запчасти.
Чтоб получить консультацию или заказать оперативно запчасти
Заполните форму и получите подробную консультацию !
Отправить
Saeco Idea есть в нашем магазине
170 100 грн.
нет в наличии
119 000 грн.
инструкцияPhilips Saeco Idea CAP002

Automatic espresso coffee machine
Model
IDEA
INSTRUCTION AND MAINTENANCE MANUAL
Type: CAP002/A/B
Espresso Italia PTY LTD
www.espressoitalia.com.au
Freecall 1300 660 976
Посмотреть инструкция для Philips Saeco Idea CAP002 бесплатно. Руководство относится к категории кофеварки, 1 человек(а) дали ему среднюю оценку 7.4. Руководство доступно на следующих языках: английский. У вас есть вопрос о Philips Saeco Idea CAP002 или вам нужна помощь? Задайте свой вопрос здесь
Главная
Не можете найти ответ на свой вопрос в руководстве? Вы можете найти ответ на свой вопрос ниже, в разделе часто задаваемых вопросов о Philips Saeco Idea CAP002.
Как часто следует очищать кофеварку от накипи?
Какой лучший способ очистки кофеварки от накипи?
Как долго можно хранить кофе в зернах?
Как лучше всего хранить кофе?
Как помол сказывается на вкусе кофе?
Инструкция Philips Saeco Idea CAP002 доступно в русский?
Не нашли свой вопрос? Задайте свой вопрос здесь
|
Код товара: 96431 Основные характеристики
Описание Автоматическая кофемашина Saeco Idea Restyle Cappuccino используется в офисах, на предприятиях общественного питания и торговли для приготовления кофе эспрессо, капучино, а также напитков на основе растворимых продуктов. Модель оснащена двойным бойлером и окном загрузки молотого кофе. Лицевая панель изготовлена из нержавеющей стали. Особенности:
Дополнительные характеристики:
Внимание! Информация о товарах, размещенная на сайте, не является публичной офертой, определяемой положениями Части 2 Статьи 437 Гражданского кодекса Российской Федерации. Производители вправе вносить изменения в технические характеристики, внешний вид и комплектацию товаров без предварительного уведомления. Уточняйте характеристики у наших менеджеров перед оформлением заказа. |
Торговая марка Saeco Более чем 20-летний опыт работы сделал Saeco компанией, которой можно гордиться. Сегодня это мощная международная группа и лидер европейского рынка в категории полностью автоматических кофемашин для домашнего использования. В ассортимент продукции также входят торговые автоматы для различных учреждений и предприятий общепита.
Анастасия Отдел качества Распределение заказов, отправленных нами через ТК: Деловые линии — 58.3% Санкт-Петербург, Екатеринбург, Сочи, … ПЭК — 20.3% Санкт-Петербург, Сочи, Екатеринбург, … КИТ — 3.3% Астана, Атырау, Феодосия, … Желдорэкспедиция — 1.2% Якутск, Владивосток, Находка, … Байкал-Сервис — 1.2% Пятигорск, Санкт-Петербург, Анапа, … За прошедшие 5 дней отправлены заказы в города: Ангарск, Владикавказ, Екатеринбург, Казань, Калининград, Лениногорск, Махачкала, Моздок, Мурманск, Нальчик, Обнинск, Ростов-на-Дону, Салехард, Санкт-Петербург, Элиста, Южно-Сахалинск |


