Посмотреть инструкция для Bosch Benvenuto Classic TCA5401 бесплатно. Руководство относится к категории кофеварки, 14 человек(а) дали ему среднюю оценку 8.5. Руководство доступно на следующих языках: английский. У вас есть вопрос о Bosch Benvenuto Classic TCA5401 или вам нужна помощь? Задайте свой вопрос здесь
Главная
| Bosch | |
| Benvenuto Classic TCA5401 | |
| кофеварка | |
| английский | |
| Руководство пользователя (PDF) |
Не можете найти ответ на свой вопрос в руководстве? Вы можете найти ответ на свой вопрос ниже, в разделе часто задаваемых вопросов о Bosch Benvenuto Classic TCA5401.
Как часто следует очищать кофеварку от накипи?
Какой лучший способ очистки кофеварки от накипи?
Как долго можно хранить кофе в зернах?
Как лучше всего хранить кофе?
Как помол сказывается на вкусе кофе?
Инструкция Bosch Benvenuto Classic TCA5401 доступно в русский?
Не нашли свой вопрос? Задайте свой вопрос здесь

77
ru
Указания по
безопасности
Внимательно ознакомьтесь с данной
инструкцией по эксплуатации,
руководствуйтесь приведенными в
ней указаниями и сохраните ее для
дальнейшего использования!
Данный прибор не предназначен
для промышленного применения,
им можно пользоваться только в
домашнем хозяйстве.
! Опасность поражения током!
Данныйбытовойприборследует
подключатьиэксплуатироватьтолько
сучетомданных,приведенныхна
фирменнойтабличке.Приборомможно
пользоватьсятольковслучае,если
онсамиегосетевойшнурнеимеют
повреждений.Пользованиеприбором
допускаетсятолькововнутренних
помещенияхприкомнатнойтемпературе.
Неподпускайтедетейкработающему
прибору.Вслучаевозникновения
неисправностисразужеизвлекитевилку
сетевогошнураизрозетки.Воизбежание
возникновенияопаснойситуации
ремонтприбора(например,замена
поврежденногосетевогошнура)должен
выполнятьсятолькосервиснойслужбой
нашейфирмы.Нивкоемслучаене
погружайтевводунисамприбор,ниего
сетевойшнур.Невставляйтеникаких
предметоввкофемолку.
! Опасность ошпаривания!
Насадкадляподачигорячейводы/пара
9
сильнонагревается.Прикасатьсяможно
толькокпластмассовымэлементам
насадки9,анекдеталямкорпуса.В
самомначалеотборапараилигорячей
водывозможнопоявлениебрызгиз
насадки9.
Краткий обзор
Рисунок A
1 Сетевойвыключатель
2 Поворотныйрегуляторуровня
заполнения
3 Дисплей
4 Клавиша4(кофе)
5 Клавиша5(крепостькофе)
6 Клавишаa(режиможидания/ВКЛ)
7 Клавишаh(нагревпара)
8 Поворотныйрегуляторg/h(горячая
вода/пар)
9 Насадка(дляотборагорячейводы/
пара)
a)держательнасадки
b)втулка
c)наконечникнасадки
10 Регулируемоеповысотеустройство
подачикофе
11 Крышкаемкостидляводы
12 Съемнаяемкостьдляводы
13 Емкостьдлякофейныхзеренс
крышкой,сохраняющейаромат
14 Шахтадлязагрузкимолотогокофе/
чистящихтаблеток
15 Поддондлячашек(функция
подогрева)
16 Ползунковыйрегуляторстепени
помолакофе
17 Дверцыблоказаваривания
18 Блокзаваривания
a)клавиша(красная)
b)рукоятка
19 Решетка
20 Поддондлякофейнойгущи
21 Поддондлясбораостатковводы
22 Поплавок
23 Отсекдляхранениякабеля
Перед первым
использованием
Общие сведения
Длязаполнениясоответствующих
емкостейиспользуйтетолько
чистуюводубезуглекислотыи

78
предпочтительносмесикофейных
зерен,предназначенныедля
автоматическихкофеварок.Не
используйтекофейныезерна,
обработанныесприменением
глазированных,карамелизованныхили
другихсахаросодержащихдобавок,они
закупориваюткофемолку.Определите
жесткостьиспользуемойводыс
помощьюприлагаемойконтрольной
полоски.Еслижесткостьводыпо
результатамтестанесоответствует
степени4,произведитесоответствующее
программированиеприбора(см.раздел
«Настройкажесткостиводы»).
Первое включение прибора
●Вытянитесетевойшнурна
соответствующуюдлинуизотсека
дляхранениякабеляивставьтеегов
розетку.
●Снимитеемкостьдляводы12,
промойтеееизаполнитесвежей
холоднойводой.Уровеньнедолжен
превышатьотметку„max“.
●Установитеемкостьдляводы12в
прямомположенииинадавитенанее
вниздоупора.
●Заполнитеемкостьдлязерен
кофейнымизернами.
●Установитесетевойвыключатель1
вположениеI.Клавишаa«режим
ожидания»светитсянеяркимкрасным
светом.
●Убедитесьвтом,чторегулятор8
установленвположение„O“.
●Нажмитеклавишуa.Надисплее
загораетсясимвол8.
Припервомвключениитребуется
заполнитьводойтрубопроводную
системувнутриприбора.
●Подставьтечашкуподнасадку9.
●Установитеповоротныйрегулятор8в
положениеg/h;вчашкувыливается
немноговоды.
Установитеповоротныйрегулятор8
обратновположениеO.
●Клавишаaмигает,приборпроизводит
промывкуинагревание.
Приборготов к работевслучае,если
светятсявсечетыреклавиши4, 5, a, h
ииндикаторкрепостикофе(кофейные
зерна)надисплее.
i Назаводеизготовителеприбор
запрограммированнастандартные
настройки,обеспечивающие
оптимальныйрежимработы.
Указание:Припервомиспользовании
прибораилиприегопервомвключении
последлительногоперерывапервая
чашкакофеещенеимеетполного
ароматаиеенеследуетвыпивать.
Элементы управления
1 Сетевой выключатель
Находящийсяназаднейсторонеприбора
сетевойвыключатель1служитдля
включенияилиотключенияподачи
электроэнергии.
Послевключениясетевоговыключателя
клавиша
aсветитсянеяркимкрасным
светом.Приборнаходитсяврежиме
ожидания(«standby»).
Внимание
Не пользуйтесь сетевым
выключателем при работающем
приборе. Выключение прибора
допускается только при его
нахождении в режиме ожидания.
2 Поворотный регулятор уровня
заполнения
Припомощиповоротногорегулятора
уровнязаполненияможетпроизводиться
плавнаянастройкаобъемачашкиот
маленькойчашкиEвплотьдобольшой
чашкиF.
ru

79
3 Дисплей
Дисплейслужитдляотображения
настроекисообщенийприбораввиде
соответствующихсимволов.
6 Индикаторподачикофе
для2чашек
7 мигает Крышкашахтыдля
загрузкимолотогокофе
14открыта
7 светится Молотыйкофе/Режим
очистки
5 светится Слабыйкофе
55светится Нормальныйкофе
555светитсяКрепкийкофе
555мигает Емкостьдлякофейных
зеренпуста
S светится Сервис:указаниена
необходимостьудаления
накипи/очисткиприбора
S мигает Сервис:производится
выполнениесервисной
программы
9 светится Заполнитьемкостьдля
+
8мигает воды12.Установить
чашкуподнасадкой
9
и,повернуврегулятор
8,установитьегов
положение
g/h.
8 мигает Установитьрегулятор8в
положение
g/h.
8 светится Установитьрегулятор8в
положение
O.
Dсветится Опорожнитьподдоны
Dмигает Поддоныотсутствуют
4 Клавиша подачи кофе
4
Даннаяклавишаслужитдляподачи
кофе.
Принажатииклавиши1раздля
заполненияоднойчашкипроизводится
размолкофе,егозавариваниеиподачав
чашку.Впроцессеподачикофеклавиша
4мигает.
При2кратномнажатииклавишив
течение3сек.длязаполнениядвух
чашекпроизводитсяразмолкофе,
егозавариваниеиподачавчашки,
причемпроцессразмолаизаваривания
повторяется.Впроцессеподачикофе
клавиша
4мигает,анадисплее
высвечиваетсясимвол
6(двечашки).
iПовторноенажатиеклавишиподачи
кофе4служитдляпреждевременного
завершенияподачикофе.
5 Клавиша настройки крепости кофе
5
Припомощиклавиши5можно
установитькрепостькофе:
5 слабыйкофе,
55 нормальныйкофе,
555 крепкийкофе.
Настройкаотображаетсянадисплее.
6 Клавиша режима ожидания a
Припомощиклавишиaприбор
включаетсяилипереключаетсяна
режиможидания(«standby»).При
нажатииклавишиaприборпроизводит
нагревание,причемклавиша
aмигает
впроцессенагреванияипоследующей
промывки.Приборготовкработе,если
клавиши4, 5, a, hсветятся,ана
дисплее,взависимостиотнастройки,
появляютсяодин,дваилитрисимвола,
изображающиекофейныезерна.Прибор
непроизводитпромывку,если:
– привключениионещеостается
теплым;
– передпереключениемнарежим
ожиданиянепроизводиласьподача
кофе;
– незадолгодовыключенияприбора
былапроизведенаподачапара.
7 Клавиша нагрева пара
h
Принажатииклавишиhвприборе
образуетсяпар,необходимыйдля
вспениванияилинагревания.
ru
80
8 Поворотный регулятор подачи пара
Приустановкеповоротногорегуляторав
положениеподачигорячейводы
gили
параhпроизводитсясоответственно
подачаводыилипара.Крометого,для
подачипаратребуетсяпредварительно
нажатьклавишуподачипараh(см.
раздел«Пардлявспениваниямолока»)
Настройки и визуальная
индикация
Настройка жесткости воды
Правильнаянастройкажесткостиводы
важнадляобеспечениясвоевременной
сигнализациионеобходимостиудаления
накипи.Предварительноустановлена
степеньжесткостиводы4.Для
определенияжесткостиводыВыможете
использоватьприлагаемуюконтрольную
полоскуилиобратитьсязаинформацией
вместноепредприятиеводоснабжения.
Cтепень Градусыжесткостиводы
Нем.(°dH) Франц.(°fH)
1
2
3
4
1-7
8-15
16-23
24-30
1-13
14-27
28-42
43-54
●Определитежесткостьводыс
помощьюприлагаемойконтрольной
полоски.
Например:
=степень2
●Переключитеприборнарежим
ожидания.
●Удерживайтеклавишуподачипараh
внажатомположениивтечениекак
минимум3сек.Количествосветящихся
клавишуправления4, 5, a, h
соответствуетнастроеннойжесткости
воды.
●Нажимайтеклавишуподачипара
hдотехпор,поканезагорятся
клавишиуправлениявколичестве,
соответствующемнужнойжесткости
воды.
●Одинразнажмитеклавишуa.На
короткоевремязагораютсяклавиши
управления,соответствующие
установленнойжесткости;выбранная
жесткостьводысохраняетсявпамяти
прибора.
Вслучаепримененияфильтра
дляочисткиводы(специальная
принадлежность)требуетсяустановить
степеньжесткостиводы1.
Указание:Есливтечение90сек.не
производитсянажатиениоднойиз
клавиш,приборпереключаетсянарежим
приготовлениякофебезсохранения
новойнастройки.Сохраненнаяранее
степеньжесткостиводыостаетсябез
изменений.
Припервомприменениифильтраили
послезаменыфильтранеобходимо
произвестипромывкуприбора.
●Наполнитьемкостьдляводыводойдо
отметки“0,5л”.
●Подставитьподнасадку9достаточно
большуюемкость(примерно0,5л).
●Установитьповоротныйрегулятор8в
положениеg/h .
●Послетогокакизнасадки9перестанет
вытекатьвода,установитьповоротный
регуляторобратновположение“O”.
●Наполнитьемкостьдляводыи
трубопроводнуюсистему(см.“Первое
включениеприбора”).
Настройка степени помола
Требуемаястепеньпомолакофе
настраиваетсяползунковымрегулятором
16.
ru

81
Внимание
Степень помола должна
регулироваться только при
работающей кофемолке! В противном
случае возможно повреждение
прибора.
●Нажмитеклавишу4.
●Приработающейкофемолке
установитеползунковыйрегулятор16
втребуемоеположение:чемменьше
точка,теммельчемолотыйкофе.
i Новаянастройказаметнатолькопри
заполнениивторойилитретьейчашки.
Совет:Прииспользованиизерентемной
обжаркиследуетустанавливатьболее
крупныйпомол,априиспользовании
зеренсветлойобжарки–болеемелкий
помолкофе.
Поплавок
Поплавок22вподдоне21сигнализирует
онеобходимостиопорожненияподдона.
●Еслипоплавок22хорошовиден,
опорожнитеподдон21.
Приготовление кофе
Даннаяавтоматическаякофемашина
эспрессопроизводитпомолсвежего
кофедлякаждогоновогозаваривания.
Предпочтительноиспользованиесмесей
кофейныхзерен,предназначенныхдля
кофемашинэспрессоилиавтоматичес
кихкофеварок.Хранитекофевзернах
впрохладномместе,взащищеннойот
доступавоздухагерметичнойупаковке
либовбыстрозамороженномсостоянии.
Возможентакжеразмолбыстрозаморо
женныхкофейныхзерен.
Важная информация:Необходимо
ежедневноезаполнениеемкости
дляводысвежейводой.Вданной
емкостипостояннодолжнонаходиться
количествоводы,достаточноедля
работыприбора–работаприборабез
водынедопускается.
Совет:производитеподогревчашки
(чашек),преждевсегомаленьких
толстостенныхчашекдлякофеэспрессо,
наподдоне
15либопромывкучашек
горячейводой.
Приготовление кофе из
кофейных зерен
Прибордолженбытьготовкработе.
●Установитенужныйуровень
заполненияспомощьюповоротного
регулятора2.
●Выберитеклавишей5желательную
крепостькофе.
●Подставьтечашку(чашки)под
устройствоподачикофе10.
●Взависимостиотколичествачашек
нажмитеклавишу4одинраз(1чашка)
либодваждывтечениетрехсекунд
(2чашки).Кофезавариваетсяи
наливаетсявчашку(чашки).
Внимание
В случае выбора двух чашек размол
зерен и заваривание производятся два
раза подряд.
●Подачакофеавтоматически
прекращаетсяпослевытекания
установленногообъема.
i Повторноенажатиеклавишиподачи
кофе4служитдляпреждевременного
завершенияподачикофе.Для
заполнения2чашекустройствоподачи
кофеоснащенодвумянасадками
(чашкидолжныустанавливатьсяодна
возледругой).
ru

82
Приготовление кофе из
молотого кофе эспрессо/
молотого кофе
Прибордолженбытьготовкработе.
●Установитенужныйуровень
заполненияспомощьюповоротного
регулятора2.
●Подставьтепредварительно
подогретуючашку(чашки)под
устройствоподачикофе10.
●Откройтекрышкушахтыдлязагрузки
молотогокофе14.
●Засыпьтевшахтудлязагрузки
молотогокофе14 одну-двеполные
докраевмерныеложкикофесреднего
помола.
Внимание
Ни в коем случае не загружайте
цельные зерна или растворимый кофе!
Загружайте не более двух полных до
краев мерных ложек.
●Закройтекрышкушахтыдлязагрузки
молотогокофе14.
●Нажмитеклавишу4.
iДляприготовленияочереднойчашки
молотогокофетребуетсяповторить
данныйпроцесс.
Указание:Есливтечение90секунд
отборкофенебудетпроизведен,
камеразавариванияавтоматически
опорожняетсявоизбежание
переполнения.Приборпроизводит
промывку.
Приготовление горячей
воды
Прибордолженбытьготовкработе.
Даннаяфункцияпозволяетпроизводить
приготовлениегорячейводы,например,
длячашкичая.
! Опасность ошпаривания
Насадка сильно нагревается, поэтому
прикасаться можно только к ее
пластмассовым элементам.
●Подставьтесоответствующуючашку
поднасадку9.
●Сдвиньтевтулкунанасадке9
полностьювниз.
●Установитеповоротныйрегулятор8в
положениеg/h.
! Опасность ошпаривания
После установки регулятора
в положение g/h возможно
образование брызг. Не прикасайтесь
к насадке 9 и не направляйте ее на
людей.
●Завершитепроцессвозвратом
регулятора8вположениеO.
Пар для вспенивания
молока
Прибордолженбытьготовкработе.Вы
можетесначалапроизвестивспенивание
молокаитолькопослеэтого–подачу
кофе,либопроизвестивспенивание
молокаотдельноидобавитьеговкофе.
! Опасность ошпаривания
Насадка сильно нагревается, поэтому
прикасаться можно только к ее
пластмассовым элементам.
●Сдвиньтевтулкунанасадке9
полностьювниз.
●Заполнитечашкумолокомпримерно
на1/3.
●Нажмитеклавишуh.Клавиша
начинаетмигать.
iПриборпроизводитнагреваниев
течениепримерно20секунд.
●Погрузитенасадку9глубоковмолоко,
незадеваядначашки.
●Есликлавишаhсветится,ана
дисплеепоявилсясимвол8 ,
установитеповоротныйрегулятор8в
положениеg/h.
ru

83
! Опасность ошпаривания
После установки регулятора
в положение g/h возможно
образование брызг. Выходящий из
насадки пар очень горячий, вследствие
чего возможно разбрызгивание
жидкостей. Не прикасайтесь к насадке
9 и не направляйте ее на людей.
●Медленновращайтечашкудомомента
вспениваниямолока.
●Завершитепроцессвозвратом
регулятора8вположениеO.
Указание:Послеохлаждениянасадки
9следуетнезамедлительнопроизвести
ееочистку.Удалениезасохшихостатков
молоказатруднительно.
Совет: Рекомендуетсяиспользовать
холодноемолоко1,5%жирности.
Пар для нагревания
напитков
! Опасность ошпаривания
Насадка сильно нагревается, поэтому
прикасаться можно только к ее
пластмассовым элементам.
Прибордолженбытьготовкработе.
●Сдвиньтевтулкунанасадке9 вверх.
●Нажмитеклавишуh.Онаначинает
мигать.
i Приборпроизводитнагреваниев
течениепримерно20секунд.
●Погрузитенасадку9глубоков
нагреваемуюжидкость.
●Есликлавишаhсветится,ана
дисплеепоявилсясимвол8,
установитеповоротныйрегулятор8в
положениеg/h.
! Опасность ошпаривания
После установки регулятора
в положение g/h возможно
образование брызг. Выходящий из
насадки пар очень горячий, вследствие
чего возможно разбрызгивание
жидкостей. Не прикасайтесь к насадке
9 и не направляйте ее на людей.
●Завершитепроцессвозвратом
регулятора
8вположениеO.
Указание:Послеохлаждениянасадки
9следуетнезамедлительнопроизвести
ееочистку.Удалениезасохшихостатков
молоказатруднительно.
Уход и ежедневная
чистка
! Опасность поражения током!
Перед чисткой прибора необходимо
отсоединить сетевой шнур от
розетки. Ни в коем случае не
погружайте прибор в воду. Не
используйте паровых очистителей.
●Протритекорпусприборавлажной
тряпкой.Неиспользуйтеабразивные
чистящиесредства.
●Промывкавсехотсоединяющихся
деталейдолжнапроизводиться
исключительновручную.
●Используйтедляпромывкиемкости12
тольководу.
●Снимите,опорожнитеипочистите
поддоныдлякофейнойгущи20и
сбораостатковводы21.
●Протритеилипропылесосьте
внутреннеепространствоприбора
(пространстводляустановки
поддонов).
Указание:Еслинаходящийсявхолодном
состоянииврежимеожиданияприбор
включаетсяклавишейaилиеслион
послеподачикофепереключаетсяна
режиможидания,промывкаприбора
производитсяавтоматически.Темсамым
системаавтоматическипроизводит
очистку.
Насадка 9 для горячей воды/пара
●Отвинтитенасадку9оттрубкидля
подачипара.
ru

84
●Произведитеразборкувсехэлементов
насадки
(рисунок E).
●Почиститенасадкумягкойщеткойс
использованиемщелочногочистящего
средства.Прочиститенаконечник
насадки9/cспередитупойиглой.
●Промойтеипросушитевсеэлементы
насадки.
Чистка блока заваривания
Блокзавариваниядлячисткиможно
вынимать(рисунок D).
●Выключитеприборнажатиемклавиши
a.
●Установитесетевойвыключатель1в
положение0.
●Откройтедверцу17блоказаваривания
18.
●Удерживаякраснуюклавишу18а
внажатомположении,поверните
рукоятку18bвверхдоееслышимой
фиксации.
●Осторожновыньтеблокзаваривания
18зарукояткуипромойтеегопод
проточнойводойбезприменения
моющегосредства.Неиспользуйтев
этихцеляхпосудомоечнуюмашину.
●Почиститевнутреннеепространство
приборапылесосомиливлажной
тряпкой.
●Вставьтеблокзавариваниядоупора.
●Удерживаякраснуюклавишу18а
внажатомположении,поверните
рукоятку18bдоупоравниздоее
слышимойфиксации.Блокзаварива
ниязаблокированвприборе.
●Закройтедверцублоказаваривания.
Сервисная программа:
комбинированный
процесс удаления
накипи и чистки
Еслипривключенномприборена
дисплеепоявляетсясимвол„S“,
необходимонезамедлительно
произвестиудалениенакипиичистку
прибора.Вслучаевыполнения
сервиснойпрограммыневсоответствии
синструкциейвозможноповреждение
прибора.
Специально разработанные средство
для удаления накипи (номер заказа
310451) и чистящие таблетки
(номер заказа 310575) входят в
комплект поставки прибора и могут
заказываться через сервисную
службу нашей фирмы.
Внимание
При каждом выполнении сервисной
программы необходимо использовать
средство для удаления накипи
и чистящее средство согласно
инструкции.
Ни в коем случае не прерывайте
выполнение сервисной программы!
Не пейте используемые жидкости!
Ни в коем случае не используйте уксус
или средства на уксусной основе!
Ни в коем случае не загружайте
таблетки для удаления накипи или
иные средства для удаления накипи
в шахту для загрузки чистящих
таблеток!
i Вовремявыполнениясервисной
программы(примерно40минут)на
дисплеемигаетсимвол„S“.
Важная информация:Еслив
емкостидляводыустановленфильтр,
необходимообязательноудалитьего
передзапускомсервиснойпрограммы.
ru

85
Запуск сервисной программы
●Нажмитеклавишу
aдляпереключения
приборанарежиможидания.
●Удерживайтеклавишуподачикофе
4какминимумвтечение3сек.в
нажатомположении.
НадисплеепоявляетсясимволD.
●Опорожнитеиустановитенапрежнее
местоподдоны20и21.
Надисплеепоявляетсясимвол7.
●Откройтекрышкушахтыдлязагрузки
молотогокофе/чистящихтаблеток14.
●Загрузитевшахту14 одну чистящую
таблеткуизакройтекрышку.
Надисплеепоявляетсясимвол9,
клавиша4мигает.
●Заполнитеемкостьдляводычуть
теплойводой,добавьтесредство
дляудалениянакипииполностью
растворитееговводе(общийобъем
жидкости:0,5литра)
либо
●залейтеготовуюсмесьдляудаления
накипивемкостьдляводы(общий
объемжидкости:0,5литра).
●Нажмитеклавишу4;приборначинает
удалениенакипи.Длительность
процесса:около10минут.Жидкость
дляудалениянакипиперетекаетв
поддон21.
Надисплеемигаетсимвол8.
●Подставьтеподнасадку9достаточно
большуюивысокуюемкость(примерно
0,5литра).
●Установитеповоротныйрегулятор8в
положениеg/h,приборпродолжает
процессудалениянакипивтечение
примерно5минут.Жидкостьдля
удалениянакипиперетекаетвемкость.
НадисплеепоявляетсясимволD.
●Опорожнитеподдон21иустановите
егонапрежнееместо.
Надисплеепоявляетсясимвол9,
клавиша
4мигает.
●Опорожнитеемкость12,почиститеее,
заполнитеводойдоотметки„max“и
установитенапрежнееместо.
●Подставьтеподнасадку9достаточно
большуюемкость(примерно0,5
литра).
●Нажмитеклавишу4,приборначинает
промывку,немноговодыперетекаетв
емкость.
Надисплеепоявляетсясимвол8.
●Установитеповоротныйрегулятор8
вположение„O“;приборначинает
процессочистки.Длительность
процесса:около10минут.Вначале
жидкостьперетекаетвнутриприбора
вемкость21,азатемвытекаетиз
устройстваподачикофе.
НадисплеепоявляетсясимволD.
●Опорожнитеиустановитенапрежнее
местоподдоны20и21.
Приборпроизводитнагреваниеивновь
готовкработевслучае,есливсечетыре
клавишисветятсяпостоянно4, 5, a, h.
Важная информация:Вслучае
прерываниясервиснойпрограммы,
например,вследствиеперебоя
электроснабжения,передвключением
прибораобязательно требуется
опорожнитьемкостьдляводы,промыть
ееизаполнитьсвежейводой.После
этоговключитеприбор.
●Приборпроизводитпромывкусо
сливомжидкостивемкость21.
Надисплеемигаетсимвол8.
●Подставьтечашкуподнасадку9и
установитеповоротныйрегулятор8в
положениеg/h.
Водасливаетсявчашку.
Надисплеепоявляетсясимвол8.
●Установитеповоротныйрегулятор8
обратновположение„O“.
Приборпроизводитпромывкуиснова
готовкработе.
ru

86
Защита от замерзания
Воизбежаниевызванныхзамерзанием
поврежденийприбораприего
транспортировкеихранениинеобходимо
предварительнополностьюопорожнить
прибор.
Прибордолженбытьготовкработе.
●Снятьемкостьдляводы,опорожнить
ееиустановитьнапрежнееместо.
●Подставитьподнасадку9большую
узкуюемкость.
●Нажмитеклавишуh.
●Когданадисплееначнетмелькать
символ8,установитьповоротный
регулятор8вположениеg/h .
Втечениенепродолжительного
времениприборпроизводит
образованиепара.
●Послетогокакизнасадки9
перестанетпоявлятьсяпар,установить
поворотныйрегуляторобратнов
положение“O”.
●Выключитьприбор.
Утилизация
A
Данныйприборимеетмаркировку
согласноевропейскойдирективе
2002/96/ЕСпоутилизациистарых
электрическихиэлектронныхприборов
(waste electrical and electronic equipment-
WEEE).Этойдирективойопределены
действующиенавсейтерриторииЕС
правилаприемаиутилизациистарых
приборов.Информациюобактуальных
возможностяхутилизацииВыможете
получитьвмагазине,вкоторомВы
приобрелиприбор.
Условия гарантийного
обслуживания
Получитьисчерпывающуюинформацию
обусловияхгарантийногообслуживания
ВыможетевВашемближайшем
авторизованномсервисномцентреилив
сервисномцентреотпроизводителя
ООО«БСХБытоваяТехника»,атакже
найтивфирменномгарантийномталоне,
выдаваемомприпродаже.
Мыоставляемзасобойправона
внесениеизменений.
ru

87
ru
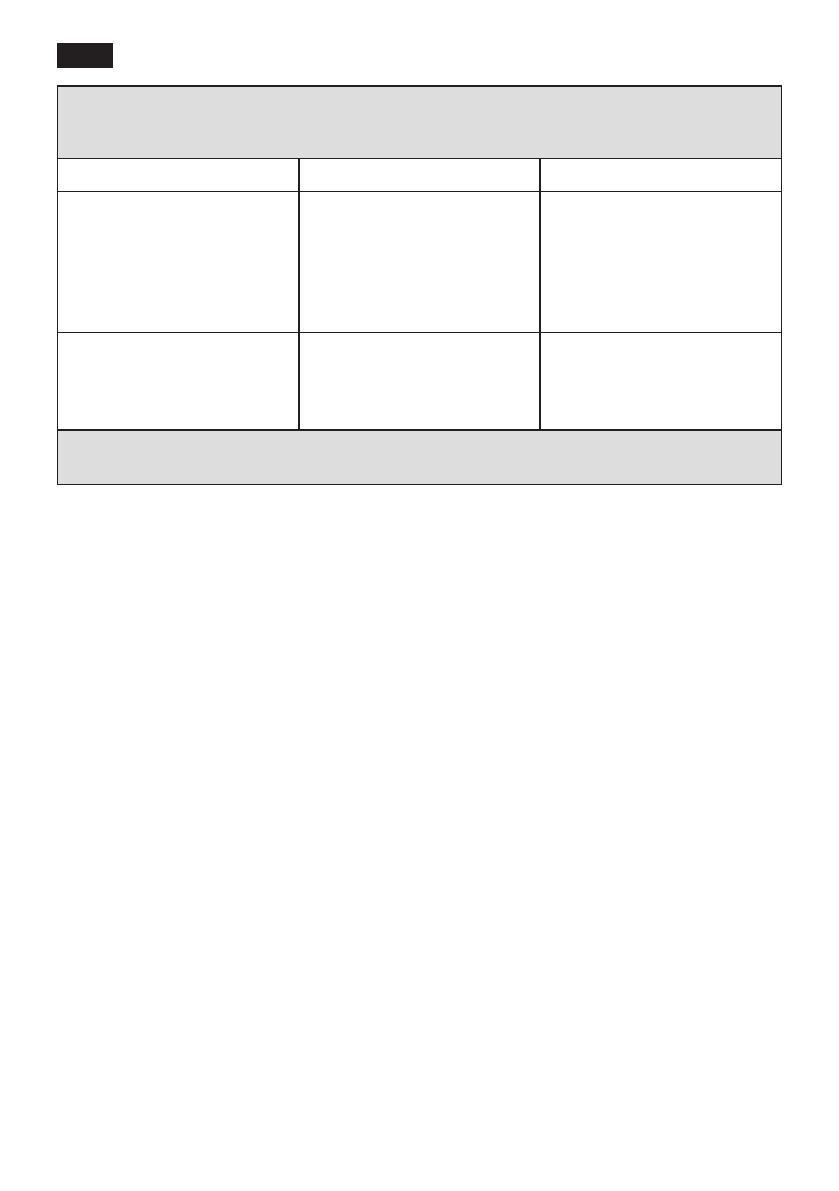
Самостоятельное устранение мелких
неисправностей
Неисправность Причина Устранение
Символы
555
мигают,хотяемкость
длякофейныхзерен
заполнена.
Кофемолказаполнена
ещенеполностью.
Повторнонажмите
клавишуподачикофе
4.
Невозможнаподача
горячейводыилипара.
Насадка
9засорилась. Прочиститенасадку9.
Слишкоммалопеныили
пенаслишкомжидкая.
Неправильноеположение
втулкиbнанасадке9.
Неподходящеемолоко.
Сдвиньтевтулкуbна
насадке9 вниз.
Используйтехолодное
молоко1,5%жирности.
Кофевытекаеттолько
каплями.
Слишкоммелкийпомол.
Слишкоммелкиймолотый
кофе.
Настройтенаболее
крупныйпомол.
Используйтемолотый
кофеболеекрупного
помола.
Кофеневытекаетиз
прибора.
Емкостьдляводы
ненаполненаили
установленанеправильно.
Наполнитьемкость
дляводыипроверить
правильностьее
положения,при
необходимости
произвестинаполнение
трубопроводнойсистемы
(см.“Первоевключение
прибора”).
Кофебез„крема“(слоя
пенки).
Неподходящийсорткофе.
Используютсяне
свежеобжаренныезерна.
Степеньпомолане
соответствуетсорту
кофейныхзерен.
Используйтекофедругого
сорта.
Используйтеболее
свежиекофейныезерна.
Оптимизируйтестепень
помола.
Кофемолканепроизводит
размолкофейныхзерен.
Зернанескатываются
вкофемолку(слишком
маслянистыезерна).
Слегкапостучитепо
емкостидлякофейных
зерен.
Если Вы не смогли устранить неисправность самостоятельно, свяжитесь с
«горячей линией» 495 737 2961.
88
Самостоятельное устранение мелких
неисправностей
Неисправность Причина Устранение
Кофемолкаработаетс
громкимшумом.
Вкофемолкупопали
посторонниепредметы
(например,мелкие
камешки,встречающиеся
дажевкофеэлитных
сортов).
Свяжитесьс«горячей
линией».Указание:для
приготовлениякофепока
можноиспользовать
молотыйкофе.
Клавиша
a(режим
ожидания)иклавишаh
(пар)поочередномигают.
Блокзаваривания
18 невставлен,либо
неправильновставлени
зафиксирован.
Вставьтеизафиксируйте
блокзаваривания18.
Если Вы не смогли устранить неисправность самостоятельно, свяжитесь с
«горячей линией» 495 737 2961.
ru
/
Читайте наши статьи

Эксплуатация кофемашины в зимний период
Что происходит с кофемашиной при длительном нахождении в помещении с низкой температурой? Перевозили кофемашину в багажнике — что теперь от неё ожидать?

Скидка на ремонт кофемашины
Получите 20% скидку на ремонт или обслуживание вашей кофемашины, а также при заказе кофе «Coffee-Everyday» у нас.

Уход за кофемашиной: рекомендации и советы
Как увеличить срок экслуатации вашей кофемашины или кофеварки? Как влияет качество воды на долговечность системы? Как правильно определить момент обсуживания?
(скачивание инструкции бесплатно)
Формат файла: PDF
Доступность: Бесплатно как и все руководства на сайте. Без регистрации и SMS.
Дополнительно: Чтение инструкции онлайн

TCA 54..
Страница:
(1 из 93)
навигация

1

2

3

4

5

6

7

8

9

10

11

12

13

14

15

16

17

18

19

20

21

22

23

24

25

26

27

28

29

30

31

32

33

34

35

36

37

38

39

40

41

42

43

44

45

46

47

48

49

50

51

52

53

54

55

56

57

58

59

60

61

62

63

64

65

66

67

68

69

70

71

72

73

74

75

76

77

78

79

80

81

82

83

84

85

86

87

88

89

90

91

92

93
Оглавление инструкции
- Страница 1 из 94
TCA 54.. - Страница 2 из 94
de 2 en 11 fr 20 it 29 nl 39 es 48 tr 58 pl 67 ru 77 - Страница 3 из 94
A 16 3 S 1 I 0 23 4 5 6 7 12 11 15 14 13 2 8 9 10 17 18 19-22 - Страница 4 из 94
B D 18 max 12 11 0,5 l C 20 19 21 22 - Страница 5 из 94
18 18b 18a E 9 9a 9b 9c - Страница 6 из 94
de Sicherheitshinweise Die Gebrauchsanleitung bitte sorgfältig durchlesen, danach handeln und auf bewahren! Dieses Gerät ist für den Haushalt und nicht für den gewerblichen Gebrauch bestimmt. ! Stromschlaggefahr! Gerät nur gemäß Angaben auf dem Typenschild anschließen und betreiben. Nur - Страница 7 из 94
de ● Vergewissern, dass der Drehknopf 8 auf „O“ steht. ● Taste a drücken. Im Display blinkt 8. Bei der ersten Inbetriebnahme muss das Wasserleitungssystem im Gerät noch gefüllt werden. ● Eine Tasse unter die Düse 9 stellen. ● Den Drehknopf 8 auf g/h stellen, etwas Wasser läuft in die Tasse. Den - Страница 8 из 94
de i Durch nochmaliges Drücken der Bezugstaste 4 kann der Kaffeebezug vorzeitig beendet werden. 5 Taste 5 Kaffeestärke Durch Drücken der Taste 5 kann die Kaffeestärke von 5 mild 55 normal 555 stark eingestellt werden. Die Einstellung ist im Display zu sehen. 6 Taste a „stand by“ Mit der Taste a - Страница 9 из 94
de Beim ersten Einsatz des Filters oder nach Filterwechsel muss das Gerät gespült werden. ● Wassertank bis zur Markierung „0,5 l“ mit Wasser füllen. ● Ein ausreichend großes Gefäß (ca. 0,5 l) unter die Düse 9 stellen. ● Den Drehknopf 8 auf g/h stellen. ● Kommt kein Wasser mehr aus der Düse 9, den - Страница 10 из 94
de Zubereitung mit Espresso-/Kaffeepulver Dampf zum Milchaufschäumen Das Gerät muss betriebsbereit sein. ● Mit dem Drehknopf 2 die gewünschte Füllmenge einstellen. ● Vorgewärmte Tasse(n) unter den Kaffeeauslauf 10 stellen. ● Den Deckel am Schacht für Kaffeepulver 14 öffnen. ● Ein bis zwei - Страница 11 из 94
de Dampf zum Getränke erwärmen ● Innenraum des Gerätes (Aufnahme Schalen) auswischen oder aussaugen. ! Verbrennungsgefahr Hinweis: Wenn das Gerät mit der Taste a „stand by“ im kalten Zustand eingeschaltet oder nach Bezug von Kaffee in „stand by“-Betrieb versetzt wird, spült das Gerät automatisch. - Страница 12 из 94
de Service-Programm: Kombinierter Entkalkungs- und Reinigungsprozess Im Display leuchtet 7 auf. ● Deckel am Schacht 14 für Pulverkaffee/ Reinigungstabletten öffnen. ● Eine Reinigungstablette in den Schacht 14 geben und den Deckel schließen. Leuchtet bei eingeschaltetem Gerät im Display „S“ auf, - Страница 13 из 94
de Im Display leuchtet D auf. ● Schale 20 und Schale 21 ausleeren, reinigen und wieder einsetzen. Das Gerät heizt auf und ist wieder betriebs bereit wenn alle vier Tasten 4, 5, a und h konstant leuchten. Wichtig: Wurde das Service-Programm z.B. durch Stromausfall unterbrochen, unbedingt vor - Страница 14 из 94
de Kleine Störungen selbst beheben Störung Ursache 555 blinken trotz gefülltem Das Mahlwerk ist noch nicht Bezugstaste 4 nochmals vollständig gefüllt. drücken. Bohnenbehälter. Abhilfe Kein Heißwasser- oder Dampfbezug möglich. Düse 9 ist verstopft. Düse 9 reinigen. Zu wenig Schaum oder zu flüssiger - Страница 15 из 94
en Safety instructions Please read these instructions carefully and keep for future reference. This appliance is designed for domestic and not commercial use. ! Risk of electric shock Connect and operate the appliance only in accordance with the specifications on the rating label. Do not use if - Страница 16 из 94
en ● Press the a button. 8 lights up on the display. When switched on for the first time, the water pipes in the appliance must be filled. ● Place a cup under the nozzle 9. ● Turn the dial 8 to g/h. Water runs into the cup. Turn the dial 8 back to O. ● The a button will now flash. The appliance - Страница 17 из 94
en 6 Standby button a Button a switches on the appliance or switches it to stand-by mode. When button a is pressed, the appliance heats up and button a flashes while the appliance heats up and is rinsed. When the buttons 4, 5, a and h light up and one, two or three beans (depending on the setting) - Страница 18 из 94
en ● While the grinding unit is running, move the sliding switch 16 to the desired position: the smaller the dots, the finer the grind. i The new setting will not become apparent until the second or third cup is brewed. Tip: For dark roast coffee beans, choose a coarser grind; for light roast - Страница 19 из 94
en Preparing hot water The appliance must be ready for use. This function allows water to be heated for a cup of tea, for example. ! Risk of burns The nozzle gets very hot. Do not touch the metal parts! ● Place an appropriate cup under the nozzle 9. ● Push the sleeve on the nozzle 9 all the way - Страница 20 из 94
en Maintenance and daily cleaning ! Risk of electric shock Unplug the appliance before cleaning it. Never immerse the appliance in water. Do not use a steam cleaner. ● Wipe the outside of the appliance with a damp cloth. Do not use scouring agents. ● Wash all removable parts by hand only. ● Rinse - Страница 21 из 94
en Starting the service programme ● Switch the appliance to stand-by mode using the a button. ● Hold down the coffee dispensing button 4 for at least 3 seconds. D lights up on the display. ● Empty and reinsert the trays 20 and 21. 7 lights up on the display. ● Open the cover of the duct 14 for - Страница 22 из 94
en Anti-freeze Guarantee In order to avoid damage through cold during transportation and storage, the appliance must be emptied completely first. The appliance must be ready for use. ● Remove, empty, and replace water tank. ● Place a large, narrow container under nozzle 9. ● Press h button. ● As - Страница 23 из 94
en Troubleshooting Problem Possible cause Solution 555 flashing when bean container is full. The grinding unit is not yet full enough. Press coffee dispensing button 4 again No hot water or steam discharge. Nozzle 9 is blocked. Clean nozzle 9. Foam insufficient or too runny. Sleeve b on nozzle 9 - Страница 24 из 94
fr Consignes de sécurité Lire attentivement le mode d‘emploi, se conformer à ses indications et le conserver à portée de la main. Cet appareil est destiné à un usage ménager et en aucun cas à une utilisation commerciale. ! Risque de choc électrique ! Pour le raccordement et l‘utilisation de la - Страница 25 из 94
fr ● etirer le réservoir d’eau 12, le rincer puis R le remplir d’eau froide pure. Attention de ne pas dépasser le repère « max ». ● lacer le réservoir d’eau 12 bien droit et P appuyer pour le faire descendre. ● Remplir de café le bac à grains. ● lacer l’interrupteur 1 sur I. La touche a « P - Страница 26 из 94
fr percolation sont répétées deux fois. Durant cette opération, la touche 4 clignote et le symbole 6 (2 tasses) clignote à l’écran. i l est possible d’arrêter prématurément I l’écoulement du café en appuyant de nouveau sur la touche de dosage 4. 5 Touche 5 Arôme du café Appuyer sur la touche 5 - Страница 27 из 94
fr Lors de la première utilisation du filtre ou après un changement de filtre, il faut rincer la machine. ● Remplir d’eau le réservoir d’eau jusqu’à la marque « 0,5 l ». ● Placer un récipient suffisamment grand (0,5 l env.) sous la buse 9. ● Placer le sélecteur 8 sur g/h. ● Lorsque l’eau ne - Страница 28 из 94
fr Préparation à partir de café moulu pour espresso/percolateur La machine doit être prête à fonctionner. ● A l’aide du sélecteur 2, régler la quantité d’eau souhaitée. ● Placer la tasse/les tasses préchauffée(s) sous le bec verseur 10. ● Ouvrir le couvercle de la trémie pour café moulu 14. ● - Страница 29 из 94
fr Conseil pratique : utiliser de préférence du lait froid avec une teneur en matières grasses de 1,5%. Réchauffer un liquide à la vapeur ! Risque de brûlure La buse devient brûlante, la saisir uniquement par l’élément en plastique. La machine doit être prête à fonctionner. ● Faire monter la - Страница 30 из 94
fr ● Placer la chambre de percolation 18 jusqu’à ce qu’elle se trouve en butée. ● Maintenir appuyé le bouton rouge 18a et tourner la poignée 18b vers le bas jusqu’en butée (bruit d’enclipsage caractéristique). La chambre de percolation est verrouillée. ● Replacer le volet de la chambre de - Страница 31 из 94
fr ● ider le réservoir d’eau 12, le nettoyer, V le remplir d’eau jusqu’au repère « max » et le replacer. ● Placer un récipient suffisamment grand (0,5 l environ) sous la buse 9. ● Appuyer sur la touche 4, la machine commence le cycle de rinçage, un peu d’eau s’écoule dans le récipient. Le - Страница 32 из 94
fr Eliminer soi-même les petites défaillances Défaillance Cause Remède 555 clignotent bien que le bac à grains soit plein. Le moulin n’est pas intégralement rempli. Appuyer de nouveau sur la touche de dosage 4. Production d’eau chaude ou La buse 9 est obturée. de vapeur impossible. Nettoyer la buse - Страница 33 из 94
it Istruzioni di sicurezza Leggere con attenzione interamente, osservare e conservare le istruzioni per l‘uso! Questo apparecchio è destinato all‘uso domestico e non all‘attività professionale. ! Pericolo di scarica elettrica! Nel collegamento e nell‘uso dell‘apparecchio, rispettare i dati della - Страница 34 из 94
it ● ogliere il serbatoio per l’acqua 12, T sciacquarlo e riempirlo con acqua pulita fredda. Non superare il livello indicato come “max“. ● osizionare il serbatoio dell’acqua 12 P diritto e spingerlo completamente verso il basso. ● iempire l’apposito contenitore con i R chicchi di caffè. ● - Страница 35 из 94
it 4 Tasto di prelievo 4 caffè Con questo tasto è possibile prelevare il caffè: premere 1x per una tazza, il caffè viene macinato, preriscaldato e versato nella tazza. Il tasto 4 lampeggia durante il prelievo. Premere 2x nell’arco di 3 secondi per due tazze, il caffè viene macinato, preriscaldato e - Страница 36 из 94
it ● Ora premere il tasto vapore h fino a quando si accendono i tasti di comando per la durezza dell’acqua desiderata. ● Premere una volta il tasto a. I tasti impo stati si accendono brevemente, la durez za dell’acqua impostata è memorizzata. Se si utilizzo il filtro per l’acqua (accessorio - Страница 37 из 94
it ● A seconda del numero di tazze, premere il tasto di prelievo 4 una volta (1 tazza) o due volte in tre secondi (2 tazze). Il caffè viene preriscaldato e quindi scende nelle tazze. Nota: se non preleva del caffè entro 90 secondi, la camera di cottura si svuota auto maticamente per evitare un - Страница 38 из 94
it ● remere il tasto h, che inizia a P lampeggiare. i ’apparecchio riscalda ora per circa 20 L secondi. ● mmergere il tubo del getto 9 I profondamente nel latte, ma senza toccare il fondo della tazza. ● uando il tasto h si accende e sul Q display compare 8, posizionare il pulsante 8 su g/h. - Страница 39 из 94
it Pulire l’unità di bollitura L’unità di bollitura può essere rimossa per la pulizia (figura D). ● Spegnere l’apparecchio con il tasto a. ● Posizionare l’interruttore di rete 1 su 0. ● Aprire lo sportello 17 dell’unità di bollitura 18. ● Tenere premuto il pulsante rosso 18a e ruotare verso l’alto - Страница 40 из 94
it ● Premre il tasto 4, l’apparecchio inizia la decalcificazione. Durata circa 10 minuti. Il liquido inizia a fluire nella vasca 21. Su display lampeggia 8. ● Posizionare sotto il tubo del getto 9 un recipiente sufficiente grande e alto (circa da 0,5 litri). ● Ruotare il pulsante 8 su g/h, - Страница 41 из 94
it Misura di protezione dal gelo Per evitare danni provocati dall’azione del freddo durante il trasporto o il deposito, è necessario svuotare completamente l’apparecchio. L’apparecchio deve essere pronto per l’uso. ● Togliere il serbatoio dell’acqua, svuotarlo e reinserirlo. ● Posizionare un - Страница 42 из 94
it Soluzione di piccoli guasti Guasto Causa Rimedio 555 Lampeggiano, anche se il contenitore dei chicchi di caffè è pieno. Il macinacaffè non è ancora completamente pieno. Premere ancora una volta il tasto di prelievo 4. Prelievo acqua calda o vapore impossibile. Il tubo di getto 9 è otturato. - Страница 43 из 94
nl Veiligheidsvoorschriften De gebruiksaanwijzing a.u.b. zorgvuldig lezen, ernaar handelen en bewaren! Dit apparaat is bedoeld voor huishoudelijk en niet voor zakelijk gebruik. ! Gevaar van elektrische schok! Het apparaat uitsluitend aansluiten en gebruiken volgens de gegevens op het typeplaatje. - Страница 44 из 94
nl ● Het waterreservoir correct opnieuw installeren en helemaal naar onderen duwen. ● Het bonenreservoir met koffiebonen vullen. ● De netschakelaar 1 op I zetten. Toets a (stand-by) licht zwak rood op. ● Controleren of de draaiknop 8 op “O“ staat. ● De toets a indrukken. Op het display knippert 8. - Страница 45 из 94
nl 5 Toets 5 (koffiesterkte) Door de toets 5 in te drukken, kan de koffiesterkte worden ingesteld op 5 mild 55 normaal 555 sterk De instelling wordt op het display weergegeven. 6 Toets a (stand-by) Moet de toets a wordt het apparaat ingeschakeld of in stand-bymodus gezet. Als de toets a wordt - Страница 46 из 94
nl ● Het waterreservoir en het waterleidings systeem vullen (zie „Het apparaat in gebruik nemen“). Maalgraad instellen Met de schuifschakelaar 16 voor de koffie maalgraad kan de fijnheid van de gemalen koffie worden ingesteld. Let op De maalgraad alleen bij draaiend maalwerk instellen! Anders kan - Страница 47 из 94
nl Let op Geen hele bonen of oploskoffie gebruiken! Maximaal twee afgestreken maatlepels koffie gebruiken. ● et deksel van de koker voor gemalen H koffie 14 sluiten. ● e toets 4 indrukken. D i oor een tweede kop met gemalen koffie V deze werkwijze herhalen. Opmerking: Als binnen 90 seconden - Страница 48 из 94
nl ● et pijpje 9 diep in op te warmen vloeistof H steken. ● ls de toets h brandt en op het display A verschijnt 8, de draaiknop 8 op g/h zetten. ! Risico van brandwonden Na instelling op g/h kan de vloeistof wat spatten. De vrijkomende stoom is zeer heet en kan vloeistoffen doen opspatten. - Страница 49 из 94
nl Serviceprogramma: ontkalken en reinigen in één Als bij het ingeschakelde apparaat op het display „S“ oplicht, dient het apparaat onmiddellijk met het serviceprogramma te worden ontkalkt en gereinigd. Als het serviceprogramma niet volgens de instructies verloopt, kan het apparaat worden - Страница 50 из 94
nl p het display licht 8 op. O ● e draaiknop 8 op “O“ zetten; het D apparaat start nu het reinigingsproces. Duur: ca. 10 minuten. Eerst loopt de vloeistof binnen in het apparaat in de schaal 21 en vervolgens uit de koffieuitloop. p het display licht D op. O ● e schalen 20 en 21 - Страница 51 из 94
nl Kleine storingen zelf oplossen Storing Oorzaak Oplossing 555 knipperen, hoewel het bonenreservoir gevuld is. Het maalwerk is nog niet volledig gevuld. De toets 4 nogmaals indrukken. Geen afgifte van heet water Het pijpje 9 is verstopt. of stoom mogelijk. Het pijpje 9 reinigen. Te weinig schuim - Страница 52 из 94
es Advertencias de seguridad Lea cuidadosamente las instrucciones de uso antes de poner el aparato en funcionamiento y consérvelas después en un lugar seguro. Este aparato está diseñado para el uso doméstico y no para el uso industrial. ! ¡Peligro de electrocución! Conecte el aparato y póngalo en - Страница 53 из 94
es Puesta en funcionamiento ● Retire la longitud de cable necesaria del compartimiento y conecte el cable. ● Retire el recipiente de agua 12, límpielo y llénelo con agua fría hasta el máximo nivel “máx.”. ● Coloque el recipiente de agua 12 sin ladearlo y empújelo hacia abajo. ● Llene el recipiente - Страница 54 из 94
es 9 se ilumina + 8 parpadea 8 parpadea 8 se ilumina D se ilumina D parpadea Llene el recipiente para a gua 12, coloque la taza debajo de la boquilla 9 y luego ponga el botón giratorio 8 en g/h. P onga el botón giratorio 8 en g/h. P onga el botón giratorio 8 en “O”. Vacíe los recipientes - Страница 55 из 94
es p.ej. = dureza 2 ● Ponga el aparato en modo “stand by”. ● Presione como mínimo durante 3 segundos la tecla h. El número de teclas 4, 5, a, h que se iluminan indica el grado de dureza del agua ajustado. ● A continuación presione la tecla h hasta que se ilumine la cantidad de teclas necesarias - Страница 56 из 94
es Preparación con granos de café La máquina ha de estar lista para funcionar. ● ije la cantidad deseada con el botón F giratorio 2. ● eleccione la intensidad del café S deseada con la tecla 5. ● oloque la taza o las tazas precalentadas C debajo del dispositivo de salida del café 10. ● ulse - Страница 57 из 94
es Vapor para espumar leche Vapor para calentar bebidas La máquina ha de estar lista para funcionar. Primero espume la leche y después extraiga el café o espume la leche por separado y viértala después sobre el café. ! ¡Peligro de quemadura! Toque solamente la parte de plástico, ya que la - Страница 58 из 94
es ● etire el recipiente para el poso de café R 20 y el de agua residual 21, vacíelos y límpielos. ● impie el interior de la máquina (recipien L tes) con un paño o con una aspiradora Advertencia: Si la máquina se conecta mediante la tecla “stand by” cuando está en reposo o si se pone en el - Страница 59 из 94
es En el display aparece 7. ● bra la tapa del recipiente para café en A polvo/pastillas de limpieza 14. ● eposite una pastilla en el recipiente D 14 y cierre la tapa. En el display se ilumina 9 y la tecla 4 parpadea. ● lene el recipiente para agua con agua L tibia, añada el producto para - Страница 60 из 94
es Protección contra la formación de hielo Para evitar daños provocados por el hielo durante el transporte o almacenamiento, el aparato debe estar antes completamente vacío. El aparato debe estar listo para el servicio. ● Retirar el recipiente para agua, vaciarlo y volver a insertarlo. ● Colocar un - Страница 61 из 94
es Solución de problemas Problema Causa Solución 555 parpadean, a pesar de que el recipiente para granos de café está lleno. El molino no está completamente lleno. Pulse de nuevo la tecla 4. No se puede extraer agua La boquilla 9 está caliente ni vapor. bloqueada. Limpie la boquilla 9. Muy poca - Страница 62 из 94
tr Emniyetle ilgili açıklamalar Kullanma kılavuzunu lütfen dikkatlice okuyun, kılavuza göre hareket edin ve kılavuzu başvuru kaynağı olarak saklayın! Bu cihaz evlerde kullanım için uygun olup büyük işletmelerde kullanıma yönelik değildir. ! Elektrik tehlikesi! Cihaz bağlantısını sadece tip - Страница 63 из 94
tr ● Kahve çekirdeği bölmesini kahve çekirdekleriyle doldurun. ● Açma/kapama şalterini 1, I konumuna getirin. a „stand by“ tuşu kırmızı yanar. ● 8 sıcak su/buhar seçim düğmesinin “O“ konumunda olmasına dikkat edin. ● a tuşuna basın. Diyalog göstergede 8 yanıp söner. İlk çalıştırma esnasında - Страница 64 из 94
tr İki fincan kahve için 3 saniye içersinde 2x basın, kahve öğütülür, demlenir ve fincanlara akar, öğütme ve demleme işlemi tekrarlanır. Tuş 4 yanıp söner ve bu işlem esnasında dijital göstergede 6 (2 fincan) yanar. i şaret tuşuna 4 tekrar basıldığında İ kahve alma işlemine daha önceden son - Страница 65 из 94
tr Filtreyi ilk kez kullanırken veya filtreyi değiştirdikten sonra cihaz çalkalanmalıdır. ● Su haznesini “0,5 l” işaretine kadar su ile doldurun. ● Enjektör 9 altına yeterli büyüklükte bir kap (yaklaşık 0,5 l) yerleştirin. ● Çevirme düğmesini 8, g/h konumuna getirin. ● Enjektörden 9 su akmıyorsa, - Страница 66 из 94
tr Espresso ve çekilmiş kahve ile hazırlık Cihazın çalışmaya hazır konumda olması gerekir. ● Çevirme düğmesi 2 ile istenilen dolum miktarı ayarlanabilir. ● Ön ısıtması yapılan fincan(lar) kahve çıkış yerinin altına 10 konulmalıdır. ● Çekilmiş kahve için delikteki kapağı 14 açın ● Çekilmiş kahve - Страница 67 из 94
tr İçecek ısıtmak için buhar ! Yanma tehlikesi Enjektör çok sıcak olur, sadece plastik kısımdan tutun. Cihazın çalışmaya hazır konumda olması gerekir. ● Enjektördeki manşonu 9 yukarıya sürün. ● Tuşa h basın. Yanıp sönmeye başlar. i ihaz yaklaşık 20 saniye ısıtır. C ● Enjektörü 9 ısıtmak - Страница 68 из 94
tr Özel geliştirilmiş ve uygun olarak hazırlanmış kireç giderici madde (sipariş numarası 310451) ve temizlik tabletleri (sipariş numarası 310575) teslimat kapsamında bulunmakta olup müşteri hizmetleri servisinden temin edilebilir. Dikkat Her servis programı uygulamaya konulduğunda kireç giderici ve - Страница 69 из 94
tr Önemli: Servis programı kesildiği zaman, örneğin elektrik kesintisinden dolayı, cihazı çalıştırmadan önce su deposunu mutlaka boşaltın, çalkalayın ve içine temiz su koyun. Ardından cihazı tekrar açın. ● Cihaz, atık su kabına çalkalanır 21. Diyalog göstergede 8 yanıp söner ● Enjektör 9 altına - Страница 70 из 94
tr Küçük arızaların şahsen ortadan kaldırılması Arıza Sebebi Çözüm yolu Çekirdek kabı dolu olmasına rağmen 555 yanıp söner. Öğütme düzeni henüz tam olarak dolu değil. İşaret tuşuna 4 tekrar basın. Sıcak su veya buhar ilişkisi mümkün değil. Enjektör 9 tıkalı. Enjektörü 9 temizleyin. Çok az köpük - Страница 71 из 94
pl Wskazówki dotyczące bezpieczeństwa Należy dokładnie przeczytać instrukcję obsługi, przestrzegać zawartych w niej zaleceń i zachować ją w celu przyszłego użytkowania! Urządzenie jest przeznaczone do użytku domowego, a nie do stosowania w zakładach przemysłowych. ! Niebezpieczeństwo porażenia - Страница 72 из 94
pl Pierwsze włączenie ● Wyciągnij kabel sieciowy na odpowiednią długość ze schowka na kabel i podłącz go do sieci. ● Wyjmij pojemnik na wodę 12, przepłucz go i napełnij świeżą zimną wodą. Uważaj na oznaczenie „max“. ● Wyrównaj położenie pojemnika na wodę 12 i przyciśnij w dół aż do ogranicznika. ● - Страница 73 из 94
pl 9 świeci +8 miga 8 miga 8 świeci D świeci D miga Napełnić pojemnik na wodę 12 ustawić filiżankę pod , dyszą 9 i przekręcić pokrętło 8 na pozycję g/h. U stawić pokrętło 8 w pozycji g/h. Ustawić pokrętło 8 w pozycji O. Opróżnić pojemniki Brak pojemników 4 Przycisk 4 (kawa) Służy do parzenia - Страница 74 из 94
pl ● Ustal twardość wody za pomocą dołączonego paska testowego. Na przykład: = stopień 2 ● Przełącz urządzenie na tryb stand by. ● Przytrzymaj przycisk pary h co najmniej przez 3 sek. Liczba pokazywanych przy tym na wyświetlaczu symboli 4, 5, a, h odpowiada ustawionemu stopniowi twardości wody. ● - Страница 75 из 94
pl Przygotowywanie kawy z ziarnek Urządzenie musi być gotowe do pracy. ● Ustaw wymaganą pojemność filiżanki pokrętłem 2. ● Wybierz przyciskiem 5 wymaganą moc kawy. ● Ustaw filiżankę (filiżanki) pod dystrybutorem kawy 10. ● Naciśnij przycisk 4 w zależności od liczby filiżanek: jeden raz (1 - Страница 76 из 94
pl Para do spieniania mleka Urządzenie musi być gotowe do pracy. Możesz najpierw spienić mleko i dopiero potem nalać kawę lub spień mleko oddzielnie i dodaj je do kawy. ! Niebezpieczeństwo poparzenia Dysza jest bardzo gorąca, dlatego dotykać można tylko jej plastikowych części. ● Przesuń tuleję - Страница 77 из 94
pl ● Przetrzeć ściereczką lub oczyścić odkurzaczem wewnetrzną przestrzeń urządzenia (przestrzeń do ustawiania pojemników). Wskazówka: Jeśli urządzenie jest zimne a albo w przypadku, gdy urządzenie po nalewaniu kawy zostało przełączone na tryb stand by, przepłukiwanie urządzenia jest wykonywane - Страница 78 из 94
pl Na wyświetlaczu pojawia się symbol D. ● Opróżnij i ustaw pojemniki 20 i 21 w urządzeniu. Na wyświetlaczu pojawia się symbol 7. ● Otwórz osłonę dozownika mielonej kawy/ tabletek czyszczących 14. ● Włóż do dozownika 14 jedną tabletkę czyszczącą i zamknij osłonę. Na wyświetlaczu pojawia się - Страница 79 из 94
pl ● Gdy na wyświetlaczu zamiga symbol 8, ustaw gałkę regulacyjną 8 w pozycji g/h . Urządzenie przez krótki czas przygotowuje parę. ● Gdy z dyszy 9 nie będzie już wydostawała się żadna para, ustaw regulacyjną znowu w pozycji “O”. ● Wyłącz urządzenie. Utylizacja A Urządzenie oznakowane jest zgodnie - Страница 80 из 94
pl Samodzielne usuwanie drobnych usterek Usterka Przyczyna Sposób usunięcia Z urządzenia nie wylewa się kawa. Pojemnik na wodę nie jest napełniony lub jest ustawiony nieprawidłowo. Napełnij pojemnik na wodę i sprawdź jego położenie, w razie potrzeby napełnij również system rurowy (patrz “Pierwsze - Страница 81 из 94
ru Указания по безопасности Внимательно ознакомьтесь с данной инструкцией по эксплуатации, руководствуйтесь приведенными в ней указаниями и сохраните ее для дальнейшего использования! Данный прибор не предназначен для промышленного применения, им можно пользоваться только в домашнем хозяйстве. ! - Страница 82 из 94
ru предпочтительно — смеси кофейных зерен, предназначенные для автоматических кофеварок. Не используйте кофейные зерна, обработанные с применением глазированных, карамелизованных или других сахаросодержащих добавок, они закупоривают кофемолку. Определите жесткость используемой воды с помощью - Страница 83 из 94
ru 3 Дисплей Дисплей служит для отображения настроек и сообщений прибора в виде соответствующих символов. 6 И ндикатор подачи кофе для 2 чашек 7 мигает рышка шахты для К загрузки молотого кофе 14 открыта 7 светится олотый кофе/Режим М очистки 5 светится Слабый кофе 55 светится ормальный - Страница 84 из 94
ru 8 Поворотный регулятор подачи пара При установке поворотного регулятора в положение подачи горячей воды g или пара h производится соответственно подача воды или пара. Кроме того, для подачи пара требуется предварительно нажать клавишу подачи пара h (см. раздел «Пар для вспенивания молока») - Страница 85 из 94
ru Внимание Степень помола должна регулироваться только при работающей кофемолке! В противном случае возможно повреждение прибора. ● Нажмите клавишу 4. ● При работающей кофемолке установите ползунковый регулятор 16 в требуемое положение: чем меньше точка, тем мельче молотый кофе. i овая настройка - Страница 86 из 94
ru Приготовление кофе из ! Опасность ошпаривания Насадка сильно нагревается, поэтому молотого кофе эспрессо/ прикасаться можно только к ее молотого кофе пластмассовым элементам. Прибор должен быть готов к работе. ● Установите нужный уровень заполнения с помощью поворотного регулятора 2. ● - Страница 87 из 94
ru ! Опасность ошпаривания После установки регулятора в положение g/h возможно образование брызг. Выходящий из насадки пар очень горячий, вследствие чего возможно разбрызгивание жидкостей. Не прикасайтесь к насадке 9 и не направляйте ее на людей. ● Медленно вращайте чашку до момента вспенивания - Страница 88 из 94
ru ● Произведите разборку всех элементов насадки (рисунок E). ● Почистите насадку мягкой щеткой с использованием щелочного чистящего средства. Прочистите наконечник насадки 9/c спереди тупой иглой. ● Промойте и просушите все элементы насадки. Чистка блока заваривания Блок заваривания для чистки - Страница 89 из 94
ru Запуск сервисной программы ● Нажмите клавишу a для переключения прибора на режим ожидания. ● Удерживайте клавишу подачи кофе 4 как минимум в течение 3 сек. в нажатом положении. На дисплее появляется символ D. ● Опорожните и установите на прежнее место поддоны 20 и 21. На дисплее появляется - Страница 90 из 94
ru Защита от замерзания Во избежание вызванных замерзанием повреждений прибора при его транспортировке и хранении необходимо предварительно полностью опорожнить прибор. Прибор должен быть готов к работе. ● Снять емкость для воды, опорожнить ее и установить на прежнее место. ● Подставить под насадку - Страница 91 из 94
ru Самостоятельное устранение мелких неисправностей Неисправность Причина Устранение Символы 555 мигают, хотя емкость для кофейных зерен заполнена. Кофемолка заполнена еще не полностью. Повторно нажмите клавишу подачи кофе 4. Невозможна подача горячей воды или пара. Насадка 9 засорилась. Прочистите - Страница 92 из 94
ru Самостоятельное устранение мелких неисправностей Неисправность Причина Устранение Кофемолка работает с громким шумом. В кофемолку попали посторонние предметы (например, мелкие камешки, встречающиеся даже в кофе элитных сортов). Свяжитесь с «горячей линией». Указание: для приготовления кофе пока - Страница 93 из 94
������������������� ������ �� ��� �������������� ����������� ��� ������������� ������������ ��� ������� ��������� ��� ������ ������� ���������������� ������������ ������ ��� ������������������� ������������ ��� ���������� ��� ��� ����������� ��� ��� ����������� ���������� ��� ������ ����� ������� - Страница 94 из 94
View a manual of the Bosch Benvenuto Classic TCA5401 below. All manuals on ManualsCat.com can be viewed completely free of charge. By using the ‘Select a language’ button, you can choose the language of the manual you want to view.

MANUALSCAT | EN
Question & answers
Have a question about the Bosch Benvenuto Classic TCA5401 but cannot find the answer in the user manual? Perhaps the users of ManualsCat.com can help you answer your question. By filling in the form below, your question will appear below the manual of the Bosch Benvenuto Classic TCA5401. Please make sure that you describe your difficulty with the Bosch Benvenuto Classic TCA5401 as precisely as you can. The more precies your question is, the higher the chances of quickly receiving an answer from another user. You will automatically be sent an e-mail to inform you when someone has reacted to your question.
Ask a question about the Bosch Benvenuto Classic TCA5401
Page: 1
18
18a
18b
9a
9
9b
9c
E
Page: 2
11
en
Safety instructions
Please read these instructions carefully
and keep for future reference.
This appliance is designed for domestic
and not commercial use.
! Risk of electric shock
Connect and operate the appliance only in
accordance with the specifications on the
rating label.
Do not use if either the the power cord or
the appliance is damaged.
Use indoors at room temperature only.
Keep children away from the appliance.
In the event of malfunction, unplug the
appliance immediately.
To avoid potential hazards, repairs such as
replacing a damaged cord should only be
performed by our service personnel.
Never immerse the appliance or power cord
in water.
Do not reach into the grinding unit.
! Risk of scalding
The nozzle for hot water and steam 9 gets
very hot. Hold the nozzle 9 by the plastic
part only, not by the metal parts. Keep body
parts away from the nozzle and do not aim
it at yourself or anyone else. When steam
or hot water is released, the nozzle 9 may
initially sputter.
Overview
Fig. A
1 Power on/off switch
2 Dial for adjusting the fill quantity
3 Display
4 Coffee dispensing button 4
5 Coffee strength button 5
6 Stand-by / on button a
7 Steam generation button h
8 Hot water / steam dial g/h
9 Nozzle (for hot water/steam)
a) Nozzle mounting
b) Sleeve
c) Nozzle tip
10 Height-adjustable coffee outlet
11 Lid for water tank
12 Removable water tank
13 Bean container with aroma cover
14 Ground coffee / cleaning tablet duct
15 Cup shelf (warming function)
16 Sliding switch for adjusting grind
17 Doors to brewing unit
18 Brewing unit
a Button (red)
b Handle
19 Grate
20 Coffee grounds tray
21 Residual water tray
22 Float
23 Cord storage compartment
Before using
for the first time
General
Fill the water tank with fresh, uncarbonated
water only, and if possible, use only beans
for fully automatic coffee and espresso
machines. Do not use coffee beans that
have been glazed, caramelized or treated
with other additives containing sugar, since
they will block the grinding unit. Check the
water hardness with the enclosed test strip.
If a value other than 4 is displayed, change
the setting on the appliance accordingly
(see “Setting the water hardness“).
Switching on the appliance
● Pull enough of the power cord out of the
storage compartment and plug it into the
electrical socket.
● Remove and rinse the water tank 12
and fill it with fresh cold water. Do not fill
above the “max“ mark.
● Replace the water tank 12 and push it
firmly downward into place.
● Fill the bean container with coffee beans.
● Set the power on/off switch 1 to I. The
stand-by button a glows red.
● Make sure that the hot water/steam dial 8
is at “O“.
Page: 3
12
en
● Press the a button. 8 lights up on the
display.
When switched on for the first time, the
water pipes in the appliance must be filled.
● Place a cup under the nozzle 9.
● Turn the dial 8 to g/h. Water runs into
the cup. Turn the dial 8 back to O.
● The a button will now flash.
The appliance rinses and heats up.
The appliance is ready for use when all
four buttons 4, 5, a, h and the coffee
strength indicator (coffee beans) light up on
the display.
i The appliance’s factory settings are
programmed for optimal performance.
Note: If the appliance is being used for the
first time or has not been operated for a
prolonged period, the first cup of coffee will
not have the full aroma and should not be
consumed.
Controls
1 Power on/off switch
The power switch 1 on the rear of the
appliance switches the power supply on or
off.
When the power has been switched on, the
a button glows red. The appliance is now in
stand-by mode.
Warning
Do not press the power on/off switch while
the appliance is operating. The appliance
should only be switched off when it is in
stand-by mode.
2 Dial for adjusting the amount of coffee
per cup
This dial 2 allows variable adjustment of the
quantity of coffee from a small cup E to a
large cup F.
3 Display
The display uses symbols to indicate
appliance settings and messages.
6 Coffee dispensing, 2 cups
7 flashing Lid for ground coffee
duct 14 is open
7 on Ground coffee / Cleaning
5 on Mild coffee
55 on Medium-strength coffee
555 on Strong coffee
555 flashing Bean container empty
S on Service:
Descale/clean appliance
S flashing
Service programme
in operation
9 on Fill water tank 12, hold cup
+ 8 flashing under nozzle 9 and turn
dial 8 to g/h.
8 flashing Turn dial 8 to g/h.
8 on Turn dial 8 to O.
Don Empty trays
Dflashing Trays missing
4 Coffee dispensing button 4
Coffee can be brewed by pressing this
button.
Press once for one cup. The coffee is
ground, brewed and dispensed into the cup.
Button 4 flashes during this process.
Press twice within 3 seconds for two
cups. The coffee is ground, brewed and
dispensed into the cups (the grinding and
brewing process takes place twice). Button
4 flashes and 6 (2 cups) appears on the
display during this process.
iIf the coffee dispensing button 4 is
pressed again, the coffee brewing
process is terminated.
5 Coffee strength button 5
This button 5 is used to select the coffee
strength:
5 mild
55 medium
555 strong
The selected setting is shown on the
display.
Page: 4
13
en
6 Standby button a
Button a switches on the appliance or
switches it to stand-by mode. When button
a is pressed, the appliance heats up and
button a flashes while the appliance heats
up and is rinsed. When the buttons 4, 5, a
and h light up and one, two or three beans
(depending on the setting) appear on the
display, the appliance is ready for operation.
The appliance will not be rinsed if:
– it was still warm when switched on, or
– coffee was not discharged before it was
switched to “stand-by“ mode,
or
– steam was discharged shortly before it
was switched off.
7 Steam generation button h
Button h generates steam for foaming or
warming.
8 Steam dispensing dial
Hot water or steam can be dispensed by
turning the dial to hot water g or steam h.
To dispense steam, the steam generation
button h must be pressed first (see “Steam
for foaming milk“).
Settings and displays
Setting the water hardness
It is important that the water hardness be
set correctly, so that the appliance indicates
accurately when the descaling programme
should be run. The factory setting is a water
hardness of 4. You can check the water
hardness using the enclosed test strip or by
asking your local water supplier.
Degree Water hardness
German (°dH) French (°fH)
1
2
3
4
1-7
8-15
16-23
24-30
1-13
14-27
28-42
43-54
● Determine the water hardness with the
enclosed test strip.
e.g. = Hardness 2
● Switch the device to stand-by.
● Hold down the steam button h for at
least 3 seconds. The number of service
buttons 4, 5, a, h that light up indicate
the selected water hardness.
● Press the steam button h repeatedly
until the correct number of buttons is lit.
● Press button a once. The selected
number of service buttons should light
up briefly; this indicates that the desired
water hardness setting has been saved
successfully.
If a water filter (special accessory) is used,
the water hardness should be set to 1.
Note: If no button is pressed within 90
seconds, the appliance switches to stand-
by mode without saving the new settings.
In this case, the previous water hardness
setting is retained.
The first time a filter is used or after
changing the filter, the appliance needs to
be cleaned.
● Fill the water tank up to the 0.5l mark.
● Place a suitable container (approx. 0.5
litres) under the nozzle 9.
● Turn the dial 8 to g/h.
● If no water comes out of nozzle 9, turn
the dial back to O.
● Fill the water tank and water pipes (see
section “Switching on the appliance”).
Adjusting the grinding unit
Sliding switch 16 adjusts the degree of
grinding, from coarse to fine.
Warning
Adjust the grinding unit only while it is
running! Otherwise the appliance may be
damaged.
● Press the coffee dispensing button 4.
Page: 5
14
● While the grinding unit is running, move
the sliding switch 16 to the desired
position: the smaller the dots, the finer the
grind.
iThe new setting will not become apparent
until the second or third cup is brewed.
Tip: For dark roast coffee beans, choose a
coarser grind; for light roast beans, select a
finer grind.
Float
The float 22 in the water tray 21 shows
when the tray needs emptying.
● If the float 22 is clearly visible, empty the
water tray 21.
Preparation
This fully automatic espresso/coffee
machine grinds beans freshly for each
brew. If possible, use only beans for fully
automatic coffee and espresso machines.
Deep-freeze or store in a cool place in
sealed, airtight containers. Coffee beans
can be ground while frozen.
Important: Fill the water tank with fresh
water every day. The tank must always
contain sufficient water for operating the
appliance. Do not allow it to become empty.
Tip: Pre-warm cups, especially small, thick
espresso cups, by placing on the cup shelf
15 or rinsing with hot water.
Using coffee beans
The appliance must be ready for use.
● Set the desired per-cup quantity using
dial 2.
● Select the desired coffee strength using
button 5.
● Place the prewarmed cup(s) under the
coffee outlet 10.
● Press the coffee dispensing button 4
once for 1 cup or twice within three
seconds for 2 cups. The coffee is brewed
and dispensed into the cup(s).
Note
If you select two cups, the grinding and
brewing process is performed twice.
● Coffee dispensing stops automatically
when the selected quantity has been
dispensed.
iThe brewing process can be terminated
by pressing the coffee dispensing button
4 again. When coffee is brewed for
2 cups, it is dispensed via two outlet
nozzles (place the cups side by side).
Using ground espresso/
coffee powder
The appliance must be ready for use.
● Set the desired per-cup quantity using the
dial 2.
● Place the prewarmed cup(s) under the
coffee outlet 10.
● Open the cover of the ground coffee duct
14.
● Add one to two level scoops of ground
coffee (grind: medium-fine) to the ground
coffee duct 14.
Note
Do not add whole beans or instant coffee!
Use a maximum of two level scoops of
coffee.
● Close the cover of the ground coffee duct
14.
● Press the coffee dispensing button 4.
iRepeat the process if a second cup is
desired.
Note: If coffee is not brewed within 90
seconds, the brewing chamber is emptied
automatically in order to prevent overfilling.
The appliance is rinsed.
en
Page: 6
15
Preparing hot water
The appliance must be ready for use. This
function allows water to be heated for a cup
of tea, for example.
! Risk of burns
The nozzle gets very hot. Do not touch the
metal parts!
● Place an appropriate cup under the
nozzle 9.
● Push the sleeve on the nozzle 9 all the
way down.
● Turn the dial 8 to g/h.
! Risk of scalding
When the dial 8 is set to g/h, the nozzle
may sputter a little. Do not touch the nozzle
9 or aim it at anyone.
● End the process by turning the dial 8
back to O.
Steam for foaming milk
The appliance must be ready for use. You
can foam the milk first and add the coffee
on top, or foam the milk separately and
pour it into the coffee.
! Risk of burns
The nozzle gets very hot. Do not touch the
metal parts!
● Push the sleeve on the nozzle 9 all the
way down.
● Fill the cup approximately 1/3 full of milk.
● Press the h button. It will start to flash.
iThe appliance will heat up for approx. 20
seconds.
● Immerse the nozzle 9 deep into the milk,
but do not let it touch the bottom of the
cup.
● When the h button lights up and 8
appears on the display, turn the dial 8 to
g/h.
! Risk of scalding
When the dial 8 is set to g/h, the nozzle
9 may sputter. Escaping steam is very hot
and may cause liquids to sputter. Do not
touch the nozzle 9 or aim it at anyone.
● Rotate the cup slowly until the milk is fully
foamed.
● End the process by turning the dial 8
back to O.
Note: When the nozzle 9 has cooled
down, clean it immediately. Dried residue is
difficult to remove.
Tip: If possible, use cold low-fat (1.5% fat)
milk.
Steam for heating drinks
! Risk of burns
The nozzle gets very hot. Do not touch the
metal parts!
The appliance must be ready for use.
● Push the sleeve on the nozzle 9 all the
way up.
● Press the h button. It will start to flash.
iThe appliance will now heat up for
approx. 20 seconds.
● Immerse the nozzle 9 deep into the liquid
you want to heat.
● When the h button lights up and 8
appears on the display, turn dial 8 to g/
h.
! Risk of scalding
When the dial 8 is set to g/h, the nozzle
9 may sputter a little. Escaping steam is
very hot and may cause liquid to sputter.
Do not touch the nozzle 9 or aim it at
anyone.
● End the process by turning the dial 8
back to O.
Note: When the nozzle 9 has cooled down,
clean immediately. Dried residue is difficult
to remove.
en
Page: 7
16
Maintenance and daily
cleaning
! Risk of electric shock
Unplug the appliance before cleaning it.
Never immerse the appliance in water. Do
not use a steam cleaner.
● Wipe the outside of the appliance with a
damp cloth. Do not use scouring agents.
● Wash all removable parts by hand only.
● Rinse out the water tank 12 with water
only.
● Remove, empty and clean the trays for
coffee grounds 20 and residual water 21.
● Wipe out or vacuum the inside of the
appliance (tray holders).
Note: If the appliance is cold when switched
on with the a button, or if it is set to stand-
by after brewing coffee, it is automatically
rinsed, i.e. the system cleans itself.
Nozzle 9 for hot water/steam
● Unscrew the nozzle 9 from the steam
pipe.
● Dismantle all parts (Fig. E).
● Clean with a caustic cleaning solution and
a soft brush. Clean the tip of the nozzle
9/c with a blunt needle.
● Thoroughly rinse and dry all parts.
Brewing unit
The brewing unit can be removed for
cleaning (Fig. D).
● Turn off the appliance with button a.
● Turn the power on/off switch 1 to 0.
● Open the door 17 to the brewing unit 18.
● Hold the red button 18a down and push
the handle 18b up until you hear it
engage.
● Grasp the brewing unit 18 by the handle,
remove carefully, and rinse under running
water. Do not use cleaning agents. Do not
place in the dishwasher.
● Vacuum the inside of the appliance, or
clean it with a damp cloth.
● Reinsert the brewing unit 18 all the way
into the appliance.
● Hold the red button 18a down and push
the handle 18b down as far as it goes,
until you hear it engage. The brewing unit
is now secure.
● Close the doors of the brewing unit.
Service programme:
Combined cleaning and
descaling process
If an S is shown on the display while the
appliance is on, the service programme
must be run immediately to clean and
descale the appliance. If the service
programme is not run as instructed, the
appliance may be damaged.
Specially-developed descaling (order no.
310451) and cleaning agents (order no.
310575) are included with the appliance
and can also be obtained from customer
service.
Warning
Each time you run the service programme,
you should follow the instructions for
using the cleaning and descaling agents
carefully.
Never interrupt the descaling programme.
Do not drink the liquids.
Never use vinegar or vinegar-based
products.
Never put descaling tablets or other
descaling materials into the duct for
cleaning tablets.
iThe S symbol flashes while the service
programme is running (approx. 40
minutes).
Important: If there is a filter in the water
tank, it needs to be removed before the
service programme is run.
en
Page: 8
17
Starting the service programme
● Switch the appliance to stand-by mode
using the a button.
● Hold down the coffee dispensing button
4 for at least 3 seconds.
D lights up on the display.
● Empty and reinsert the trays 20 and 21.
7 lights up on the display.
● Open the cover of the duct 14 for ground
coffee / cleaning tablets.
● Place one cleaning tablet in the duct 14
and close the cover.
9 lights up on the display and the 4
button flashes.
● Fill the water tank with lukewarm water,
add descaling agent and dissolve
completely (total liquid: 0.5 litres).
or
● Pour prepared descaling mixture into the
water tank (total liquid: 0.5 litres).
● Press the 4 button. The descaling
process begins. Duration approx. 10
minutes. The descaling solution flows into
the water tray 21.
8 flashes on the display.
● Place a suitable container (approx. 0.5
litres) under the nozzle 9.
● Set the dial 8 to g/h. The descaling
process begins. Duration approx. 5
minutes. The descaling solution flows into
the container.
D lights up on the display.
● Empty and reinsert the water tray 21.
9 lights up on the display and the 4
button flashes.
● Empty and clean the water tank 12, fill
with fresh water up to the “max“ mark and
reinsert.
● Place a suitable container (approx. 0.5
litres) under the nozzle 9.
● Press the 4 button. The cleaning process
begins. Water flows into the container.
8 lights up on the display.
● Turn the dial 8 to O. The cleaning process
begins. Duration approx. 10 minutes.
Liquid flows into tray 21 inside the
appliance, then from the coffee outlet.
D lights up on the display.
● Empty, clean and re-insert the trays 20
and 21.
The appliance heats up and is ready for use
again when all four buttons 4, 5, a and h
light up and remain lit.
Important: If the service programme is
interrupted, e.g. owing to a loss in power,
it is vital that the water tank be emptied,
rinsed and filled with fresh water before
the appliance is used again. Then turn the
appliance on.
● The appliance rinses, liquid flows into
tray 21.
8 flashes on the display.
● Hold a cup under the nozzle 9 and turn
the knob 8 to g/h.
Water runs into the cup.
8 lights up on the display.
● Turn the knob 8 back to O.
The appliance rinses and is ready for use
again.
en
Page: 9
18
Anti-freeze
In order to avoid damage through cold
during transportation and storage, the
appliance must be emptied completely
first.
The appliance must be ready for use.
● Remove, empty, and replace water tank.
● Place a large, narrow container under
nozzle 9.
● Press h button.
● As soon as 8 lights up on display, turn
dial 8 to g/h.
The appliance will release steam for a
while.
● When nozzle 9 stops releasing steam,
turn dial back to ‘O’.
● Turn off the appliance.
Disposal A
This appliance is labelled in accordance
with the European Directive 2002/96/EG
relating to waste electrical and electronic
equipment – WEEE. The directive provides
the framework for the EU-wide take-back
and disposal of end-of-life appliances.
Please ask your specialist retailer about
current disposal facilities.
Guarantee
The guarantee conditions for this appliance
are as defined by our representative in the
country in which it is sold. Details regarding
these conditions can be obtained from the
dealer from whom the appliance was pur
chased. The bill of sale or receipt must be
produced when making any claim under the
terms of this guarantee.
Right of modification reserved.
en
Page: 10
19
en
Troubleshooting
Problem Possible cause Solution
555 flashing when bean
container is full.
The grinding unit is not yet
full enough.
Press coffee dispensing
button 4 again
No hot water or steam
discharge.
Nozzle 9 is blocked. Clean nozzle 9.
Foam insufficient or too
runny.
Sleeve b on nozzle 9 not in
correct position.
Milk not suitable for foaming
Push down sleeve b on
nozzle 9.
Use cold low-fat (1.5% fat)
milk.
Coffee dispensing slows to
a trickle.
Coffee is ground too fine.
Pre-ground coffee is too
fine.
Adjust the grinding unit to a
coarser setting.
Use a more coarsely-
ground coffee.
Coffee not dispensed. Water tank not filled or not
correctly positioned.
Fill water tank and make
sure it is in the right
position. If necessary,
fill water pipes (see
section “Switching on the
appliance”).
Coffee has no ”crema”
(creamy foam).
Unsuitable type of coffee.
Beans no longer fresh.
Degree of grinding
inappropriate for beans.
Change type of coffee used.
Use fresh beans.
Optimize degree of
grinding.
Grinding unit does not grind
the beans.
Beans are not falling into
the grinding unit (beans too
oily).
Gently tap the bean
container.
Grinding unit makes a loud
noise.
Foreign objects in the
grinding unit (e.g. grit,
which can be found even in
superior types of coffee).
Call the hotline.
Note: The appliance can
still be used to make pre-
ground coffee.
Stand-by button a and
steam button h flash
alternately.
The brewing unit 18 is
missing, or is not properly
inserted or secured.
Insert and secure the
brewing unit 18.
If problems cannot be eliminated, always call the hotline.
- Brand:
- Bosch
- Product:
- coffee makers
- Model/name:
- Benvenuto Classic TCA5401
- Filetype:
- Available languages:
- Dutch, English, German, French, Spanish, Italian, Polish, Turkish