(скачивание инструкции бесплатно)
Формат файла: PDF
Доступность: Бесплатно как и все руководства на сайте. Без регистрации и SMS.
Дополнительно: Чтение инструкции онлайн
Руководство пользователя
Страница:
(1 из 155)
навигация
1
2
3
4
5
6
7
8
9
10
11
12

13
14
15
16
17
18
19

20

21
22
23
24
25
26

27
28
29
30

31
32
33
34

35
36
37
38
39
40
41
42
43
44
45
46
47
48
49
50
51
52

53

54

55
56
57
58
59
60
61

62
63
64
65
66
67
68
69
70
71
72
73

74
75
76
77
78
79
80
81
82
83
84
85
86

87
88
89
90
91
92
93
94
95
96
97
98
99
100
101
102

103
104
105
106
107
108
109

110

111
112
113
114
115
116

117
118
119
120

121
122
123
124

125
126

127
128
129
130
131
132
133
134
135
136
137
138
139
140

141
142
143
144
145
146
147
148
149

150

151
152

153
154

155
Оглавление инструкции
- Страница 1 из 156
Руководство пользователя - Страница 2 из 156
• Microsoft и Windows являются зарегистрированными торговыми марками Microsoft Corporation. • Windows® носит официальное название “Операционная система Microsoft® Windows®”. • Apple и Macintosh являются зарегистрированными торговыми марками Apple Inc. • Mac OS является торговой маркой Apple Inc. • - Страница 3 из 156
Àëãîðèòì ðàáîòû ñ BR-800 3 - Страница 4 из 156
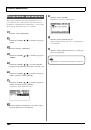
USING THE UNIT SAFELY 002c • Не вскрывайте прибор и не производите какие-либо модификации внутри него или сетевого адаптера. ………………………………………………………………………………………………………… • Не пытайтесь самостоятельно ремонтировать прибор - Страница 5 из 156
014 • Оберегайте прибор от сильных ударов (не роняйте его!) ………………………………………………………………………………………………………… • Не включайте сетевой шнур в розетку, к которой уже подключено много других электроприборов. Будьте внимательны при - Страница 6 из 156
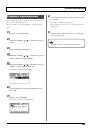
Âàæíûå çàìå÷àíèÿ Ïèòàíèå: èñïîëüçîâàíèå áàòàðåé 355b • 301 • Не подключайте аппаратуру к источнику электропитания, к которому уже подключены электроприборы с использованием преобразователя напряжения (такие как холодильник, стиральная машина, микроволновая печь или кондиционер), а также снабженные - Страница 7 из 156
Âàæíûå çàìå÷àíèÿ 556 • 708 При подсоединении/отсоединении шнуров и кабелей никогда не тяните за шнур электропитания. Беритесь только за сам разъем, чтобы не повредить внутренние элементы кабеля. • 558a • Чтобы не вызывать недовольства окружающих, постарайтесь устанавливать приемлемый уровень - Страница 8 из 156
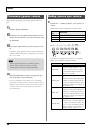
Ñîäåðæàíèå Алгоритм работы с BR-800 …………………….. 3 Выбор треков для записи………………………. 38 Техника безопасности ……………………………… 4 Выбор V-треков ……………………………………….. 39 Важные - Страница 9 из 156
Ñîäåðæàíèå Ðàáîòà ñ ýôôåêòàìè………… 53 Смена наборов ударных (Drum Kit) …………95 Выбор набора ударных …………………………… 95 Применение эффектов разрыва…………… 54 Патчи и банки эффектов ………………………. 54 Включение/отключение эффекта разрыва - Страница 10 из 156
Ñîäåðæàíèå Èñïîëüçîâàíèå USB …………117 Выходные установки (OUTPUT)………….. 133 Подготовка к работе с USB…………………. 118 Установки для LINE OUT и PHONES (OUTPUT MODE)………………….133 Сведения о “BR-800 DVD-ROM”……………. 118 Установка драйвера USB - Страница 11 из 156
Îñíîâíûå âîçìîæíîñòè Цифровой рекордер BR-800 позволяет создавать пьесы даже начинающим пользователям. Прибор облегчит процесс ознакомления со всеми преимуществами цифровой записи, начиная с записи и заканчивая мастерингом. Îäíîâðåìåííàÿ çàïèñü 4 òðåêîâ/îäíîâðåìåííîå âîñïðîèçâåäåíèå 8 òðåêîâ - Страница 12 из 156
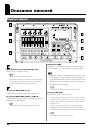
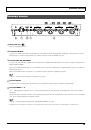
Îïèñàíèå ïàíåëåé Âåðõíÿÿ ïàíåëü fig.TopPanel.eps Èíäèêàòîðû PEAK Оповещают о возможности появления искажений сигнала MIC L/R (âñòðîåííûé ñòåðåîìèêðîôîí L/R) на входах INPUT 1 – 4 или встроенном стереомикрофоне. Используется для записи в стерео. “Выбор входного источника” (стр. 37) * Встроенные - Страница 13 из 156
Îïèñàíèå ïàíåëåé Ôåéäåðû òðåêîâ [1] – [7/8] Êíîïêà [RETRY] Устанавливают уровни громкости треков. Устанавливает локатор пьесы в точку, соответствующую на- Ôåéäåð [RHYTHM] чалу последней записи. Устанавливает уровень громкости ударных. Êíîïêà [REPEAT] Задает границы цикла воспроизведения. - Страница 14 из 156
Îïèñàíèå ïàíåëåé fig.TopPanel.eps Êíîïêà [TRACK] Êíîïêà [EFFECTS] Позволяет устанавливать тембральные характеристики тре- Обеспечивает доступ к экрану включения/отключения эф- ков, а также редактировать треки (стр. 105). фекта разрыва (стр. 54) и редакции его установок. Êíîïêà [MENU] Êíîïêà - Страница 15 из 156
Îïèñàíèå ïàíåëåé 6 Òåìï Темп пьесы. Äèñïëåé fig.Display.eps 7 Èçìåðèòåëü óðîâíÿ Отображает уровни сигналов. Элемент INPUT TRACK RHY L R Отображает различную информацию, содержание которой Описание Уровни на входах. Уровни громкости каждого трека. Уровень громкости ударных. Выходная громкость после - Страница 16 из 156
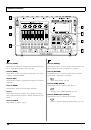
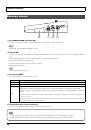
Îïèñàíèå ïàíåëåé Ëèöåâàÿ ïàíåëü fig.FrontPanel.eps 1 Ðàçúåì PHONES (ñòåðåîäæåê) Служит для подключения опциональных стереонаушников. Сигналы на данном разъеме идентичны сигналам на выходах LINE OUT. Громкость в наушниках устанавливается фейдером [MASTER]. Если OUTPUT MODE (стр. 133) установить в - Страница 17 из 156
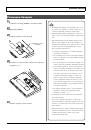
Îïèñàíèå ïàíåëåé Òûëüíàÿ ïàíåëü fig.RearPanel.eps 1 Çàùèòíûé ñëîò ( ) http://www.kensington.com/ 2 Ðàçúåìû LINE OUT Служит для вывода аналоговых аудиосигналов на внешнее звуковое оборудование (например, стереоусилитель) или на CD-рекордер и подобное оборудование для записи выходных сигналов BR-800 - Страница 18 из 156
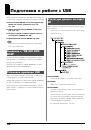
Îïèñàíèå ïàíåëåé Áîêîâàÿ ïàíåëü fig.SidePanel.eps 1 Ñëîò MEMORY CARD (äëÿ êàðòû SD) Служит для установки карты SD. Если карта SD не установлена, запись невозможна. “Карты SD, поддерживаемые BR-800” (стр. 142) 2 Ðàçúåì USB Служит для подключения BR-800 к компьютеру кабелем USB. Эта коммутация - Страница 19 из 156
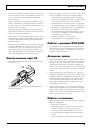
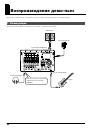
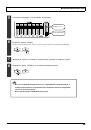
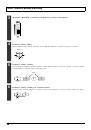
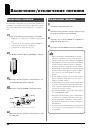
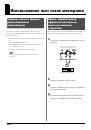
Îïèñàíèå ïàíåëåé Óñòàíîâêà áàòàðåé 1 2 Установите селектор [POWER] в положение “OFF”. • Переворачивая прибор, подкладывайте под его углы газеты или журналы, а также следите за тем, Переверните BR-800. чтобы не повредить кнопки и контроллеры. 3 • Переворачивая прибор, обращайтесь с ним аккуратно, - Страница 20 из 156
Äëÿ çàìåòîê 20 - Страница 21 из 156
Êðàòêîå ðóêîâîäñòâî 21 - Страница 22 из 156
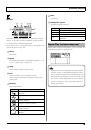
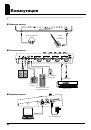
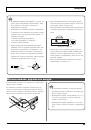
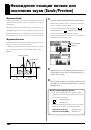
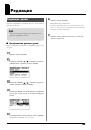
Âîñïðîèçâåäåíèå äåìî-ïüåñ Прилагаемая к BR-800 карта SD содержит демо-пьесы. Ниже описана процедура их воспроизведения. 1. Êîììóòàöèÿ Отключите питание BR-800 и мониторов и выполните следующую коммутацию. fig.Quick_EZ1-e.eps Мониторы Сетевой адаптер К разъемам LINE OUT К разъему GUITAR/BASS - Страница 23 из 156
Âîñïðîèçâåäåíèå äåìî-ïüåñ 2. Âêëþ÷åíèå ïèòàíèÿ * При включении питания придерживайтесь следующей очередности, в противном случае можно повредить оборудование. 1 На BR-800 установите фейдер [MASTER] в минимум. 2 Включите селектор [POWER]. 3 Включите питание мониторов. fig.Quick_DemoSong2-1.eps - Страница 24 из 156
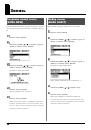
Âîñïðîèçâåäåíèå äåìî-ïüåñ 3. Âîñïðîèçâåäåíèå äåìî-ïüåñ 1 Нажмите кнопку [MENU]. Раскроется экран MENU. D_Menu_Input.eps 2 Кнопками CURSOR [ [ENTER]. ]/[ ] установите курсор на “SONG” и нажмите кнопку ]/[ ] установите курсор на “SELECT” и нажмите кнопку Раскроется экран SONG. D_Song_New.eps 3 - Страница 25 из 156
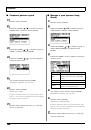
Âîñïðîèçâåäåíèå äåìî-ïüåñ 5 Установите фейдеры, как показано на рисунке. fig.Quick_DemoSong3-5-e.eps Фейдеры треков Фейдер [MASTER] 6 Нажмите кнопку [PLAY]. Начнется воспроизведение пьесы. Отрегулируйте громкость фейдером [MASTER]. fig.Quick_DemoSong3-6.eps 7 Фейдерами треков установите необходимую - Страница 26 из 156
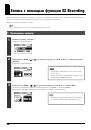
Çàïèñü ñ ïîìîùüþ ôóíêöèè EZ Recording Функция EZ Recording упрощает подготовку к записи. Просто выберите источник записи и требуемый музыкальный стиль, а наиболее подходящие установки эффекта и ритма будут произведены автоматически. Например, запишем исполнение на гитаре. См. “1. Коммутация” (стр. - Страница 27 из 156
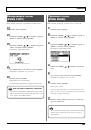
Çàïèñü ñ ïîìîùüþ ôóíêöèè EZ Recording 4 Нажмите кнопку [ENTER]. Раскроется экран EZ REC-3. На нем отображаются значения параметров SOURCE и CATEGORY (источник и ритм соответственно). D_EZ_Rec_Result_Guitar.eps Кнопками CURSOR [ ]/[ ] и колесом можно изменять эффект и ритм. 5 Нажмите кнопку [ENTER]. - Страница 28 из 156
Çàïèñü ñ ïîìîùüþ ôóíêöèè EZ Recording 3 Фейдером [MASTER] установите комфортный уровень мониторинга. 4 Нажмите кнопку [REC]. fig.Quick_EZ2-3.eps Кнопка [REC] начнет мигать красным цветом; BR-800 перейдет в режим готовности к записи. fig.Quick_EZ2-4-e.eps Мигает 5 Нажмите кнопку [PLAY]. Кнопка - Страница 29 из 156
Çàïèñü ñ ïîìîùüþ ôóíêöèè EZ Recording 3. Âîñïðîèçâåäåíèå 1 Нажмите кнопку [ZERO] для возврата к началу пьесы. Текущая временная позиция (положение локатора) изменится на 00:00:00-00:0. fig.Quick_EZ3-1.eps 2 Нажмите кнопку [PLAY]. Начнется воспроизведение пьесы. Отрегулируйте громкость фейдером - Страница 30 из 156
Çàïèñü ñ ïîìîùüþ ôóíêöèè EZ Recording Ñïèñîê ïàðàìåòðîâ EZ Recording SOURCE CATEGORY Выберите установку, наиболее соответствующую используе- Выберите музыкальный стиль, наиболее соответствующий мому входному источнику. исполняемому. Параметр E.GUITAR AC.GUITAR (GTR IN) AC.GUITAR (MIC) BASS VOCAL - Страница 31 из 156
Ïîäãîòîâêà ê çàïèñè 31 - Страница 32 из 156
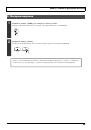
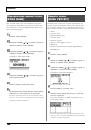
Êîììóòàöèÿ Произведите коммутацию, как показано на рисунке. Перед коммутацией обязательно отключите питание всего оборудования. fig.panel-e.eps ■ Ëèöåâàÿ ïàíåëü Гитара или бас-гитара Стереонаушники ■ Òûëüíàÿ ïàíåëü Портативный аудиоплеер Мониторы Микрофон Ножная педаль (FS-5U и т.д.) Педаль - Страница 33 из 156
Êîììóòàöèÿ • Во избежание повреждения динамиков и других устройств, перед коммутацией устанавливайте в минимум громкость и отключайте питание всех • При подключении кабелей с резисторами уровень сигналов может быть занижен. Поэтому желательно использовать кабели без резисторов. коммутируемых - Страница 34 из 156
Âêëþ÷åíèå/îòêëþ÷åíèå ïèòàíèÿ Âêëþ÷åíèå ïèòàíèÿ По окончании коммутации (стр. 32) включите питание оборудования в указанном ниже порядке. Нарушение порядка Îòêëþ÷åíèå ïèòàíèÿ 1 Остановите воспроизведение пьесы. включения оборудования может привести к его поврежде- 2 нию. 1 который использовался при - Страница 35 из 156
Çàïèñü/ Âîñïðîèçâåäåíèå 35 - Страница 36 из 156
Çàïèñü Ñîçäàíèå íîâîé ïüåñû (SONG NEW) В рамках BR-800 записанный материал называется “пьесой”. Âûáîð ïüåñû (SONG SELECT) Ниже описана процедура выбора пьесы для записи. Для создания новой пьесы выполните следующую процеду- 1 ру. 1 2 Нажмите кнопку [MENU]. 2 Нажмите кнопку [MENU]. Кнопками CURSOR [ - Страница 37 из 156
Çàïèñü Âûáîð âõîäíîãî èñòî÷íèêà Значение INPUT OFF MONO REC STEREO REC SIMUL REC 4TRACK REC Ниже описана процедура выбор источника записи и определения количества треков записи. 1 2 Нажмите кнопку [MENU]. Кнопками CURSOR [ ]/[ Описание Отключено (запись не производится). Запись производится на один - Страница 38 из 156
Çàïèñü Óñòàíîâêà óðîâíÿ çàïèñè Âûáîð òðåêîâ äëÿ çàïèñè Ниже описана процедура регулировки уровня записи на 1 трек. Кнопками 1 – 7/8 [REC] выберите трек (треки) для записи. 1 2 Закройте фейдер [MASTER]. Установите регулятор [REC LEVEL] приблизительно в центральное положение и медленно открывайте - Страница 39 из 156
Çàïèñü Âûáîð V-òðåêîâ Ïîíÿòèå V-òðåêà Каждый из треков BR-800 содержит 8 виртуальных “V-тре- Каждый трек содержит 8 виртуальных треков, каж- ков”. Для записи или воспроизведения можно выбрать лю- дый из которых в свою очередь можно выбрать для бой виртуальный трек. записи/воспроизведения. То есть, - Страница 40 из 156
Çàïèñü Óñòàíîâêà âõîäíîé ñòåðåîïàíîðàìû (PAN) Можно отрегулировать стереопанораму входного сигнала. Çàïèñü 1 Нажмите кнопку [REC]. Кнопка [REC] начнет мигать красным цветом, и BR-800 1 перейдет в режим готовности к записи. Нажмите кнопку [TRACK]. fig.Rec03-e.eps Мигает 2 Кнопками CURSOR [ ]/[ ] - Страница 41 из 156
Çàïèñü Çàïèñü öèêëà Âîñïðîèçâåäåíèå Эта функция копирует записанные данные после останова записи таким образом, что они будут занимать приблизи- 1 тельно 200 тактов. Нажмите кнопку [ZERO]. Локатор пьесы переместится в позицию 00:00:00-00:0. С помощью данной функции можно быстро создавать фразы, - Страница 42 из 156
Çàïèñü äîïîëíèòåëüíûõ ïàðòèé (íàëîæåíèå) Треки, кнопки [PLAY] которых горят или мигают, уже содержат записанные данные. Процесс прослушивания ранее записанного материала в процессе записи нового исполнения на другой трек называется “наложением”. Это позволяет записывать партии различных - Страница 43 из 156
Âîñïðîèçâåäåíèå â öèêëå (Repeat) Óñòàíîâêà ãðàíèö öèêëà 4 Чтобы запомнить установки цикла, сохраните пьесу. С помощью функции “повтора” можно циклично воспроизводить заданный регион. “Сохранение пьесы (SAVE CURRENT STATE)” (стр. 109) Выбранный регион циклично воспроизводится следующим образом. - Страница 44 из 156
Âîñïðîèçâåäåíèå â öèêëå (Repeat) Òî÷íàÿ óñòàíîâêà ãðàíèö öèêëà Поскольку граничные точки цикла устанавливаются в моменты нажатия кнопки [REPEAT], точность их задания может оказаться проблематичной. В таких случаях с помощью функции “квантования” можно установить границы цикла с точностью до одного - Страница 45 из 156
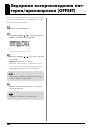
Ïåðåçàïèñü ñ âðåçêîé (Punch-In/Out) Если при записи были допущены ошибки исполнения или по каким-либо другим причинам, может потребоваться пе- 3 Запустите воспроизведение пьесы и регулятором резаписать только определенный регион трека. [REC LEVEL] установите уровень записи. В процессе - Страница 46 из 156
Ïåðåçàïèñü ñ âðåçêîé (Punch-In/Out) ■ Èñïîëüçîâàíèå íîæíîé ïåäàëè При записи инструментальных партий, чтобы облегчить ма- Àâòîìàòè÷åñêàÿ âðåçêà нипуляции с рекордером, для управления врезкой удобно Данная операция автоматически включает и отключает использовать опциональную ножную педаль (например, - Страница 47 из 156
Ïåðåçàïèñü ñ âðåçêîé (Punch-In/Out) 4 ■ Çàïèñü Кнопками CURSOR [ ]/[ ] установите курсор на “DISP” и колесом выберите единицы, в которых устанавливаются точки входа/выхода в режим врезки. Значение TIME MEASURE Описание Единицы времени. Единицы тактов. Ниже рассмотрен пример, в котором объясняется - Страница 48 из 156
Îòìåíà îïåðàöèè (UNDO/REDO) Иногда требуется отменить результат операции в случае, если результат записи вас не устраивает, или была допущена ошибка в установках. В таких случаях можно выполнить операцию “Undo”. Undo означает возврат к состоянию, предшествующему выполнению последней операции. Чтобы - Страница 49 из 156
Ïðîñìîòð èíôîðìàöèè î ïüåñå Ïðîñìîòð îñòàâøåãîñÿ âðåìåíè çàïèñè В процессе записи или в режиме готовности к записи мож- Ïðîñìîòð èíôîðìàöèè î ïüåñå Ниже описано, как просмотреть информацию о пьесе. но просмотреть оставшееся для записи время. 1 2 1 Нажмите кнопку [MENU]. Нажмите кнопку [MENU]. 2 - Страница 50 из 156
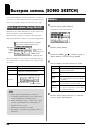
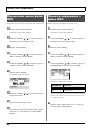
Áûñòðàÿ çàïèñü (SONG SKETCH) Если перевести BR-800 в режим Song Sketch, его можно использовать для записи/воспроизведения стереофайлов WAV. Çàïèñü Этот подход упрощает запись музыкальных идей и фраз. Âõîä â ðåæèì Song Sketch Нажмите кнопку [SONG SKETCH] для входа в режим Song 1 Нажмите кнопку [SONG - Страница 51 из 156
Áûñòðàÿ çàïèñü (SONG SKETCH) 6 Ñòèðàíèå ôàéëà WAV Нажмите кнопку [REC]. Начнется запись. Ниже описано, как стереть файл WAV. Кнопка [PLAY] загорится зеленым цветом, а кнопка [REC] – красным. 1 fig.Rec04-e.eps Горит Горит Нажмите кнопку [SONG SKETCH]. Отобразится экран SONG SKETCH. 7 2 По окончании - Страница 52 из 156
Áûñòðàÿ çàïèñü (SONG SKETCH) Îïðåäåëåíèå èìåíè ôàéëà WAV Ниже приводится процедура определения имени файла WAV. 1 Нажмите кнопку [SONG SKETCH]. Ïðîñìîòð èíôîðìàöèè î ôàéëå WAV Можно просмотреть информацию о файле WAV. 1 Отобразится экран SONG SKETCH. 2 Кнопками CURSOR [ ]/[ ] установите курсор на - Страница 53 из 156
Ðàáîòà ñ ýôôåêòàìè 53 - Страница 54 из 156
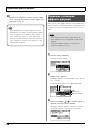
Ïðèìåíåíèå ýôôåêòîâ ðàçðûâà BR-800 имеет независимые процессоры, которые реализуют В рамках каждого банка имеются следующие типы патчей работу эффектов 4 типов: эффекты разрыва, эффекты пет- эффектов. ли, эквалайзеры треков и эффекты мастеринга. Ïðåñåòíûå ïàò÷è Их можно использовать одновременно и - Страница 55 из 156
Ïðèìåíåíèå ýôôåêòîâ ðàçðûâà Âêëþ÷åíèå/îòêëþ÷åíèå ýôôåêòà ðàçðûâà 3 Кнопками CURSOR [ ]/[ ] установите курсор на “EZ TONE” и нажмите кнопку [ENTER]. Отобразится экран EZ TONE. 1 4 Нажмите кнопку [EFFECTS]. Кнопка [EFFECTS] загорится, и эффект разрыва включится. Кнопками [CURSOR] выберите на экране - Страница 56 из 156
Ïðèìåíåíèå ýôôåêòîâ ðàçðûâà 5 Относительно сохранения текущих настроек эффекта см. параграф “Сохранение установок эффекта раз- Ðåäàêöèÿ óñòàíîâîê ýôôåêòà ðàçðûâà рыва (Write)” (стр. 57). Чтобы создать новый эффект выберите существующий патч с наиболее близким к задуманному звуком, отредактируйте - Страница 57 из 156
Ïðèìåíåíèå ýôôåêòîâ ðàçðûâà 4 Кнопками CURSOR [ ]/[ ] устанавливайте курсор на эффект и колесом включайте/отключайте его. Состояние эффектов отображается с помощью иконок. Индикация Описание Ñîõðàíåíèå óñòàíîâîê ýôôåêòà ðàçðûâà (Write) Ниже описано, как задавать имя отредактированным установкам - Страница 58 из 156
Ïðèìåíåíèå ýôôåêòîâ ðàçðûâà Ñìåíà ìåñòîïîëîæåíèÿ ýôôåêòà ðàçðûâà (LOCATION) ■ INPUT <REC DRY> Эта установка позволяет прослушивать звук, прошедший через эффект разрыва, но записываться будет необработанный эффектом сигнал (т.е., прямой сигнал). Это удобно при BR-800 позволяет изменять - Страница 59 из 156
Ïðèìåíåíèå ýôôåêòîâ ðàçðûâà Ñïèñîê àëãîðèòìîâ Ниже приведены алгоритмы (доступные эффекты и порядок их коммутации), которые могут использоваться в качестве эффектов разрыва. Доступные алгоритмы зависят от банка. Чтобы выбрать необходимый алгоритм, сначала выберите банк, содержащий данный алгоритм, - Страница 60 из 156
Ïðèìåíåíèå ýôôåêòîâ ðàçðûâà 3. GUITAR TO BASS Имитирует звучание бас-гитары при игре на электрогитаре. * Данный эффект не предусматривает игру аккордами. fig.GuitarToBass.eps -[G->B]-[COMP/LM]-[WAH]-[DIST] [AMP]-[EQ]-[NS]-[MOD]= Guitar to Bass 5. BASS MULTI Это — мультиэффект для бас-гитары. - Страница 61 из 156
Ïðèìåíåíèå ýôôåêòîâ ðàçðûâà Áàíê: MICROPHONE Áàíê: LINE 6. VOCAL MULTI 8. STEREO MULTI Это — мультиэффект для вокала. Он обеспечивает наиболее Этот алгоритм объединяет в себе стереоэффекты 7 типов. оптимальные для вокала эффекты. fig.StereoMulti.eps fig.VocalMulti.eps =[COMP/LM]=[LOFI]=[EQ]=[NS] - Страница 62 из 156
Ïðèìåíåíèå ýôôåêòîâ ðàçðûâà Áàíê: SIMUL 9. VO + GT.AMP Этот алгоритм предназначен для одновременной записи вокала и электрогитары. Для электрогитары предусмотрена имитация звука предусилителя и кабинета. (GUITAR) (MIC) fig.VOGTAMPGuitar.eps fig.VOGTAMPMic.eps -[COMP/LM]-[AMP]-[EQ]-[NS]-[MOD]-[DLY]- - Страница 63 из 156
Ïðèìåíåíèå ýôôåêòîâ ðàçðûâà 10. VO + AC.SIM 11. VO + ACOUSTIC Этот алгоритм предназначен для одновременной записи во- Этот алгоритм предназначен для одновременной записи во- кала и электрогитары. кала и акустической гитары. Для электрогитары предусмотрена имитация звука акусти- Для гитары - Страница 64 из 156
Ïðèìåíåíèå ýôôåêòîâ ðàçðûâà Áàíê: 4INPUT Ñïèñîê ïàðàìåòðîâ 12. 4-INPUT MULTI Торговые марки, упомянутые в данном документе, принадлежат своим законным владельцам и не имеют отношения к фирме BOSS. Эти компании не являются филиалами BOSS и не имеют лицензий на изготовление BOSS BR-800. Их торговые - Страница 65 из 156
Ïðèìåíåíèå ýôôåêòîâ ðàçðûâà Параметр/ Диапазон Описание Параметр/ Диапазон ATTACK 0 – 100 Лимитер, разделяющий входной сигнал на 4 полосы частот — ультра-НЧ, НЧ, ВЧ и ультра-ВЧ с независимой обработкой в диапазонах НЧ и ВЧ. Частоты раздела полос устанавливаются параметрами XOVER F L, M и H. Атака - Страница 66 из 156
Ïðèìåíåíèå ýôôåêòîâ ðàçðûâà Описание RELEASE *3 0 – 100 Создает уникальный эффект вау за счет изменения частоВремя отключения эффекта после спада сигнала ниже уровня порога. Пороговое значение (для диапазона НЧ), выше которого начинается ограничение уровня сигнала. Коэффициент компрессии сигнала - Страница 67 из 156
Ïðèìåíåíèå ýôôåêòîâ ðàçðûâà Параметр/ Диапазон Описание Параметр/ Диапазон FREQUENCY *3 Описание BLUES OD Звук Crunch эффекта BOSS BD-2. Производит дисторшн, подчеркивающий все нюансы звукоизвлечения. CRUNCH Яркий резкий звук с элементами дисторшна. NATURAL OD Овердрайв с естественными искажениями. - Страница 68 из 156
Ïðèìåíåíèå ýôôåêòîâ ðàçðûâà Параметр/ Диапазон Описание Параметр/ Диапазон 0 – 100 Громкость прямого сигнала. E.LEVEL (Effect Level) 0 – 100 Äëÿ àëãîðèòìîâ “BASS MULTI” èëè “GUITAR TO BASS” Параметр/ Диапазон Громкость сигнала эффекта. D.LEVEL (Direct Level) 0 – 100 Громкость прямого сигнала. - Страница 69 из 156
Ïðèìåíåíèå ýôôåêòîâ ðàçðûâà HI-GAIN T-AMP R-FIER MS MODERN MS CLASSIC BG LEAD Описание Моделирует звук левого входа Matchless D/C-30. Имитация лампового усилителя MATCH DRIVE широко используется в различных стилях, от блюза до рока. FAT MATCH Моделирует звук Matchless с модифицированным усилением. - Страница 70 из 156
Ïðèìåíåíèå ýôôåêòîâ ðàçðûâà Параметр/ Диапазон Описание Параметр/ Диапазон 1×10” Компактный открытый кабинет с одним 10” динамиком. MIC LEV (Mic Level) 1×12” Компактный открытый кабинет с одним 12” динамиком. D.LEVEL (Direct Level) 2×12” Компактный открытый кабинет с двумя 12” динамиками. 4×10” - Страница 71 из 156
Ïðèìåíåíèå ýôôåêòîâ ðàçðûâà Параметр/ Диапазон Описание BRIGHT *3 Параметр/ Диапазон Описание MIC LEV (Mic Level) Включает/отключает установку «прозрачности». 0 – 100 OFF Прозрачность не используется. D.LEVEL (Direct Level) ON Прозрачность включается и создает более светлый и отчетливый тон. 0 – - Страница 72 из 156
Ïðèìåíåíèå ýôôåêòîâ ðàçðûâà EQUALIZER NOISE SUPPRESSOR Управляет тембром звука. Для диапазонов высокой и низ- Данный эффект понижает шумы и фон, вырабатываемые кой середины реализована параметрическая эквализация. датчиками гитары. Поскольку подавление шума синхронизировано с огибающей гитарного - Страница 73 из 156
Ïðèìåíåíèå ýôôåêòîâ ðàçðûâà Параметр/ Диапазон MODULATION LOW LEVEL С помощью TYPE выбирается эффект модуляции. Параметр/ Диапазон 0 – 100 Описание Усиление в низкочастотном диапазоне. HIGH FREQ (High Frequency) 800Hz – 8.00kHz ON/OFF OFF, ON Описание Включает/отключает эффект. Высокочастотный - Страница 74 из 156
Ïðèìåíåíèå ýôôåêòîâ ðàçðûâà BASS SIM (Bass Simulator) SLOW GEAR Эффект эмуляции индивидуальных характеристик таких ги- Производит эффект “скрипичного” звучания. тарных компонентов, как звукосниматели и типы конструкции корпуса. Это позволяет с помощью всего лишь одного инструмента имитировать - Страница 75 из 156
Ïðèìåíåíèå ýôôåêòîâ ðàçðûâà SITAR SIM (Sitar Simulator) P SHIFTER Данный эффект имитирует звучание ситара. Этот эффект смещает высоту звучания оригинального тона вверх или вниз в диапазоне двух октав. Параметр/ Диапазон Описание TONE -50 – +50 Тембр звучания эффекта. При увеличении значения высокие - Страница 76 из 156
Ïðèìåíåíèå ýôôåêòîâ ðàçðûâà PHASER FLANGER Фазер добавляет сигнал с переменной фазой к прямому сиг- Флэнжер создает характерный эффект, напоминающий звук налу для получения «вращающегося» звука. реактивного самолета. Параметр/ Диапазон Параметр/ Диапазон Описание TYPE RATE Выбор количества каскадов - Страница 77 из 156
Ïðèìåíåíèå ýôôåêòîâ ðàçðûâà ROTARY PAN Данный эффект имитирует звучание вращающихся динами- Эффект изменяет баланс громкости левого и правого кана- ков. лов стереопанорамы для перемещения звука между колонками. Параметр/ Диапазон Описание SPEED SEL (Speed Select) SLOW, FAST Частота вращения - Страница 78 из 156
Ïðèìåíåíèå ýôôåêòîâ ðàçðûâà CHORUS DBL DELAY (Doubling Delay) Хорус формирует слегка расстроенный сигнал и добавляет Добавляя немного задержанный по времени сигнал к пря- его к основному сигналу для придания ему глубины и объ- мому, данный эффект создает иллюзию совместного звуча- ема. ния - Страница 79 из 156
Ïðèìåíåíèå ýôôåêòîâ ðàçðûâà DELAY ACOUSTIC SIMULATOR Данный эффект добавляет к прямому сигналу задержан- Эффект эмуляции индивидуальных характеристик таких ги- ный, создавая пространственное звучание или спецэффекты. тарных компонентов, как звукосниматели и типы конструкции корпуса. Это позволяет с - Страница 80 из 156
Ïðèìåíåíèå ýôôåêòîâ ðàçðûâà Параметр/ Диапазон Описание TYPE Выбор типа эффекта GUITAR TO BASS. JB Звучание Fender Jazz Bass. PB Звучание Fender Precision Bass. REAR VOL (Rear Volume) *1 0 – 100 Громкость заднего датчика. При значении 0 звук будет отсутствовать. FRONT VOL (Front Volume) *1 0 – 100 - Страница 81 из 156
Ïðèìåíåíèå ýôôåêòîâ ðàçðûâà TONE/SFX Эффект изменяет тембральный характер или создает спецэффекты. Параметр/ Диапазон Описание ON/OFF OFF, ON Включает/отключает эффект. DISTORTION Производит искаженный голос. RADIO Производит голос, как по радио. STROBE “Нарезает” звук голоса. CHORUS Обогащает звук - Страница 82 из 156
Ïðèìåíåíèå ýôôåêòîâ ðàçðûâà LOW CUT Обрезной фильтр, удаляющий низкочастотные помехи. Параметр/ Диапазон Параметр/ Диапазон PRE FILTER *4 OFF, ON Включает/отключает эффект. SAMPLE RATE *4 DEPTH 20 – 2000 Hz Частота среза, ниже которой отфильтровываются низкочастотные помехи. OFF, 1/2 – 1/32 Эффект, - Страница 83 из 156
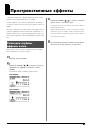
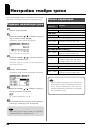
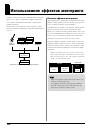
Ïðîñòðàíñòâåííûå ýôôåêòû С помощью встроенных в BR-800 “эффектов петли” можно добавить звуку пространственность и глубину. 3 Глубину эффекта петли можно устанавливать независимо для каждого трека или входа, регулируя уровень посыла на Кнопками CURSOR [ ]/[ ] и колесом установите уровень посыла для - Страница 84 из 156
Ïðîñòðàíñòâåííûå ýôôåêòû Ðåäàêöèÿ ýôôåêòà ïåòëè Ñïèñîê ïàðàìåòðîâ 1 REVERB Нажмите кнопку [TRACK]. Добавляет к сигналу реверберационные отражения. 2 Кнопками CURSOR [ ]/[ ] установите курсор на “REVERB” или “CHO/DLY” и нажмите кнопку [ENTER]. Отобразится экран установки уровня посыла. D_Reverb.eps - Страница 85 из 156
Ïðîñòðàíñòâåííûå ýôôåêòû Параметр/ Диапазон Описание CHORUS/DELAY E.LEVEL (Effect Level) 0 – 100 Громкость эффекта. SPRG SENS (Spring Sensitivity) *1 0 – 100 *1 Чувствительность эффекта пружинной реверберации. Чем выше значение, тем выразительнее эффект даже при слабом звукоизвлечении. Параметр/ - Страница 86 из 156
Íàñòðîéêà òåìáðà òðåêà Каждый трек BR-800 содержит независимый трехполосный эквалайзер, позволяющий произвести коррекцию тембра. Ñïèñîê ïàðàìåòðîâ Ðåäàêöèÿ ýêâàëàéçåðà òðåêà Параметр/ Диапазон 1 ON/OFF 2 Нажмите кнопку [TRACK]. OFF, ON Описание Включает/отключает эффект. LOW GAIN Кнопками CURSOR [ - Страница 87 из 156
Ðàáîòà ñ óäàðíûìè 87 - Страница 88 из 156
Îáçîð ðèòì-ñåêöèè BR-800 имеет ритм-секцию, работающую независимо от аудиотреков 1 – 7/8. Ритм можно использовать в качестве метронома при записи К пресетным относятся паттерны, соответствующие или же создавать свои аккомпанементы ударных из встро- вступлению, куплету, сбивке и коде. Определить - Страница 89 из 156
Îáçîð ðèòì-ñåêöèè ■ Àðàíæèðîâêè Паттерн можно использовать автономно, в качестве метронома, но при этом ритм не будет меняться в течение всей Çâóêè óäàðíûõ (íàáîðû óäàðíûõ) пьесы. Чтобы создать пьесу с музыкальными вариациями, необходимо располагать паттерны в определенном порядке, например, - Страница 90 из 156
Îáçîð ðèòì-ñåêöèè Âêëþ÷åíèå/îòêëþ÷åíèå ðèòìà Ïåðåêëþ÷åíèå ðåæèìîâ Pattern è Arrangement BR-800 имеет два режима работы ритм-секции: режим пат- 1 Нажмите кнопку [RHYTHM]. Кнопка [RHYTHM] загорится, и зазвучит партия ударных. fig.rhythm_on_off-e.eps Горит тернов (Pattern) и режим аранжировки - Страница 91 из 156
Âîñïðîèçâåäåíèå ïàòòåðíîâ Ниже описаны выбор и цикличное воспроизведение одного из встроенных паттернов. 8 Фейдерами [RHYTHM] и [MASTER] установите требуемый уровень громкости. 1 Нажмите кнопку [RHYTHM]. Кнопка [RHYTHM] загорится, сигнализируя о включении ритм-секции. 2 Кнопками CURSOR [ 9 Чтобы - Страница 92 из 156
Âîñïðîèçâåäåíèå ïàòòåðíîâ Èçìåíåíèå òåìïà Находясь на экране Play, можно изменять темп воспроизведения паттерна. 1 Кнопками CURSOR [ ]/[ ] установите курсор на индикатор темпа. D_Play_Tempo.eps 2 Колесом измените темп. Темп воспроизведения паттерна изменится. Óñòàíîâêà òåìïà êíîïêîé [TAP TEMPO] - Страница 93 из 156
Âîñïðîèçâåäåíèå àðàíæèðîâîê Ниже описаны выбор и воспроизведение одной из встроенных аранжировок. 9 Фейдерами [RHYTHM] и [MASTER] установите требуемый уровень громкости. 1 Нажмите кнопку [RHYTHM]. Кнопка [RHYTHM] загорится, сигнализируя о включении ритм-секции. 2 Кнопками CURSOR [ 10 Чтобы - Страница 94 из 156
Âîñïðîèçâåäåíèå àðàíæèðîâîê èçìåíåíèå òåìïà Находясь на экране Play, можно изменять темп воспроизведения аранжировки. 1 Кнопками CURSOR [ ]/[ ] установите курсор на индикатор темпа. D_Play_Tempo.eps 2 Колесом измените темп. Темп воспроизведения аранжировки изменится. Óñòàíîâêà òåìïà êíîïêîé [TAP - Страница 95 из 156
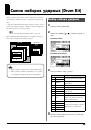
Ñìåíà íàáîðîâ óäàðíûõ (Drum Kit) Набор ударных представляет собой совокупность ударных инструментов. BR-800 содержит 9 “пресетных наборов удар- Âûáîð íàáîðà óäàðíûõ ных”. С помощью “BR-800 Rhythm Editor” можно создать 5 пользовательских наборов ударных. Наборы ударных сохраняются 1 Нажмите кнопку - Страница 96 из 156
Ñîçäàíèå àðàíæèðîâêè BR-800 позволяет размещать паттерны в нужном порядке Ниже описана процедура создания аранжировки. для создания аранжировки, то есть структуры всей пьесы от вступления до коды. После создания аранжировки ее можно сохранить в качестве аранжировки пьесы. 1 Аранжировка может - Страница 97 из 156
Ñîçäàíèå àðàíæèðîâêè 7 Кнопками CURSOR [ ]/[ ] установите курсор на редактируемый параметр и колесом измените значе• Начальный такт для шага 1 всегда равен “001”. ние. Нажав кнопку [PLAY], можно прослушать паттерн те- Его изменить невозможно. • Начальный такт не может совпадать с началь- кущего - Страница 98 из 156
Ñîçäàíèå àðàíæèðîâêè Âñòàâêà øàãà Ñòèðàíèå øàãà В текущий шаг можно вставить новый. Ниже описана процедура стирания выбранного шага. Пос- fig.04-550.eps ле стирания шага его номер присваивается следующему шаVerse гу. Insert fig.04-570.eps Шаг 1 Шаг 2 Шаг 3 Шаг 1 Шаг 2 Шаг 3 Шаг 4 Intro Verse Fill - Страница 99 из 156
Ñîçäàíèå àðàíæèðîâêè Îïðåäåëåíèå èìåíè àðàíæèðîâêè Аранжировке пьесы можно назначить имя, состоящее максимум из 8 символов. 1 2 Нажмите кнопку [RHYTHM]. Кнопками CURSOR [ ]/[ 9 Нажмите кнопку [EXIT] несколько раз, чтобы вернуться на экран Play. Экран отобразит “Keep power on!”, и отредактированное - Страница 100 из 156
Ñîçäàíèå àðàíæèðîâêè Êîïèðîâàíèå àðàíæèðîâêè 9 Отобразится запрос на подтверждение. Чтобы отредактировать пресетную аранжировку или создать вариацию уже существующей, необходимо сначала Нажмите кнопку [ENTER]. D_Arrange_Erase_Sure.eps скопировать модифицируемую аранжировку, а затем операции - Страница 101 из 156
Ñîçäàíèå àðàíæèðîâêè Ñòèðàíèå àðàíæèðîâêè 8 Для выполнения операции стирания нажмите кноп- Ниже описана процедура стирания шага 2 и всех последую- ку [ENTER]. щих шагов из аранжировки пьесы. Для отмены нажмите кнопку [EXIT]. Шаг 1 не стирается, он устанавливается в “Metro” (метро- * Экран отобразит - Страница 102 из 156
Çàäåðæêà âîñïðîèçâåäåíèÿ ïàòòåðíà/àðàíæèðîâêè (OFFSET) Можно задать временной сдвиг, на который будет задержано воспроизведение паттерна или аранжировки относительно воспроизведения аудиотреков. 1 2 Нажмите кнопку [RHYTHM]. Кнопками CURSOR [ ]/[ ] установите курсор на “OFFSET” и нажмите кнопку - Страница 103 из 156
Ðåäàêöèÿ 103 - Страница 104 из 156
Íàõîæäåíèå ïîçèöèè íà÷àëà èëè îêîí÷àíèÿ çâóêà (Scrub/Preview) Ôóíêöèÿ Scrub В процессе редакции пьесы может потребоваться точное оп- 1 Удерживая кнопку [STOP], нажмите кнопку [PLAY]. ределение позиции начала звука или региона для записи с Кнопка [PLAY] начнет мигать, и начнется воспроизве- - Страница 105 из 156
Ðåäàêöèÿ 6 Ðåäàêöèÿ òðåêà Копирование будет выполнено. Доступно копирование и стирание треков, а также импорт данных Song Sketch. Нажмите кнопку [ENTER]. * В процессе обновления данных на дисплей выводится “Keep power on!”. Если на дисплее отображается данное сообщение, отключать питание - Страница 106 из 156
Ðåäàêöèÿ ■ Ñòèðàíèå äàííûõ òðåêà 1 2 1 Нажмите кнопку [TRACK]. Кнопками CURSOR [ ]/[ ■ Èìïîðò â òðåê äàííûõ Song Sketch ] установите курсор на 2 3 ]/[ ] установите курсор на ]/[ ]/[ ] установите курсор на Кнопками CURSOR и колесом выберите параметры импорта данных. ] и колесом выберите стираемый - Страница 107 из 156
Ðåäàêöèÿ Êîïèðîâàíèå ïüåñû (SONG COPY) Ниже описана процедура копирования текущей пьесы. 1 2 Óäàëåíèå ïüåñû (SONG ERASE) Ниже описана процедура удаления пьесы с карты SD. 1 Нажмите кнопку [MENU]. 2 Кнопками CURSOR [ ]/[ ] установите курсор на 3 Кнопками CURSOR [ ]/[ ] установите курсор на ]/[ ] - Страница 108 из 156
Ðåäàêöèÿ Îïðåäåëåíèå èìåíè ïüåñû (SONG NAME) При создании новой пьесы она автоматически получает имя, например “SONG 0001”. По окончании создания пьесы рекомендуется задать ей информационно емкое имя в целях упрощения поиска. 1 Çàùèòà ïüåñû (SONG PROTECT) Созданная пьеса может быть случайно - Страница 109 из 156
Ðåäàêöèÿ Ñîõðàíåíèå ïüåñû (SAVE CURRENT STATE) В качестве данных пьесы BR-800 сохраняются следующие установки. • Записанные данные • Состояние микшера (панорама, эквализация треков и т.д.) • Патчи пьес для эффекта разрыва • Патчи пьес для эффекта мастеринга • Аранжировка/паттерн • Эффект петли • - Страница 110 из 156
Äëÿ çàìåòîê 110 - Страница 111 из 156
Ìàñòåðèíã 111 - Страница 112 из 156
Èñïîëüçîâàíèå ýôôåêòîâ ìàñòåðèíãà В данной главе изложен процесс микширования записанных треков на два трека и применение “эффекта мастеринга” для создания законченной композиции с оптимальным уровнем громкости. Ïîíÿòèå ýôôåêòà ìàñòåðèíãà При создании CD из записанных пьес крайне важно поддерживать - Страница 113 из 156
Èñïîëüçîâàíèå ýôôåêòîâ ìàñòåðèíãà 1 6 Нажмите кнопку [MENU]. Нажмите кнопку [MASTER FX]. Кнопка [MASTER FX] загорится, и эффект мастеринга 2 включится. Кнопками CURSOR [ ]/[ ] установите курсор на “MASTERING” и нажмите кнопку [ENTER]. Отобразится экран MASTER FX. MasteringFX-e.eps P: пресетный / S: - Страница 114 из 156
Èñïîëüçîâàíèå ýôôåêòîâ ìàñòåðèíãà 12 По окончании мастеринга нажмите кнопку [STOP]. 2 Выберите эффект мастеринга. Результат сохранится на выбранный для записи трек, и Кнопками CURSOR [ отобразится экран PREVIEW. сетный, пользовательский патч или патч пьесы, а так- D_Master_Preview.eps ]/[ ] и - Страница 115 из 156
Èñïîëüçîâàíèå ýôôåêòîâ ìàñòåðèíãà Ñîõðàíåíèå óñòàíîâîê ýôôåêòà ìàñòåðèíãà (Write) Ниже описано, как определить имя созданного патча и сохранить его в качестве нового патча. 1 Ñïèñîê ïàðàìåòðîâ Параметр/ Значение DYNAMICS На экране выбора эффекта мастеринга кнопкой CURSOR [ ] установите курсор на - Страница 116 из 156
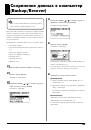
Èñïîëüçîâàíèå ïüåñ ïîñëå ìàñòåðèíãà Ïåðåâîä ïüåñû â ôîðìàò, ðàñïîçíàâàåìûé êîìïüþòåðîì Созданные в BR-800 пьесы можно преобразовать в файлы WAV/AIFF с помощью “BOSS BR Series Wave Converter”. После такого преобразования становятся доступными следу- Çàïèñü îáðàáîòàííîé ýôôåêòîì ìàñòåðèíãà ïüåñû íà - Страница 117 из 156
Èñïîëüçîâàíèå USB 117 - Страница 118 из 156
Ïîäãîòîâêà ê ðàáîòå ñ USB BR-800 оборудован интерфейсом USB. При подключении его к компьютеру становятся доступными следующие операции. ● Èñïîëüçîâàíèå BR-800 â êà÷åñòâå àóäèîèíòåðôåéñà èëè ïàíåëè óïðàâëåíèÿ (ñòð. 119, ñòð. 120). ● Îáìåí äàííûìè ìåæäó BR-800 è êîìïüþòåðîì (ñòð. 121). ● Ñîçäàíèå - Страница 119 из 156
Ðàáîòà BR-800 â êà÷åñòâå àóäèîèíòåðôåéñà Перед подключением BR-800 к компьютеру необходимо установить драйвер USB (стр. 118). Çàïèñü â BR-800 àóäèîñèãíàëîâ êîìïüþòåðà Воспроизводящиеся в компьютере аудиосигналы можно передать по USB в BR-800 и записать их на треки BR-800. Çàïèñü àóäèîñèãíàëîâ èç - Страница 120 из 156
Ðàáîòà BR-800 â êà÷åñòâå ïàíåëè óïðàâëåíèÿ Ðàáîòà ñ SONAR LE Перед подключением BR-800 к компьютеру необходимо установить драйвер USB (стр. 118). SONAR LE находится на “BR-800 DVD-ROM”. См. файл “ReadmeEN.txt” на “BR-800 DVD-ROM”. Также см. документацию на SONAR LE, находящуюся на “BR-800 DVD-ROM”. - Страница 121 из 156
Îáìåí äàííûìè ñ êîìïüþòåðîì Ïåðåäà÷à ôàéëîâ WAV • Перед подключением BR-800 к компьютеру необходимо установить драйвер USB (стр. 118). • BR-800 не поддерживает длинные имена файлов. BR-800 поддерживает работу с файлами WAV, имею- Длинные имена отображаются некорректно. щими следующий формат. Имя - Страница 122 из 156
Îáìåí äàííûìè ñ êîìïüþòåðîì 5 Нажмите кнопку [ENTER]. 7 Отобразится экран Idling. Отключите BR-800 от компьютера. Windows D_USB_Idling.eps В “My Computer” правой кнопкой мыши нажмите иконку “BOSS_BR-800” (или “removable disk (*:)”) и выберите “Eject”. Mac OS Перетащите иконку “BR-800” на иконку - Страница 123 из 156
Ñîõðàíåíèå äàííûõ â êîìïüþòåð (Backup/Recover) 4 ]/[ ] установите курсор на “BACKUP” и нажмите кнопку [ENTER]. Перед подключением BR-800 к компьютеру необходимо установить драйвер USB (стр. 118). Кнопками CURSOR [ Отобразится экран BACKUP. D_USB_Backup.eps Когда карта SD заполнена или требуется - Страница 124 из 156
Ñîõðàíåíèå äàííûõ â êîìïüþòåð (Backup/Recover) • При архивировании/восстановление необходимо перетаскивать мышью всю папку “ROLAND”. Если скопировать только часть этой папки, использование данных в BR-800 будет невозможно. • В процессе операции восстановления экран компьютера может отобразить - Страница 125 из 156
Óñòàíîâêè USB Ниже описаны установки BR-800, относящиеся к USB. Произведите эти установки согласно конкретной ситуации. 1 Параметр/ Описание Значение DIR MONITOR (Direct monitor) Определяет, будут или нет аудиосигналы BR-800 подаваться на разъемы PHONES и LINE OUT. Нажмите кнопку [MENU]. - Страница 126 из 156
Óñòàíîâêè USB Параметр/ Описание Значение OUT POSITION (Output position) Определяет выводимый через USB сигнал BR-800. * В режиме Control Surface сигнал выводится после регулятора [REC LEVEL]. Выводится сигнал после фейдера MASTER [MASTER]. Выводится сигнал после регулятора [REC LEVEL] (т.e., - Страница 127 из 156
Äîïîëíèòåëüíûå ôóíêöèè 127 - Страница 128 из 156
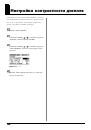
Íàñòðîéêà êîíòðàñòíîñòè äèñïëåÿ В зависимости от места расположения BR-800 и условий работы изображение на дисплее может стать трудно различимым. Если это произошло, отрегулируйте контрастность дисплея с помощью следующей процедуры. 1 2 Нажмите кнопку [MENU]. Кнопками CURSOR [ ]/[ ] установите - Страница 129 из 156
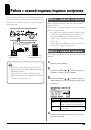
Ðàáîòà ñ íîæíîé ïåäàëüþ/ïåäàëüþ ýêñïðåññèè Если подключить ножную педаль (опциональную BOSS FS5U или Roland DP-2) к разъему FOOT SW/EXP PEDAL тыль- Ðàáîòà ñ ïåäàëüþ ýêñïðåññèè ной панели, с ее помощью можно будет управлять различПедаль экспрессии можно использовать при включенном ными функциями. - Страница 130 из 156
Íàñòðîéêà èíñòðóìåíòà (TUNER) BR-800 имеет хроматический тюнер для настройки гитар и бас-гитар. ■ Èíäèêàöèÿ ïðè íàñòðîéêå Встроенный в BR-800 тюнер отображает опорный тон, имя Ниже описана процедура настройки гитары. * При использовании тюнера воспроизведение или запись недо- ноты и шкалу - Страница 131 из 156
Íàñòðîéêà èíñòðóìåíòà (TUNER) 3 Используя шкалу настройки, настраивайте гитару Óñòàíîâêà îïîðíîãî òîíà так, чтобы загорелся центральный индикатор. Опорный тон для настройки гитары задается относительно Если высота тона находится в рамках ±50 центов от частоты ноты A4 (центральное A на клавиатуре - Страница 132 из 156
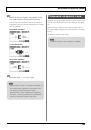
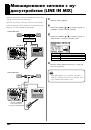
Ìèêøèðîâàíèå ñèãíàëà ñ àóäèîóñòðîéñòâà (LINE IN MIX) Функция “Line In Mix” позволяет микшировать сигнал входа LINE IN с сигналом выхода LINE OUT. 1 Нажмите кнопку [MENU]. Функция “Line In Mix” позволяет избежать использования внешнего микшера. Сигнал внешнего аудиоустройства микшируется с сигналом - Страница 133 из 156
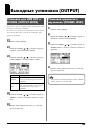
Âûõîäíûå óñòàíîâêè (OUTPUT) Óñòàíîâêè äëÿ LINE OUT è PHONES (OUTPUT MODE) Óñòàíîâêà ãðîìêîñòè â íàóøíèêàõ (PHONES LEVEL) Аудиосигналы треков и ударных можно распределить между выходами LINE OUT и PHONES. 1 Нажмите кнопку [MENU]. Это удобно, когда требуется воспроизводить сигналы треков через выходы - Страница 134 из 156
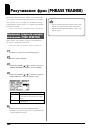
Ðàçó÷èâàíèå ôðàç (PHRASE TRAINER) BR-800 имеет функцию Phrase Trainer, позволяющую понизить скорость воспроизведения (Time Stretch) или ослабить сигнал вокала или соло-гитары, расположенный в центре стереопанорамы (Center Cancel), что упрощает разучивание • При включенной функции Phrase Trainer - Страница 135 из 156
Ðàçó÷èâàíèå ôðàç (PHRASE TRAINER) Îñëàáëåíèå öåíòðàëüíîãî ñèãíàëà (CENTER CANCEL) 5 Кнопками CURSOR [ ]/[ ] установите курсор на “CENTER ADJUST” и колесом откорректируйте установку, добиваясь максимального ослабления цент- Данная функция позволяет ослабить сигнал в центре стереопанорамы (например, - Страница 136 из 156
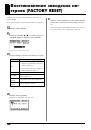
Âîññòàíîâëåíèå çàâîäñêèõ íàñòðîåê (FACTORY RESET) Операция “Factory Reset” восстанавливает заводские настройки BR-800. Также можно выбрать типы восстанавливаемых настроек. 5 Нажмите кнопку [ENTER] для выполнения операции Factory Reset или нажмите кнопку [EXIT] для отмены. 1 2 После нажатия кнопки - Страница 137 из 156
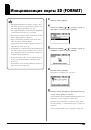
Èíèöèàëèçàöèÿ êàðòû SD (FORMAT) 1 • При форматировании все данные на карте уничтожаются. Обязательно архивируйте важные дан- 2 ные перед форматированием (стр. 123). • После форматирования прилагаемой к BR-800 кар- Нажмите кнопку [MENU]. Кнопками CURSOR [ ]/[ ] установите курсор на “SD CARD” и - Страница 138 из 156
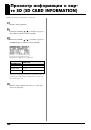
Ïðîñìîòð èíôîðìàöèè î êàðòå SD (SD CARD INFORMATION) Можно просмотреть информацию о карте SD. 1 2 Нажмите кнопку [MENU]. Кнопками CURSOR [ ]/[ ] установите курсор на “SD CARD” и нажмите кнопку [ENTER]. 3 Кнопками CURSOR [ ]/[ ] установите курсор на “INFORMATION” и нажмите кнопку [ENTER]. - Страница 139 из 156
Ôóíêöèÿ ýíåðãîñáåðåæåíèÿ (POWER SAVE) Данная функция приглушает свечение подсветки дисплея и кнопок в целях экономии энергопотребления, если в течение заданного интервала времени манипуляций с кнопками и колесом не производится. ■ Âûõîä èç ñîñòîÿíèÿ Power Save При любых манипуляциях с кнопками или - Страница 140 из 156
Ðàáîòà ñ êîíäåíñàòîðíûì ìèêðîôîíîì (PHANTOM POWER) При использовании конденсаторного микрофона, требующего фантомного питания, включите фантомное питание, как 1 Нажмите кнопку [MENU]. описано ниже. BR-800 обеспечивает фантомное питание +48 В для конденсаторного микрофона, подключенного к разъему - Страница 141 из 156
Ïðèëîæåíèå 141 - Страница 142 из 156
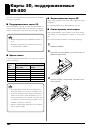
Êàðòû SD, ïîääåðæèâàåìûå BR-800 Для записи и воспроизведения аудиоматериала в BR-800 используются карты SD. ■ Ïîääåðæèâàåìûå êàðòû SD ■ Ôîðìàòèðîâàíèå êàðòû SD Перед использованием новой карты SD ее требуется отформатировать. См. “Инициализация карты SD (FORMAT)” (стр. 137). При использовании карт - Страница 143 из 156
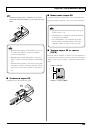
Êàðòû SD, ïîääåðæèâàåìûå BR-800 4 ■ Èçâëå÷åíèå êàðòû SD Чтобы не потерять винт, заверните его на место Аккуратно нажмите на карту SD и затем отпустите палец. крестовой отверткой Phillips (+), как показано на ри- Карта SD немного выйдет из слота, после этого вытащите сунке. ее. fig.CardSlot03.eps • - Страница 144 из 156
Ñïèñîê àðàíæèðîâîê/ïàòòåðíîâ Ñïèñîê ïðåñåòíûõ àðàíæèðîâîê В пресетных аранжировках (кроме Metro 4/4) после E (кода) следует 3-тактная пауза (BREAK) и затем Начальный такт Имя аранНачаль# Размер BREAK жировки ный темп IN V1 F1 V2 F2 V2 END P01 ROCK1 130 4/4 1 2 4 6 8 10 12 16 P02 ROCK2 130 4/4 1 3 5 - Страница 145 из 156
Ñïèñîê àðàíæèðîâîê/ïàòòåðíîâ Ñïèñîê ïðåñåòíûõ ïàòòåðíîâ Имя паттерна (Аббревиатура на дисплее) ROCK1 ROCK2 ROCK3 ROCK4 ROCK5 ROCK6 Hard Rock 1(HdRc1) Hard Rock 1(HdRc2) Hard Rock 1(HdRc3) Hard Rock 1(HdRc4) Hard Rock 1(HdRc5) HEAVY1 (HEVY1) HEAVY2 (HEVY2) HEAVY3 (HEVY3) HEAVY4 (HEVY4) HEAVY5 - Страница 146 из 156
Íåèñïðàâíîñòè В данной главе перечислены типовые проблемы и способы их решения. Если проблему самостоятельно решить не удалось, обратитесь в сервисный центр. Ïðîáëåìû ñ ïèòàíèåì Проблема Питание не включается Описание Корректно ли установлен селектор питания BR-800? Установите селектор питания - Страница 147 из 156
Íåèñïðàâíîñòè Проблема Запись не производится Не отключается реверберация Записанный звук содержит шумы или искажения Возникновение самовозбуждения Описание Не защищена ли пьеса от записи? Установлена ли карта SD? Достаточно ли свободного места на карте SD? Не заблокирована ли карта SD? Не - Страница 148 из 156
Íåèñïðàâíîñòè Ïðîáëåìû ñ USB Проблема Не отображается экран Idling Описание Корректно ли подключен кабель USB? Поддерживает ли операционная система компьютера работу с BR-800? Стр. 32 118 Не слышен входной сигнал с USB Не установлен ли параметр INPUT MIX в “OFF”? 125 Панель управления работает - Страница 149 из 156
Ñîîáùåíèÿ îá îøèáêàõ При попытке выполнения ошибочной операции или сбое при выполнении операции на дисплее отображается сообщение об ошибке. При появлении сообщения об ошибке выполните соответствующее действие. Сообщение Already exists! Battery low! Cannot change file name! Cannot erase! Cannot - Страница 150 из 156
Ñîîáùåíèÿ îá îøèáêàõ Сообщение Причина Достигнуто максимальное количество событий для одной пьесы BR-800. Действие Сотрите ненужные треки. Стр. 105 Ïîíÿòèå ñîáûòèÿ Event full! No card! No file! No song! Not available! Power down! Protected! Stop P.Trainer! Stop recorder! System error! Too many - Страница 151 из 156
Ñîîáùåíèÿ îá îøèáêàõ Сообщение Unsupported card! Unsupported format! USB buffer full! Memory full! Причина BR-800 работу с данной картой SD не поддерживает. Формат карты SD не поддерживается BR-800. Попытка импорта файла WAV, не поддерживаемого BR-800. По USB передается слишком плотный поток - Страница 152 из 156
Òåõíè÷åñêèå õàðàêòåðèñòèêè BR-800: Öèôðîâîé ðåêîðäåð Треки Частота дискретизации Частотный диапазон АЦП ЦАП Номинальный входной уровень Входное сопротивление Номинальный выходной уровень Выходное сопротивление Рекомендуемое сопротивление нагрузки Уровень шумов Дисплей Разъемы Питание Потребляемый - Страница 153 из 156
fig.15_WEEE_Small.eps Äàííûé ñèìâîë îçíà÷àåò, ÷òî îòìå÷åííîå èì èçäåëèå äîëæíî óòèëèçèðîâàòüñÿ îòäåëüíî îò äîìàøíèõ îòõîäîâ, ñîãëàñíî ïðèíÿòîìó â êîíêðåòíîé ñòðàíå çàêîíîäàòåëüñòâó. fig.16_ChineseRoHS.eps - Страница 154 из 156
fig.09B-17.eps Äëÿ ñòðàí Åâðîïû Äàííîå èçäåëèå ñîîòâåòñòâóåò òðåáîâàíèÿì äèðåêòèâû EMC îò 2004/108/EC. fig.14.eps - Страница 155 из 156
Èíôîðìàöèÿ Ïðè íåîáõîäèìîñòè ðåìîíòà îáðàùàéòåñü â áëèæàéøèé òåõöåíòð Roland ïî àäðåñó: Roland Music Äîðîæíàÿ óë., ä. 3, êîðï.6 117 545 Ìîñêâà, Ðîññèÿ Òåë: (495) 981-4967 - Страница 156 из 156
-
Руководство пользователя
-
• Microsoft и Windows являются зарегистрированными торговыми марками Microsoft Corporation.
• Windows® носит официальное название “Операционная система Microsoft® Windows®”.
• Apple и Macintosh являются зарегистрированными торговыми марками Apple Inc.
• Mac OS является торговой маркой Apple Inc.
• Все названия продуктов, упоминаемые в документе, являются торговыми марками или зарегистрированными торговыми
марками соответствующих владельцев.
• Логотипы SD (     ) и SDHC (      ) являются торговыми марками SD-3C, LLC.
• MMP (Moore Microprocessor Portfolio) обозначает портфолио патента микропроцессорной архитектуры, разработанной
Technology Properties Limited (TPL). Компания Roland получила лицензию на данную технологию у TPL Group.
•
•
•
•
•
Прежде чем приступить к работе, внимательно ознакомьтесь с информацией, приведенной в
разделах "Техника безопасности" и "Важные замечания". Там содержатся важные сведения,
касающиеся правильной эксплуатации устройства. Для того, чтобы максимально эффективно
использовать все функциональные возможности прибора, внимательно прочтите данное
руководство целиком. Сохраните руководство, оно может пригодиться в дальнейшем.
•
•
Copyright © 2010 BOSS CORPORATION
Все права защищены. Воспроизведение данного материала, полное или частичное,
без письменного разрешения BOSS CORPORATION запрещено.
BOSS является зарегистрированной торговой маркой или торговой маркой BOSS CORPORATION
в США и/или других странах.
•
-
Aeai?eoi ?aaiou n BR-800
3
Руководство пользователя
• Microsoft и Windows являются зарегистрированными торговыми марками Microsoft Corporation. • Windows® носит официальное название “Операционная система Microsoft® Windows®”. • Apple и Macintosh являются зарегистрированными торговыми марками Apple Inc. • Mac OS является торговой маркой Apple Inc. •
Àëãîðèòì ðàáîòû ñ BR-800 3
USING THE UNIT SAFELY 002c • Не вскрывайте прибор и не производите какие-либо модификации внутри него или сетевого адаптера. ………………………………………………………………………………………………………… • Не пытайтесь самостоятельно ремонтировать прибор
014 • Оберегайте прибор от сильных ударов (не роняйте его!) ………………………………………………………………………………………………………… • Не включайте сетевой шнур в розетку, к которой уже подключено много других электроприборов. Будьте внимательны при
Âàæíûå çàìå÷àíèÿ Ïèòàíèå: èñïîëüçîâàíèå áàòàðåé 355b • 301 • Не подключайте аппаратуру к источнику электропитания, к которому уже подключены электроприборы с использованием преобразователя напряжения (такие как холодильник, стиральная машина, микроволновая печь или кондиционер), а также снабженные
Âàæíûå çàìå÷àíèÿ 556 • 708 При подсоединении/отсоединении шнуров и кабелей никогда не тяните за шнур электропитания. Беритесь только за сам разъем, чтобы не повредить внутренние элементы кабеля. • 558a • Чтобы не вызывать недовольства окружающих, постарайтесь устанавливать приемлемый уровень
Ñîäåðæàíèå Алгоритм работы с BR-800 …………………….. 3 Выбор треков для записи………………………. 38 Техника безопасности ……………………………… 4 Выбор V-треков ……………………………………….. 39 Важные
Ñîäåðæàíèå Ðàáîòà ñ ýôôåêòàìè………… 53 Смена наборов ударных (Drum Kit) …………95 Выбор набора ударных …………………………… 95 Применение эффектов разрыва…………… 54 Патчи и банки эффектов ………………………. 54 Включение/отключение эффекта разрыва
Ñîäåðæàíèå Èñïîëüçîâàíèå USB …………117 Выходные установки (OUTPUT)………….. 133 Подготовка к работе с USB…………………. 118 Установки для LINE OUT и PHONES (OUTPUT MODE)………………….133 Сведения о “BR-800 DVD-ROM”……………. 118 Установка драйвера USB
Îñíîâíûå âîçìîæíîñòè Цифровой рекордер BR-800 позволяет создавать пьесы даже начинающим пользователям. Прибор облегчит процесс ознакомления со всеми преимуществами цифровой записи, начиная с записи и заканчивая мастерингом. Îäíîâðåìåííàÿ çàïèñü 4 òðåêîâ/îäíîâðåìåííîå âîñïðîèçâåäåíèå 8 òðåêîâ
Îïèñàíèå ïàíåëåé Âåðõíÿÿ ïàíåëü fig.TopPanel.eps Èíäèêàòîðû PEAK Оповещают о возможности появления искажений сигнала MIC L/R (âñòðîåííûé ñòåðåîìèêðîôîí L/R) на входах INPUT 1 – 4 или встроенном стереомикрофоне. Используется для записи в стерео. “Выбор входного источника” (стр. 37) * Встроенные
Îïèñàíèå ïàíåëåé Ôåéäåðû òðåêîâ [1] – [7/8] Êíîïêà [RETRY] Устанавливают уровни громкости треков. Устанавливает локатор пьесы в точку, соответствующую на- Ôåéäåð [RHYTHM] чалу последней записи. Устанавливает уровень громкости ударных. Êíîïêà [REPEAT] Задает границы цикла воспроизведения.
Îïèñàíèå ïàíåëåé fig.TopPanel.eps Êíîïêà [TRACK] Êíîïêà [EFFECTS] Позволяет устанавливать тембральные характеристики тре- Обеспечивает доступ к экрану включения/отключения эф- ков, а также редактировать треки (стр. 105). фекта разрыва (стр. 54) и редакции его установок. Êíîïêà [MENU] Êíîïêà
Îïèñàíèå ïàíåëåé 6 Òåìï Темп пьесы. Äèñïëåé fig.Display.eps 7 Èçìåðèòåëü óðîâíÿ Отображает уровни сигналов. Элемент INPUT TRACK RHY L R Отображает различную информацию, содержание которой Описание Уровни на входах. Уровни громкости каждого трека. Уровень громкости ударных. Выходная громкость после
Îïèñàíèå ïàíåëåé Ëèöåâàÿ ïàíåëü fig.FrontPanel.eps 1 Ðàçúåì PHONES (ñòåðåîäæåê) Служит для подключения опциональных стереонаушников. Сигналы на данном разъеме идентичны сигналам на выходах LINE OUT. Громкость в наушниках устанавливается фейдером [MASTER]. Если OUTPUT MODE (стр. 133) установить в
Îïèñàíèå ïàíåëåé Òûëüíàÿ ïàíåëü fig.RearPanel.eps 1 Çàùèòíûé ñëîò ( ) http://www.kensington.com/ 2 Ðàçúåìû LINE OUT Служит для вывода аналоговых аудиосигналов на внешнее звуковое оборудование (например, стереоусилитель) или на CD-рекордер и подобное оборудование для записи выходных сигналов BR-800
Îïèñàíèå ïàíåëåé Áîêîâàÿ ïàíåëü fig.SidePanel.eps 1 Ñëîò MEMORY CARD (äëÿ êàðòû SD) Служит для установки карты SD. Если карта SD не установлена, запись невозможна. “Карты SD, поддерживаемые BR-800” (стр. 142) 2 Ðàçúåì USB Служит для подключения BR-800 к компьютеру кабелем USB. Эта коммутация
Îïèñàíèå ïàíåëåé Óñòàíîâêà áàòàðåé 1 2 Установите селектор [POWER] в положение “OFF”. • Переворачивая прибор, подкладывайте под его углы газеты или журналы, а также следите за тем, Переверните BR-800. чтобы не повредить кнопки и контроллеры. 3 • Переворачивая прибор, обращайтесь с ним аккуратно,
Äëÿ çàìåòîê 20
Êðàòêîå ðóêîâîäñòâî 21
Âîñïðîèçâåäåíèå äåìî-ïüåñ Прилагаемая к BR-800 карта SD содержит демо-пьесы. Ниже описана процедура их воспроизведения. 1. Êîììóòàöèÿ Отключите питание BR-800 и мониторов и выполните следующую коммутацию. fig.Quick_EZ1-e.eps Мониторы Сетевой адаптер К разъемам LINE OUT К разъему GUITAR/BASS
Âîñïðîèçâåäåíèå äåìî-ïüåñ 2. Âêëþ÷åíèå ïèòàíèÿ * При включении питания придерживайтесь следующей очередности, в противном случае можно повредить оборудование. 1 На BR-800 установите фейдер [MASTER] в минимум. 2 Включите селектор [POWER]. 3 Включите питание мониторов. fig.Quick_DemoSong2-1.eps
Âîñïðîèçâåäåíèå äåìî-ïüåñ 3. Âîñïðîèçâåäåíèå äåìî-ïüåñ 1 Нажмите кнопку [MENU]. Раскроется экран MENU. D_Menu_Input.eps 2 Кнопками CURSOR [ [ENTER]. ]/[ ] установите курсор на “SONG” и нажмите кнопку ]/[ ] установите курсор на “SELECT” и нажмите кнопку Раскроется экран SONG. D_Song_New.eps 3
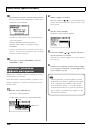
Âîñïðîèçâåäåíèå äåìî-ïüåñ 5 Установите фейдеры, как показано на рисунке. fig.Quick_DemoSong3-5-e.eps Фейдеры треков Фейдер [MASTER] 6 Нажмите кнопку [PLAY]. Начнется воспроизведение пьесы. Отрегулируйте громкость фейдером [MASTER]. fig.Quick_DemoSong3-6.eps 7 Фейдерами треков установите необходимую
Çàïèñü ñ ïîìîùüþ ôóíêöèè EZ Recording Функция EZ Recording упрощает подготовку к записи. Просто выберите источник записи и требуемый музыкальный стиль, а наиболее подходящие установки эффекта и ритма будут произведены автоматически. Например, запишем исполнение на гитаре. См. “1. Коммутация” (стр.
Çàïèñü ñ ïîìîùüþ ôóíêöèè EZ Recording 4 Нажмите кнопку [ENTER]. Раскроется экран EZ REC-3. На нем отображаются значения параметров SOURCE и CATEGORY (источник и ритм соответственно). D_EZ_Rec_Result_Guitar.eps Кнопками CURSOR [ ]/[ ] и колесом можно изменять эффект и ритм. 5 Нажмите кнопку [ENTER].
Çàïèñü ñ ïîìîùüþ ôóíêöèè EZ Recording 3 Фейдером [MASTER] установите комфортный уровень мониторинга. 4 Нажмите кнопку [REC]. fig.Quick_EZ2-3.eps Кнопка [REC] начнет мигать красным цветом; BR-800 перейдет в режим готовности к записи. fig.Quick_EZ2-4-e.eps Мигает 5 Нажмите кнопку [PLAY]. Кнопка
Çàïèñü ñ ïîìîùüþ ôóíêöèè EZ Recording 3. Âîñïðîèçâåäåíèå 1 Нажмите кнопку [ZERO] для возврата к началу пьесы. Текущая временная позиция (положение локатора) изменится на 00:00:00-00:0. fig.Quick_EZ3-1.eps 2 Нажмите кнопку [PLAY]. Начнется воспроизведение пьесы. Отрегулируйте громкость фейдером
Çàïèñü ñ ïîìîùüþ ôóíêöèè EZ Recording Ñïèñîê ïàðàìåòðîâ EZ Recording SOURCE CATEGORY Выберите установку, наиболее соответствующую используе- Выберите музыкальный стиль, наиболее соответствующий мому входному источнику. исполняемому. Параметр E.GUITAR AC.GUITAR (GTR IN) AC.GUITAR (MIC) BASS VOCAL
Ïîäãîòîâêà ê çàïèñè 31
Êîììóòàöèÿ Произведите коммутацию, как показано на рисунке. Перед коммутацией обязательно отключите питание всего оборудования. fig.panel-e.eps ■ Ëèöåâàÿ ïàíåëü Гитара или бас-гитара Стереонаушники ■ Òûëüíàÿ ïàíåëü Портативный аудиоплеер Мониторы Микрофон Ножная педаль (FS-5U и т.д.) Педаль
Êîììóòàöèÿ • Во избежание повреждения динамиков и других устройств, перед коммутацией устанавливайте в минимум громкость и отключайте питание всех • При подключении кабелей с резисторами уровень сигналов может быть занижен. Поэтому желательно использовать кабели без резисторов. коммутируемых
Âêëþ÷åíèå/îòêëþ÷åíèå ïèòàíèÿ Âêëþ÷åíèå ïèòàíèÿ По окончании коммутации (стр. 32) включите питание оборудования в указанном ниже порядке. Нарушение порядка Îòêëþ÷åíèå ïèòàíèÿ 1 Остановите воспроизведение пьесы. включения оборудования может привести к его поврежде- 2 нию. 1 который использовался при
Çàïèñü/ Âîñïðîèçâåäåíèå 35
Çàïèñü Ñîçäàíèå íîâîé ïüåñû (SONG NEW) В рамках BR-800 записанный материал называется “пьесой”. Âûáîð ïüåñû (SONG SELECT) Ниже описана процедура выбора пьесы для записи. Для создания новой пьесы выполните следующую процеду- 1 ру. 1 2 Нажмите кнопку [MENU]. 2 Нажмите кнопку [MENU]. Кнопками CURSOR [
Çàïèñü Âûáîð âõîäíîãî èñòî÷íèêà Значение INPUT OFF MONO REC STEREO REC SIMUL REC 4TRACK REC Ниже описана процедура выбор источника записи и определения количества треков записи. 1 2 Нажмите кнопку [MENU]. Кнопками CURSOR [ ]/[ Описание Отключено (запись не производится). Запись производится на один
Çàïèñü Óñòàíîâêà óðîâíÿ çàïèñè Âûáîð òðåêîâ äëÿ çàïèñè Ниже описана процедура регулировки уровня записи на 1 трек. Кнопками 1 – 7/8 [REC] выберите трек (треки) для записи. 1 2 Закройте фейдер [MASTER]. Установите регулятор [REC LEVEL] приблизительно в центральное положение и медленно открывайте
Çàïèñü Âûáîð V-òðåêîâ Ïîíÿòèå V-òðåêà Каждый из треков BR-800 содержит 8 виртуальных “V-тре- Каждый трек содержит 8 виртуальных треков, каж- ков”. Для записи или воспроизведения можно выбрать лю- дый из которых в свою очередь можно выбрать для бой виртуальный трек. записи/воспроизведения. То есть,
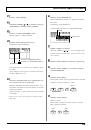
Çàïèñü Óñòàíîâêà âõîäíîé ñòåðåîïàíîðàìû (PAN) Можно отрегулировать стереопанораму входного сигнала. Çàïèñü 1 Нажмите кнопку [REC]. Кнопка [REC] начнет мигать красным цветом, и BR-800 1 перейдет в режим готовности к записи. Нажмите кнопку [TRACK]. fig.Rec03-e.eps Мигает 2 Кнопками CURSOR [ ]/[ ]
Çàïèñü Çàïèñü öèêëà Âîñïðîèçâåäåíèå Эта функция копирует записанные данные после останова записи таким образом, что они будут занимать приблизи- 1 тельно 200 тактов. Нажмите кнопку [ZERO]. Локатор пьесы переместится в позицию 00:00:00-00:0. С помощью данной функции можно быстро создавать фразы,
Çàïèñü äîïîëíèòåëüíûõ ïàðòèé (íàëîæåíèå) Треки, кнопки [PLAY] которых горят или мигают, уже содержат записанные данные. Процесс прослушивания ранее записанного материала в процессе записи нового исполнения на другой трек называется “наложением”. Это позволяет записывать партии различных
Âîñïðîèçâåäåíèå â öèêëå (Repeat) Óñòàíîâêà ãðàíèö öèêëà 4 Чтобы запомнить установки цикла, сохраните пьесу. С помощью функции “повтора” можно циклично воспроизводить заданный регион. “Сохранение пьесы (SAVE CURRENT STATE)” (стр. 109) Выбранный регион циклично воспроизводится следующим образом.
Âîñïðîèçâåäåíèå â öèêëå (Repeat) Òî÷íàÿ óñòàíîâêà ãðàíèö öèêëà Поскольку граничные точки цикла устанавливаются в моменты нажатия кнопки [REPEAT], точность их задания может оказаться проблематичной. В таких случаях с помощью функции “квантования” можно установить границы цикла с точностью до одного
Ïåðåçàïèñü ñ âðåçêîé (Punch-In/Out) Если при записи были допущены ошибки исполнения или по каким-либо другим причинам, может потребоваться пе- 3 Запустите воспроизведение пьесы и регулятором резаписать только определенный регион трека. [REC LEVEL] установите уровень записи. В процессе
Ïåðåçàïèñü ñ âðåçêîé (Punch-In/Out) ■ Èñïîëüçîâàíèå íîæíîé ïåäàëè При записи инструментальных партий, чтобы облегчить ма- Àâòîìàòè÷åñêàÿ âðåçêà нипуляции с рекордером, для управления врезкой удобно Данная операция автоматически включает и отключает использовать опциональную ножную педаль (например,
Ïåðåçàïèñü ñ âðåçêîé (Punch-In/Out) 4 ■ Çàïèñü Кнопками CURSOR [ ]/[ ] установите курсор на “DISP” и колесом выберите единицы, в которых устанавливаются точки входа/выхода в режим врезки. Значение TIME MEASURE Описание Единицы времени. Единицы тактов. Ниже рассмотрен пример, в котором объясняется
Îòìåíà îïåðàöèè (UNDO/REDO) Иногда требуется отменить результат операции в случае, если результат записи вас не устраивает, или была допущена ошибка в установках. В таких случаях можно выполнить операцию “Undo”. Undo означает возврат к состоянию, предшествующему выполнению последней операции. Чтобы
Ïðîñìîòð èíôîðìàöèè î ïüåñå Ïðîñìîòð îñòàâøåãîñÿ âðåìåíè çàïèñè В процессе записи или в режиме готовности к записи мож- Ïðîñìîòð èíôîðìàöèè î ïüåñå Ниже описано, как просмотреть информацию о пьесе. но просмотреть оставшееся для записи время. 1 2 1 Нажмите кнопку [MENU]. Нажмите кнопку [MENU]. 2
Áûñòðàÿ çàïèñü (SONG SKETCH) Если перевести BR-800 в режим Song Sketch, его можно использовать для записи/воспроизведения стереофайлов WAV. Çàïèñü Этот подход упрощает запись музыкальных идей и фраз. Âõîä â ðåæèì Song Sketch Нажмите кнопку [SONG SKETCH] для входа в режим Song 1 Нажмите кнопку [SONG
Áûñòðàÿ çàïèñü (SONG SKETCH) 6 Ñòèðàíèå ôàéëà WAV Нажмите кнопку [REC]. Начнется запись. Ниже описано, как стереть файл WAV. Кнопка [PLAY] загорится зеленым цветом, а кнопка [REC] – красным. 1 fig.Rec04-e.eps Горит Горит Нажмите кнопку [SONG SKETCH]. Отобразится экран SONG SKETCH. 7 2 По окончании
Áûñòðàÿ çàïèñü (SONG SKETCH) Îïðåäåëåíèå èìåíè ôàéëà WAV Ниже приводится процедура определения имени файла WAV. 1 Нажмите кнопку [SONG SKETCH]. Ïðîñìîòð èíôîðìàöèè î ôàéëå WAV Можно просмотреть информацию о файле WAV. 1 Отобразится экран SONG SKETCH. 2 Кнопками CURSOR [ ]/[ ] установите курсор на
Ðàáîòà ñ ýôôåêòàìè 53
Ïðèìåíåíèå ýôôåêòîâ ðàçðûâà BR-800 имеет независимые процессоры, которые реализуют В рамках каждого банка имеются следующие типы патчей работу эффектов 4 типов: эффекты разрыва, эффекты пет- эффектов. ли, эквалайзеры треков и эффекты мастеринга. Ïðåñåòíûå ïàò÷è Их можно использовать одновременно и
Ïðèìåíåíèå ýôôåêòîâ ðàçðûâà Âêëþ÷åíèå/îòêëþ÷åíèå ýôôåêòà ðàçðûâà 3 Кнопками CURSOR [ ]/[ ] установите курсор на “EZ TONE” и нажмите кнопку [ENTER]. Отобразится экран EZ TONE. 1 4 Нажмите кнопку [EFFECTS]. Кнопка [EFFECTS] загорится, и эффект разрыва включится. Кнопками [CURSOR] выберите на экране
Ïðèìåíåíèå ýôôåêòîâ ðàçðûâà 5 Относительно сохранения текущих настроек эффекта см. параграф “Сохранение установок эффекта раз- Ðåäàêöèÿ óñòàíîâîê ýôôåêòà ðàçðûâà рыва (Write)” (стр. 57). Чтобы создать новый эффект выберите существующий патч с наиболее близким к задуманному звуком, отредактируйте
Ïðèìåíåíèå ýôôåêòîâ ðàçðûâà 4 Кнопками CURSOR [ ]/[ ] устанавливайте курсор на эффект и колесом включайте/отключайте его. Состояние эффектов отображается с помощью иконок. Индикация Описание Ñîõðàíåíèå óñòàíîâîê ýôôåêòà ðàçðûâà (Write) Ниже описано, как задавать имя отредактированным установкам
Ïðèìåíåíèå ýôôåêòîâ ðàçðûâà Ñìåíà ìåñòîïîëîæåíèÿ ýôôåêòà ðàçðûâà (LOCATION) ■ INPUT <REC DRY> Эта установка позволяет прослушивать звук, прошедший через эффект разрыва, но записываться будет необработанный эффектом сигнал (т.е., прямой сигнал). Это удобно при BR-800 позволяет изменять
Ïðèìåíåíèå ýôôåêòîâ ðàçðûâà Ñïèñîê àëãîðèòìîâ Ниже приведены алгоритмы (доступные эффекты и порядок их коммутации), которые могут использоваться в качестве эффектов разрыва. Доступные алгоритмы зависят от банка. Чтобы выбрать необходимый алгоритм, сначала выберите банк, содержащий данный алгоритм,
Ïðèìåíåíèå ýôôåêòîâ ðàçðûâà 3. GUITAR TO BASS Имитирует звучание бас-гитары при игре на электрогитаре. * Данный эффект не предусматривает игру аккордами. fig.GuitarToBass.eps -[G->B]-[COMP/LM]-[WAH]-[DIST] [AMP]-[EQ]-[NS]-[MOD]= Guitar to Bass 5. BASS MULTI Это — мультиэффект для бас-гитары.
Ïðèìåíåíèå ýôôåêòîâ ðàçðûâà Áàíê: MICROPHONE Áàíê: LINE 6. VOCAL MULTI 8. STEREO MULTI Это — мультиэффект для вокала. Он обеспечивает наиболее Этот алгоритм объединяет в себе стереоэффекты 7 типов. оптимальные для вокала эффекты. fig.StereoMulti.eps fig.VocalMulti.eps =[COMP/LM]=[LOFI]=[EQ]=[NS]
Ïðèìåíåíèå ýôôåêòîâ ðàçðûâà Áàíê: SIMUL 9. VO + GT.AMP Этот алгоритм предназначен для одновременной записи вокала и электрогитары. Для электрогитары предусмотрена имитация звука предусилителя и кабинета. (GUITAR) (MIC) fig.VOGTAMPGuitar.eps fig.VOGTAMPMic.eps -[COMP/LM]-[AMP]-[EQ]-[NS]-[MOD]-[DLY]-
Ïðèìåíåíèå ýôôåêòîâ ðàçðûâà 10. VO + AC.SIM 11. VO + ACOUSTIC Этот алгоритм предназначен для одновременной записи во- Этот алгоритм предназначен для одновременной записи во- кала и электрогитары. кала и акустической гитары. Для электрогитары предусмотрена имитация звука акусти- Для гитары
Ïðèìåíåíèå ýôôåêòîâ ðàçðûâà Áàíê: 4INPUT Ñïèñîê ïàðàìåòðîâ 12. 4-INPUT MULTI Торговые марки, упомянутые в данном документе, принадлежат своим законным владельцам и не имеют отношения к фирме BOSS. Эти компании не являются филиалами BOSS и не имеют лицензий на изготовление BOSS BR-800. Их торговые
Ïðèìåíåíèå ýôôåêòîâ ðàçðûâà Параметр/ Диапазон Описание Параметр/ Диапазон ATTACK 0 – 100 Лимитер, разделяющий входной сигнал на 4 полосы частот — ультра-НЧ, НЧ, ВЧ и ультра-ВЧ с независимой обработкой в диапазонах НЧ и ВЧ. Частоты раздела полос устанавливаются параметрами XOVER F L, M и H. Атака
Ïðèìåíåíèå ýôôåêòîâ ðàçðûâà Описание RELEASE *3 0 – 100 Создает уникальный эффект вау за счет изменения частоВремя отключения эффекта после спада сигнала ниже уровня порога. Пороговое значение (для диапазона НЧ), выше которого начинается ограничение уровня сигнала. Коэффициент компрессии сигнала
Ïðèìåíåíèå ýôôåêòîâ ðàçðûâà Параметр/ Диапазон Описание Параметр/ Диапазон FREQUENCY *3 Описание BLUES OD Звук Crunch эффекта BOSS BD-2. Производит дисторшн, подчеркивающий все нюансы звукоизвлечения. CRUNCH Яркий резкий звук с элементами дисторшна. NATURAL OD Овердрайв с естественными искажениями.
Ïðèìåíåíèå ýôôåêòîâ ðàçðûâà Параметр/ Диапазон Описание Параметр/ Диапазон 0 – 100 Громкость прямого сигнала. E.LEVEL (Effect Level) 0 – 100 Äëÿ àëãîðèòìîâ “BASS MULTI” èëè “GUITAR TO BASS” Параметр/ Диапазон Громкость сигнала эффекта. D.LEVEL (Direct Level) 0 – 100 Громкость прямого сигнала.
Ïðèìåíåíèå ýôôåêòîâ ðàçðûâà HI-GAIN T-AMP R-FIER MS MODERN MS CLASSIC BG LEAD Описание Моделирует звук левого входа Matchless D/C-30. Имитация лампового усилителя MATCH DRIVE широко используется в различных стилях, от блюза до рока. FAT MATCH Моделирует звук Matchless с модифицированным усилением.
Ïðèìåíåíèå ýôôåêòîâ ðàçðûâà Параметр/ Диапазон Описание Параметр/ Диапазон 1×10” Компактный открытый кабинет с одним 10” динамиком. MIC LEV (Mic Level) 1×12” Компактный открытый кабинет с одним 12” динамиком. D.LEVEL (Direct Level) 2×12” Компактный открытый кабинет с двумя 12” динамиками. 4×10”
Ïðèìåíåíèå ýôôåêòîâ ðàçðûâà Параметр/ Диапазон Описание BRIGHT *3 Параметр/ Диапазон Описание MIC LEV (Mic Level) Включает/отключает установку «прозрачности». 0 – 100 OFF Прозрачность не используется. D.LEVEL (Direct Level) ON Прозрачность включается и создает более светлый и отчетливый тон. 0 –
Ïðèìåíåíèå ýôôåêòîâ ðàçðûâà EQUALIZER NOISE SUPPRESSOR Управляет тембром звука. Для диапазонов высокой и низ- Данный эффект понижает шумы и фон, вырабатываемые кой середины реализована параметрическая эквализация. датчиками гитары. Поскольку подавление шума синхронизировано с огибающей гитарного
Ïðèìåíåíèå ýôôåêòîâ ðàçðûâà Параметр/ Диапазон MODULATION LOW LEVEL С помощью TYPE выбирается эффект модуляции. Параметр/ Диапазон 0 – 100 Описание Усиление в низкочастотном диапазоне. HIGH FREQ (High Frequency) 800Hz – 8.00kHz ON/OFF OFF, ON Описание Включает/отключает эффект. Высокочастотный
Ïðèìåíåíèå ýôôåêòîâ ðàçðûâà BASS SIM (Bass Simulator) SLOW GEAR Эффект эмуляции индивидуальных характеристик таких ги- Производит эффект “скрипичного” звучания. тарных компонентов, как звукосниматели и типы конструкции корпуса. Это позволяет с помощью всего лишь одного инструмента имитировать
Ïðèìåíåíèå ýôôåêòîâ ðàçðûâà SITAR SIM (Sitar Simulator) P SHIFTER Данный эффект имитирует звучание ситара. Этот эффект смещает высоту звучания оригинального тона вверх или вниз в диапазоне двух октав. Параметр/ Диапазон Описание TONE -50 – +50 Тембр звучания эффекта. При увеличении значения высокие
Ïðèìåíåíèå ýôôåêòîâ ðàçðûâà PHASER FLANGER Фазер добавляет сигнал с переменной фазой к прямому сиг- Флэнжер создает характерный эффект, напоминающий звук налу для получения «вращающегося» звука. реактивного самолета. Параметр/ Диапазон Параметр/ Диапазон Описание TYPE RATE Выбор количества каскадов
Ïðèìåíåíèå ýôôåêòîâ ðàçðûâà ROTARY PAN Данный эффект имитирует звучание вращающихся динами- Эффект изменяет баланс громкости левого и правого кана- ков. лов стереопанорамы для перемещения звука между колонками. Параметр/ Диапазон Описание SPEED SEL (Speed Select) SLOW, FAST Частота вращения
Ïðèìåíåíèå ýôôåêòîâ ðàçðûâà CHORUS DBL DELAY (Doubling Delay) Хорус формирует слегка расстроенный сигнал и добавляет Добавляя немного задержанный по времени сигнал к пря- его к основному сигналу для придания ему глубины и объ- мому, данный эффект создает иллюзию совместного звуча- ема. ния
Ïðèìåíåíèå ýôôåêòîâ ðàçðûâà DELAY ACOUSTIC SIMULATOR Данный эффект добавляет к прямому сигналу задержан- Эффект эмуляции индивидуальных характеристик таких ги- ный, создавая пространственное звучание или спецэффекты. тарных компонентов, как звукосниматели и типы конструкции корпуса. Это позволяет с
Ïðèìåíåíèå ýôôåêòîâ ðàçðûâà Параметр/ Диапазон Описание TYPE Выбор типа эффекта GUITAR TO BASS. JB Звучание Fender Jazz Bass. PB Звучание Fender Precision Bass. REAR VOL (Rear Volume) *1 0 – 100 Громкость заднего датчика. При значении 0 звук будет отсутствовать. FRONT VOL (Front Volume) *1 0 – 100
Ïðèìåíåíèå ýôôåêòîâ ðàçðûâà TONE/SFX Эффект изменяет тембральный характер или создает спецэффекты. Параметр/ Диапазон Описание ON/OFF OFF, ON Включает/отключает эффект. DISTORTION Производит искаженный голос. RADIO Производит голос, как по радио. STROBE “Нарезает” звук голоса. CHORUS Обогащает звук
Ïðèìåíåíèå ýôôåêòîâ ðàçðûâà LOW CUT Обрезной фильтр, удаляющий низкочастотные помехи. Параметр/ Диапазон Параметр/ Диапазон PRE FILTER *4 OFF, ON Включает/отключает эффект. SAMPLE RATE *4 DEPTH 20 – 2000 Hz Частота среза, ниже которой отфильтровываются низкочастотные помехи. OFF, 1/2 – 1/32 Эффект,
Ïðîñòðàíñòâåííûå ýôôåêòû С помощью встроенных в BR-800 “эффектов петли” можно добавить звуку пространственность и глубину. 3 Глубину эффекта петли можно устанавливать независимо для каждого трека или входа, регулируя уровень посыла на Кнопками CURSOR [ ]/[ ] и колесом установите уровень посыла для
Ïðîñòðàíñòâåííûå ýôôåêòû Ðåäàêöèÿ ýôôåêòà ïåòëè Ñïèñîê ïàðàìåòðîâ 1 REVERB Нажмите кнопку [TRACK]. Добавляет к сигналу реверберационные отражения. 2 Кнопками CURSOR [ ]/[ ] установите курсор на “REVERB” или “CHO/DLY” и нажмите кнопку [ENTER]. Отобразится экран установки уровня посыла. D_Reverb.eps
Ïðîñòðàíñòâåííûå ýôôåêòû Параметр/ Диапазон Описание CHORUS/DELAY E.LEVEL (Effect Level) 0 – 100 Громкость эффекта. SPRG SENS (Spring Sensitivity) *1 0 – 100 *1 Чувствительность эффекта пружинной реверберации. Чем выше значение, тем выразительнее эффект даже при слабом звукоизвлечении. Параметр/
Íàñòðîéêà òåìáðà òðåêà Каждый трек BR-800 содержит независимый трехполосный эквалайзер, позволяющий произвести коррекцию тембра. Ñïèñîê ïàðàìåòðîâ Ðåäàêöèÿ ýêâàëàéçåðà òðåêà Параметр/ Диапазон 1 ON/OFF 2 Нажмите кнопку [TRACK]. OFF, ON Описание Включает/отключает эффект. LOW GAIN Кнопками CURSOR [
Ðàáîòà ñ óäàðíûìè 87
Îáçîð ðèòì-ñåêöèè BR-800 имеет ритм-секцию, работающую независимо от аудиотреков 1 – 7/8. Ритм можно использовать в качестве метронома при записи К пресетным относятся паттерны, соответствующие или же создавать свои аккомпанементы ударных из встро- вступлению, куплету, сбивке и коде. Определить
Îáçîð ðèòì-ñåêöèè ■ Àðàíæèðîâêè Паттерн можно использовать автономно, в качестве метронома, но при этом ритм не будет меняться в течение всей Çâóêè óäàðíûõ (íàáîðû óäàðíûõ) пьесы. Чтобы создать пьесу с музыкальными вариациями, необходимо располагать паттерны в определенном порядке, например,
Îáçîð ðèòì-ñåêöèè Âêëþ÷åíèå/îòêëþ÷åíèå ðèòìà Ïåðåêëþ÷åíèå ðåæèìîâ Pattern è Arrangement BR-800 имеет два режима работы ритм-секции: режим пат- 1 Нажмите кнопку [RHYTHM]. Кнопка [RHYTHM] загорится, и зазвучит партия ударных. fig.rhythm_on_off-e.eps Горит тернов (Pattern) и режим аранжировки
Âîñïðîèçâåäåíèå ïàòòåðíîâ Ниже описаны выбор и цикличное воспроизведение одного из встроенных паттернов. 8 Фейдерами [RHYTHM] и [MASTER] установите требуемый уровень громкости. 1 Нажмите кнопку [RHYTHM]. Кнопка [RHYTHM] загорится, сигнализируя о включении ритм-секции. 2 Кнопками CURSOR [ 9 Чтобы
Âîñïðîèçâåäåíèå ïàòòåðíîâ Èçìåíåíèå òåìïà Находясь на экране Play, можно изменять темп воспроизведения паттерна. 1 Кнопками CURSOR [ ]/[ ] установите курсор на индикатор темпа. D_Play_Tempo.eps 2 Колесом измените темп. Темп воспроизведения паттерна изменится. Óñòàíîâêà òåìïà êíîïêîé [TAP TEMPO]
Âîñïðîèçâåäåíèå àðàíæèðîâîê Ниже описаны выбор и воспроизведение одной из встроенных аранжировок. 9 Фейдерами [RHYTHM] и [MASTER] установите требуемый уровень громкости. 1 Нажмите кнопку [RHYTHM]. Кнопка [RHYTHM] загорится, сигнализируя о включении ритм-секции. 2 Кнопками CURSOR [ 10 Чтобы
Âîñïðîèçâåäåíèå àðàíæèðîâîê èçìåíåíèå òåìïà Находясь на экране Play, можно изменять темп воспроизведения аранжировки. 1 Кнопками CURSOR [ ]/[ ] установите курсор на индикатор темпа. D_Play_Tempo.eps 2 Колесом измените темп. Темп воспроизведения аранжировки изменится. Óñòàíîâêà òåìïà êíîïêîé [TAP
Ñìåíà íàáîðîâ óäàðíûõ (Drum Kit) Набор ударных представляет собой совокупность ударных инструментов. BR-800 содержит 9 “пресетных наборов удар- Âûáîð íàáîðà óäàðíûõ ных”. С помощью “BR-800 Rhythm Editor” можно создать 5 пользовательских наборов ударных. Наборы ударных сохраняются 1 Нажмите кнопку
Ñîçäàíèå àðàíæèðîâêè BR-800 позволяет размещать паттерны в нужном порядке Ниже описана процедура создания аранжировки. для создания аранжировки, то есть структуры всей пьесы от вступления до коды. После создания аранжировки ее можно сохранить в качестве аранжировки пьесы. 1 Аранжировка может
Ñîçäàíèå àðàíæèðîâêè 7 Кнопками CURSOR [ ]/[ ] установите курсор на редактируемый параметр и колесом измените значе• Начальный такт для шага 1 всегда равен “001”. ние. Нажав кнопку [PLAY], можно прослушать паттерн те- Его изменить невозможно. • Начальный такт не может совпадать с началь- кущего
Ñîçäàíèå àðàíæèðîâêè Âñòàâêà øàãà Ñòèðàíèå øàãà В текущий шаг можно вставить новый. Ниже описана процедура стирания выбранного шага. Пос- fig.04-550.eps ле стирания шага его номер присваивается следующему шаVerse гу. Insert fig.04-570.eps Шаг 1 Шаг 2 Шаг 3 Шаг 1 Шаг 2 Шаг 3 Шаг 4 Intro Verse Fill
Ñîçäàíèå àðàíæèðîâêè Îïðåäåëåíèå èìåíè àðàíæèðîâêè Аранжировке пьесы можно назначить имя, состоящее максимум из 8 символов. 1 2 Нажмите кнопку [RHYTHM]. Кнопками CURSOR [ ]/[ 9 Нажмите кнопку [EXIT] несколько раз, чтобы вернуться на экран Play. Экран отобразит “Keep power on!”, и отредактированное
Ñîçäàíèå àðàíæèðîâêè Êîïèðîâàíèå àðàíæèðîâêè 9 Отобразится запрос на подтверждение. Чтобы отредактировать пресетную аранжировку или создать вариацию уже существующей, необходимо сначала Нажмите кнопку [ENTER]. D_Arrange_Erase_Sure.eps скопировать модифицируемую аранжировку, а затем операции
Ñîçäàíèå àðàíæèðîâêè Ñòèðàíèå àðàíæèðîâêè 8 Для выполнения операции стирания нажмите кноп- Ниже описана процедура стирания шага 2 и всех последую- ку [ENTER]. щих шагов из аранжировки пьесы. Для отмены нажмите кнопку [EXIT]. Шаг 1 не стирается, он устанавливается в “Metro” (метро- * Экран отобразит
Çàäåðæêà âîñïðîèçâåäåíèÿ ïàòòåðíà/àðàíæèðîâêè (OFFSET) Можно задать временной сдвиг, на который будет задержано воспроизведение паттерна или аранжировки относительно воспроизведения аудиотреков. 1 2 Нажмите кнопку [RHYTHM]. Кнопками CURSOR [ ]/[ ] установите курсор на “OFFSET” и нажмите кнопку
Ðåäàêöèÿ 103
Íàõîæäåíèå ïîçèöèè íà÷àëà èëè îêîí÷àíèÿ çâóêà (Scrub/Preview) Ôóíêöèÿ Scrub В процессе редакции пьесы может потребоваться точное оп- 1 Удерживая кнопку [STOP], нажмите кнопку [PLAY]. ределение позиции начала звука или региона для записи с Кнопка [PLAY] начнет мигать, и начнется воспроизве-
Ðåäàêöèÿ 6 Ðåäàêöèÿ òðåêà Копирование будет выполнено. Доступно копирование и стирание треков, а также импорт данных Song Sketch. Нажмите кнопку [ENTER]. * В процессе обновления данных на дисплей выводится “Keep power on!”. Если на дисплее отображается данное сообщение, отключать питание
Ðåäàêöèÿ ■ Ñòèðàíèå äàííûõ òðåêà 1 2 1 Нажмите кнопку [TRACK]. Кнопками CURSOR [ ]/[ ■ Èìïîðò â òðåê äàííûõ Song Sketch ] установите курсор на 2 3 ]/[ ] установите курсор на ]/[ ]/[ ] установите курсор на Кнопками CURSOR и колесом выберите параметры импорта данных. ] и колесом выберите стираемый
Ðåäàêöèÿ Êîïèðîâàíèå ïüåñû (SONG COPY) Ниже описана процедура копирования текущей пьесы. 1 2 Óäàëåíèå ïüåñû (SONG ERASE) Ниже описана процедура удаления пьесы с карты SD. 1 Нажмите кнопку [MENU]. 2 Кнопками CURSOR [ ]/[ ] установите курсор на 3 Кнопками CURSOR [ ]/[ ] установите курсор на ]/[ ]
Ðåäàêöèÿ Îïðåäåëåíèå èìåíè ïüåñû (SONG NAME) При создании новой пьесы она автоматически получает имя, например “SONG 0001”. По окончании создания пьесы рекомендуется задать ей информационно емкое имя в целях упрощения поиска. 1 Çàùèòà ïüåñû (SONG PROTECT) Созданная пьеса может быть случайно
Ðåäàêöèÿ Ñîõðàíåíèå ïüåñû (SAVE CURRENT STATE) В качестве данных пьесы BR-800 сохраняются следующие установки. • Записанные данные • Состояние микшера (панорама, эквализация треков и т.д.) • Патчи пьес для эффекта разрыва • Патчи пьес для эффекта мастеринга • Аранжировка/паттерн • Эффект петли •
Äëÿ çàìåòîê 110
Ìàñòåðèíã 111
Èñïîëüçîâàíèå ýôôåêòîâ ìàñòåðèíãà В данной главе изложен процесс микширования записанных треков на два трека и применение “эффекта мастеринга” для создания законченной композиции с оптимальным уровнем громкости. Ïîíÿòèå ýôôåêòà ìàñòåðèíãà При создании CD из записанных пьес крайне важно поддерживать
Èñïîëüçîâàíèå ýôôåêòîâ ìàñòåðèíãà 1 6 Нажмите кнопку [MENU]. Нажмите кнопку [MASTER FX]. Кнопка [MASTER FX] загорится, и эффект мастеринга 2 включится. Кнопками CURSOR [ ]/[ ] установите курсор на “MASTERING” и нажмите кнопку [ENTER]. Отобразится экран MASTER FX. MasteringFX-e.eps P: пресетный / S:
Èñïîëüçîâàíèå ýôôåêòîâ ìàñòåðèíãà 12 По окончании мастеринга нажмите кнопку [STOP]. 2 Выберите эффект мастеринга. Результат сохранится на выбранный для записи трек, и Кнопками CURSOR [ отобразится экран PREVIEW. сетный, пользовательский патч или патч пьесы, а так- D_Master_Preview.eps ]/[ ] и
Èñïîëüçîâàíèå ýôôåêòîâ ìàñòåðèíãà Ñîõðàíåíèå óñòàíîâîê ýôôåêòà ìàñòåðèíãà (Write) Ниже описано, как определить имя созданного патча и сохранить его в качестве нового патча. 1 Ñïèñîê ïàðàìåòðîâ Параметр/ Значение DYNAMICS На экране выбора эффекта мастеринга кнопкой CURSOR [ ] установите курсор на
Èñïîëüçîâàíèå ïüåñ ïîñëå ìàñòåðèíãà Ïåðåâîä ïüåñû â ôîðìàò, ðàñïîçíàâàåìûé êîìïüþòåðîì Созданные в BR-800 пьесы можно преобразовать в файлы WAV/AIFF с помощью “BOSS BR Series Wave Converter”. После такого преобразования становятся доступными следу- Çàïèñü îáðàáîòàííîé ýôôåêòîì ìàñòåðèíãà ïüåñû íà
Èñïîëüçîâàíèå USB 117
Ïîäãîòîâêà ê ðàáîòå ñ USB BR-800 оборудован интерфейсом USB. При подключении его к компьютеру становятся доступными следующие операции. ● Èñïîëüçîâàíèå BR-800 â êà÷åñòâå àóäèîèíòåðôåéñà èëè ïàíåëè óïðàâëåíèÿ (ñòð. 119, ñòð. 120). ● Îáìåí äàííûìè ìåæäó BR-800 è êîìïüþòåðîì (ñòð. 121). ● Ñîçäàíèå
Ðàáîòà BR-800 â êà÷åñòâå àóäèîèíòåðôåéñà Перед подключением BR-800 к компьютеру необходимо установить драйвер USB (стр. 118). Çàïèñü â BR-800 àóäèîñèãíàëîâ êîìïüþòåðà Воспроизводящиеся в компьютере аудиосигналы можно передать по USB в BR-800 и записать их на треки BR-800. Çàïèñü àóäèîñèãíàëîâ èç
Ðàáîòà BR-800 â êà÷åñòâå ïàíåëè óïðàâëåíèÿ Ðàáîòà ñ SONAR LE Перед подключением BR-800 к компьютеру необходимо установить драйвер USB (стр. 118). SONAR LE находится на “BR-800 DVD-ROM”. См. файл “ReadmeEN.txt” на “BR-800 DVD-ROM”. Также см. документацию на SONAR LE, находящуюся на “BR-800 DVD-ROM”.
Îáìåí äàííûìè ñ êîìïüþòåðîì Ïåðåäà÷à ôàéëîâ WAV • Перед подключением BR-800 к компьютеру необходимо установить драйвер USB (стр. 118). • BR-800 не поддерживает длинные имена файлов. BR-800 поддерживает работу с файлами WAV, имею- Длинные имена отображаются некорректно. щими следующий формат. Имя
Îáìåí äàííûìè ñ êîìïüþòåðîì 5 Нажмите кнопку [ENTER]. 7 Отобразится экран Idling. Отключите BR-800 от компьютера. Windows D_USB_Idling.eps В “My Computer” правой кнопкой мыши нажмите иконку “BOSS_BR-800” (или “removable disk (*:)”) и выберите “Eject”. Mac OS Перетащите иконку “BR-800” на иконку
Ñîõðàíåíèå äàííûõ â êîìïüþòåð (Backup/Recover) 4 ]/[ ] установите курсор на “BACKUP” и нажмите кнопку [ENTER]. Перед подключением BR-800 к компьютеру необходимо установить драйвер USB (стр. 118). Кнопками CURSOR [ Отобразится экран BACKUP. D_USB_Backup.eps Когда карта SD заполнена или требуется
Ñîõðàíåíèå äàííûõ â êîìïüþòåð (Backup/Recover) • При архивировании/восстановление необходимо перетаскивать мышью всю папку “ROLAND”. Если скопировать только часть этой папки, использование данных в BR-800 будет невозможно. • В процессе операции восстановления экран компьютера может отобразить
Óñòàíîâêè USB Ниже описаны установки BR-800, относящиеся к USB. Произведите эти установки согласно конкретной ситуации. 1 Параметр/ Описание Значение DIR MONITOR (Direct monitor) Определяет, будут или нет аудиосигналы BR-800 подаваться на разъемы PHONES и LINE OUT. Нажмите кнопку [MENU].
Óñòàíîâêè USB Параметр/ Описание Значение OUT POSITION (Output position) Определяет выводимый через USB сигнал BR-800. * В режиме Control Surface сигнал выводится после регулятора [REC LEVEL]. Выводится сигнал после фейдера MASTER [MASTER]. Выводится сигнал после регулятора [REC LEVEL] (т.e.,
Äîïîëíèòåëüíûå ôóíêöèè 127
Íàñòðîéêà êîíòðàñòíîñòè äèñïëåÿ В зависимости от места расположения BR-800 и условий работы изображение на дисплее может стать трудно различимым. Если это произошло, отрегулируйте контрастность дисплея с помощью следующей процедуры. 1 2 Нажмите кнопку [MENU]. Кнопками CURSOR [ ]/[ ] установите
Ðàáîòà ñ íîæíîé ïåäàëüþ/ïåäàëüþ ýêñïðåññèè Если подключить ножную педаль (опциональную BOSS FS5U или Roland DP-2) к разъему FOOT SW/EXP PEDAL тыль- Ðàáîòà ñ ïåäàëüþ ýêñïðåññèè ной панели, с ее помощью можно будет управлять различПедаль экспрессии можно использовать при включенном ными функциями.
Íàñòðîéêà èíñòðóìåíòà (TUNER) BR-800 имеет хроматический тюнер для настройки гитар и бас-гитар. ■ Èíäèêàöèÿ ïðè íàñòðîéêå Встроенный в BR-800 тюнер отображает опорный тон, имя Ниже описана процедура настройки гитары. * При использовании тюнера воспроизведение или запись недо- ноты и шкалу
Íàñòðîéêà èíñòðóìåíòà (TUNER) 3 Используя шкалу настройки, настраивайте гитару Óñòàíîâêà îïîðíîãî òîíà так, чтобы загорелся центральный индикатор. Опорный тон для настройки гитары задается относительно Если высота тона находится в рамках ±50 центов от частоты ноты A4 (центральное A на клавиатуре
Ìèêøèðîâàíèå ñèãíàëà ñ àóäèîóñòðîéñòâà (LINE IN MIX) Функция “Line In Mix” позволяет микшировать сигнал входа LINE IN с сигналом выхода LINE OUT. 1 Нажмите кнопку [MENU]. Функция “Line In Mix” позволяет избежать использования внешнего микшера. Сигнал внешнего аудиоустройства микшируется с сигналом
Âûõîäíûå óñòàíîâêè (OUTPUT) Óñòàíîâêè äëÿ LINE OUT è PHONES (OUTPUT MODE) Óñòàíîâêà ãðîìêîñòè â íàóøíèêàõ (PHONES LEVEL) Аудиосигналы треков и ударных можно распределить между выходами LINE OUT и PHONES. 1 Нажмите кнопку [MENU]. Это удобно, когда требуется воспроизводить сигналы треков через выходы
Ðàçó÷èâàíèå ôðàç (PHRASE TRAINER) BR-800 имеет функцию Phrase Trainer, позволяющую понизить скорость воспроизведения (Time Stretch) или ослабить сигнал вокала или соло-гитары, расположенный в центре стереопанорамы (Center Cancel), что упрощает разучивание • При включенной функции Phrase Trainer
Ðàçó÷èâàíèå ôðàç (PHRASE TRAINER) Îñëàáëåíèå öåíòðàëüíîãî ñèãíàëà (CENTER CANCEL) 5 Кнопками CURSOR [ ]/[ ] установите курсор на “CENTER ADJUST” и колесом откорректируйте установку, добиваясь максимального ослабления цент- Данная функция позволяет ослабить сигнал в центре стереопанорамы (например,
Âîññòàíîâëåíèå çàâîäñêèõ íàñòðîåê (FACTORY RESET) Операция “Factory Reset” восстанавливает заводские настройки BR-800. Также можно выбрать типы восстанавливаемых настроек. 5 Нажмите кнопку [ENTER] для выполнения операции Factory Reset или нажмите кнопку [EXIT] для отмены. 1 2 После нажатия кнопки
Èíèöèàëèçàöèÿ êàðòû SD (FORMAT) 1 • При форматировании все данные на карте уничтожаются. Обязательно архивируйте важные дан- 2 ные перед форматированием (стр. 123). • После форматирования прилагаемой к BR-800 кар- Нажмите кнопку [MENU]. Кнопками CURSOR [ ]/[ ] установите курсор на “SD CARD” и
Ïðîñìîòð èíôîðìàöèè î êàðòå SD (SD CARD INFORMATION) Можно просмотреть информацию о карте SD. 1 2 Нажмите кнопку [MENU]. Кнопками CURSOR [ ]/[ ] установите курсор на “SD CARD” и нажмите кнопку [ENTER]. 3 Кнопками CURSOR [ ]/[ ] установите курсор на “INFORMATION” и нажмите кнопку [ENTER].
Ôóíêöèÿ ýíåðãîñáåðåæåíèÿ (POWER SAVE) Данная функция приглушает свечение подсветки дисплея и кнопок в целях экономии энергопотребления, если в течение заданного интервала времени манипуляций с кнопками и колесом не производится. ■ Âûõîä èç ñîñòîÿíèÿ Power Save При любых манипуляциях с кнопками или
Ðàáîòà ñ êîíäåíñàòîðíûì ìèêðîôîíîì (PHANTOM POWER) При использовании конденсаторного микрофона, требующего фантомного питания, включите фантомное питание, как 1 Нажмите кнопку [MENU]. описано ниже. BR-800 обеспечивает фантомное питание +48 В для конденсаторного микрофона, подключенного к разъему
Ïðèëîæåíèå 141
Êàðòû SD, ïîääåðæèâàåìûå BR-800 Для записи и воспроизведения аудиоматериала в BR-800 используются карты SD. ■ Ïîääåðæèâàåìûå êàðòû SD ■ Ôîðìàòèðîâàíèå êàðòû SD Перед использованием новой карты SD ее требуется отформатировать. См. “Инициализация карты SD (FORMAT)” (стр. 137). При использовании карт
Êàðòû SD, ïîääåðæèâàåìûå BR-800 4 ■ Èçâëå÷åíèå êàðòû SD Чтобы не потерять винт, заверните его на место Аккуратно нажмите на карту SD и затем отпустите палец. крестовой отверткой Phillips (+), как показано на ри- Карта SD немного выйдет из слота, после этого вытащите сунке. ее. fig.CardSlot03.eps •
Ñïèñîê àðàíæèðîâîê/ïàòòåðíîâ Ñïèñîê ïðåñåòíûõ àðàíæèðîâîê В пресетных аранжировках (кроме Metro 4/4) после E (кода) следует 3-тактная пауза (BREAK) и затем Начальный такт Имя аранНачаль# Размер BREAK жировки ный темп IN V1 F1 V2 F2 V2 END P01 ROCK1 130 4/4 1 2 4 6 8 10 12 16 P02 ROCK2 130 4/4 1 3 5
Ñïèñîê àðàíæèðîâîê/ïàòòåðíîâ Ñïèñîê ïðåñåòíûõ ïàòòåðíîâ Имя паттерна (Аббревиатура на дисплее) ROCK1 ROCK2 ROCK3 ROCK4 ROCK5 ROCK6 Hard Rock 1(HdRc1) Hard Rock 1(HdRc2) Hard Rock 1(HdRc3) Hard Rock 1(HdRc4) Hard Rock 1(HdRc5) HEAVY1 (HEVY1) HEAVY2 (HEVY2) HEAVY3 (HEVY3) HEAVY4 (HEVY4) HEAVY5
Íåèñïðàâíîñòè В данной главе перечислены типовые проблемы и способы их решения. Если проблему самостоятельно решить не удалось, обратитесь в сервисный центр. Ïðîáëåìû ñ ïèòàíèåì Проблема Питание не включается Описание Корректно ли установлен селектор питания BR-800? Установите селектор питания
Íåèñïðàâíîñòè Проблема Запись не производится Не отключается реверберация Записанный звук содержит шумы или искажения Возникновение самовозбуждения Описание Не защищена ли пьеса от записи? Установлена ли карта SD? Достаточно ли свободного места на карте SD? Не заблокирована ли карта SD? Не
Íåèñïðàâíîñòè Ïðîáëåìû ñ USB Проблема Не отображается экран Idling Описание Корректно ли подключен кабель USB? Поддерживает ли операционная система компьютера работу с BR-800? Стр. 32 118 Не слышен входной сигнал с USB Не установлен ли параметр INPUT MIX в “OFF”? 125 Панель управления работает
Ñîîáùåíèÿ îá îøèáêàõ При попытке выполнения ошибочной операции или сбое при выполнении операции на дисплее отображается сообщение об ошибке. При появлении сообщения об ошибке выполните соответствующее действие. Сообщение Already exists! Battery low! Cannot change file name! Cannot erase! Cannot
Ñîîáùåíèÿ îá îøèáêàõ Сообщение Причина Достигнуто максимальное количество событий для одной пьесы BR-800. Действие Сотрите ненужные треки. Стр. 105 Ïîíÿòèå ñîáûòèÿ Event full! No card! No file! No song! Not available! Power down! Protected! Stop P.Trainer! Stop recorder! System error! Too many
Ñîîáùåíèÿ îá îøèáêàõ Сообщение Unsupported card! Unsupported format! USB buffer full! Memory full! Причина BR-800 работу с данной картой SD не поддерживает. Формат карты SD не поддерживается BR-800. Попытка импорта файла WAV, не поддерживаемого BR-800. По USB передается слишком плотный поток
Òåõíè÷åñêèå õàðàêòåðèñòèêè BR-800: Öèôðîâîé ðåêîðäåð Треки Частота дискретизации Частотный диапазон АЦП ЦАП Номинальный входной уровень Входное сопротивление Номинальный выходной уровень Выходное сопротивление Рекомендуемое сопротивление нагрузки Уровень шумов Дисплей Разъемы Питание Потребляемый
fig.15_WEEE_Small.eps Äàííûé ñèìâîë îçíà÷àåò, ÷òî îòìå÷åííîå èì èçäåëèå äîëæíî óòèëèçèðîâàòüñÿ îòäåëüíî îò äîìàøíèõ îòõîäîâ, ñîãëàñíî ïðèíÿòîìó â êîíêðåòíîé ñòðàíå çàêîíîäàòåëüñòâó. fig.16_ChineseRoHS.eps
fig.09B-17.eps Äëÿ ñòðàí Åâðîïû Äàííîå èçäåëèå ñîîòâåòñòâóåò òðåáîâàíèÿì äèðåêòèâû EMC îò 2004/108/EC. fig.14.eps
Èíôîðìàöèÿ Ïðè íåîáõîäèìîñòè ðåìîíòà îáðàùàéòåñü â áëèæàéøèé òåõöåíòð Roland ïî àäðåñó: Roland Music Äîðîæíàÿ óë., ä. 3, êîðï.6 117 545 Ìîñêâà, Ðîññèÿ Òåë: (495) 981-4967
- Page 2
* Microsoft and Windows are registered trademarks of Microsoft Corporation. * Windows® is known officially as: “Microsoft® Windows® operating system.” * Apple and Macintosh are registered trademarks of Apple Inc. * Mac OS is a trademark of Apple Inc. * All product names mentioned in this document are trademarks or registered trademarks of their respective owners. * The SD logo ( ) and SDHC logo ( ) are trademarks of SD-3C, LLC. -
Page 3: Recording Flow On The Br-800
Recording Flow on the BR-800 Preparations for Recording Make Connections (p. 32) Turn the Power On/Off (p. 34) Record/Playback Record (p. 36) Playback (p. 41) Record with Effects Applied Turning the Insert Effect On/Off (p. 55) Easily Edit the Insert Effect (p. 55) Record while Listening to Rhythm Turn Rhythm On/Off (p.
-
Page 4: Using The Unit Safely
USING THE UNIT SAFELY About WARNING and CAUTION Notices About the Symbols symbol alerts the user to important instructions or Used for instructions intended to alert the warnings.The specific meaning of the symbol is user to the risk of death or severe injury determined by the design contained within the triangle.
- Page 5
108b • Before moving the unit, disconnect the AC • Protect the unit from strong impact. adaptor and all cords coming from external (Do not drop it!) devices……………………………………. 109b • Before cleaning the unit, turn off the power •… -
Page 6: Important Notes
IMPORTANT NOTES Power Supply: 355b • When moved from one location to another where the Use of Batteries temperature and/or humidity is very different, water droplets (condensation) may form inside the unit. • Do not connect this unit to same electrical outlet that is Damage or malfunction may result if you attempt to use being used by an electrical appliance that is controlled the unit in this condition.
- Page 7
IMPORTANT NOTES • Do not keep cards in direct sunlight, in closed • Never strike or apply strong pressure to the display. vehicles, or other such locations. • When connecting / disconnecting all cables, grasp the • Do not allow cards to become wet. connector itself—never pull on the cable. -
Page 8: Table Of Contents
Contents Recording Flow on the BR-800 ….3 Selecting the Track(s) for Recording ..38 Selecting V-Tracks……..39 USING THE UNIT SAFELY….4 Adjusting the Stereo Feel of the Input IMPORTANT NOTES……6 Sound (PAN)……….40 Main Features………. 11 Recording ……….40 Panel Descriptions……..
- Page 9
Contents Using Effects ……. 53 Creating an Original Arrangement ..96 Inserting a Step ……… 98 Using Insert Effects …….. 54 Erasing a Step ……….. 98 Effect Patches and Banks ……54 Naming an Arrangement……99 Turning the Insert Effect On/Off ..55 Copying an Arrangement ….. - Page 10
Contents Using the BR-800 as an Adjusting the Headphone Volume (PHONES LEVEL)……..135 Audio Interface ……..119 Recording Audio from the BR-800 on Practicing Phrases Your Computer ……..119 (PHRASE TRAINER)……136 Using the BR-800 to Hear Songs Slowing Down the Speed Played Back by Your Computer .. -
Page 11: Main Features
Main Features The BR-800 is a digital recorder that allows even the beginner to create songs easily. From recording to mastering, this convenient device makes it easy for you to start enjoying the benefits of digital recording. Four-Track Simultaneous Connecting via USB (p. 117) Recording/Eight-Track There are three ways of powering the unit: with an AC Simultaneous Playback…
-
Page 12: Panel Descriptions
Panel Descriptions Top Panel fig.TopPanel.eps PEAK indicators These indicate whether distortion is occurring with respect MIC L/R (internal stereo microphones L/R) to INPUT 1–4 jacks or with the internal stereo microphones (input sources). You can use these microphones to record in stereo. “Selecting the Input Source”…
- Page 13
Panel Descriptions Track [1]–[7/8] faders [RETRY] button These faders adjust the playback volume of each track. This button returns to the time location at which you last started recording. [RHYTHM] fader [REPEAT] button This fader adjusts the volume of the rhythm. Use this button to specify a desired section for repeated listening. - Page 14
Panel Descriptions fig.TopPanel.eps [TRACK] button [EFFECTS] button This button allows you to adjust each track’s tone quality or This button accesses a screen in which you can turn the edit the track (p. 105). insert effect (p. 54) on/off and edit its settings. [MENU] button [RHYTHM] button This button accesses various functions, such as settings for… -
Page 15: About The Play Screen
Panel Descriptions Power This indicates the power supply status. Display Indication Explanation fig.Display.eps Power is being supplied from the AC adaptor. Power is being supplied from the com- puter. The batteries are in good condition. The batteries are running low. The batteries are almost empty.
-
Page 16: Front Panel
Panel Descriptions Front Panel fig.FrontPanel.eps PHONES jack (stereo phone type) Connect separately sold stereo headphones here. Connecting headphones will allow you to hear the same sound as the LINE OUT jacks outputs. Use the [MASTER] fader to adjust the headphone volume. If the OUTPUT MODE (p.
-
Page 17: Rear Panel
Panel Descriptions Rear Panel fig.RearPanel.eps Security Slot ( http://www.kensington.com/ LINE OUT jacks These are analog audio output jacks. You can connect them to external audio equipment (e.g., a stereo amp), or to a CD recorder or similar device to record the BR-800’s analog output (p. 116). FOOT SW/EXP PEDAL (Foot switch/Expression pedal) jack A separately sold foot switch (BOSS FS-5U, Roland DP-2) or expression pedal (Roland EV-5, BOSS FV-500L/FV-500H) can be connected here.
-
Page 18: Side Panel
Panel Descriptions Side Panel fig.SidePanel.eps MEMORY CARD (SD card) slot Insert an SD card. Recording is not possible unless an SD card is inserted. “SD Cards that Can Be Used with the BR-800” (p. 146) USB connector This connector lets you connect the BR-800 to your computer via a USB cable. When connected to a computer, you’ll be able to do the following things.
-
Page 19: Installing Batteries
Panel Descriptions Installing Batteries Make sure that the [POWER] switch is “OFF.” • When turning the unit upside-down, get a bunch of newspapers or magazines, and place them Turn the BR-800 upside down. under the four corners or at both ends to prevent damage to the buttons and controls.
- Page 20
MEMO… -
Page 21: Quick Start
Quick Start…
-
Page 22: Listening To The Demo Songs
Listening to the Demo Songs The SD card included with the BR-800 contains demo songs. Here’s how to play back the demo songs. 1. Make Connections With the power switched off on both the BR-800 and your monitor speakers, make connections as shown below. fig.Quick_EZ1-e.eps Monitor speakers AC adaptor…
-
Page 23: Turn On The Power
Listening to the Demo Songs 2. Turn on the Power * You must use the following procedure to turn on the power. Using an incorrect order may cause malfunction or speaker damage. Lower the BR-800’s [MASTER] fader. fig.Quick_DemoSong2-1.eps Turn on the [POWER] switch. fig.Quick_DemoSong2-2.eps Turn on the power of your monitor speakers.
-
Page 24: Listen To The Demo Songs
Listening to the Demo Songs 3. Listen to the Demo Songs Press the [MENU] button. The MENU screen will appear. D_Menu_Input.eps Use the CURSOR [ ] buttons to move the cursor to “SONG,” and press the [ENTER] button. The SONG screen will appear. D_Song_New.eps Use the CURSOR [ ] buttons to move the cursor to “SELECT,”…
- Page 25
Listening to the Demo Songs Set the faders to the positions shown below. fig.Quick_DemoSong3-5-e.eps Track faders to nominal position. [MASTER] fader at minimum. Press the [PLAY] button. Song playback will start. Slowly raise the [MASTER] fader to adjust the volume. fig.Quick_DemoSong3-6.eps Move the track faders to adjust each track’s volume as desired. -
Page 26: Recording With The Ez Recording Function
Recording with the EZ Recording Function EZ Recording is a function that makes it easy to start recording. Simply select a recording source and the desired musical style, and the most suitable effect and rhythm settings will be made automatically. As an example, here how to record your guitar.
-
Page 27: Recording
Recording with the EZ Recording Function Press the [ENTER] button. The EZ REC-3 screen will appear. The effect and rhythm for the selected SOURCE and CATEGORY are shown. D_EZ_Rec_Result_Guitar.eps You can use the CURSOR [ ] buttons and the dial to change the effect or rhythm. Press the [ENTER] button.
- Page 28
Recording with the EZ Recording Function Slowly increase the [MASTER] fader to adjust the volume to the appropriate level for monitoring. fig.Quick_EZ2-3.eps Press the [REC] button. The [REC] button will blink red; the BR-800 is now in recording-standby mode. fig.Quick_EZ2-4-e.eps Blinking Press the [PLAY] button. -
Page 29: Playing Back
Recording with the EZ Recording Function 3. Playing Back Press the [ZERO] button to return to the beginning of the song. The current time location will change to 00:00:00-00:0. fig.Quick_EZ3-1.eps Press the [PLAY] button. Song playback will start. Use the [MASTER] fader to adjust the playback volume. fig.Quick_EZ3-2.eps This completes recording using the EZ Recording function.
-
Page 30: Ez Recording Parameter List
Recording with the EZ Recording Function EZ Recording Parameter List SOURCE CATEGORY Choose the setting that’s appropriate for the input source Choose the style of music that’s closest to what you have in you’re recording. mind for your song. Parameter Explanation Parameter Choose this when recording an electric…
-
Page 31: Getting Ready To Record
Getting Ready to Record…
-
Page 32: Making Connections
Making Connections Make connections as shown in the illustrations below. Make sure that the power to all of your equipment is switched off before you make connections. fig.panel-e.eps ■ Front Panel Electric guitar Stereo headphone Electric bass ■ Rear Panel Portable audio player etc.
-
Page 33: Using The Cord Hook
Making Connections • To prevent malfunction and/or damage to speakers • Some connection cables contain resistors. When or other devices, always turn down the volume, and connection cables with resistors are used, the sound turn off the power on all devices before making any level may be extremely low, or impossible to hear.
-
Page 34: Turning The Power On/Off
Turning the Power On/Off Turning the Power On Turning the Power Off Once the connections have been completed (p. 32), turn on power to your various devices in the order specified. By Make sure that song playback is stopped. turning on devices in the wrong order, you risk causing malfunction and/or damage to speakers and other devices.
-
Page 35: Recording/Playback
Recording/ Playback…
-
Page 36: Recording
Recording Creating a New Song Selecting a Song (SONG NEW) (SONG SELECT) The BR-800 manages your recordings in units called Select the song that you want to record. “songs.” To record a new song, carry out the procedure below. Press the [MENU] button. Press the [MENU] button.
-
Page 37: Selecting The Input Source
Recording Selecting the Input Source Use the CURSOR [ ] buttons to move the cursor to “MODE,” and use the dial to choose the Here’s how to select the input source you’ll be recording, number of tracks that you’ll be recording. and specify the number of tracks that you want to record.
-
Page 38: Adjusting The Recording Level
Recording Adjusting the Recording Selecting the Track(s) for Level Recording Here’s how to adjust the volume of the recording on the track. Press one of the track 1–7/8 [REC] buttons to select the track(s) on which recording will occur. The indicators on the buttons show the track status as Lower the [MASTER] fader.
-
Page 39: Selecting V-Tracks
Recording Selecting V-Tracks What are V-Tracks? Each of the BR-800’s tracks contains eight “V-tracks,” and Each track consists of eight virtual tracks, and you you can choose one of these V-tracks for recording or can choose any one of these tracks for recording or playback.
-
Page 40: Adjusting The Stereo Feel Of The Input Sound (Pan)
Recording Adjusting the Stereo Feel of Recording the Input Sound (PAN) You can adjust the stereo feel (pan) of your instruments’ Press the [REC] button. input sound. The [REC] button will blink red, and the BR-800 will enter recording-standby mode. fig.Rec03-e.eps Press the [TRACK] button.
-
Page 41: Loop Recording
Recording Loop Recording Playback Loop recording is a function that copies the recorded data when you stop recording, making it occupy approximately Press the [ZERO] button. 200 measures. The time location of the song will return to 00:00:00- By using Loop recording you can easily create looped 00:0.
-
Page 42: Recording Additional Performances (Overdubbing)
Recording Additional Performances (Overdubbing) Tracks whose track [PLAY] button is lit or blinking already source during recording, use the [MASTER] fader to lower contain recorded sound. the volume. If you want to adjust the volume of the performances that are playing back, use the track faders of The process of listening to previously recorded sound while each track.
-
Page 43: Playing Back Repeatedly (Repeat)
Playing Back Repeatedly (Repeat) Specifying the Repeat If you want to save the repeat region you specified, Region save the song. By using the “repeat” function you can repeatedly play back a specified region. “Saving a Song (SAVE CURRENT STATE)” (p. 109) The repeat region will repeatedly play back as follows.
-
Page 44: Setting The Repeat Region To An Exact Interval
Playing Back Repeatedly (Repeat) Setting the Repeat Region to an Exact Interval By pressing the [REPEAT] button twice at the same location, you can set the repeat region to a single Normally, the repeat start/end points will be set to the measure.
-
Page 45: Re-Recording Only Over A Mistake (Punch-In/Out)
Re-Recording Only Over a Mistake (Punch-In/Out) When recording, there may be times when you made a mistake or were unable to play as you intended. In such Play back the song, and use the [REC LEVEL] knob to cases, you can use punch-in/out to re-record only the adjust the volume of the input source.
-
Page 46: Auto Punch-In/Out
Re-Recording Only Over a Mistake (Punch-In/Out) ■ Using a foot switch Auto Punch-In/Out If you’re recording an instrumental performance by yourself and simultaneously operating the recording “Auto punch-in/out” is the operation of automatically system, it’s convenient to use a separately sold foot switch punching-in/out at the locations you specify beforehand.
- Page 47
Re-Recording Only Over a Mistake (Punch-In/Out) ■ Recording Use the CURSOR [ ] buttons to move the In this example, we’ll explain how to specify the auto punch-in/out locations beforehand, and then re-record a cursor to “DISP,” and turn the dial to choose the units specified region of the previously recorded track 1. -
Page 48: Cancelling An Operation (Undo/Redo)
Cancelling an Operation (UNDO/REDO) There may be times when you would like to cancel the Returning to the Previous result of an operation; for example, when recording, you State (UNDO) might not have been able to record as you intended, or you might have made a mistake when making editing settings.
-
Page 49: Viewing Information About The Song
Viewing Information about the Song Viewing the Remaining Viewing Song Information Recording Time Here’s how to view information about the song. Here’s how you can make the recording-standby or recording screen show the remaining recording time. Press the [MENU] button. Press the [MENU] button.
-
Page 50: Simple Recording (Song Sketch)
Simple Recording (SONG SKETCH) By putting the BR-800 in Song Sketch mode, you can use it Recording as a stereo WAV file recorder/player. This provides an easy way to record your song ideas and phrases. Press the [SONG SKETCH] button. Switching to Song Sketch The SONG SKETCH screen will appear.
-
Page 51: Playback
Simple Recording (SONG SKETCH) Erasing a WAV File Press the [REC] button. Recording will begin. Here’s how to erase a WAV file. The [PLAY] button will light green, and the [REC] button will light red. fig.Rec04-e.eps Press the [SONG SKETCH] button. The SONG SKETCH screen will appear.
-
Page 52: Naming A Wav File
Simple Recording (SONG SKETCH) Naming a WAV File Viewing Information about the WAV File You are free to assign a name to a WAV file. Here’s how to view information about the WAV file. Press the [SONG SKETCH] button. The SONG SKETCH screen will appear. Press the [SONG SKETCH] button.
-
Page 53: Using Effects
Using Effects…
-
Page 54: Using Insert Effects
Using Insert Effects The BR-800 has independent processors for four different Effect patches are further organized within each bank as kinds of effects: insert effects, loop effects, track EQ, and follows. mastering effects. Preset patches You can use these simultaneously, and make settings for Preset patches already contain patch data;…
-
Page 55: Turning The Insert Effect On/Off
Using Insert Effects Turning the Insert Effect On/ Use the CURSOR [ ] buttons to move the cursor to “EZ TONE,” and press the [ENTER] button. The EZ TONE screen will appear. Press the [EFFECTS] button. Use the [CURSOR] buttons to operate the tone grid to The [EFFECTS] button will light, and the insert effect get the desired sound.
-
Page 56: Editing The Insert Effect Settings
Using Insert Effects Editing the Insert Effect If you want to save the current effect settings, proceed Settings as described in “Saving the Insert Effect Settings (Write)” (p. 57). To create a new effect sound, choose an existing patch that’s close to what you have in mind, and then edit it.
-
Page 57: Saving The Insert Effect Settings (Write)
Using Insert Effects Saving the Insert Effect Use the CURSOR [ ] buttons to move the Settings (Write) cursor to each effect, and use the dial to specify the on/off status of each effect. Here’s how to assign a name (patch name) to the effect The icons show the status of each effect as follows.
-
Page 58: Changing The Location Of The Insert Effect (Location)
Using Insert Effects ■ INPUT <REC DRY> Changing the Location of This setting lets you monitor the sound that has passed the Insert Effect (LOCATION) through the insert effect, but the sound unprocessed by the effect (i.e., the dry sound) will be recorded. Use this setting The BR-800 lets you change the location of the insert effect, if you want to try out various effects after recording.
-
Page 59: Algorithm List
Using Insert Effects Algorithm List The algorithms (the available effects and their connection order) that can be used as an insert effect are shown below. The algorithms that can be selected will differ for each bank. To select the algorithm that you wish to use, first select the effect bank that includes that algorithm, and select a patch that uses the desired algorithm.
-
Page 60: Bass Multi
Using Insert Effects 3. GUITAR TO BASS 5. BASS MULTI Simulates the sound of a bass guitar. This is a multi-effect designed for bass guitar. Obtain the sound of a bass guitar while playing an electric Appropriate for creating standard bass sound. guitar.
-
Page 61: Vocal Multi
Using Insert Effects BANK : MICROPHONE BANK : LINE 6. VOCAL MULTI 8. STEREO MULTI This is a multi-effect for vocals. This algorithm connects seven types of effect, all in full stereo. It provides effects that are optimized for vocals. fig.StereoMulti.eps fig.VocalMulti.eps =[COMP/LM]=[LOFI]=[EQ]=[NS]…
- Page 62
Using Insert Effects BANK : SIMUL 9. VO + GT.AMP This algorithm is for use when simultaneously recording a vocal and electric guitar. For the guitar, you can produce an amp sound using a preamp and speaker simulator. (GUITAR) (MIC) fig.VOGTAMPGuitar.eps fig.VOGTAMPMic.eps -[COMP/LM]-[AMP]-[EQ]-[NS]-[MOD]-[DLY]-… - Page 63
Using Insert Effects 10. VO + AC.SIM 11. VO + ACOUSTIC This algorithm is for use when simultaneously recording a This algorithm is for use when simultaneously recording a vocal and electric guitar. vocal and acoustic guitar. For the guitar, you can make the electric guitar sound like For the guitar, you can produce a warm sound as though a an acoustic guitar. -
Page 64: Parameter List
Using Insert Effects BANK : 4INPUT Parameter List 12. 4-INPUT MULTI The trademarks listed in this document are trademarks of their respective owners, which are separate This is an effect for four-channel microphone recording. companies from BOSS. Those companies are not affiliated with BOSS and have not licensed or It provides the effects needed for recording with multiple authorized BOSS’s BR-800.
- Page 65
Using Insert Effects Parameter/ Parameter/ Explanation Explanation Range Range ATTACK This limiter lets you divide the input signal into four separate bands—ultra Adjusts the strength of the picking at- low, low, high, and ultra high frequen- tack when the strings are played. High- 0–100 cy ranges—and apply different settings er values result in s sharper attack,… - Page 66
Using Insert Effects Parameter/ Explanation Range RELEASE *3 The wah effect creates a unique tone by changing the Adjusts the time from when the signal frequency response characteristics of a filter. 0–100 level drops below the threshold until Parameter/ when limiting is removed. Explanation Range LO THRES *4… - Page 67
Using Insert Effects Parameter/ Parameter/ Explanation Explanation Range Range FREQUENCY *3 This is a crunch sound of the BOSS BD-2. BLUES OD This produces distortion that faithfully Adjusts the center frequency of the Wah 0–100 reproduces the nuances of picking. effect. - Page 68
Using Insert Effects Parameter/ Parameter/ Explanation Explanation Range Range TONE E.LEVEL (Effect Level) -50–+50 Adjusts the tone. 0–100 Adjusts the volume of the effect sound. E.LEVEL (Effect Level) D.LEVEL (Direct Level) 0–100 Adjusts the volume of the effect sound. 0–100 Adjusts the volume of the direct sound. - Page 69
Using Insert Effects Parameter/ Parameter/ Explanation Explanation Range Range This models the sound input to left in- This is a metal sound suited to heavy BOSS METAL put on a Matchless D/C-30. riffs. MATCH A simulation of the latest tube amp This models the lead channel of a DRIVE 5150 DRIVE… - Page 70
Using Insert Effects Parameter/ Parameter/ Explanation Explanation Range Range This is the built-in speaker of the amp MIC LEV (Mic Level) ORIGINAL you selected with PREAMP TYPE. 0–100 Adjusts the volume of the microphone. This is a compact open-back speaker D.LEVEL (Direct Level) 1×8”… - Page 71
Using Insert Effects Parameter/ Parameter/ Explanation Explanation Range Range BRIGHT *3 Simulates the condition that the micro- 1–10 phone is moved away from the center of Turns the bright setting on/off. the speaker cone. Bright is not used. MIC LEV (Mic Level) Bright is switched on to create a lighter and 0–100 Adjusts the volume of the microphone. -
Page 72: Noise Suppressor
Using Insert Effects EQUALIZER NOISE SUPPRESSOR This adjusts the tone as a equalizer. A parametric type is This effect reduces the noise and hum picked up by guitar adopted for the high-middle and low-middle range. pickups. Since it suppresses the noise in synchronization with the envelope of the guitar sound (the way in which the Parameter/ guitar sound decays over time), it has very little effect on…
- Page 73
Using Insert Effects Parameter/ MODULATION Explanation Range LOW LEVEL Use TYPE to select the effect that you want to use. Adjusts the enhancer volume for the low 0–100 Parameter/ frequency range. Explanation Range HIGH FREQ (High Frequency) ON/OFF 800Hz– Sets the high frequency range for the en- OFF, ON Turns the MODULATION effect on/off. -
Page 74: Slow Gear
Using Insert Effects BASS SIM (Bass Simulator) SLOW GEAR Simulation of the characteristics of particular bass This produces a volume-swell effect (“violin-like” sound). components such as pickups and different bass bodies Parameter/ allows you to switch among a number of different bass Explanation Range types all while using a single bass.
- Page 75
Using Insert Effects SITAR SIM (Sitar Simulator) P SHIFTER This simulates the sound of the sitar. This effect changes the pitch of the original sound (up or down) within a range of two octaves. Parameter/ Explanation Range Parameter/ Explanation Range TONE TYPE This adjusts the tone. - Page 76
Using Insert Effects PHASER FLANGER By adding varied-phase portions to the direct sound, the The flanging effect gives a twisting, jet-airplane-like phaser effect gives a whooshing, swirling character to the character to the sound. sound. Parameter/ Explanation Range Parameter/ Explanation Range RATE TYPE… - Page 77
Using Insert Effects ROTARY This produces an effect like the sound of a rotary speaker. With the volume level of the left and right sides alternately changing, when playing sound in stereo, you can get an Parameter/ effect that makes the guitar sound appear to fly back and Explanation Range forth between the speakers. - Page 78
Using Insert Effects CHORUS DBL DELAY (Doubling Delay) In this effect, a slightly detuned sound is added to the By adding a slightly time-delayed sound to the direct original sound to add depth and breadth. sound, this produces the impression that multiple sources are sounding together (a “doubling”… -
Page 79: Acoustic Simulator
Using Insert Effects DELAY ACOUSTIC SIMULATOR This effect adds delayed sound to the direct sound, giving Simulation of the characteristics of particular guitar more body to the sound or creating special effects. components such as pickups and different guitar bodies allows you to switch among a number of different guitar Parameter/ types all while using a single guitar.
-
Page 80: Pitch Correct
Using Insert Effects Parameter/ PITCH CORRECT Explanation Range TYPE Corrects inaccuracies in the pitch. With certain settings, pitch correct can make the pitch Select the type of GUITAR TO BASS processor. change in a coarse “stair-step” fashion to produce a The sound of a Fender Jazz Bass.
- Page 81
Using Insert Effects Parameter/ TONE/SFX Explanation Range If you’ve specified the key of your song, Adjusts the tonal character or applies special effects. -1OCT– +1OCT harmony that is suitable for that key will be added at the interval you specify here. Parameter/ Explanation By changing the vocal character, this pro-… -
Page 82: Low Cut
Using Insert Effects Parameter/ LOW CUT Explanation Range FILTER *3 This filter cuts out vocal pop and other unwanted low-band 0–100 This parameter adjusts the filter. noise. D:E *3 Parameter/ Explanation This adjusts the balance of the direct and ef- Range 100:0–0:100 fect volumes.
-
Page 83: Adding A Sense Of Spaciousness
Adding a Sense of Spaciousness By making use of the BR-800’s onboard “Loop Effects,” you can add a sense of spaciousness and depth to your sounds. Use the CURSOR [ ] buttons and the dial to You can adjust the effect depth by adjusting the send level adjust the send level of each track.
-
Page 84: Editing The Loop Effect
Adding a Sense of Spaciousness Editing the Loop Effect Parameter List REVERB Press the [TRACK] button. This effect adds reverberation to the sound. Parameter/ Use the CURSOR [ ] buttons to move the Explanation Range cursor to “REVERB” or “CHO/DLY,” and press the TYPE [ENTER] button.
- Page 85
Adding a Sense of Spaciousness Parameter/ CHORUS/DELAY Explanation Range E.LEVEL (Effect Level) Parameter/ 0–100 Adjusts the volume of the reverb sound. Explanation Range SPRG SENS (Spring Sensitivity) *1 TYPE Adjusts the sensitivity of the spring reverb Select the type of effect. 0–100 effect. -
Page 86: Adjusting The Tone Of Each Track
Adjusting the Tone of Each Track The BR-800 provides a three-band equalizer that’s Parameter List independent for each track. You can use this to adjust the tone quality of each track. Parameter/ Explanation Editing the Track EQ Range ON/OFF OFF, ON Turns the EQUALIZER effect on/off.
-
Page 87: Using Rhythm
Using Rhythm…
-
Page 88: Overview Of The Rhythm Section
Overview of the Rhythm Section The BR-800 provides a dedicated rhythm generator that is separate from the audio tracks 1–7/8. You can use this rhythm as a guide during recording, or The preset patterns include patterns for intro, verse, create an original rhythm backing by arranging various fill, and ending.
-
Page 89: About The Drum Sounds (Drum Kits)
Overview of the Rhythm Section ■ Arrangements About the Drum Sounds Although a pattern can be used by itself like a metronome (Drum Kits) to guide your practicing, that would mean that the rhythm does not change from the beginning to the end of the song. Typically, a drum performance uses a set that includes a If you want to create a song that has musical variation, variety of percussion instruments (such as kick drum and…
-
Page 90: Turning The Rhythm On/Off
Overview of the Rhythm Section Turning the Rhythm On/Off Switching between Pattern Mode and Arrangement Mode Press the [RHYTHM] button. The BR-800 lets you use rhythm in either of two modes: The [RHYTHM] button will light, and the rhythm will Pattern mode and Arrangement mode.
-
Page 91: Playing Patterns
Playing Patterns Here’s how to select one of the internal patterns and make it play repeatedly. Use the [RHYTHM] fader and the [MASTER] fader to adjust the volume appropriately. Press the [RHYTHM] button. The [RHYTHM] button will light, indicating that To stop playback, press the [STOP] button.
-
Page 92: Changing The Tempo
Playing Patterns Changing the Tempo Here’s how to change the pattern playback tempo when you’re in the play screen. Use the CURSOR [ ] buttons to move the cursor to the tempo indication. D_Play_Tempo.eps Turn the dial to adjust the tempo. The pattern playback tempo will change.
-
Page 93: Playing An Arrangement
Playing an Arrangement Here’s how to select and play one of the internal arrangements. Use the [RHYTHM] fader and the [MASTER] fader to adjust the volume appropriately. Press the [RHYTHM] button. The [RHYTHM] button will light, indicating that To stop playback, press the [STOP] button. Rhythm is on.
-
Page 94: Changing The Tempo
Playing an Arrangement Changing the Tempo Here’s how to change the playback tempo of an arrangement when you’re in the play screen. Use the CURSOR [ ] buttons to move the cursor to the tempo indication. D_Play_Tempo.eps Use the dial to adjust the tempo. The arrangement’s playback tempo will change.
-
Page 95: Changing The Drum Sounds (Drum Kit)
Changing the Drum Sounds (Drum Kit) A drum kit is a set containing various rhythm instrument Selecting a Drum Kit sounds. The BR-800 contains nine “preset drum kits.” By using “BR-800 Rhythm Editor” you can create five of your own original drum kits. Drum kits are saved for each Press the [RHYTHM] button.
-
Page 96: Creating An Original Arrangement
Creating an Original Arrangement The BR-800 lets you place patterns in the desired order to Now let’s try actually creating an arrangement. make an arrangement, thus creating the structure of your entire song from intro to ending. Once you’ve created an arrangement, you can save it as a song arrangement.
- Page 97
Creating an Original Arrangement Use the CURSOR [ ] buttons to move the cursor to the parameter that you want to edit, and use • The starting measure of step 1 will always be the dial to edit the value. “001.”… -
Page 98: Inserting A Step
Creating an Original Arrangement Inserting a Step Erasing a Step Here’s how to insert a new step at the current step. Here’s how to erase the selected step. The erased step will inherit the contents of the following step. fig.04-550.eps fig.04-570.eps Insert Verse…
-
Page 99: Naming An Arrangement
Creating an Original Arrangement Naming an Arrangement Press the [EXIT] button a number of times to return to the play screen. You can freely assign a name (arrangement name) of up to The screen will indicate “Keep power on!” and the eight characters to a song arrangement.
-
Page 100: Copying An Arrangement
Creating an Original Arrangement Copying an Arrangement Press the [ENTER] button. The copy confirmation screen will appear. If you want to slightly modify a preset arrangement, or D_Arrange_Erase_Sure.eps create a variation of an existing arrangement, you can do so by copying it as a song arrangement and then editing the copy.
-
Page 101: Erasing An Arrangement
Creating an Original Arrangement Erasing an Arrangement If you’re sure that you want to erase the arrangement, press the [ENTER] button. Here’s how to erase step 2 and all following steps of the If you decide to cancel, press the [EXIT] button. song arrangement.
-
Page 102: Delaying The Pattern/Arrangement Playback (Offset)
Delaying the Pattern/ Arrangement Playback (OFFSET) Here’s how you can specify a time offset by which the pattern or arrangement will be delayed relative to the playback of the audio tracks. Press the [RHYTHM] button. Use the CURSOR [ ] buttons to move the cursor to “OFFSET,”…
-
Page 103: Editing
Editing…
-
Page 104: Finding The Location At Which A Sound Begins Or Ends (Scrub/Preview)
Finding the Location at which a Sound Begins or Ends (Scrub/Preview) Scrub function When editing a song, you might need to find the precise Hold down the [STOP] button and press the [PLAY] button. location at which a sound begins or the region on which you want to perform auto punch-in recording.
-
Page 105: Editing
Editing Track Editing Press the [ENTER] button. The copy will be carried out. You can copy or erase tracks, or import song sketch data. * The display will indicate “Keep power on!” while the data is being updated. Do not turn off the power while this message is shown.
-
Page 106: Erasing Track Data
Editing ■ Erasing track data ■ Importing song sketch data into a track Press the [TRACK] button. Press the [TRACK] button. Use the CURSOR [ ] buttons to move the cursor Use the CURSOR [ ] buttons to move the to “TRACK EDIT,”…
-
Page 107: Copying A Song (Song Copy)
Editing Copying a Song Erasing a Song (SONG COPY) (SONG ERASE) Here’s how to copy the currently selected song. Here’s how to erase a song from SD card. Press the [MENU] button. Press the [MENU] button. Use the CURSOR [ ] buttons to move the Use the CURSOR [ ] buttons to move the…
-
Page 108: Naming A Song (Song Name)
Editing Naming a Song Protecting a Song (SONG NAME) (SONG PROTECT) When you create a new song, it will automatically be given A song you’ve created can be inadvertently recorded over or unintentionally erased. a name such as “SONG 0001.” When you’ve finished a To prevent such accidents, you can protect the song data song, you should give it an appropriate name so that your from being rewritten (Song Protect).
-
Page 109: Saving A Song (Save Current State)
Editing Saving a Song Saving Memory on the SD (SAVE CURRENT STATE) Card On the BR-800, the following content is saved as song data. When you overwrite or erase audio data by overdubbing, punch in/out recording, or track editing, this audio data •…
- Page 110
MEMO… -
Page 111: Mastering
Mastering…
-
Page 112: Using Mastering In Creating A Song
Using Mastering in Creating a Song What is the mastering effect? This chapter explains the process of mixing down your recorded tracks onto two tracks and applying a “mastering When creating a CD from your recorded songs, it’s effect” to create a finished song with the optimal volume important to manage the overall volume so that the loudest level.
- Page 113
Using Mastering in Creating a Song Press the [MENU] button. Press the [MASTER FX] button. The [MASTER FX] button will light, and the mastering effect will turn on. Use the CURSOR [ ] buttons to move the The MASTER FX screen will appear. cursor to “MASTERING,”… -
Page 114: Editing The Mastering Effect Settings
Using Mastering in Creating a Song When you’ve finished mastering, press the [STOP] Choose a mastering effect. button. Use the CURSOR [ ] buttons and the dial to The result will be saved on the mastering-destination select preset/song/user and the desired number. track, and the PREVIEW screen will appear.
-
Page 115: Saving The Mastering Effect Settings (Write)
Using Mastering in Creating a Song Saving the Mastering Effect Parameter List Settings (Write) Parameter/ Explanation Here’s how to assign a name to the patch you created, and Value save it as a new patch. DYNAMICS This adjusts the variation in volume be- tween loud and soft passages in the per- From the mastering effect select screen, press the formance.
-
Page 116: Making Use Of Songs After Mastering
Making Use of Songs After Mastering Making Use of Songs on Recording the Mastered Your Computer Song to an External Device Songs you’ve created using the BR-800 can be converted to Here’s how to record your mastered song onto your CD WAV/AIFF files using the “BOSS BR Series Wave recorder or other device.
-
Page 117: Using Usb
Using USB…
-
Page 118: Before Using Usb
Before Using USB The BR-800 is equipped with a USB connector. When Data Structure on the SD connected to your computer, you’ll be able to perform the Card following operations. ● Use the BR-800 as an audio interface or control The folders and files created on the SD card are in the surface (p.
-
Page 119: Using The Br-800 As An Audio Interface
Using the BR-800 as an Audio Interface Using the BR-800 to Record Songs Played Back by Your You must install the USB driver before connecting Computer the BR-800 to your computer (p. 118). Here’s how audio data played back by your computer can be sent to the BR-800 via USB and recorded on the BR-800’s Recording Audio from the tracks.
-
Page 120: Using The Br-800 As A Control Surface
Using the BR-800 as a Control Surface Use a USB cable to connect the BR-800 to your computer. You must install the USB driver before connecting the BR-800 to your computer (p. 118). Press the [MENU] button. The BR-800 can operate via USB as a controller for your The MENU screen will appear.
-
Page 121: Using Sonar Le
Using the BR-800 as a Control Surface Using SONAR LE Controllers that Can Be Used in Control Surface Mode SONAR LE can be found on the “BR-800 DVD-ROM.” For details on the location of SONAR LE, refer to You can use the following controllers to control your DAW “ReadmeEN.txt”…
-
Page 122: Exchanging Data With Your Computer
Exchanging Data with Your Computer Transferring WAV Files • You must install the USB driver before connecting the BR-800 to your computer (p. 118). • The BR-800 does not support long file names. The BR-800 can use WAV files that are in the For data with a long file name, the file name will following format.
- Page 123
Exchanging Data with Your Computer Press [ENTER]. Stop the connection between the BR-800 and your computer. The Idling screen will appear. D_USB_Idling.eps Windows users In My Computer, right-click the “BOSS_BR-800” icon (or the “removable disk (*:)” icon), and choose “Eject.” Mac OS users Drag the “BR-800”… -
Page 124: Saving Data On Your Computer (Backup/Recover)
Saving Data on Your Computer (Backup/Recover) Use the CURSOR [ ] buttons to move the cursor to “BACKUP,” and press the [ENTER] button. You must install the USB driver before connecting The BACKUP screen will appear. the BR-800 to your computer (p. 118). D_USB_Backup.eps When your SD card has filled up, or if you want to save important data on your computer, you can create a backup.
- Page 125
Saving Data on Your Computer (Backup/Recover) • When backing up or recovering, you must drag and drop the entire “ROLAND” folder. If you copy only a portion of the folders, the data might not be usable on the BR-800. • In some cases during the recover operation, your computer might display a message asking you to confirm the overwrite. -
Page 126: Making Settings For Usb Functionality
Making Settings for USB Functionality This section explains how to make settings for the BR-800’s Parameter List USB-related functionality. Make the settings that are appropriate for how you’re using the BR-800. Parameter/ Explanation Value DIR MONITOR (Direct monitor) Press the [MENU] button. This specifies whether the BR-800’s audio output will be The MENU screen will appear.
- Page 127
Making Settings for USB Functionality Parameter/ Explanation Value OUT POSITION (Output position) This specifies which signal of the BR-800 will be output via USB. * In Control Surface mode, the signal as it is immediately after passing through the [REC LEVEL] knob will be output. - Page 128
MEMO… -
Page 129: Convenient Functions
Convenient Functions…
-
Page 130: Adjusting The Display Contrast
Adjusting the Display Contrast Depending on the location in which the BR-800 is placed or the conditions of use, you might find the display difficult to read. If so, proceed as follows to adjust the display’s contrast. Press the [MENU] button. Use the CURSOR [ ] buttons to move the cursor to “SYSTEM,”…
-
Page 131: Using A Foot Switch/Expression Pedal
Using a Foot Switch/Expression Pedal If you connect a foot switch (such as the separately available Using an Expression Pedal BOSS FS-5U or Roland DP-2) to the FOOT SW/EXP PEDAL jack on the rear panel, you’ll be able to control some The expression pedal can be used when the insert effect is functions using your foot.
-
Page 132: Tuning Your Instrument (Tuner)
Tuning Your Instrument (TUNER) ■ Indications while tuning The BR-800 provides a Chromatic Tuner function that makes it easy to tune an instrument. The built-in tuner The BR-800’s built-in tuner shows the reference pitch, note supports guitar or bass guitar. name, and tuning guide.
-
Page 133: Specifying The Tuner’s Reference Pitch
Tuning Your Instrument (TUNER) Specifying the Tuner’s While watching the tuning guide, tune your Reference Pitch instrument so that the center indicator is lit. If the difference is within ±50 cents of the correct pitch, When tuning an instrument, the reference pitch is the tuning guide will show the difference between conventionally given as the frequency of the A4 note your instrument and the displayed pitch.
-
Page 134: Mixing The Sound From An Audio Device (Line In Mix)
Mixing the Sound from an Audio Device (LINE IN MIX) “Line In Mix” is a function that allows the input from LINE IN to be mixed with the output from LINE OUT. Press the [MENU] button. By using “Line In Mix” you can avoid having to use an external mixer.
-
Page 135: Output Settings (Output)
Output Settings (OUTPUT) Output Settings for LINE Adjusting the Headphone OUT and Headphone Volume (PHONES LEVEL) (OUTPUT MODE) The sound of the tracks and the rhythm sound can be Press the [MENU] button. divided between LINE OUT jacks and PHONES jack output.
-
Page 136: Practicing Phrases (Phrase Trainer)
Practicing Phrases (PHRASE TRAINER) The BR-800 provides a Phrase Trainer function, which lets you slow down the playback speed (Time Stretch) or minimize a vocal or guitar solo that’s localized at the center • You can’t perform recording operations while of the sound field (Center Cancel), so you can conveniently using Phrase Trainer (Time Stretch or Center practice your instrument by playing along with a recording.
-
Page 137: Minimizing Sounds In The Center (Center Cancel)
Practicing Phrases (PHRASE TRAINER) Minimizing Sounds in the Use the CURSOR [ ] buttons to move the Center (CENTER CANCEL) cursor to “CENTER ADJUST,” and use the dial to adjust the setting so that the sound you want to This function lets you minimize the sounds that are heard in eliminate is minimized.
-
Page 138: Restoring The Factory Settings (Factory Reset)
Restoring the Factory Settings (FACTORY RESET) The “Factory Reset” operation returns the BR-800 to its factory-set state. Press the [ENTER] button if you want to execute the You can also specify the range of settings that will be Factory Reset operation, or press the [EXIT] button if returned to their factory-set state.
-
Page 139: Initializing An Sd Card (Format)
Initializing an SD Card (FORMAT) Press the [MENU] button. • When you format a card, the entire contents of that card will be lost. Be sure to back up important Use the CURSOR [ ] buttons to move the data before you continue (p. 124). cursor to “SD CARD,”…
-
Page 140: Viewing The Sd Card Usage (Sd Card Information)
Viewing the SD Card Usage (SD CARD INFORMATION) Here’s how to view the usage status of the SD card. Press the [MENU] button. Use the CURSOR [ ] buttons to move the cursor to “SD CARD,” and press the [ENTER] button. Use the CURSOR [ ] buttons to move the cursor to “INFORMATION,”…
-
Page 141: Reducing The Battery Consumption (Power Save)
Reducing the Battery Consumption (POWER SAVE) ■ Exiting the Power Save state This function dims the display backlight and buttons to conserve power if no switch or dial has been operated for a When you operate a button or the dial, you’ll exit the Power certain length of time.
-
Page 142: Using A Condenser Microphone (Phantom Power)
Using a Condenser Microphone (PHANTOM POWER) If you’re using a condenser microphone that requires phantom power, turn on the phantom power as follows. Press the [MENU] button. The BR-800 can provide +48 V phantom power to a condenser microphone connected to the XLR connector of INPUT 4.
-
Page 143: Adjusting The Sensitivity Of The Touch Sensors
Adjusting the Sensitivity of the Touch Sensors The top panel of the BR-800 employs touch sensors. Over Press all of the buttons except the [EXIT] button and time, depending on the location in which you use the BR- [ENTER] button. 800 and the type of usage you subject it to, you may notice a Using the dial, adjust the value until a button’s name decline in the response of these touch sensors, or find that…
- Page 144
MEMO… -
Page 145: Appendixes
Appendixes…
-
Page 146: Sd Cards That Can Be Used
SD Cards that Can Be Used with the BR-800 ■ Formatting an SD card The BR-800 uses SD cards to record and play back. If you’re using a commercially available SD card, you’ll ■ SD cards that are known to work need to format it before use.
-
Page 147: Removing An Sd Card
SD Cards that Can Be Used with the BR-800 ■ Removing an SD card To prevent the removed screw from being lost, use a Gently press the SD card inward, and then release your Phillips (+) screwdriver to attach it in the location finger.
-
Page 148: Br-800 Effect Patch List
BR-800 Effect Patch List Insert Effects BANK: GUITAR 48 SPACY 11 3+5 LOW BANK: SIMUL 49 OCT LEAD 12 3rd+5th E.GUITAR MULTI VO + GT.AMP 50 PedalWah 13 3+5 HIGH 1 StckLead 1 Clean ACOUSTIC SIM 14 DIST 2 70HrdRck 2 Bluesy 51 for LP 15 RADIO…
-
Page 149: Mastering Effects
BR-800 Effect Patch List Mastering Effects Recommended Connections (4-INPUT MULTI) Mix Down Patch Recommended Connection PreMastr Name Live Mix INPUT1: for any instruments Pop Mix INPUT2: for any instruments 4CH LMT INPUT3: for any instruments DanceMix INPUT4: for any instruments JinglMix INPUT1: for any instruments HardComp…
-
Page 150: Arrangement / Pattern List
Arrangement / Pattern List Preset Arrangement List Each of the preset Arrangement (except Metro4/4) is set so that a BREAK, followed by V1 (verse) comes after the E (ending). Arrangement Initial Starting measure Drum Beat BREAK Name Tempo ROCK1 ROOM ROCK2 ROOM ROCK3…
-
Page 151: Preset Pattern List
Arrangement / Pattern List Preset Pattern List Pattern Name Measure Initial (Abbreviation shown Beat Tempo in display) ROCK1 ROCK2 ROCK3 ROCK4 ROCK5 ROCK6 Hard Rock 1 (HdRc1) Hard Rock 2 (HdRc2) Hard Rock 3 (HdRc3) Hard Rock 4 (HdRc4) Hard Rock 5 (HdRc5) HEAVY1 (HEVY1) HEAVY2 (HEVY2) HEAVY3 (HEVY3)
-
Page 152: Troubleshooting
Troubleshooting This section contains tips to help you solve problems. If this information does not help you solve the problem, please contact a customer service location listed at the end of this manual. Problems with the Power Supply Item Explanation Page Is the BR-800’s power switch set correctly? Make sure that the BR-800’s power switch is set to “USB”…
-
Page 153: Problems With The Sd Card
Troubleshooting Item Explanation Page Could the song be protected? p. 108 Is an SD card inserted? p. 146 Could the SD card have insufficient free space? p. 140 Could the SD card be locked? p. 147 Can’t record Could you be using the Phrase Trainer? p.
-
Page 154: Problems With Usb
Troubleshooting Problems with USB Item Explanation Page p. 32 Is the USB cable connected correctly? Idling screen does not appear Does your computer’s operating system support the BR-800? p. 118 Can’t hear sound being input via Could INPUT MIX be “OFF”? p.
-
Page 155: Error Message List
Error Message List An error message will appear in the display if you attempt to perform an invalid operation or if an operation could not be executed correctly. Take the appropriate action for the message that appears. Message Cause Action Page Already exists! There is a file of the same name.
- Page 156
Error Message List Message Cause Action Page Data could not be read or written fast Reduce the number of tracks being played simulta- enough because the data is stored on neously. Use the Mastering function to combine p. 112 the SD card in a fragmentary man- tracks, and erase the tracks that you don’t need to ner. - Page 157
Error Message List Message Cause Action Page The operation you attempted cannot Turn the Time Stretch and Center Cancel function Stop P.Trainer! be executed while the Phrase Trainer p. 136 “OFF.” (p. 136) is operating. The operation you attempted cannot be executed while the recorder is op- Press the [STOP] button to stop playback or record- Stop recorder! -
Page 158: Specifications
Specifications BR-800 : Digital Recorder Track: Tracks Simultaneously recording track: 4 V-Track: 64 (8 V-Tracks per each Track) Sample Rate 44.1 kHz Frequency Response 20 Hz to 20 kHz (+1/-3 dB) 24-bit AD Conversion 24-bit + AF-AD (GUITAR/BASS) DA Conversion 24-bit GUITAR/BASS jack: -10 dBu INPUT 1–4 jacks:…
-
Page 159: Index
Index Numerics Copying Arrangement ……100 4-INPUT MULTI ……. 64 GTR SIM ……….73 Song ……….. 107 8-TRACK COMP/LIM ….. 64 Guitar Simulator ……. 73 Track ………. 105 GUITAR TO BASS …… 60, 79 Cord hook ………. 33 GUITAR/BASS ……… 16 COSM ……….
- Page 160
Index Naming REPEAT ……… 13, 43–44 Time ………… 15 Arrangement ……99 Repeat ……….43 TIME STRETCH ……136 Insert effect ……… 57 RETRY ………. 13, 40 TONE/SFX ……..81 Mastering effect ……. 115 REVERB ……..83–84 TRACK ……… 14, 58 Song ……….. - Page 161
fig.15_WEEE_Small.eps For EU Countries fig.16_ChineseRoHS.eps For China… - Page 162
fig.09B-17.eps For EU Countries This product complies with the requirements of EMC Directive 2004/108/EC. For the USA FEDERAL COMMUNICATIONS COMMISSION RADIO FREQUENCY INTERFERENCE STATEMENT This equipment has been tested and found to comply with the limits for a Class B digital device, pursuant to Part 15 of the FCC Rules. - Page 163
When you need repair service, call your nearest Roland Service Center or authorized Roland Information distributor in your country as shown below. TAIWAN ECUADOR RUSSIA OMAN AFRICA EUROPE ROLAND TAIWAN ENTERPRISE Mas Musika Roland Music LLC TALENTZ CENTRE L.L.C. Rumichaca 822 y Zaruma Dorozhnaya ul.3,korp.6 Malatan House No.1 CO., LTD.

- Manuals
- Brands
- Boss Manuals
- Voice Recorder
- TurboStart BR-800
- Owner’s manual
-
Contents
-
Table of Contents
-
Troubleshooting
-
Bookmarks
Quick Links
Related Manuals for Boss BR-800
Summary of Contents for Boss BR-800
-
Page 2
© 2010 BOSS CORPORATION All rights reserved. No part of this publication may be reproduced in any form without the written permission of BOSS CORPORATION. BOSS is a registered trademark of BOSS CORPORATION in the United States and/or other countries. -
Page 3: Recording Flow On The Br-800
Recording Flow on the BR-800 Preparations for Recording Make Connections (p. 32) Turn the Power On/Off (p. 34) Record/Playback Record (p. 36) Playback (p. 41) Record with Effects Applied Turning the Insert Effect On/Off (p. 55) Easily Edit the Insert Effect (p. 55) Record while Listening to Rhythm Turn Rhythm On/Off (p.
-
Page 4: Using The Unit Safely
USING THE UNIT SAFELY About WARNING and CAUTION Notices About the Symbols symbol alerts the user to important instructions or Used for instructions intended to alert the warnings.The specific meaning of the symbol is user to the risk of death or severe injury determined by the design contained within the triangle.
-
Page 5
108b • Before moving the unit, disconnect the AC • Protect the unit from strong impact. adaptor and all cords coming from external (Do not drop it!) devices……………………………………. 109b • Before cleaning the unit, turn off the power •… -
Page 6: Important Notes
IMPORTANT NOTES Power Supply: 355b • When moved from one location to another where the Use of Batteries temperature and/or humidity is very different, water droplets (condensation) may form inside the unit. • Do not connect this unit to same electrical outlet that is Damage or malfunction may result if you attempt to use being used by an electrical appliance that is controlled the unit in this condition.
-
Page 7
• While using the BR-800, keep all cables and similar items away from the top panel, so they don’t come into contact with it. Do not place any objects on the panel. -
Page 8: Table Of Contents
Contents Recording Flow on the BR-800 ….3 Selecting the Track(s) for Recording ..38 Selecting V-Tracks……..39 USING THE UNIT SAFELY….4 Adjusting the Stereo Feel of the Input IMPORTANT NOTES……6 Sound (PAN)……….40 Main Features………. 11 Recording ……….40 Panel Descriptions……..
-
Page 9
Changing the Tempo ……. 94 Using [TAP TEMPO] Button to Set the Before Using USB ……… 120 Tempo …………94 About the “BR-800 DVD-ROM” ..120 Changing the Drum Sounds Installing the USB Driver …… 120 (Drum Kit) ……….95 Data Structure on the SD Card….. -
Page 10
Contents Using the BR-800 as an Audio Adjusting the Headphone Volume (PHONES LEVEL)……..137 Interface ……….121 Recording Audio from the BR-800 on Practicing Phrases Your Computer ……..121 (PHRASE TRAINER)……138 Using the BR-800 to Hear Songs Slowing Down the Speed (TIME Played Back by Your Computer .. -
Page 11: Main Features
Main Features The BR-800 is a digital recorder that allows even the beginner to create songs easily. From recording to mastering, this convenient device makes it easy for you to start enjoying the benefits of digital recording. Four-Track Simultaneous Connecting via USB (p. 119)
-
Page 12: Panel Descriptions
Panel Descriptions Top Panel fig.TopPanel.eps PEAK indicators These indicate whether distortion is occurring with respect MIC L/R (internal stereo microphones L/R) to INPUT 1–4 jacks or with the internal stereo microphones (input sources). You can use these microphones to record in stereo. “Selecting the Input Source”…
-
Page 13
Panel Descriptions Track [1]–[7/8] faders [RETRY] button These faders adjust the playback volume of each track. This button returns to the time location at which you last started recording. [RHYTHM] fader [REPEAT] button This fader adjusts the volume of the rhythm. Use this button to specify a desired section for repeated listening. -
Page 14
[RHYTHM] button This button accesses various functions, such as settings for This button accesses a screen in which you can turn the the entire BR-800. rhythm on/off and edit its settings. [EXIT] button This button returns you to the previous screen, or cancels an “Overview of the Rhythm Section”… -
Page 15: About The Play Screen
This indicates the volume of the output the song. following the [MASTER] fader. The BR-800 is set to use a frame rate of 30 frames per second (non-drop). This protocol setting is defined as About the Play Screen part of the MTC (MIDI Time Code) specifications. To…
-
Page 16: Front Panel
Panel Descriptions Front Panel fig.FrontPanel.eps PHONES jack (stereo phone type) Connect separately sold stereo headphones here. Connecting headphones will allow you to hear the same sound as the LINE OUT jacks outputs. Use the [MASTER] fader to adjust the headphone volume. If the OUTPUT MODE (p.
-
Page 17: Rear Panel
BR-800’s analog output (p. 118). FOOT SW/EXP PEDAL (Foot switch/Expression pedal) jack A separately sold foot switch (BOSS FS-5U, Roland DP-2) or expression pedal (Roland EV-5, BOSS FV-500L/FV-500H) can be connected here. If a foot switch is connected, you can use your foot to start/stop song playback or to punch-in/out.
-
Page 18: Side Panel
“SD Cards that Can Be Used with the BR-800” (p. 148) USB connector This connector lets you connect the BR-800 to your computer via a USB cable. When connected to a computer, you’ll be able to do the following things.
-
Page 19: Installing Batteries
Make sure that the [POWER] switch is “OFF.” • When turning the unit upside-down, get a bunch of newspapers or magazines, and place them Turn the BR-800 upside down. under the four corners or at both ends to prevent damage to the buttons and controls. Also, you should try to orient the unit so no buttons or Detach the battery cover.
-
Page 20
MEMO… -
Page 21: Quick Start
Quick Start…
-
Page 22: Listening To The Demo Songs
Listening to the Demo Songs The SD card included with the BR-800 contains demo songs. Here’s how to play back the demo songs. 1. Make Connections With the power switched off on both the BR-800 and your monitor speakers, make connections as shown below.
-
Page 23: Turn On The Power
Listening to the Demo Songs 2. Turn on the Power * You must use the following procedure to turn on the power. Using an incorrect order may cause malfunction or speaker damage. Lower the BR-800’s [MASTER] fader. fig.Quick_DemoSong2-1.eps Turn on the [POWER] switch.
-
Page 24: Listen To The Demo Songs
Listening to the Demo Songs 3. Listen to the Demo Songs Press the [MENU] button. The MENU screen will appear. D_Menu_Input.eps Use the CURSOR [ ] buttons to move the cursor to “SONG,” and press the [ENTER] button. The SONG screen will appear. D_Song_New.eps Use the CURSOR [ ] buttons to move the cursor to “SELECT,”…
-
Page 25
Additionally, this data must not be copied, nor used in a secondary copyrighted work without the permission of the copyright holder. • Music Data Copyright: © 2010 BOSS Corporation… -
Page 26: Recording With The Ez Recording Function
Recording with the EZ Recording Function EZ Recording is a function that makes it easy to start recording. Simply select a recording source and the desired musical style, and the most suitable effect and rhythm settings will be made automatically. As an example, here how to record your guitar.
-
Page 27: Recording
Recording with the EZ Recording Function Press the [ENTER] button. The EZ REC-3 screen will appear. The effect and rhythm for the selected SOURCE and CATEGORY are shown. D_EZ_Rec_Result_Guitar.eps You can use the CURSOR [ ] buttons and the dial to change the effect or rhythm. Press the [ENTER] button.
-
Page 28
Slowly increase the [MASTER] fader to adjust the volume to the appropriate level for monitoring. fig.Quick_EZ2-3.eps Press the [REC] button. The [REC] button will blink red; the BR-800 is now in recording-standby mode. fig.Quick_EZ2-4-e.eps Blinking Press the [PLAY] button. The [PLAY] button will light green, the [REC] button will light red, and recording will begin. -
Page 29: Playing Back
Recording with the EZ Recording Function 3. Playing Back Press the [ZERO] button to return to the beginning of the song. The current time location will change to 00:00:00-00:0. fig.Quick_EZ3-1.eps Press the [PLAY] button. Song playback will start. Use the [MASTER] fader to adjust the playback volume. fig.Quick_EZ3-2.eps This completes recording using the EZ Recording function.
-
Page 30: Ez Recording Parameter List
Recording with the EZ Recording Function EZ Recording Parameter List SOURCE CATEGORY Choose the setting that’s appropriate for the input source Choose the style of music that’s closest to what you have in you’re recording. mind for your song. Parameter Explanation Parameter Choose this when recording an electric…
-
Page 31: Getting Ready To Record
Getting Ready to Record…
-
Page 32: Making Connections
Making Connections Make connections as shown in the illustrations below. Make sure that the power to all of your equipment is switched off before you make connections. fig.panel-e.eps ■ Front Panel Electric guitar Stereo headphone Electric bass ■ Rear Panel Portable audio player etc.
-
Page 33: Using The Cord Hook
Using the Cord Hook A slot (cord hook) for securing the AC adaptor cord is built into the bottom of the BR-800. To prevent the inadvertent disruption of power to your unit • Do not use excessive force when pressing the cord (should the plug be pulled out accidentally), and to avoid into the cord hook.
-
Page 34: Turning The Power On/Off
Make sure that the BR-800’s display does not indicate been made correctly? “Keep power on!” ❒ Are the volume controls of the BR-800 and the connected equipment set to the minimum position? Turn the BR-800’s [POWER] switch off. ❒ Is the SD card inserted? (p. 148) Lower the BR-800’s [MASTER] fader.
-
Page 35: Recording/Playback
Recording/ Playback…
-
Page 36: Recording
Creating a New Song Selecting a Song (SONG NEW) (SONG SELECT) The BR-800 manages your recordings in units called Select the song that you want to record. “songs.” To record a new song, carry out the procedure below. Press the [MENU] button.
-
Page 37: Selecting The Input Source
The input that’s being input via the USB connec- LINE IN jack sensitivity cannot be adjusted on tor. the BR-800. USB connector Choose this when recording a guitar or GTR & bass connected to the GUITAR/BASS MIC L/R jack simultaneously with the vocals via the internal stereo microphones.
-
Page 38: Adjusting The Recording Level
Recording Adjusting the Recording Selecting the Track(s) for Level Recording Here’s how to adjust the volume of the recording on the track. Press one of the track 1–7/8 [REC] buttons to select the track(s) on which recording will occur. The indicators on the buttons show the track status as Lower the [MASTER] fader.
-
Page 39: Selecting V-Tracks
Recording Selecting V-Tracks What are V-Tracks? Each of the BR-800’s tracks contains eight “V-tracks,” and Each track consists of eight virtual tracks, and you you can choose one of these V-tracks for recording or can choose any one of these tracks for recording or playback.
-
Page 40: Adjusting The Stereo Feel Of The Input Sound (Pan)
Recording the Input Sound (PAN) You can adjust the stereo feel (pan) of your instruments’ Press the [REC] button. input sound. The [REC] button will blink red, and the BR-800 will enter recording-standby mode. fig.Rec03-e.eps Press the [TRACK] button. Blinking…
-
Page 41: Loop Recording
Recording Loop Recording Playback Loop recording is a function that copies the recorded data when you stop recording, making it occupy approximately Press the [ZERO] button. 200 measures. The time location of the song will return to 00:00:00- By using Loop recording you can easily create looped 00:0.
-
Page 42: Recording Additional Performances (Overdubbing)
(right) while turning the pan of the sound you’re Press the [REC] button. currently playing all the way to the right (left). [REC] will blink red, and the BR-800 will enter recording-standby mode. “Adjusting the Stereo Feel of the Input Sound (PAN)”…
-
Page 43: Playing Back Repeatedly (Repeat)
Playing Back Repeatedly (Repeat) Specifying the Repeat If you want to save the repeat region you specified, Region save the song. By using the “repeat” function you can repeatedly play back a specified region. “Saving a Song (SAVE CURRENT STATE)” (p. 111) The repeat region will repeatedly play back as follows.
-
Page 44: Setting The Repeat Region To An Exact Interval
Playing Back Repeatedly (Repeat) Setting the Repeat Region to an Exact Interval By pressing the [REPEAT] button twice at the same location, you can set the repeat region to a single Normally, the repeat start/end points will be set to the measure.
-
Page 45: Re-Recording Only Over A Mistake (Punch-In/Out)
[ REC ] [ REC ] [ STOP ] At the moment you want to start re-recording, press On the BR-800, you can use either “manual punch-in/out” the [REC] button. or “auto punch-in/out.” Punch-in will occur, and you’ll be in record mode.
-
Page 46: Auto Punch-In/Out
(e.g., BOSS FS-5U or Roland DP-2) so that operations can be This is useful when you want to punch-in/out at precise performed using your foot.
-
Page 47
Re-Recording Only Over a Mistake (Punch-In/Out) ■ Recording Use the CURSOR [ ] buttons to move the In this example, we’ll explain how to specify the auto punch-in/out locations beforehand, and then re-record a cursor to “DISP,” and turn the dial to choose the units specified region of the previously recorded track 1. -
Page 48: Cancelling An Operation (Undo/Redo)
Cancelling an Operation (UNDO/REDO) There may be times when you would like to cancel the Returning to the Previous result of an operation; for example, when recording, you State (UNDO) might not have been able to record as you intended, or you might have made a mistake when making editing settings.
-
Page 49: Viewing Information About The Song
Viewing Information about the Song Viewing the Remaining Viewing Song Information Recording Time Here’s how to view information about the song. Here’s how you can make the recording-standby or recording screen show the remaining recording time. Press the [MENU] button. Press the [MENU] button.
-
Page 50: Simple Recording (Song Sketch)
Simple Recording (SONG SKETCH) By putting the BR-800 in Song Sketch mode, you can use it Recording as a stereo WAV file recorder/player. This provides an easy way to record your song ideas and phrases. Press the [SONG SKETCH] button.
-
Page 51: Playback
Simple Recording (SONG SKETCH) Erasing a WAV File Press the [REC] button. Recording will begin. Here’s how to erase a WAV file. The [PLAY] button will light green, and the [REC] button will light red. fig.Rec04-e.eps Press the [SONG SKETCH] button. The SONG SKETCH screen will appear.
-
Page 52: Naming A Wav File
Simple Recording (SONG SKETCH) Naming a WAV File Viewing Information about the WAV File You are free to assign a name to a WAV file. Here’s how to view information about the WAV file. Press the [SONG SKETCH] button. The SONG SKETCH screen will appear. Press the [SONG SKETCH] button.
-
Page 53: Using Effects
Using Effects…
-
Page 54: Using Insert Effects
User patches User patches can be rewritten, and the user patch data is stored in the BR-800’s internal memory. If you’ve created a “Adding a Sense of Spaciousness” (p. 84) patch and would like to use it in another song as well, it’s “Adjusting the Tone of Each Track”…
-
Page 55: Turning The Insert Effect On/Off
Using Insert Effects Turning the Insert Effect On/ Use the CURSOR [ ] buttons to move the cursor to “EZ TONE,” and press the [ENTER] button. The EZ TONE screen will appear. Press the [EFFECTS] button. Use the [CURSOR] buttons to operate the tone grid to The [EFFECTS] button will light, and the insert effect get the desired sound.
-
Page 56: Editing The Insert Effect Settings
Using Insert Effects Editing the Insert Effect If you want to save the current effect settings, proceed Settings as described in “Saving the Insert Effect Settings (Write)” (p. 57). To create a new effect sound, choose an existing patch that’s close to what you have in mind, and then edit it.
-
Page 57: Saving The Insert Effect Settings (Write)
Using Insert Effects Saving the Insert Effect Use the CURSOR [ ] buttons to move the Settings (Write) cursor to each effect, and use the dial to specify the on/off status of each effect. Here’s how to assign a name (patch name) to the effect The icons show the status of each effect as follows.
-
Page 58: Changing The Location Of The Insert Effect (Location)
(i.e., the dry sound) will be recorded. Use this setting The BR-800 lets you change the location of the insert effect, if you want to try out various effects after recording.
-
Page 59: Copying Insert Effects (Effect Bank Copy)
Using Insert Effects Copying Insert Effects (EFFECT BANK COPY) The user patches for an insert effect can be copied to song patches in the same bank, or song patches can be copied to user patches in the same bank. Since user patches stored in this unit can be copied to songs on an SD card, you can conveniently use this for a variety of purposes, including making backups.
-
Page 60: Algorithm List
Using Insert Effects Algorithm List The algorithms (the available effects and their connection order) that can be used as an insert effect are shown below. The algorithms that can be selected will differ for each bank. To select the algorithm that you wish to use, first select the effect bank that includes that algorithm, and select a patch that uses the desired algorithm.
-
Page 61: Bass Multi
Using Insert Effects 3. GUITAR TO BASS 5. BASS MULTI Simulates the sound of a bass guitar. This is a multi-effect designed for bass guitar. Obtain the sound of a bass guitar while playing an electric Appropriate for creating standard bass sound. guitar.
-
Page 62: Vocal Multi
Using Insert Effects BANK : MICROPHONE BANK : LINE 6. VOCAL MULTI 8. STEREO MULTI This is a multi-effect for vocals. This algorithm connects seven types of effect, all in full stereo. It provides effects that are optimized for vocals. fig.StereoMulti.eps fig.VocalMulti.eps =[COMP/LM]=[LOFI]=[EQ]=[NS]…
-
Page 63
Using Insert Effects BANK : SIMUL 9. VO + GT.AMP This algorithm is for use when simultaneously recording a vocal and electric guitar. For the guitar, you can produce an amp sound using a preamp and speaker simulator. (GUITAR) (MIC) fig.VOGTAMPGuitar.eps fig.VOGTAMPMic.eps -[COMP/LM]-[AMP]-[EQ]-[NS]-[MOD]-[DLY]-… -
Page 64
Using Insert Effects 10. VO + AC.SIM 11. VO + ACOUSTIC This algorithm is for use when simultaneously recording a This algorithm is for use when simultaneously recording a vocal and electric guitar. vocal and acoustic guitar. For the guitar, you can make the electric guitar sound like For the guitar, you can produce a warm sound as though a an acoustic guitar. -
Page 65: Parameter List
This is an effect for four-channel microphone recording. companies from BOSS. Those companies are not affiliated with BOSS and have not licensed or It provides the effects needed for recording with multiple authorized BOSS’s BR-800. Their marks are used microphones.
-
Page 66
Adjusts the strength of the picking at- TYPE tack when the strings are played. 0–100 Higher values result in s sharper at- Models the BOSS CS-3 compact effects BOSS COMP tack, creating a more clearly defined processor. sound. TONE D-COMP This models a MXR DynaComp. -
Page 67
Adjusts the sensitivity at which the filter D-COMP, BOSS LIM, RACK 160 D, or VTG RACK U. will change in the direction determined by *3 Setting available when TYPE is set to BOSS LIM, RACK the POLARITY setting. 0–100 160 D, or VTG RACK U. -
Page 68
Parameter/ Parameter/ Explanation Explanation Range Range FREQUENCY *3 This is a crunch sound of the BOSS BD-2. BLUES OD This produces distortion that faithfully Adjusts the center frequency of the Wah 0–100 reproduces the nuances of picking. effect. A lustrous crunch sound with an add-… -
Page 69
BASS OD basses. This is a sound with flat response. FULL RANGE This is a crunch sound of the BOSS BD-2. Good for acoustic guitar. BLUES OD This produces distortion that faithfully re- CLEAN TWIN This models a Fender TWIN REVERB. -
Page 70
Explanation Range Range This models the sound input to left in- This is a metal sound suited to heavy BOSS METAL put on a Matchless D/C-30. riffs. MATCH A simulation of the latest tube amp This models the lead channel of a… -
Page 71
Using Insert Effects Parameter/ Parameter/ Explanation Explanation Range Range This is the built-in speaker of the amp MIC LEV (Mic Level) ORIGINAL you selected with PREAMP TYPE. 0–100 Adjusts the volume of the microphone. This is a compact open-back speaker D.LEVEL (Direct Level) 1×8”… -
Page 72
Using Insert Effects Parameter/ Parameter/ Explanation Explanation Range Range BRIGHT *3 Simulates the condition that the micro- 1–10 phone is moved away from the center of Turns the bright setting on/off. the speaker cone. Bright is not used. MIC LEV (Mic Level) Bright is switched on to create a lighter and 0–100 Adjusts the volume of the microphone. -
Page 73: Noise Suppressor
Using Insert Effects EQUALIZER NOISE SUPPRESSOR This adjusts the tone as a equalizer. A parametric type is This effect reduces the noise and hum picked up by guitar adopted for the high-middle and low-middle range. pickups. Since it suppresses the noise in synchronization with the envelope of the guitar sound (the way in which the Parameter/ guitar sound decays over time), it has very little effect on…
-
Page 74
Using Insert Effects Parameter/ MODULATION Explanation Range LOW LEVEL Use TYPE to select the effect that you want to use. Adjusts the enhancer volume for the low 0–100 Parameter/ frequency range. Explanation Range HIGH FREQ (High Frequency) ON/OFF 800Hz– Sets the high frequency range for the en- OFF, ON Turns the MODULATION effect on/off. -
Page 75: Slow Gear
Using Insert Effects BASS SIM (Bass Simulator) SLOW GEAR Simulation of the characteristics of particular bass This produces a volume-swell effect (“violin-like” sound). components such as pickups and different bass bodies Parameter/ allows you to switch among a number of different bass Explanation Range types all while using a single bass.
-
Page 76
Using Insert Effects SITAR SIM (Sitar Simulator) P SHIFTER This simulates the sound of the sitar. This effect changes the pitch of the original sound (up or down) within a range of two octaves. Parameter/ Explanation Range Parameter/ Explanation Range TONE TYPE This adjusts the tone. -
Page 77
Using Insert Effects PHASER FLANGER By adding varied-phase portions to the direct sound, the The flanging effect gives a twisting, jet-airplane-like phaser effect gives a whooshing, swirling character to the character to the sound. sound. Parameter/ Explanation Range Parameter/ Explanation Range RATE TYPE… -
Page 78
Using Insert Effects ROTARY This produces an effect like the sound of a rotary speaker. With the volume level of the left and right sides alternately changing, when playing sound in stereo, you can get an Parameter/ effect that makes the guitar sound appear to fly back and Explanation Range forth between the speakers. -
Page 79
Using Insert Effects CHORUS DBL DELAY (Doubling Delay) In this effect, a slightly detuned sound is added to the By adding a slightly time-delayed sound to the direct original sound to add depth and breadth. sound, this produces the impression that multiple sources are sounding together (a “doubling”… -
Page 80: Acoustic Simulator
Using Insert Effects DELAY ACOUSTIC SIMULATOR This effect adds delayed sound to the direct sound, giving Simulation of the characteristics of particular guitar more body to the sound or creating special effects. components such as pickups and different guitar bodies allows you to switch among a number of different guitar Parameter/ types all while using a single guitar.
-
Page 81: Pitch Correct
Using Insert Effects Parameter/ PITCH CORRECT Explanation Range TYPE Corrects inaccuracies in the pitch. With certain settings, pitch correct can make the pitch Select the type of GUITAR TO BASS processor. change in a coarse “stair-step” fashion to produce a The sound of a Fender Jazz Bass.
-
Page 82
Using Insert Effects Parameter/ TONE/SFX Explanation Range If you’ve specified the key of your song, Adjusts the tonal character or applies special effects. -1OCT– +1OCT harmony that is suitable for that key will be added at the interval you specify here. Parameter/ Explanation By changing the vocal character, this pro-… -
Page 83: Low Cut
Using Insert Effects Parameter/ LOW CUT Explanation Range FILTER *3 This filter cuts out vocal pop and other unwanted low-band 0–100 This parameter adjusts the filter. noise. D:E *3 Parameter/ Explanation This adjusts the balance of the direct and ef- Range 100:0–0:100 fect volumes.
-
Page 84: Adding A Sense Of Spaciousness
Adding a Sense of Spaciousness By making use of the BR-800’s onboard “Loop Effects,” you Editing the Loop Effect can add a sense of spaciousness and depth to your sounds. You can adjust the effect depth by adjusting the send level from each input or track to the loop effect.
-
Page 85: Parameter List
Adding a Sense of Spaciousness Parameter/ Parameter List Explanation Range E.LEVEL (Effect Level) REVERB 0–100 Adjusts the volume of the reverb sound. SPRG SENS (Spring Sensitivity) *1 This effect adds reverberation to the sound. Adjusts the sensitivity of the spring reverb Parameter/ 0–100 effect.
-
Page 86: Adjusting The Tone Of Each Track
Adjusting the Tone of Each Track The BR-800 provides a three-band equalizer that’s Parameter List independent for each track. You can use this to adjust the tone quality of each track. Parameter/ Explanation Editing the Track EQ Range ON/OFF OFF, ON Turns the EQUALIZER effect on/off.
-
Page 87: Using Rhythm
Using Rhythm…
-
Page 88: Overview Of The Rhythm Section
Overview of the Rhythm Section The BR-800 provides a dedicated rhythm generator that is separate from the audio tracks 1–7/8. You can use this rhythm as a guide during recording, or The preset patterns include patterns for intro, verse, create an original rhythm backing by arranging various fill, and ending.
-
Page 89: About The Drum Sounds (Drum Kits)
➝ chorus ➝ break ➝ ending. The BR-800 provides nine different drum sets that are On the BR-800, data that places patterns in a specific order suitable for various styles. Each set is called a “drum kit.”…
-
Page 90: Turning The Rhythm On/Off
Turning the Rhythm On/Off Switching between Pattern Mode and Arrangement Mode Press the [RHYTHM] button. The BR-800 lets you use rhythm in either of two modes: The [RHYTHM] button will light, and the rhythm will Pattern mode and Arrangement mode. turn on. fig.rhythm_on_off-e.eps…
-
Page 91: Playing Patterns
Rhythm is turned on. Use the CURSOR [ ] buttons to move the • When the BR-800 is shipped from the factory, the cursor to “TYPE.” song patterns (S001–S100) contain no data, so nothing will play even if you select them.
-
Page 92: Changing The Tempo
Playing Patterns Changing the Tempo Here’s how to change the pattern playback tempo when you’re in the play screen. Use the CURSOR [ ] buttons to move the cursor to the tempo indication. D_Play_Tempo.eps Turn the dial to adjust the tempo. The pattern playback tempo will change.
-
Page 93: Playing An Arrangement
Playing an Arrangement Here’s how to select and play one of the internal arrangements. Use the [RHYTHM] fader and the [MASTER] fader to adjust the volume appropriately. Press the [RHYTHM] button. The [RHYTHM] button will light, indicating that To stop playback, press the [STOP] button. Rhythm is on.
-
Page 94: Changing The Tempo
Playing an Arrangement Changing the Tempo Here’s how to change the playback tempo of an arrangement when you’re in the play screen. Use the CURSOR [ ] buttons to move the cursor to the tempo indication. D_Play_Tempo.eps Use the dial to adjust the tempo. The arrangement’s playback tempo will change.
-
Page 95: Changing The Drum Sounds (Drum Kit)
A drum kit is a set containing various rhythm instrument Selecting a Drum Kit sounds. The BR-800 contains nine “preset drum kits.” By using “BR-800 Rhythm Editor” you can create five of your own original drum kits. Drum kits are saved for each Press the [RHYTHM] button.
-
Page 96: Creating An Original Arrangement
Creating an Original Arrangement The BR-800 lets you place patterns in the desired order to Now let’s try actually creating an arrangement. make an arrangement, thus creating the structure of your entire song from intro to ending. Once you’ve created an arrangement, you can save it as a song arrangement.
-
Page 97
Creating an Original Arrangement Use the CURSOR [ ] buttons to move the cursor to the parameter that you want to edit, and use • The starting measure of step 1 will always be the dial to edit the value. “001.”… -
Page 98: Inserting A Step
Creating an Original Arrangement Inserting a Step Erasing a Step Here’s how to insert a new step at the current step. Here’s how to erase the selected step. The erased step will inherit the contents of the following step. fig.04-550.eps fig.04-570.eps Insert Verse…
-
Page 99: Naming An Arrangement
Creating an Original Arrangement Naming an Arrangement Press the [EXIT] button a number of times to return to the play screen. You can freely assign a name (arrangement name) of up to The screen will indicate “Keep power on!” and the eight characters to a song arrangement.
-
Page 100: Copying An Arrangement
Creating an Original Arrangement Copying an Arrangement Press the [ENTER] button. The copy confirmation screen will appear. If you want to slightly modify a preset arrangement, or D_Arrange_Erase_Sure.eps create a variation of an existing arrangement, you can do so by copying it as a song arrangement and then editing the copy.
-
Page 101: Erasing An Arrangement
Creating an Original Arrangement Erasing an Arrangement If you’re sure that you want to erase the arrangement, press the [ENTER] button. Here’s how to erase step 2 and all following steps of the If you decide to cancel, press the [EXIT] button. song arrangement.
-
Page 102: Delaying The Pattern/Arrangement Playback (Offset)
Delaying the Pattern/ Arrangement Playback (OFFSET) Here’s how you can specify a time offset by which the pattern or arrangement will be delayed relative to the playback of the audio tracks. Press the [RHYTHM] button. Use the CURSOR [ ] buttons to move the cursor to “OFFSET,”…
-
Page 103: Editing
Editing…
-
Page 104: Finding The Location At Which A Sound Begins Or Ends (Scrub/Preview)
The [PLAY] button will blink, and scrub playback will begin. The BR-800 provides a “scrub” function that is a convenient way to find such locations. The tempo indication area will show either “…
-
Page 105: Editing
Editing Track Editing You can copy or erase tracks, or import song sketch data. The results of your track editing operations are saved to the song when you return to the play Make the settings for performing a copy using the screen.
-
Page 106: Moving Track Data
Editing Press the [ENTER] button. The copy will be carried out. * The display will indicate “Keep power on!” while the data is being updated. Do not turn off the power while this message is shown. Make the settings for performing a move using the CURSOR buttons and the dial.
-
Page 107: Erasing Track Data
Editing ■ Erasing track data To erase, press the [ENTER] button. This operation erases data from the specified region. A message will ask “Are you sure?” Track 1 If you decide to cancel the procedure, press the [EXIT] button. Track 1 Press the [ENTER] button.
-
Page 108
Editing ■ Importing song sketch data into a track Use the CURSOR buttons and the dial to select the tracks and V-tracks that you want to exchange. Press the [TRACK] button. To exchange, press the [ENTER] button. Use the CURSOR [ ] buttons to move the cursor A message will ask “Are you sure?”… -
Page 109: Copying A Song (Song Copy)
Editing Copying a Song Erasing a Song (SONG COPY) (SONG ERASE) Here’s how to copy the currently selected song. Here’s how to erase a song from SD card. Press the [MENU] button. Press the [MENU] button. Use the CURSOR [ ] buttons to move the Use the CURSOR [ ] buttons to move the…
-
Page 110: Naming A Song (Song Name)
Editing Naming a Song Protecting a Song (SONG NAME) (SONG PROTECT) When you create a new song, it will automatically be given A song you’ve created can be inadvertently recorded over or unintentionally erased. a name such as “SONG 0001.” When you’ve finished a To prevent such accidents, you can protect the song data song, you should give it an appropriate name so that your from being rewritten (Song Protect).
-
Page 111: Saving A Song (Save Current State)
Saving Memory on the SD (SAVE CURRENT STATE) Card On the BR-800, the following content is saved as song data. When you overwrite or erase audio data by overdubbing, punch in/out recording, or track editing, this audio data • Recorded data will not actually be deleted from the SD card.
-
Page 112
MEMO… -
Page 113: Mastering
Mastering…
-
Page 114: Using Mastering In Creating A Song
* The mastering effect provides 19 “preset patches” (P01– effect P16), 19 rewritable “user patches” (U01–U19), and 19 “song patches” (S01–S19) which are stored for each song. fig.03-020.eps_80 TRACK 8-VMST TRACK 7-VMST SD Card BR-800 Mastering-destination tracks Song Preset User Song Patch Patch…
-
Page 115
V-tracks for mastering. If you want to record onto other tracks, use the Press the [REC] button. CURSOR buttons and the dial to select the desired The [REC] button will blink red, and the BR-800 will recording-destination tracks. enter recording-standby mode. fig.Rec03-e.eps… -
Page 116: Editing The Mastering Effect Settings
Using Mastering in Creating a Song When you’ve finished mastering, press the [STOP] Choose a mastering effect. button. Use the CURSOR [ ] buttons and the dial to The result will be saved on the mastering-destination select preset/song/user and the desired number. track, and the PREVIEW screen will appear.
-
Page 117: Saving The Mastering Effect Settings (Write)
Using Mastering in Creating a Song Saving the Mastering Effect Parameter List Settings (Write) Parameter/ Explanation Here’s how to assign a name to the patch you created, and Value save it as a new patch. DYNAMICS This adjusts the variation in volume be- tween loud and soft passages in the per- From the mastering effect select screen, press the formance.
-
Page 118: Making Use Of Songs After Mastering
Recording the Mastered Your Computer Song to an External Device Songs you’ve created using the BR-800 can be converted to Here’s how to record your mastered song onto your CD WAV/AIFF files using the “BOSS BR Series Wave recorder or other device.
-
Page 119: Using Usb
Using USB…
-
Page 120: Before Using Usb
If you place a WAV file from your computer into this folder, you’ll be able to play it back on the BR-800. WAV files created on the BR-800 can also be copied from the SKETCH folder into your computer.
-
Page 121: Using The Br-800 As An Audio Interface
You must install the USB driver before connecting Computer the BR-800 to your computer (p. 120). Here’s how audio data played back by your computer can be sent to the BR-800 via USB and recorded on the BR-800’s Recording Audio from the tracks. BR-800 on Your Computer…
-
Page 122: Using The Br-800 As A Control Surface
The BR-800 can operate via USB as a controller for your The MENU screen will appear. music production software (DAW software). * When the BR-800 is used as a control surface, you will have Use the CURSOR [ ] buttons to move the control over INPUT SELECT and EFFECT.
-
Page 123: Using Sonar Le
Using SONAR LE Controllers that Can Be Used in Control Surface Mode SONAR LE can be found on the “BR-800 DVD-ROM.” For details on the location of SONAR LE, refer to You can use the following controllers to control your DAW “ReadmeEN.txt”…
-
Page 124: Exchanging Data With Your Computer
• You must install the USB driver before connecting the BR-800 to your computer (p. 120). • The BR-800 does not support long file names. The BR-800 can use WAV files that are in the For data with a long file name, the file name will following format.
-
Page 125
* When the following screen appears, press the [ENTER] connection. button. D_USB_Disconnect.eps Transfer the WAV file. To copy a WAV file from the BR-800 to your computer 1. Double-click the “BOSS_BR-800” icon (or the “removable disk (*:)” icon); the “ROLAND” folder will appear. -
Page 126: Saving Data On Your Computer (Backup/Recover)
• Arrangements (song) • Loop effect A “BOSS_BR-800” icon (or a “removable disk (*:)” Use a USB cable to connect the BR-800 to your icon) will appear on your computer. computer. * If the Idling screen does not appear, you won’t be able to proceed with the following steps.
-
Page 127
BR-800. • When you recover the data, the data in the SD card will be overwritten. Stop the connection between the BR-800 and your computer. Windows users In My Computer, right-click the “BOSS_BR-800” icon (or the “removable disk (*:)”… -
Page 128: Making Settings For Usb Functionality
Making Settings for USB Functionality This section explains how to make settings for the BR-800’s Parameter List USB-related functionality. Make the settings that are appropriate for how you’re using the BR-800. Parameter/ Explanation Value DIR MONITOR (Direct monitor) Press the [MENU] button.
-
Page 129
Parameter/ Explanation Value OUT POSITION (Output position) This specifies which signal of the BR-800 will be output via USB. * In Control Surface mode, the signal as it is immediately after passing through the [REC LEVEL] knob will be output. -
Page 130
MEMO… -
Page 131: Convenient Functions
Convenient Functions…
-
Page 132: Adjusting The Display Contrast
Adjusting the Display Contrast Depending on the location in which the BR-800 is placed or the conditions of use, you might find the display difficult to read. If so, proceed as follows to adjust the display’s contrast. Press the [MENU] button.
-
Page 133: Using A Foot Switch/Expression Pedal
If you connect a foot switch (such as the separately available Using an Expression Pedal BOSS FS-5U or Roland DP-2) to the FOOT SW/EXP PEDAL jack on the rear panel, you’ll be able to control some The expression pedal can be used when the insert effect is functions using your foot.
-
Page 134: Tuning Your Instrument (Tuner)
■ Indications while tuning The BR-800 provides a Chromatic Tuner function that makes it easy to tune an instrument. The built-in tuner The BR-800’s built-in tuner shows the reference pitch, note supports guitar or bass guitar. name, and tuning guide.
-
Page 135: Specifying The Tuner’s Reference Pitch
With the factory settings, this is set to 440 Hz. If your instrument matches the displayed pitch D_Tuner_E_just.eps The reference pitch setting is saved within the BR-800. If your instrument is flat D_Tuner_E_low.eps Repeat steps 1–3 to tune each string of your instrument.
-
Page 136: Mixing The Sound From An Audio Device (Line In Mix)
By using “Line In Mix” you can avoid having to use an external mixer. The sound of your external audio device will be mixed inside the BR-800 with the BR-800’s own Use the CURSOR [ ] buttons to move the output.
-
Page 137: Output Settings (Output)
“SPLIT.” Press the [EXIT] button a number of times to return to D_Output_Split.eps the play screen. When you turn on the BR-800’s power, the “PHONES LEVEL” setting is reset to “100.” Setting Explanation The sound of the tracks and the…
-
Page 138: Practicing Phrases (Phrase Trainer)
Practicing Phrases (PHRASE TRAINER) The BR-800 provides a Phrase Trainer function, which lets you slow down the playback speed (Time Stretch) or minimize a vocal or guitar solo that’s localized at the center • You can’t perform recording operations while…
-
Page 139: Minimizing Sounds In The Center (Center Cancel)
Practicing Phrases (PHRASE TRAINER) Minimizing Sounds in the Use the CURSOR [ ] buttons to move the Center (CENTER CANCEL) cursor to “CENTER ADJUST,” and use the dial to adjust the setting so that the sound you want to This function lets you minimize the sounds that are heard in eliminate is minimized.
-
Page 140: Restoring The Factory Settings (Factory Reset)
Restoring the Factory Settings (FACTORY RESET) The “Factory Reset” operation returns the BR-800 to its factory-set state. Press the [ENTER] button if you want to execute the You can also specify the range of settings that will be Factory Reset operation, or press the [EXIT] button if returned to their factory-set state.
-
Page 141: Initializing An Sd Card (Format)
• Before you use a commercially available SD card, you must format it on the BR-800. • Make sure that the BR-800’s power is turned off before you insert or remove an SD card. Inserting or removing an SD card while the power is on may destroy the data on the SD card or damage the SD card itself.
-
Page 142: Viewing The Sd Card Usage (Sd Card Information)
Viewing the SD Card Usage (SD CARD INFORMATION) Here’s how to view the usage status of the SD card. Press the [MENU] button. Use the CURSOR [ ] buttons to move the cursor to “SD CARD,” and press the [ENTER] button. Use the CURSOR [ ] buttons to move the cursor to “INFORMATION,”…
-
Page 143: Reducing The Battery Consumption (Power Save)
Reducing the Battery Consumption (POWER SAVE) ■ Exiting the Power Save state This function dims the display backlight and buttons to conserve power if no switch or dial has been operated for a When you operate a button or the dial, you’ll exit the Power certain length of time.
-
Page 144: Using A Condenser Microphone (Phantom Power)
If you’re using a condenser microphone that requires phantom power, turn on the phantom power as follows. Press the [MENU] button. The BR-800 can provide +48 V phantom power to a condenser microphone connected to the XLR connector of INPUT 4.
-
Page 145: Adjusting The Sensitivity Of The Touch Sensors
148, p. 149 in the Owner’s Manual. Connect the AC adaptor. * Make sure that the BR-800 is powered using the AC adaptor To save your settings, press the [ENTER] button; to while you are adjusting the sensitivity of the sensors.
-
Page 146
MEMO… -
Page 147: Appendixes
Appendixes…
-
Page 148: Sd Cards That Can Be Used With The
■ Removing the card cover the BR-800. When the BR-800 is shipped from the factory, the card cover is fastened to the unit using a screw to discourage theft of the SD card.
-
Page 149: Removing An Sd Card
SD Cards that Can Be Used with the BR-800 ■ Removing an SD card To prevent the removed screw from being lost, use a Gently press the SD card inward, and then release your Phillips (+) screwdriver to attach it in the location finger.
-
Page 150: Br-800 Effect Patch List
BR-800 Effect Patch List Insert Effects BANK: GUITAR 48 SPACY 11 3+5 LOW BANK: SIMUL 49 OCT LEAD 12 3rd+5th E.GUITAR MULTI VO + GT.AMP 50 PedalWah 13 3+5 HIGH 1 StckLead 1 Clean ACOUSTIC SIM 14 DIST 2 70HrdRck…
-
Page 151: Mastering Effects
BR-800 Effect Patch List Mastering Effects Recommended Connections (4-INPUT MULTI) Mix Down Patch Recommended Connection PreMastr Name Live Mix INPUT1: for any instruments Pop Mix INPUT2: for any instruments 4CH LMT INPUT3: for any instruments DanceMix INPUT4: for any instruments…
-
Page 152: Arrangement / Pattern List
Arrangement / Pattern List Preset Arrangement List Each of the preset Arrangement (except Metro4/4) is set so that a BREAK, followed by V1 (verse) comes after the E (ending). Arrangement Initial Starting measure Drum Beat BREAK Name Tempo ROCK1 ROOM ROCK2 ROOM ROCK3…
-
Page 153: Preset Pattern List
Arrangement / Pattern List Preset Pattern List Pattern Name Measure Initial (Abbreviation shown Beat Tempo in display) ROCK1 ROCK2 ROCK3 ROCK4 ROCK5 ROCK6 Hard Rock 1 (HdRc1) Hard Rock 2 (HdRc2) Hard Rock 3 (HdRc3) Hard Rock 4 (HdRc4) Hard Rock 5 (HdRc5) HEAVY1 (HEVY1) HEAVY2 (HEVY2) HEAVY3 (HEVY3)
-
Page 154: Troubleshooting
Explanation Page Is the BR-800’s power switch set correctly? Make sure that the BR-800’s power switch is set to “USB” if you’re using USB bus power, p. 18 or to “ON” if you’re using the AC adaptor or batteries. Is sufficient power being supplied to your computer or USB hub? The connection cannot be established if insufficient power is being supplied to the BR-800.
-
Page 155: Problems With The Sd Card
If there is noise or distortion following mastering, the track output levels are too high. distortion Could a microphone with high output impedance be connected directly to the BR-800? Since the INPUT 1–4 jacks are designed for a low input impedance, the recording level –…
-
Page 156: Problems With Usb
Control surface Have you made the correct settings in your DAW software? mode does not In order to use the BR-800 as a control surface with your DAW software, the control sur- work correctly – face setting of your DAW software must be set to “Mackie control.” For details, refer to the owner’s manual of the DAW software you’re using.
-
Page 157: Error Message List
Error Message List An error message will appear in the display if you attempt to perform an invalid operation or if an operation could not be executed correctly. Take the appropriate action for the message that appears. Message Cause Action Page Already exists! There is a file of the same name.
-
Page 158
105 has been exceeded. What is an event? An “event” is the smallest unit used by the BR-800 to manage the data recorded on an SD card. Event full! Approximately 30,000 events are allocated for each newly created song. -
Page 159
Format the card on the BR-800. p. 141 Unsupported An SD card not supported by the Use an SD card that is supported by the BR-800. p. 148 BR-800 is inserted. card! An SD card of a format not usable by Format the card on the BR-800. -
Page 160: Specifications
* In the interest of product improvement, the specifications and/or appearance of this unit are subject to change without prior notice. * 0 dBu = 0.775 Vrms * AF method (Adaptive Focus method) Adaptive Focus is a unique Roland/BOSS technology that allows the signal noise (S/N) ratios of AD and DA converters to be vastly improved.
-
Page 161: Index
Index Numerics Copying Frame ……….15 Arrangement ……100 4-INPUT MULTI ……. 65 Song ……….. 109 8-TRACK COMP/LIM ….. 65 GTR SIM ……….74 Track ………. 105 Cord hook ………. 33 Guitar Simulator ……. 74 COSM ……….11 GUITAR TO BASS …… 61, 80 A.GUITAR MULTI ……
-
Page 162
Index REDO ……….48 Reference pitch ……. 135 NAME ……….117 TAP TEMPO ……13, 92, 94 REPEAT ……… 13, 43–44 Naming TEMPO ……..15, 92, 94 Repeat ……….43 Arrangement ……99 Time ………… 15 Insert effect ……… 57 RETRY ………. -
Page 163
MEMO… -
Page 164
MEMO… -
Page 165
fig.15_WEEE_Small.eps For EU Countries fig.16_ChineseRoHS.eps For China… -
Page 166
For the USA DECLARATION OF CONFORMITY Compliance Information Statement Model Name : BR-800 Type of Equipment : Digital Recorder Responsible Party : Roland Corporation U.S. 5100 S.Eastern Avenue, Los Angeles, CA 90040-2938 Address : (323) 890-3700 Telephone :…