- Главная
-
Canon
-
Пленочные фотокамеры
-
650
На этой странице вы найдёте полный список документов на Пленочные фотокамеры Canon 650.
Выберите необходимый PDF файл.
-

Пленочные фотокамеры
Canon 650 Инструкция по эксплуатацииТип файла
PDFРазмер
3.76 MbКол-во страниц
88Просмотров
7753Download / Read online
- 1
Другие Canon Пленочные фотокамеры
-
Canon EOS 1000 F Инструкция по эксплуатации
PDF файлов
1Просмотров
27698 -
Canon AV 1 Инструкция по эксплуатации
PDF файлов
1Просмотров
15166 -
Canon 650 Инструкция по эксплуатации
PDF файлов
1Просмотров
9798 -
Canon AT 1 Инструкция по эксплуатации
PDF файлов
1Просмотров
8504 -
Canon AL-1 AL-1 Инструкция по эксплуатации
PDF файлов
1Просмотров
7414 -
Canon AV-1 Film Camera AV1 Инструкция по эксплуатации
PDF файлов
1Просмотров
6699
Другие устройства Canon
-
Принтеры и МФУ
Canon PIXMA MX492 Руководство пользователяPDF файлов
15Просмотров
98964 -
Принтеры
Canon PIXMA MP160 Инструкция по эксплуатацииPDF файлов
1Просмотров
88944 -
Принтеры и МФУ
Canon MAXIFY MB2020 Руководство пользователяPDF файлов
10Просмотров
86146 -
Принтеры и МФУ
Canon MAXIFY MB5020 Руководство пользователяPDF файлов
10Просмотров
77455 -
Принтеры и МФУ
Canon MAXIFY MB2320 Руководство пользователяPDF файлов
10Просмотров
76309 -
Принтеры и МФУ
Canon MAXIFY MB5320 Руководство пользователяPDF файлов
10Просмотров
75095
Вопросы
-
слабая батарея
Ноутбуки
Acer
1310
Alex 12.02.2016 17:26
Ранее вы смотрели
Производители
Bench Dog Tools
Cotswold Outdoor
Dolphin Peripherals
Homecare Enterprise
Model Shipways
Photogenic Professional Lighting
Salus
Treasure Garden
Unified Brands
WAC Lighting
Типы устройств
Автомобильные сигнализации
Вездеходы
Аксессуары для велосипедов
Газовые нагреватели
Радионяни
Тостеры
Электронные книги
Электросковороды
Аксессуары для торцовочных плит
Фитнес-мониторинг
Устройства
Dell 1015
Hitachi HR-550
HP 2500CMHP
KitchenAid KAWE550V
Linear MGR/ 1-Channel Gate Receiver
MSI PH67S-C43 (B3)
Pyramid Technologies SE703WX
Sony LUMA LMD-2450MD
TEFAL KI150D10
Tricity Bendix BWD 1012
freeuserguide.ru
About Us
Contacts
Disclamers
Privacy Policy
Эта страница полезна для вас? Поделитесь ссылкой:
This is the full text and images from the manual. This may take 3 full minutes for all images to appear. If they
do not all appear. Try clicking the browser «refresh» or «reload button».
This camera manual library is for reference and historical purposes, all rights reserved.
This page may not be sold or distributed without the expressed permission of the producer
Most other places would charge you $10.50 for a electronic copy
This will allow me to continue to buy new manuals and maintain these pages.
If you use Pay Pal, use the link below. Use the above address for a check, M.O. or cash.
Introduction
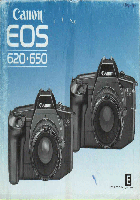
Thank you for purchasing the Canon EOS 620/650. Designed with the most advanced and innovative technology
available, this high performance AF/AE SLR camera with a built-in motor drive offers you genuine, creative
freedom and picture-taking ease.
Enjoy Taking Photos More Comfortably
This is EOS’ design theme. The EOS 620/650 has brilliantly made it come true thanks to the high speed, precise
auto-focus system and the built-in motor drive capable of winding film up to three frames per second which
maximizes your potential.
Needless to say film speed setting and film transportation have been completely automated. A few of the many
features of the EOS 620/650 are the evaluative metering function (Factor 6 light analysis system) in which the
camera automatically recognizes subject pattern and its size so correct exposure can be obtained in backlit
situations, and the intelligent program AE mode which selects the ideal program line according to the
characteristics of the lens in use.
In addition, your photographic options are further expanded by exclusive accessories such as the Speedlites
420EZ and 300EZ that respond to a wide range of illuminations from dark surroundings to fill-in flash, the
Canon EOS 620-650
Camera Manual
This page is copyright© by
I have no connection with any camera company
If you find this manual useful, how about a donation of $4 to:
M. Butkus, 29 Lake Ave., High Bridge, NJ 08829-1701
and send your E-mail address too so I can thank you.
or $20.00 for a hard to read Xerox copy.
It’ll make you feel better, won’t it?
To main Chinon/Ricoh manual site
POSTED 12-5-02
, M. Butkus, N.J.
Canon
650 Инструкция по эксплуатации
Популярность:
7753 просмотры
Подсчет страниц:
88 страницы
Тип файла:
Размер файла:
3.76 Mb
Краткое содержание страницы № 1
Canon EOS 620-650
Camera Manual
POSTED 12-5-02
This is the full text and images from the manual. This may take 3 full minutes for all images to appear. If they
do not all appear. Try clicking the browser «refresh» or «reload button».
This camera manual library is for reference and historical purposes, all rights reserved.
This page is copyright© by , M. Butkus, N.J.
This page may not be sold or distributed without the expressed permission of the producer
I have no connection with a
Краткое содержание страницы № 2
Quartz Date Back E that imprints data, and the Technical Back E that memorizes exposure control data. For a full understanding of the EOS 620/650, please read this instruction booklet carefully before using the camera. While reading these instructions unfold the front and back flaps of this booklet for easy reference to the camera s parts. EOS» is derived from «Electro-Optical System» originating from the completely electronic data communication between the camera and lens. Further, «EO
Краткое содержание страницы № 3
Table of Contents Preliminary Preparations 1. Attaching the Lens 6 2. Loading the Battery 8 3. Checking the Battery 9 4. Loading the Film 10 [Automatic Film Speed Setting] 12 Basic Steps 1. Setting the Main Switch to the «Full Auto» Position 14 2. Holding the Camera 15 3. AF Focusing 16 4. Exposure 17 [Display Panel Illumination] 18 5. Automatic Film Rewind 19 [Rewinding Mid-Roll] 20 Making the Most of Your EOS 620/650 1. Main Switch Functions 22 2. Setting the AF Mod
Краткое содержание страницы № 4
1. Attaching the Lens 1) Turn the rear lens cap in the direction of the arrow until it stops and remove it from the lens. · To attach the rear lens cap, align its »O» mark with the red dot on the lens. Then lightly push it in and turn it clockwise until it stops. 2) Turn the body cap counterclockwise and remove it. · To attach the body cap, align its «o» mark with the camera’s red dot, then turn the cap clockwise. 3) To mount the lens, align the lens mount positioning point with
Краткое содержание страницы № 5
1) Remove the grip with a coin or similar object. 2) As shown in the photo, load the battery so that its terminals face in the direction of the camera. Make sure the battery is pushed in all the way until it is locked by the orange lever 3) Replace the grip securely. · When replacing the battery, first push the orange lever upward to remove the dead battery. · When using a tripod, dismount t the camera before replacing the battery. 3. Checking the Battery 1 ) Set the main swit
Краткое содержание страницы № 6
2) Open the switch cover on the back of the camera and press the battery check button( ). Battery power shows in the display panel. 4. Loading the Film 1) To open the back cover, push the back cover latch down while pressing the back cover lock button 2) Insert the upper-flat end of the film cartridge into the film chamber first. The film-load check mark (OIL) appears in the display panel. 3) Pull the film leader across the shutter curtain until its tip is aligned with the orange
Краткое содержание страницы № 7
4) Make sure that the film has no slack and that its perforations are properly engaged with the sprocket teeth. 5) Close the back cover. The camera advances the film automatically and stops when «1» appears in the frame counter in the display panel. 6) During film advance, the film transport bars will appear at the bottom of the display panel moving in sequence from left to right. However, if the film does not advance correctly, the bars blink after the camera has stopped and th
Краткое содержание страницы № 8
Basic Steps 1. Setting the Main Switch to the «Full Auto» Position 1) Slide the lens focus switch to «AF» 2) Set the camera’s main switch to the «Full Auto» position (the green » 0 » mark). The following displays will appear: ONE SHOT: One of the AF modes. P (Program): One of the AE modes. S (Single): One of the film winding modes. For further details on the above displays, please refer to pp. 24, 26 and 27. 2. Holding the Camera Your pictures will not be sharp if the
Краткое содержание страницы № 9
1) Center the AF from (‘[ ]» mark) over the main subject. Do not touch the lens’ moving parts during AF focusing. 2) Press the shutter button halfway and automatic focus (AF) starts. When correct focus is obtained, the green AF in-focus indicator lights up in the viewfinder and the AF focus signal (short electronic beeper tone) sounds. · Original focus remains locked, even if the subject or focusing distance changes as long as the shutter button is held halfway. · When AF is impossible
Краткое содержание страницы № 10
5. Automatic Film Rewind The film automatically rewinds at the end of the roll. 1) During rewind the film transport bars move in 2) Film rewind stops automatically when the film has sequence from right to left to indicate the function in been completely rewound. Open the back cover when progress while the frame counter counts in descending the film-load check mark(~) blinks. order. Press the film rewind button (~) to rewind before the 3) Remove the film cartridge. roll ends
Краткое содержание страницы № 11
((*)) (ON): In addition to being the same ON position [ ] (ON): Full auto position. The setting will be as as «A», the electronic beeper tone sounds in the follows automatically regardless of the mode. 1) AF following cases; mode — ONE SHOT 2) AE mode — P (Program) 3) Film 1) When correct focus is obtained. — AF focus signal winding mode — S (Single) 4) Electronic beeper tone (short beeper tone) 2) When the automatically-set shutter speed is too slow -short; AF focus signal to hand-
Краткое содержание страницы № 12
3) Turn the electronic input dial to select either «ONE SHOT» or «SERVO» 3. Setting the Film Winding Mode This camera has two automatic film winding modes. S: Single exposure. The film automatically advances to the next frame upon shutter release. C: Continuous exposure. Keep pressing the shutter button and the film winds continuously at the maximum speed of approximately three frames per second. **image missing: Self-timer position. (see p. 58) To set the film winding mode, fo
Краткое содержание страницы № 13
(1 ) Program AE [Purpose] The camera automatically sets shutter speed/ aperture combinations according to subject brightness. This mode particularly suits first-time SLR users or those who prefer to concentrate on picture composition or candid snapshots. [SETTING] While pressing the shooting mode selector, turn the electronic input dial until «P» appears in the display panel. When the automatically-set shutter speed is too slow to hand-hold, the camera will sound a long be
Краткое содержание страницы № 14
[PURPOSE] With the EOS 620, you can change the automatically-set shutter speed/aperture combinations of the program AE mode. This function is particularly useful when you need a specific shutter speed or aperture while shooting in the program AE mode. Be sure to set the main switch to the «A» or «(‘ ‘)» position. (At the green » [ ] » position, the program shift function cannot be used. [SETTING] Simply turn the electronic input dial until the desired shutter speed or aperture v
Краткое содержание страницы № 15
(3) Shutter-Priority AE [PURPOSE] In this mode the shutter speed is manually set and the camera automatically chooses the correct aperture for the lighting conditions. This mode is best for taking pictures of moving subjects by con trolling the shutter speed. Faster shutter speeds freeze subject motion while slower shutter speeds can produce artistic blur effects. [SETTING] 1) While pressing the shooting mode selector, turn the electronic input dial until «TV» appears in the displa
Краткое содержание страницы № 16
(4) Aperture-Priority AE [Purpose] In this mode, the aperture is set manually and the camera chooses correct shutter speed for the blighting conditions (the opposite of shutter-priority AE). Use this mode for portraits, landscapes and still-life photography where depth of field is an important factor. (see p. 36) [SETTING] 1) While pressing the shooting mode selector, turn the electronic input dial until «Av» appears in the display panel. 2) Remove your finger from the shooting
Краткое содержание страницы № 17
Depth of Field When your subject is in focus, there is a certain area in front of it and behind it which will also be in focus. This range of sharpness is called «depth of field». Depth of field has the following characteristics: 1) The smaller the aperture, the wider the depth of field and vice versa. 2) The shorter the lens focal length is, the greater the depth of field, provided that aperture and shooting distance are the same. 3) The farther the shooting distance, the greater t
Краткое содержание страницы № 18
(5) Depth of Field AE (EOS 650 Only) [PURPOSE] This mode makes everything from a certain point in the foreground to the background in focus, using both the AF function and the depth of field. The camera automatically sets the correct aperture value and corresponding shutter speed for the lighting conditions. Use this mode for landscapes and large-group commemorative shots. [SETTING] 1) While pressing the shooting mode selector, turn the electronic input dial until «DEPTH» ap
Краткое содержание страницы № 19
 Gently press the shutter button completely to take the picture. When shooting continuously, it is not necessary to focus the same subject again provided you keep pressing the shutter button halfway after exposure. (To clear, press the shooting mode selector after you remove your finger from the shutter button.) [VIEW FINDER INFORMATION] Correct exposure- Exposure will be correct if continuously lit values display. Underexposure — Both the shutter speed of 30″ and the lens
Краткое содержание страницы № 20
· When you try to focus extremely near and far points the automatically-set shutter speed will be comparatively slower and the long beeper tone will sound to warn you of camera-shake. Hold the camera steady or use a tripod. · When using a zoom lens, do not change the lens focal length after focusing the first point Always be sure to compose the picture first. · It is advisable to use a wide-angle lens to obtain maximum depth-of-field effect. (A lens focal length of more than 200mm is n
Canon EOS 620 — 650 camera manual
Canon EOS 620-650
Camera Manual
TO FIRST PART OF MANUAL
—
TO SECOND PART OF MANUAL
CLICK HERE TO SEE THE «EF LENS LINEUP»
Interchangeable Focusing Screens The Overall New Laser-Matte/AF Frame screen comes
with your camera. You can change the focusing screen according to specific focusing needs
with six different focusing screens available optionally.
file:///D|/copy_topcities/chinon/canon_620-650/canon_eos_620-650-3.htm (1 of 15)1/9/2005 1:18:39 PM