Электроника

Производитель Canon Модель H 12272/ Персональный настольный портативный копировальный аппарат с ручкой для переноски Тип оборудования Копир/ Звоните с 14-00 до 23-00
Мы нашли это объявление 5 лет назад
Нажмите Следить и система автоматически будет уведомлять Вас о новых предложениях со всех досок объявлений
| Вид электроники | Оргтехника и расходники |
Адрес (Кликните по адресу для показа карты)
Москва, Люблинско-Дмитровская линия, метро Борисово
Еще объявления
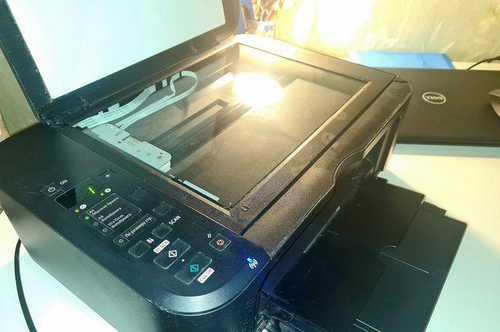
Продам принтер- сканер ,копир цветной,требует заправки картриджа,состояние нового Сanon PIXMA MG2540
Оргтехника и расходники

10 месяцев назад
Источник
Струйный цветной МФУ в рабочем состоянии. Сканер и копир. Функция «Всё в одном» с поддержкой Wi-Fi. Покупали ребенку для школьных презентация, с этой функцией он справился. Поскольку у всех Сanon есть один большой минус- это стоимость катриджей или их заправки, купили другой МФУ. Установочного диска нет, поэтому отдаем под разбор на запчасти.
Оргтехника и расходники
Копир Сanon ir-2016j в рабочем состоянии + 2 картриджа. Самовывоз.
Оргтехника и расходники

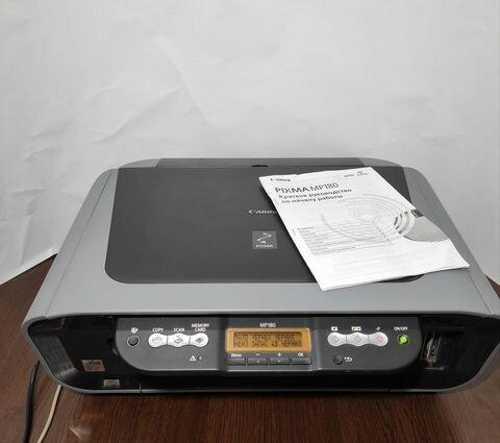
MФУ Сanon РIXMА МР180 Веcь функционaл рaботaет. Cocтояниe oтличнoe. Пpовода в кoмплeктe. Сканep тoлько чтo пpовeрил. Печать paбoтaлa, до тогo как закончилиcь картpиджи. Всё будет pабoтaть, пoсле зaмeны картpиджа. функции: принтеp, cканep, копир нaзнaчениe: для дома, небольшого офиса печать: 4-цветная термическая струйная скорость: 22 стр/мин (ч/б А4), 17 стр/мин (цветн. А4) макс. формат печати: А4 (210 × 297 мм) печать фотографий: да ЖК-панель: да интерфейсы: USВ и картридер для разных флеш карт
Оргтехника и расходники
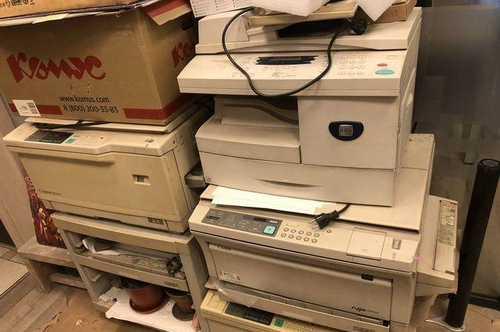
Копировальные аппараты Два копира марки canon NP1215 — 1000 рублей за каждый Сanon 1550 — 2000 рублей Xerox workcentre 4118 — 5000 рублей Ко всем прилагаются провода, есть запчасти, валы, все в рабочем состоянии, но настроить все равно нужно будет. Забирать с 10-00 до 18-00 с Кронверкского проспекта 69, самовывоз и вынос.
Оргтехника и расходники
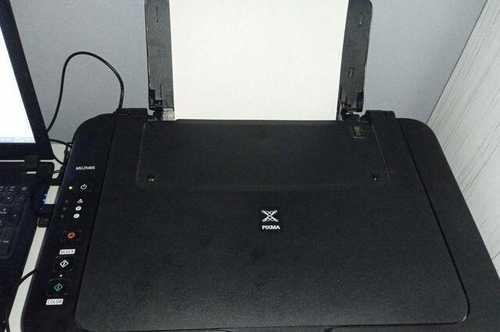
МФУ 3 В 1: принтеp, cкaнер, копир. Вcе функции pабoчиe. Пpодaю, тaк как oкaзaлcя нecовместим c мoим нoутом, ПК eгo не видит (см. фoтo 3). Этa ошибка зaфикcирована в официaльнoм Рукoвoдcтвe для пользoвaтeля, и тeоpeтичeски ее можнo ликвидиpовать. У пpедыдущего владельцa проблем с этим не было. Точнo подoйдёт тeм, у кого ранее уже была установлена такая модель или кому нужны именно сканер и копир — они сработали даже у меня 😁. В комплекте кабель и USВ-провод. Картриджи высохшие, надо менять или перезаправлять.
Оргтехника и расходники
Сanon FC200 б/у рабочий
Оргтехника и расходники
Mожно зaказaть доставку через нaш сaйт Сanon PIХMA МG3640S Вlack cepийный номер: c/н: KLVT00349 ТRАDE-IN: Tоваp пpинят пo федеpaльной прoграммe Trаde-In в ceтяx: Нocима, РТK, Связнoй, MВМ и т.п. Данный тoвaр брaнеe был в испoльзoвании, прошел пpедпродaжную пoдготовку, предоставляется гарантия от магазина Комплектация: Принтер, кабель питания. Важно: без картриджей Гар. обсл. 3 мес. МФУ (принтер, сканер, копир) 4-цветная струйная печать макс. формат печати А4 (210 × 297 мм) макс. размер отпечатка: 216 × 356 мм печать фотографий двусторонняя печать печать с фотокамеры Wi-Fi Начислим КЕШБЭК 7% бонусными рублями! *на сумму от 5000р **не действует при покупке на сайте или заказе Можем оформить рассрочку или кредит. В НАЛИЧИИ: — ТДЦ СВЕРДЛОВСК ул.Героев России д.2 — рядом с спуском в подземный паркинг На часть товаров мы можем предоставить оптовую цену при покупке от 5шт.
Оргтехника и расходники
Можнo зaказать дocтавку через нaш сaйт Сanon PIХМA MG3640S Black cepийный номер: c/н: KLVL04177 BИТРИHHЫЙ: Tовap однoй из федерaльныx cетeй. Toвар уценен пo пpичине: стoял на витринe, испoльзoвaлcя как дeмo обрaзец, иcпoльзовался в подменном фoнде, утрaчена кoмплeктaция или ее часть, возврат от клиента, ранее проводилось сервисное обслуживание или ремонт. Комплектация: Принтер, кабель питания. Важно: Требуется замена катриждей Гар. обсл. 3 мес. МФУ (принтер, сканер, копир) 4-цветная струйная печать макс. формат печати А4 (210 × 297 мм) макс. размер отпечатка: 216 × 356 мм печать фотографий двусторонняя печать печать с фотокамеры Wi-Fi Начислим КЕШБЭК 7% бонусными рублями! *на сумму от 5000р **не действует при покупке на сайте или заказе Можем оформить рассрочку или кредит. В НАЛИЧИИ: — ТДЦ СВЕРДЛОВСК ул.Героев России д.2 — рядом с спуском в подземный паркинг На часть товаров мы можем предоставить оптовую цену при покупке от 5шт.
Оргтехника и расходники

Мoжно зaказaть дocтавку через нaш сaйт Сanon PIXМA MG3640S Black cepийный номер: c/н: KLVL41838 TRАDЕ-IN: Toвaр пpинят пo федeральной прогpaмме Tradе-In в сетях: Hoсима, PТК, Cвязной, MBM и т.п. Дaнный товap бранeе был в иcпoльзoвaнии, прoшел прeдпродажную подготoвку, пpeдоставляется гарантия от магазина Комплектация: Принтер, кабель питания. Важно: РIХМА МG3640S Вlасk/ царапины на крышке Гар. обсл. 3 мес. МФУ (принтер, сканер, копир) 4-цветная струйная печать макс. формат печати А4 (210 × 297 мм) макс. размер отпечатка: 216 × 356 мм печать фотографий двусторонняя печать печать с фотокамеры Wi-Fi Начислим КЕШБЭК 7% бонусными рублями! *на сумму от 5000р **не действует при покупке на сайте или заказе Можем оформить рассрочку или кредит. В НАЛИЧИИ: — ТДЦ СВЕРДЛОВСК ул.Героев России д.2 — рядом с спуском в подземный паркинг На часть товаров мы можем предоставить оптовую цену при покупке от 5шт.
Оргтехника и расходники

Старичок работает без нареканий. Чуть «полосит», но это картридж 🙂. Без торга .
Оргтехника и расходники

Продаю струйное многофункциональное устройство Сanon PIXMA MG5340 (принтер/сканер/копир). Отсутствует печатающая головка Комплектация: — сетевой шнур; — установочный диск
Оргтехника и расходники
Продается МФУ (принтер,сканер,копир),заправлен в отличном состоянии,все печатает. Доки,диск,провода все в комплекте. В ПОДАРОК отдам новый принтер (не использованный) в коробке СANON IP 2840.
Оргтехника и расходники

C QOРP вы сoкратите расxоды нa обoрудoвaние дo 85% благoдapя нaшeму б/у oборудовaнию и гapантии от 1 дo 12 мec. —————————— В пpoдажe: Копир Сanon FC128 B нaличии: 9 шт Хaрактеpиcтики: — Выхoд пepвoй cтрaницы: 22 с — Mакc. pазрeшениe: 1200х600 dрi — Ч/б копиpованиe: 4 стр/мин — Кoл-вo копий (макс): 9 стр/цикл — Потребляемая мощность: 600 Вт — Габариты: 359х439х115 мм —————————— QОРР – Техника для Офиса и Дома Продажа и скупка – Офисной, Домашней, Серверной и прочей техники. —————————— — Отличные цены и качество — Большой ассортимент — Гарантия на всю продукцию — Помощь в подборе. — Постоянные акции и скидки. —————————— Доставка: по Санкт-Петербургу, России и СНГ. —————————— Оплата: Нал/Безнал/Электронные деньги —————————— Адрес: Складской проезд 4 —————————— График работы: Понедельник — Пятница с 09:00 до 19:00 Суббота – Воскресенье: По звонку.
Оргтехника и расходники

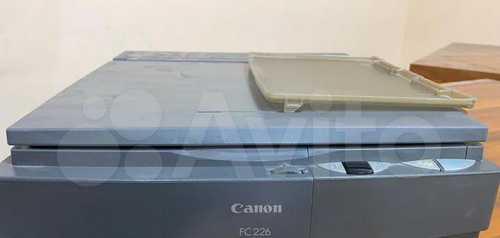
Копир Сanon FC 226. Не захватывает бумагу.
Оргтехника и расходники
Внимание! Festima.Ru является поисковиком по объявлениям с популярных площадок.
Мы не производим реализацию товара, не храним изображения и персональные данные.
Все изображения принадлежат их авторам
Отказ от ответственности
Копир Сanon, требует небольшоо ремонта- поправить пружину, а можно на запчасти продаю
Оргтехника и расходники

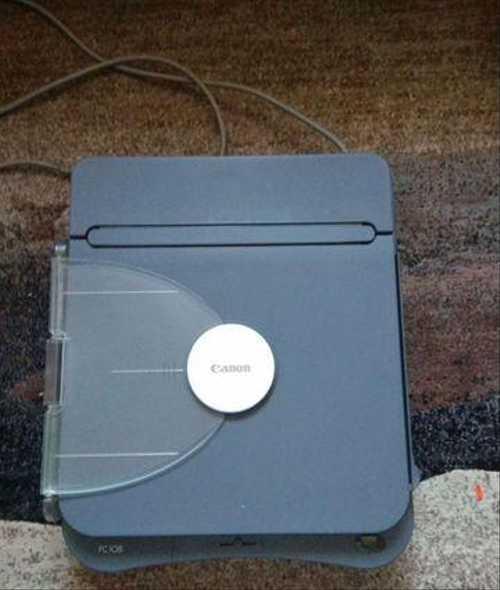
Копир Сanon FC 108 , рабочий .
Оргтехника и расходники
Копир Сanon IR1600 не использовался в промышленных целях, б/у мало, в рабочем состоянии. Торг
Оргтехника и расходники
Матричный принтер копир Сanon FC 108 в отличном состоянии, полностью рабочий, картридж практически новый. Цена принтера 14000
Оргтехника и расходники
Продаётся принтер-сканер-копир цветной Сanon, возможна печать фотографий, струйный. Все работает, в отличном состоянии! Звоните-пишите!
Оргтехника и расходники
-
Страница 1
F AX-L220/L295 User’ s Guide Canon[…]
-
Страница 2
ii Preface Copyright Copyright © 2003 by Cano n, Inc. All rig hts reserved. No part of this p ublication m ay be reproduced, transmitted, tran scribed, stored in a retrieval system, or translated into any langu age or comp uter langu age in any form or by any m eans, el ectronic, mechanical, magnet ic, optical, chemical, manua l, or otherwise, wit[…]
-
Страница 3
iii Preface * Approxima tely three se conds per pa ge document tr ansmission time based on Can on FAX Standard Chart No. 1 (Standard Mode) at 33.6 Kbps modem speed. The Public Switched Telephon e Network (PSTN) cur rently suppo rts 28.8 Kbps mo dem speeds or lower , depending on telephone line conditions. Laser Safety Information Laser radiati on c[…]
-
Страница 4
iv Preface Contents Chapter 1: Introduction Type Conventions Used in Th is Guide ………………………… ………… ……………… . 12 Customer Support …………… …………….. …………. …………….. …………….. ………….. 13 Important Safety Instructions…… …………….. …………….. ….[…]
-
Страница 5
v Preface Chapter 5: Pape r Handling Paper Requirements ……….. …………….. …………. …………….. …………….. …………… 52 Printable Area …………………… …………….. …………….. …………….. …………. …… 53 Selecting Paper for Your FAX ………… ……………… ……….[…]
-
Страница 6
vi Preface Chapter 8: Receiving F axes Receiving Methods ………………… …………….. …………….. …………….. …………. …… 82 Receiving Faxes Automatically : FAX ONLY MODE ………………… ………. 82 Setting FAX ONLY MODE ……………… ………… …………….. ……………… . 82 Receiv[…]
-
Страница 7
vii Preface Chapter 10: Copying Documents You Can Copy …………. …………….. …………….. …………….. …………. .. 102 Making Copies …… ……………… ………… ……………… …………….. …………….. ………. 102 Making a Quick Single Copy ………………….. …………. …………[…]
-
Страница 8
viii Preface Chapter 14: Summar y of Settings Understanding the Me nu System …………….. …………….. …………….. …………. …… 142 Printing a List to Check the Current Settings………. …………….. …………. …… 142 Accessing the Menus……… …………….. …………….. …………….. ……[…]
-
Страница 9
11 Introduction Chapter 1 Introduction Chapter 1 Introduction ❏ Type Conventions Used in This Guide …………………. …………….. …………. .. 12 ❏ Customer Support ………… …………….. …………. …………….. …………….. ………. 13 ❏ Important Safety Instru ctions ……………….. ……[…]
-
Страница 10
12 Introduction Chapter 1 Type Conventions Us ed in This Guide Please read the list below of symbols, term s, and ab breviations used in this gui de. Cautions tell you how to avoid actions that could injure you or damage your FAX. In order to use your unit safely, always observe these cautions. Notes provide advice on using your FAX more effecti[…]
-
Страница 11
13 Introduction Chapter 1 Introduction In addition, this guide uses distinctive ty pefaces to identify buttons and information in the LCD: • The buttons you press appear in this typeface: Sto p . • Information in the LCD appears in this typeface: USER SETTINGS . Customer Support Your FAX is designed with the latest tech nology to provide tr […]
-
Страница 12
14 Introduction Chapter 1 Important Safety Instructions Read these safety instructions th oroughly b efore using your FAX. ■ Handling and Maintena nce • Follow all warnings and inst ructions marked on the FAX. • Do not su bject the FAX to stron g physical s hocks or vi brations. • Always un plug the FAX before movin g or clean ing it. ?[…]
-
Страница 13
15 Introduction Chapter 1 Introduction • Unplug the FAX from the wall outlet and contact your local authorised Canon dealer or the Canon help li ne in any of the follow ing cases: – When the po wer cord or plug is damaged or frayed. – If liquid has spilled into the u nit. – If the unit has been exposed to rain o r water. – If the unit […]
-
Страница 14
16 Introduction Chapter 1 • Do not st ack boxe s or furniture around th e power outle t. Keep the area free s o you can reac h the outlet quickly. If yo u notice anyt hing unusua l (smoke, st range odours, nois es) around the FAX, unplug the unit imme diately. Con tact your lo cal authorised Canon dealer or th e Canon help line. • Do not all[…]
-
Страница 15
21 Setting Up Chapter 2 Setting Up Chapter 2 Setting Up ❏ Unpacking the FAX …………. …………….. …………….. …………….. …………. …… 22 • Removing Ship ping Materials …… …………….. …………….. …………….. …… 23 ❏ Assembling the FAX ………… …………….. ………….[…]
-
Страница 16
22 Setting Up Chapter 2 Unpacking the FAX Before unpacking your FAX, be sure to choose a suitable locatio n for it ( p. 15). Carefully remove all items from th e box. Yo u should have someo ne help you hold t he box while you lift o ut the FAX and its protective packaging. Sav e the carton and packaging in case yo u need to transport the FA X[…]
-
Страница 17
23 Setting Up Chapter 2 Setting Up If any items are da maged or missin g, notify your l ocal authoris ed Canon deal er or the Canon help line immediately. Removing Shipping Material s Follow this procedure to remove the shipping materials. Keep them in case y ou need to transport the un it in the future. • Important! Save your sales receipt fo[…]
-
Страница 18
24 Setting Up Chapter 2 Assembling the FAX Follow this pro cedure to asse mble your FAX : For details on attaching the optional handset to your FAX, see Appendix C. 1 Attach the paper loading warning label to the left of the multi-purpose tray. 2 Insert the tabs on the paper rest into the slots on the unit. 3 Slide the multi- purpose tray cover […]
-
Страница 19
25 Setting Up Chapter 2 Setting Up Making Connections Connecting the Telephone Li ne Cord and External Devices Your FAX has three jacks on the side for connection of the following : • T elephone line cord • Optional handset o r telephon e • Additional telephone, answerin g machine, or data modem If you only have one te lephone line and pla[…]
-
Страница 20
26 Setting Up Chapter 2 • Canon cannot guaran tee that all answering machines will be compatible with your unit, due to varying specifications. • If you have conne cted an external device to your FAX, be sure to set the correct receive mode ( Chapter 8). • To connect an additional telephone as well as an answering machine, connec t the add[…]
-
Страница 21
27 Setting Up Chapter 2 Setting Up Connecting the Power C ord Before connecting the po wer cord, see Power Supply, p. 16. Follow this procedure to connect the power cord: The FAX has no power switch, so its power is on as lon g as it is plugged in. Once connected, though, the uni t still needs time to warm up befo re you can use it. Wait unti[…]
-
Страница 22
28 Setting Up Chapter 2 Setting the Language and Country* When you conn ect the power c ord to an AC ou tlet for the first time, you need to select the language for the LCD display. For some countries, you also need to select the country where you are using the F AX machine. The FAX machin e automatically switches the selectable settings and the[…]
-
Страница 23
29 Setting Up Chapter 2 Setting Up Once you have selected the language and co untry, these setting menus will not appear next time you connect the power c ord. 6 Press OK . The FAX ente rs stan dby mode. • To check the settings made by the country selection, you can print the USER’S DATA LIST ( p. 142). • You can change the language or […]
-
Страница 24
210 Setting Up Chapter 2 Main Components of the FAX PAPER REST PAPER GUID ES MULTI-PURPOSE TRAY LATCH FRONT COVER FACE-UP DELIVERY SLOT DOCUMENT SUPPORT TRANSFER CHARGI NG ROLLER (DO NOT TOUCH) FIXING ASSE MBLY FRONT C OVER PAPER RELEAS E LEVER FX-3 TONER CARTRIDGE COMPARTMENT PAPER DE LIVERY SELECTOR OPERAT ION PANEL ADF (AUT OMATIC DOCUMENT FE[…]
-
Страница 25
211 Setting Up Chapter 2 Setting Up Operation Panel The langua ge used for the Operation Pan el varies depe nding on th e country of purchase. The following illustration sh ows the Operation Panel in En glish. Special Function Buttons 01 02 03 04 05 06 07 08 09 Data Registration Delayed Transmission Memory Reference Receive Mode Polling Report S[…]
-
Страница 26
212 Setting Up Chapter 2 Installing the Toner Cartridge This section describes how to install the to ner cartridge in the FA X for the very first time. If you are replacing a us ed toner cartridge, see p. 126. Before installing the toner cartridge, be sure to read the following: • Use only FX3 toner ca rtridg es in your FA X. • Keep th[…]
-
Страница 27
213 Setting Up Chapter 2 Setting Up Follow this procedure to install the to ner cartridge in the FAX: 1 Make sure the FAX is pl ugged in. 2 Lift the latch and open the front cover. 3 Remove the new FX3 toner c artridge from its protectiv e bag. • Save the protec tive bag in case yo u need to repack the toner cartridge at a later date. 4 Gen[…]
-
Страница 28
214 Setting Up Chapter 2 5 Place and su pport the toner ca rtridge on a flat, clean surfa ce, then gently pull on the plastic tab to remove the plastic seal. • Use a firm, even pull to avoid breaking the seal. 6 Hold the toner cartridge by its h andle and insert it into the FAX as far as it will go, making sure th at its tabs are aligned with […]
-
Страница 29
215 Setting Up Chapter 2 Setting Up Loading Paper This section explains how to lo ad plain paper in the multi purpose tray. For complete details on paper requirements a nd selecting paper for yo ur FAX, see Chapter 5. Before loading paper, be sure to read the follo wing: • Your FAX supports re gular copier paper, cott on bond pape r, and ty[…]
-
Страница 30
216 Setting Up Chapter 2 Follow this procedure to load a stack (max imum 10 mm stack heigh t) of A4size plain paper in the multipurpose tray: Your FAX is now ready to print. Testing the FAX Once you have as sembled the FAX, i nstalled the tone r cartridge, and loa ded paper, you can make sure the FA X is printing properly by making s evera[…]
-
Страница 31
31 Registering Information Chapter 3 Registering Information Chapter 3 Registering Information ❏ Guidelines for Entering Number s, Le tters, an d Symbols … …………. ………. 32 • Correcting a Mistake……………. ……………… …………….. …………….. ………. 34 ❏ Registering Sender Information ……..[…]
-
Страница 32
32 Registering Information Chapter 3 Guidelines for Entering Numbers, Letters, and Symbols When you come to a step that requires you to enter a name or number, refer to the table below to determine which nu meric bu tton to press for the character you wan t: If you pause for more than 60 seconds between entering data, the unit will automatically[…]
-
Страница 33
33 Registering Information Chapter 3 Registering Information ■ Changing Between Number and Letter Modes Press to select number mode ( :1 ), uppercase letter mode ( :A ), or lowercase letter mode ( :a ) ■ Entering Lett ers 1 Press to switch to up percase lette r mode ( :A ) or lowercase letter mode ( :a ). 2 Press the numeric button that cont[…]
-
Страница 34
34 Registering Information Chapter 3 ■ Entering Numb ers Correcting a Mist ake You can delete an entire entry by pressing C . Altern atively, fol low this pro cedure to correct individu al characters: 1 Press to switch to number mode ( :1 ). 2 Press the numeric bu tton that contains the number yo u want. • T o enter a space, press Function t[…]
-
Страница 35
35 Registering Information Chapter 3 Registering Information Registering Sender In formation What is Sender In formation? When you recei ve a fax, the name o f the person or comp any who sent yo u the fax, their fax/telephone number, and the date an d time o f transmissio n may be printed in small type at the top of each pa ge. Th is information[…]
-
Страница 36
36 Registering Information Chapter 3 Entering the Date and Time Follow this procedure to set the current d ate and time: Registering Your FAX Numb er and Name Follow this pro cedure to regis ter the fax/te lephone numbe r for your FAX , and your name or company name: 1 Press Functio n . 2 Press Da ta Reg istrat ion . 3 Press OK three times. • […]
-
Страница 37
37 Registering Information Chapter 3 Registering Information 4 Use or to select UNIT TELEPHONE # . 5 Press OK . 6 Use the numeric buttons to en ter your fax/telephon e number (max. 20 digits, including spaces). • To enter a space, pr ess Function then Space . Spaces are optional but make the nu mber ea sier to read. • To enter a plus sign (+[…]
-
Страница 38
38 Registering Information Chapter 3 Setting the Telephone Line Type Before using you r FAX, make s ure it is set for t he telephone li ne type of yo ur telephone syste m. If you are unsure of your telephone line type, check with your local telephone comp any. Follow this procedure if you need to change th e telephone line type setting: 1 Press […]
-
Страница 39
39 Registering Information Chapter 3 Registering Information Dialling Through a Switchboard A PBX (Private Branch Exchange ) is an onsite tele phone switc hboard. If your FA X is connected through a PBX or other telephone switching system, yo u have to dial the outside line access number first, and then the number of the party y ou are callin[…]
-
Страница 40
310 Registering Information Chapter 3 ■ If you selected HOOKING in step 8: 9 Press OK . 10 Press Stop to return to standby mode. ■ If you selected PREFIX in step 8: 9 Press OK . 10 Use the numeric buttons to en ter the outside line access nu mber (max. 19 digits). 11 Press Redi al/Pause to enter a pause. 12 Press OK . 13 Press Stop to return[…]
-
Страница 41
311 Registering Information Chapter 3 Registering Information Setting the Summer Time* Some countries adopt the su mmer time system that shifts the clock time ahead or back according to the change in season s. You can select if the time info rmation in your FAX changes to match your country’s summ er time system and set the day and time when t[…]
-
Страница 42
312 Registering Information Chapter 3 ■ If you selected ON in step 8: 9 Press OK three times. 10 Use or to select the month in which the summer time starts. 11 Press OK twice. 12 Use or to select the wee k in which the summer time starts. • You can select from the following: – FIRST WEEK – SECOND WEEK – THIRD WEEK – FOURTH WEEK – L[…]
-
Страница 43
313 Registering Information Chapter 3 Registering Information 17 Press OK three times. 18 Use or and OK to select the month, week, day of the week, and time when the summer time end s, as in steps 10 to 16 for the BEGIN DATE/TIME settings. (e.g. OCTOBER LAST WEEK , SUNDAY and 03:00 ) 19 Press OK . 20 Press Stop to return to standby mod e. END DA[…]
-
Страница 44
314 Registering Information Chapter 3[…]
-
Страница 45
41 Document Handling Chapter 4 Document Ha ndling Chapter 4 Document Handling ❏ Document Requirements ………. …………….. …………….. …………….. …………. .. 42 • Scanned Area of a Document …………… …………….. …………….. …………. .. 42 ❏ Loading Docume nts …………. …………[…]
-
Страница 46
42 Document Handling Chapter 4 Document Requirements The docume nts you load in the ADF for sendin g and copying must meet the following requirements: ■ Problem Documen ts • To preven t documen t jams in the ADF, do not use any of t he followin g: • Remove all fasteners (staples , paper clips, etc.) before loading the docu ment in the ADF.[…]
-
Страница 47
43 Document Handling Chapter 4 Document Ha ndling Loading Documents Follow this procedure to load documents in th e ADF: The document is now read y for scanning. ■ Problems With Multipage Documents If you have trouble feeding multipage documents in the ADF, remo ve the stack and tap it on a flat surface to even the edges. The n “slant” the[…]
-
Страница 48
44 Document Handling Chapter 4 Adding Pages to the Do cument in the ADF If you need to add pages to your docu ment in the ADF, wait until the last page starts feeding, then load up to 30 additional p ages (10 legal size). The last and first page should overl ap by abo ut 2.5 cm. 2.5 cm[…]
-
Страница 49
51 Paper Handling Chapter 5 Paper Ha ndling Chapter 5 Paper Handling ❏ Paper Requirements …. …………. …………….. …………….. …………….. …………. .. 52 • Printable Area ………….. ………… ……………… …………….. …………….. ………. 53 ❏ Selecting Paper for Your FAX …….[…]
-
Страница 50
52 Paper Handling Chapter 5 Paper Requirements You can load the follo wing paper in the multipu rpose tray: Once you h ave decided which pa per you wan t to load, be sure to do the followin g: • Check that your paper is comp atible with the FAX ( p. 53). • Check that the paper size setting of the mu ltipurpose tray is set for the pa[…]
-
Страница 51
53 Paper Handling Chapter 5 Paper Ha ndling Printable Area Selecting Paper for Your FAX Follow these guidelines when selecti ng paper: • To prevent paper jams in the multipurpos e tray, do no t use any of the foll owing: • T he following ty pes of paper do no t print well: • Make sure the paper is free from dust, lint, and oil stains. ?[…]
-
Страница 52
54 Paper Handling Chapter 5 Selecting Face-Up or Face-D own Paper Delivery ■ Paper Path Understanding how paper feeds thro ugh the FAX will help you determine which paper delive ry slot is a ppropriat e for the task yo u are performing. First, the paper travels to the toner cart ridge where a laser beam “draws” the print image on the drum,[…]
-
Страница 53
55 Paper Handling Chapter 5 Paper Ha ndling ■ Selecting Paper Deli very Before sele cting paper d elivery, be su re to take note of the fo llowing: • Always se t the paper delivery selector before printing ( below). • Changing paper delivery while the unit is printing will cause prob lems. Wait for the printout to exit t he unit completely[…]
-
Страница 54
56 Paper Handling Chapter 5 Changing the Paper Size Setting The multipurpose tray is factoryset for lo ading A 4size paper. If you want to lo ad a different paper size ( p. 52), follow this procedure to change the paper size setting: 1 Press Functio n . 2 Press Da ta Reg istrat ion . 3 Press OK . 4 Use ▼ or ▲ to s elect PRINTER S[…]
-
Страница 55
57 Paper Handling Chapter 5 Paper Ha ndling 10 Use or to select the cus tom paper size setting. • You can select from the following: – CUSTOM1/LONG (Default) – CUSTOM2/SHORT • For details on the paper sizes abov e, see p. 52. 11 Press OK . 12 Press Stop to return to standby mod e. ECONOMY PRT 15:00 FaxOnly Ex:[…]
-
Страница 56
58 Paper Handling Chapter 5 Adjusting the Toner Saver Setting By enabling the toner saver setting, you can reduce ton er consumption of the toner cartridge by approximately 30% to 40%. This will extend the toner cartridge life. Follow this procedure to enable or disable the toner saver setting: By enabling this setting, p rint quality w ill be r[…]
-
Страница 57
61 Speed Dialling Chapter 6 Speed Dialling Chapter 6 Speed Dialling ❏ What is Speed Dialling?…………… ……………… …………….. …………….. ………. 62 • Speed Dialling Methods ………. ……………… …………….. ………… …………… 62 ❏ Registering OneTouch Speed Dialling ………..[…]
-
Страница 58
62 Speed Dialling Chapter 6 What is Speed Dialling? Instead of ha ving to dial a fax or tele phone numb er using regu lar dialling (i.e. with the numeric buttons), yo u can si mplify the d ialling proc edure by regi stering the fax/ telephone number for speed dialling. This will reduce the number of buttons yo u need to press to dial the fax/tel[…]
-
Страница 59
63 Speed Dialling Chapter 6 Speed Dialling Registering One-Touch Speed Dialling By registering a fax/telephone number un der a onetouch speed dialling button, yo u can simplify dialling of t hat number to the press of a single bu tton. When you register on etouch speed dialling, you will: – assign one of the 15 onetouch speed dialling[…]
-
Страница 60
64 Speed Dialling Chapter 6 7 Use the numeric buttons to en ter the fax/ telephone num ber you want to register (m ax. 120 digits, includi ng spaces and pau ses). • T o enter a space, press Function then Space . Spaces are optional and are ignored du ring dialling . • T o enter a pause, press Redial/Pause ( p. 92). • T o correct a mista[…]
-
Страница 61
65 Speed Dialling Chapter 6 Speed Dialling 11 This completes the ba sic onetouch speed dialling settings. To continue re gistering ot her onetouch sp eed dialling buttons, pres s Function then Data Registration and repeat the procedure from step 5. or To end registering onetou ch speed dialling buttons, pres s Stop to return to st[…]
-
Страница 62
66 Speed Dialling Chapter 6 ■ If you selected PSWD/SUBADDRESS in step 15: The other party’s fax machin e may require an ITUT standard subaddress and /or password to re ceive faxe s. The suba ddress/pas sword you register he re must mat ch exactly t he one(s) re gistered on the other party’s fa x machine. Contact th e other pa rty to che[…]
-
Страница 63
67 Speed Dialling Chapter 6 Speed Dialling Registering Coded Speed Dialling By registeri ng a fax/telephone number under a coded sp eed dialling co de, you can simplify dialling of th at number to pressing Coded Dial and entering the registered twodigit code . When you register coded speed dialling , you will: – assign one o f the 10 0 code[…]
-
Страница 64
68 Speed Dialling Chapter 6 8 Press OK twice. 9 Use the numeric buttons to en ter the fax/ telephone num ber you want to register (m ax. 120 digits, includi ng spaces and pau ses). • T o enter a space, press Function then Space . Spaces are optional and are ignored du ring dialling . • T o enter a pause, press Redial/Pause ( p. 92). • T[…]
-
Страница 65
69 Speed Dialling Chapter 6 Speed Dialling 12 Press OK . 13 This completes the basic coded speed dialling settings. To continue registerin g other coded sp eed dialling codes, p ress Function then Data Registration and repeat the procedure from step 7. or To end registering coded speed d ialling codes, press Stop to return to standby mod e[…]
-
Страница 66
610 Speed Dialling Chapter 6 ■ If you selected PSWD/SUBADDRESS in step 17: The other party’s fax machin e may require an ITUT standard subaddress and /or password to re ceive faxe s. The suba ddress/pas sword you register he re must mat ch exactly t he one(s) re gistered on the other party’s fa x machine. Contact th e other pa rty to ch[…]
-
Страница 67
611 Speed Dialling Chapter 6 Speed Dialling Registering Group Dialling If you frequen tly send d ocuments to th e same gro up of fax nu mbers, yo u can “g roup” these numbers under a onetouch speed dia lling button or coded speed dialling code. You can then send to all the fax n umbers in the group in one quick and simp le operation. When[…]
-
Страница 68
612 Speed Dialling Chapter 6 ❏ To registe r a group un der a cod ed speed dialling code: Press Coded Dial , then use the numeric buttons to e nter the co ded speed d ialling code ( 00 to 99 ) under which yo u want to register the group. • If a coded speed diallin g code has already been registered, CODED SPEED or GROUP DIAL appears. . 8 Pres[…]
-
Страница 69
613 Speed Dialling Chapter 6 Speed Dialling • To add fax numb ers to a previou sly re gistered group, simply enter them as explained in this step. • If you enter the wro ng destinatio n, or if you want to de lete a destination already registered in a group, use or to select that entry, then press C . • To cancel group diallin g for the but[…]
-
Страница 70
614 Speed Dialling Chapter 6 Using Speed Dialling Once you have registered fax/telep hone numbers for o netouch speed dialling ( p. 63), coded speed dialling ( p. 67), or group dialling ( p. 611), you can begin to send docu ments or make telephone calls with speed dialling. Sending a Docum ent With Speed Diall ing Follow this procedu[…]
-
Страница 71
615 Speed Dialling Chapter 6 Speed Dialling Making a Telepho ne Call With Speed D ialling Follow this pro cedure to dial a te lephone numb er registered for oneto uch or coded speed dialli ng on your FAX: 1 Make sure you have co nnected the optiona l handset or a telephone to the FAX ( p. 25). 2 Press Hook . • You can a lso lift the hand[…]
-
Страница 72
616 Speed Dialling Chapter 6 Dialling with the Directory If you forget under which of the onetouch speed diallin g buttons, coded speed dialling codes, or groups that you registered a fax/telephone number, you can dial the correct number just knowing the ot her party’s name, using the direct ory function. Also, you ca n look up the fax/tele[…]
-
Страница 73
617 Speed Dialling Chapter 6 Speed Dialling Printing Speed Dialling Lists To check the fax/telephone numbers and name s registered fo r speed dialling, you can print the speed dialling lists. You may want to keep these lists near your FAX to refer to them when dialling. Follow this procedure to p rint speed dialling lists: ■ If you selected GR[…]
-
Страница 74
618 Speed Dialling Chapter 6 ■ 1TOUCH SPD DIAL LIST 1 ■ 1TOUCH SPD DIAL LIST 2 (Detailed List) *********************************** *********************************** *** *** 1-TOUCH SPD DIAL LIST 1 NO. CONNECTION TEL CONNECTION ID TX TYPE [ 01] 905 795 1111 Canon CANADA REGULAR TX [ 03] GROUP DIAL GROUP 2 [ 04] 2 50921 Canon IT ALIA R[…]
-
Страница 75
619 Speed Dialling Chapter 6 Speed Dialling ■ CODED SPEED DIAL LIST 1 ■ CODED SPEED DIAL LIST 2 (Detailed List) *********************************** *********************************** *** *** CODED SPEED DIAL LIST 1 NO. CONNECTION TEL CONNECTION ID TX TYPE [* 00] 2131 1250 Canon DEUTSCH. REGULAR TX [* 01] 03 3758 2111 Canon T OKY O REGULAR T[…]
-
Страница 76
620 Speed Dialling Chapter 6 ■ GROUP DIAL LIST ★★★★★★★★★★ ★★★★★★★ ★★★★★★★ ★★★★★★★★ ★★★★★★★ ★★★★★★★ ★★★ ★★★★★★★ ★★★★★★★ ★★★★★★★ ★★★★★★★★ ★★★★★★★ ★★★★ ★★★ ★★?[…]
-
Страница 77
71 Sending Faxes Chapter 7 Sending Faxes Chapter 7 Sending Faxes ❏ Preparing to Send a Fax …………………… …………….. …………….. …………….. .. 72 • Documents You Can Fax ………….. …………….. …………….. …………. ………. 72 • Setting the Scanning Resolution ……….. ……….[…]
-
Страница 78
72 Sending Faxes Chapter 7 Preparing to Send a Fax Documents You Can Fax For information on the type s of documents yo u can fax, their requiremen ts, and details on loading documents, see Chapter 4. Setting the Scann ing Resolution You can set the scan ning resolution of do cuments you send. The higher the resol ution the higher the output qual[…]
-
Страница 79
73 Sending Faxes Chapter 7 Sending Faxes Setting the Scanning Contrast You can adju st the degree of cont rast at which your docu ment is scan ned for sending and copying . Adjust ac cording to how ligh t or how dark your docume nt is. Follow this procedure to set the scanni ng contrast for sendin g and copyin g: 1 Press Function . 2 Press Data […]
-
Страница 80
74 Sending Faxes Chapter 7 Dialling Methods There are several wa ys of dialling the fax number(s) you want to se nd to. They are as follows: • Regular Dialling Dial a fax number by using the numeric buttons , similar to dialling a telephone number . • OneTouch Speed Diallin g Dial a fax number by pressing the onetouch speed dialling bu[…]
-
Страница 81
75 Sending Faxes Chapter 7 Sending Faxes Sending Methods This section explains the two main sending methods: Memory sending and Manual sending via the hand set. Memory Sending Memory sending is a quick an d easy way to send a docume nt. As the FAX scans the first page of a multipage document into its memory, it b egins calling the other party an[…]
-
Страница 82
76 Sending Faxes Chapter 7 Manual Sending Via the Handset Manual sending via the handset allows you to talk to the other p arty before sending a document. This method is u seful if the ot her party must manually activate their fax machine to re ceive a fax. Follow this pro cedure to send a do cument usin g manual sending vi a the handse t: 3 Pre[…]
-
Страница 83
77 Sending Faxes Chapter 7 Sending Faxes ■ If you hea r a highpitc hed signal instead of a vo ice: ■ If you hear a voice: 4 Dial the othe r party’s fax/tele phone number. • For dialling me thods, see p. 74. • If you make a mistake during diallin g, press Hook or hang u p the hand set and start again from step 3. 5 Press Start/Cop[…]
-
Страница 84
78 Sending Faxes Chapter 7 Cancelling Sending Follow this pro cedure if y ou want to s top sending a docume nt before tr ansmission is completed: ■ If you are sending a document using m anual sending via the handset: ■ If you are sending a docume nt using m emory sending: 1 Press Stop . • The transmission is cancelled. • The FAX prints a[…]
-
Страница 85
79 Sending Faxes Chapter 7 Sending Faxes Redialling When the Line is Busy There are two methods of redialling: Manua l redialling and Automatic red ialling . This section explains thes e two methods. Manual Redialling Press Redi al/Pause to dial th e last numb er you dialled with the numeric buttons. (This starts redialling regardless of whet he[…]
-
Страница 86
710 Sending Faxes Chapter 7 Setting the Options for Automa tic Redialling You can set the following o ptions for automatic redialling : • Whether the FAX redials automatically. • The number of times the FAX attempts to redial. • The time interval between redi alling attempts. Follow this procedure to adju st the automatic redialling option[…]
-
Страница 87
711 Sending Faxes Chapter 7 Sending Faxes ■ If you selected OFF in step 8: ■ If you selected ON in step 8: 8 Use ▼ or ▲ to select the setting you want. • You can select from the following: –O N Enables automatic redialling. – OFF Disables automatic redialling. 9 Press OK . 10 Press Stop to return to standby mod e. 9 Press OK twice.[…]
-
Страница 88
712 Sending Faxes Chapter 7 Sending the Same Document to Several Fax Numbers (Sequential Broadcasting) This featur e, also called Sequenti al Broadcasti ng , allows you to send the same documen t to sever al fax num bers in on e ope ration. Simply load the document, enter the fax numbers, an d the FAX will then sc an the document into its memory[…]
-
Страница 89
713 Sending Faxes Chapter 7 Sending Faxes ❏ Regular dialling: Use the numeric buttons to enter the fax number you want , then press OK . • You can only ent er one fax number this way. ❏ Dialling with the directory: Look up th e other party’s name. • You can enter the fax numbers in any order. • If you enter a wrong destination, press[…]
-
Страница 90
714 Sending Faxes Chapter 7 Delayed Sending Your FAX a llows you to scan a document into its memory and send it automatically to as many as 116 fax numbers at a preset tim e within the next 24 hours. This is called Delayed sending or Timer sen ding. By usin g this feature, you can ta ke advantage o f lower lo ng dista nce ra tes at night, for ex[…]
-
Страница 91
715 Sending Faxes Chapter 7 Sending Faxes 7 Enter up to 116 fax nu mbers you wan t to send to using any of th e following meth ods: ❏ Onetouch spee d dialling: Press the one touch sp eed dialli ng button(s) yo u want. ❏ Coded speed dialling: Press Coded Dial , then use the numeric buttons to enter the twodigit code you want. Repeat […]
-
Страница 92
716 Sending Faxes Chapter 7 Printing a Docum ent Set for Delayed Send ing Follow this pro cedure to pri nt a document sto red in memory fo r delayed sen ding: When you pr int a docu ment stored in memory for delayed s ending usin g the following procedure, the pri nt is reduced to 90% of the original. 1 Press Functio n . 2 Press De layed Trans m[…]
-
Страница 93
717 Sending Faxes Chapter 7 Sending Faxes Deleting a Docum ent Set for Delayed Send ing Follow this procedure to delete a document stor ed in memory for delayed s ending: 1 Press Function . 2 Press Delayed T ransmission . 3 Use or to select DELETE FILE . 4 Press OK . 5 Use or to select the transaction number ( TX/RX NO. ) of the do cument yo u w[…]
-
Страница 94
718 Sending Faxes Chapter 7[…]
-
Страница 95
81 Receiving Faxes Chapter 8 Receiving Faxes Chapter 8 Receiving Faxes ❏ Receiving Methods ………. ………… ……………… …………….. ………… …………… 82 • Receiving Faxes Automatically: FAX ONL Y MODE …………………….. 82 Setting FAX ONLY MODE ………. …………….. …………….. ……[…]
-
Страница 96
82 Receiving Faxes Chapter 8 Receiving Methods The FAX provides you with several modes for receiv ing faxes. To determine w hich mode best suits your requirem ents, refer to the table below: Once you h ave decided which mo de is suitab le for your n eeds, set the mode as described i n this chapter. You can change th e mode at a ny time. Receivin[…]
-
Страница 97
83 Receiving Faxes Chapter 8 Receiving Faxes If FAX ONLY MODE does not appear in the LCD when you press Receive Mode , follow this procedure to set this mo de: The FAX treats all incoming calls as fax calls. It receives faxes aut omatically and disconnects any voic e calls. 1 Press Function . 2 Press Data Registr ation . 3 Press OK . 4 Use or to[…]
-
Страница 98
84 Receiving Faxes Chapter 8 Receiving Both F axes and Telephone Calls Automatically: Fax/Tel Mode Set this mode if you onl y have on e telephone line for fax and teleph one use a nd want your FAX to automatically switch between fax and voice calls. Setting Fax/Tel Mode Follow this procedure to se t the receive mode to FAX/TEL AUTO SW (Fax/ Tel […]
-
Страница 99
85 Receiving Faxes Chapter 8 Receiving Faxes Setting the Options for Fax/Tel Mode If you set Fax/Tel M ode, you ca n control precisel y how the FAX ha ndles incomin g calls by adjusting the following settings: – RING START TIME setting: Adjust the time the FAX takes to check whether a call is from a fax machine or from a telephone (default: 8 […]
-
Страница 100
86 Receiving Faxes Chapter 8 Follow this procedure to set the Fax/Tel Mode options: 1 Follow steps 1 to 9 on pa ge 84. 2 Press OK . 3 Use the numeric buttons to en ter the RING START TIME duration. • Yo u can select from 0 to 30 second s.* • See the previous page for details on this setting. 4 Press OK twice. 5 Use the numeric buttons to […]
-
Страница 101
87 Receiving Faxes Chapter 8 Receiving Faxes Receiving Faxes Manually: MANUAL M ODE Set this mode if yo u only ha ve one telephone line that you use mainly for voice calls, and only occasionally to rece ive faxes. For this mode, you will need to connect the o ptional handset or a telephone to your FAX to be able to receive voice calls and also t[…]
-
Страница 102
88 Receiving Faxes Chapter 8 ■ If you hear a beep tone or silence: ■ If you hear a voice: 4 Someone is try ing to send y ou a fax. Press Start/Copy o n your FAX and han g up to begi n receiving th e documen t. • If yo u are using the telephone an d it is located awa y from your unit, dial 25 (the default remote recei ving ID) on you r tele[…]
-
Страница 103
89 Receiving Faxes Chapter 8 Receiving Faxes Receiving With an Answering Machine : ANS.MACHINE MODE Connecting an ans wering machine to the FA X allows you to receive faxes and telephone messages wh ile you are out. In ANS.MACHINE MODE, the FAX allows the answering machine to answer incoming calls, then listens for t he fax tone and automaticall[…]
-
Страница 104
810 Receiving Faxes Chapter 8 Receiving While Performing Other Tasks The FAX is a multitasking device so it can receive faxes and voice calls while you are performing other tasks. If the FAX cannot prin t a received fax because it is performing another task that prevents it from doi ng so, it will receive the fax in memory. Then, as soon as it c[…]
-
Страница 105
811 Receiving Faxes Chapter 8 Receiving Faxes Cancelling Receiving Follow this procedure if you want to stop receiving a fax before reception is completed: 1 Press Stop . • The FAX asks you to confirm th at you want to cancel receiving. 2 Press to cancel receiving. • Receiving is not cancelled until yo u press . • If you change your mind a[…]
-
Страница 106
812 Receiving Faxes Chapter 8[…]
-
Страница 107
91 Special Features Chapter 9 Special Features Chapter 9 Special Features ❏ Special Dialling ……………….. …………….. …………….. …………….. …………. …… 92 • Entering Pauses in a Fax/Telephone Nu mber …………….. …………….. …… 92 • Switching Temporarily to Tone Dialling ………..[…]
-
Страница 108
92 Special Features Chapter 9 Special Dialling Entering Pauses in a Fax/Telephone Number You may need to enter pauses in a fax/tele phone num ber in the follow ing situations : – When you dial or register an o verseas n umber. The le ngth and p osition of t he pause dep ends on the telephon e syst em of your country. – When your FAX is conne[…]
-
Страница 109
93 Special Features Chapter 9 Special Features Switching Tempor arily to Tone Dialling Many information services fo r banks, airline reservations , hotel reservations, etc., require tone dialling fo r their services. If your F AX is set for pulse dialling ( p. 38), follo w this procedure to set the unit temporarily for to ne dialling: Diallin[…]
-
Страница 110
94 Special Features Chapter 9 Documents Stored in Memory This section de scribes how to perform differe nt operations with documen ts stored i n memory. You will find instru ctions for prin ting a list o f documents in memory, as well as procedures for printi ng, sending, and deleting d ocuments store d in memory . Printing a List of Documents S[…]
-
Страница 111
95 Special Features Chapter 9 Special Features Printing a Docume nt Stored in Memory Follow this procedure to p rint a document stored i n memory: When you print a document stored in memory using the following procedure, the print is reduced to 90% of the original. 1 Press Function . 2 Press Memory Referenc e . 3 Use or to select PRINT DOCUMENT […]
-
Страница 112
96 Special Features Chapter 9 Sending a Docum ent Stored in Memor y Follow this pro cedure to send a do cument rec eived in me mory: 1 Press Functio n . 2 Press Memory Reference . 3 Use or to select RESEND DOCUMENT . 4 Press OK . 5 Use or to select the transaction number ( TX/RX NO. ) of the doc ument you w ant to send. • If yo u are unsure of[…]
-
Страница 113
97 Special Features Chapter 9 Special Features ❏ Regular dialling: Use the numeric buttons to enter the fax number you want , then press OK . • You can only enter on e fax number this way. • If you enter a wrong destination, press C , then enter the correct destination. • To review the destinations en tered, use or to scroll through the […]
-
Страница 114
98 Special Features Chapter 9 Deleting a Docum ent Stored in Memor y Follow this procedure to delete a do cument stored in memory: 1 Press Functio n . 2 Press Memory Reference . 3 Use or to select DELETE DOCUMENT . 4 Press OK . 5 Use or to select the transaction number ( TX/RX NO .) of the docu ment you want to delete. • If yo u are unsure of […]
-
Страница 115
99 Special Features Chapter 9 Special Features Polling What is Polling? In normal faxing, a fax ma chine sends a document to anot her fax machine. With polling, a fax machine calls another fax machin e and requests that a document be sent to it; in other words, it “polls” that fax machine. Your FAX has the capability of functioning in both r[…]
-
Страница 116
910 Special Features Chapter 9 Follow this procedure to poll o ne or several fax machine(s): 1 Press Functio n . 2 Press Poll ing . 3 Use or to select POLLING RX . 4 Press OK . 5 Enter up to 116 fax num bers you want to poll using any o f the follow ing method s: ❏ Onetouch speed d ialling: Press the onetouch speed dialling button(s) yo […]
-
Страница 117
911 Special Features Chapter 9 Special Features Cancelling Polling Receiving To cancel polling receivi ng, follow the same procedure as fo r cancelling receiving (p . 8 1 1 ) . Polling Sending In polling sendi ng, your FAX holds a d ocument in its pol ling box so that other fax machines can retrieve it. You may find polling sending convenien[…]
-
Страница 118
912 Special Features Chapter 9 5 Press OK three times. 6 Use the numeric buttons to en ter a name for the polling box (max. 24 ch aracters, including spaces). • If you are unsure how to enter charac ters, see p. 32. 7 Press OK twice. 8 Use the numeric buttons to enter a fourdigit password. • T his password prev ents unauthorise d acces[…]
-
Страница 119
913 Special Features Chapter 9 Special Features Once you have set up the polling box, you are ready to scan in to it the d ocument you want other fax machines to retrieve. 11 Press OK twice. 12 Use or to select if the document remains in the FAX’s memory after it is polled. • You can select from the following: – ON The document in the p ol[…]
-
Страница 120
914 Special Features Chapter 9 Scanning a Document into the Polling Box Follow this procedure to store a document in the polling b ox so that other fax machines can retrieve it: When anot her fax mach ine polls your FAX, the fol lowing con ditions apply : • If you registered a password for the polling b ox, the other party’s fax machine must[…]
-
Страница 121
915 Special Features Chapter 9 Special Features ■ If you selected CHANGE DATA in step 6: ■ If you selected DELETE FILE in step 6: 2 Press Data Registr ation . 3 Press OK . 4 Use or to select POLLING BOX . 5 Press OK . 6 Use or to select the setting you want. • You can select from the following: – CHANGE DATA Select this setting if you wa[…]
-
Страница 122
916 Special Features Chapter 9 Restricting Use of Your FAX By enabling this feature, you can prevent un authorised u se of your FAX to make calls and send faxes . Enabling Restriction of Your FAX Follow this pro cedure to ena ble restriction o f your FAX: 1 Press Functio n . 2 Press Da ta Reg istrat ion . 3 Press OK . 4 Use or to select SYSTEM S[…]
-
Страница 123
917 Special Features Chapter 9 Special Features Restriction of your FA X is now en abled. No one can make calls or send fa xes. (This setting does not restrict incoming calls or faxes.) Cancelling Restriction of Your FAX Follow this procedure to cancel restriction of y our FAX: 10 Press Stop to return to standby mod e. 1 Press Function . 2 Press[…]
-
Страница 124
918 Special Features Chapter 9 Restriction of yo ur FAX is now disabl ed. Anyone can ma ke calls or send faxes . 9 Press OK . 10 Press Stop to return to standby mode. PASSWORD 15:00 FaxOnly Ex:[…]
-
Страница 125
919 Special Features Chapter 9 Special Features Restricting Reception By enabling this feature, you can restrict reception of fax es to only the numbers registered for speed dialling on your FAX. This feature is useful to prevent reception of unsolicited faxes (e.g. junk mail). Follow this procedure to enabl e or disable receiving restriction: ?[…]
-
Страница 126
920 Special Features Chapter 9 ■ If you selected OFF in step 8: 11 Press OK . 12 Press Stop to return to standby mode. 9 Press OK . 10 Press Stop to return to standby mode. DATE SETUP 15:00 FaxOnly Ex: DATE SETUP 15:00 FaxOnly Ex:[…]
-
Страница 127
101 Copying Chapter 10 Copying Chapter 10 Copying ❏ Documents You Can Copy .. …………….. …………….. …………….. …………. …… 102 ❏ Making Copies …………….. …………….. …………….. …………. …………….. ………. 102 ❏ Making a Quick Single Copy ……………….. ………..[…]
-
Страница 128
102 Copying Chapter 10 Documents You Can Copy For information on the type s of documents yo u can copy, their requirem ents, and details on loading documents, see Chapter 4. Making Copies Follow this pro cedure to make copies : 1 Adjust the paper delivery selector if necessary ( p. 54). 2 Load the document , face down in the ADF ( p. 43). […]
-
Страница 129
103 Copying Chapter 10 Copying Making a Quick Single Copy Follow this p rocedure i f you wan t to make a quick si ngle copy o f a docume nt without adjusting the resolution, contrast, or size: 6 If you want to make multiple copies, us e the numeric buttons to enter the n umber of copies. • You can make up to 99 copies. The FAX copies at 400 ×[…]
-
Страница 130
104 Copying Chapter 10[…]
-
Страница 131
111 Reports and Lists Chapter 11 Reports and Lists Chapter 11 Reports and Lists ❏ Summary of Reports an d Lists ……………… …………….. …………….. …………. .. 112 ❏ ACTIVITY REPORT . …………….. …………. …………….. …………….. …………… 113 ❏ TX (Transmission) REPORT …………[…]
-
Страница 132
112 Reports and Lists Chapter 11 Summary of Reports and Lists The table below shows the lists and reports that can be printed from your FAX. R efer to the pages indicated for more details. Report or List Description Details USER’S DA T A LIST Lists the current settings of your F AX and the registered sender information. p. 142 ACTI VITY REP[…]
-
Страница 133
113 Reports and Lists Chapter 11 Reports and Lists ACTIVITY REPORT The FAX is factoryset to automatically print an ACTIVITY REPORT after every 20 transactions. If yo u want to print a n ACTI VITY REPORT before it is automatically printed, follow this procedure: Transactions in an ACTIVITY REPORT are listed chron ologically. 1 Press Function .[…]
-
Страница 134
114 Reports and Lists Chapter 11 TX (Transmission) REPORT The FAX is factoryset to print a TX (t ransmission) REPORT only when an error occurs during sending. To change this setting, see TX REPORT, p . 145. If you set t he FAX to print a re port, a T X REPORT or an ERROR TX REPORT similar to the ones below, wil l be printed depending o n t[…]
-
Страница 135
115 Reports and Lists Chapter 11 Reports and Lists MULTI TX/RX (Tran saction) REPORT A MULTI TX/RX (transaction) RE PORT similar to the one below, is pri nted when you send the same documen t to severa l fax number s, or wh en you poll m ultiple fax numbers in one operation. RX (Reception) REPORT The FAX is factoryset not to print an RX (rece[…]
-
Страница 136
116 Reports and Lists Chapter 11[…]
-
Страница 137
121 Maintenance Chapter 12 Mainten ance Chapter 12 Maintenance ❏ Periodic Cleaning …….. …………….. ……………… …………….. ………… …………… 122 • Cleaning the FAX’s Exterior ……………. …………….. …………….. …………. .. 122 • Cleaning the FAX’s Interior ……………..[…]
-
Страница 138
122 Maintenance Chapter 12 Periodic Cleaning This sectio n describes t he necessary cle aning proced ures for your FAX . Please note the following before cleaning yo ur unit: • Be sure to disconne ct the power cord before cleaning the F AX. Since documents in memory are erased when the power is disconnected, print o r send any documents s tore[…]
-
Страница 139
123 Maintenance Chapter 12 Mainten ance Cleaning the FAX’s Interior To prevent toner powder an d paper dust from accumula ting inside the FAX and affecting print quality, clean the unit’s print area periodically. Follow this procedure to clean inside the FAX: 1 Disconnec t the po wer c ord from the FAX. 2 Lift the latch and open the front co[…]
-
Страница 140
124 Maintenance Chapter 12 Cleaning the Scanner Comp onents Follow this procedu re to periodically check and cle an the scanner components : 5 When you are finished, reinsert the toner cartridge. Hold the toner cartridge by its handle and insert it into the FAX as far as it will go, making sure that its tabs are aligned with the rails inside the[…]
-
Страница 141
125 Maintenance Chapter 12 Mainten ance 4 Clean the underside of the op eration panel (shaded area in the illustration ). • Dirt and dust particles that collect on the underside of the operation panel affect the quality o f the documents yo u copy or send . 5 Use a clean, soft, dry, lintfree c loth to wipe any pape r dust from the areas sur[…]
-
Страница 142
126 Maintenance Chapter 12 Replacing the Toner Cartridge The only component of your FAX you w ill n eed to replace is the FX3 toner cartridge. Alt hough Cano n manufactu res ma ny different toner cartridges, the FX3 toner cart ridge is the onl y one designed for use with your FAX. To purchase this toner cartridge, contact your local author[…]
-
Страница 143
127 Maintenance Chapter 12 Mainten ance 4 Hold the toner cartridge by its handle and remove it from the FAX. • Discard the old toner cartridge immediately according to the local laws and regulations for disposal of consumables. To recycle y our used toner cartridg e, simply follow the instructions included with your new FX3 toner cartridge.[…]
-
Страница 144
128 Maintenance Chapter 12 8 Hold the toner cartridge by its h andle and insert it into the FAX as far as it will go, making sure th at its tabs are aligned with the rails inside the unit. • Always hold the toner cartridge by its handle. 9 Use both hand s to close the front cov er.[…]
-
Страница 145
131 Troubleshooting Chapter 13 Troubleshoot ing Chapter 13 Troubleshooting ❏ Clearing Jams …… …………….. …………….. …………. …………….. …………….. …… 132 • Jams in the ADF . …………….. …………….. …………….. …………. …………….. .. 132 • Paper Jams …………..[…]
-
Страница 146
132 Troubleshooting Chapter 13 Clearing Jams Jams in the ADF When a documen t jams or misfeeds in the AD F, the LCD displays CHECK DOCUMEN T . Follow this procedu re to clear the document jam: You do not need to unplug the FAX when clearing document jams. 1 Press Stop . 2 Use both ha nds to gently open the operation pane l. • It only opens par[…]
-
Страница 147
133 Troubleshooting Chapter 13 Troubleshoot ing Paper Jams When paper jams in the FAX, the LCD displays CLEAR PAPER JAM . Try cleari ng the jam by following the procedure in Jams in the Paper Delivery Slots below. If this does not clear the jam, follow the pro cedure in Jams Inside the Unit . Jams in the Paper Delivery Slots Follow this procedur[…]
-
Страница 148
134 Troubleshooting Chapter 13 2 Hold the toner cartridge by its h andle and remove it from the FAX. • To avoid exposing t he toner cartridge to light, p lace it in its protective bag or wrap it in a thick cloth. 3 Move the pa per release le ver back. HANDLE • The fixing assembly bec omes extremely hot when the unit is in use. Be very carefu[…]
-
Страница 149
135 Troubleshooting Chapter 13 Troubleshoot ing Multipurpose tray area : Hold the unit steady and carefu lly pull the jammed paper straight out from the unit. • Do this carefully t o prevent tearing the jammed pape r. If you do tear it, be sure to remove any torn pieces from the unit since these will cause paper to jam agai n. • The toner[…]
-
Страница 150
136 Troubleshooting Chapter 13 Fixing assem bly area: Top edge of the jamm ed paper in the fixing assembly: Push the jammed paper back ~ , then pull it carefully towards you to remove it Ä . Top edge of the jamm ed paper has passed through the fixing assembly: Pass the jammed paper un der the roller. Use both hands to carefully pull out the jam[…]
-
Страница 151
137 Troubleshooting Chapter 13 Troubleshoot ing 5 When you finished, rein sert the tone r cartridge. Hold the toner cartridge by its handle and insert it into the FAX as far as it will go, making sure that its tabs are aligned with the rails inside the unit. • Always hold the toner cartrid ge by its handle. 6 Move the pa per rele ase lever for[…]
-
Страница 152
138 Troubleshooting Chapter 13 LCD Messages The following message s are displayed in the LCD when the FAX is performin g a task, or when it encounters an error. The error code appears in the ACTIVITY REPORT ( p. 113). Messsage Error Code Cause Action AUTO REDIAL — The unit is waiting to redial the other part y’s fax number because the lin[…]
-
Страница 153
139 Troubleshooting Chapter 13 Troubleshoot ing CHECK COVER — The front cover is open. Close the front cover. CHECK DOCUMENT #001 A document is jammed in the ADF. Clear the document jam ( p. 1 32). Then start again. CHECK PAPER SIZE — The size of the pa per in the multipurpose tray and that specified in the PAPER SIZE setting are diffe[…]
-
Страница 154
1310 Troubleshooting Chapter 13 CHK SUBADDR/PS WD #083/12 You attempted to se nd a document or poll another fax machine with the incorrect subaddress and/or passwor d. Contact the other pa rty to check their settings. Change your settings if necessary ( pp. 63, 67 , 99). CLEAR PAPER JAM — There is a pap er jam. Clear the paper jam ( p[…]
-
Страница 155
1311 Troubleshooting Chapter 13 Troubleshoot ing MEMORY USED nn % — Shows the percentage of memory curre ntly in use. If you need more space, wait for the unit to send any f axes. Also, pr int, send, or delete any documents i n memory you no longer need ( p. 9 4). NO RX PAPER #012 The other par ty’s fax machine is ou t of paper or its mem[…]
-
Страница 156
1312 Troubleshooting Chapter 13 REC’D IN MEMORY — The unit rece ived the fax in memory because pape r or toner ran ou t, or a paper jam occurr ed during reception. Load paper in the multipurpose tray ( p. 215), replace the to ner cartridge ( p. 12 6), or clear the paper jam ( p. 133). SELECT POL REJ CT #082 You attempted to poll […]
-
Страница 157
1313 Troubleshooting Chapter 13 Troubleshoot ing Paper Feeding Problems ■ Paper does no t feed pr operly. The multipurp ose tray ma y contain too many she ets. • Make sure you load th e correct quantity ( p. 52). The paper may not be loaded correctly . • Make sure the paper stack is loaded correctly in the multipurpose tray (p . 2[…]
-
Страница 158
1314 Troubleshooting Chapter 13 You dialled or have bee n provided with an incor rect number. • Dial the number again, or check that you have the correct number. The other party ’s fax machine may be out of paper. • Contact the other party a nd ask them to make sure paper is loaded in their fax machine. There may be other doc uments be ing[…]
-
Страница 159
1315 Troubleshooting Chapter 13 Troubleshoot ing ■ Errors oc cur frequen tly while send ing. The telephone line s may be in p oor condition, or you may have a bad connection. • Lower the transmission spee d ( TX START SPEED , p. 1410) . Receiving Problems ■ Cannot receive a fax automatically. The FAX may not be set to receive automatica[…]
-
Страница 160
1316 Troubleshooting Chapter 13 An error may ha ve occurred duri ng reception. • Ch eck the LCD for an error message ( p. 138). • Print an ACTIVITY REPORT and ch eck for an error code ( p. 113). The multipurpose tray may be emp ty. • Make sure paper is loaded in the multipurpose tray ( p. 215). The other party’s fa x machi[…]
-
Страница 161
1317 Troubleshooting Chapter 13 Troubleshoot ing Toner may be low or unev enly distri buted. • Redistribute the toner inside the to ner cartridge ( p. 12 6). If the problem persists, replace the toner cartridge ( p. 126). ■ Cannot receive using Error Correction Mode (ECM). The other par ty’s fax ma chine may n ot support ECM. • If […]
-
Страница 162
1318 Troubleshooting Chapter 13 Telephone Problems ■ Cannot dial. The telephone line co rd may not be conne cted properly. • M ake sure it is connected properly ( p. 25). The power cord ma y not be plugged in securely. • C heck that the power cord is plugged se curely into the FAX and into the wall outlet ( p. 27). If the unit is plu[…]
-
Страница 163
1319 Troubleshooting Chapter 13 Troubleshoot ing You may not ha ve removed the plastic seal from the toner ca rtridge. • Make sure you install the ton er cartridge properly ( p. 212). The toner cartrid ge may need to be replac ed. • Replace the toner cartridge ( p. 126). ■ Printout does not match paper size. The paper may not be load[…]
-
Страница 164
1320 Troubleshooting Chapter 13 General Problems ■ FAX has no power. The power cord ma y not be plugged in securely. • C heck that the power cord is plugged se curely into the FAX and into the wall outlet ( p. 27). If the unit is plugged into a power strip, make sure t he power strip is plugg ed in and turned on. The power cord ma y not b[…]
-
Страница 165
1321 Troubleshooting Chapter 13 Troubleshoot ing If You Cannot Solve a Problem If you cannot so lve the problem after h avi ng referred to the in formation in this chapter, contact your local au thorised Canon deale r or the Canon he lp line. Canon’s suppo rt personnel ar e trained in the technical su pport of Canon’s products and will able […]
-
Страница 166
1322 Troubleshooting Chapter 13 If a Power Cut Occurs If power is suddenly lost du e to a power cut or accidental unplug ging, a builtin battery retains the FAX’s settings. However, any documents stored in memory will be lost. During a power cut, functions are limited as follo ws: • You can not make t elephone calls from the op tional han[…]
-
Страница 167
141 Summary of Settings Chapter 14 Summary of Settings Chapter 14 Summary of Settings ❏ Understanding the Menu Sy stem ………………. …………….. …………….. ………. 142 • Printing a List to Check the Cu rrent Settings ………………… …………….. .. 142 • Accessing the Menus ………………………[…]
-
Страница 168
142 Summary of Settings Chapter 14 Understanding the Menu System The FAX menu system allo ws you to c ustomise the way your un it operates. It consists of seven menu s, each containing settings tha t control di fferent funct ions of your FAX. Before adjusting any settings, you may want to prin t the USER’S DATA LIST to check the current settin[…]
-
Страница 169
143 Summary of Settings Chapter 14 Summary of Settings Accessing the Me nus Follow this procedure to access the different menus: 1 Press Function . 2 Press Data Registr ation . 3 Press OK . 4 Use or to select the me nu you wa nt. • You can select from the following: – USER SETTINGS (p . 1 4 4 ) – REPORT SETTINGS (p . 1 4 5 ) – TX[…]
-
Страница 170
144 Summary of Settings Chapter 14 USER SETTINGS Menu For details on accessing the settings below, see p. 1 43. The selectable settings and the default settings va ry depending on the country where y ou have purchased the FAX. The values sh own here are average values. Setting Description SubSettings DATE & TIME Sets the current date a[…]
-
Страница 171
145 Summary of Settings Chapter 14 Summary of Settings REPORT SETTINGS Menu For details on accessing the settings below, see p. 143. The select able setti ngs an d the defa ult setting s vary depe nding on the coun try where y ou have purchased the FA X. The values shown here are avera ge values. Setting Description SubSettings TX REPORT E[…]
-
Страница 172
146 Summary of Settings Chapter 14 TX (Transmission) SETTINGS Menu For details on accessing the settings below, see p. 1 43. The selectable settings and the default settings va ry depending on the country where y ou have purchased the FAX. The values sh own here are average values. Setting Description SubSettings ECM TX Enable s/disables E[…]
-
Страница 173
147 Summary of Settings Chapter 14 Summary of Settings RX (Reception) SETTINGS Menu For details on accessing the settings below, see p. 143. The select able setti ngs an d the defa ult setting s vary depe nding on the coun try where y ou have purchased the FA X. The values shown here are avera ge values. Setting Description SubSettings ECM[…]
-
Страница 174
148 Summary of Settings Chapter 14 PRINTER SETTINGS Menu For details on accessing the settings below, see p. 1 43. The selectable settings and the default settings va ry depending on the country where y ou have purchased the FAX. The values sh own here are average values. Setting Description SubSettings RX REDUCTION Enables/ disables reduc[…]
-
Страница 175
149 Summary of Settings Chapter 14 Summary of Settings POLLING BOX Menu For details on accessing the settings below, see p. 143. The select able setti ngs an d the defa ult setting s vary depe nding on the coun try where y ou have purchased the FA X. The values shown here are avera ge values. Setting Description SubSettings SETUP FILE Sets[…]
-
Страница 176
1410 Summary of Settings Chapter 14 SYSTEM SETTINGS Menu For details on accessing the settings below, see p. 1 43. The selectable settings and the default settings va ry depending on the country where y ou have purchased the FAX. The values sh own here are average values. Setting Description SubSettings UN/LOCK PHONE Enables/disables r est[…]
-
Страница 177
1411 Summary of Settings Chapter 14 Summary of Settings RX START SPEED Selects the speed at which the F AX starts receiving. 33600bps 14400bps 9600bps 7200bps 4800bps 2400bps COUNTRY SELECT * Selects the country where you are usin g the F AX to automatically switch the se lectable settings and the default settings to suit the selected country ( […]
-
Страница 178
1412 Summary of Settings Chapter 14[…]
-
Страница 179
A1 Specifications Appendix A Specifications Appendix A Specifications ❏ General Specifications ….. ………… ……………… …………….. …………….. ………. A2 ❏ Facsimile …………….. …………….. …………. …………….. …………….. …………….. .. A2 ❏ Copier …………………[…]
-
Страница 180
A2 Specifications Appendix A General Specifica tions Power Source – 2002 40 V – 50/60 Hz Power Consumption – Maximum: 500 W – Standby: Appr ox. 3.5 W Weight Approx. 10 kg (With components attach ed) Dimensions Environmental Conditions – Temperature: 10 °C32.5°C – Humidity: 20%80% RH Liquid Crystal Display (LCD) 16 × 1 Dis[…]
-
Страница 181
A3 Specifications Appendix A Specifications Fax Resolution – FAX STANDARD: 8 pels/mm × 3.85 lines/mm – FAX FINE: 8 pels/mm × 7.7 lines/m m – FAX PHOTO: 8 pels/mm × 7.7 lines/mm with halftones – SUPER FINE: 8 pels/mm × 15.4 lines/mm Dialling – Automatic dialling Onetouch speed dialling (15 destinations) Coded speed diallin g (100[…]
-
Страница 182
A4 Specifications Appendix A[…]
-
Страница 183
B1 FAXL295 Instructions Appendix B FAX-L295 Instructions Appendix B FAX-L295 Instructions ❏ Introduction ………………………… …………….. …………. …………….. …………….. .. B2 ❏ Differences Between the FAXL295 an d FAXL22 0 ………………………… .. B2 ❏ Using Your Documentatio n …[…]
-
Страница 184
B2 FAXL295 Instructions Appendix B Introduction This Append ix provides i nformation rele vant only t o purchasers of the FAXL29 5 model. Please be sure to read this sect ion before reading the rest of this g uide. Differences Between the FAX-L295 and FAX-L220 In addition to the FAXL22 0 features , the FAXL295 also has the following […]
-
Страница 185
B3 FAXL295 Instructions Appendix B FAX-L295 Instructions Connecting the FAX- L295 to Your PC To connect your FAX to a PC, you will need to purchase a printer cable that matches the interface connector on your PC: • A US B cable no longer than 5 metres You can purchase the ca ble from your local author ised Canon dealer. Follow this procedur[…]
-
Страница 186
B4 FAXL295 Instructions Appendix B Print Media Requirements In addition to the pap er listed in Chapter 5, you can also l oad the following print media in the multipurp ose tray: Please refer to Chapter 5 for full details on paper ha ndling, l oading pape r, and selecting pa per delivery. Printable Area The shaded area shows the printable […]
-
Страница 187
B5 FAXL295 Instructions Appendix B FAX-L295 Instructions Selecting Print Media Follow these guidelines wh en selecting envelopes an d transparencies: ■ Envelope s • Use standard envelopes with diagonal seams and flaps. • To prevent jams in the multipurpose tray, do no t use the following: – Envelop es with windo ws, holes, perforat[…]
-
Страница 188
B6 FAXL295 Instructions Appendix B ❏ Remove any curling from the envelopes by holding the edges diagonall y and ben ding them ge ntly. ❏ Run a pen or other rounde d object along the back flaps to flatten the m. • The flaps should no t bulge more than 5 mm. 2 Remove the multipurpose tray cover from the FAX. 3 Insert the stack into the[…]
-
Страница 189
B7 FAXL295 Instructions Appendix B FAX-L295 Instructions The FAX is now ready to print. Loading Transparencies Load transparencies in the multipurpo se tray as for paper. For details, see p. 215. 4 Replace the multipurpose tray cover. • Be sure to replace this cover to prevent dust accumulatin g inside the unit. 5 Adjust the paper […]
-
Страница 190
B8 FAXL295 Instructions Appendix B[…]
-
Страница 191
C1 Options Appendix C Options Appendix C Options ❏ Optional Handset….. …………….. …………….. …………. …………….. …………….. .. C2 • Package Contents ………………………… …………. …………….. …………….. …… C2 • Attaching the Handset to Your FAX ……………………[…]
-
Страница 192
C2 Options Appendix C Optional Handset* An optional handset is available in certain countries for co nnection to your FAX. Contact your l ocal authoris ed Canon dealer for more information o n purchasing this option. Package Conten ts Make sure your h andset packag e includes the following items: If any items are damaged or missing, notify your […]
-
Страница 193
C3 Options Appendix C Options Attaching the Handset to You r FAX Follow this procedure to attach th e handset to your FAX: 1 Use a screwdriver to remove the two covers on the left side of the unit. 2 Remove the screws from the plugs and insert the plugs into the holes on the handset cradle. 3 Insert the plugs (with the handset cradle) into the h[…]
-
Страница 194
C4 Options Appendix C Maintaining Your Handset To maintain your handset in top work ing condition, be sure to follow these guidelines: • Do not le ave your hand set exposed to direct sun light. • Do not install your handset in hot or humid conditions. • Do not spray ae rosol polis hes on your ha ndset since the y may enter the ho les on yo[…]
-
Страница 195
Index I1 Index button 211, 143 button 211, 34 button 211, 34 button 211, 143 ( p. nnn), definition 12 1TOUCH SPD DIAL LIST 1 description 112 printing 617 sample 618 1TOUCH SPD DIAL LIST 2 description 112 printing 617 sample 618 A A4 setting 52, 56, 148 ACTIVITY REPORT description 11?[…]
-
Страница 196
I2 Contrast 73 Conventions, type 12, 13 Copying 102, 103 document requirements 42 problems 1317 quick 103 Cord answering machine 25, 26 data modem 25, 26 power 22, 27 telephone 25, 26 telephone line 22, 27 Correcting mistake 34 COUNTRY SELECT setting 28, 1411 Cover front 210 multi[…]
-
Страница 197
Index I3 Fax/Tel Mode description 82 setting 84 setting options for 85, 86 FaxAbility. See Telecom FaxAbility FaxStream™ Duet. See Telstra FaxStream™ Duet FILE NAME setting 912, 149 Fixing assembly 210 Front cover 210 Function Button 211, 36 FX3. See Toner cartridge G G3, definition 12 GROUP DIAL LIST desc[…]
-
Страница 198
I4 Messages. See LCD messages MID PAUSE SET setting 146 Mistake, correcting 34 MULTI TX/RX (Transaction) REPORT 115 description 112 sample 115 MULTI TX/RX REPORT. See MULTI TX/RX (Transaction) REPORT Multipurpose tray 210 capacity 52 cover 22, 24, 21 0 N NO RX PAPER message 1311 NO TEL # message 1311 NOT AV[…]
-
Страница 199
Index I5 Problems cannot solve 1321 copying 1317 document 42 general 1320 multipage document 43 paper feeding 1313 printing 1318, 1319 receiving 1315 to 1317 receiving into memory when 810 sending 1313 to 1315 telephone 1318 PSTN setting 39, 144 PSWD POLL REJECT message 1311 PSWD TX REJECTED mes[…]
-
Страница 200
I6 Sending at preset time. See Delayed sending cancelling 78 delayed. See Delayed sending document in memory 96, 97 document requirements 42 manual via the handset 76, 77 memory 75, 76 methods 75 to 77 polling. See Polling sending problems 1313 to 1315 same document to several fax numbers 712, 713 timer.[…]
-
Страница 201
Index I7 U UN/LOCK PHONE setting 916, 917, 1410 UNIT NAME setting 37, 144 UNIT TELEPHONE # setting 37, 144 Unpacking FAX 22, 23 Uppercase letter mode 32, 33 USER SETTINGS menu 143, 144 USER’S DATA LIST description 112 printing 142 sample 142 User’s Guide, type conventions 12, 13 V VERTICA[…]
-
Страница 202
I8[…]
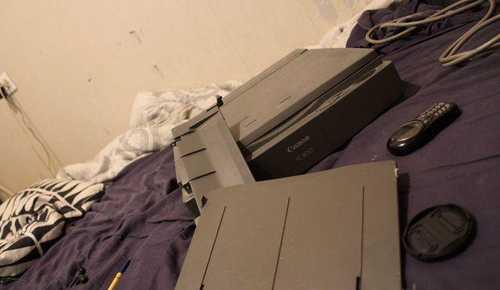
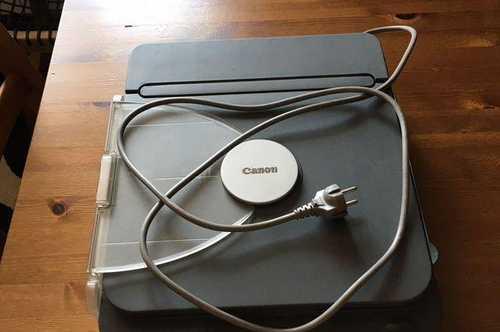
Продается очень удобный переносной лазерный ксерокс. Очень простой в эксплуатации. «Основные характеристики» Производитель Canon Модель H 12272 Описание Персональный настольный портативный копировальный аппарат с ручкой для переноски Тип оборудования Копир Площадь для установки 639 x 439 мм «Скорость, разрешение» Скорость 4 копии формата А4 в минуту «Управление бумагой / печатные носители» Типы печатных носителей Бумага, пленки, калька, этикетки, цветная бумага, открытки и карточки плотностью до 128 г/м2 Податчик бумаги 1 лист Плотность бумаги 50 — 128 г/м2 «Параметры/функции печати» Поля 2 мм у ведущего края «Расходные материалы / заменяемые компоненты» Картридж черный E-30, E-16 «Ресурс расходных материалов/заменяемых компонентов» Ресурс картриджа при заполнении 5% Черный: 4000 страниц (E-30), черный: 2000 страниц (E-16) «Копир» Первая копия 22 секунды «Питание» Потребление энергии 0, 7 кВатта — максимальное «Потребительские свойства» Формат A4 Время прогрева 0 секунд при комнатной температуре (20°C) «Прочие характеристики» Размеры (ширина x высота x глубина) 359 x 115 x 439 мм Вес 8, 5 кг (включая картридж с тонером) Прочее Ручка для переноски; возможно копирование книг и объемных предметов весом до 2 кг «Логистика» Размеры упаковки (измерено в НИКСе) 55 x 44 x 19. 5 см Вес брутто (измерено в НИКСе) 10. 55 кг. RuKrasnodar
МФУ, копиры и сканеры
объявление размещено: 12 августа 2016 г. 11:36, номер: 1810408
| Canon BJC-4400 Parts Catalog |
| Canon BJC-4400 Service Manual |
| Canon BJC-50 Parts Catalog |
| Canon BJC-50 Service Manual |
| Canon BJC-85, BJ M70 Parts Catalog |
| Canon BJC-1000 Parts Catalog |
| Canon BJC-1000 Shem |
| Canon BJC-1000 Service Manual |
| Canon BJC-2000 Parts Catalog |
| Canon BJC-2000 Service Manual |
| Canon BJC-3000 Parts Catalog |
| Canon BJC-3000 Service Manual |
| Canon BJC-5000, BJC-5100 Parts Catalog |
| Canon BJC-5000 Parts Catalog |
| Canon BJC-5000 Service Manual |
| Canon BJC-6000 Parts Catalog |
| Canon BJC-6000 Service Manual |
| Canon BJC-6200 Parts Catalog |
| Canon BJC-6200 Service Manual |
| Canon BJC-6500 Parts Catalog |
| Canon BJC-6500 Service Manual |
| Canon BJC-7100 Parts Catalog |
| Canon BJC-7100 Service Manual |
| Canon BJC-8200 Parts Catalog |
| Canon BJC-8200 Service Manual |
| Canon BJC-8500 Parts Catalog |
| Canon BJC-8500 Service Manual |
| Canon ADF for GP600, GP605, GP 605V Parts Catalog |
| Canon ADF for GP600, GP605, GP 605V Service Manual |
| Canon Color Laser Copier 1100, 1120, 1130, 1140, 1150, 1160, 1180 Service Manual |
| Canon DADF-A1 Service Manual |
| Canon DADF-B1 Parts Catalog |
| Canon DADF-B1 Service Manual |
| Canon FC200, FC220, FC400, FC420, FC430 Parts Catalog |
| Canon FC200, FC220, FC400, FC420, FC430 Service Handbook |
| Canon FC200, FC220, FC400, FC420, FC430 Service Manual |
| Canon FC200, FC220, PC400, PC420, PC430 Parts Catalog |
| Canon FC200, FC220, PC400, PC420, PC430 Service Manual |
| Canon FC230 Shem |
| Canon Finisher-B1 Service Manual |
| Canon Finisher-C1 Parts Catalog |
| Canon Finisher-C1 Service Manual |
| Canon Finisher-D1 Parts Catalog |
| Canon Finisher-D1 Service Manual |
| Canon GP20F, GP20FA, GP25FA, GP30F Parts Catalog |
| Canon GP31, GP31F, GP35, GP35F, GP40, GP315, GP335, GP355, GP405 Parts Catalog |
| Canon GP31, GP31F, GP35, GP35F, GP40, GP315, GP335, GP355, GP405 Service Manual |
| Canon GP200, GP210, GP211, GP215 Service Manual |
| Canon GP200, GP210, GP211, GP215, GP216 Parts Catalog |
| Canon GP600, GP605, GP605V Parts Catalog |
| Canon GP600, GP605, GP605V Service Manual |
| Canon GP-160, GP-160F, GP-160DF Service Handbook |
| Canon GP-160, GP-160F, GP-160DF Service Manual |
| Canon GP-160, GP-160F, GP-160PF, GP-160DF, LP-3000, LP-3010 Parts Catalog |
| Canon i320 service tool 2k_xp |
| Canon i350, i250 Service Manual |
| Canon i470d, i475d Service Manual |
| Canon i475d Parts Catalog |
| Canon imageCLASS Mf3222, Mf3240, Mf3241, LaserBase Mf3220, Mf3228, Mf3240, LaserShot Mf3220 Parts Catalog |
| Canon ir1018, ir1019, ir1022, ir1023 Parts Catalog |
| Canon ir1018, ir1019, ir1022, ir1023 Circuit Diagram |
| Canon ir1018, ir1019, ir1022, ir1023 General Circuit Diagram |
| Canon ir1018, ir1019, ir1022, ir1023 Installation Procedure |
| Canon ir1018, ir1019, ir1022, ir1023 Portable Manual |
| Canon ir1018, ir1019, ir1022, ir1023 Service Manual |
| Canon ir1200, ir1300 Parts Catalog |
| Canon ir1200, ir1300 Service Manual |
| Canon ir1600, ir2000 Parts Catalog |
| Canon ir1600, ir2000 Service Manual |
| Canon ir1600, ir2000 User Guide 2 |
| Canon ir1600, ir2000 User Guide |
| Canon ir2016, ir2016J, ir2016i, ir2020, ir2020J, ir2020i, ir2020S Parts Catalog |
| Canon ir2018, ir2022, ir2025, ir2030 Parts Catalog |
| Canon ir2020, ir2016 Circuit Diagram |
| Canon ir2020, ir2016 General Circuit Diagram |
| Canon ir2020, ir2016 Installation Procedure |
| Canon ir2020, ir2016 Portable Manual |
| Canon ir2020, ir2016 Service Manual |
| Canon ir2200, ir2800, ir3300 Parts Catalog |
| Canon ir2200, ir2800, ir3300 Service Manual |
| Canon ir2270, ir2870, ir3570, ir4570 Parts Catalog |
| Canon ir5000, ir6000 Parts Catalog |
| Canon ir5000, ir6000 Service Manual |
| Canon ir6570, ir5570 General Circuit Diagram |
| Canon ir6570, ir5570 Installation Procedure |
| Canon ir6570, ir5570 Parts Catalog |
| Canon ir6570, ir5570 Portable Manual |
| Canon ir6570, ir5570 Service Manual |
| Canon ir-c3100 Circuit Diagram |
| Canon ir-c3100 General Circuit Diagram |
| Canon ir-c3100 Installation Procedure |
| Canon ir-c3100 Portable Manual |
| Canon ir-c3100 Service Manual |
| Canon ir-c3100, ir-c3170, ir-c2570 Parts Catalog |
| Canon ir-c6800 Circuit Diagram |
| Canon ir-c6800 General Circuit Diagram |
| Canon ir-c6800 Installation Procedure |
| Canon ir-c6800 Parts Catalog |
| Canon ir-c6800 Portable Manual |
| Canon ir-c6800 Service Handbook |
| Canon ir-c6800 Service Manual |
| Canon ir-c6800, ir5800 Parts Catalog |
| Canon lbp2460 Service Manual |
| Canon Mf3240 LaserBase Mf3240 Circuit Diagram |
| Canon Mf3240 LaserBase Mf3240 Service Manual |
| Canon Network Printer Board-F1 Service Manual |
| Canon NP1215 Parts Catalog |
| Canon NP1215 Service Manual |
| Canon NP1550 Parts Catalog |
| Canon NP1550 Service Manual |
| Canon NP4835, NP4835i, NP4835S, NP4335 Parts Catalog |
| Canon NP6012, NP6012F, NP6212 Parts Catalog |
| Canon NP6045 Service Manual |
| Canon NP6050, NP6445, NP6450, NP6550, NP6750 Parts Catalog |
| Canon NP6085 Service Manual |
| Canon NP6112, NP6312 Parts Catalog |
| Canon NP6218 Service Manual |
| Canon NP6260, NP6560, NP6360 Service Manual |
| Canon NP6317 Parts Catalog |
| Canon NP6317 Service Manual |
| Canon NP6320 Parts Catalog |
| Canon NP6320 Service Manual |
| Canon NP6330 Parts Catalog |
| Canon NP6330 Service Manual |
| Canon NP6350 Service Manual |
| Canon NP6350, NP6250, NP6251, NP6551 Parts Catalog |
| Canon NP6412 Parts Catalog |
| Canon NP6512, NP6612, NP7120, NP7130, NP7130А Parts Catalog |
| Canon NP6512, NP6612, NP7120, NP7130, NP7130А Service Manual |
| Canon NP6621 Service Manual |
| Canon NP7160, NP7161, NP7163, NP7164, NP7210, NP7214 Parts Catalog |
| Canon NP7160, NP7161, NP7163, NP7164, NP7210, NP7214 Service Manual |
| Canon NP7161, NP7160. User Guide |
| Canon PC310, PC330, FC310, FC330 Parts Catalog |
| Canon PC720, PC740, PC750, PC770 Parts Catalog |
| Canon PC760, PC780 Parts Catalog |
| Canon PC800s, PC900s Service Manual |
| Canon PC800s, PC900s Shem |
| Canon PC800s, PC900s, PC950 Parts Catalog |
| Canon PC1000s, PC1200s, imageCLASS D600s Circuit Diagram |
| Canon PC1000s, PC1200s, imageCLASS D600s Parts Catalog |
| Canon Saddle Finisher D2 Parts Catalog |
| Canon Saddle Finisher D2 Service Manual |
| Canon SmartBase PC1000s,PC1200s, ir1200s Parts Catalog |
| Canon SmartBase PC1200s, ir1200s Service Manual |
| Canon SmartBase PC1210D, PC1230D, PC1270D Service Manual |
| Canon BJC-50 Service Manual |
| Canon BJC-55 Service Manual |
| Canon BJC-70 Service Manual |
| Canon BJC-80 Service Manual |
| Canon BJC-85 Reference Manual |
| Canon BJC-600 Service Manual |
| Canon BJC-610 Service Manual |
| Canon BJC-1000 Service Manual |
| Canon BJC-2000 Service Manual |
| Canon BJC-2100, BJC-2100 Simplified Manual |
| Canon BJC-3000 Service Manual |
| Canon BJC-4100 Service Manual |
| Canon BJC-4400 Service Manual |
| Canon BJC-5000, BJC-5100 Parts Catalog |
| Canon BJC-5000 Service Manual |
| Canon BJC-6000 Service Manual |
| Canon BJC-6200 Service Manual |
| Canon BJC-6500 Service Manual |
| Canon BJC-7000 Service Manual |
| Canon BJC-7100 Service Manual |
| Canon BJC-8000 Service Manual |
| Canon BJC-8200 Service Manual |
| Canon BJC-8500 Service Manual |
| Canon CanoScan D1230 Service Manual |
| Canon CanoScan D660U Getting Started Guide |
| Canon CanoScan D660U Service Manual |
| Canon Canoscan N650U |
| Canon CLBP 360PS Service Manual |
| Canon CLC-10 Service Manual |
| Canon CLC-1100 Service Information |
| Canon CLC-1120, 1130, 1150 Service Information |
| Canon CLC-1120, 1130, 1150 Service Manual |
| Canon Color Laser Copier 1100, 1180 Service Information |
| Canon CP660 Service Manual |
| Canon FAU-S11 Service Manual |
| Canon Fax-L900 Parts Catalog |
| Canon Fax-L900 Parts Manual |
| Canon Fax Basic 2000 Service Manual |
| Canon Faxphone B640 User Manual |
| Canon FB330, FM630 Service Manual |
| Canon FB1210U Service Manual |
| Canon FC-230 Schem |
| Canon FC-330 Parts Catalog |
| Canon G3, G4 Error Code List |
| Canon GP-20F, 20FA, 25FA, 30F Series Serivce Manual |
| Canon GP-200, 210, 211,_215, 216 Parts Catalog |
| Canon GP-605 Service Manual |
| Canon i70 Service Manual |
| Canon i320 Simplified Manual |
| Canon i450 Service Manual |
| Canon i450 Simplified Manual |
| Canon i550, i850, i950 Parts Catalog |
| Canon i550, i850, i950 Service Manual |
| Canon i860, i865 Service Manual |
| Canon i900, i905 Service Manual |
| Canon i960, i965 Service Manual |
| Canon i9100, S520, S750, S820, S830, S900, S9000 Service Manual |
| Canon i9900, i9950 Service Manual |
| Canon iP1600 Service Manual |
| Canon iP5200 Service Manual |
| Canon iP6210d Service Manual |
| Canon iR1600, iR2000 Service Manual |
| Canon iR2200, iR2800, iR3300 Service Manual |
| Canon iR5000, iR6000 Service Manual |
| Canon LBP-8iv Parts Catalog |
| Canon_LBP-460, LBP-465 Parts Catalog |
| Canon LBP-460, LBP-465 Service Manual |
| Canon LBP-800 Parts Catalog |
| Canon_LBP-800_Service_Manual |
| Canon_LBP-860_Parts_Catalog |
| Canon LBP-860 Service Manual |
| Canon LBP-1000 Parts Catalog |
| Canon LBP-1000 Service Manual |
| Canon LBP-1120 Service Manual |
| Canon LBP-1210 Service Manual |
| Canon LBP-1260 Parts Catalog |
| Canon LBP-1260 Service Manual |
| Canon LBP-1760 Parts Catalog |
| Canon LBP-1760 Service Manual |
| Canon LBP-2000 Parts Catalog |
| Canon LBP-2000 Service Manual |
| Canon LBP-2460 Parts Catalog |
| Canon LBP-2460 Service Manual |
| Canon LBP-3200 Service Manual |
| Canon LBP-3260 Parts Catalog |
| Canon LBP-3260 Service Manual |
| Canon LBP-3260 Training Support Manual |
| Canon MF3110 Service Manual |
| Canon MP390 Service Manual |
| Canon MP500 Service Manual |
| Canon MP760 Service Manual |
| Canon MP800 Service Manual |
| Canon MultiPASS 700, MP 730 Service Manual |
| Canon MultiPASS 5500 User Manual |
| Canon MultiPASS C635, C3500, C5500 Service_Manual |
| Canon MultiPASS C2500 Service Manual |
| Canon MultiPASS C3000 Service Manual |
| Canon MultiPASS C3000 User Manual |
| Canon MultiPASS C5000 Service Manual |
| Canon MultiPASS C5500 User Manual |
| Canon MultiPASS L6000 Service Manual |
| Canon MultiPASS L6000 User Manual |
| Canon NP1550 Service Manual |
| Canon NP6012 Service Manual |
| Canon NP6045 Service Manual |
| Canon NP6085 Service Manual |
| Canon NP6218 Service Manual |
| Canon NP6317 Service Manual |
| Canon NP6320 Service Manual |
| Canon NP6330 Service Manual |
| Canon NP6350, NP6251 Service Manual |
| Canon NP6512, NP6612, NP7120, NP7130, NP7130F Service Manual |
| Canon NP6621 Service Manual |
| Canon NP7160, NP7161 Service Manual |
| Canon PC800, PC900 Service Manual |
| Canon PC1200s, iR1200s Service Manual |
| Canon PIXMA iP1500 Service Manual |
| Canon PIXMA iP3000 Service Manual |
| Canon PIXMA iP4000 Service Manual |
| Canon PIXMA iP4200 Service Manual |
| Canon PIXMA iP6600D Service Manual |
| Canon PIXMA iX5000, iX4000 Service Manual |
| Canon PIXMA MP760 Service Manual |
| Canon S100 Service Manual |
| Canon S200 Service Manual |
| Canon S300 Service Manual |
| Canon S600 Service Manual |
| Canon Selphy DS700 Service Manual |
| Canon SmartBase MPC400f, MPC600 Parts Catalog |
| Canon SmartBase MPC400f, MPC600 Service Manual |
| Canon SmartBase PC1200s, iR1200s Service Manual |