MP510_QSG_Cover.fm Page 1 Friday, May 12, 2006 5:16 PM
Краткое руководство по началу работы
Содержание
Введение
Выбор языка ЖК дисплея
Подготовка аппарата
Установка драйверов MP
Загрузка бумаги для печати
Печать с Вашего компьютера
Сканирование изображений
Копирование
Печать с карты памяти
Прямая печать фотографий с совместимого устройства
Замена чернильницы
Сведения об Электронных руководств
7
8
4
5
2
3
1
1
9
12
16
18
MP510_QSG_Cover.fm Page 2 Friday, May 12, 2006 5:16 PM
Стандарт Exif Print
Данный аппарат поддерживает стандарт Exif Print.
Exif Print – это стандарт , который используется для улучшения взаимодействия между цифровыми камерами и принтерами . При подключении цифровой камеры , совместимой со стандартом Exif Print, для оптимизации печати используются данные камеры об условиях съемки , что позволяет добиться превосходного качества отпечатков .
Канадские требования к защите от радиопомех
Данный цифровой аппарат не превышает установленные пределы для оборудования
Класса B по уровню излучения радиопомех от цифровых устройств , указанному в стандарте для оборудования , вызывающего радиопомехи , «Digital Apparatus», ICES-
003 ( канадский промышленный стандарт ).
Cet appareil numérique respecte les limites de bruits radioélectriques applicables aux appareils numériques de Classe B prescrites dans la norme sur le matériel brouilleur NMB-
003 d’Industrie Canada intitulée « Appareils numériques ».
Международная программа ENERGY STAR
®
Являясь партнером программы ENERGY STAR что данное изделие удовлетворяет основным рекомендациям ENERGY STAR по экономии электроэнергии .
®
, корпорация Canon Inc. установила ,
Международная программа ENERGY STAR
® по развитию офисного оборудования является глобальной программой , поощряющей использование экономичных компьютеров и другого энергосберегающего офисного оборудования . Программа стимулирует производство и распространение продукции с малым потреблением электроэнергии . В этой открытой программе могут добровольно принять участие все заинтересованные организации .
Она охватывает такое офисное оборудование , как компьютеры , мониторы , принтеры , факсимильные и копировальные устройства .
Разработанные стандарты и логотипы используются во всех странах , участвующих в программе .
Потребляемая мощность
Никогда не подключайте принтер к сети , напряжение в которой отличается от стандартов той страны , где был приобретен принтер . Использование источника питания с неправильным напряжением может привести к возгоранию или поражению электрическим током . Стандартные напряжения и частоты :
100-240 В переменного тока , 50/60 Гц
Расходные материалы
Расходные материалы ( чернильницы / картриджи FINE) можно будет приобрести в течение пяти лет после снятия аппарата с производства .
Правила техники безопасности
.
Осторожно
z Никогда не пытайтесь подключать шнур питания к сетевой розетке или отключать от нее влажными руками .
z Не допускайте повреждения , модификации , чрезмерного растяжения и скручивания шнура питания .
Не кладите на шнур питания тяжелые предметы .
z Никогда не подключайте принтер к сети , напряжение в которой отличается от стандартов той страны , где был приобретен принтер . Использование источника питания с неправильным напряжением и частотой может привести к возгоранию или поражению электрическим током .
z Вилку следует вставлять в розетку до упора .
Внимание !
z В целях безопасности храните чернильницы в недоступном для маленьких детей месте .
z Не роняйте и не трясите чернильницы , поскольку это может привести к выливанию чернил , которые могут испачкать одежду и руки .
Необходимо также изучить указания по мерам безопасности в электронном
Руководстве пользователя
. Во избежание травм или повреждения аппарата обязательно выполняйте инструкции , содержащиеся в предупреждениях .
Номер модели : K10281 (MP510)
MP510_QSG.fm Page 1 Friday, May 12, 2006 5:13 PM
Введение
Благодарим за приобретение многофункционального аппарата Canon MP510.
В данном
Кратком руководстве по началу работы
следующие сим волы указывают на важные для пользователя сведения . Всегда выполняйте указания , отмеченные этими символами .
Осторожно
Указания , несоблюдение которых опасно для жизни или может привести к серьезной травме в результате неправильной эксплуатации оборудования . Выполнение этих указаний обязательно для безопасной работы .
Внимание !
Указания , несоблюдение которых может привести к травме или материальному ущербу в результате неправильной эксплуатации оборудования . Выполнение этих указаний обязательно для безопасной работы .
Запомните
Указания , которые должны соблюдаться для безопасной эксплуатации .
Уведомления о товарных знаках
z «Windows» и «Internet Explorer» являются товарными знаками корпорации Microsoft, зарегистрированными в США и других странах .
z «Macintosh» и «Mac» являются товарными знаками корпорации Apple Computer, Inc., зарегистрированными в США и других странах .
z «Adobe» и «Adobe RGB (1998)» являются зарегистрированными товарными знаками или товарными знаками Adobe Systems Incorporated в США и других странах .
z «SmartMedia» является товарным знаком корпорации Toshiba.
z «MEMORY STICK», «Memory Stick PRO», «MEMORY STICK Duo» и «Memory Stick Pro
Duo» являются товарными знаками корпорации Sony.
z «xD-Picture Card» является товарным знаком корпорации Fuji Photo Film, Ltd.
z «MultiMediaCard» является товарным знаком компании Infineon Technologies AG.
z «SD Secure Digital memory card» и «miniSD Card» являются товарными знаками ассоциации SD Association.
©2006 CANON INC.
Все права защищены . Никакая часть настоящего документа не может быть передана или скопирована в какой бы то ни было форме без письменного разрешения .
Выбор языка ЖК
—
дисплея
1
Нажмите кнопку
[COPY]
, подождите 5 секунд , затем нажмите кнопку
[MENU]
.
2
Однократно нажмите кнопку
]
, затем нажмите кнопку
[OK]
.
3
Однократно нажмите кнопку
]
, затем нажмите кнопку
[OK]
.
4
Трижды нажмите кнопку
}
, затем нажмите кнопку
[OK]
.
Если к принтеру подключено устройство по протоколу Bluetooth, нажмите кнопку
} четыре раза , затем нажмите кнопку
[OK]
.
5
Кнопкой { или } выберите язык , на котором Вы хотите читать сообщения , затем нажмите кнопку
[OK]
.
Введение
1
MP510_QSG.fm Page 2 Friday, May 12, 2006 5:13 PM
2
Подготовка аппарата
Перед установкой аппарат и подготовкой его к использованию обязательно прочитайте инструкцию по установке .
Распакуйте аппарат
Убедитесь в том , что в комплект поставки входят все компоненты , изображенные на крышке упаковочной коробки .
Запомните
z Не подключайте USBкабель , пока не будет установлено программное обеспечение .
z USBкабель служит для подключения аппарата к Вашему компьютеру .
1
Включите питание аппарата .
Внимание !
Перед включением аппарата обязательно удалите защитные ленты .
Примечание
z Положение лент может отличаться от показанного на рисунке .
z Убедитесь , что вилка сетевого шнура вставлена в розетку до упора , так как она может туго в нее входить .
z Если сообщения на экране отображаются не на том языке , см . раздел « Выбор языка ЖК дисплея
» на стр . 1.
2
Установите печатающую головку .
Внимание !
Не прикасайтесь к внутренним деталям , кроме рычажка фиксации печатающей головки .
Запомните
Если модуль сканирования ( крышка принтера ) остается открытым в течение более 10 мин , держатель печатающей головки перемещается вправо . В этом случае закройте модуль сканирования ( крышку принтера ) и снова откройте его .
Примечание
z Внутри упаковки , в которой поставляется печатающая головка , или на внутренней части защитного колпачка могут быть прозрачные или голубые чернила – это никаким образом не отражается на качестве печати . Будьте осторожны при обращении с этими деталями , чтобы не испачкаться чернилами .
z Не пытайтесь заново установить защитный колпачок после его удаления .
3
Установите чернильницы .
Запомните
z Убедитесь , что все чернильницы установлены в правильное положение в соответствии с маркировкой . Аппарат нельзя использовать , пока не установлены все чернильницы .
z Прежде чем приступать к работе , подождите около 2 минут , пока аппарат не перестанет издавать рабочий шум .
Примечание
z Убедитесь , что прозрачная лента удалена с чернильницы в том порядке , как показано на рисунке в шаге 3 инструкции по установке .
z Не сжимайте бока чернильницы , поскольку это может привести к вытеканию чернил , которые могут испачкать одежду и руки .
z Не пытайтесь заново установить защитный колпачок .
z
Если какая либо чернильница установлена неправильно , на ЖК дисплее отображается сообщение об ошибке . Откройте модуль сканирования ( крышку принтера ) и убедитесь , что положение всех чернильниц соответствует маркировке .
Подготовка аппарата
MP510_QSG.fm Page 3 Friday, May 12, 2006 5:13 PM
Установка драйверов
MP
Общие сведения для Windows
® и Macintosh
®
Примечание относительно процесса установки
z
При появлении экрана
[Select Language/ Выбор языка ]
выберите язык , затем нажмите кнопку
[Next/ Далее ]
.
z
При появлении экрана
[Select Your Place of Residence/ Выберите регион вашего проживания ]
выберите место размещения , затем нажмите кнопку
[Next/ Далее ]
.
z
Существуют два способа установки драйверов MP и другого программного обеспечения .
[Easy Install/ Простая установка ]
: все программы , имеющиеся на компакт диске
[Setup CD-ROM/ Установочном компакт диске ]
, будут установлены автоматически
[Custom Install/ Выборочная установка ]
: можно выбрать программы для установки z Когда появится экран
[User Registration/ Регистрация пользователя ]
, нажмите кнопку
[Register/ Регистрация ]
. Если компьютер подключен к сети Интернет , на экран выводятся указания по регистрации аппарата .
Сведения для Windows
Примечание
z При установке драйверов MP в Windows XP или Windows 2000 необходимо войти в систему с учетной записью группы
[Administrators/ Администраторы ]
.
z Перед установкой драйверов отключите все антивирусные приложения и автоматически запускаемые программы .
z Если автоматически открылось показанное ниже окно , отсоедините кабель USB, подключенный к компьютеру . Затем закройте это окно , нажав кнопку
[Cancel/ Отмена ]
, и выключите принтер . После этого z снова запустите процесс установки . Подробнее о процессе установки см . в инструкции по установке .
Для установки программы Adobe
®
RGB (1998) нажмите кнопку
[Custom Install/ Выборочная установка ]
и следуйте указаниям на экране .
z Установка программы Adobe RGB (1998) в
ОС Windows Me и Windows 98 невозможна .
z Если в процессе установки появится запрос подтверждения перезагрузки компьютера , нажмите кнопку
[OK]
. Производится автоматическая перезагрузка компьютера .
z Если подключение не распознается , см . раздел « Не удается установить драйверы MP» в электронном
Руководстве пользователя
.
Сведения для Macintosh
Примечание
z Перед установкой драйверов MP отключите все антивирусные приложения и автоматически запускаемые программы или удалите их из системной папки .
z Для установки электронного
Руководства пользователя
на другом языке дважды щелкните папку
[Manual/ Руководство ]
на компакт диске
[Setup CD-ROM/ Установочном компакт диске ]
, папку
[Canon]
, а затем скопируйте папку нужного языка на жесткий диск .
Установка драйверов MP
3
MP510_QSG.fm Page 4 Friday, May 12, 2006 5:13 PM
Загрузка бумаги для печати
В переднее устройство подачи можно загружать обычную бумагу формата A4, Letter или B5.
Загрузка другой бумаги в переднее устройство подачи не допускается . Информацию по загрузке бумаги в устройство автоподачи см . в электронном
Руководстве пользователя
.
Запомните
z Использование для пробной печати обычной бумаги , нарезанной на листы формата 4″ x 6″ /
101,6 мм x 152,4 мм , 5″ x 7″ / 127,0 x 177,8 мм или 2,13″ x 3,39″ / 54,0 x 86,0 мм ( кредитная карточка ), может привести к замятию бумаги .
z Всегда загружайте бумагу , используя книжную ориентацию . Загрузка бумаги с альбомной ориентацией может вызвать замятие бумаги .
1
Откройте переднее устройство подачи (A).
(C)
2
Выдвиньте опору для вывода бумаги (B).
3
Нажмите переключатель
(E) (B) (A) (D)
[Paper Feed Switch]
( Переключатель подачи )
(C), чтобы загорелся индикатор
[Front Feed]
( Подача спереди )
(D).
4
Установите рычажок выбора толщины бумаги (E) в левое положение .
5
Загрузите бумагу в переднее устройство подачи стороной для печати ВНИЗ , выровняв пачку бумаги по правому краю переднего устройства подачи .
Стопка бумаги не должна быть выше метки максимальной загрузки (A).
6
Совместите край бумаги с меткой формата бумаги (B).
7
Нажмите на направляющую бумаги (C) и придвиньте ее к левому краю стопки бумаги .
(C)
(A)
(B)
4
Загрузка бумаги для печати
MP510_QSG.fm Page 5 Friday, May 12, 2006 5:13 PM
Печать с Вашего компьютера
В этом разделе приводятся инструкции по основным операциям печати .
Печать в Windows
1
Включите аппарат и загрузите в него бумагу .
2
Проверьте , правильно ли выбрано устройство подачи бумаги .
3
Создайте документ или откройте предназначенный для печати файл с помощью соответствующей прикладной программы .
4
Выберите пункт
[Print/ Печать ]
в меню
[File/ Файл ]
прикладной программы .
5
Убедитесь , что выбран принтер
[Canon
MP510]
и нажмите кнопку
[Preferences/
Настройка ]
( или
[Properties/ Свойства ]
).
6
Укажите требуемые значения параметров и нажмите кнопку
[OK]
.
Убедитесь , что в поле
[Paper Source/ Источник бумаги ]
выбрано значение
[Paper Feed Switch/
Переключ . подачи бумаги ]
.
Примечание
z Если выбран вариант
[Front for Plain Paper/
Переднее для обычной бумаги ]
, аппарат автоматически переключается на переднее устройство подачи при выборе значения
[Plain
Paper/ Обычная бумага ]
для параметра
[Media
Type/ Тип носителя ]
. В переднее устройство подачи можно загружать только обычную бумагу формата A4, Letter или B5.
z Для получения информации о других функциях драйвера принтера нажмите кнопку
[Help/
Справка ]
или
[Instructions/ Инструкции ]
для просмотра интерактивной справки или электронного руководства
[Printer Driver Guide/
Руководство по драйверу принтера ]
. Кнопка
[Instructions/ Инструкции ]
отображается только в том случае , если установлены электронные руководства .
7
Нажмите кнопку
[Print/ Печать ]
( или
[OK]
).
Печать с Вашего компьютера
5
MP510_QSG.fm Page 6 Friday, May 12, 2006 5:13 PM
Печать в системе Macintosh
1
Включите аппарат и загрузите в него бумагу .
2
Проверьте , правильно ли выбрано устройство подачи бумаги .
3
Создайте документ или откройте предназначенный для печати файл с помощью соответствующей прикладной программы .
4
Выберите пункт
[Page Setup/ Параметры страницы ]
в меню
[File/ Файл ]
прикладной программы .
5
Убедитесь , что в параметре
[Format for/
Форматировать для ]
выбран принтер
[MP510]
.
6
Выберите требуемый формат бумаги в параметре
[Paper Size/ Размер бумаги ]
.
7
Нажмите кнопку
[OK]
.
8
Выберите пункт
[Print/ Печать ]
в меню
[File/ Файл ]
прикладной программы .
9
Во всплывающем меню выберите пункт
[Quality & Media/ Качество и носители ]
.
10
Задайте требуемые значения параметров .
Убедитесь , что в поле
[Paper Source/
Источник бумаги ]
выбрано значение
[Paper
Feed Switch/ Переключ . подачи бумаги ]
.
6
Примечание
z Если выбран вариант
[Front for Plain Paper/
Переднее для обычной бумаги ]
, аппарат автоматически переключается на переднее устройство подачи при выборе значения
[Plain
Paper/ Обычная бумага ]
для параметра
[Media
Type/ Тип носителя ]
. В переднее устройство подачи можно загружать только обычную бумагу формата A4, Letter или B5.
z Для получения информации о других функциях драйвера принтера нажмите кнопку для просмотра электронного
Руководства по драйверу принтера
. Если электронные руководства не установлены ,
Руководство по драйверу принтера
не отображается , даже если нажать кнопку .
11
Нажмите кнопку
[Print/ Печать ]
.
Печать с Вашего компьютера
MP510_QSG.fm Page 7 Friday, May 12, 2006 5:13 PM
Сканирование изображений
С помощью аппарата можно сканировать изображения , не печатая их , и сохранять на компьютере в виде файлов распространенных типов , таких как JPEG, TIFF, растровые изображения или PDF. При сканировании печатного текста можно с помощью программного обеспечения OCR ( оптическое распознавание символов ) преобразовать текст в текстовые компьютерные данные .
Методы сканирования
Сканирование с использованием программы MP Navigator
Используя программу MP Navigator, можно сканировать оригиналы , загруженные на стекло экспонирования , и просматривать изображения , хранящиеся в компьютере или на карте памяти . Отсканированные документы можно предварительно просматривать , распечатывать и редактировать согласно Вашим требованиям .
Для редактирования и печати отсканированного документа можно использовать прилагаемое программное обеспечение .
Подробные указания по работе с программой MP Navigator см . в электронном
Руководстве по сканированию
.
Сканирование с панели управления аппарата
1
Включите питание аппарата .
2
Поместите оригинал на стекло экспонирования .
3
Нажмите кнопку
[SCAN]
.
4
Кнопкой
{ или
} выберите операцию сканирования , затем нажмите кнопку
[OK]
.
5
Нажмите кнопку
[Color] ( Цветной )
или
[Black] ( Черный )
.
Операция , выполняемая после сканирования оригинала , зависит от настройки операции сканирования , заданной на шаге 4. Подробнее изменение параметров работы см . в электронном
Руководстве по сканированию
.
Сканирование с помощью программного приложения .
Можно отсканировать изображение с помощью программ , совместимых с TWAIN или WIA
( только для Windows XP), и работать с отсканированным изображением в этой программе .
Подробные указания по работе см . в электронном
Руководстве по сканированию
.
Сканирование изображений
7
MP510_QSG.fm Page 8 Friday, May 12, 2006 5:13 PM
Копирование
Как сделать копию
В этом разделе описаны основные операции по копированию .
1
Включите аппарат и загрузите бумагу для печати .
2
Проверьте , правильно ли выбрано устройство подачи бумаги .
3
Задайте параметры копирования .
(1)
Размер страницы , тип носителя , качество изображения , увеличение
Отображаются настройки , заданные на экране настроек режима копирования .
(2)
Количество копий
Кнопкой
{ или
} установите требуемое количество копий .
(3)
Интенсивность
Для увеличения интенсивности нажимайте кнопку [ , для уменьшения интенсивности – кнопку ] .
4
Поместите оригинал на стекло экспонирования .
5
Нажмите кнопку
[Color] ( Цветной )
для цветного копирования или кнопку
[Black] ( Черный )
для черно белого копирования .
(2)
(3)
(1)
Использование других функций копирования
<Enlarge/Reduce> ( Увеличить / Уменьш .)
Уменьшение или увеличение копий .
<Sticker copy> ( Копия наклейки )
Изготовление наклеек из фотографий или графики формата 4″ x 6″/101,6 x 152,4 мм на бумаге для наклеек Canon.
<Borderless copy> ( Копия без полей )
Копирование цветных изображений на всю поверхность страницы без полей .
<Image Repeat> ( Повтор изобр .)
Копирование нескольких экземпляров изображения на одну страницу . Для количества копий изображения на странице можно выбрать одно из заданных в аппарате фиксированных значений или ввести число вручную .
8
Копирование
MP510_QSG.fm Page 9 Friday, May 12, 2006 5:13 PM
Печать с карты памяти
Установка карты памяти
1
Включите питание аппарата .
2
Откройте крышку гнезда для карты .
3
Вставьте одну и только одну карту памяти в гнездо для карты .
Тип карты
z
Compact Flash (CF) card z Microdrive z xD-Picture card*
Установка карты
Загорается
Вставьте в левое гнездо для карты . z SmartMedia
Загорается
Вставьте в правое гнездо для карты . z MEMORY STICK z MEMORY STICK PRO z MEMORY STICK Duo* z MEMORY STICK PRO Duo* z SD Secure Digital z MiniSD Card* z MultiMediaCard (v3.31)
Загорается
Вставьте в центральную часть правого гнезда для карты .
* Прежде чем вставлять карту памяти в гнездо , обязательно установите ее в специальный адаптер .
4
Убедитесь , что загорелся индикатор
[Access] ( Обращение )
.
5
Закройте крышку гнезда для карты .
Печать с карты памяти
9
MP510_QSG.fm Page 10 Friday, May 12, 2006 5:13 PM
Извлечение карты памяти
1
Откройте крышку гнезда для карты .
2
Убедитесь , что индикатор
[Access] ( Обращение )
не мигает , и извлеките карту памяти .
3
Закройте крышку гнезда для карты .
Печать фотографий <Single-photo Print> ( Печать
1 фотографии )
1
Включите аппарат и загрузите бумагу для печати .
Любую другую бумагу , кроме обычной бумаги формата A4, Letter или B5, следует загружать в устройство автоподачи .
2
Проверьте , правильно ли выбрано устройство подачи бумаги .
3
Вставьте карту памяти в гнездо для карты .
4
Нажмите кнопку
[MEMORY CARD]
.
5
Кнопкой
[ или
] выберите
<Single-photo print> ( Печать 1 фотографии )
, затем нажмите кнопку
[OK]
.
6
Кнопкой [ или ] выведите на экран фотографию , которую требуется напечатать , затем нажмите кнопку
[Color] ( Цветной )
.
7
Задайте параметры печати .
(1)
Размер страницы , тип носителя , качество изображения
Отображаются настройки , заданные на экране настроек режима карты памяти .
(2)
Количество копий
Кнопкой
{ или
} установите требуемое количество копий .
(2)
(1)
8
Нажмите кнопку
[Color] ( Цветной )
.
Использование других функций печати
<Multi-photo print> ( Печать нескольких фото )
Печать заданного числа копий для каждой из фотографий .
<Layout print> ( Макетная печать )
Печать фотографии с использованием заданного макета .
<Sticker print> ( Печать наклейки )
Печать любимой фотографии в рамке на фотонаклейках Canon.
10
Печать с карты памяти
MP510_QSG.fm Page 11 Friday, May 12, 2006 5:13 PM
<Print all photos> ( Печать всех фотографий )
Печать всех фотографий , хранящихся на карте памяти .
<Photo index print> ( Печать индексного листа )
Печать индексного листа всех фотографий , хранящихся на карте памяти .
<DPOF print> (DPOFпечать )
Печать в соответствии с параметрами цифрового заказа печати DPOF, заданными в цифровой камере ( если они были заданы ).
Печать с помощью индексного листа
1
Включите аппарат и загрузите бумагу формата A4 или Letter.
2
Проверьте , правильно ли выбрано устройство подачи бумаги .
3
Вставьте карту памяти в гнездо для карты памяти .
4
Нажмите кнопку
[Photo Index Sheet] ( Индексный лист фотографий )
.
5
Кнопкой [ или ] выберите
<Photo Index Sheet print> ( Печать индексного листа )
, затем нажмите кнопку
[OK]
.
6
Кнопкой
[ или
] выберите диапазон фотографий , включаемых в индексный лист , затем нажмите кнопку
[OK]
.
7
Нажмите кнопку
[Color] ( Цветной )
.
8
Заполните соответствующие кружки на индексном листе фотографий .
9
Загрузите бумагу , выбранную для печати индексного листа .
Загружайте ее из устройства автоподачи .
10
Нажмите кнопку
[Photo Index Sheet]
( Индексный лист фотографий )
.
11
Кнопкой [ или ] выберите
<Scan sheet and print> ( Сканиров . листа и печать )
, затем нажмите кнопку
[OK]
.
12
Поместите индексный лист фотографий на стекло экспонирования изображением вниз и нажмите кнопку
[ ОК ]
.
Печать с карты памяти
11
MP510_QSG.fm Page 12 Friday, May 12, 2006 5:13 PM
Прямая печать фотографий с совместимого устройства
Печать с PictBridgeсовместимого устройства
Можно напрямую подсоединить к принтеру PictBridgeсовместимое устройство ( например цифровую камеру , видеокамеру или мобильный телефон ) и печатать снятые фотографии без использования компьютера .
Примечание
z PictBridge – это промышленный стандарт , открывающий широкие возможности в области цифровой фотографии , включая прямую печать фотоизображений с цифрового фотоаппарата , видеокамеры или мобильного телефона * без использования компьютера . Если устройство соответствует стандарту PictBridge, его можно подсоединить к данному аппарату для прямой печати независимо от производителя или модели устройства .
z В камере или мобильном телефоне можно выбрать изображения для печати и задать различные параметры печати .
* Далее PictBridgeсовместимые цифровые фотокамеры , цифровые видеокамеры и оснащенные камерой мобильные телефоны называются собирательным термином «PictBridgeсовместимое устройство ».
Устройство с этим символом является PictBridgeсовместимым .
Подключение PictBridgeсовместимого устройства
Для подключения PictBridgeсовместимого устройства к данному аппарату используйте кабель USB, рекомендованный производителем устройства .
Внимание !
Не подключайте к порту прямой печати данного аппарата никакое другое оборудование , кроме PictBridgeсовместимых устройств и дополнительно приобретаемого модуля
Bluetooth BU-20. Нарушение этого требования может привести к поражению электрическим током , возгоранию или повреждению устройства .
Примечание
При печати фотографий с помощью цифрового устройства , подключенного к аппарату , рекомендуется использовать блок питания переменного тока , прилагаемый к устройству .
Если используется аккумулятор устройства , обязательно полностью зарядите его .
1
Подготовьте аппарат .
Порядок установки аппарата и подготовки его к печати см . в
Краткой инструкции по установке
.
2
Включите аппарат и загрузите бумагу в устройство автоподачи .
Примечание
При прямой печати с PictBridgeсовместимого устройства в качестве источника бумаги можно использовать только устройство автоподачи . Не загружайте бумагу в переднее устройство подачи .
12
Прямая печать фотографий с совместимого устройства
MP510_QSG.fm Page 13 Friday, May 12, 2006 5:13 PM
3
Подключите PictBridgeсовместимое устройство к аппарату .
Примечание
В зависимости от модели или марки устройства перед его подключением , возможно , потребуется выбрать режим печати , совместимый с PictBridge. После подключения устройства к аппарату может также понадобиться включить это устройство или вручную выбрать режим воспроизведения .
Выполните на PictBridgeсовместимом устройстве все необходимые операции перед его подсоединением к аппарату в соответствии с указаниями , приведенными в руководстве по эксплуатации устройства .
(1)
Убедитесь , что PictBridgeсовместимое устройство выключено .
(2)
Подсоедините PictBridgeсовместимое устройство к аппарату с помощью кабеля
USB, рекомендованного производителем устройства .
Устройство включается автоматически .
Если устройство не включается автоматически , включите его вручную .
(3)
Настройте PictBridgeсовместимое устройство для прямой печати .
При правильном подключении аппарата на
ЖК дисплее устройства отображается символ .
(2)
Примечание
Если символ не отображается , см . раздел « Не удается правильно распечатать изображения с подключенной цифровой камеры » электронного
Руководства пользователя
.
Печать фотографий непосредственно с PictBridgeсовместимого устройства
При работе с PictBridgeсовместимым устройством обязательно следуйте указаниям , приведенным в руководстве по его эксплуатации . В этом разделе рассматриваются параметры [Page size/ Размер бумаги ], [Media type/ Тип носителя ], [Layout/ Компоновка ],
[Image optimization modes/ Режимы оптимизации изображения ] и [Date printing mode/
Режим печати даты ], которые могут быть заданы в PictBridgeсовместимом устройстве , подсоединенном к аппарату .
z
Проверка или изменение настроек печати PictBridge с помощью камеры
Для изменения параметра [ Р age size/ Размер бумаги ] или [Media type/ Тип носителя ] выберите на устройстве режим настройки печати PictBridge и проверьте или измените настройки .
Сведения о параметрах , описанных далее
Некоторые из рассматриваемых ниже параметров могут отсутствовать на некоторых устройствах . В таком случае для этих параметров используется рассмотренная ниже настройка
[Default/ Базовые ]
.
* В приведенных ниже описаниях приводятся названия параметров , используемые в
PictBridgeсовместимых устройствах марки Canon. Названия параметров могут отличаться в зависимости от марки или модели устройства .
Прямая печать фотографий с совместимого устройства
13
MP510_QSG.fm Page 14 Friday, May 12, 2006 5:13 PM
14
z
Допустимый формат данных изображения
Данный аппарат может печатать изображения , снятые DCF
®
совместимой цифровой камерой *, а также файлы PNG.
* Exif2.21совместимые z
Параметры [Paper Size/ Размер бумаги ] и [Paper Type/ Тип бумаги ]
Если в PictBridgeсовместимом устройства для этих параметров задано значение
[Default/ Базовые ]
( для параметров используется соответствующая настройка аппарата ), используются значения параметров
[Page size/ Размер бумаги ]
и
[Media type/ Тип носителя ]
, заданные в режиме карты памяти аппарата .
В зависимости от значений параметров
[Paper Size/ Размер бумаги ]
и
[Paper Type/
Тип бумаги ]
можно загружать бумагу для печати указанных ниже размеров и типов .
Значение параметра
[Paper Size/ Размер бумаги ]
[10 x 15 см /4″ x 6″]
Значение параметра
[Paper Type/ Тип бумаги ]
[Photo/ Фото ]
Загружаемая бумага
[13 x 18 см /5″ x 7″]
*2
[A4/8.5″ x 11″ (Letter)/
A4/8,5″ x 11″ (Letter)]
*3, *4
[Fast Photo/ Супер фото ]
[Photo/ Фото ]
[Photo/ Фото ]
[Photo/ Фото ]
[Photo/ Фото ]
[Fast Photo/ Супер фото ]
[Photo/ Фото ]
[Photo/ Фото ]
[Photo Paper Plus Glossy/
Фотобумага с особым глянцем ]
[Photo Paper Pro/ Качественная фотобумага ]
[Photo Paper Plus Semi-gloss/
Фотобумага с особым полуглянцем ]
[Glossy Photo Paper/ Глянцевая фотобумага ]
[Glossy Photo Paper “Everyday
Use”/« Повседневная » глянцевая фотобумага ]
[Photo Stickers/ Фотонаклейки ]
*1
[Photo Paper Plus Glossy/
Фотобумага с особым глянцем ]
[Photo Paper Plus Glossy/
Фотобумага с особым глянцем ]
[Photo Paper Pro/ Качественная фотобумага ]
[Photo Paper Plus Semi-gloss/
Фотобумага с особым полуглянцем ]
[Glossy Photo Paper/ Глянцевая фотобумага ]
[Glossy Photo Paper “Everyday
Use”/« Повседневная » глянцевая фотобумага ]
[Glossy Photo Paper/ Глянцевая фотобумага ]
[5.4 x 8.6 см /Credit card/
5,4 x 8,6 см / Кредитная карточка ]
[Photo/ Фото ]
*1 Используется только для печати [photostickers/ фотонаклеек ]. При печати на бумаге для наклеек выберите для параметра
[Paper Size/ Размер бумаги ]
значение
[10 x 15 см /4″ x 6″]
.
*2 Может быть выбрана только в некоторых PictBridgeсовместимых устройствах марки
Canon.
*3 Значение
[Plain Paper/ Обычная бумага ]
для параметра
[Paper Type/ Тип бумаги ]
может быть выбрано только в том случае , если для параметра
[Paper Size/ Размер бумаги ]
задано значение
[A4 or 8.5″ x 11″ (Letter)/A4 или 8,5″ x 11″ (Letter)]
. Если для параметра
[Paper Type/ Тип бумаги ]
выбрано значение
[Plain Paper/ Обычная бумага ]
, печать без полей на выполняется , даже если для параметра
[Layout/
Компоновка ]
выбрано значение
[Borderless/ Без полей ]
.
*4 Печать 4 изображений на странице ([4-up/ Мульти 4]) возможна в том случае , если для параметра
[Paper Size/ Размер бумаги ]
установлено значение
[A4 or 8.5″ x 11″
(Letter)/A4 или 8,5″ x 11″ (Letter)]
.
Прямая печать фотографий с совместимого устройства
MP510_QSG.fm Page 15 Friday, May 12, 2006 5:13 PM z
Параметры [Layout/ Компоновка ] и [Trimming/ Кадрировка ]
Если в PictBridgeсовместимом устройстве для параметра
[Layout/ Компоновка ]
задано значение
[Default/ Базовые ]
( значение соответствует значению , заданному в аппарате ), используются настройки печати , заданные в режиме карты памяти аппарата . Для параметра
[Trimming/ Кадрировка ]
используется значение , заданное в PictBridgeсовместимом устройстве .
При печати на бумаге [Photo Stickers/ Фотонаклейки ] (PS-101) выберите для параметра
[Layout/ Компоновка ]
значение
[N-up/ Мульти N]
, затем выберите
[16-up/ Мульти 16]
.
* На некоторых PictBridgeсовместимых устройствах для параметра [Layout/
Компоновка ] отображаются значения [2-up/ Мульти 2], [4-up/ Мульти 4], [9-up/ Мульти 9] и [16-up/ Мульти 16]. В этом случае обязательно выберите значение
[16-up/
Мульти 16]
.
* Если в PictBridgeсовместимом устройстве не предусмотрен вариант , соответствующий настройке
[16-up/ Мульти 16]
, печать на наклейках невозможна .
* При печати на бумаге [Photo Stickers/ Фотонаклейки ] (PS-101) не устанавливайте для параметра
[Layout/ Компоновка ]
значение
[Borderless/ Без полей ]
.
z
Параметр [Image Optimize/ Оптимизация изображения ]
Если в PictBridgeсовместимом устройстве для параметра
[Image optimize/
Оптимизация изображения ]
задано значение
[Default/ Базовые ]
( значение соответствует значению , заданному в аппарате ), используются настройки печати , заданные на вкладке 2 экрана настройки режима карты памяти аппарата .
Дополнительные сведения об этой настройке см . в электронном
Руководстве пользователя
.
При использовании некоторых моделей PictBridgeсовместимых устройств марки
Canon могут быть доступны дополнительные настройки
[VIVID]
,
[NR]
,
[VIVID+NR]
или
[Face/ Лицо ]
.
* [VIVID]
обеспечивает большую насыщенность зеленых и синих областей фотографии .
[NR]
( устранение шумов ) обеспечивает удаление шумов на синем фоне , например небе , и темном фоне .
[VIVID+NR]
является комбинацией функций VIVID и NR.
[Face/ Лицо ]
корректирует контрастность изображений , снятых в контровом свете .
z
Параметр [Date/File No. Print/ Печать даты / номера файла ]
Данный аппарат не позволяет изменять значение этого параметра . Используется значение , заданное в PictBridgeсовместимом устройстве .
Если при съемке изображения на него уже была нанесена дата , установите для этого параметра печати PictBridge значение
[Off/ Выкл .]
. Если выбрать значение
[Date/ Дата ]
,
[File No./ Номер файла ]
или
[Both/ Оба ]
, дата и / или номер файла будет распечатываться поверх даты , напечатанной камерой .
Примечание
z Никогда не отсоединяйте USBкабель во время печати , если такое разрешение не было выведено на экран PictBridgeсовместимого устройства .
При отсоединении кабеля USB, соединяющего PictBridgeсовместимое устройство и аппарат , следуйте указаниям руководства по эксплуатации , поставляемого с устройством .
z В PictBridgeсовместимом устройстве нельзя задавать указанные ниже параметры или выполнять перечисленные ниже операции :
– выбор параметра качества печати ;
– обслуживание аппарата .
Прямая печать фотографий с совместимого устройства
15
MP510_QSG.fm Page 16 Friday, May 12, 2006 5:13 PM
Замена чернильницы
Если в чернильницах закончились чернила , замените чернильницы в соответствии с приведенными ниже указаниями .
1
Откройте переднее устройство подачи .
2
Убедитесь , что аппарат включен , затем откройте модуль сканирования ( крышку принтера ).
3
Нажмите защелку чернильницы , индикатор которой часто мигает (A), и извлеките ее .
Не прикасайтесь к фиксатору печатающей головки ( В ).
4
Извлеките новую чернильницу из упаковки , затем потяните за оранжевую ленту в направлении стрелки (A), чтобы снять защитную пленку с отверстия для воздуха (B). Затем полностью удалите пленку (C).
(C)
(B) (A)
(A)
(B)
16
Замена чернильницы
MP510_QSG.fm Page 17 Friday, May 12, 2006 5:13 PM
5
Снимите оранжевый защитный колпачок
(A) с нижней поверхности чернильницы .
Удаляя защитный колпачок , держите его осторожно , чтобы не запачкать пальцы .
Выбросите колпачок , как только он будет снят .
Запомните
Не дотрагивайтесь до электрических контактов (B) на чернильнице . Это может привести к неверной работе аппарата или невозможности печати .
6
Вставьте передний край чернильницы в печатающую головку .
Убедитесь , что положение чернильницы соответствует маркировке (A).
7
Нажмите на метку на чернильнице , чтобы чернильница со щелчком зафиксировалась на месте .
Убедитесь , что индикатор [Ink] ( Чернила ) (A) загорелся красным цветом .
8
Закройте модуль сканирования ( крышку принтера ).
(A)
(A)
(B)
(A)
Замена чернильницы
17
MP510_QSG.fm Page 18 Friday, May 12, 2006 5:13 PM
Сведения об Электронных руководств
Помимо
Краткого руководство по началу работы
, вместе с аппаратом также поставляются электронные руководства . Подробные указания по установке [On-screen Manuals/
Электронных руководств ] см . в инструкции по установке .
Чтобы просмотреть [On-screen Manuals/ Электронные руководства ]:
Для просмотра электронного руководства дважды щелкните мышью ярлык
[MP510 On-screen
Manual/ Электронное руководство MP510]
на рабочем столе или щелкните
[Start/ Пуск ]
>
[All Programs/ Все программы ]
( или
[Programs/ Программы ]
) >
[Canon MP510 Manual/
Руководство по MP510]
>
[MP510 On-screen Manual/ Электронное руководство MP510]
.
Требования к системе
Браузер : программа для просмотра справки Windows в формате HTML
Примечание
z Необходимо установить Microsoft Internet Explorer
®
5.0 или более поздней версии .
z Электронные руководства могут отображаться неправильно в зависимости от версии операционной системы или программы Internet Explorer. Рекомендуется регулярно обновлять систему с помощью Windows Update.
Чтобы просмотреть электронное руководство , дважды щелкните ярлык
[MP510 On-screen
Manual/ Электронное руководство по MP510]
на рабочем столе .
Примечание
Если
Руководство пользователя
установлено из папки
[Manual]
компакт диска
[Setup CD-ROM/
Установочном компакт диске ]
, откройте папку , в которую было скопировано
Руководство пользователя
, и дважды щелкните файл
[top.htm]
.
Требования к системе
Браузер : программа для просмотра справки
Примечание
z При использовании некоторых операционных систем [On-screen Manuals/ Электронных руководств ] может отображаться неправильно . Рекомендуется регулярно обновлять систему .
z В качестве обозревателя для просмотра электронных руководств в формате HTML рекомендуется использовать программу Safari. Если браузер Safari не установлен на компьютер , загрузите его с webузла компании Apple Computer, Inc. и установите его .
18
Сведения об Электронных руководств
MP510_QSG.fm Page 19 Friday, May 12, 2006 5:13 PM
Только для Европейского союза
( и Европейской экономической зоны ).
Данный символ обозначает , что в соответствии с Директивой
WEEE (Waste Electrical and Electronic Equipment, или Утилизация электрического и электронного оборудования ) (2002/96/EC) и законодательством Вашего государства настоящий продукт не разрешается утилизировать вместе с бытовыми отходами . Данный продукт следует передать в предназначенный для этого пункт сбора , работающий , например , по принципу обмена , т .
е . когда при сдаче использованного продукта Вы приобретаете новый аналогичный продукт , или в авторизованный пункт сбора для переработки электрического и электронного оборудования (EEE). Ненадлежащая утилизация отходов данного типа может негативно повлиять на экологическую обстановку и здоровье людей вследствие действия потенциально опасных веществ , обычно входящих в состав EEE. Таким образом , правильная утилизация данного продукта станет Вашим вкладом в дело эффективного использования природных ресурсов . Более подробную информацию о месте сбора оборудования для его последующей переработки можно получить в местном городском управлении , в отделе по управлению утилизацией , в организации , работающей по авторизованной схеме
WEEE, или в местной службе утилизации отходов .
Дополнительную информацию относительно возврата и переработки
WEEEпродуктов можно получить на webсайте : www.canon-europe.com/ environment.
( Европейская экономическая зона : Норвегия , Исландия и Лихтенштейн )
Только для клиентов в Европе , на Среднем
Востоке , в Африке и в России
Адреса службы поддержки клиентов Canon см . на задней обложке брошюры « Система европейской гарантии (EWS)» или на веб узле www.canon-europe.com.
Canon Europa N.V., Bovenkerkerweg 59-61, 1185 XB Amstelveen, The Netherlands
Идентификатор Bluetooth: B02954
Сведения об Электронных руководств
19
MP510_QSG.fm Page 20 Friday, May 12, 2006 5:13 PM
20
Сведения об Электронных руководств
Regulatory Information
FCC Notice (U.S.A. Only)
For 120V, 60Hz model
Model Number: K10281
This device complies with Part 15 of the FCC Rules. Operation is subject to the following two conditions:
(1) This device may not cause harmful interference, and (2) this device must accept any interference received, including interference that may cause undesired operation.
Note: This equipment has been tested and found to comply with the limits for a Class B digital device, pursuant to Part 15 of the FCC Rules. These limits are designed to provide reasonable protection against harmful interference in a residential installation. This equipment generates, uses and can radiate radio frequency energy and, if not installed and used in accordance with the instructions, may cause harmful interference to radio communications.
However, there is no guarantee that interference will not occur in a particular installation. If this equipment does cause harmful interference to radio or television reception, which can be determined by turning the equipment off and on, the user is encouraged to try to correct the interference by one or more of the following measures:
Reorient or relocate the receiving antenna.
Increase the separation between the equipment and receiver.
Connect the equipment into an outlet on a circuit different from that to which the receiver is connected.
Consult the dealer or an experienced radio/TV technician for help.
Use of a shielded cable is required to comply with Class B limits in Subpart B of Part 15 of the FCC Rules.
Do not make any changes or modifications to the equipment unless otherwise specified in the manual. If such changes or modifications should be made, you could be required to stop operation of the equipment.
Canon U.S.A., Inc.
One Canon Plaza
Lake Success, NY 11042
1-516-328-5600
Users in Canada
Caution
z This Class B digital apparatus meets all requirements of the Canadian Interference-Causing Equipment
Regulations.
z Cet appareil numérique de la classe B respecte toutes les exigences du Règlement sur le matériel brouilleur du Canada.
Customer Technical Supports
Canon Canada Inc., offers a full range of customer technical support* options:
For interactive troubleshooting, e-mail technical support, the latest driver downloads and answers to frequently asked questions (www.canon.ca)
Automated interactive telephone support on most current products 24 hours, 7 days a week (1-800-OK-
CANON)
Free live technical support Mon — Fri 9am-8pm EST (excluding holidays) for products still under warranty (1-800-OK-CANON)
The location of the authorized service facility nearest you (1-800-OK-CANON) If the problem cannot be corrected by using one of the above technical support options, repair options are available at the time of your call to the Free live technical support number above or via the website at www.canon.ca
* Support program specifics are subject to change without notice.
z CANON CANADA INC.
1-800-OK-CANON (1-800-652-2666)
24 HOURS A DAY, SEVEN DAYS A WEEK http://www.canon.ca
The following ink tanks are compatible with this product.
Les réservoirs d’encre suivants sont compatibles avec ce produit.
S tímto produktem je možné používat následující nádržky s inkoustem.
Selle tootega ühilduvad järgmised tindimahutid.
Ar produktu ir sader ī gas š ā das tintes tvertnes.
Su šiuo gaminiu galima naudoti tokias rašalo talpykles.
A következ ő tintatartályok használhatók ezzel a készülékkel.
Do tego urz ą dzenia pasuj ą nast ę puj ą ce zbiorniki z atramentem.
С этим продуктом совместимы следующие чернильницы .
S tem izdelkom so združljivi naslednji č rnilni vložki.
S týmto výrobkom sú kompatibilné nasledujúce atramentové kazety.
A ş a ğ ı daki mürekkep hazneleri bu ürünle uyumludur.
З даним виробом сумісні такі ємності з чорнилом .
QT5-0461-V01 XXXXXXXX ©CANON INC.2006
PRINTED IN VIETNAM
Quick Start Guide
Guide de démarrage rapide
Stru č ná p ř íru č ka
Kiirstardi juhend
Darba uzs ā kšanas rokasgr ā mata
Greito parengimo instrukcija
Beüzemelési útmutató
Szybkie wprowadzenie
Краткое руководство по началу работы
Kratka navodila za postavitev in uporabo
Stru č ná príru č ka
H
ı
zl
ı
Kurulum K
ı
lavuzu
Коротка інструкція з користування
E14
QT5-0461-V01
У вас уже есть продукция Canon? Зарегистрируйте свои продукты для доступа к программному обеспечению и обновлениям встроенного ПО, а также подпишитесь на рассылку, чтобы получать персонализированные советы и эксклюзивные предложения
Поддержка
Canon PIXMA MP510
Загружайте драйверы, ПО, встроенное ПО и руководства, а также получите доступ к материалам поддержки для вашего продукта серии PIXMA.
Драйверы
Для выполнения подключения некоторых устройств к компьютеру может потребоваться драйвер. На этой вкладке вы найдете соответствующие драйверы для своего устройства или, в случае отсутствия драйверов, описание совместимости устройства с каждой операционной системой.
Полезная информация. Доступ к программному обеспечению, руководствам и другим материалам можно получить с помощью вкладок, расположенных выше.
Операционная система Обнаруженная операционная система
Программное обеспечение
Программное обеспечение загружать необязательно, но оно обеспечивает дополнительные функции и позволяет максимально эффективно пользоваться возможностями устройства. На этой вкладке можно просмотреть и загрузить доступное программное обеспечение для вашего устройства.
Операционная система Обнаруженная операционная система
Руководства пользователя
Руководства для вашего устройства или программного обеспечения перечислены ниже.
Приложения и функции
На этой вкладке можно посмотреть доступные приложения и функции, совместимые с вашим устройством.
Встроенное ПО
Встроенное ПО — это постоянное программное обеспечение, установленное на устройстве и обеспечивающее его корректную работу. Canon может периодически выпускать обновления для этого встроенного ПО, и если обновление доступно, его можно загрузить ниже.
FAQs
На этой вкладке вы найдете ответы на часто задаваемые вопросы и другую полезную информацию, которая поможет вам в решении вопросов и проблем.
Важная информация
На этой вкладке вы найдете подборку часто задаваемых вопросов, которые, на наш взгляд, будут вам интересны.
Коды ошибок
Код ошибки или сообщение об ошибке может появиться на устройстве по различным причинам. С помощью поля поиска можно найти полезную информацию о конкретном коде ошибки, где будут указаны причина ошибки и необходимые действия по ее устранению.
Технические характеристики
Ниже приведены все технические характеристики данного продукта.
Полезные ссылки
-
-
Ремонт
Поиск центров по ремонту оборудования, полезная информация по процессу ремонта
-
Переработка
Узнайте больше о программе утилизации картриджей Canon
-
Canon ID
Регистрация продукта и управление аккаунтом Canon ID
-
Page 1: Quick Start Guide
Photo All-in-One Quick Start Guide…
- Page 2
Telephone Device for the Deaf (TDD) support is available at (1-866-251-3752). 4. Extended Service and Support Canon CarePAK Extended Service Plan is a cost-attractive and easy-to-use extended service program that provides up to three full years of service and support coverage at a very attractive price. - Page 3
Photo All-in-One Quick Start Guide… - Page 4
Canon PIXMA MP510 Photo All-in-One Quick Start Guide. Copyright This manual is copyrighted by Canon U.S.A., Inc. with all rights reserved. Under the copyright laws, this manual may not be reproduced in any form, in whole or in part, without the prior written consent of Canon U.S.A., Inc. -
Page 5: Table Of Contents
Table of Contents Before Printing…2 Turning the Machine On and Off …2 Handling the Original Document…4 Loading Printing Paper …6 Changing the Print Settings …17 Printing from Your Computer…22 Printing with Windows…22 Printing with Macintosh…23 Scanning Images …24 Scanning Methods …24 Copying …25 Making Copies …25 Using Other Copy Functions…25…
-
Page 6: Before Printing
Before Printing Turning the Machine On and Off Turn on the machine before printing. Turning on the Machine Before turning on the machine, confirm the following. The Print Head and ink tanks are set into place. If you are using the machine connected to a computer, confirm also the following. The machine is connected to your computer (or a compatible device).
-
Page 7: Turning Off The Machine
Turning off the Machine To turn off the machine, press the ON/OFF button. When the POWER lamp stops flashing, the machine is turned off. Important About the Power Plug When removing the power plug after turing off the machine, be sure to confirm that the POWER lamp is not lit.
-
Page 8: Handling The Original Document
Handling the Original Document This section describes how to load the original document on the Platen Glass. Original Document Requirements The original documents you load on the Platen Glass for copying or scanning must meet these requirements: Document Paper documents type Photographs Books…
- Page 9
Important Do not place any objects weighing more than 4.4 lb / 2 kg on the Platen Glass. Do not press or put weight on the original with pressure exceeding 4.4 lb / 2 kg. Doing so may cause the scanner to malfunction or the Platen Glass to break. -
Page 10: Loading Printing Paper
Loading Printing Paper This section describes how to load printing paper in the Auto Sheet Feeder and the Front Feeder. Paper Handling Recommended Paper and Requirements Media Type Paper Support Load Limit Model Auto Sheet Feeder Plain Paper — 0.52 inches / 13 mm Envelopes —…
-
Page 11: Media Types You Cannot Use
Folded, curled, or wrinkled paper Damp paper Paper that is too thin (weighing less than 64 gsm / 17 lb) Paper that is too thick (non-Canon genuine paper weighing more than 105 gsm / 28 lb) Picture postcards Front Feeder…
-
Page 12: Using Specialty Media
Note that some types of clear plastic folders and albums may cause the edges of the paper to turn yellow. Using Specialty Media Canon recommends that you use Canon genuine media to ensure optimal print quality. Photo Quality Media Glossy Photo Paper…
- Page 13
Using the Auto Sheet Feeder and the Front Feeder This machine offers two paper sources to load printing paper; the Auto Sheet Feeder, found at the top of the machine, and the Front Feeder, found at the front of the machine. Note You cannot load paper other than A4, Letter, or B5-sized plain paper in the Front Feeder. - Page 14
To Change the Paper Source The Auto Sheet Feeder lamp lights up when feeding from the Auto Sheet Feeder, and the Front Feeder lamp lights up when feeding from the Front Feeder. Before you print, make sure that the paper source selection matches the paper source where you actually loaded paper. -
Page 15: Changing The Paper Source
Changing the Paper Source Before printing, confirm that the location where you have loaded paper is selected as the paper source. Press the Paper Feed Switch to change the paper source. Important When Printing from Your Computer If Paper Feed Switch is not selected for Paper Source in the printer driver, the Paper Feed Switch on the machine will be disabled when printing.
-
Page 16: Loading Paper
Note For details on the specialty media Canon provides for use with its various printers, refer to “Printing Media” in the User’s Guide on-screen manual. For detailed instructions on how to load specialty media into the machine, refer to “Printing Media”…
-
Page 17: Loading Paper In The Auto Sheet Feeder
Loading Paper in the Auto Sheet Feeder Flatten the four corners of the paper before loading it. Note Align the edges of paper neatly before loading. Loading paper without aligning the edges may cause paper jams. If paper is curled, hold the opposing curled corners and gently bend them in the opposite direction until the paper becomes completely flat.
- Page 18
23. Loading Paper in the Front Feeder You can load A4, Letter, or B5-sized plain paper (such as Canon Super White Paper SW-201) in the Front Feeder. You cannot load any other paper in the Front Feeder. Flatten the four corners of the paper before loading it. - Page 19
Load the paper with the print side facing DOWN. (1) Load the paper in the Front Feeder with the print side facing DOWN and the leading edge to the far side. (2) Align the paper stack against the right edge of the Front Feeder. -
Page 20: Loading Envelopes
Loading Envelopes Envelopes must be fed from the Auto Sheet Feeder. Use either European DL or US Comm. Env. #10-sized envelope. Important You need to print from the computer to print on envelopes. Do not use envelopes with embossed or treated surfaces, a double flap, pressure seals, or sticker flaps.
-
Page 21: Changing The Print Settings
Changing the Print Settings This section describes the Settings screen that can be specified on the Operation Panel when copying or when printing from a memory card. To Change the Print Settings You can change the print settings such as page size, media type, bordered or borderless print, etc.
-
Page 22: Copy Mode
Change the setting. (1) Use the [ or ] button to change the setting. Example: Change to 4″ x 6″ (101 x 152) here. Complete setting. (1) Press the Settings button. The LCD returns to the Settings screen. Print Setting Items Each tab contains the following setting items.
-
Page 23: Memory Card Mode
(3) Adjust image quality according to the original. Fast, Standard, High Note Fast can be selected when Plain paper is selected as the media type. If you used Fast with media type set to Plain paper and the quality is not as good as expected, select Standard or High and try copying again.
- Page 24
(1) Select the page size. 8.5″ x 11″ (215 x 279), A4, 4″ x 6″ (101 x 152), 5″ x 7″ (127 x 177), Credit card Important You cannot load paper other than A4, Letter, or B5-sized plain paper in the Front Feeder. When specifying a page size other than A4 or 8.5″… - Page 25
(4) Activate/deactivate Face brightener function. Brightens a darkened face on the photo taken against the light. Face brightener ON, Face brightener OFF (5) Activate/deactivate Image optimizer function. Corrects and smooths the jagged contours for printing. Image optimizer ON, Image optimizer OFF (6) Adjust brightness. -
Page 26: Printing From Your Computer
Create a document or open a file to print using an appropriate application software. Select Print on the application software’s File menu. Make sure that Canon MP510 Printer is selected, and click Preferences (or Properties). Specify the required settings and click OK.
-
Page 27: Printing With Macintosh
Printing with Macintosh Turn on the machine and load the paper in the machine. See “Turning the Machine On and Off” on page 2 and “Loading Printing Paper” on page 6. Make sure that the proper paper source is selected. See “Changing the Paper Source”…
-
Page 28: Scanning Images
Scanning Images You can scan images from the machine to a computer without printing them and save them in popular file formats, such as JPEG, TIFF, bitmaps, or PDF. If you are scanning printed text, you can use the OCR (Optical Character Recognition) software to convert it to text data. Scanning Methods Scanning Using the MP Navigator Using MP Navigator, you can scan originals loaded on the Platen Glass and view images saved…
-
Page 29: Copying
Reduced/Enlarged Copy Reduces or enlarges copies. Sticker Copy Makes stickers from 4″ x 6″ / 101.6 x 152.4 mm photos or graphics using Canon sticker paper. Borderless Copy Copies color images so that they fill the entire page without borders.
-
Page 30: Printing From A Memory Card
Printing from a Memory Card Memory Cards Supported by This Machine The following memory cards are compatible with this machine. Memory cards that can be directly inserted into the Card Slot: Memory cards that can be inserted in the Card Slot using the adapter: *1 Requires purchase of a separate compact flash card adapter for xD-Picture cards.
-
Page 31: Inserting The Memory Card
Inserting the Memory Card Turn on the machine. See “Turning the Machine On and Off” on page 2. Open the Card Slot Cover. Insert one and only one memory card into the Card Slot. Card Type Compact Flash (CF) card Microdrive xD-Picture card* SmartMedia…
-
Page 32: Removing The Memory Card
Prints specifying the number of copies to print for each photo. Layout Print Prints photos your pasted in the specified layout. Sticker Print Prints your favorite photo with a frame on Canon Photo Stickers. Print all photos Prints all photos saved on the memory card. Printing from a Memory Card…
-
Page 33: Printing Using The Photo Index Sheet
Photo index print Prints an index of all the photos saved on a memory card. DPOF print Prints according to the Digital Print Order Format (DPOF) settings on your digital camera, if you have specified them. Printing Using the Photo Index Sheet Turn on the machine, and load A4 or Letter-sized paper.
-
Page 34: Printing Photographs Directly From A Compliant Device
Printing Photographs Directly from a Compliant Device Printing from a PictBridge Compliant Device You can connect a PictBridge compliant device such as a digital camera, camcorder, or mobile phone and print recorded images directly without using a computer. Note PictBridge is an industry standard enabling a range of digital photo solutions, including the direct printing of photos from a digital still camera, camcorder or mobile phone* without the need to use a computer.
-
Page 35: Printing Photographs Directly From A Pictbridge Compliant Device
Default setting explained below is applied for the setting item. * In the following description, names of settings items are given according to those used in Canon-brand PictBridge compliant devices. Setting item names may be different depending on the brand or model of your device.
- Page 36
For details on this setting, refer to the User’s Guide on-screen manual. If you are using a Canon-brand PictBridge compatible device, additional options of VIVID, NR, VIVID+NR, or Face may be available, depending on the model. - Page 37
Date/File No. Print Setting You cannot change this setting on this machine. The setting on the PictBridge compliant device is applied. If the images already have dates superimposed when shot, set this PictBridge setting item to Off. If you select Date, File No., or Both, the date and/or file number will be printed over the date printed by the camera’s function. -
Page 38: Routine Maintenance
Routine Maintenance Replacing an Ink Tank When ink runs out, replace the ink tank. The machine will not print if the wrong type of ink tank is used, or if it is installed in the incorrect position. The machine uses the following ink tanks. Black: PGI-5BK Cyan: CLI-8C Note…
-
Page 39: Knowing When To Replace Ink Tank
* With this operation, releasing the function for detecting the remaining ink level is memorized. Please be advised that Canon shall not be liable for any malfunction or trouble which may be caused by continuation of printing under the ink out condition.
-
Page 40: Replacing Ink Tanks
Important Handling Ink To maintain optimal printing quality, we recommend the use of specified Canon brand ink tanks. Refilling ink is not recommended. Once you remove an ink tank, replace it immediately. Do not leave the machine with ink tanks removed.
- Page 41
Prepare the replacement tank. (1) Remove the new ink tank from its packaging, then pull the orange tape in the direction of the arrow (A) so that the protective film does not remain on the air hole (B). Then remove the film completely (C). - Page 42
Install the ink tank. (1) Insert the front end of the ink tank into the Print Head. (2) Press on the the ink tank snaps firmly into place. (3) Make sure that the ink tank lamp lights up red. Important The machine cannot be used unless all the ink tanks are installed. -
Page 43: Keeping The Best Printing Results
Keeping the Best Printing Results To avoid drying of the Print Head and clogging of the nozzles, note the following. When You Turn Off the Machine Follow the procedure below to turn off the machine. (1) Press the ON/OFF button to turn off the machine. (2) Confirm that the POWER lamp has gone out.
-
Page 44: When Printing Becomes Faint Or Colors Are Incorrect
See “Print Head Deep Cleaning” on page 46. Note If Print Head Deep Cleaning does not resolve the problem, the Print Head may be damaged. Contact your Canon service representative. If the Ruled Lines Are Shifted Step 1 Routine Maintenance See “Aligning the Print Head”…
-
Page 45: Printing The Nozzle Check Pattern
Printing the Nozzle Check Pattern Print the nozzle check pattern to determine whether the ink ejects properly from the Print Head. Make sure that the machine is turned on, open the Front Feeder, and extend the Output Paper Support. Load a sheet of A4 or Letter-sized plain paper in the Auto Sheet Feeder or the Front Feeder.
-
Page 46: Examining The Nozzle Check Pattern
Examining the Nozzle Check Pattern Follow the procedure below to examine the nozzle check pattern, and perform cleaning if necessary. Note If the ink level is low, the nozzle check pattern is not printed correctly. Replace the relevant ink tank. See “Replacing an Ink Tank”…
- Page 47
If Lines Are Missing or White Streaks Are Present (1) Select Also B and press the OK button. The cleaning confirmation screen is displayed. (2) Select Yes and press the OK button to start Print Head Cleaning. See “Print Head Cleaning” on page 44. Routine Maintenance… -
Page 48: Print Head Cleaning
Print Head Cleaning Clean the Print Head if lines are missing or if white streaks appear in the printed nozzle check pattern. Cleaning unclogs the nozzles and restores the print head condition. Note that cleaning the Print Head causes used ink to be absorbed in the ink absorber. Cleaning the Print Head consumes ink, so perform Print Head Cleaning only when necessary.
- Page 49
Note If the problem is not resolved after performing steps 4 and 5 twice, try Print Head Deep Cleaning. See “Print Head Deep Cleaning” on page 46. Routine Maintenance… -
Page 50: Print Head Deep Cleaning
Print Head Deep Cleaning If print quality does not improve by standard Print Head Cleaning, try Print Head Deep Cleaning, which is a more powerful process. Note that cleaning the Print Head causes used ink to be absorbed in the ink absorber. Print Head Deep Cleaning consumes more ink than standard Print Head Cleaning, so perform this procedure only when necessary.
- Page 51
(3) If this does not solve the problem, the Print Head may be damaged. Contact your Canon service representative. Routine Maintenance… -
Page 52: Aligning The Print Head
Aligning the Print Head If ruled lines are printed misaligned or print results are otherwise unsatisfactory, adjust the print head position. Automatic Print Head Alignment Make sure that the machine is turned on, open the Front Feeder, and extend the Output Paper Support.
-
Page 53: Manual Print Head Alignment
Adjust the print head position. (1) For each row in the Print Head Alignment Sheet (A, B, C, etc.), select the pattern that has the least noticeable streaks, and fill in the corresponding circle ( or a black ink pen. (2) Load the Print Head Alignment Sheet on the Platen Glass.
- Page 54
Print the Print Head Alignment Sheet. (1) Press the Menu button. (2) Use the [ or ] button to select Maintenance/settings, then press the OK button. The Maintenance/settings screen is displayed. (3) Use the [ or ] button to select Maintenance, then press the OK button. The Maintenance screen is displayed. - Page 55
Note If it is difficult to pick the best pattern, pick the setting that produces the least noticeable vertical white streaks. (A) Less noticeable white streaks (B) More noticeable white streaks (4) Check the printed patterns and use the [ or ] button to input the number of the pattern in column L that has the least noticeable horizontal streaks. -
Page 56: Cleaning Your Machine
Cleaning Your Machine This section describes the cleaning procedure that is needed to maintain your machine. Caution Be sure to turn off the power and disconnect the power cord before cleaning the machine. Do not use tissue paper, paper towels, or similar materials for cleaning. Paper tissue powders or fine threads may remain inside the machine and cause problems such as a blocked Print Head and poor printing results.
- Page 57
Repeat step 3 three times. The paper cleans the Paper Feed Rollers as it feeds through the machine. If there are no signs of improvement after performing cleaning three times, contact a Canon service representative. Cleaning the Paper Feed Roller of the Front Feeder Turn off the machine. -
Page 58: Cleaning The Inside Of The Machine (Bottom Plate Cleaning)
Hold the Rear Cover Lever and then press to the right and pull to remove the Rear Cover. Manually rotate the paper feed roller toward you and apply a cotton swab or the like to wipe off dust or stain. (A) Do not touch these.
-
Page 59: Cleaning The Protrusions Inside The Machine
Load this and only this sheet of paper in the Auto Sheet Feeder with the open side to the front. Set the Paper Thickness Lever to the left. Perform bottom plate cleaning. (1) Press the Menu button. (2) Use the [ or ] button to select Maintenance/settings, then press the OK button. The Maintenance/settings screen is displayed.
-
Page 60: Troubleshooting
Troubleshooting This section describes troubleshooting tips for problems you may encounter when using the machine. Note If you cannot find appropriate tips for your problem, refer to the on-screen manuals. “Error Message Is Displayed on the LCD” on page 57 “LCD Cannot Be Seen At All or Is Hard to See”…
-
Page 61: Error Message Is Displayed On The Lcd
5 seconds, and then release it. * With this operation, releasing the function for detecting the remaining ink level is memorized. Please be advised that Canon shall not be liable for any malfunction or trouble which may be caused by continuation of printing under the ink out condition.
- Page 62
5 seconds, and then release it. * With this operation, releasing the function for detecting the remaining ink level is memorized. Please be advised that Canon shall not be liable for any machine malfunction or damage caused by refilled ink tanks. -
Page 63: Lcd Cannot Be Seen At All Or Is Hard To See
LCD Cannot Be Seen At All or Is Hard to See Cause The display on the LCD is hard to see. Cannot see the display on the LCD. An Unintended Language Is Displayed on the LCD Cause The language you want to be displayed is not selected.
-
Page 64: Cannot Install The Mp Drivers
Double-click the CD-ROM icon on your desktop to start installation. If the CD-ROM icon is not displayed on the desktop, there may be a problem with the CD-ROM. Contact a Canon service representative. Follow the procedure described in the Easy Setup Instructions for proper installation.
-
Page 65: Cannot Connect To Computer Properly
If the CD-ROM icon is not displayed, restart your computer. If the icon is still not displayed, try different disks and see if they are displayed. If other disks are displayed, there is a problem with the Setup CD-ROM. Contact a Canon service representative.
-
Page 66: Print Results Not Satisfactory
Print Results Not Satisfactory Cannot Print to End of Job Cause Size of the print data is extremely large (Windows XP/Windows 2000 only). Part of the Page Is Not Printed Cause Page Size setting in the Operation Panel does not match the actual size of the paper loaded in the machine.
-
Page 67: Ink Does Not Come Out/Printing Does Not Start/Printing Is Blurred/Colors Are Wrong/Straight Lines Are Misaligned
If the problem is still not resolved after performing Print Head Deep Cleaning twice The Print Head may be damaged. Contact your Canon service representative. For details on how to print the nozzle check pattern, how to clean the Print Head, and how to perform Print Head Deep Cleaning, see “When Printing…
-
Page 68: White Streaks
Action When printing data with high color saturation such as photographs or images in deep color, we recommend using Photo Paper Pro or other Canon specialty paper. See “Media Types You Cannot Use” on page 7. Check that the Media Type set in the Operation Panel (when performing wireless printing, the Media Type setting in Wireless print settings) matches the type of the loaded printing paper.
- Page 69
Cause Printing on inappropriate type of paper. Paper is curled. Inappropriate Paper Thickness Lever setting. Media Type setting in the Operation Panel does not match the actual type of paper. Printing graphics with Intensity setting set too high. Printing beyond the recommended printing area. -
Page 70: Colors Are Uneven Or Streaked
Colors Are Uneven or Streaked Cause Print quality is not set appropriately. Printing Problems When Copying Cause The original document is not loaded correctly. The print quality setting is not suitable for the original. The original document is not loaded with the side to be copied faced down.
-
Page 71: Printing Does Not Start
Printing Does Not Start Cause The machine is not powered on./The power cord is not connected. Ink tank is empty. Ink tank not installed in proper position. Open the Scanning Unit (Printer Cover) and check the ink lamps. Ink tank is not installed securely. / Part of the orange tape is remaining.
-
Page 72: Paper Does Not Feed Properly
Cause Unnecessary print jobs are left in queue. / Computer problems. Paper Does Not Feed Properly Cause Printing on inappropriate type of paper. Paper Feed Rollers are dirty. Paper not loaded properly. Troubleshooting Action Restarting your computer may solve the problem. If there are any unnecessary print jobs, follow the procedure below to delete them.
- Page 73
Cause Paper source selection is inappropriate. Too much plain paper loaded. Foreign object in the Auto Sheet Feeder or Front Feeder. Envelopes not prepared or loaded properly. Rear Cover is not attached properly. Action You cannot load paper other than A4, Letter, or B5-sized plain paper in the Front Feeder. -
Page 74: Paper Jams
If you cannot remove the paper or the paper tears inside the machine, or if the paper jam error continues after removing the paper, contact your Canon service representative. Do not load credit card-sized paper in the landscape orientation.
- Page 75
68 to confirm that you are using the correct paper and are loading it in the machine correctly. If you cannot remove the paper or the paper tears inside the machine, or if the paper jam error continues after removing the paper, contact your Canon service representative. Troubleshooting… -
Page 76: Error Message Appears On The Screen
(3)Open the File menu and select Properties. (4)Click the Ports tab to confirm the port settings. Make sure that a port named USBnnn (Canon MP510 Printer) (where n is a number) is selected for Print to the following port(s). In Windows Me or Windows 98, click the Details tab and make sure that MPUSBPRNnn (Canon MP510 Printer) is selected for Print to the following port.
-
Page 77: Error No.: 300 Is Displayed
However, because printing is disabled once the ink absorber becomes completely full and until the ink absorber is replaced, you are recommended to contact a Canon service representative as early as possible. (You will need to replace a particular part of the machine.)
-
Page 78: Cannot Print Properly From A Digital Camera
If you are using a non-Canon PictBridge compatible camera and not sure how to dismiss the printer error message from the camera, check the error message displayed on the LCD and dismiss the error message. For details on dismissing an error message from the machine, see “Error Message Is Displayed on the LCD”…
- Page 79
5 seconds, and then release it. * With this operation, releasing the function for detecting the remaining ink level is memorized. Please be advised that Canon shall not be liable for any machine malfunction or damage caused by refilled ink tanks. -
Page 80: Cannot Print Properly From A Photo Index Sheet
Cannot Print Properly from a Photo Index Sheet Cause “Failed to scan Photo Index Sheet.” is displayed. Troubleshooting Action Make sure the Photo Index Sheet is set in the correct position and orientation on the Platen Glass. Make sure the Platen Glass and the Photo Index Sheet are not dirty. Make sure all required circles on the Photo Index Sheet are filled in.
-
Page 81: Appendix
You can view the on-screen manuals in the following way: To view the on-screen manual, double-click the MP510 On-screen Manual shortcut icon on the desktop, or click Start > All Programs (or Programs) > Canon MP510 Manual > MP510 On- screen Manual.
-
Page 82: Specifications
Specifications Printing resolution (dpi) Print speed * * Based on Canon standard pattern. Print speed may vary depending on system configuration, software, document complexity, print mode and page coverage. Print width Acoustic noise level Operating environment Storage environment Power supply…
- Page 83
Glossy Photo Paper, Glossy Photo Paper “Everyday Use”, Plain Paper) Credit card / 5.4 x 8.6 cm (Glossy Photo Paper Card Size) *1 Canon-brand sticker. Printing on this paper is available only when the Layout function on your camera has a 16-up option. See “Recommended Paper and Requirements”… - Page 84
Interface Operating System USB 2.0 Hi-Speed Windows XP SP1, SP2 Windows 2000 Professional SP4 Windows XP SP1, SP2 Windows 2000 Professional SP2, SP3, Windows Millennium Edition Windows 98 Interface Operating System USB 2.0 Hi-Speed Mac OS X v.10.4 Mac OS X v.10.2.8 — v.10.3 *1 Conform to the operating system’s requirement when it is higher than this. -
Page 85: Menu Items
Menu Items When you press the Menu button, the Settings button, or the Photo Index Sheet button, the Menu will be displayed on the LCD. Use the menu items to specify various settings of the machines’s functions and to perform machine maintenance.
- Page 86
Memory Card Mode Menu button Single-photo print Multi-photo print Special photo print Layout print Sticker print Print all photos Photo Index print DPOF print Maintenance/settings Settings button Page size Media type Print quality Bordered/Borderless Date/file no. Vivid photo Photo optimizer pro Noise reduction Face brightener Image optimizer… -
Page 87: Safety Precautions
Safety Precautions Please read the safety warnings and cautions provided in this manual to ensure that you use the machine safely. Do not attempt to use the machine in any way not described in this manual. Warning You may cause an electric shock, fire, or damage the machine if you ignore any of these safety precautions.
- Page 88
Maintaining the Do not attempt to disassemble or modify the machine. There are no user serviceable parts inside machine the machine. The machine contains high-voltage components. Never attempt any maintenance procedure not described in this guide. Working around the Do not use highly flammable sprays near the machine. machine This could cause a fire or electric shock if the spray comes into contact with electrical components inside the machine. - Page 89
Working around the Never put your hands or fingers in the machine while it is printing. machine Do not place any object on the machine. Do not place metal objects (paper clips, staples, etc.) or containers of flammable solvents (alcohol, thinners, etc.) on top of the machine. -
Page 90: Legal Limitations On Use Of Your Product And Use Of Images
Legal Limitations on Use of Your Product and Use of Images It may be unlawful to make copies of, scan, print, or use reproductions of the following documents. The list provided is non-exhaustive. When in doubt, check with a legal representative in your jurisdiction.
-
Page 91: Users In The U.s.a
1-516-328-5600 Canon U.S.A., INC. LIMITED WARRANTY — (USA Only) The limited warranty set forth below is given by Canon U.S.A., Inc. («Canon USA») with respect to the new or refurbished Canon-brand product («Product») packaged with this limited warranty, when purchased and used in the United States only.
- Page 92
Separate Warranty. Non-Canon brand equipment and software that may be distributed with the Product are sold «as is» and without warranty of any kind by Canon USA, including any implied warranty regarding merchantability or fitness for a particular purpose, and all such warranties are disclaimed. - Page 93
Toll-free live technical support Monday-Saturday (excluding holidays) at 1-800-828-4040 Telephone Device for the Deaf (TDD-1-866-251-3752) Repair or Exchange Service Options: In the event service is required for the Product during the limited warranty period, Canon USA offers two hardware support options: Authorized Service Facility Carry-In / Mail-In Service Canon USA’s Carry-In/Mail-In Service provides repair or exchange, at Canon USA’s option, through Canon USA’s Authorized Service Facility (ASF) network. - Page 94
** InstantExchange warranty service is subject to the availability of refurbished or new replacement units. Canon U.S.A., Inc. One Canon Plaza Lake Success, NY 11042 ©2006 Canon U.S.A., Inc. Canon is a registered trademark of Canon Inc. in the United States and may also be a registered trademark in other countries. Safety Precautions… -
Page 95: Index
Specifications copy 79 general 78 PictBridge 79 scan 79 System Requirements 80 Troubleshooting 56 paper jams 70 Turning off the Machine 3 Turning on the Machine 2 Users in the U.S.A. Canon U.S.A., Inc. Limited Warranty — U.S. Only Index…
- Page 96
This product uses the following copyrighted software: exit.c Copyright © 1990 The Regents of the University of California. All rights reserved. Redistribution and use in source and binary forms are permitted provided that the above copyright notice and this paragraph are duplicated in all such forms and that any documentation, advertising materials, and other materials related to such distribution and use acknowledge that the software was developed by the University of California, Berkeley. -
Page 97: Ink Tanks
© 2006 Canon U.S.A., Inc. Canon is a registered trademark of Canon Inc. in the United States and may be a registered trademark or trademarks in other countries. All other product and brand names are trademarks of their respective owners. As an ENERGY STAR Canon U.S.A., Inc.
- Page 98
The following ink tanks are compatible with this product. QT5-0454-V02 XXXXXXXX ©CANON INC.2006 PRINTED IN VIETNAM…
На этой странице вы можете совершенно бесплатно скачать Руководство пользователя Canon PIXMA MP510.
У документа PDF Руководство пользователя 2 страниц, а его размер составляет 4.2 Mb.
Читать онлайн Принтеры и МФУ Canon PIXMA MP510 Руководство пользователя

Скачать файл PDF «Canon PIXMA MP510 Руководство пользователя» (4.2 Mb)
Популярность:
1668 просмотры
Подсчет страниц:
2 страницы
Тип файла:
Размер файла:
4.2 Mb
Прочие инструкции Canon PIXMA MP510


Прочие инструкции Canon Принтеры и МФУ


Прочие инструкции Canon


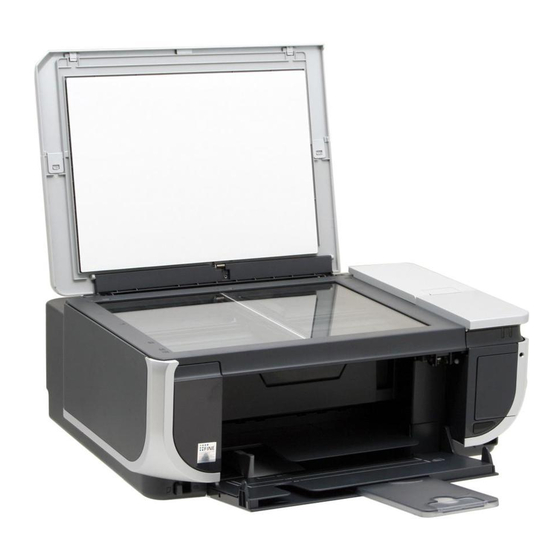
-
Contents
-
Table of Contents
-
Troubleshooting
-
Bookmarks
Quick Links
Photo All-in-One
Quick Start Guide
Related Manuals for Canon PIXMA MP510
Summary of Contents for Canon PIXMA MP510
-
Page 1: Quick Start Guide
Photo All-in-One Quick Start Guide…
-
Page 2
Telephone Device for the Deaf (TDD) support is available at (1-866-251-3752). 4. Extended Service and Support Canon CarePAK Extended Service Plan is a cost-attractive and easy-to-use extended service program that provides up to three full years of service and support coverage at a very attractive price. -
Page 3
Photo All-in-One Quick Start Guide… -
Page 4
Canon PIXMA MP510 Photo All-in-One Quick Start Guide. Copyright This manual is copyrighted by Canon U.S.A., Inc. with all rights reserved. Under the copyright laws, this manual may not be reproduced in any form, in whole or in part, without the prior written consent of Canon U.S.A., Inc. -
Page 5: Table Of Contents
Table of Contents Before Printing…2 Turning the Machine On and Off …2 Handling the Original Document…4 Loading Printing Paper …6 Changing the Print Settings …17 Printing from Your Computer…22 Printing with Windows…22 Printing with Macintosh…23 Scanning Images …24 Scanning Methods …24 Copying …25 Making Copies …25 Using Other Copy Functions…25…
-
Page 6: Before Printing
Before Printing Turning the Machine On and Off Turn on the machine before printing. Turning on the Machine Before turning on the machine, confirm the following. The Print Head and ink tanks are set into place. If you are using the machine connected to a computer, confirm also the following. The machine is connected to your computer (or a compatible device).
-
Page 7: Turning Off The Machine
Turning off the Machine To turn off the machine, press the ON/OFF button. When the POWER lamp stops flashing, the machine is turned off. Important About the Power Plug When removing the power plug after turing off the machine, be sure to confirm that the POWER lamp is not lit.
-
Page 8: Handling The Original Document
Handling the Original Document This section describes how to load the original document on the Platen Glass. Original Document Requirements The original documents you load on the Platen Glass for copying or scanning must meet these requirements: Document Paper documents type Photographs Books…
-
Page 9
Important Do not place any objects weighing more than 4.4 lb / 2 kg on the Platen Glass. Do not press or put weight on the original with pressure exceeding 4.4 lb / 2 kg. Doing so may cause the scanner to malfunction or the Platen Glass to break. -
Page 10: Loading Printing Paper
Loading Printing Paper This section describes how to load printing paper in the Auto Sheet Feeder and the Front Feeder. Paper Handling Recommended Paper and Requirements Media Type Paper Support Load Limit Model Auto Sheet Feeder Plain Paper — 0.52 inches / 13 mm Envelopes —…
-
Page 11: Media Types You Cannot Use
Folded, curled, or wrinkled paper Damp paper Paper that is too thin (weighing less than 64 gsm / 17 lb) Paper that is too thick (non-Canon genuine paper weighing more than 105 gsm / 28 lb) Picture postcards Front Feeder…
-
Page 12: Using Specialty Media
Note that some types of clear plastic folders and albums may cause the edges of the paper to turn yellow. Using Specialty Media Canon recommends that you use Canon genuine media to ensure optimal print quality. Photo Quality Media Glossy Photo Paper…
-
Page 13
Using the Auto Sheet Feeder and the Front Feeder This machine offers two paper sources to load printing paper; the Auto Sheet Feeder, found at the top of the machine, and the Front Feeder, found at the front of the machine. Note You cannot load paper other than A4, Letter, or B5-sized plain paper in the Front Feeder. -
Page 14
To Change the Paper Source The Auto Sheet Feeder lamp lights up when feeding from the Auto Sheet Feeder, and the Front Feeder lamp lights up when feeding from the Front Feeder. Before you print, make sure that the paper source selection matches the paper source where you actually loaded paper. -
Page 15: Changing The Paper Source
Changing the Paper Source Before printing, confirm that the location where you have loaded paper is selected as the paper source. Press the Paper Feed Switch to change the paper source. Important When Printing from Your Computer If Paper Feed Switch is not selected for Paper Source in the printer driver, the Paper Feed Switch on the machine will be disabled when printing.
-
Page 16: Loading Paper
Note For details on the specialty media Canon provides for use with its various printers, refer to “Printing Media” in the User’s Guide on-screen manual. For detailed instructions on how to load specialty media into the machine, refer to “Printing Media”…
-
Page 17: Loading Paper In The Auto Sheet Feeder
Loading Paper in the Auto Sheet Feeder Flatten the four corners of the paper before loading it. Note Align the edges of paper neatly before loading. Loading paper without aligning the edges may cause paper jams. If paper is curled, hold the opposing curled corners and gently bend them in the opposite direction until the paper becomes completely flat.
-
Page 18
23. Loading Paper in the Front Feeder You can load A4, Letter, or B5-sized plain paper (such as Canon Super White Paper SW-201) in the Front Feeder. You cannot load any other paper in the Front Feeder. Flatten the four corners of the paper before loading it. -
Page 19
Load the paper with the print side facing DOWN. (1) Load the paper in the Front Feeder with the print side facing DOWN and the leading edge to the far side. (2) Align the paper stack against the right edge of the Front Feeder. -
Page 20: Loading Envelopes
Loading Envelopes Envelopes must be fed from the Auto Sheet Feeder. Use either European DL or US Comm. Env. #10-sized envelope. Important You need to print from the computer to print on envelopes. Do not use envelopes with embossed or treated surfaces, a double flap, pressure seals, or sticker flaps.
-
Page 21: Changing The Print Settings
Changing the Print Settings This section describes the Settings screen that can be specified on the Operation Panel when copying or when printing from a memory card. To Change the Print Settings You can change the print settings such as page size, media type, bordered or borderless print, etc.
-
Page 22: Copy Mode
Change the setting. (1) Use the [ or ] button to change the setting. Example: Change to 4″ x 6″ (101 x 152) here. Complete setting. (1) Press the Settings button. The LCD returns to the Settings screen. Print Setting Items Each tab contains the following setting items.
-
Page 23: Memory Card Mode
(3) Adjust image quality according to the original. Fast, Standard, High Note Fast can be selected when Plain paper is selected as the media type. If you used Fast with media type set to Plain paper and the quality is not as good as expected, select Standard or High and try copying again.
-
Page 24
(1) Select the page size. 8.5″ x 11″ (215 x 279), A4, 4″ x 6″ (101 x 152), 5″ x 7″ (127 x 177), Credit card Important You cannot load paper other than A4, Letter, or B5-sized plain paper in the Front Feeder. When specifying a page size other than A4 or 8.5″… -
Page 25
(4) Activate/deactivate Face brightener function. Brightens a darkened face on the photo taken against the light. Face brightener ON, Face brightener OFF (5) Activate/deactivate Image optimizer function. Corrects and smooths the jagged contours for printing. Image optimizer ON, Image optimizer OFF (6) Adjust brightness. -
Page 26: Printing From Your Computer
Create a document or open a file to print using an appropriate application software. Select Print on the application software’s File menu. Make sure that Canon MP510 Printer is selected, and click Preferences (or Properties). Specify the required settings and click OK.
-
Page 27: Printing With Macintosh
Printing with Macintosh Turn on the machine and load the paper in the machine. See “Turning the Machine On and Off” on page 2 and “Loading Printing Paper” on page 6. Make sure that the proper paper source is selected. See “Changing the Paper Source”…
-
Page 28: Scanning Images
Scanning Images You can scan images from the machine to a computer without printing them and save them in popular file formats, such as JPEG, TIFF, bitmaps, or PDF. If you are scanning printed text, you can use the OCR (Optical Character Recognition) software to convert it to text data. Scanning Methods Scanning Using the MP Navigator Using MP Navigator, you can scan originals loaded on the Platen Glass and view images saved…
-
Page 29: Copying
Reduced/Enlarged Copy Reduces or enlarges copies. Sticker Copy Makes stickers from 4″ x 6″ / 101.6 x 152.4 mm photos or graphics using Canon sticker paper. Borderless Copy Copies color images so that they fill the entire page without borders.
-
Page 30: Printing From A Memory Card
Printing from a Memory Card Memory Cards Supported by This Machine The following memory cards are compatible with this machine. Memory cards that can be directly inserted into the Card Slot: Memory cards that can be inserted in the Card Slot using the adapter: *1 Requires purchase of a separate compact flash card adapter for xD-Picture cards.
-
Page 31: Inserting The Memory Card
Inserting the Memory Card Turn on the machine. See “Turning the Machine On and Off” on page 2. Open the Card Slot Cover. Insert one and only one memory card into the Card Slot. Card Type Compact Flash (CF) card Microdrive xD-Picture card* SmartMedia…
-
Page 32: Removing The Memory Card
Prints specifying the number of copies to print for each photo. Layout Print Prints photos your pasted in the specified layout. Sticker Print Prints your favorite photo with a frame on Canon Photo Stickers. Print all photos Prints all photos saved on the memory card. Printing from a Memory Card…
-
Page 33: Printing Using The Photo Index Sheet
Photo index print Prints an index of all the photos saved on a memory card. DPOF print Prints according to the Digital Print Order Format (DPOF) settings on your digital camera, if you have specified them. Printing Using the Photo Index Sheet Turn on the machine, and load A4 or Letter-sized paper.
-
Page 34: Printing Photographs Directly From A Compliant Device
Printing Photographs Directly from a Compliant Device Printing from a PictBridge Compliant Device You can connect a PictBridge compliant device such as a digital camera, camcorder, or mobile phone and print recorded images directly without using a computer. Note PictBridge is an industry standard enabling a range of digital photo solutions, including the direct printing of photos from a digital still camera, camcorder or mobile phone* without the need to use a computer.
-
Page 35: Printing Photographs Directly From A Pictbridge Compliant Device
Default setting explained below is applied for the setting item. * In the following description, names of settings items are given according to those used in Canon-brand PictBridge compliant devices. Setting item names may be different depending on the brand or model of your device.
-
Page 36
For details on this setting, refer to the User’s Guide on-screen manual. If you are using a Canon-brand PictBridge compatible device, additional options of VIVID, NR, VIVID+NR, or Face may be available, depending on the model. -
Page 37
Date/File No. Print Setting You cannot change this setting on this machine. The setting on the PictBridge compliant device is applied. If the images already have dates superimposed when shot, set this PictBridge setting item to Off. If you select Date, File No., or Both, the date and/or file number will be printed over the date printed by the camera’s function. -
Page 38: Routine Maintenance
Routine Maintenance Replacing an Ink Tank When ink runs out, replace the ink tank. The machine will not print if the wrong type of ink tank is used, or if it is installed in the incorrect position. The machine uses the following ink tanks. Black: PGI-5BK Cyan: CLI-8C Note…
-
Page 39: Knowing When To Replace Ink Tank
* With this operation, releasing the function for detecting the remaining ink level is memorized. Please be advised that Canon shall not be liable for any malfunction or trouble which may be caused by continuation of printing under the ink out condition.
-
Page 40: Replacing Ink Tanks
Important Handling Ink To maintain optimal printing quality, we recommend the use of specified Canon brand ink tanks. Refilling ink is not recommended. Once you remove an ink tank, replace it immediately. Do not leave the machine with ink tanks removed.
-
Page 41
Prepare the replacement tank. (1) Remove the new ink tank from its packaging, then pull the orange tape in the direction of the arrow (A) so that the protective film does not remain on the air hole (B). Then remove the film completely (C). -
Page 42
Install the ink tank. (1) Insert the front end of the ink tank into the Print Head. (2) Press on the the ink tank snaps firmly into place. (3) Make sure that the ink tank lamp lights up red. Important The machine cannot be used unless all the ink tanks are installed. -
Page 43: Keeping The Best Printing Results
Keeping the Best Printing Results To avoid drying of the Print Head and clogging of the nozzles, note the following. When You Turn Off the Machine Follow the procedure below to turn off the machine. (1) Press the ON/OFF button to turn off the machine. (2) Confirm that the POWER lamp has gone out.
-
Page 44: When Printing Becomes Faint Or Colors Are Incorrect
See “Print Head Deep Cleaning” on page 46. Note If Print Head Deep Cleaning does not resolve the problem, the Print Head may be damaged. Contact your Canon service representative. If the Ruled Lines Are Shifted Step 1 Routine Maintenance See “Aligning the Print Head”…
-
Page 45: Printing The Nozzle Check Pattern
Printing the Nozzle Check Pattern Print the nozzle check pattern to determine whether the ink ejects properly from the Print Head. Make sure that the machine is turned on, open the Front Feeder, and extend the Output Paper Support. Load a sheet of A4 or Letter-sized plain paper in the Auto Sheet Feeder or the Front Feeder.
-
Page 46: Examining The Nozzle Check Pattern
Examining the Nozzle Check Pattern Follow the procedure below to examine the nozzle check pattern, and perform cleaning if necessary. Note If the ink level is low, the nozzle check pattern is not printed correctly. Replace the relevant ink tank. See “Replacing an Ink Tank”…
-
Page 47
If Lines Are Missing or White Streaks Are Present (1) Select Also B and press the OK button. The cleaning confirmation screen is displayed. (2) Select Yes and press the OK button to start Print Head Cleaning. See “Print Head Cleaning” on page 44. Routine Maintenance… -
Page 48: Print Head Cleaning
Print Head Cleaning Clean the Print Head if lines are missing or if white streaks appear in the printed nozzle check pattern. Cleaning unclogs the nozzles and restores the print head condition. Note that cleaning the Print Head causes used ink to be absorbed in the ink absorber. Cleaning the Print Head consumes ink, so perform Print Head Cleaning only when necessary.
-
Page 49
Note If the problem is not resolved after performing steps 4 and 5 twice, try Print Head Deep Cleaning. See “Print Head Deep Cleaning” on page 46. Routine Maintenance… -
Page 50: Print Head Deep Cleaning
Print Head Deep Cleaning If print quality does not improve by standard Print Head Cleaning, try Print Head Deep Cleaning, which is a more powerful process. Note that cleaning the Print Head causes used ink to be absorbed in the ink absorber. Print Head Deep Cleaning consumes more ink than standard Print Head Cleaning, so perform this procedure only when necessary.
-
Page 51
(3) If this does not solve the problem, the Print Head may be damaged. Contact your Canon service representative. Routine Maintenance… -
Page 52: Aligning The Print Head
Aligning the Print Head If ruled lines are printed misaligned or print results are otherwise unsatisfactory, adjust the print head position. Automatic Print Head Alignment Make sure that the machine is turned on, open the Front Feeder, and extend the Output Paper Support.
-
Page 53: Manual Print Head Alignment
Adjust the print head position. (1) For each row in the Print Head Alignment Sheet (A, B, C, etc.), select the pattern that has the least noticeable streaks, and fill in the corresponding circle ( or a black ink pen. (2) Load the Print Head Alignment Sheet on the Platen Glass.
-
Page 54
Print the Print Head Alignment Sheet. (1) Press the Menu button. (2) Use the [ or ] button to select Maintenance/settings, then press the OK button. The Maintenance/settings screen is displayed. (3) Use the [ or ] button to select Maintenance, then press the OK button. The Maintenance screen is displayed. -
Page 55
Note If it is difficult to pick the best pattern, pick the setting that produces the least noticeable vertical white streaks. (A) Less noticeable white streaks (B) More noticeable white streaks (4) Check the printed patterns and use the [ or ] button to input the number of the pattern in column L that has the least noticeable horizontal streaks. -
Page 56: Cleaning Your Machine
Cleaning Your Machine This section describes the cleaning procedure that is needed to maintain your machine. Caution Be sure to turn off the power and disconnect the power cord before cleaning the machine. Do not use tissue paper, paper towels, or similar materials for cleaning. Paper tissue powders or fine threads may remain inside the machine and cause problems such as a blocked Print Head and poor printing results.
-
Page 57
Repeat step 3 three times. The paper cleans the Paper Feed Rollers as it feeds through the machine. If there are no signs of improvement after performing cleaning three times, contact a Canon service representative. Cleaning the Paper Feed Roller of the Front Feeder Turn off the machine. -
Page 58: Cleaning The Inside Of The Machine (Bottom Plate Cleaning)
Hold the Rear Cover Lever and then press to the right and pull to remove the Rear Cover. Manually rotate the paper feed roller toward you and apply a cotton swab or the like to wipe off dust or stain. (A) Do not touch these.
-
Page 59: Cleaning The Protrusions Inside The Machine
Load this and only this sheet of paper in the Auto Sheet Feeder with the open side to the front. Set the Paper Thickness Lever to the left. Perform bottom plate cleaning. (1) Press the Menu button. (2) Use the [ or ] button to select Maintenance/settings, then press the OK button. The Maintenance/settings screen is displayed.
-
Page 60: Troubleshooting
Troubleshooting This section describes troubleshooting tips for problems you may encounter when using the machine. Note If you cannot find appropriate tips for your problem, refer to the on-screen manuals. “Error Message Is Displayed on the LCD” on page 57 “LCD Cannot Be Seen At All or Is Hard to See”…
-
Page 61: Error Message Is Displayed On The Lcd
5 seconds, and then release it. * With this operation, releasing the function for detecting the remaining ink level is memorized. Please be advised that Canon shall not be liable for any malfunction or trouble which may be caused by continuation of printing under the ink out condition.
-
Page 62
5 seconds, and then release it. * With this operation, releasing the function for detecting the remaining ink level is memorized. Please be advised that Canon shall not be liable for any machine malfunction or damage caused by refilled ink tanks. -
Page 63: Lcd Cannot Be Seen At All Or Is Hard To See
LCD Cannot Be Seen At All or Is Hard to See Cause The display on the LCD is hard to see. Cannot see the display on the LCD. An Unintended Language Is Displayed on the LCD Cause The language you want to be displayed is not selected.
-
Page 64: Cannot Install The Mp Drivers
Double-click the CD-ROM icon on your desktop to start installation. If the CD-ROM icon is not displayed on the desktop, there may be a problem with the CD-ROM. Contact a Canon service representative. Follow the procedure described in the Easy Setup Instructions for proper installation.
-
Page 65: Cannot Connect To Computer Properly
If the CD-ROM icon is not displayed, restart your computer. If the icon is still not displayed, try different disks and see if they are displayed. If other disks are displayed, there is a problem with the Setup CD-ROM. Contact a Canon service representative.
-
Page 66: Print Results Not Satisfactory
Print Results Not Satisfactory Cannot Print to End of Job Cause Size of the print data is extremely large (Windows XP/Windows 2000 only). Part of the Page Is Not Printed Cause Page Size setting in the Operation Panel does not match the actual size of the paper loaded in the machine.
-
Page 67: Ink Does Not Come Out/Printing Does Not Start/Printing Is Blurred/Colors Are Wrong/Straight Lines Are Misaligned
If the problem is still not resolved after performing Print Head Deep Cleaning twice The Print Head may be damaged. Contact your Canon service representative. For details on how to print the nozzle check pattern, how to clean the Print Head, and how to perform Print Head Deep Cleaning, see “When Printing…
-
Page 68: White Streaks
Action When printing data with high color saturation such as photographs or images in deep color, we recommend using Photo Paper Pro or other Canon specialty paper. See “Media Types You Cannot Use” on page 7. Check that the Media Type set in the Operation Panel (when performing wireless printing, the Media Type setting in Wireless print settings) matches the type of the loaded printing paper.
-
Page 69
Cause Printing on inappropriate type of paper. Paper is curled. Inappropriate Paper Thickness Lever setting. Media Type setting in the Operation Panel does not match the actual type of paper. Printing graphics with Intensity setting set too high. Printing beyond the recommended printing area. -
Page 70: Colors Are Uneven Or Streaked
Colors Are Uneven or Streaked Cause Print quality is not set appropriately. Printing Problems When Copying Cause The original document is not loaded correctly. The print quality setting is not suitable for the original. The original document is not loaded with the side to be copied faced down.
-
Page 71: Printing Does Not Start
Printing Does Not Start Cause The machine is not powered on./The power cord is not connected. Ink tank is empty. Ink tank not installed in proper position. Open the Scanning Unit (Printer Cover) and check the ink lamps. Ink tank is not installed securely. / Part of the orange tape is remaining.
-
Page 72: Paper Does Not Feed Properly
Cause Unnecessary print jobs are left in queue. / Computer problems. Paper Does Not Feed Properly Cause Printing on inappropriate type of paper. Paper Feed Rollers are dirty. Paper not loaded properly. Troubleshooting Action Restarting your computer may solve the problem. If there are any unnecessary print jobs, follow the procedure below to delete them.
-
Page 73
Cause Paper source selection is inappropriate. Too much plain paper loaded. Foreign object in the Auto Sheet Feeder or Front Feeder. Envelopes not prepared or loaded properly. Rear Cover is not attached properly. Action You cannot load paper other than A4, Letter, or B5-sized plain paper in the Front Feeder. -
Page 74: Paper Jams
If you cannot remove the paper or the paper tears inside the machine, or if the paper jam error continues after removing the paper, contact your Canon service representative. Do not load credit card-sized paper in the landscape orientation.
-
Page 75
68 to confirm that you are using the correct paper and are loading it in the machine correctly. If you cannot remove the paper or the paper tears inside the machine, or if the paper jam error continues after removing the paper, contact your Canon service representative. Troubleshooting… -
Page 76: Error Message Appears On The Screen
(3)Open the File menu and select Properties. (4)Click the Ports tab to confirm the port settings. Make sure that a port named USBnnn (Canon MP510 Printer) (where n is a number) is selected for Print to the following port(s). In Windows Me or Windows 98, click the Details tab and make sure that MPUSBPRNnn (Canon MP510 Printer) is selected for Print to the following port.
-
Page 77: Error No.: 300 Is Displayed
However, because printing is disabled once the ink absorber becomes completely full and until the ink absorber is replaced, you are recommended to contact a Canon service representative as early as possible. (You will need to replace a particular part of the machine.)
-
Page 78: Cannot Print Properly From A Digital Camera
If you are using a non-Canon PictBridge compatible camera and not sure how to dismiss the printer error message from the camera, check the error message displayed on the LCD and dismiss the error message. For details on dismissing an error message from the machine, see “Error Message Is Displayed on the LCD”…
-
Page 79
5 seconds, and then release it. * With this operation, releasing the function for detecting the remaining ink level is memorized. Please be advised that Canon shall not be liable for any machine malfunction or damage caused by refilled ink tanks. -
Page 80: Cannot Print Properly From A Photo Index Sheet
Cannot Print Properly from a Photo Index Sheet Cause “Failed to scan Photo Index Sheet.” is displayed. Troubleshooting Action Make sure the Photo Index Sheet is set in the correct position and orientation on the Platen Glass. Make sure the Platen Glass and the Photo Index Sheet are not dirty. Make sure all required circles on the Photo Index Sheet are filled in.
-
Page 81: Appendix
You can view the on-screen manuals in the following way: To view the on-screen manual, double-click the MP510 On-screen Manual shortcut icon on the desktop, or click Start > All Programs (or Programs) > Canon MP510 Manual > MP510 On- screen Manual.
-
Page 82: Specifications
Specifications Printing resolution (dpi) Print speed * * Based on Canon standard pattern. Print speed may vary depending on system configuration, software, document complexity, print mode and page coverage. Print width Acoustic noise level Operating environment Storage environment Power supply…
-
Page 83
Glossy Photo Paper, Glossy Photo Paper “Everyday Use”, Plain Paper) Credit card / 5.4 x 8.6 cm (Glossy Photo Paper Card Size) *1 Canon-brand sticker. Printing on this paper is available only when the Layout function on your camera has a 16-up option. See “Recommended Paper and Requirements”… -
Page 84
Interface Operating System USB 2.0 Hi-Speed Windows XP SP1, SP2 Windows 2000 Professional SP4 Windows XP SP1, SP2 Windows 2000 Professional SP2, SP3, Windows Millennium Edition Windows 98 Interface Operating System USB 2.0 Hi-Speed Mac OS X v.10.4 Mac OS X v.10.2.8 — v.10.3 *1 Conform to the operating system’s requirement when it is higher than this. -
Page 85: Menu Items
Menu Items When you press the Menu button, the Settings button, or the Photo Index Sheet button, the Menu will be displayed on the LCD. Use the menu items to specify various settings of the machines’s functions and to perform machine maintenance.
-
Page 86
Memory Card Mode Menu button Single-photo print Multi-photo print Special photo print Layout print Sticker print Print all photos Photo Index print DPOF print Maintenance/settings Settings button Page size Media type Print quality Bordered/Borderless Date/file no. Vivid photo Photo optimizer pro Noise reduction Face brightener Image optimizer… -
Page 87: Safety Precautions
Safety Precautions Please read the safety warnings and cautions provided in this manual to ensure that you use the machine safely. Do not attempt to use the machine in any way not described in this manual. Warning You may cause an electric shock, fire, or damage the machine if you ignore any of these safety precautions.
-
Page 88
Maintaining the Do not attempt to disassemble or modify the machine. There are no user serviceable parts inside machine the machine. The machine contains high-voltage components. Never attempt any maintenance procedure not described in this guide. Working around the Do not use highly flammable sprays near the machine. machine This could cause a fire or electric shock if the spray comes into contact with electrical components inside the machine. -
Page 89
Working around the Never put your hands or fingers in the machine while it is printing. machine Do not place any object on the machine. Do not place metal objects (paper clips, staples, etc.) or containers of flammable solvents (alcohol, thinners, etc.) on top of the machine. -
Page 90: Legal Limitations On Use Of Your Product And Use Of Images
Legal Limitations on Use of Your Product and Use of Images It may be unlawful to make copies of, scan, print, or use reproductions of the following documents. The list provided is non-exhaustive. When in doubt, check with a legal representative in your jurisdiction.
-
Page 91: Users In The U.s.a
1-516-328-5600 Canon U.S.A., INC. LIMITED WARRANTY — (USA Only) The limited warranty set forth below is given by Canon U.S.A., Inc. («Canon USA») with respect to the new or refurbished Canon-brand product («Product») packaged with this limited warranty, when purchased and used in the United States only.
-
Page 92
Separate Warranty. Non-Canon brand equipment and software that may be distributed with the Product are sold «as is» and without warranty of any kind by Canon USA, including any implied warranty regarding merchantability or fitness for a particular purpose, and all such warranties are disclaimed. -
Page 93
Toll-free live technical support Monday-Saturday (excluding holidays) at 1-800-828-4040 Telephone Device for the Deaf (TDD-1-866-251-3752) Repair or Exchange Service Options: In the event service is required for the Product during the limited warranty period, Canon USA offers two hardware support options: Authorized Service Facility Carry-In / Mail-In Service Canon USA’s Carry-In/Mail-In Service provides repair or exchange, at Canon USA’s option, through Canon USA’s Authorized Service Facility (ASF) network. -
Page 94
** InstantExchange warranty service is subject to the availability of refurbished or new replacement units. Canon U.S.A., Inc. One Canon Plaza Lake Success, NY 11042 ©2006 Canon U.S.A., Inc. Canon is a registered trademark of Canon Inc. in the United States and may also be a registered trademark in other countries. Safety Precautions… -
Page 95: Index
Specifications copy 79 general 78 PictBridge 79 scan 79 System Requirements 80 Troubleshooting 56 paper jams 70 Turning off the Machine 3 Turning on the Machine 2 Users in the U.S.A. Canon U.S.A., Inc. Limited Warranty — U.S. Only Index…
-
Page 96
This product uses the following copyrighted software: exit.c Copyright © 1990 The Regents of the University of California. All rights reserved. Redistribution and use in source and binary forms are permitted provided that the above copyright notice and this paragraph are duplicated in all such forms and that any documentation, advertising materials, and other materials related to such distribution and use acknowledge that the software was developed by the University of California, Berkeley. -
Page 97: Ink Tanks
© 2006 Canon U.S.A., Inc. Canon is a registered trademark of Canon Inc. in the United States and may be a registered trademark or trademarks in other countries. All other product and brand names are trademarks of their respective owners. As an ENERGY STAR Canon U.S.A., Inc.
-
Page 98
The following ink tanks are compatible with this product. QT5-0454-V02 XXXXXXXX ©CANON INC.2006 PRINTED IN VIETNAM…