-
Contents
-
Table of Contents
-
Troubleshooting
-
Bookmarks
Quick Links
Related Manuals for Casio CTK-900
Summary of Contents for Casio CTK-900
-
Page 1
CTK900-ES-1… -
Page 2
NOTICE This equipment has been tested and found to comply with the limits for a Class B digital device, pursuant to Part 15 of the FCC Rules. These limits are designed to provide reasonable protection against harmful interference in a residential installation. -
Page 3: Safety Precautions
Symbols 1. Do not rub your eyes! Rinse them with Various symbols are used in this user’s guide and on the water. product itself to ensure that the product is used safely and 2. Contact your physician immediately.
-
Page 4
Doing so creates the risk of electric shock. damaged by dropping or subjecting it to strong G Use the AC adaptor where it will not be impact creates the risk of fire and electric shock. splashed with water. Water creates the risk of Take the following steps immediately. -
Page 5
Safety Precautions AC Adaptor Connectors G Misuse of the AC adaptor creates the risk of Connect only the specified devices and fire and electric shock. Always make sure equipment to the product’s connectors. you observe the following precautions. Connection of a non-specified device or •… -
Page 6
Make sure you mount the product on the stand correctly. * Stand is available as an option. When using batteries, be sure to replace them or shift to one of the alternate power sources whenever you notice any of the following symptoms. -
Page 7: Introduction
Auto Accompaniment function. Synthesizer Mode Edit built-in sounds to produce your own original creations. Up to 120 of your own sounds can be stored in memory for recall, just like the built-in tones.
-
Page 8: Registration Memory
MIDI input. Registration Memory Keyboard setups can be stored in memory for later recall and instant set up whenever you need them. Up to 32 setups (4 setups × 8 banks) can be stored in registration memory.
-
Page 9: Table Of Contents
To edit a drawbar organ tone ….E-20 Parameter Details …….E-21 Mixer Function….E-36 To save an edited drawbar What you can do with the Mixer ..E-36 organ tone ………..E-22 Turning Channels On and Off …. E-36 Using the Parameter Edit Mode ..E-37 How Parameters Work …….
-
Page 10
Using the SMF Player… E-71 Synthesizer Mode Functions….E-40 Playing Back an SMF ……E-73 Creating a User Tone……E-43 Configuring Other Settings ….E-73 Storing a User Tone In Memory ..E-45 MIDI…….. E-75 Registration Memory … E-46 What is MIDI?……..E-75 Registration Memory Features….E-46 General MIDI …….. -
Page 11: General Guide
General Guide General Guide 707A-E-011A…
-
Page 12: Attaching The Score Stand
BANK button b) STORE button EXIT button SONG MEMORY TRACK buttons AUTO HARMONIZE button Attaching the Score stand (*1) Insert the score stand into the slot at the top of the keyboard as shown in the illustration. E-10 707A-E-012A…
-
Page 13: Playing A Demo Tune
• Due to LCD element characteristics, display contrast changes depending on the angle from which you view it. The initial default contrast setting is one that allows easy viewing for a musician seated directly in front of the display. You can also adjust the contrast to the level that suits your particular needs.
-
Page 14: Power Supply
Load six D-size batteries into the battery compartment. • Make sure that the positive ( + ) and negative (–) ends are facing correctly. Misuse of batteries can cause them to leak resulting in damage to nearby objects, or to explode, creating the risk of fire and personal injury.
-
Page 15: Using The Ac Adaptor
Song Memory song numbers, SMF player or disconnecting the AC adaptor. settings (play mode, manual play part, SMF playback • Using the AC adaptor for a long time can cause it to become volume) warm to the touch. This is normal and does not indicate malfunction.
-
Page 16: Turning Off The Keyboard
Power Supply Turning Off the Keyboard Memory Contents • Be sure to press the POWER button to turn off power and In addition to the above settings, data stored in the make sure that the LCD backlight is off before Registration Mode and Song Memory Mode is also retained disconnecting the AC adaptor or doing anything else.
-
Page 17: Connections
• With piano tones, depressing the pedal causes notes to on one end and two PIN plugs on the other end. Note that the linger, much like a piano’s damper pedal. standard plug you connect to the keyboard must be a stereo •…
-
Page 18: Basic Operations
This keyboard comes with tones built-in, as shown below. To play the keyboard A partial list of the available tone names is printed on the keyboard console. See the “Tone List” on page A-1 of this manual for a complete list.
-
Page 19
Basic Operations Drawbar Organ Tones: To select a tone 50 Preset Tones + 100 User Tones Find the tone you want to use in the tone list and Number of DSP Line On/Off note its tone number. Number Tone Type… -
Page 20: Piano Setting Button
(page E-61, E-62) can • The setup of the keyboard does not change if you press the cause conflicts. To avoid conflicts, DSP is allocated to the last…
-
Page 21: Using The Drawbar Organ Mode
Your keyboard has built-in “drawbar organ tones” that can be altered using nine digital drawbars whose operations are similar to the controls on a drawbar organ. You can also select percussion or key click. There is room in memory for storage of up to 100 user- created drawbar tone variations.
-
Page 22: To Select A Drawbar Organ Tone
Tone Name • If you have drawbar organ tones assigned to more than one Use the number buttons to input the three digit channel, changing the drawbar organ tone setting for one of the channels causes the same setting to be applied to all of tone number for the tone you want to select.
-
Page 23: Parameter Details
0 to 3 selected. Drawbar 8’ Ft 8’ 0 to 3 None of the channel numbers (1 to 16) are displayed in the Drawbar 4’ Ft 4’ 0 to 3 drawbar organ tone selection mode and editing mode. Drawbar 2 2/3’…
-
Page 24: To Save An Edited Drawbar Organ Tone
Use the [+] and [–] buttons to select a tone number. • You can select a tone number in the range of 100 to 199. After the tone name is the way you want, press the ] CURSOR button to store the tone.
-
Page 25: Applying Effects To Tones
You can have up to 100 effect types in user memory at one time. You can also select the DSP type of the last DSP enabled tone that you used. This means you always have…
-
Page 26: Dsp Parameters
See “Changing the Settings of DSP Parameters” for more information. • Whether or not an effect is applied to the parts that are sounding also depends on Mixer Mode Reverb Send, Chorus Send, and DSP on/off settings. See “Mixer Function”…
-
Page 27: Dsp Button
Checking the DSP button will tell you whether or not DSP is enabled for the tone that is currently selected for a part. The DSP button will be lit for a tone that is DSP enabled (DSP line ON), and unlit for a tone that is DSP disabled (DSP line OFF).
-
Page 28: Selecting Chorus
Parameters High Damp Same as Reverb Type You can control the relative strength of a reverb and how it is applied. See the following section titled “REVERB Parameters” for more information. • Whether or not an effect is applied to the parts that are…
-
Page 29: Using The Equalizer
Specifies the undulation depth of the chorus sound. A higher value produces deeper undulation. • Whether or not an effect is applied to the parts that are sounding also depends on Mixer Mode Reverb Send, Use the [ + ] and [–] buttons or the number buttons Chorus Send, and DSP on/off settings.
-
Page 30: Auto Accompaniment
Use the MODE button to select the accompaniment mode you of this means that you get full, realistic accompaniments for want to use. Each press of the MODE button cycles through the melody notes you play with your right hand, creating the the available accompaniment modes as shown in the mood of a one-person ensemble.
-
Page 31: Selecting A Rhythm
Software (on the Bundled CD-ROM)” on page E-76 for more • To stop rhythm play, press the START/STOP button. information. • Chords will sound along with the rhythm if any of the three To select a rhythm accompaniment mode lamps above the MODE button is lit. if…
-
Page 32: Using Auto Accompaniment
Auto Accompaniment feature. Before starting, you should “accompaniment keyboard” and “melody keyboard,” and first select the rhythm you want to use and set the tempo of tells you how to play CASIO CHORDs. the rhythm to the value you want.
-
Page 33
FULL RANGE CHORD Keyboard pattern to be a chord. Any other input (that is not a FULL RANGE CHORD pattern) is interpreted as melody play. Because of this, there is no need for a separate… -
Page 34: Using An Intro Pattern
Using a Rhythm Variation feature. Before starting, you should first select the rhythm you want to use, set the tempo, and use the MODE button to select the chord play method you want to use (NORMAL, CASIO In addition to the standard rhythm pattern, you can also CHORD, FINGERED, FULL RANGE CHORD).
-
Page 35: Synchro Starting Accompaniment With Rhythm Play
Finishing with an Ending with Rhythm Play Pattern You can set up the keyboard to start rhythm play at the same You can end your performances with an ending pattern that time you play the accompaniment on the keyboard. brings the rhythm pattern you are using to a natural- sounding conclusion.
-
Page 36: Using One-Touch Preset
• Auto Harmonize turns off temporarily whenever you start demo tune play. It turns back on as soon as the operation or function that caused it to turn off is finished. • Auto Harmonize is enabled only when the Auto Accompaniment mode is FINGERED or CASIO CHORD.
-
Page 37: Adjusting The Accompaniment Volume
Channel 5 to the tone you want to use for the Example: 110 harmonize notes. In addition to the tone, you can also use the Mixer to change a number of other parameters, such as volume balance. See m V o l “Using the Parameter Edit Mode”…
-
Page 38: Mixer Function
Channels 6 through 10. (1 through 16) and lets you control the channel on/off, volume, • When this keyboard is being used as the sound source for an and pan pot parameters of each channel. externally connected computer or other MIDI device, all 16 In addition to channels 1 through 16, the Mixer also has a DSP channels are assigned musical instrument parts.
-
Page 39: Using The Parameter Edit Mode
Indicates channel volume of 127 This setting turns off the currently selected channel, which is indicated by the absence of the bar at the bottom of the level Use the number buttons or [+] and [–] to change meter for that channel.
-
Page 40: How Parameters Work
Octave Shift (Range: –2 to 0 to +2) Editing DSP Channel Parameters You can use octave shift to shift the range of the tone up or down. When using the piccolo tone, there may be cases when While Channel 16 is selected, press the [ very high notes you want to play are not included within the CURSOR button.
-
Page 41
Send, and DSP System Chorus parameters to be used in DSP Line (Settings: on, oFF) place of the Pan Pot, Reverb Send, and Chorus Send You can use this parameter to turn DSP line off for a particular parameter’s settings. channel, or to turn it on. -
Page 42: Synthesizer Mode
The preset tones that are built into this keyboard consist of a number of parameters. To create a user tone, you first recall an advanced tone (000 to 331) or a preset tone (400 to 599) and then change its parameters to change it to your own tone.
-
Page 43
You can specify changes in volume and sound characteristics. Attack time This is the rate or time it takes for the tone to reach its highest volume level. You can specify a fast rate, where the tone reaches its highest volume level immediately, a slow rate where it gradually rises, or something in between. -
Page 44
000 through 049. • You can create an original tone using a user tone that includes a waveform (tone number 800 to 819). In this case, the storage area is the same as the source tone area. -
Page 45: Creating A User Tone
Attack Time (Range: –64 to 00 to +63) Time it takes before the tone sounds after a key is pressed First, select the preset tone you want to use as a basis for your user tone.
-
Page 46
This parameter controls changes in the volume of the tone in accordance with the pressure applied to the keyboard keys. A • If you store an original tone with the DSP line turned on (see greater positive value increases the volume of the output as… -
Page 47: Storing A User Tone In Memory
Press the YES button to save the data. Use a preset tone that is similar to the one you are trying to create. • The message “Complete” appears momentarily on the…
-
Page 48: Registration Memory
Registration memory lets you store up to 32 keyboard setups data with your own data. (4 sets × 8 banks) for instant recall whenever you need them. • Registration memory functions are disabled while you are using the SMF Player, Song Memory or demo tune function.
-
Page 49: To Save A Setup In Registration Memory
Release the STORE and REGISTRATION buttons. • Whenever you save a setup and assign it a setup name, any setup data previously assigned to that name is replaced with the new data. • The setup is saved as soon as you press a REGISTRATION •…
-
Page 50: To Recall A Setup From Registration Memory
Registration Memory Use the BANK button or the number buttons to select the bank. • If you do not perform any operation for about five seconds after pressing the BANK button, the keyboard automatically clears the registration memory recall screen.
-
Page 51: Song Memory Function
Tracks Keyboard song memory records and plays back much like a • With this keyboard, Track 1 is the basic track, which can be standard tape recorder. There are a total of six tracks, each of used to record keyboard play, along with Auto which can be recorded separately.
-
Page 52: Basic Song Memory Operations
Track 2 Track 3 Track 4 Track 5 • The level meters for tracks 11 through 16 are shown on Track 6 the display while the keyboard is in record standby, so you can easily check which tracks are already recorded.
-
Page 53: Mixer Mode Settings
MODE button. Channel 1 Mixer parameters (page E-36) are automatically • Optional pedal operation is also recorded. See “Track recorded to Track 1. You can use the Mixer to change each of 1 Contents After Real-time Recording”. the parameters.
-
Page 54: Playing Back From Song Memory
To turn off a specific track Playing Back from Song Press the SONG MEMORY TRACK button of the track you want to turn off, or use the Mixer (Page E-36) to turn off the Memory channel of the track. Once you record tracks to song memory, you can play them Recording Melody and Chords back to see what they sound like.
-
Page 55
Press the SYNCHRO/FILL-IN NEXT button. • Inputting “0” as the chord length in steps 5 and 6 of the above procedure specifies a rest, but the rest is not reflected in the Play a chord. -
Page 56
Note lengths Augmented Use number buttons [1] through [6] to specify whole notes ( ), Diminished half notes ( ), quarter notes ( ), eighth notes ( ), 16th notes Suspended four ( ), and 32nd notes ( ). Seventh… -
Page 57: Recording Multiple Tracks
The procedure you use for recording to Tracks 2 In step 4, press INTRO/ENDING 1 or INTRO/ENDING 2 through 6 is identical to the one you use when recording to button after the SYNCHRO/FILL-IN NEXT button. Track 1.
-
Page 58
• When playing back a track that was recorded with an Advanced Tone selected, they may be a slight delay before the first note of the track sounds. If this happens, try to insert a very short rest at the beginning of the track. -
Page 59: Correcting Mistakes While Step Recording
The procedure described here lets you move the input point Press the [ ] CURSOR button. to the left in order to make changes in data you have already input. Note, however, that moving the input point to the left and changing data automatically deletes all of the data r t e ? recorded to the right of the input point.
-
Page 60: Editing Memory Contents
• You can only change rhythm numbers that were originally set for Track 1 using step recording. R e c • You cannot use the edit procedure to add more data to a recording. • You cannot move portions of a recording to a different location within the recording.
-
Page 61: Editing A Song
• Whenever editing memory contents, never change a note so / n d 1 it is identical to the note before or after it. Doing so may alter the length of the changed note and the note before or after it.
-
Page 62
Press the SONG MEMORY button once to enter playback standby. playback standby. Use the [ + ] and [–] buttons to select the number of Use the [+] and [–] buttons to select the number of the song that contains the header data you want to the song that contains the track you want to delete. -
Page 63: Keyboard Settings
Part 4: Layered and split tone part Using Layer Press the LAYER button. Layer lets you assign two different tones (a main tone and a layered tone) to the keyboard, both of which play whenever you press a key. For example, you could layer the GM FRENCH HORN tone on the GM BRASS tone to produce a rich and brassy sound.
-
Page 64: Using Split
• Turning on layering switches the currently selected part from To select “448 GM STRINGS 1” as the main tone, Part 1 to Part 2, and displays the layered tone. At that time, press the TONE button and then use the number…
-
Page 65: Using Layer And Split Together
• Turning on split switches the currently selected part to Part Example: 3, and displays the split tone. At that time, you can use the ] and [ ] CURSOR buttons to switch between parts. To set “445 GM PIZZICATO” as the split tone.
-
Page 66: Transposing The Keyboard
• The allowable pitch range you can transpose within depends on the tone you are using. If a transpose operation causes a note to be outside of the pitch range for the tone being used, the keyboard automatically plays the same note in the nearest octave that falls within the pitch range of the tone you are using.
-
Page 67: Tuning The Keyboard
To lower the tuning by 20. • Pressing the TRANSPOSE/FUNCTION button exits the transpose screen. • The keyboard can be tuned within a range of –99 cents to +99 cents. * 100 cents is equivalent to one semitone. • The tuning setting also affects playback from song memory and Auto Accompaniment.
-
Page 68: Changing Other Settings
• The above settings are all saved whenever you turn off the keyboard. For details, see “Memory Contents” on page E-14. • MIDI settings and Delete/Initialize settings are disabled while you are using the SMF Player or Song Memory function.
-
Page 69
Keyboard Settings To use the keyboard settings menu Press the TRANSPOSE/FUNCTION button. • This causes a pointer to appear on the display next to TRANSPOSE/FUNCTION. Use the [ ] and [ ] CURSOR buttons, and the [ ] and [ ] CURSOR buttons to recall the items whose settings you want to change. -
Page 70
• It can take about 40 seconds to perform a delete or initialize procedure after you pressing the YES button in step 7 above. The message “Pls Wait” will remain on the display to indicate that a procedure is being performed. Never try to perform any operation while “Pls Wait”… -
Page 71
Keyboard Settings Setting Menu Items Auto Harmonize Types You can select from among the 10 different types of auto harmonize listed below. Type Description Duet1 Adds a 1-part harmony to keyboard play. Duet2 Adds a 1-part harmony to keyboard play. Duet2 harmony is more open than Duet1. -
Page 72
Specifies whether this keyboard’s auto accompaniment or song on/oFF (Ac/sg Out) memory is sent as MIDI messages. Local Control Setting on/oFF Specifies whether the keyboard should sound the parts played on it. (Local) Delete/Initialize Settings Setting menu Range Default Description SMF Delete —… -
Page 73: Using The Smf Player
Software (on the Bundled CD-ROM)” on page E-76 for more information. * Note that the number of files you can store in memory also depends on the size of each file. If your files are very large, you may be able to store fewer than 200.
-
Page 74
Playback complete. File Number File Name ABC 2 You can use the [ ] and [ ] CURSOR buttons or [+] and [–] buttons to change the SMF. Direct input using number buttons is also possible. Playback stopped. Error (Other errors may also occur.) -
Page 75: Playing Back An Smf
• You can specify a setting in the range of 000 (minimum) to 127 (maximum). To play back an SMF • Pressing [ + ] and [–] at the same time returns the SMF volume setting to 100. Press the SMF PLAYER button to display the file •…
-
Page 76
• Use the [ ] and [ ] CURSOR buttons or the [+] and [–] buttons to select the output mode. • You can select from among the following two output types. int: Keyboard’s built-in speakers out: MIDI OUT •… -
Page 77: Midi
Song Memory on an external devices If a MIDI THRU function provided by the software is being sound source. run on a connected computer or other MIDI device, be sure to • on : Outputs auto accompaniment or Song Memory as turn this keyboard’s “Local Control Setting”…
-
Page 78: Using The Music Data Management Software (On The Bundled Cd-Rom
• Though Music Data Management Software is designed to http://music.casio.com/ run under the standard configurations of the above operating systems, note that it may not be able to run correctly under certain software and hardware environments. Music Data Management Software •…
-
Page 79
To connect to a computer • The DATA ACCESS lamp lights whenever the keyboard is Be sure to turn off the keyboard and your computer before exchanging data with a connected computer over a MIDI connecting them. You should also set the volume controller of cable connection. -
Page 80: Troubleshooting
AC adaptor. • Dim power indicator • Occasional interruption of sound • A tone that is totally different from the • Instrument does not turn on. when playing at high volumes one that is selected.
-
Page 81
This is an unavoidable result of the digital sampling process,* and does not sounds slightly different indicate malfunction. * Multiple digital samples are taken for the low range, middle range, and high depending where it is played on the keyboard. -
Page 82: Specifications
61 standard-size keys, 5 octaves with touch response (Off / 1 / 2 / 3) Tones: 332 Advanced Tones + 200 Preset Tones + 18 Drum Sets + 100 standard user tones + 20 user tones with waves* + 4 user drum sets with waves* + 50 drawbar organ tones + 100 user drawbar organ tones (824 tones total);…
-
Page 83
Power consumption: 7.7W 96.0 × 37.5 × 14.6 cm (37 × 14 × 5 Dimensions: inch) Weight: Approximately 5.6 kg (12.3lbs) (without batteries) * The same memory area is used to store waveform data, accompaniment data, and SMF data. E-81 707A-E-083A… -
Page 84: Care Of Your Instrument
• You may notice lines in the finish of the case of this instrument. These lines are a result of the molding process used to shape the plastic of the case. They are not cracks or breaks in the plastic, and are no cause for concern.
-
Page 85: Dsp Algorithm List
5: High Gain (Range: –12, –11, –10 to 0 to +10, +11, +12) • Function Adjusts the gain of the high-band equalizer. This is an effector that you can use to set an upper limit value on the level of the input signal. 04 :LFO Wah •…
-
Page 86
13 :Enhancer 09 :Stereo Phaser • Function • Function Enhances the outlines of the low range and high range of the input This is a stereo phaser that modulates the phase in accordance with signal. a sine wave LFO. • Parameters •… -
Page 87
1: LFO Depth (Range: 0 to 127) • Function Adjusts the depth of the LFO. This is a fader that creates artificial reverb that sounds like it is being 2: Feedback(Range: –64 to 0 to +63) cut with a gate. -
Page 88
0: Delay Time (Range: 0 to 127) • Function Adjusts the delay time. This is a multi effector that is related to Stereo Phaser – Stereo Delay 1. 1: Wet Level (Range: 0 to 127) • Parameters Adjusts the level of the effect sound. -
Page 89
2-Tap Delay) 1: Enhancer Low Gain 2: Enhancer High Frequency • Function 3: Enhancer High Gain This is a multi effector that is related to Ring Modulator – Sin 2- 4: Delay Time Phase Chorus. 5: Delay Wet Level • Parameters… -
Page 90
• Function • Function This is a multi effector that is related to Auto Wah – Tri 2-Phase This is a multi effector that is related to Auto Wah – Distortion – 2- Chorus – 2-Tap Delay. Tap Delay. • Parameters •… -
Page 91
6: Delay Wet Level 7: Delay Feedback M27 :Multi27 (LFO Wah – Distortion – 2-Tap Delay) • Function This is a multi effector that is related to LFO Wah – Distortion – 2- Tap Delay. • Parameters 0: Wah Manual… -
Page 92: Appendix
1 No./N 2 Tone Group/Grupo de Sonido 3 Tone Name/Nombre de sonido 4 Program Change/Cambio de programa 5 Bank Select MSB/MSB de selección de banco 6 Maximum Polyphony/Polifonía máxima 7 Range Type/Tipo de gama 8 DSP Type/Tipo DSP Advanced Tones/Sonidos avanzados…
-
Page 93
Appendix/Apéndice 4 5 6 7 4 5 6 7 126 BASS RESO.SQR BASS 39 50 32 –1 Enha Cho 201 BRASS TROMBONE SECTION 57 51 16 –1 GateRvb2 127 BASS RESO.SAW BASS 1 38 53 32 –1 AWhChDly 202 BRASS OCTAVE FRENCH HORN 60 50 16 –1 RvbHall1… -
Page 94
86 50 16 N StXDelay 305 SYNTH-PAD NOISY SAW 90 49 16 N Lo-Fi 278 SYNTH-LEAD FOURTH LEAD 86 51 16 N Auto Pan 306 SYNTH-PAD SINE PAD 89 49 16 N Phaser 279 SYNTH-LEAD DETUNE SAW 81 51 16 N Chorus 2… -
Page 95
Appendix/Apéndice 4 5 6 7 8 4 5 6 7 8 484 GM GM CHARANG – 542 VARIOUS CHURCH ORGAN 3 – 485 GM GM VOICE LEAD – 543 VARIOUS PUFF ORGAN – 486 GM GM FIFTH LEAD – 544 VARIOUS NYLON GUITAR RELEASE –… -
Page 96
NO DATA 819 USER TONE with WAVE NO DATA User Drum Sets with Waves/Ajustes de batería de usuario con ondas 900 USER DRUM SET with WAVE POWER ROOM SET 902 USER DRUM SET with WAVE NO DATA 901 USER DRUM SET with WAVE NO DATA… -
Page 97
24 DRAWBAR 16′ ORGAN 96 16 N Rotary DRAWBAR DIST. RING ORGAN 96 10 N DistRing Drawbar Organ User Tones/Sonidos de usuario de órgano con Drawbar 100 USER DRAWBAR DRAWBAR ORGAN 1 141 USER DRAWBAR DEEP CHORUS ORGAN 101 USER DRAWBAR… -
Page 98
*2 El ajuste predeterminado de fábrica es datos de sonido con *3 The initial factory default is preset Drum Set with Wave data for onda predeterminados para los números de sonido 800 a 804. tone number 900. System reset clears all stored data. -
Page 99: Drum Assignment List
Appendix/Apéndice Drum Assignment List/Lista de asignación de batería “ ” indicates the same sound as STANDARD SET 1./“ ” indica el mismo sonido que STANDARD SET 1. 707A-E-189A…
-
Page 100
Appendix/Apéndice 707A-E-190A… -
Page 101: Rhythm List
• Esta lista muestra la configuración predeterminada de fábrica, • This list shows the initial factory default configuration, in which según la cual el área de usuario (160 a 175) contiene datos de the user area (160 through 175) contains default rhythm data.
-
Page 102: Fingered Chord Chart
Appendix/Apéndice Fingered Chord Chart/Cuadro de acordes Fingered This table shows the fingerings for commonly used chords, including inverted fingerings. Esta tabla muestra las digitaciones para los acordes usados comúnmente, incluyendo las digitaciones invertidas. A-11 707A-E-192A…
-
Page 103
Appendix/Apéndice * You can change the keyboard range of dim7 chords for roots A, B b , and B, and aug chords for roots B b and B by adjusting the split point setting (page E-62). * Puede cambiar la gama del teclado de los acordes dim7 para las notas fundamentales A, B b y acordes aumentados (augment) para las notas fundamentales B b y B mediante el ajuste del punto de división (página S-62). -
Page 104: Effect List
LongDelay 2 Settable parameters depend on the DSP type. Also, the parameters for each DSP type depend on the algorithm* associated with the DSP type. See the DSP Algorithm List on CHORUS Effect List/ page E-83 for more information. * Effector structure and operation type Lista de efectos de chorus (CHORUS) Los parámetros que pueden ajustarse dependen en el tipo…
-
Page 105
[14] Delay Delay [61] Auto Wah Auto Wah [15] 3Tap Delay 3-Tap Delay [62] AWhChDly Auto Wah — Chorus — Delay [16] St Delay Stereo Delay [63] LWhChDly LFO Wah — Chorus — Delay [17] StXDelay Stereo Cross Delay Guitar Fx… -
Page 106
707A-E-202A… -
Page 107
707A-E-203A… -
Page 108
MA0503-A Printed in China CTK900-ES-1…
(скачивание инструкции бесплатно)
Формат файла: PDF
Доступность: Бесплатно как и все руководства на сайте. Без регистрации и SMS.
Дополнительно: Чтение инструкции онлайн

РУКОВОДСТВО
ПОЛЬЗОВАТЕЛЯ
Страница:
(1 из 124)
навигация

1

2

3

4

5

6

7

8

9

10

11

12

13

14

15

16

17

18

19

20

21

22

23

24

25

26

27

28

29

30

31

32

33

34

35

36

37

38

39

40

41

42

43

44

45

46

47

48

49

50

51

52

53

54

55

56

57

58

59

60

61

62

63

64

65

66

67

68

69

70

71

72

73

74

75

76

77

78

79

80

81

82

83

84

85

86

87

88

89

90

91

92

93

94

95

96

97

98

99

100

101

102

103

104

105

106

107

108

109

110

111

112

113

114

115

116

117

118

119

120

121

122

123

124
Оглавление инструкции
- Страница 1 из 125
РУКОВОДСТВО ПОЛЬЗОВАТЕЛЯ - Страница 2 из 125
Декларация соответствия Номер модели: CTK-900 Торговая фирма: CASIO COMPUTER CO., LTD. Ответственная сторона: CASIO, INC. Адрес: 570 MT. PLEASANT AVENUE, DOVER, NE ERSE 07801 Телефон: 7 — 61-5400 Данное устройство отвечает требованиям части 15 Правил ФКС. Работа устройства должна соответствовать - Страница 3 из 125
Меры безопасности Поздравляем вас с приобретением электронного музыкального инструмента CASIO! • Прежде чем приступать к использованию этого инструмента, внимательно прочитайте все содержащиеся в этом руководстве инструкции. • Сохраните это руководство, чтобы обращаться к нему в будущем. Символы В - Страница 4 из 125
Меры безопасности ПРЕДУПРЕЖДЕНИЕ •Никогда не касайтесь адаптера переменного тока мокрыми руками. В противном случае возникает опасность поражения электрическим током. •Не используйте адаптер переменного тока в местах, где на него может попасть вода, так как это может вызвать возгорание или - Страница 5 из 125
Меры безопасности ОСТОРОЖНО ОСТОРОЖНО Адаптер переменного тока Соединители •Неправильное использование адаптера переменного тока создает опасность возгорания и поражения электрическим током. Обязательно соблюдайте указанные ниже меры предосторожности. • Не располагайте электрический провод около - Страница 6 из 125
Меры безопасности ОСТОРОЖНО Правильная сборка подставки* Неправильно установленная подставка может перевернуться, а инструмент — упасть, что влечет за собой опасность получения травмы. Аккуратно соберите подставку, следуя прилагаемой инструкции. Убедитесь в том, что музыкальный инструмент правильно - Страница 7 из 125
Введение Поздравляем вас с выбором этого музыкального инструмента производства CASIO. Он имеет следующие функции и особенности. 550 инструментальных тембров, включая насыщенные усовершенствованные тембры 332 усовершенствованных тембра запрограммированы вместе с тембрами DSP, делая их более - Страница 8 из 125
Введение Мощные эффекты Набор мощных цифровых эффектов, таких как реверберация, хорус и другие, обеспечивает вам полный контроль над нужным вам типом звучания. Вы даже можете изменять параметры эффекта для создания ваших собственных оригинальных эффектов. Инструмент также оборудован 4-полосным - Страница 9 из 125
Содержание Меры безопасности …………………………….. 1 Введение ……………………………………………… 5 Использование тембровых эффектов … 23 Блоки эффектов ……………………………………………. 23 Выбор типа DSP-эффекта - Страница 10 из 125
- Страница 11 из 125
Общее устройство инструмента 9 - Страница 12 из 125
Общее устройство инструмента 1 Кнопка «POWER» [Питание] 20 Кнопка «AUTO HARMONIZE» [Автогармонизация] 2 Индикатор питания 21 Кнопка «SPLIT» [Разделение клавиатуры] 3 Кнопка «SONG MEMORY» [Память песен] 22 Кнопка «LAYER» [Наложение тембров] 4 Кнопка «SYNTH» [Синтезатор] 23 Кнопки управления курсором - Страница 13 из 125
Общее устройство инструмента *2 39 39 Кнопки с цифрами • Для ввода цифр в целях изменения выведенных на дисплей значений параметров и установок. 40 Кнопки [+]/[-] «YES/NO» [Да/Нет] • При помощи кнопок с цифрами нельзя вводить отрицательные значения. Для этого используйте кнопки [+] (увеличение - Страница 14 из 125
Источники питания Электропитание этого музыкального инструмента может осуществляться от стандартной стенной розетки домашней электросети (через указанный в технических характеристиках адаптер переменного тока) или от батарей. Если вы не пользуетесь музыкальным инструментом, обязательно выключайте - Страница 15 из 125
Источники питания Использование адаптера переменного тока Используйте только адаптер переменного тока, рекомендованный для данного музыкального инструмента. Рекомендованный адаптер переменного тока: AD-5 Задняя панель Автоматическое отключение питания При питании от батарей электропитание - Страница 16 из 125
Источники питания Выключение инструмента Содержимое памяти • Прежде чем отсоединять адаптер переменного тока от инструмента и выполнять какие-либо другие действия, выключите питание инструмента, нажав на кнопку «POWER», и убедитесь, что подсветка ЖК-дисплея выключилась. • Ни в коем случае не - Страница 17 из 125
Источники питания ПРИМЕЧАНИЕ Разъем «PHONES/OUTPUT» [Наушники/Выходной сигнал] • Перед подсоединением наушников или другого внешнего устройства установите на минимум уровень громкости на инструменте и подключаемом устройстве. После подключения можно установить требуемый уровень громкости. Задняя - Страница 18 из 125
Основные операции 1 3 5 7 «MAIN VOLUME» [Основной уровень громкости] «TONE» [Тембр] «PIANO SETTING» [Настройка фортепьяно] Кнопки с цифрами В этом разделе представлена информация о выполнении основных операций на музыкальном инструменте. Как играть на клавиатуре 1. Для включения музыкального - Страница 19 из 125
Основные операции Тембры акустического органа: 50 предустановленных тембров + 100 пользовательских тембров Номера Количество тембров Тип тембров Линия DSP вкл./выкл. (*1) 000 – 049 50 Предустановленные тембры Вкл./Выкл. (*5) 100 – 199 100 Пользовательские тембры (*6) Как выбрать тембр 1. Найдите - Страница 20 из 125
Основные операции Смена тембров и настройка DSP-эффектов Данный музыкальный инструмент оборудован только одним звуковым источником DSP. По этой причине выбор нескольких тембров, для которых активизирована функция DSP, для нескольких партий при использовании функций наложения тембров или разделения - Страница 21 из 125
Использование режима акустического органа (Drawbar Organ) 1 «DRAWBAR ORGAN» [Акустический орган] 3 «EXIT» [Выход] 2 Кнопки управления курсором []/[]/[]/[] 4 Кнопки с цифрами 5 [+]/[-] Ваш музыкальный инструмент имеет встроенные «тембры акустического органа», которые могут быть изменены с - Страница 22 из 125
Использование режима акустического органа (Drawbar Organ) • Когда на дисплее отображается сообщение «More?» [Больше?], вы можете перейти к экранам режима синтезатора и редактирования DSP-эффектов путем нажатия кнопки управления курсором [] или кнопки [+]. Выбор тембра акустического органа 1. - Страница 23 из 125
Использование режима акустического органа (Drawbar Organ) Описание параметров Название параметра Ниже приведено описание параметров, которые вы может настроить при помощи экрана редактирования тембра акустического органа. Диапазон установок Этот параметр определяет положение каждого регистра и - Страница 24 из 125
Использование режима акустического органа (Drawbar Organ) Сохранение отредактированного тембра акустического органа 1. После редактирования параметров используйте кнопки управления курсором [] и [] для отображения на дисплее сообщения «More?» [Больше?]. 2. Нажмите кнопку управления курсором [] - Страница 25 из 125
Использование тембровых эффектов 1 «EFFECT» [Эффект] 4 Кнопки управления курсором []/[]/[]/[] Ваш музыкальный инструмент оснащен множеством различных эффектов, которые вы можете применять к инструментальным тембрам. Блоки эффектов РЕВЕРБЕРАЦИЯ ХОРУС Источник звука ЭКВАЛАЙЗЕР выкл. 16 каналов - Страница 26 из 125
Использование тембровых эффектов 2. Нажмите кнопку управления курсором []. 3. При помощи кнопок [+] и [-] или кнопок с цифрами выберите желаемый тип DSP. • См. «Перечень эффектов» на стр. А-13 для получения информации о типах DSP, которые могут быть выбраны. • При желании вы также можете изменить - Страница 27 из 125
Использование тембровых эффектов Сохранение значений параметров DSP Вы можете сохранить до 100 модифицированных DSP-эффектов в пользовательской области для использования в дальнейшем. Включение и выключение линии DSP 1. ПРИМЕЧАНИЕ • 1. Ячейки пользовательской области памяти DSP-эффектов с 100 по - Страница 28 из 125
Использование тембровых эффектов Уровень ER Изменение значений параметров эффекта реверберации Вы можете управлять относительной силой эффекта реверберации и способом его применения. Для получения более подробной информации смотрите следующий подраздел «Параметры эффекта реверберации». 1. То же, - Страница 29 из 125
Использование тембровых эффектов Параметры эффекта хоруса Уровень хоруса (диапазон: от 000 до 127) Задает силу эффекта хоруса. Регулировка усиления (громкости) диапазона 1. Скорость хоруса (диапазон: от 000 до 127) Задает скорость вибрации звука с эффектом хоруса. Чем выше значение, тем быстрее - Страница 30 из 125
Автоаккомпанемент 1 «MODE» [Режим] 3 «ACCOMP VOLUME» [Уровень громкости аккомпанемента] 5 «EXIT» [Выход] 7 «VARIATION/FILL-IN» [Вариация/Вставка] 9 «START/STOP» [Запуск/Остановка] 11 «AUTO HARMONIZE» [Автогармонизация] 13 [+]/[-] Данный музыкальный инструмент автоматически играет партию басов и - Страница 31 из 125
Автоаккомпанемент Выбор ритма В данном музыкальном инструменте имеется 160 встроенных захватывающих музыкальных ритмов, которые можно выбирать при помощи следующей процедуры. Вы также можете перенести данные аккомпанемента с вашего компьютера и сохранить до 16 вариантов в качестве пользовательских - Страница 32 из 125
Автоаккомпанемент Использование автоаккомпанемента Ниже описана процедура использования функции автоаккомпанемента данного музыкального инструмента. Перед началом использования необходимо выбрать желаемый ритм и установить темп. Как использовать автоаккомпанемент 1. Метод исполнения аккордов «CASIO - Страница 33 из 125
ПРИМЕЧАНИЕ • ПРИМЕЧАНИЕ При исполнении минорных аккордов и септаккордов не имеет значения, нажимаете ли вы черные или белые клавиши справа от клавиши мажорного аккорда. • Метод исполнения аккордов «FINGERED» • Метод «FINGERED» предоставляет в ваше распоряжение 15 различных типов аккордов. Ниже - Страница 34 из 125
Автоаккомпанемент Пример: Исполнение аккорда До-мажор. При использовании любой из аппликатур, показанных на приведенной ниже иллюстрации, исполняется аккорд До-мажор. 1 E G Следующая процедура описывает порядок использования функции вставки. C G Использование модели вставки Модели вставки позволяют - Страница 35 из 125
Автоаккомпанемент Синхронный запуск аккомпанемента с исполнением ритма Можно установить рабочие параметры музыкального инструмента таким образом, чтобы исполнение ритма начиналось одновременно с вашим исполнением аккомпанемента на клавиатуре. Следующая процедура описывает последовательность - Страница 36 из 125
Автоаккомпанемент Использование функции вызова предварительных настроек одним нажатием Функция вызова предварительных настроек одним нажатием автоматически активизирует перечисленные ниже настройки в соответствии с используемой моделью ритма. • • • • • • • • Тембр клавиатуры Включение/выключение - Страница 37 из 125
Автоаккомпанемент Типы автогармонизации Функция автогармонизации позволяет вам выбирать между 10 типами автогармонизации. Смена типов выполняется путем выбора типа при помощи кнопки «TRANSPOSE/FUNCTION». Для получения более подробной информации см. раздел «Прочие установки» на стр. 66. Регулировка - Страница 38 из 125
Функция микшера 1 «MIXER» [Микшер] 2 «DRAWBAR ORGAN» [Акустический орган] 3 «TONE» [Тембр] 4 «EXIT» [Выход] 7 [+]/[-] 5 Кнопки управления курсором []/[]/[]/[] 6 Кнопки с цифрами Что вы можете делать при помощи микшера На данной клавиатуре вы можете одновременно исполнять несколько разных партий - Страница 39 из 125
Функция микшера 3. Нажимайте кнопки управления курсором []/[] для отображения на дисплее экрана включения/выключения. Использование режима редактирования параметров Редактирование параметров для каналов с 1 по 16 4. При помощи кнопок [+]/[-] выберите установку «on» [вкл.] или «oFF» [выкл.]. - Страница 40 из 125
Функция микшера Редактирование параметров канала DSP 1. Когда выбран канал 16, нажмите кнопку управления курсором []. • Этим действием выбирается канал DSP. • При нажатии кнопки управления курсором [], когда выбран канал DSP, происходит возврат к каналу 16. Сдвиг октавы (диапазон: от –2 до 0 до - Страница 41 из 125
Функция микшера Передача сигнала хоруса (диапазон: от 000 до 127) Этот параметр управляет силой хоруса, применяемого к партии. Установка «000» отключает хорус, а установка «127» задает максимальный хорус. • «Передача сигнала хоруса» не работает для некоторых звуков ударных инструментов. - Страница 42 из 125
Режим синтезатора 1 «SYNTH» [Синтезатор] 4 Кнопки с цифрами 2 «EXIT» [Выход] 5 [+]/[-] 3 Кнопки управления курсором []/[]/[]/[] Режим синтезатора данного музыкального инструмента предоставляет вам средства для создания ваших собственных оригинальных тембров. Просто выберите один из встроенных - Страница 43 из 125
Режим синтезатора Форма волны характеристик тембра Установка тембра Указывает, какой из предустановленных тембров должен использоваться в качестве исходного. Резонанс Резонанс усиливает гармонические составляющие вблизи частоты среза, за счет чего создает отчетливое звучание. Высокое значение - Страница 44 из 125
Режим синтезатора Сохранение пользовательских тембров Группа номеров тембров с 700 по 799 (пользовательские тембры с 001 по 100) называется «пользовательской областью», потому что эти номера зарезервированы для хранения пользовательских тембров. После вызова предустановленного тембра и изменения - Страница 45 из 125
Режим синтезатора Создание пользовательского тембра Используйте следующую процедуру для выбора предустановленного тембра и изменения его параметров для создания пользовательского тембра. 1. Параметры и их значения Ниже описаны функции каждого параметра и диапазоны их настройки. Время нарастания - Страница 46 из 125
Режим синтезатора Задержка вибрато (диапазон: от –64 до 00 до +63) Задает интервал времени перед началом вибрато. Передача сигнала реверберации (диапазон: от 000 до 127) Этот параметр управляет реверберацией. Скорость вибрато (диапазон: от –64 до 00 до +63) Скорость эффекта вибрато Передача - Страница 47 из 125
Режим синтезатора Подсказки по созданию пользовательских тембров Нижеприведенные подсказки сделают создание пользовательских тембров более быстрым и легким. Когда у вас есть приблизительное представление о тембре, который вы хотите создать, выберите похожий предустановленный тембр и возьмите его за - Страница 48 из 125
Регистрационная память 1 «MODE» [Режим] 4 «STORE» [Сохранение] 2 «BANK» [Банк] 5 Кнопки с цифрами Функции регистрационной памяти Регистрационная память позволяет вам сохранять до 32 (4 области х 8 банков) групп настроек клавиатуры для активизации в любой момент, когда они вам потребуются. Ниже - Страница 49 из 125
Регистрационная память Названия групп настроек Вы можете сохранить настройки в одной из 32 областей, которую вы можете выбрать при помощи кнопок «BANK» с 1 по 4 и четырех кнопок «REGISTRATION». Областям памяти присвоены названия с 1-1 по 8-4, как показано на рисунке ниже. Сохранение настроек в - Страница 50 из 125
Регистрационная память Вызов настроек из регистрационной памяти 1. При помощи кнопки «BANK» или кнопок с цифрами выберите банк. • Если вы не выполните следующий шаг в течение 5 секунд после нажатия кнопки «BANK», окно вызова настроек из регистрационной памяти автоматически исчезнет с дисплея. 2. - Страница 51 из 125
Функция памяти песен 1 «MODE» [Режим] 3 «TONE» [Тембр] 5 7 9 11 13 Кнопки управления курсором []/[]/[]/[] «VARIATION/FILL-IN» [Вариация/Вставка] «START/STOP» [Запуск/Остановка] «SONG MEMORY TRACK» [Дорожки памяти песен] [+]/[-], «YES» [Да]/«NO» [Нет] 2 «SONG MEMORY» [Память песен] 4 «DRAWBAR - Страница 52 из 125
Функция памяти песен Выбор дорожки Используйте кнопки «SONG MEMORY TRACK», помеченные «CHORD» с «TR1» по «TR6» для выбора желаемой дорожки. Кнопки выбора дорожек памяти песен Запись в реальном времени При записи в реальном времени ноты записываются одновременно с их исполнением на клавиатуре. Как - Страница 53 из 125
Функция памяти песен 5. Сыграйте что-нибудь на клавиатуре. • Вы также можете записать аккорды автоаккомпанемента, выбрав подходящий режим при помощи кнопки «MODE». • Также записываются операции с педалью (приобретается отдельно). См. подраздел «Содержимое дорожки 1 после записи в реальном времени» - Страница 54 из 125
Функция памяти песен Как включать партию автоаккомпанемента во время записи Вместо выполнения пункта 4 нажмите кнопку «SYNCHRO/ FIL-IN NEXT», а затем начните играть в регистре мелодии клавиатуры для включения записи без автоаккомпанемента. При достижении момента, в который необходимо подключить - Страница 55 из 125
Функция памяти песен Как записать аккорды в пошаговом режиме 6. Введите длительность аккорда (как долго он должен звучать, прежде чем будет сыгран следующий аккорд). 1. Нажмите кнопку «SONG MEMORY» три раза для входа в режим ожидания пошаговой записи, а затем при помощи кнопок с цифрами выберите - Страница 56 из 125
Функция памяти песен Задание аккордов в режиме обычного исполнения Когда при помощи кнопки «MODE» установлен режим обычного исполнения при пошаговой записи, вы можете задавать аккорды с использованием метода, отличного от «CASIO CHORD» и «FINGERED». Этот метод задания аккордов может использоваться - Страница 57 из 125
Функция памяти песен Варианты записи дорожки 1 в пошаговом режиме Ниже описаны несколько вариантов, которыми можно пользоваться при записи дорожки 1 в пошаговом режиме. В основе всех этих вариантов лежит процедура, описанная в подразделе «Как записать аккорды в пошаговом режиме» на стр. 53. Как - Страница 58 из 125
Функция памяти песен Содержимое дорожки после записи в реальном времени 3. Задайте номер тембра. • При нажатии кнопки «TONE» или кнопки «DRAWBAR ORGAN» на дисплее отображается номер и название тембра. После этого вы можете использовать кнопки с цифрами или кнопки [+] (увеличение) и [-] (уменьшение) - Страница 59 из 125
Функция памяти песен Содержимое индикатора уровня в режиме ожидания записи/редактирования 2. Просматривая данные на дисплее, используйте кнопки управления курсором [] и [] для перемещения точки ввода к данным, которые вы хотите изменить. Каналы с 11 по 16 соответствуют дорожкам со 2-й по 6-ю. - Страница 60 из 125
Функция памяти песен Как удалить отдельную ноту 1. 4. Используйте кнопки управления курсором [] и [] для перемещения к позиции в дорожке, где расположена нота или параметр, который вы хотите отредактировать. Выполните пункты 1 и 2 из вышеприведенного подраздела «Как исправлять ошибки при записи в - Страница 61 из 125
Функция памяти песен Способы редактирования и содержимое дисплея Изменение номера ритма Измените номер ритма при помощи кнопок с цифрами или кнопок [+] и [-]. Ниже описаны способы редактирования, которые вы можете использовать для изменения значений различных параметров, сохраненных в памяти. N o - Страница 62 из 125
Функция памяти песен 5. Нажмите кнопку «YES», чтобы удалить песню и вернуться в режим ожидания воспроизведения. Как удалить отдельную дорожку 1. Нажмите один раз кнопку «SONG MEMORY», чтобы войти в режим ожидания воспроизведения. 2. При помощи кнопок [+] и [-] выберите номер песни, содержащую - Страница 63 из 125
Установки клавиатуры Keyboard Settings Keyboard Settings 11 22 33 44 55 1 Keyboard Settings 2 3 4 5 99 9 bkbk 8 6677 8 «MODE» [Режим] MODE �� MODE[Тембр] «TONE» EXIT �� EXIT «DSP» �� MODE LAYER LAYER � «LAYER» [Наложение] ��� EXIT с цифрами [+]/[–], Кнопки YES/NO [+]/[–], YES/NO �� � - Страница 64 из 125
Установки клавиатуры 5. Для отмены наложения тембров и возврата клави- атуры в обычный режим нажмите кнопку «LAYER» еще раз. ПРИМЕЧАНИЕ • • • При активизации функции наложения текущая выбранная партия переключается с партии 1 на партию 2, и на дисплее появляется название наложенного тембра. При - Страница 65 из 125
Установки клавиатуры ПРИМЕЧАНИЕ • • • • При активизации функции разделения текущая выбранная партия переключается на партию 3, и на дисплее появляется название дополнительного тембра. При этом вы можете использовать кнопки управления курсором [] и [] для переключения между партиями. При - Страница 66 из 125
Установки клавиатуры Транспонирование клавиатуры Функция транспонирования позволяет вам повышать или понижать общую тональность клавиатуры шагами изменения в один полутон. Например, если необходимо аккомпанировать певцу, поющему в тональности, отличной от данного музыкального инструмента, можно - Страница 67 из 125
Установки клавиатуры Настройка клавиатуры Функция настройки клавиатуры дает вам возможность выполнить тонкую настройку для соответствия настройке другого музыкального инструмента. Как настроить клавиатуру 1. Нажмите кнопку «TRANSPOSE/FUNCTION». 2. При помощи кнопок управления курсором [] и [] - Страница 68 из 125
Установки клавиатуры Прочие установки Типы установок В нижеприведенной таблице указаны параметры, значения которых вы можете изменить. Меню установок Описание Страница Транспонирование (Trans.) Регулирует общую настройку клавиатуры с шагом в полутон. Автогармонизация (AutoHarm) Выбирает тип - Страница 69 из 125
Установки клавиатуры Как использовать меню установок клавиатуры 1. Нажмите кнопку «TRANSPOSE/FUNCTION». • При этом на дисплее рядом с надписью «TRANSPOSE/FUNCTION» появится указатель. 2. При помощи кнопок управления курсором [] и [], а также [] и [] вызовите на дисплей параметры, установки - Страница 70 из 125
Установки клавиатуры 3. При помощи кнопок [+] и [-] или кнопок с цифрами измените значения. • Заданные вами установки будут действовать, даже если вы не нажмете кнопку «EXIT». • См. нижеследующий подраздел «Настройка пунктов меню» для получения подробной информации по каждой установке. • После - Страница 71 из 125
Установки клавиатуры Настройка пунктов меню Типы автогармонизации Вы можете выбирать из 10 типов автогармонизации, перечисленных ниже. № Тип (Название параметра) Описание 0 «Duet1» [Дуэт 1] Добавляет 1 гармоническую линию к исполняемым на клавиатуре нотам. 1 «Duet2» Добавляет 1 гармоническую - Страница 72 из 125
Установки клавиатуры Установки MIDI Меню установок Диапазон Первоначальная установка Описание Канал клавиатуры (Keybd Ch) От 01 до 16 01 Задает канал передачи для игры с использованием основного тембра. Определитель аккордов во входных сигналах MIDI (Chord) on/oFF oFF Определяет, должны ли - Страница 73 из 125
Использование SMF-плеера Using the SMF Player 3 12 7 8 45 «SMF PLAYER» [SMF-плейер] � «ACCOMP VOLUME» [Уровень громкости аккомпанемента] � Кнопки с цифрами � 6 � � «MIXER» [Микшер] «START/STOP» [Запуск/Остановка] [+]/[-] «EXIT» [Выход] � Кнопки управления курсором []/[]/[]/[] � [ - Страница 74 из 125
Использование SMF-плеера Последовательность операций в режиме SMF-плейера Экран дисплея Экран выбора тембра/ритма Область отображения номера Кнопка «SMF PLAYER» Область отображения текста Кнопка «SMF PLAYER» Выберите файл. Номер файла Имя файла 000 ABC1 [�]*, [+] [�]*, [–] 001 ABC2 [�], [+] [�], - Страница 75 из 125
Использование SMF-плеера Воспроизведение файла формата SMF 2. При помощи кнопок [+] и [-] или кнопок с цифрами отрегулируйте громкость воспроизведения файла формата SMF. • Вы можете задать установку в диапазоне от 000 (минимум) до 127 (максимум). • При одновременном нажатии кнопок [+] и [-] - Страница 76 из 125
Использование SMF-плеера 4. Нажмите кнопку управления курсором [] для вызова на дисплей экрана выбора выходного режима. • При помощи кнопок управления курсором [] и [] или кнопок [+] и [-] выберите выходной режим. • Вы можете выбрать один из следующих двух выходных режимов. int: встроенные - Страница 77 из 125
MIDI Установки MIDI Что такое MIDI? MIDI – это стандарт для цифровых сигналов и соединительных устройств, который делает возможным обмен музыкальными данными между музыкальными инструментами, компьютерами и другими устройствами, выпущенными разными производителями. Соединения интерфейса MIDI - Страница 78 из 125
MIDI Использование программного обеспечения управления музыкальными данными (на прилагаемом CD-ROM) Программное обеспечение управления музыкальными данными на прилагаемом к музыкальному инструменту CDROM, дает вам возможность передавать данные, загруженные с МУЗЫКАЛЬНОГО САЙТА CASIO, с вашего - Страница 79 из 125
MIDI Восстановление первоначальных заводских настроек музыкального инструмента 2. Включите музыкальный инструмент, а затем включи- В папке «Data» на прилагаемом к музыкальному инструменту CD-ROM имеется файл под названием «alldata.ckf», в котором содержатся данные для восстановления первоначальных - Страница 80 из 125
Поиск и устранение неисправностей Проявление неисправности Нет звука при нажатии клавиш клавиатуры Возможная причина Способ устранения См. страницу 1. Правильно подключите адаптер переменного тока, убедитесь в правильной полярности установки батарей, убедитесь, что батареи не разряжены. 2. - Страница 81 из 125
Поиск и устранение неисправностей Проявление неисправности Ничего не происходит при нажатии кнопки «LAYER» или «SPLIT». Нет звука при воспроизведении MIDI-данных с компьютера. См. страницу Возможная причина Способ устранения 1. Один или несколько мелодийных каналов (со 2 по 4) выключены. 2. Слишком - Страница 82 из 125
Технические характеристики Модель: CTK-900 Клавиатура: 61 клавиша стандартного размера, 5 октав с функцией чувствительности клавиш к силе нажатия (выкл./1/2/3) Тембры: 332 усовершенствованных тембра + 200 предустановленных тембров + 18 тембров наборов ударных инструментов + 100 стандартных - Страница 83 из 125
Технические характеристики Прочие функции • Транспонирование: • Настройка: • ЖКД: 49 шагов (от -24 полутонов до +24 полутонов) регулируемая (А4 = приблизительно 440 Гц ±100 сотых) С регулируемой контрастностью SMF-плейер: Возможность хранения до 200 файлов* во флэш-памяти • Поддерживаемый формат: - Страница 84 из 125
Уход за музыкальным инструментом Избегайте нагрева, высокой влажности и прямого солнечного света. Оберегайте ваш музыкальный инструмент от прямого солнечного света, не размещайте его рядом с кондиционером или в месте с чрезвычайно высокой температурой. Не устанавливайте музыкальный инструмент - Страница 85 из 125
Перечень алгоритмов DSP-эффектов 00: Auto Pan • Функция Непрерывно выполняет панорамирование входного сигнала влевовправо в соответствии с НЧ-генератором. • Параметры 0: Степень (диапазон: от 0 до 127) Регулировка степени панорамирования. 1: Глубина (диапазон: от 0 до 127) Регулировка глубины - Страница 86 из 125
Перечень алгоритмов DSP-эффектов 1: Нижние частоты (диапазон: от 0 до 127) Регулировка усиления нижних частот. Частота среза различается в зависимости от предварительных установок DSP. 2: Верхние частоты (диапазон: от 0 до 127) Регулировка усиления верхних частот. Частота среза различается в - Страница 87 из 125
Перечень алгоритмов DSP-эффектов 2: Обратная связь (диапазон: от –64 до 0 до +63) Регулировка обратной связи звука. 3: Влажный уровень (диапазон: от 0 до 127) Регулировка уровня громкости звука с эффектом. 17: Sin 2-Phase Chorus • Функция Это стереофонический хорус в соответствии с LFO с - Страница 88 из 125
Перечень алгоритмов DSP-эффектов 2: Обратная связь (диапазон: от 0 до 0 до 127) Регулировка повтора реверберации. 3: Глушение верхних частот (диапазон: от 0 до 127) Регулировка глушения задержанного звука верхнего диапазона. Чем ниже значение, тем сильнее глушение задержанного звука верхнего - Страница 89 из 125
Перечень алгоритмов DSP-эффектов M05: Multi05 (Enhancer – 1-Phase Chorus) • Функция Это мультиэффектор, связанный с усилителем – 1-фазным хорусом. • Параметры 0: Нижние частоты усилителя 1: Усиление нижних частот 2: Верхние частоты усилителя 3: Усиление верхних частот 4: Степень LFO хоруса 5: - Страница 90 из 125
Перечень алгоритмов DSP-эффектов M16: Multi16 (Drive Rotary – Reflection) • Функция Это мультиэффектор, связанный с перегрузкой вращающегося динамика – отражением. • Параметры 0: Усиление перегрузки вращающегося динамика 1: Уровень перегрузки вращающегося динамика 2: Скорость перегрузки - Страница 91 из 125
Перечень алгоритмов DSP-эффектов M27: Multi27 (LFO Wah – Distortion – 2-Tap Delay) • Функция Это мультиэффектор, связанный с LFO «вау»– дисторшн-эффектом – 2-полосной задержкой. • Параметры 0: Ручная настройка эффекта «вау» 1: Степень LFO «вау» 2: Глубина LFO «вау» 3: Усиление дисторшн-эффекта 4: - Страница 92 из 125
Приложения Перечень тембров № Смена программы Тип диапазона Группа тембров Старший бит выбора банка Тип DSP Название тембра Максимальная полифония Усовершенствованные тембры � � � 0 1 2 3 4 5 6 7 8 9 10 11 12 13 14 15 16 17 18 19 20 21 22 23 24 25 26 27 28 29 30 31 32 33 34 35 36 37 - Страница 93 из 125
Приложения � � � 126 127 128 129 130 131 132 133 134 135 136 137 138 139 140 141 142 143 144 145 146 147 148 149 150 151 152 153 154 155 156 157 158 159 160 161 162 163 164 165 166 167 168 169 170 171 172 173 174 175 176 177 178 179 180 181 182 183 184 185 186 187 188 189 190 191 192 193 194 195 - Страница 94 из 125
Приложения � � 276 277 278 279 280 281 282 283 284 285 286 287 288 289 290 291 292 293 294 295 296 297 298 299 300 301 302 303 SYNTH-LEAD SYNTH-LEAD SYNTH-LEAD SYNTH-LEAD SYNTH-LEAD SYNTH-LEAD SYNTH-LEAD SYNTH-LEAD SYNTH-LEAD SYNTH-LEAD SYNTH-LEAD SYNTH-LEAD SYNTH-LEAD SYNTH-LEAD SYNTH-LEAD - Страница 95 из 125
Приложения � 484 485 486 487 488 489 490 491 492 493 494 495 496 497 498 499 500 501 502 503 504 505 506 507 508 509 510 511 512 513 514 515 516 517 518 519 520 521 522 523 524 525 526 527 528 529 530 531 532 533 534 535 536 537 538 539 540 541 � GM GM GM GM GM GM GM GM GM GM GM GM GM GM GM GM GM - Страница 96 из 125
Приложения Пользовательские тембры � � � � 700 701 702 703 704 705 706 707 708 709 710 711 712 713 714 715 716 717 718 719 720 721 722 723 724 725 726 727 728 729 730 731 732 733 734 735 736 737 738 739 740 741 742 743 744 745 746 747 748 749 USER TONE USER TONE USER TONE USER TONE USER TONE USER - Страница 97 из 125
Приложения Предустановленные тембры акустического органа � 0 1 2 3 4 5 6 7 8 9 10 11 12 13 14 15 16 17 18 19 20 21 22 23 24 � � DRAWBAR DRAWBAR DRAWBAR DRAWBAR DRAWBAR DRAWBAR DRAWBAR DRAWBAR DRAWBAR DRAWBAR DRAWBAR DRAWBAR DRAWBAR DRAWBAR DRAWBAR DRAWBAR DRAWBAR DRAWBAR DRAWBAR DRAWBAR DRAWBAR - Страница 98 из 125
Приложения � � � 182 USER DRAWBAR 183 � USER DRAWBAR � 184 USER DRAWBAR 182 USER DRAWBAR 185 USER DRAWBAR 183 USER DRAWBAR 186 USER DRAWBAR 184 USER DRAWBAR 187 USER DRAWBAR 185 USER DRAWBAR 188 USER DRAWBAR 186 USER DRAWBAR 189 USER DRAWBAR 187 USER DRAWBAR 190 USER DRAWBAR 188 USER DRAWBAR 191 - Страница 99 из 125
Приложения Таблица назначения клавишам клавиатуры тембров ударных инструментов Символ «» означает тот же звук, что и в стандартном наборе 1. A-8 - Страница 100 из 125
Приложения A-9 - Страница 101 из 125
Приложения Перечень ритмов No./ Nº Название ритма 8-дольные 000 001 002 003 004 005 006 007 008 009 010 011 012 8 BEAT 1 8 BEAT 2 8 BEAT 3 8 BEAT 4 8 BEAT 5 8 BEAT POP 1 8 BEAT POP 2 8 BEAT POP 3 8 BEAT POP 4 60’S SOUL 8 BEAT DANCE POP ROCK 1 POP ROCK 2 16-дольные 013 014 015 016 017 018 019 020 - Страница 102 из 125
Приложения Диаграмма аппликатуры аккордов в режиме «FINGERED» В данной таблице приведены аппликатуры для широко используемых аккордов, в том числе обращенные аппликатуры. Основной тон аккорда Тип аккорда A-11 - Страница 103 из 125
Приложения Основной тон аккорда Тип аккорда * Вы можете изменить диапазон клавиатуры для аккордов dim7 с основными тонами A, B и B и аккордов aug с основными тонами B и B, отрегулировав установку точки разделения (стр. 62). A-12 - Страница 104 из 125
No./ Nº Приложения 12 Flanger3 13 Flanger4 14 SDelay3 Перечень эффектов 15 SDelay4 Отображение No./ Nº на дисплее Название 12 Flanger3 00 Room1типов эффекта реверберации Перечень 01 Room2 Hall 1 Отображение Hall 2 на дисплее Plate1 Room1 Delay Room2 PanDelay Room3 Plate2 Hall 1 Plate3 Hall 2 - Страница 105 из 125
Идентификатор алгоритма Отображение на дисплее Название DSP [05] [06] 10 09 Phaser StPhaser Фазер [07] [08] [09] [10] [11] 16 17 19 18 5 M0 Chorus1 Chorus2 Chorus3 Chorus4 Enha Ch o Хорус 1 [12] [13] 26 7 M0 Flanger EnhaFlan Фланжер [14] [15] [16] [17] [18] [19] 28 22 20 21 M0 6 25 Delay 3Tap Dela - Страница 106 из 125
- Страница 107 из 125
Модель CTK-900 Технологическая карта MIDI Функция … Версия: 1.0 Режим Распознанные По умолчанию 1 – 16 1 – 16 Измененный 1 – 16 1 – 16 По умолчанию Основной канал Переданные Mode 3 [Режим 3] Mode 3 [Режим 3] Номер ноты: Динамическая характеристика нажатия «After Touch» [Послекасание] Сообщения Х - Страница 108 из 125
«Program Change» [Программное изменение] «System Exclusive» [Системно-специфическое сообщение] 0 – 127 ******* 0 – 127 ******* :Реальный номер «System Common» [Общесистемные MIDIсообщения] :Позиция мелодии :Выбор мелодии :Мелодия Х Х Х Х Х Х Реальное системное время : Тактовая синхронизация - Страница 109 из 125
- Страница 110 из 125
Б-1 - Страница 111 из 125
- Страница 112 из 125
Б-3 - Страница 113 из 125
Приложения Б-4 - Страница 114 из 125
Музыка всего мира Б-5 - Страница 115 из 125
Основные настройки перед началом работы Б-6 - Страница 116 из 125
Приложение 1: Data Manager (программа управления музыкальными данными) Б-7 - Страница 117 из 125
Приложение 1: Data Manager (программа управления музыкальными данными) Б-8 - Страница 118 из 125
Приложение 2: Parameter Editor (редактор параметров) Б-9 - Страница 119 из 125
Приложение 2: Parameter Editor (редактор параметров) Б-10 - Страница 120 из 125
Приложение 3: Rhythm Converter (конвертер стилей) Б-11 - Страница 121 из 125
Приложение 3: Rhythm Converter (конвертер стилей) Б-12 - Страница 122 из 125
Приложение 4: Wave Converter (конвертер сэмплов) Б-13 - Страница 123 из 125
Приложение 4: Wave Converter (конвертер сэмплов) Б-14 - Страница 124 из 125
- Страница 125 из 125
Инструкции и руководства похожие на CASIO CTK-900
Другие инструкции и руководства из категории Синтезатор
© 2023 manuals-help.ru, Все права защищены
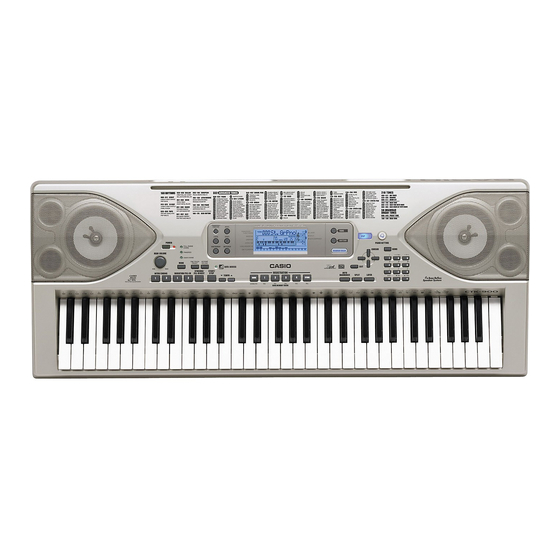
Синтезаторы Casio CTK-900 — инструкция пользователя по применению, эксплуатации и установке на русском языке. Мы надеемся, она поможет вам решить возникшие у вас вопросы при эксплуатации техники.
Вы можете скачать инструкцию к Casio CTK-900 по ссылке ниже, если не хотите ждать загрузки. Если остались вопросы, задайте их в комментариях после инструкции.
«Загружаем инструкцию», означает, что нужно подождать пока файл загрузится и можно будет его читать онлайн. Некоторые инструкции очень большие и время их появления зависит от вашей скорости интернета.
Полезные видео
Характеристики
Остались вопросы?
Не нашли свой ответ в руководстве или возникли другие проблемы? Задайте свой вопрос в форме ниже с подробным описанием вашей ситуации, чтобы другие люди и специалисты смогли дать на него ответ. Если вы знаете как решить проблему другого человека, пожалуйста, подскажите ему


Часто задаваемые вопросы

Как посмотреть инструкцию к Casio CTK-900?
Необходимо подождать полной загрузки инструкции в сером окне на данной странице или скачать кликнув по специальной кнопке.
Руководство на русском языке?
Все наши руководства представлены на русском языке или схематично, поэтому вы без труда сможете разобраться с вашей моделью
Как можно распечатать инструкцию?
Скачайте ее по специальной кнопке над формой чтения на ваше устройства и отправьте на печать.
-
Страница 1
1 Part I MIDI Message Overview 1 Produc t Configurati on as a M IDI Device …………… …………. ………………. …………. ………………. …………. 7 1.1 Controller Bl ock ……………. …………….. …………….. …………….. ……………. ………… .. ……………….. …………….. … 7 1.2 […]
-
Страница 2
2 10.15 Vibrato Rate (4CH) ……… ……………….. …………….. ………………. …………….. ……….. … ……………….. ………. 16 10.16 Vibrato Depth (4DH)……………. ………………. …………….. …………….. ………………. …. …….. ………………. ….. 16 10.17 Vibrato Delay (4EH[…]
-
Страница 3
3 Part IV This Model’s System Exclusive Messages 17 Format …. ……………. ……………. …………….. ……………. ……………. ………………. …………. ……………. ……. 31 17.1 Message Classificat ions………………….. …………….. ……………. …………….. ……………. ……….[…]
-
Страница 4
4 Part VI Parameter Set List 26 User Ton e Parameter Se t ……………. ………………. …………….. ……………. ……………. …………… . ………. 58 27 User Tim bre Parameter S et …………. ……………. ……………….. ……………. ……………. ……………. ………. 58 28 User Dr um Paramete […]
-
Страница 5
5 40.25 Algorithm 24 (18H) : Reverse Gate Reverb ……………. …………….. ………………. ………………. ………… ….. 69 40.26 Algorithm 25 (19H) : Reflection ……… …………….. ………………. …………….. …………….. ……….. ……………. 69 40.27 Algorithm 26 (1AH) : Flanger ……………[…]
-
Страница 6
6 42.13 Equalizer Mid Frequency Setting Value Table …………… ………………. ……………….. ………….. ……………. 77 42.14 Equalizer High Frequency Setting Value Table ……………. ………………. ……………….. ………… …………. .. 77 42.15 Equalizer Gain Setting Value Table …………….. …..[…]
-
Страница 7
7 Part I MIDI Message Overview 1 Pr oduct Configuration as a MIDI Device This Model consists of a controller block and a sound source block as described below . • Controller Block – Keyboard – Pedals, wheels, and other real-time controllers – Auto accompanime nt – Song Memory – SMF Player – Parameter editing tools • Sound Source Blo[…]
-
Страница 8
8 1.3 Sound Sour ce Common Sub-blocks The S ound Sou rce Commo n Sub-bl ocks in clude so und so urce sett ings t hat are no t dep endent o n sound s ource parts; name ly effectors , a mixe r , and a dr awbar o rgan waveform sy nthesi zer . Basic ally , common su b-block paramet ers can b e cont rolle d using S yste m Exclusi ve messa ges, but a n u[…]
-
Страница 9
9 4 Different Operations Depending on P ar t Mode Each Part Mode (see 12.1 «About the Part Mode»), which is the sound source operational mode, has different messages for performing operations upon receipt. Each message is explained in the applicable message sections of this document . Part II Channel Message 5 Receive Channel The channel […]
-
Страница 10
10 8N o t e O n Format Send Sent when something is played on the keyboard. Receive Received over MIDI Channels that correspond to each part. Any part whose mixer channel is turned of f is not received. 9 P ol yphonic K ey Pressure Format Send Operation This message is not sen t. Receive Operation This message is not rece ived. 10 Contr ol Change Fo[…]
-
Страница 11
11 10.1 Bank Select (00H) Format Send Sent when a tone is selected. See the «T one List» of this Model’s User’s Guide for detail s. Receive Receipt causes a change in the tone bank number stored in this Model’s memory , but the tone is not actually changed until Program Change is received. For details, see «12 Program […]
-
Страница 12
12 10.4 V olume (07H) Format Note 1: The setting value match es the value that is sent and received. Send Sent when the volume of Mixer Part 1 through 16 is changed. Receive Receipt changes the Mixer Part V olume. 10.5 P an (0AH) Format Note 1: For information about the relationship between setting values and send/receive values, see «42.6 Pan[…]
-
Страница 13
13 10.7 General Use Contr ollers 1 thr ough 8 (10H through 13H, 50H thr ough 53H) Format Note 1: MIDI Channel Number The MIDI Channel for manipula ting DSP parameters with control change messa ges is called the «Global Channel». The initial factory default Global Channel is Channel 1. The Global Channel cannot be changed with a control pa[…]
-
Страница 14
14 10.9 Sostenuto (42H) Format Note 1: For information about the relationship between setting values and send/receive values, see the «42.1 Off/On Setting V alue T able» in «Part VIII Setting V alues and Send/Receive V alues.» Send Sent when the assignable jack is configured for sostenuto and the connected pedal is operated. Rec[…]
-
Страница 15
15 10.12 En velope Attack Time (49H) Format Note 1: For information about the relationship between setting values and send/receive values, see «42.5 -64 to 0 to 63 Setting V alue T able» in «Part VIII Setting V alues and Send/Receive V alues». Send Sent when Attack T ime is changed with the synthesizer function. Receive Receipt […]
-
Страница 16
16 10.15 Vibrato Rate (4CH) Format Note 1: For information about the relationship between setting values and send/receive values, see «42.5 -64 to 0 to 63 Setting V alue T able» in «Part VIII Setting V alues and Send/Receive V alues». Send Sent when V ibrato Rate is changed with the synthesizer function. Receive Receipt changes […]
-
Страница 17
17 10.18 Reverb Send (5BH) Format Note 1: The setting value match es the value that is sent and received. Send Sent when Reverb Send of Mixer Part 1 through 16 is changed. Receive Receipt changes Reverb Send of Mixer Part 1 through 16. 10.19 Chorus Send (5DH) Format Note 1: The setting value match es the value that is sent and received. Send Sent w[…]
-
Страница 18
18 Send This message is never sent . Receive Receipt changes Fi lter Cutoff of T one Parameter . 10.20.2 Filter Resonance Format Note 1: For information about the relationship between setting values and send/receive values, see «42.5 -64 to 0 to 63 Setting V alue T able» in «Part VIII Setting V alues and Send/Receive V alues». S[…]
-
Страница 19
19 Send Sent when Drawbar Organ Parameter is changed on this Model. Receive Receipt changes the drawbar position in accor dance with the message content s. 10.20.4 Drawbar Organ Click Format Note 1: For information about the relationship between setting values and send/receive values, see the «42.1 Off/On Setting V alue T able» in «P[…]
-
Страница 20
20 Send Sent when 3rd Percussion of Drawbar Parameter is changed on this Model. Receive Receipt changes 3rd Percussion the Drawbar Organ Parameter . 10.20.7 Percussion Decay Time Format Note 1: The setting value match es the value that is sent and received. Send Sent when Percussion Decay T ime of Drawbar Parameter is changed on this Model. Receive[…]
-
Страница 21
21 10.21.2 Fine T une Format Note 1: For information about the relationship between setting values and send/receive values, see «42.7 -99 to 0 to 99 Setting V alue T able» in «Part VIII Setting V alues and Send/Receive V alues». Send Sent when Fine T une of Mixer Part 1 through 16 is by operation of this Model. Receive Receipt c[…]
-
Страница 22
22 10.21.5 Null Format Send This message is never sent . Receive Receipt deselects RPN. 10.22 All Sound Off (78H) Format Send This message is never sent . Receive Receipt stops all voices that are sounding. 10.23 Reset All Control lers (79H) Format Send Sent when the song function is used. Receive Receipt initializ es controller values as shown bel[…]
-
Страница 23
23 11 Mode Message 11.1 All Notes Off (7BH) Format 11.2 Omni Off (7CH) Format 11.3 Omni On (7DH) Format 11.4 Mono (7EH) Format 11.5 P oly (7FH) Format Send These messages are never sent. Receive Receipt of any of these messages releases (same as releasing the keyboard key) the currently sounding voice. Message Format: BnH 7BH 00H n: MIDI Channel Nu[…]
-
Страница 24
24 12 Pr ogram Change Format Send Sent when a tone is selected. See the «T one List» of this Model’s User’s Guide for details about program numbers. Receive Receipt changes the tone of the part corresponding to the MIDI Channel. The selected tone is determined by the program value of this message and the Bank Select message valu[…]
-
Страница 25
25 Part III System Message 15 Active Sensing Format Send This message is never sent . Receive When this message is received once, the Active Sensing mode is entered. If no MIDI Message is received for a particular amount of time, voices being sounded by this Model’s sound source are released, controller is reset, and Active Sensing mode is exi[…]
-
Страница 26
26 16.1.2 Master Balance Format Note 1: For information about the relationship between setting values and send/receive values, see «42.6 Pan Setting V alue T able» in «Part VIII Setting V alues and Send/Receive V alues». Send This message is never sent . Receive Receipt changes the Master Pan parameter . Note that the Master Pan[…]
-
Страница 27
27 16.1.5 Reverb Parameter Format T ype Format Note 1: For information about the relationship between setting values and send/receive values, see «42.10 Reverb T ype Setting V alue T able» in «Part VIII Setting V alues and Send/Receive V alues.» Send Sent when the Reverb T ype parameter of System Reverb is changed. Receive Recei[…]
-
Страница 28
28 Note 1: For information about the relationship between setting values and send/receive values, see «42.1 1 Chorus T ype Setting V alue T able» in «Part VIII Setting V alues and Send/Receive V alues.» Send Sent when the Chorus T ype parameter of System Chorus is changed. Receive Receipt changes the System Chorus T ype paramete[…]
-
Страница 29
29 Send T o Reverb Format Note 1: The setting value is the same as the value that is sent. Send This message is never sent . Receive Receipt changes the Chorus Send T o Reverb parameter . The Chorus Send to Reverb parameter cannot be changed with an operation of this Model. 16.1.7 GM System Message GM System On Format Send This message is never sen[…]
-
Страница 30
30 16.1.8 GS Message Send This message is never sent . Receive Receipt performs the same operation as when the GM System On message is received. 16.2 CTK-900/WK-3200/WK-3700 System Exc lusive Message Format These messages can control most of the this Model’s parameters, as well as user data send/receive with Flash memory and come commands . Fo[…]
-
Страница 31
31 Part IV This Model’s System Exclusive Messages 17 Format 17.1 Message Classifications This Model’s SysEx operations are classified as Parameter type for send and receive of an individual Par ameter, and Parameter Set type for Bulk send and receive of a set of parameters. These SysEx types can be further broken down into parameter categ[…]
-
Страница 32
32 17.2 Message Structures This Model’s System Exclusive Messages is formed of the 13 fields shown below . Whether or not a particular field is included in a message and the length of each field depends on the message. The minimum unit for the length of each field is bytes. If two values are contained within the same byte, they are separated b[…]
-
Страница 33
33 17.2.6 6… cat : Category 0cccccccB = Category (7bit) The category indicates the type of data handled by the System Exclusive Message. The ID number (ID) of the Category is indicated on the left, while the communication operation (Action) is indicated on the right. A …A vailable (Includes cases here parameters are only partially available.) R[…]
-
Страница 34
34 17.2.7 7… prm : Parameter ID The Parameter ID field indicates the parameter type. When transferring parameters (see «Part V Parameter List» below) individually (as opposed to bulk transfer), this field is used to identify the parameter being transferred by its parameter ID. Any othe r time, this field is filled with the value 00H. 17[…]
-
Страница 35
35 17.2.10 10.. .index Parameter Index Number This field contains a supplementary number that points to data when parameters are arrayed. This means that each parameter has a different number , and the length of the number is anywhere from one to four bytes. Even when parameters have the same IDs, for example, the parameters also have preset number[…]
-
Страница 36
36 17.2.1 1 1 1… data Parameter Data This field is always empty . Indicates the value of the parameter itself. The length varies in accordance with the data size indicated by the » dlen » field, as shown below . This field is not included for a parameter request. Each block of data is packed from the lowest order byte first. In the case[…]
-
Страница 37
37 For a bulk data transfer operation, the Parameter Set data to be transferred is read sequentially in 16-bit data starting from the top address. Read values are divided into 3-byte segments as shown below , and then sent in sequence. The following is the conversion format, which is the same as the individual parameter 16-bit transfer detailed abo[…]
-
Страница 38
38 18 P arameter Operations There are two parameter operations: Individual Parameter T ransfer and Individual Parameter Request. A single session is concluded when this Model sends an IPC (Individual Parameter Change) in response to an IPR (Individual Parameter Request) from an external device, or when an IPC is sent by an external device or this M[…]
-
Страница 39
39 19.1.2 Session and Subsession Subsession One Parameter Set can be transferred per subsession. Subsession transfers one Parameter Set or data that is broken down into multiple packe ts for transfer , with EOD (End of data) sent at the end to termina te the send. Data is broken down into multipl e packets when a single Paramete r Set is larger t h[…]
-
Страница 40
40 19.3 Handshake Pr otocol Commu nication Flow A session starts with the receiving device sending a request using an HDR or with the sending device sending HDS data. The sending device does not send the next packet until it receives an ACK from the receiving device. The maximum wait time of at least 2000 msec is reserved. Failure of a response to […]
-
Страница 41
41 The session can be canceled for any reason by sending an HDJ. The HDJ can be sent by the sending device or the receiving device. The bulk dump session is terminated immediately upon receipt of an HDJ. In the case of the WK-3700, for e xample, when a communicati on request is received from an exte rnal source while floppy disk control is being pe[…]
-
Страница 42
42 The same packet i s resent when a checksum mismatch or incompatible data structure error is detect ed. Data Receiver Data Sender Operation BDS → Data Send ← BSY Busy (Send Canceled) Data Receiver Data Sender Operation HDR → Send Request ← BSY Busy (Send Canceled) Data Receiver Data Sender Operation HDS → Data Send ← BSY Busy (Send Ca[…]
-
Страница 43
43 Part V Parameter Lists These lists show the parameters that can be transferred individually using System Exclusive Messages. • Note 1: Any parameter that has «r» to the right of its Parameter ID number is a read-only parameter that can be used for obtaining status informa tion only . A parameter with «w» next to its Paramet[…]
-
Страница 44
44 System Parameter List Note 1: This is the version number of models with the same System Exclusive Model ID = 1 1-02. This value is used to specify the model for a parame ter send request from an external source. Note 2: This is a request to look up and cancel the tone status of parts whose bits are set. It does this by canceling the DSP Line sel[…]
-
Страница 45
45 Data Management Command List Note 1: Receipt of this parameter causes this Model to terminate all music and note play , and enter a mode that is optimized for bulk dump. Note 2: This parameter stores a value, in bytes, that indicates the remaining free Song area memory . Note 3: This parameter stores a va lue, in bytes, that indicates the rem ai[…]
-
Страница 46
46 20.3 Command P arameter List System Exclusive Format Setup P arameter List MIDI Pa rameter List Field Value 01 SYSEX F0 02 MAN 44 03 MOD 11,02 04 dev Either 00 to 1F, or 7F 05 act 00(IPC), 01(IPR) 06 cat Command = 0 07 prm 00-7F 08 ilen/dlen 0 / bit size — 1 09 ps LSB,MSB = 00,00 10 index Part 11 data See the Parameter List 12 sum None 13 EOX F7[…]
-
Страница 47
47 21 P atch P arameter The patch parameter is a temporary area that controls the sound source operation mode. Mixer settings, synthesizer function, DSP function and other editable parameters are also included in these areas. The content of this area is rewritten whenever preset data or user data is selected and manipulated. The parameters in this […]
-
Страница 48
48 Note 1: See «42.7 -99 to 0 to 99 Setting V alue T able». Note 2: See «42.4 -24 to 0 to 24 Setting V alue T able». Note 3: See «42.6 Pan Setting V alue T able». Note 4: This specifies the volume of data sent from System Chorus to System Reverb. Note 5: When «DSP Bypass» is specified for «DSP Line Bypas[…]
-
Страница 49
49 System Re verb Note 1: Selects the System Reverb preset type. Receipt of GM/GS Reset selects Hall2. The other System Reverb parameters are changed to preset values in accordance with this type value. See «42.10 Reverb T ype Setting V alue T able.» Master Equalizer Note 1: Selects the Master EQ preset type. Receipt of GM/GS Reset select[…]
-
Страница 50
50 DSP Pa tch Parameter The values of this parameter do not change when DSP T ype and T one V a lues are changed. Note 1: Selects the DSP T ype. Receipt of GM/GS Reset selects 014 Delay . 200 is stored when a tone-associated DSP is read into the DSP area . Note 2: See «42.6 Pan Setting V alue T able». DSP T ype parameter The value of this[…]
-
Страница 51
51 21.2 P atch P ar t Parameter List This list shows setting paramete rs that are specific for each part. System Exclusive Format ParamID Parameter bit Value Default Setting Valu e (Decimal) 38 DSP User Parameter0 07 00-7F — 0-127 39 DSP User Parameter1 07 00-7F — 0-127 3A DSP User Parameter2 07 00-7F — 0-127 3B DSP User Parameter3 07 00-7F — 0-127[…]
-
Страница 52
52 Basic Parameter List Note 1: Number of the tone alloc ated to this part. Note 2: Sets the Normal, Drum and Drawbar Organ modes of the part play operation . For detailed operations, see «12.1 About the Part Mode». T une / Mix parameter T one para meter Note 1: Change the tone name. One character is indicated by each byte. ParamID Parame[…]
-
Страница 53
53 Assignab le Contr oller Par ameter Note 1: When V ibrato is selected for Modulation Assign, this parameter specifies the depth of the vibrato effect to be applied relative to the modulation button, modulation wheel, and received Modulation message value. This parameter does not affect the value sent by the Modulation message when the modulation […]
-
Страница 54
54 22 W ave Data P arameters W ave Data Parameters contain address and size information about expanded waveform data. 22.1 W ave Data Inf ormation System Exclusive Format P arameter List Field Value 01 SYSEX F0 02 MAN 44 03 MOD 11,02 04 dev Either 00 to 1F, or 7F 05 act 00(IPC), 01(IPR) 06 cat Wave Data = 08 07 prm 00-7F 08 ilen/dlen 0 / bit size -[…]
-
Страница 55
55 23 Song Data P arameter Song Data Parameters contain address, size, and name information about song sequencer data. 23.1 Song Data Inf ormation System Exclusive Format P arameter List Field Value 01 SYSEX F0 02 MAN 44 03 MOD 11,02 04 dev Either 00 to 1F, or 7F 05 act 00(IPC), 01(IPR) 06 cat Song = 0A 07 prm 00-7F 08 ilen/dlen 0 / bit size — 1 09[…]
-
Страница 56
56 24 Rh ythm Data P arameter s Rhythm Data Parameters contain address, size, and name information about expanded rhythm data. 24.1 Rh ythm Data Information System Exclusive Format P arameter List Field Value 01 SYSEX F0 02 MAN 44 03 MOD 11,02 04 dev Either 00 to 1F, or 7F 05 act 00(IPC), 01(IPR) 06 cat Rhythm = 0B 07 prm 00-7F 08 ilen/dlen 0 / bit[…]
-
Страница 57
57 25 SMF Data P arameters SMF Data Parameters contain address, size, and name information about SMF data. 25.1 SMF Data Inf ormation System Exclusive Format P arameter List Field Value 01 SYSEX F0 02 MAN 44 03 MOD 11,02 04 dev Either 00 to 1F, or 7F 05 act 00(IPC), 01(IPR) 06 cat SMF = 10 07 prm 00-7F 08 ilen/dlen 0 / bit size — 1 09 ps LSB,MSB = […]
-
Страница 58
58 Part VI Parameter Set List This list shows the parameter sets that can be transferred using System Exclusive Message Bulk Dump. 26 User T one Parameter Set System Exclusive Format 27 User Timbre P arameter Set This is the parameter set that is associate d with and sent with T one. System Exclusive Format Field Value 01 SYSEX F0 02 MAN 44 03 MOD […]
-
Страница 59
59 28 User Drum P arameter Set This is the drum se t parameter set. System Exclusive Format 29 User V oice P arameter Set This is the parameter set that is associate d with and sent with T imbre. Four voices are associa ted with one timbre. System Exclusive Format Field Value 01 SYSEX F0 02 MAN 44 03 MOD 11,02 04 dev Either 00 to 1F, or 7F 05 act 0[…]
-
Страница 60
60 30 User Instrument P arameter Set This is the parameter set that is associate d with and sent with Drum. All key numbers are supported, so one drum set is associated with 128 instruments. System Exclusive Format 31 User W ave P arameter Set This is the parameter set that is associ ated with and sent with V oice or Instrument. 16 waves are associ[…]
-
Страница 61
61 32 User DSP P arameter Set System Exclusive Format 33 Song Data System Exclusive Format Field Value 01 SYSEX F0 02 MAN 44 03 MOD 11,02 04 dev Either 00 to 1F, or 7F 05 act 04(HDS), 05(HDR), 07(Control) 06 cat DSP = 09 07 prm 00-7F 08 ilen/dlen See «IV This Model’s System Exclusive Messages». 09 ps Indicates the DSP number being tr[…]
-
Страница 62
62 34 User Rh ythm P attern System Exclusive Format 35 Registration Data System Exclusive Format Field Value 01 SYSEX F0 02 MAN 44 03 MOD 11,02 04 dev Either 00 to 1F, or 7F 05 act 04(HDS), 05(HDR), 07(Control) 06 cat User Rhythm = 0B 07 prm 00 08 ilen/dlen See «IV This Model’s System Exclusive Messages». 09 ps Indicates the rhythm n[…]
-
Страница 63
63 Note 1: The relationship between the «Bank», «Number» and «ps (parameter set)» are as shown below . 36 User Draw bar P arameter Set System Exclusive Format Bank Number ps Bank Number ps 1 1 0020H 5 1 0030H 1 2 0021H 5 2 0031H 1 3 0022H 5 3 0032H 1 4 0023H 5 4 0033H 2 1 0024H 6 1 0034H 2 2 0025H 6 2 0035H 2 3 0026H 6[…]
-
Страница 64
64 37 SMF P arameter Set System Exclusive Format Data Format Bulk dumping SMF data transfers the data with a 128-byte header appended as shown below . The header data starts with an 8-byte file name, which is displayed by this Model after receipt. Field Value 01 SYSEX F0 02 MAN 44 03 MOD 11,02 04 dev Either 00 to 1F, or 7F 05 act 04(HDS), 05(HDR), […]
-
Страница 65
65 38 Flash Memory Image P arameter Set This Parameter Set is used for dumping flash memory contents. One Parameter Set corresponds to an image block of 2 Mbytes of flash memory . The 4 Mbytes of flash memory of this Model is made up of two blocks, so two Parameter Sets are used. System Exclusive Format 39 About P arameter Set (PS) numbers When usi[…]
-
Страница 66
66 Part VII DSP Parameter List This list shows the parameters for each of the DSP algorithms. U0 to U7 indicate User Paramete rs 0 to 7, while I00 to I15 indicate Internal Parameters 00 to 15. Parameters for which no setting range is indicated, receipt of a value from 0 to 127 is assigned as-is to the parameter . 40 DSP Algorithm List (Single Effec[…]
-
Страница 67
67 40.7 Algorithm 06 (06H) : Compressor Note 1: This algorithm a djusts the level a t which the compress or effect st arts. 40.8 Algorithm 07 (07H) : Limiter 40.9 Algorithm 08 (08H) : Di stor tion 40.10 Algorithm 09 (09H) : Stereo Phaser Note 1: See the «42.5 -64 to 0 to 63 Setting V alue T able.» 40.11 Algorithm 10 (0AH) : Phaser Note 1:[…]
-
Страница 68
68 40.15 Algorithm 14 (0EH) : Ring Modulator 40.16 Algorithm 15 (0FH) : LoFi Note 1: See the «42.5 -64 to 0 to 63 Setting V alue T able.» 40.17 Algorithm 16 (10H) : 1-Phase Chorus Note 1: See the «42.5 -64 to 0 to 63 Setting V alue T able.» 40.18 Algorithm 17 (11H) : Sin 2-Phase Chorus Note 1: See the «42.5 -64 to 0 to 63 S[…]
-
Страница 69
69 40.23 Algorithm 22 (16H) : 3-T ap Delay 40.24 Algorithm 23 (17H) : Gate Re verb 40.25 Algorithm 24 (18H) : Re verse Gate Reverb 40.26 Algorithm 25 (19H) : Reflection Note 1: See «42.8 T ype0 to T ype7 Setting V alue Ta b l e » . 40.27 Algorithm 26 (1AH) : Flanger Note 1: See the «42.5 -64 to 0 to 63 Setting V alue T able.» 40[…]
-
Страница 70
70 41 DSP Algorithm List (Multi Effect) The multi-algorithms (M00 to M31) listed below are combinations of the algorithms described above. Parameter operations and other details are the same as the previous algorithms, so there is no separate explanation provided here. 41.1 Algorithm M00 (20H) : Multi00 41.2 Algorithm M01 (21H) : Multi01 41.3 Algor[…]
-
Страница 71
71 41.6 Algorithm M05 (25H) : Multi05 41.7 Algorithm M06 (26H) : Multi06 41.8 Algorithm M07 (27H) : Multi07 41.9 Algorithm M08 (28H) : Multi08 41.10 Algorithm M09 (29H) : Multi09 41.11 Algorithm M10 (2AH) : Multi10 Number Parameter Notes U0 Enhancer Low Frequency — U1 Enhancer Low Gain — U2 Enhancer High Frequency — U3 Enhancer High Gai n — U4 Chor[…]
-
Страница 72
72 41.12 Algorithm M11 (2BH) : Multi11 41.13 Algorithm M12 (2CH) : Multi12 41.14 Algorithm M13 (2DH) : Multi13 41.15 Algorithm M14 (2EH) : Multi14 41.16 Algorithm M15 (2FH) : Multi15 Number Parameter Notes U0 Compressor Depth — U1 Compressor Attack — U2 Compressor Level — U3 Lo-Fi Noise 1 — U4 Lo-Fi Noise 2 — U5 Lo-Fi T one — U6 Lo-Fi Resonance — U[…]
-
Страница 73
73 41.17 Algorithm M16 (30H) : Multi16 41.18 Algorithm M17 (31H) : Multi17 41.19 Algorithm M18 (32H) : Multi18 41.20 Algorithm M19 (33H) : Multi19 41.21 Algorithm M20 (34H) : Multi20 41.22 Algorithm M21 (35H) : Multi21 Number Parameter Notes U0 Od Gain — U1 Od Level — U2 Rot Speed — U3 Rot Slow Rate — U4 Rot Fast Rate — U5 Reflecti on W et Level — […]
-
Страница 74
74 41.23 Algorithm M22 (36H) : Multi22 41.24 Algorithm M23 (37H) : Multi23 41.25 Algorithm M24 (38H) : Multi24 41.26 Algorithm M25 (39H) : Multi25 41.27 Algorithm M26 (3AH) : Multi26 Number Parameter Notes U0 W a h Resonanc e — U1 W ah Manual — U2 W ah LFO Rate — U3 W ah LFO Depth — U4 Chorus LFO Depth — U5 Delay Ti me — U6 Delay W et Level — U7 De[…]
-
Страница 75
75 41.28 Algorithm M27 (3BH) : Multi27 41.29 Algorithm M28 (3CH) : Multi28 41.30 Algorithm M29 (3DH) : Multi29 41.31 Algorithm M30 (3EH) : Multi30 41.32 Algorithm M31 (3FH) : Multi31 Number Parameter Notes U0 W ah Manual — U1 W ah LFO Rate — U2 W ah LFO Depth — U3 Distortion Gain — U4 Distortion Level — U5 Delay Delay T ime — U6 Delay W et Level — […]
-
Страница 76
76 Part VIII Setting V alues and Send/Receive V alues 42 Setting V alue T able 42.1 Off/On Setting V alue T able 42.2 Slow/F ast Setting V alue T able 42.3 Rotate/Break Setting V alue T able 42.4 -24 to 0 to 24 Setting V alue T able 42.5 -64 to 0 to 63 Setting V alue T able 42.6 P an Setting V alue T able 42.7 -99 to 0 to 99 Setting V alue T able 4[…]
-
Страница 77
77 42.10 Reverb T ype Setting V alue T able 42.11 Chorus T ype Setting V alue T able 42.12 Equalizer Low Frequenc y Setting Va l u e Ta b l e 42.13 Equalizer Mid Frequency Setting Va l u e Ta b l e 42.14 Equalizer High Frequency Setting V alue T a ble V alue T ransmit/Receive Room1 00H Room2 01H Room3 02H Hall1 03H Hall2 04H Plate1 05H Delay 06H Pa[…]
-
Страница 78
78 42.15 Equalizer Gain Setting Va l u e Ta b l e The parameter value is not equivalent to dB (decibels). 42.16 DSP Algorithm ID T able 42.17 Drawbar P osition Setting V alue Ta b l e 42.18 Drawbar P ercussion Setting T a ble V alue Transmit Receive -12 00H 00H-04H -1 1 05H 05H-09H -10 0AH 0AH-0EH -9 0FH 0FH-13H -8 14H 14H-18H -7 19H 19H-1DH -6 1EH[…]
-
Страница 79
79 Part IX MIDI Implementation Notation 42.19 Hexadecimal Notation MIDI implementation sometimes requires that data be expressed in hexadecimal format. Hexadecimal values are indicated by the letter «H» after the value. The hexadecimal equivalents of decimal values 10 through 15 are expressed as the letters A through F . The following tab[…]
-
Страница 80
MA0504-A CASIO COMPUTER CO.,LTD. 6-2, Hon-machi 1-chome Shibu y a-ku, Tok y o 151-8543, Japan[…]
Перед Вами Руководство пользователя синтезатора, цифрового пианино Casio CTK-900. Вы можете ознакомиться и скачать данное руководство по эксплуатации бесплатно.
Инструкция по применению на русском языке, предложенная производителем, позволяет
правильно использовать Вашу бытовую технику и электронику.
-
 1
1
-
2
-
3
-
4
-
5
-
6
-
7
-
8
-
9