-
Contents
-
Table of Contents
-
Bookmarks
Quick Links
Phone and Voicemail
User’s Guide For
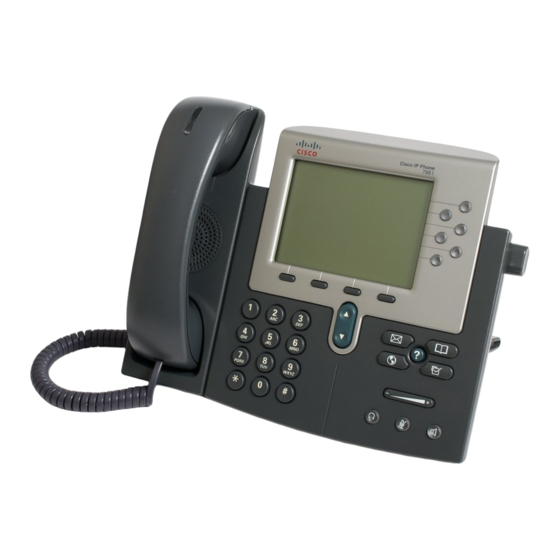
Cisco 7961 Phones
Martinez Unified School District
Technology Department
Related Manuals for Cisco 7961
Summary of Contents for Cisco 7961
-
Page 1
Phone and Voicemail User’s Guide For Cisco 7961 Phones Martinez Unified School District Technology Department… -
Page 2: Table Of Contents
Table of Contents General Information ………………. 1 Understanding Lines vs. Calls …………….2 Selecting Calls ………………..3 Viewing Calls and Switching Between Calls ……….. 4 How to Use the Handset and Speakerphone……………………5 Transfer a Call ………………..7 Transfer a Call Directly to Voicemail …………..7 Placing a Conference Call ……………..
-
Page 3: General Information
General Information Your Cisco phone is a smart phone with context-sensitive buttons. This means that the functions a button performs change depending on what you’re currently doing. For instance, if you haven’t picked up the telephone handset (it is onhook) your buttons will have different labels then if you have picked up the handset to answer or place a call (offhook.) As you learn to operate your phone, it is important to understand the phone…
-
Page 4: Understanding Lines Vs. Calls
Each phone line can handle multiple calls. Lines The Cisco IP Phone 7961 supports up to six lines. The number of lines available on your phone depends on how your system administrator has configured your phone’s programmable buttons. To see how many lines you have, look at the line area of your phone screen.
-
Page 5: Selecting Calls
Note: You may need to push the More softkey to find the Select softkey. Verifying selected calls: Use the Navigation button to scroll through the list of calls. Selected calls are grouped together in the call list. Martinez Unified School District 3 Phone and Voicemail Users Guide for Cisco 7961 Phones …
-
Page 6: Viewing Calls And Switching Between Calls
To return to the standard view, press the Information Button (designated with an I or a?), then immediately press the line button. Martinez Unified School District 4 Phone and Voicemail Users Guide for Cisco 7961 Phones …
-
Page 7: How To Use The Handset And Speakerphone
1. Press the Softkey located directly below the word Hold on the LCD screen to place the caller on hold. 2. Press the Softkey located directly below the words New Call on the LCD screen to get a dial tone. 3. Dial the desired number. Martinez Unified School District 5 Phone and Voicemail Users Guide for Cisco 7961 Phones …
-
Page 8
The buttons for the different available lines are located on the right hand side of the LCD screen. A telephone icon is displayed on the screen for each line. Martinez Unified School District 6 Phone and Voicemail Users Guide for Cisco 7961 Phones … -
Page 9: Transfer A Call
While on a conference call the user can drop the last person who had been added to the conference call. 1. Press the More Softkey. 2. Choose RmLstC (remove last caller) Softkey. The last person is dropped from the call. Martinez Unified School District 7 Phone and Voicemail Users Guide for Cisco 7961 Phones …
-
Page 10: Remove Conference Participants
Exit Softkey twice to return to the normal phone screen. Join Allows you to join two or more calls that are on one line to create a conference call. You remain on the call. Associated Softkey: Join Martinez Unified School District 8 Phone and Voicemail Users Guide for Cisco 7961 Phones …
-
Page 11: Using The Mute Button
1. Press the Up and Down Volume Arrows located on the lower right side of the phone base. 2. The ringer will automatically play. Continue pressing the Up or Down Volume Arrows until the desired ringer level is reached. Martinez Unified School District 9 Phone and Voicemail Users Guide for Cisco 7961 Phones …
-
Page 12
7. Press the Softkey located directly below the word OK on the LCD screen. 8. Press the Softkey located directly below the word Save on the LCD screen to save the changes. Martinez Unified School District 10 Phone and Voicemail Users Guide for Cisco 7961 Phones … -
Page 13: Changing The Lcd Contrast
6. Once the desired level of contrast is achieved, press the Softkey located directly below the word OK on the LCD screen. 7. Press the Softkey located directly below the word Save on the LCD screen, to save the changes. Martinez Unified School District 11 Phone and Voicemail Users Guide for Cisco 7961 Phones …
-
Page 14: Using The Call History
4. To select a different placed call, use the Scroll Down Button to highlight the desired listing. 5. Press the Dial Softkey to dial the highlighted record. 6. If the user does not wish to dial the number, press the Directories button to exit the directory. Martinez Unified School District 12 Phone and Voicemail Users Guide for Cisco 7961 Phones …
-
Page 15: Expansion Module
If the line is in use the line button will glow red. A flashing yellow light indicates an incoming call to that line. The Expansion Module must be plugged into an electrical wall jack. Martinez Unified School District 13 Phone and Voicemail Users Guide for Cisco 7961 Phones …
-
Page 16: Voicemail
3. Enter your 4-digit telephone extension and press # 4. Enter your password and press # Forwarding calls to another number 1. Press the CFwdAll Softkey. 2. Dial the number to which calls should be forwarded. Martinez Unified School District 14 Phone and Voicemail Users Guide for Cisco 7961 Phones …
-
Page 17
3. After a brief pause, a notice will appear on the bottom of the LCD screen stating that calls have been forwarded to that number. Turning Off Forwarding to Voicemail 1. Press the CFwdAll Softkey. Martinez Unified School District 15 Phone and Voicemail Users Guide for Cisco 7961 Phones … -
Page 18: Help/Support
Help/Support If you require assistance, please contact the Help Desk by calling 313-0414 x2114 You can also visit the Technology Department VOIP help page at http://martinez.k12.ca.us Martinez Unified School District 16 Phone and Voicemail Users Guide for Cisco 7961 Phones …
Основные операции с вызовами
IP-телефон Cisco 7961G/7961G-GE и 7941G/7941G-GE
25
Совет
• Если при вводе номера допущена ошибка, нажмите << для удаления одной или
нескольких цифр. Для прекращения попытки набора номера нажмите Отмена.
• Отсутствие тонального сигнала вызова и невозможность посылки вызова могут
быть обусловлены указанными ниже причинами. При необходимости обратитесь
к системному администратору для получения дополнительной информации.
–
Требуется зарегистрироваться для доступа к услуге динамического назначения
добавочных номеров с помощью кнопки
на телефоне.
–
После набора номера требуется ввести код данных клиента или код принудительной
авторизации.
–
Для телефона установлены ограничения по времени суток, запрещающие
использование некоторых функций в определенные часы.
Ответ на вызов
Для ответа на вызов снимите трубку. Другие варианты ответа на вызов приводятся в следующей таблице.
Если требуется…
Выполните следующие действия…
Ответить на вызов в режиме
гарнитуры
Нажмите кнопку ,
если она не горит.
Если кнопка
уже горит, нажмите Ответ или
(мигающую
кнопку линии).
Ответить по громкой связи
Нажмите ,
Ответ или
.
Перевести вызов
с установленным соединением
в режим удержания для ответа
на поступивший вызов
Нажмите Ответ либо (если вызов поступил по другой линии)
мигающую кнопку линии .
В результате любого из этих
Ответить на вызов
с использованием функции
ожидания вызова
Обратитесь к системному администратору для настройки на
телефоне функции ожидания вызова.
Если эта функция включена, при поступлении нового вызова во
время другого вызова подается тональный сигнал ожидания вызова
и отображается информация о вызывающем абоненте. Для ответа
на вызов нажмите Ответ. Для возврата к исходному вызову
необходимо перевести новый вызов в режим удержания.
См. раздел «Использование функций удержания и возобновления
вызовов» на стр. 27.
Время на прочтение
4 мин
Количество просмотров 22K
Всем привет!
Отличные новости для владельцев IP-телефонов Cisco моделей 7940, 7941, 7960 или 7961 — все они теперь поддерживаются 3CX Phone System v12!
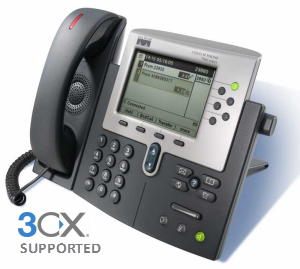
В этом материале мы расскажем о плюсах 3CX перед Cisco Call Manager, о тонкостях перевода Cisco 79xx с протокола SCCP на SIP, а также пройдем весь процесс настройки аппаратов для 3CX.
Поехали!..
В чем плюсы перехода на 3CX?
1. 3CX дешевле большинства решений от вендоров
Лицензии 3CX Phone System в большинстве случаев дешевле конкурентных решений. При этом нет необходимости приглашать сторонних специалистов, чтобы поддерживать систему и проводить какие-то работы, например расширение функционала или добавление новых абонентов.
К тому же вы получаете дополнительные приложения, например софтфоны для Android, iPhone, Windows и MAC – совершенно бесплатно.
2.Сокращение расходов на установку и обучение
Используйте уже имеющиеся аппараты Cisco 7940 / 7941 / 7960 / 7961, при этом вы не только сэкономите на покупке IP-телефонов, но и максимально сокращаете время миграции, т.к. 3CX поддерживает автонастройку.
Не нужно переучивать пользователей на новые телефоны – они смогут использовать привычные CISCO 79xx как и раньше.
3. Расширяйте АТС любыми IP-телефонами
После перехода на 3CX вы можете подключать любые IP-телефоны. И конечно же можно купить новые или БУ CISCO 79xx, но вы можно взять сторонние более дешевые аппараты например snom или Yealink.
И как подключить 3CX?
Схема довольно простая:
- 1) Установите 3CX Phone System for Windows. Скачать 3CX можно здесь.
- 2) Вам понадобится “SIP” прошивка для аппаратов CISCO 7940. CISCO Call Manager использует собственный протокол SCCP который отличается от обычного SIP. Загрузите SIP-прошивку в IP-телефоны CISCO 79xx. Подробное описание как это сделать — ниже
- 3) Настройте аппараты для работы с 3CX. Об этом — тоже ниже по тексту!
Разберемся подробнее в установке SIP прошивки для Cisco
ПРИМЕЧАНИЕ: Данное руководство было проверено с версией прошивки pos3.08.12.00. Имейте в виду, что различные версии прошивок могут иметь различную функциональность.
Эта инструкция описывает, как перевести Cisco 7940 / 7941 / 7960 / 7961 с SCCP протокола в SIP, для работы в 3CX Phone System.
Шаг 1: Получите файлы прошивки
Скачайте SIP прошивку для Cisco 79xx, совместимую с 3CX Phone System. Последняя проверенная прошивка P003-8-12-00. Извлеките архив на ваш компьютер.
Шаг 2: Создание TFTP сервера и заливка файлов на телефон
Скачайте любой TFTP сервер себе на компьютер. В данной статье использовался Pumpkin TFTP сервер, но можно использовать и другие.
Установите TFTP сервер. Убедитесь, что вы указали правильные IP адреса, необходимые для корректной передачи данных. Настройте Pumpkin TFTP как показано на рисунке 1. Включите параметр “Give all files” в поле Read Request Behavior.

Шаг 3: Настройка DHCP-сервера
- Настройте DHCP сервер и создайте резервирование IP адреса под телефон Cisco
- Когда это сделано, отредактируйте резервирование адреса и нажмите «Настройка параметров»
- Найдите параметр «Опция 66» и введите IP адрес, на котором установлен TFTP сервер. Рекомендуется установить TFTP сервер на той же машине, где установлен 3CX Phone System. (см. рисунок 2)

Шаг 4: Выполните обновление прошивки
Положите все скаченные файлы в каталог, который вы определили в параметрах сервера TFTP и перезагрузите телефон. Благодаря «Опции 66» телефону будет присвоен IP-адрес и будет указано, откуда загружать файлы и данные.
ПРИМЕЧАНИЕ: Обратите внимание, что большинство телефонов Cisco не имеют веб-интерфейса. Единственным способом настроить телефоны является настройка через конфигурационные файлы, при помощи TFTP сервера.
Окей, и как теперь настроить 3CX?
Для IP телефонов Cisco серии 79XX есть довольно неприятный момент в настройке со сторонним оборудованием — у этих аппаратов нет веб-интерфейса, все настройки производятся через XML-шаблон, который нужно править руками, что довольно неудобно. Это руководство покажет вам, как настроить IP телефоны Cisco 7940/7941/7960 или 7961 под 3CX Phone System 12.
Шаг 1: Конфигурация сервера DHCP
В первую очередь необходимо настроить сервер DHCP для использования «Опции 66». «Опция 66» установит на телефон IP адрес, на который он сможет принимать конфигурационные файлы и прошивки. В этом примере мы будем считать, что IP адрес телефона Cisco 10.172.0.120, а IP адрес 3CX Phone System (сервер конфигурации) является 10.172.0.105. Руководство по настройке «Опции 66» можно посмотреть по ссылке.
Шаг 2: Конфигурация TFTP сервера
На сервере, где установлен 3CX Phone System (сервер конфигурации) должен быть установлен сервер TFTP. В этой инструкции будем использовать программу PumpKIN TFTP, которую можно скачать здесь.
1. Скачайте и установите PumpKIN TFTP. Запустите TFTP сервер и перейдите на страницу настроек.

2. Нажмите кнопку «Browse» и перейдите в папку C:ProgramData3CXDataHttpInterfaceprovisioning %%PROVSUBDIR%%. Это путь, где 3CX Phone System создает файлы конфигурации для Cisco 7940/7941/7960/7961.
3. Настройте TFTP, и выберите все файлы.
4. Скачайте файлы прошивок, поддерживаемых 3CX Phone System, и положите их в папку, указанную в пункте 2. Это последние испытанные прошивки Cisco 79xx версии P003-8-12-00, совместимые с 3CX Phone System.
ПРИМЕЧАНИЕ: В последних версиях 3CX Phone System, вы можете пропустить этот шаг, потому что файлы прошивок уже включены в дистрибутив 3CX Phone System.
Шаг 3: 3CX Настройка 3CX Phone System
1. Войдите в консоль управления 3CX Phone System.

2. Перейдите в настройки внутреннего номера и нажмите на кнопку «Автонастройка Телефона». Нажмите на поле «Модель» и из выпадающего списка выберите Cisco 7940/7941/7960 или 7961.

3. Введите MAC адрес телефона в поле MAC адрес. Нажмите на кнопку «Применить», затем «OK». Конфигурационный файл будет автоматически создан.
4. Включите или перезагрузите IP телефон Cisco.
5. Телефон получит IP адрес от сервера DHCP, используя параметр «Опция 66» подключиться к серверу TFTP для загрузки прошивки и конфигурации телефона. Телефон перезагрузится и зарегистрируется в 3CX Phone System.
Готово!
Краткое содержание страницы № 1
User Guide
Cisco Unified CallManager Express
User Guide for Cisco Unified IP Phones 7905/7912, 7906/7911,
7940/7960, 7941/7961 (SCCP)
1 Overview
2 Operating Your Phone
3 Phone Features and Functions List
Краткое содержание страницы № 2
1 Overview This guide provides phone, soft key, and features descriptions for the following Cisco Unified IP Phone models: • 7905/7912 • 7906/7911G • 7940/7960 • 7941/7961 Cisco Unified IP Phone 7905G/7912 and 7906/7911G Physical Layout The Cisco Unified IP phones 7905/7912 and 7906/7911 phones are single-line phones. The 7906/7911 phones provide a higher resolution display than the 7905/7912 phones, and are similar in operation. 2 1 9 8 3 4 5 6 7 Name Description Cisco IP phone model type Shows
Краткое содержание страницы № 3
Name Description Hold button Places an active call on hold. Resumes a held call. 6 Keypad Functions like a traditional telephone keypad. 7 8 Volume button Increases or decreases handset volume and on-hook ring volume. 9 Handset with indicator light Functions like a traditional handset. Connecting Your Phone This section shows how to use the connectors on your Cisco IP phone. 3 2 5 1 4 1 Network port (10BASE-T) 4 Cisco power supply (optional) 2 Handset port 5 Power cable with wall socket plug 3 D
Краткое содержание страницы № 4
Adjusting the Handset Rest When you connect your phone, you can adjust the handset rest so that the receiver will not slip out of the cradle. Use the following method to adjust the handset: 1. Set the handset aside and pull the square plastic tab from the handset rest. 2. Rotate the tab 180 degrees. 3. Slide the tab back into the handset rest. An extension protrudes from the top of the rotated tab. Return the handset to the handset rest. 1 2 3 Cisco Unified IP Phone 7960G, 7940G, 7961G, and 7941
Краткое содержание страницы № 5
Name Description Line or speed-dial button Opens a new line, speed-dials a phone number, or ends a call. The Cisco Unified IP 3 Phone 7940G has two lines, and the Cisco Unified IP Phone 7960G has six lines. Footstand adjustment Allows you to adjust the angle of the phone base. 4 5 Directories button Provides access to phone directories. 6 Question “?” button Not in use. 7 Settings button Provides access to phone settings such as display contrast and ring type. Speaker button Toggles the speaker
Краткое содержание страницы № 6
Connecting Your Phone This section show how to use the connectors on your Cisco IP phone. 8 1 AUX 10/100 SW 10/100 PC DC48V 7 2 6 3 5 4 1 DC adapter port (DC48V) for phones not 5 Access port (10/100 PC) for connecting provided with inline power your phone to your computer 2 AC-to-DC power supply 6 Handset port 3 AC power cord 7 Headset port 4 Network port (10/100 SW) for connecting to the 8 Footstand button network 6 113656 +
Краткое содержание страницы № 7
Adjusting the Handset Rest When you connect your phone, you can adjust the handset rest so that the receiver will not slip out of the cradle. Use the following method to adjust the handset: 1. Set the handset aside and pull the square plastic tab from the handset rest. 2. Rotate the tab 180 degrees. 3. Slide the tab back into the handset rest. An extension protrudes from the top of the rotated tab. Return the handset to the handset rest. 1 2 3 Soft Key Descriptions Your Cisco Unified IP phone is
Краткое содержание страницы № 8
Soft Key Description (continued) Edit Selects a number and activates the cursor for editing. EditDial Selects a number and activates the cursor for editing. EndCall Ends the current call. Exit Exits from the current selection or screen. Flash Provides hookflash functionality for three-way calling and call waiting services provided by the PSTN or Centrex service. GPickUp Selectively picks up calls to a phone number that is a member of a pickup group. Hold Places an active call on hold. Resumes a
Краткое содержание страницы № 9
2 Operating Your Phone This section describes how to operate your Cisco Unified IP phone. Because there are differences in phone and site configuration, not all features and procedures described here may apply to your phone. Consult your system administrator for more information. This section includes: • Basic: Place a Call, page 9 • Speakerphone: Place a Call, page 10 • Headset: Place a Call, page 10 • Answer a Call, page 10 • End a Call, page 10 • Redial a Number, page 10 • Hold a Call, page 1
Краткое содержание страницы № 10
Speakerphone: Place a Call To place a call using the speakerphone, use one of the following methods: • Press the speakerphone button and perform the steps for placing a basic call, and do not lift the handset. • Perform the steps for placing a basic call and do not lift the handset. To switch to handset operation, just lift the handset. Headset: Place a Call To place a call using a headset, press the heasdset button, then perform the steps for placing a basic call, and do not lift the handset. T
Краткое содержание страницы № 11
Mute a Call To mute a call, press the Mute button. The Mute button lights, indicating that the other party cannot hear you. To deactivate the mute function, use one of the following methods: • Press the Mute button again. • Lift the handset if you are using mute with the speakerphone. Note The Mute feature does not generate music or beeps. Manage Call Waiting If you are on a call when a second call comes in, you hear a call-waiting tone or see a flashing indicator light on the handset rest, depe
Краткое содержание страницы № 12
Transfer a Call To transfer a selected call to another number, use one of the following methods: • Blind transfer—Immediately redirects the call without allowing you to speak to the transfer recipient (the person to whom you are transferring the call). • Consult transfer—Redirects the call after first allowing you to speak to the transfer recipient. To transfer a call, use the following method: 1. During a call, press the Trnsfer soft key. The call is placed on hold. 2. Dial the number to which
Краткое содержание страницы № 13
• cBarge—Use this soft key to add yourself to an existing call on a shared line and to turn the call into a standard conference call. This feature is available only on phones that use shared lines. Place a Conference Call To place a three-party conference call, use the following method: 1. During a call, press the more soft key and then the Confrn soft key to open a new line and put the first party on hold. 2. Place a call to another number. 3. When the call connects, press the Confrn soft key a
Краткое содержание страницы № 14
Program Personal Speed-Dial Buttons After an administrator has defined one or more speed-dial instances for a Cisco Unified IP phone, you can reprogram numbers that are not locked or program numbers into an instance that has an empty dial string. To program personal speed-dial buttons, use the following method: 1. Select an available phone line by lifting the handset, by pressing the NewCall soft key, or by pressing a line button. Listen for the dial tone. 2. Press the pound key (#). 3. Press th
Краткое содержание страницы № 15
Place a Call from Call History To place a call to a number in the call history list, use the following method: 1. Use the Navigation button to scroll through the call history list. 2. Use the Select soft key to select a phone number. The digits appear on the phone display. 3. To dial the number as it appears on the phone display: – Press the Dial soft key. To edit the number on the phone display before dialing, use the following method: 1. Press the Edit soft key to place the cursor at the begin
Краткое содержание страницы № 16
Activate Do Not Disturb For visual call alerting and information without audible ringing, use Do Not Disturb (DND). Calls receive normal call-forward-busy and no-answer treatment. To activate DND, use the following method: 1. Press the more soft key to locate the DND soft key. 2. Press the DND soft key. A display text message indicates that the phone is in Do-Not-Disturb mode. Note Pressing the DND soft key immediately forwards the call to the call-forward destination set on the phone. If the ca
Краткое содержание страницы № 17
3 Phone Features and Functions List The following list is an alphabetical list of features and functions for your IP phone. Activate Do Not Disturb, page 16 Adjust the Display Contrast, page 16 Adjust the Ring Volume, page 16 Adjust the Volume for the Current Call, page 16 Answer a Call, page 10 Call-Blocking (Toll Bar) Override, page 11 Clear Call History, page 15 End a Call, page 10 End a Conference Call, page 13 Forward All Calls, page 12 Hold a Call, page 10 Manage Call Waiting, page 11 Mute
Краткое содержание страницы № 18
Corporate Headquarters European Headquarters Americas Headquarters Asia Pacific Headquarters Cisco Systems, Inc. Cisco Systems International BV Cisco Systems, Inc. Cisco Systems, Inc. 170 West Tasman Drive Haarlerbergpark 170 West Tasman Drive 168 Robinson Road San Jose, CA 95134-1706 Haarlerbergweg 13-19 San Jose, CA 95134-1706 #28-01 Capital Tower USA 1101 CH Amsterdam USA Singapore 068912 www.cisco.com The Netherlands www.cisco.com www.cisco.com Tel: 408 526-4000 www-europe.cisco.com Tel: 408

Cisco Unified IP Phone 7941G, 7941G-GE, 7942G, 7961G, 7961G-GE,
and 7962 User Guide for Cisco Unified Communications Manager 9.0
(SCCP and SIP)
First Published: June 19, 2012
Last Modified: July 30, 2015
Americas Headquarters
Cisco Systems, Inc.
170 West Tasman Drive
San Jose, CA 95134-1706
USA
http://www.cisco.com
Tel: 408 526-4000
800 553-NETS (6387)
Fax: 408 527-0883