- Manuals
- Brands
- Citizen Manuals
- Watch
- Eco-Drive
- Instruction manual
-
Contents
-
Table of Contents
-
Troubleshooting
-
Bookmarks
Quick Links
Related Manuals for Citizen Eco-Drive
Summary of Contents for Citizen Eco-Drive
-
Page 1
INSTRUCTION MANUAL… -
Page 2
After reading the manual, store it in a safe place for future reference. Be sure to visit the Citizen website at http://www.citizenwatch-global.com/ . Here you will find a variety of information such as electronic setting guides, answers to frequently asked questions, Eco-Drive recharging information and more. -
Page 3
Safety precautions — IMPORTANT This manual contains instructions that should be strictly followed at all times not only for optimal use, but to prevent any injuries to yourself, other persons or property. We encourage you to read the entire booklet (especially, pages 66 to 79) and understand the meaning of the following symbols: ■… -
Page 4
Safety precautions ■ Important instructions are categorized and depicted in this manual as follows: (Following symbols are examples of Pictograms.) Warning (caution) symbol followed by prohibited matters. Warning (caution) symbol followed by instructions that should be followed or precautions that should be observed. -
Page 5
7 levels. time signal reception. It can be used as a reference for • Perpetual calendar choosing a good charging place. No need for monthly and leap-year date correction until February 28, 2100. * “Eco-Drive” is an original technology of Citizen. -
Page 6: Table Of Contents
CONTENTS Before using this watch . . . . . . . Setting the world time . . . . . . Band adjustment . . . . . . . . . . . . . . .8 Switching daylight saving time Protective stickers .
-
Page 7
CONTENTS Checking and adjusting leap Eco-Drive watch handling second setting . . . . . . . . . . . . precautions . . . . . . . . . . . . . . . -
Page 8: Before Using This Watch
Before using this watch After unpacking, the following must be done before using the watch: Checking the current power reserve (page 12) Setting the world time (page 24) Receiving the satellite time signal (page 32) This watch has a rechargeable cell which is charged by exposing the dial to light.
-
Page 9: Band Adjustment
If adjustment is not done correctly, the bracelet may unexpectedly become detached leading to loss of your watch or injury. Consult your nearest authorized Citizen service center. Other shops may charge for, or may not provide, the service.
-
Page 10: How To Use A Specially Designed
Before using this watch How to use a specially designed crown/button Some models are equipped with a specially designed crown and/or push button to prevent accidental operation. Screw down crown/button Unlock the crown/button prior to operate your watch. Unlock Lock Push the crown in to the case.
-
Page 11
Before using this watch Recessed button Press the button with a non-marring narrow-tipped object such as a wooden toothpick. • Metal objects may cause marring or scratching of the button. -
Page 12: Component Identification
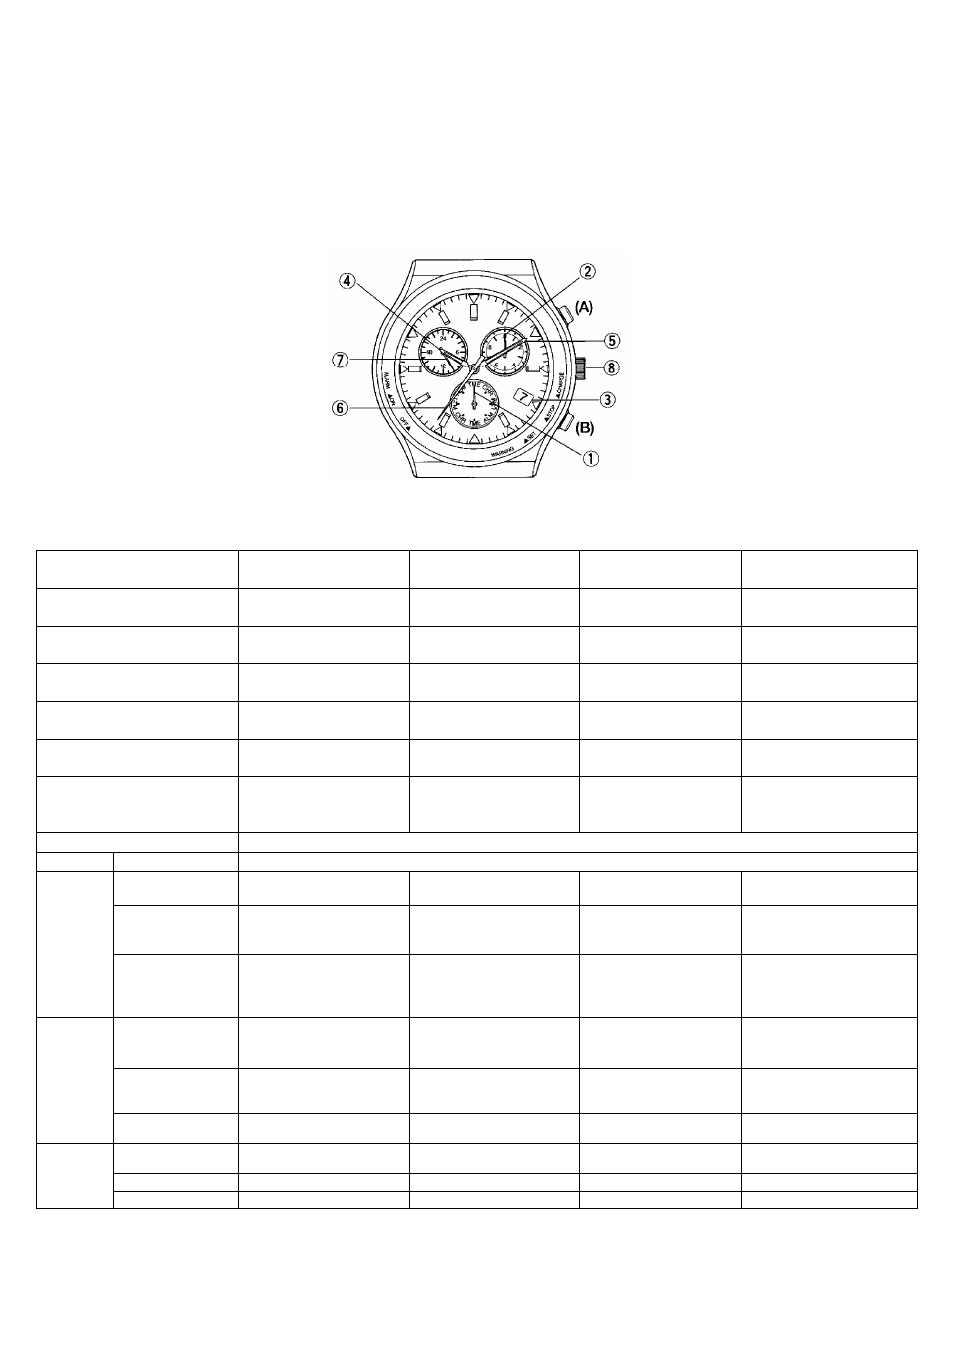
Component identification RX: Reception-in- progress indication OK/NO: Reception Hour hand result indication Button Function hand • Day indication Minute • Power reserve level hand scale (5 levels) Crown • Daylight saving time ( SMT ON/OFF ) Date indication Button Place name/ time zone Second hand…
-
Page 13: Charging Your Watch
Charging your watch This watch has a rechargeable cell which is charged by exposing the dial to light, such as direct sunlight or fluorescent lamps (refer to page 16 for charging guidelines). For optimal performance, be sure to: • Put the watch in a location where the dial is exposed to bright light such as by the window even when it is not used.
-
Page 14
• This watch contains a large-capacity rechargeable cell for performing power- consuming satellite signal reception. This large capacity cell takes more time to charge than those found in other Eco-Drive watches. • If the surrounding temperature falls below 0°C (32°F) or exceeds 40°C (104°F), the “Charge suspension temperature detection function”… -
Page 15
• If you do not charge the watch for 30 days after it has stopped, recharging will not be possible (over discharge detection function). Consult your nearest authorized Citizen service center if no hands start to move even after charging a stopped watch for one day or more exposing to direct… -
Page 16
Charging your watch During the insufficient charge warning state The time and date is indicated correctly. Operations below are available: • Checking power generation amount • Setting the world time • Adjusting the time and calendar manually You cannot execute operations other than above such as reception of satellite time signals. -
Page 17
Charging your watch Charging time by environment Below are the approximate charging times when exposing to light continuously. Please use this table as a reference only. Charging time (approx .) To start working To become fully Environment Illuminance (lx) To work for one day normally when the charged when the cell cell is discharged… -
Page 18
Charging your watch Power save function The hour, minute, and second hands stop automatically to save power as 3 days passed after stopping power generation. • The watch is still running internally to keep the time and calendar correctly even after the power save function has activated. -
Page 19: Checking The Current Power Reserve And Power Generation
Charging your watch Checking the current power reserve and power generation amount Always care about the current power reserve and charging environment of the watch to be sure it is charged sufficiently. Indication of power generation amount in level Indication of power reserve in level Function hand Hour, minute and…
-
Page 20
Charging your watch Push the crown in to position Press and release the upper right button The power reserve and power generation amount at the moment of pressing the button are indicated in level. • Power reserve level: page 20 •… -
Page 21
Charging your watch Indication of power reserve in level Level Power reserve level scale Duration 5 months — 5 days or 24 — 20 months 20 — 14 months 14 — 5 months (approx .) 5 days shorter Insufficient Power reserve Power reserve Power reserve is OK. -
Page 22
Charging your watch CAUTION • At the level 0, the second hand starts to move once every two seconds (insufficient charge warning function, page 14). Some functions become unavailable while the function is activated. For details, see page 15. • The level of power reserve is not indicated when temperature of the watch is too high or too low (non-chargeable state). -
Page 23: Amount
Charging your watch Indication of power generation amount in level The level of power generation amount means power being generated by the solar cell represented in 7 levels (0 — 6). Level Level scale of power generation amount Sufficient power Charge in a brighter location where the level of power Meaning generation for…
-
Page 24
Charging your watch CAUTION • The level of power generation amount indicated is that of the moment you engage this function. The level indication does not reflect any change in power generation after engaging this function. • The level may vary even under the same brightness due to the entry angle of light to the dial of the watch or other elements. -
Page 25: Setting The World Time
Setting the world time This watch can indicate the time around the world according to which of 40 time zones (offsets from UTC—Coordinated Universal Time) is chosen. Pull the crown out to position The second hand indicates the current time zone and the function hand indicates the daylight saving time setting (page 30).
-
Page 26
Setting the world time How to read indication of the world time setting The watch has 40 time zone markers with several representative area names. A time zone is set by pointing the second hand at one of the markers. In the illustration on the left, the second hand Time zone markers points to 28 seconds and time zone setting is… -
Page 27
Setting the world time Table of time zones and representative areas • Countries or regions may change time zones for various reasons. Time zone Second hand Area name Representative area (UTC offset) position 0 sec. London 2 sec. Paris 4 sec. Athens 6 sec. -
Page 28
Setting the world time Time zone Second hand Area name Representative area (UTC offset) position 14 sec. Dhaka +6.5 15 sec. — Yangon 16 sec. Bangkok 18 sec. BJS (HKG) Beijing/Hong Kong +8.75 20 sec. — Eucla 21 sec. Tokyo +9.5 23 sec. -
Page 29
Setting the world time Time zone Second hand Area name Representative area (UTC offset) position +12.75 31 sec. — Chatham Islands 32 sec. Nuku‘alofa 34 sec. — Kiritimati 36 sec. — Baker Island 38 sec. Midway 40 sec. Honolulu -9.5 41 sec. -
Page 30
Setting the world time Time zone Second hand Area name Representative area (UTC offset) position -4.5 51 sec. — Caracas 52 sec. Santiago -3.5 53 sec. — St. John’s 54 sec. Rio de Janeiro 56 sec. Fernando de Noronha 58 sec. Azores •… -
Page 31: Switching Daylight Saving Time
Switching daylight saving time and standard time Daylight saving time is a system adopted in some countries/areas to gain an extra daylight during summer. This watch can display the daylight saving time or the standard time according to the area selected for world time. •…
-
Page 32
Switching daylight saving time and standard time Pull the crown out to position The second hand indicates the current world time setting and the function hand indicates the current daylight saving time setting. Press and release the lower right button SMT ON SMT OFF The daylight saving time is… -
Page 33: Before Receiving The Satellite
Before receiving the satellite time signal This watch receives time information from satellites to adjust the time and calendar automatically. This watch only receives time information. Location information is not acquired. For receiving the satellite time signal smoothly The average monthly accuracy of this watch is ±5 seconds even if a satellite time signal is not received.
-
Page 34
Before receiving the satellite time signal Cautions regarding receiving the satellite time signal Do not perform satellite time signal reception while operating a vehicle as doing so is extremely dangerous. • If the second hand is moving once every two seconds (insufficient charge warning function), you cannot perform satellite time signal reception. -
Page 35: Time Signal
Before receiving the satellite time signal When receiving the satellite time signal As shown in the picture below, make sure you are in an area with few surrounding trees, buildings, or other objects with may obstruct the satellite time signal. Face the dial towards the sky and perform time signal reception.
-
Page 36: Time Signal
Before receiving the satellite time signal Receiving signals indoors near a window Place the watch near a window with a wide view of the sky and orient the dial in an obliquely upward direction (approximately 45°). • If there are buildings, trees, or other obstacles above the window, satellite signals may not be able to be received.
-
Page 37: Time Signal
Before receiving the satellite time signal Poor reception areas It may be difficult to receive the satellite time signal under certain environmental conditions or in certain areas. Areas with obstructions above the watch Nearby objects which emit magnetism or noise •…
-
Page 38: Receiving The Satellite Time
Receiving the satellite time signal Reception methods of the satellite time signal You can use the two reception methods below. You can also check the previous reception result (success or fail). (page 42) Method Time required (approx .) 3 — 20* seconds Manual Normal reception for time and * It may take up to 70 seconds after…
-
Page 39: Receiving The Satellite Time
Receiving the satellite time signal Manual reception 1 (time required: 3 — 20 seconds) Reception for time and calendar adjustment. Use this method normally. • It may take up to 70 seconds after adjusting calendar or some other cases. Push the crown in to position Press and hold the lower right button until the second hand points “RX”…
-
Page 40
Receiving the satellite time signal After finishing reception, the second hand indicates the reception result (page 42) for 2 seconds and returns to normal movement. When the time or calendar is incorrect even after successful reception Check the settings of world time (page 24) and daylight saving time (page 30). If the time or calendar is still incorrect after that, execute manual reception 2 (page 40). -
Page 41
Receiving the satellite time signal Manual reception 2 (time required: about 21 seconds — 13 minutes) Reception to adjust the time and calendar when the leap second has been updated. Push the crown in to position Press and hold the lower right button for 7 seconds . -
Page 42
Receiving the satellite time signal After finishing reception, the second hand indicates the reception result (page 42) for 2 seconds and returns to normal movement. When the time or calendar is incorrect even after successful reception Check the settings of world time (page 24) and daylight saving time (page 30). •… -
Page 43: Checking The Previous Reception Result Of The Satellite
Receiving the satellite time signal Checking the previous reception result of the satellite time signal Push the crown in to position Press and release the lower right button The previous reception result is indicated. The reception succeeded. The time and calendar have been corrected.
-
Page 44: Time Signal
Receiving the satellite time signal Press and release the lower right button to finish the procedure . The hands returns to current time indication. • They returns to current time indication automatically in about 10 seconds. About the reception result The previous reception result is stored for 6 days.
-
Page 45: Checking And Adjusting Leap
Checking and adjusting leap second setting This watch displays the time information by setting the leap second and time difference (manual adjustment) to the International Atomic Time information received from the satellite. • Leap second setting can automatically be adjusted by executing manual reception 2 (page 40) and using leap second information.
-
Page 46
Checking and adjusting leap second setting Pull the crown out to position The second hand points to the 0 second. Press and release the upper right button Using 0 minute/second position as the starting point, the minute and second hands indicate the leap second setting. -
Page 47: Second Setting
Checking and adjusting leap second setting Turn the crown to adjust the setting if the leap second is not correct . • Adjustable range is from 0 to ‒90 seconds. Push the crown in to position to finish the procedure .
-
Page 48: Checking And Adjusting The Rollover Number Setting
Checking and adjusting the rollover number setting In order for this watch to correctly process the week information* received from the satellite, a rollover number for each time period is set. The rollover numbers will be updated automatically. If the rollover number setting is incorrect, the time and date may not be indicated accurately.
-
Page 49
Checking and adjusting the rollover number setting Pull the crown out to position The second hand points to 0 second. Press and release the upper right button The second and minute hands indicate the leap second setting. Press and hold the upper right button for 5 seconds or more . -
Page 50: Rollover Number Setting
Checking and adjusting the rollover number setting Turn the crown to adjust the setting if it is not correct . • Adjustable range is from “0” to “5”. • See the table below and set the correct rollover number. Push the crown in to position to finish the procedure .
-
Page 51: Adjusting The Time And Calendar
Adjusting the time and calendar manually Pull the crown out to position Press and hold the upper right button until the second hand points to the 30 seconds position . Pull the crown out to position The second hand points to 0 second. Press and release the lower right button repeatedly to change the hand/indication to be corrected .
-
Page 52
Adjusting the time and calendar manually Rotate the crown to adjust the hand/indication . • Year and month are indicated with the second hand. Set them referring to the next page. • The function hand rotates 5 times for each change of date. -
Page 53: Manually
Adjusting the time and calendar manually Month and year indications Set the year and month with the position of the second hand. “Month” corresponds to one of the 12 “Year” corresponds to the years since zones shown in the figure below. leap year and indicated with markers in Each number means month.
-
Page 54: Manually
Adjusting the time and calendar manually Years since leap Actual year Second hand position year 2012, 2016, 2020, 2024 0 (Leap year) Hour marker 2013, 2017, 2021, 2025 1st min. marker 2014, 2018, 2022, 2026 2nd min. marker 2015, 2019, 2023, 2027 3rd min.
-
Page 55: Checking And Correcting The Reference Position
Checking and correcting the reference position If the time or calender is not shown correctly even after proper reception of the time signal, check whether the reference position is correct. • If the hands and indication do not reflect the correct reference position, the time and calendar will not be indicated accurately even if the satellite time signal is received.
-
Page 56
Checking and correcting the reference position Push the crown in to position Press and hold the upper right button for 7 seconds . The current reference position is indicated after indicating the power reserve and power generation amount. Check the current reference position . Refer to the figure on the previous page. -
Page 57: Reference Position
Checking and correcting the reference position Pull the crown out to position The function hands move slightly. Press and release the lower right button repeatedly to change the hand/indication to be corrected . • Each time you press the button, the target changes as follows: Date/day →…
-
Page 58: Reference Position
Checking and correcting the reference position Repeat steps 5 and 6 . Push the crown in to position Press and release the upper right button finish the procedure . • The watch returns automatically to the time indication as about 2 minutes passed without any operation.
-
Page 59: Troubleshooting
Troubleshooting If you have a problem with your watch, check the items below. Symptom Remedies Page Problems with time signal reception When the second hand moves once every two seconds, the watch cannot receive the time signal. Charge the watch. Avoiding places where the satellite signal may be obstructed and objects which emit noise.
-
Page 60
Page Problems with time signal reception (continued) If the remedies above do not solve the problems, Reception is − consult your nearest authorized Citizen service unsuccessful. center. Check the world time setting. Check the daylight saving time setting. The correct time… -
Page 61
Charge the watch under direct sunlight until the No hands move. second hand moves normally. If the remedies above do not solve the problems, − consult your nearest authorized Citizen service center. -
Page 62
Troubleshooting Symptom Remedies Page Time/calendar is abnormal. Check the world time setting. Check the daylight saving time setting. Receive the satellite time signal to adjust the time Time/calendar is incorrect. and calendar. Check and correct the reference position. Adjust the time and calendar manually. Check the daylight saving time setting. -
Page 63
If the watch does not work charged. after exposing the dial to direct sunlight for more than one day, it is possible that the rechargeable cell has over discharged. Consult the nearest authorized Citizen service center. -
Page 64
The watch stops the watch is being charged correctly. Continue charging − immediately after it is even when the second hand starts moving normally. charged. If there are no other defects, please consult your nearest authorized Citizen service center. -
Page 65
Troubleshooting Resetting the watch — All Reset When the watch does not work properly, you can reset all the settings. If the power reserve is insufficient, charge the watch first. Be sure to perform the following operations after All Reset. . -
Page 66
Troubleshooting Pull the crown out to position Press and hold buttons at the same time for 3 seconds or more and release them . As you release the buttons, the hands move slightly to indicate that reset completed. The setting values after All Reset Calendar January of leap year (5-second position) World time… -
Page 67: Eco-Drive Watch Handling
Eco-Drive watch handling precautions <Always Make Sure to Recharge Frequently>…
-
Page 68
Eco-Drive watch handling precautions CAUTION Recharging Precautions Examples:… -
Page 69: Precautions
Eco-Drive watch handling precautions <Replacement of Rechargeable Cell> WARNING Handling of Rechargeable Cell…
-
Page 70: Precautions
Eco-Drive watch handling precautions WARNING Use Only the Specified Battery…
-
Page 71: Water Resistance
Water resistance WARNING Water Resistance • Refer to the watch dial and/or the case back for the indication of the water resistance of your watch. The following chart provides examples of use for reference to ensure that your watch is used properly.
-
Page 72
Water resistance Water-related use Operate the Minor crown or exposure to Swimming Scuba diving Saturation button when water (washing and general Skin diving, using an air diving using the watch face, rain, etc.) washing work marine sports tank helium gas is wet… -
Page 73
Water resistance • Non-water resistant models are not designed to come into contact with any moisture. Take care not to expose a watch with this rating to any type of moisture. • Water resistance for daily use (to 3 atmospheres) means the watch is water resistant for occasional accidental splashing. -
Page 74: Precautionary Items And Usage
Precautionary items and usage limitations CAUTION To Avoid Injury • Be particularly careful when wearing your watch while holding a small child, to avoid injury. • Be particularly careful when engaged in strenuous exercise or work, to avoid injury to yourself and others.
-
Page 75
Precautionary items and usage limitations CAUTION Precautions • Always use the watch with the crown pushed in (normal position). If the crown is of the screw lock-type, make sure it is securely locked. • Do not operate the crown or any push buttons when the watch is wet. Water may enter the watch causing damage to vital components. -
Page 76: Limitations
Precautionary items and usage limitations CAUTION When Wearing Your Watch <Band> • Leather bands and rubber (urethane) bands will deteriorate over time due to perspiration dirt. Because of the natural materials, leather band will be worn, deformed, and discolored over time.
-
Page 77: Limitations
• We recommend seeking the assistance of an experienced watch technician for sizing of your watch. If adjustment is not done correctly, the bracelet may unexpectedly become detached leading to loss of your watch or injury. Consult your nearest authorized Citizen service center. Other shops may charge for, or may not provide, the service.
-
Page 78: Limitations
Precautionary items and usage limitations <Strong Shock> • Avoid dropping the watch or subjecting it to other strong impact. It may cause malfunctions and/or performance deterioration as well as damage to the case and bracelet. <Static Electricity> • The integrated circuits (IC) used in quartz watches are sensitive to static electricity. Please note the watch may operate erratically or not at all if exposed to intense static electricity.
-
Page 79: Limitations
Precautionary items and usage limitations CAUTION Always Keep Your Watch Clean • Rotate the crown while it is pressed in fully and press the buttons periodically so they do not become stuck due to accumulations of foreign matter. • The case and band of the watch come into direct contact with the skin. Corrosion of the metal or accumulated foreign matter may result in black residue coming from the bracelet when exposed to moisture or perspiration.
-
Page 80: Limitations
Precautionary items and usage limitations Caring for Your Watch • Wipe any dirt or moisture such as perspiration from the case and crystal with a soft cloth. • For metallic, plastic or synthetic rubber (polyurethane) band, clean it with soap and a soft toothbrush.
-
Page 81: Specifications
Specifications Model Type F100 Analog solar-powered watch Timekeeping Average monthly accuracy: ±5 seconds when worn at normal operation accuracy temperatures between +5°C (41°F) and +35°C (95°F) (without reception) Operating ‒10°C (14°F) to +60°C (140°F) temperature range • Time: Hours, minutes, seconds •…
-
Page 82
Specifications • Solar power function • Confirming reception status (RX) • Overcharging prevention function • Indicating the result of the last • Insufficient charge warning function reception (OK/NO) (two-second interval movement) • World time • Over discharge detection function (40 time zones (27 place names)) •… -
Page 83
This product follows the provisions of R&TTE Directive (1999/5/EC) ETSI EN300 440-2 V1.4.1 ETSI EN301 489-3 V1.4.1 EN60950-1 : 2006 +A12 : 2011 * Model No.CC2 Cal.F100 CTZ-B8182…

Содержание
- Установите дату и время
- Шаг 1
- Шаг 2
- Шаг 3
- Шаг 4
- Шаг 5
- Шаг 6
- Шаг 7
- Шаг 8
- Используйте хронограф
- Шаг 1
- Шаг 2
- Шаг 3
- Шаг 4
Компания Citizen Watch — один из крупнейших в мире производителей наручных часов для мужчин и женщин. Часы Citizen Promaster, являющиеся частью линии часов Citizen Eco-Drive, представляют собой часы на солнечных батареях, которые можно заряжать естественным и искусственным светом. С дополнительными функциями, такими как хронограф и будильник, Citizen Promaster — это сложные часы, которые легко установить и использовать.
Установите дату и время
Шаг 1
Нажмите нижнюю левую кнопку часов Citizen Promaster, чтобы перейти в режим времени и даты.
Шаг 2
Найдите корону на правой стороне вашего гражданина Promaster. Вытяните заводную головку до первой позиции.
Шаг 3
Установите соответствующий город для ваших часов Citizen Promaster, когда название города начнет мигать. Нажмите верхнюю кнопку с правой стороны вашего Citizen Promaster, чтобы перемещаться по списку городов, пока не появится название нужного города.
Шаг 4
Нажмите нижнюю левую кнопку на часах, чтобы перейти к экрану перехода на летнее время. Включите или выключите функцию перехода на летнее время, нажав нижнюю правую кнопку на часах Citizen Promaster.
Шаг 5
Перейдите в режим секунд на вашем Citizen Promaster, нажав левую нижнюю кнопку. Нажмите правую нижнюю кнопку, чтобы установить часы на «00».
Шаг 6
Используйте левую нижнюю кнопку на вашем Citizen Promaster, чтобы перейти к минутам на ваших часах. Установите цифры минут на соответствующий номер, используя верхнюю и нижнюю кнопки с правой стороны ваших часов.
Шаг 7
Повторите, чтобы установить формат времени, даты, месяца, дня и года на вашем Citizen Promaster.
Шаг 8
Нажмите на заводную головку часов Citizen Promaster, чтобы завершить процесс установки даты и времени.
Используйте хронограф
Шаг 1
Нажимайте нижнюю левую кнопку на вашем Citizen Promaster до тех пор, пока индикатор режима хронографа «CHR» не появится в нижней части экрана ваших цифровых часов.
Шаг 2
Используйте верхнюю правую кнопку на часах Citizen Promaster, чтобы запустить, приостановить и остановить время на хронографе.
Шаг 3
Нажмите верхнюю правую кнопку на вашем Citizen Promaster, чтобы показать время разделения круга.
Шаг 4
Перезапустите хронограф вашего Citizen Promaster, нажав нижнюю правую кнопку, когда хронограф остановлен.
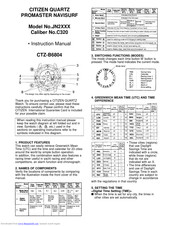
CITIZEN QUARTZ
Eco-Drive
Chronograph
BL5XXX/Cal.E81✼
РУКОВОДСТВО ПОЛЬЗОВАТЕЛЯ.
Название компонентов.
Название
Режим текущего
времени/календаря
Режим хронографа
Режим местного
времени
Режим звукового
сигнала
①
Стрелка выбора
режима
В позиции ТМЕ
В позиции CHR
В позиции L-TM
В позиции ALM
②
Функциональная
стрелка
В позиции 0
(12 часовой)
Показывает 1/20
секунды
В позиции 0
(12 часовой)
В позиции 0
(12 часовой)
③
Календарь
Показывает текущую
дату
Показывает текущую
дату
Показывает дату
местного времени
Показывает текущую
дату
④
Часовая стрелка
Показывает часы
Показывает часы
Показывает часы
местного времени
Показывает часы
будильника
⑤
Минутная стрелка
Показывает минуты
Показывает минуты
Показывает минуты
местного времени
Показывает минуты
будильника
⑥
Секундная стрелка
Показывает секунды
Показывает секунды
хронографа
Показывает секунды Показывает
включение
будильника
⑦
24 часовая стрелка
Синхронизирована с часовой стрелкой, показывает часы в 24-часовм формате.
Положение ключа
Нормальное
Переключение режимов
Переключение режимов
Переключение
режимов
Переключение режимов
1 положение
Установка календаря
Проверка позиции
0/коррекция
(функц.
стрелки, окна даты)
Дисплей местного
времени
Включение будильника
⑧
Ключ
2 положение
Установка времени
Проверка позиции
0/коррекция
(сек., 24
часовой, часовой,
минутной стрелок)
Коррекция местного
времени
Коррекция времени
будильника, включая
установку.
Нормальное
Не используется
Старт/стоп, сброс (нажатие
кнопки в течение 2 сек)
Не используется
Проверка сигнала
(нажатие кнопки в
течение 2 сек)
1 положение
Установка года
Проверка позиции
0/коррекция (функц.
стрелки, окна даты)
Не используется
Включение/отключение
Кнопка
(А)
2 положение
Не используется
Коррекция 0- позиции
секундной стрелки
Не используется
Включение/отключение
Нормальное
Не используется
После остановки вызов
1/20 секундной стрелки
Не используется
Не используется
1 положение
Установка месяца
Не используется
Не используется
Не используется
Кнопка
(В)
2 положение
Не используется
Не используется
Не используется
Не используется
- Manuals
- Brands
- Citizen Manuals
- Watch
- PROMASTER
Manuals and User Guides for Citizen PROMASTER. We have 1 Citizen PROMASTER manual available for free PDF download: Instruction Manual
CITIZEN PROMASTER Instruction Manual (9 pages)
Brand: CITIZEN
|
Category: Watch
|
Size: 0.21 MB
Table of Contents
-
Setting the Calendar
2
-
Switching between Analog Time and Digital Time
2
-
Convenient Functions
4
-
Using the Bezel
5
-
Specifications
7
-
Water Resistance
9
Advertisement
Advertisement
Related Products
-
Citizen PROMASTER SKY
-
Citizen PROMASTER NAVIHAWK
-
Citizen PROMASTER BLUE ANGELS
-
Citizen PROMASTER SKYHAWK
-
Citizen Promaster Skyhawk A-T
-
Citizen Promaster Tsuno Chrono Racer
-
Citizen Promaster Air A-T
-
Citizen PROXIMITY
-
Citizen PA0 SERIES
-
Citizen P990
Citizen Categories
Watch
![]()
Printer
Calculator
Blood Pressure Monitor
Label Maker
More Citizen Manuals
Содержание
- Инструкция и руководство для Citizen JY0020-64E на русском
- . Перед использованием .
- Функция приема радио сигнала Это часы с функцией корректиро.
- Проверьте как движется секундная стрелка. С интервалом в.
- . Проверьте уровень заряда .
- за внешних условий прием сигнала может быть невозможен, или .
- показывается шкалой из .
- Как настроить часы citizen eco drive radio controlled
Инструкция и руководство для
Citizen JY0020-64E на русском
11 страниц подробных инструкций и пользовательских руководств по эксплуатации
WATCH IT! — How To Set The Citizen Eco-Drive SkyHawk Watch
Мъжки часовник Citizen — JY0020 64E
CITIZEN SUPER SKYHAWK JY0020-64E Обновленная версия
CITIZEN Eco Drive Skyhawk A-T watch JY0020-64E
Citizen Promaster JY0020-64E Skyhawk — Zegarek.net
Citizen Promaster Skyhawk JY0020-64E
Citizen Eco-Drive Radio Controlled
Citizen PMV 65-2271 Калибровка стрелок.
. Перед использованием .
1. Ваши часы
2. Перед использованием
3. Основные операции
Получение радио сигнала
4. Получение радио сигнала
5. Зоны слабого приема
6. Индикация во время приема
7. Подтверждение статуса приема
8. Информация по зонам приема
9. Индикация городов мира
10. Индикация заряда
11. Изменение режима
12. Использование домашнего времени и мирового времени
13. Использование функции летнего времени
14. Установка времени
15. Установка календаря
16. Использование таймера
17. Использование хронографа
18. Настройки мирового времени
19. Использование будильника мирового времени
20. Использование настроек получения
21. Подсветка
22. Сброс всех настроек
Использование логарифмической линейки
Солнечный заряд
23. Функция солнечного заряда
24. Характеристики часов с солнечной батареей
А. Функция сохранения энергии
В. Фун-я предупреждения о недостаточном заряде
С. Фун-я предотвращения перезарядки
D. Уход за часами на солнечной батарее
Исправление ошибок
А. Фун-я приема радио сигнала
В. Eco-Drive

Функция приема радио сигнала Это часы с функцией корректиро.
Функция приема радио сигнала
Это часы с функцией корректировки времени, способные принимать радио волны с
точным временем, транслируемые через радио передатчики, расположенные в трех
регионах: Японии, США и Европе( Германии). Часы используют радио волны, чтобы
корректировать время и дату.
Автоматический прием: Часы трижды в сутки способны принимать радио волны в 2, 3 и 4
утра. Если часы успешно приняли сигнал в 2 часа, то больше не будут делать попыток в
эти сутки.
Прием радио волны назначенный на 4 часа может быть изменен на любое другое время
суток.
Прием по необходимости: Радио волна может быть принята в любое время суток. В
случае невозможности приема радио волны, время и дату можно установить вручную,и
часы будут работать с погрешностью +/- 15 секунд в месяц.
Функция мирового времени
UTC (Всеобщее скоординированное время), время и дата 43 городов (или регионов) мира,
или же время одного города ( региона) могут быть установлены и использованы в любое
время. Это удобно при частых путешествиях.
Функция солнечного заряда.
Это мультифункциональные часы Eco-Drive, оснащенные солнечной батареей и
превращающие солнечную энергию в электричество.
Фун-я индикации заряда: Эта функция отображает уровень заряда, используя четыре
деления, и показывая примерно на сколько заряжена батарея.
Фун-я сохранения энергии: Часы оснащены двумя функциями сохранения энергии. Если
часы не повернуты циферблатом к солнечному светы 30 минут или более, все
жидкокристаллические дисплеи выключаются ( 1я фун-я). Если часы не повернуты
циферблатом к солнечному свету неделю или более, секундные стрелки останавливаются,
чтобы минимизировать энергозатраты (2я фун-я).
Важные моменты, касающиеся приема радио сигнала
Есть 2 метода приема радио волн: автоматический и по необходимости.
Прием сигнала внутренней однонаправленной антенной может быть ослаблен
географически м положением или зданиями.
Чтобы принять радио волны:
— Снимите часы с руки
— Направьте часы отметкой 9.00 к окну
— Положите часы на стабильную поверхность
-Не двигайте часы во время приема. Движение часов может привести к прерыванию и
незавершенному приему. Во время приема сигнала, секундная стрелка двигается в режиме
приема. После окончания, возвращается к движению в односекундном интервале.
— Прием занимает от 2 до 15 минут максимум.
2. Перед использованием

Проверьте как движется секундная стрелка. С интервалом в.
Проверьте как движется секундная стрелка.
С интервалом в 1 секунду → Проверьте статус приема.
Часовую головку в Секундная стрелка Ваши часы правильно
С интервалом в 2 секудв 1е положение. указывает на статус → получают радио
или остановились Вращайте головку → приема Н, М или L сигнал.
↓ чтобы установить режим
Срочно зарядите часы, ТМЕ
поместив их под лучи Часовую головку в
солнца. нормальное положение → Секундная стрелка Обратитесь к разделу
Нажмите на правую указывает на статус → «Прием по необходимости»
нижнюю кнопку (А) приема NO чтобы настроить прием
сигнала
Если прием сигнала невозможен, обратитесь в сервисный центр Citizen.
Перед использованием часов, убедитесь в том что стрелки точно откалиброваны и
показывают точно на «0» точку. Стрелки могут сбиться с исходного положения при
сильном магнитном воздействии. В этом случае, даже при получении радио волн, стрелки
не будут показывать время точно.
Примеры вещей, способных повлиять на часы таким образом:
— Медицинские продукты, например браслеты, ожерелья, повязки.
— Холодильные установки
— Электромагнитные печи
— Сумки с магнитными замками
— Мобильные телефоны
1. Вытащите часовую головку в 1е положение и установите режим на CHR (хонограф)
2. Установите часовую головку во 2е положение.
Стрелки начнут двигаться быстро, останавливаясь на исходном положении занесенном в
память телефона.
3. Если исходное положение установлено правильно, проверка закончена. Установите
часовую головку в исходное положение.
Если исходное положение неверно, обратитесь к разделу «Установка исходного
положение».
Правильные исходные положения.
Индикатор заряда: EUR
Часовая и минутная стрелки UTC: 12.00
24 часовая стрелка: 12.00
3. Основные операции

. Проверьте уровень заряда .
1. Проверьте уровень заряда
Установите родной город (а. установите часовую
головку в 1е положение и установите режим ТМЕ. в. Нажмите кнопку А или В
чтобы установить необходимый город. с. Нажмите кнопки А и В одновременно
чтобы зафиксировать выбранный город.)
Установите время (вручную или
путем приема радио сигнала)
Настройте цифровой дисплей 1 (мировое время
или дата могут быть показаны на дисплее 1)
4. Получение радио сигнала
Возможно 3 вида получения радио сигнала: автоматическое получение, по необходимости
и восстанавливающий радио сигнал.
Есть 3 режима в которых возможно получение сигнала: время (ТМЕ), календарь (CAL),
получение (RX-S). Часы не могут принимать сигнал ни в каких других режимах.
— Получение сигнала невозможно пока часовая головка находится в нормальном
положении
— Если родной город «UTC», то получение невозможно
— Получение невозможно во время работы хронографа или таймера
— Уровень приема может меняться в зависимости от окружающей среды.
— Когда часы принимают радио сигнал, все стрелки остановятся.
Автоматический прием
Не обязательно устанавливать режимы во время автоматического приема. Часы сами
получат радио волны каждые сутки в 2, 3 и часа утра. Прием в 4 часа может быть изменен
на любое время суток. Прием сигнала может быть отключен.
Получение радио сигналов
Снимите часы с руки и положите на стабильную поверхность максимально близко кокну,
где радио волны будут более доступны, повернув боком с отметкой 9.00 к передатчику.
Прием по необходимости
— Установите часовую головку в 1е положение и установите режим CAL, TME или RX-S.
— Установите часовую головку в нормальное положение.
— Снимите часы с руки и положите на стабильную поверхность максимально близко
кокну, где радио волны будут более доступны.
— Направьте часы стороной с отметкой 9.00 к передатчику и зажмите правую нижнюю
кнопку (А) примерно на 2 секунды. Отпустите когда услышите звук а секундная стрелка
остановится на RX. Затем секундная стрелка переместится на Н, М или L.
Не двигайте часы во время приема.
— После успешного получения сигнала секундная стрелка автоматически передвинется с
Н, М или L на полученное время и к 1 секундным интервалам.
Восстанавливающий радио сигнал.
Если часы останавливаются из-за недостаточного заряда, положите их под солнечный
свет. После зарядки, часы автоматически получат радио сигнал, чтобы восстановить
время.
Хранение ваших часов с радио приемником.
Если часы получают недостаточно света или же хранятся в темноте продолжительное
время (неделя или больше) , включается функция сохранения энергии и стрелки часов
останавливаются. Хотя время и не отображается, часы сохраняют его правильным. В
некоторых ситуациях автоматический прием невозможен, из-за слабого сигнала.
5. Зоны слабого приема.

за внешних условий прием сигнала может быть невозможен, или .
Из-за внешних условий прием сигнала может быть невозможен, или сильно затруднен по
причине помех. Например, при большой концентрации зданий, радом с высоковольтными
вышками, в поезде, самолете, машине, рядом с телевизором, компьютером, работающим
телефоном, в очень жарких, или холодных местах.
6. Индикация во время приема
Подготовка к получению
Секундная стрелка перемещается
При успешном приеме секундная
На отметку RX и останавливается
перемещается с отметки
стрелка возвращается к движению
RX на уровень радио сигнала
с 1 секундными интервалами и
Н, М или L и начинается
корректируются все остальные
Время, необходимое для приема
Прием занимает примерно от 2х до 15 минут, в зависимости от погодных условий. Если
прием сигнала срывается, часы возвращаются к нормальной работе.
Во время приема сигнала, секундная стрелка может сделать 1 полный оборот и вернутся к
индикации уровня сигнала. Не двигайте часы до полного завершения процесса, пока
секундная стрелка не вернется к движению с 1 секундными интервалами.
7. Подтверждение статуса приема.
1. Установите режим ТМЕ, CAL или RX-S.
2. Нажмите нижнюю правую кнопку (А) 1 раз чтобы отобразить статус приема.
Секундная стрелка передвинется на Н, М, L или NO.
3. Нажмите нижнюю кнопку (А) еще раз и часы вернуться к нормальному режиму
работы. ТО же самое произойдет если в течение 10 секунд не делать никаких
операций.
8. Информация по зонам приема
Эти часы могут принимать стандартные радио волны, транслируемые из Японии (два
передатчика), США и Европы (Германии). Можно выбрать другой город в своем регионе.
Качество приема сигнала зависит от условий погоды (гроза например) и изменяется в
зависимости от времени года.
9. Индикация городов мира
UTC (объединенное мировое время) и 43 города (региона) внесены в память этих часов
заранее, а также возможно внести еще 1 город по своему усмотрению. Время любого
города можно посмотреть.
Нажимайте правую верхнюю кнопку (В) в то время как часовая головка установлена в
первое положение и часы находятся в режиме ТМЕ или CAL чтобы выбрать города.
10. Индикация уровня заряда батареи.

показывается шкалой из .
— Уровень заряда (примерный) показывается шкалой из 4х делений.
— Следите за уровнем заряда своих часов. Мы рекомендуем вам поддерживать заряд на
уровне 2 примерно.
11. Изменение режима
У часов есть 8 режимов: время (ТМЕ), календарь (CAL), таймер (ТМR), хронограф (СНR),
установка мирового времени (WT-S), будильник 1 (AL – 1), будильник 2 (AL – 2) и
установка приема (RX – S).
1.
Установите часовую головку в положение 1
2. Вращайте часовую головку вправо или влево чтобы выбрать
необходимый вам режим.
3. Верните часовую головку в нормальное положение.
12. Использование домашнего времени и мирового времени
Когда вы путешествуете в другую страну или город с отличным часовым поясом, можно
легко посмотреть время в родном городе и в городе пребывания. (переключение может
быть только в режимах времени и календаря).
Переключение между домашним временем и мировым временем.
— Установите часовую головку в первое положение
— Установите режим времени (ТМЕ) или календаря (CAL)
— Зажмите кнопки (А) и (В) одновременно ( вы услышите звуковое подтверждение)
— Поверните часовую головку, чтобы вернуться в нормальное положение.
13. Использование функции летнего времени
При обновлении времени, используя функцию приема радио волны, летнее время
устанавливается автоматически при необходимости.
14. Установка времени
— Время может быть установлено вручную в зонах, где невозможно принять радио волну.
— Чтобы установить время, выберите город, время которого вы хотите изменить.
Изменение времени.
— Установите часовую головку в первое положение и включите режим времени (ТМЕ).
-Нажимайте кнопки (А) или (В), чтобы выбрать город, время которого вы хотите
изменить.
— Установите часовую головку в положение 2 чтобы войти в режим корректировки
времени
·
Секундная стрелка установится на положение 12 часов
Дисплей, показывающий домашнее время выключится
Нажмите нижнюю правую кнопку (А) чтобы включить или выключить функцию
После включения режима летнего времени часовая стрелка сдвинется на час
Нажав верхнюю правую кнопку (В) вы сможете поменять режим корректировки.
— Нажмите верхнюю правую кнопку (В) чтобы откорректировать секунды
Источник
Как настроить часы citizen eco drive radio controlled

9. ОБЩИЕ РЕКОМЕНДАЦИИ ПО ВРЕМЕНИ ПОДЗАРЯДКИ
Время, требуемое для подзарядки, может зависеть от целого ряда факторов, включая освещенность поверхности и общий дизайн
часов (цвет циферблата и т.д.). В приведенной ниже таблице указаны приблизительные рекомендуемые параметры, необходимые
для достаточной подзарядки часов.
Требуемое время (примерно)
Подзарядка от остановки часов
до движения секундной стрелки
с 1-секундным интервалом
уровня 3 (полная)
Комнатное освещение 40
Расстояние 60-70 см от
лампы дневного света (30Вт)
Расстояние 20 см от лампы
дневного света (30 Вт)
Дневной свет (пасмурная
погода)
Дневной свет (ясная погода) 25
3 часа 30 минут
Полная подзарядка – это время, за которое часы полностью зарядились из положения остановки.
Подзарядка на 1 день работы – это время, за которое часы зарядятся для хода с интервалом 1 секунда в течение 1 дня.
10. СПЕЦИАЛЬНЫЕ ФУНКЦИИ ЧАСОВ С СОЛНЕЧНОЙ ЭНЕРГИЕЙ
Перечисленные ниже функции специально разработаны для часов с солнечным элементом питания. В случае недостатка энергии
часы автоматически переключаются в Режим недостаточного питания как показано на рисунке.
о недостаточном заряде
Зарядите часы, поместив их на свет до тех пор, пока стрелка заряда не начнет указывать на Уровень 3.
Обратите внимание: Если часы остановились, они не начнут ходить сразу, как только окажутся на свету. Перед тем как они снова
пойдут, должно пройти 10 минут.
Режим Недостаточного Питания
Секундная стрелка изменяет интервал движения с 1-секундного на 2-секундный, что является признаком недостаточно заряженной
батареи. В этом случае вы должны как можно скорее зарядить батарею.
Тем не менее, в этом случае часы будут продолжать показывать правильное время, но через 7 дней остановятся, если вы не зарядите
батарею. После того, как батарея зарядится в достаточной степени, движение секундной стрелки вернется к нормальному интервалу
1 секунда.
Функция предотвращения передозировки энергии
Вы можете перезаряжать свои часы без опасения сжечь аккумуляторную батарею, так как данная модель часов снабжена
специальной функцией ограничения избыточной энергии, получаемой при зарядке часов.
11. УКАЗАНИЯ К ИСПОЛЬЗОВАНИЮ ЧАСОВ
[Постарайтесь все время подзаряжать часы]
В случае, если доступ света к часам ограничен (циферблат закрыт рукавом одежды), количество световой энергии может быть
недостаточным для нормального функционирования часов в течение продолжительного времени.
•
Каждый раз, снимая часы, оставляйте их в хорошо освещенных местах, и они всегда будут нормально функционировать.
g Как лучше заряжать батарею
Не заряжайте батарею при температуре выше 60 С/ 140 F, иначе часы могут сломаться. Избегайте оставлять часы возле
источников света, выделяющих большое количество теплоты, а также в местах, подверженных сильному нагреву, например, на
приборном щитке автомобиля. Если вы заряжаете часы под галогенной лампой или лампой накаливания, соблюдайте
дистанцию 50 см для предотвращения перегрева.
Предупреждения, касающиеся аккумуляторной батареи
Никогда не вынимайте батарею из часов.
Если вам все же пришлось удалить аккумуляторную батарею, не допускайте, чтобы с ней играли маленькие дети, ребенок
может случайно проглотить батарею.
Если это произошло, немедленно обратитесь к врачу.
Если батарея подлежит замене, производите замену в сервисном центре.
Источник