- Manuals
- Brands
- Commax Manuals
- Telephone
- CIOT-1020M
- User manual
-
Contents
-
Table of Contents
-
Bookmarks
Quick Links
CIOT-1020M User Manual
1
https://smartel.ua
Related Manuals for Commax CIOT-1020M
Summary of Contents for Commax CIOT-1020M
-
Page 1
CIOT-1020M User Manual https://smartel.ua… -
Page 2: Table Of Contents
Contents ……………………..Safety Warning & Caution Main funciton ……………………….4 Basic Screen Configuration ………………….6 Home Screen ……………………….10 Home Area ……………………….. 10 2.1. Editing a space list ………………….11 2.2. Registering a device ………………… 12 2.3. Placing device (move / delete) ……………..
-
Page 3: Main Funciton
Start 1 Main function Function Description Display of widget type such as today’s weather, indoor COMMAX temperature and humidity, smart plug electricity amount, Widget absence information Login User subscription and login to use UC and Cloud Membership To view and set the integrated value information provided…
-
Page 4
Automatic User can register interlock device (IP Door, CCTV, IoT device device, etc.) registration COMMAX IP and various environce setting for lobby call and system Setting operation Mobile call Calls to mobile phones login ID same as wallpad… -
Page 5
Android 1920×1080 Nexus5x 2048×1536 Nexus9 2560×1440 Galaxy Note 2560×1440 GalaxyS5 edge 1920×1080 GalaxyS4 2560 x 1440 LG G3 cat6 Total 11ea https://smartel.ua… -
Page 6: Basic Screen Configuration
CONTENTS CONTENTS Touch screen SPEAKER HOME CMOS POWER S/W POWER LED SENSOR(OPTION) EMERGENCY GUARD CALL RS-485(OPTION) Door Release Door Release(OPTION) DIAL Basic Screen Configuration https://smartel.ua…
-
Page 7
The moving of screen for using scrolling The screen change The navigation bar of home screen bottom Go to home screen Go back Volume control Go to Setting Home screen bottom setting bar Go to system wireless Wifi setting Wifi setting Go to wired network IP setting IPsetting… -
Page 8
Check the status of external Internet connection Internet status Go to IP Door Camera registration Door registration Go to user registration User registration Go to IoTt device registration Device registration Go to wall pad setting Wall pad settings Go to OS setting OS setting https://smartel.ua… -
Page 9: Home Screen
2 Home Screen Home Area View the door camera View the door camera Dial key for call dial Door, network, membership status display Device Icons is displayed during abnormal operation status All App list all Apps Scene and Reservation control Scene contorl User Emergency button Emergency button…
-
Page 10: Editing A Space List
2.1. Editing a space list ‘Press an empty space on background screen for one second. Drag the space you want to move and move it to the desired location Press the «X» button to delete the space. Press «+» button to add space Press the Cancel button to cancel editing Press the ‘complete ‘ button to save the space list.
-
Page 11: Registering A Device
Press «Enter» on the keyboard. Select a space image ‘Press ‘OK’ button to add space. ‘Previous’ button will move to previous screen [공간 추가 화면] 2.2. Registering a device Method 1. Press an empty space on background screen for one second.
-
Page 12
Connect the device according to the device pairing method The device can be paired for up to 60 seconds. Press Cancel ‘button to cancel the device pairing method. When a device is registered, the device is automatically placed on the screen https://smartel.ua… -
Page 13
Method 2. Drag or click IoT Device ICON leftside on screen Click IoT Pairing ICON on upside and drag center on screen. Connect the device by using device pairing method. https://smartel.ua… -
Page 14: Placing Device (Move / Delete)
2.3. Placing device (move / delete) Method1. Press an empty space on background screen for one second Press ‘Device icon placement’. You can move to the desired location by pressing the device you want to move. Drag the device, move it to the desired location, and release the device To delete a device, press the corresponding icon longer to move to the desired location https://smartel.ua…
-
Page 15
To delete a device, press the icon longer and move it to the upper trash [Device delet screen] Method 2. Drag or click IoT Device ICON leftside on screen https://smartel.ua… -
Page 16
You can move to the desired location by pressing the device you want to move. To delete a device, press the icon longer and move it to the upper trash https://smartel.ua… -
Page 17: Controlling Devices
2.4. Controlling devices Move to the space to control. You can turn the device on / off by pressing the device you want to control [The device control sreen] 2.5. Widget Area Provide a summary of our home environment and external environment information at present Press empty space on background screen for one second.
-
Page 18
To delete a widget, press the widge tlonger and move it to the upper trash. https://smartel.ua… -
Page 19: House Reporter
House Reporter We provide value information on the screen that allows us to understand our home environment and external conditions [The house reporter screen] 3.1. Edit house reporter Press edit «buttonu Press the «(On / Off)» button and you can select the value information item to be displayed..
-
Page 20
Press the «Search» button Select one of areas from search list [The weather area setting screen] https://smartel.ua… -
Page 21: Control
4 Control 4.1. Control lighting Go to the Lighting tab. When you press power button of whole lightings, all lightings are turned When you press power button of whole lightings, all lightings are turned off. Press the power button of the lighting you want to control to turn the light on off.
-
Page 22: Multi-Sensor
4.2. Multi-sensor Checking multi-sensor Go to the Indoor Environment tab. Displays information collected in indoor environment by multi-sensor. [Multi sensor Screen] 4.3. Magnetic sensor Go to the Safety tab. ‘Detected’ is displayed when door open is detected. If no door open is detected, «No detected» is displayed.
-
Page 23: Adding Devices
4.4. Adding devices Control standby power ① Press the + button to enter the Add Device mode. ② Pairing mode is for 1 minute [Standby power Screen] [Standby power Screen] https://smartel.ua…
-
Page 24: Edit Device
4.5. Edit device Change the device nickname Select the device and change the nickname. ① Press button and finish changing the nickname of the devices. ① [Device edit Screen] Remove device Select the device you want to delete. Press the ①…
-
Page 25: Application
5 Application 5.1. Interphone 5.1.1. Screen Layout Call connection screen ① ② [Monitoring Screen] https://smartel.ua…
-
Page 26: Door Entrance
Press ① button to end the door monitoring. Press ② button to save video. Call connection screen ① ② ③ [Call connection Screen] ① call. ② Start Call / Open Door ③ Save video ④ Adjust call volume 5.2. Door entrance Monitor and call from door camera Click on the door entrance icon in the Quick Menu.
-
Page 27
Open the door When the call comes in and the call button is pressed, the door open button appears. Press the door open button to open the door. Saving the image of our house / common entrance visitor When you press the save video button during a call, the icon changes to and video recording starts Once you click the save button again, the image will be saved. -
Page 28: Call Log
Call house Press dial on background . You can call by entering the number of builidng and household or pressing the button of guard station and office 5.3. Call Log [Display for Call log] https://smartel.ua…
-
Page 29
Using Call Log When you click icon at the top of screen, you can delete the call log. https://smartel.ua… -
Page 30: Security
5.4. Security CCTV monitoring and save the image CCTV monitoring Occur emergency on urgent situation Occur emergency Security 5.4.1. Occur emergency Detect emergency The emergency has been activated by users or sensors automatically. Emergenc y situation will be operated with 3 steps(Occur → Stop → Restore). Occur emergency 5.4.2.
-
Page 31
Stop emergency 5.4.3. Click the “Stop” button. Click the password and “OK” button. (Password from factory : 1234) [Enter password] Return emergency 5.4.4. Click the “Restore” button. When you click it, the emergency will be disarmed. [Window for restoring emergency] CCTV 5.4.5. -
Page 32
⑤ ④ ① ⑥ ③ ⑦ ② [CCTV menu display] ① CCTV Display ⑤ Favorites ② Move to the next display ⑥ Seleted lists ③ Move to the previous display ⑦ List of favoirtes ④ Channal list ⑧ Check the saved image CCTV monitoring &… -
Page 33: Checking Visitor
5.5. Checking visitor Check the saved image of enterence or lobby Checking visitor 5.5.1. Visitor Check the saved image of enterence or lobby [Display for saved image] Delete the saved image Delete With icons, you can check the location of saved movie clip. Movie clip from enterence Enterence Movie clip from lobby…
-
Page 34
Check the saved movie clip You can check the time and date of saved movie clip from the enterence or lobby. Delete the saved movie clip Click the ‘Delete’ button. Click the individual movie clip or “All movie clip’ for the selection. To un-select the movie clip, click that icon again. -
Page 35: Etc App
5.6. Etc App Calculation Calculator Set the alarm and time Clock Sign up / Edit / Initialization Sign up Setting for wallpad Wallpad setting Android setting OS setting Internet brower Brower https://smartel.ua…
-
Page 36
5.6.1. Calculator You can use it for calculation. [Display for calculation] 5.6.2. Brower This is the web brower for internet. https://smartel.ua… -
Page 37
5.6.3. Sign up Sign up / Edit / Initialization Enter ‘ID’ and clikc ‘Duplication check’. Select the living country. Enter ‘Passward’, ‘Retype Passward’ and click ‘Registration’. [Display for Sign-up] Edit & Initialization If you have already siged up, you can see the current ID on the display. You can change the passward to click ‘P/W change’… -
Page 38
5.7. Wallpad setting You can set the user information, wallpad, controlling devices, Door camera and other devices. Click “Wallpad setting” icon, display. [Display for Wallpad setting] 5.7.1. Wallpad setting You can set the SIP server, call number of guard station and passwords for wallpad. https://smartel.ua… -
Page 39
— If wallpad sets Slave, input IP of Master wallpad and select Slave number (501 ~ 510) ※ If you are a member of COMMAX, you need to initialize the member information before setting it as Slave. ※ After the setting of the month pad type is completed, it is automatically rebooted. -
Page 40: Emergency
You can change the password for disarming emergency and Away mode. Enter the new password. Re-enter the same password. If passwords are same, it has been changed. ※ Initial password is 1234. You can change the building & household number. ※…
-
Page 41
After initialization, you can not restore the data. [List for initialization] — Call log — Saved image — Saved movie clip — Emergency log 5.7.4. Door camera setting You can register IP door camera. 1) Click “Door Camera Setting”, push the button of door camera for 5 seconds, the camera image will be displayed automatically. -
Page 42
Click “Camera Preview”, you can check the image of door camera. Click ‘Registeration’ button, the door camera will be registered to wallpad automatically. You can change the name of door camera to click “Edit” button. 5.7.5. CCTV Registeration You can register IP type CCTV camera. Click “CCTV camera register’… -
Page 43
Click “Preview” button and enter the ID & Passward, you can check the image of CCTV camera. https://smartel.ua… -
Page 44
Clikc “Register” button, that CCTV camera will be registered. Click “Edit” button, you can change the name of CCTV camera. https://smartel.ua… -
Page 45
5.7.6. Call setting You can adjust the calling functions. The menu is as below. Continuous call time : You can select the call time between 30 sec ~ 3 min. Video recording time : You can select the recording time between 10 sec ~ 60 sec. -
Page 46
Video auto save: When you select it, video clip will be saved automatically Video clip will be saved on your app. Allow smartphone incoming call : When you select it, you can receive tha call from the visitors to your smart phone. 5.7.7. -
Page 47
Select the place and select the ringtone. (Preview for ringtone) Click the ‘Confirm’ button, the ringtone has been selected. 5.7.9. Wallpad information You can check the information of systems such as versions of S/W. https://smartel.ua… -
Page 48
5.7.10. Check the version of application Click “Application” button. The version of app will be displayed. 5.7.11. Touch keypad sensitivity You can control sensitivity of keypad, if product has touch keypad. https://smartel.ua… -
Page 49: Scene / Booking Control
6 Scene / Booking control ④ ① ② ③ [Main display of Scene / Scenario menu] ① Move to Home display ③ Detail of Scene ② Add Scene ④ Quick move to scenario control 6.1.1. Add Scene In the menu, click the ‘Add scene‘ button. Click ‘Create the scene with selected device’…
-
Page 50
[Display for name & icon] [Display for device setting] 6.1.2. Away mode Activate & Deactivate the away mode Display for away mode status You can set the sensors, saving visitor image, turn-off the light or bypass the call in the away mode.. Activate the away mode Click the away mode icon. -
Page 51
① Lead time for Away mode ② Start the away mode ③ List for activiation with away mode ※ Away mode will not be activated during the setting of security. ※ Lead time for away mode can be set in the menu of ‘Away mode setting → Option →… -
Page 52
※ This function will be activated when the sensors are installed in the house. ※ You can choose the usage of sensors in the menu of [Setting → Signal → Usage of sensor]. Set the security Check the security sensor in ‘Security area (②)’ button. Activate the selected area to click ‘Confirm(①)’… -
Page 53
6.1.4. Scene control Click the scene among the list. devices will operated belongs to its scene. Click ‘Details’ in the main menu. devices will operated to click ‘Run’ button. 6.1.5. Edit Scene Click ‘Security: Applying>’ button, you can arm / disarm the security while you activate the curtain scene. -
Page 54
6.1.6. Setting the scenario(Mode) You can control the devices under the setting of scenario.. Ex.) Turn-on the Lighging when disarming the away mode ※ It may take 1 to 5 min due to server condition. 6.1.7. Adding scenario control Click “Control the scenario” button at the right-top of display. -
Page 55
Select the options of device. Click ‘ ’ button for the saving. ‘Activiation’ will be set as same as ‘Condition’. When the setting of “Codition” and “Activiation” is completed, click the ‘ ’ button for saving. You can see the created scenario. 7.2.1. -
Page 56
PRODUCT MODLE CIOT-1020M SPEC LINE UTP (CAT.5e) VOLTAGE INPUT : PoE DC 36V ~ 54V / DC5V POWER STANDBY :5W , MAX : 10W TELECOMUNNICATION AUDIO : VoIP, VIDEO : H.264, H.265 STANDARD UTP (CAT.5e) 70m LINE & DISTANCE (FROM THE PSE) TEMPERATURE 0℃… -
Page 57
INSTALLATION PACKAGE CONTENTS. Bracket for wall mount Manual CIOT-1020M T4 X 18(4EA) M3 x 6(1EA) Screw for wall mount Screw for body ООО Компания «Строймир» г. Киев, ул. Борщаговская 154А, оф. 435 +38 (044) 331-15-43 info@smartel.ua https://smartel.ua https://smartel.ua…
Артикул: М0000155152

Артикул: М0000155152
IP видеомонитор, четырхядерный (Cortex A9), 1G DDR/8G eMMC Memory, Ethernet 10/100 PoE,… подробнее
Для уточнения цены и сроков поставки направьте запрос менеджеру. Время ответа на запрос 1-2 рабочих дня.
в закладки
сравнить
Наличие:
На заказ
Товар на данный момент отсутствует на складе. Есть возможность привезти его по вашему заказу.
Узнать сроки поставки
1. Оформите заказ
2. Дождитесь связи с менеджером — он позвонит в течении часа и подскажет вам текущие сроки поставки
3. Оплатите заказ. Привезем товар под указанный срок!
Способы оплаты:
Банковская картаБанковская карта
Банковский перевод
- Описание
- Характеристики
- Документация
- Отзывы
- Документация на Commax CIOT-1020M
Документация Commax CIOT-1020M
Ознакомиться с документацией: документации, паспорта, схемы подключения IP видеодомофон Commax CIOT-1020M на Layta.ru
Другие производители категории Абонентские устройства многоабонентные
Розничная цена: 46 530 руб
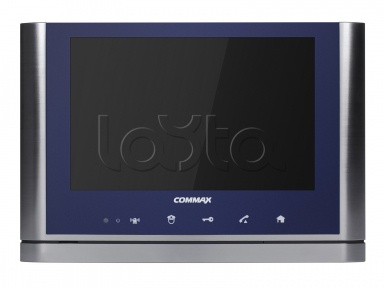
IP видеодомофон с диагональю 10″, четырхядерный процессор (Cortex A9), 1G DDR/8G eMMC Memory, Ethernet 10/100 PoE, Android 6.0, H.264 / Onvif , подключение исполнительных устройств IoT, охранные функции, связь со смартфоном (вызов, общение, управление). Цвет Синий с серым. Размеры: 308 х 213 х 23 мм
Другие товары этой коллекции
Hub 4ch x 100Mbps port x POE. Размеры: 120 х 85 х 30 мм.
Розничная цена: 6 480 руб
Hub 8ch x 100Mbps port x POE. Размеры: 120 х 85 х 30 мм.
Розничная цена: 10 980 руб
IP индивидуальная вызывная панель, настенное крепление, камера 2МР, угол обзора 130˚, видео H.264 / Onvif, ОС Linux, размеры 112 х 146 х 44 мм, температурный режим -40ºC ~ + 40ºC.
Розничная цена: 19 440 руб
IP индивидуальная вызывная панель, антивандальный влагостойкий корпус, встроенная подсветка до 10 м, настенное крепление, камера 2Мп, угол обзора 90 градусов, видео H.264/Onvif, ОС Linux, сеть 10/100, Base-T, RJ-45, питание PoE IEEE 802.3af, температурный режим -40 ~ +50
Розничная цена: 21 600 руб
Мини сервер: предназначен для коммутации и программирования IP многоквартирной системы. Питание POE. Размеры: 104 х 94 х 29 мм
Розничная цена: 32 580 руб
IP видеодомофон с диагональю 7″, четырхядерный процессор (Cortex A9), 1G DDR/8G eMMC Memory, Ethernet 10/100 PoE, Android 6.0, H.264 / Onvif , подключение исполнительных устройств IoT, охранные функции, связь со смартфоном (вызов, общение, управление). Цвет Синий с серым. Размеры: 244 х 180 х 18 мм.
Розничная цена: 34 740 руб
IP видеодомофон с диагональю 7″, четырхядерный процессор (Cortex A9), 1G DDR/8G eMMC Memory, Ethernet 10/100 PoE, Android 6.0, H.264 / Onvif , подключение исполнительных устройств IoT, охранные функции, связь со смартфоном (вызов, общение, управление). Цвет Белый с серым. Размеры: 244 х 180 х 18 мм.
Розничная цена: 34 740 руб
IP видеодомофон с диагональю 10″, четырхядерный процессор (Cortex A9), 1G DDR/8G eMMC Memory, Ethernet 10/100 PoE, Android 6.0, H.264 / Onvif , подключение исполнительных устройств IoT, охранные функции, связь со смартфоном (вызов, общение, управление). Цвет Синий с серым. Размеры: 308 х 213 х 23 мм
Розничная цена: 46 530 руб
IP станция охраны, 7″ LED экран, камера 1Mp. угол обзора 90 градусов, ОС Android, 4.2.2, видео H.264 / Mpeg4, настольное / врезное исполнение, основные функции: Вызов квартиры, просмотр камер видеонаблюдения, наблюдение за посетителем, связь с общим входом. Размеры: 252 х 247 х 3 мм
Розничная цена: 64 800 руб
Ip металлическая врезная панель, 7-дюймовый светодиодный дисплей, BLE, RFID-карта , Full-HD разрешение, Onvif Стандартный, Severless (Используйте COMMAX Cloud), TCP / IP связи. Питание DC 14V, 2.1A. Рабочая температура окружающей среды -40ºC ~ + 40ºC. Размеры: 250 x 255 х 7 мм. Память DDR3 1GB. Бесконтактные датчики освещением LCD панели.
Розничная цена: 75 780 руб

ПОСЛЕДНИЙ ОТЗЫВ
Какая вызывная панель подойдет к Видеодомофон COMMAX арт. CIOT-1020M?..
Курьером (3-7 рабочих дней)0 руб.
(300 руб. при покупке до 3500 руб.)
Почтой России (5-10 рабочих дней)0 руб.
(300 руб. при покупке до 3500 руб.)
Самовывоз из ПВЗ (3-7 рабочих дней)0 руб.
(300 руб. при покупке до 3500 руб.)
ХАРАКТЕРИСТИКИ
Подключаемые устройства
— с 1 вызывной панелью
ОПИСАНИЕ
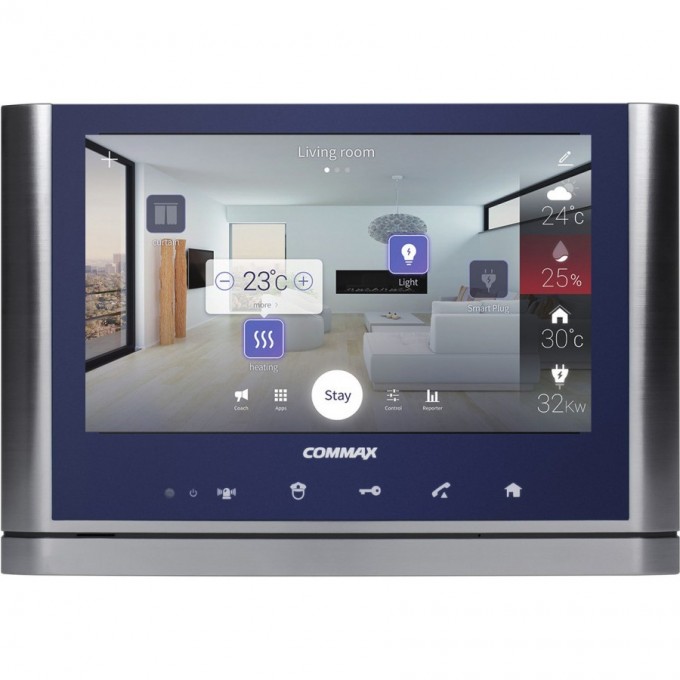
Уникальный в своем классе IP видеодомофон Commax CIOT-1020M с 10″ дюймовым сенсорным дисплеем и операционной системой Android 6.0 — это не просто видеодомофон, это практически полноценный компьютер с поддержкой различных приложений, виджетов (погода, температура и пр.). Встроенный Wi-Fi модуль, возможность работы с браузером и выход в сеть Интернет непосредственно с самого домофона. Поддерживает разрешение разрешение 1280×800, Multi Touch, возможность подключения до 3-х подчиненных мониторов CIOT-700M/CIOT-1020M, возможность подключения 8-ми видеопанелей CIOT-D20M, подключение до 8-ми дополнительных IP камер на монитор, работа с извещателями и исполнительными устройствами, поддержка до 40 ZigBee устройств, поддержка SD карты, возможность внутреннего вызова любого монитора, работа с Android/iOS приложением IP Home IoT. Интуитивно понятный интерфейс, особенно для пользователей Android устройств, дает возможность легко разобраться в меню и настройках. Цвет корпуса: синий + серый металл.
Последние отзывы или вопросы
Какая вызывная панель подойдет к Видеодомофон COMMAX арт. CIOT-1020M?
Читать полностью
ОТВЕТЫ (1)
Ответ магазина
25.06.2023
Добрый день! К этому монитору подойдут только вызывные панели COMMAX линейки CIOT.
Есть всего две:
COMMAX CIOT-D20P
IP индивидуальная антивандальная влагостойкая вызывная панель, настенное крепление, камера 2МР, угол обзора 90˚, видео H.264 / Onvif, ОС Linux, размеры 59 х 164 х 42 мм, температурный режим -40ºC ~ + 40ºC
COMMAX CIOT-D21M
Широкоугольная IP панель вызова в металлическом элегантном корпусе,
с возможностью передавать высококачественное 2-мегапиксельное цветное изображение.
Особенности:
Элегантный внешний вид, Цветная матрица CMOS
Разрешение камеры: 2 Мп
Широкий угол обзора: 120°
LED подсветка, Кнопка вызова механическая
Реле для управления электрозамком
Питание: PoE/DC 5V, Совместимость по протоколу Onvif
Размеры корпуса: 110х145х28 мм
Главный абонентский гибридный монитор Commax CIOT-1020M на базе четырехъядерного процессора Cortex A9 и ОС Android версии 6.0 поддерживает подключение до 20 дополнительных мониторов и исполнительных устройств IoT, IP-камер, вызывных панелей. Укомплектован 10.1″ сенсорным дисплеем с LED-подсветкой и разрешением 1280×800, сенсорными кнопками, памятью DDR на 1 Гбайт (RAM) и eMMC на 8 Гбайт (Flash).
Функциональность:
- Управление замками.
- Поддержка связи по Wi-Fi (IEEE 802.15.4), Zigbee HA 1.2 (совместимый), Ethernet 10/100 Мбит/с (SIP).
- Вызов и переговоры, прием вызовов с нескольких панелей с последовательным переключением.
- Видеомониторинг вестибюля без вызова.
- Звонок в определенный офис и здание через IP-сеть.
- Голосовой вызов на пост охраны, постановка и снятия с охраны.
- Видеонаблюдение в реальном времени из списка CCTV, запись (в том числе пропущенного вызова) и просмотр видео.
- Регистрация, контроль и управление беспроводными IoT-датчиками (магнитными, инфракрасными) по протоколу Zigbee HA 1.2. для режима отсутствия, контроля взлома, детекции открытой двери, аварийного уведомления etc.
- Активация тревоги вручную или автоматически по сигналу датчика.
- Подключение к ACC-сигнализации.
- Управление освещением.
- Формирование и управление сценариями.
- Поддержка звонков и переадресация вызова на мобильные телефоны, управление со смартфонов (ОС Android 4.4.1 и выше, iOS 8.0 и выше) через облачный сервис.
- Оповещение о чрезвычайной ситуации на мобильный телефон.
- Автоматическое определение подчиненного монитора.
- Журнал вызовов, журнал тревог.
CIOT-1020M оборудован индикатором питания, микрофоном, динамиком. На прозрачную поверхность экрана нанесено AF-покрытие для защиты от отпечатков пальцев и истирания. Рабочие температуры — 0 ºС… +40 ºС. Питание получает от РоЕ-коммутатора — 36 ~ 54 В DC или от адаптера DC 5 В. Энергопотребление: максимальное — 10 Вт, в режиме ожидания — 5 Вт. Установка — накладная. Размер — 308×213×23 мм.


