Код: 126083
Извините, товара сейчас нет в наличии
55 820
рублей
Бесплатная доставка
по Красноярску
Извините, товара сейчас нет в наличии
Новости интернет-магазина «Лаукар»:
Дополнительная информация в категории Электропила:
В интернет-магазине бытовой техники «Лаукар» Вы можете скачать инструкцию к товару Пила дисковая DeWALT DWE7485-QS совершенно бесплатно.
Все инструкции, представленные на сайте интернет-магазина бытовой техники «Лаукар», предоставляются производителем товара.
Перед началом использования товара рекомендуем Вам ознакомиться с инструкцией по применению.
Для того чтобы скачать инструкцию, Вам необходимо нажать на ссылку «скачать инструкцию», расположенную ниже, а в случае, если ссылки нет,
Вы можете попробовать обратиться к данной странице позднее,
возможно специалисты интернет-магазина бытовой техники «Лаукар» еще не успели загрузить для скачивания инструкцию к товару:
Пила дисковая DeWALT DWE7485-QS.

Фирма-производитель оставляет за собой право на внесение изменений в конструкцию, дизайн и комплектацию товара: Пила дисковая DeWALT DWE7485-QS. Пожалуйста, сверяйте информацию о товаре с информацией на
официальном сайте компании производителя.
- Manuals
- Brands
- DeWalt Manuals
- Saw
- DWE7485
- Instruction manual
-
Contents
-
Table of Contents
-
Bookmarks
Quick Links
Instruction Manual
Guide D’utilisation
Manual de instrucciones
DWE7485
Table Saw
Scie de table
Sierra de Banco
If you have questions or comments, contact us.
Pour toute question ou tout commentaire, nous contacter.
Si tiene dudas o comentarios, contáctenos.
1-800-4-D
WALT
e
Related Manuals for DeWalt DWE7485
Summary of Contents for DeWalt DWE7485
-
Page 1
Instruction Manual Guide D’utilisation Manual de instrucciones DWE7485 Table Saw Scie de table Sierra de Banco If you have questions or comments, contact us. Pour toute question ou tout commentaire, nous contacter. Si tiene dudas o comentarios, contáctenos. 1-800-4-D WALT… -
Page 2
English (original instructions) Français (traduction de la notice d’instructions originale) Español (traducido de las instrucciones originales) -
Page 3
English Definitions: Safety Alert Symbols and Words This instruction manual uses the following safety alert symbols and words to alert you to hazardous situations and your risk of personal injury or property damage. DANGER: Indicates an imminently hazardous situation which, if not avoided, will result in death or serious injury. WARNING: Indicates a potentially hazardous situation which, if not avoided, could result in death or serious injury. -
Page 4: General Power Tool Safety Warnings
English Table Saw DWE7485 GENERAL POWER TOOL SAFETY WARNINGS power tool’s operation. If damaged, have the power tool repaired before use. Many accidents are caused by poorly maintained power tools. WARNING: Read all safety warnings, instructions, illustrations and specifications f ) Keep cutting tools sharp and clean. Properly maintained cutting tools with sharp cutting provided with this power tool.
-
Page 5: Kickback Causes And Related Warnings
English j ) Feed workpiece at an even pace. Do not bend or twist the workpiece. If jamming j ) Make sure that the saw blade is installed to rotate in the proper direction. Do not occurs, turn the tool off immediately, unplug the tool then clear the jam. Jamming use grinding wheels, wire brushes, or abrasive wheels on a table saw.
-
Page 6: Specifications
English Saw Blades n ……rated speed ….. wear respiratory protection Do not use saw blades that do not conform to the dimensions stated in the specifications……. earthing terminal • ….. wear eye protection Do not use any spacers to make a blade fit onto the spindle. Use only the blades specified in this …..
-
Page 7
English nOTE: To attach this table saw to a stand, please follow the instructions included with the nOTE: The saw is shipped with the non-through-cutting riving knife installed. stand assembly. 1. Raise the saw blade arbor to its maximum height. Installing the Throat Plate (Fig. C) 2. -
Page 8: Assembly And Adjustments
English WARNING: To reduce the risk of serious personal injury, turn unit off and disconnect Fig. F it from power source before making any adjustments or removing/installing attachments or accessories. An accidental start-up can cause injury. WARNING: To reduce the risk of injury, the saw must be secured to prevent unintended movement during use.
-
Page 9
English 1. Using a 5 mm hex wrench, loosen rear pivot bracket fasteners 38 just enough to allow the 3. Locate the three small set screws 42 adjacent to the riving knife lock knob 30 . These screws bracket to move side-to-side. will be used to adjust the riving knife position. -
Page 10: Operation
Push green button 44 in to turn this saw on and push down the red paddle to turn this www.dewalt.com saw off. If a different blade is used and the body thickness and kerf width dimensions are not provided, Lock Off Feature Instructions use the following procedure to determine the correct riving knife thickness: A cover above the switch folds down for insertion of a padlock to lock the saw off.
-
Page 11
English nOTE: This fence will allow the guard to remain on the saw when completing narrow ripping. Fig. S This fence will provide ample space for a push stick. Fine Adjustment Knob (Fig. A) The fine adjustment knob 4 allows smaller adjustments when setting the fence. Before adjusting, be sure the rail lock lever is in its up or unlocked position. -
Page 12: Compound Mitering
English Non-Through-Ripping Small Pieces (Fig. A) Fig. T It is unsafe to rip small pieces. It is not safe to put your hands close to the blade. Instead, rip a larger piece to obtain the desired piece. When a small width is to be ripped and the hand cannot be safely put between the blade and the rip fence, use one or more push sticks.
-
Page 13
English Non-Through-Compound Mitering Fig. Z This is a combination of non-through-bevel crosscutting and non-through-mitering. Follow the instructions for both non-through-bevel crosscutting and non-through-mitering. Dust Collection (Fig. A, X) This table saw is equipped with a guard dust collection port 14 and a dust collection port … -
Page 14: Maintenance
Dust extraction Y connector (contact your local dealer) Fig. CC ** The DWE74911 stand is ONLY compatible with the DWE7485 if purchased separately. When purchased with the original DWE7491RS saw, the stand DOES NOT include the necessary adapter brackets for the DWE7485.
-
Page 15
FRAnçAis Définitions : symboles et termes d’alarmes sécurité Ces guides d’utilisation utilisent les symboles et termes d’alarmes sécurité suivants pour vous prévenir de situations dangereuses et de risques de dommages corporels ou matériels. DANGER : indique une situation dangereuse imminente qui, si elle n’est pas évitée, entraînera la mort ou des blessures graves. AVERTISSEMENT : indique une situation potentiellement dangereuse qui, si elle n’est pas évitée, pourrait entraîner la mort ou des blessures graves. -
Page 16
FRAnçAis Scie de table DWE7485 AVERTISSEMENTS GÉNÉRAUX SUR LA SÉCURITÉ DES OUTILS b ) Ne pas utiliser un outil électrique dont l’interrupteur est défectueux. Tout outil électrique dont l’interrupteur est défectueux est dangereux et doit être réparé. AVERTISSEMENT : lisez tous les avertissements de sécurité, toutes les instructions, c ) Débranchez la fiche de la prise électrique et, si amovible, retirez le bloc-piles de… -
Page 17
FRAnçAis servez-vous d’un bloc-poussoir. Les moyens d’assistance au travail garderont vos mains à 4) Procédures de fonctionnement du banc de scie une distance sécuritaire de la lame. (avertissements) e ) N’utiliser que le bâton-poussoir fourni ou un bâton fabriqué selon les mesures a ) Lors du retrait du dessus de table, du remplacement de lame de scie ou pour faire le données. -
Page 18: Lames De Scie
FRAnçAis NE JAMAIS TENTER DE LIBÉRER UNE LAME BLOQUÉE AVANT D’AVOIR ARRÊTÉ LA SCIE • systématiquement un appareil de protection des voies respiratoires homologué par le NIOSH ET RETIRÉ LE SOURCE D’ÉNERGIE. Si un morceau ou un rebut restait coincé dans le dispositif ou l’OSHA.
-
Page 19: Description (Fig. A)
FRAnçAis Retrait de la plaque de lumière Fig. B 1. Retirez la plaque de lumière 15 en tournant le bouton de verrouillage de came 24 d’un quart de tour vers la gauche. 2. En utilisant le trou passe-doigt 26 sur la plaque, tirez la plaque de lumière vers le haut et l’avant pour exposer l’intérieur de la scie.
-
Page 20
FRAnçAis Fig. E 4. Desserrez les vis de l’indicateur d’échelle de coupe 33 et réglez l’indicateur d’échelle de coupe sur zéro (0). Resserrez les vis de l’indicateur d’échelle de coupe. La lecture de 3 l’échelle de coupe jaune (supérieure) est valide seulement lorsque le guide est installé à droite de la lame et sur la position 1 [coupe longitudinale de 0 à… -
Page 21: Assemblage Et Ajustements
FRAnçAis ASSEMBLAGE ET AJUSTEMENTS 7. Vérifiez l’échelle d’angle de biseau. Si l’indicateur n’est pas sur 0°, desserrez la vis de l’indicateur et ajustez l’indicateur sur le bon angle. Resserrez la vis de l’indicateur. 40 AVERTISSEMENT : afin de réduire le risque de blessure corporelle, éteignez l’appareil 8.
-
Page 22
Les dimensions d’épaisseur de corps de lame et de largeur de traits de scie pour toutes les lames de scie de table D WALT sont disponibles sur le site www.dewalt.com. l’interrupteur est en position d’ARRÊT avant de brancher la machine. -
Page 23
FRAnçAis Utilisation de la fonctionnalité de verrouillage Bouton de réglage de précision (Fig. A) Un capot au-dessus de l’interrupteur se rabat pour permettre l’insertion d’un cadenas pour Le bouton de réglage de précision 4 permet d’effectuer des réglages de précision sur le verrouiller la scie à… -
Page 24
FRAnçAis AVERTISSEMENT : certaines formes de pièces, comme les moulures, peuvent ne pas le guide, et pousser complètement la pièce au-delà de la lame. Le guide longitudinal étroit de soulever le dispositif de carter de lame correctement. Alimentez la pièce lentement pour cette scie de table peut être utilisé… -
Page 25
FRAnçAis Fig. U 6. Ne jamais tenter de ramener la pièce de travail alors que la scie tourne. Coupez l’alimentation, laissez la scie s’arrêter et retirez délicatement la pièce. Coupe transversale non part-en-part biseautée Cette opération est la même qu’une coupe transversale sauf que l’angle de la lame est différent que le réglage de zéro degrés (0°). -
Page 26
FRAnçAis Lubrification (Fig. Y) • Avant les déplacements, verrouillez le guide en place, abaissez la lame et verrouillez le biseau. • Toujours se servir des poignées 22 pour transporter la machine.. 1. Les roulements du moteur sont lubrifiés de façon permanente en usine et aucune autre lubrification n’est nécessaire. -
Page 27
Les accessoires recommandés pour cet outil sont vendus séparément au centre de service de votre région. Pour obtenir de l’aide concernant l’achat d’un accessoire, communiquer avec WALT , composer le 1 800 433-9258 (1 800 4-D WALT) ou visiter notre site Web : www.dewalt. com. •… -
Page 28
EsPAñOl Definiciones: Símbolos y Palabras de Alerta de Seguridad Este manual de instrucciones utiliza los siguientes símbolos y palabras de alerta de seguridad para alertarle de situaciones peligrosas y del riesgo de lesiones corporales o daños materiales. PELIGRO: Indica una situación de peligro inminente que, si no se evita, provocará la muerte o lesiones graves. ADVERTENCIA: Indica una situación de peligro potencial que, si no se evita, podría provocar la muerte o lesiones graves. -
Page 29
EsPAñOl Sierra de Banco DWE7485 ADVERTENCIAS GENERALES DE SEGURIDAD PARA HERRAMIENTAS 4) Uso y Mantenimiento de la Herramienta Eléctrica a ) No fuerce la herramienta eléctrica. Utilice la herramienta eléctrica correcta para ELÉCTRICAS el trabajo que realizará. Si se la utiliza a la velocidad para la que fue diseñada, la ADVERTENCIA: Lea todas las advertencias de seguridad, instrucciones, ilustraciones herramienta eléctrica correcta permite trabajar mejor y de manera más segura. -
Page 30
EsPAñOl b ) Alimente la pieza de trabajo con la hoja de la sierra o el cortador sólo contra la inestable y causa un desalineamiento de la ranura con la cuchilla de la sierra, atascamiento dirección de rotación. Alimentar la pieza de trabajo en la misma dirección en que la y retroceso. -
Page 31
Más de Más de inmediatamente, apáguela y saque la batería hasta que se haya identificado y corregido el problema. Contacte con un centro de servicio de fábrica de DeWalt, un centro de servicio autorizado de D WALT u otro personal de servicio calificado si no puede identificarse el problema. -
Page 32: Uso Debido
EsPAñOl Especificaciones Instalación de la Placa de Garganta (Fig. C) 1. Alinee la placa de garganta 15 como se muestra en la Figura C, e inserte las lengüetas de Tamaño del banco 485 x 485 mm (19 x 19″) la parte posterior de la placa de garganta en los orificios en la parte posterior de la abertura Ángulo de inglete 30°…
-
Page 33
EsPAñOl Instalación/Retiro de la Unidad del Protector de la Hoja y el Cuchillo Fig. F Separador (Fig. E) ATENCIÓN: Use el ensamble de la protección de cuchilla para todo el corte completo. nOTA: La sierra se envía con el cuchillo de corte sin corte completo instalado. 1. -
Page 34: Montaje Y Ajustes
EsPAñOl Montaje Sobre Banco (Fig. A) ADVERTENCIA: Para reducir el riesgo de lesiones personales, apague la unidad y desconéctela de la fuente de energía antes de realizar cualquier ajuste o retirar/ nOTA: Un soporte de sierra de banco portátil está diseñado para ser utilizado con esta sierra y instalar conexiones o accesorios.
-
Page 35: Operación
D WALT pueden encontrarse en www.DEWALT.com. 10. Repita el paso 4 para verificar la posición del cuchillo separador. Repita los pasos 5 a 7 si Si se utiliza una hoja diferente y las dimensiones del espesor de cuerpo y el ancho de línea es necesario.
-
Page 36
EsPAñOl nOTA: Jale la unidad anti-rebote para asegurarse de que se haya bloqueado en su sitio. • Si se está realizando un corte longitudinal, asegúrese de que la palanca de bloqueo de la siEMPRE asegúrese de que ambos protectores están en su posición baja en contacto con el guía esté… -
Page 37
EsPAñOl ADVERTENCIA: Cuando se hagan cortes longitudinales biselados y siempre que sea posible, alcance el cuchillo de desgarre, apague la unidad y desconecte la máquina de la fuente de coloque la guía a un lado de la hoja para que esta esté inclinada alejada de la guía y de energía. -
Page 38
EsPAñOl Fig. T 8. Cuando corte una pieza larga de material o un tablero, siempre use un soporte de trabajo. Un caballete, rodillos, o ensamble de salida de alimentación proporcionan un soporte adecuado para este propósito. El soporte de trabajo debe estar a la misma altura o ligeramente debajo que el banco de sierra. -
Page 39
EsPAñOl . Consulte la sección Instalación/retiro de la Fig. W 4. Retire la unidad del protector de la hoja 11 unidad del protector de la hoja y el cuchillo separador . Coloque la unidad del protector de la hoja en el sujetador como se muestra, luego gire la perilla de bloqueo 1/4 de vuelta para bloquearla en su sitio. -
Page 40: Mantenimiento
D WALT, llame al 1-800-4-D WALT guía auxiliar para cortes delgados en todo momento. (1-800-433-9258) o visite nuestro sitio web: www.dewalt.com. iMPORTAnTE: La guía auxiliar para cortes delgados y el borde que sobresale 47 (Fig. BB) deben •…
-
Page 41: Especificaciones
Esta garantía no cubre falla de partes debido al desgaste normal o abuso de la herramienta. Para detalles adicionales de la cobertura de la garantía e información de reparación de garantía, visite www.dewalt.com o llame al 1-800-4-D WALT (1-800-433-9258).
-
Page 44
WALT Industrial Tool Co. 701 East Joppa Road, Towson, MD 21286 Copyright © 2019 The following are trademarks for one or more D WALT power tools: the yellow and black color scheme, the “D” shaped air intake grill, the array of pyramids on the handgrip, the kit box configuration, and the array of lozenge-shaped humps on the surface of the tool.

PDF инструкция · 44 страниц(ы) английский
инструкцияDeWalt DWE7485

If you have questions or comments, contact us.
Pour toute question ou tout commentaire, nous contacter.
Si tiene dudas o comentarios, contáctenos.
1-800-4-
DeWALT
Instruction Manual
Guide D’utilisation
Manual de instrucciones
DWE7485
Table Saw
Scie de table
Sierra de Banco
Посмотреть инструкция для DeWalt DWE7485 бесплатно. Руководство относится к категории пилы, 10 человек(а) дали ему среднюю оценку 9.1. Руководство доступно на следующих языках: английский. У вас есть вопрос о DeWalt DWE7485 или вам нужна помощь? Задайте свой вопрос здесь
Главная
| DeWalt | |
| DWE7485 | DWE7485-QS | |
| пила | |
| 5035048723371 | |
| английский | |
| Руководство пользователя (PDF), Сведения о гарантии (PDF) |
Содержимое упаковки
| Толкатель | Да |
| Ключ для замены диска | Да |
| Режущий диск в комплекте | Да |
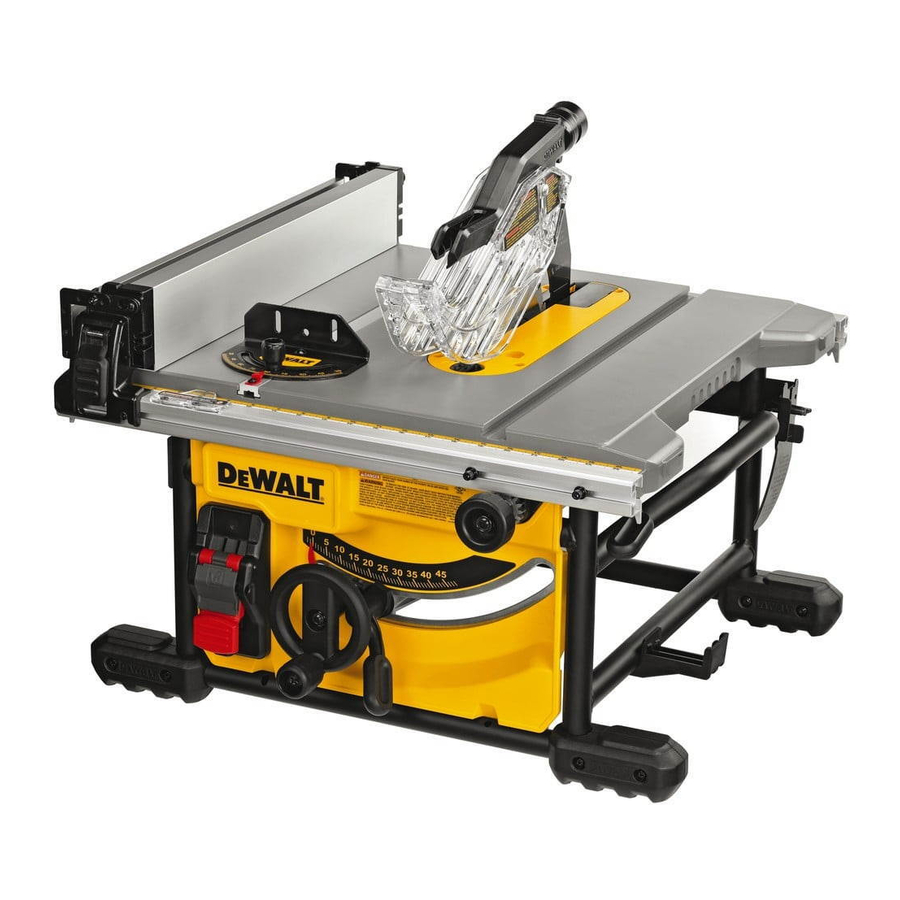
Вес и размеры
| Вес | 22000 g |
| Диаметр диска | 210 mm |
| Диаметр отверстия шпинделя | 30 mm |
| Ширина стола | 485 mm |
| Глубина стола | 485 mm |
| Ширина | 605 mm |
| Глубина | 605 mm |
| Высота | 330 mm |
Производительность
| Обороты холостого хода (1 передача) | 5800 RPM |
| Глубина пропила под углом (90º) | 65 mm |
| Глубина пропила под углом 45º | 45 mm |
| Ширина реза на параллельном упоре (макс) | 622 mm |
Свойства
| Цвет товара | Black, Grey, Yellow |
Энергопитание
| Входная мощность | — W |
| Выходная мощность | 1850 W |
показать больше
Не можете найти ответ на свой вопрос в руководстве? Вы можете найти ответ на свой вопрос ниже, в разделе часто задаваемых вопросов о DeWalt DWE7485.
Какой вес DeWalt DWE7485?
Мой диск пилы затупился. Что мне делать?
Как удалить ржавчину с устройства DeWalt пила?
Что означает «16 В» или «20 В»?
Обязательно ли надевать противошумные наушники при использовании пила?
Какая высота DeWalt DWE7485?
Какая ширина DeWalt DWE7485?
Какая толщина DeWalt DWE7485?
Инструкция DeWalt DWE7485 доступно в русский?
Не нашли свой вопрос? Задайте свой вопрос здесь
Pусский
убедитесь в том, что диск свободно вращается.
Включите инструмент и начните снова выполнять
распил, не прилагая к инструменту излишней силы.
•
НИКОГДА не пытайтесь распилить стопку
незакрепленных между собой кусков заготовки, это
может привести к потере контроля или возникновению
обратного удара. Надежно закрепляйте материалы.
•
Следите за правильным расположением защитного
кожуха. При пилении он всегда должен быть обращен в
сторону заготовки.
Пильные диски
•
Не допускается использование пильных дисков, размеры
которых не соответствуют размерам, указанным в
разделе «Технические характеристики». Не используйте
никаких монтажных элементов при установке пильного
диска на шпиндель. Для распиловка древесины и других
схожих материалов используйте только те диски, что
указаны в данном руководстве, соответствующие
стандарту EN847-1.
•
Максимальная указанная скорость всегда должна быть
больше или хотя бы равной скорости, указанной на
паспортной табличке инструмента.
•
Диаметр пильного диска должен соответствовать
обозначениям на паспортной табличке инструмента.
•
Старайтесь использовать специальные пильные диски с
пониженным уровнем шума.
•
Не используйте пильные диски из
быстрорежущей стали.
•
Не используйте треснувшие или поврежденные
пильные диски.
•
Правильно подбирайте пильные диски в соответствии
с материалом.
•
При захвате пильных дисков или заготовок из грубого
материала всегда надевайте защитные перчатки. По
возможности храните пильные диски в держателе.
Остаточные риски
При использовании пилы присутствуют следующие риски:
•
повреждения в результате касания
вращающихся частей.
Несмотря на соблюдение соответствующих инструкций по
технике безопасности и использование предохранительных
устройств, некоторые остаточные риски невозможно
полностью исключить. А именно:
•
ухудшение слуха;
•
несчастные случаи, происходящие в результате
контакта с открытым движущимся диском пилы;
•
при замене пильных дисков голыми руками существует
опасность получения травм;
•
риск защемления пальцев при снятии
защитного кожуха.
•
ущерб здоровью в результате вдыхания пыли от
распила древесины, в особенности, дуба, бука и ДВП.
Следующие факторы влияют на уровень шума:
24
•
разрезаемый материал;
•
тип пильного диска;
•
сила подачи;
•
техническое состояние инструмента.
Следующие факторы влияют на количество пыли:
•
износ пильного диска;
•
скорость воздушного потока пылеудаляющего
устройства ниже 20 м/сек;
•
неточная подача заготовки.
Остаточные риски
При использовании пилы присутствуют следующие риски:
•
повреждения в результате касания
вращающихся частей.
Несмотря на соблюдение соответствующих инструкций по
технике безопасности и использование предохранительных
устройств, некоторые остаточные риски невозможно
полностью исключить. А именно:
•
ухудшение слуха;
•
несчастные случаи, происходящие в результате
контакта с открытым движущимся диском пилы;
•
при замене пильных дисков голыми руками существует
опасность получения травм;
•
риск защемления пальцев при снятии
защитного кожуха.
•
ущерб здоровью в результате вдыхания пыли от
распила древесины, в особенности, дуба, бука и ДВП.
Следующие факторы влияют на уровень шума:
•
разрезаемый материал;
•
тип пильного диска;
•
сила подачи;
•
техническое состояние инструмента.
Следующие факторы влияют на количество пыли:
•
износ пильного диска;
•
скорость воздушного потока пылеудаляющего
устройства ниже 20 м/сек;
•
неточная подача заготовки.
Электробезопасность
Электродвигатель рассчитан на работу только при одном
напряжении сети. Следите за напряжением электрической
сети, оно должно соответствовать величине, обозначенной
на информационной табличке инструмента.
Ваш инструмент D
e
в соответствии с EN62841; поэтому при работе с
ним не требуется заземление.
Если поврежден кабель питания, его нужно заменить
у производителя или в официальном сервисном
центре DEWALT.
ПРИМЕЧАНИЕ: Это устройство предназначено для
подключения к системе сетевого питания с максимально
допустимым сопротивлением системы Zмакс в 0,25 Ом
в точке интерфейса (коробка питания) источника
питания пользователя. Пользователь должен убедиться
WALT имеет двойную изоляцию