Посмотреть инструкция для DJI Mini 3 Pro бесплатно. Руководство относится к категории дроны, 22 человек(а) дали ему среднюю оценку 9.2. Руководство доступно на следующих языках: русский. У вас есть вопрос о DJI Mini 3 Pro или вам нужна помощь? Задайте свой вопрос здесь
Не можете найти ответ на свой вопрос в руководстве? Вы можете найти ответ на свой вопрос ниже, в разделе часто задаваемых вопросов о DJI Mini 3 Pro.
Могу ли я запускать дрон в ближайших аэропортах?
Может ли аккумулятор моего дрон взорваться?
Инструкция DJI Mini 3 Pro доступно в русский?
Не нашли свой вопрос? Задайте свой вопрос здесь
В этом выпуске рассмотрим дрон DJI Mini 3 Pro. Разберем его технические характеристики, возможности, плюсы и минусы, а также вы узнаете какие инновационные фишки есть у данного квадрокоптера. Этот экспресс-обзор будет полезен новичкам — тем, кто только выбирает свой первый дрон, и тем, кто ни разу не летал ни на каких дронах и хочет выбрать для себя максимально полезный, эффективный и универсальный квадрокоптер для полетов.

Содержание статьи:
- Комплектация квадрокоптера DJI Mini 3 Pro
- Технические характеристики DJI Mini 3 Pro
- Дизайн квадрокоптера DJI Mini 3 Pro
- Пульт DJI RC-N1
- Камера квадрокоптера DJI Mini 3 Pro
- Полет на дроне DJI Mini 3 Pro
- Режимы съемок DJI Mini 3 Pro
- Дальность полета DJI Mini 3 Pro
- Цены на квадрокоптеры DJI Mini 3 Pro
- Выводы по квадрокоптеру DJI Mini 3 Pro
- Видеообзор квадрокоптера DJI Mini 3 Pro
В стандартную комплектацию DJI Mini 3 PRO входит:
- Квадрокоптер DJI Mini 3 Pro — 1 шт.
- Пульт дистанционного управления DJI RC-N1 — 1 шт.
- Кабель для пульта DJI RC-N1 (с разъемом USB Type-C) — 1 шт.
- Кабель для пульта DJI RC-N1 (с разъемом Lightning) — 1 шт.
- Кабель для пульта DJI RC-N1 (со стандартным разъемом Micro-USB) — 1 шт.
- Интеллектуальная полетная батарея DJI Mini 3 Pro — 1 шт.
- Запасные пропеллеры DJI Mini 3 Pro (пара) — 1 шт.
- Защита подвеса DJI Mini 3 Pro — 1 шт.
- Кабель Type-C к Type-C PD — 1 шт.
- Отвертка — 1 шт.
- Комплект винтов — 6 шт.

Комплектация Fly More Kit несколько отличается от обычной, там дополнительно идут два энергоемких аккумулятора и один обычный. Также в составе есть зарядный хаб с индикаторами заряда каждой батареи — можно не переживать, что важная съемка прекратится в неподходящий момент, достаточно заменить батарею и продолжить съемку.

Сумка на плечо, запасные пропеллеры с винтами и кабель для передачи данных — все это также находится в комплектации Fly More Kit-версии. Для большей наглядности привожу список ниже:
Комплект DJI Mini 3 Pro Fly More Kit:
- Аккумуляторы: 2 шт
- Зарядный хаб: 1 шт
- Пропеллеры: 4 шт
- Винты: 12 шт
- Сумка на плечо: 1 шт
- Кабель для передачи данных USB 3.0 Type-C: 1 шт


Сам дрон довольно легкий, весит всего 249 грамм. Для сравнения iPhone 13 Pro весит 203 грамма. Такая лёгкость дрона даёт отсылку ко второй версии квадрокоптера DJI. Если не вставлять батарею, то он почти ничего не весит. Обычная батарея, которая идет в комплекте с квадрокоптером, на 2453 миллиампера. Другие две батареи повышенной энергоемкости, они на 3850 миллиампер.

Как заявляют разработчики DJI, обычной батареи хватит на 34 минуты полёта. А батареи с повышенной энергоемкости будет хватать на ~40-50 минут. Конечно на деле всё может оказаться чуть меньше.
Батарея вставляется до щелчка, и уверенно сидит в дроне.
Дизайн квадрокоптера DJI Mini 3 Pro
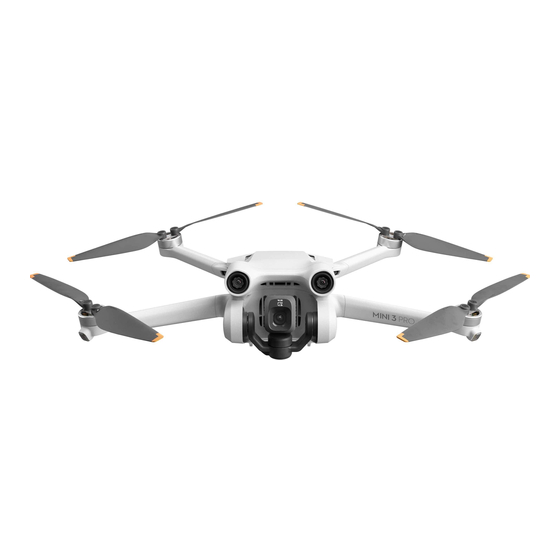
Давайте рассмотрим сам дизайн. Он довольно интересный и футуристический, почти как космический корабль. Впереди имеются большие датчики, а сзади чуть поменьше. Боковые отсутствуют. Поэтому будьте осторожны когда летаете боком вблизи какие-либо объектов.

Снимая защитную крышку камеры видно обновленную систему стабилизации, и инновационное решение для квадрокоптеров — это переворачивание камеры в вертикальное положение, т.е. можно снимать вертикальные видео для Stories и Reels, просто незаменимая вещь, которая избавит от лишних временных затрат на этапе монтажа. Пропеллеры немножко прорезинены, в целом у них тонкий и качественный пластик тонкий, всё в совокупности выглядит очень достойно.
У квадрокоптера DJI Mini 3 Pro есть инновационное решение — он может снимать вертикальные видео для Stories и Reels.

Имеется слот для карты памяти, разъем для зарядки и обновления системы. Кстати, во время надевания крышки многие сталкиваются со сложностями. Самое главное попасть в верхнюю часть, зафиксировать, в потом уже нижнюю. Со второго раза получается у всех.
Пульт DJI RC-N1

Пульт стандартный со стиками, с местом установки смартфона. Кстати, многие тесты показали, что с обычным пультом версии N1 связь с DJI Mini 3 Pro намного лучше, чем с пультом со встроенным экраном. Но это уже на ваше усмотрение, кому как удобно.
Технические характеристики пульта DJI RC-N1:
| Мощность передатчика (ЭИИМ) | 2,400-2,4835 ГГц:
<26 дБм (FCC), <20 дБм (CE/SRRC/MIC) |
| Макс. размер совместимого мобильного устройства | Длина: 180 мм, ширина: 86 мм, высота: 10 мм |
| Поддерживаемые типы разъемов | Lightning, Micro USB (Type-B), USB-C |
| Система передачи видео | O3 Pro |
| Макс. время работы аккумулятора | Без зарядки мобильного устройства: 6 ч.
При зарядке мобильного устройства — 4 часа |
| Диапазон рабочих температур | От −10 до +40°C |
Камера квадрокоптера DJI Mini 3 Pro

Диафрагма у камеры постоянно f/1,7, светосильная, т.е.с возможностью осуществлять ночную съемку при слабом освещении. Фокусное расстояние 24 мм, что является универсальным стандартом. Сама матрица CMOS 1/1,3 дюйма. 48 мегапикселей, 4К 60 кадров. В целом достойная камера для перспективного квадрокоптера.
| Матрица | CMOS 1/1,3 дюйма
Число эффективных пикселей: 48 Мп |
| Объектив | Угол обзора: 82,1°
Эквивалент формата 24 мм Диафрагма: f/1,7 Фокус: от 1 м до ∞ |
| Диапазон ISO | Видео:
100-6400 (авто) 100-6400 (ручная настройка) Фото: 100-6400 (авто) 100-6400 (ручная настройка) |
| Скорость затвора | Скорость электронного затвора: 2–1/8000 с |
| Макс. размер изображения | 4:3:
8064×6048 (48 Мп) 4032×3024 (12 Мп) 16:9: 4032×2268 (12 Мп) |
| Режимы статической фотосъемки | Покадровая
Интервальная: JPEG: 2/3/5/7/10/15/20/30/60 с JPEG + RAW: 2/3/5/7/10/15/20/30/60 с Автоматический брекетинг экспозиции (AEB): 3/5/7 ступеней экспозиции с шагом 2/3 EV Панорама: вы можете выбрать сферическую панораму, 180°, широкоугольный или вертикальный формат. |
| Фотоформат | JPEG/DNG (RAW) |
| Разрешение видео | 4K: 3840×2160 при 24/25/30/48/50/60 кадрах/с
2,7K: 2720×1530 при 24/25/30/48/50/60 кадрах/с FHD: 1920×1080 при 24/25/30/48/50/60 кадрах/с Замедленная съемка: 1920×1080 при 120 кадрах/с |
| Видеоформат | MP4/MOV (H.264/H.265) |
| Макс. битрейт видео | 150 Мбит/с |
| Диапазон увеличения | 4K: 2x
2,7K: 3x FHD: 4x |
| Режимы быстрой съемки | Дрони, Круг, Спираль, Ракета, Бумеранг и Астероид |
| Цветовые профили | Обычный
D-Cinelike |
| Поддерживаемые файловые системы | FAT32 (≤32 Гбайт)
exFAT (>32 Гбайт) |
| Система передачи видео | DJI O3 |
| Качество трансляции | 1080p/30 кадров/с |
| Диапазон рабочих частот | 2,400-2,4835 ГГц
Согласно местным законам, частоту 5,8 ГГц запрещено использовать в некоторых странах, например, в России, Японии, Израиле, Украине и Казахстане. Для полетов в этих странах используйте частоту 2,4 ГГц. Всегда проверяйте местные законы перед полетом. Они могут меняться со временем. |
| Пропускная способность связи | 1,4 МГц ⁄ 3 МГц ⁄ 10 МГц ⁄ 20 МГц ⁄ 40 МГц |
| Задержка сигнала (зависит от условий на месте и мобильного устройства) | Дрон + пульт управления: Около 120 м/с |
| Макс. битрейт видео | Дрон + пульт управления: 18 Мбит/с |
| Макс. битрейт загрузки | DJI O3:
Пульт управления DJI RC-N1 5,5 Мбайт/с DJI RC: 5,5 Мбайт/с Wi-Fi 5: Макс. 30 Мбайт/с * Измерено в лабораторных условиях с небольшими помехами в странах/регионах, поддерживающих как 2,4 ГГц, так и 5,8 ГГц. Отснятый материал сохранялся на встроенном твердотельном накопителе SSD или во внутренней памяти. Скорость загрузки может отличаться в зависимости от фактических условий. |
| Диапазоны передачи сигнала (FCC) | Сильные помехи (городская среда): Около 1-3 км
Средние помехи (пригородные районы): Около 6 км Низкие помехи (пригородные/прибрежные районы): Около 12 км * Измерения получены в открытой среде без помех при выполнении стандарта FCC. Информация предоставлена в справочных целях и не дает никаких гарантий относительно фактического расстояния полета. * Максимальное расстояние односторонней связи DJI Mini 3 Pro в странах/регионах с разными стандартами: FCC: США, Австралия, Канада, Гонконг, Тайвань, Чили, Колумбия, Пуэрто-Рико и другие регионы. Макс. дальность передачи сигнала 12 км SRRC: Континентальный Китай. Макс. дальность передачи сигнала: 6 км CE: Великобритания, Россия, Франция, Германия, Португалия, Испания, Швейцария, Макао, Новая Зеландия, ОАЭ и другие регионы. Макс. дальность передачи сигнала 6 км MIC: Япония. Макс. дальность передачи сигнала: 6 км |
| Антенны | 2T4R с 4 антеннами |
| Передача аудиосигнала | Нет |
Полет на дроне DJI Mini 3 Pro
Для взлёта используем авто-взлет. При сильном ветре его может немного штормить. При отлёте более чем на 50 метров, работу пропеллеров уже не слышно. Такой параметр характеризует его как тихий дрон. Картинка во время полёта приятная. Если лететь по солнцу картинка должна быть намного лучше.

И теперь самый интересный момент — это переворот камеры. Очень удобная функция, когда надо записать вертикальное видео. На монтаже избавляет от лишних манипуляций с кадрированием, просто записал и готово.
Режимы съемок DJI Mini 3 Pro
У данного квадрокоптера имеются режимы быстрой съемки. Бумеранг, астероид — это все от DJ Mini 2 Mini SE. Давайте для теста выберем Active Track. Выбираем объект, “Трек — Go” следование и пошли. Отлично работает.

Попробуем в параллельный Active Track. Выделяем объект, нажимаем параллельный и пробуем идти, а квадрокоптер следует за нами. И теперь резко вперед. Всё работает нормально, без нареканий.

Фотография 48 мегапикселей.
Дальность полета DJI Mini 3 Pro

Еще небольшой тест на связь. Проверим дальность полёта. По заявлениям разработчиков дальность полёта у коптера DJI Mini 3 Pro до 12 км. Но в этом тесте отлетим на 50-100 метров на высоте 40 метров, как это бывает на многих коммерческих съемках. Чаще всего это полёты в зоне визуальной видимости. Связь держит хорошо. Коптер держится нормально, управление отзывчивое. Напомню, что пульт у нас стандартный.
Цены на квадрокоптеры DJI Mini 3 Pro
Анализируя цены на маркетплейсах в России, минимальные цена на данный квадрокоптер начинается с 79890 рублей и выше. За версию DJI Mini 3 Pro (DJI RC) цена 139050 рублей по состоянию на сентябрь 2022 год.
Выводы по квадрокоптеру DJI Mini 3 Pro

Итак, давайте перейдем к выводам DJI Mini 3. Данный квадрокоптер отлично подойдет для начинающих. Он очень компактный, легкий и функциональный в плане того, что у него поворачивается камера полностью на 90 градусов (для Stories и Reels это супер). Есть Active Track, множество интеллектуальных режимов по быстрой съемке. То есть если вы новичок одно нажатие кнопки сделает все за вас — уже все отснимется. Батарея отлично держит. Единственный минус — это ветроустойчивость. Если сильный ветер будет проблематично с ним полетать: он будет трястись его будет штормить. В остальном вообще без нареканий. Для тревел блога или для семейных кадров DJI Mini 3 Pro идеальная вещица.
Видеообзор квадрокоптера DJI Mini 3 Pro
Для большей наглядности рекомендую посмотреть вам видеообзор на данный квадрокоптер.
Источник: DJI Mini 3 Pro ОБЗОР ЛУЧШЕГО ДРОНА ДЛЯ НОВИЧКОВ / DJI Mini 3 Pro ПЕРВЫЙ ЗАПУСК И НАСТРОЙКА ДРОНА 🚀🔥 // https://youtu.be/wytb52Neu8A // Денис Назаренко
- Manuals
- Brands
- dji Manuals
- Drones
- MINI 3 PRO
- User manual
-
Contents
-
Table of Contents
-
Bookmarks
Quick Links
Related Manuals for dji MINI 3 PRO
Summary of Contents for dji MINI 3 PRO
-
Page 1
User Manual 2022.06 v1.2… -
Page 2
Printing this Document This document supports high resolution printing. Revision Log Version Date Revisions Added support for FocusTrack, QuickShots (Dronie, Rocket, Circle, Helix, v1.2 2022.6 and Boomerang), and Hyperlapse in portrait mode, and added USB mode. © 2022 DJI All Rights Reserved. -
Page 3: Using This Manual
The DJI RC remote controller has the DJI Fly app already installed. Users are required to download DJI Fly to their mobile device when using DJI RC-N1 remote controller. The Android version of DJI Fly is compatible with Android v6.0 and later. The iOS version of DJI Fly is compatible with iOS v11.0 and later.
-
Page 4: Table Of Contents
Contents Using this manual Legend Read Before the First Flight Video Tutorials Download the DJI Fly App Download DJI Assistant 2 (Consumer Drones Series) Product Profile Introduction Using for the First Time Diagram Aircraft Introduction Flight Modes Aircraft Status Indicator…
-
Page 5
Auto Takeoff/Landing Starting/Stopping the Motors Flight Test Appendix Specifications Firmware Update Aftersales Information © 2022 DJI All Rights Reserved. -
Page 6
Product Profile This section introduces DJI Mini 3 Pro and lists the components of the aircraft and remote controller. © 2022 DJI All Rights Reserved. -
Page 7: Product Profile
3.0) technology, DJI Mini 3 Pro offers a maximum transmission range of 12 km and video quality at up to 1080p 30fps from the aircraft to DJI Fly. The remote controller works at both 2.4 and 5.8 GHz, and is capable of selecting the best transmission channel automatically.
-
Page 8: Using For The First Time
DJI Mini 3 Pro User Manual Using for the First Time DJI Mini 3 Pro is folded before being packaged. Follow the steps below to unfold the aircraft and remote controller. Preparing the Aircraft All aircraft arms are folded before the aircraft is packaged. Follow the steps below to unfold the aircraft.
-
Page 9
Activating the DJI Mini 3 Pro Aircraft DJI Mini 3 Pro requires activation before first use. After powering on the aircraft and remote controller, follow the on-screen prompts to activate DJI Mini 3 Pro using DJI Fly. An internet connection is required for activation. -
Page 10: Diagram
Binding the Aircraft and Remote Controller After activation, the aircraft is bound to the remote controller automatically. If automatic binding fails, follow the on-screen prompts on DJI Fly to bind the aircraft and remote controller for optimal warranty services. Updating Firmware A prompt will appear in DJI Fly when new firmware is available.
-
Page 11
DJI Mini 3 Pro User Manual DJI RC Remote Controller Systems are available). Press and hold to initiate RTH. Press again to cancel RTH. 5. Flight Mode Switch Switch between Cine, Normal, and Sport mode. 6. Power Button Press once to check the current battery level. -
Page 12
Controls the tilt of the camera. Press and hold The control sticks are removable and easy to the customizable button to use the gimbal dial store. Set the flight control mode in DJI Fly. for zoom control. 6. Customizable Button The functions of the button can be set in 14. -
Page 13
Aircraft DJI Mini 3 Pro contains a flight controller, video downlink system, vision systems, infrared sensing system, propulsion system, and an Intelligent Flight Battery. © 2022 DJI All Rights Reserved. -
Page 14: Aircraft
Intelligent Flight Battery. Flight Modes DJI Mini 3 Pro has three flight modes, plus a fourth flight mode that the aircraft switches to in certain scenarios. Flight modes can be switched via the Flight Mode switch on the remote controller.
-
Page 15: Aircraft Status Indicator
Lighting requirements vary depending on the region. Observe local laws and regulations. QuickTransfer DJI Mini 3 Pro can connect directly to mobile devices via Wi-Fi, enabling users to download photos and videos from the aircraft to the mobile device through DJI Fly without using the DJI RC-N1 remote controller.
-
Page 16: Return To Home
DJI Mini 3 Pro User Manual 2. Make sure Bluetooth and Wi-Fi are enabled on the mobile device. Launch DJI Fly and a prompt will appear to connect to the aircraft. 3. Tap Connect. Once successfully connected, the files on the aircraft can be accessed and downloaded at high speed.
-
Page 17
The action the aircraft performs once it loses the remote controller signal can be set as Return to Home, Land, or Hover in DJI Fly. If the action was set as Return to Home in advance, and where the Home ©… -
Page 18
The aircraft will hover in place for a while before landing. It is important to set a suitable RTH altitude before each flight. Launch DJI Fly and set the RTH altitude. In RTH, if the current altitude of the aircraft is lower than the RTH altitude, it will automatically ascend to the RTH altitude first. -
Page 19: Vision Systems And Infrared Sensing Systems
2. If the ground is determined unsuitable for landing, the aircraft will hover and wait for pilot confirmation. 3. If Landing Protection is not operational, DJI Fly will display a landing prompt when the aircraft descends to 0.5 m from the ground. Push the throttle stick down for one second to land.
-
Page 20
The Forward and Backward Vision Systems will activate automatically when the aircraft is in Normal or Cine mode and Obstacle Avoidance is set to Bypass or Brake in DJI Fly. The Forward and Backward Vision Systems work best with adequate lighting and clearly marked or textured obstacles. Due to inertia, users must make sure to brake the aircraft within a reasonable distance. -
Page 21: Intelligent Flight Mode
Use soft cloth if there is any dirt, dust, or water on the glass of the infrared sensing and vision systems. DO NOT use any cleaning product that contains alcohol. c) Contact DJI Support if there is any damage to the glass of the Infrared Sensing System or Vision Systems.
-
Page 22
Move the roll stick to circle the subject, pitch stick to alter the distance from the subject, throttle stick to change the altitude, and yaw stick to adjust the frame. The aircraft will bypass obstacles in ActiveTrack 4.0 regardless of the settings in DJI Fly when the vision systems are working normally. -
Page 23
3. Tap the shutter/record button to take photos or start recording. View the footage in Playback. Exiting FocusTrack Tap Stop in DJI Fly or press the Flight Pause button once on the remote controller to exit FocusTrack. DO NOT use FocusTrack in areas with people and animals running or vehicles moving. -
Page 24
1. Launch the aircraft and make it hover at least 2 m (6.6 ft) above ground. 2. In DJI Fly, tap the shooting mode icon to select MasterShots and read the instructions. Make sure you understand how to use the shooting mode and there are no obstacles in the surrounding area. -
Page 25
Make sure to follow local privacy laws and regulations when using MasterShots. QuickShots QuickShots shooting modes include Dronie, Rocket, Circle, Helix, Boomerang, and Asteroid. DJI Mini 3 Pro records according to the selected shooting mode and automatically generates a short video. The video can be viewed, edited, or shared to social media from playback. -
Page 26
DJI Mini 3 Pro User Manual 2. In DJI Fly, tap the shooting mode icon to select QuickShots and follow the prompts. Make sure you understand how to use the shooting mode and there are no obstacles in the surrounding area. -
Page 27
2. Tap the shutter/record button to begin. Cruise Control: Set the function of the customizable button (C1 or C2 button for DJI RC and Fn button for the DJI RC-N1 remote controller) to Cruise Control, and press the customizable button and control stick at the same time to enter Cruise Control. -
Page 28: Advanced Pilot Assistance Systems (Apas 4.0)
DJI Mini 3 Pro User Manual orientation and gimbal. Follow the steps below to use Course Lock: 1. Set the interval time, video duration, and max speed. The screen displays the number of photos that will be taken and the shooting duration.
-
Page 29: Flight Recorder
(Consumer Drones Series). Propellers There are two types of DJI Mini 3 Pro propellers, which are designed to spin in different directions. The marked propellers should be attached to the marked motors, and unmarked propellers to the unmarked motors. The two propeller blades attached to one motor are the same. Make sure to match the propellers and motors by following the instructions.
-
Page 30
Use two propellers from the same package. DO NOT mix with propellers from other packages. Only use official DJI propellers. DO NOT mix propeller types. Purchase additional propellers if necessary. Make sure that the propellers and motors are installed securely before each flight. Check to make sure the screws on the propellers are tightened after every 30 hours of flying time (approx. -
Page 31: Intelligent Flight Battery
Intelligent Flight Battery DJI Mini 3 Pro Intelligent Flight Battery is a 7.38 V, 2453 mAh battery. DJI Mini 3 Pro Intelligent Flight Battery Plus is a 7.38 V, 3850 mAh battery. The two batteries have the same structure and dimensions but different weight and capacity.
-
Page 32
DJI Mini 3 Pro User Manual Using the Battery Checking the Battery Level Press the power button once to check the battery level. LED1 LED2 LED3 LED4 Battery Level LEDs Power Button The battery level LEDs display the power level of the battery during charging and discharging. The… -
Page 33
Fully charge the battery before each use. It is recommended to use the charging devices provided by DJI, such as the DJI Mini 3 Pro Two-Way Charging Hub, DJI 30W USB-C Charger, or other USB Power Delivery chargers. The DJI Mini 3 Pro Two-Way Charging Hub and the DJI 30W USB-C Charger are both optional accessories. -
Page 34
1. Insert the batteries into the charging hub until there is a click. 2. Connect the charging hub to a power outlet (100-240V, 50/60 Hz) using a USB-C cable and a DJI 30W USB-C charger or other USB Power Delivery chargers. -
Page 35
When using the DJI 30W USB-C Charger, the charging time for Mini 3 Pro Intelligent Flight Battery is approximately 1 hour and 4 minutes, while for Mini 3 Pro Intelligent Flight Battery Plus it is approximately 1 hour and 41 minutes. -
Page 36
DJI Mini 3 Pro User Manual Battery Protection Mechanisms Status LED1 LED2 LED3 LED4 Blinking Pattern LED2 blinks twice per second Overcurrent detected LED2 blinks three times per second Short circuit detected LED3 blinks twice per second Overcharge detected LED3 blinks three times per second Over-voltage charger detected… -
Page 37: Gimbal And Camera
Gimbal Profile The DJI Mini 3 Pro 3-axis gimbal stabilizes the camera, allowing you to capture clear and steady images and videos at high flight speed. The gimbal has a control tilt range of -90˚ to +60˚, and two control roll angles of -90˚…
-
Page 38
Storing Photos and Videos DJI Mini 3 Pro supports the use of a microSD card to store your photos and videos. A microSD card with a UHS-I Speed Grade 3 rating or above is required due to the fast read and write speeds necessary for high-resolution video data. -
Page 39
Remote Controller This section describes the features of the remote controller and includes instructions for controlling the aircraft and the camera. © 2022 DJI All Rights Reserved. -
Page 40: Remote Controller
Remote Controller DJI RC When used with DJI Mini 3 Pro, DJI RC remote controller features OcuSync O3 video transmission, works at both 2.4 GHz and 5.8 GHz frequency bands. It is capable of selecting the best transmission channel automatically and can transmit 1080p 30fps HD live view from the aircraft to the remote controller at a distance of up to 12 km (7.5 mi) (compliant with FCC standards, and measured in…
-
Page 41
(throttle), and left/right movement (roll). The control stick mode determines the function of each control stick movement. Three preprogrammed modes (Mode 1, Mode 2, and Mode 3) are available and custom modes can be configured in DJI Fly. Mode 1… -
Page 42
DJI Mini 3 Pro User Manual The default control mode of the remote controller is Mode 2. In this manual, Mode 2 is used as the example to illustrate how to use the control sticks. Stick Neutral/Center Point: Control sticks are in the center. -
Page 43
RTH and to regain control of the aircraft. Customizable Buttons Go to System Settings in DJI Fly and select Control to set the functions of the customizable C1 and C2 buttons. Status LED and Battery Level LEDs Description… -
Page 44
The remote controller beeps when there is an error or warning. Pay attention when prompts appear on the touch screen or in DJI Fly. Slide down from the top and select Mute to disable all alerts, or slide the volume bar to 0 to disable some alerts. -
Page 45
DJI Mini 3 Pro User Manual Make sure the remote controller is within 0.5 m of the aircraft during the linking. The remote controller will automatically unlink from an aircraft if a new remote controller is linked to the same aircraft. -
Page 46
×2 Slide down from the top of the screen to Slide down twice from the top open the status bar when in DJI Fly. of the screen to open Quick Settings when in DJI Fly. The status bar displays the time, Wi-Fi signal, battery level of the remote controller, etc. -
Page 47
DJI Mini 3 Pro User Manual 4. Adjusting Brightness Slide the bar to adjust the screen brightness. 5. Adjusting Volume Slide the bar to adjust the volume. Advanced Features Calibrating the Compass The compass may need to be calibrated after the remote controller is used in areas with electromagnetic interference. -
Page 48: Dji Rc-N1
DJI Mini 3 Pro User Manual DJI RC-N1 When used with DJI Mini 3 Pro, DJI RC-N1 features OcuSync O3 video transmission, works at both 2.4 GHz and 5.8 GHz frequency bands, is capable of selecting the best transmission channel automatically, and offers 1080p 30fps HD live view transmission from the aircraft to DJI Fly on a mobile device (depending on mobile device performance) at a maximum transmission range of 12 km (7.5 mi)
-
Page 49
(throttle), and left/right movement (roll). The control stick mode determines the function of each control stick movement. Three preprogrammed modes (Mode 1, Mode 2, and Mode 3) are available and custom modes can be configured in DJI Fly. Mode 1… -
Page 50
DJI Mini 3 Pro User Manual The default control mode of the remote controller is Mode 2. In this manual, Mode 2 is used as the example to illustrate how to use the control sticks. Stick Neutral/Center Point: Control sticks are in the center. -
Page 51
RTH and to regain control of the aircraft. Customizable Button To customize the function of this button, go to System Settings in DJI Fly and select Control. Customizable functions include recentering the gimbal and toggling between the map and live view. -
Page 52
DJI Mini 3 Pro User Manual Optimal Transmission Zone The signal between the aircraft and the remote controller is most reliable when the remote controller is positioned towards the aircraft as depicted below. Weak Weak Strong Optimal Transmission Zone Linking the Remote Controller The remote controller is already linked to the aircraft when purchased together as a combo. -
Page 53
DJI Fly App This section introduces the main functions of the DJI Fly app. © 2022 DJI All Rights Reserved. -
Page 54: Dji Fly App
Enter SkyPixel to view videos and photos shared by users. Profile View account information, flight records; visit the DJI forum, online store; access the Find My Drone feature, and other settings such as firmware updates, camera view, cached data, account privacy, and language.
-
Page 55: Camera View
DJI Mini 3 Pro User Manual Camera View 1. Flight Mode N: Displays the current flight mode. 2. System Status Bar In Flight: Indicates the aircraft flight status and displays various warning messages. Tap to view more information when a warning prompt appears.
-
Page 56
USB mode and connect to a computer to use USB mode. To disable USB mode, restart the aircraft and disable USB mode in DJI Fly. In USB mode, the aircraft will disconnect from the remote controller. -
Page 57
DJI Mini 3 Pro User Manual About View device information, firmware information, app version, battery version, and more. 8. Shooting Modes Photo: Single, Burst Shooting, AEB, 48MP, or Timed Shot. Video: Normal, Slow Motion. Digital zoom is supported in normal video mode. -
Page 58
The app is designed to assist in your operations. Use your sound discretion and DO NOT rely on the app to control your aircraft. Your use of the app is subject to DJI Fly Terms of Use and DJI Privacy Policy. -
Page 59
Flight This section describes safe flight practices and flight restrictions. © 2022 DJI All Rights Reserved. -
Page 60: Flight
Flight Limits GEO (Geospatial Environment Online) System DJI’s Geospatial Environment Online (GEO) System is a global information system that provides real-time information on flight safety and restriction updates and prevents UAVs from flying in restricted airspace. Under exceptional circumstances, restricted areas can be unlocked to allow flights in. Prior to that, the user must submit an unlocking request based on the current restriction level in the intended flight area.
-
Page 61
Flight Altitude and Distance Limits Maximum flight altitude restricts an aircraft’s flight altitude, while maximum flight distance restricts an aircraft’s flight radius around the Home Point. These limits can be set using the DJI Fly app for improved flight safety. -
Page 62: Pre-Flight Checklist
Zones, which are further divided into Restricted Zones, Authorization Zones, Warning Zones, Enhanced Warning Zones, and Altitude Zones. Users can view such information in real time in DJI Fly. GEO Zones are specific flight areas, including but not limited to airports, large event venues, locations where public emergencies have occurred (such as forest fires), nuclear power plants, prisons, government properties, and military facilities.
-
Page 63: Starting/Stopping The Motors
2. Power on the remote controller and the aircraft. 3. Launch DJI Fly and enter the camera view. 4. Wait for the aircraft self-diagnostics to complete. If DJI Fly does not show any irregular warning, you can start the motors.
-
Page 64
1. The pre-flight checklist is designed to help you fly safely and shoot videos during flight. Go through the full pre-flight checklist before each flight. 2. Select the desired gimbal operation mode in DJI Fly. 3. It is recommended to take photos or record videos when flying in Normal or Cine mode. -
Page 65
Appendix © 2022 DJI All Rights Reserved. -
Page 66: Appendix
C Mode: 25° Max Angular Velocity S Mode: 130°/s by default (the adjustable range on DJI Fly is 20-250°/s) N Mode: 75°/s by default (the adjustable range on DJI Fly is 20-120°/s) C Mode: 30°/s by default (the adjustable range on DJI Fly is 20-60°/s) Operating Temperature -10°…
-
Page 67
DJI Mini 3 Pro User Manual Hovering Accuracy Range Vertical: Vision Positioning: ±0.1 m GNSS Positioning: ±0.5 m Horizontal: Vision Positioning: ±0.3 m High Accuracy System Positioning: ±0.5 m Transmission Video Transmission System Operating Frequency 2.400-2.4835 GHz, 5.725-5.850 GHz Transmitter Power (EIRP) 2.4 GHz: <26 dBm (FCC), <20 dBm (CE/SRRC/MIC) -
Page 68
DJI RC-N1 Remote Controller Transmission Video Transmission System When used with different aircraft hardware configurations, the DJI RC-N1 Remote Controller will automatically select the corresponding firmware version for updating, and support the following transmission technologies depending on the linked aircraft model: a. -
Page 69
DJI RC Remote Controller Transmission Video Transmission System When used with different aircraft hardware configurations, the DJI RC Remote Controller will automatically select the corresponding firmware version for updating. It supports the O3 transmission technology when linked with DJI Mini 3 Pro. -
Page 70
DJI Mini 3 Pro User Manual Supported microSD Cards for UHS-I Speed Grade 3 rating microSD card DJI RC Remote Controller Recommended microSD SanDisk Extreme 64GB V30 A1 microSDXC SanDisk Extreme 128GB V30 A2 microSDXC Cards for DJI RC Remote… -
Page 71
When DJI Mini 3 Pro stays in standby mode for a long time, its temperature may continuously rise. With a built-in temperature control system, the drone, when in standby mode can detect the current temperature and decide whether to automatically power off to prevent overheating. -
Page 72: Firmware Update
Using DJI Fly When connecting the aircraft or remote controller to DJI Fly, you will be notified if a new firmware update is available. To start updating, connect your remote controller or mobile device to the internet and follow the on-screen instructions.
-
Page 73: Aftersales Information
Before performing an update, make sure the Intelligent Flight Battery has at least 40% power and the remote controller 30%. Do not unplug the USB-C cable during an update. Aftersales Information Visit https://www.dji.com/support to learn more about aftersales service policies, repair services, and support. © 2022 DJI All Rights Reserved.
-
Page 74
This content is subject to change. Download the latest version from http://www.dji.com/mini-3-pro If you have any questions about this document, please contact DJI by sending a message to DocSupport@dji.com. is a trademark of DJI. Copyright © 2022 DJI All Rights Reserved.
перейти к содержанию
![]()
![]()
![]() Краткое руководство v1.0
Краткое руководство v1.0
 https://s.dji.com/guidell
Mini 3 Pro Легкий и складной дрон с камерой
Перед первым использованием зарядите аккумулятор Intelligent Flight Battery, чтобы активировать его.
Проверьте уровень заряда батареи: нажмите один раз.
Включение / выключение питания: нажмите, затем нажмите и удерживайте.

Режим 2 |
 |
 https://Awww.dji.com/mini-3-pro/downloads
является торговой маркой компании Dul.
Copyright © 2022 DJI. Все права защищены.
YC.BZ.SS001944.01 WM162_Документы / Ресурсы
Артикул: 5416
Обучающий видеокурс по дрону Mavic Mini 3 Pro, компактному дрону DJI.
Описание
Обучающий видеокурс по дрону Mavic Mini 3 Pro, компактному дрону DJI.
Мы расскажем о Mini и его характеристиках, о первом полете, а также Вы получите полезные советы, которые могут взять на заметку даже опытные пилоты.
Видеокурс состоит из уроков
- Обзор комплекта
- Подготовка к полету
- Прошивка DJI Mini 3 Pro
- Калибровка компаса
- Как осуществить ваш Первый безопасный полет на DJI Mini 3 Pro
- Обзор режимов быстрой съемки
- Обзор режимов интеллектуальной съемки

Видеокурс /видеоурок DJI Mini 3 Pro / DJI Mini 3
Наличными, картами, безналичные платежи с НДС и без, торги
Отзывы
Хотите оставить отзыв?Поставьте свою оценку!
Сделайте выбор!