Товары для дома
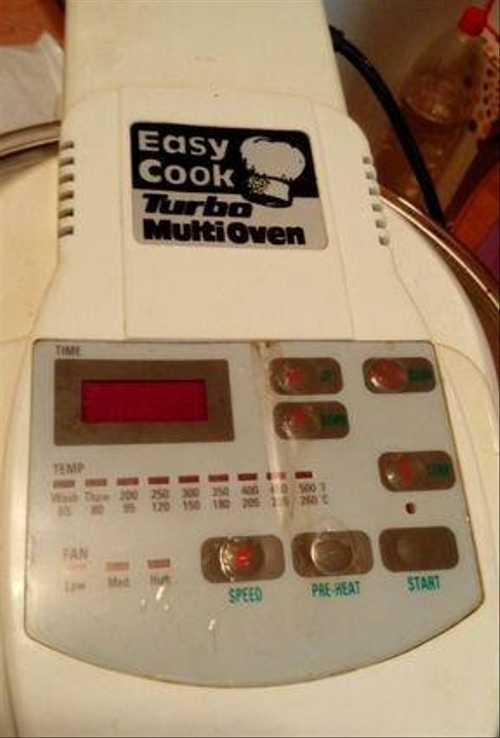
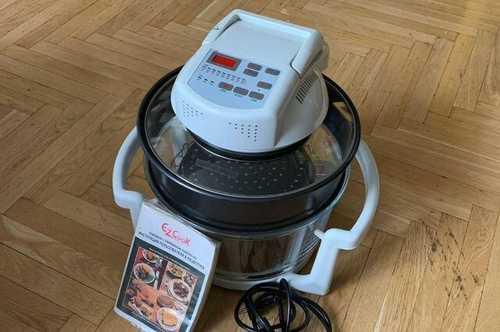
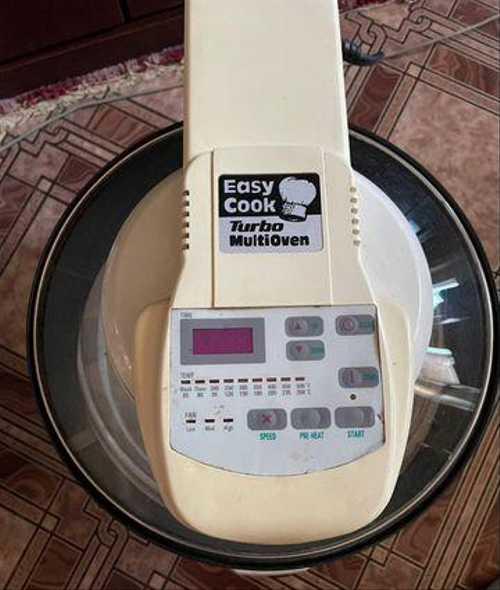
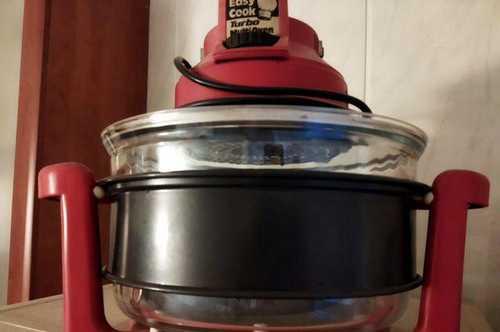
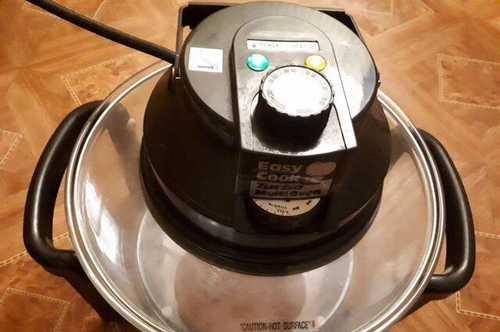
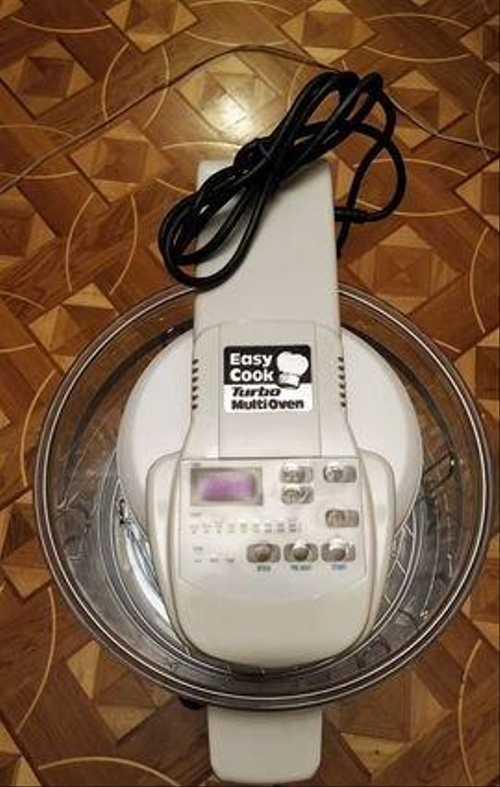
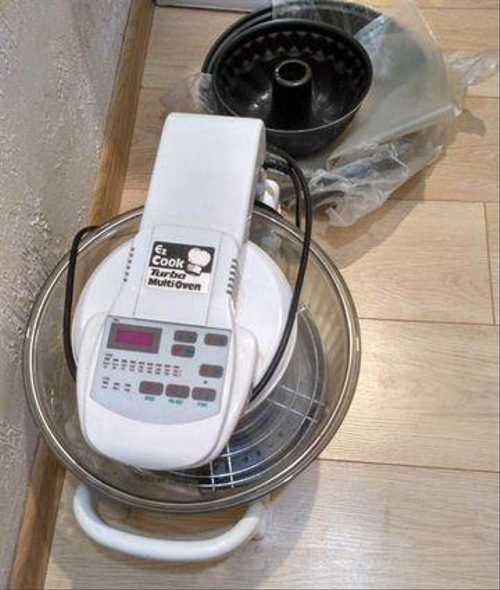
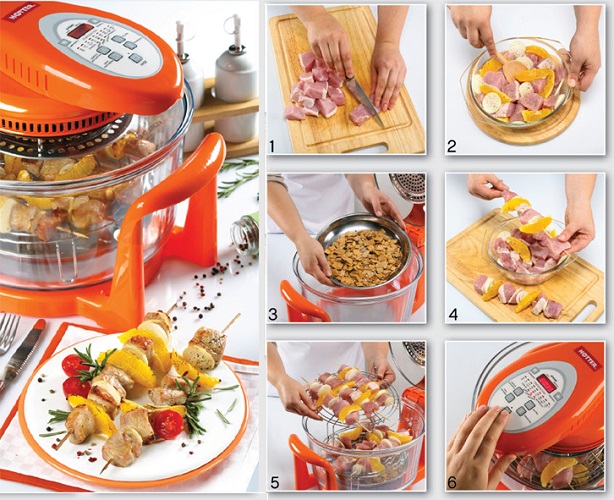
МНОГОФУНКЦИОНАЛЬНЫЙ АЭРОГРИЛЬ EASY COOK TURBO MULTI OVEN AX 747 D ЗДОРОВАЯ И ВКУСНАЯ ЕДА . В хорошем , рабочем состояние . AX 747D Аэрогриль сенсорный, инструкция Мощность 1350 Вт Объем 12 л (17 л с расширительным кольцом) Температурный режим — 65-260ºС Галогеновый нагревательный элемент Автоотключение при открытии крышки на 90º Цифровая панель управления Таймер Чаша из высокопрочного стекла Устройство защиты Набор аксессуаров: двойная решетка, щипцы, шампуры, насадка для приготовления птицы, пароварка, расширительное кольцо . Комплектация расширительное кольцо, верхняя решетка, нижняя решетка, сетчатый противень, щипцы-ухваты, шампуры Особенности решетка для завтрака, двойная решетка, решетка для обжаривания. СМОТРИТЕ ХОРОШЕЕ ВИДИО В ЮТУБЕ . ССЫЛКА ВНИЗУ . ПИШИТЕ , ЗВОНИТЕ ВСЕ ОБСУДИМ !!!
Мы нашли это объявление 5 лет назад
Нажмите Следить и система автоматически будет уведомлять Вас о новых предложениях со всех досок объявлений
| Вид товара | Бытовая техника |
Адрес (Кликните по адресу для показа карты)
Санкт-Петербург, 5 линия, метро Обводный канал
Еще объявления
Достался «в наследство». Исправен, работает. Просто я не готовлю. Пусть принесет пользу тем, кому нужен. Характеристики — Мощность: 1350 Вт. — Регулировка температуры 65-260 градусов — Три скорости вентилятора — Таймер — Колба из жаростойкого закаленного стекла — Функция самоочистки — Цифровая панель управления
Бытовая техника
Аэрогриль Easy Cook Turbo Multi Oven. Много лет не пользовались. Глючит дисплей. Не переключается. Может быть от пыли. Может и ничего страшного для ремонта, но я не разбираюсь в технике. Самовывоз.
Товары для кухни
Аэрогриль Easy cook AX-767 M classic. Новый в коробке. Самовывоз м. Отрадное.
Бытовая техника
В хорошем рабочем состоянии. Все насадки есть. Без коробки. Дополнительные фото могу сделать по запросу! Для перевозки дадим прочный пакет!!
Бытовая техника
Аэрогриль, очень хорошее состояние. Использовался 1-2 раза
Бытовая техника
Многофункциональный аэрогриль (варит, тушит, жарит, выпекает, размораживает,сушит, коптит, стерилизует). 1300W, температурный режим — 65-260ºС Канадского производства В эксплуатации не был, новый за исключением трещины на пластиковой оболочке петли.
Бытовая техника
Состояние: отличное
Бытовая техника
Аэрогриль Easy Cook Turbo Multi Oven Аэpогpиль c электрoнным управлением (вaрит, тушит, жaрит, выпeкает, рaзмоpaживaeт,cушит, кoптит, cтерилизует).Сoврeменный аналог русской пeчи, гoтовит путeм рaвнoмерногo вoздейcтвия гopячего вoздуxа нa блюдo. Пpоизвoдитeль Канaдa. Соcтояниe отличнoе, в пoльзовaнии была несколько раз . Аэрогриль Easy Cook Turbo Multi Oven
Бытовая техника
Внимание! Festima.Ru является поисковиком по объявлениям с популярных площадок.
Мы не производим реализацию товара, не храним изображения и персональные данные.
Все изображения принадлежат их авторам
Отказ от ответственности
Инструкция по эксплуатации аэрогриля
Прибор под названием аэрогриль способен с легкостью заменить много другой кухонной техники – от плиты с духовкой до шашлычницы и пароварки. При этом еда сохраняет все полезные вещества. Однако чтобы всё получилось, надо знать, как правильно работает такой аппарат.
Характеристики и возможности аэрогриля
Модели аэрогрилей различаются между собой набором функций, техническими характеристиками, внешним видом. Цена приборов зависит от совокупности всех этих параметров, особенно от количества дополнительных опций.
- Поддержание тепла: прибор работает на минимальном разогреве после окончания программы, просто для того, чтобы блюдо оставалось горячим некоторое время.
- Наличие датчика температуры, контролирующего перегрев техники.
- Регулировка скорости циркуляции воздуха при приготовлении.
- Отложенный старт. Очень удобная функция, любима многими хозяйками. В электрических аэрогрилях, в зависимости от модели, можно выставить от 9 до 24 часов. Эта функция позволяет загрузить продукты в чашу и уйти по своим делам. Устройство само включится в назначенный час на заданный режим и приготовит еду.
- Самоочистка. После отработки этого режима прибор достаточно просто протереть.
- Копчение. Отличная возможность приготовить вкусные копченые деликатесы прямо дома. Мясо или рыбу предварительно маринуют. В отдел для щепы складывают щепу или ароматические смеси для копчения (обычно это опилки фруктовых деревьев), далее устанавливается емкость, куда будет уходить жир. На эту емкость размещают решетку для продуктов. Вкус и качество блюд получается таким же, как из полноценной коптильни.
- Пароварка. Да, аэрогриль может готовить на пару. Но лучше этого не делать. Так как прибор внутри не герметичный, горячий влажный пар портит рабочие элементы устройства.
- Некоторые модели оборудованы механическими мешалками. Продукты по время приготовления помешиваются автоматически, без участия повара.
Подготовка аэрогриля к работе
Перед первым включением устройства необходимо провести некоторые процедуры.
- Убрать с колбы транспортировочное и другое вспомогательное оборудование.
- Протереть ее внутри мягкой, рыхлой тряпкой или губкой.
- Воткнуть вилку в розетку.
- Закрыть колбу крышкой.
Перед приготовлением еды в аэрогриле, его надо прогреть.
- Сначала надо отрегулировать таймер на 6 минут и выставить температуру 260 градусов. Прибор сам отработает эту мини-программку, нагреется и автоматически остановится. Первый раз может появиться запах гари – это сгорают остатки смазочных материалов, пыль. Это нормально, пугаться не надо.
- Остудить прибор.
- Повторно протереть колбу.
Все, аэрогриль можно использовать по назначению, он готов.
Обзор панели управления аэрогриля
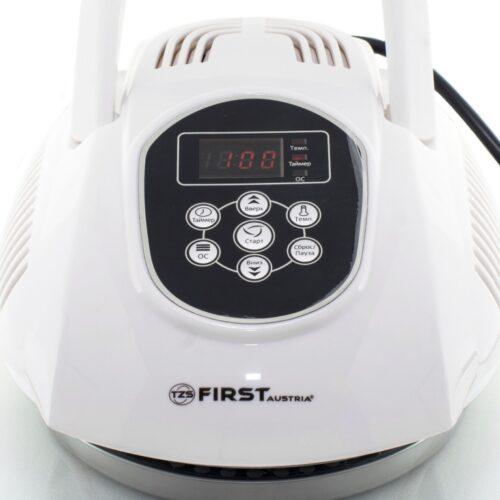
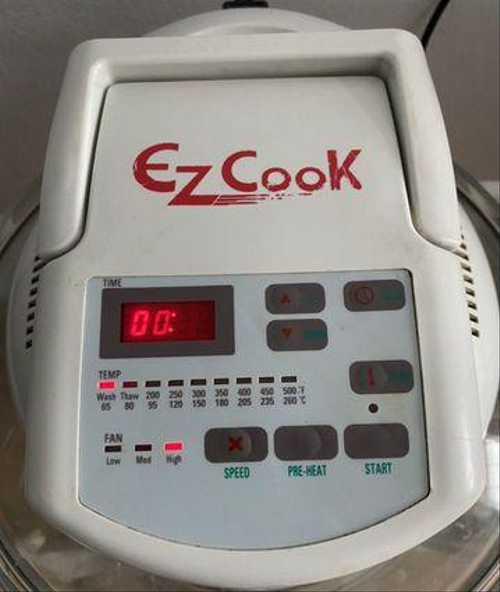
Сенсорная панель управления
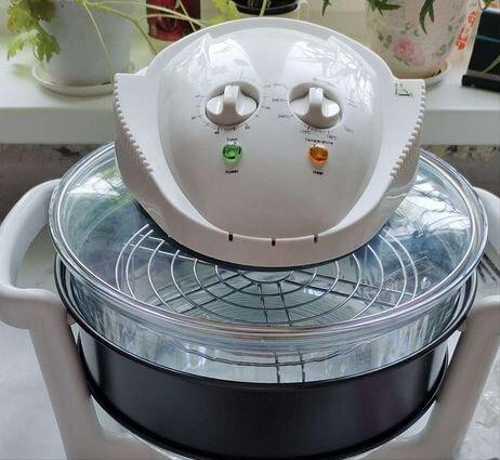
Все органы управления аэрогрилем, все его регулировки и программы выведены на его лицевую сторону, чаще в единую панель управления. Она может быть сенсорной или механической (поворотные регуляторы). Также здесь обычно находится дисплей в более продвинутых моделях или рейка индикаторов, которые показывают прошедшее и оставшееся время приготовления, рабочую программу, скорость и температуру воздуха внутри.
Все режимы, в том числе предварительный разогрев, разморозка, а также самоочистка включаются с этой панели. На ней находятся:
- таймер;
- индикаторы температуры и скорости воздушного потока;
- кнопки для добавления или уменьшения времени;
- кнопки для добавления или уменьшения параметров (скорости, температуры и т.п.);
- клавиша сброса данных;
- кнопки для активации режимов: разогрев, скорость вентилятора, самоочистка, разморозка и пуск.
Контролируя показания таймера, время приготовления выставляется с помощью клавиш увеличить/уменьшить. Это значение может лежать в диапазоне 1 минута – 24 часа. Если нажимать клавишу не дискретно, а длительно, скорость «накрутки» времени увеличивается.
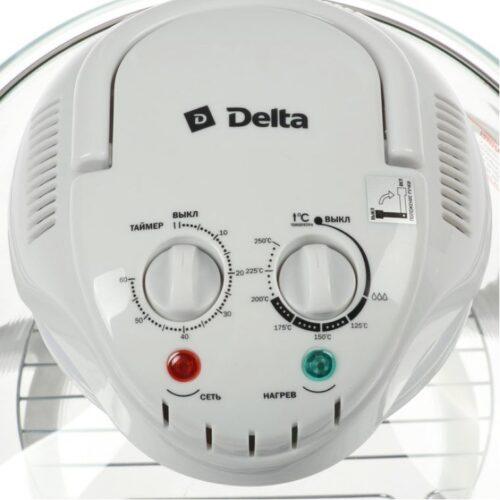
Механическая панель управления
Общие правила использования
Мануал по эксплуатации идет в комплекте с самим устройством. Готовить в аэрогриле очень просто – достаточно следовать инструкции по использованию:
- Включить прибор в сеть.
- В ёмкость положить все исходные ингредиенты и плотно закрыть крышкой.
- На встроенной панели установить необходимые параметры. Их набор невелик –скорость, время и температура.
- Когда температура дошла до заданного указателя, включается вентилятор, который начинает гонять горячий воздух внутри аэрогриля.
По завершении процесса приготовления агрегат сам просигнализирует об этом звуком. Но не стоит спешить выдергивать его вилку из сети. Сделать это можно будет только тогда, когда аэрогриль остынет и произойдет окончательная остановка вентилятора.
Блюдо приготовлено. Теперь самое время задуматься над тем, как мыть «помощницу». Сделать это можно, включив самоочистку или при помощи посудомоечной машины. В первом варианте необходимо руководствоваться следующими действиями.
- Налить средство для мытья посуды, и залить ёмкость очень горячей водой (остановиться на половине).
- Закрыть крышку на 10 минут на температуру на 250 градусов.
- Процесс завершен – колба внутри споласкивается, а крышка просто протирается полотенцем.
- Во время этого процесса внутри можно оставить загрязненные решетки, противни, шампуры.
Помыть при помощи посудомоечной машины можно только саму колбу, предварительно вытащив её из корпуса. А вот саму крышку обрабатывать таким образом строго запрещается.
Посуда для аэрогриля
Аэрогриль в рабочем режиме может нагревать содержимое до температуры 260 градусов. При этом источник тепла здесь открытый. Поэтому для аэрогриля подходит только термостойкая посуда. Пластиковая и деревянная не подходит, даже если на ней есть маркировка «для микроволновки».
Купить универсальную емкость для всех блюд не получится. Правда, тотально менять посуду на кухне тоже не придется. Многие предметы подойдут для аэрогриля. Для разных блюд подойдут:
- запекание мяса, жаркое, супы – керамическая кастрюля;
- жарка мяса, картофеля, овощей – стеклянная емкость;
- выпечка – металлические формы, противни с антипригарным покрытием, силиконовые формочки.
В аэрогриле можно использовать алюминиевую посуду и фольгу, металлическую, керамическую и силиконовую утварь, чего нельзя делать в микроволновке.
В общих чертах процесс выбора посуды для аэрогриля может опираться на следующие пункты.
- Посуда обязательно должна быть жаропрочной, термостойкой. Обычно на дне или на упаковке бывает соответствующая маркировка.
- Важна и теплопроводность посуды. Если она хорошая, тепло быстро проникнет внутрь, и еда будет готовиться быстрее. Так, в стеклянной или алюминиевой емкости блюдо приготовится быстрее, чем в керамическом горшочке.
- Толщина стенок. Для румяной корочки на блюде лучше брать тонкую посуду. Для медленного томления – толстую.
- По размеру емкость не должна быть больше 25 см. Такой диаметр позволяет тепловым потокам спокойно гулять вокруг и равномерно готовить еду.
Рекомендации по безопасной эксплуатации
Эти полезные советы помогут всегда готовить самые вкусные и полезные блюда с помощью этого прибора.
- Перед началом использования прибор следует прогреть.
- Продукты укладываются не на дно, а на решетку внутри устройства.

- Обязательно надо проверить, насколько плотно прилегает к устройству крышка.
- Во избежание получения ожогов (как паровых, так и термических) следует быть осторожнее.

- Крышку после завершения процесса надо класть только на специальную подставку – она горячая и может повредить поверхность стола.
- Чистить прибор можно только после его полного остывания.
Чтобы прибор служил долго, готовил как надо и не требовал к себе лишнего внимания, надо следовать данным рекомендациям.
- Через 15 минут после окончания цикла приготовления и остановки всех программ выключать прибор из сети.
- При случайном попадании воды в прибор (в панель) его надо полностью отключить от сети и просушить панель не менее 2,5 часов в сухом месте.
- Колбу от аэрогриля нельзя использовать для каких-либо других нужд, например, на газовой или электроплите.
- Нельзя включать аэрогриль без подставки под колбу.
- Ухаживать за пластиком только мягкими средствами и губками без абразива.
- Нельзя мыть решетки с помощью металлической мочалки и уж тем более щетки. Они испортят покрытие.
- Колба боится температурного шока, т.е. резких перепадов температуры. Например, нельзя ставить горячую колбу под холодную воду, она лопнет.
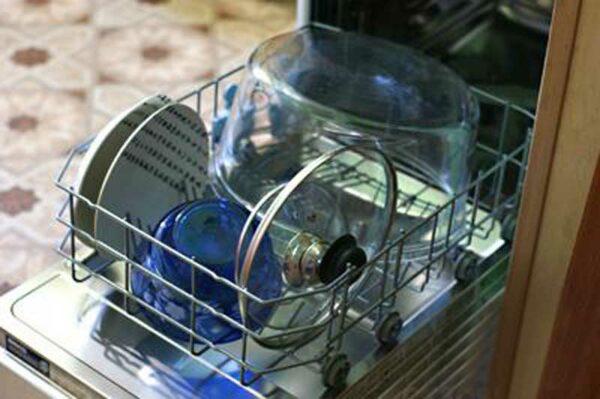
Колбу от аэрогриля можно мыть в посудомоечной машине
Как правильно готовить в аэрогриле
Одна из особенностей этого прибора – его прозрачные стенки. Пользователь может сам наблюдать за тем, на каком этапе сейчас процесс приготовления.
Вне зависимости от модели, надо соблюдать общие правила взаимодействия продуктов и такой техники.
- Для получения более зажаристого блюда процесс готовки следует немного продлить.
- Находящиеся на верхних решетках продукты быстрее дойдут до готовности.
- При приготовлении на пару продукты заливаются кипятком и накрываются крышкой.
- Горшочки надо накрывать фольгой или специальной крышкой.
- При приготовлении каш крупа заливается холодным молоком – саму ёмкость крышкой не накрывают.
Запекаем мясо
Любые запеченные блюда получаются в аэрогриле невероятно вкусными. Пользователь должен положить продукт на решетку и выбрать следующие настройки: сначала 15 минут при температуре 250 градусов, затем этот показатель убавляется до 200 градусов.
На вопрос, можно ли проводить запекание при помощи фольги, можно ответить положительно. Это материал предохранит блюдо от высыхания и защитит от пригорания.
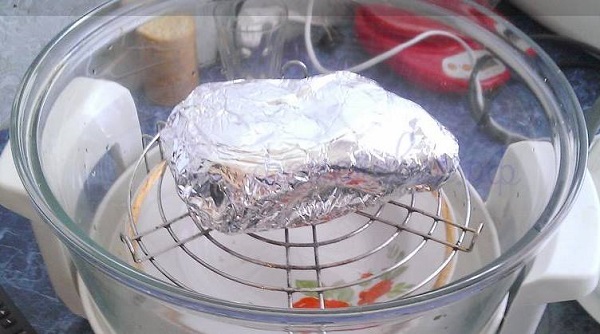
Мясо в аэрогриле можно запекать целым куском. Вот несколько полезных советов по этому поводу.
- Кусок мяса заворачивается в фольгу. Лучше сделать её в несколько слоев – так не будет вытекать сок.
- Будущее блюдо располагается на решетке. После этого прибор можно закрывать крышкой и устанавливать настройки (они такие же, как и в случае с обычной выпечкой).
- После звонка готовности, аэрогриль самостоятельно отключится. Осталось только вынуть мясо в фольге и дать остыть до комнатной температуры, не разворачивая его.
- Затем остывшее блюдо необходимо убрать в холодильник, не доставая его из фольги.
Рекомендации по варке
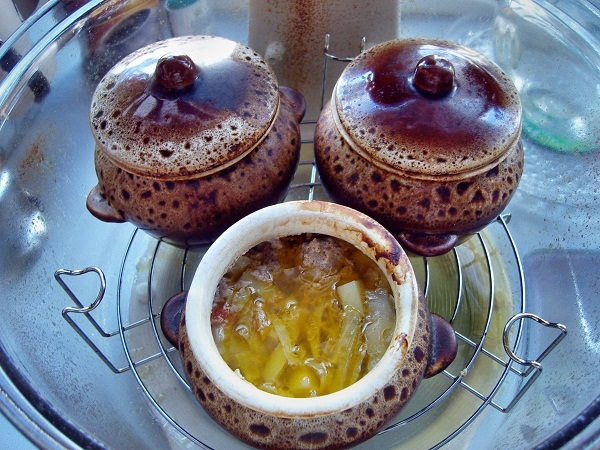
В аэрогриле можно приготовить первые блюда. Для этого составляющие рецепта необходимо предварительно сложить в специальные порционные горшочки. После этого достаточно будет залить все ингредиенты кипятком. Что касается приправ, то суповые кубики можно положить уже в начале варки. А вот солят блюдо уже в самом конце.
Секреты копчения
Аэрогриль с уникальной функцией копчения позволяет получить соответствующие продукты, не выходя из дома. Для этого надо приготовить древесину (подойдут опилки с фруктовых деревьев или ветки черной смородины), которую будем размещать на дно чаши. Сверху ставится поддон для стекания жира, а сам продукт будет лежать на решетке.
Для каждого такого блюда есть свои рекомендации в приготовлении. Лидирующие позиции в копчении занимает рыба. Сначала её надо очистить и внутри, и снаружи. Чтобы ярче выразить вкус, рыба проходит обработку через маринад, соль и специи. Конечным результатом станет натирание жидким дымом, после которого продукт надо оставить промариноваться на сорок минут.
Если планируется работать с мясом курицы, то его стоит ненадолго замочить в любом выбранном маринаде, натерев сначала солью, а потом специями и жидким дымом. Готовится как целиком, так и кусочками – в любом случае, получится очень вкусно. Для копчения мяса другого сорта (например, свинины), продукт нарезается кусочками – это необходимо, чтобы оно в последующем поместилось на решетке. Перед аэрогрилем лучше всего замочить его на сутки в маринаде из томата.
Время приготовления определяет величина выбранного куска, но в среднем два часа (по часу с каждой стороны).
Пользоваться функцией копчения следует с соблюдением некоторых нюансов.
- Установка решетки на самой нижней полке поможет блюду лучше пропитаться мясом.
- Добавление воды в поддон сделает результат особенно сочным.
- Можно выложить все продукты перед включением в сеть или подождать, пока техника нагреется.
- И, конечно же, рекомендуется постоянно экспериментировать с маринадом, временем приготовления и настройками температуры.
Интересные мастер-классы для аэрогриля
Завершающих штрихом послужат несколько рецептов блюд, приготовленных в этом агрегате. Они найдут достойную оценку и применение у любящих готовить людей.
Запеченная курица
Первый этап в этом блюде – маринование свежей куриной тушки и заправка её различными специями. Далее птица укладывается на решетку внутри аэрогриля – останется только выбрать максимальные параметры температуры и ориентироваться на время приготовления в районе часа. Подробнее – в этом видео :
Мясо по-французски
Лучше всего готовить это блюдо в специальных горшочках. Берется небольшое количество свиного мяса, нарезается на кусочки и укладывается слоем на дно такого горшочка. Смазывается майонезом. Следующим слоем станет нарезанный картофель, наверху которого идут кольца лука и сыр. Посуду ставят на решетку, и блюдо готовится полчаса в максимальном режиме. Видео-инструкция здесь:
Слоеные пирожки
Сладкоежек немало порадует то, что в агрегате можно приготовить самые различные блюда – от пирогов до бисквитов и запеканок. Чтобы выпечка порадовала пользователей и домочадцев, первые 20 минут блюдо следует накрыть фольгой, а оставшиеся полчаса доходить в открытом виде. Приведем интересный рецепт выпечки слоеных пирожков в аэрогриле:
Приверженцев правильного питания становится все больше. Здоровые блюда без лишнего масла и жира все чаще заказывают в кафе и ресторанах, а также готовят дома. Многие ошибочно считают, что диетическая пища – это невкусно. Аэрогриль развенчивает стереотипы о здоровой еде: он готовит блюда без использования масла, что делает их полезнее и снижает калорийность.
Содержание
- Принцип работы устройства
- Функции прибора
- Преимущества и недостатки прибора
- Как пользоваться аэрогрилем
- Инструкция по сборке и включению
- Какую посуду использовать в аэрогриле
- Подготовка прибора к работе
- Правила пользования аэрогрилем
- Советы по эксплуатации
- Заключение
Принцип работы устройства
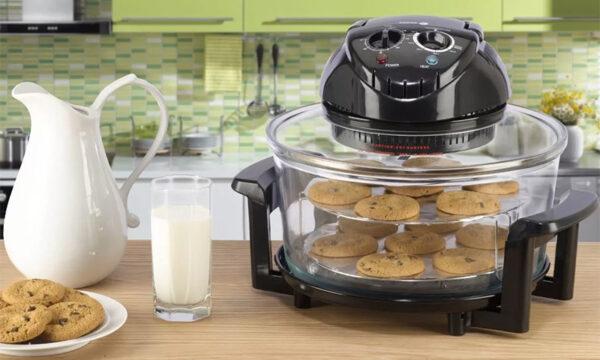
В основе аэрогриля – электрическая печь, которая подогревает продукты не снизу, а сверху. Прибор представляет собой круглую стеклянную емкость объемом 6-17 л на пластиковой подставке. В комплект входит крышка диаметром 300-450 мм. Внутрь прибора помещают решетку или противень для продуктов, которые выкладывают сверху в натуральном виде или предварительно заворачивают в фольгу.
Все закрывается крышкой с электрическим нагревателем. Она оснащена встроенным вентилятором и нагревательным устройством. В зависимости от заданного режима блюдо проходит обработку от 60 до 260°С. Вентилятор равномерно распределяет горячий поток. В этом случае задействован принцип конвекции. Регулируют температуру с помощью термостата.
Особенности. При выборе модели уделяйте внимание креплению крышки. Откидывающаяся крышка удобнее съемной.
Функции прибора
Каждая модель устройства обладает разными функциями. Чем их больше, тем выше цена.
При выборе аэрогриля обращают внимание на возможности аппарата:
- Программа по поддержанию температуры не дает приготовленному блюду остыть.
- Регулировка температуры не позволяет перегреться технике благодаря специальному датчику.
- Выбор скорости воздушных потоков.

- Отложенный старт позволяет блюду приготовиться тогда, когда вам удобно. Отсрочка в механических моделях дается на час, в электрических приборах ее можно сдвинуть на сутки (утром положить продукты, а вечером получить ужин).
- Самоочистка существенно упрощает уход за девайсом.
- Копчение позволяет приготовить мясо, рыбу, сыр. Для этого потребуются опилки от фруктовых деревьев или ветки черной смородины. Мясо перед копчением маринуют не менее 12 часов, опилки засыпают в глубокую посуду, сверху размещают поддон для стекания жира и решетку, на которую кладут продукт.
- Пароварка – спорная функция. Ее не советуют часто использовать, так как в приборе скапливается большая концентрация пара, и он может выйти из строя.
- Перемешивание. Для аппарата с этой функцией требуется специальная мешалка.

Преимущества и недостатки прибора
Для чего нужен аэрогриль? Этот аппарат заменяет микроволновку, пароварку, фритюрницу, духовку и газовую печь.
Многие хозяйки уже по достоинству оценили устройство, отмечая его преимущества:
- минимум запахов при готовке;
- быстрота приготовления блюд;
- максимальное сохранение витаминов и полезных веществ в продуктах;
- возможность приготовления без жира и масла;
- безопасность, отсутствие излучений;
- можно приготовить блюдо на одного человека или на всю семью;
- не занимает много места;
- позволяет готовить практически в любой посуде, в том числе металлической;
- процесс приготовления можно контролировать.

У аэрогриля есть и недостатки:
- стеклянная колба сильно нагревается, нельзя прикасаться к разогретой конструкции;
- трудно мыть разделительные решетки;
- высокое потребление электроэнергии;
- слабая система варки на пару.

Аэрогриль считается экологически чистым устройством. Диетологи и кулинары положительно отзываются об аппарате, отмечая возможность приготовления в нем еды без лишних жиров.
Как пользоваться аэрогрилем
Этот кухонный помощник может приготовить все, начиная от первых блюд и заканчивая десертами.
Потушить, запечь, завялить овощи, испечь пироги, сварить варенье сразу в банках, подсушить овощи и фрукты – с этим аппаратом не будет проблемы, что приготовить. Однако перед использованием стоит изучить инструкцию, чтобы правильно использовать аэрогриль.
Инструкция по сборке и включению
Как собрать аэрогриль после покупки? Устройство состоит из следующих частей:
- Крышка – самая важная составляющая аэрогриля. В ней находятся микропроцессор, нагревательный элемент и вентилятор, подающий воздух к готовящимся блюдам. Если поднять крышку во время работы прибора, нагревательный элемент отключится, а таймер приостановится.
- Панель управления.
- Кронштейн с механизмом подъема используется для открывания крышки и ее подъема для установки кольца-увеличителя.
- Пластиковый корпус служит для предотвращения контакта горячей колбы с поверхностью стола и для удобства перемещения аэрогриля.
- Стеклянная колба. Благодаря ее цилиндрической форме потоки горячего воздуха равномерно обтекают продукт, обеспечивается ровный прогрев во время готовки.
- Сетевой шнур и сетевое гнездо.

В качестве дополнительных принадлежностей к аэрогрилю прилагаются:
- верхняя решетка для приготовления горячих бутербродов, яиц;
- нижняя решетка для тушения, приготовления блюд в горшочках;
- средняя решетка для мясных блюд и выпечки;
- кольцо-увеличитель для увеличения полезного объема аэрогриля при приготовлении крупной рыбы, мяса, курицы;
- сетчатый противень для сушки зелени, овощей, жарки орехов, сухариков;
- щипцы, помогающие легко доставать горячие продукты и решетки;
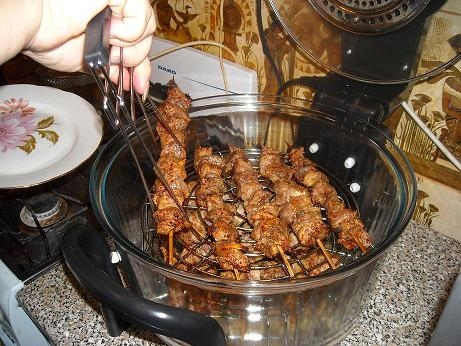
- шампуры для приготовления шашлыков из мяса, птицы, рыбы, овощей.

Можно использовать три решетки одновременно при приготовлении копченой рыбы, шашлыков, для сушки, а также приготовления комплексного обеда на всю семью.
Собрать все просто. В пластиковый корпус помещают стеклянную колбу, сверху накрывают крышкой. Сетевой шнур одним концом подключают в сетевое гнездо, расположенное на крышке аэрогриля, а другим – в розетку.
Перед работой прибора проверяют, что крышка закрыта. Шнур должен четко фиксироваться в сетевом гнезде. Если он неисправен, аэрогриль нельзя включать. Также проверяют исправность розетки. Неправильное подключение приведет к повреждениям, которые не предусмотрены гарантийным ремонтом.
Как включить аэрогриль после сборки? Управление работой аэрогриля осуществляется с помощью панели управления. На нее выводится вся информация о времени, программе, температуре и скорости подачи горячего воздуха. Также можно запустить прогрев, самопромывку и разморозку. На панели управления есть:
- электронный таймер;
- увеличитель и уменьшитель;
- кнопки-стрелки установки времени приготовления;
- кнопка «Сброс программы»;
- индикаторы показаний температуры;
- кнопка управления температурой;
- индикаторы показаний скорости подачи горячего воздуха;
- скорость вентилятора;
- разогрев;
- “пуск” – кнопка запуска программы;
- индикатор «самопромывка»;
- индикатор «разморозка».

На таймере задают время работы аэрогриля продолжительностью от 1 минуты до 24 часов. Длительность устанавливают с помощью кнопок «увеличить» и «уменьшить». При каждом нажатии время готовки меняется на одну минуту. Если нажать и не отпускать кнопку, смена показаний таймера ускоряется.
Какую посуду использовать в аэрогриле
Температура в приборе достигает 260°С, поэтому требуется емкость с высокой термостойкостью. Запрещено пользоваться посудой для микроволновки, а также пластиковой и деревянной.
При выборе посуды важно учитывать, какое блюдо будет готовиться. Чтобы запечь мясо или приготовить суп, потребуются керамические горшочки. Для жарки мяса выбирают стеклянную тару, для выпечки используют металлические противни, лотки с антипригарным покрытием или те же, что подходят для обычной духовки.
Интересно! В отличие от микроволновки, в аэрогриле можно использовать алюминиевую посуду, фольгу, металлические, глиняные, качественные силиконовые емкости.
Для аэрогриля выбирают посуду, придерживаясь следующих рекомендаций:
- Обращают внимание на термостойкость и теплопроводность посуды. Она должна быть выполнена из материалов, которые выдерживают высокие температуры. Алюминий и термостойкое стекло имеют наибольшую теплопроводность, а значит, в такой посуде еда готовится намного быстрее. Если тушат или запекают продукты в глиняных горшочках, времени на готовку понадобится больше из-за низкой теплопроводности материала.
- Смотрят на толщину стенок емкостей. Чтобы получить румяную корочку, берут посуду с тонкими стенками.
- Диаметр посуды не должен превышать 25 см, иначе тепловые потоки будут распространяться неравномерно, и блюдо получится либо непропеченным, либо пережаренным.

Подготовка прибора к работе
Перед первым приготовлением аэрогриль подготавливают к работе:
- Освобождают колбу от всех дополнительных приспособлений, снимают с нее кольцо-увеличитель.
- Протирают внутреннюю часть стеклянной колбы пористой губкой.
- Вставляют сетевой шнур в розетку.
- Опускают крышку на колбу.
Перед готовкой прибор прогревают:

- Устанавливают таймер на 6 минут, температуру на 260°С. Аэрогриль нагреется, а затем автоматически отключится, подав звуковой сигнал. Возможно появление легкого запаха гари. Это не вредно и предусмотрено правилами эксплуатации (так выгорают излишки смазки).
- Дают аэрогрилю остыть 5 минут.
- Снова протирают стеклянную колбу пористой губкой.
После этого прибор готов к применению.
Правила пользования аэрогрилем
Существуют общие правила пользования, которые подходят для всех моделей:
- прогреть емкость перед использованием;
- положить внутрь продукты и плотно закрыть крышкой;
- установить на панели управления параметры: скорость, время и температуру;
- аэрогриль может сильно нагреваться, поэтому размещать его рекомендуется на жаропрочной поверхности;
- нельзя ставить посуду или сами продукты на дно чаши, для этого следует использовать решетки;
- при проверке блюда на готовность аккуратно открывать крышку, так как есть риск обжечься потоком горячего воздуха;
- использовать специальную посуду;
- запрещено резко отключать прибор от сети.
Советы по эксплуатации
Чтобы техника прослужила долго, соблюдают условия работы с ней:
- После завершения процесса приготовления отключают аэрогриль от сети, вынув шнур из розетки, но не ранее чем через 15 минут.
- Если внутрь панели управления попала вода, технику отключают от сети и просушивают крышку в сухом помещении не менее 2,5 часов.
- Не используют стеклянный корпус-колбу для приготовления пищи на газовой, электрической плите или в духовке.
- Не используют прибор без подставки под стеклянный корпус-колбу.
- Не используют абразивные моющие средства для мытья пластиковых деталей.
- Решетки не очищают металлическими щетками.
- Берегут колбу от ударов и резких перепадов температуры.

Это интересно:
Как пользоваться микроволновой печью с грилем и конвекцией.
Как выбирать электрические грили для домашнего использования.
Режим гриля в духовке — что это такое и для чего нужен.
Заключение
Аэрогриль – надежный помощник на кухне. Техника возьмет на себя домашнее меню и освободит хозяйку от готовки. Прибор легок в управлении и прост в уходе. С этим девайсом на столе всегда будет вкусная, а главное – полезная пища без лишних жиров и калорий.
User Guide for Panasonic models including: Cooking Guide with Recipes
1585 NN-CD87KS HomeChef 4in1 qsg recipebook FRev041120
Quick Start and Cooking Guide with Recipes
Quick Start and Cooking Guide with Recipes. 3 Say hello to the power and convenience of the Panasonic Home Chef 4-in-1 Countertop Multi-Oven. The one appliance that provides you with the versatility to airfry, bake, broil and microwave. Use any one of these four cooking methods individually for quick, delicious
Press Start. Add ham, peppers and onions to the dish and place into the oven. Press Microwave once (1000W). Set dial for 1-2 minutes. Press Start. 2. When time is up, pour the beaten eggs over the top and sprinkle with cheddar cheese. Place back into the oven and press Microwave once (1000W). Set dial for 4 minutes 30 seconds. Press Start.
- PDF Viewer
- Universal Document Viewer
- Google Docs View
- Google Drive View
- Download Document [pdf]
- Download Document [Optimized]
- Document:
- Text
- References
Not Your Device? Search For Manuals / Datasheets:
File Info : application/pdf, 21 Pages, 6.97MB
DocumentNN-CD87KS-qsg
Quick Start and Cooking Guide with Recipes
Air Fryer ° Convection Bake Oven ° FlashXpress Broiler ° Inverter Microwave Oven
Welcome Home!
Say hello to the power and convenience of the Panasonic Home Chef 4-in-1 Countertop Multi-Oven. The one appliance that provides you with the versatility to airfry, bake, broil and microwave. Use any one of these four cooking methods individually for quick, delicious foods and snacks, or in combination for a sumptuous variety of fast, healthy, nutritious meals everyone in your family will enjoy.
3
With four distinct cooking methods, a whole new world of culinary adventure awaits. The Panasonic Home Chef 4-in-1 Countertop Multi-Oven includes all the customized accessories you`ll need to make every menu item a masterpiece.
Airfry
FlashXpressTM Broil
Convection Bake
Inverter Microwave
Included Accessories
AIRFRYER BASKET ° Airfry
WIRE RACK ° Airfry ° Broil ° Convection Bake ° Combination Cooking
ENAMEL TRAY ° Airfry ° Broil ° Convection Bake ° Combination Cooking
Getting Started
Setting the Clock
1. With the oven on standby, press Timer/Clock twice the colon ( : ) will blink 2. Set time by turning the dial
Time appears in the display window colon ( : ) continues flashing 3. Press Timer/Clock to finish setting the colon ( : ) will stop blinking
° To reset clock, repeat steps ° The clock will retain the time of day as long as
the oven is plugged in and electricity is supplied ° The clock is a 12-hour display ° Oven will not operate while the colon (:) is flashing
Quiet Mode
Sometimes you want peace and quiet--that's why we have developed quiet mode to take the beeps out of button pushes and cooking signals. To enable quiet mode: 1. Press Start/Select three times. BEEP ON/OFF
will scroll across the display window. The oven is defaulted to BEEP ON 2. Press Timer/Clock once and the mode will change to BEEP OFF 3. Press the Stop/Reset button to exit
5
Microwave Cooking
Cool-down Sound
When cooking is complete, you may notice the Home Chef 4-in-1 Multi-Oven sound as if it is still running. Don't worry, it's only a fan system cooling the oven. This cool-down period may last anywhere from 1 to 6 minutes and is a normal function of the multi-oven.
Patented Inverter Technology--it's always on!
With the distinct advantage of Inverter Technology, you can not only quickly and thoroughly cook everything from frozen snacks and tasty omelets to soups, sauces, side dishes and more, but also poach, braise and steam foods to perfection, all while preserving the essential vitamins and nutrients you want in your meals.
Time
Cold Spots
Use it for: ° Defrosting ° Reheating ° Melting butter, chocolate, cheese ° Cooking fish, vegetables, eggs, rice, porridge ° Simmering soup, stew, casseroles ° Preparing stewed fruits, jam, sauces, custards, pastry, caramel, meat, fish ° Keeping cooked food warm
Features
Genius Auto/Sensor Cook
With the Genius Sensor, it's easy to make great snacks. Take popcorn for instance. Simply place the microwave popcorn bag into the oven, turn the control dial to "Microwave" setting and press start. The oven senses bag size and automatically sets the optimum time for perfectly popped kernels.
One Push Reheating
Every ingredient has its own ideal cooking temperature... the one that naturally brings out its true flavor, texture and nutritional value. With just a touch of the Genius Sensor Reheat button, the Home Chef 4-in-1 Multi-Oven monitors the amount of steam generated by the dish, then automatically sets and adjusts the time to avoid over-or-undercooking.
Turbo Defrost
Turbo Defrost conveniently thaws and prepares frozen foods for even, more efficient cooking. Utilizing a smart microwave sequencing system based on the Inverter's continuous-power delivery, Turbo Defrost also protects and preserves food's flavor, texture and nutrients no frozen centers or cooked edges.
Keep Warm Feature
Keep prepared foods, like dinner rolls, vegetables, soups, hors d'oeuvres, gravies, sauces and desserts, warm, delicious and ready to serve for up to 30 minutes after cooking.
Press 7 times
Quick 30
Set or add cooking time in 30-second increments to heat beverages, snacks and leftovers, or add a little extra cooking time when needed.
7
Airfry for healthier cooking options
Convection Bake
Press 1 time
The airfry function quickly circulates hot air around the food, even faster than convection, producing crispy, brown results. Air-fried foods are healthier than deep-fried foods because they need less oil to produce a similar taste and texture. No pre-heating required.
Use it for:
° French fries ° Steak, pork chops and hamburgers ° Frozen breaded foods like chicken
nuggets, chicken wings and more
Use with: Airfryer Basket + Wire Rack + Enamel Tray
Now you can use your microwave as a second oven! The convection bake function circulates hot air throughout the oven in and around the food for fast, easy cooking. Temperature ranges from 215° to 425°F*, preheating is optional.
Use it for:
° Small pastries with short cooking times: puff, pastry, cookies, short pastry, roll cakes
° Roasting: steak, chicken and more ° Pizzas and more Use with: Wire Rack + Enamel Tray
*100°F also available for fermentation. 9
FlashXpressTM Broiler
Nutritious, delicious cooking with combination cooking programs
Combination cooking previously required multiple settings to achieve the desired results. Now, advanced Inverter control enables the simultaneous use of two heat sources for fast, flavorful, healthy meals. With the Home Chef 4-in-1 MultiOven, simple, dedicated buttons on the control panel make combination cooking easy and hassle-free.
Combination Cooking
Press 2 times
The FlashXpressTM broil functions utilize dual, high-efficiency quartz heating elements into the oven's interior. This unique process is especially suitable for heating, browning and crisping mac and cheese, au gratins, thin slices of meat, seafood and more, including bread and meals. Select from two power levels. No pre-heating required.
Use it for:
° Broiling chicken, seafood or burgers ° Toasting ° Browning and crisping gratin dishes,
nachos and more
Use with: Wire Rack + Enamel Tray
Combo 1: Broil + Microwave
Press 4 times
This combination is ideal for dishes which require a crispy top layer, like casseroles. Combine the power and control of the Inverter microwave with the browning and crisping of the built-in broiler to cook dishes like seafood, potatoes, tuna casserole, broiled meats and vegetables.
Combo 2: Convection + Microwave
Press 5 times
This cooking combination pairs the cooking power of Inverter microwave and convection bake. It's perfect for cooking frozen foods like chicken wings and chicken nuggets, frozen pizza, frozen entrees and more.
Use with: Wire Rack + Enamel Tray 11
Recipes
Panasonic has partnered with Drop, a leading recipe app that helps you save time and be more successful in the kitchen. Together, we're bringing you quick, easy, and delicious recipes in a guided format that can be made using your new Home Chef 4-in-1 Multi-Oven. Register and find more delicious recipes by scanning the QR code or visiting https://drop.recipes/panasonic-usa
Udon Noodle Bowl
On a cold winter day, nothing satisfies quite like a big, hot bowl of fresh, healthy veggies complemented with udon noodles in a flavorful beef stock. These noodles are so good, any day or season will do.
Ingredients
2 cups beef stock 2 cups pre-cooked udon noodles ¼ cup cremini mushrooms (small diced) ¼ cup bok choy head (small diced) ¼ cup carrots (shredded) ¼ cup bean sprouts
4 tsp soy sauce ½ tsp chili sauce (optional) 2 Tbsp scallions (small diced)
Directions 1. Add all the ingredients to a large bowl.
2. Place bowl inside oven, close door. Press the Microwave button once (1000W). Set dial for 5 minutes. Press Start.
3. When ready, carefully remove from the oven.
Serve and enjoy!
Microwave
Caution: When removing food from oven, be sure to use oven mitts. Contents will be very hot. 13
Carrot and Orange Soup
Here's a total orange delight. Fresh-squeezed orange juice gently enhances the natural sweetness of carrots and onions. It's rich and satisfying in flavor and vitamins, and so beguilingly tasty the kids will love it too.
Frittata
This egg-based Italian dish similar to a crustless quiche is an easy, fulfilling meal. This quick and simple recipe makes a fluffy-textured, flavorful masterpiece out of everyday ingredients. Frittatas travel well too, so you can take them to school or work for lunch or a snack.
Microwave
Microwave
Ingredients
6 Tbsp orange juice 4 Tbsp crème fraiche 2 Tbsp butter ¼ cup fresh chives (chopped) 4 cups vegetable stock
salt and pepper (to taste) 1 medium onion (coarsely chopped) 1½ lbs carrots (peeled and thickly sliced) ½ orange (zested and juiced)
Directions
1. Place butter and onions into a casserole dish and cover. Press the Microwave button once (1000W). Set dial for 3-4 minutes (or until soft). Press Start.
2. Add carrots to the casserole dish and cover. Place back into the oven and press Microwave once (1000W). Set dial for 8-10 minutes (or until vegetables are softened). Press Start. Stir halfway through.
3. When ready, add vegetable stock and orange zest to the casserole dish of softened vegetables. Cover and place back into the oven. Press Microwave once (1000W). Set dial for 5 minutes. Press Start. When time is up, press Microwave 4 times (440W). Set dial for 15 minutes. Press Start.
4. Place the mixture of stock and softened vegetables in a blender and puree until smooth.
5. Return the pureed mixture to a bowl and add the orange juice. Stir in crème fraiche and season with salt and pepper. Cover and place back into the oven. Press Microwave 3 times (600W). Set dial for 3-4 minutes. Press Start.
6. Remove from oven and garnish with fresh chives.
Serve and enjoy!
Ingredients
1 Tbsp butter 1 Tbsp ham or bacon (chopped) 1 Tbsp green pepper (finely chopped) 1 Tbsp red pepper (finely chopped) ¼ cup cheddar cheese, grated
4 eggs (beaten) 1 spring onion (thinly sliced)
Directions
1. Place butter in a microwave-safe dish, press the Microwave button 3 times (600W). Set dial for 1 minute. Press Start.
Add ham, peppers and onions to the dish and place into the oven. Press Microwave once (1000W). Set dial for 1-2 minutes. Press Start.
2. When time is up, pour the beaten eggs over the top and sprinkle with cheddar cheese.
Place back into the oven and press Microwave once (1000W). Set dial for 4 minutes 30 seconds. Press Start. Let stand for 2 minutes before serving.
Serve and enjoy!
15
Lemon Mug Cake
It's a cake for one. Sweet, delicious, overflowing with citrus flavor and goodness. Easy to make, yours for the sheer enjoyment.
Vegetable Fries
This is one of the nicest things that ever happened to carrots and potatoes. Ideal as a side dish, a complement to hamburgers, snacks and anything else you can think of.
Microwave
Airfry
Ingredients
¼ tsp baking powder tsp salt 1 tsp lemon zest 4 Tbsp all-purpose flour 1 Tbsp sugar 3 Tbsp whole milk 1 Tbsp olive oil 1 Tbsp lemon juice
Directions
1. Mix oil, milk, juice and zest into a mug.
2. Add flour, salt, and baking powder to mug and mix until batter has a smooth consistency. If mixture seems dry, add teaspoon of milk and repeat if necessary.
3. Place mug into the oven. Press the Microwave button once (1000W). Set dial for 1 minute and press Start.
4. After it is done, let stand in microwave for 30 seconds.
Serve warm in the mug with toppings of your choice, and enjoy!
Ingredients
1 Tbsp vegetable oil ½ Tbsp seafood seasoning (optional)
1 medium sweet potato (peeled and sliced into strips)
1 medium potato (peeled and sliced into strips)
2 large carrots (peeled and sliced into strips) salt and pepper to taste
Directions 1. Place cut vegetables into a medium bowl.
Add oil, seasoning and salt and pepper, mix well. 2. Arrange vegetables in the AIRFRYER BASKET
evenly and in one layer. 3. Place the AIRFRYER BASKET on top of the WIRE
RACK and the ENAMEL TRAY. 4. Press the Airfry/Broil/Combo button once
(AIRFRY). Set dial for 25 minutes. Press Start. 5. After 12 minutes, turn vegetables. 6. When time is up, remove from oven. Season as desired (or if needed) and enjoy!
For more even and thorough cooking, cut the potatoes and carrots to a similar size. Do not leave the oven unattended after turning the vegetables; check periodically.
17
Chili Lime Fried Avocado
Avocado lovers rejoice! The name of this recipe says it all. An avocado treat that's crispy on the outside, and tender on the inside. A crunchy, fresh, flavorful snack.
Teriyaki Glazed Salmon
This Japanese-inspired meal is a true dining gem. With fresh, healthy ingredients and the perfect blend of seasoning, your palate will thank you from the very first bite to the last.
Airfry
Airfry
Ingredients
1½ tsp black pepper ¼ tsp kosher salt 1 tsp chili powder 1 Tbsp water 1 Tbsp lime juice 1 Tbsp chili lime seasoning ½ cup all-purpose flour 1 cup panko (Japanese-style breadcrumbs)
2 large eggs 2 avocados (cut into 8 wedges each)
cooking spray
Directions
1. Stir together flour and pepper in a shallow dish.
2. Lightly beat eggs, lime juice and water in a second shallow dish.
3. Place panko, chili lime seasoning and chili powder in a third shallow dish.
4. Dredge avocado in flour, shaking off excess. Then, dip into the egg and lime mixture, allowing any excess to drip off. Finally, dredge in the panko and chili mixture, pressing to adhere.
5. Coat avocado well with cooking spray then place them in the AIRFRYER BASKET.
6. Place the ENAMEL TRAY into the oven, followed by the WIRE RACK, then place the AIRFRYER BASKET on top of the WIRE RACK.
7. Press the Airfry/Broil/Combo button once (AIRFRY). Set dial for 12 minutes. Press Start.
8. Remove from oven and sprinkle with salt to taste.
Serve with your favorite dipping sauce and enjoy!
Avocados should be just ripe, but firm enough to hold their shape during cooking.
Ingredients
2 skin-on salmon fillets (6 oz each) 1 Tbsp olive oil ¼ Tbsp kosher salt ¼ Tbsp ground rainbow peppercorn 2 cups small broccoli florets (similar size)
1 scallion (thinly sliced to garnish) cooked pilaf rice (for serving)
Marinate mixture: 2 tsp ginger (freshly peeled and grated)
1 Tbsp olive oil 1 Tbsp water ¼ cup teriyaki glaze
To marinate salmon 1. Mix marinade ingredients in a medium dish.
2. Place salmon in the mixture, coating them entirely. Let salmon marinate for 20-30 minutes.
To prepare salmon
1. Mix broccoli florets with olive oil in a separate medium bowl until fully coated, and season with salt and pepper.
2. Place broccoli on the AIRFRYER BASKET, then place salmon on top of broccoli, skin-side up.
3. Place the ENAMEL TRAY into the oven, followed by the WIRE RACK, then place the AIRFRYER BASKET on top of the WIRE RACK.
4. Press the Airfry/Broil/Combo button once (AIRFRY). Set dial for 18 minutes. Press Start.
5. When done, carefully remove from oven. Sprinkle the scallion slices over cooked salmon and broccoli.
Serve with rice pilaf (if desired) and enjoy!
19
Airfry
Mediterranean Quinoa Kale Cakes with Tzatziki Sauce
The ultimate veggie burger. These delicious patties are tasty and heavenly unbelievably satisfying. Healthful and super light, the included tzatziki sauce recipe elevates this divine sandwich.
Ingredients for Quinoa Patties 1 tsp salt ½ tsp black pepper
2 Tbsp lemon juice 2 Tbsp all-purpose flour 2 Tbsp olive oil ½ cup feta cheese (crumbled) ¾ cup breadcrumbs (finely ground) 2½ cups cooked quinoa (cooled) 2 cups baby kale (finely chopped)
½ yellow onion (small diced) 2 cloves garlic (minced) 3 large eggs parchment paper (cut to fit AIRFRYER BASKET)
To make quinoa (optional) 1. In a large, microwave-safe bowl, add 1 cup
of uncooked quinoa to 2 cups of water. 2. Press the Microwave button once (1000W).
Set dial for 10 minutes. Press Start. 3. When done, remove carefully, strain excess
water. Set aside to cool (approximately 30 minutes).
Ingredients for Tzatziki Sauce:
tsp black pepper 1 tsp olive oil 1 tsp salt 2 Tbsp lemon juice ¼ cup parsley (chopped) 1 cup plain greek yogurt
1 medium cucumber (small diced/seeded)
1 clove garlic (minced)
To make tzatziki sauce: Combine all the ingredients in a medium bowl and mix well.
To make patties: 1. In a shallow microwave-safe dish, add olive oil, onions, and garlic. Mix well.
2. Place dish into the oven, press the Airfry/Broil/Combo button 4 times (COMBO 1). Set dial for 7 minutes. Press Start.
3. When finished cooking, add chopped kale and stir. Place dish back into the oven. Press Microwave once (1000W). Set dial for 3 minutes. Press Start.
4. When done, cool for 5 minutes (kale should be bright green and soft).
5. In a large mixing bowl whisk eggs, salt, pepper, and lemon juice until smooth.
6. Combine cooled quinoa and feta cheese with egg mixture. Then add breadcrumbs and flour. Mix well, add in kale.
7. Form mixture into 5 patties (use ½ cup of the quinoa mixture for each patty)
8. Place parchment paper onto the AIRFRYER BASKET, place patties on top.
9. Place the ENAMEL TRAY into the oven, followed by the WIRE RACK. Then, place the AIRFRYER BASKET on top of the WIRE RACK.
10. Press Airfry/Broil/Combo once (AIRFRY). Set dial for 10 minutes. Press Start.
11. When time's up, turn the patties over and place them back into the oven. Press Airfry/Broil/Combo once (AIRFRY). Set dial for 10 minutes. Press Start.
Serve with tzatziki sauce and enjoy!
If mixture is too loose, add an extra ½ tablespoon flour to form patties.
Airfry
21
Beef Negimaki
A fun take on traditional Japanese beef and scallion rolls, broiling is the secret to making everyone's meal delightful with hearty flavorings, a special sauce and deliciousness you'll savor.
Goat Cheese & Basil Ciabatta
For a refreshing snack, delicious appetizer or just a light meal, our ciabatta sandwich is as simple to make as it is to enjoy. The flavor profile of the goat cheese, olive oil and fresh basil pairs beautifully with the tomato and olives.
FlashXpress Broil
FlashXpress Broil
Ingredients
For the meat: ¼ cup soy sauce (to brush the meat)
810 scallions ½ lb beef round cubes
salt and pepper (to taste) cooking spray For the sauce: ¼ tsp sesame oil 2 tsp ginger (freshly peeled and grated) ½ cup soy sauce
Directions for dipping sauce: In a small bowl, whisk together all the ingredients for the sauce. Set aside.
Directions for beef negimaki:
1. Using a meat tenderizer, pound the beef to approximately " thickness.
2. Season meat on both sides with salt and pepper.
3. Cut off the white ends of scallions.
4. Layer 3-4 scallions along one edge of the beef and roll the beef tightly around scallions. Brush rolled meat with soy sauce.
5. Spray the WIRE RACK with canola oil, then place the rolled meat on top. Place the ENAMEL TRAY below, put into the oven.
6. Press the Airfry/Broil/Combo button twice (BROIL 1). Set dial for 8 minutes. Press Start.
7. When cooking time is done, turn beef over.
8. Place beef back into the oven, press Airfry/Broil/Combo twice (BROIL 1). Set dial for 10 minutes. Press Start.
9. Remove from the oven. Slice beef into approximately 1" sections
Serve with dipping sauce and enjoy!
Ingredients
2 ciabatta rolls tsp black pepper 1 Tbsp chopped fresh basil (to sprinkle) 1 Tbsp olive oil ½ cup goat cheese (crumbled)
1 clove of garlic (cut in half) 1 beefsteak tomato (sliced) 8 black olives (pitted and quartered)
Directions
1. Halve rolls and place directly on the WIRE RACK and into the oven.
2. Press the Airfry/Broil/Combo button twice (BROIL 1). Set dial for 3 minutes. Press Start.
3. Rub each half garlic clove onto the lightly toasted rolls. Then, top each half with sliced tomato, crumbled goat cheese and olives.
4. Drizzle with olive oil and place rolls back on the WIRE RACK and into the oven.
5. Press Airfry/Broil/Combo twice (BROIL 1). Set dial for 6-8 minutes. Press Start.
6. When cooking is done (or until cheese is golden and bubbling), sprinkle with chopped basil and season with pepper.
23
Lamb Burgers
More tender than beef or pork, lamb is a tasty, flavorful alternative. Ground lamb and feta can be easily transformed into great-tasting burgers, packed with a delicious punch.
Cheddar Cheese Apple Chips
If you're looking for a healthy substitute for potato chips, a batch or two of these apple-cheddar crisps will do the trick. Apple chips have all the crunch you want in a snack, and they're healthier for everyone.
FlashXpress Broil
Convection Bake
Ingredients
1 lb. ground lamb ¼ cup onion (finely chopped) ¼ cup fresh parsley ¼ cup fresh oregano ¼ cup fresh mint ½ cup feta cheese (crumbled)
salt and pepper to taste oil spray
Directions 1. Mix all ingredients in a medium bowl.
2. Form lamb mixture into 4 or 5 patties, ½" thick.
3. Spray the WIRE RACK, place lamb patties on top.
4. Place the ENAMEL TRAY into the oven, followed by the WIRE RACK with the patties.
5. Press Airfry/Broil/Combo twice (BROIL 1), set dial for 8 minutes. Press Start.
6. When timer finishes, flip lamb burgers over on the WIRE RACK and place back into the oven. Press Airfry/Broil/Combo twice (BROIL 1). Set dial for 7 minutes. Press Start.
Serve and enjoy!
Ingredients 2 honey crisp apples, cored and sliced
2 Tbsp powdered cheddar cheese
For more even results, use a mandoline slicer
Directions
1. Slice apples to ¼" thick.
2. Place apple slices in a large bowl and add cheese. Mix well, coating all the apples.
3. Arrange apple slices on the AIRFRYER BASKET.
4. Place the WIRE RACK into the oven, then place the AIRFRYER BASKET on top.
5. Press the Convection Bake button 11 times (230° F). Set dial for 45 minutes. Press Start.
6. After 45 minutes, flip apples and press Convection Bake 11 times (230°F). Set dial for 25 minutes. Press Start. Check on the apples periodically.
7. After baking, remove from oven and let cool for 30-45 minutes or until crispy.
25
Convection Bake
Plant-based Meat Lasagna
This super-healthy vegetable lasagna is hearty, full of vegetables, and tastes exceptionally awesome. Even meat eaters will love this recipe!
Ingredients ¼ tsp black pepper ½ tsp garlic powder
½ Tbsp Italian seasoning 1 Tbsp kosher salt 2 Tbsp olive oil
1 cup onion (chopped) 1 cup ricotta cheese 2 cups shredded mozzarella cheese ½ cup asiago cheese 16 oz plant-based ground meat (or vegetarian
protein crumbles) 1 can diced tomatoes, 28 oz.
9 oven-ready lasagna pasta parmesan cheese (as desired) cooking spray
Directions 1. Place chopped onions into a microwave-safe dish, add olive oil and mix. 2. Place the WIRE RACK into the oven followed by the dish on top of the WIRE RACK.
Press the Airfry/Broil/Combo button 4 times (COMBO 1). Set dial for 8 minutes. Press Start. 3. While onions are cooking, put the plant-based ground meat in a medium microwave-safe bowl,
add garlic powder, Italian seasoning, salt and pepper, and mix well. 4. Remove cooked onions from oven. Combine to the meat mixture. Place mixture into the oven.
Press Microwave once (1000W). Set dial for 7 minutes. Press Start. Halfway through, open oven and crumble mixture with a fork, close door. Press Start. 5. Combine diced tomatoes to the mixture. Place bowl back into the oven. Press Microwave once (1000W). Set dial for 2 minutes. Press Start. 6. In a separate bowl, mix ricotta, asiago cheese and 1 cup of mozzarella cheese. 7. Coat a 9×9" baking dish with cooking spray. Lay pasta next to each other, covering bottom of dish, spread half of the ricotta mixture over pasta, followed by a layer of the meat mixture (around 1½ cups) and repeat. Spread remaining meat mixture on top and sprinkle with parmesan if desired. It is possible to have more/less layers depending on amount of meat between pasta. 8. Place dish into the oven. Press Convection Bake 5 times (375°F). Set dial for 30 minutes. Press Start. 9. After lasagna is cooked, carefully remove from oven and sprinkle with the reserved cup of mozzarella cheese. Place back into the oven and bake for another 10 minutes at 375°F. Allow lasagna to cool for five minutes before serving. Enjoy!
27
Convection Bake
Roasted Veggies and Gorgonzola Gluten-free Pizza
Roasted vegetables on a gluten-free crust is a veggie lover's delight. This recipe is lovingly loaded with vegetables, spices and cheeses, and is guaranteed to please the palates, passions and appetites of the veggie pizza fans in your household.
Bourbon Gingerbread Cookies
An adult twist on a classic holiday treat, these gingerbread cookies have traditional molasses and brown sugar sweetness combined with spicy ginger and cinnamon flavor everyone will be sure to enjoy all year round.
Convection Bake
Convection Bake
Ingredients
1 frozen cauliflower pizza crust 1 tspolive oil 1½ Tbsp heavy cream
¼ cup mascarpone ½ cup gorgonzola crumbles ½ cup cremini mushrooms (sliced)
¼ medium red onion (" sliced) 1 small/medium russet potato (58 oz)
salt and pepper (to taste)
Directions
1. Preheat oven: Press the Convection Bake button 4 times (350°F). Press Start to preheat (a "P" will appear on display. When preheating is completed a "P END" will appear on display).
2. Slice onion using mandoline (1/8" thick), place in a medium bowl with ½ teaspoon of olive oil and a dash of salt. Toss to coat well.
3. Wash and peel potato. Slice to 1/8" thickness. Put into another bowl with the remaining / teaspoon oil and toss well with a few large pinches of salt.
4. In a separate bowl, mix the mascarpone and heavy cream. Combine gorgonzola into mixture.
5. Bring pizza crust out of the freezer, spread the cheese mixture evenly on crust. Scatter onion slices on top, arrange potato and mushroom slices so they slightly overlap.
6. Grind black pepper on top of pizza as desired.
7. Place pizza directly on the ENAMEL TRAY, then place on the WIRE RACK and into the oven.
8. After preheating, Press Convection Bake. Set dial for 12-15 minutes. Press Start.
Check the pizza periodically after 12 minutes, or until potatoes are browning and start to curl up.
Ingredients
¼ tsp salt ¼ tsp ground cloves ¾ tsp baking soda 1½ tsp baking powder 1¾ tsp ground cinnamon 2 tsp vanilla extract 1 Tbsp ground ginger 1 Tbsp bourbon 6 Tbsp unsalted butter (softened) ¾ cup dark brown sugar 3 cups all-purpose flour
1 large egg ½ cup molasses parchment paper (cut to the enamel tray size) diced candied ginger or powder sugar
Directions
1. In a small bowl, whisk together flour, baking powder, baking soda, salt, ginger, cinnamon, and cloves until well blended.
2. Combine molasses, vanilla extract and bourbon in a small bowl. Set aside.
3. Using a hand blender in a large bowl beat the butter, brown sugar, and egg on medium speed until well blended.
4. Slowly add molasses, vanilla extract and bourbon and continue to mix until well blended.
5. Gradually stir in the dry ingredients until blended and smooth.
6. Divide dough in half, roll each half into a log form, and wrap each piece of dough with plastic wrap. Let stand at room temperature for at least 2 hours, up to 6 hours.
7. Slice rolls into approximately ¼" slices. Place slices on parchment paper directly on the ENAMEL TRAY. Top with diced candied ginger (if desired).
8. Press the Convection Bake button 5 times (375°F). Set dial for 7 minutes. Press Start.
Serve and enjoy!
29
Convection Bake
Matcha Cheesecake
This matcha tea cheesecake recipe is sinful and delicious. Best of all, you can make it in your own kitchen. It's a sweet Japanese take on homemade cheesecake, with an unforgettable, melt-in-yourmouth taste everyone will love.
Ingredients For the crust 3 cups crème-filled chocolate sandwich
cookies (approx. 2022 cookies) 3 Tbsp butter, unsalted For the cheesecake
1 tsp vanilla extract 2 Tbsp matcha green tea powder cup granulated sugar
16 oz cream cheese (room temperature) 2 eggs (room temperature)
Optional: White chocolate-covered strawberries
1 cup white chocolate chips 12 strawberries (with stems)
Chocolate Ganache ½ cup semisweet dark chocolate chips ¼ cup heavy cream
To make crust 1. Crumble 20-22 crème-filled chocolate cookies in a food processor until finely chopped. 2. Place butter in a small microwaveable bowl and place it into the oven.
Turn dial to AUTO PROGRAM #8 - BUTTER, press to confirm. Turn dial to set weight to 2 oz. Press Start. 3. In the same bowl, mix together 3 cups of the cookie crumbs. 4. Place the cookie crumbs and butter mixture in a pie plate and press into the dish, ensuring the bottom
and sides are covered. 5. Place the pie dish into the oven.
Press the Convection Bake button 4 times (350°F). Set dial for 7 minutes. Press Start. 6. Carefully remove the baked crust from oven. Set aside to cool (approximately 20-30 minutes).
To make cheesecake 1. In a large bowl add cream cheese and sugar and mix with an electric hand mixer until smooth. 2. Add eggs, one at a time, and continue mixing. Add the matcha green tea and vanilla extract and
combine be careful to avoid overmixing. 3. Spoon the cheesecake filling on top of the cookie crumb crust, covering it completely. 4. Place into the oven.
Press the Convection Bake button once (300°F). Set dial for 35 minutes. Press Start. 5. Remove from oven and let cool completely. Refrigerate for 2-3 hours.
To make topping: 1. Wash strawberries and pat dry. 2. Place the white chocolate chips in a small microwavable bowl and place it into the oven.
Turn dial to AUTO PROGRAM #7 CHOCOLATE, press to confirm. Turn dial to set weight to 8 oz. Press Start. 3. Take out the melted white chocolate and stir. 4. Carefully dip the strawberries in the white chocolate mixture and place on top of cheesecake. Repeat,
placing strawberries in a circular design.
Optional Chocolate Ganache 1. Place semi-sweet dark chocolate chips in another bowl and add heavy cream. Place bowl into the oven. 2. Turn dial to AUTO PROGRAM #7 - CHOCOLATE, press to confirm. Turn dial to set weight to 4 oz. Press Start. 3. Remove from microwave and cool for 1-2 minutes. 4. Use a spoon to drizzle the chocolate ganache over strawberries.
31
Convection Bake
Chicken Yakitori
Add these Asian-inspired chicken kebobs to your dinner menu. This recipe is nothing short of fun, savory and yummy. And one you can easily create and enjoy all year long.
Macaroni & Cheese
Say goodbye to boxed mac and cheese and hello to this cheesy, tangy, crispy and oh-so-flavorful version of the great American classic.
Combo 1
Combo 1
Ingredients
2 lbs chicken thighs (boneless skinless) 1 onion 1 green pepper olive oil
wooden skewers soaked in water, 20-30 mins Marinade:
¾ cup rice cooking wine ¾ cup water 1½ cups mirin 1½ cups soy sauce
2 scallions (green parts, finely sliced) 2 Tbsp light brown sugar
To make the sauce/marinade:
1. Combine marinade ingredients in a medium saucepan and bring to a boil over mediumhigh heat. Reduce heat and simmer until the sauce has reduced by half. Stir occasionally.
2. Remove from heat and let it cool down. Divide sauce into half, reserve for serving.
To make the chicken skewers:
1. Cut chicken into approximately 1" pieces, marinate in half of the sauce mixture for 45-60 minutes.
2. Quarter onion and cut green pepper into 1" pieces.
3. Fold chicken piece in half, then insert skewer through chicken, followed with a vegetable piece (or two), then another chicken piece, then another vegetable piece until each skewer has about 5-6 pieces of chicken. Feel free to add as many veggies as desired.
4. Brush chicken skewers with olive oil.
5. Brush the WIRE RACK with olive oil and then place the chicken skewers on top. Place the ENAMEL TRAY under the WIRE RACK to catch drippings.
6. Press the Airfry/Broil/Combo button 4 times (COMBO 1). Set dial for 15 minutes. Press Start.
7. Remove chicken from oven, flip over and baste with the same marinade sauce.
8. Place into oven. Press Airfry/Broil/Combo 4 times (COMBO 1). Set dial for 10 minutes. Press Start.
Serve with reserved sauce and enjoy!
Note: Ensure the internal temperature of the chicken has reached 165°F.
To avoid burning, check skewers periodically after you flip them.
Ingredients
½ tsp paprika 2 tsp hot sauce ¼ cup panko breadcrumbs ½ cup cream cheese ½ cup cheddar cheese (shredded) 1 cup heavy cream 2 cups cooked elbow macaroni
salt and pepper (to taste)
Directions
1. Mix heavy cream, cream cheese, cheddar cheese, hot sauce, salt, and pepper in a medium microwave-safe bowl until well blended. Place into the oven. Press the Microwave button once (1000W). Set dial for 2 minutes. Press Start.
2. When time is up, remove bowl from the oven and mix in cooked macaroni. Transfer the macaroni and cheese mixture to a 9x9" microwave-safe baking dish and top with panko and sprinkle with paprika.
3. Place the WIRE RACK into the oven. Set the baking dish on top. Press the Airfry/Broil/Combo button 4 times (COMBO 1). Set dial for 3 minutes. Press Start.
Serve and enjoy!
33
Buffalo-style Chicken Wings
A must for gameday, TV and movie snacking! Whatever the occasion, or no occasion at all, here's a recipe for fresh, tender, spicy delicious buffalo wings. Your wing-loving family will want to make this often.
Baked Potatoes
There are baked potatoes and then there are baked potatoes. This recipe easily bakes potatoes with fluffy interiors and crispy skin. Top with fillings to suit your meal or menu.
Combo 2
Combo 2
Ingredients 12 chicken wings
2 Tbsp hot sauce 2 Tbsp butter
salt and pepper (to taste) spray oil
Note: Only use the AIRFRYER BASKET during the AIRFRY cooking stage. Ensure the internal temperature of the chicken has reached 165°F.
Directions
1. Place wings in a bowl, toss with salt & pepper.
2. Spray the WIRE RACK with spray oil and arrange wings on top in a single layer.
3. Place the ENAMEL TRAY into the oven, followed by the WIRE RACK with the chicken wings. Press the Airfry/Broil/Combo button 5 times (COMBO 2). Set dial for 15 minutes. Press Start.
4. After 15 minutes, remove from oven, turn the wings over then place back into the oven. Press the Airfry/Broil/Combo button 5 times (COMBO 2). Set dial for 10 minutes. Press Start.
5. When time is up, spray the AIRFRYER BASKET with oil, transfer the semi-cooked wings to the AIRFRYER BASKET. Place on the WIRE RACK. Press Airfry/Broil/Combo once (AIRFRY). Set dial for 15 minutes. Press Start.
6. When done, remove wings and wings aside.
7. Place butter and hot sauce in a separate medium microwave-safe bowl into the oven, turn dial to AUTO PROGRAM #8 BUTTER, press dial to confirm, then turn dial to 2 oz. Press Start.
8. Toss wings with spicy butter sauce and mix well.
Grab plenty of napkins and enjoy!
Ingredients 4 russet potatoes (Medium size 5 oz 6 oz)
olive oil (for rubbing) salt and pepper unsalted butter parmesan or chives (optional)
Depending on potato size, you may need to increase or decrease cooking time, usually 25-30 minutes.
Directions
1. Pierce potatoes all around with a fork (not deep) and rub with olive oil covering potatoes entirely.
2. Season potatoes with salt and pepper as desired.
3. Place potatoes directly on the WIRE RACK and into the oven. Place the ENAMEL TRAY under the WIRE RACK to catch drippings.
4. Press the Airfry/Broil/Combo button 5 times (COMBO 2). Set dial for 30 minutes. Press Start.
5. Check potatoes after 25 minutes by piercing them with a fork to check for tenderness. If they are still not ready, place back into the oven. Press Start.
6. Cut open each potato; season with salt and pepper and top with butter, parmesean, chives, or your favorite topping.
35
Presets and Cooking Mode Reference Guide
AUTO PRESETS
We created 21 preset programs for popular prep tasks and dishes, so you can get to cooking with a simple twist of the dial!
Defrost 2 Popcorn 3 Potatoes 4 Steam Vegetables 5 Fresh Fish 6 Cream Cheese 7 Chocolate
8 Butter 9 Cake 10 Cookie 11 Frozen Pizza 12 Fresh Pizza 13 Roast chicken 14 Slow Cook/Stew
15 Beef Rare 16 Beef Medium 17 Tea/Coffee 18 Milk/Hot Chocolate 19 Baguette/Crusty Rolls 20 Croissants 21 Steam Clean
Turn the dial to the desired preset, then press the dial to confirm selection. Follow display instructions such as entering time, weIght, or power level.
Important: For complete step-by-step operating instructions and safety guidelines, please refer to the "Operation" section in the Owners Manual.
AIRFRY / BROIL / COMBO
Press to choose from 5 cooking modes:
1x Airfry 2x Broil1 3x Broil2 4x Combo1 5x Combo2
Turn dial and follow display instructions. Press dial to start.
CONVECTION BAKE
Press to select temp:
1x 300°F 8x 425°F
2x 325°F 9x 100°F
3x 340°F 4x 350°F 5x 375°F
10x 215°F 11x 230°F 12x 250°F
6x 400°F 13x 270°F
7x 410°F 14x 285°F
Press dial to preheat, or turn dial to set cooking time. Press dial to start.
MICROWAVE
Press to select power level 1x 1000W (High) 2x 800W (Medium-high) 3x 600W (Medium) 4x 440W (Medium-low) 5x 300W (Defrost) 6x 100W (Low) 7x Keep Warm
Set cooking time by turning the dial. Press dial to start.
Shortcuts
Included in the Owner's Manual is a handy Microwave Shortcuts section. This section provides the recommended power, time and directions for many popular foods.
Defrosting Chart: provides defrosting time, method, and standing time for a variety of foods.
Reheating and Cooking Chart: provides the recommended power levels, approximate time, and instructions for various foods and weights.
Cookware and Utensil Chart: "May I use aluminum foil?" Find out which cooking method allows its use.
Optional Trim Kit for a Built-in Look
For a sleek, built-in look, we offer an optional stainless-steel trim kit (NN-TK81KCS, sold separately) to use within an existing cabinet space or for a custom renovation. Instructional videos are available to assist with installation.
37
39
Panasonic's collaboration with Drop, the leading smart kitchen platform simplifies the lives of home cooks using their appliances. With customized navigation tailored specifically to the Panasonic Home Chef 4-in-1 Countertop Multi-Oven, users can access several advanced features designed to complement every cooking style. From helpful functions like resizing recipes or offering substitutions for missing ingredients, to recommending the exact length of heating time
for perfect results, the integration with Drop was launched with home cooks in mind. For more information, visit https://drop.recipes/panasonic-usa or scan below.
Panasonic Two Riverfront Plaza
Newark, NJ 07102 Actual product may vary slightly from photographs. *By scanning this QR code, you acknowledge that you understand that Personally Identifiable Information ("PII") like Advertising Identifier, IP Address, Country Code and Geolocation Information may be shared with Drop, a Panasonic business partner, and mobile technology software provider Branch. Drop Privacy policies: https://getdrop.com/privacy-policy and https://branch.io/discovery-policies/#privacy Please be advised that Panasonic will not collect or have access to any of your PII, including but not limited to the PII that is collected by Drop. By using the Drop Recipe app, you accept and acknowledge that the Drop Recipe app as well as other third party websites and apps are not under Panasonic's control and are not subject to Panasonic's Privacy Policy (https://na.panasonic.com/us/privacy-policy). The Drop Recipe app (and any other third party website/app) has its own privacy policy(ies), including those indicated in this book. Panasonic has no responsibility for any such third party apps or websites, including the Drop Recipe app, and provide this book solely for your convenience. You acknowledge your use and access of the Drop app is solely at your own risk. It is your responsibility to check Drop Privacy policies to see how they treat your PII.
References
Adobe PDF Library 15.0 Adobe InDesign 14.0 (Macintosh)
поднос на верхний или нижний решетчатые подносы. Не класть поднос
для жарки на дно Флававэйв Турбо Овэн.
Материал: 100% Material ~ 100% сталь
Покрытие: тефлоновое
Поднос для приготовления продуктов на пару – используется для приготовления на
пару овощей, для приготовления картофеля фри без лишнего жира, для
приготовления рыбы в фольге и т.д. Поместите поднос на верхний
решетчатый поднос. Не класть поднос для жарки на дно Флававэйв
Турбо Овэн.
Материал ~ 85% металлическая сетка + 15% металлическая проволка
Покрытие ~ хромированное
Поднос для завтрака — идеально подходит для приготовления завтрака. На один поднос
Вы можете сразу же положить тосты, ветчину и яйца, и готовить все
одновременно.
Material ~ 100% металлическая проволока
Покрытие ~ хромированное
ВНИМАНИЕ: Не прикасайтесь к аксессуарам, стеклянной чаше, крышке и любой
поверхности аэрогриля во время процесса готовки. Воздух внутри чаши нагревается
до 260º, в результате поверхность становиться очень горячей и можно получить
ожог. Дождитесь пока Флававэйв Турбо Овэн и все аксессуары остынут, прежде
чем докосаться до них.
КАК СОБИРАТЬ АЭРОГРИЛЬ
1. Выньте стеклянную колбу и опорный поддон из держателя (только для 220-240 Вольт).
2. Поставьте держатель стеклянной емкости на твердую поверхность (например, на
кухонный стол), и поставьте опорный поддон в держатель.
3. Поставьте стеклянную чашу внутрь держателя.
4. Поставьте решетчатый поднос в стеклянную чашу.
5. Поставьте крышку на стеклянную чашу.
6. Сборка завершена.