More timers and manuals:
http://waterheatertimer.org/Woods-timers-and-manuals.html#seven
Item No.: EMT757
A. Functions
1. The Programmable Digital Timer (hereinafter refer as «Timer») can preset specific on/off
time of your home electrical appliances, e.g. using in coffee machine, lamps. It is ideal for
energy saving and home security.
2. The countdown function can switch on/off your appliance on your pre-set time and
random functions allows you to switch on and off the appliance in irregular time, it is not
only ideal for home automation, also prevent burglary during your absence.
3. The LCD displays program setting status and real time.
4. With maximum 140 on/off programs per week .
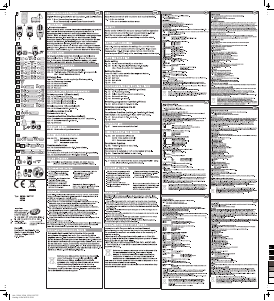
B. Diagram & Descriptions
No. Description
1
LCD Display
2
CLOCK button Return to real time display when in program setting
3
CD button
4
RND button
5
On/Off button
6
SET button
∧+ button
7
∨ — button
8
9
S — silk screen
printing
10
Reset button
11
Socket & Plug
C. Time Display
There are two different kinds of time displays:
1. 12-hour display: the digital number is from 11:59 to 12:00 with AM or PM shown on the
LCD
2. 24-hour display: the digital number is from 00:00 to 23:59, no AM or PM is shown on the
LCD
Instruction Manual for
Programmable Digital Timer
Functions
Shows time and program setting.
press together with SET Button to set real time and week
press together with -Button to change to Summer Time
Press the button to start/stop countdown program when it is in
AUTO status
Press the button to start/stop random program when it is in AUTO
status
Change the setting mode to ON, ATUO or OFF. When press the
button each time, the horizontal line in the LCD moves to
ON
AUTO
OFF which were silk printed on the Timer
To set time and week and to confirm setting
Press the button to increase the time, week or program group
Press the button to reduce the time, week or program group
Press CLOCK Button and - Button at the same time to change to
Summer Time. Time display adds one hour automatically and «S»
are shown on the LCD.
Press once to reset all your preset programs
Connect your appliance to the socket and plug the timer to the wall
AC socket to get power
1/4
Таймер электронный
/s.siteapi.org/162d81d2f83ff6c/img/4b5pzgri2xycwscsk4sgow4gk80k4w "Таймер электронный для аквариума")
Таймер электронный
Электронный таймер позволяет задать программу включения/выключения света или другого оборудование в аквариуме. Программируется как на постоянную работу в заданное время, так и индивидуально на каждый день недели.
Электронный таймер позволяет задать программу включения/выключения света или другого оборудование в аквариуме. Программируется как на постоянную работу в заданное время, так и индивидуально на каждый день недели.
Встроенный аккумулятор может работать без подзарядки в течение нескольких часов. С помощью компактного LCD дисплея и кнопочной панели управления легко настроить нужный режим эксплуатации устройства. Вы устанавливаете программу один раз на каждый день недели. Таймер будет повторять заданную Вами программу.
Максимальная мощность подключаемых приборов 1800Вт.
| Номинальное напряжение | 230 В |
| Номинальная частота | 50 Гц |
| Максимальная подключаемая нагрузка | 1800 Вт |
| Степень защиты | IP20 |
| Цвет | белый |
| Номинальный ток | 8 А |
| Минимальный интервал включения | 1 мин |
| Применение | в помещении |
| Максимальное количество включений в сутки | 20 |
| Максимальное количество включений в неделю | 70 |
| Тип | электронный |
| Длина | 50 мм |
| Ширина | 76 мм |
| Высота | 102 мм |
| Гарантийный период | 1 год |
Нет комментариев
Добавить комментарий
С этим товаром покупают
Руководство

Рейтинг
Сообщите нам, что вы думаете о REV EMT757, оставив оценку продукта. Хотите поделиться вашими впечатлениями от данного изделия или задать вопрос? Вы можете оставить комментарий в нижней части страницы.
Довольны ли вы данным изделием REV?
Да Нет
65 голоса
Часто задаваемые вопросы
Наша служба поддержки выполняет поиск полезной информации по изделиям и отвечает на часто задаваемые вопросы. Если вы заметили неточность в наших часто задаваемых вопросах, сообщите нам об этом с помощью нашей контактной формы.
Мой переключатель времени издает мягкий дребезжащий звук, это нормально? Проверенный
Механические таймеры имеют внутренний механизм, который может издавать тихий дребезжащий звук. Эти переключатели времени также могут производить четкий щелчок при включении и выключении.
Это было полезно (529)

GREAT BRITAIN • CUSTOMER SERVICE tel. 020 8247 9300 e-mail customerservice@clasohlson.co.uk internet www.clasohlson.co.uk
Ver. 20141216
Use
Time display
The clock is showing 12 or 24 hour display. To change between 12 and 24 hour
display, press and hold CLOCK until the display changes the time format.
• At 12 hour display AM or PM is shown on the display.
• At 24 hour display neither AM nor PM is shown on the display.
Set time
Note: The time switch must be in normal mode (time) before setting
of time and week day. Push CLOCK to return to normal mode.
1. Push and hold SET until the week indicator blinks.
2. Push ▲+ to change week day forward, or ▼— to change week day
backwards. The selected week day is shown in the display.
3. Push SET to confirm. The hour setting blinks in the display.
4. Use ▲+ and ▼— to set hours.
5. Push SET to confirm. The minute setting blinks in the display.
6. Use ▲+ and ▼— to set minutes.
7. Push CLOCK to return to normal mode.
Summer/Winter time
Press CLOCK and ▼— at the same time to switch between summer and
winter time. S is shown on the display to indicate summer time.
Installation of programme
1. Push ON/OFF to set the time switch in AUTO mode.
2. When the display is in normal mode, press ▲+ to return to settings mode.
1ON is shown on the display’s bottom left corner.
“1” indicates program number 1 (of 20).
“ON” indicates the time for activation.
“OFF” indicates the time for off activation.
3. Use ▲+ and ▼— to change the program number according to
the following sequence:
1ON → 1OFF → …… 20ON → 20OFF → d ON/OFF (countdown)
4. After selected program, push SET to set week day for on and off activation.
5. Use ▲+ to change week days. The days will be changed in the following
combinations:
MO TU WE TH FR SA SU; MO → TU → WE → TH → FR → SA → SU:
MO WE FR; TU TH SA; SA SU; MO TU WE; TH FR SA;
MO TU WE TH FR; MO TU WE TH FR SA
6. Push SET to confirm. The hour setting blinks in the display.
7. Use ▲+ and ▼— to set hours.
8. Push SET to confirm. The minute setting blinks in the display.
9. Use ▲+ and ▼— to set minutes.
10. Press CLOCK to return to normal mode.
Countdown function
Set the countdown time
The countdown interval is from 1 second to 99 hours, 59 minutes and 59 seconds.
1. When the display is in normal mode, press ▼— to return to the countdown
function. The display shows d ON or d OFF.
d indicates that the countdown function is activated.
2. Push SET until ON or OFF blinks on the display.
3. Use ▲+ and ▼— to switch between ON or OFF.
ON Set the duration for how long the device/output will be ON (the device/
output will be turned off after the countdown). OFF set the duration for how
long the device/output will be OFF (the device/output will be turned on after
the countdown).
4. Push SET to confirm. The timer display blinks.
5. Use ▲+ and ▼— to set hours.
6. Push SET to confirm. The minutes display blinks.
7. Use ▲+ and ▼— to set minutes.
8. Push SET to confirm. The seconds blink.
9. Use ▲+ and ▼— to set seconds.
10. Push SET to confirm and then push CLOCK to return to normal mode.
Start the countdown
1. Set the countdown time according to the instructions above.
2. Connect the device to the time switch and connect the time switch
to a wall socket.
3. Push ON/OFF to set the time switch in AUTO mode.
4. Push CD to start the countdown function. CD will blink to confirm that CD-
mode is activated.
5. When the countdown has come to 00:00:00, the e.g. lamp turns on
or off depending on what has been programmed.
Random on and off activation
1. Connect the device to the time switch and connect the time switch
to a wall socket.
2. Push ON/OFF to set the time switch in AUTO mode.
3. Push RND. An icon with the letter R will appear to confirm that the RND-
mode is activated. The output is now off for 26 to 42 minutes before it
randomly turns on. The output then stays on for 10 to 26 minutes before it
turns off again.
Turning the lamp on and off manually
Push ON/OFF to manually activate or deactivate the time switch.
ON The voltage turns on regardless of the setting and the connected
device can be used.
AUTO The time switch operates according to pre-set program.
OFF The voltage turns off and the connected device cannot be used.
Safety
• The time switch is intended for use indoors and may not be used outdoors!
• Devices connected to the time switch must be constructed for the same
voltage according to the specifications below.
• The built-in batteries are fully charged after approx. 2 hours use.
Disposal
Follow local ordinances when disposing this product. If you are unsure about
the disposal of this product contact your municipality.
Specifications
Mains Supply 230 V AC, 50 Hz
Max load 1800 W
Operating Temperature 0–55 °C
Class IP20
Minimum time interval 1 minute
1. LCD-display
2. S – Indication on the display for summer time.
3. CLOCK – Press to return to normal mode (time).
4. SET – Sets time and week day and also confirms settings.
5. ▼— – Adjusts time, week, and program group.
6. ▲+ – Adjusts time, week, and program group.
7. ON/OFF – Changes function on the time switch. ON, AUTO or OFF.
8. RND – Randomly activates on and off when the time switch
is in AUTO mode.
9. CD – Starts or stops the countdown function when the time switch
is in AUTO mode.
10. RESET – Press one time to reset the time switch to factory settings.
11. Plug socket
Digital time switch
Art.no 18-2029 Modell EMT757-UK 18-2175 EMT757-UK 36-2901 EMT757 36-4600 EMT757 36-5035 EMT757x2
Please read the entire instruction manual before using the product and save
it for future reference. We apologise for any text or photographic errors and
any changes in technical data. If you have any questions concerning technical
problems please contact our Customer Service Department.
Product Description
Digital time switch with 20 on/off activations per day.
• CD
• Random function (random on and off activation)
• LCD-display
• Safety shuttered socket
Buttons and Functions
5
6
7
8
9
10
1
2
3
4
11
More timers and manuals:
http://waterheatertimer.org/Woods-timers-and-manuals.html#seven
Item No.: EMT757
A. Functions
1. The Programmable Digital Timer (hereinafter refer as «Timer») can preset specific on/off
time of your home electrical appliances, e.g. using in coffee machine, lamps. It is ideal for
energy saving and home security.
2. The countdown function can switch on/off your appliance on your pre-set time and
random functions allows you to switch on and off the appliance in irregular time, it is not
only ideal for home automation, also prevent burglary during your absence.
3. The LCD displays program setting status and real time.
4. With maximum 140 on/off programs per week .
B. Diagram & Descriptions
No. Description
1
LCD Display
2
CLOCK button Return to real time display when in program setting
3
CD button
4
RND button
5
On/Off button
6
SET button
∧+ button
7
∨ — button
8
9
S — silk screen
printing
10
Reset button
11
Socket & Plug
C. Time Display
There are two different kinds of time displays:
1. 12-hour display: the digital number is from 11:59 to 12:00 with AM or PM shown on the
LCD
2. 24-hour display: the digital number is from 00:00 to 23:59, no AM or PM is shown on the
LCD
Instruction Manual for
Programmable Digital Timer
Functions
Shows time and program setting.
press together with SET Button to set real time and week
press together with -Button to change to Summer Time
Press the button to start/stop countdown program when it is in
AUTO status
Press the button to start/stop random program when it is in AUTO
status
Change the setting mode to ON, ATUO or OFF. When press the
button each time, the horizontal line in the LCD moves to
ON
AUTO
OFF which were silk printed on the Timer
To set time and week and to confirm setting
Press the button to increase the time, week or program group
Press the button to reduce the time, week or program group
Press CLOCK Button and - Button at the same time to change to
Summer Time. Time display adds one hour automatically and «S»
are shown on the LCD.
Press once to reset all your preset programs
Connect your appliance to the socket and plug the timer to the wall
AC socket to get power
1/4
GREAT BRITAIN • CUSTOMER SERVICE tel. 020 8247 9300 e-mail customerservice@clasohlson.co.uk internet www.clasohlson.co.uk
Ver. 20141216
Use
Time display
The clock is showing 12 or 24 hour display. To change between 12 and 24 hour
display, press and hold CLOCK until the display changes the time format.
• At 12 hour display AM or PM is shown on the display.
• At 24 hour display neither AM nor PM is shown on the display.
Set time
Note: The time switch must be in normal mode (time) before setting
of time and week day. Push CLOCK to return to normal mode.
1. Push and hold SET until the week indicator blinks.
2. Push ▲+ to change week day forward, or ▼— to change week day
backwards. The selected week day is shown in the display.
3. Push SET to confirm. The hour setting blinks in the display.
4. Use ▲+ and ▼— to set hours.
5. Push SET to confirm. The minute setting blinks in the display.
6. Use ▲+ and ▼— to set minutes.
7. Push CLOCK to return to normal mode.
Summer/Winter time
Press CLOCK and ▼— at the same time to switch between summer and
winter time. S is shown on the display to indicate summer time.
Installation of programme
1. Push ON/OFF to set the time switch in AUTO mode.
2. When the display is in normal mode, press ▲+ to return to settings mode.
1ON is shown on the display’s bottom left corner.
“1” indicates program number 1 (of 20).
“ON” indicates the time for activation.
“OFF” indicates the time for off activation.
3. Use ▲+ and ▼— to change the program number according to
the following sequence:
1ON → 1OFF → …… 20ON → 20OFF → d ON/OFF (countdown)
4. After selected program, push SET to set week day for on and off activation.
5. Use ▲+ to change week days. The days will be changed in the following
combinations:
MO TU WE TH FR SA SU; MO → TU → WE → TH → FR → SA → SU:
MO WE FR; TU TH SA; SA SU; MO TU WE; TH FR SA;
MO TU WE TH FR; MO TU WE TH FR SA
6. Push SET to confirm. The hour setting blinks in the display.
7. Use ▲+ and ▼— to set hours.
8. Push SET to confirm. The minute setting blinks in the display.
9. Use ▲+ and ▼— to set minutes.
10. Press CLOCK to return to normal mode.
Countdown function
Set the countdown time
The countdown interval is from 1 second to 99 hours, 59 minutes and 59 seconds.
1. When the display is in normal mode, press ▼— to return to the countdown
function. The display shows d ON or d OFF.
d indicates that the countdown function is activated.
2. Push SET until ON or OFF blinks on the display.
3. Use ▲+ and ▼— to switch between ON or OFF.
ON Set the duration for how long the device/output will be ON (the device/
output will be turned off after the countdown). OFF set the duration for how
long the device/output will be OFF (the device/output will be turned on after
the countdown).
4. Push SET to confirm. The timer display blinks.
5. Use ▲+ and ▼— to set hours.
6. Push SET to confirm. The minutes display blinks.
7. Use ▲+ and ▼— to set minutes.
8. Push SET to confirm. The seconds blink.
9. Use ▲+ and ▼— to set seconds.
10. Push SET to confirm and then push CLOCK to return to normal mode.
Start the countdown
1. Set the countdown time according to the instructions above.
2. Connect the device to the time switch and connect the time switch
to a wall socket.
3. Push ON/OFF to set the time switch in AUTO mode.
4. Push CD to start the countdown function. CD will blink to confirm that CD-
mode is activated.
5. When the countdown has come to 00:00:00, the e.g. lamp turns on
or off depending on what has been programmed.
Random on and off activation
1. Connect the device to the time switch and connect the time switch
to a wall socket.
2. Push ON/OFF to set the time switch in AUTO mode.
3. Push RND. An icon with the letter R will appear to confirm that the RND-
mode is activated. The output is now off for 26 to 42 minutes before it
randomly turns on. The output then stays on for 10 to 26 minutes before it
turns off again.
Turning the lamp on and off manually
Push ON/OFF to manually activate or deactivate the time switch.
ON The voltage turns on regardless of the setting and the connected
device can be used.
AUTO The time switch operates according to pre-set program.
OFF The voltage turns off and the connected device cannot be used.
Safety
• The time switch is intended for use indoors and may not be used outdoors!
• Devices connected to the time switch must be constructed for the same
voltage according to the specifications below.
• The built-in batteries are fully charged after approx. 2 hours use.
Disposal
Follow local ordinances when disposing this product. If you are unsure about
the disposal of this product contact your municipality.
Specifications
Mains Supply 230 V AC, 50 Hz
Max load 1800 W
Operating Temperature 0–55 °C
Class IP20
Minimum time interval 1 minute
1. LCD-display
2. S – Indication on the display for summer time.
3. CLOCK – Press to return to normal mode (time).
4. SET – Sets time and week day and also confirms settings.
5. ▼— – Adjusts time, week, and program group.
6. ▲+ – Adjusts time, week, and program group.
7. ON/OFF – Changes function on the time switch. ON, AUTO or OFF.
8. RND – Randomly activates on and off when the time switch
is in AUTO mode.
9. CD – Starts or stops the countdown function when the time switch
is in AUTO mode.
10. RESET – Press one time to reset the time switch to factory settings.
11. Plug socket
Digital time switch
Art.no 18-2029 Modell EMT757-UK 18-2175 EMT757-UK 36-2901 EMT757 36-4600 EMT757 36-5035 EMT757x2
Please read the entire instruction manual before using the product and save
it for future reference. We apologise for any text or photographic errors and
any changes in technical data. If you have any questions concerning technical
problems please contact our Customer Service Department.
Product Description
Digital time switch with 20 on/off activations per day.
• CD
• Random function (random on and off activation)
• LCD-display
• Safety shuttered socket
Buttons and Functions
5
6
7
8
9
10
1
2
3
4
11