Дата: 02 августа 2006 года | Язык: EN | Размер: 920.56 Kb
Интерактивное руководство, в котором в доступной форме изложены основные характеристики устройства и правила его эксплуатации
Дата: 02 августа 2006 года | Язык: EN
Интерактивное руководство, в котором в доступной форме изложены основные характеристики устройства и правила его эксплуатации
Дата: 05 мая 2005 года | Язык: RU | Размер: 1.31 Mb
Подробное описание процесса распаковки и первоначальной установки принтера.
Дата: 17 июля 2007 года | Язык: RU
Интерактивное руководство, в котором в доступной форме изложены основные характеристики устройства и правила его эксплуатации
Дата: 23 мая 2002 года | Язык: EN | Размер: 673.58 Kb
Подробное описание команд EPSON ESC/P2 и примеры их применения для управления принтером
Дата: 23 мая 2002 года | Язык: EN | Размер: 822.13 Kb
Подробное описание команд EPSON ESC/P2 и примеры их применения для управления принтером
Дата: 23 мая 2002 года | Язык: EN | Размер: 1.07 Mb
Подробное описание команд EPSON ESC/P2 и примеры их применения для управления принтером
Дата: 23 мая 2002 года | Язык: EN | Размер: 741.62 Kb
Подробное описание команд EPSON ESC/P2 и примеры их применения для управления принтером
Дата: 23 мая 2002 года | Язык: EN | Размер: 2.84 Mb
Подробное описание команд EPSON ESC/P2 и примеры их применения для управления принтером
Дата: 23 мая 2002 года | Язык: EN | Размер: 189.6 Kb
Подробное описание команд EPSON ESC/P2 и примеры их применения для управления принтером
Дата: 23 мая 2002 года | Язык: EN | Размер: 46.83 Kb
Подробное описание команд EPSON ESC/P2 и примеры их применения для управления принтером
-
Contents
-
Table of Contents
-
Troubleshooting
-
Bookmarks
Quick Links
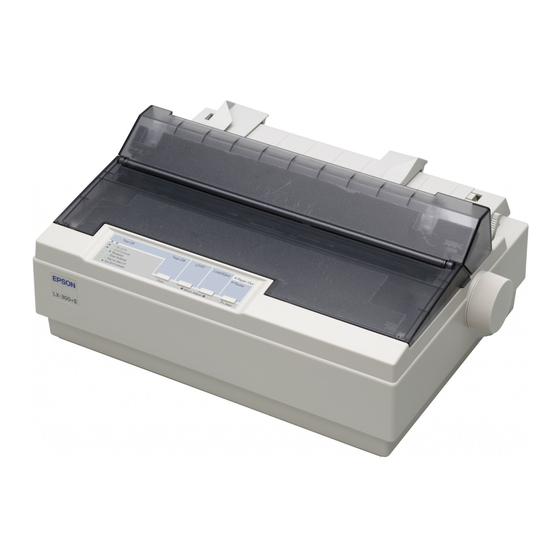
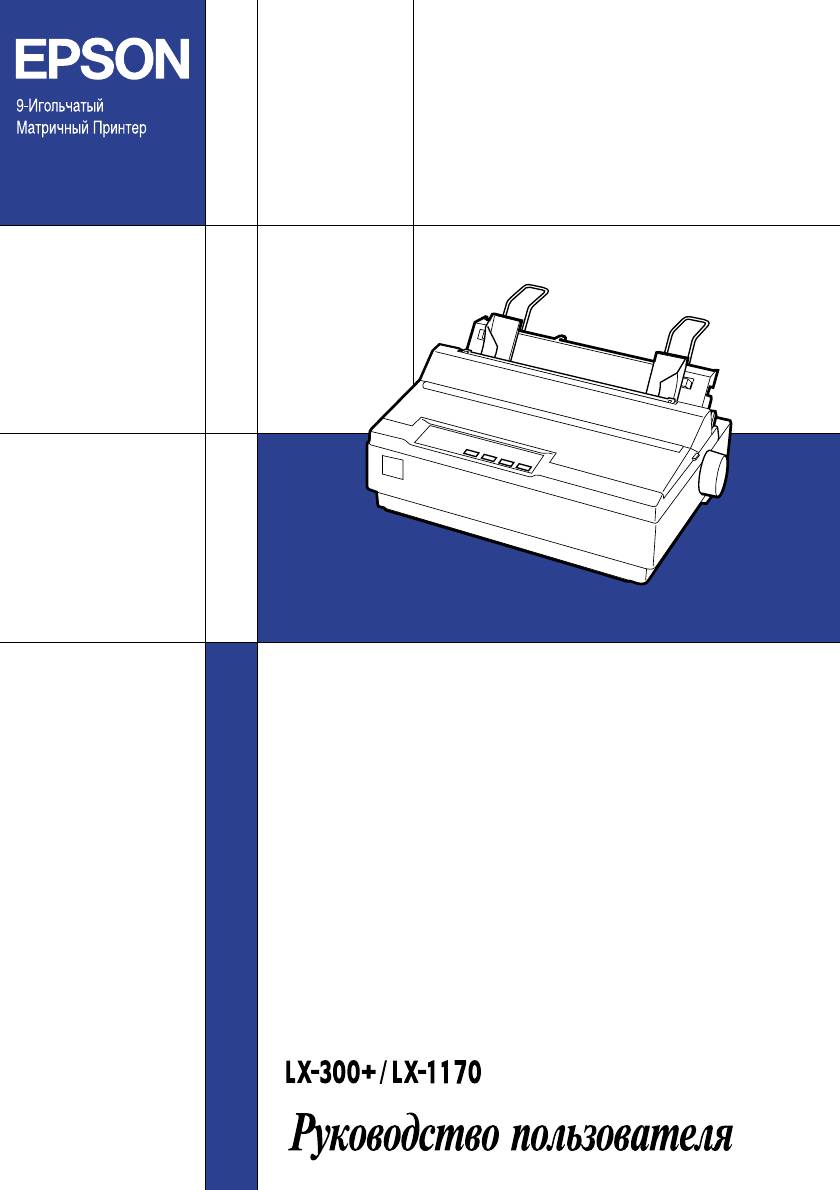
9-pin Dot Matrix Printer
User’s Guide
Related Manuals for Epson LX-300+II
Summary of Contents for Epson LX-300+II
-
Page 1
9-pin Dot Matrix Printer User’s Guide… -
Page 2
Seiko Epson Corporation. The information contained herein is designed only for use with this Epson printer. Epson is not responsible for any use of this information as applied to other printers. -
Page 3: Table Of Contents
Connecting the Printer ……..11…
-
Page 4
Declaration of Conformity ……. . . 47 Epson America, Inc., Limited Warranty ….. . 48… -
Page 5: Introduction
See the Reference Guide for more information. You can purchase ribbon cartridges, paper, manuals, and accessories ® from an Epson authorized reseller. To find the nearest reseller, call 800-GO-EPSON (800-463-7766). Or you can purchase online at www.epsonstore.com (U.S. sales) or www.epson.ca (Canadian sales). Introduction…
-
Page 6
Introduction… -
Page 7: Setting Up The Printer
Save all packing and protective materials in case you need to ship the printer in the future. Caution: Check the printer and other items carefully for tape and packing materials; there may be more than is shown above. Setting Up the Printer…
-
Page 8: Choosing A Place For The Printer
❏ Place the printer near a wall outlet where you can easily unplug the power cord. Position the power cord and interface cable so they do not interfere with paper feeding.
-
Page 9
Attach the paper guide by aligning the notches on each side with the tabs on the printer. Then lift up the paper guide and push it into the printer slightly to lock it in place. Attach the paper supports. To install the ribbon cartridge, you need to remove the printer cover. -
Page 10
Use your hand to slide the print head to the middle of the printer, then insert the ribbon cartridge as shown below and make sure it clicks into place. -
Page 11: Connecting The Printer
10. Replace the printer cover and close it. Connecting the Printer Attach the power cord and connect the printer to your computer as follows: Connect the power cord to the printer and to a grounded electrical outlet. Connect the printer to your computer using a USB, parallel, or serial interface cable, as shown on the following page.
-
Page 12
IEEE1284 (Parallel) Connect firmly and fasten the screw. RS-232C (Serial) Connect firmly and fasten. Note: You can connect cables to multiple interfaces simultaneously; the printer switches automatically to the correct interface when it receives data. Setting Up the Printer Connect firmly. -
Page 13: Installing The Printer Software
After you connect the printer to your computer, you need to install the printer software on the CD-ROM that came with your printer. The software includes the printer driver and Epson Status Monitor 3, which displays printer status information and notifies you of printer errors.
-
Page 14: For Dos Programs
To view the Reference Guide on your computer, do either of the following: ❏ Double click the LX-300+II Reference Guide icon on your desktop. ❏ Click Start > Programs (or All Programs ) > EPSON > LX-300+II Reference Guide > LX-300+II Reference Guide Setting Up the Printer to exit the installation.
-
Page 15: Paper Handling
Printing with the push tractor Follow these steps to load continuous paper on the push tractor: Turn off the printer. Remove the printer cover and the paper guide, and pull the paper release lever forward to the continuous paper position. Paper Handling…
-
Page 16
Unlock the sprockets on the tractor by pulling the blue lock levers forward. Slide the left sprocket so the pins are above the 0 mark on the printer scale (beneath the tractor). The printer starts printing to the right of the position marked 0. -
Page 17
Then slide the paper guide toward the front of the printer until you feel it click. 10. Replace the printer cover and close it. -
Page 18: Removing A Printed Document From The Push Tractor
23. Caution: Never use the paper feed knob to adjust the top-of-form position; this may damage the printer or cause it to lose the top-of-form position. The paper automatically feeds back to the loading position the next time you print.
-
Page 19: Switching Between Continuous Paper And Single Sheets
Follow the instructions on page 27 to load single sheets. To switch back to continuous paper, follow these steps: Press the Load/Eject button to eject any sheet in the printer. Move the paper release lever to the continuous paper position.
-
Page 20: Printing With The Pull Tractor
To load continuous paper using the pull tractor, you must move the tractor to the pull tractor position, as described below. If your tractor is already installed in this position, make sure the printer is turned off and skip to step 6.
-
Page 21
Lower the tractor onto the mounting slots at the top of the printer as shown below, and tilt it back until you feel it lock into place. Unlock the sprockets by pulling the blue lock levers forward. Feed the paper into the rear paper slot as shown below, and pull it up. -
Page 22
10. To separate the incoming paper from the printed paper, attach the paper guide. Hold it horizontally and fit its notches over the printer’s mounting posts. Then slide the paper guide toward the back of the printer until you feel it click. -
Page 23: Adjusting The Top-Of-Form Position
LF/FF button to advance the page to the next top-of-form position, and then see the next section to adjust the loading position. To eject the paper, tear off the paper entering the printer; then press the LF/FF button to feed the paper forward.
-
Page 24
Note: ❏ The printer has a minimum and a maximum top-of-form position. If you try to adjust it beyond these limits, the printer beeps and stops moving the paper. ❏ When the paper reaches the default top-of-form position, the printer beeps and stops moving the paper briefly. -
Page 25: Advancing Paper To The Tear-Off Edge
Note: If the Tear Off (Font) lights are flashing, the paper is in the tear-off position. If you press the Tear Off (Font) button again, the printer feeds your paper to the next top-of-form position. Advancing paper to the tear-off position automatically…
-
Page 26
Note: The printer has a minimum and a maximum tear-off position. If you try to adjust the tear-off position beyond these limits, the printer beeps and stops moving the paper. -
Page 27: Printing On Single Sheets
Note: Your tear-off position setting remains in effect until you change it, even if you turn off the printer. (If you want to restore the printer’s default tear-off position, you can reset the printer. See page 37 for instructions.) Printing on Single Sheets You can load single sheets of paper one at a time using the printer’s…
-
Page 28
The printer automatically pulls it into the correct printing position. When the printer receives data, it begins printing. If the document is more than one page, the printer beeps three times after printing each page. -
Page 29: Printing On Special Paper
Printing on Special Paper With the LX-300+II, you can print on a wide variety of special paper types, including multipart forms, labels, and envelopes. Caution: When printing on multipart forms, thicker-than-normal paper, labels, or envelopes, make sure your application software settings keep the printing entirely within the printable area.
-
Page 30: Multipart Forms
Never load continuous multipart forms joined by metal staples, tape, or continuous gluing. ❏ Use single-sheet multipart forms that are line-glued only at the top. Insert the forms glued-edge-first into the printer. ❏ Make sure that multipart forms are not wrinkled. ❏…
-
Page 31: Labels
❏ To remove the labels from the printer, tear off the fresh supply at the back of the printer; then press the LF/FF button to advance the remaining labels out of the printer.
-
Page 32
Paper Handling… -
Page 33: Using The Control Panel
❏ Load and eject paper ❏ Select a built-in font ❏ Change the printer’s default settings Buttons and Lights 1 Tear Off (Font) lights Flash when continuous paper is in the tear-off position; otherwise, the lights indicate the selected font.
-
Page 34
Flashes when paper has not been fully ejected or if paper is jammed in the printer. 7 Pause light ❏ On when the printer is paused. ❏ Flashes when the printer is in Micro Adjust mode. ❏ Flashes when the print head has overheated. Using the Control Panel… -
Page 35: Selecting A Built-In Font
It is best to use your application program to select the font you want to use in a document. However, you may sometimes need to select one of the printer’s six built-in fonts using the buttons on the control panel, as described below. (The settings you make in application programs usually override settings you make from the printer’s control panel.)
-
Page 36: Changing The Printer’s Default Settings
Changing the Printer’s Default Settings While you can often change the printer’s settings through your software or printer driver, you may sometimes need to change one or more of the printer’s default settings from the printer’s control panel using the Default Setting mode.
-
Page 37: Using Default Setting Mode
Make sure paper is loaded and the printer is off. Hold down the Tear Off ( Font ) button and then turn on the printer. The printer enters Default Setting mode and prints instructions for selecting the language. The current language is indicated by which control panel lights are on.
-
Page 38
Using the Control Panel… -
Page 39: Troubleshooting
Pause light, if necessary. No paper is loaded in the selected paper source. Load paper in the printer. Then press the Pause button to turn off the Pause light, if necessary. The paper is not loaded correctly.
-
Page 40
= on, f = flashing ••• = short series of beeps (three beeps) ••••• = long series of beeps (five beeps) Note: The printer beeps once if you press a control panel button when the corresponding function is not available. Troubleshooting Problem… -
Page 41: Clearing A Paper Jam
If continuous paper is jammed in the printer, tear off the fresh supply at the perforation nearest the paper entry slot. Gently remove any paper inside the printer, including any torn pieces. You can use the knob on the right side of the printer to help feed the paper out. Caution: Use the paper feed knob to clear paper jams only when the printer is off.
-
Page 42
Then turn off the printer. Caution: Do not turn off the printer while it is printing the self test. Always press the Pause button to stop printing and the LF/FF button to eject the printed page before you turn off the printer. -
Page 43: Where To Get Help
Where To Get Help If your Epson printer is not operating properly and you cannot solve the problem using the troubleshooting information, see the support information below. Internet support Visit Epson’s support website at http://support.epson.com and select your printer for solutions to common problems. You can download drivers and documentation, get FAQs and troubleshooting advice, or e-mail Epson with your questions.
-
Page 44
Troubleshooting… -
Page 45: Product Information
Do not place the printer on an unstable surface or near a radiator or heat source. ❏ Place the printer on a flat surface. It will not operate properly if it is tilted or placed at an angle. ❏ Do not block or cover the slots and openings in the printer’s cabinet, and do not insert objects through the slots.
-
Page 46: Fcc Compliance Statement For United States Users
❏ Unplug the printer before cleaning it, and always clean it with a piece of damp cloth only. ❏ Do not spill liquid onto the printer. ❏ Except as specifically explained in this guide, do not attempt to service the printer yourself.
-
Page 47: Warning
Declaration of Conformity According to 47CFR, Part 2 and 15 for Class B Personal Computers and Peripherals; and/or CPU Boards and Power Supplies used with Class B Personal Computers: Epson America, Inc. Located at: MS 3-13 3840 Kilroy Airport Way…
-
Page 48: Epson America, Inc., Limited Warranty
Epson also warrants that the consumable ribbon enclosed with the product will perform to the manufacturer’s specified usage, which usage may expire before the expiration of the limited warranty for the Epson product. For warranty service, you must provide proof of the date of original purchase.
-
Page 49
Epson Dealer or Epson Customer Care Center. You are responsible for all costs (shipping, insurance, travel time) in getting the product to the service location. -
Page 50
This warranty gives you specific legal rights, and you may also have other rights which vary from jurisdiction to jurisdiction. To find the Epson Authorized Reseller nearest you, visit our website at: www.epson.com. To find the Epson Customer Care Center nearest you, visit http://support.epson.com.
Раздел: Офисная Техника
Тип: Матричные Принтеры
Инструкция к Матричным Принтерам Epson LX-300
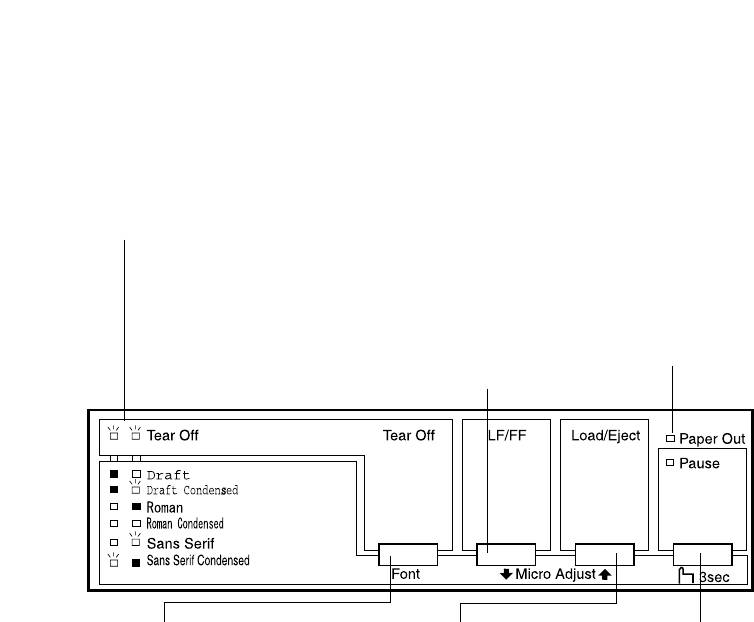
Кнопки и световые индикаторы панели управления
Индикаторы Tear Off
Кнопка LF/FF
Индикатор Paper Out
(Font) (Отрыв (Шрифт))**
(Перевод строки
(Нет бумаги)
/Перевод страницы)
Мигают, когда лента
Горит, если
•
•
находится на позиции
Если нажать на эту
в выбранный источник
•
отрыва, либо указывают
кнопку и отпустить ее,
не заложена бумага
на выбранный шрифт.
бумага продвинется
или, если бумага
вперед на одну
загружена
строку.
неправильно.
При удержании
Мигает, если бумага
•
•
нажатой кнопки лист
не выведена
будет выведен
из принтера до конца
из принтера, а лента
или принтер заклинен
продвинется к началу
замятой бумагой.
следующей страницы.
Кнопка Tear Off (Font)
Кнопка Load/Eject
Кнопка Pause (Пауза)
(Отрыв (Шрифт))**
(Загрузка/Выдача)
Приостанавливает печать
Протягивает ленту
Загружает лист
и после повторного
•
•
к позиции отрыва.
бумаги.
нажима возобновляет
печать. Удержите эту
Оттягивает ленту назад
Выводит лист, если он
•
•
кнопку нажатой 3 с, чтобы
от позиции отрыва
был загружен в принтер.
включить режим Micro
к позиции начала
Загружает ленту
•
Adjust (Микроподача)*.
страницы.
из позиции парковки.
Для выхода из режима
Оттягивает ленту назад
нажмите кнопку вновь.
•
на позицию парковки.
Индикатор Pause (Пауза)
Горит, когда принтер
•
приостановлен.
*Режим Micro Adjust (Микроподача)
Мигает, если включен
•
Если вы удержите кнопку Pause (Пауза) нажатой в тече-
режим Micro Adjust
ние 3 с, принтер войдет в режим Микроподачи. В этом
(Микроподача)*.
режиме вы можете нажимать кнопки LF/FF (Перевод
Мигает при перегреве
строки/Перевод страницы) и Load/Eject (Загрузка /Выда-
•
печатающей головки.
ча) для регулировки позиции начала страницы или отры-
ва. См. гл. 2, «Пользование принтером».
**Выбор шрифта
В режиме Micro Adjust (Микроподача) вы можете
выбрать шрифт для печати, нажимая на кнопку Tear Off
(Font) (Отрыв (Шрифт)). На выбранный шрифт
указывают горящие, погашенные или мигающие
индикаторы Tear Off (Font) (Отрыв (Шрифт)).
9-игольчатый ударный матричный принтер
Охраняется авторским правом. Никакая часть данной публикации не может быть воспроизведе-
на, записана в поисковой системе или перенесена в любой форме и любыми средствами, в том
числе электронными, механическими, фотографическими, записывающими или иными без пред-
варительного письменного разрешения от фирмы SEIKO EPSON CORPORATION. Содержащую-
ся в ней информацию можно использовать только на этом принтере EPSON. Фирма EPSON не
несет ответственности, если какая-то часть данной информации будет применена на других
принтерах.
Ни фирма SEIKO EPSON CORPORATION, ни ее филиалы не несут юридической ответственности
перед покупателем этого изделия или третьей стороной за повреждения и убытки, которые несут
покупатели или третья сторона в результате несчастного случая, неправильного пользования издели—
ем, его видоизменения или внесения в его конструкцию модификаций, не предусмотренных инст—
рукциями фирмы SEIKO EPSON CORPORATION по эксплуатации и техническому обслуживанию.
Фирма SEIKO EPSON CORPORATION не несет юридической ответственности за повреждения
или неполадки, возникающие в результате использования дополнительных устройств или расход-
ных материалов, кроме обозначенных фирмой SEIKO EPSON CORPORATION как Original EPSON
Products (оригинальные продукты фирмы «Эпсон») или EPSON Approved Products (продукты,
сертифицированная фирмой «Эпсон»).
EPSON и EPSON ESC/P — зарегистрированные товарные знаки фирмы SEIKO EPSON CORPORATION.
Microsoft, Windows и Windows NT Windows — зарегистрированные товарные знаки фирмы
Microsoft Corporation.
IBM — зарегистрированный товарный знак фирмы International Business Machines Corporation.
Общее уведомление: Другие названия продуктов используются здесь лишь для идентификации и
могут быть товарными знаками их соответствующих правообладателей. Фирма EPSON не пре-
тендует ни на какие права собствености по этим товарным знакам.
Copyright © 2001 by SEIKO EPSON CORPORATION, Nagano, Japan.
Напечатано на вторичной бумаге.
Руководство пользователя

Соответствие стандарту FCC на допустимые радиопомехи
Данный аппарат прошел испытания и признан соответствующим требованиям по подавлению
радиопомех, предъявляемым к цифровым устройствам Класса В согласно Части 15 Правил FCC,
введенных Федеральной комиссией связи США. Эти нормы направлены на обеспечение
разумной защиты от генерируемых радиопомех при установке принтера в жилых помещениях.
Принтер вырабатывает, потребляет и может излучать радиочастотную энергию, поэтому если его
не установить и не использовать в соответствии с инструкциями, он может создавать вредные
помехи приему радиовещательных и телевизионных передач. Однако нет гарантии, что помехи
не будут возникать в частном случае установки принтера. Если принтер действительно создает
помехи радиоприему и телевидению, что можно проверить, выключая и включая принтер в
электросеть, пользователь должен попытаться устранить эту неполадку одним из следующих
способов:
❑ Переориентировать или установить в другом месте приемную антенну
❑ Увеличить расстояние между принтером и приемником радио/телепередач
❑ Подключить принтер в другую розетку электросети, которая не питает приемник
радио/телепередач
❑ Проконсультироваться с дилером или опытным радио/телемастером.
ПРЕДУПРЕЖДЕНИЕ
При подключении принтера к компьютеру через неэкранированный интерфейсный кабель
пользователь лишается сертификата FCC на принтер, так как в этом случае могут быть
превышены нормы на допустимый уровень радиопомех, принятые Федеральной комиссией
связи США. Пользователь обязан приобрести и использовать для подключения принтера к
компьютеру экранированный интерфейсный кабель. Если у принтера имеется несколько
интерфейсных разъемов, отсоедините кабели от неиспользуемых интерфейсных портов.
Изменения или модификации, введенные пользователем без письменного разрешения от
производителя принтеров, лишают пользователя права эксплуатировать данный принтер.
ii

Декларация соответствия
Согласно своду федеральных постановлений 47CFR, Части 2 и 15, касающихся персональных
компьютеров и периферийных устройств Класса В и/или плат ЦПУ и источников
электропитания, применяемых на персональных компьютерах Класса В:
Мы: EPSON Seiko Corporation.
Адрес: 129110, Москва
ул. Щепкина, д. 42, стр. 2А
Офисный центр «Чайка-Плаза»
Телефон: (095) 777 0355, факс: (095) 777 0357
Заявляем в силу исключительной ответственности о том, что продукт,
обозначенный здесь, соответствует своду федеральных постановлений 47CFR
в Частях 2 и 15 и является цифровым устройством Класса В по правилам FCC.
Каждый продаваемый продукт идентичен образцовому изделию,
прошедшему испытания и признанному соответствующим установленным
стандартам. Регистрируемые характеристики продолжают указывать на то,
что от выпускаемых изделий можно ожидать стабильности результатов в
пределах допустимых вариаций вследствие серийности производства и
проведения испытаний на статистической основе, как того требуют правила
47CFR 2.909. Работа связана со следующими условиями: (1) это изделие не
должно вызывать вредных помех; (2) это изделие должно быть устойчивым к
восприятию вредных помех, включая помехи, которые могут вызывать
нежелательную работу.
Фирменное наименование: EPSON
Тип продукта: Ударный матричный принтер
Модель: P170A
iii