Содержание
- Скачать драйвер для 35mm Film Scanner
- 35mm Film Scanner
- Как установить драйвер?
- Универсальный драйвер для принтера и сканера компании Samsung
- Как установить в Windows 10
- Драйверы для сканеров
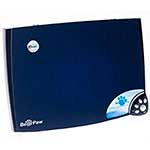
- Mustek BearPaw 2400CU Plus
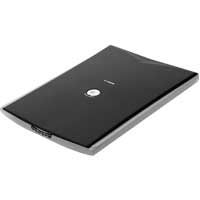
- Canon CanoScan LiDE 25
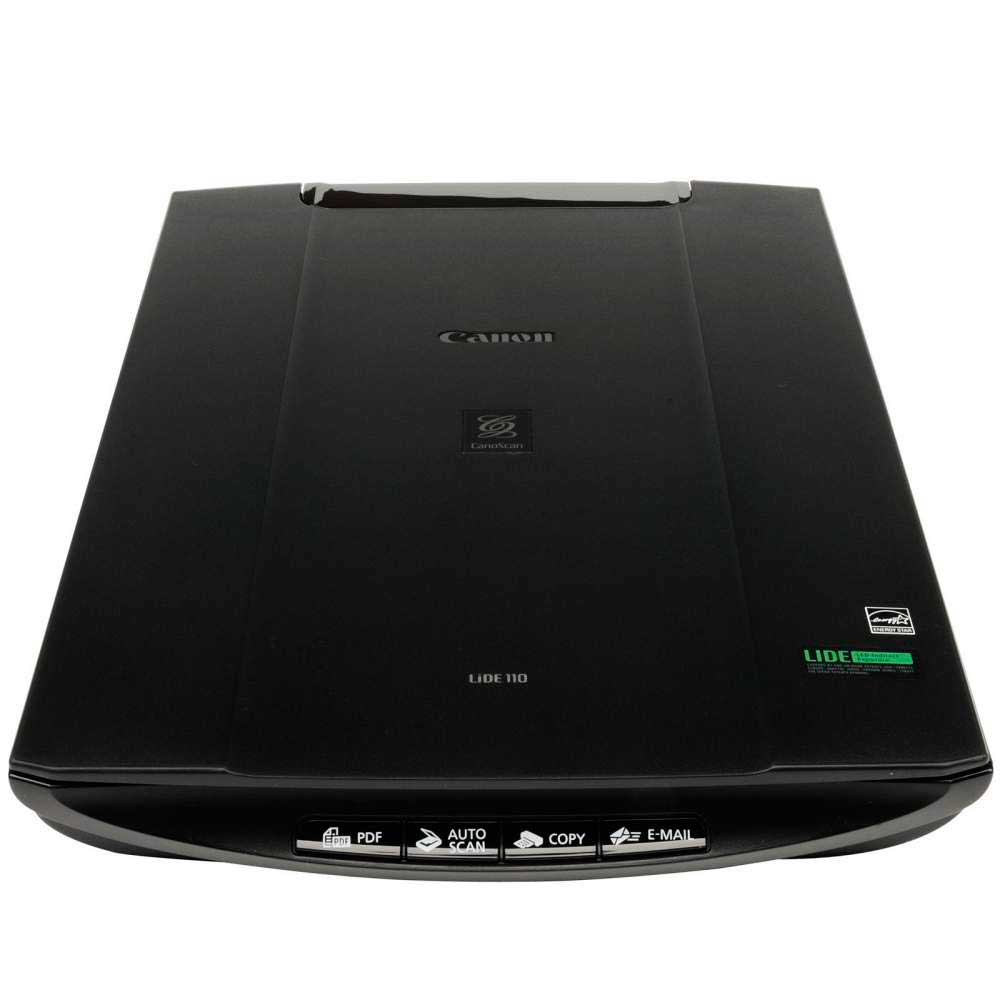
- Canon CanoScan LiDE 110
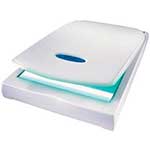
- Mustek 1200 UB / 1200 UB Plus
- HP Scanjet N6310
- Canon CanoScan 9000F
- Genius ColorPage-Vivid 1200XE
- Epson Perfection 1650
- Genius ColorPage-Slim 1200
- Canon imageFORMULA DR-M140
- Сканер Windows 10
- Где скачать сканер для Windows 10?
- Принцип работы сканера в Виндовс 10
- Видео по настройке встроенного инструмента
- Универсальный драйвер для принтера и сканера Samsung
- Для принтера
- Windows 2003-2016/XP-10
- Mac OS X 11.0
- Mac OS X 10.15
- Для сканера
- Windows 2003-2012/XP-10
- Установка
Скачать драйвер для 35mm Film Scanner
35mm Film Scanner
Драйвер это по своей сути связующее звено между операционной системой, то есть программным обеспечением и железом, то есть физическими устройствами, таким как видеокарты, принтеры, процессоры и т.д. В операционной системе могут быть заложены базовые драйвера для самых необходимых устройств — мышка, клавиатура, но для всего остального потребуются свежие драйвера.
Как установить драйвер?
a) Для начала надо на рабочем столе выбрать значок (Мой компьютер) и нажать по нему правой кнопкой мыши, в выпадающем меню выбрать (Свойства).
b) Теперь переходим на вкладку (Оборудование) и нажимает на кнопку (Диспетчер устройств).
c) Теперь необходимо выбрать устройство для которого будет устанавливаться/обновляться драйвер. На строке с устройством надо нажать правой кнопкой мыши и в выпадающем меню выбрать (Свойства), либо можно просто дважды по нему щелкнуть, чтобы перейти в нужные настройки.
d) Переходим на вкладку (Драйвер), выбираем кнопку (Обновить).
e) В появившемся диалоговом окне выбираем пункт (Нет, не в этот раз) и переходим (Далее).
f) На этом этапе есть два вариант. Можно попытаться установить драйвера в автоматическому режиме, тогда ОС сама попытается найти подходящие устройству драйвера и установить их, для этого выбираем (Автоматическая установка (рекомендуется)) , если попытка завершится неудачно, то надо переходить ко второму пункту (Установка из указанного места) и выбираем (Далее).
g) Этот пункт меню подразумевает выбор между поиском драйвера на сменных носителях и вариантом указать папку с драйвером самостоятельно. Поэтому если в наличии есть диск с драйверами, то надо вставьте диск в CD-rom и выбрать вариант (Поиск на сменных носителях (дискетах, компакт-дисках..)) и перейти (Далее).
Если драйвер найден и скачен в интернете самостоятельно, то надо указать в ручную путь к папке в которой находятся установочный данные для драйвера следующим образом. Выбираем пункт (Включить следующее место поиска:) и переходим в (Обзор), теперь из списка выбираем папку с драйвером и кликаем на кнопку (ОК). Теперь смело переходим (Далее), если все сделано правильно, то начнется установка необходимого драйвера.
Универсальный драйвер для принтера и сканера компании Samsung
 Если вы не сможете установить драйвер по ссылкам ниже, то можете установить драйвер для Windows 7/ 8 / 8.1 / 10 с помощью базового драйвера. Подробнее читайте в нашей статье. Или изучите установку драйвера без диска (статья).
Windows 10 / 8 / 8.1 / Vista / 7 / 2003 / 2008 / 2012 / 2016 — для работы принтера
Варианты разрядности: x32/x64
Нажмите для скачивания (рекомендуем): Samsung-all-drivers
Нажмите для скачивания (рекомендуем): Samsung-all-XPS
Нажмите для скачивания (рекомендуем): Samsung-all-PS
Нажмите для скачивания (рекомендуем): Samsung-all-PCL6
Windows 10 / 8 / 8.1 / Vista / 7 / 2003 / 2008 / 2012 / 2016 — для работы сканера
Варианты разрядности: x32/x64
Нажмите для скачивания (рекомендуем): Samsung-all-scan
Как установить в Windows 10
Производитель сканеров и принтеров Samsung создал универсальную программу Universal Print Driver. С ее помощью вы сможете настраивать и устанавливать любые модели оборудования компании. После инсталляции, можно отправлять документы на разные устройства, делать отчеты, просматривать историю, она сама будет делать автоматические настройки, вы их даже не заметите. Разработчики продукта сделали удобный интерфейс, в котором вы разберетесь без инструкций. Установка проходит в несколько простых шагов, обновление программы делается автоматически.
Дистрибутив создан в разных вариантах, если вы не знаете, что именно вам надо, используйте для загрузки первую ссылку.
Нажмите на ссылку, чтобы скачать драйвер Samsung Universal Print Driver. Выберете место сохранения на диске, можете поместить его на рабочий стол для простоты поиска. Теперь запускайте экзешник и повторяйте шаги. В инструкции вы увидите картинки, они могут иметь ряд различий с тем, что вы увидите на своем мониторе, так как интерфейс для разных моделей может различаться.
После запуска программы подождите появления первого окна, так кликните около слова «Установить», потом на «Ок».
Внизу окна есть пустой квадратик, нажмите на него, чтобы появилась галочка, потом жмите «Далее».
В новом окне выберете пункт в зависимости от вашей ситуации. Если вы первый раз делаете установку, щелкните около слов «Новый принтер». Второй пункт подходит для случая, если надо найти принтер, а последний, для установки программы без подключения устройства. После выбора, жмите «Далее».
Выбираем подключение через «USB», жмите «Далее».
Включите устройство и соедините его с компьютером, потом снова на «Далее».
Начнется установка, она может длиться несколько минут. Когда процесс закончится, нажмите на «Готово».
Драйверы для сканеров
Данный раздел содержит в себе самые свежие драйвера и утилиты для сканеров от Canon, Epson, HP и других производителей. Любой драйвер вы сможете скачать абсолютно бесплатно по ссылкам ниже под операционную систему Windows.
Mustek BearPaw 2400CU Plus
Mustek BearPaw 2400CU Plus — очередная модель сканера от компании Mustek, который обладает достаточно высокой производительностью на свою цену. Вы сможете с легкостью отсканировать нужный вам документ либо фотографию, а с помощью дополнительного ПО.
Canon CanoScan LiDE 25
Canon CanoScan LiDE 25 — функциональная модель сканера, который на сегодняшний день не выпускается, но владельцев сканера от этого меньше не стало. Данный сканер в полной мере справляется с поставленными задачами и имеет высокую производительность.
Canon CanoScan LiDE 110
Canon CanoScan LiDE 110 — более новая модель сканера от популярной и одной из лучших компаний Canon. Данный сканер немного улучшен по сравненияю с предшественниками но для его работы и для отображения сканера на компьютере необходима установка.
Mustek 1200 UB / 1200 UB Plus
Mustek 1200 UB / 1200 UB Plus — две достаточно старенькие модель сканера, которых входит в бюджетный сегмент и способен полностью решить вопрос со сканирование документов и изображений. Также стоит отметить сдержанный дизайн и качественное.
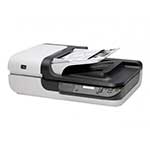
HP Scanjet N6310
HP ScanJet N6310 — еще одна популярная модель сканера, который был анонсирован на рынке компанией Hewlett Packard и стал достаточно удачной моделью. В первую очередь отмечается высокая производительность и стильный дизайн, вы с легкостью сможете.
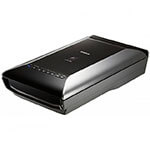
Canon CanoScan 9000F
Официальный драйвер для сканера Canon CanoScan 9000F, который считается универсальным и поддерживает все версии операционной системы Windows. Установка данного драйвера предельно простой и максимально автоматизированный процесс, потому проблем.
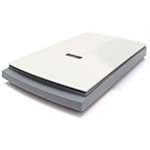
Genius ColorPage-Vivid 1200XE
Genius ColorPage-Vivid 1200XE — довольно старый но все еще пользующийся большим спросом сканер, который как и другие нуждается в установке драйвера на компьютер для его определения операционной системой Windows. Процесс установки драйвера предельно.
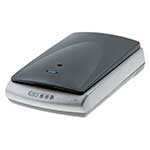
Epson Perfection 1650
Epson Perfection 1650 — достаточно громоздкий но функциональный сканер, который предназначен для сканирования документов и фотографий что собственно позволяет перевести его в электронный вариант. Для определения сканера компьютером и для возможности.
Genius ColorPage-Slim 1200
Genius ColorPage-Slim 1200 — стильный, компактный и производительный сканер, позволяющий мгновенно произвести сканирование фотографии или документам с отличным качеством. Данный драйвер позволяет вашему компьютеру и операционной системе Windows.
Canon imageFORMULA DR-M140
Canon imageFORMULA DR-M140 — производительный офисный помощник, который предоставляем возможность производить быстрое цветное сканирвоание печать документов. Стоит отметить компактный размер и стильный дизайн, но перед использование.
Сканер Windows 10
- Категория: Утилиты
- Операционная система: Windows 10
- Ключ: Не требуется
- Русский язык: Есть
- Лицензия: Бесплатно
- Загрузок: 35 138
Скачать Сканер Windows 10 бесплатно
Сканирование документов на компьютере обеспечивается с помощью нескольких компонентов: функционального устройства (самостоятельного сканера или в составе МФУ), драйверов и программного интерфейса. Сканер в windows 10 отличается новым интерфейсом и дополнительными возможностями. Располагается он на прежнем месте — в «Панели управления». Там перечислен список подключенных факсов, принтеров и сканеров. Интерфейс приложения довольно удобный, но он больше ориентирован под факсы — на стартовом экране отображается список входящих/отправленных писем. Переключение на вкладку сканирования можно в левом нижнем углу интерфейса.
Где скачать сканер для Windows 10?
По умолчанию у каждого производителя оборудования есть своя утилита для печати/создания электронных копий печатного документа. В связке с ABBYY FineReader можно сканировать любые файлы и создавать на компьютере архив любого размера. Загрузить программное обеспечение можно на официальном сайте фирмы-поставщика оборудования или же воспользоваться запасным вариантом. В «Windows Store» есть приложение «Сканер» с минимальным набором настроек. Пользователь может подключать планшетный или любой тип устройства, выбирать активный девайс и тип выходного файла (PNG, JPG). Доступен предварительный просмотр и кнопка запуска распознавания.

Принцип работы сканера в Виндовс 10
Для корректного функционирования устройства нужно подключить его через USB или Bluetooth адаптер к компьютеру/ноутбуку и установить правильные драйвера. Чтобы не тратить много времени на поиск подходящего компонента, воспользуйтесь автоматизированным решением вроде DriverPack Solution. Софт проанализирует список подключенных устройств и подберет оптимальное программное обеспечение.
После успешного подключения нужно будет зайти в «Принтеры и факсы», настроить параметры сканирования и запустить процесс. Документ будет отображаться в общем списке, и его можно сохранить в любом формате или переместить в папку на рабочем столе.

Видео по настройке встроенного инструмента
В видео ролике наглядно проиллюстрирован процесс работы со стандартным интерфейсом факса/сканера. Он даст базовые знания, после просмотра вы сможете повторить шаги со своим устройством.
Инструмент для распознавания документов от Microsoft вполне заслуживает внимания. Можно пользоваться им или установить софт от производителя оборудования. Для базовых задач вполне подойдет и стандартная программа, если же нужно еще и редактировать изображения: менять ориентацию, наносить текст и фигуры, то не получится обойтись без более функциональной утилиты.
Универсальный драйвер для принтера и сканера Samsung
Если вам нужны только основные функции — возможность печатать и сканировать, то можно установить универсальный драйвер. Это программное обеспечение подходит ко всей печатной технике Samsung. То есть, вы можете установить на свой компьютер универсальный драйвер для принтера и/или сканера и, подключившись к любому устройству Samsung, распечатывать или сканировать.
Если ваш компьютер подключен к нескольким печатающим устройствам Samsung, то, установив универсальный драйвер, вы сможете использовать любое устройство.
Условия использования ПО в лицензии НР .
Для принтера
Windows 2003-2016/XP-10
Разрядность: 32/64
Язык: Русский + Другие
*Не поддерживает Windows XP.
Mac OS X 11.0
Язык: Русский + Другие
Версия: 3.93.01
Дата: 11.02.2021
Mac OS X 10.15
Язык: Русский + Другие
Версия: 3.92.00
Дата: 16.09.2020
Для сканера
Windows 2003-2012/XP-10
Разрядность: 32/64
Язык: Русский + Другие
Версия: 1.02.19
Дата: 01.11.2017
Установка
Скачиваете драйвер. Заходите с правами администратора в систему. Подключаете принтер к компьютеру. Запускаете скачанный файл. В сообщении контроля учетных записей — разрешаете установку. Выйдет окошко ниже. Выбираем «Установить».
Запустится программа установки. «Далее».
В параметрах установки нажимаете «Далее».
Программа найдет подключенный к ПК принтер и установит драйвер.
Используя этот сайт, вы соглашаетесь на использование файлов cookie. Больше информации — в нашей Политике конфиденциальности.
Выберите язык
Домашняя страница Joom
Войти
Мои заказы
Корзина
ГлавнаяКаталогЭлектроникаОргтехникаСканеры

Товар больше не доступен
Вернуться на главную
Похожие товары

Sale 🔥
7 дней
-63 %
15-27 июл
Цена 4 131 ₽ руб.
Цена 11 230 ₽ руб.
135 Пленка Слайд Сканер Конвертер Портативный Негативный Сканер Пленки 8 Мегапиксель CMOS Конвертировать 35mm135mm

-50 %
Цена 434 ₽ руб.
Цена 867 ₽ руб.
PD 45W USB C Зарядное устройство Быстрая зарядка Зарядное устройство Тип C Быстрая зарядка 3.0 для Iphone 14 Pro Xiaomi Samsung Мобильные телефоны Зарядные устройства

-70 %
Цена 461 ₽ руб.
Цена 1 536,67 ₽ руб.
Usb c Зарядное устройство 20W PD Быстрая зарядка для iPhone 14 13 12 11 Тип C зарядное устройство pulg Адаптер быстрой зарядки для Xiaomi Huawei Samsung

Sale 🔥
7 дней
-61 %
Цена 781 ₽ руб.
Цена 2 005 ₽ руб.
300 Мбит / с Беспроводной Wi-Fi Ретранслятор AP Маршрутизатор Усилитель сигнала Расширитель диапазона ЕС / США Штекер

-55 %
Цена 416 ₽ руб.
Цена 918 ₽ руб.
2 PD USB зарядное устройство Двойной тип C USB зарядное устройство Быстрая зарядка 3.0 для iPhone 14 Pro Xiaomi Samsung Адаптер мобильного телефона

Sale 🔥
7 дней
-63 %
Цена 5 272 ₽ руб.
Цена 14 375 ₽ руб.
32G SD карта хранения 135 мм / 35 мм ЖК-экран слайд негативная пленка сканер конвертер

-48 %
Цена 307 ₽ руб.
Цена 590 ₽ руб.
Спорт Dv Экшн Камера Камера Зарядное устройство для Sj4000 H9R

Sale 🔥
3 дня
-42 %
Цена 8 259 ₽ руб.
Цена 14 200 ₽ руб.
Xprinter XP-365BLabel Принтер термограф штрих-кодов Принтер наклеек 20-80 мм Бумага в супермакете для Windows / Linux

-70 %
Цена 214 ₽ руб.
Цена 713,33 ₽ руб.
USB 3.0 Type-C OTG Кабельный адаптер Тип C USB-C OTG Преобразователь для Xiaomi Mi5 Mi6 Huawei Samsung Мышь Клавиатура USB Disk Flash

-60 %
Цена 516 ₽ руб.
Цена 1 290 ₽ руб.
Двойной USB-источник питания 12-24 В 3,1 А для автомобиля, лодки, мотоцикла, универсального зеленого света

Sale 🔥
7 дней
-71 %
Цена 340 ₽ руб.
Цена 1 166,67 ₽ руб.
Регулируемый держатель телефона Клип Кронштейн Зажим Крепление для селфи Монопод штатив

-60 %
Цена 1 291 ₽ руб.
Цена 3 227,50 ₽ руб.
Силиконовые защитные чехлы для eufyCam серии AntiScratch камеры защитные крышки давая безопасности

-60 %
Цена 1 417 ₽ руб.
Цена 3 542,50 ₽ руб.
20 В 2,25 А 45 Вт ноутбук с круглым наконечником адаптер питания подходит для Lenovo US Plug 100V-240V

Sale 🔥
7 дней
-50 %
QGeeM
Цена 826 ₽ руб.
Цена 1 665 ₽ руб.
65 Вт USB-зарядное устройство Быстрая зарядка QC 3.0 PD 3.0 Настенная зарядка 5 портов Великобритания ЕС Штепсельный адаптер

-60 %
Цена 1 974 ₽ руб.
Цена 4 935 ₽ руб.
Dodocool AC750 Двухдиапазонный беспроводной Wi-Fi AP / ретранслятор / маршрутизатор высокое качество

Sale 🔥
7 дней
-56 %
Цена 562 ₽ руб.
Цена 1 288 ₽ руб.
2шт Регулируемый настенный держатель для планшета Универсальная подставка для телефона Стойка

Sale 🔥
7 дней
-39 %
Essager
Цена 1 215 ₽ руб.
Цена 2 000 ₽ руб.
USB Тип C Быстрое зарядное устройство 30W QC PD 3.0 Двухпортовый мини портативный адаптер для iPhone 14 13 12 iPad Xiaomi Быстрые настенные зарядные устройства

-70 %
Цена 315 ₽ руб.
Цена 1 050 ₽ руб.
Телефон штатив Крепление адаптер Держатель телефона Держатель Клип с двойной 1/4 резьбы Холодная обувь для штатива Селфи

-60 %
Цена 337 ₽ руб.
Цена 843 ₽ руб.
Бленда объектива Ew-60E Ew60E для Canon EOS M M2 M3 Ef-M 11-22Mm f/4-5.6 IS STM 55Mm

-53 %
Цена 1 180 ₽ руб.
Цена 2 502 ₽ руб.
Показать ещё
Оценок — 3
, средний балл: 2.7
()
Инструкция по эксплуатации Acer, модель Film Scanner
Фрагмент инструкции
Step 2. Place original on the holder Place the film in the film holder. Two types of film holders are supplied with your film scanner. You can select the appropriate film holder that fits the type of your film: Note: When you place the film/slide in the filmstrip/slide holder, make sure that the film/slide is free from dust. You may also want to check that the film/slide is cleaned properly. If you want to scan a filmstrip: You can use the filmstrip holder (the holder with 6 rectangular lattices and a FILM mark) to place your filmstrip. F I L M P U S H C L O S E Filmstrip holder Pull the handle on the cover to open the cover. 9 English Place the filmstrip on the filmstrip holder with the emulsion side facing up. Close the cover and push the “PUSH CLOSE” mark at the middle of the cover. You will hear a click when the cover is secured. PUSH PUSHPUSH Insert the filmstrip holder into the holder insertion slot. 10 English If you want to scan slides: You can use the slide holder (the holder with 4 rectangular lattices and a SLIDE mark) to place your slide. Slide holder Pull the handle on the cover to open the cover. Then place the slide on the slide holder with the emulsion side face up. When you place the slide in the lattice, insert the lower left corner of the slide into the plastic stopper, then push the slide into the lattice until it is firmly fixed. You can place up to 4 slides in the slide holder. 11 English Close the cover and push the “PUSH CLOSE” mark and the middle of the cover. You will hear a click when the cover is secured. P U S H P U SH Insert the slide holder into the holder insertion slot. Step 3. Scan Now you can either push the SCAN button to activate automatic preview, or manually open an image editing software to activate MiraPhoto and do the preview: 12 English To use SCAN button: Push the SCAN button on the film scanner front panel. A dialogue box will pop up on the screen asking you to choose an image editing software to use. Choose the application you want to use and then click OK. Note: if you have only one image editing software installed in your computer, this dialogue box will be skipped. The application you choose will be activated. Meanwhile, MiraPhoto will start to preview the original. To preview manually: (1) Open your image editing application software. (2) From “File” menu, choose “Scanner”, “Select source” or “Select TWAIN_32 source” to select MiraPhoto as the TWAIN image source. (This differs according to the application you use) (3) Choose “Scan”, “Acquire” or “TWAIN_32 source” (this also differs according to the application you use), MiraPhoto will pop up on the screen. Click “Preview” to preview the original. According to the original you scan, choose an appropriate image type from the “Image Type” drop-down listbox in MiraPhoto. Specify a scanning resolution in the “Resolution” drop-down listbox and adjust the size and position of the dotted rectangle in the Preview Area to specify a scan area. Click «Scan» to start scanning the original. Step 4. Edit When scanning has completed, MiraPhoto will import the images into your image editing software. You can now close MiraPhoto and begin editing or saving the image. 13 English 14 English Chapter 4. Using MiraPhoto You can access MiraPhoto through your image editing applications. When you click “Acquire” or “Scan” in your application, the MiraPhoto main screen will appear: Menu Bar Image Thumbnail Area Tool Buttons Combo Boxes Film Selection Area Control Buttons Job Info ButtonPreview Area The following sections in this chapter will describe MiraPhoto in more detail. 15 English Menu Bar There are three selectable menu items in the Menu Bar. Each menu item contains several options in its submenu: File submenu MiraPhoto can record the settings you make for each scan session in a configuration file. With this feature, you can specify different settings for each individual scan job in a configuration file. You can then load the configuration file when you want to apply the settings. For example, you can save the settings you make for scanning artwork films in a configuration file called “Artwork”. The next time you want to scan artwork films, you can load the “Artwork” configuration file, and MiraPhoto will apply the settings recorded in it. Load Config… Load the configuration file you created. When the configuration file is loaded successfully, MiraPhoto will apply the settings recorded in the configuration file automatically. Save Config… Save current MiraPhoto settings to the configuration file Save Config As… Save current MiraPhoto Settings as another new configuration file. Usually you can create a new configuration file in this way. You can designate different file names for each configuration file. Reset Config When you select this item, the settings you make in MiraPhoto will reset to their default value. Auto Save Config When you select this item, your settings will be saved automatically in a configuration file a…
- Page 1
English Français Deutsch Italiano Español Film Scanner User’s Manual… -
Page 4: Important Safety Instructions
Copyright Copyright © 1999 by this company. All rights reserved. No part of this publication may be reproduced, transmitted, transcribed, stored in a retrieval system or translated into any language or computer language, in any form or by any means, electronic, mechanical, magnetic, optical, chemical, manual or otherwise, without the prior written permission of this company.
- Page 6
FCC Information The Federal Communication Commission Radio Frequency Interference Statement includes the following paragraph: This equipment has been tested and found to comply with the limits for a Class B Digital Device, pursuant to Part 15 of the FCC Rules. These limits are designed to provide reasonable protection against harmful interference in a residential installation. - Page 8
Eject button… 23 Zoom button… 23 Preview button… 23 Scan button… 23 Exit button … 23 … 24 UTTONS Film Type button … 24 Flip button… 24 Rotate button … 25 Mirror button … 25 Crop button … 25 Color Enhancement Tools button … 26 Invert button… - Page 10
English … -
Page 12: 1.2 Hardware Introduction
Friendly and Smart Driver MiraPhoto is the driver for your ScanWit film scanner. Its easy and instinctive interface design allows you to proceed with your scanning job quickly. You can also use it to adjust the scanning parameters efficiently. Its powerful functions can help you to optimize the scanned image for your specific purpose.
-
Page 14: Rear Panel
Ventilation holes These holes are used to ventilate the heat from inside of the film scanner. Do not block these holes when the film scanner is in use. SCSI ID selector You can use the SCSI ID selector to select the SCSI ID of your film scanner.
-
Page 16: 1.3 Software Introduction
English 1.3 Software Introduction MiraPhoto is the driver program for your scanner. It is TWAIN compliant and designed to be user-friendly. With its iconlized user- interface and fully logical task-flow design, you can complete a satisfactory scanning job with only a few mouse clicks. With MiraPhoto, you can: Preview, scan and import the scanned image into your image editing software.
-
Page 18: Step 3 Test The Scanner
Step 3 Test the scanner Turn the scanner power on by depressing the power button on the front panel of the scanner. You may notice that the scanner will start to perform a self-test, and the LED indicators will blink for a few seconds.
- Page 20
English Place the filmstrip on the filmstrip holder with the emulsion side facing Close the cover and push the “PUSH CLOSE” mark at the middle of the cover. You will hear a click when the cover is secured. Insert the filmstrip holder into the holder insertion slot. -
Page 22: Step 3. Scan
Close the cover and push the “PUSH CLOSE” mark and the middle of the cover. You will hear a click when the cover is secured. Insert the slide holder into the holder insertion slot. Step 3. Scan Now you can either push the SCAN button to activate automatic preview, or manually open an image editing software to activate MiraPhoto and do the preview:…
- Page 24
English … -
Page 26: Menu Bar
Menu Bar File submenu Load Config… Load the configuration file you created. When the configuration file is loaded successfully, MiraPhoto will apply the settings recorded in the configuration file automatically. Save Config… Save current MiraPhoto settings to the configuration file Save Config As……
-
Page 28: Monitor Gamma
English Monitor Gamma Generally, a monitor cannot display the real colors of an image in the real world. In order to have the monitor approximate the colors as close as possible, you may need to adjust the monitor gamma. Adjustment of the monitor gamma can make the monitor approximate the colors of the original image more closely.
-
Page 30: Image Thumbnail Area
Image Thumbnail Area The Image Thumbnail Area displays thumbnail images of each previewed scan. Click on the thumbnail image and the image will be displayed in the Preview Area. You can select the image you want to scan by clicking the red dot at the upper right corner of the thumbnail.
-
Page 32: Scan Mode Box
Frame You can click the number of the frame you want to scan. You can select multiple frames and the film scanner will scan all the images you selected. MiraPhoto will display the frame(s) selected in green. Click to select all the images in the Image Thumbnail Area for scanning.
-
Page 34: Tool Buttons
Tool Buttons Tool Buttons provide a full range of tools and image effect options to optimize the scan quality. Film Type button When this button is clicked, the Film Type dialog box will appear: If you do not know the type of your film or if your film type is not listed, select Generic from the drop-down list.
-
Page 36: Color Enhancement Tools Button
English Color Enhancement Tools button Click this button to activate the Tool Bar which contains the buttons for the following tools: Invert button Click this button to get an inverted image: Original image Image after Invert is applied…
-
Page 38: Color Balance Button
Color Balance button Click this button to evoke the Color Balance dialog box: To adjust the color balance, you will want to first select the channel you want to adjust, then drag the triangles under the three color bars. In addition, you can also enter the desired values directly into the three entry boxes to the right of the color bars to adjust the color balance.
- Page 40
Entry Box While you drag within the Color Wheel to choose the hue and saturation of color or drag the triangle below the Lightness Bar to specify the lightness of color, the related information will also be shown in the Entry Boxes. - Page 42
The original image and its Tonal Map. The curve is straight and diagnal. You can also click the curve to add new points and further change the shape of the curve: Click to add a new point. Input/Output Status Area You can read the precise input/output value here. - Page 44
Brighter images have brighter pixels, therefore the bars in the right are higher than that in the left. In addition, if we take a look at the two images below: Image 1 We notice that in Image 1, there is higher contrast between the brighter and darker part of the image;… - Page 46
If the Input Level is set as 20 to 230, then you may represent a total of 210 (230 minus 20) color levels in the image. If you set the Output Level as 10 to 250, you can “expand” the original 210 levels of color to 240 levels (250 minus 10). -
Page 48: Color Wizard Button
Color Wizard button The Color Wizard button offers two quick and convenient tools for you to adjust the overall quality of the scanned image: Auto Density: if you choose this item, MiraPhoto will optimize the density of the image automatically. Apply all button Click on the Apply All button to apply the setting changes you make in the Tool Bar to all images.
- Page 50
English … -
Page 52: Getting Started
English Getting Started To run Photo Express, double click the Photo Express icon on your Windows desktop or open from Windows Start Menu. When you run Photo Express, make sure that the monitor display is at a resolution of 800×600 or 1024×768 and Hi Color (15/16 bit) or True Color (24 bit) mode.
-
Page 54: Getting Images
Getting Images The first thing you want to do when you start Photo Express is to get the photos you want to work with into the actual program. The place you start is with Album. From here, you can do almost anything in Photo Express. All other ways of getting photos can work independently of Album, but they are also set up to let you capture or open images directly to it.
-
Page 56: Working On Images
Working on Images Adjusting Images After you have acquired an image from a scanner or digital camera, it may need some adjustments. Photo Express provides you with the perfect tool for adjusting your photos: the Transform tool. To re-align a photo: .To freely rotate a photo, select the spin wheel in the upper right or lower left corner of the photo and rotate into position.
-
Page 58: Sharing Images
Sharing Images Printing Images Once you have put the finishing touches onto your photos, it is time to print them out. Photo Express contains numerous printing options, letting you output posters and name cards in addition to its regular printing duties. To print an image: You can also print album thumbnails.
-
Page 60: Express Your Images
Express Your Images Create Calendars One of the easiest tasks to accomplish in Photo Express is making calendars, either for your Windows desktop or for your real desktop. They are great for keeping your loved ones close, in addition to being a convenient way to keep track of important dates in style.
-
Page 62: Working In Project Mode
Working in Project Mode The Project mode gives you a focused environment in which to create custom greeting cards, calendars, invitations, birthday and anniversary cards, name cards, and planners. The Project mode is useful for getting through a “project” as quickly and efficiently as possible. It is where Photo Express lives up to its name, speeding you through all the necessary tasks while keeping all the unnecessary or extraneous components secure in the background.
-
Page 64: Adding Decoration
Adding Decoration One category of tools on the Edit menu in Project mode is unique to that tab: Decoration. These are special, object-based effects such as Frames, Edges and Props you can use to enhance photo objects in a project. To add special edge effects to a photo object: To add frame to a photo object: Select a photo object.
-
Page 66: Sharing Templates
Sharing Templates Sharing templates works exactly the same way as sharing photos in Photo mode. You can print, e-mail, fax, or output them to web pages. For more on these tools, see the online help and related documents. To e-mail a template: To fax a template: To output a template as a Web page: Click the Share: E-mail button on the…
-
Page 68: 6.2 Faq
If you find that your ScanWit film scanner uses the same SCSI ID number with another SCSI device, you must either change the SCSI ID number of your scanner or that of the other SCSI device. To change the SCSI ID number of your ScanWit film scanner: 1.
-
Page 70: Appendix
Interface Platform Power Consumption Net Weight Dimension Film scanner with color-CCD optical module Color — 3 s Color — less than 10 ms / line — less than 38 s/ 35mm film, 2700 dpi Color — 3s for 35mm film…
Page 3
English Film Scanner User’s Manual…
Page 5
This product should be operated from the type of power indicated on the marking label. If you are not sure of the type of power available, consult your dealer or local power company. Do not allow anything to rest on the power cord. Do not locate this product where persons will walk on the cord.
Page 7: Table Of Contents
CHAPTER 1. INTRODUCTION… 1 1.1 F … 1 EATURES 1.2 H ARDWARE NTRODUCTION Front Panel … 2 Rear Panel … 4 1.3 S OFTWARE NTRODUCTION CHAPTER 2. INSTALLATION … 7 1. I SCSI NSTALL THE 2. C ONNECT THE SCANNER TO YOUR COMPUTER EST THE SCANNER 4.
Page 9
English … 60 RODUCT PECIFICATION MiraPhoto Quick Reference Map Menu Bar Image Thumbnail Area Tool Buttons page 16 page 20 page 23 Combo Boxes page 20 Film Selection Area page 22 Control Buttons Preview Area page 23 page 39…
Page 11: Chapter 1. Introduction
1.1 Features Congratulations on your purchase of the ScanWit film scanner! The ScanWit film scanner is the utmost cost-effective solution for film scanning. Its high capability is bound to boost your scan job efficiency significantly. It is equipped with the following unique features:…
Page 13: Led Indicators
READY: When the film scanner is powered on and ready to scan, this LED indicator will remain on, indicating that you can start to scan. Holder insertion slot You can insert the filmstrip/slide holder through this slot for scanning.
Page 15
This is a 25-pin SCSI connector. Use this connector to connect other SCSI devices from the film scanner. Note: when you position the ScanWit film scanner, be sure to leave the space illustrated below to ensure that the film/slide holder moves into/out of the film scanner without being blocked by any object.
Page 17: Chapter 2. Installation
Chapter 2. Installation Please follow the steps below to set up your ScanWit film scanner: Step 1. Install the SCSI interface card Power off your computer and disconnect the computer power from the power outlet. Open the computer cover and locate the PCI slot of your computer.
Page 19: Chapter 3. Making Your First Scan
Step 1. Test the scanner Turn on the power of your film scanner, then your computer. Wait until the scanner completes its self-test. You can judge the status of the film scanner from the LED indicators. Once the READY LED indicator stops flashing, the film scanner is ready to scan.
Page 21
English If you want to scan slides: You can use the slide holder (the holder with 4 rectangular lattices and a SLIDE mark) to place your slide. Slide holder Pull the handle on the cover to open the cover. Then place the slide on the slide holder with the emulsion side face up.
Page 23: Step 4. Edit
To use SCAN button: Push the SCAN button on the film scanner front panel. A dialogue box will pop up on the screen asking you to choose an image editing software to use. Choose the application you want to use and then click Note: if you have only one image editing software installed in your computer, this dialogue box will be skipped.
Page 25: Chapter 4. Using Miraphoto
Chapter 4. Using MiraPhoto You can access MiraPhoto through your image editing applications. When you click “Acquire” or “Scan” in your application, the MiraPhoto main screen will appear: Menu Bar Combo Boxes Film Selection Area Control Buttons The following sections in this chapter will describe MiraPhoto in more detail.
Page 27: Settings Submenu
Settings submenu Scan Size… When you choose this item, the following dialog box will appear: There are two selectable items: Max. Area and Custom. Choosing Max. Area, MiraPhoto will scan the full range of the image. If you choose Custom, you can enter the size you want into the Width (max.: 0.94 inches) and Height (max.: 1.38 inches) text boxes.
Page 29: Film Type
Film Type Choosing this item, the following dialog box will appear: If you do not know the type of your film or if your film type is not listed, select Generic from the drop-down list. When the selection is done, click OK to confirm or Cancel to abort. Auto Preview If this item is checked, MiraPhoto will perform the preview operation automatically each time it is invoked.
Page 31: Resolution Box
Resolution box Resolution is used to decide how delicate the scanner captures the original image. When the original is scanned and turned into a digital image, the scanner captures and records the image in terms of pixels. As more pixels are used to record an image, more details in the image can be represented.
Page 33: Control Buttons
Control Buttons Eject button Click this button to eject the filmstrip/slide holder from the film scanner. Zoom button Click this button to zoom in on the image. Preview button Click this button to begin previewing the image. Preview proceeds in color or in monochrome depending on the setting in the Image Type combo box.
Page 35: Rotate Button
English Rotate button Click this button to rotate the image 90 degrees clockwise. You can click this button several times to get the image orientation you want. Mirror button Click this button to get a mirror reflection effect on the original as if you were viewing the image in a mirror: Original image Image after Mirror is applied…
Page 37: Brightness/contrast Button
Brightness/Contrast button Click this button to bring up the Brightness/Contrast Dialog box: Brightness control You can drag the triangle below the bar to increase/decrease the overall brightness of the image, or click on the Auto button to let MiraPhoto adjust the brightness automatically. Contrast control You can drag the triangle below the bar to increase/decrease the overall contrast of the…
Page 39: Color Adjustment Button
Color Adjustment button Click this button, and the Color Adjustment dialog box will appear: The Color Adjustment tool uses three control items: Hue, Saturation and Lightness. Hue is a characteristic that distinguishes one color from another, while Saturation decides the intensity of a color.
Page 41: Curve Button
Curve button The Curve tool is used to adjust the brightness properties of midtone pixels in an image. The following dialogue box will appear after you click this button: Below component in the dialog box and how to use the Curve tool to adjust an image: Color Channel box Use this box to select the color channel to be adjusted.
Page 43: Level Button
Level button Clicking on the Level button, and the Level dialog box will appear: Color Channel box Use this box to select the color channel to be adjusted. This allows you to adjust the histogram property of each color channel respectively. Histogram The Histogram displays the distributing status of dark and bright pixels in an image.
Page 45
With the information from the histogram, we will be better able to adjust an image with the histogram tools. Below the Histogram, there are three tiny triangles: Shadow Threshold By dragging these triangles, you can adjust the brightness and contrast of an image precisely. For example, if you drag the Shadow Threshold triangle to the right, the pixels with lower brightness level than the Shadow Threshold will be cut into black, which makes the image look darker.
Page 47: Filter Button
Filter button This function allows you to sharpen or blur the image. You can choose from the list: No filter, Sharpen, Sharpen more, Blur, Blur more and Unsharp Mask. If you want the edge of the image to be sharper, i.e., in a higher contrast against the background, select sharpen or sharpen more.
Page 49: Preview Area
Preview Area Info button The Info button is located at the lower right corner of the MiraPhoto main window. You can click this button to read the detailed information of the image you are currently working on in the JobInfo dialog box, or click on the Save as… button in the dialog box to save the information as a .txt file for future reference.
Page 51: Chapter 5. Photo Express
Chapter 5. Photo Express In this chapter you will be introduced to the fantastic world of Photo Express. Learn more about this bundled software and make your everyday life more interesting and colorful! Refer to Photo Express electronic User’s Manual in the software disc for more details on how to use its different features and functions.
Page 53
Express between Photo mode and Project mode. Photo mode is where the majority of your work is done, while the Project mode lets you make greeting cards, name cards, and other fun things based on templates. Command Panel: The Command panel lists all of the available categories in Photo Express necessary for getting the most out of your creativity when working on photos.
Page 55
To add new images to an album: Select an album. Click the File icon and browse for the folder where the images are stored. 3. When they appear in the Options panel, click the Select All button (or select images individually by holding down the Ctrl key as you click them).
Page 57
To trim your photo: To re-size your photo: Click the Trim button in the Edit: Adjust category. The Trim options will open in the Options panel. Select a Trim shape and then set the amount of Soft edge you want to soften the edges of the trimmed photo with.
Page 59: Saving Images
Saving Images After work on your photo is complete, you may want to save it. In Photo Express, you can save a photo in a variety of different image file formats. Each file format has its own unique properties and characteristics. Some formats, however, are better than others for specific situations, such as saving for the Web are.
Page 61: Morphing Photos
Morphing Photos One of Photo Express’ more novel effects extras is that of image morphing. Morphing transforms an image over time to create interesting and unique “warps” of the original photo. Image morphs are output as either image sequences or animated GIF files. To morph an image: Note: you can output image morphs as either an image sequence or GIF animations.
Page 63: Working With Templates
Working with Templates Photo Express’ unique templates can be edited and customized to suit your own needs. Templates consist of multiple components, usually a combination of text and photos with a decoration or two perhaps thrown in. To change any one of these components, simply select it and choose the appropriate tools from the Toolbar.
Page 65: Printing Templates
Printing Templates As with Photo mode, Project mode lets you print your work when you’re finished with it. The same options available in Photo mode apply in Project mode as well. For more on printing, see Printing Images and the online help.
Page 67: Chapter 6. Troubleshooting And Faq
6.1.3 SCSI Connection Guideline ScanWit film scanner uses a SCSI interface to connect to your computer and other SCSI devices. Depending upon the configuration you use, there will be certain guidelines to follow in order to ensure the proper function of…
Page 69: Chapter 7. Service Information
Taiwan: [email protected] USA: [email protected] Europe: [email protected] For free driver updates, product information and news release, please visit the following web addresses: http://www.acerperipherals.com.tw (Taiwan)
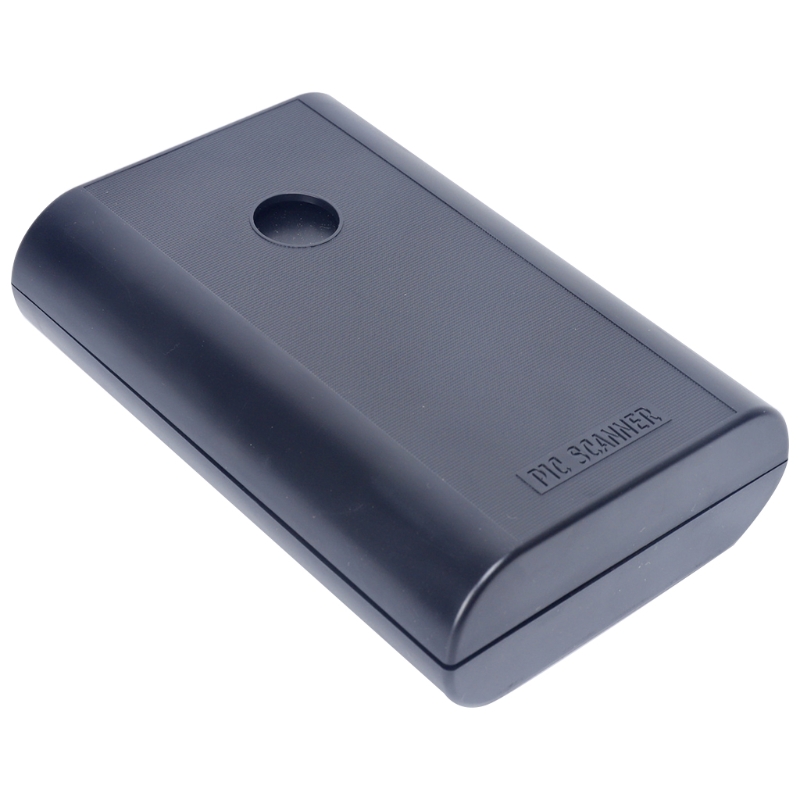
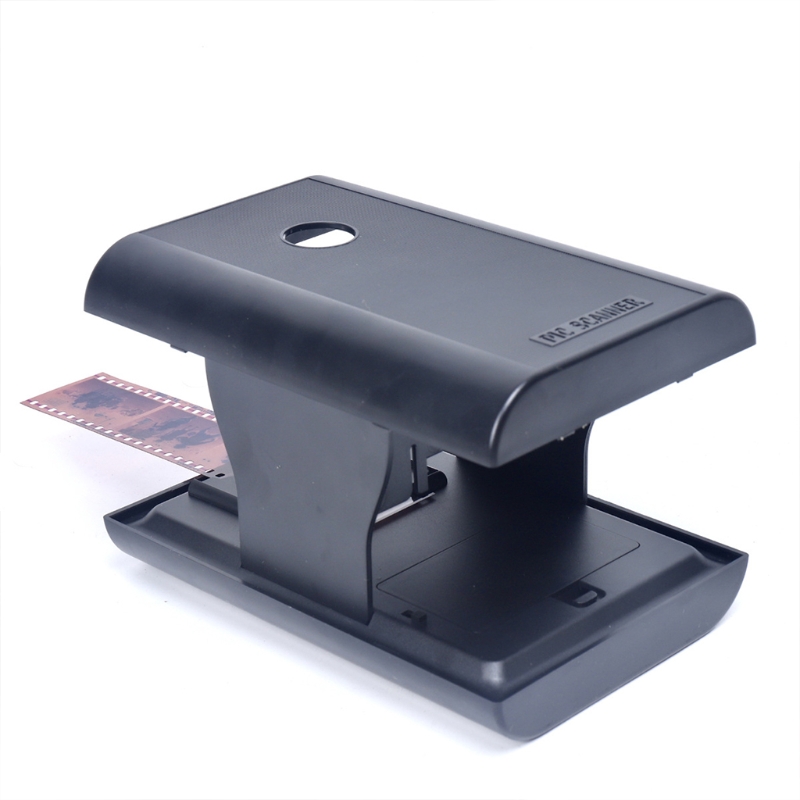
Film scanner EC718. Так называется игрушка, которую я себе недавно приобрёл.
Собственно, сканер по принципу работы, представляет из себя фотоаппарат для 35мм плёнки. Как и любой фотоаппарат, сканер работает независимо от компьютера, и записывает отснятые изображения на карту памяти.

Внуртенних источников питания (аккумулятор, батарейки) в сканере не предусмотрено. Работает сканер от сети 220В.

При включении сканера на несколько секунд появляется вот такая заставка-приветствие.

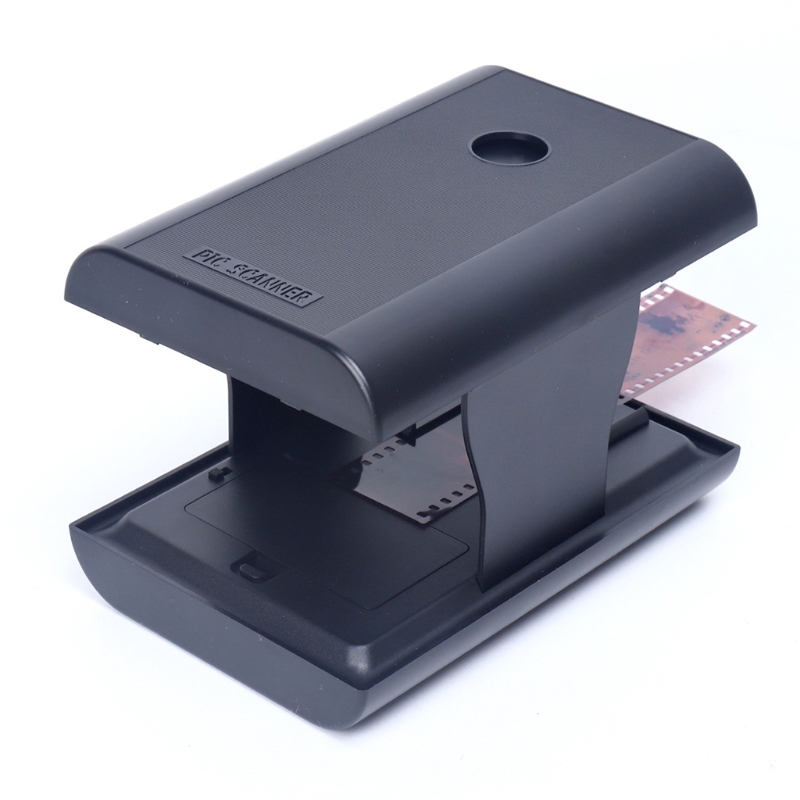
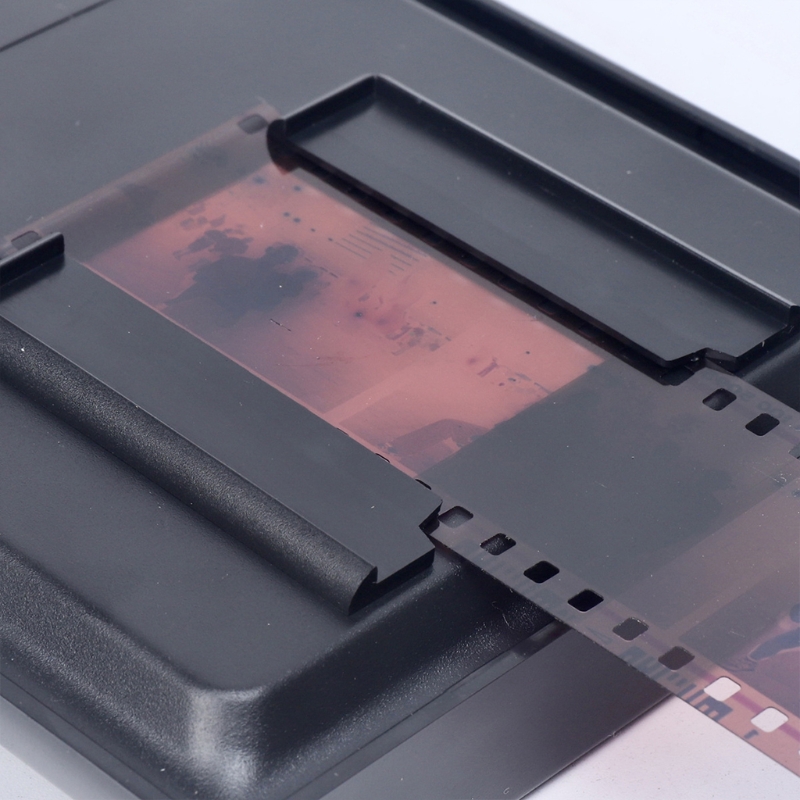
Сканер комплектуется двумя кассетами: для слайдов, и для плёнки. К сожалению, если работать кассетой для плёнки, то плёнку придётся резать на куски по шесть кадров. Перемещение плёнки в данной кассете не предусмотрено. Я для оцифровки плёнки использовал слайд-кассету. В этой кассете по краям имеются «щели», и нет фиксаторов перфорации.

При настройках: негативная плёнка — на экране появляется обращённое в позитив изображение. Очень удобно для просмотра архивов — «где что есть». Особенно хороша игрушка для просмотра затемнённых, перепроявленных, или переэкспонированных негативов!

На выходе имеется изображение 2736х1824 пикселя. Или, более привычно — 5 мегапикселей. Что касаетсч качества, то тут всё в первую очередь зависит от качества сканируемого негатива. Однако замечу, при работе данным сканером не будет лишним воспользоваться графическим редактором и немного добавить яркость и контрастность.

И ещё: сканер не имеет функций Dust Removal (удаление дефектов), поэтому перед началом сканирования плёнку лучше аккуратно протереть сухой салфеткой.
Перейти на страницу of 23
Summary
-
Reflecta Film Scanner — page 1
Us er m anual …
-
Reflecta Film Scanner — page 2
1- For c ustomers in North and So u th America For custo mers in USA This device complie s w ith Part 15 of the FCC rules . Opera tion is subjec t to t he follow ing t w o condition s: (1) Thi s devi c e may not cause ha rmful interfer ence. (2) This devi c e must accept any in terf eren ce rece ived, including i nt erfere nce that may cause unde …
-
Reflecta Film Scanner — page 3
2 — 1. Name of p art s Note: Thi s film scanner supports Windows XP and Vista (32-bits) via USB 2.0 only. W e strongly sug ges t using a clean, dry, non-alcohol cotton swab to insert into the film scanner slot and clean th e glas s surface periodically to prod uce a clear imag e. Please make sure your film negativ es/mounted slides and cover tra …
-
Reflecta Film Scanner — page 4
3- 2. How to i n st all a film into the fil m holde r a. Open the film holde r as illustra ted b. Put a film in the fil m slot as show n c. Close the film holder …
-
Reflecta Film Scanner — page 5
4- 3. Inst all th e sof twa re and d river T o use the fil m scanner y ou need to i nstall t he s o ftw are d ri v er and ArcSof t PhotoImp ression 6 in ad vance. Inst alling Driver 1.T u rn on the comp ut e r . 2.Insert i nstallatio n CD in to t he CD- RO M drive and t he in stallati on CD m enu w ill appear . 3. W hen you se e the follow in …
-
Reflecta Film Scanner — page 6
5- Recommend ed to selec t “Install the so ftw are automatically . …
-
Reflecta Film Scanner — page 7
6- Choose “con t inue anyw a y” button. 3.Sele ct “Finish” but ton to comp lete the inst allatio n. …
-
Reflecta Film Scanner — page 8
7 — New Hardw are Wizard (Vist a) 1. Af ter connecting the fil m scanner to the computer wit h USB cable, the new hardware wizard will d etect the new device. 2. Follow the in s tructions on screen. Reco mm ended to select “I ns t all the sof tware auto ma tically . Choos e “Don’ t show this mes sage again for th is device” button. …
-
Reflecta Film Scanner — page 9
8- Choose “Ins tall this driver sof tw are anyw ay” button. 3.Sele ct “Finish” but ton to comp lete the inst allatio n. …
-
Reflecta Film Scanner — page 10
9- 4. Con nect film scanne r and y our compu ter with t he USB cable Note: For first time u ser , p lease do not plug the film holder include d with film sl ot i nto the f i lm scann er whi le connect the scanner with the co mpute r . Y ou w ill s ee t he P W R LED is re d 5. Using the film sc anner 1. Click “ Photo Impress ion 6” i co n o n …
-
Reflecta Film Scanner — page 11
10 — In select t he device option make sure OVT scanner is displ ayed. When u s ers st art the ope ration, the picture will show on “N ormal qualit y”. Then it is user ’s choice t o selec t “TIF” or “JPG”. I t is recom mended to select “JPG” format. Pic2 Select t he loca tion t o save the pic tures 1 Select the type of film …
-
Reflecta Film Scanner — page 12
1 1- Pic4 Y ou can adjust the locatio n of the film by moving t he film holde r , th e f ilm holder c an b e moved forw ard only one w ay . Pic5 Click “Sn ap Shot” or p res s the “Copy” button and th e “Snap Shot” w ill appear i n the smaller w indo w t o the right . On the film strip a gr een frame indi cates the cu rren t picture se …
-
Reflecta Film Scanner — page 13
12- Click exi t and you w ill see the pictur e in t he ma in Arcsof t w indow a s below . T o ensure t he best image quality , t he sc anner balances the sensor fo r each pi cture this m ay ta ke 3 or 5 se c. dep ending on the im age complexity and your compu ter hardw are. …
-
Reflecta Film Scanner — page 14
13- PIC 6 Click the “ format” to f ind out the re solution o f t he pi cture. 6. Now y ou can s t art to ed it the pictu re as yo u like: First you are suppo sed to select t he picture by clic k ing a t the picture . And then u se the Arc s o ft tools to edit the pictures. — Ma in Menu The M ain Men u appears in the uppe r left corner of the …
-
Reflecta Film Scanner — page 15
14- Select th e folde rs you want to scan -L e t» s you choose the folders f or scanning . * View Full Sc ree n /Play (F4) Play s or display s t he first selec te d file in full screen view . — Ma in Button s * Get Photos Acquire f rom Scanne r …
-
Reflecta Film Scanner — page 16
15- Here you can: Acquire image s from conne c ted T WAIN complian t devices s uch as scanners and some digi tal cameras. Assign na mes t o image file s as they are acquired (using today» s date or a descripti ve w ord). How to acqu ire images from a T W AIN c omplian t device: 1. Sele c t a scanner or othe r T WAIN de vice from the …
-
Reflecta Film Scanner — page 17
16- In additio n to the large photo w o rkspace, the Photo Editing T ools module includes five distinct sets of c ont rols: Enh ance The Enhan ce fun c tion i n c ludes tw o types o f contro ls: Auto E nhance Click «A ut o Enhan ce» button to impr ove the overall quality of your picture s with a single cli ck. Manua l F i x For prec …
-
Reflecta Film Scanner — page 18
17- How to fix the color o f a photo: 1. Drag t he c olor balanc e s lider s to make the photo c olor appear m or e natural. Add red or yellow to make the photo warmer . Add blue or gr een t o make the photo cooler . 2. Drag the Lighter/Dar ker slider t o the l eft to reveal detail s hidden in a dark photo o r to the righ t to make a faded pho t …
-
Reflecta Film Scanner — page 19
18- 5. Click «U ndo» if you make a m ista ke or don» t like the resul t. Crop This f eature enables you to trim p hoto s fo r d ra m ati c eff ect or c ut off the u gly/di st ractin g p arts of a pic t ure. How to use crop: 1. Choose the crop ori entation (portrait or landscape) . 2. Sele c t a f ixed proportion fo r t he crop rect …
-
Reflecta Film Scanner — page 20
19- 2. Drag the fi rst sli der to m ake the transition betw e en the b lurred and n on-blurred are a sharp o r smooth. 3. Drag the second s lider to increase o r decrea se the amou nt of blur . 4. Click «A pply» if you lik e the result . Cli c k «Can cel» if you d o not. Saving You r Results W he n you» re done edi tin g …
-
Reflecta Film Scanner — page 21
20- Clone The Clon e tool is g ood for removing un w anted element s from a p hoto. It c an also be used for fun effe ct, l i ke moving a nose from one person t o an other. How to use the Clone t ool to remove a t elepho ne pole from the ba ckground of a photo: 1. Esta blish a source point for th e Clone tool by holding t he Shif t key and clicki …
-
Reflecta Film Scanner — page 22
21- Paint Brush Let you «paint» on yo ur image w he n you click and drag the mouse. Plea se click and drag the sliders be low to change the brush si ze and transpar ency. Line Draw a straight line i n the photo. Ple ase click an d drag the s lider s below to change th e line w idth and tran sparency. Eraser Simula te an eraser, removing …
-
Reflecta Film Scanner — page 23
22 — 6. S p ecification Inte rface: USB 2.0 only Image Sensor: 1/1. 8” inch 5 mega CMOS sensor (5,174,400 pixels) Lens: F no.= 2.0, 4 Glass eleme nt s, Half-field A ngle=15 Frame Rate (M ax.): 5M(2592×1944) 2 f ps, SXGA (1280X960) 15 fp s Focus Range: Fixed focus Exposure Control: Automatic Color Balance: Automatic Scan high resolution 5MP …
Производитель Reflecta
Категория Photo Scanner
Документы, которые мы получаем от производителя устройства Reflecta Film Scanner мы можем разделить на несколько групп. Это в частности:
— технические чертежи Reflecta
— инструкции обслуживания Film Scanner
— паспорта изделия Reflecta
— информационные брошюры
— энергетические этикетки Reflecta Film Scanner
Все из них важны, однако самую важную информацию с точки зрения пользователя мы найдем в инструкции обслуживания Reflecta Film Scanner.
Группа документов, определяемая как инструкции обслуживания, делится также на более подробные типы, такие как: Инструкции монтажа Reflecta Film Scanner, инструкции обслуживания, короткие инструкции или инструкции пользователя Reflecta Film Scanner. В зависимости от потребностей, Вам необходимо поискать требуемый документ. На нашем сайте Вы можете просмотреть самую популярную инструкцию использования изделия Reflecta Film Scanner.
Полная инструкция обслуживания устройства Reflecta Film Scanner, как должна выглядеть?
Инструкция обслуживания, определяемая также как пособие пользователя, или просто «руководство» — это технический документ, цель которого заключается в использовании Reflecta Film Scanner пользователями. Инструкции пишет, как правило технический писатель, языком, доступным для всех пользователей Reflecta Film Scanner.
Полная инструкция обслуживания Reflecta, должна заключать несколько основных элементов. Часть из них менее важная, как например: обложка / титульный лист или авторские страницы. Однако остальная часть, должна дать нам важную с точки зрения пользователя информацию.
1. Вступление и рекомендации, как пользоваться инструкцией Reflecta Film Scanner
— В начале каждой инструкции, необходимо найти указания, как пользоваться данным пособием. Здесь должна находится информация, касающаяся местонахождения содержания Reflecta Film Scanner, FAQ и самых распространенных проблем — то есть мест, которые чаще всего ищут пользователи в каждой инструкции обслуживания
2. Содержание
— индекс всех советов, касающихся Reflecta Film Scanner, которое найдем в данном документе
3. Советы по использованию основных функций устройства Reflecta Film Scanner
— которые должны облегчить нам первые шаги во время использования Reflecta Film Scanner
4. Troubleshooting
— систематизированный ряд действия, который поможет нам диагностировать а в дальнейшем очередность решения важнейших проблем Reflecta Film Scanner
5. FAQ
— чаще всего задаваемые вопросы
6. Контактные данные
Информация о том, где искать контактные данные производителя / сервисного центра Reflecta Film Scanner в данной стране, если самостоятельно не получится решить проблему.
У вас вопрос, касающийся Reflecta Film Scanner?
Воспользуйтесь формуляром, находящимся ниже
Наша цель — обеспечить Вам самый быстрый доступ к руководству по эксплуатации устройства Acer Film Scanner
. Пользуясь просмотром онлайн Вы можете быстро просмотреть содержание и перейти на страницу, на которой найдете решение своей проблемы с Acer Film Scanner
.
Для Вашего удобства
Если просмотр руководства Acer Film Scanner
непосредственно на этой странице для Вас неудобен, Вы можете воспользоваться двумя возможными решениями:
- Полноэкранный просмотр -, Чтобы удобно просматривать инструкцию (без скачивания на компьютер) Вы можете использовать режим полноэкранного просмотра. Чтобы запустить просмотр инструкции Acer Film Scanner
на полном экране, используйте кнопку Полный экран
. - Скачивание на компьютер — Вы можете также скачать инструкцию Acer Film Scanner
на свой компьютер и сохранить ее в своем архиве. Если ты все же не хотите занимать место на своем устройстве, Вы всегда можете скачать ее из ManualsBase.
Руководство по эксплуатации Acer Film Scanner
Advertisement
Advertisement
Печатная версия
Многие предпочитают читать документы не на экране, а в печатной версии. Опция распечатки инструкции также предусмотрена и Вы можете воспользоваться ею нажав на ссылку, находящуюся выше — Печатать инструкцию
. Вам не обязательно печатать всю инструкцию Acer Film Scanner
а только некоторые страницы. Берегите бумагу.
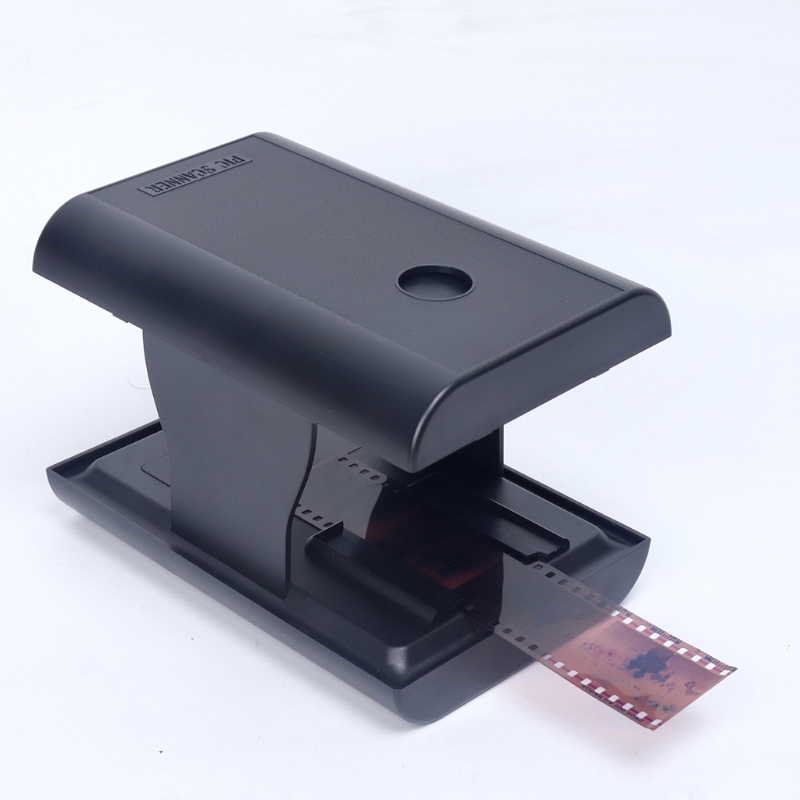
Сканер слайдов для пленки 35 мм/135 мм конвертер TON169 портативный сканер старых35 мм/135 мм пленка слайд сканер конвертер TON169 портативный старые фильмы сканер преобразует слайды и негативы в JPEG
OOTDTY
Особенности на 100% абсолютно новый и высокого качества
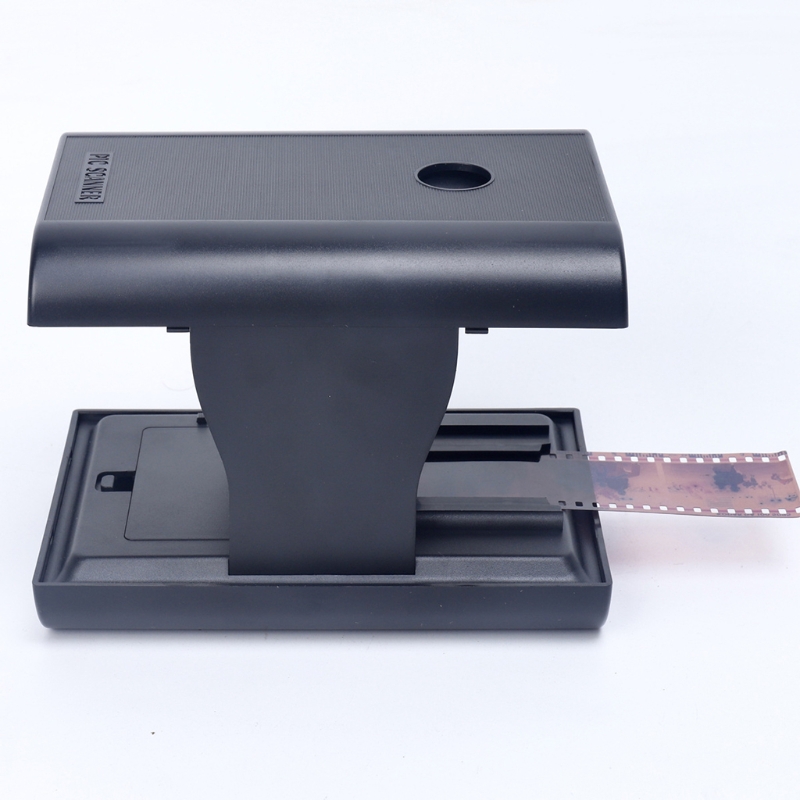
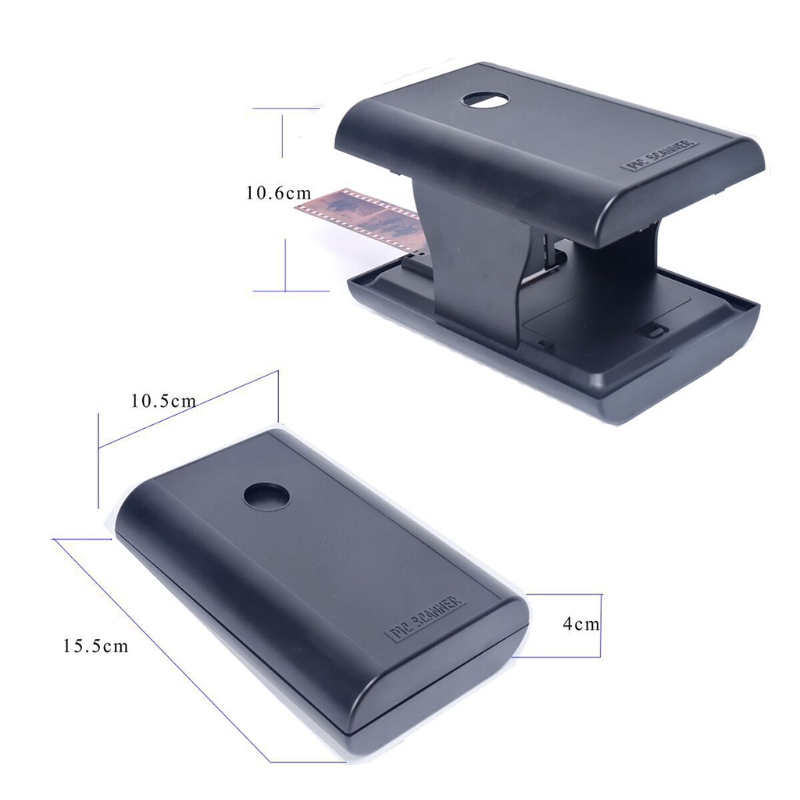
Складной и компактный дизайн: Этот сканер складной и не занимает много места, вы можете сложить его в Размер маленькой коробки, так что это очень удобно для хранения и путешествий.
Оживите эти старые воспоминания: совместимость с 35 мм слайдами и пленочными негативами. Нет более сложных операций и дорогих сборов.
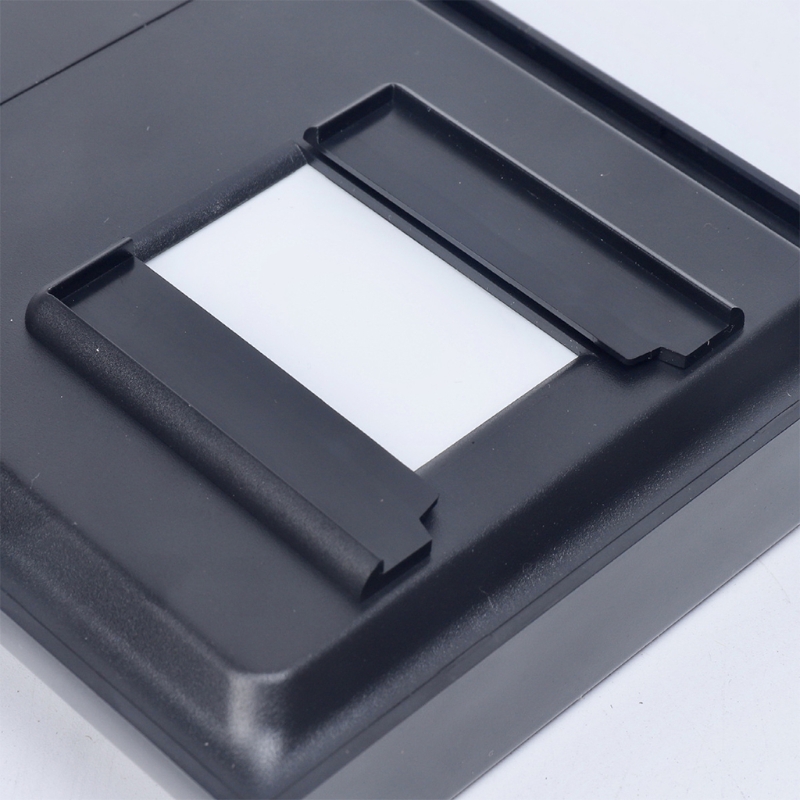
Простой и супер простой в использовании: вставьте слайд или отрицательный элемент в лоток, включите Встроенный светодиодный фонарь, поместите объектив вашего смартфона через отверстие, а затем нажмите, чтобы запечатлеть. Обратите внимание: Качество фотографий будет ограничено разрешением камеры вашего телефона.
Пленка в JPEG с вашим телефоном: мобильный сканер пленки TON169 позволяет конвертировать старые пленки и слайды 35 мм со своим смартфоном. Этот сканер-отличный подарок для родителей и интересная игрушка для детей.
Бесплатное приложение для сканирования и обмена: Используйте бесплатное приложение TON169 для захвата, обрезания, поворота и фильтрации; Регулировка цвета и контрастности; Поделиться в социальных сетях!
Спецификация: Модель: TON169
Материал: пластик
Размер: приблизительно 15.5×10.5x 4 см/6.1×4.13×1.57in
Поддержка: 35 мм/135 мм цветная положительная пленка, отрицательная пленка, цветные и черно-белые горки
Поддержка: функции предварительного просмотра изображений, воспроизведения и редактирования
Качество сканирования: это связано с использованием пикселей на мобильный телефон
Формат файла: Изображение JPEG
Посылка включает в себя: 1PCx телефон слайд-сканер
Примечание: В комплект поставки не входят аккумуляторы. Пожалуйста, покупайте с осторожностью.
Напоминание о кэшбэке: Что бы получить кешбек при покупке этого или другого товара на Aliexpress. Авторизуйтесь или зарегистрируйетсь в кэшбэк-сервисе, далее появиться подробная инструкция как получать кэшбэк при покупках на Алиэкспресс.

Отзывы покупателей
*о других товарах
Отзывы
Здесь вы можете оставить свой отзыв о данном товаре.
$73.13
 Availability: In Stock
 Shipping: Free Airmail
 Ship From: China Warehouse
Estimated Delivery: 
Bulk Savings (Buy more save more)
1. 8 Mega pixel high resolution Film Scanner
2. Converts 135(35)mm film negatives and slides to JPEGS in seconds
3. Approx. 2400dpi, 4800dpi interpolated
4. Quick one touch scanner
5. Includes Media Impressions software for image capture and editing
6. Compatible with Windows XP/Vista/Win7/Win8/Win 10 32/64-bit& Mac OS 10.10/10.11/10.12/10.13
7. USB 2.0 Compatible
8. USB Power
9. Image Sensor: CMOS sensor
10. Voltage/Current: 5V/0.5A
11. Package contents:
FS-I-8MA-ND x 1
Magnetic slide holder x 1
Magnetic film holder x 1
CD-ROM x 1
Clean brush x 1
USB cable x 1
User manual(EN) x 1
Q & A
There are no questions yet
Ask a question
Your question will be answered by a store representative or other customers.
Thank you for the question!
Your question has been received and will be answered soon. Please do not submit the same question again.
Error
![]()
Внуртенних источников питания (аккумулятор, батарейки) в сканере не предусмотрено. Работает сканер от сети 220В.
При включении сканера на несколько секунд появляется вот такая заставка-приветствие.
Сканер комплектуется двумя кассетами: для слайдов, и для плёнки. К сожалению, если работать кассетой для плёнки, то плёнку придётся резать на куски по шесть кадров. Перемещение плёнки в данной кассете не предусмотрено. Я для оцифровки плёнки использовал слайд-кассету. В этой кассете по краям имеются «щели», и нет фиксаторов перфорации.
При настройках: негативная плёнка — на экране появляется обращённое в позитив изображение. Очень удобно для просмотра архивов — «где что есть». Особенно хороша игрушка для просмотра затемнённых, перепроявленных, или переэкспонированных негативов!
На выходе имеется изображение 2736х1824 пикселя. Или, более привычно — 5 мегапикселей. Что касаетсч качества, то тут всё в первую очередь зависит от качества сканируемого негатива. Однако замечу, при работе данным сканером не будет лишним воспользоваться графическим редактором и немного добавить яркость и контрастность.
И ещё: сканер не имеет функций Dust Removal (удаление дефектов), поэтому перед началом сканирования плёнку лучше аккуратно протереть сухой салфеткой.
Перейти на страницу of 23
Summary
-
Reflecta Film Scanner — page 1
Us er m anual …
-
Reflecta Film Scanner — page 2
1- For c ustomers in North and So u th America For custo mers in USA This device complie s w ith Part 15 of the FCC rules . Opera tion is subjec t to t he follow ing t w o condition s: (1) Thi s devi c e may not cause ha rmful interfer ence. (2) This devi c e must accept any in terf eren ce rece ived, including i nt erfere nce that may cause unde …
-
Reflecta Film Scanner — page 3
2 — 1. Name of p art s Note: Thi s film scanner supports Windows XP and Vista (32-bits) via USB 2.0 only. W e strongly sug ges t using a clean, dry, non-alcohol cotton swab to insert into the film scanner slot and clean th e glas s surface periodically to prod uce a clear imag e. Please make sure your film negativ es/mounted slides and cover tra …
-
Reflecta Film Scanner — page 4
3- 2. How to i n st all a film into the fil m holde r a. Open the film holde r as illustra ted b. Put a film in the fil m slot as show n c. Close the film holder …
-
Reflecta Film Scanner — page 5
4- 3. Inst all th e sof twa re and d river T o use the fil m scanner y ou need to i nstall t he s o ftw are d ri v er and ArcSof t PhotoImp ression 6 in ad vance. Inst alling Driver 1.T u rn on the comp ut e r . 2.Insert i nstallatio n CD in to t he CD- RO M drive and t he in stallati on CD m enu w ill appear . 3. W hen you se e the follow in …
-
Reflecta Film Scanner — page 6
5- Recommend ed to selec t “Install the so ftw are automatically . …
-
Reflecta Film Scanner — page 7
6- Choose “con t inue anyw a y” button. 3.Sele ct “Finish” but ton to comp lete the inst allatio n. …
-
Reflecta Film Scanner — page 8
7 — New Hardw are Wizard (Vist a) 1. Af ter connecting the fil m scanner to the computer wit h USB cable, the new hardware wizard will d etect the new device. 2. Follow the in s tructions on screen. Reco mm ended to select “I ns t all the sof tware auto ma tically . Choos e “Don’ t show this mes sage again for th is device” button. …
-
Reflecta Film Scanner — page 9
8- Choose “Ins tall this driver sof tw are anyw ay” button. 3.Sele ct “Finish” but ton to comp lete the inst allatio n. …
-
Reflecta Film Scanner — page 10
9- 4. Con nect film scanne r and y our compu ter with t he USB cable Note: For first time u ser , p lease do not plug the film holder include d with film sl ot i nto the f i lm scann er whi le connect the scanner with the co mpute r . Y ou w ill s ee t he P W R LED is re d 5. Using the film sc anner 1. Click “ Photo Impress ion 6” i co n o n …
-
Reflecta Film Scanner — page 11
10 — In select t he device option make sure OVT scanner is displ ayed. When u s ers st art the ope ration, the picture will show on “N ormal qualit y”. Then it is user ’s choice t o selec t “TIF” or “JPG”. I t is recom mended to select “JPG” format. Pic2 Select t he loca tion t o save the pic tures 1 Select the type of film …
-
Reflecta Film Scanner — page 12
1 1- Pic4 Y ou can adjust the locatio n of the film by moving t he film holde r , th e f ilm holder c an b e moved forw ard only one w ay . Pic5 Click “Sn ap Shot” or p res s the “Copy” button and th e “Snap Shot” w ill appear i n the smaller w indo w t o the right . On the film strip a gr een frame indi cates the cu rren t picture se …
-
Reflecta Film Scanner — page 13
12- Click exi t and you w ill see the pictur e in t he ma in Arcsof t w indow a s below . T o ensure t he best image quality , t he sc anner balances the sensor fo r each pi cture this m ay ta ke 3 or 5 se c. dep ending on the im age complexity and your compu ter hardw are. …
-
Reflecta Film Scanner — page 14
13- PIC 6 Click the “ format” to f ind out the re solution o f t he pi cture. 6. Now y ou can s t art to ed it the pictu re as yo u like: First you are suppo sed to select t he picture by clic k ing a t the picture . And then u se the Arc s o ft tools to edit the pictures. — Ma in Menu The M ain Men u appears in the uppe r left corner of the …
-
Reflecta Film Scanner — page 15
14- Select th e folde rs you want to scan -L e t» s you choose the folders f or scanning . * View Full Sc ree n /Play (F4) Play s or display s t he first selec te d file in full screen view . — Ma in Button s * Get Photos Acquire f rom Scanne r …
-
Reflecta Film Scanner — page 16
15- Here you can: Acquire image s from conne c ted T WAIN complian t devices s uch as scanners and some digi tal cameras. Assign na mes t o image file s as they are acquired (using today» s date or a descripti ve w ord). How to acqu ire images from a T W AIN c omplian t device: 1. Sele c t a scanner or othe r T WAIN de vice from the …
-
Reflecta Film Scanner — page 17
16- In additio n to the large photo w o rkspace, the Photo Editing T ools module includes five distinct sets of c ont rols: Enh ance The Enhan ce fun c tion i n c ludes tw o types o f contro ls: Auto E nhance Click «A ut o Enhan ce» button to impr ove the overall quality of your picture s with a single cli ck. Manua l F i x For prec …
-
Reflecta Film Scanner — page 18
17- How to fix the color o f a photo: 1. Drag t he c olor balanc e s lider s to make the photo c olor appear m or e natural. Add red or yellow to make the photo warmer . Add blue or gr een t o make the photo cooler . 2. Drag the Lighter/Dar ker slider t o the l eft to reveal detail s hidden in a dark photo o r to the righ t to make a faded pho t …
-
Reflecta Film Scanner — page 19
18- 5. Click «U ndo» if you make a m ista ke or don» t like the resul t. Crop This f eature enables you to trim p hoto s fo r d ra m ati c eff ect or c ut off the u gly/di st ractin g p arts of a pic t ure. How to use crop: 1. Choose the crop ori entation (portrait or landscape) . 2. Sele c t a f ixed proportion fo r t he crop rect …
-
Reflecta Film Scanner — page 20
19- 2. Drag the fi rst sli der to m ake the transition betw e en the b lurred and n on-blurred are a sharp o r smooth. 3. Drag the second s lider to increase o r decrea se the amou nt of blur . 4. Click «A pply» if you lik e the result . Cli c k «Can cel» if you d o not. Saving You r Results W he n you» re done edi tin g …
-
Reflecta Film Scanner — page 21
20- Clone The Clon e tool is g ood for removing un w anted element s from a p hoto. It c an also be used for fun effe ct, l i ke moving a nose from one person t o an other. How to use the Clone t ool to remove a t elepho ne pole from the ba ckground of a photo: 1. Esta blish a source point for th e Clone tool by holding t he Shif t key and clicki …
-
Reflecta Film Scanner — page 22
21- Paint Brush Let you «paint» on yo ur image w he n you click and drag the mouse. Plea se click and drag the sliders be low to change the brush si ze and transpar ency. Line Draw a straight line i n the photo. Ple ase click an d drag the s lider s below to change th e line w idth and tran sparency. Eraser Simula te an eraser, removing …
-
Reflecta Film Scanner — page 23
22 — 6. S p ecification Inte rface: USB 2.0 only Image Sensor: 1/1. 8” inch 5 mega CMOS sensor (5,174,400 pixels) Lens: F no.= 2.0, 4 Glass eleme nt s, Half-field A ngle=15 Frame Rate (M ax.): 5M(2592×1944) 2 f ps, SXGA (1280X960) 15 fp s Focus Range: Fixed focus Exposure Control: Automatic Color Balance: Automatic Scan high resolution 5MP …
Производитель Reflecta
Категория Photo Scanner
Документы, которые мы получаем от производителя устройства Reflecta Film Scanner мы можем разделить на несколько групп. Это в частности:
— технические чертежи Reflecta
— инструкции обслуживания Film Scanner
— паспорта изделия Reflecta
— информационные брошюры
— энергетические этикетки Reflecta Film Scanner
Все из них важны, однако самую важную информацию с точки зрения пользователя мы найдем в инструкции обслуживания Reflecta Film Scanner.
Группа документов, определяемая как инструкции обслуживания, делится также на более подробные типы, такие как: Инструкции монтажа Reflecta Film Scanner, инструкции обслуживания, короткие инструкции или инструкции пользователя Reflecta Film Scanner. В зависимости от потребностей, Вам необходимо поискать требуемый документ. На нашем сайте Вы можете просмотреть самую популярную инструкцию использования изделия Reflecta Film Scanner.
Полная инструкция обслуживания устройства Reflecta Film Scanner, как должна выглядеть?
Инструкция обслуживания, определяемая также как пособие пользователя, или просто «руководство» — это технический документ, цель которого заключается в использовании Reflecta Film Scanner пользователями. Инструкции пишет, как правило технический писатель, языком, доступным для всех пользователей Reflecta Film Scanner.
Полная инструкция обслуживания Reflecta, должна заключать несколько основных элементов. Часть из них менее важная, как например: обложка / титульный лист или авторские страницы. Однако остальная часть, должна дать нам важную с точки зрения пользователя информацию.
1. Вступление и рекомендации, как пользоваться инструкцией Reflecta Film Scanner
— В начале каждой инструкции, необходимо найти указания, как пользоваться данным пособием. Здесь должна находится информация, касающаяся местонахождения содержания Reflecta Film Scanner, FAQ и самых распространенных проблем — то есть мест, которые чаще всего ищут пользователи в каждой инструкции обслуживания
2. Содержание
— индекс всех советов, касающихся Reflecta Film Scanner, которое найдем в данном документе
3. Советы по использованию основных функций устройства Reflecta Film Scanner
— которые должны облегчить нам первые шаги во время использования Reflecta Film Scanner
4. Troubleshooting
— систематизированный ряд действия, который поможет нам диагностировать а в дальнейшем очередность решения важнейших проблем Reflecta Film Scanner
5. FAQ
— чаще всего задаваемые вопросы
6. Контактные данные
Информация о том, где искать контактные данные производителя / сервисного центра Reflecta Film Scanner в данной стране, если самостоятельно не получится решить проблему.
У вас вопрос, касающийся Reflecta Film Scanner?
Воспользуйтесь формуляром, находящимся ниже
Наша цель — обеспечить Вам самый быстрый доступ к руководству по эксплуатации устройства Acer Film Scanner
. Пользуясь просмотром онлайн Вы можете быстро просмотреть содержание и перейти на страницу, на которой найдете решение своей проблемы с Acer Film Scanner
.
Для Вашего удобства
Если просмотр руководства Acer Film Scanner
непосредственно на этой странице для Вас неудобен, Вы можете воспользоваться двумя возможными решениями:
- Полноэкранный просмотр -, Чтобы удобно просматривать инструкцию (без скачивания на компьютер) Вы можете использовать режим полноэкранного просмотра. Чтобы запустить просмотр инструкции Acer Film Scanner
на полном экране, используйте кнопку Полный экран
. - Скачивание на компьютер — Вы можете также скачать инструкцию Acer Film Scanner
на свой компьютер и сохранить ее в своем архиве. Если ты все же не хотите занимать место на своем устройстве, Вы всегда можете скачать ее из ManualsBase.
Руководство по эксплуатации Acer Film Scanner
Advertisement
Advertisement
Печатная версия
Многие предпочитают читать документы не на экране, а в печатной версии. Опция распечатки инструкции также предусмотрена и Вы можете воспользоваться ею нажав на ссылку, находящуюся выше — Печатать инструкцию
. Вам не обязательно печатать всю инструкцию Acer Film Scanner
а только некоторые страницы. Берегите бумагу.
Сканер слайдов для пленки 35 мм/135 мм конвертер TON169 портативный сканер старых35 мм/135 мм пленка слайд сканер конвертер TON169 портативный старые фильмы сканер преобразует слайды и негативы в JPEG
OOTDTY
Особенности на 100% абсолютно новый и высокого качества
Складной и компактный дизайн: Этот сканер складной и не занимает много места, вы можете сложить его в Размер маленькой коробки, так что это очень удобно для хранения и путешествий.
Оживите эти старые воспоминания: совместимость с 35 мм слайдами и пленочными негативами. Нет более сложных операций и дорогих сборов.
Простой и супер простой в использовании: вставьте слайд или отрицательный элемент в лоток, включите Встроенный светодиодный фонарь, поместите объектив вашего смартфона через отверстие, а затем нажмите, чтобы запечатлеть. Обратите внимание: Качество фотографий будет ограничено разрешением камеры вашего телефона.
Пленка в JPEG с вашим телефоном: мобильный сканер пленки TON169 позволяет конвертировать старые пленки и слайды 35 мм со своим смартфоном. Этот сканер-отличный подарок для родителей и интересная игрушка для детей.
Бесплатное приложение для сканирования и обмена: Используйте бесплатное приложение TON169 для захвата, обрезания, поворота и фильтрации; Регулировка цвета и контрастности; Поделиться в социальных сетях!
Спецификация: Модель: TON169
Материал: пластик
Размер: приблизительно 15.5×10.5x 4 см/6.1×4.13×1.57in
Поддержка: 35 мм/135 мм цветная положительная пленка, отрицательная пленка, цветные и черно-белые горки
Поддержка: функции предварительного просмотра изображений, воспроизведения и редактирования
Качество сканирования: это связано с использованием пикселей на мобильный телефон
Формат файла: Изображение JPEG
Посылка включает в себя: 1PCx телефон слайд-сканер
Примечание: В комплект поставки не входят аккумуляторы. Пожалуйста, покупайте с осторожностью.
Напоминание о кэшбэке: Что бы получить кешбек при покупке этого или другого товара на Aliexpress. Авторизуйтесь или зарегистрируйетсь в кэшбэк-сервисе, далее появиться подробная инструкция как получать кэшбэк при покупках на Алиэкспресс.
Отзывы покупателей
*о других товарах
Отзывы
Здесь вы можете оставить свой отзыв о данном товаре.
$73.13
Availability: In Stock
Shipping: Free Airmail
Ship From: China Warehouse
Estimated Delivery:
Bulk Savings (Buy more save more)
1. 8 Mega pixel high resolution Film Scanner
2. Converts 135(35)mm film negatives and slides to JPEGS in seconds
3. Approx. 2400dpi, 4800dpi interpolated
4. Quick one touch scanner
5. Includes Media Impressions software for image capture and editing
6. Compatible with Windows XP/Vista/Win7/Win8/Win 10 32/64-bit& Mac OS 10.10/10.11/10.12/10.13
7. USB 2.0 Compatible
8. USB Power
9. Image Sensor: CMOS sensor
10. Voltage/Current: 5V/0.5A
11. Package contents:
FS-I-8MA-ND x 1
Magnetic slide holder x 1
Magnetic film holder x 1
CD-ROM x 1
Clean brush x 1
USB cable x 1
User manual(EN) x 1
Q & A
There are no questions yet
Ask a question
Your question will be answered by a store representative or other customers.
Thank you for the question!
Your question has been received and will be answered soon. Please do not submit the same question again.
Error

An error occurred when saving your question. Please report it to the website administrator. Additional information:
Thank you for the answer!
Your answer has been received and will be published soon. Please do not submit the same answer again.
Error
![]()
An error occurred when saving your answer. Please report it to the website administrator. Additional information: