![]()
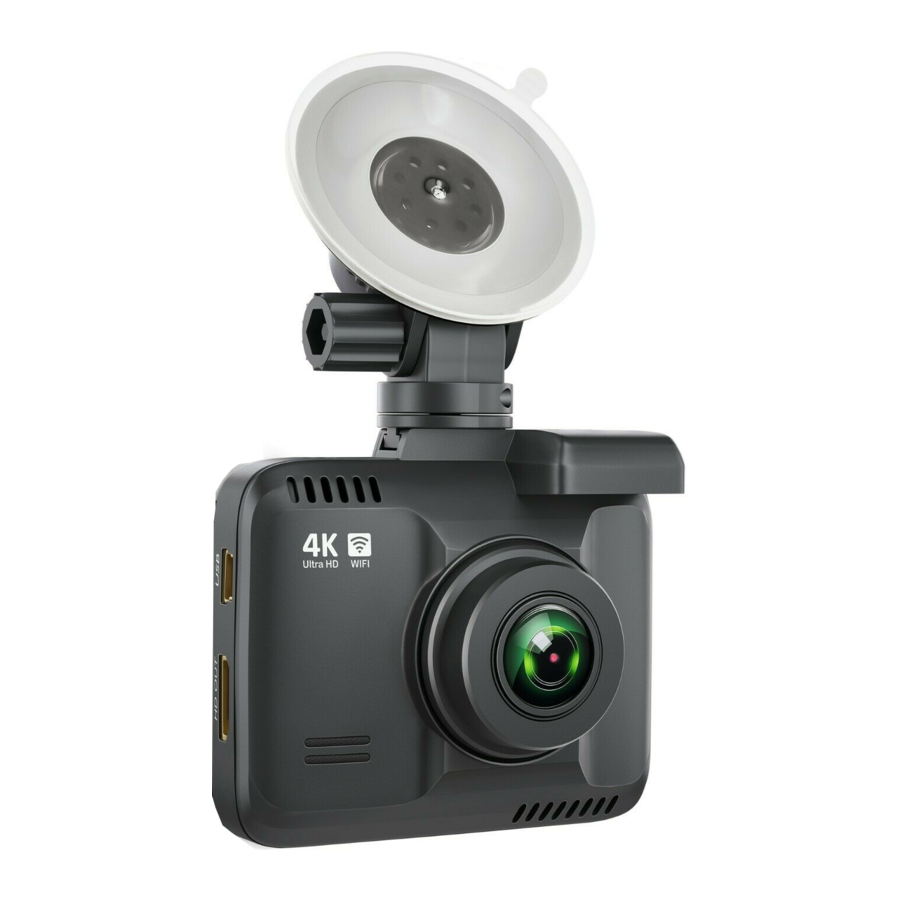
4К УХД 2160П Цифровая камера
Обслуживание клиентов : topbulls@163.com
Пользователь Manual
Знакомство с кнопками

■ кнопка питания
- Нажмите и удерживайте в течение 3 секунд, чтобы включить или выключить, и нажмите и удерживайте более 6 секунд, чтобы принудительно выключить
■ Кнопка ОК
- Короткое нажатие, чтобы начать или приостановить запись
■ ВВЕРХ/ВАЙ-ФАЙ
- Интерфейс настройки: функция меню ВВЕРХ
- Нажмите кнопку UP в течение 3 секунд, чтобы включить или выключить WiFi. Wi-Fi по умолчанию выключен
- Нажмите UP, чтобы переключить переднюю и заднюю линзы (Примечание: режим двойной записи поддерживает эту функцию)
■ ВНИЗ/переключатель
- Интерфейс настройки: функция меню ВНИЗ
- Интерфейс записи: короткое нажатие, чтобы закрыть и открыть запись звука
■ Кнопка МЕНЮ
- Когда запись приостановлена: короткое нажатие MENU для перехода к функции меню
- Запись в начальном состоянии: короткое нажатие MENU для блокировки текущего file
■ Сброс
- Если камера имеет ненормальную запись или отключение WiFi, вы можете перезапустить камеру, кратковременно нажав кнопку сброса.
■ Слот для карт TF
- Пожалуйста, используйте TF-карту 32-256 ГБ (класс 10 U3 или выше)
Инструкция по установке
- Заглушите двигатель автомобиля
- Найдите в машине подходящее место, не мешающее вождению, затем протрите окружающее стекло, установите кронштейн и повесьте камеру.
- Оторвите защитную пленку на линзе, убедитесь, что линза чистая, и отрегулируйте положение линзы так, чтобы линза и земля оставались на одном уровне.
- Вставьте один конец шнура питания в розетку камеры, а другой конец в розетку автомобиля.
- Запустите двигатель и проверьте, правильно ли установлена камера.
Инструкции по записи/фотографированию
■ Запись
Включите камеру и войдите в режим записи, в левом верхнем углу экрана появится значок видео.![]() . Начните запись, на экране будет мигать красная точка в статусе недозаписи. В то же время в записи вы не можете управлять меню и переключать режим работы, затем коротко нажмите OK, чтобы остановить запись
. Начните запись, на экране будет мигать красная точка в статусе недозаписи. В то же время в записи вы не можете управлять меню и переключать режим работы, затем коротко нажмите OK, чтобы остановить запись
■ Фотосъемка
В состоянии остановки записи коротко нажмите MODE, чтобы переключиться в режим фото, в верхнем левом углу экрана отображается значок фото.![]() . Коротко нажмите OK, чтобы сделать снимок, коротко нажмите MEMU, чтобы войти в настройки изображения, коротко нажмите MODE, чтобы переключиться в режим воспроизведения
. Коротко нажмите OK, чтобы сделать снимок, коротко нажмите MEMU, чтобы войти в настройки изображения, коротко нажмите MODE, чтобы переключиться в режим воспроизведения
■ Воспроизведение видео/изображений
- В режиме фото нажмите MODE, чтобы переключиться в режим воспроизведения со значком воспроизведения
 отображается в левом верхнем углу экрана
 - Кратковременное нажатие на кнопку UP для выбора file вверх
- Короткое нажатие кнопки ВНИЗ для выбора file вниз
- Коротко нажмите OK, чтобы воспроизвести выбранное видео. file
- Коротко нажмите MENU, чтобы войти в настройки меню, где вы можете удалить или разблокировать files
■ Настройка
В трех режимах (запись, фото, воспроизведение) состояние паузы, короткое нажатие MEMU для входа в меню, а затем короткое нажатие еще раз, чтобы переключиться в меню настроек![]() . Кратковременным нажатием ВВЕРХ или ВНИЗ выберите другую настройку, выберите настройку, которую необходимо изменить, коротким нажатием OK, чтобы войти, чтобы изменить, затем коротким нажатием МЕНЮ, чтобы выйти из интерфейса меню.
. Кратковременным нажатием ВВЕРХ или ВНИЗ выберите другую настройку, выберите настройку, которую необходимо изменить, коротким нажатием OK, чтобы войти, чтобы изменить, затем коротким нажатием МЕНЮ, чтобы выйти из интерфейса меню.
Установите приложение и подключите Wi-Fi
■ Установить приложение
- Найдите «LuckyCam» в магазине приложений или отсканируйте следующий QR-код, чтобы загрузить приложение.
- После установки приложение предложит «если вы хотите, чтобы «LuckyCam» получил доступ к фотографиям вашего телефона», нажмите «ОК».
■ Подключить Wi-Fi
- Войдите в МЕНЮ в состоянии паузы записи, снова нажмите МЕНЮ, чтобы переключиться в меню настройки, выберите WiFi, выберите «Вкл» (или нажмите и удерживайте кнопку ВВЕРХ более 3 секунд, чтобы открыть WIFI), а затем на экране отобразится WIFI. имя и пароль (не нужно вводить пароль при повторном подключении)
- Войдите в интерфейс настроек WLAN телефона, найдите WIFI камеры, например: NVT_CARDV******, введите пароль для подключения, начальный пароль WIFI: 12345678.
- После успешного соединения телефона и рекордера вы можете открыть приложение для view экран в реальном времени или записанное видео и изображения. (Поскольку этот рекордер действительно имеет разрешение 4K, когда в режиме реального времени view, пиксели будут сжаты, чтобы получить настоящее видео 4K HD, загрузите видео, а затем посмотрите)
- Нажмите APP, чтобы войти в интерфейс загрузки, экран рекордера перейдет к интерфейсу загрузки загрузки, обратно к основному интерфейсу APP через телефон, экран рекордера возобновит интерфейс записи.
- Длительно нажмите ВВЕРХ более 3 секунд, чтобы выйти из WIFI, нажмите OK, и диктофон вернется к записи.
Схема кнопок интерфейса работы с мобильным приложением 1

Схема кнопок интерфейса работы с мобильным приложением 2

■ Предварительное видеоview
Когда приложение успешно подключено к рекордеру, рекордер находится в состоянии остановки записи, нажмите меню «Папка», нажмите, чтобы воспроизвести одно из видео (Примечание: прямое предварительноеview будет буфер прогресса видео)
■ Скачать
нажмите «![]() «,чтобы скачать видео на телефон нажмите»
«,чтобы скачать видео на телефон нажмите»![]() «,чтобы увидеть фотографии
«,чтобы увидеть фотографии
Примечание: Видео, воспроизводимое мобильным телефоном, сжато. Если вы хотите посмотреть оригинальное видео высокой четкости, загрузите и воспроизведите его на своем мобильном телефоне или вставьте TF-карту в свой компьютер для просмотра.
GPS-трекер и задняя камера
■ GPS-трекер
- GPS-модуль представляет собой квадратный аксессуар в коробке, и для его работы необходимо включить питание. Подключите кабель питания к разъему на GPS, а затем подключите GPS к разъему питания на рекордере, после чего вы сможете использовать его после подключения.
- GPS-соединение установлено успешно, на экране появится значок GPS.
- При успешном подключении к GPS сохраненное видео будет отмечено соответствующими координатами (долготой и широтой) и скоростью автомобиля.
- При воспроизведении видео на телефоне будет воспроизводиться информация GPS-отслеживания.
- Модуль GPS с лентой на этом участке необходимо прикрепить к лобовому стеклу, чтобы принимать стабильный сигнал. (Помните, чтобы паста не переворачивалась, иначе она нарушит направление GPS)

■ Задняя камера
- Подключите заднюю камеру, на экране будет отображаться видео записи сзади в режиме реального времени.
- В то же время карта TF сохранит видео с задней камеры с file суффикс «В»
- Заднюю камеру следует установить возле номерного знака. Оба сзади viewизображения при вождении и обратном направлении четкие и четкие. Чтобы использовать функцию заднего хода, установите заднюю камеру в положение

Базовые настройки
- Разрешение: Разрешение видео по умолчанию: 3840*2160+1920*1080 25P Меню также содержит 2560*1440+1920*1080 30P и FULL HD, выберите соответствующее разрешение и нажмите OK, чтобы переключить разрешение. (2160P соответствует 4K)
- Циклическая запись: по умолчанию 3 минуты, щелкните меню «Циклическая запись», и продолжительность видео можно установить на 1 минуту / 3 минуты / 5 минут.
- Широкий динамический диапазон: по умолчанию установлено значение «Вкл.», что означает, что он автоматически захватывает больше света и регулирует яркость для получения четких видео и изображений с точной цветопередачей даже в условиях низкой освещенности.
- G-сенсор: настройка по умолчанию «средняя», что соответствует чувствительности вибрации при file заблокирован
- ЭВ экспозиция: по умолчанию +0.0, с различными опциями, доступными в меню
- Запись аудио: По умолчанию установлено значение «Вкл.». Включите запись видео, выберите «Выкл.», чтобы выключить запись.
- Дата Ст.amp: По умолчанию установлено значение «Вкл.», при котором отображаются время и дата записанного видео.
- Вай-фай: настройка по умолчанию «Выкл.», выберите «Вкл.» или нажмите и удерживайте кнопку ВВЕРХ, чтобы открыть, подключитесь через мобильное приложение.
- Дата / время: Выберите меню, чтобы отобразить дату и время, вручную отрегулируйте текущее время и дату или подключитесь к меню настроек приложения и выберите настройки времени, нажмите «Автосинхронизация», чтобы установить текущую дату и время.
- Автоматическое выключение: Настройка по умолчанию «Выкл.», настройка меню 1мин/3мин/5мин
• Выберите «Выкл.», то есть в состоянии остановки записи камера не будет автоматически отключаться.
• Выберите «1 минуту», то есть в состоянии остановки записи камера автоматически выключится через 1 минуту. - Зеркало задней камеры: настройка по умолчанию «включено», то есть оттягиваться ли в зеркало
- по умолчанию «3 минуты», щелкните, чтобы выбрать меню (Выкл. / 1 мин. / 3 мин. / 5 мин.)
• Выберите «Выкл.», т. е. дисплей будет включен в течение длительного времени.
• Выберите «1 минуту», т. е. дисплей перейдет в черный режим заставки экрана через 1 минуту. - Звуковой сигнал: по умолчанию «Вкл.», т. е. открывать звук клавиши
- Язык: язык по умолчанию «Является английским», в меню настроек есть несколько языков
- GPS: Выберите «Вкл.», чтобы отобразить значок символа GPS на экране, выберите «Выкл.», чтобы закрыть значок символа GPS на экране.
- Часовой пояс: часовой пояс по умолчанию GMT +8:00, в меню можно выбрать глобальный часовой пояс
- Предупреждение о скорости: По умолчанию 100км/ч, можно выбрать в меню между 70140км/ч, то есть после выбора 100км/ч, если скорость движения автомобиля больше этой скорости, машина подаст звуковой сигнал. (Перед использованием этой функции необходимо подключить GPS)
- Единица скорости: по умолчанию км/ч, меню содержит км/ч, мили в час опционально
- Частота: по умолчанию для 50 Гц, меню содержит 50 Гц, 60 Гц опционально
- Формат: Форматирование выберите «Подтвердить», чтобы удалить все данные на TF-карте.
- Настройки по умолчанию: Выберите «Подтвердить», чтобы восстановить заводские настройки.
- Определение движения: настройка по умолчанию «выкл.», может быть установлена в приложении, например, выбор «вкл.», то есть в состоянии остановки рекордера, обнаружение объекта перед движением, рекордер автоматически записывает 10 секунд, а затем останавливается. рекордер автоматически записывает через 10 секунд после остановки
параметры
| ЦП | НОВАТЭК НТ96670 |
| Представьте датчик | КМОП-матрица SONY STARVIS |
| Монитор | 3.0inch IPS |
| Пикселей | 800M (3840*2160+1920*1080) |
| HUD | Настоящее 4К |
| формат видео | MP4 |
| Динамик | поддержка |
| Voltage | DC 5V |
| Память | TF-карта, U3 class10 или выше, максимальная поддержка 256 ГБ |
| Эксплуатация | (-20 ℃-70 ℃) |
| температура (℃) | многоязычная |
| язык | поддержка |
| Автоматическая регистрация включить |
поддержка |
| Циклическая запись | поддержка |
| WDR | поддержка |
| GPS | поддержка |
| Задержка выключения | поддержка |
| Монитор парковки | Поддержка, необходимо подключить аппаратный комплект |
| G-сенсор | поддержка |
| Замка | поддержка |
| запись | поддержка |
| Видеокодек | H.264 / H.265 |
Общие проблемы и решения
| Проблема | Причины и решения |
| Невозможно начать | Убедитесь, что автомобиль находится в режиме ACC «ON» или в зажигании. |
| Crash | Нажмите кнопку сброса, чтобы перезапустить |
| Невозможно записать, отправить будильник «бип-бип» |
Нет TF-карты, сбой TF-карты или TF-карта не может быть распознана, вы можете заменить TF-карту или отформатировать TF-карту |
| Не удается подключиться | Мобильные устройства, такие как сотовые телефоны, должны находиться рядом с регистратором, выбрать SSID в настройках и ввести правильный пароль. |
| Нет живого преview | Убедитесь, что соединение нормальное, снова откройте приложение после выхода. |
| Задержка изображения | Приложение для сотового телефона выглядит ненормально или с ошибкой программы, повторно загрузите и установите приложение и уменьшите количество программного обеспечения, работающего на телефоне. |
| Ошибка сохранения настроек | Проверьте, в порядке ли соединение |
Примечание: Форматирование tf-карты
Поскольку TF-карта находится в рабочем состоянии, длительное использование TF-карты приведет к ее фрагментации или повреждению, пожалуйста, регулярно проверяйте и форматируйте TF-карту (Предложение: регулярно проверяйте и форматируйте TF-карту каждый месяц)
Важные замечания
- Пожалуйста, обратите внимание на установку часового пояса при первом использовании.
- рекомендуется использовать оригинальную SD-карту, Samsung и другую TF-карту класса 10 или U3 или выше, чтобы избежать проблем несовместимости. (Поддержка 32–256 ГБ класса 10 U3 или выше TF-карты)
- поскольку рекордер для настоящих пикселей 4K, при воспроизведении записанного видео на компьютере или телевизоре загрузите специальный проигрыватель 4K, рекомендуется загрузить медиаплеер PotPlayer и VLC. (Если вы используете проигрыватель, который не поддерживает воспроизведение видео 4K, это приведет к задержке видеоэкрана.)
- Пожалуйста, используйте оригинальные аксессуары, предоставленные нами, только в случае проблем с совместимостью после использования других, особенно использование гнезда для прикуривателя 2 или 3 в 1 приведет к 100% недостаточному источнику тока.
- Поскольку этот продукт питается от суперконденсатора, а не от батареи, поэтому, если вам нужно использовать функцию мониторинга парковки, он должен быть подключен к кабелю buck (не входит в комплект) к модулю распределения автомобиля, потому что установка кабельной линии buck очень сложна , для установки рекомендуется обратиться в местный авторемонтный центр, понижающий кабель необходимо приобретать отдельно. (Аккумуляторный источник питания легко стареет, не устойчив к высоким температурам и холоду и подвержен взрыву, поэтому суперконденсатор является более продвинутым.tagэффективнее и безопаснее, чем метод питания от батареи.)
- Расстояние подключения Wi-Fi доступно для 15 футов, больше, чем это расстояние, автоматически отключится
- При использовании диктофона возникают проблемы или трудности, пожалуйста, свяжитесь с нами в первую очередь послепродажного обслуживания клиентов: topbulls@163.com, мы решим для вас как можно скорее
Отказ от ответственности
Автомобильный регистратор — это инструмент, который записывает процесс вождения автомобиля с помощью видео, изображений и звука. Аварии происходят только как вспомогательная ссылка
Специальное примечание: автомобильный регистратор должен находиться в нормальном состоянии записи, чтобы
записать file. Но в следующих случаях приведет к повреждению или потере изображения
- В видеозаписи вытаскивание TF-карты приведет к последнему видео. file повреждение или потеря
- В видеозаписи ненормальный сбой питания приведет к последнему видео. file повреждение или потеря
- Рекордер в процессе записи подвергся разрушительному столкновению, что приведет к повреждению или потере видео
- Рекордер сильно пострадал во время записи, что привело к ослаблению карты памяти, что может привести к повреждению file или вызвать file потеряться
Документы / Ресурсы
-
Contents
-
Table of Contents
-
Bookmarks
Quick Links
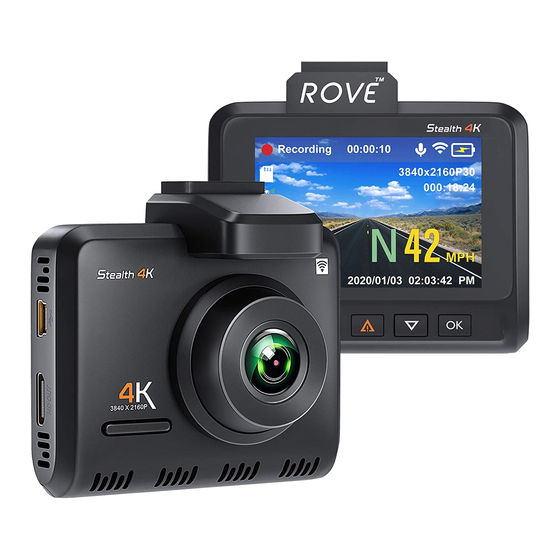
MODEL: Stealth 4K
3840 X 2160P @30FPS
U S E R M A N U A L
U S E R M A N U A L
www.rovedashcam.com
Copyright (C) 2019, All rights reserved
Related Manuals for ROVE Stealth 4K
Summary of Contents for ROVE Stealth 4K
-
Page 1
MODEL: Stealth 4K 3840 X 2160P @30FPS U S E R M A N U A L U S E R M A N U A L www.rovedashcam.com Copyright (C) 2019, All rights reserved… -
Page 2: Customer Service
CUSTOMER SERVICE Response in just 6 hours help@rovedashcam.com For faster response text us 1 (401) 484-ROVE(7683) Hours: Mon — Fri 9am-5pm PST Scan the QR Code to Email US Scan the QR Code to Text US Just Scan the QR Code with your iPhone or Android’s…
-
Page 3: How To Videos
HOW TO VIDEOS Visit our website www.rovedashcam.com/pages/videos Understanding ROVE Stealth 4K Watch HOW-TO VIDEOS to learn & understand all the features so you can get the maximum benefit out of it.
-
Page 4
C O N T E N T G U I D E User Agreement+Precaution+User Warning Getting Started — Out Of The Box Instructions Technical Specification Main Features Package Contents Product Diagram Understanding Keys & Functions Inserting / Removing A Micro+SD Card Formating Memory Card Installation Turning On/off your Camera… -
Page 5: User Agreement
USER MANUAL USER AGREEMENT By purchasing ROVE Dash cam, it is assumed that by default you agree with precautions, user warnings and all the terms & conditions of warranty. If for any reason you do not agree with any of the terms mentioned in this manual, then you may return the product in its original packaging unused within its return window for a full refund.
-
Page 6
Do not place the camera loose on top of the dashboard or in-front of the air bags. Do not mount the camera where it can be a distraction if it became loose and fall off the windshield while driving. Do not expose this device to an excessive heat, dust or use any chemical substance or cleaning solvent to clean this device. -
Page 7: Out Of The Box Instructions
USER MANUAL G e t t i n g S t a r t e d OUT OF THE BOX INSTRUCTIONS Make sure to always keep the camera plugged into the power, because camera’s internal battery is NOT meant to last more than 3-5 minutes depending on the video resolution you choose.
-
Page 8
ROVE Stealth 4K Car dash cam is programmed to turn ON and START RECORDING automatically when it receives the power, and STOPS RECORDING and turns OFF automati- cally within 4-5 seconds when the power is disconnected. (i.e. when you start /stop your car) Setting Date &… -
Page 9: Technical Specification
USER MANUAL TECHNICAL SPECIFICATION SCREEN Screen size 2.35″ Screen type Screen resolution 960 X 480P SENSOR Sensor name OmniVision OS08A10 Sensor native resolution 8MP PurCell CMOS LENS Lens type and layers 6G+1 IR Lens Lens Angle 150° A+ Wide Wide Angle Focal length f= 3.0mm (F/NO = 2.0) STORAGE…
-
Page 10
VIDEO Supported video resolution Single cam: 4K 3840*2160 P30, with frame rating 1080P P60, 1080P P30 Dual Cam: 4K + 1080P Video format Compression H.265/H.264 USB FUNCTIONS USB-Storage USB Charging TECHNICAL DETAILS Working Temperature -10°C (14°F) ~ +60°C (140°F) Weight 82.4g SIZE 73 X 62 X 15mm (Exclude Lens) -
Page 11: Main Features
USER MANUAL MAIN FEATURES 4K 3840 x 2160P Resolution 512GB Max Support Micro-SD Class 10, U3 Rear Camera Full-HD 1080P (Optional) Digital Distortion Correction 20MP Photos WDR — (True Color Gamut) 150° A+ Wide Angle Lens Super Night Vision Built-In WiFi Built-In GPS Time-Lapse Video Seamless Loop Recording…
-
Page 12: Package Contents
PACKAGE CONTENTS ROVE Stealth 4K Dash Cam Windshield Suction Mount Car Wire Trim Tool 12FT Mini-USB Car Charging Cable 2.5FT Mini-USB Data Cable 5 x Cable Hiding Clips 3M Sticky Mount User Manual & Registration Card ROVE Dual USB Car Charger…
-
Page 13: Product Diagram
USER MANUAL PRODUCT DIAGRAM RESET 10 11 12 13 14 Memory Card Slot Display Down Power Button USB Port Menu/Mode Rear Cam Slot HD OUT Speaker Reset SOS / Wi-Fi Lens…
-
Page 14
Understanding Keys & Functions LONG PRESS = Press & Hold For 2-3 Seconds SHORT PRESS = Press Once FUNCTION INSTRUCTION Power ON: Short press to power ON. Power ON/OFF Power OFF: Long press to power OFF. Take Photo PHOTO: Short Press to take a PHOTO when in video mode. -
Page 15: Inserting / Removing A Micro Sd Card
USER MANUAL INSERTING / REMOVING A MICRO SD CARD Must use only Brand Name, Class-10, U3 or higher speed Micro-SD Card. Max support 512GB. We Recommend SAMSUNG Class 10, U3 Speed Micro-SD Card. You can purchase it from Amazon here: https://www.amazon.com/dp/B07MKSGZM6/ TO INSTALL Make sure the camera is turned OFF First.
-
Page 16: Formatting Memory Card
FORMATTING MEMORY CARD Please press the (M) MENU button to enter the settings. Settings Video Settings Front Audio Settings Light Frequency 60Hz Then press the DOWN button to scroll down until you see Format Memory Card >> Then press the OK button to enter format submenu. >> then press DOWN button to highlight the CONFIRM >> Then press the OK button to confirm to format the memory card (The formatting process will be super quick. Now press the M button to exit the settings).
-
Page 17: Installation
Make sure to format the memory card before first time use. Installation Position: It is recommended to install ROVE Stealth 4K at the near of rear view mirror of driver opposite side. Clean any foreign matter and moisture from the place where the product will be installed.
-
Page 18
To Lock The Suction Mount: Press & hold it tight to remove any air between suction mount and the windshield. While pressing & holding towards the windshield, turn the LOCK- ING Knob towards CLOCK WISE to LOCK in place. Press the suction mount against windshield and while pressing, turn the LOCKING Knob towards LOCK position to lock the mount in place. -
Page 19
USER MANUAL Adjust the lens angle of the camera. Loosen the screw to adjust the camera’s view angle Simply rotate the and then tighten to camera 360 lock that angle. record any direction you prefer. Start the engine and check if the product works properly. Caution: Make sure to remove the Plastic Lens Screen Protector before recording videos. -
Page 20
Lighter Plug Wiring at a glance Charging Only use the supplied charger to power and charge the Rove Stealth 4K dash cam. You can use your iPhone or Android Phone’s USB Charger, and plug into your home’s 110V Wall outlet to power/charge the camera while in your home. -
Page 21: Turning On/Off Your Camera
USER MANUAL TURNING ON/OFF YOUR CAMERA AUTO POWER ON/OFF Auto Power ON: ROVE Stealth 4K Dash Cam is designed to ON and start recording automatically when it receives power. i.e. when the car engine is started. Auto Power OFF: The camera is also pre-configured to turn itself OFF automatically within few seconds when the power gets disconnected, i.e.
-
Page 22: Understanding Status Icons
UNDERSTANDING STATUS ICONS Home Screen Microphone Indicator Wi-Fi Indicator Recording Indicator Battery Indicator Recording 00:00:10 Memory Card Indicator Video Resolution 3840x2160P30 GPS Signal Indicator Current Date Parking Mode Status Current Time Motion Detection Status Recording Status 2019/03/23 02:03:42 Loop Recording Timer (Resets every loop) Menu, SOS,…
-
Page 23: Led Status Light Indicator
USER MANUAL LED STATUS LIGHT INDICATOR General Understanding RED LIGHT Indicates Recording Status Blinking RED Recording Video Solid RED/NO RED NOT Recording Video GREEN LIGHT Indicates Internal Ba�ery Charging Status Solid GREEN Internal Ba�ery Charging NO GREEN Light Internal Ba�ery Fully Charged DIFFERENT SCENARIOS When Camera Is Plugged Into The POWER Solid RED + Solid GREEN…
-
Page 24: Battery Information
BATTERY INFORMATION This product contains Lithium-Ion inbuilt battery. With a full charge battery should last upto 2-5 minutes. Internal battery is NOT meant to last long time. The higher the video resolution you choose the more power it will consume, hence it will last short duration, and the lower video resolution you choose the less power it will consume, hence it will last longer.
-
Page 25
USER MANUAL and sun exposure inside the car can exceed specified range above depending upon your geographical and weather conditions. Do not expose this camera to extreme high heat, direct sunlight, cigerattes, cigars, candles or low temperatures or crush or break. Do not use in humid, wet and/or corrosive environment. -
Page 26: Using Wi-Fi Feature
WiFi signal (instead of a Bluetooth) to pair your smartphone with ROVE Stealth-4K. What is the WiFi Range? The WiFi signal range is about 10FT when there are NO obstruc- tions in the middle.
-
Page 27
It is NOT a cloud or an IP camera and it is NOT meant to do that. You can get live video and footage on ROVE Stealth-4K’s APP as long as you stay within the 10FT range from the dash cam. -
Page 28
Connecting WiFi For iPHONE From your Home screen, go to Settings > Wi-Fi Turn on Wi-Fi. Your device will automatically search for available Wi-Fi networks. -
Page 29
USER MANUAL From the available networks list, choose the «ROVE Stealth 4K» WiFi Network When Prompted, Enter The 88889999 Default Password: (First time only — then it will save the password) Wait until the connection is complete. After you join the network,… -
Page 30
(First Time Only — Then it will save the password” Wait until the connection is complete. Once connected to ROVE Stealth 4K WiFi, it will say “No Internet”. Which is fine. You just have to tap on the pop up notification that will show up in few seconds to select that you still want to stay connected even though there is NO Internet. -
Page 31
Open the ROVE Stealth-4K APP & Select «Connect Dash Cam» The camera should now be paired automatically with ROVE Stealth-4K APP and you should see the LIVE Video Feed. Select Album, to access Choose this to switch live video view previously recorded videos between FRONT &… -
Page 32
You can easily navigate yourself, view your record- ings, change settings etc. Choose to select any videos then take action to either DOWNLOAD or DELETE selected files. View Photos Taken Access Emergency Locked Videos Access Recorded Videos APP UPDATES COMING SOON. Please pardon us, we are working on improving our APP and language ASAP. -
Page 33
USER MANUAL Video Being Downloaded to your phone directly. Note: Apple logo & App Store are trademarks of Apple Inc., Google logo and Google Play are trademarks of Google Inc. -
Page 34
UNDERSTANDING PARKING MODE Parking mode works as follows. Let’s say you went shopping and parked your car in the parking lot. Then someone hits your car while backing up their car, then the impact caused by hitting your car makes your camera vibrate, which then activates the built-in G-sensor and then parking mode, which then turns ON your camera automatically and starts recording for 1-min, then it locks and saves that video file so it does NOT get deleted by the loop… -
Page 35: Understanding Motion Detection
USER MANUAL UNDERSTANDING MOTION DETECTION Motion detection feature is made for people who want to create surveillance around their car when the car is NOT driving, during the night or when they are not in their car so the camera can record every time if there is a motion in front of the camera.
-
Page 36
camera starts to move, which makes the light captured by the camera to change (hence, the camera notices that something in front of it is moving) which will trigger the camera to START recording automatically. Now, the camera will continue to record until there is NO more motion in front of the camera. -
Page 37: Video Settings
Attention: To EXIT the Settings Menu, Press the M button to go back. VIDEO SETTINGS A. VIDEO RESOLUTION ROVE Stealth 4K dashcam offers multiple video resolutions. 3840x2160P is the 4K resolution. You can choose the video resolution you like. Higher resolu- tion videos will take more storage spaces as you know.
-
Page 38
10-Min 20-Min C. TIME LAPSE VIDEO ROVE Stealth 4k supported to captures videos with Time Lapse recording mode. It’s around one to four frames per second. Please make sure to turn OFF Time-Lapse Video option once you are done using it. Otherwise camera will only record time lapse video everytime. -
Page 39
USER MANUAL D. VIDEO ENCODING You can choose the video encoding you like. H.265 is more advanced than H.264 in several ways. The main difference is that HEVC allows for further reduced file size. H.265 (DEFAULT) H.264 E. DISTORTION CORRECTION Because of the circular wide-angle lens of the dash cameras to capture the details on wide side, some distortion in the image is created. -
Page 40: Audio Settings
NO stamps on the video what so ever. ON (Default) AUDIO SETTINGS A. AUDIO ROVE Stealth 4K has built in microphone to record audio with video. You can choose to record mute video by choosing OFF. ON (Default) B. SPEAKER VOLUME This feature allows you to adjust the volume of the built in speaker in the camera.
-
Page 41: Light Frequency
USER MANUAL C. KEY TONE This features allows you to turn the key tone/beep sound OFF/ON. ON (Default) D. BOOT-UP TONE This feature allows you to turn OFF the camera’s booting up and turning off tone. ON (Default) LIGHT FREQUENCY Here you should choose the frequency accordingly to your power supply specification used in your country based on your geographical location.
-
Page 42: Usb Mode
LCD ON/OFF SETTING By turning ON this feature, the camera will automatically turn the display screen OFF. (Please NOTE that the camera will stay ON) OFF (Default) 1-Min 3-Min 5-Min USB MODE When you plug the camera with your 2.5FT short USB cable to your PC/MAC, this feature allows you to connect your camera as a flash drive (Select STORAGE).
-
Page 43: Parking Monitor
USER MANUAL retrieve your footage before using your camera again to prevent the loss of important Video file due to the loop cycle function, in case the force was minor which did NOT trigger G-Sensor to lock video file automatically. It is best practice and recommended for you to retrieve all necessary video footage after any event of accident before using your camera to prevent loss of vital video file.
-
Page 44: Motion Detection
MOTION DETECTION This setting can be used for various purposes such as remote video surveillance, during parking etc. When this feature is turned ON: The camera will record ONLY when there is motion detected in front of camera’s field of view by using it’s advanced motion detection algorithm.
-
Page 45: Date And Time
USER MANUAL DATE & TIME Time and date can be set manually. LANGUAGE This setting allows you to choose your desired language setting for camera. English (Default) Simplified Chinese French Traditional Chinese Spanish Russian Portuguese Japanese Deutsch Thai Italian Polish GPS INFORMATION This feature allow you to see your current geographical location in Latitude &…
-
Page 46: Format Memory Card
WiFi This feature will allow you to turn Wi-Fi ON. Default Password = 88889999 (See Page # 25 to 32) ON (Default) ABOUT MODEL VERSION : V1.06-10-2019 OPERATING SYSTEM : Linux Kernel-4.9.y WiFi Name : ROVE Stealth-4K Password : 88889999…
-
Page 47
USER MANUAL GPS player Software Installation (PC/MAC Only) (Only suitable for the units with GPS function) To download FREE Car DV Player, visit www.rovedashcam.com Why Car DV Player? What are the features? Check G-Sensor Data Play back your recorded videos To see the Exact GPS route with the video on google maps Check Driving Speed Check Driving Direction (i.e. -
Page 48
Playback Your Recorded Videos There are 3 different way you can access your videos. A. Directly On The CAMERA Long Press M Button to Enter Playback Mode Playback Front EMR Record Use UP/DOWN Button to Front Record Select the appropriate Folder Rear EMR Record Select All Delete… -
Page 49
USER MANUAL 00:02/00:11 Play / Pause Previous Next 2019_05_21_130347_00.MP4 Use UP/DOWN Button to Select the function first. Then Press OK Button to confirm the function. B. On PC/MAC Insert Micro-SD Card Into SD-Adaptor then insert the SD-adaptor into PC/MAC SD-adaptor slot. 512GB SD Card Micro-SD Card… -
Page 50
Connect the camera to USB MODE PC/MAC via 2.5FT Charging — Operate Camera Normally USB Data Cable Connect as a Webcam PC/MAC Then go to settings > USB Mode > Storage Connect as a Flash Drive PC/MAC 2.5FT USB Data Cable (Included) Go to the SD-Card folder through browsing the file explorer from your PC/MAC. -
Page 51
USER MANUAL Correct Video Player To Play 4K VIDEOS: We recommend VLC Media Player to play the 4K videos. You can download it FREE by visiting www.videolan.org Right Click on the video file > then select “OPEN WITH”> then select “VLC Media Player” to play the video. -
Page 52
To View GPS Route & Other Data, Use our FREE Car DV Player. You can download it by visiting > http://www.rovedascam.com ATTENTION Do NOT Use Windows Media Player to ATTENTION STOP play the videos from your Stealth-4K. These are High-Bit Rate 4K videos, which requires specific codecs &… -
Page 53: One-Year Limited Warranty
USER MANUAL ONE YEAR LIMITED WARRANTY We at ROVE InnoTech would like to provide One (1) full year of limited warranty for your product from the date of purchase to be free from defects in materials and craftsmanship. IMPORTANT: Please save your warranty/serial number card as an evidence.
-
Page 54
misuse detected by the Authorized service center personnel, the warranty will be void and service / repairs will be done on chargeable basis only and subject to availability of parts. The company’s obligation under this warranty shall be limited to repair or providing replacement of part(s) only. The maximum claim(s) if entertained by the company will be subject to the maximum retail price of the product purchased or the purchase price, whichever is lower and on production… -
Page 55
ROVE InnoTech (here in after referred to as “the company”) guarantees to the purchaser that this product carries a warranty for the period mentioned above, commencing from… -
Page 56
Damage is caused by using different power cord or chargers that are not supplied by us. In addition, ROVE reserves the right to refuse warranty against any product or services that are obtained and/or used in… -
Page 57: Faq & Troubleshooting
USER MANUAL FAQ / TROUBLESHOOTING Resetting the device IF the camera become frozen or if no buttons responding, then press the RESET button with a paper clip once to restart the camera at any point. This will NOT reset any settings that you have previously selected.
-
Page 58
My oldest video files are missing Your ROVE Dash Cam has Loop Cycle Recording. When it is set to either 1, 3, 5 or 10 or 20-Minutes, it will delete oldest files and record newer files over and over when the memory card is full. -
Page 59
Please feel free to contact our personalised support at help@rovedashcam.com Most e-mails are typically replied within 4-6 hours. However all quesitons are answered within 24 Hours. No Exceptions For faster response, we recommend that you please text us at 1-401-484-ROVE (7683). Please visit http://www.rovedascam.com… -
Page 60
It is user’s responsibility to comply with all local and state laws. ROVE Stealth 4K Dash Cam must be placed at proper location so it does not obstruct your view while driving. Do not use or manipulate any functions or any accesso- ries of ROVE Dash Cam while driving. -
Page 61
This is the very first edition of user manual that we wrote for Stealth 4K and we have worked extremely hard to provide such content. At ROVE we are dedicated to continuously improving camera’s firmware and adding more features as they become available. -
Page 62
NOTICE This product complies with the radio interface requirements of the European Community. This symbol means the product must not be discarded as household waste, and should be delivered to an appropriate and recycling helps protect natural resources, human health and the environment. -
Page 63
USER MANUAL A BIG THANK YOU !! •> Thank you for purchasing your new ROVE Stealth 4K Dash Cam. We hope you find your new dash cam useful and fun to use. •> If you are having difficulties setting it up, please email us at help@rovedashcam.com. -
Page 64
QUESTIONS CUSTOMER SERVICE: Response in just 6 hours For faster response text us help@rovedashcam.com 1 (401) 484-ROVE(7683) HOURS Mon — Fri 9am-5pm PST Scan the QR Code to CONTACT US Scan to Email US: Scan to Text US: help@rovedashcam.com 1-401-484-7683…
-
Contents
-
Table of Contents
-
Bookmarks
Quick Links
MODEL: R2-4K
U S E R M A N U A L
U S E R M A N U A L
www.rovedashcam.com
Copyright (C) 2020, All rights reserved
Related Manuals for ROVE R2-4K
Summary of Contents for ROVE R2-4K
-
Page 1
MODEL: R2-4K U S E R M A N U A L U S E R M A N U A L www.rovedashcam.com Copyright (C) 2020, All rights reserved… -
Page 2
CUSTOMER SERVICE Response in just 6 hours help@rovedashcam.com For faster response text us 1 (401) 484-ROVE(7683) Hours: Mon — Fri 9am-5pm PST Scan the QR Code to Email US Scan the QR Code to Text US Just Scan the QR Code with your iPhone or Android’s… -
Page 3
HOW TO VIDEOS Visit our website www.rovedashcam.com/pages/videos Understanding ROVE R2-4K Watch HOW-TO VIDEOS to learn & understand all the features so you can get the maximum benefit out of it. -
Page 4: Table Of Contents
Forma�ng Memory Card …………25 Time-Zone Se�ng …………..Using WiFi Feature …………..Connec�ng ROVE R2-4K Dash Cam With Smart Phone … 29 Understanding 3 – Camera Modes ………. 30 Playback Your Recorded Videos ……….Understanding Camera Se�ngs ……….. 37 Video Se�ngs…
-
Page 5: Introduc�On
@24 fps Digital Vehicle Dash Cam (Automobile Black Box). This product provides high quality image capture and irrefutable evidence for what goes on from the perspective of your dashboard. Rove Dash Cam is a very elegant, convenient and durable multi-vehicle driving recorder. PRODUCT OVERVIEW This Product is a leading Ultra HD Digital Vehicle Black Box Recorder.
-
Page 6: Features
USER MANUAL FEATURES: 2.4” LCD Screen NOVATEK NT-96660 Chipset + SONY IMX335 Sensor 4K Ultra-HD 2880x2160P @24fps Built-In WiFi Built-In GPS for Geo Tagging 150° Ultra-wide A+ Viewing Angle Loop Cycle Recording Split Record Mode G-Sensor Motion Detection Parking Mode Time Lapse Video Emergency Video Lock Button Up to 512GB Class 10, U3 Speed for 4K Video is required.
-
Page 7: User Agreement
USER AGREEMENT By purchasing ROVE Dash cam, it is assumed that by default you agree with precautions, user warnings and all the terms & conditions of warranty. If for any reason you do not agree with any of the terms mentioned in this manual, then you may return the product in its original packaging unused within its return window for a full refund.
-
Page 8
USER MANUAL Do not place the camera loose on top of the dashboard or in-front of the air bags. Do not mount the camera where it can be a distraction if it became loose and fall off the windshield while driving. Do not expose this device to an excessive heat, dust or use any chemical substance or cleaning solvent to clean this device. -
Page 9: Ge�Ng Started
Getting Started OUT OF THE BOX INSTRUCTIONS Please read and understand warnings & safety instructions before operating. Make sure to always keep the camera plugged into power, because camera’s internal battery is NOT intended to last more than 3-5 minutes depending on the video resolution you choose.
-
Page 10
USER MANUAL ROVE R2-4K Car dash cam is programmed to turn ON and START RECORDING automatically when it receives power, and STOPS RECORDING and turns OFF automatically when power gets disconnected within 4-5 seconds . (i.e. when you start /stop your car) Setting Date &… -
Page 11: Camera Specifica�Ons
CAMERA SPECIFICATIONS Chipset / Sensor NOVATEK 96660 / SONY IMX335 LCD Screen 2.4 Inch Lens 150° A+ Ultra HD Wide Angle Video Resolu�on 2880x2160P @24fps (4K) 2560x1440P @30fps 2304x1296P @30fps 1920x1080P @60fps (FULL HD) 1920x1080P @30fps 1280x720P @120fps (Can Play: SLOW- MOTION VIDEO) 1280x720P @60fps 1280x720P @30fps…
-
Page 12: Package Contents
Opera�ng Temperature -22°F (-30°C) ~ 176°F Temperature Guideline (80°C to 140°F), Working Humidity: 10 – 90% Package Contents: • Dash Cam • ROVE Fast Dual USB Charger • 12 FT USB Power Cable • 2.5 FT USB Data Cable PC/MAC • 360°Windshield Suction Mount •…
-
Page 13
Copyright (C) 2019, All rights reserved Copyright (C) 2019, All rights reserved ROVE Dual USB Car Charger Thank you Card User Manual PLEASE NOTE: Memory Card Is NOT Included. We Recommend SAMSUNG Class 10,U3 Speed Micro-SD Card, Max 512GB… -
Page 14: Unit Structure Appearance & Bu�Ons
USER MANUAL UNIT STRUCTURE APPEARANCE & BUTTONS: Reset Built-In GPS Windshield Mount Latch TV Out Menu/Mode Bu�on UP or Mute on/off Bu�on Emergency Lock or WiFi on/off Bu�on Down or LCD on/off Bu�on OK or Confirm Bu�on Mini-USB Power Input / Data output slot Micro SD Card Slot HDMI Out…
-
Page 15: Shortcuts & Understanding Bu�Ons
SHORTCUTS & UNDERSTANDING BUTTONS BUTTON IMAGE BUTTON NAME SHORTCUTS / FUNCTIONS To Turn ON The Camera: Press power bu�on once. POWER To Turn OFF The Camera: Long press power bu�on for 2-seconds. BUTTON Press once while video is being recorded to take a quick snap shot. Press Once — to enter/exit menu se�ngs MENU / MODE LONG PRESS for 2-Seconds — to Switch Modes…
-
Page 16: Installa�On
Make sure to format the memory card before first time use. Installation Position: It is recommended to install ROVE R2-4K at the near of rear view mirror of driver opposite side. Clean any foreign matter and moisture from the place where the product will be installed.
-
Page 17
To Lock The Suction Mount: Press & hold it tight to remove any air between suction mount and the windshield. While pressing & holding towards the windshield, turn the LOCK- ING Knob towards CLOCKWISE to LOCK in place. Press the suction mount against windshield and while pressing, turn the LOCKING Knob towards LOCK position to lock the mount in place. -
Page 18
USER MANUAL Adjust the lens angle of the camera. Loosen the screw to adjust the camera’s view angle Simply rotate the and then tighten to camera 360 lock that angle. record any direction you prefer. Start the engine and check if the product works properly. CAUTION: Make sure to remove the Plastic Lens Screen Protector before recording videos. -
Page 19
Lighter Plug Wiring at a glance Charging Only use the supplied charger to power and charge the Rove R2-4K dash cam. You can use your iPhone or Android Phone’s USB Charger, and plug into your home’s 110V Wall outlet to power/charge the camera while in your home. -
Page 20: Turning Your Camera On/Off
USER MANUAL TURNING YOUR CAMERA ON/OFF AUTO POWER ON/OFF Auto Power ON: ROVE R2-4K Dash Cam is designed to turn ON and start recording automatically when it receives power. i.e. when the car engine is started. Auto Power OFF: The camera is also pre-configured to turn itself OFF automatically within few seconds when the power gets disconnected, i.e.
-
Page 21: Home Screen
HOME SCREEN Loop Recording Timer Wide Dynamic Range Time Lapse Record Video Resolution Video Mode (Resets every loop) Loop Recording Total Trip Time Motion Detection Parking Mode Indicator Exposure Value (Resets when camera restarts) G-Sensor Microphone Indicator Memory Card Indicator Current Time Battery Indicator Current Date…
-
Page 22: Led Status Light Indicator
USER MANUAL LED STATUS LIGHT INDICATOR BLINKING RED LED — Recording Video SOLID RED LED — Not Recording Video NO RED LED — Camera is Turned OFF SOLID GREEN LED — Internal Ba�ery Charging NO GREEN LED — Internal ba�ery fully charged DIFFERENT SCENARIOS When Camera Is Plugged Into The POWER Solid…
-
Page 23
VIDEO SETTINGS Resolution Parking Mode Exposure Loop Recording Time Lapse record Record Audio Motion Detection Stamp Gsensor Live Speed Distortion Correction Speed Unit Hide Status Icons Rotate Video SYSTEM SETTINGS Language WiFi Beep Sound Clock Format TV Mode GPS Time Zone Setting Date/Time Speaker Volume License Plate… -
Page 24: Inser�Ng/ Removing Memory Card
If you experience camera FREEZING or LAGGING or STOPS Recording after few seconds. Then It is the issue of the MEMORY CARD. (NOT THE CAMERA ISSUE) — Please Contact US. ROVE R2-4K Dash Camera is High Bit-Rate 4K Video recording device. Which requires High Speed Rating SPECIFIC Micro-SD Cards.
-
Page 25: Forma�Ng Memory Card
FORMATTING MEMORY CARD Press to STOP video recording first or to clear the error message. If you have any on the screen. Please press the button once to enter the video settings. Press the button again to switch to the System Settings. Format Format Default Setting…
-
Page 26: Time-Zone Se�Ng
USER MANUAL TIME-ZONE SETTING: To set the date & time, choose one of the following options below: You can choose date and time of your choice manually, go to System Settings > Date/Time and select the date and time of your choice.
-
Page 27: Using Wifi Feature
WiFi signal (instead of a Bluetooth) to pair your smartphone with ROVE R2-4K. What is the WiFi Range? The WiFi signal range is about 10FT when there are NO obstruc- tions in the middle.
-
Page 28
It is NOT a cloud or an IP camera and it is NOT meant to do that. You can get live video and footage on ROVE R2-4K’s APP as long as you stay within the 10FT range from the dash cam. -
Page 29: Connec�Ng Rove R2-4K Dash Cam With Smart Phone
For Android phones: There is one extra step you will have to take. Once you connect to ROVE R2-4K WiFi, it will say “No Internet”. Which is fine. You just have to tap on the pop up no�fica�on that will show up in few seconds to select that you s�ll want to stay connected even though there…
-
Page 30: Understanding 3 — Camera Modes
USER MANUAL UNDERSTANDING 3 – CAMERA MODES: ROVE R2-4K has 3 different camera modes: VIDEO MODE PHOTO MODE PLAYBACK MODE TO SWITCH MODE: Press & Hold “M button for 2-seconds. NOTE: Each Mode has their own separated Menu settings. • System Settings are common between all three Modes.
-
Page 31
2. PHOTO MODE: Photo mode lets you take a snapshot. While in the Photo Mode: Press button to take a snapshot • Press button to ZOOM IN • Press button to ZOOM OUT • Press MEbutton to enter Photo Mode’s Menu Settings •… -
Page 32: Playback Your Recorded Videos
USER MANUAL Playback Your Recorded Videos There are 3 different way you can access your videos. A. Directly On The CAMERA by switching to the PLAYBACK MODE. You can do this by pressing and holding the Resolution button for two seconds Loop Recording so it will switch from Video mode to Photo mode.
-
Page 33
B. On PC/MAC To play on your PC/Mac, simply connect the camera using included short USB Data cable and choose the Connect as USB Flash Drive on the camera when this message pops up. Connect to PC/MAC Connect as USB Flash Drive Connect as PC/MAC Webcam Operate Camera Normally You can simply remove the memory card from camera and insert… -
Page 34
USER MANUAL Then simply go to MY PC or Folder, then look for the added flash drive. You should be able to see drive «D» or «E» or other name depending on the pre-installed hard drives. Once you find the added flash drive, double click in it, then you will see the NOVATEK folder where you will find your unlocked videos. -
Page 35
Correct Video Player To Play 4K VIDEOS: We recommend VLC Media player. You can get it free at www.videolan.org You can also use our GPS Player from our website for free to view the google maps from www.rovedashcam.com… -
Page 36
ROVE R1-4K WiFi by entering the defalt password “12345678” Once connected, simply open the correct ROVE APP for your model. Please note that ROVE R2-4K model uses “ROVE” App only. So make sure you are using the correct App for the correct model that you have. -
Page 37: Understanding Camera Se�Ngs
Attention: To EXIT the Settings Menu, Press the button to go back. VIDEO SETTINGS VIDEO RESOLUTION ROVE R2-4K dashcam offers multiple video resolutions. You can choose the video resolution you like. Higher resolu- tion videos will take more storage space. 2880x2160P @ 24fps (4K)
-
Page 38
USER MANUAL OFF: When you choose off, the camera will Continue to record each file 4GB in size until the memory card becomes full and then it will give you “Card Full” message. It will NOT record any further until you either delete files to make room or format the memory card. -
Page 39
MOTION DETECTION: This setting can be used for various purposes such as remote Video surveillance, during parking etc. When this feature is turned ON: The built in camera Will record ONLY when there is motion detected in front Of camera’s field Of view by using its advanced motion detection algorithm. -
Page 40
USER MANUAL PARKING MODE: This feature is designed to work when camera is SHAKEN during Hit-&-Run event while your car is parked. When someone hits your car and shaking is detected based on your G-sensor setting, the camera Will turn ON automatically > then START recording for 1-min on internal battery >… -
Page 41
RECORD AUDIO: Rove r2-4k— has built-in microphone to record audio with video. You can choose to record mute video by choosing OFF. You can also press UP button to mute/un-mute while video is being recorded. • • ON (Default) G-SENSOR:… -
Page 42
USER MANUAL SPEED UNIT: You can choose desired speed option stamp to be displayed and recorded on video stamp based on your selection. KM/H • MPH (Default) • STAMPS: This option allows you to turn ON All the stamps on the bottom of the video. -
Page 43: Photo Se�Ngs
PHOTO SETTINGS: To Enter Photo Se�ng: Press & Hold «M»button to enter Photo Mode. Press » button ONCE to enter Photo Settings. Press «D» button to access photo settings. Now use » » «D» buttons to scroll through > then press «0K»…
-
Page 44
USER MANUAL 3F/SECOND BURST MODE: This feature allows you to take burst capture of 3-Frames/Sec with single press of a button. • • ON (Default) IMAGE QUALITY: This feature allows you to set the quality level of an image captured. Higher the image quality more space it will take on the memory card. -
Page 45
PHOTO EFFECT: This feature allows you to choose color effect for captured image. • Color (Default) • Black & White • Sepia ISO: This feature allows you to set the camera’s sensitivity to light when taking photos. The higher the setting value the greater the sensitivi- •… -
Page 46: Playback Se�Ngs
USER MANUAL PLAYBACK SETTINGS: To Enter Playback Se�ng: 1. Press & Hold «M» button two times to enter Playback Mode. 2. Press «M» button ONCE to enter Play Settings. 3. Press «D» button to access Play settings. 4. Now use «U»…
-
Page 47: System Se�Ngs
SYSTEM SETTINGS: WIFI: This feature will allow you to turn WiFi broadcast ON from the camera so you can connect your phone with ROVE R2-4K Dash Cam to access videos, photos and settings. WiFi Name SSID: ROVE R2-4K-********* Password: 12345678 You can also turn WiFi ON/OFF by pressing &…
-
Page 48
USER MANUAL TIME ZONE SETTING: Here you can choose your desired or local time zone setting based on UTC/ GMT value. Please make sure to adjust time zone setting during standard vs. daylight savings time. UTC/GMT -8:00 (Default) • • UTC/GMT -12:00 to UTC/GMT +12:00 To find your correct UTC/GMT time zone setting, please visit : h�p://www.greenwichmean�me.com/�me-zone/usa/… -
Page 49
BEEP SOUND: This feature allows you to turn ON/OFF camera button’s beep sound & any voice confirmation. • ON (Default) • LANGUAGE: This setting allows you to choose your language setting for camera’s firmware. English (Default) French Spanish Portuguese Deutsch Italian Simplified Chinese Traditional Chinese… -
Page 50
USER MANUAL TV MODE: Here you can choose your TV mode based on your country’s TV setting. NTSC (Default) • • LICENSE PLATE: This feature will allow you to insert custom vehicle ID or Driver ID to be stamped on video. •… -
Page 51
Here you can check the current firmware version installed on your camera. You will need this information in the future to check if newer version of firmware is available. Please visit: For latest firmware upgrade www.rovedashcam.com inctructions. ROVE-R2-4K-06102017 (First — Original Firmware) •… -
Page 52: Rese�Ng The Camera
USER MANUAL RESETTING THE CAMERA: Resetting Hardware & Software are two different things. Reset The Hardware/Camera: Press the RESET Button at the bottom of the camera once. If the camera is freezing or stuck where no buttons will respond, then please press the RESET button only ONCE at the bottom of the camera with a paper clip or tip of the pen while it is turned ON.
-
Page 53: Understanding Parking Mode
MOST IMPORTANT: UNDERSTANDING PARKING MODE Parking mode works as follows. Let’s say you went shopping and parked your car in the parking lot. Then someone hits your car while backing up their car, then the impact caused by hitting your car makes your camera vibrate, which then activates the built-in G-sensor and then parking mode, which then turns ON your camera automatically and starts recording for 1-min, then it locks…
-
Page 54: Understanding Mo�On Detec�On
USER MANUAL UNDERSTANDING MOTION DETECTION Motion detection feature is made for people who want to create surveillance around their car when the car is NOT driving, during the night or when they are not in their car so the camera can record every time if there is a motion in front of the camera.
-
Page 55
camera to change (hence, the camera notices that something in front of it is moving) which will trigger the camera to START recording automatically. Now, the camera will continue to record until there is NO more motion in front of the camera. Then it will STOP recording and stay in stand by mode (idle mode) until the next motion detection event occurs and triggers the camera. -
Page 56: Ba�Ery Informa�On
USER MANUAL BATTERY INFORMATION This Product contains Lithium-ion inbuilt battery. With a full charge battery should last upto 2-5 minutes. Internal battery is NOT meant to last long time. The higher the video resolution you choose the more power it will consume, hence it will last short duration, and the lower video resolution you choose the less power it will consume, hence it will last longer.
-
Page 57
CAUTION: If you leave your car for long time we advise that you remove • the camera from the car because the temperature inside the car can exceed specified range above depending upon your geographical and weather conditions. Do not expose this camera to extreme high heat, direct •… -
Page 58: Gps Player Installa�On
USER MANUAL GPS PLAYER INSTALLATION (Only suitable for the units with GPS func�on) To download FREE GPS Player, visit www.rovedashcam.com Why GPS Player? What are the features? Check G-Sensor Data Play back your recorded videos To see the Exact GPS route with the video on google maps Check Driving Speed Check Driving Direction (i.e.
-
Page 59
Date & Time Shows Date & Time of video was recorded Past Viewed Files These are you previously viewed files. Click on to view them again. Driving Speed This is where your driving speed will be displayed. Playback Controls • Reverse •… -
Page 60: One Year Limited Warranty
USER MANUAL ONE YEAR LIMITED WARRANTY: We at would like to provide One (1) full year of limited warranty for your product from the date of purchase to be free from defects in materials and craftsmanship. IMPORTANT: Please save your warranty/serial number card as an evidence.
-
Page 61
maximum retail price of the product purchased or the purchase price, whichever is lower and on production of original proof of purchase. During the warranty period in the event of any unforeseen circumstances where spares not available a commercial solution in lieu of repairs will be calculated based on company’s prevail- ing depreciation rules and the same will be binding on the purchaser. -
Page 62
USER MANUAL 4. Company shall not be liable directly or indirectly for any claim for compensation if the Product has been exposed to moisture and / or dampness and / or extreme thermal and / or extreme environmental conditions or to rapid changes in such conditions, to corrosion, to oxidation, to spillage of food or liquid or to influence from external chemical products. -
Page 63: Safety & Legal Aspects
ROVE Dash- Cam while driving. Distraction is a leading cause of accidents. AGREEMENTS: By purchasing ROVE Dash Cam, you hereby agree with all the terms and conditions of warranty, warnings and precautions. If for any reason you do not agree with these terms, you may return the product in its original packaging unused within its return window for a full refund.
-
Page 64: Troubleshoo�Ng Your Rove R2-4K
Please trust us. We have sold thousands of ROVE Dash Camera’s and they do NOT lag, we stand by our prduct and we do extensive tes�ng. Some customers simply thinks the camera is bad or not stable, but that is NOT the case here.
-
Page 65
Also Please make sure “Parking Mode” is also set to OFF. My oldest video files are missing Your ROVE Dash Cam has Loop Cycle Recording. When it is set to either 1, 3, 5 or 10-mins, it will delete oldest files and record newer files over and over when the memory card is full. -
Page 66
USER MANUAL My date and �me is not staying the same even a�er I set date and �me. Please go to camera’s system se�ngs > Time Zone Se�ng > Set your correct GMT value > 0K to confirm. Thats it. Now every-�me you have GPS signal, you will always have correct date and �me. -
Page 67: A Big Thank You
A BIG THANK YOU!! Thank you for purchasing your new Dash Cam. We hope you find your new dash cam useful and fun to use. If you are having difficulties setting it up, please email us at help@ rovedashcam.com. 99% of all setup problems can easily be resolved and should be able to get you up and running in no time.
-
Page 68: Contact Us
QUESTIONS CUSTOMER SERVICE: Response in just 6 hours For faster response text us help@rovedashcam.com 1 (401) 484-ROVE(7683) HOURS Mon — Fri 9am-5pm PST Scan the QR Code to CONTACT US Scan to Email US: Scan to Text US: help@rovedashcam.com 1-401-484-7683…