- Manuals
- Brands
- Husqvarna Manuals
- Lawn Mower
- LC53 e
Manuals and User Guides for Husqvarna LC53 e. We have 6 Husqvarna LC53 e manuals available for free PDF download: Operator’s Manual, Workshop Manual
Husqvarna LC53 e Operator’s Manual (108 pages)
Brand: Husqvarna
|
Category: Lawn Mower
|
Size: 22.58 MB
Table of Contents
-
Svenska
4
-
Symbolför Klaring
2
-
Symbolförklaring
3
-
Åtgärder Före Användning Av Ny Gräsklippare
3
-
Table of Contents
4
-
-
-
INNEHÅLL Innehåll
4
-
Ad Är Vad
5
-
Ad Är Vad På Gräsklipparen
5
-
-
Säkerhetsinstruktioner
6
-
Personligt Skydd
6
-
Maskinens Säkerhetsutrustning
6
-
Allmänna Säkerhetsinstruktioner
7
-
Allmänna Arbetsinstruktioner
8
-
-
Montering
9
-
Montering Av Styre
9
-
-
Bränslehantering
10
-
Drivmedel
10
-
-
Start Och Stopp
11
-
Start Och Stopp
12
-
-
Underhåll
13
-
Tekniska Data
16
-
EG-Försäkran Om Överensstämmelse
18
-
-
-
Dansk
21
-
SYMBOLFORKLARING Symbolforklaring
19
-
Forberedelser, Inden en Ny Plæneklipper Tages I Brug
20
-
INDHOLD Indhold
21
-
Hvad er Hvad
22
-
Hvad er Hvad På Plæneklipperen
22
-
-
Sikkerhedsinstruktioner
23
-
Personlig Beskyttelse
23
-
Maskinens Sikkerhedsudstyr
23
-
Generelle Sikkerhedsinstruktioner
24
-
Generelle Arbejdsinstruktioner
25
-
-
Montering
27
-
Montering Af Styr
27
-
-
Brændstofhåndtering
28
-
Drivmiddel
28
-
-
Start Og Stop
29
-
Vedligeholdelse
31
-
Indstilling Af Koblingswire
33
-
Dagligt Eftersyn
33
-
Ugentligt Eftersyn
33
-
-
Tekniske Data
34
-
EF-Overensstemmelseserklæring
36
-
-
-
Norsk
39
-
SYMBOLFORKLARING Symbolforklaring
37
-
Tiltak Før Bruk Av en Ny Gressklippere
38
-
INNHOLD Innhold
39
-
Hva er Hva
40
-
Hva er Hva På Gressklipperen
40
-
-
Sikkerhetsinstruksjoner
41
-
Personlig Beskyttelse
41
-
Maskinens Sikkerhetsutstyr
41
-
Generelle Sikkerhetsinstruksjoner
42
-
Generelle Arbeidsinstruksjoner
43
-
-
Montering
44
-
Montering Av Styre
44
-
-
Brennstoffhåndtering
45
-
Brennstoff
45
-
-
Start Og Stopp
46
-
Vedlikehold
48
-
Justering Av Koplingsvaier
50
-
Daglig Ettersyn
50
-
Ukentlig Ettersyn
50
-
-
Tekniske Data
51
-
EF-Erklæring Om Samsvar
53
-
-
-
Suomi
56
-
MERKKIEN SELITYKSET Merkkien Selitykset
54
-
Toimenpiteet Ennen Uuden Ruohonleikkurin Käyttöä
55
-
SISÄLTÖ Sisältö
56
-
Koneen Osat
57
-
Ruohonleikkurin Osat
57
-
-
Turvaohjeet
58
-
Henkilökohtainen Suojaus
58
-
Koneen Turvalaitteet
58
-
Yleiset Turvaohjeet
59
-
Yleiset Työohjeet
60
-
-
Asennus
62
-
Ohjaimen Asennus
62
-
-
Polttoaineen Käsittely
63
-
Polttoaine
63
-
-
Käynnistys Ja Pysäytys
64
-
Kunnossapito
66
-
Leikkuukannen Puhdistaminen
68
-
Viikoittaiset Toimenpiteet
68
-
Kuukausittaiset Toimenpiteet
68
-
-
Tekniset Tiedot
69
-
EY-Vaatimustenmukaisuusvakuutus
71
-
-
-
English
74
-
Key to Symbols
72
-
Steps before Using a New Lawn Mower
73
-
Contents
74
-
What Is What
75
-
What Is What on the Lawn Mower
75
-
-
Safety Instructions
76
-
Personal Protection
76
-
Machine’s Safety Equipment
76
-
Cutting Equipment
76
-
-
General Safety Precautions
77
-
Fuel Safety
77
-
-
General Working Instructions
78
-
-
Assembly
79
-
Fitting the Handlebar
79
-
-
Fuel Handling
80
-
Fuel
80
-
Engine Oil
80
-
-
-
Starting and Stopping
81
-
Maintenance
83
-
Spark Plug
83
-
Changing the Oil
84
-
Drive and Gearbox
84
-
Weekly Maintenance
85
-
Adjusting the Clutch Wire
85
-
Monthly Maintenance
85
-
Daily Maintenance
85
-
-
Technical Data
86
-
EC-Declaration of Conformity
88
-
-
-
Français
91
-
EXPLICATION des SYMBOLES Explication des Symboles
89
-
Mesures À Prendre Avant D’utiliser Une Tondeuse Neuve
90
-
Sommaire
91
-
Quels Sont Les Composants
92
-
Quels Sont Les Composants de la Tondeuse
92
-
-
Instructions de Sécurité
93
-
Protection Personnelle
93
-
Équipement de Sécurité de la Machine
93
-
Instructions Générales de Sécurité
94
-
Méthodes de Travail
95
-
-
Montage
97
-
Montage du Guidon
97
-
-
Manipulation du Carburant
98
-
Carburant
98
-
Remplissage de Carburant
98
-
Huile Moteur
98
-
-
-
Démarrage Et Arrêt
99
-
Entretien
101
-
Entretien Hebdomadaire
103
-
Entretien Mensuel
103
-
Entretien Quotidien
103
-
-
Caractéristiques Techniques
104
-
Assurance de Conformité UE
106
-
-
Advertisement

Husqvarna LC53 e Operator’s Manual (72 pages)
Lawn Mowers
Brand: Husqvarna
|
Category: Lawn Mower
|
Size: 6.29 MB
Table of Contents
-
English
4
-
Key to Symbols
2
-
Steps before Using a New Lawn Mower
3
-
-
Contents
3
-
Table of Contents
4
-
Contents
4
-
-
Wha T Is What
5
-
What Is What on the la Wn Mower
5
-
What Is What on the Lawn Mower
6
-
-
Safety Instr Uctions
7
-
Personal Protection
7
-
Machine ‘ S Safety Equipment
7
-
General Safety Precautions
8
-
General Working Instructions
9
-
-
Assembly
10
-
Fitting the Handlebar
10
-
-
Fuel Handling
11
-
Fuel
11
-
-
Starting and Stopping
12
-
Maintenance
13
-
Spark Plug
13
-
T Echnical Data
14
-
Daily Maintenance
15
-
Weekly Maintenance
15
-
-
Technical Data
16
-
EC-Declaration of Conformity
17
-
-
-
Español
20
-
Índice
18
-
ACLARACIÓN de LOS SÍMBOLOS Aclaración de Los Símbolos
18
-
Preparativos para el Empleo de un Cortacésped Nuevo
19
-
-
Índice
20
-
¿Qué es Qué?
21
-
Componentes del Cortacésped
21
-
Componentes del Cortacésped
22
-
-
Instrucciones de Seguridad
23
-
Protección Personal
23
-
Equipo de Seguridad de la Máquina
23
-
Instrucciones Generales de Seguridad
24
-
Instrucciones Generales de Trabajo
25
-
-
Montaje
27
-
Montaje del Manillar
27
-
-
Manipulacion del Combustible
28
-
Carburante
28
-
-
Arranque y Parada
29
-
Mantenimiento
30
-
Filtro de Aire
30
-
Cambio de Aceite
31
-
Mantenimiento Diario
32
-
Mantenimiento Semanal
32
-
-
Datos Tecnicos
33
-
Datos Técnicos
33
-
Declaración CE de Conformidad
34
-
-
-
Português
37
-
Índice
35
-
EXPLICAÇÃO DOS SÍMBOLOS Explicação Dos Símbolos
35
-
-
Índice
37
-
Como Se Chama?
38
-
Relva
38
-
Como Se Chama no Cortador de Relva
38
-
Como Se Chama no Cortador de Relva
39
-
-
Instruções de Segurança
40
-
Protecção Pessoal
40
-
Equipamento de Segurança da Máquina
40
-
Instruções Gerais de Segurança
41
-
Instruções Gerais de Trabalho
42
-
-
Montagem
44
-
Montagem da Direcção
44
-
-
Manejo de Combustível
45
-
Combustível
45
-
-
Arranque E Paragem
46
-
Manutenção
47
-
Filtro de Ar
47
-
-
Especificações Técnicas
50
-
Certificado CE de Conformidade
51
-
-
Especificações Técnicas
50
-
-
Italiano
54
-
SIMBOLOGIA Simbologia
52
-
Interventi Prima DI Usare un Nuovo Rasaerba
53
-
INDICE Indice
54
-
Che Cosa C’è
55
-
Che Cosa C’è Nel Rasaerba
55
-
Che Cosa C’è Nel Rasaerba
56
-
-
Norme DI Sicurezza
57
-
Protezione Personale
57
-
Dispositivi DI Sicurezza Della Macchina
57
-
Norme Generali DI Sicurezza
58
-
Istruzioni Generali DI Lavoro
59
-
-
Montaggio
61
-
Montaggio del Manubrio
61
-
-
Operazioni con Il Carburante
62
-
Carburante
62
-
-
Avviamento E Arresto
63
-
Manutenzione
64
-
Manutenzione Giornaliera
66
-
Manutenzione Settimanale
66
-
-
Caratteristiche Tecniche
67
-
Dichiarazione DI Conformità CE
68
-
-

Husqvarna LC53 e Operator’s Manual (72 pages)
Brand: Husqvarna
|
Category: Lawn Mower
|
Size: 13.26 MB
Table of Contents
-
English
4
-
Key to Symbols
2
-
Steps before Using a New Lawn Mower
3
-
Table of Contents
4
-
-
-
Contents
4
-
What Is What
5
-
What Is What on the Lawn Mower
5
-
-
Safety Instructions
6
-
Personal Protection
6
-
Machine’s Safety Equipment
6
-
General Safety Precautions
7
-
General Working Instructions
8
-
-
Assembly
9
-
Fitting the Handlebar
9
-
-
Fuel Handling
10
-
Fuel
10
-
-
Starting and Stopping
11
-
Maintenance
13
-
Daily Maintenance
15
-
Weekly Maintenance
15
-
-
Technical Data
16
-
EC-Declaration of Conformity
18
-
-
-
Español
21
-
ACLARACIÓN de LOS SÍMBOLOS Aclaración de Los Símbolos
19
-
Preparativos para el Empleo de un Cortacésped Nuevo
20
-
Índice
21
-
¿Qué es Qué?
22
-
Componentes del Cortacésped
22
-
-
Instrucciones de Seguridad
23
-
Protección Personal
23
-
Equipo de Seguridad de la Máquina
23
-
Instrucciones Generales de Seguridad
24
-
Instrucciones Generales de Trabajo
25
-
-
Montaje
27
-
Montaje del Manillar
27
-
-
Manipulacion del Combustible
28
-
Carburante
28
-
-
Arranque y Parada
29
-
Mantenimiento
31
-
Mantenimiento Diario
33
-
Mantenimiento Semanal
33
-
-
Datos Tecnicos
34
-
Datos Técnicos
34
-
Declaración CE de Conformidad
36
-
-
-
Português
39
-
EXPLICAÇÃO DOS SÍMBOLOS Explicação Dos Símbolos
37
-
Passos a Efectuar Antes de Utilizar um Novo Cortador de Relva
38
-
Índice
39
-
Como Se Chama?
40
-
Como Se Chama no Cortador de Relva
40
-
-
Instruções de Segurança
41
-
Protecção Pessoal
41
-
Equipamento de Segurança da Máquina
41
-
Instruções Gerais de Segurança
42
-
Instruções Gerais de Trabalho
43
-
-
Montagem
45
-
Montagem da Direcção
45
-
-
Manejo de Combustível
46
-
Combustível
46
-
-
Arranque E Paragem
47
-
Manutenção
49
-
Filtro de Ar
49
-
-
Especificações Técnicas
52
-
Especificações Técnicas
52
-
Certificado CE de Conformidade
54
-
-
-
Italiano
57
-
SIMBOLOGIA Simbologia
55
-
Interventi Prima DI Usare un Nuovo Rasaerba
56
-
INDICE Indice
57
-
Che Cosa C’è
58
-
Che Cosa C’è Nel Rasaerba
58
-
-
Norme DI Sicurezza
59
-
Protezione Personale
59
-
Dispositivi DI Sicurezza Della Macchina
59
-
Norme Generali DI Sicurezza
59
-
Istruzioni Generali DI Lavoro
61
-
-
Montaggio
62
-
Montaggio del Manubrio
62
-
-
Operazioni con Il Carburante
63
-
Carburante
63
-
Olio Motore
63
-
-
-
Avviamento E Arresto
64
-
Manutenzione
66
-
Manutenzione Giornaliera
68
-
Manutenzione Settimanale
68
-
-
Caratteristiche Tecniche
69
-
Dichiarazione DI Conformità CE
71
-
-
Advertisement

Husqvarna LC53 e Workshop Manual (34 pages)
Brand: Husqvarna
|
Category: Lawn Mower
|
Size: 8.77 MB
Table of Contents
-
Table of Contents
3
-
1 Introduction and Safety Regulations
4
-
General
4
-
Revisions
4
-
Target Group
4
-
Safety Instructions
4
-
General Safety Instructions
4
-
Special Safety Instructions
4
-
-
Symbols on the Product
5
-
Symbols on the Battery and /Or on the Battery Charger
5
-
-
2 Delivery and Service
6
-
Service Schedule
6
-
Assembly and Function Test
7
-
To Assemble the Handle
7
-
To Adjust the Handle Height
7
-
To Assemble the Grass Catcher
8
-
To Assemble the Mulching-Kit
8
-
-
Function Test of LC 141Vli/Lc 141Li
8
-
To Start and Stop the Motor
8
-
To Do a Test of the Save Function
9
-
Speed Control (LC 141 Vli)
9
-
-
Function Test of LC 141C
10
-
To Select an Approved Cable
10
-
To Start and Stop the Motor
10
-
-
-
3 Design and Function
11
-
Serial Number
11
-
Type Plate/Product Serial Number
11
-
-
Motor
11
-
Drive (LC 141Vli)
11
-
Cutting Equipment
11
-
-
4 Repair Instructions LC 141Vli/Lc 141Li
12
-
Product Overview for Repair Instructions
12
-
To Replace the Blade
13
-
To Remove and Attach the Motor Cover
13
-
To Replace the Battery Connection Harness
14
-
To Replace the Motor
15
-
To Replace the Motor Controller Unit
15
-
To Remove the Wheels
15
-
To Replace the Transmission (LC 141Vli)
16
-
To Replace the Transmission Control (LC 141Vli)
17
-
To Replace the Relay (LC 141Li)
18
-
To Replace the Handle
18
-
To Replace the Safety Key Switch
19
-
-
5 Repair Instructions LC 141C
20
-
Product Overview for Repair Instructions
20
-
To Remove and Attach the Outer Motor Cover
21
-
To Replace the Blade
21
-
To Replace the Motor
22
-
To Replace the Drive Belt
23
-
To Replace the Handle
24
-
-
6 Specifications
25
-
Technical Data LC 141Vli and LC 141 Li
25
-
Technical Data LC 141C
26
-
-
7 Appendices and Schedules
27
-
Wiring Diagram LC 141Vli
27
-
Wiring Diagram LC 141Li
28
-
Troubleshooting Schedule LC 141Vli
29
-
Troubleshooting Schedule LC 141Li
31
-

Husqvarna LC53 e Workshop Manual (36 pages)
Brand: Husqvarna
|
Category: Lawn Mower
|
Size: 0.97 MB
Table of Contents
-
Table of Contents
11
-
Front Axle, Dismantling
12
-
Front Axle, Assembling
12
-
Rear Axle Without Drive, Dismantling
13
-
Rear Axle Without Drive, Assembling
13
-
Rear Axle with Drive, Dismantling
14
-
Rear Axle with Drive, Assembling
14
-
Replacing the Drive Belt
16
-
Height Control Lock, LC48 E, LC53 E
16
Husqvarna LC53 e Operator’s Manual (20 pages)
Brand: Husqvarna
|
Category: Lawn Mower
|
Size: 1.67 MB
Table of Contents
-
Key to Symbols
2
-
Steps before Using a New Lawn Mower
3
-
Table of Contents
4
-
Contents
4
-
Wha T Is What
5
-
What Is What on the la Wn Mower
5
-
Safety Instr Uctions
6
-
P Ersonal Protection
6
-
Machine ‘ S Safety Equipment
6
-
General Safety Precautions
7
-
General Working Instructions
8
-
Assembly
10
-
Fitting the Handlebar
10
-
Fuel Handling
11
-
Fuel
11
-
Starting and Stopping
12
-
Maintenance
13
-
Changing the Oil
14
-
Drive and Gearbox
14
-
Weekly Maintenance
15
-
Adjusting the Clutch Wire
15
-
Daily Maintenance
15
-
-
TECHNICAL D ATAT Echnical Data
16
Advertisement
Related Products
-
Husqvarna LC53B e
-
Husqvarna LC53E e
-
Husqvarna LC53 Ee
-
Husqvarna LC53 Be
-
Husqvarna LC56
-
Husqvarna LC 551SP
-
Husqvarna LC 551 iV
-
Husqvarna LC 551iV
-
Husqvarna LC56AWD
-
Husqvarna LC 551VQ
Husqvarna Categories
![]()
Lawn Mower
Trimmer
Chainsaw
Motorcycle
Saw
More Husqvarna Manuals
- Производитель: Husqvarna
-
Страна производства:
Швеция
- Артикул: 9666692-03
- Модель: LC 53 e
- Гарантия: 1 год
- В сравнение
Информацию по данному товару Вы можете уточнить по телефонам:
8 495 215-50-63
8 800 333-18-92
- Описание
- Характеристики
- Документация
- Отзывы (3)
- Принадлежности
Описание
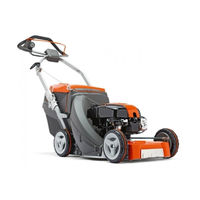
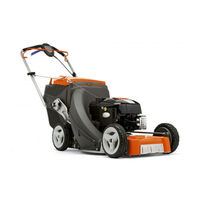
Газонокосилка бензиновая Husqvarna LC 53 e — самоходная компактная газонокосилка, идеально подходящая для участков газона до 25 соток, создана для частных пользователей, предъявляющих самые высокие требования к газонокосилке в отношении эргономики, прочности, удобства в использовании и качества. Функция Comfort Cruise установленная на LC 53 e- позволяет стричь газон с желаемой скоростью , запоминает установку для следующей стрижки.
|
|
Twin Control — двойное управление включением привода колес, позволяет легко регулировать скорость движения газонокосилки любой рукой. |
|
|
Twin Control — двойное управление включением привода колес, позволяет легко регулировать скорость движения газонокосилки любой рукой. |
|
|
Husqvarna LC 53 e обладает универсальностью благодаря нескольким способам стрижки травы. Выберите режим стрижки для получения оптимальных результатов — используйте травосборник для повышения чистоты газона, функцию BioClip(r) (мульчирование) для удобрения почвы или выброс для стрижки редко обрабатываемых участков. |
|
|
AFT — уникальная конструкция с режущей декой, ножом и желобом, создающими оптимальный поток воздуха. Это обеспечивает превосходные результаты при всех режимах стрижки. При использовании травосборника он заполняется до оптимального уровня, поэтому его реже приходится опустошать. |
|
|
AFT — уникальная конструкция с режущей декой, ножом и желобом, создающими оптимальный поток воздуха. Это обеспечивает превосходные результаты при всех режимах стрижки. При использовании травосборника он заполняется до оптимального уровня, поэтому его реже приходится опустошать. |
|
|
Основа конструкции газонокосилки Husqvarna LC 53 e — прочное оцинкованное шасси, которое повышает устойчивость и маневренность |
|
|
Уникальная разработанная конструкция рукоятки позволяет регулировать ее высоту для повышения комфорта во время стрижки травы. Регулирующий рычаг, расположенный в верхней части рукоятки, обеспечивает бесступенчатую регулировку высоты. Кабели скрыты в трубках рукоятки, поэтому они не цепляются за кусты и не повреждаются, когда рукоятка сложена. |
|
|
Рукоятка с мягкой накладкой установлена под углом для оптимального комфорта и эргономичности. В рукоятку интегрирована функция контроля присутствия оператора, повышающая легкость и удобство использования. Рукоятка с несколькими мягкими накладками обеспечивает гибкий выбор положения руки для уменьшения нагрузки на суставы пальцев, кистей и предплечий. Она также позволяет перемещать LC 53 e одной рукой. |
|
|
Трубки, образующие рукоятку, соединены шарниром, что позволяет пользователю быстро сложить рукоятку для хранения или транспортировки газонокосилки. |
|
|
Трубки, образующие рукоятку, соединены шарниром, что позволяет пользователю быстро сложить рукоятку для хранения или транспортировки газонокосилки. |
|
|
Одна легкодоступная эргономичная рукоятка позволяет регулировать высоту всей режущей деки и заменяет собой индивидуальные рычаги для каждой оси или каждого колеса. |
|
|
Благодаря удобно расположенному окну индикатора оператор может легко контролировать установленную высоту стрижки. |
|
|
Благодаря удобно расположенному окну индикатора оператор может легко контролировать установленную высоту стрижки. |
|
|
Стальная режущая дека Husqvarna LC 53 e изготовлена штамповкой из одного листа, по этому она не имеет сварных частей и оцинкована гальваническим способом для повышения износостойкости. Порошковое покрытие защищает деку от коррозии и увеличивает ее срок службы |
|
|
Легко запускаемый мощный плавно работающий двигатель типа DOV с функцией ReadyStart, избавляющей от необходимости вручную осуществлять подкачку топлива в карбюратор и управлять положением воздушной заслонки. |
|
|
Легко запускаемый мощный плавно работающий двигатель типа DOV с функцией ReadyStart, избавляющей от необходимости вручную осуществлять подкачку топлива в карбюратор и управлять положением воздушной заслонки. |
|
|
LC 53 e имеет колеса с двумя подшипниками, которые обеспечивают плавность работы и минимальный люфт даже после многолетней эксплуатации |
|
|
Штуцер для поливочного шланга облегчает очистку режущей деки. Присоедините шланг, включите воду, запустите двигатель, и вы получите очищенную деку. Для достижения оптимальных результатов очищайте деку сразу после использования. |
|
|
Штуцер для поливочного шланга облегчает очистку режущей деки. Присоедините шланг, включите воду, запустите двигатель, и вы получите очищенную деку. Для достижения оптимальных результатов очищайте деку сразу после использования. |
|
|
Износостойкий бампер из нержавеющей стали защищает переднюю часть газонокосилки. |
|
|
Высокое расположение компактного эргономичного жесткого травосборника на газонокосилке облегчает его снятие и установку. Он имеет широкое отверстие и рукоятку в задней части, что облегчает его опустошение. |
|
|
Высокое расположение компактного эргономичного жесткого травосборника на газонокосилке облегчает его снятие и установку. Он имеет широкое отверстие и рукоятку в задней части, что облегчает его опустошение. |
|
|
Нисходящий поток воздуха направляет шум и пыль вниз от пользователя для создания более комфортной рабочей среды |


Особенности газонокосилки Husqvarna LC 53 e:
Работать с газонокосилкой, осуществлять техническое обслуживание и ремонт должны лица, хорошо ознакомленные с ее специфическими характеристиками и знающие соответствующие правила техники безопасности.
Во время работы с косилкой Husqvarna LC 53 e вы должны использовать специальные одобренные средства защиты. Косилку следует использовать только при наклоне склонов не более 30°. При работе с газонокосилкой всегда носите прочную обувь и длинные брюки.
Перед началом кошения убедитесь, что в ножи не попали посторонние предметы. Это может затупить ножи и привести к искривлению вала. Убедитесь, что ножи надежно установлены и сбалансированы. Проверьте режущее оборудование. Никогда не пользуйтесь тупым, треснувшим или поврежденным оборудованием!
Модель LC 53 e оснащена электронным пусковым устройством, которое облегчает запуск и работу с газонокосилкой. Машина является самоходной благодаря приводу на задние колеса.
Газонокосилка предназначена для стрижки травы на открытых и ровных грунтовых площадках. Пир начале работы поместите косилку на плоской поверхности. Примечание: не помещать на гальке и т.п. Можно использовать как не этилированный, так и этилированный бензин. Не заливайте топливо при работающем двигателе
Косите газон два раза в неделю во время самых активных периодов роста. Не следует скашивать более чем 1/3 от длины травы, особенно, в засушливые периоды. В первый раз установите большую высоту скашивания. Проверьте результат и затем отрегулируйте высоту скашивания подходящим образом.
После работы очистите машину сразу после использования. Остатки травы после стрижки намного легче смыть струей воды. Обязательно промойте режущий блок снизу водой.
Ежегодно (по завершению сезона) проведите заточку и балансировку лезвий режущего блока. Удалите штекер провода свечи зажигания. Установка и снятие лезвий требует применения защитных перчаток. Проводите замену масла по завершению каждого сезона или каждые 25 часов работы. Может применяться SAE 30.
Газонокосилка бензиновая Husqvarna LC 53 e — самоходная компактная газонокосилка, идеально подходящая для участков газона до 25 соток, создана для частных пользователей, предъявляющих самые высокие требования к газонокосилке в отношении эргономики, прочности, удобства в использовании и качества. Функция Comfort Cruise установленная на LC 53 e- позволяет стричь газон с желаемой скоростью , запоминает установку для следующей стрижки.
Twin Control — двойное управление включением привода колес, позволяет легко регулировать скорость движения газонокосилки любой рукой.
Husqvarna LC 53 e обладает универсальностью благодаря нескольким способам стрижки травы. Выберите режим стрижки для получения оптимальных результатов — используйте травосборник для повышения чистоты газона, функцию BioClip(r) (мульчирование) для удобрения почвы или выброс для стрижки редко обрабатываемых участков.
AFT — уник
Характеристики
| Характеристики | |
| Вес, кг | 43.3 |
| Выброс травы | Задний |
| Гарантированная звуковая мощность, Lw дБ (А) | 96 |
| Модель двигателя | DOV 750 |
| Мощность двигателя, кВт | 2.7 |
| Мощность двигателя, л.с. | 3.67 |
| Мульчирование | Есть |
| Объем топливного бака, л | 1 |
| Производитель двигателя | Briggs&Stratton |
| Рабочий объем цилиндра, см³ | 161 |
| Самоходная | Да |
| Складывающаяся рукоятка | Да |
| Тип двигателя | Бензиновый |
| Фильтры | |
| Высота скашивания, мм | 25-75 |
| Режимы стрижки | TrioClip |
| Самоходная | Да |
| Тип двигателя | Бензиновый |
| Ширина скашивания, см | 53 |
| Оснащение | |
| Большие задние колеса | Нет |
| Емкость травосборника, л | 60 |
| Заглушка BioClip® | В комплекте |
| Колеса | На подшипниках |
| Травосборник | Жесткий |
| Габариты и вес | |
| Вес брутто, кг | 45.3 |
| Высота в упаковке, мм | 1820 |
| Длина в упаковке, мм | 690 |
| Размер колес передних/задних, мм/дюйм | 210 / 8.5 |
| Ширина в упаковке, мм | 1090 |
| Режущее оборудование | |
| Высота стрижки, мин-макс, мм | 25-75 |
| Количество положений высоты стрижки | 5 |
| Материал режущей деки | Сталь |
| Регулировка высоты стрижки | Центральная |
| Режимы стрижки | TrioClip |
| Ширина скашивания, см | 53 |
| Материал | |
| Материал корпуса | Сталь |
| Спецификации двигателя | |
| Объем масляного бака, л | 0.6 |
| Частота, соответствующая максимальной мощности, об/мин | 2900 |
| Система привода | |
| Привод | Задний |
| Принцип движения | TwinControl |
| Скорость движения вперед, мин.-макс, км/час | 0-5.4 |
| Комплект поставки | |
| Газонокосилка Husqvarna LC 53 e — 1 шт. | |
| Травосборник — 1 шт. | |
| Заглушка для мульчирования — 1 шт. | |
| Инструкция по эксплуатации — 1 шт. |
Документация
Отзывы (3)
| 15.10.2013 |
|
Плюсы Качество сборки супер! Все детали идеально подходят к друг другу и нет никаких зазоров. В эксплуатации и обслуживании она не прихотлива. Все узлы надежны, в них нет сомнений. Минусы Спустя три года эксплуатации, я всего лишь поменял ремень привода колес, который растянулся от столь интенсивного использования. Скашивал несколько раз в месяц по 25 соток. Отзыв Для больших участков с газонной травой – это самый оптимальный вариант. Небольшие кротовые кочки, камешки и прочие неровности ей не страшны. Кошу только в режиме мульчирования, потому не приходится собирать траву, так как она очень мелко перемалывается. Для ландшафтного дизайнера это просто находка! Она маневренная, что позволяет выписывать пируэты на траве. На небольшие пригорки она заезжает без потери мощности, лишь иногда приходится ее подталкивать с чуть большим усилием. Я покупал ее по рекомендации знакомого дилера, он мой двоюродный свояк. Ни разу не пожалел, что его послушал. Косилке не хватает только круиз-контроля, чтобы можно было одной рукой управлять. |
| Сергей Бринн 08.07.2011 |
|
Плюсы Складывается для транспортировки удобно. В сложенном положении занимает очень мало места. Быстро косит траву и запускается без единой проблемы. Минусы Система выбора высоты немного клинит. Круиз выключается, если его не придерживать, но думаю, что это специально сделано, чтобы она не уехала никуда. Отзыв Косилку купил для ухода за дачным участком своим, который купил совсем недавно. Он был в немного запущенном состоянии, моя старая газонокосилка с объемом работы не справилась, а там косить 30 соток примерно. Пришлось покупать новую, чтобы все это дело перекосить. С фирмой Хускварна я уже был знаком по своей бензопиле, так что тут выбирать не пришлось. Купил рекомендованную модель LC 53 e. О покупке не жалею, с 30 сотками я справился за несколько часов в первый день использования. Я просто в восторге! Она очень технологичная, все современные вспомогательные системы в ней присутствуют. Внешний вид глаз радует. Работать с ней одно удовольствие, даже не замечаешь, как скашиваешь эти 30 соток. Единственное, что мне слегка не понравилось, это травосборник. Он забивается постоянно, поэтому я его снял и кошу только в режиме мульчирования. |
| Озолин Н 16.06.2011 |
|
Плюсы Травосборник отличный, собирает всю траву. Если подключить шланг к штуцеру, то ее можно легко промыть. Запуск двигателя простой и легкий. Ручка очень удобная, за счет своей регулировки без фиксации положений. Чтобы хранить газонокосилку, можно сложить рукоять. Минусы На маленьком участке управление самоходностью неудобно. Рукав для подачи травы в специальную емкость (травосборник) очень большой и постоянно цепляется за все препятствия. В горку едет ужасно, можно сказать, что сам ее толкаю. Накладки на колесах постоянно отваливаются. Отзыв Густая и мокрая трава также отлично, как и сухая попадает в травосборник, в рукаве почти ничего не остается. С тем, чтобы рукав был забит травой я ни разу не сталкивался. Препятствия в виде кочек и прочего необходимо объезжать только справа, потому что иначе травосборник будет цепляться. Привод лучше всего подключать на прямых и ровных частях участка, тогда он будет работать отлично. А ободки из резины, которые на колесах, я просто приклеил на суперклей. Двигатель обладает неплохой мощностью. По сути, все что от вас требуется, это просто идти сзади нее и выбирать направление движения. Она со всем остальным справится. После долго простоя без работы проблем с запуском тоже нет. Всегда с пол оборота. Газонокосилка отличная, аналогов у других фирм ей нет! |
Обнаружив ошибку или неточность в тексте или описании товара, выделите ее и нажмите Shift+Enter.

Газонокосилки Husqvarna LC 53e 9666692-03 — инструкция пользователя по применению, эксплуатации и установке на русском языке. Мы надеемся, она поможет вам решить возникшие у вас вопросы при эксплуатации техники.
Вы можете скачать инструкцию к Husqvarna LC 53e 9666692-03 по ссылке ниже, если не хотите ждать загрузки. Если остались вопросы, задайте их в комментариях после инструкции.
«Загружаем инструкцию», означает, что нужно подождать пока файл загрузится и можно будет его читать онлайн. Некоторые инструкции очень большие и время их появления зависит от вашей скорости интернета.
Полезные видео
Характеристики
Остались вопросы?
Не нашли свой ответ в руководстве или возникли другие проблемы? Задайте свой вопрос в форме ниже с подробным описанием вашей ситуации, чтобы другие люди и специалисты смогли дать на него ответ. Если вы знаете как решить проблему другого человека, пожалуйста, подскажите ему


Часто задаваемые вопросы

Как посмотреть инструкцию к Husqvarna LC 53e 9666692-03?
Необходимо подождать полной загрузки инструкции в сером окне на данной странице или скачать кликнув по специальной кнопке.
Руководство на русском языке?
Все наши руководства представлены на русском языке или схематично, поэтому вы без труда сможете разобраться с вашей моделью
Как можно распечатать инструкцию?
Скачайте ее по специальной кнопке над формой чтения на ваше устройства и отправьте на печать.

11-0556_McCulloch manual_148x210.indd 1
2012-10-19 14:43
GB
Operator’s manual 2-15
SE
Bruksanvisning 16-29
DK
Brugsanvisning 30-43
FI
Käyttöohje 44-57
NO
Bruksanvisning 58-71
FR
Manuel d’utilisation 72-85
NL
Gebruiksaanwijzing 86-99
IT
Istruzioni per l’uso 100-113
ES
Manual de instrucciones 114-127
DE
Bedienungsanweisung 128-141
PT
Instruções para o uso 142-155
RU
ýêñïëóàòàöèè
156-169
BG
åêñïëîàòàöèß
170-183
HU
Használati utasítás
184-197
PL
Instrukcja obs∏ugi
198-211
EE
Käsitsemisõpetus
212-225
LV
Lieto‰anas pamÇc¥ba
226-239
LT
Naudojimosi instrukcijos
240-253
SK
Návod na obsluhu
254-267
HR
Priruãnik
268-281
SI
Navodila za uporabo
282-295
CZ
Návod k pouÏití
296-309
RO
Instrucöiuni de utilizare
310-323
GR
√‰ËÁ›Â˜ ¯Ú‹Ûˆ˜
324-337
M40-125
M46-125 M46-125R
M46-125RX M46-140R
M51-140R M51-140RP
![]()
Operator’s manual Manual de instrucciones Instruções para o uso Istruzioni per l’uso
LC48 e LC48B e LC53 e LC53B e LC53E e LB48 e
Please read the operator’s manual carefully and make sure you understand the instructions before using the machine. Lea detenidamente el manual de instrucciones y asegúrese de entender su contenido antes de utilizar la máquina. Leia as instruções para o uso com toda a atenção e compreenda o seu conteúdo antes de fazer uso da máquina. Prima di usare la macchina,leggere per intero le istruzioni per l’uso e accertarsi di averne compreso il contenuto.
GB (2-18) ES (19-36)
PT (37-54) IT (55-71)
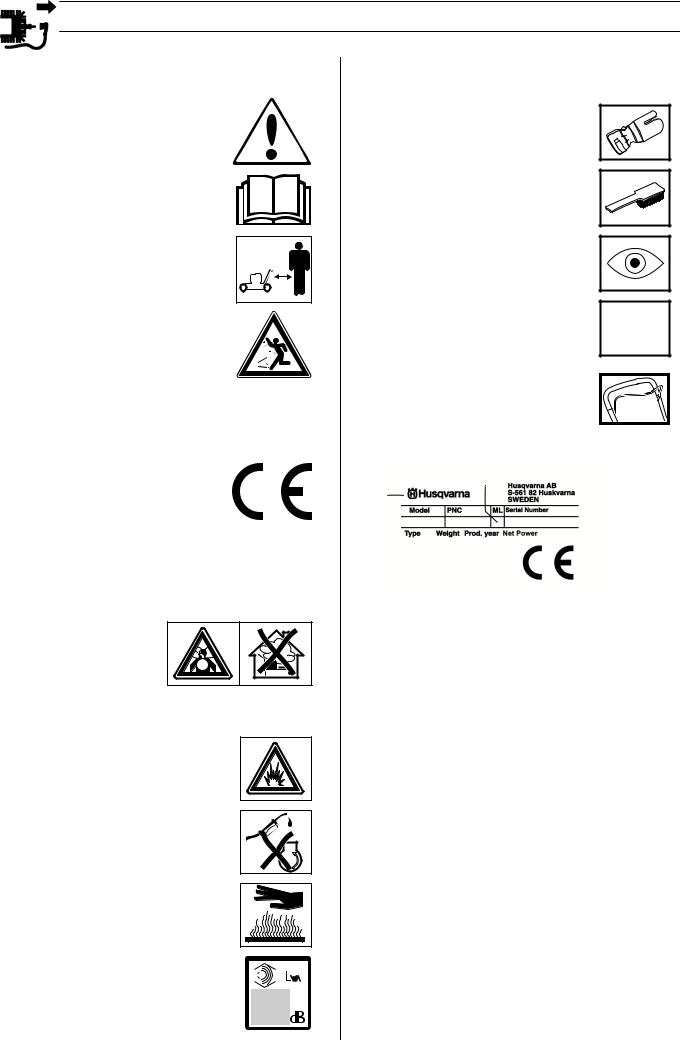
KEY TO SYMBOLS
Key to symbols
WARNING! The machine can be a dangerous tool if used incorrectly or carelessly, which can cause serious or fatal injury to the operator or others.
Please read the operator’s manual carefully and make sure you understand the instructions before using the machine.
Never use the machine if persons, especially children or pets, are in the immediate vicinity.
Watch out for thrown objects and ricochets.
Warning: rotating cutter. Keep hands and feet clear.
This product is in accordance with applicable EC directives.
Warning: rotating parts. Keep hands and feet clear.
Never use the machine indoors or in spaces lacking proper ventilation. Exhaust fumes contain carbon monoxide, an odourless, poisonous and highly dangerous gas.
Risk of explosion
Always shut off the engine before refuelling.
Hot surface
Noise emission to the environment according to the European Community’s Directive. The machine’s emission is specified in chapter Technical data and on label.
2 – English
Other symbols/decals on the machine refer to special certification requirements for certain markets.
Always wear protective gloves.
Regular cleaning is required.
Visual check.
The ignition lead should always be removed from the spark plug before repair, cleaning or maintenance work.
Switch off the engine by releasing the engine brake handle before carrying out any checks or maintenance.
Rating plate
|
3 |
4 |
||||||||||
|
1 |
|||||||||||
|
2 |
5 |
||||||||||
|
6 |
7 |
8 |
9 |
1Manufacturer
2Model
3Product number
4Maintenance lever
5Serial number
6Type
7Weight
8Production year
9Power
KEY TO SYMBOLS
Steps before using a new lawn mower
•Please read the operator’s manual carefully.
•Check that the cutting equipment is correctly fitted and adjusted. See instructions under the heading Assembly.
•Fill with fuel and oil in the engine. See the instructions under the heading fuel handling.
WARNING! Under no circumstances may the
!design of the machine be modified without the permission of the manufacturer. Always use genuine accessories. Non-authorized modifications and/or accessories can result in serious personal injury or the death of the operator or others.
WARNING! A lawn mower is a dangerous
!tool if used carelessly or incorrectly and can cause serious, even fatal injuries. It is extremely important that you read and understand the contents of this operator’s manual.
WARNING! Long-term inhalation of the
!engine’s exhaust fumes can represent a health hazard.
Husqvarna AB has a policy of continuous product development and therefore reserves the right to modify the design and appearance of products without prior notice.
English – 3

CONTENTS |
|
|
Contents |
|
|
KEY TO SYMBOLS |
|
|
Key to symbols ……………………………………………………. |
2 |
|
Steps before using a new lawn mower …………………… |
3 |
|
CONTENTS |
|
|
Contents ……………………………………………………………. |
4 |
|
WHAT IS WHAT? |
|
|
What is what on the lawn mower? …………………………. |
5 |
|
SAFETY INSTRUCTIONS |
|
|
Personal protection ……………………………………………… |
6 |
|
Machine′s safety equipment …………………………………. |
6 |
|
General safety precautions …………………………………… |
7 |
|
General working instructions ………………………………… |
8 |
|
ASSEMBLY |
|
|
Fitting the handlebar ……………………………………………. |
9 |
|
FUEL HANDLING |
|
|
Fuel …………………………………………………………………… |
10 |
|
STARTING AND STOPPING |
|
|
Starting and stopping …………………………………………… |
11 |
|
MAINTENANCE |
|
|
Maintenance ………………………………………………………. |
13 |
|
TECHNICAL DATA |
|
|
Technical data …………………………………………………….. |
16 |
|
EC-declaration of conformity …………………………………. |
18 |
4 – English

WHAT IS WHAT?
|
17 |
||||
|
19 |
||||
|
18 |
16 |
|||
|
20 |
15 |
|||
|
1 |
21 |
|||
|
2 |
14 |
|||
|
3 |
||||
|
13 |
||||
|
4 |
11 |
12 |
||
|
8 |
9 |
10 |
||
|
5 |
||||
|
6 |
||||
|
7 |
What is what on the lawn mower?
|
1 |
Handle / handlebar |
12 |
Oil tank |
|
2 |
Drive |
13 |
Cutting height control |
|
3 |
Starter handle |
14 |
Rear deflector (not LB48e) |
|
4 |
Grass catcher (not LB48e) |
15 |
Engine brake handle |
|
5 |
Fuel tank |
16 |
Blade brake LC48B e and LC53B e |
|
6 |
Air filter |
17 |
Electric starter LC 53 Ee |
|
7 |
Spark plug |
18 |
Symbols |
|
8 |
Cutting cover |
19 |
Mulching plug (not LB48e) |
|
9 |
Muffler |
20 |
Side ejection LB 48 e |
|
10 |
Water connector |
21 |
Operator′s manual |
|
11 |
Protective cover |
English – 5

SAFETY INSTRUCTIONS
Personal protection
WARNING!You must use personal protection
!whenever you use the machine.
•Gloves must be worn when required, for example when fitting, inspecting or cleaning cutting attachments.
•Always wear heavy, long pants. Do not wear shorts, sandals or go barefoot.
•Wear sturdy, non-slip boots or shoes.
Generally clothes should be close-fitting without restricting your freedom of movement.
Machine′s safety equipment
This section describes the machine′s safety equipment, its purpose, and how checks and maintenance should be carried out to ensure that it operates correctly. See the ”What is what?” section to locate where this equipment is positioned on your machine.
WARNING! Never use a machine that has
!faulty safety equipment! Carry out the inspection, maintenance and service routines listed in this section.
Cutting cover
The cutting cover is designed to reduce vibration and to reduce the risk of cuts. Make sure the cutting cover is not damaged and that there are no visible defects such as cracks.
Engine brake handle
The engine brake is designed to stop the engine. When the grip on the engine brake handle is released the engine should stop.
•Check that the engine brake works correctly and is undamaged.
Place the lawn mower on firm, flat surface and start it. Make sure that the cutter cannot come into contact with the ground or other objects.
Apply full throttle and then release the brake handle. The engine brake should always be adjusted so that the engine stops within 3 seconds. If this does not happen, the machine should be handed in to an authorized servicing dealer for adjustment.
6 – English
Muffler
The muffler is designed to keep noise levels to a minimum and to direct exhaust fumes away from the user.
|
! |
WARNING! The exhaust fumes from the |
|
engine are hot and may contain sparks |
|
|
which can start a fire. Never start the |
|
|
machine indoors or near combustible |
|
|
material! |
In areas with a hot, dry climate there is a high risk of fires. These areas are sometimes controlled by legislation and requirements that among other things the muffler must be equipped with an approved type of spark arrestor mesh.
For mufflers it is very important that you follow the instructions on checking, maintaining and servicing your machine.
|
! |
WARNING! The muffler gets very hot in use |
|
and remains so for a short time afterwards. |
|
|
Do not touch the muffler if it is hot! |
•Never use a machine that has a faulty muffler.
•Check that the muffler is securely attached and not damaged.
Cutting equipment
Make sure the cutter does not hit foreign objects such as stones, roots or the like. This can make the cutter dull and bend the engine shaft. Always ensure the cutter is well ground and balanced correctly. See also instructions under the heading Maintenance.
Check the cutting attachment. Never use blunt, cracked or damaged equipment. Damage blades and worn bolts are major hazards.
Also check that the cutter bolt is undamaged and that the engine shaft is not bent.
|
! |
WARNING! Never use a machine with faulty |
|
safety equipment. The machine’s safety |
|
|
equipment must be checked and maintained |
|
|
as described in this section. If your machine |
|
|
fails any of these checks contact your |
|
|
service agent to get it repaired. |

SAFETY INSTRUCTIONS
General safety precautions
•A lawn mower is only designed to mow lawns. The only accessories you can use with this engine unit are the cutters we recommend in the Technical data chapter.
•Never use the machine if you are tired, if you have drunk alcohol, or if you are taking medication that could affect your vision, your judgement or your co-ordination.
•Keep in mind that the operator is responsible for accidents or hazards occuring to other people or their property.
WARNING! Running an engine in a confined
!or badly ventilated area can result in death due to asphyxiation or carbon monoxide poisoning.
•You must use personal protection whenever you use the machine. See the instructions under the heading Personal protection.
•Never use a machine that has been modified in any way from its original specification.
•Never use any accessories other than those recommended in this manual. See instructions under the headings Cutting equipment and Technical data.
WARNING! A faulty cutting attachment may
!increase the risk of accidents.
•Never use a machine that is faulty. Carry out the checks, maintenance and service instructions described in this manual. Some maintenance and service measures must be carried out by trained and qualified specialists. See instructions under the heading Maintenance.
•Before use:
1Check that the engine brake works correctly and is undamaged. See the instructions under the heading Checking the braking effect.
2Check that all handles and controls are undamaged and free of oil.
3Check that the muffler is securely attached and not damaged.
4Check that all parts of the lawn mower are tightened correctly and that they are not damaged or missing.
5Check that the cutter is undamaged and not cracked. Replace the cutter if necessary.
Starting
WARNING! Long-term inhalation of the
!engine’s exhaust fumes can represent a health hazard.
•Never start a lawn mower unless the cutters and all covers are fitted correctly.
•Never start the machine indoors. Exhaust fumes can be dangerous if inhaled.
•Ensure that the working area is sufficiently illuminated to create a safe working environment.
•Observe your surroundings and make sure that there is no risk of people or animals coming into contact with the cutting equipment. The operator is responsible for any unsafe situations or risks that people and property are exposed to.
•Place the lawn mower on firm, flat surface and start it. Make sure that the cutter cannot come into contact with the ground or other objects.
•Never twist the starter cord around your hand.
See the instructions under the heading Start and stop.
Fuel safety
|
! |
WARNING! Fuel and fuel vapour are highly |
|
inflammable. Take care when handling fuel |
|
|
and engine oil. Bear in mind the risk of fire, |
|
|
explosion and inhaling fumes. |
•Never refuel the machine while the engine is running.
•Always ensure there is adequate ventilation when refuelling and filling oil.
•Move the machine at least 3 m from the refuelling point before starting it.
•Never start the machine:
1If you have spilt fuel or engine oil on the machine.Wipe off the spill and allow the remaining fuel to evaporate.
2If you spill fuel or engine oil on yourself or your clothes. Change your clothes.
3If the machine is leaking fuel. Check regularly for leaks from the fuel cap and fuel lines.
Transport and storage
•The fuel and engine oil tanks should be emptied before longer periods of storage or when transporting the lawn mower. Ask where you can dispose of surplus fuel and engine oil at your local petrol station.
•Always store the lawn mower and fuel so that any leakage or vapours do not risk coming into contact with sparks or naked flames. For example, electrical machines, electric motors, relays/switches, boilers, or the like.
•Always store fuel in an approved container designed for that purpose.
English – 7

SAFETY INSTRUCTIONS
General working instructions
WARNING! This section describes basic
!safety precautions for working with the lawn mower.This information is never a substitute for professional skills and experience. If you get into a situation where you feel unsure about how to progress, stop and seek expert advice. Contact your dealer, service agent or an experienced lawn mower user. Avoid all usage which you consider to be beyond your capability
Basic safety rules
•Look around you:
—To ensure that people, animals or other things cannot affect your control of the machine.
—To make sure that none of the above might come into contact with the cutting equipment.
•Branches, twigs, stones, etc. should be removed from the lawn before you start to mow. Make sure the cutter does not hit foreign objects such as stones, roots or the like.
This can make the cutter dull and bend the engine shaft.
•Never lift up the lawn mower or carry it around when the engine is running. If you must lift the lawn mower, first switch off the engine and disconnect the ignition lead from the spark plug.
•Do not use the machine in bad weather, such as dense fog, heavy rain, strong wind, intense cold, etc. Working in bad weather is tiring and often brings added risks, such as icy ground.
•Make sure you can move and stand safely. Check the area around you for possible obstacles (roots, rocks, branches, ditches, etc.) in case you have to move suddenly. Take great care when working on sloping ground.
•The engine should be switched off when moving over ground that is not to be mowed. For example, gravel paths, stone, shingle, asphalt, etc.
The brake handle must never be permanently anchored in handle when the machine is running.
Follow the instructions above, but do not use a lawn mower in a situation where you cannot call for help in case of an accident.
Basic mowing technique |
|
|
! |
WARNING! Make sure that your hands and |
|
feet do not come near the cutting attachment |
|
|
when the engine is running. |
General
•Mowing slopes can be dangerous. Do not use the lawn mower on very steep slopes.
•The lawn mower should not be used on inclines greater than 30 degrees.
•On sloping ground you should work along the slope. It is much easier to work along a slope than it is to work up and down it.
•Branches, twigs, stones, etc. should be removed from the lawn before you start to mow.
•Never lift up the lawn mower or carry it around when the engine is running. If you must lift the lawn mower, first switch off the engine and disconnect the ignition lead from the spark plug.
•Make sure the cutter does not hit foreign objects such as stones, roots or the like. This can make the cutter dull and bend the engine shaft. A bent axle gives imbalance and heavy vibration, which results in a great risk of the cutter becoming loose.
•If any foreign object is hit or if vibrations occur stop the machine immediately. Disconnect the HT lead from the spark plug. Check that the machine is not damaged.
Repair any damage.
•Never mow more than 1/3 of the length of the grass. This especially applies during dry periods. Mow first with the cutting height set high. Then check the result and lower to an appropriate height. If the grass is really long, drive slowly and mow twice if necessary.
•Never run with the machine when it is running.You should always walk with the lawn mower.
Pay particular attention when pulling the machine towards you during work.
Cutting height
Shut down the engine before changing the cutting height.
The cutting height can be adjusted in five different steps, mm.
Do not set the cutting height too low as there is a risk that the cutters might hit ground with unevenness.
8 – English

ASSEMBLY
Fitting the handlebar
Take care not to damage the cables and wires when you fold up the handlebar.
•Hold the lock button on the locking device in and fold up the handle.
•Adjust the height of the top part of the handlebar.
•Screw on the handle with the knob.
•To collapse the handle, hold the lock button in and fold down the handle.
Assembly of the catcher (not LB48e)
•Lift the hind shield and suspend the grass container.
Side ejection
•LB48e can be used with side ejection by fitting the side ejector on the cutting cover.
•Lift up the side cover and place the side ejector on the shaft.
Mulching function
LB48e is a lawn mower with mulching function.
Machines equipped with a catcher can be used with mulching function in the following way.
•Lift up the back shield and remove the container.
•Insert the mulching plug into the collector channel.
•Close the shield and ensure that it is locked with the mulching plug.
English – 9

FUEL HANDLING
Fuel
WARNING! Always ensure there is adequate
!ventilation when handling fuel.
Petrol
•Use good quality unleaded petrol. Leaded petrol can be used if unleaded petrol is not available.
•Fuel should be at least 77 octane.
•If the machine is not used for some time the fuel tank should be emptied and cleaned.
Engine oil
Check the oil level before starting the lawn mower. A too low oil level can cause serious damage to the engine.
•For the best result and function use HUSQVARNA fourstroke oil.
•If HUSQVARNA four-stroke oil is not available, you may use another four-stroke oil of good quality. Contact your dealer when selecting oil. In general SAE 30 is recommended.
•Never use oil intended for two-stroke engines.
Check the oil level before starting the lawn mower. A too low oil level can cause serious damage to the engine.
Oil level
Unscrew the oil filler cap and check the oil level on the dipstick fitted to the cover.
The oil filler cap must be completely screwed down to give a correct picture of the oil level.
If the oil level is low, fill using engine oil up to the upper level on the dipstick.
FILL
VER
O
T
NO
O
D
ON
CAUTI
LL
FU
Only use recommended engine oil. See the Technical data section.
Fuelling |
||
|
! |
WARNING! Taking the following precautions, |
|
|
will lessen the risk of fire: |
||
 Do not smoke or place hot objects near fuel.
 Always shut off the engine before refuelling.
When refuelling, open the fuel cap slowly so that any excess pressure is released gently.
 Tighten the fuel cap carefully after refuelling.
Always move the machine away from the refuelling area before starting.
Do not fill too much petrol. Leave about 35 mm under the filler cap so that the fuel can expand.
Clean around the fuel cap. Clean the fuel and oil tank regularly. The fuel filter should be changed at least once a year. Contamination in the tanks causes malfunction.
Always move the machine about 3 metres from the refuelling position before starting.
10 – English
![]()
STARTING AND STOPPING
Starting and stopping
WARNING! Note the following before
!starting:
Do not start a lawn mower unless the cutter and all covers are fitted correctly. Otherwise the cutter could come loose and cause personal injuries.
Always move the machine away from the refuelling area before starting.
Place the machine on a flat surface. Ensure the cutting attachment cannot come into contact with any object.
Keep people and animals well away from the working area.
Starting
Ensure the ignition lead sits correctly on the spark plug.
•Pull the engine brake handle against the upper handlebar with your left hand.
LC48B e and LC53B e
Set the stop switch to the start position.
•Grip the starter handle, slowly pull out the cord with your right hand until you feel some resistance (the starter pawls grip), now quickly and powerfully pull the cord. Never twist the starter cord around your hand.
CAUTION! Do not pull the starter cord all the way out and do not let go of the starter handle when the cord is fully extended. This can damage the machine.
LC 53 Ee
LC53Ee are equipped with electronic start which is used in the following way.
•Before using the electronic start for the first time you need to charge the battery. See instructions under the heading Maintenance.
•Fold in the engine brake handle towards the handlebar.
•Insert the ignition key and push the key.
LC48B e and LC53B e
LC48Be and LC53Be are equipped with a blade brake.
To make the cutters rotate, do the following:
•Fold down the brake handle towards the handlebar.
•Move the blade knob to its end position.
Drive
The machines are self-propelling with backwheel drive.
To use the drive on the wheel pull the clutch lever towards you.
The drive can be gradually controlled.
English – 11

STARTING AND STOPPING
Stopping
LB48 e, LC48 e, LC53 e, LC53E e
•Stop the engine by releasing the engine brake handle.
•Machines with electric start remove the key.
LC48B e and LC53B e
•The cutter stops rotating when you release the brake handle.
•The engine is switched off by moving the stop switch to the stop position.
12 – English

MAINTENANCE
Maintenance
WARNING! Make sure the cutting attachment
!has stopped before cleaning, carrying out repairs or an inspection. Disconnect the HT lead from the spark plug.
The ignition lead should always be removed from the spark plug before repair, cleaning or maintenance work.
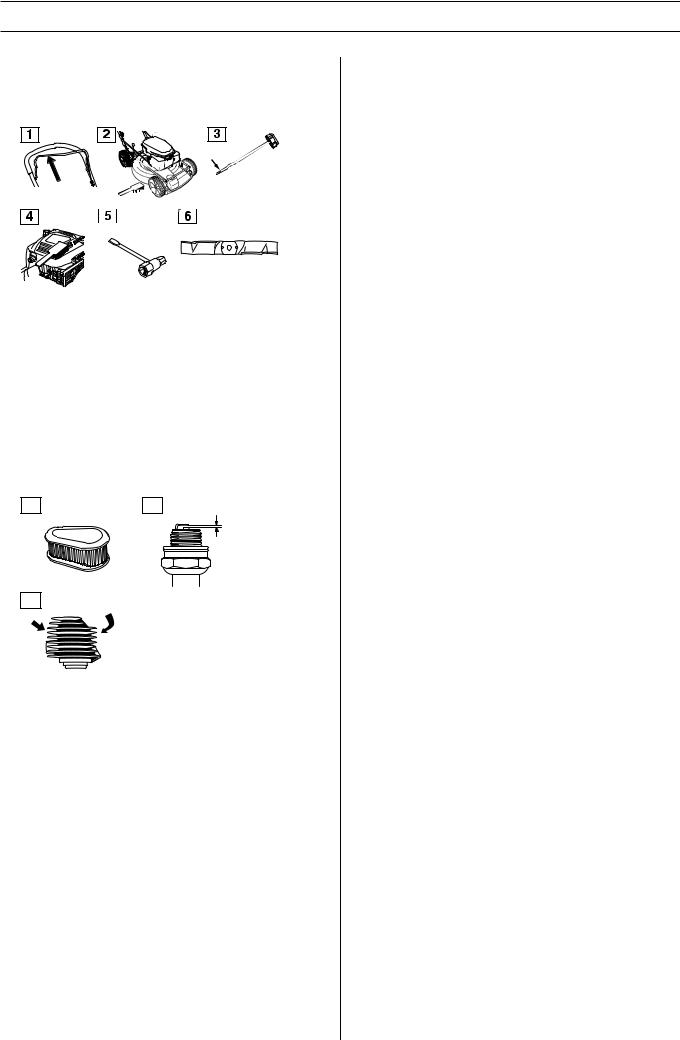
Air filter
The air filter must be regularly cleaned to remove dust and dirt in order to avoid:
•Carburettor malfunctions
•Starting problems
•Loss of engine power
•Unnecessary wear to engine parts.
•Excessive fuel consumption.
An air filter that has been in use for a long time cannot be cleaned completely.The filter must therefore be replaced with a new one at regular intervals. A damaged air filter must always be replaced.
Cleaning the air filter
Remove the air filter cover.
Remove the air filter and check that it is undamaged. Replace with a new air filter if you believe it to be defective.
Clean the filter by knocking the filter against a flat surface. Never use solvent with petroleum, for example, kerosene, or compressed air to clean the filter.
When reassembling, make sure that the filter completely seals against the filter holder.
Spark plug |
|
|
! |
WARNING! The muffler gets very hot in use |
|
and remains so for a short time afterwards. |
|
|
Do not touch the muffler if it is hot! |
If the machine is low on power, difficult to start or runs poorly at idle speed: always check the spark plug first before taking any further action. If the spark plug is dirty, clean it and check that the electrode gap is 0.5 mm. The spark plug should be replaced after about a month in operation or earlier if necessary.
 0,5 mm
CAUTION! Always use the recommended spark plug type! Use of the wrong spark plug can damage the piston/cylinder.
Muffler
The muffler is designed to reduce the noise level and to direct the exhaust gases away from the operator. The exhaust gases are hot and can contain sparks, which may cause fire if directed against dry and combustible material.
Regularly check that the muffler is securely attached to the machine.
Never use a machine that has a faulty muffler.
Cutter
|
! |
WARNING! Always wear heavy-duty gloves |
|
when repairing the cutting attachment. The |
|
|
blades are very sharp and can easily cause |
|
|
cuts. |
Damaged blades should be replaced when hitting obstacles that result in a breakdown.
Replacing or sharpening the blades should be conducted by an authorised service workshop.
English – 13

MAINTENANCE
Changing the oil
The engine oil should be changed each year and every 25 working hours.
When changing the oil proceed as follows::
•Empty the fuel tank by running the machine until the tank is empty.
•Disconnect the HT lead from the spark plug.
•Unscrew the oil filler cap.
•Use the oil pump (accessory) to empty the oil tank.
Ask where you can dispose of surplus engine oil at your local petrol station.
•Fill with new engine oil of a good quality. See the Technical data section.
•Check the oil level with the dipstick on the oil filler cap.
•The oil filler cap must be completely screwed down to give a correct picture of the oil level. If the oil level is low, fill using engine oil up to the upper level on the dipstick.
FILL
R
VE
O
NOT
O
D
UTION
CA
LL
FU
•Screw on the oil filler cap.
Charge the battery LC 53 Ee
The battery can be charged as follows:
•Remove the collector
•Push the locking open and remove the battery cover.
•Loosen the battery cable connections.
•Connect the battery charger and charge the battery for max. 24 hours.
max 24 h
Cleaning cutting cover
•Connect a water hose to the cutting cover connection.
•Start the engine and let the blade rotate for a while. The water is thrown out and cleaning the cutting cover.
Adjusting the clutch wire
The clutch wire is adjusted by turning the adjustment screw.
14 – English
MAINTENANCE
Below you will find some general maintenance instructions.
Daily maintenance
1Check that the engine brake handle works safely.
2Brush leaves, grass and the like off of the lawn mower.
3Check the oil level.
4Clean the air intake on the starter. Check the starter and starter cord.
5Check that nuts and screws are tight.
6Check the cutting attachment. Never use blades that are dull, cracked or damaged.
Weekly maintenance
3
1Clean the air filter. Replace if necessary.
2Clean the spark plug. Check that the electrode gap is 0.51 mm.
3Clean the cooling fins on the cylinder.
At least once a year
1Carry out annually service at authorised dealer (at least once a year or every 30 hours).
English – 15

TECHNICAL DATA
Technical data
|
LC 48 e |
LC 48 Be |
LB 48 e |
|
|
Engine |
|||
|
Engine manufacturer |
Briggs & Stratton |
Briggs & Stratton |
Briggs & Stratton |
|
Cylinder displacement, cm3 |
161 |
161 |
161 |
|
Speed, rpm |
2900 |
2900 |
2900 |
|
Nominal engine output, kW (see note 1) |
2,7 |
2,7 |
2,7 |
|
Ignition system |
|||
|
Spark plug |
Champion QC12YC |
Champion QC12YC |
Champion QC12YC |
|
Electrode gap, mm |
0,5 |
0,5 |
0,5 |
|
Fuel and lubrication system |
|||
|
Fuel tank capacity, litre |
1,6 |
1,6 |
1,6 |
|
Oil tank capacity, litre |
0,6 |
0,6 |
0,6 |
|
Engine oil |
SAE 30 |
SAE 30 |
SAE 30 |
|
Weight |
|||
|
Lawn mower with empty tanks, kg |
42 |
44 |
38 |
|
Noise emissions |
|||
|
(see note 2) |
|||
|
Sound power level, measured dB(A) |
95 |
93 |
90 |
|
Sound power level, guaranteed LWA dB(A) |
96 |
95 |
92 |
|
Sound levels |
|||
|
(see note 3) |
|||
|
Sound pressure level at the operators ear, dB(A) |
82 |
80 |
76 |
|
Vibration levels |
|||
|
(see note 4) |
|||
|
Handle |
|||
|
Cutting |
|||
|
Cutting system |
3 in 1 |
3 in 1 |
2 in 1 |
|
Cutting height, mm |
25-70 |
25-70 |
25-70 |
|
Cutting width, cm |
48 |
48 |
48 |
|
Cutter |
Fixed |
Fixed |
Fixed |
|
Drive |
|||
|
Speed, km/h |
5,4 |
5,4 |
5,4 |
|
Starting |
|||
|
Electric starter |
— |
— |
— |
Note 1: The power rating of the engine indicated is the average net output (at specified rpm) of a typical production engine for the engine model measured to SAE standard J1349/ISO1585. Mass production engines may differ from this value. Actual power output for the engine installed on the final machine will depend on the operating speed, environmental conditions and other values.
Note 2: Noise emissions in the environment measured as sound power (LWA) in conformity with EC directive 2000/14/EC.
Note 3: Reported data for noise pressure level has a typical statistical dispersion (standard deviation) of 1.2 dB(A).
Note 4: Reported data for vibration level has a typical statistical dispersion (standard deviation) of 0,2 m/s2.
16 – English

TECHNICAL DATA
|
LC 53 e |
LC 53 Be |
LC 53 Ee |
|
|
Engine |
|||
|
Engine manufacturer |
Briggs & Stratton |
Briggs & Stratton |
Briggs & Stratton |
|
Cylinder displacement, cm3 |
161 |
161 |
161 |
|
Speed, rpm |
2900 |
2900 |
2900 |
|
Nominal engine output, kW (see note 1) |
2,7 |
2,7 |
2,7 |
|
Ignition system |
|||
|
Spark plug |
Champion QC12YC |
Champion QC12YC |
Champion QC12YC |
|
Electrode gap, mm |
0,5 |
0,5 |
0,5 |
|
Fuel and lubrication system |
|||
|
Fuel tank capacity, litre |
1,6 |
1,6 |
1,6 |
|
Oil tank capacity, litre |
0,6 |
0,6 |
0,6 |
|
Engine oil |
SAE 30 |
SAE 30 |
SAE 30 |
|
Weight |
|||
|
Lawn mower with empty tanks, kg |
40 |
45 |
46 |
|
Noise emissions |
|||
|
(see note 2) |
|||
|
Sound power level, measured dB(A) |
98 |
97 |
98 |
|
Sound power level, guaranteed LWA dB(A) |
98 |
98 |
98 |
|
Sound levels |
|||
|
(see note 3) |
|||
|
Sound pressure level at the operators ear, dB(A) |
83 |
82 |
83 |
|
Vibration levels |
|||
|
(see note 4) |
|||
|
Handle, m/s2 |
|||
|
Cutting |
|||
|
Cutting system |
3 in 1 |
3 in 1 |
3 in 1 |
|
Cutting height, mm |
25-70 |
25-70 |
25-70 |
|
Cutting width, cm |
53 |
53 |
53 |
|
Cutter |
Fixed |
Fixed |
Fixed |
|
Drive |
|||
|
Speed, km/h |
5,4 |
5,4 |
5,4 |
|
Starting |
|||
|
Electric starter |
— |
— |
Yes |
Note 1: The power rating of the engine indicated is the average net output (at specified rpm) of a typical production engine for the engine model measured to SAE standard J1349/ISO1585. Mass production engines may differ from this value. Actual power output for the engine installed on the final machine will depend on the operating speed, environmental conditions and other values.
Note 2: Noise emissions in the environment measured as sound power (LWA) in conformity with EC directive 2000/14/EC.
Note 3: Reported data for noise pressure level has a typical statistical dispersion (standard deviation) of 1.2 dB(A).
Note 4: Reported data for vibration level has a typical statistical dispersion (standard deviation) of 0,2 m/s2.
English – 17

TECHNICAL DATA
EC-declaration of conformity
(Applies to Europe only)
Husqvarna AB, SE-561 82 Huskvarna, Sverige, tel: +46-36-146500, declares under sole responsibility that the lawn mowers
Husqvarna LB 48 e, LC 48 e, LC 48 Be, LC 53 e, LC 53 Be and LC 53 Ee from the serial numbers 10xxxxxxx and onwards comply with the requirements of the COUNCIL’S DIRECTIVE:
—of May 17, 2006 «relating to machinery» 2006/42/EC
—of December 15, 2004 ”relating to electromagnetic compatibility” 2004/108/EC.
—of May 8, 2000 ”relating to the noise emissions in the environment” 2000/14/EC. For information relating to noise emissions, see the chapter Technical data.
0404, SMP Svensk Maskinprovning AB, Fyrisborgsgatan 3, SE-754 50 Uppsala, has issued reports regarding the assessment of conformity according to annex VI of the COUNCIL’S DIRECTIVE of May 8, 2000 ”relating to the noise emissions in the environment” 2000/14/EC.
The certificates have the numbers:
01/901/083 — Husqvarna LC 53 e, LC 53 Ee
01/901/085 — Husqvarna LC53B e
01/901/087 — Husqvarna LB48 e
01/901/086 — Husqvarna LC48B e
01/901/088 — Husqvarna LC48 e
Huskvarna December 29, 2009
Bengt Ahlund, Development manager (Authorized representative for Husqvarna AB and responsible for technical documentation.)
18 – English

ACLARACIÓN DE LOS SÍMBOLOS
Aclaración de los símbolos
¡ATENCIÓN! La máquina, si se utiliza de forma errónea o descuidada, puede ser una herramienta peligrosa que puede causar daños graves e incluso la muerte al usuario y a otras personas.
Lea detenidamente el manual de instrucciones y asegúrese de entender su contenido antes de utilizar la máquina.
No utilizar nunca la máquina si hay personas, especialmente niños, o animales cerca.
Cuidado con los objetos lanzados o rebotados.
Advertencia de cuchilla rotativa. Cuidado con las manos y los pies.
Este producto cumple con la directiva CE vigente.
Advertencia: piezas giratorias. Mantenga alejados las manos y los pies.
No emplee nunca la máquina en recintos cerrados ni en espacios sin ventilación. Los gases de escape contienen monóxido de carbono, un gas inodoro y tóxico que comporta peligro de muerte.
Riesgo de explosión
No haga nunca el repostaje con el motor en marcha.
Superficie caliente
Las emisiones sonoras en el entorno según la directiva de la Comunidad Europea. Las emisiones de la máquina se indican en el capítulo Datos técnicos y en la etiqueta.
Los demás símbolos/etiquetas que aparecen en la máquina corresponden a requisitos de homologación específicos en determinados mercados.
Use siempre guantes protectores.
La máquina debe limpiarse regularmente.
Control visual.
El cable de encendido debe soltarse siempre de la bujía antes de efectuar trabajos de reparación, limpieza o mantenimiento.
La revisión y/o el mantenimiento deben hacerse con el motor parado: suelte la horquilla del freno de motor.
Placa de características
|
3 |
4 |
||||||||||
|
1 |
|||||||||||
|
2 |
5 |
||||||||||
|
6 |
7 |
8 |
9 |
1Fabricante
2Modelo
3Número de producto
4Palanca de mantenimiento
5Número de serie
6Tipo
7Peso
8Año de fabricación
9Potencia
Spanish – 19

ACLARACIÓN DE LOS SÍMBOLOS
Preparativos para el empleo de un cortacésped nuevo
•Lea detenidamente el manual de instrucciones.
•Compruebe el montaje y ajuste del equipo de corte. Vea las instrucciones bajo el título Montaje.
•Reposte combustible y ponga aceite en el motor. Vea las instrucciones del apartado referente a la manipulación de combustible.
¡ATENCIÓN! Bajo ninguna circunstancia
!debe modificarse la configuración original de la máquina sin autorización del fabricante. Utilizar siempre recambios originales. Las modificaciones y/o la utilización de accesorios no autorizadas pueden ocasionar accidentes graves o incluso la muerte del operador o de terceros.
¡ATENCIÓN! Un cortacésped utilizado de
!forma errónea o negligente puede ser una herramienta peligrosa que puede causar daños graves e incluso con peligro de muerte. Es sumamente importante que lea estas instrucciones y comprenda el contenido de este manual.
¡ATENCIÓN! La inhalación prolongada de los
!gases de escape del motor comporta riesgos para la salud.
Husqvarna AB trabaja constantemente para perfeccionar sus productos y se reserva, por lo tanto, el derecho a introducir modificaciones en la construcción y el diseño sin previo aviso.
20 – Spanish
![]()
ÍNDICE
|
Índice |
|
|
ACLARACIÓN DE LOS SÍMBOLOS |
|
|
Aclaración de los símbolos …………………………………… |
19 |
|
Preparativos para el empleo de un cortacésped nuevo |
20 |
|
ÍNDICE |
|
|
Índice ………………………………………………………………… |
21 |
|
¿QUÉ ES QUÉ? |
|
|
Componentes del cortacésped? ……………………………. |
22 |
|
INSTRUCCIONES DE SEGURIDAD |
|
|
Protección personal …………………………………………….. |
23 |
|
Equipo de seguridad de la máquina ………………………. |
23 |
|
Instrucciones generales de seguridad ……………………. |
24 |
|
Instrucciones generales de trabajo ………………………… |
25 |
|
MONTAJE |
|
|
Montaje del manillar …………………………………………….. |
27 |
|
MANIPULACION DEL COMBUSTIBLE |
|
|
Carburante …………………………………………………………. |
28 |
|
ARRANQUE Y PARADA |
|
|
Arranque y parada ………………………………………………. |
29 |
|
MANTENIMIENTO |
|
|
Mantenimiento ……………………………………………………. |
31 |
|
DATOS TECNICOS |
|
|
Datos técnicos ……………………………………………………. |
34 |
|
Declaración CE de conformidad ……………………………. |
36 |
Spanish – 21

|
¿QUÉ ES QUÉ? |
||||
|
17 |
||||
|
19 |
||||
|
18 |
16 |
|||
|
20 |
15 |
|||
|
1 |
||||
|
21 |
||||
|
2 |
14 |
|||
|
3 |
||||
|
13 |
||||
|
11 |
12 |
|||
|
4 |
8 |
9 |
10 |
|
|
5 |
||||
|
6 |
||||
|
7 |
Componentes del cortacésped?
|
1 |
Empuñadura / manillar |
12 |
Depósito de aceite |
|
2 |
Transmisión |
13 |
Palanca de ajuste de la altura de corte |
|
3 |
Empuñadura de arranque |
14 |
Deflector trasero (no LB48e) |
|
4 |
Recogedor de césped (no LB48e) |
15 |
Horquilla del freno de motor |
|
5 |
Depósito de combustible |
16 |
Freno de la cuchilla LC48Be y LC53Be |
|
6 |
Filtro de aire |
17 |
Arranque eléctrico LC 53 Ee |
|
7 |
Bujía |
18 |
Símbolos |
|
8 |
Cubierta de corte |
19 |
Enchufe para trituradora (no LB48e) |
|
9 |
Silenciador |
20 |
Expulsión lateral LB 48 e |
|
10 |
Conexión de agua |
21 |
Manual de instrucciones |
|
11 |
Cubierta protectora |
22 – Spanish
 Loading…