![]() Download Article
Download Article
![]() Download Article
Download Article
Clocks made in the old-fashioned tradition require winding in order to operate. Grandfather clocks are freestanding timepieces of this type, controlled by the fall of weights and the movement of a pendulum in a tall case. Follow these instructions to wind any type of grandfather clock.
-

1
Look for the winding points. If your grandfather clock is wound by a crank or a key, it should have one to three small holes on the clock face. Most commonly, these are located near the 3 (III), the 9 (IX), the center, or anywhere in the lower half of the clock face. If you do not see a hole, and your clock did not come with a crank or key, see the instructions for chain-wound clocks instead.
-
2
Obtain a clock crank or key of the correct size. Newly purchased clocks of this type should come with a key or crank, but if you acquired a used clock, or misplaced the winding implement, you can find a new one online or from a clockmaker. Open the door protecting the clock face, and measure the width of each hole precisely using a ruler or tape measure with a millimeter scale (mm), or preferably a set of calipers that can measure in 0.25 mm increments.[1]
Purchase a crank or key with this shaft width for safe and easy winding. You may wish to purchase three or four winding implements in different sizes, in case your measurement was slightly off.-
Note: When purchasing a crank, make sure the length of the shaft is sufficient to raise the crank above the level of the clock hands, so you can turn it 360º without damaging them.[2]
- Some manufacturers sell keys in a numbered scale, rather than by shaft width. However, there is no single industry-wide scale, so referring to the exact millimeter size is recommended.[3]
Advertisement
-
Note: When purchasing a crank, make sure the length of the shaft is sufficient to raise the crank above the level of the clock hands, so you can turn it 360º without damaging them.[2]
-
3
Use the crank or key to wind the first weight. Gently push the shaft of the crank or key into any one of the winding holes. It should be a snug fit, but do not force it in. Gently hold the clock face steady with one hand, and use the other to gently turn the crank. Try turning in both directions, and see which one moves smoothly; each individual clock winds either clockwise or counterclockwise. One of the long weights lower down in the clock should rise as you turn. Stop turning right before the weight touches the wooden «seat board,» or when the key no longer easily turns.[4]
- If you cannot turn the key easily, or you do not see a weight moving, check to see if one of the weights is already at the top. If one or more of the chimes is turned off, the weight responsible for timing that chime will not fall, and does not need to be wound.
- The weights are typically located above the pendulum. You may or may not need to open the lowercase in order to see them.
-
4
Repeat the process for the other winding points. If your clock has more than one weight, it should also have more than one winding point in the clock face. Move the crank or key to the remaining winding points, turning it in each one until every weight is nearly touching the wooden board above it.
-
5
If necessary, make adjustments carefully. Now is a good time to check whether the clock is still displaying the correct time. If not, you may physically move only the minute hand to the correct time, moving it clockwise only. Always stop at the 12 (XII) and allow the clock to strike the hour before continuing.[5]
Do the same for other points if the clock chimes at additional times (typically the quarter hours at the 3, 6, and 9).- There are some clocks that can safely have their minute hand turned counterclockwise, but do not risk it unless you are certain. If the minute hand «resists» attempts to move it clockwise, and can move smoothly counterclockwise, you may have an unusual model that should be adjusted counterclockwise.[6]
- If your clock is running too fast or too slow, find the knob or nut at the bottom of the swinging pendulum. Tighten it clockwise in order to slow the clock down, or loosen it counterclockwise to speed it up.
- There are some clocks that can safely have their minute hand turned counterclockwise, but do not risk it unless you are certain. If the minute hand «resists» attempts to move it clockwise, and can move smoothly counterclockwise, you may have an unusual model that should be adjusted counterclockwise.[6]
-
6
Wind weekly, or as necessary. Almost all grandfather clocks are made to run for seven or eight days without winding, so winding them on the same day each week will ensure that it never stops. If your clock stops before its regular winding time, however, you may need to wind it more frequently.


Advertisement
-
1
Look for chains hanging next to the weights. Open the door protecting the long, hanging weights in the clock case (not the pendulum). Most clocks have one, two, or three weights, but there may be more on unusual models. If you see a hanging chain next to each weight, your clock is probably chain-wound.
- If you cannot find either a chain or a winding hole in the clock face, ask someone to help you look, or consult a professional clockmaker or clock repair shop.
-
2
Gently pull on one of the chains. Grasp a chain hanging next to a weight that is not at the top of the case. Slowly pull down on the chain and watch the weight rise. Continue until the weight is almost touching the board at the top of the weight case, or until you cannot move the weight by pulling at the same gentle rate.[7]
- Pull on the chain next to a weight, never the chain the weight is attached to.
- It does not matter which weight you wind first.
-
3
Repeat with the other weights. Each weight has its own chain. Gently pull on each of these until the weight associated with it has nearly touched the board above the weights. Your clock is fully wound once all the weights are in the top-most position.
- Typically, the center weight controls the clock’s timekeeping. If other weights are present, they control the hour strike, or the quarter-hour chime.
-
4
Make adjustments if necessary. Physically rotate the minute hand, not the hour hand, of the clock if you need to set the time. Rotate clockwise unless you feel resistance in that direction, and use your free hand to steady the clock face as you turn. Be gentle to avoid bending or breaking the clock hand, and stop and wait for the clock to strike or time before continuing to move the hand.
- A nut on the bottom of the pendulum can be tightened to slow the clock down, or loosened to speed it up. Adjust this if you find yourself adjusting the time every week or two.


Advertisement
Add New Question
-
Question
What is the order of sequence for the weight? My clock doesn’t have the left, middle and right letters on the bottom.

The heaviest weight is on the right. Light weights are in the center and left. On the right side, as you are facing the clock, the right weight usually runs the quarter hour chimes. The other two are for hourly chimes and clock movement.
-
Question
Why won’t the pendulum keep swinging?
Is your clock even? If the clock is not on even ground, it throws off the pendulum.
-
Question
My clock strikes the wrong hour. How do I correct it?
If it is only the number of strikes that is wrong, simply move the hour hand to match the number of strikes. It is only held in place by friction, unlike the minute hand which has a hard connection.
See more answers
Ask a Question
200 characters left
Include your email address to get a message when this question is answered.
Submit
Advertisement
Video
-
If your clock has a moon dial set within the clock face, you may adjust it to the correct moon phase by gently applying pressure to this small dial, and moving it clockwise. This also applies to other small dials on your clock face.[8]
-
If you do not want quarter-hour or hourly chimes, do not wind the two weights that control those aspects. Alternatively, look for a lever on the dial or the side of the clock that allow you to turn off the chime completely or during night hours.
Thanks for submitting a tip for review!
Advertisement
-
Do not force the key or crank into the winding points.
-
If the key or crank is not turning smoothly or the chains will not pull downward, do not continue. Contact a professional.
Advertisement
Things You’ll Need
- Clock key or crank
References
About This Article
Article SummaryX
To wind a grandfather clock, start by locating the winding points on the face of the clock, which are usually close to the 3, the 9, and the center. If you don’t have a key, measure the openings in millimeters, then purchase a new key online, or from a clockmaker. Next, insert the key into the first winding point and rotate it until it no longer turns easily. Then, repeat this process with the two other winding points. Finally, check to see if the clock is still displaying the correct time, and make adjustments as necessary. To learn how to wind a chain-wound clock, read on!
Did this summary help you?
Thanks to all authors for creating a page that has been read 242,071 times.
Reader Success Stories
-

«This article was especially helpful to me, as I have never owned a grandfather clock. I have for thirty years…» more
Did this article help you?
![]() Загрузить PDF
Загрузить PDF
![]() Загрузить PDF
Загрузить PDF
Часы, изготовленные в старых традициях, для своей работы требуют, чтобы их заводили время от времени. Часовой шкаф – это часы, стоящие на полу, которые контролируются падениями гирек и движением маятника и имеющие форму высокого шкафа. Следуйте инструкциям, чтобы завести любой тип часового шкафа.
-
1
Поищите точки для завода часов. Если ваш часовой шкаф заводится с помощью заводной ручки или ключа, тогда он должен иметь одну-три маленьких отверстий на циферблате. Зачастую, они расположены около цифр 3 (III), 9 (IX), в центре или где-нибудь в нижней половине циферблата. Если вы не видите отверстий или к вашему часовому шкафу не прилагается заводная ручка или ключ, то приступайте к следующему шагу и прочтите инструкцию для завода часового шкафа имеющих разъем и цепь.
-
2
Достаньте заводную ручку или ключ подходящего размера. Недавно купленные часы такого типа обычно идут в наборе с заводной ручкой или ключом, но если вы приобрели подержанные часы или часовой шкаф, у которого заменена заводная часть, в таком случае вы можете найти подходящий инструмент онлайн или купить его у часовщика. Откройте дверцу, которая защищает циферблат, и точно измерьте размер каждого отверстия, используя линейку или измерительную ленту, с миллиметровыми делениями (мм) или, что еще лучше, штангенциркуль, у которого шаг измерения равен 0.25 мм.[1]
Купите ручку или ключ с шириной вала, подходящей для отверстий на циферблате, чтобы обеспечить легкий и безопасный завод часов. Возможно, вы предпочтете купить три или четыре инструмента разного размера, на случай, если ваши измерения были слегка неточны.-
Примечание:При покупке заводной ручки, удостоверьтесь, что длина вала достаточна, чтобы ручка не задевала стрелки часов, и вы не повредили часы при повороте ее на 360º.[2]
- Некоторые производители продают ключи в пронумерованном масштабе, а не по ширине вала. Однако не существует единой системы масштабов для всех производителей, поэтому, рекомендуется руководствоваться измерениями в миллиметрах.[3]
-
Примечание:При покупке заводной ручки, удостоверьтесь, что длина вала достаточна, чтобы ручка не задевала стрелки часов, и вы не повредили часы при повороте ее на 360º.[2]
-
3
Используйте заводную ручку или ключ, чтобы завести первый грузик. Аккуратно протолкните ручку или ключ в одно из отверстий для завода. Ключ должен туго проходить, но без приложения особых усилий. Осторожно придерживайте циферблат одной рукой, а второй аккуратно поверните ручку или ключ. Попробуйте повернуть в обоих направлениях, и посмотрите, в каком из них завод двигается легче; в каждой модели часов завод индивидуален – по часовой или против часовой стрелки. Во время того, как вы поворачиваете ключ или ручку, гирька, находящаяся ниже остальных должна начать подниматься вверх. Прекратите поворачивать, перед тем как гирька поднимется к деревянному бортику или ключ больше не поворачивается.[4]
- Если вы не можете с легкостью повернуть ключ или вы не видите, чтобы гирька двигалась, то вам стоит проверить, возможно, одна из гирек уже вверху. Если один или несколько колоколов в часах отключены, то гирька, ответственная за этот колокол и его своевременный звон не опуститься и ее не надо заводить.
- Гирьки обычно находятся выше маятника. Вам, возможно, понадобиться, или не понадобиться открыть нижнюю часть часового шкафа, чтобы увидеть их.
-
4
Повторите процесс с другими отверстиями завода. Если в ваших часах находится более одной гирьки, то в таком случае, на циферблате должно быть более одного отверстия. Переместите ручку завода или ключ в следующее отверстие, и поворачивайте, пока каждая гирька не переместиться вверх, к своей самой высокой своей точке, практически касаясь деревянной планки над собой.
-
5
Если необходимо, сделайте аккуратные корректировки. Теперь самое время проверить показывают ли часы все еще правильное время. Если нет, то вы можете в ручную повернуть только минутную стрелку по часовому ходу, пока часы не покажут правильное время. Всегда останавливайтесь на отметке 12 (XII), чтобы позволить часам перейти на следующий час.[5]
Сделайте это и для других отверстий, если часы бьют в неправильное время (обычно, часы должны бить в 3, 6, и 9 часов).- Существуют модели часов, в которых вы можете поворачивать минутную стрелку против часовой стрелки, но не рискуйте, если вы не уверены. Если минутная стрелка не поддается при повороте ее по часовой стрелке, но легко поворачивается против нее, значит вы возможно владелец нестандартной модели, минутную стрелку которой нужно поворачивать против часовой стрелки.[6]
- Если ваши часы идут слишком быстро или слишком медленно, то найдите ручку или гайку в нижней движущейся части маятника. Затяните ее сильнее (вправо), чтобы замедлить ход часов или ослабьте (влево), чтобы ускорить их.
- Существуют модели часов, в которых вы можете поворачивать минутную стрелку против часовой стрелки, но не рискуйте, если вы не уверены. Если минутная стрелка не поддается при повороте ее по часовой стрелке, но легко поворачивается против нее, значит вы возможно владелец нестандартной модели, минутную стрелку которой нужно поворачивать против часовой стрелки.[6]
-
6
Заводите часы каждую неделю или по мере необходимости. Практически все часовые шкафы рассчитаны на работу в течении семи-восьми дней без завода, поэтому если вы заводите их каждую неделю в один и тот же день, это гарантирует, что они никогда не остановятся. Если ваши часы остановились до момента их регулярного завода, значит, вам нужно заводить их чаще.
Реклама


-
1
Найдите цепи, висящие рядом с гирьками. Откройте дверь, защищающую внутреннюю часть шкафа под циферблатом, в которой висят гирьки. Большинство часов имеет одну, две или три гирьки, но существуют также не типичные модели часовых шкафов. Если вы обнаружили цепи, висящие рядом с каждой из гирек, то, скорее всего, ваш часовой шкаф относится к типу – разъем-цепь.
- Если вы не обнаружили ни цепи, ни отверстий на циферблате часов, значит, вам стоит попросить кого-нибудь вам помочь, или проконсультироваться с профессиональным часовщиком, либо с консультантом в салоне починки часов.
-
2
Осторожно потяните одну из цепей. Возьмитесь за цепь, висящую рядом с гирькой, которая не находиться вверху шкафа. Медленно потяните вниз цепь, и вы увидите, что гирька поднимается вверх. Продолжайте, пока гирька не поднимется практически до деревянной планки, или пока цепь продолжает легко поддаваться.[7]
- Тяните вниз цепь, которая находиться рядом с гирькой, но никогда не ту, на которой гирька висит.
- Не важно, какую из гирек вы заведете в первую очередь.
-
3
Повторите манипуляции со следующими гирьками. Каждая гирька имеет свою цепь. Аккуратно тяните вниз каждую цепь по очереди, пока гирька, за которую она отвечает, не достигнет верхней планки над собой. Ваши часы полностью заведены, когда каждая из гирек находится максимально высоко, практически касаясь верхней деревянной планки.
- Обычно, именно центральная гирька отвечает за соблюдение часами правильного хода времени. Если в вашем часовом шкафе присутствуют другие гирьки, то они, зачастую, отвечают за часовую стрелку или за бой часов.
-
4
Сделайте корректировки, если необходимо. Вручную поверните минутную стрелку, а не часовую, если вам нужно установить правильное время на часах. Поворачивайте минутную стрелку по часовой стрелке, если вы не чувствуете противодействие стрелки по ходу в этом направлении. Придерживайте циферблат свободной рукой. Будьте аккуратны, чтобы предотвратить изгиб или поломку стрелки, а также останавливайтесь время от времени и ждите, чтобы часы подстроились под новое время, перед тем как вы продолжите поворачивать стрелку.
- Вы можете затянуть гайку в нижней части маятника сильнее (вправо), чтобы замедлить ход часов или ослабить ее (влево), чтобы ускорить их. Приспособьтесь делать это каждую неделю или две.
Реклама


Советы
- Если вы не хотите, чтоб ваши часы били каждые три часа или каждый час, то не заводите две гирьки, которые отвечают за этот аспект. Вы также можете поискать рычаг на циферблате или сбоку часового шкафа, который позволит вам отключить бой часов в ночное время или полностью.
- Если на циферблате ваших часов есть движущийся диск, отвечающий за лунный период, то вы можете откорректировать правильность показа фазы луны, если аккуратно нажмете на диск и повернете его по часовой стрелке. Это также относится к другим маленьким движущимся дискам на циферблате ваших часов.[8]
Реклама
Предупреждения
- Если заводная ручка или ключ не поворачиваются без сопротивления, а цепь не тянется легко вниз, то не продолжайте. Свяжитесь с профессионалом.
- Не используйте силу при введении заводной ручки или ключа в отверстие на циферблате.
Реклама
Что вам понадобятся
- Заводная ручка или часовой ключ
Об этой статье
Эту страницу просматривали 5804 раза.
Была ли эта статья полезной?
Просмотров 19.9к. Опубликовано 07.01.2019
Захотев узнать о том, как настроить деревянный будильник, не поленился, потратив час, все таки разобрался в настройках этого чудо-будильника. Сразу скажу, что эта «деревяшка» на батарейках долго работать не будет (всего 2-3 дня), поэтому подключил к сети через зарядное устройство сотового телефона. Но, один огромный минус этого деревянного будильника в том, что у него сложные настройки, которые при отключении от сети сразу же сбиваются. Пробовал подключить одновременно и зарядку и ставить батарейки в надежде что батарейки будут поддерживать работу при отключении от сети, но мои надежды не оправдались — батарейки так же быстро сели.
Поэтому решил научиться настраивать эти часы-будильник куб деревянный. Потратил на это час времени. Итак..
Содержание
- Как настроить время и дату
- Установка даты
- Как отключить или поставить будильник
- Как выключить экономию энергии или датчик шума
- Как выключить постоянное переключение даты и времени на дисплее
- Комнатная температура в Фаренгейтах или в Цельсиях — как переключить
Как настроить время и дату
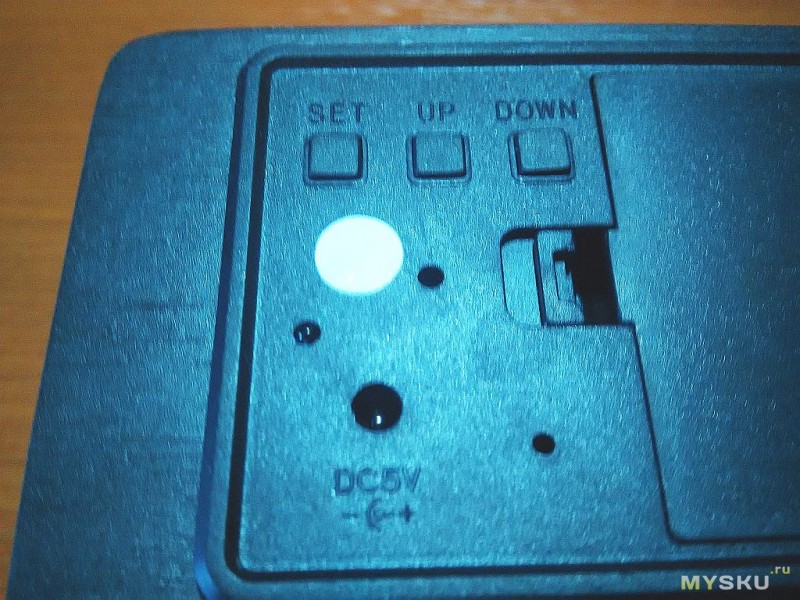
На этом будильнике имеются три кнопки для настроек. SET, UP и DOWN.
Первым делом настроим время. Для этого нажимаем и удерживаем кнопу SET — появится выбор формата времени 12 или 24 (выбираем кнопками UP или DOWN) мне нравится 24 часовой формат, поэтому я выбрал его.
Затем листаем дальше (коротким нажатием на SET) появится настройка времени. Устанавливаем время, сначала часы (нажимая UP или DOWN) и нажав снова на SET переходим на настройки минут, которые начнут мигать. Время установлено…
Установка даты
Для этого кнопкой SET листаем и находим дату. И в тот момент когда на экране отображается дата нажимаем и удерживаем SET . Выйдет число 20:00 (это не часы, а год 2000-ный) выбираем год (также кнопками UP или DOWN), например 2020, затем нажимаем SET и появится настройка месяца и дня. Сначала настраиваем месяц (кнопками UP или DOWN) нажимаем SET и выбираем день. Вот и все, дата установлена.
Как отключить или поставить будильник
Если рядом с минутой сверху горит точка, то у вас включен какой то из будильников (их три). Сначала разберемся как выключить будильник, так как в первый день, я не знав что он включен лег спать и он как заорёт в час ночи, еле выключил. Поэтому первым делом я научился выключать будильники))).
Для выключения листаем кнопкой SET до первого будильника и нажав UP вырубаем, далее второй будильник и затем и третий если включены. То есть надпись «оП А1» при нажатии UP, должна стать «- — А1» и так далее…
- «оП А1» — первый будильник включен
- «- — А1» — первый будильник выключен.
- «оП А2» — второй будильник включен
- «- — А2» — второй будильник выключен.
- «оП А3» — третий будильник включен
- «- — А3» — третий будильник выключен.
Ставим будильник также как и ставили дату и время. Для этого переводим один из будильников на «оП». Затем нажимаем и удерживаем кнопку SET выйдет формат времени 12/24 листаем дальше не трогая время и дату, до самого будильника и ставим время.
Как выключить экономию энергии или датчик шума
На таких будильниках есть функция экономия энергии, при которой дисплей через несколько секунд гаснет и включается только через датчик шума, например если постучать по столу или топнуть по полу. С одной стороны это хорошо, можно сэкономить батарейки, однако есть два минуса… Во первых при этой функции неправильно показывает датчик температуры, а во-вторых нужно пошуметь довольно-таки сильно, чтобы включился дисплей. Например ночью проснулся хочешь узнать время, то можешь разбудить других если будешь топать по полу или стучать по столу (хлопать ладошками и щелкать пальцами бесполезно). Да и некрасиво смотрится без включенного дисплея — непонятно что за кубик лежит на столе.
Итак, как выключить эту функцию? Делается это очень легко, коротким нажатием кнопки DOWN. Нажимаем DOWN и видим надпись «оП 5g» которая означает что включен режим энергосбережения, нажимаем еще раз кнопку DOWN и появится надпись «- — 5g» режим энергосбережения выключен.
«оП 5g» — активирован режим экономии энергии
«- — 5g» — экономия энергии выключен
Как выключить постоянное переключение даты и времени на дисплее
Еще одна мне ненужная функция в этих часах это постоянное переключение даты и времени. Например повернулся быстренько посмотреть время а там высвечивается дата и приходится ждать пока она обратно переключится. Это меня очень раздражало в первое время. В итоге я нашел как это устранить. Для этого нажимаем на кнопку UP видим надпись dp -1 . Нам надо ее убрать, то есть перелистать кнопкой UP до dp -2 или dp -3 (главное не было dp -1). А что означает dp -2 и dp -3 я так и не понял пока. Если что потом допишу.
Комнатная температура в Фаренгейтах или в Цельсиях — как переключить
Если эту самую кнопку DOWN нажать и удерживать то температура будет показывать в Фаренгейтах. Обратно в Цельсии переключается тоже также удерживанием DOWN.
… Ну и замучился я с этим будильником. По человечески нельзя что ли сделать настройки. Вот нашел в интернете еще какую то инструкцию, может кому то пригодится.
Скачать инструкцию в формате ПДФ: feeebc67d44a0010d5503093bbc0b84d0aaca764
Покупал чисто для того чтобы узнавать время ночью, а не как будильник. Удобно же, (особенно зимой когда утром темно) проснулся посмотрел время и дальше можно спать если еще рано.
Пришлось вырубать свет в квартире и часы сбились, поэтому решил сделать эту публикацию в первую очередь для себя, а то опять забуду. Бумажка с инструкциями уже давным давно потерялась. Если кому то статья пригодилась, то очень рад…
Стильные электронные часы в оригинально исполненном деревянном корпусе идеально впишутся в интерьер любого дома или офиса. Отображают время, дату и температуру в помещении. Имеют три будильника и активацию отображения времени только по звуковому сигналу (например хлопку). Питание от батареек или USB 5 вольт.
Подробности
Рассчитать доставку
Дополнительная скидка 5% за некоторые способы предоплаты.
Характеристики
Страна производства
—
Китай
Особенности
—
Настольные, Одноцветные, Питание от USB, Питание от батареек
Дополнительная информация
—
Формат времени: 12 / 24 часа.
Отображение: время, дата, температура. (поочередно с интервалом)
Функция будильника.
3 кнопки для настройки и управления часами.
Разъем для подключения внешнего источника питания (кабель для питания от USB порта в комплекте).
Так же есть возможность питания от сетевого адаптера 5В. (адаптер не входит в комплект)
Материал корпуса
—
имитация дерева
Все характеристики
В нашем магазине действует кешбэк до 15% бонусными рублями на все заказы. Бонусы начисляются после получения заказа.
Вам также может понравиться

- Цена: $12.77
- Перейти в магазин
Короткая история: ребенок подрастает, начинает следить за временем. Бегать каждый раз на кухню, где висят часы — не вариант. Решено покупаем электронные (чтоб тиканье не мешало), крупные, желательно не откровенная дешевка из подворотни. Поиск выдал достаточно много вариантов и расцветок. от просто часов до часов с указанием температуры окружающего воздуха.
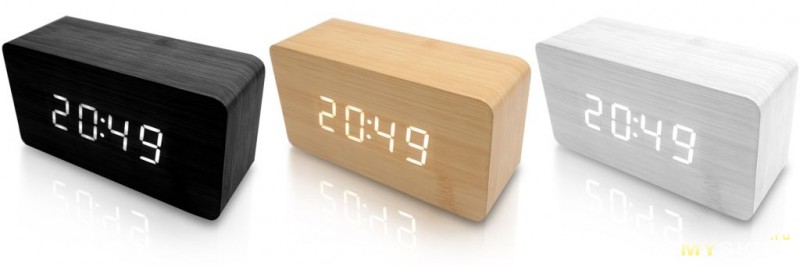
цвета — под любой интерьер — от натурального дерева до черных. Подсветка тоже различая — зеленая, белая, синея, красная.
Посовещавшись, выбрали черные с зеленой подсветкой. после оплаты продавец выдал стандартный трек, часы потихоньку импортировались во Владивостоке, но представьте мое удивление, когда однажды через два! дня утром мне пришла смс о выдаче моего заказа курьеру на доставку. Через час я уже держал посылку в руках Доставка осуществлялась ранее неизвестной мне фирмой CDEK. упаковка удивила еще раз: на ней был только трек-номер, больше ничего!

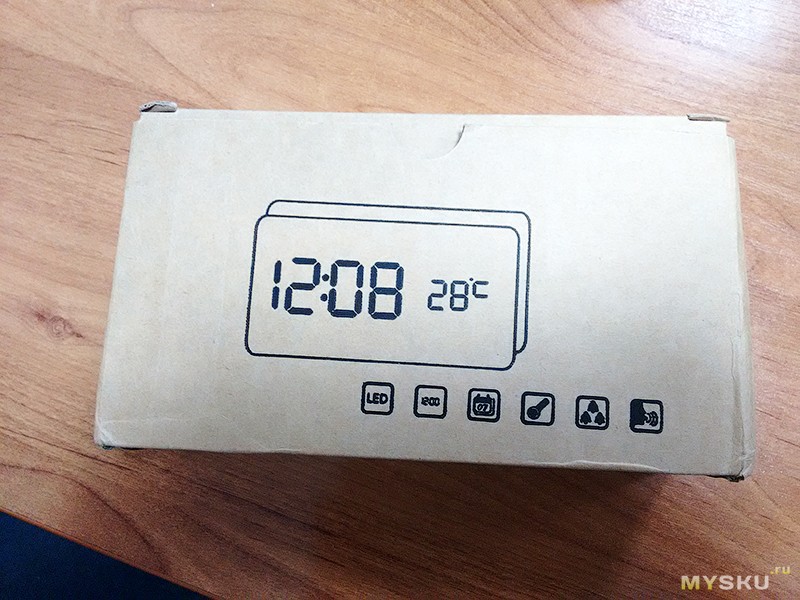
коробка из простого картона, без ярких картинок и особых надписей:


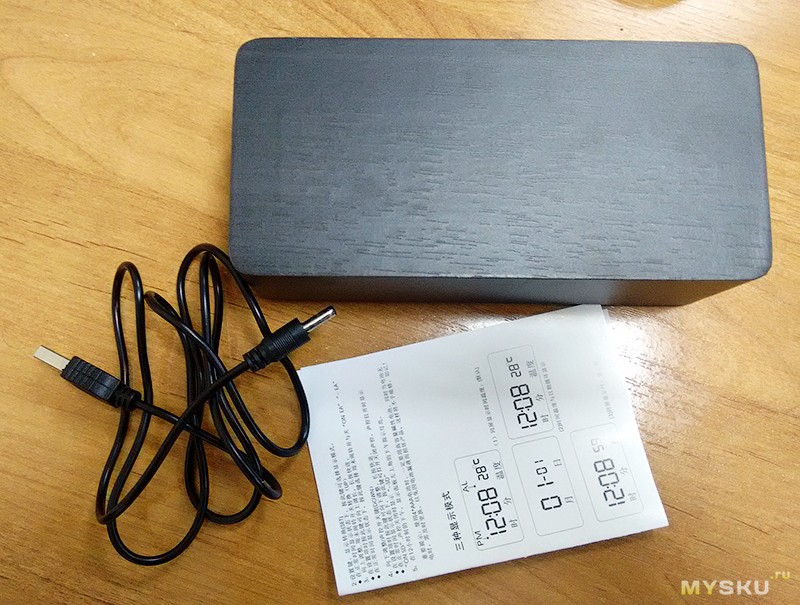
внутри в пупырке лежали сами часы, USB кабель питания и инструкция:

к сожалению, адаптер питания не было.
Запаха пластмассы не было.
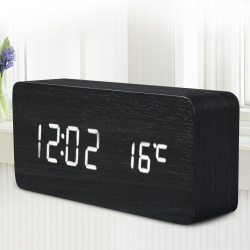
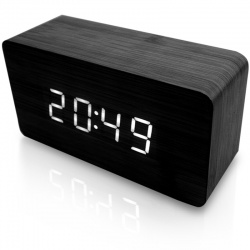
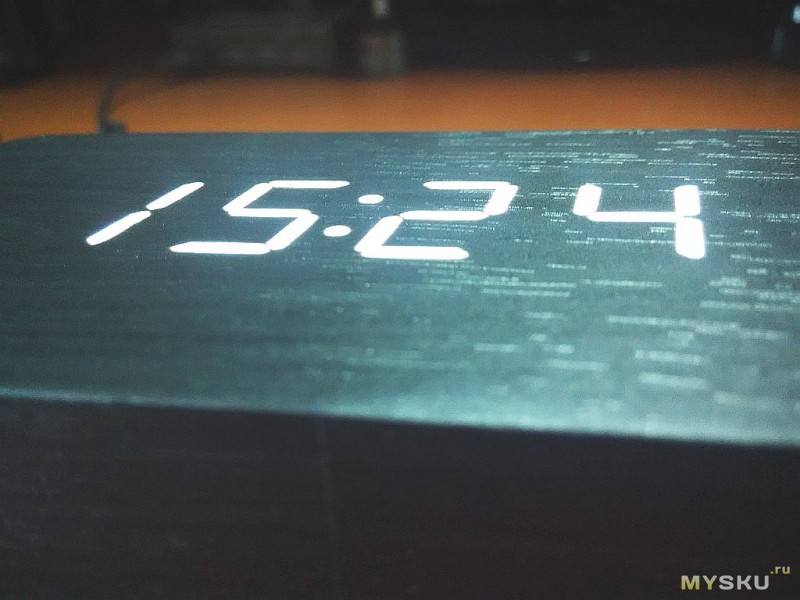
Часы представляют собой прямоугольный брусок со скругленными краями, размером 150x40x70 мм. Поверхность напоминает дерево, но при ближайшем рассмотрении видно, что текстура напечатана.
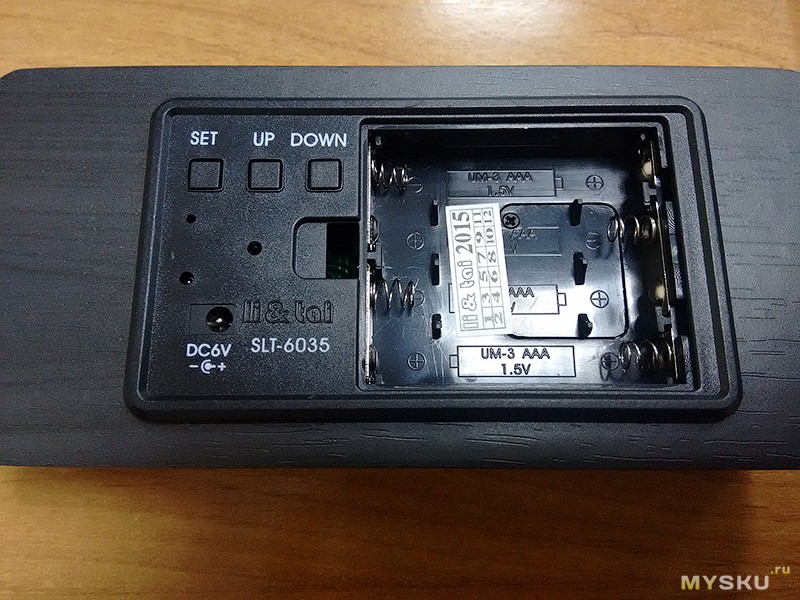
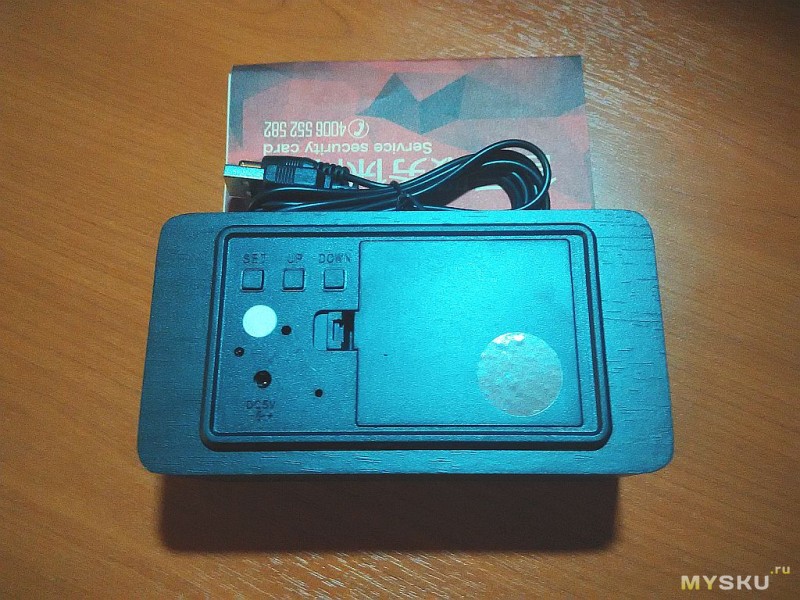
Сзади — отсек для батареек, разъем для адаптера и три кнопки управления. Управление очень простое, всё настраивается за пару минут.
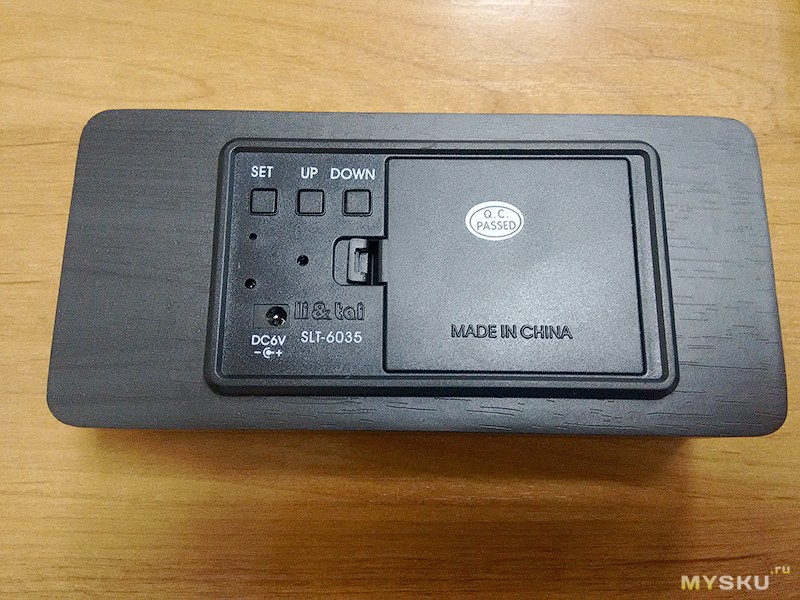
Часы сохраняет настройки при отключении питания. Нагрева при работе нет.
Есть функция отключения дисплея и пробуждения индикации по хлопку — но мы ей не пользуемся.

Основные функции:
— время (12 и 24 часовой формат)
— дата
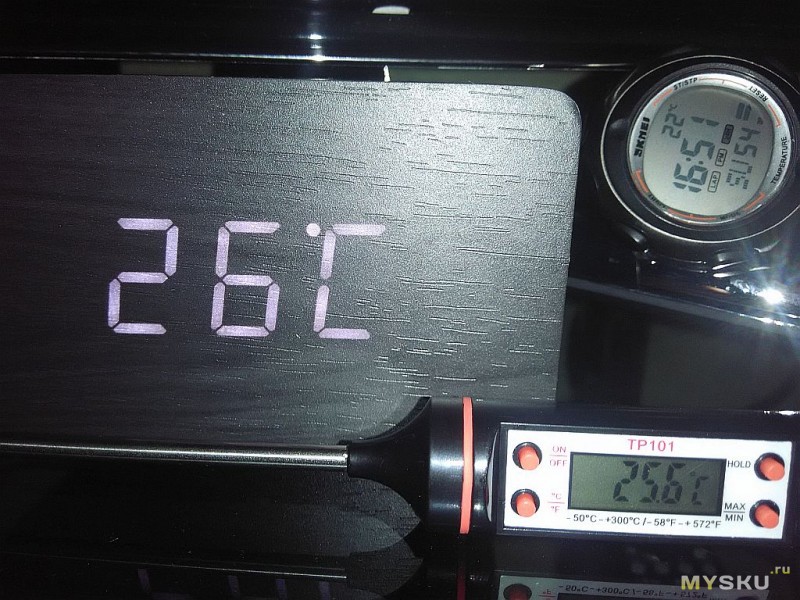
— температура воздуха (по Цельсию и по Фаренгейту)
— 3 будильников
Есть 2 вида отображения:
— время, температура
— время с секундами температура циклично
Нам часы очень понравились своим дизайном. Будильник для ребенка слабоват: в школу не поднимает, приходится добуживать.
Плюсы:
дизайн
качество сборки
отсутствие «ухода» за две недели
отсутствие запахов
Огромный минус — нет адаптера питания.
Планирую купить
+27
Добавить в избранное
Обзор понравился
Содержание
- Li & tai wood clock SLT-6035 — Home
- Add Your Answer
- Draw a box over the problem!!
- Attachments: Added items
- Related Questions:
- Set the time of li&tai SLT-6015
- Instruction manual for the Zeon dog clock
- I have a Dakota Daniels grandfather clock. The chimes work, the pendulum works, but the clock hands don’t move.
- Elite 6035 surround sound. How do I connect?
- Need help hooking up my surround sound speakers with receiver .
- Have any universal codes for EA-6035 5.1 A/V Surround .
- No tengo el manual de mi lapto toshiba premium
- Canon NP 6035 Error code &switch on and off
- Had to change battery. Since I did this the day will scroll several times and will not let me set the day, nor the time, nor the mode. Is my unit toast ?? As it was working till I changed the battery.
- Sd card slt does not read card
- How do I program Woods digital timer 59203?
- Unlock my phone
- «Деревянные» электронные домашние часы с отличным дизайном
- Деревянные настольные многоцветные RGB-LED часы SLT-9005A
- Основные характеристики часов:
Li & tai wood clock SLT-6035 — Home
Posted by Anonymous on Jan 12, 2014
Add Your Answer
- — Answer the question.
- — If you need clarification, ask it in the comment box above.
- — Better answers use proper spelling and grammar.
- — Provide details, support with references or personal experience.
Upload an image from your computer
Draw a box over the problem!!
Attachments: Added items
Complete. Click «Add» to insert your video. Add

Set the time of li&tai SLT-6015
Instruction manual for the Zeon dog clock
You will need Adobe Reader software (free) to download the instructions, save them (in PDF format), and print them.
The dog clock is manufactured by Zeon Ltd.:
Zeon UK
Units 1 & 2, Phoenix Park
Apsley Way
London, NW2 7LN
United Kingdom
Tel: +44 208 208 1833
Zeon HK
6A, Tai Tak Industrial Building
2-12 Kwai Fat Rd
Kwai Chung N.T.
Hong Kong
Tel: +852 2412 3178
This is the link to the company (United Kingdom) home page:
http://www.zeonltd.co.uk/home
I have a Dakota Daniels grandfather clock. The chimes work, the pendulum works, but the clock hands don’t move.
Elite 6035 surround sound. How do I connect?
Need help hooking up my surround sound speakers with receiver .
Have any universal codes for EA-6035 5.1 A/V Surround .
No tengo el manual de mi lapto toshiba premium
Canon NP 6035 Error code &switch on and off
Had to change battery. Since I did this the day will scroll several times and will not let me set the day, nor the time, nor the mode. Is my unit toast ?? As it was working till I changed the battery.
Most digital timers suggest resetting as last-step effort to restore functionality.
This particular timer is reset by removing battery.
Try removing battery again. Otherwise it seems the timer has gone bad.
HB88RC is discontinued product.
Replacement is heavy-duty Intermatic HB800RCL 2-outlet or HB800RCH 1-outlet timer.
http://www.smarthome.com/25078/Intermatic-HB800RCL-Heavy-Duty-Digital-Appliance-Timer/p.aspx
http://www.smarthome.com/48715/Intermatic-HB800RCH-Outdoor-Digital-Timer/p.aspx
Sd card slt does not read card
How do I program Woods digital timer 59203?
Link shows all Woods timers and manuals
http://waterheatertimer.org/Woods-timers-and-manuals.html
If instructions below do not match your timer, look through timers on Woods page to identify, and then add a comment.
Manual for 59203
http://waterheatertimer.org/pdf/Woods-59203.pdf
Instructions below are for Woods 59203 & GE 59203 plug-in programmable timer with 2-prong polarized outlet:
Plug timer in until battery is charged.
If display will not show, then timer battery needs to be recharged, or timer may be busted, or electric circuit is tripped off, or electric circuit heeds to be tested with circuit analyzer.
Set current time:
Press and hold CLOCK button.
Press HOUR and MINUTE to set correct time with am and pm.
Press Day button to set current day.
Release clock button.
Program timer:
Press PROGRAM button until «1 ON» displays. This is program1 ON.
Press MINUTE and HOUR buttons to set ON time for program1
Press DAY button to choose day or group of days for program1 ON
Press PROGRAM button until «1 OFF» displays. This is program1 OFF
Press MINUTE and HOUR buttons to set OFF time for program1
Press DAY button to choose day or group of days for program1 OFF
Press PROGRAM button until «2 ON» displays. This is program2 ON.
Repeat steps above to set ON and OFF time for 5 programs.
When programming is completed, press CLOCK button to exit programming.
Press ON/AUTO/OFF button until Auto displays.
Make sure lamp is turned on.
Make sure bulb is good.
Unlock my phone
Dear sir, How are you, I’m sending you some codes and I hope these codes will surely help you out.:)
Nokia Code & their function:
- *3370# This Nokia code activates Enhanced Full Rate Codec (EFR) — Your Nokia cell phone uses the best sound quality but talk time is reduced my approx. 5%
- #3370# Deactivate Enhanced Full Rate Codec (EFR)
- *#4720# Activate Half Rate Codec — Your phone uses a lower quality sound but you should gain approx 30% more Talk Time
- *#4720# With this Nokia code you can deactivate the Half Rate Codec
- *#0000# Displays your phones software version, 1st Line : Software Version, 2nd Line : Software Release Date, 3rd Line : Compression Type
- *#9999# Phones software version if *#0000# does not work
- *#06# For checking the International Mobile Equipment Identity (IMEI Number)
- #pw+1234567890+1# Provider Lock Status. (use the «*» button to obtain the «p,w» and «+» symbols)
- #pw+1234567890+2# Network Lock Status. (use the «*» button to obtain the «p,w» and «+» symbols)
- #pw+1234567890+3# Country Lock Status. (use the «*» button to obtain the «p,w» and «+» symbols)
- #pw+1234567890+4# SIM Card Lock Status. (use the «*» button to obtain the «p,w» and «+» symbols)
- *#147# This lets you know who called you last (Only vodofone)
- *#1471# Last call (Only vodofone)
- *#21# This phone code allows you to check the number that «All Calls» are diverted to
- *#2640# Displays phone security code in use
- *#30# Lets you see the private number
- *#43# Allows you to check the «Call Waiting» status of your cell phone.
- *#61# Allows you to check the number that «On No Reply» calls are diverted to
- *#62# Allows you to check the number that «Divert If Unreachable (no service)» calls are diverted to
- *#67# Allows you to check the number that «On Busy Calls» are diverted to
- *#67705646# Phone code that removes operator logo on 3310 & 3330
- *#73# Reset phone timers and game scores
- *#746025625# Displays the SIM Clock status, if your phone supports this power saving feature «SIM Clock Stop Allowed», it means you will get the best standby time possible
- *#7760# Manufactures code
- *#7780# Restore factory settings
- *#8110# Software version for the nokia 8110
- *#92702689# Displays — 1.Serial Number, 2.Date Made, 3.Purchase Date, 4.Date of last repair (0000 for no repairs), 5.Transfer User Data. To exit this mode you need to switch your phone off then on again
- *#94870345123456789# Deactivate the PWM-Mem
- **21*number# Turn on «All Calls» diverting to the phone number entered
- **61*number# Turn on «No Reply» diverting to the phone number entered
- **67*number# Turn on «On Busy» diverting to the phone number entered
Источник
«Деревянные» электронные домашние часы с отличным дизайном
Короткая история: ребенок подрастает, начинает следить за временем. Бегать каждый раз на кухню, где висят часы — не вариант. Решено покупаем электронные (чтоб тиканье не мешало), крупные, желательно не откровенная дешевка из подворотни. Поиск выдал достаточно много вариантов и расцветок. от просто часов до часов с указанием температуры окружающего воздуха.
цвета — под любой интерьер — от натурального дерева до черных. Подсветка тоже различая — зеленая, белая, синея, красная.Посовещавшись, выбрали черные с зеленой подсветкой. после оплаты продавец выдал стандартный трек, часы потихоньку импортировались во Владивостоке, но представьте мое удивление, когда однажды через два! дня утром мне пришла смс о выдаче моего заказа курьеру на доставку. Через час я уже держал посылку в руках Доставка осуществлялась ранее неизвестной мне фирмой CDEK. упаковка удивила еще раз: на ней был только трек-номер, больше ничего!
коробка из простого картона, без ярких картинок и особых надписей:
внутри в пупырке лежали сами часы, USB кабель питания и инструкция:
к сожалению, адаптер питания не было.
Запаха пластмассы не было.
Часы представляют собой прямоугольный брусок со скругленными краями, размером 150x40x70 мм. Поверхность напоминает дерево, но при ближайшем рассмотрении видно, что текстура напечатана.
Сзади — отсек для батареек, разъем для адаптера и три кнопки управления. Управление очень простое, всё настраивается за пару минут.
Часы сохраняет настройки при отключении питания. Нагрева при работе нет.
Есть функция отключения дисплея и пробуждения индикации по хлопку — но мы ей не пользуемся.
Основные функции:
— время (12 и 24 часовой формат)
— дата
— температура воздуха (по Цельсию и по Фаренгейту)
— 3 будильниковЕсть 2 вида отображения:
— время, температура
— время с секундами температура цикличноНам часы очень понравились своим дизайном. Будильник для ребенка слабоват: в школу не поднимает, приходится добуживать.
Плюсы:
дизайн
качество сборки
отсутствие «ухода» за две недели
отсутствие запаховИсточник
Деревянные настольные многоцветные RGB-LED часы SLT-9005A
Часы SLT-9005A имеют целых 115 вариантов цветов свечения символов, т.к. сделаны на RGB-светодиодах.
Также имеют два порта USB для питания или зарядки других гаджетов!
Основные характеристики часов:
Три режима изменения цветов цифр: Один цвет, цикл из 7-ми цветов, или цикл из 115-ти цветов.
Два р ежима отображения информации: [DP2] Отображение времени, даты и температуры в цикле. [DP1] Отображение только времени.
Функция будильника: Три набора ежедневных сигналов тревоги.
Кроме того, функция будильника может быть включена/выключена в субботу и воскресенье.
Регулировкой яркости символов: Три вида яркости с помощью ручной регулировки: 1:LU, 2:LU и 3:LU.
Управление звуком: при включенном режиме (on:Sd) часы включаются при громком звуке, например хлопке, примерно на 16 секунд.
Функция повтора будильника: после одной минуты тревоги, будильник автоматически входит в статус snoozing. Всего 6 раз, с интервалом 5 минут, всего получается 36 минут. Д анную функцию можно включить и отключить в режиме настройки.
USB выходы: часы имеют два порта USB для питания других гаджетов.
Единицы измерения температуры: ℃ и ℉ (-20℃ до +50℃)
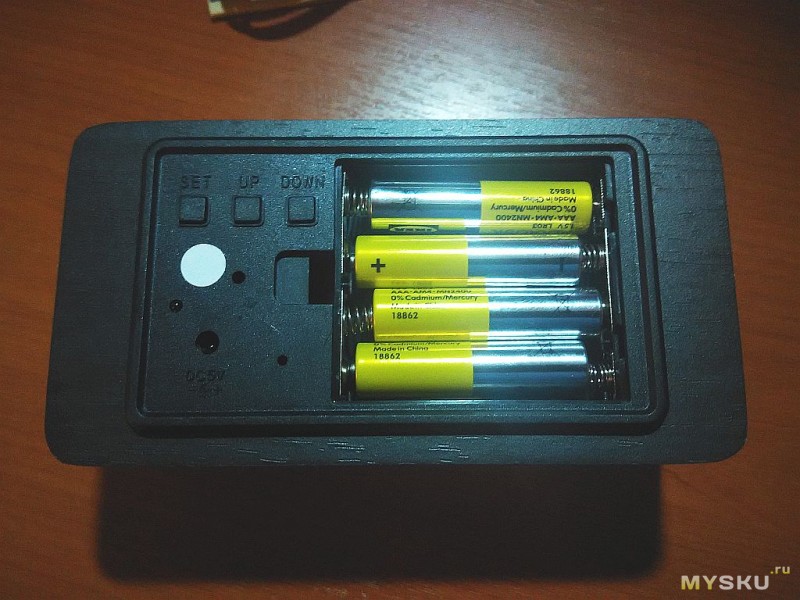
Питание: Часы можно запитать от любого источника c USB-выходом, адаптера питания USB DC5V или батареек (4 * AAA). Также в часах предусмотрена батарейка CR2032, для сохранения настроек при отключении питания.
Размер часов: Д*Ш*В 13,8*3,5*6,8 см (5,43*1,37*2,67 дюймов)
Обратная сторона часов с кнопками управления, USB-портами, входом питания и отсеком для батареек:
1 * светодиодные часы
1 * кабель USB
1 * руководство пользователя (eng) Для покупки товара в нашем интернет-магазине выберите понравившийся товар или несколько товаров и добавьте их все в «корзину». Далее перейдите в «Корзину» и нажмите на «Оформить заказ».
Начните набирать ваш город в соответствующее поле и выберите его из выпадающего списка. Далее выберите способ доставки, способ оплаты, введите данные получателя и адрес. В комментарии можете указать дополнительную информацию. Стоимость и сроки доставки рассчитаются автоматически, в зависимости от вашего города, веса и размеров посылки, а также выбранного способа оплаты. Нажмите кнопку «Оформить заказ». Менеджер свяжется с Вами для подтверждения заказа по указанному Вами телефону.
Источник


- Цена: $17,99 покупал по акции за $9,99
- Перейти в магазин
Давно хотел купить настольные часы со светящимся табло, но что-то не попадались приличные модели, хотя выбор в оффлайне большой и даже по цене, можно найти дешевле. И вот всемогущий JD, да не иссякнут его купоны, выставил на продажу симпатичные часики трех цветов с фактурой под дерево. Они сразу мне приглянулись из-за своего строгого дизайна и вполне приемлемой ценой. Однако они долго не появлялись в продаже. Видимо не хотели отдавать за дешево и придерживали для рождественской распродажи. И вот как только они стали доступны, сразу заказал. Часы очень красивые и сделаны очень качественно. Разобрать их без повреждения корпуса нет возможности, по-этому потрошить не буду — жалко. Кому интересны подробности, представляю вашему вниманию небольшой обзорчик.
В настоящий момент на сайте представлены модели в трех цветах на выбор.
Оплата и доставка
Заказ был оплачен 10 декабря а уже вчера 26 декабря курьер принес посылку. Получается что на все про все ушло 16 дней. Это рекорд по доставке посылок от JD в моей истории заказов.
Распаковка
Посылка упакована в неизменном стиле JD, но помимо этого сами часы упакованы дополнительно в две заводские коробки. Это говорит о том, что производитель не экономит на упаковке и ответственно относится к процессу транспортировки товара до конечного пользователя.
Технические характеристики
- Часовой формат: 12 / 24
- Формат даты: ММ ДД
- Датчик температуры: да
- Отображение температуры: градусы / фаренгейты
- Количество установок будильника: 3
- Индикация по звуку: есть
- Регулировка подсветки: есть
- Цвет подсветки: белый
- Питание: 4 х 1.5 В ААА
- Питание внешнее: DC 5 В
- Длина кабеля питания: 50 см
- Размер часов: 12,6 х 4,5 х 6,5 см
Комплектация
В комплекте идут; сами часы без элементов питания, кабель питания (возможно им можно заряжать часы если в них установить аккумуляторы, я не проверял, т.к. таковых нет в наличии) и что-то на подобии мануала на китайском.
В часы устанавливаются четыре батарейки формата ААА. Настройка производится тремя кнопками на задней панели.
Угол обзора очень хороший, в темноте часы светятся достаточно ярко и четко показываю символы на экране, однако не освещают пространство около себя. Возможно кому то это не понравится. Лично я не люблю когда ночью комната освещается ночниками или светодиодами от устройств.
Точность температуры проверил как смог, если честно не уверен ни в одном из устройств на фото :). Хотя если честно, мена мало волнует температура в квартире пока работает отопление
И под конец гифка с демонстрацией работы часов. Для просмотра кликните по картинке внизу

В заключение хочу сказать что часы мне понравились. как я уже говорил выглядят очень стильно и красиво. К сожалению не очень хорошо фотографирую, по этому говорю вам с полной ответственностью — в жизни часы выглядят намного красивее чем на фото.
На этом все! Спасибо всем что читали.
P.S.
Регулировка яркости: Удерживаешь Up, потом кнопками Up и Down меняешь яркость (спасибо за подсказку apu)
Включение/выключение индикации по звуку: Нажимаем Down для выбора нужного режима
Планирую купить
+30
Добавить в избранное
Обзор понравился
+16
+42
×
Сейчас вы находитесь в городе Москва
Выберите город, в который Вы хотите осуществить доставку
)uMBRu24Q3+fw~~60_57.JPG?set_id=880000500F)

![]()
![]()
Вопрос по товару?
Мы перезвоним!
Основные характеристики
Группа товаров:
Запасные части и инструменты
Оригинальное название:
Hermle Grandfather Clock Installation Operating Instructions 451-050 1161-853
Товар из США
Доставим в Ваш город
Артикул:223470874458
Продавец:
clockodile
(18050)
Местонахождение:Milwaukee, Wisconsin, US
Доставка до склада США
667 ₽ ($5.99)

Товары из магазинов
США и Европы
без наценок!
Отправили
67 000 посылок
с 2008 года!
Знаменитый
каталог eBay
на русском языке!
Доставка курьером
до двери
Почтой или в удобный пункт выдачи!
Похожие товары
Hermle Grandfather Clock Installation Operating Instructions 451-050 1161-853
Hermle Grandfather Clock Installation Operating Instructions 451-050 1161-853 – можно купить на shopozz.ru с доставкой
из Milwaukee, Wisconsin, US. Все товары из
категории «Запасные части и инструменты» быстро и вовремя доставляются в Россию и страны СНГ.
Полную информацию о доставке можно посмотреть в разделе «Доставка».
На товары категории «Запасные части и инструменты» действует доступная цена,
поэтому Hermle Grandfather Clock Installation Operating Instructions 451-050 1161-853 можно
приобрести всего за
8565 руб.
Не можете сделать выбор? Посмотрите другие товары продавца
clockodile
(18050)
–
«Смотреть все товары».
Возникли вопросы о товаре, условиях оплаты либо доставки?
Закажи обратный
звонок!
Другие бренды категории
В чем наша ценность
Покупки без ограничений
- Доставка в любой город СНГ
- Простой процесс оплаты
- Каталог на русском языке
Доступ к 3 млн. товаров
- Доставка в любой город СНГ
- Простой процесс оплаты
- Каталог на русском языке
Консолидация и сервис
- Доставка в любой город СНГ
- Простой процесс оплаты
- Каталог на русском языке
Покупки в США и Европе — это просто
Вы делаете заказ — мы выкупаем товары и доставляем вам
Склад

$46
Косметика M.A.C.maccosmetics.com

$46
Часы Timexamazon.com

$15
Джинсы levi’sebay.com
К вам домойОтправляем в Россию и
во все страны СНГ
Начать выгодные покупки в зарубежных интернет-магазинах
This guide will be useful for people who own a grandfather clock or floor clock. You can see our full selection of Grandfather Clocks here and Floor Clocks here.
Finding Product Information Label
It is important to know your product information label which includes model number and serial number. We suggest you take a look and find it once you receive your clock. You can find it on the outside of the shipping carton or on the back of the door, on the back or top of the Grandfather Clock, inside the top back corner or inside the Grandfather Clock above the back of the dial. This information will be useful in case you need to obtain parts for your clock, need maintenance or repair service.
Understanding Basic Operation of a Grandfather Clock
At the heart of every floor clock is the movement. The movement controls the hour strike, time keeping, and chime. The pendulum and weights are critical components to operation of the clock movement. The pendulum provides the ability to regulate and adjust the time keeping. As described within these instructions, adjustments to the pendulum to achieve accurate time keeping is easily accomplished. The three weights provide power to the hour strike (left weight), time (center weight), and chime melody (right weight). Without these weights, the clock would not operate. Each weight is different and must be properly hung from the movement (left, center, right) to ensure proper operation. Weights are hung from the movement by a cable or chain. The weights must be raised at least every 7 days or the clock will stop. Raising cable driven weights is accomplished through use of a crank. Raising chain driven weights is accomplished by pulling down on the loose end of the chain. The strike and chime sounds are made by a series of hammers hitting various length rods. Each rod makes a different sound when hit by a hammer. Specific chime melodies are achieved by controlling the sequence that each hammer hits a corresponding rod.
This Guide contains the following information:
GRANDFATHER CLOCK / FLOOR CLOCK: CABLE
- Setting Up Your Clock
- Hanging Pendulum
- Hanging Weights
- Setting Moon Dial
- Setting Time
- Starting Clock
GRANDFATHER CLOCK / FLOOR CLOCK: CHAIN
- Setting Up Your Clock
- Hanging Pendulum
- Hanging Weights
- Setting Moon Dial
- Setting Time
- Starting Clock
GENERAL INFORMATION
- Product Information Label
- Moving Your Clock
- Installing / Removing Top Side Panel
- Glass Features
- Raising Weights
- Regulating Timekeeping
- Automatic Night-Time Silencing Option
- Chime Selection
- Care And Maintenance
TROUBLE SHOOTING
- Difficulty Rotating The Moon Dial
- Clock Does Not Chime At Proper Time
- Clock Does Not Strike The Correct Hour
- Clock Will Not Chime or Strike
- Chimes Have The Incorrect Tone
FOLLOW THESE SIX STEPS TO SET UP CLOCKS THAT REQUIRE WEIGHTS SUSPENDED FROM A PULLEY AND CABLE
STEP 1: SETTING UP YOUR CLOCK
Located in the bottom of the shipping carton will be a box. This box contains:
a) a key to fit your clock door
b) a crank which will be used to wind your clock and
c) weights which operate the clock movement. Also, within the shipping carton will be the clock pendulum packaged in a separate box.
Move the clock close to its final location — ENSURE CLOCK IS POSITIONED SQUARE AND FIRM ON THE FLOOR SO THAT IT WILL NOT FALL OVER. ADJUST LEVELERS FOR MAXIMUM STABILITY AND PROPER ALIGNMENT.
-
Access to the clock movement, chimes and cables is made in three possible ways; through the front door(s), through the top side panels (or side doors on some clocks), or through the back access panel. The top side panels are held from the inside by tape or a plastic clip. The plastic clip may be turned or tape may be removed permanently.
-
Remove the cardboard sleeve, from around the chime rods and pendulum guide, by holding the cardboard sleeve at points ‘A’ and ‘B’ and pulling straight down. Pull straight down and off the ends of the chime rods and pendulum guide (See figure 1).
-
Remove the foam pads from between the chime hammers and chime rods. Care should be taken to avoid bending the chime hammers. The chime hammers will be free to move after the cardboard sleeve has been removed, thereby allowing easy removal of the foam pads.

DO NOT REMOVE THE STYROFOAM BLOCKS from above the cable pulleys. This is one of the most critical points in the entire set-up operation. Removing the styrofoam blocks at this time could cause the cables to overlap and bind the movement. You can remove the styrofoam blocks AFTER they become loose through normal operation, which typically occurs after eight (8) hours of run time.
Position the clock into its final location. Once in place, your clock cabinet must be leveled, as the clock may not operate if it is not level. There are four (4) levelers under the cabinet on each corner that can be screwed in (up) or out (down) to make adjustments. Place a level alongside the clock cabinet from front to back and side to side, adjusting the levelers until level. It may be necessary to periodically check your cabinet after initial set-up, (especially if the clock is on carpet), as it might settle after original leveling (see figure 2).

Ensure the clock is positioned square and firm on the floor so that it will not fall over.
Illuminated cases: Some clocks have lights illuminating the inside of the clock case. Check that all packaging materials have been removed from the light bulb before operating the light.
NOTE: To perform the following steps we suggest wearing cotton gloves or using a soft cloth when handling parts.
STEP 2: HANGING PENDULUM
Some pendulums have a colored protective plastic film covering the pendulum disk. Carefully remove this film before hanging the pendulum. To hang the pendulum, locate the pendulum guide through the front door, or any of the side or back access panel locations. While holding the pendulum guide with one hand, slip the pendulum in through the front door with your other hand. Place the pendulum hook through the slot on the pendulum guide, and lower the pendulum until it is hanging securely on the pendulum guide (See figure 3).

STEP 3: HANGING WEIGHTS
DO NOT REMOVE THE STYROFOAM BLOCKS until after your clock has been operating. You can remove the styrofoam blocks AFTER they become loose through normal operation, which typically occurs after eight (8) hours of run time.
Most clocks use three weights. The bottom of each weight is labeled as to its proper hanging position as you view your clock from the front. The total weight of each weight is slightly different and each WEIGHT MUST BE INSTALLED IN ITS CORRECT LOCATION FOR THE CLOCK TO OPERATE PROPERLY. Check the weights to ensure that they are tightly assembled.
Check to make sure that the cable is in the cable pulley. Hang the weights on the pulleys (See figure 4).

STEP 4: SETTING MOON DIAL (available on some models)
-
With your fingertips, apply slight pressure to the front of the moon dial and rotate the moon dial clockwise until the moon is directly below the #15 lunar day mark (each mark represents a lunar day) on the lunar arch (See figure 5).
-
Refer to an almanac or calendar and determine the date of the last full moon. Count the number of days past the last full moon.
-
Rotate the moon dial clockwise 1 lunar day for every day past the full moon.

Example: If the last full moon was 3 days ago, rotate the moon dial clockwise 3 lunar days so that the moon is centered at lunar day 18 on the lunar arch.
The moon dial is now set and will indicate the proper moon phases as long as the clock operates continuously. If the clock stops the moon dial will also stop and can be reset when the clock is started again.
If the moon dial will not rotate, see the Troubleshooting Section.
STEP 5: SETTING TIME (moving the hands)
CAUTION ON MOVEMENTS WITH AUTOMATIC CHIME SEQUENCING: The chime selection lever should not be in the “Auto” position when moving the hands. Moving the hands in either the clockwise or counterclockwise direction while the automatic chime sequencing is in operation could damage the chime mechanism.
CAUTION ON MOVEMENTS WITH DAY/NIGHT SHUT-OFF FEATURES: The Day/Night lever must be in the strike position (all the way up) when moving the hands. To set the time, move ONLY THE MINUTE HAND counterclockwise (backwards) until the hour and minute hand are at the correct time (See figure 6).
DO NOT MOVE THE HOUR HAND WHEN SETTING THE TIME. The hour hand will move automatically when the minute hand is moved. By moving the minute hand counterclockwise it is not necessary to wait for the clock to chime as the minute hand passes each quarter hour (See figure 6). The movement has a self correcting feature which synchronizes the chimes with the time. If after setting the clock on time, it does not chime properly, permit it to operate 2 hours to correct itself.

STEP 6: STARTING CLOCK
-
Reach through the front door of the clock and place your hand on the side of the pendulum disk.
-
Move the pendulum to the far left of center and release. Let the clock operate a few minutes until the pendulum settles into an even swinging motion (See figure 7).

If your clock gains or looses time after twenty-four (24) hours, see General Information Section to regulate the timekeeping of your clock.
AFTER the styrofoam blocks become loose through normal operation, which typically occurs after eight (8) hours of run time, you can remove the styrofoam blocks. Remove the styrofoam blocks by lifting the blocks straight up until they clear the cable pulley. Then gently push them back, through the cables. Do not use tools to remove the blocks. Do not permit the cable to overlap on the drum.
FOLLOW THESE SIX STEPS TO SET UP CLOCKS THAT REQUIRE WEIGHTS SUSPENDED FROM A CHAIN
STEP 1: SETTING UP YOUR CLOCK
Located in the bottom of the shipping carton will be a box. This box contains:
a) a key to fit your clock door
b) weights which operate the clock movement
Also, within the shipping carton will be the clock pendulum packaged in a separate cardboard box.
Move the clock close to its final location — WARNING: ENSURE CLOCK IS POSITIONED SQUARE AND FIRM ON THE FLOOR SO THAT IT WILL NOT FALL OVER. ADJUST LEVELERS FOR MAXIMUM STABILITY AND PROPER ALIGNMENT.
- Access to the clock movement, chimes and chains is made in three possible ways; through the front door(s) through the side or back access panel. The rear access panel is held in place with plastic clips. Turn the top clips to remove the rear access panel. The side access panels are held from the inside by tape or a plastic clip. The clip may be turned or tape may be removed permanently. Refer to the General Information section on how to properly remove and install side access panels.
- Remove the plastic retainer from the chime rods by carefully tilting and sliding the retainer down off the ends of the chime rods. Remove the foam pads from between the hammers and chime rods. Care should be taken to avoid bending the chime hammers and chime rods. The chains have been packed for shipment in a bag and are located near the clock movement. Pull the bag free and cut the string with scissors. Allow the chains to hang.
CAUTION: Take great care not to pull the chains through the movement or off the sprockets while removing the plastic retainer from the chains.
- Carefully remove the plastic retainer by sliding the retainer down off the chains. Remove the spring clip from the back side of the movement by first pulling one end free (See figure 8).

Position the clock into its final location. Once in place, your clock cabinet must be leveled, as the clock may not operate if it is not level. There are four (4) levelers under the cabinet on each corner that can be screwed in (up) or out (down) to make adjustments. Place a level alongside the clock cabinet from front to back and side to side, adjusting the levelers until level. It may be necessary to periodically check your cabinet after initial set-up, (especially if the clock is on carpet), as it might settle after original leveling (See figure 9). Ensure clock is positioned square and firm on the floor so that it will not fall over.

Illuminated cases: Some clocks have lights illuminating the inside of the clock case. Carefully remove the paper sleeve from the light bulb before operating the light.
NOTE: To perform the following steps we suggest wearing cotton gloves or using a soft cloth when handling parts.
STEP 2: HANGING PENDULUM
Some pendulums have a colored protective plastic film covering the pendulum disc. Carefully remove this film before hanging the pendulum. To hang the pendulum, locate the pendulum guide through the front door, or any of the side or back access panel locations. While holding the pendulum guide with one hand, slip the pendulum in through the front door with your other hand. Place the pendulum hook through the slot on the pendulum guide, and lower the pendulum until it is hanging securely on the pendulum guide (See figure 10).

STEP 3: HANGING WEIGHTS
Most clocks use three weights. The bottom of each weight is labeled as to its proper hanging position as you view your clock from the front. The total weight of each weight is slightly different and each WEIGHT MUST BE INSTALLED IN ITS CORRECT LOCATION FOR THE CLOCK TO OPERATE PROPERLY. Check the weights to ensure that they are tightly assembled.
CAUTION: Ensure that each link of each chain is properly positioned on the teeth of the sprocket. Hang each weight on the solid hook at the end of the chain, never on the chain links (See figure 11).

STEP 4: SETTING MOON DIAL (available on some models)
- With your fingertips, apply slight pressure to the front of the moon dial and rotate the moon dial clockwise until the moon is directly below the #15 lunar day mark (each mark represents a lunar day) on the lunar arch (See figure 12).
- Refer to an almanac or calendar and determine the date of the last full moon. Count the number of days past the last full moon.
- Rotate the moon dial clockwise 1 lunar day for every day past the full moon. Example: If the last full moon was 3 days ago, rotate the moon dial clockwise 3 lunar days so that the moon is centered at lunar day 18 on the lunar arch.

The moon dial is now set and will indicate the proper moon phases as long as the clock operates continuously. If the clock stops the moon dial will also stop and can be reset when the clock is started again.
If the moon dial will not rotate, see the Troubleshooting Section.
STEP 5: SETTING TIME (moving the hands)
To set the time, move ONLY THE MINUTE HAND counterclockwise (backwards) until hour and minute hand are at the correct time (See figure 13).

DO NOT MOVE THE HOUR HAND WHEN SETTING THE TIME. This hand will move automatically when the minute hand is moved. By moving the minute hand counterclockwise it is not necessary to wait for the clock to chime as the minute hand passes each quarter hour. The movement has a self correcting feature which synchronizes the chimes with the time. If after setting the clock on time, it does not chime properly, permit it to operate 2 hours to correct itself.
STEP 6: STARTING CLOCK
- Reach through the front door of the clock and place your hand on the side of the pendulum disk.
- Move the pendulum to the far left of center and release. Let the clock run a few minutes until the pendulum settles into an even swinging motion (See figure 14).

If your clock gains or looses time after 24 hours, see General Information Section to regulate the timekeeping of your clock.
GENERAL INFORMATION
PRODUCT INFORMATION LABEL
The product information label identifies the clock model number and serial number. The clock model number and serial number are essential for obtaining parts or service. The product information label is located in several locations: outside the shipping carton, back of door, back of the clock, top of the clock, inside the top back corner of the clock, or inside the clock above the back of the dial. Refer to this label when contacting us or your dealer.

Товары из магазинов
США и Европы
без наценок!
Отправили
67 000 посылок
с 2008 года!
Знаменитый
каталог eBay
на русском языке!
Доставка курьером
до двери
Почтой или в удобный пункт выдачи!
Похожие товары
Hermle Grandfather Clock Installation Operating Instructions 451-050 1161-853
Hermle Grandfather Clock Installation Operating Instructions 451-050 1161-853 – можно купить на shopozz.ru с доставкой
из Milwaukee, Wisconsin, US. Все товары из
категории «Запасные части и инструменты» быстро и вовремя доставляются в Россию и страны СНГ.
Полную информацию о доставке можно посмотреть в разделе «Доставка».
На товары категории «Запасные части и инструменты» действует доступная цена,
поэтому Hermle Grandfather Clock Installation Operating Instructions 451-050 1161-853 можно
приобрести всего за
8565 руб.
Не можете сделать выбор? Посмотрите другие товары продавца
clockodile
(18050)
–
«Смотреть все товары».
Возникли вопросы о товаре, условиях оплаты либо доставки?
Закажи обратный
звонок!
Другие бренды категории
В чем наша ценность
Покупки без ограничений
- Доставка в любой город СНГ
- Простой процесс оплаты
- Каталог на русском языке
Доступ к 3 млн. товаров
- Доставка в любой город СНГ
- Простой процесс оплаты
- Каталог на русском языке
Консолидация и сервис
- Доставка в любой город СНГ
- Простой процесс оплаты
- Каталог на русском языке
Покупки в США и Европе — это просто
Вы делаете заказ — мы выкупаем товары и доставляем вам
Склад
$46
Косметика M.A.C.maccosmetics.com
$46
Часы Timexamazon.com
$15
Джинсы levi’sebay.com
К вам домойОтправляем в Россию и
во все страны СНГ
Начать выгодные покупки в зарубежных интернет-магазинах


