- Manuals
- Brands
- HEADRUSH Manuals
- Music Pedal
- Pedalboard
- User manual
-
Contents
-
Table of Contents
-
Bookmarks
Quick Links
Related Manuals for HEADRUSH Pedalboard
Summary of Contents for HEADRUSH Pedalboard
-
Page 1
User Guide English… -
Page 2: Table Of Contents
Table of Contents Introduction ……….3 Adjusting Settings ……… 15 Overview ……….15 Parameters ………. 16 Box Contents ……….. 3 Amp ……….16 Cab ……….. 16 Support ………… 3 Effects ……….17 In …………17 Out ……….. 18 Features …………4 Mix …………
-
Page 3: Introduction
The HeadRush Pedalboard delivers a new generous and diverse offering of classic vintage and modern amp and effects models, including exclusive original boutique effects that can’t be found anywhere else, as well as the ability to load your own custom impulse response (IR) files.
-
Page 4: Features
11. Aux Volume: Turn this knob to adjust the volume level of the aux input. Important: The audio signal from the aux input is routed directly to the outputs of the HeadRush Pedalboard without any modeling applied. It is also unaffected by the master volume or phones volume knobs.
-
Page 5: Rear Panel
1. Power Input (IEC): Connect this input to a power outlet using the included power cable. 2. Power Switch: Press this button to turn the HeadRush Pedalboard’s power on. Press and hold this button to turn the HeadRush Pedalboard’s power off.
-
Page 6
17. USB Port: Connect this USB port to a computer using a standard USB cable. This connection allows the HeadRush Pedalboard to send and receive the digital audio signal to and from your computer. You can also use this connection to import or export rigs, model presets, setlists, and impulse response (IR) files. This… -
Page 7: Setup
Setup Items not listed under Introduction > Box Contents are sold separately. Guitar PA loudspeakers or mixer Guitar amplifier Headphones Power outlet Computer External effect stompboxes, modules, etc.
-
Page 8: Operation
Operation This chapter describes the HeadRush Pedalboard’s functions. Main Screen Overview Tap to search for rigs by name. Tap to view setlists. Tap and drag this bar downward to view list of rigs. Turn encoder to move Rig name. Tap to save rig.
-
Page 9: Basic Operations
Basic Operations Important: The sequence of models in your signal chain is not necessarily reflected in the footswitches. You can freely assign models to available footswitches without changing your signal chain at all—and vice versa. See Hardware Assign to learn about this. To assign a model (amp, cab, or effect) to an empty slot, tap it () and then use the list that appears.
-
Page 10: Signal Path
Signal Path You can easily reconfigure the path of your signal chain to split, creating more complex routings. To reconfigure the signal path, tap at the bottom of the main screen. The icon will change to match the current signal path as shown below. This straight signal path is the default and the most common.
-
Page 11: Stereo Vs. Mono
Stereo vs. Mono The outgoing signal from the HeadRush Pedalboard can be mono or stereo, depending on the models in your rig, the signal path, and which outputs you are using. An indicator near the end of the signal path indicates the current configuration.
-
Page 12: Views
Views The eight middle footswitches can be used to activate or bypass models (amps, cabs, or effects) as well as select rigs or setlists. These footswitches are always in one of four views: Stomp View, Rig View, Hybrid View, and Setlist View.
-
Page 13: Rigs
Rigs While using the HeadRush Pedalboard, a rig is a preset: the combination of assigned models—the amps, cabs, and effects—and the parameter settings of each of them. You can create, edit, save, and load rigs, making it easy to recall the perfect sound for each part of your performance.
-
Page 14: Optimizing Your Signal Chain
The signal chain is the path that the audio signal follows from your guitar through your selected models and ends at the outputs of the HeadRush Pedalboard. You can use the touchscreen to arrange your selected models in any sequence, but you may find that some configurations will sound better than others.
-
Page 15: Adjusting Settings
Adjusting Settings To adjust the settings of an item in your rig, double-tap it to open its settings screen. You can adjust the settings of any model (amp, cab, or effect), the input (the In/Lock icon), the output (the Out icon), or mix (the Mix icon). Overview Tap …
-
Page 16: Parameters
The Cab category is a list of popular amp cabinets, which contain the speakers. The HeadRush Pedalboard recreates not only the sound of the cabinet but also the type of microphone recording it.
-
Page 17: Effects
The available range is 1–3000 ms. USB Level: This setting controls the level of the audio signal sent from your computer to the HeadRush Pedalboard over a USB connection. The available range is -60.0 to 12.0 dB.
-
Page 18: Out
0% produces a mono signal. This affects stereo signals only, not mono signals. See Main Screen > Stereo vs. Mono to learn how the HeadRush Pedalboard handles stereo and mono signals. These settings control mix of a split signal path. This is available only for rigs with split signal paths (see Main Screen >…
-
Page 19: Hardware Assign
Hardware Assign screen. The MIDI Prog field determines the MIDI program change number of the rig. Use the Prog Change setting in the Global Settings screen to determine whether the HeadRush Pedalboard can send and/or receive MIDI program change messages (see Global Settings >…
-
Page 20: Footswitches
Footswitches The eight boxes in the lower-left corner represent the middle eight footswitches of the HeadRush Pedalboard. You can assign any switch-based parameters (ones with only two states) to any of the footswitches—regardless of their location in the signal chain.
-
Page 21: Expression Pedal
Mode). Use the toe switch to switch between them—Expression Pedal A or B. To activate the toe switch, move the “toe end” of the expression pedal so it touches the pedalboard, and then press down. The expression pedal status LED will indicate A or B.
-
Page 22: Setlists
Setlists You can use setlists to organize your rigs. A setlist is a saved collection of rigs, which you can save and recall at a later time. This is useful, for instance, if you only need some of your rigs for a performance; you can save a setlist of just those rigs so you don’t have to spend time searching through all of your rigs before playing the next song.
-
Page 23: Hands-Free Mode
12 footswitch to switch between the two. Looper The HeadRush Pedalboard has a built-in looper that you can use to layer your performances. While the looper’s operation is shown in the display, you can control most of it conveniently with the footswitches.
-
Page 24
To record the first layer of a loop, press the Record footswitch. Recording will begin immediately and the footswitch indicator will light red. Press the Record footswitch again to stop recording and start loop playback. The footswitch is now called Overdub and the footswitch indicator is yellow. To record additional layers onto the loop (overdub), press the Overdub footswitch. -
Page 25: Global Settings
Global Settings Use the global settings to configure the HeadRush Pedalboard’s overall operation. To show the global settings, tap the button in the upper-right corner of the screen, and tap Global Settings. LCD Brightness: This setting determines the brightness of the main display. Tap this field, turn the encoder to select 1 (dim) through 5 (bright), and then press the encoder.
-
Page 26
These settings affect only the HeadRush Pedalboard’s MIDI input or MIDI output. MIDI Thru: Tap On to use the MIDI output as a MIDI throughput; any MIDI information sent to the HeadRush Pedalboard’s MIDI input will be sent directly to the MIDI output. Tap Off to use the HeadRush Pedalboard’s MIDI output normally;… -
Page 27: Usb
5. Open the HeadRush drive. You can now freely click and drag contents between HeadRush and your computer. Note that any changes you make to the contents of your HeadRush will not be final until after the next step, but any changes you make to the files on your computer are immediate.
-
Page 28: Recording
When the HeadRush Pedalboard’s USB port is connected to your computer, you can select and use the HeadRush Pedalboard as a 24-bit audio interface, enabling you to play audio through it or to send its audio signal to the computer. It can use sample rates of 48 kHz or 96 kHz.
-
Page 29: Technical Specifications
Specifications are subject to change without notice. Trademarks & Licenses HeadRush is a trademark of inMusic Brands, Inc., registered in the U.S. and other countries. Avid and Eleven are trademarks or registered trademarks of Avid Technology, Inc. in the U.S. and other countries.
-
Page 30
Manual Version 1.1…
Процессоры и педали эффектов
Артикул: A073431
Гарантия: 1 год
Нет в наличии
Товара нет в наличии в сети Музторг
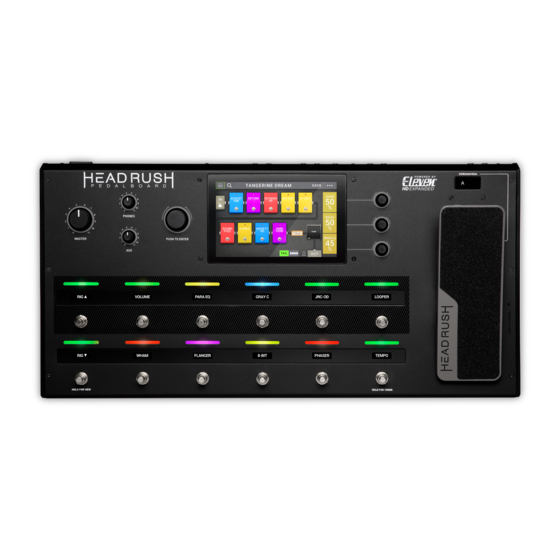
Профессиональный напольный процессор эффектов, 33 модели усилителей, 15 моделей кабинетов, 10 микрофонов, 42 вида эффектов, 12 ножных переключателей, педаль экспрессии, сенсорный экран 7′.
Интерактивность и интуитивность управления — главная отличительная особенность HeadRush Pedalboard от других топовых процессоров эффектов . Благодаря семидюймовому сенсорному дисплею настройка процессора еще никогда не была такой легкой и быстрой. А с помощью режима Hands Free Вы сможете полностью управлять своим звуком прямо во время игры.
HeadRush Pedalboard дает безграничные возможности звучания. От кристально чистого звука классических английских и американских ламповых усилителей, которые легко достигают блюзового брейкапа только лишь более сильной атакой, до самого брутального перегруза современной тяжелой музыки, который не теряет упругости и разборчивости даже в сверхпониженном строе.
Наравне с искушенными гитаристами HeadRush Pedalboard порадует и не менее искушенных бас-гитаристов. В него включены модели усилителей и кабинетов от самого знаменитого производителя басового усиления.
Технические характеристики:
- Четырехядерный процессор Eleven HD expanded DSP software
- Встроенный 24-bit 96 kHz USB аудиоинтерфейс
- 33 модели усилителей, 15 кабинетов, 10 микрофонов, 6 эффектов овердрайв / дисторшн, 5 эквалайзеров, 7 эффектов модуляции, 7 эффектов ревер / дилэй, 5 режимов педали экспрессии
- Встроенный лупер с возможностью записи до 20 минут.
- 12 переключателей с индивидуальными индикаторами OLED
- Педаль экспрессии
- 7″ сенсорный дисплей
- Входы: 6,3 мм джек
- Выходы: 2 x 6,3 мм джек, 2x XLR симметричный
- MIDI вход и выход
- Выход на наушники
- AUX вход
- Стерео петля эффектов (Send/Return)
- Размеры: 61 x 8,9 x 30,5 cм Ш/В/Д
- Вес: 7,62 кг
Нашел в описании ошибку? Выдели неточный текст и нажми Ctrl+Enter.
- Назначение: для электрогитары, бас-гитары
- Петля эффектов: последовательная
- Формат: напольный
Центральный склад г. Москва
Наличие:
нет в наличии
Музторг на Таганской
Краснохолмская наб., д.3
понедельник — суббота 10:00 — 21:00
воскресенье 10:00 — 20:00
Наличие:
нет в наличии
Музторг на Савеловской
ул. Вятская, д.1
понедельник — суббота 10:00 — 21:00
воскресенье 10:00 — 20:00
Наличие:
нет в наличии
Музторг на Кузнецком Мосту
ул. Неглинная, д.6/2
понедельник — суббота 10:00 — 20:00
воскресенье 10:00 — 18:00
Наличие:
нет в наличии

ДОСТАВКА И ОПЛАТА
Ваш город г. Москва
Доставка по Москве
Бесплатная доставка заказов от 5 000 р.
Доставка в день заказа
Заказы, оформленные до 12:00 доставим в этот же день, все товары в заказе должны быть в наличии в городе доставки.
Доставка в день заказа (по Москве в пределах МКАД):
- от 5 000 р. – бесплатно
- до 5 000 р. – 390 р.
Доставка осуществляется в интервале с 18:00 до 22:00 часов.
Доставка на следующий день и позже
Доставка на следующий день (по Москве):
— от 5 000 р. – бесплатно
— до 5 000 р. – 290р.
Доставка ко времени — выбирайте удобные интервалы
- 9:00-13:00
- 13:00-17:00
- 17:00-21:00
Мы поможем поднять до дверей крупногабаритный товар, а также собрать цифровое пианино. Услуги по подъему и сборке оплачиваются отдельно.
Сборка цифрового пианино – 600 рублей.
Стоимость подъема на этаж
При отсутствии грузового лифта:
- до 50 кг 300 р./за каждый этаж
- от 50 до 100 кг 750 р./за каждый этаж
- от 100 до 150 кг 1200 р./за каждый этаж
При наличии грузового лифта:
- до 50 кг 300 р.
- от 50 до 100 кг 750 р.
- от 100 до 150 кг 1200 р.
- от 150 кг (при наличии грузового лифта либо без него) 3200 р.
ДОСТАВКА по Московской области
Бесплатная доставка заказов от 5 000 р.
При доставке заказа на сумму более 5 000 р., но при наличии акционного товара, товара со скидкой, товара, приобретенного в рассрочку стоимость доставки 500 р.
Доставка на следующий день
Доставка на следующий день по Московской области:
- от 5 000 р. – бесплатно
- сумма заказа до 5 000 р. – стоимость доставки 500 р.
При доставке заказа на сумму более 5 000 р., но при наличии акционного товара, товара со скидкой, товара, приобретенного в рассрочку стоимость доставки 500 р.
Доставка осуществляется в интервале 09:00-21:00 часа.
Доставка на последующие даты
Доставка по Московской области:
- от 5 000 р. – бесплатно
- до 5 000 р. – стоимость доставки 500 р.
При доставке заказа на сумму более 5 000 р., но при наличии акционного товара, товара со скидкой, товара, приобретенного в рассрочку стоимость доставки 500 р.
Доставка осуществляется в течение дня.
Мы поможем поднять до дверей крупногабаритный товар, а также собрать цифровое пианино. Услуги по подъему и сборке оплачиваются отдельно.
Сборка цифрового пианино – 600 рублей.
Стоимость подъема на этаж
При отсутствии грузового лифта:
- до 50 кг 300 р./за каждый этаж
- от 50 до 100 кг 750 р./за каждый этаж
- от 100 до 150 кг 1200 р./за каждый этаж
При наличии грузового лифта:
- до 50 кг 300 р.
- от 50 до 100 кг 750 р.
- от 100 до 150 кг 1200 р.
- от 150 кг (при наличии грузового лифта либо без него) 3200 р.
Доставка и оплата по России и СНГ
- Надежные транспортные компании
- Банковской картой через интернет
- Банковский перевод
- Наличными при получении
(кроме СНГ)
Преимущества доставки
Оформление
заказа
- В разделе «Корзина» на сайте
- По номеру 8 800 555-00-75 или запросив обратный звонок
через сайт - Для юридических лиц — обратная связь.
Оплата
- Наличными или банковской картой в магазине
- Наличными или банковской картой курьеру
- Банковской картой на сайте
- В ближайшем банке
- Оформив кредит
- Безналичным переводом для юридических лиц
- Наложенным платежом
Получение
- В ближайшем магазине «Музторг»
- Курьерской доставкой
- В терминале транспортной компании
- Почтой России (EMS)
Почему выбирают «Музторг»
гарантируем подлинность, качество,
сервис. На большинство товаров срок гарантии 12 месяцев.
Надёжность
сеть магазинов в 47 городах России,
более 1000 сотрудников, более 1 миллиона посетителей ежегодно.
в соответствии с законом о защите
прав потребителей.
Кредит и рассрочка в Музторге
![]()
Простая подача заявки
![]()
Подтверждение за минуту
![]()
Одобрение 95% заявок
![]()
Четыре банка — партнера
Выбирайте подходящие программы сроком до 24 месяцев
| Зафиксируйте цену | Кредит |
|---|---|
| Первый взнос | 0% |
| Сумма | от 1 500 до 300 000 |
| Сроки выплат |
3—24 месяцев
* Минимальная сумма кредитной программы на 24 месяца — 30 000 рублей. |
| Особенности | Действует на все товары, включая акционные |
* Не распространяется на акционные товары и покупки со скидками, в т.ч. по Клубной карте.
Как оформить
В розничном магазине
В магазинах Музторг специалисты всегда помогут вам оформить рассрочку за несколько минут и сразу забрать
покупку.
В интернет-магазине
Вы можете оформить онлайн-рассрочку или кредит и при этом выбрать любой способ получения заказа.
Самовывоз из магазина Музторг
1
Выберите товар в каталоге, перейдите в корзину
и оформите заказ
2
Заполните заявку на кредит или рассрочку
3
Подпишите договор и получите
товар в магазине Музторг.
После одобрения онлайн-заявки посетите магазин для
получения товара и оформления документов.
Курьерская доставка или пункт самовывоза
1
Выберите товар в каталоге, перейдите в корзину
и оформите заказ
2
Заполните заявку на кредит или рассрочку
3
Подпишите договор
После одобрения онлайн-заявки сотрудник банка или курьер приедет к вам в удобное время для
заключения договора. Некоторые банки подписывают договоры через СМС (если вы уже являетесь
клиентом банка).
4
Получите товар
После подписания договора Музторг передаст заказ в службу доставки.

Предложение для клиентов СберБанка
«Рассрочка и кредит от СберБанка»
Оформление в СберБанк онлайн без документов
![]()
Переплата 0%
Без документов
![]()
3 000 — 300 000 рублей **
![]()
6, 12
месяцев
![]()
Оформление в СберБанк Онлайн
Подробнее с условиями кредитования можно ознакомиться
здесь
.
** Лимит суммарного остатка задоженности по данному продукту не должен превышать 300 000 рублей.
Как оформить рассрочку или кредит в СберБанке
1
Выберите товар в каталоге, перейдите в корзину и оформите
заказ
2
Подтвердите заказ
Вам не надо заполнять никаких данных (все данные есть у банка), только подтвердите сумму покупки
и список товарных позиций.
3
Решение от банка в течение 3-5 минут
В течение 3-5 минут получите итоговое решение и подтвердите данные кредита/рассрочки.
Никаких документов. Всё оформление и подтверждение через СберБанк Онлайн.
4
Получите товар
Как только вы подтвердите данные кредита, мы передадим товар в службу доставки или лично вам,
если вы находитесь в магазине Музторг.
Кредит предоставлен АО «ОТП Банк» Генеральная лицензия Банка России на осуществление банковских операций № 2766 от 27.11.2014 года. Организатор акции предоставляет скидку на товар, в итоге сумма, подлежащая выплате банку, не превышает первоначальной стоимости товара при условии, что дополнительные услуги банка не приобретаются. Полное досрочное погашение осуществляется в соответствии с «Общими условиями договора потребительского кредита по программе «Потребительский кредит». Более подробную информацию об условиях потребительского кредита АО «ОТП Банк» можно узнать на сайте www.otpbank.ru. АО «ОТП Банк» Юридический адрес: 125171, г. Москва, Ленинградское шоссе, д. 16А, стр. 2. Единый многоканальный справочный телефон: +7 (495) 775-4-775, 8 800 100-55-55
Кредит предоставлен ПАО «МТС-Банк». Лицензия Банка России №2268 от 17.12.2014 г. Организатор акции предоставляет скидку на товар, в итоге сумма, подлежащая выплате банку, не превышает первоначальной стоимости товара при условии, что дополнительные услуги банка не приобретаются. Полное досрочное погашение осуществляется в соответствии с «Общими условиями комплексного банковского обслуживания физических лиц в ПАО «МТС-Банк». Более подробную информацию об условиях потребительского кредита ПАО «МТС-Банк» можно узнать на сайте https://www.mtsbank.ru/ ПАО «МТС-Банк» оставляет за собой право отказать в предоставлении кредита без объяснения причин.
Кредит предоставляется КБ “РЕНЕССАНС КРЕДИТ” (ООО), лицензия Банка России № 3354 ОТ «26» апреля 2013 г. (далее – «Банк»). Банк предоставляет покупателю кредит, а продавец предоставляет покупателю скидку от стоимости товара, приобретаемого в кредит у продавца, предоставляемый банком, в размере процентов за пользование кредитом, в результате чего переплаты за товар не возникает, и фактически выплаченная сумма за товар не превышает его первоначальной стоимости. Решение о выдаче кредита принимается Банком по своему усмотрению на основании представленных документов клиентом. Подробную информацию можно получить на сайте https://www.rencredit.ru или по телефону 8-800-200-09-81.
Подробнее
- Все процессоры эффектов для гитар HEADRUSH
- Все
товары HEADRUSH

-
DigiTech
GNX3000
Designed by guitar fanatics in Salt Lake City, Utah 7 www.digitech.com 7 801.566.8800R6 DigiTech® Component-Based Modeling™ next generation amp modeling6 43 amp models6 24 cabinet models6 DigiTech®’s exclusive GeNetX™ Mult-Modeling™ technology6 Single coil and humbucking pick-up modeling6 57 fully prog …
GNX3000 Music Pedal, 2
-
Aion Electronics
ASTERIA MK. III
ASTERIA PREAMP DRIVE MK. III 1PROJECT NAMEASTERIA MK. IIIBASED ONEFFECT TYPEPROJECT SUMMARYDOCUMENT VERSIONCatalinbread® Formula 55An adaptation of the Fender® Deluxe 5E3 amplifier from 1955, a classic low-wattage amplifier noted for its harmonically-rich breakup that can be achieved at low volumes.Overdrive / Amp Em …
ASTERIA MK. III Music Pedal, 10
-
Keeley
Fuzz Head
K eeley Fuzz HeadGetting The Most From Your Fuzz PedalExternal Fuzz ControlsFUZZThis is the distortion control. Set this for the amount of gain or dirt you like. Actually, set it a bit higher than you might normally use so you can take advantage of the dynamics. The dynamics of this pedal are such that you can just rol …
Fuzz Head Music Pedal, 2
-
Bad Cat
X-TREME TONE
FOR YOUR RECORDS, YOU MAY WISH TO RECORD THE FOLLOWING INFORMATION.SERIAL NO._____________________ INVOICE DATE______________________Last updated: July 30, 2013Thank you for purchasing a professional tube effects pedal from Bad Cat™. Similar to all Bad Cat products, your X-Treme Tone pedal is designed from the ground …
X-TREME TONE Music Pedal, 2
-
Korg
Nu:Tekt OD-S
— 1 -EJ 12019OD-SNUTUBE OVERDRIVE KITTable of ContentsMain features ……………………………………………………. 2Cautions Before Assembly…………………………………5Tools to prepare …………………………………………………………….5Checking the parts …………….. …
Nu:Tekt OD-S Music Pedal, 16
-
Ibanez
AF2
MANUFACTURE : HOSHINO GAKKI CO., LTD. 22-3 Chome, Shumoku-Cho, Higashi, Nagoya, Aichi, JapanCE EU REPRESENTATIVE : HOSHINO BENELUX B.V. J.N. Wagenaanweg 9,1422 AK Uithoorn, NetherlandsThis equipement fu …
AF2 Music Pedal, 16
Recommended Documentation:
Your Perfect Tone is Just a Touch Away
Thank you for purchasing the HeadRush Pedalboard!
®
Featuring a finely tuned quad-core DSP system and powered by its exclusive Eleven
HD Expanded platform, the
HeadRush Pedalboard delivers the most versatile, realistic-sounding and responsive amplifier, cabinet,
microphone and effects models ever found in a floorboard guitar effects processor.
The HeadRush Pedalboard delivers a new generous and diverse offering of classic vintage and modern amp and
effects models, including exclusive original boutique effects that can’t be found anywhere else, as well as the
ability to load your own custom impulse response (IR) files. There are also exclusive features that can’t be found on
any other guitar processor, including gapless preset-switching with delay/reverb tail spillover, a looper with up to
20 minutes of record time, the ability to peel off loop layers in the reverse order they were added, and much more.
The heart of the HeadRush Pedalboard is the 7-inch touch display and its guitarist-oriented user interface,
enabling you to touch, swipe, and drag-and-drop to instantly create and edit your rigs in an unprecedented
realistic and intuitive way. The large display also gives ultra-clear feedback when performing live, especially when
making slight changes to your tone using the Hands-Free Mode.
Oh. One more thing. This one goes to 11.
Box Contents
HeadRush Pedalboard
USB Cable
Power Cable
Software Download Card
Quickstart Guide
Safety & Warranty Manual
Support
For the latest information about this product (documentation, technical specifications, system requirements,
compatibility information, etc.) and product registration, visit headrushfx.com.
For additional product support, visit headrushfx.com/support.
3
![]()
|
Quickstart Guide |
English (3–14) |
|
Guía de inicio rápido |
Español (15–26) |
|
Guide d’utilisation rapide |
Français (27–38) |
|
Guida rapida |
Italiano (39–50) |
|
Schnellstart-Anleitung |
Deutsch (51–62) |
|
Appendix |
English (63) |

2

Quickstart Guide (English)
Introduction
Your Perfect Tone is Just a Touch Away
Thank you for purchasing the HeadRush Pedalboard!
Featuring a finely tuned quad-core DSP system and powered by its exclusive Eleven® HD Expanded platform, the HeadRush Pedalboard delivers the most versatile, realistic-sounding and responsive amplifier, cabinet, microphone and effects models ever found in a floorboard guitar effects processor.
The HeadRush Pedalboard delivers a new generous and diverse offering of classic vintage and modern amp and effects models, including exclusive original boutique effects that can’t be found anywhere else, as well as the ability to load your own custom impulse response (IR) files. There are also exclusive features that can’t be found on any other guitar processor, including gapless preset-switching with delay/reverb tail spillover, a looper with over 20 minutes of record time, the ability to peel off loop layers in the reverse order they were added, and much more.
The heart of the HeadRush Pedalboard is the 7-inch touch display and its guitarist-oriented user interface, enabling you to touch, swipe, and drag-and-drop to instantly create and edit your rigs in an unprecedented realistic and intuitive way. The large display also gives ultra-clear feedback when performing live, especially when making slight changes to your tone using the Hands-Free Mode.
The following information is a quick-start guide to get you up and running, but you can also find a complete manual, tutorial videos, as well as share your feedback by visiting us at headrushfx.com.
Oh. One more thing. This one goes to 11.
Box Contents
HeadRush Pedalboard
USB Cable
Power Cable
Software Download Card
Quickstart Guide
Safety & Warranty Manual
Important: Visit headrushfx.com to download the complete user guide.
Support
For the latest information about this product (documentation, technical specifications, system requirements, compatibility information, etc.) and product registration, visit headrushfx.com.
For additional product support, visit headrushfx.com/support.
3

Features
Top Panel
|
10 |
8 |
||
|
9 |
2 |
||
|
3 |
1 |
2 |
|
|
11 |
|||
|
2 |
|||
|
6 |
7 |
||
|
5 |
12 |
||
|
4 |
|||
|
6 |
|||
|
5 |
|||
|
4 |
1.Main Display: This full-color multi-touch display shows information relevant to HeadRush Pedalboard’s current operation. Touch the display (and use the hardware controls) to control the interface. See Basic Operation to learn how it works.
2.Parameter Knobs: Turn these knobs to adjust the parameters or settings shown next to them in the main display.
3.Encoder: Turn this encoder to scroll through the available menu options or adjust the parameter values of the selected field in the display. Push the encoder to confirm your selection.
4.Footswitches: Press these footswitches to activate or deactivate the assigned model or to load the assigned rig.
5.Footswitch Displays: These display strips indicate the model or rig assigned to each footswitch.
6.Footswitch Indicators: These lights indicate whether the model or rig assigned to each footswitch is on (brightly lit) or off (dimly lit).
7.Expression Pedal: Use this pedal to adjust the assigned parameter/parameters. See Basic Operation >
Hardware Assign > Expression Pedal for more information.
8.Expression Pedal Status LCD: This small LCD indicates the current status of the expression pedal. See
Basic Operation > Hardware Assign > Expression Pedal for more information.
9.Master Volume: Turn this knob to adjust the volume level of the outputs.
10.Phones Volume: Turn this knob to adjust the volume level of the phones output.
11.Aux Volume: Turn this knob to adjust the volume level of the aux input.
Important: The audio signal from the aux input is routed directly to the outputs of HeadRush Pedalboard without any modeling applied. It is also unaffected by the master volume or phones volume knobs.
12.Cable Channel: Place your cables under and through this indent on the underside of HeadRush Pedalboard to keep your stage clutter-free and prevent people from tripping over cables.
4

Rear Panel
|
3 |
||||||||||||
|
7 |
10 |
14 |
||||||||||
|
4 |
5 |
6 |
8 |
9 |
11 |
12 |
13 |
15 |
16 |
17 |
2 |
1 |
1.Power Input (IEC): Connect this input to a power outlet using the included power cable.
2.Power Switch: Press this button to turn HeadRush Pedalboard’s power on. Press and hold this button to turn HeadRush Pedalboard’s power off.
3.Vent: Make sure this vent is unobstructed while using HeadRush Pedalboard.
4.Guitar Input (1/4”/6.35 mm, TS): Connect your guitar to this input using a standard instrument cable.
5.Expression Pedal Input (1/4”/6.35 mm, TRS): Connect an optional secondary expression pedal to this input using a standard instrument cable.
6.Aux Input (1/8”/3.5 mm, TRS): Connect an optional audio source (e.g., smartphone, tablet, etc.) to this input using an 1/8”/3.5 mm stereo cable.
7.Outputs (XLR): Connect these outputs to the inputs of your mixer, active loudspeaker, etc. If you only need to use one output, use the one labeled L/Mono.
8.Ground-Lift Switch: Engage (depress) this switch to reduce hum or noise.
9.Outputs (1/4”/6.35 mm, TRS): Connect these outputs to the inputs of your amplifier, audio interface, etc. Set the Amp/Line selector to the setting appropriate for the connected device. If you only need to use one output, use the one labeled L/Mono.
10.Amp/Line Selector: Use this switch to select the level of the signal sent from the 1/4”/6.35 mm outputs. When set to Amp, the output level will be +6 dBu for a standard guitar amplifier. When set to Line, output level will be line-level, +18 dBu.
11.Phones Output (1/4”/6.35 mm, TRS): Connect standard 1/4” (6.35 mm) stereo headphones to this output. Use the phones volume knob to control the volume level.
12.Send Outputs (1/4”/6.35 mm, TRS): Connect these outputs to the inputs of another effects module, an effect pedal, or the effects loop return of an amplifier. Set the Rack/Stomp selector to the setting appropriate for the connected device. If you only need to use one output, use the one labeled L/Mono.
13.Return Inputs (1/4”/6.35 mm, TRS): Connect these inputs to the outputs of another effects module, an effect pedal, or the effects loop send of an amplifier. Set the Rack/Stomp selector to the setting appropriate for the connected device. If you only need to use one output, use the one labeled L/Mono.
14.Rack/Stomp Selector: Use this switch to select the level of the signal sent from the send outputs to the return inputs. When set to Rack, output level will be line-level, +18 dBu. When set to Stomp, the output level will be +6 dBu like a standard guitar pedal (“stompbox”).
15.MIDI Input (5-pin DIN): Use a standard MIDI cable to connect this input to the MIDI output of an optional external MIDI device.
16.MIDI Output (5-pin DIN): Use a standard MIDI cable to connect this output to the MIDI input of an optional external MIDI device.
17.USB Port: Connect this USB port to a computer using a standard USB cable. This connection allows HeadRush Pedalboard to send and receive the digital audio signal to and from your computer. You can also use this connection to import or export rigs, model presets, and setlists.
5

Setup
|
Items not listed under Introduction > Box Contents are sold separately. |
||
|
Guitar |
PA loudspeakers or mixer |
Guitar amplifier |
 Headphones
Power outlet
|
External effect stompboxes, |
Computer |
|
modules, etc. |
6

Basic Operation
This chapter describes some of HeadRush Pedalboard’s basic functions. You can visit headrushfx.com to download the complete user guide for even more information.
Main Screen
|
Tap to view setlists. |
Tap and drag this bar downward to view list of rigs. |
|
Turn encoder to move through selectable items onscreen or to adjust parameters. Press encoder as an Enter command.
Double-tap a model, In, or Out to show its parameters.
|
Rig name. |
Tap to save rig. |
|
|
Tap its footswitch to |
Turn the parameter knobs to adjust these parameters. When a model is |
|
|
activate or deactivate it. |
selected, tap anywhere in this column to show the next three parameters. |
|
Important: The sequence of models in your signal chain is not necessarily reflected in the footswitches. You can freely assign models to available footswitches without changing your signal chain at all—and vice versa. See Hardware Assign to learn about this.
To assign a model (amp, cab, or effect) to an empty slot, tap it () and then use the list that appears. See Rigs > Creating a Rig to learn about this.
To show a model’s parameters on the right edge of the screen, tap the model so it is outlined in green. You can then turn the parameter knobs to adjust the parameters to their left. Tap anywhere in the column of those three parameters to show the next three (if the model has more than three parameters).
When no model is selected, these parameters will be ones that you assign in the
Hardware Assign screen.
To show a model’s settings screen, double-tap it. Its settings screen will appear with its preset menu, parameters, and assigned color.
To activate or deactivate a model, press the footswitch assigned to it, or tap the model’s footswitch in the display.
To load another rig (preset):
•Press the upper-left (Rig ) or lower-left (Rig ) footswitch to load the previous or next rig immediately.
•Tap the or next to the name of the current rig on the screen.
•Tap the name of the rig on the screen and then turn the encoder.
To view other options, tap the button in the upper-right corner, and then tap an option.
To rearrange the models in your signal chain, tap and drag a model to another slot or between two other models (the ones after that position will shift one slot further down the signal chain).
7

Views
HeadRush Pedalboard’s footswitches can be used not only to activate or deactivate models (amps, cabs, or effects) but also to select rigs or setlists. The middle eight footswitches are always in one of four modes:
To change the view:
1. Press and hold the lower-left footswitch until Exit appears in its display. The adjacent four footswitches now correspond to the four views: Stomp, Rig, Hybrid, and Setlist.
|
2. Press a footswitch to enter that view. |
Exit |
Stomp |
Rig |
Hybrid |
Setlist |
Stomp View
|
The middle eight footswitches correspond to |
Rig |
Model 1 |
Model 2 |
Model 3 |
Model 4 |
Looper |
|
|
models (amps, cabs, or effects) in your signal |
|||||||
|
chain. Press a footswitch to activate or deactivate |
|||||||
|
its model. |
|||||||
|
Rig |
Model 5 |
Model 6 |
Model 7 |
Model 8 |
Tuner |
Rig View
The middle eight footswitches correspond to rigs you have saved. Press a footswitch to load its rig.
To show the previous or next four rigs, press the upper-left (Bank ) or lower-left (Bank ) footswitch.
Hybrid View
The upper middle four footswitches correspond to rigs you have saved. Press one of these footswitches to load its rig. The lower middle four footswitches correspond to models (amps, cabs, or effects) in your signal chain. Press one of these footswitches to activate or deactivate its model.
Setlist View
The middle eight footswitches correspond to setlists you have saved. Press a footswitch to load its setlist.
8
|
Bank |
Rig 1 |
Rig 2 |
Rig 3 |
Rig 4 |
Looper |
|
Bank |
Rig 5 |
Rig 6 |
Rig 7 |
Rig 8 |
Tuner |
|
Bank |
Rig 1 |
Rig 2 |
Rig 3 |
Rig 4 |
Looper |
|
Bank |
Model 1 |
Model 2 |
Model 3 |
Model 4 |
Tuner |
|
Bank |
Setlist 1 |
Setlist 2 |
Setlist 3 |
Setlist 4 |
|
Bank |
Setlist 5 |
Setlist 6 |
Setlist 7 |
Setlist 8 |

Rigs
While using HeadRush Pedalboard, a rig is a preset: the combination of assigned models—the amps, cabs, and effects—and the parameter settings of each of them. You can create, edit, save, and load rigs, making it easy to recall the perfect sound for each part of your performance.
Each rig has 11 slots, each of which can have one model (amp, cab, or effect) assigned to it. Assigned slots will show graphical representations of the models, and empty slots will show a symbol.
Creating a New Rig
To create a new rig, tap the button in the upper-right corner of the screen, and tap New Rig.
To assign a model (amp, cab, or effect) to an empty slot:
1.Tap the empty slot ().
2.In the list that appears, tap the type of model you want to assign: Amp, Cab, or effect (Distortion, Dynamics/EQ, Modulation, Reverb/Delay, FX-Loop, or Expression).
3.In the list that appears, tap the model you want to assign.
4.In the next list that appears, tap the preset you want to load for that model.
If you load an amp or cab to a slot with an empty adjacent slot, a matching amp or cab will be loaded automatically to the other slot. After that, you can configure them independently: you can separate them in the signal chain, you can change the type of the amp or cab, and you can delete each model separately.
|
Model types: amps, |
Available presets |
||||
|
cabs & effects |
for each model. |
||||
Optimizing Your Signal Chain |
Available models |
||||
|
for each type. |
|||||
The signal chain is the path that the audio signal follows from your guitar through your selected models and ends at the outputs of HeadRush Pedalboard. You can use the touchscreen to arrange your selected models in any sequence, but you may find that some configurations will sound better than others.
Here are some common model placement suggestions for creating tones with HeadRush Pedalboard:
•Dynamics (e.g., compressors), filters (e.g., wah, pitch shifters), and volume pedals generally are placed at the beginning of the signal chain. Alternatively, you can place volume pedals at the end of the signal chain to provide a slight variance in functionality.
•Gain-based effects (e.g., overdrive/distortion, fuzz) usually come next.
•Equalization (EQ) is often used to shape the tonal characteristics of overdrive/distortion and fuzz effects, so put an EQ after them. Alternatively, place it before them to shape the guitar’s general tone—cutting unwanted frequencies—before the gain pedals.
•Modulation effects like flangers, phasers, and chorus are typically placed next.
•Time-based effects like delays and reverbs are generally placed near the end of the signal chain.
•An amp and a cab are often placed at the very end of the signal chain, although you can place it wherever you want.
9

Saving a Rig
If you have changed the rig at all since loading it, you will see an asterisk () next to its name at the top of the screen. You can save these changes to this rig, save these changes as another rig, or discard them altogether.
To save a rig, tap Save in the upper-right corner.
To save your changes to the current rig, tap Save.
To save your changes as a new rig, tap Save New Rig, use the keyboard that appears to enter a name, and then tap Save.
To return to the previous screen without saving, tap Cancel at any time.
To discard any changes you’ve made to the rig, tap the button in the upper-right corner, and tap Discard Changes.
Adjusting Settings
To adjust the settings of a model in your rig, double-tap it to open its settings screen.
Tap to return to retain your changes and return to the main screen.
Tap this button and tap Discard Changes to discard any changes you’ve made since opening this screen.
Turn encoder to move through selectable items onscreen or to adjust parameters. Press encoder as an Enter command.
Tap the model name to assign a different model to this slot.
Tap Delete to unassign the model from the slot.
Saving a Preset
Tap the Preset menu to select a preset. 
 See Saving a Preset.
|
Tap a color to assign it to this model. That |
||
|
color will be shown on the main screen, in |
||
|
Tap Cancel to return to discard your |
||
|
the Hardware Assign screen, and in the |
||
|
footswitch indicator for this model. |
changes and return to the main screen. |
|
Turn the parameter knobs to adjust their parameters. Tap anywhere in this column to show the next three parameters (if any).
To save a preset, tap Save in the upper-right corner.
To save your changes to the current preset, tap Save.
To save your changes as a new preset, tap Save New Preset, use the keyboard that appears to enter a name, and then tap Save.
To return to the previous screen without saving, tap Cancel at any time.
10
![]()
Hardware Assign
The Hardware Assign screen enables you to customize how HeadRush Pedalboard’s footswitches, expression pedal, and parameter knobs control each rig.
To open the Hardware Assign screen, tap the
button in the upper-right corner of the main screen, and then tap Hardware Assign.
To return to the main screen, tap the button in the upper-left corner.
Important: The Hardware Assign settings are all part of the overall rig, so remember to save your changes you want to keep.
To set the color associated with the rig, tap it in the upper-left part of the screen. This color will appear next to the rig name when you view a list of all available rigs or when you view and create setlists. It will also be the color of the corresponding footswitch indicator when HeadRush Pedalboard is in Rig View.
To set the tempo of the rig’s time-based effects (delays, modulation, etc.), tap the button under Tempo to select Current or Fixed.
•Current: The rig will use the last-used tempo or the one set by the Tempo footswitch.
To set the tempo, press the Tempo footswitch (the lower-right-most one) at the desired tempo 3–8 times to set the new tempo in beats per minute (BPM). You can do this anytime that footswitch display shows Tempo.
•Fixed: The rig will use a tempo that you set here.
To set the tempo, turn the encoder to set the desired tempo in beats per minute (BPM). You can set the tempo only in this Hardware Assign screen.
Footswitches
The eight boxes in the lower-left corner represent the middle eight footswitches of HeadRush Pedalboard. You can assign any switch-based parameters (ones with only two states) to any of the footswitches—regardless of their location in the signal chain.
To assign a parameter to a footswitch:
1.Tap a box. indicates an empty box.
2.In the list that appears, tap the model with the parameter you want to assign.
3.In the list that appears, tap the parameter you want to assign. Usually, the parameter will simply be On (to activate or deactivate it).
Tap Unassigned to unassign that footswitch.
To swap two assignments, tap and drag one of them over the other, and then release it.
11

Expression Pedal
The expression pedal can control two parameters (in Classic Mode) or two sets of parameters (in Advanced Mode). Use the toe switch to switch between them—Expression Pedal A or B.
To activate the toe switch, move the “toe end” of the expression pedal so it touches the pedalboard, and then press down. The expression pedal status LCD will indicate A or B.
The column of four boxes represents the expression pedal settings. You can assign one or more continuously adjustable parameters (ones with a range of values) to the expression pedal.
To set the expression pedal mode, tap the button above Range in the upper-right corner to select Classic or Advanced.
•Classic: You can assign one parameter to each expressional pedal (A and B). Using the toe switch will select the other expression pedal and deactivate (bypass) the current expression pedal’s parameter. For instance, if you assign a wah pedal to Expression Pedal A and a volume pedal to Expression Pedal B, only one of them will be active at any time; when you are controlling the wah pedal, the volume pedal will be bypassed, and vice versa.
•Advanced: You can assign up to four parameters to each expression pedal (A and B). Moving the pedal will adjust all of its assigned parameters simultaneously. Using the toe switch will select the other expression pedal and leave the current pedal’s parameters active and at their maximum values.
To assign a parameter to the expression pedal:
1.If the Assign button is not on, tap it.
2.Tap a box under the Assign button. indicates an empty box.
3.In the list that appears, tap the model with the parameter you want to assign.
4.In the list that appears, tap the parameter you want to assign. Tap Unassigned to unassign that box.
To swap two assignments (while in Advanced Mode), tap and drag one of them over the other, and then release it.
To set the range of an assigned parameter:
1.If the Range button is not on, tap it.
2.Tap a value under the Range button.
3.Turn the encoder to set the desired value as a percentage of the parameter’s entire range. Press the encoder or tap elsewhere to confirm the value.
Quick Parameters
The right edge of the screen shows a column of fields for three parameters. These are the three parameters that are shown first whenever you load a rig. When no model is selected on the main screen, you can turn the three parameter knobs to adjust these parameters. You can assign any continuous parameters to these knobs (parameters with a range of values rather than ones with only “on” and “off” states).
To assign a parameter to a parameter knob:
1.Tap the field to which you want to assign a parameter. indicates an empty field.
2.In the list that appears, tap the model with the parameter you want to assign. You can also select parameters for the incoming signal (Input) or outgoing signal (Output).
3.In the list that appears, tap the parameter you want to assign. Tap Unassigned to unassign that parameter knob.
12

Setlists
You can use setlists to organize your rigs. A setlist is a saved collection of rigs, which you can save and recall at a later time. This is useful, for instance, if you only need some of your rigs for a performance; you can save a setlist of just those rigs so you don’t have to spend time searching through all of your rigs before playing the next song.
To view your setlists, tap the ≡ button in the upper-left corner of the main screen. The Setlists screen will appear.
To return to the main screen, tap the button in the upper-left corner.
To create a setlist:
1.Tap New in the upper-right corner.
2.In the screen that appears, the left half is a list of all available rigs, and the right half is the list of rigs in the setlist.
To add a rig to the setlist, tap it to add it to the end of the list. Alternatively, tap and hold it, and then drag it to the desired location in the list. You can add the same rig to a setlist more than once. The [Empty ] rig in the lower-left corner is a slot to use as a placeholder to make rearranging the setlist easier; it will not be available as a selectable rig when moving through rigs in the setlist.
To rearrange the setlist, tap and hold a rig in the list on the right half, and then drag it to the desired location in the list.
To remove a rig from the setlist, tap the on its right edge.
To save a setlist, tap Save in the upper-right corner.
To save your changes to the current setlist, tap Save.
To save your changes as a new setlist, tap Save New Setlist, use the keyboard that appears to enter a name, and then tap Save.
(At any time) To return to the previous screen without saving, tap Cancel.
To discard any changes you’ve made to the setlist, tap the button in the upper-left corner, and tap Discard Changes.
To load a setlist:
1.While viewing the main screen, tap the ≡ button in the upper-left corner to view the Setlists screen. Each setlist will show the number of rigs in parentheses (including multiple instances of the same rig).
2.Tap the desired setlist. The first rig of that setlist will load immediately. Tap All Rigs to view all rigs instead of a specific setlist.
To edit a setlist, tap the button on its left side, and then tap the pencil icon. You will see the same screen you used to create the setlist, where you can edit and save it.
To delete a setlist, tap the button on its left side, and then tap the trash can icon. Tap Yes to confirm the deletion or Cancel to return to the Setlists screen without deleting it.
13

Hands-Free Mode
Hands-Free Mode enables you to adjust any of the settings on your models by using just the footswitches and expression pedal.
To enter Hands-Free Mode, press and hold a footswitch assigned to a model for over one second. While in HandsFree Mode, the screen will show a single parameter and its value, and the top six footswitches will correspond to six parameters of that model.
To exit Hands-Free Mode, press the lower-left most (Exit) footswitch.
To change the value, move the expression pedal.
To show another parameter, press the corresponding footswitch. If that model has more than six parameters, press the lower-middle two ( or ) footswitches to show the previous or next six parameters.
14

Guía de inicio rápido (Español)
Introducción
El tono perfecto está a un toque de distancia
Gracias por comprar la HeadRush Pedalboard!
Con su finamente afinado sistema DSP de cuádruple núcleo e impulsado por su exclusiva plataforma Eleven® HD Expanded, la HeadRush Pedalboard le ofrece los modelos de amplificadores, gabinetes, micrófonos y efectos más versátiles, de mejor respuesta y de sonido más real jamás incluidos en el procesador de una pedalera de efectos de guitarra.
La HeadRush Pedalboard brinda una nueva oferta generosa y diversa de modelos de amplificadores y efectos clásicos y modernos, incluyendo los exclusivos efectos boutique originales que no se pueden encontrar en otro lado, así como también la capacidad de cargar sus propios archivos de respuesta al impulso (IR) personalizados. También existen características exclusivas que no se puede encontrar en ningún otro procesador de guitarra, incluyendo la conmutación entre presets sin interrupciones con efecto de cascada de cola de retardo/reverberación, un generador de bucles con más de 20 minutos de tiempo de grabación, la capacidad de eliminar capas de los bucles en el orden inverso en el que fueron agregadas y mucho más.
El corazón de la HeadRush Pedalboard es su pantalla táctil de 7 pulgadas y su interfaz de usuario diseñada para guitarristas, el cual le permite tocar, deslizar y arrastrar y soltar para crear y editar instantáneamente sus equipos de una manera realista e intuitiva sin precedentes. Su gran pantalla también brinda una respuesta ultra clara al tocar en vivo, especialmente al realizar cambios mínimos en su tono usando el modo Manos libres.
La siguiente información es una guía de inicio rápido para que pueda ponerse en marcha rápidamente, pero también puede encontrar el manual completo y videos tutoriales, así como también comentarnos sus experiencias, en headrushfx.com.
Oh. Solo una cosa más. Esta sigue hasta 11.
Contenido de la caja
HeadRush Pedalboard
Cable USB
Cable de corriente
Tarjeta de descarga de software
Guía de inicio rápido
Manual sobre la seguridad y garantía
Importante: Visite headrushfx.com para descargar la guía del usuario completa.
Soporte
Para obtener la información más reciente acerca de este producto (documentación, especificaciones técnicas, requisitos de sistema, información de compatibilidad, etc.) y registrarlo, visite headrushfx.com.
Para obtener soporte adicional del producto, visite headrushfx.com/support.
15

Características
Panel superior
|
10 |
8 |
||
|
9 |
2 |
||
|
3 |
1 |
2 |
|
|
11 |
|||
|
2 |
|||
|
6 |
7 |
||
|
5 |
12 |
||
|
4 |
|||
|
6 |
|||
|
5 |
|||
|
4 |
1.Pantalla principal: Esta pantalla multitáctil a todo color muestra información relevante para la operación actual de la HeadRush Pedalboard. Toque la pantalla (y utilice los controles de hardware) para controlar la interfaz. Consulte Funcionamiento básico para aprender cómo funciona.
2.Perillas de parámetros: Gire estas perillas para ajustar los parámetros o los ajustes que se muestran junto a ellas en la pantalla principal.
3.Codificador: Utilice este codificador para desplazarse por las opciones de menú disponibles o ajustar los valores de los parámetros del campo seleccionado en la pantalla. Pulse el codificador para introducir su selección.
4.Interruptores de pedal: Pulse estos interruptores de pedal para activar o desactivar el modelo asignado o para cargar el equipo asignado.
5.Pantallas de los interruptores de pedal: Estas bandas de visualización indican el modelo o equipo asignado a este interruptor de pedal.
6.Indicadores de los interruptores de pedal: Estas luces indican si el modelo o equipo asignado a cada interruptor de pedal se encuentra encendido (con luz fuerte) o apagado (con luz tenue).
7.Pedal de expresión: Utilice este pedal para ajustar el/los parámetro(s) asignado(s). Consulte
Funcionamiento básico > Asignación de Hardware > Pedal de expresión para obtener más información.
8.LCD de estado del pedal de expresión: Este pequeño LCD indica el estado actual del pedal de expresión. Consulte Funcionamiento básico > Asignación de Hardware > Pedal de expresión para obtener más información.
9.Master Volume: Gire esta perilla para ajustar el volumen de las salidas.
10.Phones Volume: Gire esta perilla para ajustar el volumen de la salida para auriculares.
11.Aux Volume: Gire esta perilla para ajustar el volumen de la entrada auxiliar.
Importante: La señal de audio proveniente de la entrada auxiliar se encamina directamente hacia las salidas de la HeadRush Pedalboard sin aplicarle ningún modelado. Tampoco se ve afectada por las perillas de volumen maestro o de volumen de los auriculares.
12.Cable Channel: Coloque sus cables por debajo y a través de esta muesca del lado inferior de la HeadRush Pedalboard para mantener el escenario prolijo y evitar que la gente se tropiece con los cables.
16

Panel trasero
|
3 |
||||||||||||
|
7 |
10 |
14 |
||||||||||
|
4 |
5 |
6 |
8 |
9 |
11 |
12 |
13 |
15 |
16 |
17 |
2 |
1 |
1.Entrada de corriente (IEC): Conecte esta entrada a una toma de corriente utilizando el cable de corriente incluido.
2.Interruptor de encendido: Pulse este botón para encender la HeadRush Pedalboard. Mantenga pulsado este botón para apagar la HeadRush Pedalboard.
3.Ventilación: Asegúrese de que esta ventilación no se encuentre obstruida mientras utiliza la HeadRush Pedalboard.
4.Entradas de guitarra (6,35 mm/1/4 pulg., TRS): Conecte su guitarra a esta entrada utilizando un cable para instrumentos estándar.
5.Entrada del pedal de expresión (6,35 mm/1/4 pulg., TRS): Conecte a esta entrada un pedal de expresión secundario opcional utilizando un cable para instrumentos estándar.
6.Entrada auxiliar (3,5 mm/1/8 pulg., TRS): Conecte una fuente de audio opcional (por ej., un teléfono inteligente [smartphone], tableta, etc.) a esta entrada mediante un cable estéreo de 3,5 mm (1/8 pulg.).
7.Salidas (XLR): Conecte estas salidas a las entradas de su mezclador, altavoz activo, etc. Si sólo precisa utilizar una salida, utilice la que tiene el rótulo L/Mono.
8.Interruptor de levantamiento de tierra: Acople (baje) este interruptor para reducir el zumbido o ruido.
9.Salidas (6,35 mm/1/4 pulg., TRS): Conecte estas salidas a las entradas de su amplificador, interfaz de audio, etc. Coloque el selector Amp/Line en la posición que corresponde al dispositivo conectado. Si sólo precisa utilizar una salida, utilice la que tiene el rótulo L/Mono.
10.Selector Amp/Line: Utilice este interruptor para seleccionar el nivel de la señal enviada desde las salidas de 6,35 mm/1/4 pulg. Cuando se lo coloque en Amp, el nivel de la salida será de +6 dBu para un amplificador de guitarra estándar. Cuando se lo coloque en Line, la salida tendrá nivel de línea, +18 dBu.
11.Salida para auriculares (6,35 mm/1/4 pulg., TRS): Conecte auriculares estéreo estándar de 6,35 mm (1/4 pulg.) a esta salida. Use las perillas phones volume para controlar el nivel de volumen.
12.Salidas de envío (6,35 mm/1/4 pulg., TRS): Conecte estas salidas a las entradas de otro módulo de efectos, un pedal de efectos o el retorno del bucle de efectos de un amplificador. Coloque el selector Rack/Stomp en la posición correspondiente al dispositivo conectado. Si sólo precisa utilizar una salida, utilice la que tiene el rótulo L/Mono.
13.Entradas del retorno (6,35 mm/1/4 pulg., TRS): Conecte estas entradas a las salidas de otro módulo de efectos, un pedal de efectos o el envío del bucle de efectos de un amplificador. Coloque el selector Rack/Stomp en la posición correspondiente al dispositivo conectado. Si sólo precisa utilizar una salida, utilice la que tiene el rótulo L/Mono.
14.Selector Rack/Stomp: Utilice este interruptor para seleccionar el nivel de la señal enviada desde las salidas de envío a las entradas de retorno. Cuando se lo coloque en Rack, la salida tendrá nivel de línea, +18 dBu. Cuando se lo coloca en Stomp, el nivel de la salida será de +6 dBu para un pedal de guitarra estándar (“stompbox”).
15.Entrada de MIDI: (DIN de 5 patillas): Use un cable MIDI estándar para conectar esta entrada a la salida MIDI de un dispositivo MIDI externo opcional.
16.Salida MIDI (DIN de 5 patillas): Use un cable MIDI estándar de para conectar esta salida a la entrada MIDI de un dispositivo MIDI externo.
17.Puerto USB: Conecte este puerto USB a un ordenador utilizando un cable USB estándar. Esta conexión permite que la HeadRush Pedalboard envíe y reciba la señal de audio digital desde y hacia su ordenador. También puede utilizar esta conexión para importar o exportar equipos, presets de modelos y listas de equipos.
17

Instalación
Los elementos que no se enumeran en Introducción > Contenido de la caja se venden por separado.
|
Guitarra |
Altavoces amplificados o |
Amplificador de guitarra |
||||||||||||||||||||||||||||||||||||||||||||||||||||||||||||||||||
Auriculares
Toma de corriente
|
Stompboxes, módulos, etc. de |
Ordenador |
|
efectos externos. |
18

Funcionamiento básico
Este capítulo describe algunas de las funciones básicas de la HeadRush Pedalboard. Puede visitar headrushfx.com para descargar la guía de usuario completa y obtener más información.
Pantalla principal
Gire el codificador para desplazarse por los elementos seleccionables en la pantalla o para ajustar los parámetros. Pulse un codificador para efectuar un comando
Enter.
Haga un doble toque sobre un modelo, entrada o salida para mostrar sus parámetros.
Toque y arrastre esta barra hacia abajo Toque para ver las para ver la lista de equipos.
listas de equipos.
|
Nombre del equipo. |
Toque para guardar el equipo. |
|
Toque para ver más |
|
opciones. |
|
Toque su interruptor de |
Gire las perillas de parámetros para ajustar estos parámetros. Una vez |
|
|
pedal para activarlo o |
seleccionado un modelo, toque en cualquier lugar de esta columna para |
|
|
desactivarlo. |
mostrar los siguientes tres parámetros. |
|
Importante: La secuencia de modelos en su cadena de señal no se refleja necesariamente en los interruptores de pedal. Puede asignar libremente modelos a los interruptores de pedal disponibles sin modificar su cadena de señal en lo absoluto—y viceversa. Consulte Asignación de hardware para aprender sobre esto.
Para asignar un modelo (amplificador, gabinete o efecto) a una ranura vacía, tóquelo () y luego utilice la lista que aparece. Consulte Equipos > Creación de un equipo nuevo para aprender sobre esto.
Para mostrar los parámetros de un modelo en el lado derecho de la pantalla, tóquelo de manera que quede resaltado en verde. Entonces podrá utilizar las perillas de parámetros para ajustar los parámetros a su izquierda. Toque en cualquier lugar de la columna de esos tres parámetros para mostrar los siguientes tres (si el modelo tiene más de tres parámetros).
Cuando no se seleccione ningún modelo, estos parámetros serán los que asigne en la pantalla Asignación de hardware.
Para mostrar la pantalla de ajustes de un modelo, tóquela dos veces. Su pantalla de ajustes aparecerá con su menú predefinido, parámetros y color asignado.
Para activar o desactivar un modelo, pulse el interruptor de pedal asignado a él o toque el interruptor de pedal del modelo en la pantalla.
Para cargar otro equipo (preset):
•Pulse el interruptor de pedal superior izquierdo (Rig ) o inferior derecho (Rig ) para cargar el equipo anterior o siguiente inmediatamente.
•Toque el o junto al nombre del equipo actual en la pantalla.
•Toque el nombre del equipo en la pantalla y luego gire el codificador.
Para reacomodar los modelos de su cadena de señal, toque y arrastre un modelo hacia otra ranura o entre los dos otros modelos (los que le siguen a esa posición se desplazarán una ranura hacia abajo en la cadena de señal).
Para ver otras opciones, toque el botón en la esquina superior derecha y luego toque una opción.
19

Vistas
Los interruptores de pedal de la HeadRush Pedalboard no sólo se pueden utilizar para activar o desactivar modelos (amplificadores, gabinetes o efectos) sino también para seleccionar equipos o listas de equipos. Los ocho interruptores de pedal del medio se encuentran siempre en uno de cuatro modos:
Para cambiar la vista:
|
1. Mantenga pulsado el interruptor de pedal |
|||||
|
inferior izquierdo hasta que aparezca Exit en |
|||||
|
la pantalla. Los cuatro interruptores de pedal |
|||||
|
adyacentes ahora se corresponden con las |
|||||
|
cuatro vistas: Stomp, Rig, Hybrid y Setlist. |
Exit |
Stomp |
Rig |
Hybrid |
Setlist |
2.Pulse un interruptor de pedal para entrar a esa vista.
Vista Stomp
|
Los ocho interruptores de |
pedal del medio |
Rig |
|
|
corresponden a modelos |
(amplificadores, |
||
|
gabinetes o efectos) de su cadena de señal. |
|||
|
Pulse un interruptor de pedal para activar o |
|||
|
desactivar su modelo. |
Rig |
||
Vista Rig |
||
|
Los ocho interruptores de pedal del medio |
Bank |
|
|
corresponden a equipos que ha guardado. Pulse |
||
|
un interruptor de pedal para cargar su equipo. |
Para mostrar los cuatro equipos anteriores o siguientes, pulse el interruptor de pedal superior Bank izquierdo (Bank ) o inferior izquierdo (Bank ).
Vista híbrida |
||||
|
Los cuatro interruptores de pedal superiores del |
Bank |
|||
|
medio corresponden a equipos que ha guardado. |
||||
|
Pulse uno de estos interruptores de pedal para |
||||
|
cargar su equipo. Los cuatro interruptores de |
||||
|
pedal inferiores |
del medio |
corresponden a |
Bank |
|
|
modelos (amplificadores, gabinetes o efectos) de |
||||
|
su cadena de |
señal. Pulse |
uno de estos |
interruptores de pedal para activar o desactivar su modelo.
Model 1 
 Model 2
 Model 3
 Model 4
 Looper
Model 5 
 Model 6
 Model 7
 Model 8
 Tuner
Tuner
|
Rig 1 |
Rig 2 |
Rig 3 |
Rig 4 |
Looper |
||||
|
Rig 5 |
Rig 6 |
Rig 7 |
Rig 8 |
Tuner |
||||
|
Rig 1 |
Rig 2 |
Rig 3 |
Rig 4 |
Looper |
||||
Model 1 
 Model 2
 Model 3
 Model 4
 Tuner
Tuner
Vista de lista de equipos
Los ocho interruptores de pedal del medio corresponden a listas de equipos que ha guardado. Pulse un interruptor de pedal para cargar su lista de equipos.
|
Bank |
Setlist 1 |
Setlist 2 |
Setlist 3 |
Setlist 4 |
|
Bank |
Setlist 5 |
Setlist 6 |
Setlist 7 |
Setlist 8 |
20
 Loading…