-
Contents
-
Table of Contents
-
Bookmarks
Quick Links
User Manual
HiPath 3000/5000
HiPath optiClient 130
Version 4.0
May 2003
OP5374-00
Related Manuals for Siemens HiPath 3000
Summary of Contents for Siemens HiPath 3000
-
Page 1: User Manual
User Manual HiPath 3000/5000 HiPath optiClient 130 Version 4.0 May 2003 OP5374-00…
-
Page 2
Hackers who unlawfully gain access to customer telecommunications systems are criminals. Currently, we do not know of any telecommunications system that is immune to this type of criminal activity. Siemens Informa- tion and Communication Networks, Inc. will not accept liability for any damages, including long distance charg- es, which result from unauthorized use. -
Page 3
HiPath 3000/5000 V4.0 optiClient 130 User Manual… -
Page 4
The required features should therefore be specified in each individual case at the time of closing the contract. Siemens AG 2003 Information and Communication Networks, Hofmannstraße 51, D-81359 München, Germany ●… -
Page 5
HiPath 3000/5000 V4.0 optiClient 130 User Manual A31003-G2540-A100-3-76A9 Introduction and Important Notes Installation First Steps and User Configuration optiClient phone User Interface optiClient office User Interface optiClient easyCom User Interface Using the optiClient phone Using the optiClient office Electronic Telephone Directory… -
Page 7: Table Of Contents
3.4 Logging on …………3-12 3.4.1 Logging on with a new telephone number……3-13 3.4.2 Extended Options parameters.
-
Page 8: Opticlient Phone User Interface
4.2.5 Telephone Directory Management ……..
-
Page 9: Opticlient Easycom User Interface
8.7.5 Telephone Data Service ……..
-
Page 10: Electronic Telephone Directory
9.1.1 Selecting the Telephone Directory ……..
-
Page 11: Introduction And Important Notes
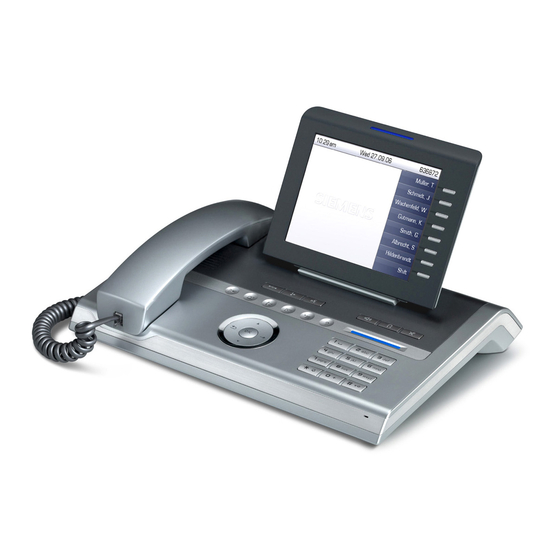
General Information The optiClient 130 is a telephony application that can be run on a PC. It permits phone calls to be conducted via a LAN (Voice over IP) in conjunction with the HiPath 3000/5000 V4.0 commu- nication system. The HG 1500 board of the HiPath 3000/5000 V4.0 enables the connection with optiClient 130 via a LAN connection.
-
Page 12: Hardware And Software Requirements
Nur für den internen Gebrauch Hardware and Software Requirements Hardware Minimum processor and RAM requirements for optiClient 130 phone/office: ● Windows 98SE Windows 2000 Processor Pentium II with 233 MHz at least 64 MB Minimum processor and RAM requirements for optiClient 130 easyCom: ●…
-
Page 13
Introduction and Important Notes Hardware and Software Requirements Software Operating system Windows 98 SE, Windows 2000 (SP2) or Windows XP ● The installation software for the optiClient 130 on the system CD offers you the following ● two user interfaces, depending on the HiPath system connected: –… -
Page 14: Target Group And Requirements
Nur für den internen Gebrauch Target Group and Requirements The Installation chapter supports service technicians on installation and startup. All other chapters provide an overview of the product and serve as a reference to assist the user in getting started. Prerequisites A31003-G2540-A100-3-76A9, 04/2003 optiClient 130 V4.0, User Manual…
-
Page 15: Safety Information
Introduction and Important Notes Safety Information Safety Information Only service personnel and authorized specialists are permitted to work on the installation. Observe the following information: Read through all the information on the equipment carefully and follow all the safety guide- ●…
-
Page 16: Safety Information: Danger
Only personnel with proper qualifications or authorized electricians should perform work ● on the low-voltage network (100 — 240 V AC). During a thunderstorm, you should not connect or remove telephone lines and PC boards. ● Expect to encounter leakage current from the telecommunications network.
-
Page 17: General Notes
Introduction and Important Notes Safety Information Install cables in such a way that they do not pose an accident risk (by people tripping over ● them) and also so that they are not damaged. 1.3.4 General Notes If the installation is brought into the operating site from a cold environment, condensation ●…
-
Page 18: Data Protection And Data Security
Members of Siemens and Siemens Rolm staff are required to observe business and data secrecy as a result of the company’s work rules.
-
Page 19
1einl.fm Introduction and Important Notes Nur für den internen Gebrauch Data Protection and Data Security A31003-G2540-A100-3-76A9, 04/2003 1-10 optiClient 130 V4.0, User Manual… -
Page 20: Installation
Nur für den internen Gebrauch Installation This section contains information on the following topics: General Information ● Configuring/installing Quality of Service ● Configuring Location Information ● optiClient Installation Procedure ● A31003-G2540-A100-3-76A9, 04/2003 optiClient 130 V4.0, User Manual Installation…
-
Page 21: General Information
In order to run the optiClient 130 properly, you will need to have Internet Explorer 4.0.1 with Service Pack 2 or a later version installed. Installation Medium/License A CD with the following code number label is supplied as the installation medium for optiClient 130: HiPath 3000/5000 ● optiClient 130 V4.0 System CD P30370-P182-A1-* HiPath 3000/5000 ●…
-
Page 22
Nur für den internen Gebrauch Installation Components The following components are installed during the optiClient 130 installation: – optiClient 130 (application software) – optiClient 130 V2 TAPI Service Provider Service Provider of the optiClient 130; bidirectional TAPI (also used by other applications) A31003-G2540-A100-3-76A9, 04/2003 optiClient 130 V4.0, User Manual Installation… -
Page 23: Configuring/Installing Quality Of Service
Installation Configuring/installing Quality of Service Configuring/installing Quality of Service General optiClient 130 can use the Windows QoS packet scheduler (Quality of Service) for network traf- fic control in order to optimize voice quality. This service gives telephony packages priority over «normal»…
-
Page 24
Nur für den internen Gebrauch In Layer 3, the six bits of the DiffServ Code Point (DSCP) field are used in the Type of Ser- ● vice (ToS) byte of the IP header. It is also important to ensure that there is sufficient bandwidth within the QoS class (Codepoint/ IEEE802.1p User Priority) used. -
Page 25
Installation Configuring/installing Quality of Service Step Procedure In the Select Network Service dialog, click QoS Packet Scheduler and click OK. The service is installed. Upon completion of this task, you are returned to the prop- erties dialog (as in Step 3) in which the QoS Packet Scheduler entry is displayed and activated: Display Click the Configure button for network card connection configuration. -
Page 26
Nur für den internen Gebrauch Step Procedure Select Enable for the 802.1p Support property: Display A31003-G2540-A100-3-76A9, 04/2003 optiClient 130 V4.0, User Manual Configuring/installing Quality of Service Installation… -
Page 27
Installation Configuring/installing Quality of Service Step Procedure Select Enable for Flow Control: Display Click OK to confirm. ● You return to the Local Area Connection Properties dialog as in Step 3, which ● you can also exit by clicking OK. Finally, close the Network and Dial-up Connections dialog. -
Page 28
Nur für den internen Gebrauch QoS RSVP service deactivation The service that manages the QoS RSVP (Resource Reservation Protocol) must now be de- activated to ensure that the system runs correctly: Step Procedure Start the service administration tool in Windows 2000 by selecting Settings — Control Panel — Administrative Tools — Services. -
Page 29: Configuring Location Information
Installation Configuring Location Information Configuring Location Information General Information In order to run the optiClient 130 correctly, all your personal location information must be en- tered accurately. If these options are missing or have errors, you will not be able to correctly dial any entries from the phone book or call lists.
-
Page 30
2install.fm A31003-G2540-A100-3-76A9, 04/2003 optiClient 130 V4.0, User Manual… -
Page 31: Opticlient Installation Procedure
Select the type of setup for the installation: For the complete installation, the optiClient is installed in the default installation ● folder C:Program FilesSiemensoptiClient 130 V4. For a custom installation, you can select a different installation folder. Ensure ● that an «optiClient 130 V4» subfolder is always created in the selected folder.
-
Page 32
Nur für den internen Gebrauch Shortcuts on the Desktop One desktop icon each is created for optiClient phone, optiClient office, and optiClient easy- Com. If you do not want to keep the desktop shortcuts, you can remove them. The programs are still available via the Start menu. -
Page 33
2install.fm Installation Nur für den internen Gebrauch optiClient Installation Procedure A31003-G2540-A100-3-76A9, 04/2003 2-14 optiClient 130 V4.0, User Manual… -
Page 34: First Steps And User Configuration
● Working with the Administration Tool ● Starting the Program ● Logging on ● Logging on with a new telephone number ● Changing the User Password ● Exiting optiClient phone / office / easyCom ● A31003-G2540-A100-3-76A9, 04/2003 optiClient 130 V4.0, User Manual…
-
Page 35: General
Personal phone book The database with the personal telephone directory of a phone number is saved on the user’s local PC by default. This database could likewise be saved in a directory that is available to all users, thus enabling them to access their personal phone books from any workstation.
-
Page 36: Working With The Administration Tool
Starting the administration tool: Start the application optiClientAdmin.exe, which is located in the program directory of the optiClient 130 (the default directory is C:Program FilesSiemensoptiClient 130 V4Client). A31003-G2540-A100-3-76A9, 04/2003 optiClient 130 V4.0, User Manual First Steps and User Configuration…
-
Page 37: Configuring Pc Settings
First Steps and User Configuration Working with the Administration Tool 3.2.1 Configuring PC settings To configure the parameters for the PC settings, proceed as follows: After starting the administration tool, select the PC settings tab. Display The current folder where the ’local’ profile file is saved is displayed under Profile folder in the Path field.
-
Page 38
Nur für den internen Gebrauch To edit the default settings, click on Change default in the profile folder. This opens the Default values dialog box in which you can configure the following default parameters: – General parameters (default) – eee Firctorm yl par(metpr)1884(s)587( G)-7.2df(ault))]TJ/F2 1 Tf0 -1.17 TD0.0034 une endea ewthic23.1hu cndnd (i)5.1nhe A130.1dn ncedi –… -
Page 39: Configuring Setup Information (License Information)
First Steps and User Configuration Working with the Administration Tool 3.2.2 Configuring Setup information (License information) To configure Setup information, proceed as follows: If the license must be changed after installation, activate the Setup information tab in the administration tool. Display The current License key is read out and displayed from the Windows registry.
-
Page 40: Configuring Parameters For Pc Performance
Nur für den internen Gebrauch 3.2.3 Configuring Parameters for PC Performance To configure PC parameters, proceed as follows: Activate the PC Performance tab in the administration tool: Display The entries under Global settings for logged on user are global Windows settings which are valid for users logged on system-wide, i.e.
-
Page 41
3benkonf.fm First Steps and User Configuration Nur für den internen Gebrauch Working with the Administration Tool Click OK or Cancel to exit the administration tool. Press Save each time to store your input in the dialog. > A31003-G2540-A100-3-76A9, 04/2003 optiClient 130 V4.0, User Manual… -
Page 42: Configuring Parameters For Quality Of Service
Nur für den internen Gebrauch 3.2.4 Configuring Parameters for Quality of Service Proceed as follows to configure parameters for Quality of Service: Activate the Quality of Service tab in the Administration Tool. Display Enter the global Windows settings for the current PC under Global settings for this PC. Use the Enable QoS under Windows 2000 option to activate or deactivate the option to ●…
-
Page 43
First Steps and User Configuration Working with the Administration Tool Layer 2: User Priority acc. to IEEE802.1p The values are entered in the three bits of the IEEE802.1p field for the «Call Signalling» and «Voice Payload» traffic types. Layer 3: Priority classes (Codepoint acc. to DiffServ) The values are entered in the six bits of the DiffServ Codepoint (DSCP) field in the Type of Service (TOS) byte for the «Call Signalling»… -
Page 44: Starting The Program
Nur für den internen Gebrauch Starting the Program General Following the installation, three versions of the optiClient 130 with three different user interfaces are available. If you are logging on with a phone number for the first time, either the default set- tings will be used (if configured), or you must supply the necessary information after the pro- gram starts.
-
Page 45: Logging On
Remote Access This option must be activated when Remote Access. The telephone number and the Password are assigned by a systems engineer when > configuring HiPath 3000/5000 V4.0. The Remote Access option must only be activated if optiClient is logged onto a HG1500.
-
Page 46: Logging On With A New Telephone Number
Nur für den internen Gebrauch 3.4.1 Logging on with a new telephone number When a user logs on with a new phone number without existing default values for the first time, the individual user and connection parameters for that number are not yet known. Consequent- ly, after the logon, a corresponding message is displayed to indicate that the system settings could not be found.
-
Page 47: General Parameters
First Steps and User Configuration Logging on – General parameters – Audio parameters – Telephone Directory parameters – Update parameters – Server parameters 3.4.2.1 General parameters Select the General tab in the extended options dialog. Display (example for optiClient office)
-
Page 48
This causes optiClient of- fice to behave as a normal telephone, i.e., the trunk access num- ber must be dialed for external numbers, and internal stations can be reached directly. -
Page 49: Audio Parameters
First Steps and User Configuration Logging on 3.4.2.2 Audio parameters Switch to the Audio tab in the extended options dialog. Display Enter the following parameters: Parameters Handset Mixer Audio playback Audio recording 3-16 Meaning Under Handset select the handset for the optiClient. All devices/ drivers installed are offered in the drop-down list.
-
Page 50
Nur für den internen Gebrauch Parameters Play back sounds only via PC speaker (not via sound card) Play back sounds via sound card and PC speaker To ensure proper functionality, it is important to note that if you are using the op- >… -
Page 51: Telephone Directory Parameters
Logging on 3.4.2.3 Telephone Directory parameters Switch to the Telephone directory tab in the extended options dialog. Display The parameters correspond to those which can also be used when setting the options in the optiClient (see Option Settings for the optiClient phone and Option Settings for the op- tiClient office).
-
Page 52: Update Parameters
Nur für den internen Gebrauch 3.4.2.4 Update parameters Switch to the Update tab in the extended options dialog. Display You can activate the Update Server here and specify the folder in which software updates are made available under the field Server share name on which update versions are stored.
-
Page 53: Server Parameters
First Steps and User Configuration Logging on 3.4.2.5 Server parameters Switch to the Server tab in the extended options dialog. Display Enter the following parameters: Parameter IP address You can now configure further parameters or click on OK. This returns you to the Logon dialog.
-
Page 54: Changing The User Password
Nur für den internen Gebrauch Changing the User Password Every HiPath 3000 user can change his/her login password for the optiClient as follows: Click on the menu key in optiClient phone or open the context menu in optiClient office. Then select Change password.
-
Page 55: Exiting Opticlient Phone / Office / Easycom
First Steps and User Configuration Exiting optiClient phone / office / easyCom Exiting optiClient phone / office / easyCom You can exit optiClient office by clicking on the menu bar and selecting the Exit command ● from the menu. You can exit optiClient phone and optiClient easyCom as usual in Windows by clicking ●…
-
Page 56: Opticlient Phone User Interface
The optiClient phone user interface simulates the optiPoint advance plus phone and gen- ● erally functions in the same way as such a telephone. Consequently, only the PC-specific operations and features are described in this document. This section contains the following information: –…
-
Page 57: Layout Of The Opticlient Phone User Interface
Headset key Meaning Minimize optiClient Exit optiClient phone When the system is idle, the date, time, and personal telephone number are displayed. When functions are activated, function- specific information is displayed here. Open/close the configured key module, see Key Modules.
-
Page 58
Function key 3 Function key 4 The first time you log in with a new telephone number, the text of the function keys > is preset and stored as it was set when the system was logged into. When logging in with the same telephone number and with other languages, text is not reloaded. -
Page 59: General Operation
This section contains the following information: – Using the PC keyboard – Setting the speaker and microphone volume – Headset – Telephone Directory Management – Call lists – Key Modules – Key Captions – Accepting / Terminating a Call Nur für den internen Gebrauch…
-
Page 60: Using The Pc Keyboard
Nur für den internen Gebrauch 4.2.1 Using the PC keyboard The following applies when using optiClient with the PC keyboard: Procedure Accept call End call (hang up) Scroll functions Confirm function Volume control Dial directly from the clipboard; a dial prefix is not added to the clipboard contents.
-
Page 61: Special Tone Settings
Procedure Click on the «+» or «-» symbol of the speaker key.The following appears on the display: Telephone Settings Ring volume? You can use the arrow keys that appear in the display to scroll between the tone settings for the ring volume, ring tone or the attention ring volume.
-
Page 62: Telephone Directory Management
Telephone Directory Management Opening Telephone Directory Management Procedure To open telephone directory management, click on the Phone Book key. A detailed description of telephone directory management can be found in the sec- tion Electronic Telephone Directory. 4.2.6 Call lists Opening Call List Management Procedure To open call list management, click on the Call List key.
-
Page 63: Key Modules
optiClient phone User Interface General Operation 4.2.7 Key Modules As with the optiphone, 1 to 4 key modules, each with 16 freely-programmable keys, can be add- ed to the basic module of the optiClient phone. To open the key module click on ●…
-
Page 64: Key Captions
Nur für den internen Gebrauch 4.2.8 Key Captions You can label the keys in the main module and in all key modules in any way you want: Step Procedure Double-click the caption field on the key. In the dialog that appears, you will see the current caption for the key and a sec- ●…
-
Page 65: Information On The Opticlient Phone
optiClient phone User Interface Information on the optiClient phone Information on the optiClient phone You can obtain further information regarding version, copyright, connected hardware, personal phone number, etc. in the following manner: Step Procedure Click the menu key. The optiClient phone menu appears. Select Information…
-
Page 66: Manual Update Check For The Opticlient Phone
Nur für den internen Gebrauch Manual Update Check for the optiClient phone In addition to the automatic update function, which checks for new update versions of the op- tiClient 130 about every 15 minutes, the optiClient 130 can also be updated manually. Step Procedure Click the menu key.
-
Page 67
optiClient phone User Interface Manual Update Check for the optiClient phone Step Procedure If you select Cancel, the update version will not be installed. The current settings for periodic update checks remain unchanged. After setting up the desired options, confirm your selection with OK. Local administration rights are required for manual (or automatic) optiClient update. -
Page 68: Option Settings For The Opticlient Phone
The Options dialog appears. ● You may configure the following parameters: – General Options – Display Options – Telephone Directory Options – Telephony Options A31003-G2540-A100-3-76A9, 04/2003 optiClient 130 V4.0, User Manual optiClient phone User Interface Option Settings for the optiClient phone 4-13…
-
Page 69: General Options
After the number of user key modules has been reduced, the modules already used > once can be completely removed only in HiPath 3000 Manager E. The parameters in other tabs can now be changed. To save the settings and to exit the dialog click on OK.
-
Page 70: Display Options
Nur für den internen Gebrauch 4.5.2 Display Options Under the Display mode tab you can activate/deactivate the following options: Display > Phone always on top The optiClient phone user interface always remains in the foreground. > Move phone to top on incoming call If the user interface is not set up to always be on top (i.e.
-
Page 71
optiClient phone User Interface Option Settings for the optiClient phone > Minimize phone after a period of time Activate this option if the user interface should be minimized after a specified amount of time. This should be entered as a number of minutes. Use the Hide phone on minimized status option to decide whether the user interface is to be minimised in the system tray or on the taskbar. -
Page 72: Telephone Directory Options
> In order to access and display the desired LDAP entries in optiClient, a number of settings need to be made. To do this, click on LDAP extensions (see also the section on Telephone Directory Options — LDAP Settings). If no LDAP telephone directory server is available, users can only use their personal phone books.
-
Page 73
optiClient phone User Interface Option Settings for the optiClient phone Display The complete LDAP directory is stored in a hierarchical structure. In some cases, only a subsection of this directory structure may be appropriate for individual users as the base directory name (Base DN) to be searched and displayed. -
Page 74
Name of an entry at this level: DE – Level designation 2: o (e.g., for «organization“) – Name of an entry at this level: SIEMENS – Level designation 3: ou (e.g., for «organization unit“) – Name of an entry at this level: ICN… -
Page 75: Telephony Options
optiClient phone User Interface Option Settings for the optiClient phone 4.5.4 Telephony Options Under the Telephony tab you can edit the following parameters: Display > If the phone numbers of incoming calls are to be transferred to an external application, activate the External Interface option and enter the directory / name of the external application.
-
Page 76: View Settings For The Opticlient Phone
Nur für den internen Gebrauch View Settings for the optiClient phone You can choose one of the three available views for the optiClient phone as follows: Step Procedure Click the menu key. The optiClient phone menu appears. ● Select View. You now have the following options: Normal view: ●…
-
Page 77: Online Help
optiClient phone User Interface Online Help Online Help To start the online help for the optiClient phone, proceed as follows: Step Procedure Click the menu key. The optiClient phone menu appears. ● Select Help. The online help is started. 4-22 Nur für den internen Gebrauch A31003-G2540-A100-3-76A9, 04/2003 optiClient 130 V4.0, User Manual…
-
Page 78: Opticlient Office User Interface
Layout of the optiClient office User Interface The optiClient office user interface has the following layout: Close optiClient office Window bar Minimize Telephone directory / Call list/ Functions window A31003-G2540-A100-3-76A9, 04/2003 optiClient 130 V4.0, User Manual optiClient office User Interface…
-
Page 79
HiPath system and may differ from the range of functions depicted here. Telephone directory: ● Managing the Telephone Directory (see also section Elec- tronic Telephone Directory). Caller- and call records (see also section Call List Manage- ●… -
Page 80: General Operation
Minimizing optiClient office – Changing your Code Key (PIN) – Setting the speaker and microphone volume – Headset – Telephone Directory Management – Call List Management – Programming the Function Keys A31003-G2540-A100-3-76A9, 04/2003 optiClient 130 V4.0, User Manual optiClient office User Interface…
-
Page 81: Opening And Closing Windows
optiClient office User Interface General Operation 5.2.1 Opening and Closing Windows Step Procedure Open the optiClient office context menu: All available windows are listed in the upper panel of the optiClient office menu. ● Nur für den internen Gebrauch A31003-G2540-A100-3-76A9, 04/2003 optiClient 130 V4.0, User Manual…
-
Page 82: Minimizing Opticlient Office
Nur für den internen Gebrauch 5.2.2 Minimizing optiClient office If you temporarily do not need the user interface of the optiClient office, you can reduce the pro- gram to an icon in the system tray of the taskbar (next to the time/date display): optiClient office in the status area of the taskbar To minimize the optiClient user interface, proceed as follows: Choose the command Minimize from the context menu or the system menu of the Office…
-
Page 83: Setting The Speaker And Microphone Volume
optiClient office User Interface General Operation 5.2.4 Setting the speaker and microphone volume Setting the speaker volume Procedure The speaker key in the Connection Parties window is used to control the volume of the speaker. To increase or decrease the volume, click on the the «+»…
-
Page 84: Special Tone Settings
Procedure Click on the «+» or «-» symbol of the speaker key in the Connection Parties window. The following appears on the display: Telephone Settings Ring volume? > You can use the arrow keys that appear in the display to scroll between the tone settings for the ring volume, ring tone or the attention ring volume.
-
Page 85: Telephone Directory Management
Telephone Directory Management To open Telephone Directory management, click on the Telephone directory tab in the Func- tions/Telephone directory/Caller- and call records window. You can find a detailed description of the optiClient phone book in section Electronic Telephone Directory. 5.2.8…
-
Page 86: Programming The Function Keys
Nur für den internen Gebrauch 5.2.9 Programming the Function Keys The function keys B to L on the keyboard can be programmed with specific functions for the optiClient. The A function key is programmed for Help, and cannot be changed. To program the function keys, proceed as follows: Step Procedure…
-
Page 87
optiClient office User Interface General Operation Step Procedure Choose the desired function from the list box. You have a choice of the following functions: Microphone off ● Suppress caller ID ● Night service ● Do not disturb feature ● Call waiting without tone ●… -
Page 88: Information On The Opticlient Office
Nur für den internen Gebrauch Information on the optiClient office You can obtain further information regarding version, copyright, connected hardware, personal phone number, etc., as follows: Step Procedure Open the optiClient office context menu: Select Information… The Info dialog appears: ●…
-
Page 89: Manual Update Check For Opticlient Office
optiClient office User Interface Manual Update Check for optiClient office Manual Update Check for optiClient office In addition to the automatic update function, which checks for new update versions of the opti- Client about every 15 minutes, the optiClient 130 can also be updated manually. Step Procedure Open the optiClient office context menu:…
-
Page 90: Option Settings For The Opticlient Office
You can set the following options: – General Options – Display Options – Telephone directory options – Telephone directory options — LDAP Settings A31003-G2540-A100-3-76A9, 04/2003 optiClient 130 V4.0, User Manual optiClient office User Interface Option Settings for the optiClient office 5-13…
-
Page 91: General Options
optiClient office User Interface Option Settings for the optiClient office 5.5.1 General Options Under the General tab you can define the following options: Display Activate the corresponding option if you want the ACD status to be displayed in the Con- ●…
-
Page 92: Display Options
Nur für den internen Gebrauch 5.5.2 Display Options Under the Display mode tab you can activate/deactivate the following options: Display > Phone always on top The optiClient phone user interface always remains in the foreground. > Move phone to top on incoming call If the user interface is not set up to always be on top (i.e.
-
Page 93: Telephone Directory Options
> In order to access and display the desired LDAP entries in optiClient, a number of settings need to be made. To do this, click on LDAP extensions (see also the section on Telephone directory options — LDAP Settings). If no LDAP telephone directory server is available, users can only use their personal phone books.
-
Page 94
Nur für den internen Gebrauch Display The complete LDAP directory is stored in a hierarchical structure. In some cases, only a subsection of this directory structure may be appropriate for individual users as the base directory name (Base DN) to be searched and displayed. In addition, you will also need to specify under which field names of the LDAP directory the details expected in the optiClient 130 are stored on the LDAP server. -
Page 95
Name of an entry at this level: DE – Level designation 2: o (e.g., for «organization“) – Name of an entry at this level: SIEMENS – Level designation 3: ou (e.g., for «organization unit“) – Name of an entry at this level: ICN… -
Page 96: Telephony Options
Nur für den internen Gebrauch 5.5.4 Telephony Options Under the Telephony tab you can edit the following parameters: > If the phone numbers of incoming calls are to be transferred to an external application, activate the External Interface option and enter the directory / name of the external application.
-
Page 97: Speed-Dial Keys
optiClient office User Interface Option Settings for the optiClient office 5.5.5 Speed-dial Keys You can call defined speed-dial numbers directly via speed-dial keys. The speed-dial keys are located in the Speed-dial keys/Dial windows (max. four). Open the window in which you want to configure the speed-dial keys, and select the Speed-dial keys tab.
-
Page 98
Nur für den internen Gebrauch Step Procedure In the following dialog, enter the key captions and the corresponding phone number (internal or external). Press the OK dialog key to confirm your selection. The speed-dial keys are displayed in the window. Changing the Caption or Phone Number of a Speed-Dial Key Step Procedure… -
Page 99
optiClient office User Interface Option Settings for the optiClient office Step Procedure You have the following options for sorting: – by name (speed-dialing key caption) – by the type of phone number (internal or external) stored on the speed-dial You can optionally sort in either –… -
Page 100: Functions
As a user, a number of general and special telephony functions are available for your personal phone number, which correspond with the configuration of the HiPath system. General telephony functions These functions can be activated in the Functions/Telephone directory/Call detail records window. Display A31003-G2540-A100-3-76A9, 04/2003 optiClient 130 V4.0, User Manual…
-
Page 101
(see Do Not Disturb Feature) Answer text ● (see Answer Text) Call forwarding ● (see Call Forwarding) Code key ● (see Telephone Lock) ACD logon ● (see ACD Logon (Logging on to System)) ACD not available ● (see ACD Unavailability) ACD post-processing ●… -
Page 102
The functions identified with «Option» depend on the feature set enabled for the indi- > vidual users and may therefore not be available in some cases. The following special telephone functions are available via the Connection Parties Window: See also… -
Page 103: Connection Parties Window
To scroll and confirm functions. Displays the corresponding connection status of the connected HiPath system as «active» or «inactive». Current ACD status of the telephone number displayed with both text and color. The type, amount, and function are dependent on the status of the current call.
-
Page 104
Nur für den internen Gebrauch Element Function icons Dialing area Call status display Function icon Call costs displayed Dialing functions Click on the arrow on the list in the Connection Parties window display: Enter the phone number or select one from the recently dialed number list. ●… -
Page 105: Call Status Display
Call status display / function icon Functions in the connection status window The available telephone functions and their use in optiClient office (accepting calls, placing calls, conferencing, etc.) is described in the section Using the optiClient office. Online Help To start the online help for the optiClient office, proceed as follows:…
-
Page 106: Opticlient Easycom User Interface
Nur für den internen Gebrauch optiClient easyCom User Interface General optiClient easyCom user interface office and optiClient phone user interfaces. It is possible to use different user interfaces simulteanously. For information to the following topics please refer to: User Interface Design ●…
-
Page 107
BofEasyCom.fm optiClient easyCom User Interface Nur für den internen Gebrauch A31003-G2540-A100-3-76A9, 04/2003 optiClient 130 V4.0, User Manual… -
Page 108: Using The Opticlient Phone
On dialling the phone number, the prefix needed to access an outside line for your location is then automatically read from the Windows Control Panel (Telephone and Modem Options) (cf. section Configuring Location Information). A31003-G2540-A100-3-76A9, 04/2003 optiClient 130 V4.0, User Manual…
-
Page 109: Basic And Advanced Functions
Using Other Functions * Call Charge Display * Busy Signaling for Speed-dial Keys * Code key * Infos * Answer text * Telephone Data Service * DTMF Transmission (Changing over to DTMF Tone Dialing) * Hunting groups * Resetting Functions ACD Functions…
-
Page 110: Overview Of Functions And Codes (In Alphabetical Order)
Nur für den internen Gebrauch Overview of Functions and Codes (in Alphabetical Order) The table below lists all available functions as they appear on the display. Functions that have been configured (contact System Support) can be activated interactively (select + save) via the Service menu (select + save or enter a code) or via function keys.
-
Page 111
Using the optiClient phone Overview of Functions and Codes (in Alphabetical Order) Functions (display) DND on DND off Door opener on Door opener off DTMF dialing Forwarding on 1=all calls 2=external calls only 3=internal calls only Forwarding off Trunk FWD on Trunk FWD out Forward Line: On Forward Line: Off… -
Page 112
Send message View sent message US: View messages UK: Display Messages Mailbox Shift Key Show call charges (own telephone) View call charges (other party’s telephone) Speaker call Suppress call ID Restore caller ID Tel. data service Temporary MSN (not for U.S.) -
Page 113
Using the optiClient phone Overview of Functions and Codes (in Alphabetical Order) Functions (display) Log on Log off Available Not available Work on Work off UCD night on UCD night off Calls in queue US:Callback UK:Set Callback View callbacks/Delete Use speed-dialing Change Speed-dial (station) Nur für den internen Gebrauch … -
Page 114: Using The Opticlient Office
For directed call pickup, click on the speed-dial key of the called party. Call Pickup in a Call Pickup Group You can pick up calls for telephones within a call pickup group from your telephone. This is also possible during a call.
-
Page 115: Do Not Disturb Feature
Activating do not disturb > To activate the Do not Disturb feature, enable the Functions tab in the Functions/ Telephone Directory/Call detail records window and click the Do Not Disturb check box. A check mark will appear. Deactivating do not disturb >…
-
Page 116: Ringer Off
All calls will be announced with a short beep and also displayed on the screen. Activating ringer off > To activate the Ringer Off function, enable the Functions tab in the Functions/Telephone Directory/Call detail records window and click the Ringer Off check box. A check mark will appear.
-
Page 117: Microphone On/Off
Connection parties window. The microphone is en- abled and a green dot appears in the icon. – activate the Functions tab in the Functions/Telephone Directory/Call detail records window and click the Microphone off option field. A check mark is set. Turning off the Microphone (Mute) >…
-
Page 118: Making Calls
Activating caller ID suppression > To activate the caller ID suppression function, enable the Functions tab in the Functions/ Telephone Directory/Call detail records window and click the Suppress extension check box. A check mark will appear. Deactivating caller ID suppression >…
-
Page 119
Using the optiClient office Making calls Step Action/Effect Dialing from the Connection parties window (dial area): Enter the number you wish to call or select it from the list box. Display Click the Confirm button to confirm Dialing from the Connection parties window (context menu): Open the context menu in the Connection Parties window and select Dial. -
Page 120: Extended Dialing Functions Per Drag & Drop
Ì k ey while performing the drag and drop operation. On dialling the phone number, the prefix needed to access an outside line for your location is then automatically read from the Windows Control Panel (Telephone and Modem Options) (cf. Section 2.3, “Configuring Locati- on Information”).
-
Page 121: Terminating Calls
Using the optiClient office Making calls 8.2.4 Terminating Calls The remote party ends the call The active call displayed in the Connection Parties window disappears. You end the call You can end a call by one of the following methods: >…
-
Page 122: Calling Multiple Parties Simultaneously
Nur für den internen Gebrauch Calling Multiple Parties Simultaneously 8.3.1 Consultation Hold You are conducting a call and would like to consult a colleague without allowing the current par- ty to listen in. Initiating a Consultation Call Step Action/Effect Variant 1 From the context menu of the first party, click Consultation hold.
-
Page 123: Conferencing
Using the optiClient office Calling Multiple Parties Simultaneously 8.3.2 Conferencing During an internal or external call, you can call up to four internal or external stations, add them to the call, and thus conduct a conference call. Initiating a Conference Step Action/Effect During a call, you initiate a consultation call with another party with whom you want…
-
Page 124: Toggle
Nur für den internen Gebrauch 8.3.3 Toggle You can toggle between two calls and alternately speak with both parties. The waiting party cannot listen in on your conversation. Both parties can be either external or internal parties. You also have the option of disconnecting from both calls and connecting the two parties to one another (Call Transfer).
-
Page 125: Parking Calls
Using the optiClient office Calling Multiple Parties Simultaneously 8.3.5 Parking Calls You can park up to ten calls, either internal, external, or both. Parked connections can be picked up at other stations. This feature is useful if you want to continue a call at another phone. Parking a Call Step Action/Effect…
-
Page 126
Nur für den internen Gebrauch Step Action/Effect Enter the line number on which the call is parked in the dialog that follows and then click OK to confirm your selection: A31003-G2540-A100-3-76A9, 04/2003 optiClient 130 V4.0, User Manual Using the optiClient office Calling Multiple Parties Simultaneously 8-13… -
Page 127: Making Calls To Stored Destinations
Calls made ● To open Call List management, click on the Caller- and call records tab in the Functions/ Telephone Directory/Call detail records window. A detailed description of the optiClient call list management can be found in section Call List Management.
-
Page 128: If You Cannot Reach A Destination
Nur für den internen Gebrauch If You Cannot Reach a Destination… 8.5.1 Callback If a user is busy or is not answering, you can store an automatic callback. This feature saves you from having to make repeated attempts to reach the user. The system/party calls you when both you and the busy station are free ●…
-
Page 129: Call Waiting
Disabling the Call Waiting Tone > To deactivate the Call Waiting feature, click the Call waiting without tone check box in the Functions tab of the Functions/Telephone Directory/Call detail records window. The check mark is set. Enabling the Call Waiting Tone >…
-
Page 130: Call Forwarding
> To disable the call forwarding function, click the Call forwarding check box in the Functions tab of the Functions/Telephone Directory/Call detail records window. The check mark and the display in the Connection Parties window are removed, and call forwarding is disabled.
-
Page 131: Night Service
Step Action/Effect To disable the Night Service function, click the Night service check box in the Func- tions tab of the Functions/Telephone Directory/Call detail records window. The check mark is removed, and the night service is disabled. 8-18 Nur für den internen Gebrauch A31003-G2540-A100-3-76A9, 04/2003 optiClient 130 V4.0, User Manual…
-
Page 132: Using Other Functions
Step Action/Effect To enable the phone lock, click the Code key check box in the Functions tab of the Functions/Telephone Directory/Call detail records window. A dialog to lock the phone appears: Enter the 5-digit code number and then click OK.
-
Page 133
To release the lock, enter the code number and then click OK. The check mark n the function option is removed. > For more details on changing codes, see the section Telephone Lock. 8-20 Nur für den internen Gebrauch A31003-G2540-A100-3-76A9, 04/2003… -
Page 134: Infos
Infos Sending Infos Step Action/Effect Click the Send Info icon on the Functions tab in the Functions/Telephone Directory/Call detail records window. or select the entry Send Info… from the context menu in the Connection Parties window. As with the optiPoint phone, you are now requested to enter the Call number of the recipient and to select the Info.
-
Page 135
Action/Effect As soon as you receive an info, the Read Infos sent icon turns blue (active) on the Functions tab of the Functions/Telephone Directory/Call detail records window. Click this icon to view the message. The sent info appears in the display that follows. -
Page 136: Answer Text
Action/Effect To select and activate an answer text, click the check box Answer text in the Func- tions tab of the Functions/Telephone Directory/Call detail records window. The dialog to select / edit the answer text appears: Select the desired answer text or edit the text by adding your own details and click OK to confirm your selection.
-
Page 137: Telephone Data Service
Using the optiClient office Using Other Functions 8.7.5 Telephone Data Service If you want to enter TDS codes that can be read and processed from other attached applica- tions, proceed as follows: Step Action/Effect Click the «TDS» symbol in the Connection Parties window.
-
Page 138: Hunting Group
The caller always hears the ringing tone. The call is switched to the first telephone that becomes available in the hunting group. Each member of the group remains available under his or her own station number. All config- ured functions such as call forwarding, for example, apply both to the individual phone number and to the group member.
-
Page 139: Resetting Functions
(depending on the configuration of the tele- phone system). Step Action/Effect Click the Reset functions icon in the Functions/Telephone Directory/Call detail records window. The functions are reset in accordance with the settings on the phone system. 8-26 Nur für den internen Gebrauch…
-
Page 140: Acd Functions
Nur für den internen Gebrauch ACD Functions The ACD (Automatic Call Distribution) feature serves to distribute calls within a team. An in- coming call is always assigned to the team member (agent) who has had the longest break without a call. The team members can also work in different locations, e.g.
-
Page 141: Acd Logon (Logging On To System)
Step Action/Effect To complete the ACD logon, click > the ACD Logon check box in the Functions tab of the Functions/Telephone Directory/Call detail records window > the entry Logon in the context menu of the Connection parties window. A dialog in which you can enter the code for the person responsible appears. Click OK to confirm your selection.
-
Page 142: Acd Logoff (Logging Off From The System)
Step Action/Effect To complete the ACD logoff, click > the ACD Logoff check box in the Functions tab of the Functions/Telephone Directory/Call detail records window > the entry Logoff in the context menu of the Connection parties window. The logoff is performed; the check mark before the function option is removed, and the ACD status in the Connection Parties window changes to grey (logged off).
-
Page 143: Acd Post-Processing
Action/Effect To enable ACD post-processing, click > the ACD post-processing check box in the Functions tab of the Functions/ Telephone Directory/Call detail records window > the entry ACD post-processing in the context menu of the Connection parties window. The check mark before the function option is set, and the ACD status in the Connec- tion Parties window changes to dark green (wrap-up).
-
Page 144: Acd Unavailability
Action/Effect To enable ACD unavailability, click > the ACD not available check box in the Functions tab of the Functions/ Telephone Directory/Call detail records window > the entry ACD not available in the context menu of the Connection parties window.
-
Page 145: Displaying The Number Of Waiting Calls
To activate the ACD Night service, click > the ACD Night extension check box in the Functions tab of the Functions/ Telephone Directory/Call detail records window > the entry ACD Night extension in the context menu of the Connection parties window.
-
Page 146: Electronic Telephone Directory
Nur für den internen Gebrauch Electronic Telephone Directory The optiClient 130 offers you — if available and configured — a central LDAP telephone directory and a personal telephone directory. Whereas the central telephone directory (if any) is main- tained by your administrator, you can customize the private directory to meet your own needs.
-
Page 147
Nur für den internen Gebrauch in optiClient phone: Click the Telephone directory button. The telephone directory is opened near the optiClient phone window. The width of the optiClient phone telephone book display can be altered. A31003-G2540-A100-3-76A9, 04/2003 optiClient 130 V4.0, User Manual… -
Page 148: General Functions
– optiClient phone: Click the LDAP icon in Phone Book Management. By clicking on the telephone book key or the call list key in the optiClient phone, it is > possible to directly switch between the two directories. LDAP Telephone Directory On selecting the LDAP telephone directory, this directory initially appears empty.
-
Page 149: Viewing Options Of The Telephone Directory
Electronic Telephone Directory General Functions 9.1.2 Viewing Options of the Telephone Directory The telephone directory is structured like a standard Windows table and can be edited accord- ingly with respect to the column views. You can: > Arrange the columns in the desired display order by dragging and dropping >…
-
Page 150: Edit Entries In The Directory
Locate the appropriate entry in the LDAP directory. Select the menu item Add to personal tel. directory from the context menu. The entry will be copied to your personal telephone directory and can then be edited further from there. Adding a New Entry to the Telephone Directory Open the context menu from any free area of the telephone directory and select New…
-
Page 151
Number Verification > When you enter a phone number in an empty field (Telephone 1, Telephone 2 (Fax) and Telephone 3 (Mobile)) for the first time or double-click in a field containing data, a verification window to check the phone details appears:… -
Page 152
The dialog to edit the telephone directory entry appears. Edit the details as required. The verification dialog for phone numbers can be opened by double-clicking any phone number field. Click OK to save these details. The edited entry will be copied to your personal telephone directory. Deleting a Telephone Directory Entry… -
Page 153: Finding A Contact In The Telephone Directory
«*» and «?» may also be used here. Click OK to confirm your search criteria. The results of the search are displayed in the form of a telephone directory with the suffix (Search results) shown in the title.
-
Page 154: Calling A Contact From The Telephone Directory
From the context menu of the party, select Dial and then choose one of the phone numbers entered for that party (Telephone 1, Telephone 2 or Telephone 3) from the submenu. The selected phone number of the party is called.
-
Page 155
7telefonb.fm Electronic Telephone Directory Nur für den internen Gebrauch General Functions A31003-G2540-A100-3-76A9, 04/2003 9-10 optiClient 130 V4.0, User Manual… -
Page 156: Call List Management
To start Call List Management in the optiClient phone: Click the Call Lists button. By clicking on the telephone book key or the call list key in the optiClient phone, it is > possible to directly switch between the two directories.
-
Page 157
Call List Management To start Call List Management in the optiClient office: Select the Caller- and call records tab in the Telephone directory window. Selecting a Call List To display one of the call lists indicated above, select it from the list box in the Call List Man-… -
Page 158
Nur für den internen Gebrauch Calling a Party from a Call List Activate the desired call list. Then click the relevant caller or called party within this list and choose Call. Deleting a Call List To delete a call list, mark the list to be deleted and click Delete records. When you delete the call list for calls made, both the list of received calls and the list of stations reached are deleted. -
Page 159
8ruflisten.fm Call List Management Nur für den internen Gebrauch A31003-G2540-A100-3-76A9, 04/2003 10-4 optiClient 130 V4.0, User Manual… -
Page 160: Index
Nur für den internen Gebrauch Index Accept call 7-4 Accepting a call 4-9, 8-1 Account code 7-3 ACD 8-27 ACD Functions 8-27 ACD logged on 8-27 ACD logoff 8-29 ACD logon 8-28 ACD Night Service diactivating 8-32 enabling 8-32 ACD not available 8-27 ACD Post-Processing 8-30 ACD post-processing 8-27, 8-30 diabling 8-30…
-
Page 161
Door opener on 7-4 Drop last conf. party (only for U.S.) 7-3 DTMF dialing 7-4 DTMF suffix dialing 8-24 DTMF transmission 8-24 Editing a Telephone Directory Entry 9-7 Nur für den internen Gebrauch Electronic Telephone Directory 9-1 E-mailing contacts 9-9 En-bloc sending 7-3… -
Page 162
Park a call 7-4 Parking a call 8-12 Parking Calls 8-12 PC keyboard 4-4 PC Performance 3-2, 3-7 Personal phone book 3-5 Personal telephone directory 9-1 Phone book management 4-7 Phone lock disabling 8-20 enabling 8-19 Phone Test 7-4 Pickup — directed 7-4… -
Page 163
1-7 Save number 7-3 Select language 7-5 Selecting the Telephone Directory 9-3 Sending Infos 8-21 Shift Key 7-5 Show call charges (own telephone) 7-5 Software requirements 1-3 Sound card 3-17 Speaker 3-17 Speaker call 7-5 Speed-dial keys 5-20 Speed-dial keys (icons) 5-20… -
Page 164
View messages UK Display Messages 7-5 Use speed-dialing 7-6 User interface 4-2, 5-1, 6-1 Verification window 9-6 View call charges (other party’s telephone) 7- View callbacks/Delete 7-6 View conf parties 7-3 View sent message 7-5 Viewing Options of the Telephone Directory… -
Page 165
opticl130v40SIX.fm Index Nur für den internen Gebrauch A31003-G2540-A100-3-76A9, 04/2003 optiClient 130 V4.0, User Manual…
Краткое содержание страницы № 1
User Manual
HiPath 3000/5000
HiPath optiClient 130
Version 4.0
May 2003
OP5374-00
Краткое содержание страницы № 2
Warning Hackers who unlawfully gain access to customer telecommunications systems are criminals. Currently, we do not know of any telecommunications system that is immune to this type of criminal activity. Siemens Informa- tion and Communication Networks, Inc. will not accept liability for any damages, including long distance charg- es, which result from unauthorized use. Although Siemens has designed security features into its products, it is your sole responsibility to use the security fe
Краткое содержание страницы № 3
s HiPath 3000/5000 V4.0 optiClient 130 User Manual
Краткое содержание страницы № 4
*1PA31003-G2540-A100-3-76A9* 1P A31003-G2540-A100-3-76A9 The information in this document contains general descriptions of the technical opti- ons available, which do not always have to be present in individual cases. The required features should therefore be specified in each individual case at the time of closing the contract. ● Siemens AG 2003 Information and Communication Networks, Hofmannstraße 51, D-81359 München, Germany Reference No.: A31003-G2540-A100-3-76A9 ● Printed in the Fed
Краткое содержание страницы № 5
Introduction and Important Notes 1 Installation 2 HiPath 3000/5000 V4.0 optiClient 130 First Steps and User Configuration 3 optiClient phone User Interface 4 User Manual optiClient office User Interface 5 optiClient easyCom User Interface 6 Using the optiClient phone 7 Using the optiClient office 8 Electronic Telephone Directory 9 A31003-G2540-A100-3-76A9 Call List Management 10
Краткое содержание страницы № 6
Краткое содержание страницы № 7
opticl130v40IVZ.fm Nur für den internen Gebrauch Contents Contents 0 short MS-HTML help name E-Doku path V2.0(relative) E-Doku Pfad V3.0(relative) name e.g., eshb_hlp.chm z.B.: ../../../../bk1/01/bh/01 e.g.: ../bk1 e.g., eshb easyCom easyCom_EN.chm ../11 ../12optiClient130easyCom 1 Introduction and Important Notes. . . . . . . . . . . . . . . . . . . . . . . . . . . . . . . . . . . . . . . . 1-2 1.1 Hardware and Software Requirements . . . . . . . . . . . . . . . . . . . . . . . . . . . . . .
Краткое содержание страницы № 8
opticl130v40IVZ.fm Contents Nur für den internen Gebrauch 3.6 Exiting optiClient phone / office / easyCom. . . . . . . . . . . . . . . . . . . . . . . . . . . . . . . . . 3-22 4 optiClient phone User Interface . . . . . . . . . . . . . . . . . . . . . . . . . . . . . . . . . . . . . . . . . . 4-1 4.1 Layout of the optiClient phone User Interface. . . . . . . . . . . . . . . . . . . . . . . . . . . . . . . . 4-2 4.2 General Operation. . . . . . . . . . . . . . . . . . . . . . . . . . . . . .
Краткое содержание страницы № 9
opticl130v40IVZ.fm Nur für den internen Gebrauch Contents 5.5.5 Speed-dial Keys . . . . . . . . . . . . . . . . . . . . . . . . . . . . . . . . . . . . . . . . . . . . . . . . . 5-20 5.6 Functions . . . . . . . . . . . . . . . . . . . . . . . . . . . . . . . . . . . . . . . . . . . . . . . . . . . . . . . . . 5-23 5.7 Connection Parties Window. . . . . . . . . . . . . . . . . . . . . . . . . . . . . . . . . . . . . . . . . . . . 5-26 5.7.1 Call status display . . . . . . . . . . . . . .
Краткое содержание страницы № 10
opticl130v40IVZ.fm Contents Nur für den internen Gebrauch 8.7.6 DTMF Suffix Dialing . . . . . . . . . . . . . . . . . . . . . . . . . . . . . . . . . . . . . . . . . . . . . . . 8-24 8.7.7 Hunting Group . . . . . . . . . . . . . . . . . . . . . . . . . . . . . . . . . . . . . . . . . . . . . . . . . . . 8-25 8.7.8 Resetting Functions . . . . . . . . . . . . . . . . . . . . . . . . . . . . . . . . . . . . . . . . . . . . . . . 8-26 8.8 ACD Functions . . . . . . . . . . . . . . . . . . . . . .
Краткое содержание страницы № 11
1einl.fm Introduction and Important Notes Nur für den internen Gebrauch 1 Introduction and Important Notes This documentation describes the installation, user configuration and use of the optiClient 130 V4.0. In order to make this documentation easier to read, the terms > optiClient 130 (for the overall product) and optiClient phone or optiClient office as well as optiClient easyCom are used for the respective user interfaces. General Information The optiClient 130 is a telephony applicatio
Краткое содержание страницы № 12
1einl.fm Nur für den internen Gebrauch Introduction and Important Notes Hardware and Software Requirements 1.1 Hardware and Software Requirements Hardware ● Minimum processor and RAM requirements for optiClient 130 phone/office: Windows 98SE Windows 2000 Windows XP Processor Pentium II with Pentium III with Pentium III with 233 MHz 450 MHz 450 MHz RAM at least 64 MB at least 128 MB at least 256 MB ● Minimum processor and RAM requirements for optiClient 130 easyCom: Windows 98SE Windows 2000 Win
Краткое содержание страницы № 13
1einl.fm Introduction and Important Notes Nur für den internen Gebrauch Hardware and Software Requirements Software ● Operating system Windows 98 SE, Windows 2000 (SP2) or Windows XP ● The installation software for the optiClient 130 on the system CD offers you the following two user interfaces, depending on the HiPath system connected: – optiClient 130 phone: An optPoint-based user interface called the “optiClient phone User Interface” in the following documentation. – optiClient 130 office: a
Краткое содержание страницы № 14
Краткое содержание страницы № 15
1einl.fm Introduction and Important Notes Nur für den internen Gebrauch Safety Information 1.3 Safety Information Only service personnel and authorized specialists are permitted to work on the installation. Observe the following information: ● Read through all the information on the equipment carefully and follow all the safety guide- lines. Make sure that you also note down the emergency numbers. ● Always contact your manager before starting any work where the necessary safety precau- tions do
Краткое содержание страницы № 16
1einl.fm Nur für den internen Gebrauch Introduction and Important Notes Safety Information 1.3.1 Safety information: Danger ● If the power cable appears to be damaged, replace it immediately. ● Only personnel with proper qualifications or authorized electricians should perform work on the low-voltage network (100 — 240 V AC). ● During a thunderstorm, you should not connect or remove telephone lines and PC boards. ● Expect to encounter leakage current from the telecommunications network. Disco
Краткое содержание страницы № 17
1einl.fm Introduction and Important Notes Nur für den internen Gebrauch Safety Information ● Install cables in such a way that they do not pose an accident risk (by people tripping over them) and also so that they are not damaged. 1.3.4 General Notes ● If the installation is brought into the operating site from a cold environment, condensation may occur. Wait until the temperature of the installation has adjusted to the ambient tem- perature and make sure that the system is absolutely dry befo
Краткое содержание страницы № 18
1einl.fm Nur für den internen Gebrauch Introduction and Important Notes Data Protection and Data Security 1.4 Data Protection and Data Security This system also processes and uses personal data for purposes such as call detail recording, displays, and customer data acquisition. In Germany, the processing and use of personal data are subject to various regulations, includ- ing the regulations of the Federal Data Protection Law (Bundesdatenschutzgesetz = BDSG). For other countries, please foll
Краткое содержание страницы № 19
1einl.fm Introduction and Important Notes Nur für den internen Gebrauch Data Protection and Data Security A31003-G2540-A100-3-76A9, 04/2003 1-10 optiClient 130 V4.0, User Manual
Краткое содержание страницы № 20
2install.fm Nur für den internen Gebrauch Installation 2Installation This section contains information on the following topics: ● General Information ● Configuring/installing Quality of Service ● Configuring Location Information ● optiClient Installation Procedure A31003-G2540-A100-3-76A9, 04/2003 optiClient 130 V4.0, User Manual 2-1
Скачать
May 2003
User Manual
HiPath 3000/5000
HiPath optiClient 130
Version 4.0
OP5374-00
Посмотреть инструкция для Siemens Hipath 3000 бесплатно. Руководство относится к категории офисные телефоны, 1 человек(а) дали ему среднюю оценку 5.3. Руководство доступно на следующих языках: английский. У вас есть вопрос о Siemens Hipath 3000 или вам нужна помощь? Задайте свой вопрос здесь
Не можете найти ответ на свой вопрос в руководстве? Вы можете найти ответ на свой вопрос ниже, в разделе часто задаваемых вопросов о Siemens Hipath 3000.
Инструкция Siemens Hipath 3000 доступно в русский?
Не нашли свой вопрос? Задайте свой вопрос здесь
-
Страница 1
HiPath 2000 HiPath 3000 HiPath 5000 optiPoint 410 advance Operating Instructions[…]
-
Страница 2
Before You Begin 2 Bef ore Y ou Beg in These oper ating instr uctions describe the optiP oint 41 0 ad vance telephone on your HiP ath 20 00 and HiPath 300 0 / 5000. The y describe all functions you can use fr om your telephone. Y ou may find that some func- tions you w ish to use are not a vailable on y our telephone. This may be due to one of the […]
-
Страница 3
Before You Begin 3 Marks The de vice conforms to the EU guideline 1 999/5/E G, as at tested by the CE mark. This de vice has been manufact ured in accor dance with our certified environ- mental management sy stem (ISO 1 40 0 1). This pr ocess ensures that energ y consumption and the use of primary ra w materials are k ept to a minimum, thus reducin[…]
-
Страница 4
Contents 4 Contents Before You Begin . . . . . . . . . . . . . . . . . . . . . . . . . . . . . . 2 Important Notes . . . . . . . . . . . . . . . . . . . . . . . . . . . . . . . . . . . . . . . . . . . 2 Marks . . . . . . . . . . . . . . . . . . . . . . . . . . . . . . . . . . . . . . . . . . . . . . . . . . . 3 Basic operating instructions . . . . […]
-
Страница 5
Contents 5 Using Callback . . . . . . . . . . . . . . . . . . . . . . . . . . . . . . . . . . . . . . . . . . . . 26 Storing a Callback. . . . . . . . . . . . . . . . . . . . . . . . . . . . . . . . . . . . . . . 26 Answering a Callback . . . . . . . . . . . . . . . . . . . . . . . . . . . . . . . . . . . . 26 Checking and Cancel ing a Saved Callba[…]
-
Страница 6
Contents 6 Conducting a Conference . . . . . . . . . . . . . . . . . . . . . . . . . . . . . . . . 55 Ending a Conference (Initiator Only) . . . . . . . . . . . . . . . . . . . . . . . . 56 Activating Tone Dialing/DTMF Suffix-Dialing . . . . . . . . . . . . . . . . . . 57 Recording Calls . . . . . . . . . . . . . . . . . . . . . . . . . . . . . . .[…]
-
Страница 7
Contents 7 Using Another Telephone Like your Own for an Ext ended Period of Time (Mobility). . . . . . . . . . . . . . . . . . . . . . . . . . . . . . . . . . . . . . . . . . 85 Fax Details and Message on Answering Machine . . . . . . . . . . . . . . . . 86 Resetting Services and Functions (System-Wide Cancellation for a Telephone) . . . . . . . . […]
-
Страница 8
Contents 8 Testing the Telephone . . . . . . . . . . . . . . . . . . . . . . . . 110 Testing the Telephone Functions . . . . . . . . . . . . . . . . . . . . . . . . . . . . 110 Checking the Key Assignment . . . . . . . . . . . . . . . . . . . . . . . . . . . . . . 110 Special Functions in the LA N (PC Network) . . . . . 111 Leaving a Hunt Group/Gro[…]
-
Страница 9
Basic operating instructions 9 Basic oper ating instruct ions optiP o int 41 0 adv ance control panel Ba cklight gr aphics display , 4 lines with 24 char s Ke ys f or telephone set tings Microphone f or speak erphone mode Speaker f or open listening and ring tones Ke y f or confirming a function Ke ys f or scrolling to functions Handset Key f i el […]
-
Страница 10
Step by Step Basic operating instructions 10 How to Use these Operating Instr uc- tio ns Y ou will find a graphic repre sentation of the steps in log- ical sequence in the lef t column. Below is an explana- tion of the s ymbols: n Lif t the handset (of f-hook). t Replace the handset (on-hook). s Conduct a call. o Enter a telephone number or code. d[…]
-
Страница 11
Basic operating instructions 11 Step by Step Displays T wo-line displa y Line 1 displa ys sit uation-specific prompts or confirma- tion messages. Line 2 display s functions that you can select b y pressing : . The s ymbol “>” on the right of this line indicates that additional options are a v ailable; y ou can scroll to these using < >[…]
-
Страница 12
Step by Step Basic operating instructions 12 Accessing Functions … Interactively Y ou can select some functions while the telephone is idle , for example: > : Use < > to scr oll to a function and press : to ex ecute it. Y ou can select other functions directly depending on the si tuation . Example: you call a number , but the line is bus[…]
-
Страница 13
Basic operating instructions 13 Step by Step Funct ions Y ou Can Use Basic and Enhanced Functions Y ou can use all basic an d enhanced communications platf orm functions that appear interactively on the screen, in the Pr ogram/Service menu, and when you press function k eys. Additional T eam and Executiv e/Secr etary Fun cti ons Æ P age 1 02f. T o[…]
-
Страница 14
Step by Step Basic operating instructions 14 Self Labelling Key -F unktion If an optiP oint self labelling ke y module is connected to your telephone, y ou do not need to label your ke y mod- ule’s progra mmable function ke ys manually A detailed description of the cor responding options is pro vided in the optiP oint 420 Operating Manual. Usi[…]
-
Страница 15
Making Calls – B asic Functions 15 Step by Step Making Calls – Basic Funct ions Answering Calls Special default rin g signaling is set f or your telephone: • When you receive an internal call, your telephone rings once ev ery f our seconds (single-tone se- quence). • When you receive an e x ternal call, y our telephone rings twice in rapid […]
-
Страница 16
Step by Step Making Calls – Basi c Function s 16 Ending the call: Pr ess the ke y . The LED goes out. or Pr ess the ke y . Notes on speak erphone mode: • T ell the other part y that y ou are using speakerphone mode. • T he speakerphone w orks bests at a low receiving volume. • T he ideal distance between the user and the tele- phone set in […]
-
Страница 17
Making Calls – B asic Functions 17 Step by Step Open Listening in the Room During a Call Y ou can let other people in the room join in on the call. Let the ot her part y kno w that y ou hav e t urned on the speaker . Precondition: Y ou are conducting a call with the hand- set. Activ ating ring transfer: Pr ess the ke y . The LED lights up. Deacti[…]
-
Страница 18
Step by Step Making Calls – Basi c Function s 18 The called party does not answ er or is busy: Pr ess the ke y . The LED goes out. Ending the call t Replace the handset. or Pr ess the ke y . Redialing a Number The last three e xternal telephone numbers dialed are stored automatically . Y ou can redial them simply b y pressing a k ey . The station[…]
-
Страница 19
Making Calls – B asic Functions 19 Step by Step T urning the Microphone On and Off T o prev ent the other party from listening in while y ou consult with someone in your of fice, you can tempor ar- ily switc h of f the handset microphone or the handsfree microphone. Y ou can also switch on the handsfree mi- crophone to answ er an announcement via[…]
-
Страница 20
Step by Step Making Calls – Basi c Function s 20 Calling a S econd P arty (Consultat ion Hold) Y ou can call a second party while engaged in a call. The first party is placed on hold. : : Confirm. o Call the second party . Return t o the first party: : Confirm. or : or qd Pr ess the ke y . The LED lights up. Enter the code. The LED goes out. S wi[…]
-
Страница 21
Making Calls – B asic Functions 21 Step by Step T ransferring a Call If the person y ou are speaking to wants to talk to another colleague of your s, you can tr ansf er the call that colleague. : : Confirm. o Enter the number of the party to which y ou want to transf er the call. s Announce the call, if necessary . t Replace the handset. or > […]
-
Страница 22
Step by Step Making Calls – Basi c Function s 22 Call Forwar ding Using V ariable Call Forwarding Y ou can immediately forw ard internal or exter nal calls to dif fer ent internal or external telephones (destinations). (External destinations req uire special configuration in the sy stem.) > : Select and confirm. or qe Enter the code. : Select […]
-
Страница 23
Making Calls – B asic Functions 23 Step by Step Using Call Forwarding No Reply (CFNR) Calls that are not answ ered af ter three rings (=def ault, can be adjusted by service personnel) or that are r e- ceived while another call is ongoing can be automatical- ly f orw arded to a specified telephone. Pr ess the ke y . The LED lights up. > : Selec[…]
-
Страница 24
Step by Step Making Calls – Basi c Function s 24 Call Forwar ding in the Carrier Network and Forwarding Multiple Subscriber Num- bers (MSN) (Not for U.S.) If this function has been configur ed (contact your ser- vice personnel), y ou can forw ard calls to you r assigned multiple subscriber number (M SN) (DID number) direct- ly within the carrier […]
-
Страница 25
Making Calls – B asic Functions 25 Step by Step Call Forwarding in the Ev ent of a T elephone Malfunction If this f eature is configur ed (ask the service personnel), you can define an internal or external call f orwar ding destination that becomes ef fectiv e when your tele- phone is not working. Pr ess the ke y . The LED lights up. > : Selec[…]
-
Страница 26
Step by Step Making Calls – Basi c Function s 26 Using Callbac k If a user is busy or is not answ ering, you can store an automatic callbac k. This f eature sa v es you from ha ving to mak e repeated at tempts to reac h the user . Y ou receive a callback, • When the other party is no longer busy • When the user who did not answ er has conduct[…]
-
Страница 27
Making Calls – B asic Functions 27 Step by Step Deleting a display ed entry: : Pr ess the «OK» dialog ke y to confirm your selection. Ending callback displa y: > : > : Select and confirm. or Pr ess the ke y . The LED goes out. or Pr ess the ke y . The LED goes out. Delete? US: Exit? UK: End? Progr am/ Ser vic e Speaker[…]
-
Страница 28
Step by Step Making Calls – Basi c Function s 28 Saving R epertor y Dialing Numbers on a Key Y ou can save freq uently-dialed station numbers on pro- grammable ke ys that are unassigned by def ault. External and internal station numbers, as well as func- tions/procedures (comprising se veral operat ing steps) can be stored on these ke ys Æ Pag e[…]
-
Страница 29
Making Calls – B asic Functions 29 Step by Step If you mak e a mistak e: > : Select and confirm. This deletes all digits entered. The s ystem telephone automatically recogniz es if you want to sa ve an internal or an e xternal station number . The options «Sa ve without LED» or «Sav e with LED» are only av ailable for inter[…]
-
Страница 30
Step by Step Making Calls – Basi c Function s 30 T e lephone Settings Adjusting the Ring V olume u or v Pr ess these ke ys while the phone is idle. : : Confirm. u or v T o raise or lo wer the v olume: Keep pres sing the ke ys until the desired v olume is set. : Sav e. Adjusting the Ring T one u or v Pr ess these ke ys while the phone is idle. : :[…]
-
Страница 31
Making Calls – B asic Functions 31 Step by Step Adjusting the display contrast The displa y has f our contrast levels that y ou can set ac- cording to your light conditions. u or v Pr ess one of the k ey s while the phone is idle. > : Select and confirm. u or v Change the displa y contrast (1 … 4). P ress the k ey re- peatedly until the desi[…]
-
Страница 32
Step by Step Making Calls – Basi c Function s 32 Adjusting the Receiving V olume During a Call Y ou are engaged in a call. u or v T o raise or lo wer the v olume: Keep pres sing the ke ys until the desired v olume is set. u or v simultaneously Sav e. Adjusting the Display to a Comfort able Read- ing Angle Y ou can swivel the display unit. A d jus[…]
-
Страница 33
Making Calls – Convenience Functions 33 Step by Step Making Calls – Convenience Fun cti on s Answering Calls Accepting a Specific Call for Y our Colleague Y ou hear another telephone ring . Pr ess the ke y . The LED lights up. > : Select and confirm 1 . or qim Enter the code. The called station appears on the screen. If applicable If se ver […]
-
Страница 34
Step by Step Making Calls – Conveni ence Functions 34 Rejecting Calls Y ou can reject calls whic h you do not wish to take. T he call is then signaled at another definable telephone (contact your service per sonnel). The telephone rings. T he caller is display ed. Pr ess the ke y . If a call cannot be rejected, y our telephone will continue to ri[…]
-
Страница 35
Making Calls – Convenience Functions 35 Step by Step Answ ering a Call With a Headset Precondition: Y our telephone rings. : Confirm. or If the «Headset» k ey has been configured Æ Page 63: Pr ess the ke y . The LED lights up. Ending the call: Pr ess the ke y . or If the «Headset» k ey has been configured Æ Page 63: Pr ess t[…]
-
Страница 36
Step by Step Making Calls – Conveni ence Functions 36 Answering Calls fr om the Entrance T elephone and Opening the Door If an entrance telephone has been progr ammed, you can use your telephone to speak to someone at the entrance telephone and to activate a door opener . If you ha ve the proper authorization (contact your ser- vice personnel), y[…]
-
Страница 37
Making Calls – Convenience Functions 37 Step by Step Opening the door with a code (at the doo r): o Af ter ringing the bell, enter the five-digit code (using t he ke ypad or a DTMF transmit ter). Depending on how the door opener has been programmed, a doorbell call sig- nal may or may not be f orwar ded. Activ ating the door opener: Pr ess the ke[…]
-
Страница 38
Step by Step Making Calls – Conveni ence Functions 38 Dialing/Making Calls En-Bloc S ending / Corr ecting Numbers If this f eature is configur ed (contact your service per- sonnel), a connection is not at tempted immediately when a station number is entered. T his means that you can correct the number if necessary . The station number is only dia[…]
-
Страница 39
Making Calls – Convenience Functions 39 Step by Step Using a Caller List If you ar e unable to accept an external or internal call, the call at tempt is stored in the caller list. Y ou can store answer ed calls either manually (both in- ternal and ex ternal calls) or automatically (e xternal calls only; contact your service per sonnel f or detail[…]
-
Страница 40
Step by Step Making Calls – Conveni ence Functions 40 Displaying the Call Time and A dditional Call Infor- mation Precondit ion: Y ou hav e retriev ed the caller list and the selected call is displa yed (blac k squar e at the beginning of line). > : Select and confirm. Inf ormation about caller name, call number and call time will be displa ye[…]
-
Страница 41
Making Calls – Convenience Functions 41 Step by Step Speed-dial Using Station and S yst em Speed-Dial Numbers Precondition: Y ou hav e stored station speed-dial num- bers Æ P age 41 or your s ervice personnel has stor ed sy stem speed-dial numbers. Pr ess the ke y . The LED lights up. > : Confirm 1 . or qk Enter the code. o Enter a speed-dial[…]
-
Страница 42
Step by Step Making Calls – Conveni ence Functions 42 : : Confirm. or If you mak e a mistake: > : Select and confirm. This delet es all entered digits. : : Confirm. or > : > : Select and confirm. or > : Select and confirm. or > : > : Select and confirm. US : S ave? UK : S ave e ntr y? Previo us? US: Next? UK: Next entry? US: Cha[…]
-
Страница 43
Making Calls – Convenience Functions 43 Step by Step Dialing a Number From the Internal Directory The internal di rectory contains all station numbers and sy stem speed-dial numbers assigned to a name. Con- tact your service per sonnel to find out if one w as con- figured f or your s ystem. Precondition: Names ha ve been assigned to the sta- tion[…]
-
Страница 44
Step by Step Making Calls – Conveni ence Functions 44 If applicable > : Select and confirm eac h let ter to be deleted. T he last let ter entered is deleted. If all let ters ar e deleted, the first entry in the directory will be displa yed again. If applicable > : Select and confirm. All entered let ters are deleted, and the first entry in […]
-
Страница 45
Making Calls – Convenience Functions 45 Step by Step Dialing from the T elephone Database (LD A P) If configured (as k your service per sonnel), you can searc h f or directory data in the LD AP database and dial the number of any subscriber you f ind there. Precondition: T he LD AP search f eature has been con- figured in the s y stem. n Lif t th[…]
-
Страница 46
Step by Step Making Calls – Conveni ence Functions 46 : Confirm. The name is searc hed f or . This ma y take a f ew seconds. The result is displayed: If only one name is f ound, it is display ed. : Confirm. If sev eral names are f ound (max. 50), the first three names will be listed and display ed (list display Æ Pag e 1 1 ) . u or v Scroll to t[…]
-
Страница 47
Making Calls – Convenience Functions 47 Step by Step Using Mailbo x es If you ha ve programmed the «Mailbo x» key Æ Pa ge 6 3 , the associated LED lights up when messages ha ve ar- rived f or you. If y our telephone is connected to a v oice mail sy stem, the «Mailbox» ke y will also light up to aler t you to an y messages tha[…]
-
Страница 48
Step by Step Making Calls – Conveni ence Functions 48 T alking to Y our Colleague with Discreet Calling If this function has been configur ed (ask y our service personnel), y ou can join an ongoing call conducted by an internal user at a s y stem telephone with display . Y ou can listen in unnoticed and speak to the inter nal user without being o[…]
-
Страница 49
Making Calls – Convenience Functions 49 Step by Step Assigning a Station Number (Not for U.S.) If this function has been configured (contact y our ser- vice personnel), y ou can selectively assign a specific number (DID number) to your telephone bef ore making an external cal l. The assigned number then appear s on the called part y’ s display […]
-
Страница 50
Step by Step Making Calls – Conveni ence Functions 50 Dialing aid from y our telephone for another tel e- phone: Pr ess the ke y . The LED lights up. > : Select and confirm. or qjk Enter the code. o Enter the internal station number («Dial f or:»). o Enter the number you wish to dial. Progr am/ Ser vic e * 67=Associated dial?[…]
-
Страница 51
Making Calls – Convenience Functions 51 Step by Step During a Call Using Call W ait ing Callers can still r each you while y ou are engaged in an- other call. A signal alerts you to the w aiting call. Y ou can either ignore or accept the waiting call. When you accept the waiting call, y ou can either end the first call or place it on hold and r e[…]
-
Страница 52
Step by Step Making Calls – Conveni ence Functions 52 Pr eventing and Allowing Call W ait ing (Automati c Camp-On) If this function has been configur ed (ask y our service tec hnician), you can pr ev ent or allo w a second call Æ P age 51 from being signaled by automatic camp-on during an ongoing call. Pr ess the ke y . The LED lights up and >[…]
-
Страница 53
Making Calls – Convenience Functions 53 Step by Step P arking a Call Y ou can park up to ten calls, either internal, e xternal, or both. P arked calls can be displa yed on and pick ed up from another telephone. T his feat ure is useful if you want to continue a call at another phone. Precondition: Y ou are conducting a call. Pr ess the ke y . The[…]
-
Страница 54
Step by Step Making Calls – Conveni ence Functions 54 Placing External Calls on Hold If you ha ve programmed a k ey on your telephone as a hold k ey Æ P age 63, you can place e xternal calls on hold. This enables all other parties to retriev e the call on the assigned line. Pr ess the «US:Hold UK:Common Hold» key . A message appears sh[…]
-
Страница 55
Making Calls – Convenience Functions 55 Step by Step Conducting a Conference In a conf erence call, y ou can talk to as many as f our other parties at the same time. These ma y be internal or external users. o Call the first party . > : Select and confirm. o Call the second station. Announce the conference. > : Select and confirm. or qg Pr […]
-
Страница 56
Step by Step Making Calls – Conveni ence Functions 56 Removing P arties Fr om the Conference (Initiat or Only) > : Select and confirm. The parties will be listed and display ed (list display Æ Pag e 1 1 ) . u or v Pr ess these ke ys to select another party . > : Select and confirm. Leav ing a Confer ence > : > : Select and confirm. o[…]
-
Страница 57
Making Calls – Convenience Functions 57 Step by Step Activating T one Dialing/DTMF Suffix -Dialing Y ou can transmit dual-tone multifr equenc y ( DTMF ) sig- nals to control devices suc h as an answ ering mac hine or automatic inf ormation sy stem. Pr ess the ke y . The LED lights up. > : S elect and confirm 1 . or qig Enter the code. o Y ou c[…]
-
Страница 58
Step by Step Making Calls – Conveni ence Functions 58 Recor ding Calls If configured (ask y our administrator), y ou can record calls. Precondit ion: Y ou are conducting a call, the «Record- ing» k ey is configur ed Æ P age 63. Pr ess the illuminated «Recor ding» ke y . The LED lights up. An announcement notifies y ou and the[…]
-
Страница 59
Making Calls – Convenience Functions 59 Step by Step T ransferring a Call after a Speak er Call (Announcement) in a Group If this function has been configured (contact y our ser- vice personnel), y ou can use a speaker call (announce- ment, Æ P age 47) to announce a call in pr ogress to a group of users Æ Page 95. Af ter a member of the group h[…]
-
Страница 60
Step by Step Making Calls – Conveni ence Functions 60 T r unk Flash T o activate ISDN-type services and f eatures through the network carrier’ s analog trunks or those of other com- munications platf orms (such as «consultation hold»), you must send a signal to the trunks bef ore dialing the ser- vice code or telephone number . Precon[…]
-
Страница 61
Making Calls – Convenience Functions 61 Step by Step If Y ou Cannot Reach a D est ination … Call W aiting (Camp-On) Precondition: Y ou have dialed an internal number and hear a busy signal. It is important that you r each the called party . W ait (appro x. 5 seconds) until «Camp-on» appears on the display and the bus y tone is follo w[…]
-
Страница 62
Step by Step Making Calls – Conveni ence Functions 62 Using Night Answ er When night answ er mode is active, f or example during a lunch break or af ter of fice hours, all external calls are immediately f orwarded to a specific internal telephone (night station). The night station can be defined b y ser- vice personnel (standar d night answ er se[…]
-
Страница 63
Saving Functions, Procedures and Appointments 63 Step by Step Saving Functions, Procedur es and Appointments Y ou can save a fr equently dialed number Æ P age 28, or frequently used functions/pr ocedures (comprising se v- eral operating steps) on an y free k ey on y our telephone or add-on device. Y ou can use dual-level k ey assignment if you ha […]
-
Страница 64
Step by Step Saving Functions, Pr o cedures and Appointments 64 : : Confirm. or > : > : Select and confirm. Meaning of LED Signals f or Saved F unctions: Call forwarding, Call forward. no re ply , Forwarding — trunk, F orw ard Line, US:Night an swer UK:Night Service, Do not dist urb, Changeo ver , Ad visory mes- sag e, Ringer cut off , HF ans[…]
-
Страница 65
Saving Functions, Procedures and Appointments 65 Step by Step Repdial ke y (internal), Dir ect station select: The other party is not engaged in a call. The other party is engaged in a call or has activ ated do not disturb. Flashing rapidly — A caller is try ing to reac h you, please pick up the phone. Flashing slowly — A caller is trying to reac h[…]
-
Страница 66
Step by Step Saving Functions, Pr o cedures and Appointments 66 Data I/O Service: No connection to an application. Activ e connection to an application. Flashing slowly — Connection to application temporarily interr upted. The following functi ons are assigned to k eys which have no LE D: Repdial k ey (e xternal), Proced ur e ke y , T race call, Sp[…]
-
Страница 67
Saving Functions, Procedures and Appointments 67 Step by Step Assigning a P rocedur e (Operating Steps) to a Key Station numbers and functions whic h require additional inputs, i.e. comprise se ver al operating steps , can be sav ed to a single k ey on y our telephone. Using the associated dial function, f or example Æ P age 50, you can sa ve all […]
-
Страница 68
Step by Step Saving Functions, Pr o cedures and Appointments 68 or > : > : Select and confirm. . UK: Program ano ther ke y? US: Another k ey? Select the stored procedur e by pr essing a ke y . Pr ocedures containing functions which can be switc hed on/of f can be activated b y pressing the ke y , and dea ctiv ated by pressing the same k ey ag[…]
-
Страница 69
Saving Functions, Procedures and Appointments 69 Step by Step Appointments F unction Y ou can tell your telephone to giv e y ou a call when you want to be r eminded of an appointment Æ P age 70. T o do this, you need to sa ve the time y ou want the call to be made. Y ou can enter a single appointment that will take place in the ne xt twenty f our […]
-
Страница 70
Step by Step Saving Functions, Pr o cedures and Appointments 70 Using Timed Reminders Precondit ion: Y ou must ha ve sa ved a timed r eminder Æ P age 69. The curr ent time is the time stored. The telephone rings. T he timed reminder appears on the screen. Pr ess the ke y t wice. or n t Lif t the handset and replace it again. US: Reminder: UK: Remi[…]
-
Страница 71
Displaying and Assigning Call Charges 71 Step by Step Displaying and Assigning Call Charges Displaying Call Charges (Not for U.S.) For the curr ent call: The dis play usually sho ws call c harges at the end of a call (default set ting). If you w ish to display charges continuously during a call in progress, y our service per sonnel must request thi[…]
-
Страница 72
Step by Step Displaying and Assigning Call Charges 72 Displaying Call Charges for Another T elephone (Not for U.S.) If this function is configur ed (contact your service per- sonnel), y ou can display and print the char geable calls f or other telephones (suc h as a pay phone). Precondit ion : Y ou hav e programmed the function «Vie w call c h[…]
-
Страница 73
Displaying and Assigning Call Charges 73 Step by Step Dialing with Call Charge Assignment Y ou can assign external calls to certain projects. Precondition: Service personnel has set up account codes f or y ou. Pr ess the ke y . The LED lights up. > : Select and confirm 1 . or qjd Enter the code. o Enter the account code. and r Press t his ke y .[…]
-
Страница 74
Step by Step Priv ate Sphere/S ecurity 74 P r iv ate Sphere/S ecurity T urning Ringer Cutoff On and Off Y ou can activate the ringer cutof f function if you do not want the receive any calls. Calls are only identified by one ring signal, an indication on the display , and a ke y whic h has been programmed to flash (suc h as a trunk ke y). > : Se[…]
-
Страница 75
Private Sphere/S ecurity 75 Step by Step Caller ID Suppression Y ou can prevent your station number or name fr om ap- pearing on the display s of external parties you call. T he f eat ure remains active until y ou deactivate it. > : Select and confirm. or > : or qlj or rlj Enter code f or «suppress» or «restore». Suppress […]
-
Страница 76
Step by Step Priv ate Sphere/S ecurity 76 Monitoring a Room A telephone can be used to monitor a room. T he func- tion must be activated on the telephone that y ou want to monitor . Calling this telephone lets y ou hear what is going on in the room. Activ ating the telephone to be monitored: Pr ess the ke y . The LED lights up. > : Select and co[…]
-
Страница 77
Private Sphere/S ecurity 77 Step by Step T race Call: Identifying Anonymous Callers (Not for U.S.) Y ou can have the carrier identify malicious e xternal call- ers. Y ou can save the caller’ s station number during the call or f or 30 seconds af ter the call ends. How ever , it is essential that you do not r eplace your handset during this time. […]
-
Страница 78
Step by Step Priv ate Sphere/S ecurity 78 Loc king the T elephone to Prev ent Unauthorized Use Y ou can prev ent unauthorized per sons from using your telephone and its electr onic notebook during y our ab- sence. Precondit ion: Y ou must ha ve configured a per sonal identification number (PIN) f or your telephone Æ Pag e 8 0 . T o lock and unloc […]
-
Страница 79
Private Sphere/S ecurity 79 Step by Step Loc king Another T elephone t o P r event Unauthorized Use If this function has been configured (contact y our service personnel), you can lock other telephones to pre vent unauthoriz ed use and then unlock them again later . Y ou can use this function to unlock the telephone f or us- ers who ha ve lock ed t[…]
-
Страница 80
Step by Step Priv ate Sphere/S ecurity 80 Sav i ng Y o ur P IN T o use the functions • to pre vent unauthorized persons from using your telephone Æ Pa ge 7 8 • to use another telephone lik e your o wn Æ Pa g e 8 4 you need to ente r a personal identification number , whic h you can sa v e yoursel f . Pr ess the ke y . The LED lights up. > […]
-
Страница 81
Using Other Functions 81 Step by Step Using Other Funct ions S ending a Message Y ou can send shor t te xt messages (inf otexts) to single users or groups of user s who hav e s ystem telephones. On sy stem telephones with no display (e.g. optiP oint 500 entry), on ISDN, pulse or tone dialling telephones, transmit ted te xt messages will be sav ed a[…]
-
Страница 82
Step by Step Using Other F unctions 82 Displaying and Deleting Messages Y ou Have Se nt > : Select and confirm. or rjl Enter the code. > : Follo w the display pr ompts. Answering Messag es «Messages receiv ed:» appears on y our screen, along with an indication of the length. : : Confirm. > : F ollow the display prompts. View sent[…]
-
Страница 83
Using Other Functions 83 Step by Step Leaving an Advisory Message Y ou can leav e an advisory message on your telephone screen f or internal callers who w ant to reac h you while you are aw ay fr om your desk. When another part y calls y ou, the message appears on the caller’ s screen. > : Select and confirm. or qjm Enter the code. > : Sele[…]
-
Страница 84
Step by Step Using Other F unctions 84 Display Number of W ait ing Calls and Ov erload Indication Y ou can show the number of e xternal waiting calls on the displa y by pr essing the «Vie w number of calls» k ey Æ Pag e 6 3 . Pr ess the «W aiting calls» key . If the number of waiting calls e xceeds a preset limit while you are […]
-
Страница 85
Using Other Functions 85 Step by Step Using Another T elephone Like y our Own for an Extended P eriod of T ime (Mobility) If this f eature is configured, y ou can use a random optiP oint 41 0 as your o wn telephone. Y our station num- ber including all set tings (for e xample, programmed ke ys) ar e transf erred. Precondition: Y ou hav e received a[…]
-
Страница 86
Step by Step Using Other F unctions 86 Fax Details and Message on Ans wer- ing Machine If a f ax or answ ering mac hine is connected to your sy s- tem and you ha ve assigned the «F ax details» function to a programmable k ey Æ P age 63, the key lights up when a fax or a message has been received. Deactiv ating indication: Pr ess the illu[…]
-
Страница 87
Using Other Functions 87 Step by Step Activating F unctions for Another T ele- phone If this function has been configured (contact y our ser- vice personnel), y ou can turn the f ollowing functions on and of f f or other telephones. This f eature is also kno wn as associated service. • Do not disturb, code: * 97/#97 Æ Pa ge 74 • Call f orwardi[…]
-
Страница 88
Step by Step Using Other F unctions 88 Using S ystem Funct ions from the Outside (DISA: Direct Inwar d S ystem Access) If this function has been configur ed (contact your ser- vice personnel), y ou can set up external outgoing calls from outside the sy stem, just like an internal user . Y ou can also activate and deactiv ate the f ollowing function[…]
-
Страница 89
Using Other Functions 89 Step by Step o W ait f or a dial tone and then enter the code, such as * 97 f or Do not disturb on. Mak e other inputs as neces- sary; (ref er to the operating instr uctions f or pulse and DTMF telephones). or o Dial the exter nal number . Y ou can only execute one function at a time, or set up only one outgoing connection.[…]
-
Страница 90
Step by Step Using Other F unctions 90 Using functions in ISDN via code dial- ing (keypad dialing) If authorized (contact y our service personnel), y ou can set ISDN functions via code dialing in some countries. Pr ess the ke y . The LED lights up. > : Confirm. or qidg Enter the code. o Enter the number of the tr unk y ou wish to use (contact yo[…]
-
Страница 91
Using Other Functions 91 Step by Step Controlling Connected Computers or Other P rogr ams and T elephone Data Service (HiP ath 3 50 0/3550/370 0/3750/380 0 Only) If this function has been configured (contact y our ser- vice personnel), you can contr ol connected computers or programs r unning on them, such as hotel services or inf ormation s ystems[…]
-
Страница 92
Step by Step Using Other F unctions 92 Communicating with PC Applicat ions ov er a CS T A Inter face If this function has been configur ed (ask y our service personnel), y ou can use your telephone to communi- cate with PC applications (CST A = C omputer S uppor ted T elecommunications A pplications). Y ou send informa- tion to the application and […]
-
Страница 93
Using Other Functions 93 Step by Step Controlling Relay s (not for HiP ath 20 0 0) If this function has been configured (contact y our ser- vice personnel), y ou can turn up to f our relay s on and of f to control dif f erent f acilities (suc h as a door opener). Depending on how the y are programmed, y ou can switc h the rela ys on and of f or swi[…]
-
Страница 94
Step by Step Using Other F unctions 94 Radio P aging (Not for U.S.) If paging equipment is connected to your s ystem (con- tact your service personnel), y ou can contact people via their poc ket receiv ers. The poc ket receiv er indicates to the person you ar e looking f or that someone is trying to get in touch. T he person y ou page can then go t[…]
-
Страница 95
Using Other T eam Functions 95 Step by Step Using Other T eam F unctions T urning Group Call On and Of f If this function has been configured (contact y our ser- vice personnel), y ou belong to one or more groups of users who can eac h be reached under a hunt gr oup or group call number . Incoming calls are signaled on all gr oup member tele- phone[…]
-
Страница 96
Step by Step Using Other T eam F unctions 96 Y ou belong to a hunt group or a gr oup call: > : > : Select and confirm 1 . or > : > : or rli or qli Enter the code f or «leav e» or «join». or Pr ess the Hunt group join/leav e ke y . or Y ou belong to multiple groups or to one group with trunk ke ys (including executiv […]
-
Страница 97
Using Other T eam Functions 97 Step by Step or > : > : Select and confirm 1 . This t urns off the audible tone f or the displayed group or trunk. or > : Select and confirm. This t urns of f the audible tone f or all groups and tr unks. or r Enter the code f or «Leav e all groups». or > : Select and confirm. This t urns of f th[…]
-
Страница 98
Step by Step Using Other T eam F unctions 98 Accepting a Call for Another Member of Y our T eam Y ou can accept calls f or other telephones in your team from y our telephone ev en while engaged in another call. T o do this, contact your service personnel to find out if a pic kup group has been configur ed. Precondit ion: Y our telephone rings brief[…]
-
Страница 99
Using Other T eam Functions 99 Step by Step Acti v atin g a nd D eac tiv ating a Ri ng ing Group Y ou can have calls f or your telephone signaled audibly at up to five other internal phones. T he person who an- sw ers fir st receiv es the call. Saving, displa ying, and del eting telephones for the ringing gr oup: Pr ess the ke y . The LED lights up[…]
-
Страница 100
Step by Step Using Other T eam F unctions 10 0 Uniform Call Distribution (UCD) If this function has been configur ed (contact your ser- vice personnel), y ou belong to a group of user s (agents) to whom calls ar e distributed. An incoming call is alwa ys assigned to the agent who has had the longest break with out a call. Logging on and off at the […]
-
Страница 101
Using Other T eam Functions 101 Step by Step Requesting and activ ating a work time: If you w ant to follo w-up on the last call y ou answered without being distur bed, you can req uest and activate a work time. T his remov es your telephone from the call distribution c ycle f or a programmable period of time un- til you log bac k on. Pr ess the ke[…]
-
Страница 102
Step by Step T eam and Executive/Secr etary Fu nctions With T runk Keys 102 T eam and Executive/S ecretar y Funct ions With T runk Keys If this function has been configur ed (contact your ser- vice personnel), y ou belong to a team of users f or whom special ke ys wer e programmed: • T ru nk keys ( MU LAP keys ) • Direct station selection k ey […]
-
Страница 103
T eam and Executive/S ecretar y Functions With T runk Keys 103 Step by Step Answering Calls With T runk Keys Precondition: Y our telephone is ringing and/or the trunk ke y is flashing rapidly . Pr ess the rapidly flashing tr unk key . This is n ot necessary if the tr unk is automatically as- signed to you when you lif t the handset or press the &qu[…]
-
Страница 104
Step by Step T eam and Executive/Secr etary Fu nctions With T runk Keys 104 S witc hing Betw een Phon e Calls on Multiple Tr u n k s Precondit ion: Y ou are conducting a call o ver a trunk in your gr oup. Another tr unk ke y st arts flashing. Pr ess the flashing trunk k ey . The fir st party is placed on hold on the other tr unk. Pr ess the slowly […]
-
Страница 105
T eam and Executive/S ecretar y Functions With T runk Keys 105 Step by Step Forwar ding Calls on Lines Y ou can immediately forw ard internal or external calls on your lines to dif ferent i nternal or ex ternal telephones (destinations); e ven e xternal destinations ar e possible in certain system configur ations. Activ a ting call f orwarding f or[…]
-
Страница 106
Step by Step T eam and Executive/Secr etary Fu nctions With T runk Keys 106 Deactiv ating call f orw arding: Pr ess the ke y . The LED lights up. > : Select and confirm. or ride Enter the code. Pr ess the tr unk ke y you wish to use. or o Enter the number of the tr unk k ey y ou wish to use. or If av ailable. Press the «F orward Line» […]
-
Страница 107
T eam and Executive/S ecretar y Functions With T runk Keys 107 Step by Step Using DSS Keys Each team member has a DSS ke y for e very other member in the team. This enables e very team member to reac h all other members of the team directly , simply by pr essing a ke y . Meaning of LED Indications on DSS K eys LED on the DSS k ey is of f — the team[…]
-
Страница 108
Step by Step T eam and Executive/Secr etary Fu nctions With T runk Keys 108 T ransferring a Call in P rogress Pr ess the DSS ke y and announce the call, if desired. t Replace the handset. or Pr ess the ke y . Accepting a Call for Another T e am Member Pr ess the flashing DSS k ey or tr unk key . n Lif t the handset. or With on-hook dialing: Us e sp[…]
-
Страница 109
T eam and Executive/S ecretar y Functions With T runk Keys 109 Step by Step T ransferring Calls Dir ectly to the Ex ecutive (Only in an Ex ecutive/S ecretary Group) Normally , audible signaling of all calls f or the e xecutiv e is heard only in the secr etary’ s of fice. Y ou can activate audible signaling so that calls ar e only signaled on the […]
-
Страница 110
Step by Step Te s t i n g t h e Te l e p h o n e 110 T est ing the T elephone T e st ing the T elephone Funct ions Y ou can test your telephone functions. Precondit ion: Y our telephone is idle. Pr ess the ke y . The LED lights up. > : Select and confirm. or qmhd Enter the code. If ev erything is OK, • all LEDs on the telephone star t flashing[…]
-
Страница 111
Special Functions in the LAN (PC Network) 111 Step by Step Special F u nctions in the LAN (PC Network) If your telephone is operating in a HiP ath 500 0 envir on- ment, multiple Hi P at h 2 000/HiP ath 300 0 s ystems are interconnected via a L AN ( L ocal A rea N et w ork, e.g . pro- prietary PC network). Y our telephone calls are conduct- ed via t[…]
-
Страница 112
Step by Step Special Functions in the LAN (PC Network) 112 T ransferring Call Forw arding Y ou can activate/deactivate call f orwarding Æ Page 22 f or your telephone from other HiP ath 500 0 telephones. > : Select and confirm. or qhk Enter the code. o Enter the (DIS A) call number of the H iP ath 2000/ HiP ath 300 0 to whic h your tele phone is[…]
-
Страница 113
Special Functions in the LAN (PC Network) 113 Step by Step Using Night Answ er If authorized (contact y our service personnel), you can define telephones in other H iP ath 2000/ HiP ath 300 0 communications platf orms as the night answer Æ Pag e 6 2 . > : Select and confirm. or qhk Enter the code. o Enter the (DIS A) call number of the Hi Pa th[…]
-
Страница 114
Step by Step Special Functions in the LAN (PC Network) 114 Ac tiv ating a nd D eac tivati ng a Ri ng in g Group Y ou can have calls f or your telephone signaled audibly at external telephones or at telephones in other Hi P ath 2000/ HiP ath 300 0 communications platf orms Æ Pag e 9 9 . Sav e /view/delete the telephones f or the ringing group: Pr e[…]
-
Страница 115
Special Functions in the LAN (PC Network) 115 Step by Step Controlling Relay s (not for HiP ath 20 0 0) If this f eature is configured (contact y our service per- sonnel), you can also control r elay s Æ P age 93 in other HiP ath 300 0 communications platf orms. > : S elect and confirm. or qhk Enter the code. o Enter the (DIS A) call number of […]
-
Страница 116
Step by Step Special Functions in the LAN (PC Network) 116 Opening the Door If this f eature is configur ed (contact your service per- sonnel), you can also activ ate the door opener Æ P age 36 in other HiP ath 2000 /HiP ath 30 00 communi- cations platf orms. > : Select and confirm. or qhk Enter the code. o Enter the (DIS A) call number of the […]
-
Страница 117
Diff er ent Displays (HiP ath 40 0 0 Environment) 117 Step by Step Dif f erent Displays (HiP ath 40 0 0 Environment) Depending on the sy stem configuration, not all func- tions may appear on the displa y exactl y as shown in this document. The f ollowing table gives an ov erview of these func- tions and shows y ou under which menus the y can be f o[…]
-
Страница 118
Step by Step Differ ent Displays (HiP ath 40 0 0 Environment) 118 Depending on the s ystem configur ation, some display texts ma y diff er from the display te xts described in this document. Please ref er to the f ollow ing table f or an ov erview of suc h texts: More f eatures? DTMF dialing? Æ Pa ge 5 7 Speaker call ? Æ Pa ge 4 7 Retrie ve call?[…]
-
Страница 119
Entering T ext on the T elephone 119 Step by Step Entering T ext on the T elephone In the f ollowing sit uations, you can enter text (alphanu- meric c haracters) on the telephone: • when sending a message Æ Pa ge 8 1 • when lea ving an advisory message Æ Pa ge 8 3 Entering text via the ke ypad d … m , q , r Enter te xt via the ke ypad. Digi[…]
-
Страница 120
Labeling, Documentation and Accessories 120 Labeling, Do cumentation and Accessories Labeling Key Fields Y ou can chose from the f ollowing options to label the ke ys with t he func- tions/c all numbers sa ved ( Æ Pag e 9 , Æ Pa ge 6 3 ) : Labeling • by hand: Labeling strips are deliv ered with your optiP oint. Write the function or a name on t[…]
-
Страница 121
Labeling, Documentation and Accessories 121 Attaching a Station Number Label Self-adhesive call-number labels are also deliv ered with your optiP oint. W rite on the call-number label (fire brigade, police, own telephone num- bers), then remo ve and stic k it in the recess on the telephone when the handset is lif ted. Documentation Y ou can find th[…]
-
Страница 122
Labeling, Documentation and Accessories 122 Accessories The f ollowing accessories help y ou customize y our telephone to your indi- vidual pref erences. optiP oint adapters are modules whic h can be plugged into the option ba ys at the bot tom of optiP oint. optiP oint self labeling ke y module: Ke y module with 1 3 pr ogrammable k ey s and automa[…]
-
Страница 123
Fixing Problems 123 Fixing P roblems T elephone Maintenance • Alwa ys use a damp or antistatic cloth to clean the telephone. Ne ver use a dry cloth. • If the telephone is very dirt y , clean it with a diluted neutral cleaner con- taining surfactants, suc h as a dish detergent. Af terwar ds remo ve all traces of the cleaner wi th a damp cloth (u[…]
-
Страница 124
Step by Step Fixing Problems 124 Responding to Error Messages on the Scr e en P ossible cause: The station number is incorrect. P ossible response: Enter a correct station number . P ossible cause: Y ou tried to activate a disabl ed function. P ossible response: Ask y our service per sonnel to authorize y ou to use the function. P ossible cause: Th[…]
-
Страница 125
Fixing Problems 125 Step by Step P ossible cause 1: If «Delete other la yer» appear s on the menu: you tried t o program a function or internal station num- ber with LED on a k ey that is alr eady progra mmed on the second lay er (for e xample, external station number). P ossible response : Confirm «Delete other lay er» to progr[…]
-
Страница 126
126 Index Index A accessories ……………………………………….. 122 account code ………………………………………. 73 activating door opener ………………………… 36 adapter …………………………… …………………. 122 advisory message ……………………………….. 83 agents ………….[…]
-
Страница 127
127 Index D deleting advisory messages ………………… 83 desk microphone ………………………………. 122 details, fax …………………………………………… 86 dial input editing ………………………………….. 38 dialing en-bloc ……………………………………………… 38 from the LDAP database[…]
-
Страница 128
128 Index K key fields, labeling …………………………. 9, 120 key labeling automatic …………………………………………. 14 keypad dialing ……………………………………… 90 keys assigning ………………………………………….. 63 fixed …………………………………………………… 9 […]
-
Страница 129
129 Index R radio paging equipment PSE ……………….. 94 recall ……………………………………………………. 59 receiving volume ……………………………. 15, 32 recording ……………………………………………… 58 redialing a number ………………………………. 18 from the caller list …….[…]
-
Страница 130
130 Index U UCD …………………………………………………… 100 using a caller list ………………………………….. 39 using a temporary phone …………………….. 84 using functions from the outside ………… 88 V variable call forwarding ……………………….. 22 W waiting calls …………………….[…]
-
Страница 131
Overview of Function s/Codes (Alphabetical) 131 Ov erview of Functions/Codes (Alphabet ical) The table below lists all a vailable functions as they appear on the display . F unctions that hav e been configured (contact your service personnel) can be activ ated interactively (se- lect + sav e) via the Program/Service menu (select + sa ve or enter a […]
-
Страница 132
Overview of Function s/Codes (A lphabet ical) 132 Conf erence Star t conf erence Adding a party to the conf erence End conf erence Vie w conf par ties R em ov e pa rty Drop last conf . par ty (only f or U.S . ) ; ; ; ; ; ; ; ; * 3 #3 * 491 X Consult Ret urn to held call Quit and return T ransf er/ US:A ccept call UK:A ccept ; ; ; ; ; ; * 0 * 0 X Co[…]
-
Страница 133
Overview of Function s/Codes (Alphabetical) 133 F orw arding on 1=all calls 2=external calls only 3=internal calls only F orw arding of f CFNR on CFNR of f T runk FWD on T runk FWD out F orwar d Line: On F orward Line : Of f ; ; ; ; ; ; ; ; ; ; ; ; ; ; ; ; ; ; * 1 * 11 * 12 * 13 #1 *495 #495 * 64 #64 * 50 1 #50 1 X X X X X X X X X X X Headset Answe[…]
-
Страница 134
Overview of Function s/Codes (A lphabet ical) 134 Pag e Answ er page (not f or U. S.) ; * 59 P ark a call Retrie ve call ; ; * 56 #56 X Phone T est ; * 940 Pickup — directed Pickup — gr oup Accep t call ; ; ; ; * 59 * 57 X X Prog. f e atur e ke y ; * 91 X Rec or din g X Red ia l X Reject call Release X Reserv e trunk ; X Reset services ; #0 X Retr […]
-
Страница 135
Overview of Function s/Codes (Alphabetical) 135 Show call c harges (own telephone) Vie w call char ges (other party’ s telephone) ; * 65 X X Speaker ca ll ; * 80 X Suppress call ID Restor e caller ID ; ; ; ; * 86 #86 X X T el. data service * 42 T emporary MSN (not f or U .S.) ;; * 41 X T emporary Phone ; * 508 X T imed reminder on T imed reminder[…]
-
Страница 136
FCC and Industry Canada Compliance 136 FCC and Industry Canada Compliance This s ection describes the req uirements f or compliance with F ederal Communications Commission (FCC) Rules and Indu stry Canada CS-03 standard. FCC Certification and Requirements The f ollowing par agraphs describe req uirements and inf ormation based on FCC rules. Service[…]
-
Страница 137
FCC and Industry Canada Compliance 137 If at any time the o wnership of Siemens optiP oint telephone is transf erred to someone else (whether independently or as part of a syst em), please supply this manual to the new owner . 1. R E N The r inger equivalence number (REN) is used to determine the q uality of devices whic h may be conne cted to the […]
-
Страница 138
FCC and Industry Canada Compliance 138 Equ ipme n t At tac hme nt L im i tati o ns The f ollowing are notices requir ed by Industry Canada T erminal Attac hment Pr ogram Cer- tification P rocedure CP -0 1 , Part I, Section 1 4. Ringer Equiv alence Number (REN) The Rin ger Equiv alence Number (REN) assigned to each terminal de vice provides an indi-[…]
-
Страница 139
© Siemens AG 2006 Siemens Communications Hofmannstr . 51 • D-81359 München Ref. No.: A31003-H1 012-C131-12-7619 Subject to a vailability . Right of modification reserved. 14.08.2006 www .siemens.com/hipath The information pro vided in this document contains merely gene ral de- scriptions or characteristics of performance which in case of actual[…]