Предложите, как улучшить StudyLib
(Для жалоб на нарушения авторских прав, используйте
другую форму
)
Ваш е-мэйл
Заполните, если хотите получить ответ
Оцените наш проект
1
2
3
4
5
 Silver с холодильником")
 Silver с холодильником")
-
16L-B/HL
-
111147
- 0
-
14.00 кг
-
310 x 350 x 950 мм
Цена:
13 000 р.
14 800 р.
Нет в наличии0
- Описание
- Характеристики
- Видеообзор
- Отзывы (1)
- Хотите этот кулер в аренду?
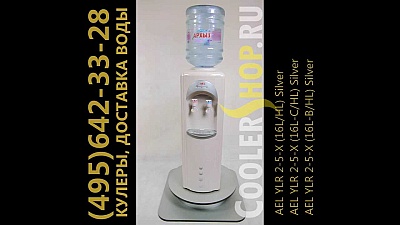
Вставки серебряного цвета. Улучшенное дизайнерское решение кулера 16L-B с холодильником и компрессорным охлаждением. Устойчивая конструкция и практичный пластиковый корпус увеличивают срок службы и практичность аппарата. Выгодное офисное решение для небольших коллективов.
| Тип исполнения | напольный с холодильником 16л |
| Мощность нагрева | 500 Вт |
| Мощность охлаждения | 130 Вт |
| Нагрев | 5 л/ч 90-95°C |
| Охлаждение | 2 л/ч 5-10°C |
| Тип охлаждения | компрессорный |
| Объём бака горячей воды | 1.1 л |
| Объём бака холодной воды | 3.6 л |
| Тип нагревательного элемента | внутренний, спиральный |
| Кран комнатной температуры | нет |
| Тип крана | нажим кружкой |
| Панель управления и индикации | нет |
| Защита от случайного нажатия | нет |
| Цвет | бежевый с серебристой вставкой |
| Гарантия | 12 мес. |
| Страна производства | Китай |
-
Кулер AEL YLR 2-5-X (16L-B/HL) Silver

Теги: AEL YLR 2-5-X (16L-B/HL) Silver
©2005 Sunbeam Products, Inc. All rights reserved.
is a registered trademark of Sunbeam Products, Inc. used under license.
Manufactured for Prestige Home Comfort, a subsidiary of the Elite Group Inc., Montreal, Canada, H3B 3X9.
©2005 Sunbeam Products, Inc. Tous droits réservés.
est une marque déposée de Sunbeam Products, Inc. utilisée en vertu d’une autorisation. Fabriqué pour Prestige Home Comfort, une filiale de Elite Group Inc., Montreal, Canada, H3B 3X9.
©2005 Sunbeam Products, Inc. Todos los derechos reservados.
es una marca registrada de Sunbeam Products, Inc. uso bajo licencia.
Fabricado por Prestige Home Comfort, una subsidiaria de Elite Group Inc., Montreal, Canada, H3B 3X9.
Toll Free Tel / Tél. sans frais / Tel sin cargo:
1 — 8 7 7 — 3 8 3 — 6 3 9 9
(8:30am-5:30pm E.S.T. / 8h30 à 17h30 H.N.E. / 8:30am-5:30pm E.S.T. E . ) s e rv i c e @ l i m a g e h o m e p roducts.com
WATER DISPENSER
DISTRIBUTEUR D’EAU
DISTRIBUIDOR DE AGUA
USER MANUAL
MANUEL D’UTILISATION
MODO DE EMPLEO
Cold, hot and room temperature water
Includes cooling compartment
Child resistant hot water guard
Eau froide, chaude et de température ambiante
Inclut un compartiment refroidisseur
Poignée du robinet d’eau chaude à l’épreuve des enfants
Agua fría, caliente y de temperatura ambiente
Incluye un compartimento frío
Manubrio con golpecitos para agua caliente a prueba de niños
WARNING
• Your water dispenser must be left upright for at least ten (10) hours, unplugged. During delivery and/or storage, the fluid inside the compressor will move. To avoid any damage to the unit, you must allow adequate time for the fluid to settle.
• Make sure to fill one 12 oz glass of water from each tap before plugging in the unit.
AVERTISSEMENT
• Le distributeur d’eau doit être laissé en position verticale pendant au moins dix (10) heures sans
être branché. Pendant la livraison et/ou l’entreposage, le fluide à l’intérieur du compresseur se déplacera. Pour éviter tout dommage à l’unité, vous devez accorder le temps suffisant pour que le fluide se replace.
• Assurez-vous de remplir un verre de 12 oz d’eau
à partir de chaque robinet avant de débrancher de l’appareil.
ADVERTIR
• El distribuidor de agua debe permanecer desenchufado y en posición vertical al menos diez (10) horas.
Durante la entrega y o el almacenaje, el líquido adentro del compressor se moverá. Hay que dejar un tiempo suficiente al líquido para que se asiente para evitar cualquier dãno a la unidad.
• Asegurarse de llenar un vaso de 12 oz de agua de cada llave de enchufar la unidad.
0.64 cu.ft / 18L cooling compartment
Compartiment refroidisseur d’une capacité de 0.64 pied cube/18L
Compartimiento frío con capacidad para 0.64 cu.ft/18L
Congratulations on purchasing your new
S u n b e a m
®
Water Dispenser!
Warnings & Precautions:
1 . Your water dispenser must be left upright for at least ten (10) hours, unplugged. During delivery and/or storage, the fluid inside the compressor will move. To avoid any damage to the unit, you must allow adequate time for the fluid to settle.
2 . B e fore placing water bottle on unit, be sure that the drain plug on the back is tightly fa s t e n e d .
3 . This unit should be placed with at least 4”/10cm between the back of the unit and the wa l l . Keep a minimum distance of 2”/5cm on each side of your water dispenser free.
4 . Mount a full water bottle onto your dispenser before plugging in your water dispenser.
5 .
Make sure to fill one 12 oz glass of water from each tap before plugging in the unit.
N OT E : Plug in the unit. Once this is done, put the switches at the back of the unit in the «ON» position.
6 . You should have hot water in approximately 15 minutes and cold water in less than 1 hour.
7 . For questions, comments or service info rmation, please call 1-877-383-6399 (8:30 a.m.-5:30 p. m . E . S. T. ) .
Félicitations pour l’achat de votre nouveau d i s t r i buteur d’eau Sunbeam
®
!
Avertissements et précautions:
1. Le distributeur d’eau doit être laissé en position verticale pendant au moins dix (10) heures sans être branché. Pendant la livraison et/ou l’entreposage, le fluide à l’intérieur du compresseur se déplacera. Pour éviter tout dommage à l’unité, vous devez accorder le temps suffisant pour que le fluide se replace.
2. Avant de placer la bouteille d’eau sur l’appareil, s’assurer que le bouchon de drainage situé à l’arrière est bien serré.
3. Laisser un espace d’au moins 10 cm entre l’appareil et le mur. Laisser un espace dégagé d’au moins 5 cm de chaque côté de l’appareil.
4. Installer une bouteille d’eau sur le distributeur d’eau avant de brancher.
5.
A s s u r e z — vous de remplir un verre de 12 oz d’eau à partir de chaque ro b i n e t , avant le branchement de l’appareil.
REMARQUE : Branchez l’unité. Une fois que ceci est fait, mettez les interrupteurs à l’arrière de l’unité en position «ON».
6. Il faut attendre environ 15 minutes pour obtenir de l’eau chaude et moins d’une heure pour de l’eau froide.
7. Pour toute question ou pour obtenir de l’information concernant le service, composer le
1-877-383-6399 (8h30-17h30 H.N.E.).
Felicidades por la compra de su nu evo d i s t r i buidor de agua Sunbeam
®
!
Advertencias y precauciones a tener en cuenta:
1 . El distri buidor de agua debe permanecer desenchufado y en posición ve rtical al menos diez (10) hora s. D u rante la entrega y o el almacenaje, el líquido adentro del compressor se move r á . H ay que dejar un tiempo suficiente al líquido para que se asiente p a ra evitar cualquier dãno a la unidad.
2 Antes de colocar la botella de agua sobre la unidad, asegúrese que el tapón de desagüe en la parte posterior esté bien apretado.
3 . Deje un espacio de 10 cm como mínimo entre el aparato y la pared. Deje un espacio libre de al menos 5 cm a cada lado del apara t o.
4 . Instale una botella de agua en el distri bu i d o r. E n c h u fe el distri buidor de agua.
5 .
A s e g u r a rse de llenar un vaso de 12 oz de agua de cada llave de enchufar la unidad.
N OTA : E n c h u fe la unidad. Una vez que se haga esto, ponga los interruptors situados detrás del aparato en posición «ON».
6. El agua caliente estará disponible en unos 15 minutos y la fría en menos de una hora.
7 . Pa ra cualquier cuestión, observación o info rmación respecto al servicio marque el 1-877-383-6399 (8:30 a.m.-5:30 p. m . E . S. T. E . ) .
TABLE OF CONTENTS
TABLE DES MATIÈRES
ÍNDICE
0 1 0 1
ENGLISH
Electrical Safety ………………………………….2
Unpacking your water dispenser …………….3
Getting to know your water dispenser……..3
Preparing your water dispenser for use ……4
How your cooling compartment works ……….4
Water dispenser maintenance ………………..5
Trouble-shooting guide …………………………6
Specifications ……………………………………..7
Electrical diagram ………………………………..7
Notes ………………………………………………..8
Warranty……………………………………….9, 10
FRANÇAIS
Électricité et sécurité…………………………..11
Déballage de votre distributeur d’eau ……12
C a ractéristiques de votre distributeur d’eau . . . . . . . .1 2
Préparation de votre distributeur d’eau
à des fins d’utilisation…………………………13
Fonctionnement de votre compartiment refroidisseur . . . . . . . . . . . . . . . . . . . . . . . . . . . .1 3
Entretien du distributeur d’eau …………….14
Directives en cas de problémes …………….15
Spécifications . . . . . . . . . . . . . . . . . . . . . . . . . . . . . . . . . . . . . . . . . . . . . . . . . .1 6
Schéma électrique………………………………16
Garantie ……………………………………..17, 18
Notes ………………………………………………19
~
ESPANOL
Electricidad y seguridad ……………………..20
Desembalar su distribuidor de agua ……..21
C a racterîsticas de su distribuidor de agua . . . . . . . . . .2 1
Prepare su distribuidor de agua antes de usarlo …………………………………………22
Funcionamiento del compartimento frío ……22
Mantenimiento del distribuidor de agua . . . . . . . . . . . .2 3
Qué hacer si tiene problemas ………………24
E s p e c i f i c a c i o n e s ………………………………25
Diagrama eléctrico …………………………….25
Notas ………………………………………………26
Garantía ……………………………………..27, 28
E N G L I S H
ELECTRICAL SAFETY
When using electrical appliances, basic safety precautions should be followed to reduce the risk of f i re, electric shock, and injury to persons or pro p e rt y. Read all instructions before using any appliance.
•
Do not let hot water touch bare skin. Keep combustible materials such as furniture, bedding, pillows, clothes, and/or papers away from the back of the unit.
•
Do not operate this, or any other appliance with a damaged cord. No other appliance should be plugged into the same outlet. Be sure that the plug is fully inserted into the receptacle.
•
Do not run cord over carpeting or other heat insulators. Do not cover the cord. Keep cord away from traffic areas, and do not submerge in water.
•
We do not recommend the use of an extension cord as it may overheat and cause a risk of fire. If you must use an extension cord, use No. 14 AWG minimum size and rated not less than 1875 watts.
•
Unplug the water dispenser before cleaning or making repairs.
•
Do not plug your water dispenser into the power outlet or turn the power switches on, when the water dispenser is empty.
•
Exercise caution and use reasonable supervision when the appliance is used by or near children.
•
Do not use your water dispenser outdoors. Place the water dispenser away from direct sunlight and make sure that there is at least 4 inches of space between the back of your unit and the wall.
Keep a minimum distance of 2 inches on each side of your unit free.
•
Do not use this product to dispense anything other than water.
•
Do not flick the power switches quickly on and off. The resulting power surges may damage your water dispenser.
•
Always turn your water dispenser off when there is no water left in the bottle or when you are changing bottles. Turn it back on after the new bottle has been placed and the air is purged from the dispensing buttons.
— 2 —
UNPACKING YOUR WATER DISPENSER
No. 0101
ongratulations, you have acquired a high quality SUNBEAM ® Water Dispenser for bottled water. This unit is packed with
C
many extra features, that you will find convenient to use. Multi-temperature capability allows you to enjoy a cool, hot or room temperature drink. It will provide you with many years of trouble free use, by following the simple instructions contained in this manual. Please take the time to read it carefully.
1) Remove the water dispenser from the cardboard box without turning it upside down, or laying it on its side.
a. Remove the strapping.
b. Lift box from base.
c . Remove the styrofoam packing inserts from the box .
d. Pull the water dispenser straight up from sytrofoam base.
e. Remove the plastic bag.
The refrigeration compressor has very sensitive mounts inside of its welded shell in order to provide quiet running. Improper handling may damage the compressor.
2) Wipe it clean if necessary.
3) Find a location for your water dispenser that is protected from direct sunlight and other sources of heat. Place the water dispenser on a level surface. Make sure that there are at least
4”/10cm of space between the back of your water dispenser and the wall. Keep a minimum distance of 2”/5cm on each side of your water dispenser free.
4) Do not plug your water dispenser into the power outlet yet! Read the instructions first.
4 in.
min
This water dispenser is for indoor use only.
Room temperature should not exceed 97°F / 36°C.
GETTING TO KNOW YOUR WATER DISPENSER
This water dispenser has two thermostats; one for the cooling compartment and one for the cold water (rear panel).
For the cold water, there is a 304 stainless steel water cooling tank.
All waterways are made from 304 stainless steel.
Refrigeration compressor is quiet and durable.
For the hot water there is a 304 stainless steel heavy duty hot water tank with an external heater. It is suitable for mineral water.
The power cord has a grounded plug. Please make sure that your outlet is properly grounded.
Easy to clean drain tray in the bottom of the cooling compartment.
Integrated No-Spill Receptacle System for added hygiene and convenience.
Three power switches on the rear of the water dispenser. One is for the hot water, the second is for the cooling compartment, and the third is for the cold water and cooling compartment.
The front panel has three indicator lights, to see if the power, heating and refrigeration are on.
There are three taps on the front. The tap handles are color-coded. Red is for hot, white for room temperature and blue for cooled water.
The hot water tap handle has a child resistant hot water guard. To operate it, squeeze the handle and locking device together and then push them down.
Easy to clean deep drip tray.
Convenient built-in fast cooling compartment.
— 3 —
P R E PARING YOUR WATER DISPENSER FOR USE
No. 0101
1) Make sure that the water dispenser is not plugged into the electrical outlet.
2) Before placing water bottle on unit, be sure that the drain plug on the back is tightly fastened.
3) Hold the water bottle vertically and upside down (over water dispenser) and place the water bottle into the nospill bottle receptacle. Apply slight pressure in order to pierce the bottle cap with the spigot. It is not advisable to make any adjustments to the thermostat settings before the water dispenser and bottled water are warmed up to normal room temperature. This unit accepts two, three or five gallon water bottles with pierceable sealed caps.
4 ) Open the taps to let the air out, until the water starts to flow. When this happens, release the taps.
5) Plug the water dispenser into a grounded power outlet and turn the power switches on.
6) If the water dispenser is brought in from outside in the winter time, give it a few hours to warm up to room temperature before plugging it in. The thermostat setting may be affected by the coldness of the water dispenser itself or the bottled water.
• The refrigeration thermostat is factory set between 7ºC and 8ºC (44.6ºF and 46.4ºF).
• The hot water thermostat is factory set between 88ºC and 89ºC (190.4ºF and 192.2ºF).
• The hot and cold indicator lights will be on while the system is working. Once the desired temperatures have been reached, the lights will go off.
• If you choose to set the cold water thermostat to the lowest setting, it may take over one hour to cool the water down to the coldest setting.
• Before the water dispenser leaves the factory, the thermostat is set properly. It is not advisable to adjust the thermostat when using the water dispenser for the first time.
PLACE
BOTTLE
VERTICALLY
STRAIGHT
DOWN
NOTE:
When your water dispenser is in operation there is a small amount of water in the passage between the water tanks and the taps. This water is not controlled by the cold, hot or room temperature settings. We recommend that in order to fully enjoy the desired temperature setting, you should eliminate this small amount, 200ml — 400ml (6.76 fl.oz — 13.52 fl.oz) using a small glass container.
HOW YOUR COOLING COMPA RTMENT WORKS
THE COOLING COMPARTMENT IS DESIGNED FOR EVEN COOLING.
Your water dispenser has two thermostats located at the back of the unit.
One thermostat controls the water and the other controls the cooling compartment. To start the compressor, a signal from either of the two thermostats is required.
Your water dispenser also has three power switches located at the back of the unit. One switch controls the hot water, one switch controls the cooling compartment, and the other switch controls the cold water and cooling compartment.
Both the cold water thermostat and the cooling compartment thermostat are factory set between 2 and 4. To adjust the temperature of the water and/or the cooling compartment, turn the corresponding thermostat clockwise to set the temperature colder, a n d counterclockwise to set the temperature warmer. When the temperature of the fridge or the water is set lower, the compressor will take a longer time to reach the set temperature than if it is set higher, but this will not affect the life of the compressor.
This cooling compartment is not a frost-free unit. Minor ice build-up in the compartment is normal and expected.
Warning: If the water and or refrigeration thermostat is set at 6 for an extended period of time, there is a possibility of freezing in the water tank or in the interior of the cooling compartment.
— 4 —
WATER DISPENSER MAINTENANCE
No. 0101
WATER TANK CLEANING INSTRUCTIONS
1) Do not flick the power switches quickly on and off. The resulting power surges may damage your water dispenser.
2) Always turn your water dispenser off when there is no water left in the bottle
or when you are changing bottles. Turn it back on after the new bottle has been placed and the air is purged from the dispensing buttons.
3) To clean the unit, first unplug the power cord. Wipe the outside of the water dispenser with a soft cloth dampened with liquid dishwashing soap. Use toothpaste to remove spots on the cabinet.
4) Twist the bottle receptacle of the No-Spill system counterclockwise and pull it up (Fig. A ) .
5) Take apart the No-Spill system by unscrewing the base (piercing pin) (Fig. B). Then proceed to wash it with dishwa s h i n g liquid, rinse it and reassemble.
6) Clean the inside of the water dispenser periodically with a small amount of vinegar. This removes mineral scaling caused by the water. Rinse it well. Use the drain on the back in order to get the water out. Make sure to open up all the taps to ensure that all cleaning liquid is drained from your water dispenser. Put all of the parts back, securely fasten the drain plug (Fig. C). It is important to let the water dispenser dry for TWO HOURS before plugging it back in. Cover the bottle receptacle to prevent it from contamination.
7) The harder the water you use, the more often you should clean the interior of the unit.
Recommended intervals are between one and three months depending on the mineral content of the water and the frequency of bottle changes.
B
C
A
Tw i s t
L i f t
Piercing Pin
COOLING COMPA RTMENT
CLEANING INSTRUCTIONS
1) To clean the unit, first unplug the power cord.
2) Allow the ice build-up to melt naturally.
NOTE: Do not use sharp objects or knives to remove ice buildup.
Do not use boiling water to remove ice.
3) The water will accumulate in the tray at the bottom of the compartment.
4) Remove the tray from the compartment and empty the water.
5) Wipe the compartment and the tray with a soft cloth dampened with liquid dishwashing soap.
D ra i n
— 5 —
TROUBLE-SHOOTING GUIDE
No. 0101
P ro b l e m
1 ) The power switch for the cold & cooling compartment are turned on, but the c o m p ressor is not starting up.
Check if:
1a) The power cord is plugged in properly.
1b) If the water dispenser is brought in from outside in the winter time, give it a few hours to warm up to room t e m p e rature before plugging it in. The thermostat setting may be affected by the coldness of the water dispenser itself or the bottled wa t e r. If the ambient (room) temperature is lower than the thermostat setting, or the wa t e r dispenser itself is cold, then the compressor will not start up. It is not advisable to make any adjustments to the thermostat setting before the water dispenser and bottled water is warmed up to normal room tempera t u r e.
2) Check if the water dispenser sits on a level surface without rocking. If the water dispenser is noisy after it’s first use, unplug the water dispenser for thirty (30) minutes, then start it up again.
2 ) The water dispenser o p e ration is noisy.
3) The radiator at the back of the water dispenser is very hot.
4 ) The contents of the cooling compartment a re not cold enough.
5 ) The compressor works n o n — s t o p.
3) If you are not satisfied with the water dispenser performance check if there is enough room around the water dispenser to provide ample ventilation. When the compressor is working, it is normal to have a hot ra d iator.
4a) Check the temperature setting of the cooling compartment.
4b) Check that the cooling compartment door is closed tightly.
6 ) The cold water tap is not working. The cold water tank is fro z e n .
7 ) The cold water tank is frozen and the cold water & cooling c o m p a r t m e n t switch is on.
8 ) The cold water is w a r m .
9) The taps are leaking.
5a) Check if the door is closed tightly.
5b) Turn both thermostats down counterclockwise. Once the compressor has stopped, readjust starting from cold water thermostat. Do not cause the compressor to start and stop frequently.
6 a ) The cold water temperature tap may freeze up under extreme conditions. When the cooling compartment is loaded and the compressor is running continuously while the bottled water is not consumed, there can be an overcooling of the cold water tank.
6 b ) To unfreeze the cold water tank turn the power switches for the cold water and cooling compartment off:
• If you need to unfreeze it in a hurry, then remove the water bottle and keep on draining hot water and pouring it back into the water receptacle. Once the tank is unfrozen turn on only the cold water & cooling compartment switch.
• If you have time, then just turn on the cooling compartment switch and turn off the cold water & cooling compartment switch.
6 c ) If you will be continuing to use the cooling compartment, keep the door closed and reduce the cooling load inside of the cooling compartment. You may turn the cold water & cooling compartment switch on, once the cold water tank is thawed.
7a) The cooling compartment temperature is controlled, therefore the cooling compartment can’t freeze.
If too many items are placed in the cooling compartment, the water may freeze. Turning the refrigeration thermostat counterclockwise to a warmer setting may reduce the probability of water freezing.
7b) There are too many items in the cooling compartment or the items are too warm. It is not advisable to place contents with a temperature exceeding 40°C (104°F) in the cooling compartment.
7c) The door of the cooling compartment is not closed.
8a) Verify that the cold water switch is ON.
8b) The cold water thermostat is set at high temperature position. Turn cold water thermostat clockwise a little to set it at a lower temperature position.
9a) The top portion of the tap has become loose. If so, tighten the top threaded portion.
9b) A calcium deposit has formed in the tap. If so, wash the inside of the water dispenser, unscrew and clean the top portion of the tap and reassemble.
10) Water is dripping out of the water dispenser and onto the floor.
10a) The bottle may have small pinholes.
10b) The drain plug is not fastened properly. Check that the soft rubber seal of the drain cap is not torn or damaged.
10c) The drain tray at the bottom of the cooling compartment is full of water. Take out the drain tray to remove water and then place it back into the cooling compartment.
— 6 —
SPECIFICATIONS
No. 0101
NO. 0101
Power supply :
Hot water heater power consumption :
Refrigeration compressor power consumption :
Refrigerant type :
Refrigerant quantity :
Cold water cooling capability :
Hot water heater capability :
Cooling compartment cooling temperature :
Volume of cooling compartment :
Net weight :
Dimensions :
Cook tap flow rate :
AC 115V / 60 Hz / 7A
4.5 Amperes
2.5 Amperes
R-134a
52 + / — 1 Gram / 1.83oz.
2L / 67.6 fl.oz. / hour (at room temp. below 30°C/86°F cools down to 10°C/50°F)
5L / 169.1fl.oz. / hour (at room temp. above 20°C/68°F heats up to 90°C/194°F)
0ºC — 10ºC / 32°F — 50°F
0.64 cu.ft. / 18 L
56.1 lbs / 25.5 kgs
15.25″ L X 12.76″ W X 38″ H (38.7cm L X 32.8cm W X 96.5cm H)
2L / 67.6 fl.oz. / minute
NOTE: UL model number on the back of the unit refers to Sunbeam ® Water Dispenser with Cooling Compartment.
ELECTRICAL DIAGRAM
1. Protection diode for the LED indicator light
2. Cooling on LED indicator light
3. Diode for the LED indicator light
4. Resistor for the LED indicator light
5. Cold water & refrigeration power switch
6. Refrigeration thermostat for the cold water
7. PTC starter for the compressor
8. Refrigeration Compressor
9. Fridge power switch
10. Refrigeration thermostat for the fridge
11. Thermal protector for the refrigeration compressor
12. Protection diode for the LED indicator light
13. Heater on LED indicator light
14. Diode for the L E D indicator light
15. Resistor for the L E D indicator light
16. Heating power switch
17. Thermostat for the hot water
18. Heater
19. Auto-reset thermostat for the hot water
20. Protection diode for the LED indicator light
21. Power on LED indicator light
22. Diode for the L E D indicator light
23. Resistor for the L E D indicator light
— 7 —
PRESTIGE HOME COMFORT/ELITE GROUP
LIMITED ONE-YEAR WA R R A N T Y P O L I C Y
EFFECTIVE: A P R I L 2 0 0 5
LIMITED WA R R A N T Y
Prestige Home Comfort/Elite Group, Inc. (hereinafter referred to as PHC/EG) hereby warrants, subject to the conditions herein stated in the paragraphs below, that should this product become defective by reason of improper workmanship or material defect during the specified warranty period, PHC/EG will repair or refund the same e ffecting all necessary parts replacements. Tr a n s p o rtation charges on parts submitted for re p a i r o r refund, under
this warranty, must be borne by the purc h a s e r.
THERE IS NO OTHER EXPRESS WA R R A N T Y. IMPLIED WARRANTIES, INCLUDING THOSE OF
M E R C H A N TA B I L I T Y AND FITNESS FOR A PA RTICULAR PURPOSE, ARE LIMITED TO THE TIME PERIOD
SPECIFIED, OR TO THE EXTENT PERMITTED BY L AW. A N Y AND A L L IMPLIED WARRANTIES A R E
EXCLUDED. LIABILITY FOR CONSEQUENTIAL DAMAGES UNDER A N Y AND A L L WARRANTIES A R E
EXCLUDED TO THE EXTENT EXCLUSION IS PERMITTED BY L AW.
P ro d u c t
Water Coolers/Dispensers
L a b o r
WA R R A N T Y P E R I O D
Consumer/Residential Use Only
1 Ye a r
90 Days
PHC/EG warrants that from the date of purchase, this product will be free from defects in material for a period of one (1) year and a period of ninety (90) days on labor. PHC/EG, at its option, will repair or refund this product found to be defective during the warranty period. If the product is no longer available, PHC/EG may refund your purchase (at a depreciated value), with an original proof of purchase. This is your exclusive warranty.
C O N D I T I O N S
O R I G I N A L SALES RECEIPT: This warranty is valid for the original retail purchaser from the date of initial retail purchase and is not transferable. Keep the original sales receipt. Proof of purchase is required to obtain warranty service and/or refund. PHC/EG dealers, service centers, or retail stores selling PHC/EG products do not have the right to alter, modify or in any way, change the terms and conditions of this warranty.
WA R R A N T Y R E G I S T R ATION IS NOT N E C E S S A RY TO OBTAIN WA R R A N T Y ON PHC/EG PRODUCTS.
S AVE YOUR PROOF O F PURCHASE RECEIPT. IF YOU DO NOT PROVIDE PROOF O F THE INITIAL
PURCHASE DATE AT THE TIME WA R R A N T Y S E RVICE IS REQUESTED, THE MANUFACTURING DAT E
O F THE PRODUCT W I L L BE USED TO DETERMINE THE WA R R A N T Y.
…. Continued on Next Page…
WARRANTY CONTROL CENTER
PLEASE PRINT LEGIBLY
SERIAL & MODEL NUMBER INFORMATION CAN BE FOUND ON (SILVER) UL
LABEL
PURCHASE DATE: DAY _______ MONTH _______ YEAR _______
SERIAL NUMBER: ___________________ MODEL NUMBER: ___________
CUSTOMER NAME: ____________________________________________________
ADDRESS: ___________________________________________________________
CITY: ______________________________ STATE/PROVINCE: _________________
POSTAL CODE / ZIP: ____________ PHONE NUMBER: ( _____ ) _____ — _______
COUNTRY: _________________________
PURCHASED FROM (STORE NAME):______________________________________
ADDRESS:____________________________________________________________
CITY: ___________________________ STATE/PROVINCE: ___________________
POSTAL CODE / ZIP: ____________ COUNTRY: ________________________ is a registered trademark of Sunbeam Products, Inc. used under license.
D E P R E C I AT I O N: Any unit being diagnosed as non-functional and warranting an exchange, during the existing warranty period, will be subject to an appropriate depreciation or user fee.
A B O U T YOUR PRODUCT WA R R A N T Y: We welcome warranty repair and apologize to you for being inconvenienced. Any Authorized service dealer may perform warranty repairs. Most warranty repairs are handled r o u t i n e l y, but sometimes requests for warranty service may not be appropriate. For example, warranty service would
N O T apply if the product damage occurred because of misuse, lack of routine maintenance, shipping, handling, warehousing or improper installation. Similarly, the warranty is void if the manufacturing date or the serial number on the product has been removed or the equipment has been altered or modified. During the warranty period, the
Authorized service dealer, at its option, will repair or refund any part that, upon examination, is found to be defective under normal use and service.
N O R M A L WEAR: This warranty does not cover normal wear of parts or damage resulting from any of the following: Negligent use or misuse of the product; Improper voltage or current; Use contrary to the operating instructions; Deviation from instructions regarding storage and transportation; Disassembly; Repair or alteration by anyone other than PHC/EG or a PHC/EG Authorized service center. Further, the warranty does not cover Acts of
God, such as fire, flood, hurricanes and tornadoes.
PHC/EG shall not be liable for any incidental or consequential damages caused by the breach of any express or implied warranty. Except to the extent prohibited by applicable law, any implied warranty of merchantability or fitness for a particular purpose is limited in duration to the duration of the above warranty. Some states, provinces or jurisdictions do not allow the exclusion or limitation of incidental or consequential damages or limitations on how long an implied warranty lasts, so the above limitations or exclusion may not apply to you. This warranty gives you specific legal rights, and you may also have other rights that vary from state to state or province to province.
H O W TO OBTAIN WA R R A N T Y S E RVICE: You must contact PHC/EG Customer Service/Technical Support at our toll-free number 1-877-383-6399. A Customer Service/Technical Support representative will attempt to resolve warranty issues over the phone. If telephone resolution is not possible, the Customer Service/Technical Support representative will require your assistance in performing routine diagnostic procedures. This warranty is effective for the time periods listed above and subject to the conditions provided for in this policy. For warranty service, find the nearest Authorized Service Dealer by calling 1-877-383-6399. Warranty service may only be performed by a Prestige
Home Comfort, Inc./Elite Group, Inc. Authorized Service Dealer.
STAMP
HERE
WARRANTY CONTROL CENTER
PRESTIGE HOME COMFORT
1175 Place du Frère André
Montréal, QC, Canada H3B 3X9
1-877-383-6399
(8:30am-5:30pm E.S.T.)
is a registered trademark of Sunbeam Products, Inc. used under license.
| Тип охлаждения: | Компрессорный |
| Цвет: | Бежевый |
| Мощность нагрева: | 500 Вт |
| Мощность охлаждения: | 112 Вт |
| Нагрев до 90 °C: | 5 литров/час |
| Охлаждение до 10 °C: | 2 литра/час |
| Габариты: | 310 x 310 x 960 мм |
| Масса: | 14 кг |
Особенности:
Этот кулер имеет интересный, но не навязчивый дизайн, благодаря чему он впишется практически в любой интерьер. Модель AEL YLR 2-5-X (16L/HL) – кулер для воды компрессорного типа охлаждения, зарекомендовавший себя как крайне надежный аппарат, который может работать в экстремальных условиях. Лето 2010 года показало уязвимость моделей с электронным охлаждением: максимально допустимая температура эксплуатации — 25°C, при большей температуре такие кулеры в лучшем случае перестают нормально охлаждать вода, а длительное использование в таких условиях ведет к поломке и дорогостоящему ремонту. Кулеру для воды AEL YLR 2-5-X (16L/HL) суровые условия климата не проблема, он также не боится интенсивного использования благодаря высокому качеству резервуаров для воды и нагревательных элементов. Это особо выгодно отличает его от конкурентов при использование в приемных или местах с большой проходимостью.
Отличный кулер для среднего офиса или небольшой компании (на 10-20 человек). Мощный компрессор и приятный глазу дизайн делает этот аппарат отличным вариантом по более чем привлекательной цене для компрессорного кулера.