- Manuals
- Brands
- Huawei Manuals
- IP Phone
- eSpace 7950
- User manual
-
Contents
-
Table of Contents
-
Bookmarks
Quick Links
eSpace 7950 IP Phone
V100R001C01SPC700
User Manual
Issue
06
Date
2013-08-04
HUAWEI TECHNOLOGIES CO., LTD.
Related Manuals for Huawei eSpace 7950
Summary of Contents for Huawei eSpace 7950
-
Page 1
7950 IP Phone V100R001C01SPC700 User Manual Issue Date 2013-08-04 HUAWEI TECHNOLOGIES CO., LTD. -
Page 2
Notice The purchased products, services and features are stipulated by the contract made between Huawei and the customer. All or part of the products, services and features described in this document may not be within the purchase scope or the usage scope. Unless otherwise specified in the contract, all statements, information, and recommendations in this document are provided «AS IS»… -
Page 3: About This Document
7950 IP Phone User Manual About This Document About This Document Overview This document covers the following information about eSpace 7950: overview, configuration, usage, and common troubleshooting methods. Intended Audience This document is intended for: End users. Symbol Conventions The symbols that may be found in this document are defined as follows.
-
Page 4
This issue is the first official release, and includes the following changes: Chapter 2 IP Phone Overview Updated phone specifications. Chapter 6 eSpace UC-Related Functions Added the description of one-key switch. Issue 06 (2013-08-04) Huawei Proprietary and Confidential Copyright © Huawei Technologies Co., Ltd. -
Page 5
7950 IP Phone User Manual About This Document Issue 01 (2012-09-29) This issue is the first office application (FOA) release. Issue 06 (2013-08-04) Huawei Proprietary and Confidential Copyright © Huawei Technologies Co., Ltd. -
Page 6: Table Of Contents
3.2.6 Restart …………………………….17 3.3 Status …………………………….17 3.3.1 Peripheral Status …………………………17 3.3.2 Network …………………………….. 17 3.3.3 About Phone…………………………..17 3.3.4 Certificate …………………………..18 3.4 Advanced …………………………….18 Issue 06 (2013-08-04) Huawei Proprietary and Confidential Copyright © Huawei Technologies Co., Ltd.
-
Page 7
5.3.5 Call Recording …………………………… 31 5.4 Making Calls …………………………..31 5.4.1 Making Calls by Directly Entering Numbers ………………….31 5.4.2 Making Calls by Predialing Numbers ……………………32 Issue 06 (2013-08-04) Huawei Proprietary and Confidential Copyright © Huawei Technologies Co., Ltd. -
Page 8
5.16 ACB (for eSpace UC2.0) ……………………….47 5.17 Distinctive Ring ………………………….. 48 5.18 BLF …………………………….. 48 5.19 DND…………………………….49 5.20 Local Conference …………………………49 5.20.1 Creating a Local Conference ……………………..49 Issue 06 (2013-08-04) Huawei Proprietary and Confidential Copyright © Huawei Technologies Co., Ltd. -
Page 9
7.5 How to Transfer Incoming Calls to the Voicemail or an Associated Number …………. 67 7.6 How to Retrieve Voice Messages ……………………..67 7.7 What Can I Do If a Registration Failure Is Displayed for a Registered Account…………68 Issue 06 (2013-08-04) Huawei Proprietary and Confidential viii Copyright © Huawei Technologies Co., Ltd. -
Page 10: Safety Precautions
Do not allow children to play with the device or accessories. Swallowing the accessories may be fatal. Use only accessories (such as the power adapter and the battery) provided or authorized only by the manufacturer. Issue 06 (2013-08-04) Huawei Proprietary and Confidential Copyright © Huawei Technologies Co., Ltd.
-
Page 11
Do not dispose of the device and the accessories in a garbage can. Dispose of the device according to the local regulations on disposing of packing materials, exhausted batteries and abandoned devices, and support the recycling activity. Issue 06 (2013-08-04) Huawei Proprietary and Confidential Copyright © Huawei Technologies Co., Ltd. -
Page 12: Ip Phone Overview
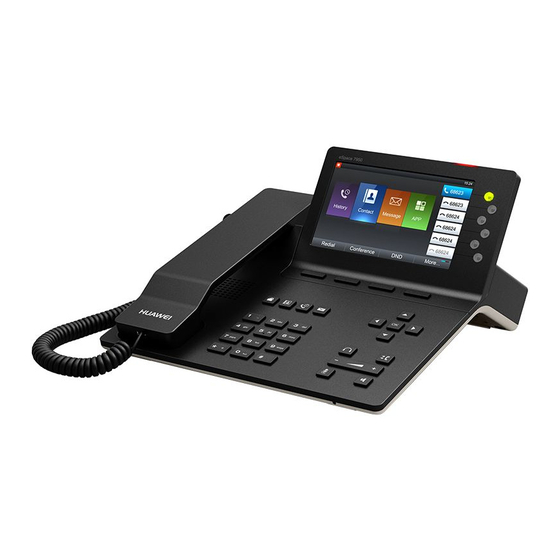
7950 IP Phone User Manual 2 IP Phone Overview IP Phone Overview 2.1 Appearance 2.1.1 Button Figure 2-1 shows the appearance of the eSpace 7950. Figure 2-1 Appearance Table 2-1 describes the buttons on the phone. Table 2-1 Buttons Button Description Contacts button Displays the Contacts screen.
-
Page 13: Led
Description MWI LED When a call comes in, the LED blinks red every second. When there is an unread message, the LED blinks red 3 Issue 06 (2013-08-04) Huawei Proprietary and Confidential Copyright © Huawei Technologies Co., Ltd.
-
Page 14
When the shared line is in talking state, the LED is steady red. When the call hold is enabled on the shared line actively, the LED blinks red every 3 seconds. Issue 06 (2013-08-04) Huawei Proprietary and Confidential Copyright © Huawei Technologies Co., Ltd. -
Page 15: Screen
A USB device is connected to the phone. The Bluetooth function is enabled. The do not disturb (DND) function is enabled. The call forward function is enabled. The auto answer function is enabled. Issue 06 (2013-08-04) Huawei Proprietary and Confidential Copyright © Huawei Technologies Co., Ltd.
-
Page 16: Line Button Icon
The line button is set as the XML App button. The line button is set as the Sleep button. The line button is set as the Phone Lock button. Issue 06 (2013-08-04) Huawei Proprietary and Confidential Copyright © Huawei Technologies Co., Ltd.
-
Page 17: Phone Settings On The Lcd Screen
Default: If you have not set any ringtones, the default ringtone is played when a call comes in. On-net: When a call from an internal user comes in, the on-net ringtone is played. Issue 06 (2013-08-04) Huawei Proprietary and Confidential Copyright © Huawei Technologies Co., Ltd.
-
Page 18: Key Tone
The Wallpaper screen is displayed. Step 2 Press Import. Step 3 Select a wallpaper to import and press Select. You can press Clear to deselect a wallpaper. Step 4 Press Import. Issue 06 (2013-08-04) Huawei Proprietary and Confidential Copyright © Huawei Technologies Co., Ltd.
-
Page 19: Call Features
Step 3 Select Speed Dial and press Select. Step 4 Set the parameters. Table 3-1 describes the parameters of programmable buttons on the expansion module. Step 5 Press Finish. Issue 06 (2013-08-04) Huawei Proprietary and Confidential Copyright © Huawei Technologies Co., Ltd.
-
Page 20
Displays the function name of the programmable button. Sleep Press the programmable button on the expansion module for the phone and expansion module to enter sleep mode. Issue 06 (2013-08-04) Huawei Proprietary and Confidential Copyright © Huawei Technologies Co., Ltd. -
Page 21: Answer Mode
Answer. You can perform the following operations to set the answer mode: Step 1 On the home screen, choose Apps > Preferences > Answer Mode. Issue 06 (2013-08-04) Huawei Proprietary and Confidential Copyright © Huawei Technologies Co., Ltd.
-
Page 22: System
If the sleep mode is enabled, the phone changes to the sleep state instantly. Auto Brightness After this function is enabled, the phone automatically decreases the screen brightness when the phone is in talking or idle state. Screensaver Issue 06 (2013-08-04) Huawei Proprietary and Confidential Copyright © Huawei Technologies Co., Ltd.
-
Page 23
You can perform the following operations to enable the auto brightness function: Step 1 On the home screen, choose Apps > System > Power Saving > Auto Brightness. The Auto Brightness screen is displayed. Step 2 Press Enable. Issue 06 (2013-08-04) Huawei Proprietary and Confidential Copyright © Huawei Technologies Co., Ltd. -
Page 24: Bluetooth
Step 2 Select Screensaver and press Disable. —-End 3.2.4 Bluetooth Enabling Bluetooth You can perform the following operations to enable Bluetooth: Step 1 On the home screen, choose Apps > System > Bluetooth. Issue 06 (2013-08-04) Huawei Proprietary and Confidential Copyright © Huawei Technologies Co., Ltd.
-
Page 25: Phone Lock
Step 1 On the home screen, choose Apps > System > Phone Lock. The Phone Lock screen is displayed. Step 2 Press Enable. The Lock After parameter is displayed. Step 3 Select a value and press Select. —-End Issue 06 (2013-08-04) Huawei Proprietary and Confidential Copyright © Huawei Technologies Co., Ltd.
-
Page 26: Restart
Step 2 Select Network and press View. —-End 3.3.3 About Phone You can perform the following operations to view basic information about the phone, including the software version, boot version, and hardware version: Issue 06 (2013-08-04) Huawei Proprietary and Confidential Copyright © Huawei Technologies Co., Ltd.
-
Page 27: Certificate
If the Log Out option is not available, contact your system administrator. The Log out? dialog box is displayed. Step 3 Press OK. The Log In screen is displayed. —-End Issue 06 (2013-08-04) Huawei Proprietary and Confidential Copyright © Huawei Technologies Co., Ltd.
-
Page 28: Web Page Settings
Step 1 On the web page, choose Preferences > Contacts. Step 2 Click Add. The Edit page is displayed. Step 3 Modify the contact information. Step 4 Click Finish. Issue 06 (2013-08-04) Huawei Proprietary and Confidential Copyright © Huawei Technologies Co., Ltd.
-
Page 29
Step 3 Modify the contact information. Step 4 Click Finish. —-End Deleting Contacts You can perform the following operations to delete contacts: Step 1 On the web page, choose Preferences > Contacts. Issue 06 (2013-08-04) Huawei Proprietary and Confidential Copyright © Huawei Technologies Co., Ltd. -
Page 30
Step 2 Click Groups. The Groups page is displayed. Step 3 Select a group to modify and click Edit. The Edit page is displayed. Step 4 Modify the group. Issue 06 (2013-08-04) Huawei Proprietary and Confidential Copyright © Huawei Technologies Co., Ltd. -
Page 31: Ringtone
You can perform the following operations to set the key tone: Step 1 On the web page, choose Preferences > Key Tone. Step 2 Select Enable or Disable. Step 3 Click Save. —-End Issue 06 (2013-08-04) Huawei Proprietary and Confidential Copyright © Huawei Technologies Co., Ltd.
-
Page 32: Wallpaper
Step 3 Select Voicemail or Number. Voicemail: Incoming calls are forwarded to the voicemail. Number: Incoming calls are forwarded to the associated number. Step 4 Click Save. —-End Issue 06 (2013-08-04) Huawei Proprietary and Confidential Copyright © Huawei Technologies Co., Ltd.
-
Page 33: Hotline
You can perform the following operations to disable the auto answer function: Step 1 On the web page, choose Call Features > Auto Answer. Step 2 Select Disable. Step 3 Click Save. —-End Issue 06 (2013-08-04) Huawei Proprietary and Confidential Copyright © Huawei Technologies Co., Ltd.
-
Page 34: Auto Dial
Step 4 Click Save. —-End 4.4.3 # as Dial You can perform the following operations to set the pond button (#) as the callout button: Issue 06 (2013-08-04) Huawei Proprietary and Confidential Copyright © Huawei Technologies Co., Ltd.
-
Page 35: Redial Button
Step 1 On the web page, choose System > Power Saving. Step 2 Select Enable for Auto Sleep. Step 3 Select a value for Sleep After. Step 4 Click Save. —-End Issue 06 (2013-08-04) Huawei Proprietary and Confidential Copyright © Huawei Technologies Co., Ltd.
-
Page 36
Step 3 Select a value for Delay. Step 4 Click Save. —-End Disabling the Screensaver Function You can perform the following operations to disable the screensaver function: Issue 06 (2013-08-04) Huawei Proprietary and Confidential Copyright © Huawei Technologies Co., Ltd. -
Page 37: Phone Lock
Step 1 On the web page, choose System > Restart. Step 2 Click Restart. The message «Are you sure you want to restart the phone?» is displayed. Step 3 Click OK. —-End Issue 06 (2013-08-04) Huawei Proprietary and Confidential Copyright © Huawei Technologies Co., Ltd.
-
Page 38: View Status
4.6.3 About Phone On the web page, choose View Status > About Phone to view basic information about the phone, including the software version, boot version, and hardware version. Issue 06 (2013-08-04) Huawei Proprietary and Confidential Copyright © Huawei Technologies Co., Ltd.
-
Page 39: Phone Usage
—-End During a login, ensure that the eSpace 7950 is properly connected to the network (that is, the icon is not displayed at the upper right corner of the login screen). If you still fail to log in, contact your system administrator。…
-
Page 40: Answering Calls Automatically
Step 2 Enter the number of a contact. If matching numbers are displayed, you can press the Up arrow or Down arrow button to select the desired number. Issue 06 (2013-08-04) Huawei Proprietary and Confidential Copyright © Huawei Technologies Co., Ltd.
-
Page 41: Making Calls By Predialing Numbers
On the home screen, you can press Redial to display the list of dialed numbers or redial the number that was dialed last time in speaker mode. Issue 06 (2013-08-04) Huawei Proprietary and Confidential Copyright © Huawei Technologies Co., Ltd.
-
Page 42: Making Calls Using Contacts
Search text box to search for a contact. (eSpace UC2.0 does not support contact search by the office phone number.) Step 4 Select a contact and press Details. Step 5 Press Call. —-End Issue 06 (2013-08-04) Huawei Proprietary and Confidential Copyright © Huawei Technologies Co., Ltd.
-
Page 43: Making Calls Using The Espace Desktop
A contact is selected on the dialing screen, and no dialing or hung up operation is performed within a specified period. Auto dial is not available in predial. Issue 06 (2013-08-04) Huawei Proprietary and Confidential Copyright © Huawei Technologies Co., Ltd.
-
Page 44: Contacts
To change the ringtone for a contact, select Ringtone and press Modify. Step 4 Press Finish. —-End Issue 06 (2013-08-04) Huawei Proprietary and Confidential Copyright © Huawei Technologies Co., Ltd.
-
Page 45: Searching For Contacts
Step 2 Search for a contact to delete. For details about how to search for a contact, see 5.5.2 Searching for Contacts. Step 3 Press More to navigate to Delete and press Delete. The message «Delete contact?» is displayed. Step 4 Press Delete. —-End Issue 06 (2013-08-04) Huawei Proprietary and Confidential Copyright © Huawei Technologies Co., Ltd.
-
Page 46: Importing Contacts
Add is displayed only when there is at least one contact in the group. A contact can be added to a group after added to my contacts. Step 5 Press Select to select a contact. Issue 06 (2013-08-04) Huawei Proprietary and Confidential Copyright © Huawei Technologies Co., Ltd.
-
Page 47: Modifying Groups
Step 3 Select a group, press More to navigate to Edit, and press Edit. The Edit screen is displayed. Step 4 Select Ringtone and press Add. The Add screen is displayed. Issue 06 (2013-08-04) Huawei Proprietary and Confidential Copyright © Huawei Technologies Co., Ltd.
-
Page 48: Deleting Group Members
Missed Call Query Step 1 Press the Call History button. The All screen is displayed. Step 2 Press the Right arrow button to switch to the Missed screen. Issue 06 (2013-08-04) Huawei Proprietary and Confidential Copyright © Huawei Technologies Co., Ltd.
-
Page 49: Querying Call Details
On the displayed All screen. Step 2 Press More to navigate to Clear and press Clear. The message «Clear all call records?» is displayed. Step 3 Press Clear. Issue 06 (2013-08-04) Huawei Proprietary and Confidential Copyright © Huawei Technologies Co., Ltd.
-
Page 50: Adding Contacts
If no number exists for the selected number type, press Select to save the number under this type. The Edit Contact screen is displayed. Step 7 Edit the contact information and press Finish. Issue 06 (2013-08-04) Huawei Proprietary and Confidential Copyright © Huawei Technologies Co., Ltd.
-
Page 51: Phone Lock
Press the Up arrow or Down arrow button to select a contact, press Contact to select a contact in my contacts, or press History to select a contact in call records, and press Done. —-End Issue 06 (2013-08-04) Huawei Proprietary and Confidential Copyright © Huawei Technologies Co., Ltd.
-
Page 52: Call Deflection
After the call forward function is enabled, incoming calls that meet the call forward conditions are forwarded to the voicemail or a specified phone number. A call can be forwarded in the following modes: Call forward all Issue 06 (2013-08-04) Huawei Proprietary and Confidential Copyright © Huawei Technologies Co., Ltd.
-
Page 53: Call Waiting
Before using the call waiting function, ensure that at least two lines have been configured for the account. Issue 06 (2013-08-04) Huawei Proprietary and Confidential Copyright © Huawei Technologies Co., Ltd.
-
Page 54: Call Pickup
The dialing screen is displayed and the dial tone is played. The line button LED is steady green. Step 3 Enter the number of the designated phone and press Pickup. —-End Issue 06 (2013-08-04) Huawei Proprietary and Confidential Copyright © Huawei Technologies Co., Ltd.
-
Page 55: Group Pickup
Enabling the Hotline Function Step 1 On the web page, choose Call Features > Hotline. Step 2 Select Enable. Issue 06 (2013-08-04) Huawei Proprietary and Confidential Copyright © Huawei Technologies Co., Ltd.
-
Page 56: Acb (For Espace Uc2.0)
Step 4 After you and the called party both answer the call, the call is connected. —-End After an ACB call is connected, the ACB record is deleted. A maximum of five ACB records can be saved. Viewing ACB Records Press Callback. Issue 06 (2013-08-04) Huawei Proprietary and Confidential Copyright © Huawei Technologies Co., Ltd.
-
Page 57: Distinctive Ring
Only Huawei eSpace UC1.1 solution supports the BLF function. The method of enabling BLF for a line button is the same as that for a programmable button on the expansion module. The following uses a programmable button on the expansion module as an example.
-
Page 58: Dnd
Step 2 User A presses Merge to create a local conference. —-End 5.20.2 Managing a Local Conference After creating a local conference, the initiator can manage the local conference. Adding Participants Step 1 Press Add. Issue 06 (2013-08-04) Huawei Proprietary and Confidential Copyright © Huawei Technologies Co., Ltd.
-
Page 59
Step 2 Press Yes. When the initiator presses End, the conference is ended. When a participant presses End, only the participant leaves the conference. —-End Issue 06 (2013-08-04) Huawei Proprietary and Confidential Copyright © Huawei Technologies Co., Ltd. -
Page 60: Advanced Secretary Service
When the LED of manager A’s line 1 is steady red, the secretary has answered the call. Step 2 Manager A presses the Line button for line 1. Issue 06 (2013-08-04) Huawei Proprietary and Confidential Copyright © Huawei Technologies Co., Ltd.
-
Page 61: Voicemail
The Voicemail screen is displayed. Step 2 Select a voice message and press Call. On the home screen, you can select Message and press OK to access the Voicemail screen. Issue 06 (2013-08-04) Huawei Proprietary and Confidential Copyright © Huawei Technologies Co., Ltd.
-
Page 62: Input Method
In speaker or handset mode, you can press the Headset button to switch to headset mode. After the switching, is displayed in the status bar of the phone screen. Issue 06 (2013-08-04) Huawei Proprietary and Confidential Copyright © Huawei Technologies Co., Ltd.
-
Page 63: Espace Uc-Related Functions
The Enterprise eSpace Desktop, a PC-based unified communications (UC) client, has been installed. The eSpace 7950 has been installed. A UC account for linkage has been configured. Before using the linkage function, ensure that the UC account you are using has been assigned the linkage rights on the server.
-
Page 64
The server setting page is displayed. Step 4 See Figure 6-2 to set parameters. Obtain the account, password, server IP address, and server port number from your system administrator. Issue 06 (2013-08-04) Huawei Proprietary and Confidential Copyright © Huawei Technologies Co., Ltd. -
Page 65: Using The Linkage Function
IP phone after you log in to the eSpace Desktop. For details, see the eSpace UC product documentation. Issue 06 (2013-08-04) Huawei Proprietary and Confidential Copyright © Huawei Technologies Co., Ltd.
-
Page 66: Linkage (For Espace Uc2.0)
6 eSpace UC-Related Functions 6.2 Linkage (for eSpace UC2.0) 6.2.1 Enabling the Linkage Function Prerequisites The Huawei eSpace Desktop has been installed. The eSpace 7950 has been installed. A UC account for linkage has been configured. Before using the linkage function, ensure that the UC account you are using has been assigned the linkage rights on the server.
-
Page 67
The server setting page is displayed. Step 4 See Figure 6-5 to set parameters and click Save. Obtain the account, password, server IP address, and server port number from your system administrator. Issue 06 (2013-08-04) Huawei Proprietary and Confidential Copyright © Huawei Technologies Co., Ltd. -
Page 68: Using The Linkage Function
Step 6 Click and select Phone as the primary, as shown in Figure 6-6. displayed for a line button on the eSpace 7950 indicates that the linkage between the eSpace 7950 and the eSpace Desktop is enabled. Figure 6-6 Enabling linkage —-End 6.2.2 Using the Linkage Function…
-
Page 69: Corporate Directory
IP phone. Before use the one-key switch service, ensure that your account has been assigned the one-key switch rights. For any questions, contact your system administrator. Issue 06 (2013-08-04) Huawei Proprietary and Confidential Copyright © Huawei Technologies Co., Ltd.
-
Page 70: Instant Conference (For Espace Uc2.0)
Step 3 Press Add. The Participant List screen is displayed. Adding participants: Press More to navigate to Add and press Add. For details, see Adding Participants. Issue 06 (2013-08-04) Huawei Proprietary and Confidential Copyright © Huawei Technologies Co., Ltd.
-
Page 71
—-End Placing a Conference on Hold Placing a conference on hold: Press Hold. Resuming a conference: Press Resume to resume a conference in hold state. Issue 06 (2013-08-04) Huawei Proprietary and Confidential Copyright © Huawei Technologies Co., Ltd. -
Page 72: Group Conference (For Espace Uc2.0)
20 contacts (including yourself) can join the conference. Select a participant, and press Other Tel to change the invitation number. —-End Adding Participants Step 1 Press Add. Issue 06 (2013-08-04) Huawei Proprietary and Confidential Copyright © Huawei Technologies Co., Ltd.
-
Page 73
Step 2 Press Yes. When the initiator presses End, the conference is ended. When a participant presses End, only the participant leaves the conference. —-End Issue 06 (2013-08-04) Huawei Proprietary and Confidential Copyright © Huawei Technologies Co., Ltd. -
Page 74: Presence (For Espace Uc2.0)
When the monitored account is in ringing or talking state, the LED is steady red. When the monitored account is away, the LED is steady yellow. When the monitored account is offline, the LED is off. Issue 06 (2013-08-04) Huawei Proprietary and Confidential Copyright © Huawei Technologies Co., Ltd.
-
Page 75: Faqs
How can I set the language displayed on the screen? Answer Step 1 On the home screen, choose Apps > System > Language. Step 2 Select a language. Step 3 Press Select. —-End Issue 06 (2013-08-04) Huawei Proprietary and Confidential Copyright © Huawei Technologies Co., Ltd.
-
Page 76: How To Change The Default Ringtone
How can I transfer incoming calls to the voicemail or an associated number? Answer For details, see 5.11 Call Forward. 7.6 How to Retrieve Voice Messages Question How can I retrieve voice messages? Issue 06 (2013-08-04) Huawei Proprietary and Confidential Copyright © Huawei Technologies Co., Ltd.
-
Page 77: What Can I Do If A Registration Failure Is Displayed For A Registered Account
If this account has been registered on an IP phone and is not a primary account (first account of an IP phone), you cannot use this account for registration on any other IP phone. Otherwise, a registration failure is displayed. Issue 06 (2013-08-04) Huawei Proprietary and Confidential Copyright © Huawei Technologies Co., Ltd.
Продолжая просмотр сайта и(или) нажимая X, я соглашаюсь с использованием файлов cookie владельцем сайта в соответствии с Политикой в отношении файлов cookie
в том числе на передачу данных, указанных в Политике, третьим лицам (статистическим службам сети Интернет), в соответствии с Пользовательским соглашением >X
Для предприятий
Huawei в странах и регионах
-
Продукты, решения и услуги для организаций
-
Облачные продукты, решения и сервисы
-
Продукты, решения и услуги для операторов
-
Смартфоны, ПК и планшеты, носимые устройства и многое другое
-
О компании Huawei, новости, события и многое другое
-
- English
- Português
- Español
-
- 简体中文
- 日本語
- Deutsch
-
- Français
- Italiano
- русский
-
- Türkçe
![]()
- History
- Most people search for
-
Grandstream Networks
GRP2603
Grandstream Networks, Inc.126 Brookline Ave, 3rd FloorBoston, MA 02215 USAVoice: (617) 566-9300 Fax: (617) 249-1987 www.grandstream.comFor Certication, Warranty and RMA information, please visit www.grandstream.comGRP2603 / GRP2603PQuick Installation Guide3-Line Essential IP Phone …
GRP2603 IP Phone, 7
-
Epygi
Swissvoice IP10S
Swissvoice IP10S Phone User Guide Swissvoice IP10S SIP Phone User Guide Revision Revised By Date Initial Tigran Avanesov 26 Oct 2004 Quadro variants: valid for SW-version: tested with SW version: Filename: MGCP config for SwissVoice IP10 User guide.doc Version: 1 Template: SupportTemplate.dot Last sav …
Swissvoice IP10S VoIP, 5
-
Nortel
M3905
Issue 1.00P0942075 StandardIntroducing your Meridian M3905 TelephoneApplications Programming your Meridian M3905 TelephoneApplications (continued) Corporate DirectoryFind a telephone numberApp’s SelectDone DialCopy a telephone number to your Personal DirectoryApp’s Select DoneDirctryMe …
M3905 IP Phone, 2
-
Grandstream Networks
GXP2130
GXP2130/GXP2140/GXP2160 Administration Guide Grandstream Networks, Inc. GXP2130/GXP2140/GXP2160 Enterprise IP Phone Administration Guide …
GXP2130 IP Phone, 89
Recommended Documentation:
Additional Guides Available
For Additional support for the eSpace 7950, visit http://support.huawei.com/enterprise. On the home page, choose
Product Support > Unified Communications and Collaboration > Unified Communications > Unified Communications
Endpoints > 7900 Series IP
administrator guide.
eSpace 7950
eSpace 7910
eSpace 7910
6-line business IP phone, with a 5-inch true-color screen;
thin and stylish
AAC-LD full-band voice codec; Bluetooth headset ready
Packing List
安装
Open the product package and check the items against the following checklist.
Contact your supplier if there are any discrepancies.
Phone body x 1
Handset x 1
NOTE
The power adapter and the headset must be purchased separately.
Connecting Cables
CAUTION
Use only the Huawei +5 V DC power adapter. A Huawei warranty does not cover any damage caused by the use of other
power adapters.
2
1
IP phone’s back view
(Optional) Expansion module
Logging In to Your Phone
Follow the steps below to log in to the home screen of your phone:
1.Power on your phone. The login screen is displayed.
2. Enter your account and password, and press the Log In softkey for login.
NOTE
During a login, ensure that the eSpace 7950 is properly connected to the network (that is, the
corner of the login screen). If you still fail to log in, contact your system administrator.
From the login screen, choose
Phone > eSpace 7950 to obtain the latest IP phone documentation including the user guide and
Handset cord x 1
Straight-through network cable x 1
3
4
Power adapter
More > Lang., the Language screen is displayed.
2 GE ports, support for power over Ethernet (PoE)
1 USB port; expansion module support
Quick Start Guide x 1
1
Expansion port, connected to the expa nsion
module
2
Power port, connected to the power adapter
3
PC port, connected to the Ethernet port of a PC
4
LAN port (Internet port) , connected to a local
area network (LAN) or public network
5
Headset port, connected to an external
headset
6
5
6
Handset port, connected to the handset cord
USB port (at the b ack o f t he s creen),
connected to a USB device
(Optional) PC
You can select a language on this screen.
Network
Headset (RJ-9)
icon is not displayed at the upper right
Handset
- Главная страница
- •
- Каталог товаров
- •
- VoIP и телефония
- •
- IP-телефоны
- •
- Huawei
- •
- IP-телефон Huawei eSpace 7950 (EP1Z02IPHO)
")

Описание товара:
IP-телефон Huawei eSpace 7950 (EP1Z02IPHO)
Описание товара
IP-телефон Huawei eSpace 7950 (EP1Z02IPHO)
Характеристики
| Прочие | ||
| Производитель | Huawei | |
| Артикул | EP1Z02IPHO | |
| Производитель | Huawei |
Похожие товары (8)
IP-телефон Huawei eSpace 7950 (EP1Z02IPHO)
Нашли дешевле
Сообщение отправлено
Ваше сообщение успешно отправлено. В ближайшее время с Вами свяжется наш специалист
Закрыть окно
