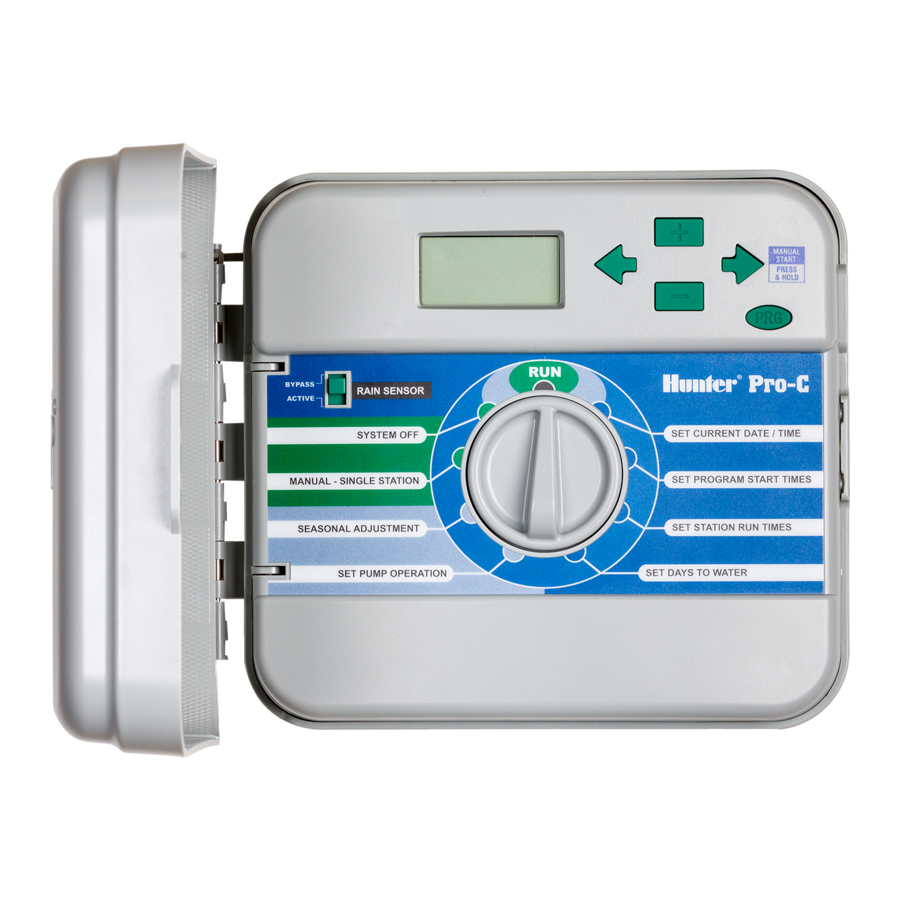
Контроллер для системы автоматического полива Hunter PCC-1201i-E
- Количество зон: 12 базовых
- Тип корпуса: фиксированный, для установки в помещении
- Материал корпуса: пластмассовый
Контроллер PCC представляет собой разновидность серии пультов Pro-C, отличающийся предустановленным количеством станций. Он является долговечным и экономичным программатором, имеет широкие возможности в настройках и чрезвычайно прост в эксплуатации. Этот пульт управления заслуженно называют «умным» за его продвинутые функциональные особенности. Он прекрасно справляется с автоматическим орошением как небольших частных приусадебных участков, так и парков, скверов и придорожных территорий. К пульту PCC можно подключить пульт ДУ ROAM, это даст возможность управлять программатором, находясь от него на расстоянии до 300 метров.
Контроллер серии PCC совместим с «Solar Sync». Эта инновационная система датчиков с помощью функции сезонной регулировки (определяется суммарное испарение солнечной радиации и испарения) автоматически регулирует график полива контроллера. В нее входят датчики Hunter Rain-Clik и Freeze-Clik, которые позволяют автоматически выключать систему полива на время дождя и заморозков. Достаточно просто запрограммировать контроллер как обычно, а Solar Sync займется всем остальным, исключая необходимость ручной регулировки графика полива. Кроме того, в контроллере PCC дополнительно предусмотрено управление тремя разными трансформаторами системы наружного освещения, оснащенными интерфейсом PXSync.
PCC
ТЕХНИЧЕСКИЕ ХАРАКТЕРИСТИКИ
• Количество независимых программ: 3
• Количество независимых программ освещения: 3
• Макс. продолжительность полива станции: 6 часов
• Функция «Цикл и впитывание» сокращает стекание воды
• Совместимость с системой датчиков Solar Sync
• Программируемая задержка на время дождя
• Энергонезависимая память. Память «Easy Retrieve».
• Автоматическая защита от коротких замыканий
• Поправка на сезонные колебания
• Возможность программирования датчика
• Ручной запуск с переходом от станции к станции
• Пропуск датчика дождя
• Гарантийный срок: 2 года
ЭЛЕКТРИЧЕСКИЕ ХАРАКТЕРИСТИКИ
►Входные показатели трансформатора: 120 В пер. тока или 230 В пер. тока
►Выходные показатели трансформатора (24 В переменного тока): 1А
►Выходные показатели станции (24 В перем. тока): 0,56 A
►Выходные показатели P/MV (24 В перем. тока): 0,28 A
►Эксплуатационная температура: от -18º C до 60º C
►Разъемы датчиков: 1


.png) |
|
|
|
.png) |
|
|
|
| PCC-601i-E | PCC-601-E | PCC-1201i-E | PCC-1201-E | PC-301i-E | PC-301-E | PC-401i-E | PC-401-E |
| Кол-во зон: 6 Тип: внутренний |
Кол-во зон: 6 Тип: наружный |
Кол-во зон: 12 Тип: внутренний |
Кол-во зон: 12 Тип: наружный |
Кол-во зон: 3-15 Тип: внутренний |
Кол-во зон: 3-15 Тип: наружный |
Кол-во зон: 4-16 Тип: внутренний |
Зон: 4-16 Тип: наружный |
-
Contents
-
Table of Contents
-
Troubleshooting
-
Bookmarks
Quick Links
PRO-C
Residential and Light Commercial
Irrigation Controller
PCC Series Controller
6- and 12- Station
Indoor/Outdoor Models
Owner’s Manual and
Installation Instructions
®
Related Manuals for Hunter PRO-C
Summary of Contents for Hunter PRO-C
-
Page 1
PRO-C ® Residential and Light Commercial Irrigation Controller PCC Series Controller 6- and 12- Station Indoor/Outdoor Models Owner’s Manual and Installation Instructions… -
Page 2: Table Of Contents
24 Options for Running Your Irrigation System 26 Using the Pro-C to Operate Outdoor Lighting Quick Check and Easy Retrieve are trademarks of Hunter Industries Inc. Pro-C, Solar Sync, Rain-Clik, Freeze-Clik and SmartPort are registered trademarks of Hunter Industries Inc.
-
Page 3: Specifications
Specifications Operating Specifications Cabinet Dimensions • Station Run Time: 1 minute to 6 hours on programs Height: 9″ (23 cm) A, B, and C Width: 10″ (21.5 cm) Depth: 4.5″ (10.9 cm) • Start Times: 4 per day, per program, for up to 12 daily starts Outdoor cabinet is NEMA 3R, IP44 rated.
-
Page 4: Pro-C Components
Pro-C Components ⑦ ① ⑬ ⑭ ⑮ ⑱ ⑯ ⑰ ⑧ ⑫ ③ ② ⑤ ⑨ ⑪ ⑥ ④ ⑩…
-
Page 5
Pro-C Components (continued) LCD Display Indicates various times, values, Sprinkler icon indicates when ① Main Display Running and programmed information watering is occurring ② Indicates watering will occur on Year Identifies current calendar year Rain Drop selected day ③ Month… -
Page 6
Pro-C Components (continued) ① ➉ ② ⑨ ③ ⑧ ④ ⑦ ⑤ ① ② ③ ④ ⑧ ⑦ ⑥ ⑤ ⑥… -
Page 7
Select individual days to water, and other systems to the controller ⑤ Set Days to Water odd, even or interval watering schedule Used to connect Hunter Solar Sync or ④ Sensor Terminals “Clik-type” sensors Turn pump or master valve ⑥… -
Page 8: Mounting The Controller To A Wall
NOTE The indoor Pro-C is not weather or water resistant, and must be installed indoors or in a protected area. This device is not intended for use by young children. Never let children play with this device.
-
Page 9: Connecting Ac Power
To be performed by a licensed electrician only. screws marked AC and the Green Wire to GND. Always use UL listed ½» (13 mm) conduit with male adapter ① when installing AC wiring. Pro-C/PCC controllers are intended ② ③ ①…
-
Page 10: Connecting Station Wires
Connecting Station Wires 1. Route valve wires between control valve location and controller. 2. At valves, attach a common wire to either solenoid wire of all valves. This is most commonly a white colored wire. Attach a separate control wire to the remaining wire of each valve.
-
Page 11: Connecting The Battery
Activating the 3V Lithium Battery After installing your Pro-C, make sure to remove the battery contact insulator to allow the Pro-C to keep time in the event of a power outage. Replacing the 3V Lithium Battery ①…
-
Page 12: Connecting A Master Valve
Connecting a Master Valve (optional) Connect either wire from Master Valve to the P/MV terminal. Connect remaining wire to the “COM” (Common) terminal. P/MV Master Valve…
-
Page 13: Connecting A Pump Start Relay
Connecting a Pump Start Relay (optional) 1. Route a wire pair from the pump relay into the controller housing. 2. Connect the pump common wire to the terminal slot “COM” (Common) and the remaining wire from the pump relay to the P/MV terminal slot. Relay holding current draw must not exceed 0.28 amps (24 VAC).
-
Page 14: Connecting A Hunter «Clik» Weather Sensor
(not included) A Hunter weather sensor or other micro-switch-type weather When the weather sensor sensors can be connected to the Pro-C. The purpose of this has deactivated automatic sensor is to stop automatic watering when weather conditions watering, “OFF” will appear dictate.
-
Page 15
Connecting a Hunter “Clik” Weather Sensor (continued) Testing the Weather Sensor The Pro-C provides simplified testing of a rain sensor when the sensor is wired into the sensor circuit. You can manually test proper operation of the rain sensor by using the One Touch Manual Start (see page 25). -
Page 16: Connecting A Hunter Remote
Hunter controls. blue wire to the screw slot marked REM. Hunter remotes make it possible for you to operate the system without having to walk back and forth to the controller. NOTE…
-
Page 17
(it is site specific). In either case, extending the wiring harness should be done using shielded cable to minimize the possible effects of electrical noise. For easiest installation, order the Hunter SmartPort shielded cable wiring harness (P/N ROAM-SCWH) with a full 25′ (7.6 meters) of shielded cable. -
Page 18: Connecting To The Hunter Solar Sync
In addition, the Solar Sync sensor includes watering schedule. a Hunter Rain-Clik and Freeze-Clik sensor that will shut down For installation and programming instructions of your Hunter your irrigation system when it rains and/or during freezing Solar Sync, please refer to the Solar Sync owner’s manual.
-
Page 19: Setting The Current Date And Time
Setting the Current Date and Time 1. Turn the dial to the DATE/TIME position. 2. The current year will be flashing in the display. Use the j and k buttons to change the year. Push the i button to proceed to setting the month. 3.
-
Page 20: Setting Program Start Times
Setting Program Start Times 1. Turn the dial to the START TIMES position. 2. Press the button to select A, B, or C. 3. Use the j and k buttons to change the start time (advances in 15-minute increments). One start time will activate all stations sequentially in that program.
-
Page 21: Setting Station Run Times
Setting Station Run Times 1. Turn the dial to the RUN TIMES position. 2. The display will show the last program selected (A, B, or C) the station number selected, and the run time for that station will be flashing. You can switch to another program by pressing the button.
-
Page 22: Setting A Watering Schedule
Setting a Watering Schedule 1. Turn the dial to the WATER DAYS position. Selecting Odd or Even Days to Water This feature uses numbered day(s) of the month for watering 2. The display will show the last program selected (A, B, instead of specific days of the week (odd days: 1st, 3rd, 5th, etc.;…
-
Page 23
Setting a Watering Schedule (continued) Selecting Interval Watering NOTE This feature is convenient if you want to have a more consistent watering schedule without having to worry about the day of the If any days are selected as non-water days at the bottom of week or the date. -
Page 24: Options For Running Your Irrigation System
Options for Running Your Irrigation System Seasonal Adjustment After programming is complete, turn the dial to the RUN Seasonal Adjust is used to make position to enable automatic execution of all selected global run time changes without re- programs and start times. programming the entire controller.
-
Page 25
Options for Running Your Irrigation System (continued) One Touch Manual Start and Advance You can also activate a program to water without using the dial. 1. With the dial in the RUN position, hold down the i button for 2 seconds. 2. -
Page 26: Using The Pro-C To Operate Outdoor Lighting
PXSync interface box. Connect wires from the first PXSync box to station output 1 (and the Common) on the Pro-C terminal. If using a second or third transformer, the second will be wired to station 2 and the third wil be wired to station 3.
-
Page 27
Using the Pro-C to Operate Outdoor Lighting (optional) Creating a Lighting Program 1. Turn the dial to the START TIMES position. 2. Press and hold the button for 6 seconds and observe the A, B, C programs moving. 3. L1 and a flashing “OFF” will appear, and the controller is ready to designate lighting programs. -
Page 28: Advanced Features
Advanced Features Set Pump/Master Valve Operation 4. Turn the dial back to the RUN position, at which time, OFF, a number and the DAYS icon The default is for all stations to have all remain on. the master valve/pump start circuit ON. The master valve/pump start can be set 5.
-
Page 29: Hidden Features
(A, B, C with four start times each) for different plant type one station turns off and the next station turns on. This is requirements. The Pro-C can be customized to display only the very helpful on systems with slow closing valves or on pump required programs.
-
Page 30: Programmable Sensor Override
Hidden Features (continued) Programmable Sensor Override The Pro-C allows the user to program the controller so that the A station that is running in the sensor override mode will display sensor disables watering on only desired stations. For example, the word “SENSOR” and flash the icon.
-
Page 31: Total Run Time Calculator
Easy Retrieve Program Memory ™ The Pro-C keeps a running total of each program’s station run The Pro-C is capable of saving the preferred watering program times. This feature provides a quick way to determine how long into memory for retrieval at a later time. This feature allows for a each program will water.
-
Page 32: Solar Sync Delay
Hidden Features (continued) Solar Sync Delay for Pro-C To change the existing Delay days setting: The delay feature is accessible only after the installation 1. Open the Solar Sync Delay menu by pressing the j button of the Solar Sync. The Solar Sync Delay feature allows the user…
-
Page 33: Cycle And Soak
Hidden Features (continued) Cycle and Soak Setting the Cycle Time: Initially Station 1 will be displayed. To access other stations, The Cycle and Soak feature allows you to split a station’s press the h or i button. run time into more usable, shorter watering durations. This feature is useful when applying water to slopes and tight soils Once the desired station is displayed, use the j or k button because it automatically applies water more slowly, helping to…
-
Page 34
Hidden Features (continued) Accessing the Soak Menu: Once the desired station is displayed, the user can use the j or k button to increase or decrease the Soak time. Once the desired Cycle times for each station have been The user can set the Soak time from 1 minute to 4 hours programmed, the Cycle time can be accessed by pressing the in 1 minute increments. -
Page 35: Hunter Quick Check
ERR symbol preceded by the station number will momentarily flash on the controller LCD display. After the Hunter Quick Check completes running this circuit diagnostic procedure, the controller returns to the automatic watering mode.
-
Page 36: Troubleshooting Guide
Troubleshooting Guide Problem Cause Solution The controller repeats itself or Too many start times (user error). Only one start time per active program continuously waters, even when it is required. Refer to “Setting Program should not be on (cycling repeatedly). Start Times”…
-
Page 37
Troubleshooting Guide (continued) Problem Cause Solution The display reads “SENSOR OFF.” The rain sensor is interrupting irrigation Slide the Rain Sensor switch on front or the sensor jumper is not installed. panel to the BYPASS position to bypass rain sensor circuit, or install the sensor jumper. -
Page 38
Certificate of Conformity to European Directives Hunter Industries declares that the irrigation controller Model Pro-C complies with the standards of the European Directives of “electromagnetic compatibility” (2014/30/EU) and “low voltage” (2014/35/EU). Senior Regulatory Compliance Engineer FCC Notice This controller generates radio frequency energy and may If necessary, the user should consult the dealer or an experienced cause interference to radio and television reception. -
Page 40: Hunter Industries Inc
HUNTER INDUSTRIES INCORPORATED | Built on Innovation ® 1940 Diamond Street, San Marcos, California 92078 USA www.hunterindustries.com LIT-618-OM-PCC-EN 3/18…
- Page 1
PRO-C ® Residential and Light Commercial Irrigation Controller PCC Series Controller 6- and 12- Station Indoor/Outdoor Models Owner’s Manual and Installation Instructions… -
Page 2: Table Of Contents
24 Options for Running Your Irrigation System 26 Using the Pro-C to Operate Outdoor Lighting Quick Check and Easy Retrieve are trademarks of Hunter Industries Inc. Pro-C, Solar Sync, Rain-Clik, Freeze-Clik and SmartPort are registered trademarks of Hunter Industries Inc.
-
Page 3: Specifications
Specifications Operating Specifications Cabinet Dimensions • Station Run Time: 1 minute to 6 hours on programs Height: 9″ (23 cm) A, B, and C Width: 10″ (21.5 cm) Depth: 4.5″ (10.9 cm) • Start Times: 4 per day, per program, for up to 12 daily starts Outdoor cabinet is NEMA 3R, IP44 rated.
-
Page 4: Pro-C Components
Pro-C Components ⑦ ① ⑬ ⑭ ⑮ ⑱ ⑯ ⑰ ⑧ ⑫ ③ ② ⑤ ⑨ ⑪ ⑥ ④ ⑩…
- Page 5
Pro-C Components (continued) LCD Display Indicates various times, values, Sprinkler icon indicates when ① Main Display Running and programmed information watering is occurring ② Indicates watering will occur on Year Identifies current calendar year Rain Drop selected day ③ Month… - Page 6
Pro-C Components (continued) ① ➉ ② ⑨ ③ ⑧ ④ ⑦ ⑤ ① ② ③ ④ ⑧ ⑦ ⑥ ⑤ ⑥… - Page 7
Select individual days to water, and other systems to the controller ⑤ Set Days to Water odd, even or interval watering schedule Used to connect Hunter Solar Sync or ④ Sensor Terminals “Clik-type” sensors Turn pump or master valve ⑥… -
Page 8: Mounting The Controller To A Wall
NOTE The indoor Pro-C is not weather or water resistant, and must be installed indoors or in a protected area. This device is not intended for use by young children. Never let children play with this device.
-
Page 9: Connecting Ac Power
To be performed by a licensed electrician only. screws marked AC and the Green Wire to GND. Always use UL listed ½» (13 mm) conduit with male adapter ① when installing AC wiring. Pro-C/PCC controllers are intended ② ③ ①…
-
Page 10: Connecting Station Wires
Connecting Station Wires 1. Route valve wires between control valve location and controller. 2. At valves, attach a common wire to either solenoid wire of all valves. This is most commonly a white colored wire. Attach a separate control wire to the remaining wire of each valve.
-
Page 11: Connecting The Battery
Activating the 3V Lithium Battery After installing your Pro-C, make sure to remove the battery contact insulator to allow the Pro-C to keep time in the event of a power outage. Replacing the 3V Lithium Battery ①…
-
Page 12: Connecting A Master Valve
Connecting a Master Valve (optional) Connect either wire from Master Valve to the P/MV terminal. Connect remaining wire to the “COM” (Common) terminal. P/MV Master Valve…
-
Page 13: Connecting A Pump Start Relay
Connecting a Pump Start Relay (optional) 1. Route a wire pair from the pump relay into the controller housing. 2. Connect the pump common wire to the terminal slot “COM” (Common) and the remaining wire from the pump relay to the P/MV terminal slot. Relay holding current draw must not exceed 0.28 amps (24 VAC).
-
Page 14: Connecting A Hunter «Clik» Weather Sensor
(not included) A Hunter weather sensor or other micro-switch-type weather When the weather sensor sensors can be connected to the Pro-C. The purpose of this has deactivated automatic sensor is to stop automatic watering when weather conditions watering, “OFF” will appear dictate.
- Page 15
Connecting a Hunter “Clik” Weather Sensor (continued) Testing the Weather Sensor The Pro-C provides simplified testing of a rain sensor when the sensor is wired into the sensor circuit. You can manually test proper operation of the rain sensor by using the One Touch Manual Start (see page 25). -
Page 16: Connecting A Hunter Remote
Hunter controls. blue wire to the screw slot marked REM. Hunter remotes make it possible for you to operate the system without having to walk back and forth to the controller. NOTE…
- Page 17
(it is site specific). In either case, extending the wiring harness should be done using shielded cable to minimize the possible effects of electrical noise. For easiest installation, order the Hunter SmartPort shielded cable wiring harness (P/N ROAM-SCWH) with a full 25′ (7.6 meters) of shielded cable. -
Page 18: Connecting To The Hunter Solar Sync
In addition, the Solar Sync sensor includes watering schedule. a Hunter Rain-Clik and Freeze-Clik sensor that will shut down For installation and programming instructions of your Hunter your irrigation system when it rains and/or during freezing Solar Sync, please refer to the Solar Sync owner’s manual.
-
Page 19: Setting The Current Date And Time
Setting the Current Date and Time 1. Turn the dial to the DATE/TIME position. 2. The current year will be flashing in the display. Use the j and k buttons to change the year. Push the i button to proceed to setting the month. 3.
-
Page 20: Setting Program Start Times
Setting Program Start Times 1. Turn the dial to the START TIMES position. 2. Press the button to select A, B, or C. 3. Use the j and k buttons to change the start time (advances in 15-minute increments). One start time will activate all stations sequentially in that program.
-
Page 21: Setting Station Run Times
Setting Station Run Times 1. Turn the dial to the RUN TIMES position. 2. The display will show the last program selected (A, B, or C) the station number selected, and the run time for that station will be flashing. You can switch to another program by pressing the button.
-
Page 22: Setting A Watering Schedule
Setting a Watering Schedule 1. Turn the dial to the WATER DAYS position. Selecting Odd or Even Days to Water This feature uses numbered day(s) of the month for watering 2. The display will show the last program selected (A, B, instead of specific days of the week (odd days: 1st, 3rd, 5th, etc.;…
- Page 23
Setting a Watering Schedule (continued) Selecting Interval Watering NOTE This feature is convenient if you want to have a more consistent watering schedule without having to worry about the day of the If any days are selected as non-water days at the bottom of week or the date. -
Page 24: Options For Running Your Irrigation System
Options for Running Your Irrigation System Seasonal Adjustment After programming is complete, turn the dial to the RUN Seasonal Adjust is used to make position to enable automatic execution of all selected global run time changes without re- programs and start times. programming the entire controller.
- Page 25
Options for Running Your Irrigation System (continued) One Touch Manual Start and Advance You can also activate a program to water without using the dial. 1. With the dial in the RUN position, hold down the i button for 2 seconds. 2. -
Page 26: Using The Pro-C To Operate Outdoor Lighting
PXSync interface box. Connect wires from the first PXSync box to station output 1 (and the Common) on the Pro-C terminal. If using a second or third transformer, the second will be wired to station 2 and the third wil be wired to station 3.
- Page 27
Using the Pro-C to Operate Outdoor Lighting (optional) Creating a Lighting Program 1. Turn the dial to the START TIMES position. 2. Press and hold the button for 6 seconds and observe the A, B, C programs moving. 3. L1 and a flashing “OFF” will appear, and the controller is ready to designate lighting programs. -
Page 28: Advanced Features
Advanced Features Set Pump/Master Valve Operation 4. Turn the dial back to the RUN position, at which time, OFF, a number and the DAYS icon The default is for all stations to have all remain on. the master valve/pump start circuit ON. The master valve/pump start can be set 5.
-
Page 29: Hidden Features
(A, B, C with four start times each) for different plant type one station turns off and the next station turns on. This is requirements. The Pro-C can be customized to display only the very helpful on systems with slow closing valves or on pump required programs.
-
Page 30: Programmable Sensor Override
Hidden Features (continued) Programmable Sensor Override The Pro-C allows the user to program the controller so that the A station that is running in the sensor override mode will display sensor disables watering on only desired stations. For example, the word “SENSOR” and flash the icon.
-
Page 31: Total Run Time Calculator
Easy Retrieve Program Memory ™ The Pro-C keeps a running total of each program’s station run The Pro-C is capable of saving the preferred watering program times. This feature provides a quick way to determine how long into memory for retrieval at a later time. This feature allows for a each program will water.
-
Page 32: Solar Sync Delay
Hidden Features (continued) Solar Sync Delay for Pro-C To change the existing Delay days setting: The delay feature is accessible only after the installation 1. Open the Solar Sync Delay menu by pressing the j button of the Solar Sync. The Solar Sync Delay feature allows the user…
-
Page 33: Cycle And Soak
Hidden Features (continued) Cycle and Soak Setting the Cycle Time: Initially Station 1 will be displayed. To access other stations, The Cycle and Soak feature allows you to split a station’s press the h or i button. run time into more usable, shorter watering durations. This feature is useful when applying water to slopes and tight soils Once the desired station is displayed, use the j or k button because it automatically applies water more slowly, helping to…
- Page 34
Hidden Features (continued) Accessing the Soak Menu: Once the desired station is displayed, the user can use the j or k button to increase or decrease the Soak time. Once the desired Cycle times for each station have been The user can set the Soak time from 1 minute to 4 hours programmed, the Cycle time can be accessed by pressing the in 1 minute increments. -
Page 35: Hunter Quick Check
ERR symbol preceded by the station number will momentarily flash on the controller LCD display. After the Hunter Quick Check completes running this circuit diagnostic procedure, the controller returns to the automatic watering mode.
-
Page 36: Troubleshooting Guide
Troubleshooting Guide Problem Cause Solution The controller repeats itself or Too many start times (user error). Only one start time per active program continuously waters, even when it is required. Refer to “Setting Program should not be on (cycling repeatedly). Start Times”…
- Page 37
Troubleshooting Guide (continued) Problem Cause Solution The display reads “SENSOR OFF.” The rain sensor is interrupting irrigation Slide the Rain Sensor switch on front or the sensor jumper is not installed. panel to the BYPASS position to bypass rain sensor circuit, or install the sensor jumper. - Page 38
Certificate of Conformity to European Directives Hunter Industries declares that the irrigation controller Model Pro-C complies with the standards of the European Directives of “electromagnetic compatibility” (2014/30/EU) and “low voltage” (2014/35/EU). Senior Regulatory Compliance Engineer FCC Notice This controller generates radio frequency energy and may If necessary, the user should consult the dealer or an experienced cause interference to radio and television reception. -
Page 40: Hunter Industries Inc
HUNTER INDUSTRIES INCORPORATED | Built on Innovation ® 1940 Diamond Street, San Marcos, California 92078 USA www.hunterindustries.com LIT-618-OM-PCC-EN 3/18…
Многозадачный контроллер Hunter PCC 1201-E для полива для участка до 0.40 Га.
Однозначно, что автополив не обходится без управляющего устройства. Вне зависимости от задач, которые вы ставите от системы, он должен все делать правильно. Ведь для вас важен автоматический полив, цена и характеристики оборудования которого имела высокий КПД.
Давайте разберемся, почему контроллер PCC 1201 E стоит выбрать при территории в 40.0 соток.
12 зон под контролем
Модель обеспечивает управление 12 электромагнитными клапанами. Каждый соленоидный клапан отвечает за зону спринклеров или же линию капельного увлажнения.
Если применить самые популярные в России спринклерные насадки МП Ротатор 3000, общее кол-во их может ровняться 130 штук. И каждый будет орошать площадь в 120 м² с радиусом в 9,1 метров. Согласитесь, отличный КПД для двенадцати клапанов.
Совместимость с датчиками погоды
Таймер для полива контроллер PCC 1201 E работает совместно с передовыми умными датчиками погоды.
например SolarSync. Вы не знаете зачем они нужны и в чем выгода их применения? Изменение заданной вами программы в зависимости от каждодневного изменения погоды. Больше солнца – полная выдача воды, пасмурная погода – сокращенное время дождевания. Если идут дожди вовсе отключится, до наступления жаркой температуры воздуха.
Мультизадачность
Таймер для полива PCC 1201-E от фирмы Хантер управляет всеми типами орошения без исключений. Все задачи автополива будут проконтролированы с высокой точностью, какие бы растения или газоны не находились на участке. Настраивается для деревьев, туй, теплиц, огорода или газона.
Используйте форму ниже на странице сайта, для заказа оборудования или бесплатной консультации от наших инженеров.
Инструкция к контроллеру
Воспользуйтесь видео инструкцией от похожего пульта для настройки работы системы.
Контроллер управления системой полива HUNTER PCC-1201-E представляет собой достаточно простой, но функциональный контроллер для установки за пределами помещения. Особенностью данного контроллера системы автоматического полива в том, что он может похвастать широким набором опций и подключаемых приборов, позволяющих настроить не только время полива, но и учесть такие погодные условия как дождь или туман. Для того чтобы устройство реагировало на подобные изменения в атмосфере, к контроллеру необходимо подсоединить специальные датчики.
Описание PCC-1201-E
— подключение до 12 станции
— тип контроллера — фиксированный
— корпусы пластмассовый для установки снаружи
— 3 независимые программы
— 4 начал старта полива на программу
— макс. продолжительность полива станции до 6 часов
— программируемая задержка на время дождя
— энергонезависимая память
— автоматическая защита от коротких замыканий;
— поправка на сезонные колебания: общая или автоматические;
— задержка между станциями