- Manuals
- Brands
- Electrolux Manuals
- Cookers
- Insight EKG6049
- User manual
-
Contents
-
Table of Contents
-
Bookmarks
Quick Links
USER MANUAL
Model EKG6049
Related Manuals for Electrolux Insight EKG6049
Summary of Contents for Electrolux Insight EKG6049
-
Page 1: User Manual
USER MANUAL Model EKG6049…
-
Page 2: Important Safety Information
IMPORTANT SAFETY INFORMATION These warnings are provided in the interests of your Take great care when heating fats and oils as they will ignite if they become too hot. safety. Ensure that you understand them all before installing or using the appliance. Your safety is of When you are lighting any burner check that it is lit paramount importance.
-
Page 3: Table Of Contents
CONTENTS Cleaning the Hob When Replacing Hotplate Burner Parts Cleaning the Shelves, Wirework Runners and FOR THE USER Grill/Oven Furniture Cleaning the Grill Important Safety Information Cleaning Inside the Grill and Oven Compartments 24 Description of the Appliance Hints and Tips Getting to Know Your Appliance Cleaning the Door(s) Before Using the Appliance…
-
Page 4: Description Of The Appliance
DESCRIPTION OF THE APPLIANCE SLIP-IN GAS DOUBLE OVEN Electronic Timer Control Panel Top Oven / Grill Main Oven…
-
Page 5: Getting To Know Your Appliance
GETTING TO KNOW YOUR APPLIANCE THE CONTROL PANEL FEATURES A — Hotplate Control B — Hotplate Control C — Main Oven Temperature Control D — Electronic Timer E — Top Oven/Grill Temperature Control F — Hotplate Control G — Hotplate Control H — Ignition Switch…
-
Page 6: Before Using The Appliance
BEFORE USING THE APPLIANCE RATING PLATE GRILL AND OVEN FURNITURE This is situated on the front frame of the appliance The following items of grill and oven furniture have and can be seen upon opening the door. Alternatively been supplied with the appliance. If you require the rating plate may also be found on the back or top replacements of any of the items listed below please of some models (where applicable).
-
Page 7: The Timer
THE TIMER A COOK TIME B END TIME C COUNTDOWN D TIME E DECREASE CONTROL F SELECTOR CONTROL G INCREASE CONTROL NOTE: The time of day must be set before the main oven will operate manually. 1. HOW TO SET THE TIME OF DAY The oven has a 24 hour clock.
-
Page 8
TO CANCEL THE COUNTDOWN If you change your mind and want to cancel the ‘Countdown’, press the Selector Control button until the ‘Countdown’ indicator neon flashes then depress the decrease control (-) until 0.00 shows in the display as Fig. 5. The ‘Countdown’ indicator neon will continue to flash for a few seconds and then return to the time of day. -
Page 9
B) TO SET THE TIMER TO SWITCH OFF ONLY i) Ensure the electricity supply is switched ON and that the correct time of day is displayed, e.g. 10.00am as Fig. 9. ii) Place food in the oven. iii) To set the length of cooking time, press the Selector Control button until the ‘Cook Time’ Fig.9. -
Page 10: The Gas Hob
THE HOB USING THE HOB The gas hob has different burner sizes to suit different types of cooking: To ensure maximum burner efficiency only use pots and pans with flat bases appropriate to the burner size used. Larger burner (Rapid or triple crown where applicable) — use a large pan for food such as chips.
-
Page 11: Things To Note
In the event of the burner flames being accidentally extinguished, turn burner control and do not attempt to re- ignite the burner for at least 1 min. THINGS TO NOTE If you are having any difficulty lighting a hob burner turn all the hob controls off and make sure the burner parts have been replaced correctly.
-
Page 12: The Grill
THE GRILL CAUTION – Accessible parts may be hot when the grill is in use. Young children should be kept away. When you first operate the grill you may hear some sounds as the burner heats up, this is quite normal and is not a fault on the appliance.
-
Page 13: Hints And Tips
Always remove the grill pan handle during grilling. Place the grill pan on the shelf so that the pan is positioned centrally beneath the grill. Ensure that the cut out on the underside of Place the grill pan on the shelf so that the pan is the handle bracket locates between the positioned centrally beneath the grill.
-
Page 14: The Top Oven
THE TOP OVEN The top oven is the smaller of the two ovens. It is designed for cooking smaller quantities of food. Place single dishes on the centre of the shelf. You should turn all food round during cooking The top oven is also ideal for use as warming compartment to warm dishes and keep food hot.
-
Page 15: Hints And Tips
HINTS AND TIPS • Arrange the shelves in the required positions before switching the oven ON. Shelf positions are counted from the top downwards. • Ensure that food is placed centrally on the shelf and there is sufficient room around the baking tray/dish to allow for maximum circulation.
-
Page 16: The Main Oven
THE MAIN OVEN HEAT ZONES There are zones of heat within the oven. The temperature in the middle is the gas mark you have chosen. The top of the oven is slightly hotter and the lower shelf slightly cooler. The base of the oven is quite a lot cooler.
-
Page 17: Hints And Tips
HINTS AND TIPS • Arrange the shelves in the required positions before switching the oven on. Shelf positions are counted from the top downwards. • Ensure that food is placed centrally on the shelf and there is sufficient room around the baking tray/dish to allow for maximum circulation.
-
Page 18: Cooking Chart
COOKING CHART The oven temperatures are intended as a guide only. It may be necessary to increase or decrease the temperatures to suit individual preferences and requirements. MAIN OVEN TOP OVEN POSITION POSITION APPROX. FOOD Mark Mark COOK TIME (min) Biscuits 10 — 20 Bread…
-
Page 19: Roasting Chart
ROASTING CHART INTERNAL TEMPERATURES – Rare : 50-60°C; Medium : 60-70°C; Well done : 70-80°C T GAS Mark MEAT COOKING TIME 20-35 minutes per ½kg (1lb) Beef/ Beef boned and 20-35 minutes over Mutton/Lamb 25-35 minutes per ½kg (1lb) and 25-35 minutes over Pork/Veal/Ham 30-40 minutes per ½kg (1lb) and 30-40 minutes over…
-
Page 20: Slowcook
SLOW COOK The slow cook setting gives a very low heat in the oven. It is particularly useful when you are cooking soups, stews and casseroles because the long slow cooking will make cheaper, tougher cuts of meat more tender. Some foods such as pastry and biscuits are not suitable for slow cooking because the temperature is too low.
-
Page 21: General Points
Vegetables • Cut into small pieces. • Dried beans must be pre-soaked then boiled in an open pan for 15 minutes before adding to any dish. • Place vegetables under meat in casseroles. • Cover food with a tight fitting lid or tin foil. MILK PUDDINGS •…
-
Page 22: Care And Cleaning
CARE AND CLEANING Before cleaning always allow the appliance to cool down before switching off at the electricity supply. CLEANING MATERIALS Before using any cleaning materials on your appliance, check that they are suitable and that their use is recommended by the manufacturer. Cleaners that contain bleach should NOT be used as they may dull the surface finishes.
-
Page 23: Cleaning The Hob
CLEANING THE HOB Clean the hotplate top using a mild abrasive. Take care not to damage the spark electrodes. If the spark electrodes are damaged the burners will not light. You can remove the pan supports, burner caps and burner crowns to clean them. Again take care not to damage the spark electrodes.
-
Page 24: Cleaning Inside The Grill And Oven Compartments
CLEANING INSIDE THE GRILL AND OVEN COMPARTMENTS The sides and back of the grill/top oven and main oven compartments are coated with a special Stayclean coating. They should not be cleaned manually. The vitreous enamel main oven base and grill compartment base can be cleaned using normal oven cleaners with care.
-
Page 25: Cleaning The Door(S)
CLEANING THE DOOR(S) To prevent damaging or weakening the door glass panels avoid the use of the following: • Household detergents and bleaches • Impregnated pads unsuitable for non- stick saucepans • Brillo/Ajax pads or steel wool pads • Chemical oven pads or aerosols •…
-
Page 26: Replacing An Oven Light Bulb
REPLACING AN OVEN LIGHT BULB The type of bulb required is a 300°C 25 watt small Edison Screw. Disconnect appliance from electricity supply before replacing the bulb. 1. Make sure the appliance is cool before replacing the bulb. 2. Open the door and remove the shelves and wirework runners.
-
Page 27: Something Not Working
SOMETHING NOT WORKING? We recommend that your appliance has an annual gas safety check carried out by our approved service organisation. Please carry out the following checks on your appliance before calling a Service Engineer. It may be that the problem is a simple one that you can solve yourself without the expense of a service call.
-
Page 28: Service And Spare Parts
SERVICE AND SPARE PARTS In the event of your appliance requiring service, or if you wish to purchase spare parts, please contact your local Service Force Centre by telephoning:- 0870 5 929929 Your telephone call will be automatically routed to the Service Force Centre covering your post code area. For the address of your local Service Force Centre and further information about Service Force, please visit the website at www.serviceforce.co.uk.
-
Page 29: Guarantee Conditions
GUARANTEE CONDITIONS Standard guarantee conditions We, Electrolux, undertake that if within 12 months of the date of the purchase this Electrolux appliance or any part thereof is proved to be defective by reason only of faulty workmanship or materials, we will, at our option repair or replace the same FREE OF CHARGE for labour, materials or carriage on condition that: •…
-
Page 30: Technical Details
TECHNICAL DETAILS DIMENSIONS Height: 900 mm (nominal) Width: 600 mm (nominal) Depth: 600 mm (to front of door panel) Weight: 66 Kg Net Space for fixing at hotplate level 2mm minimum clearance Space for fixing above hotplate level See important note ‘Location of Appliance’. Minimum space above hotplate 750mm (If cooker hood is fitted refer to the cooker hood installation instructions.
-
Page 31: Important Safety Requirements
INSTALLATION INSTRUCTIONS IMPORTANT – SAFETY REQUIREMENTS Where applicable Natural Gas and L.P Gas versions of this appliance are available. Check that this model is suitable for the type of supply available. This appliance must be installed and/or serviced by a competent person in accordance with the Gas Safety (Installation and Use) Regulations Current Editions and the I.E.E.
-
Page 32: Moving Your Appliance
MOVING YOUR APPLIANCE You may damage some soft or badly fitted floor coverings when you move the appliance. The floor covering under the appliance should be securely fixed so it does not ruck up when you move the appliance across it. Alternatively you could remove the floor covering.
-
Page 33: Connecting To The Electricity Supply
CONNECTING TO THE ELECTRICITY SUPPLY Warning: This appliance must be earthed. Do not earth this appliance to the gas supply piping. Connect to 230-240 A.C supply only. Connection to the electricity supply should be made via a properly earthed, readily accessible wall socket.
-
Page 34: Connecting To Gas Supply
CONNECTING TO GAS SUPPLY This appliance is designed to be installed with an appliance flexible connection only. Supply piping should not be less than R /8. Connection is made to the Rc ½ (½” B.S.P.) female threaded entry pipe located just below the hotplate level on the rear left hand side of the appliance.
-
Page 35
CHECKING THE GRILL Place the grill pan containing the grid, with the handle attached, into the grill compartment. Light the grill burner by turning the grill tap full on and pressing the ignition button on the fascia panel. As soon as the burner is lit the button can be released. CHECKING THE HOTPLATE Lift the lid. -
Page 36: General Note
CHECKING THE MAIN OVEN 1. Turn on the oven thermostat control knob to mark 9 and press the ignition button. As soon as the burner is alight the button can be released. 2. There should now be a low gas rate to the burner, which is the F.S.D by pass rate.
-
Page 37: Notes
NOTES…
-
Page 38
NOTES… -
Page 39
NOTES… -
Page 40
IMPORTANT NOTICE In line with our continuing policy of research and development, we reserve the right to alter models and specifications without prior notice. This instruction booklet is accurate at the date of printing, but will be superseded if specifications or appearance are changed.
9,500 руб.
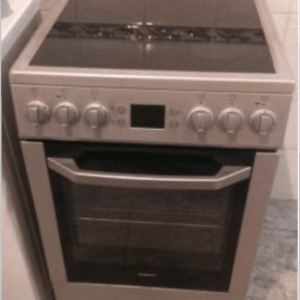
Электроплита Electrolux INSIGHT EKC513503W
Варочная панель: электрическая,стеклокерамика
Духовка: электрическая
Переключатели механические
Дисплей, таймер звуковой
Встроенные часы
Класс потребления энергии: A
Потребляемая мощность: 7860 Вт
Максимальная температура духовки: 290 °С
Габариты: 50x60x85 см
Число стекол дверцы: три
Гриль: электрический
Ящик для посуды
Бренд: Electrolux
- Описание
- Отзывы (0)
Стеклокерамика Electrolux INSIGHT EKC 513503W в хорошем и полностью исправном состоянии, без дефектов и повреждений, готова к дальнейшей, длительной эксплуатации.
Варочная панель имеет 4 конфорки, две из них более мощные и одна из них имеет две зоны расширения. Это дает возможность использовать посуду разного диаметра. Очень удобно и легко ее мыть. Все что пригорело, удаляется с помощью скребка и не остаётся ни каких следов, как в духовом шкафу, так и на варочной панели.
Будьте первым, кто оставил отзыв на “Электроплита Electrolux INSIGHT EKC513503W”
Похожие товары
-

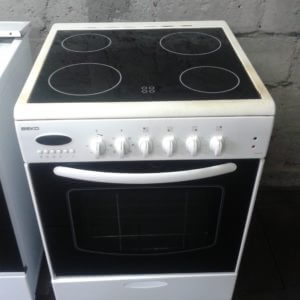
Стеклокерамика Bеко CSE57300GS
8,300 руб.
Бренд: Beko
В корзинуБыстрый просмотр
-
Стеклокерамическая плита Beko BR 312 HB
8,600 руб.
Бренд: Beko
В корзинуБыстрый просмотр
-
Электрическая плита Bosch HCE644120R
9,700 руб.
Бренд: Bosch
ПодробнееБыстрый просмотр
-
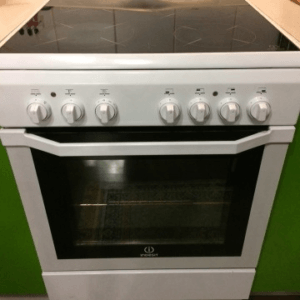
Электрическая плита Indesit KN6C10W
9,200 руб.
Бренд: Indesit
В корзинуБыстрый просмотр

Manuals Directory
Manualsdir.ru — Онлайн поиск инструкций и руководств
В] е1ес1го1их
Внимание! Текст в этом документе был распознан автоматически. Для просмотра оригинальной страницы Вы можете воспользоваться режимом «Оригинал».
Эта инструкция подходит к следующим моделям:
EKC513503 W
Перейти к контенту
![]()
Русские электронные инструкции по эксплуатации
Постоянно обновляемый большой каталог документации по эксплуатации и использованию современных устройств и оборудования на русском языке. Бесплатное скачивание файлов.
Поиск:
Главная
♥ В закладки
Просмотр инструкции в pdf


Инструкция по эксплуатации электрической плиты Indesit IS5V4PHX-RU.
Скачать инструкцию к электрической плите Indesit IS5V4PHX-RU (4,77 МБ)

Инструкции по эксплуатации электрических плит Indesit
« Инструкция к электрической плите МЕЧТА 12 06 03
» Инструкция к электрической плите Darina 1D EC 241 614 W
Вам также может быть интересно

Инструкция к холодильнику Indesit ITF 118 X

Инструкция к холодильнику Indesit ITS 5180 X

Инструкция к стиральной машине Indesit IWE 6105 B CIS

Инструкция к стиральной машине Indesit WISL 103 CIS

Инструкция к холодильнику Indesit DS 4200 S B

Инструкция к холодильнику Indesit DS 4160 S

Инструкция к холодильнику Indesit BI 160
%20RU.jpg)
Инструкция к газовой плите Indesit MVI6G1(W) RU
Добавить комментарий
Имя *
Email *
Сайт
Комментарий


![]()


Сохранить моё имя, email и адрес сайта в этом браузере для последующих моих комментариев.
- Добавить инструкцию
- Заказать инструкцию

ИнструкциЯѝпоѝэксплуатацииѝ
Плитаѝсоѝстекло—ѝ
керамиЧескойѝ
вароЧнойѝпанелью
EKC513503

3
Уважаемый покупатель,
Благодарим Вас за выбор одного из наших
высококачественных товаров.
С этим прибором Вы сможете оценить совершенную
комбинацию функционального дизайна и передовых
технологий.
Уверяем Вас, наши приборы разработаны для того, чтобы
обеспечивать только наилучшие результаты и контроль –
более того, мы задаем высочайшие стандарты качества.
Помимо этого, Вы обнаружите в своем
приборе некоторые
аспекты, которые способствуют защите окружающей среды
и экономии электроэнергии.
Пожалуйста, внимательно прочтите данное руководство по
эксплуатации для того, чтобы обеспечить оптимальное и
правильное функционирование Вашего прибора. Это даст
Вам возможность в совершенстве применять все функции
прибора и использовать его наиболее эффективно.
Мы рекомендуем Вам хранить эту инструкцию в
надежном
и удобном месте, для того, чтобы иметь возможность
пользоваться ею в любое время, когда Вам это необходимо.
Пожалуйста, передайте ее новому владельцу прибора в
случае его продажи.
Мы желаем Вам получить много удовольствия от работы с
Вашим прибором.

4
Содержаниеѝ
Дляѝустановщикаѝ
ѝ
ѝ
Установкаѝѝ
Расположениеѝприбораѝѝ
Выравниваниеѝѝ
Подключениеѝкѝэлектросетиѝѝ
ѝ
Правилаѝтехникиѝбезопасностиѝѝ
Техническиеѝхарактеристикиѝѝ
Гарантияѝиѝсервисѝѝ
Устройствоѝплитыѝѝ
Панельѝуправленияѝѝ
Духовкаѝѝ
Использованиеѝприбораѝѝ
Передѝпервымѝиспользованиемѝѝ
Управлениеѝдуховкойѝѝ
Ручкаѝуправленияѝфункциямиѝдуховкиѝ
Ручкаѝтермостатаѝѝ
Использованиеѝтрадиционнойѝдуховкиѝѝ
Приготовлениеѝсѝвентиляторомѝѝ
Грильѝѝ
Таймерѝсѝконтролемѝвремениѝѝ
Зоныѝприготовленияѝѝ
Рекомендацииѝпоѝиспользованиюѝпосудыѝѝ
Аксессуарыѝѝ
Выдвижнойѝящикѝѝ
Техническоеѝобслуживаниеѝиѝчисткаѝѝ
Заменаѝлампыѝосвещенияѝдуховкиѝѝ
Устранениеѝнеисправностейѝѝ
Какѝчитатьѝданнуюѝинструкциюѝ
Нижеприведенныеѝсимволыѝпомогутѝприѝчтенииѝинструкцииѝ
Инструкцииѝпоѝбезопасностиѝ
Пошаговыеѝоперацииѝ
Советыѝиѝрекомендацииѝ
Информацияѝпоѝохранеѝокружающейѝсредыѝ
ѝ
9
ѝ
9ѝ
10
ѝ
10
ѝ
ѝ
5
ѝ
8
ѝ
9
ѝ
12
ѝ
12
ѝ
12
ѝ
13
ѝ
13
ѝ
14
ѝ
14
ѝ
14
ѝ
15
ѝ
16
ѝ
17
ѝ
20
ѝ
22
ѝ
23
ѝ
24
ѝ
24
ѝ
25
ѝ
29
ѝ
30
ѝ
ѝ

5
Правилаѝтехникиѝбезопасности
Обязательноѝ сохранитеѝ этуѝ инструкциюѝ дляѝ последующегоѝ
использования.ѝ Приѝ передачеѝ плитыѝ третьимѝ лицамѝ обязательноѝ
предоставьтеѝ имѝ даннуюѝ инструкцию,ѝчтобыѝновыйѝвладелецѝмогѝ
ознакомитьсяѝсѝфункционированиемѝданногоѝизделияѝиѝмерамиѝ
предосторожности.ѝ
Данныеѝ требованияѝ предназначеныѝ дляѝ Вашейѝ безопасностиѝ иѝ
безопасностиѝ другихѝ лиц.Обязательноѝ внимательноѝ прочитайтеѝ
инструкцию,ѝ преждеѝ чемѝ приступитьѝ кѝ установкеѝ илиѝ
использованиюѝприбора.ѝ
Установкаѝ
• УстановкаѝданнойѝплитыѝДолжнаѝ
осуществлятьсяѝквалифицированнымѝ
персоналомѝвѝсоответствииѝсѝ
инструкциямиѝпроизводителя.ѝ
• Ремонтѝплитыѝдолженѝпроводитьсяѝ
толькоѝ авторизованнымѝ сервиснымѝ
персоналомѝ
• Плитаѝдовольноѝтяжелая.Будьтеѝ
осторожныѝприѝееѝпередвижении.ѝ
• Передѝ началомѝ использованияѝ
плитыснимитеѝсѝнееѝвсюѝупаковку.ѝ
• Электрическаяѝсетьѝдолжнаѝ
соответствоватьѝ типу,ѝ указанномуѝ
вѝ табличкеѝ сѝ техническимиѝ
данными.ѝ
• Передѝ проведениемѝ любыхѝ
работѝ поѝ чисткеѝ иѝ
техобслуживаниюѝ следуетѝ
ОТКЛЮЧИТЬѝ плитуѝ отѝ
электросети.ѝ
• ѝѝОпасноѝизменятьѝилиѝпытатьсяѝ
изменятьѝхарактеристикиѝплиты.ѝ
ѝ
Безопасностьѝдетейѝ
• Даннаяѝ плитаѝ былаѝ
разработанаѝ дляѝ использованияѝ
толькоѝ взрослыми.ѝНеѝпозволяйтеѝ
детямѝигратьѝсѝнейѝилиѝвѝ
непосредственнойѝ близостиѝ отѝ
нее.ѝ
•
Воѝвремяѝиспользованияѝплитаѝ
сильноѝ нагреваетсяѝ иѝ долгоѝ
сохраняетѝ теплоѝ дажеѝ поѝ
окончанииѝ использования. ѝНеѝ
позволяйтеѝдетямѝприближатьсяѝкѝ
прибору,ѝпокаѝонѝнеѝостыл.ѝ
• Детиѝ могутѝ такжеѝ серьезноѝ
пострадать,ѝеслиѝониѝопрокинутѝнаѝ
себяѝпосудуѝсѝплиты.ѝ
ѝ
Воѝвремяѝиспользованияѝ
• Вашаѝплитаѝпредназначенаѝ
толькоѝ дляѝ бытовогоѝ
приготовленияѝ пищи.ѝѝНикогдаѝнеѝ
используйтеѝ ееѝ вѝ другихѝ целях,ѝ
коммерческихѝилиѝпромышленных.ѝ
• Плитойѝ нельзяѝ ѝ пользоватьсяѝ
приѝналичииѝнаѝнейѝводы.ѝНикогдаѝ
неѝ управляйтеѝ плитойѝ мокрымиѝ
руками.ѝ
• Еслиѝ выѝ используетеѝ вблизиѝ
плитыѝ электрическиеѝ приборыѝ
(например,ѝэлектрическийѝ
миксер),ѝнеѝдопускайтеѝконтактаѝ
кабелейѝ питанияѝ сѝ горячимиѝ
деталямиѝплиты.ѝ
• Никогдаѝ неѝ оставляйтеѝ плитуѝ
безѝприсмотраѝприѝжаркеѝвѝмаслеѝ
илиѝ жире,горячийѝ жирѝ легкоѝ
можетѝвоспламениться.ѝ
ѝ
6
• Неѝ следуетѝ использоватьѝ
неустойчивуюѝилиѝдеформированнуюѝ
посудуѝ воѝ избежаниеѝ несчастныхѝ
случаев,ѝ вызванныхѝ ееѝ
опрокидываниемѝ илиѝ переливомѝ
жидкостейѝприѝкипении.ѝ
• Воѝвремяѝиспользованияѝ
приборѝ сильноѝ нагревается.ѝ
ѝ
Всегдаѝ используйтеѝ кухонныеѝ
рукавицы,ѝ когдаѝ достаетеѝ посудуѝ
изѝдуховкиѝилиѝдействуетеѝвблизиѝ
горячихѝчастейѝплиты.ѝ
• Воѝвремяѝиспользованияѝ
решеткаѝ гриляѝ сильноѝ
нагревается.ѝВсегдаѝиспользуйтеѝ
кухонныеѝ рукавицы,ѝкогдаѝ
достаетеѝ илиѝ устанавливаетеѝ
решетку.ѝ
• Поѝ окончанииѝ использованияѝ
плитыѝ убедитесьѝ вѝ том,ѝчтоѝвсеѝ
ручкиѝ управленияѝ установленыѝ вѝ
положениеѝ«OFF»ѝ(Выкл.)ѝ
• Всегдаѝ содержитеѝ плитуѝ вѝ
чистоте.Отложенияѝ жираѝ иѝ
пищевыеѝостаткиѝмогутѝпривестиѝкѝ
возгоранию.ѝ
• Плитуѝ следуетѝ мытьѝ вѝ
соответствииѝсѝинструкциями. ѝ
• Неѝиспользуйтеѝварочнуюѝ
поверхностьѝ вѝ качествеѝ рабочегоѝ
столаѝ илиѝ дляѝ храненияѝ кухоннойѝ
утвари.ѝ
• Неѝвключайтеѝпустыеѝварочныеѝ
зоныѝилиѝзоныѝбезѝпосуды.ѝ
• Стеклокерамикаѝустойчиваѝкѝ
температурномуѝ шокуѝ иѝ оченьѝ
крепкая,ѝноѝеёѝможноѝразбить.ѝ
Твердыеѝиѝострыеѝпредметыѝ
приѝ паденииѝ наѝ варочнуюѝ
поверхностьѝ могутѝ еёѝ
повредить.ѝ
ѝ
•
Неѝ используйтеѝ чугуннуюѝ
посудуѝ илиѝ посудуѝ сѝ
повреждённым,ѝшершавымѝдном.ѝ
Приѝ перемещенииѝ такойѝ посудыѝ
могутѝвозникнутьѝцарапины.ѝ
• Неѝ допускайтеѝ контактаѝ
жидкостей,ѝ содержащихѝ кислоты,ѝ
например,ѝуксуса,ѝлимонногоѝсокаѝ
илиѝ средстваѝ очисткиѝотѝнакипиѝ сѝ
рамкойѝ варочнойѝ поверхности,ѝ
иначеѝ наѝ нейѝ возникнутѝ матовыеѝ
пятна.ѝ
• Еслиѝ наѝ горячуюѝ варочнуюѝ
поверхностьѝ попадаетѝ сахарѝ (илиѝ
продукт,ѝсодержащийѝсахар)ѝиѝ
расплавляетсяѝ наѝ ней,ѝсразуѝ
удалитеѝ загрязнениеѝ сѝ помощьюѝ
скребка,ѝпокаѝоноѝещёѝнеѝостыло.ѝ
• Неѝкладитеѝнаѝварочнуюѝ
поверхностьѝ предметыѝ иѝ
материалы,ѝкоторыеѝмогутѝ
расплавиться,ѝнапример,ѝпластик,ѝ
алюминиевуюѝ фольгу.ѝЕслиѝтакойѝ
материалѝвсе—такиѝрасплавилсяѝнаѝ
варочнойѝ поверхности,ѝсразуѝ
очиститеѝповерхностьѝскребком.ѝ
• Используйтеѝ толькоѝ посудуѝ сѝ
ровнымѝ дномѝ безѝ острыхѝ гранейѝ
чтобыѝ избежатьѝ образованияѝ
царапин.ѝ
• Никогдаѝнеѝиспользуйтеѝнаѝ
плитеѝ илиѝ вѝ духовомѝ шкафуѝ
пластмассовуюѝ посуду.ѝНикогдаѝ
неѝ накрывайтеѝ частиѝ духовогоѝ
шкафаѝалюминиевойѝфольгойѝ
• Следитеѝ заѝ тем,ѝчтобыѝ
вентиляционныеѝ отверстияѝ вѝ
серединеѝзаднейѝчастиѝварочнойѝ
поверхностиѝ неѝ былиѝ ничемѝ
закрыты
—ѝ этоѝ необходимоѝ дляѝ
вентиляцииѝ камерыѝ духовогоѝ
шкафа.ѝ
7
Сервисѝ
ѝ
• Ремонтныеѝ работыѝ должныѝ
проводитьсяѝтолькоѝспециалистамиѝ
авторизованногоѝ сервисногоѝ центра.ѝ
Вѝ случаеѝ проведенияѝ ремонтаѝ
прибораѝ должныѝ использоватьсяѝ
толькоѝ оригинальныеѝ запасныеѝ
части.ѝ
ѝ
Мыѝ неѝ несемѝ ответственностиѝ
заѝвозможныеѝповрежденияѝвѝ
результатеѝ неправильногоѝ
использованияѝилиѝнесоблюденияѝ
действующихѝ правилѝ
безопасности.ѝСтрогоѝсоблюдайтеѝ
инструкцииѝпоѝтехобслуживаниюѝ
иѝочистке.ѝ
ѝ
Защитаѝокружающейѝсредыѝ
ѝ
• Всеѝ материалы,ѝ помеченныеѝ
символомѝ
,ѝ являютсяѝ годнымиѝ
дляѝ вторичнойѝ переработки.ѝ
Сдавайтеѝ ихѝ вѝ специальноѝ
предназначенныеѝ местаѝ
(проконсуль—ѝтируйтесьѝвѝ
соответствующихѝ службахѝ вѝ
вашемѝ районе)ѝдляѝихѝсбораѝиѝ
переработки.ѝ
• Послеѝ установкиѝ прибораѝ
утилизируйтеѝ упаковочныйѝ
материалѝвѝсоответствииѝсѝ
правиламиѝ безопасностиѝ иѝ
защитыѝокружающейѝсреды.ѝ
• Приѝ утилизацииѝ старогоѝ
прибораѝ приведитеѝ егоѝ вѝ полнуюѝ
негодность,ѝотрезавѝегоѝкабель.
ѝ
Символѝ наѝизделииѝилиѝнаѝегоѝ
упаковкеѝ указывает,ѝчтоѝоноѝнеѝ
подлежитѝ утилизацииѝ вѝ качествеѝ
бытовыхѝ отходов.ѝ Вместоѝ этогоѝ
егоѝ следуетѝ сдатьѝ вѝ
соответствующийѝ пунктѝ приемкиѝ
электронногоѝ иѝ
электрооборудованияѝ дляѝ
последующейѝ утилизации.ѝ
Соблюдаяѝправилаѝутилизацииѝ
изделия,ѝ Выѝ поможетеѝ
предотвратитьѝ причинениеѝ
окружающейѝсредеѝиѝздоровьюѝ
людейѝ потенциальногоѝ ущерба,ѝ
которыйѝ возможен,ѝвѝпротивномѝ
случае,ѝвследствиеѝнеподобающегоѝ
обращенияѝ сѝ подобнымиѝ
отходами.ѝ Заѝ болееѝ подробнойѝ
информациейѝ обѝ утилизацииѝ
этогоѝ изделияѝ просьбаѝ
обращатьсяѝкѝместнымѝвластям,ѝвѝ
службуѝпоѝвывозуѝиѝутилизацииѝ
отходовѝ илиѝ вѝ магазин,вѝ которомѝ
Выѝприобрелиѝизделие.ѝ