Всем привет!
Давно наслышана была про безболезненное удаление волос, но всё не решалась, да и в салон ходить не хотелось, поэтому решила приобрести данный аппарат на пробу. Так сказать, а вдруг понравится.
Заказала данный аппарат я на Wildberries.
На момент покупки его цена была такой.

Пришёл он в коробке.
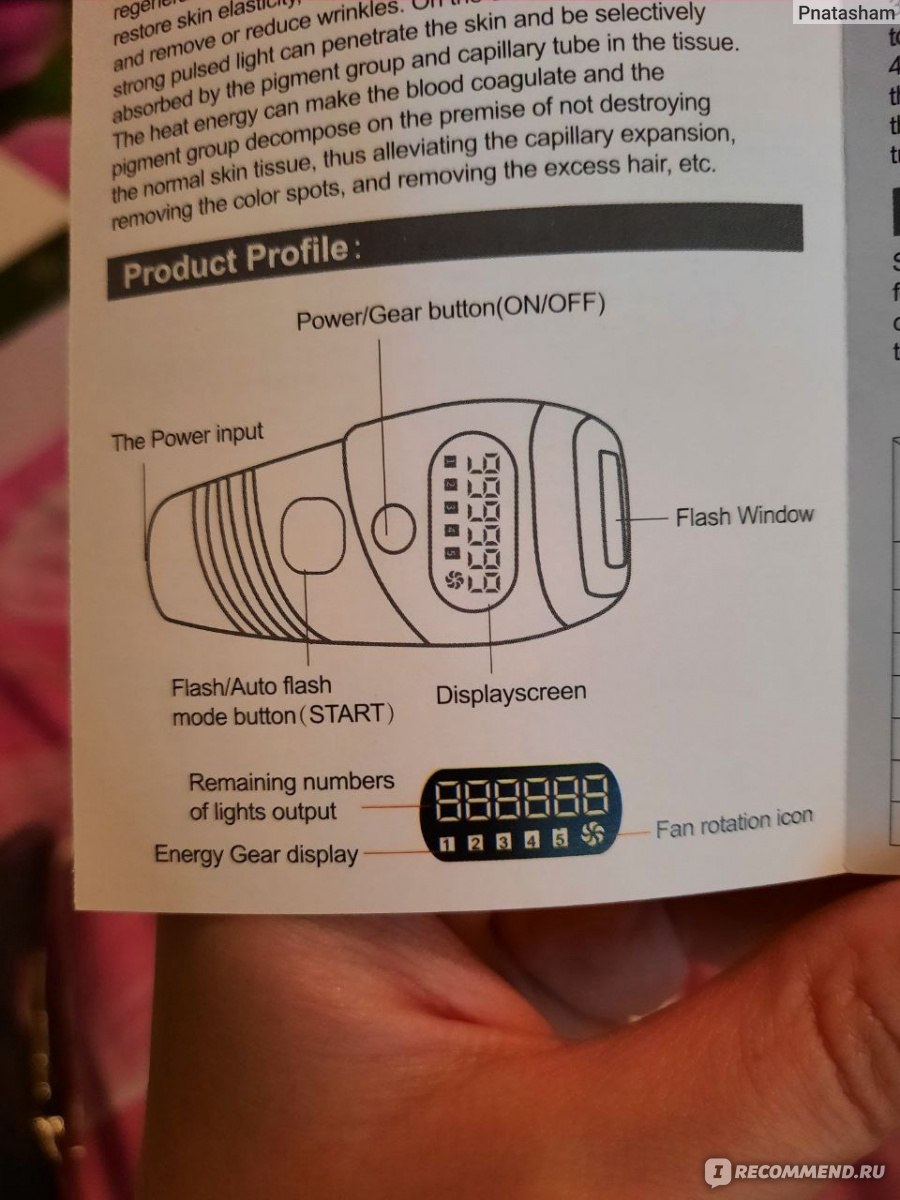
Внутри имелась инструкция.

Но, к сожалению, без знания английского языка её не прочитать.
Переводчик в помощь.

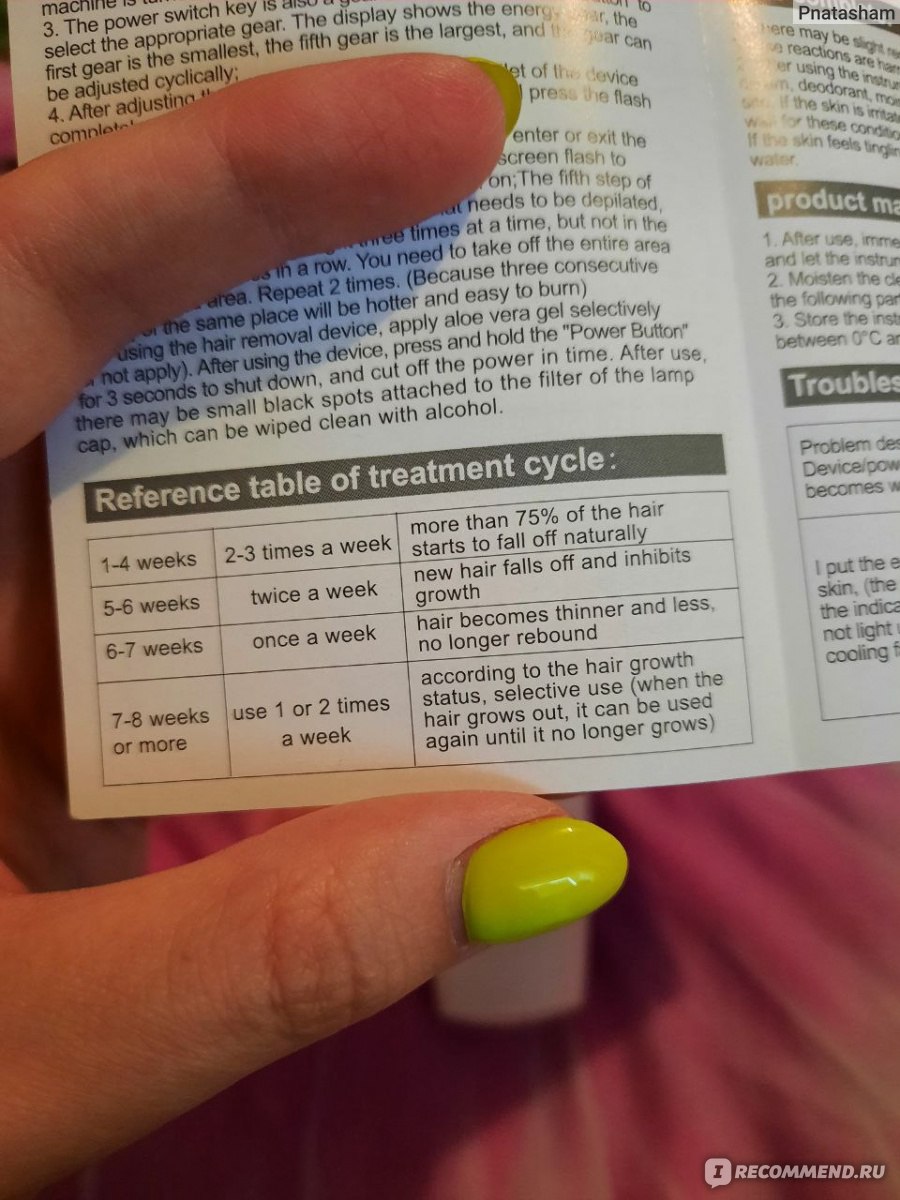
А вот и как же часто им нужно пользоваться.
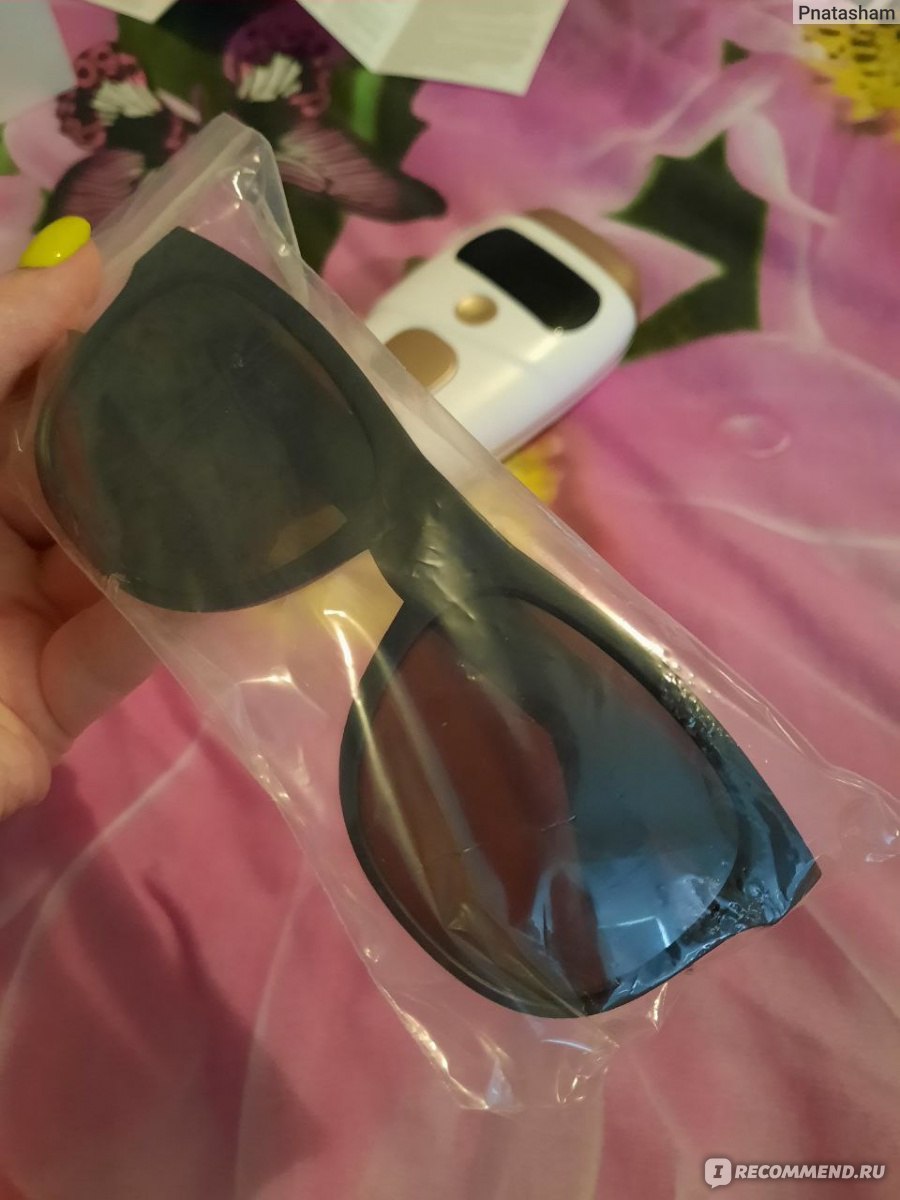
Помимо инструкции в коробке находились очки и одноразовая бритва, которой я так и не стала рисковать пользоваться.
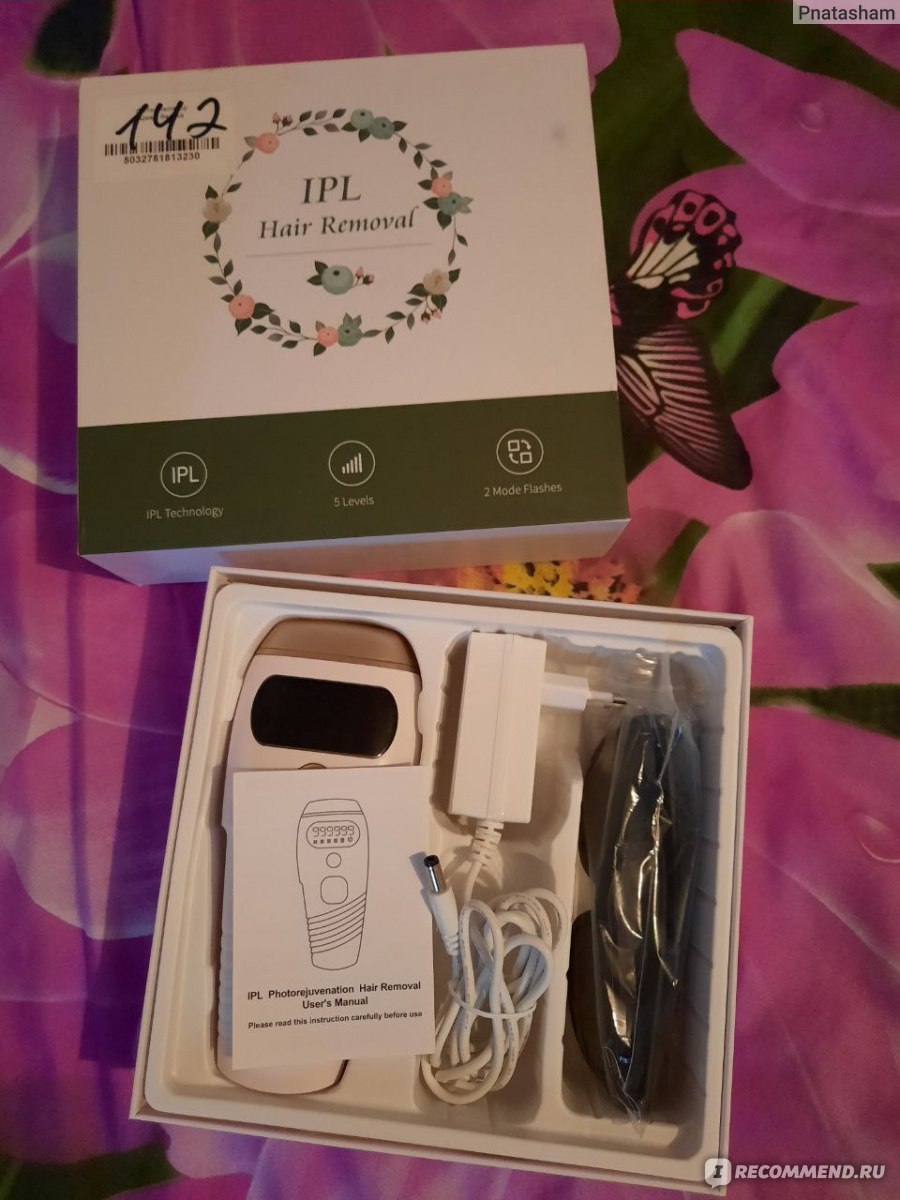
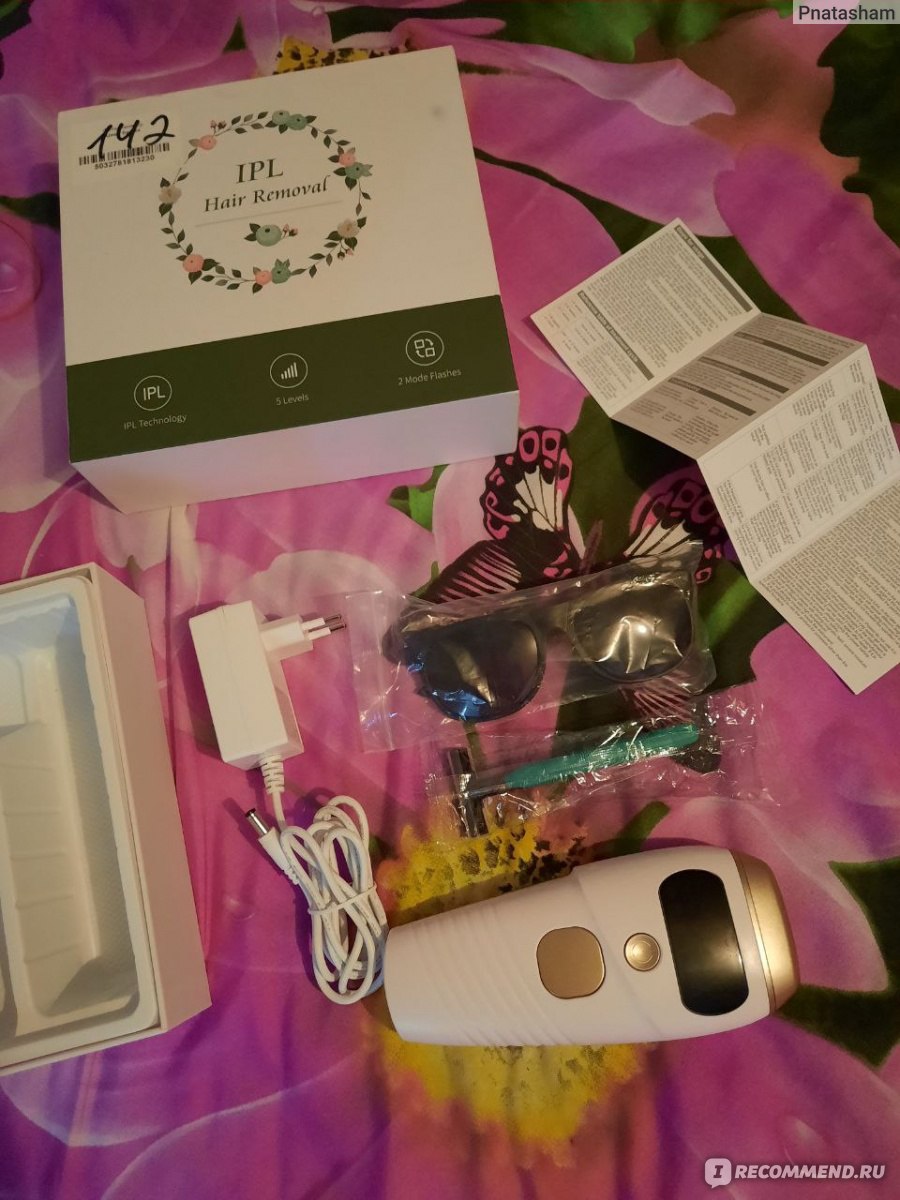

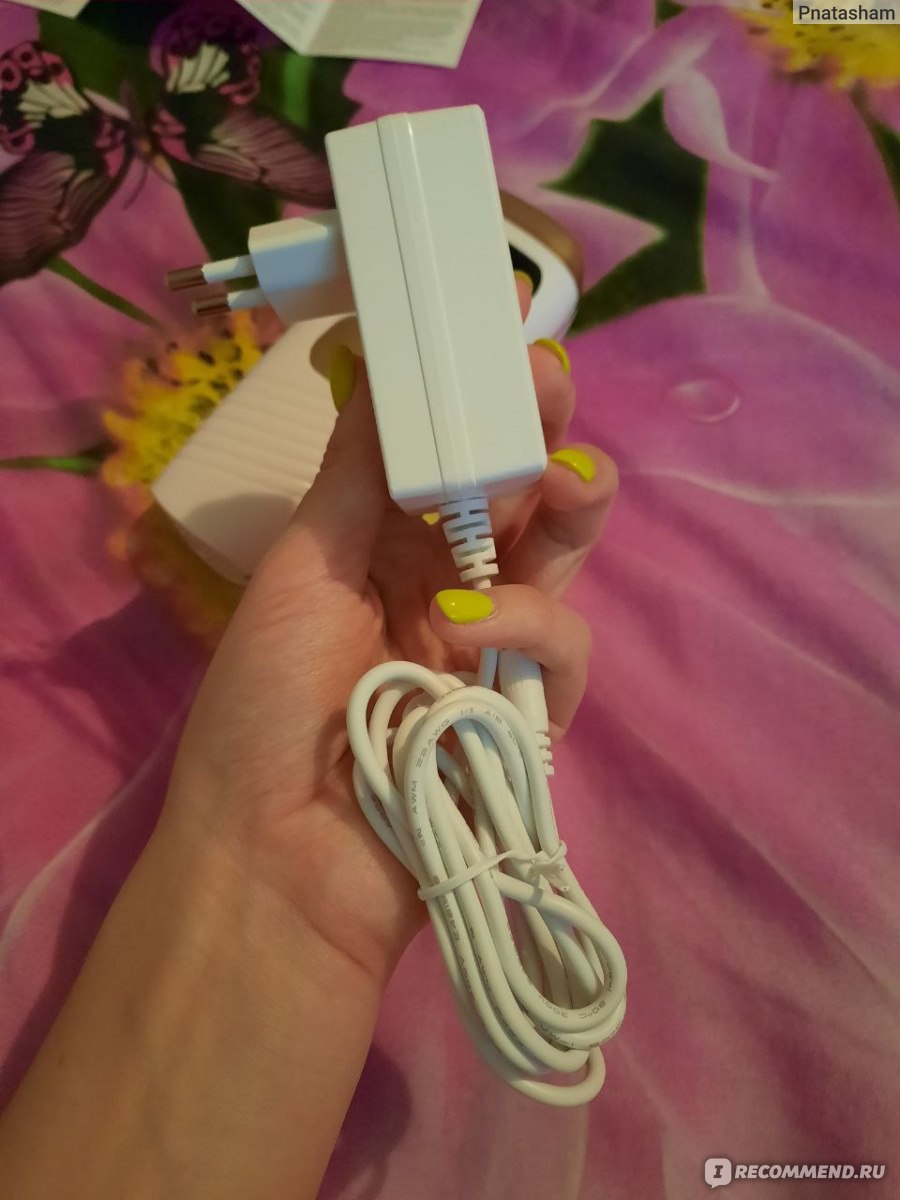
Зарядка для фотоэпилятора.
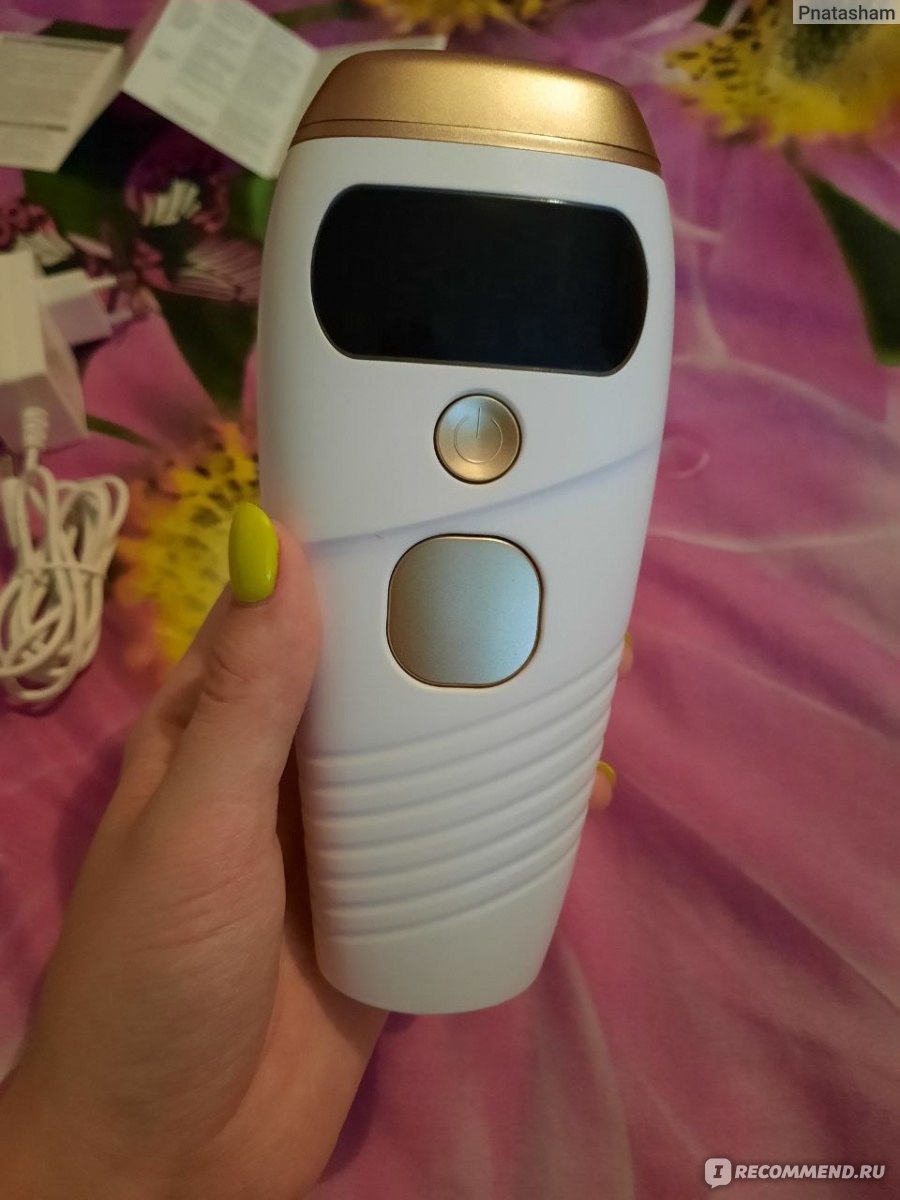
Сам фотоэпилятор.
И сзади.
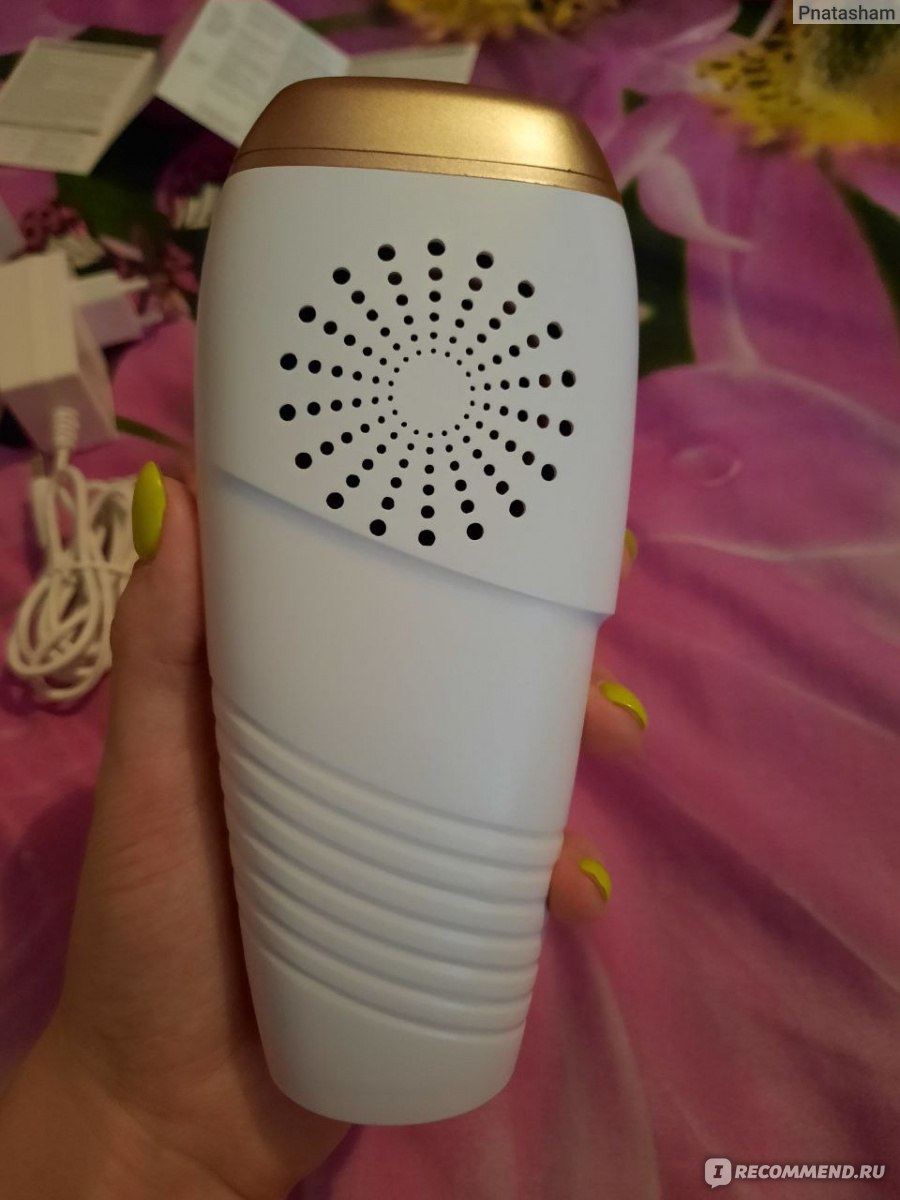
Снизу, как и сбоку есть отверстия для вентиляции, чтобы не перегрелся во время использования.

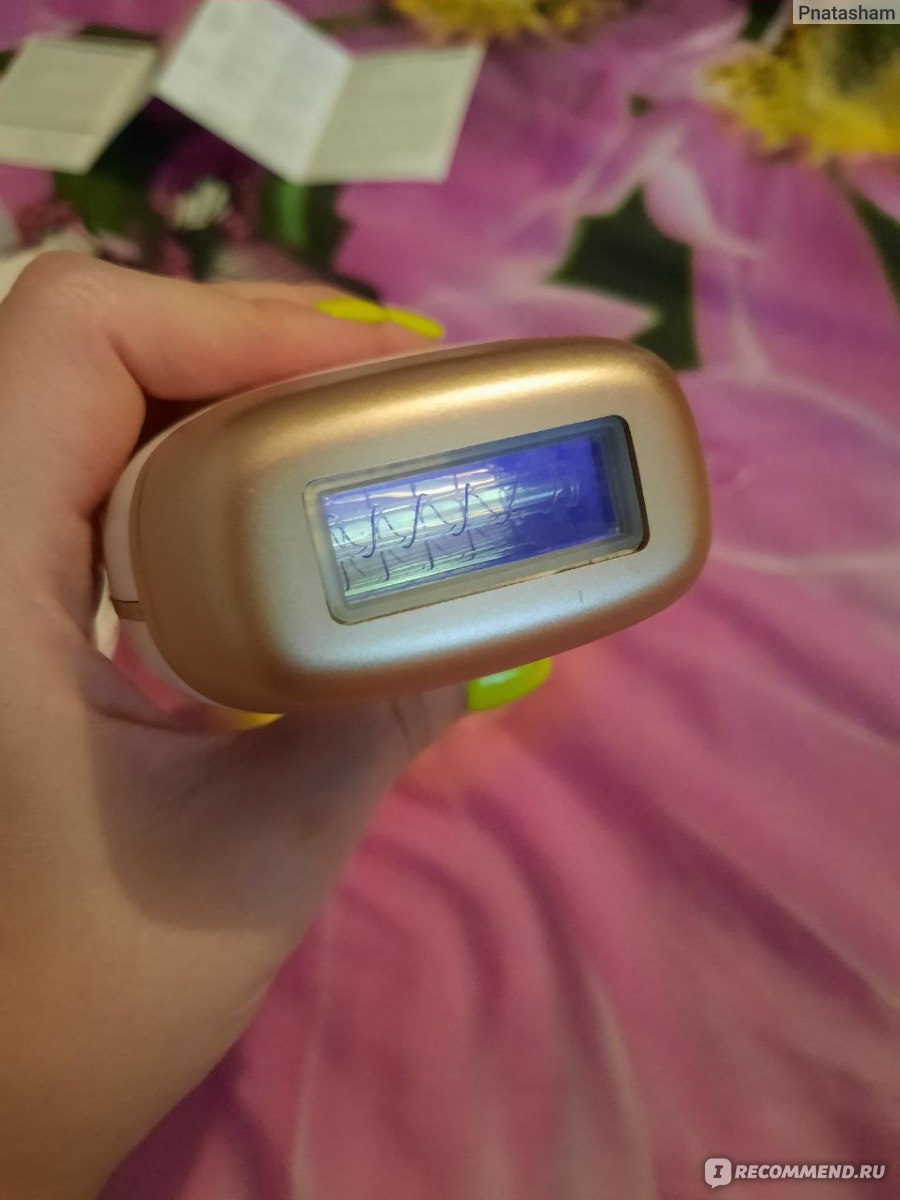
И сами лампы, которые должны выжигать волосяные луковицы наши.
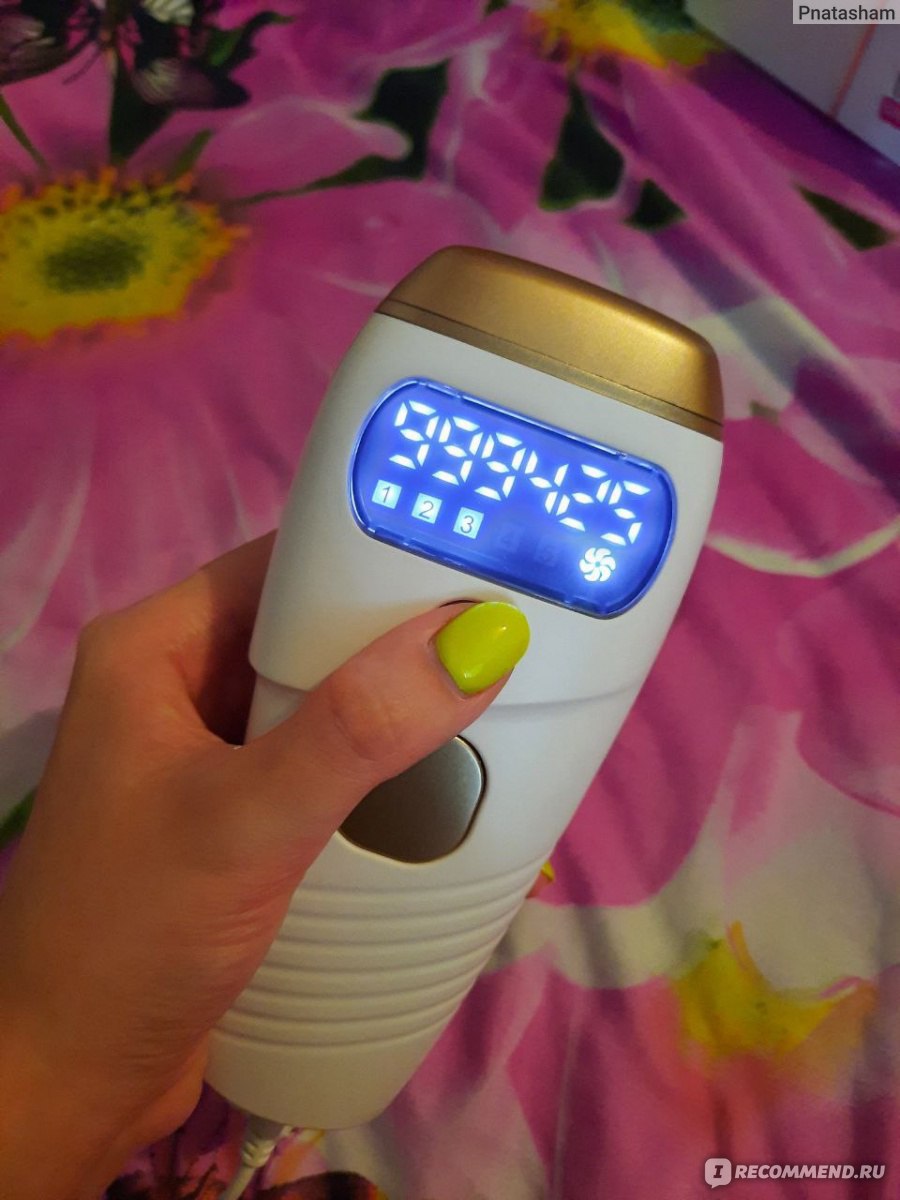
Включаем в розетку и видим на экранчике…
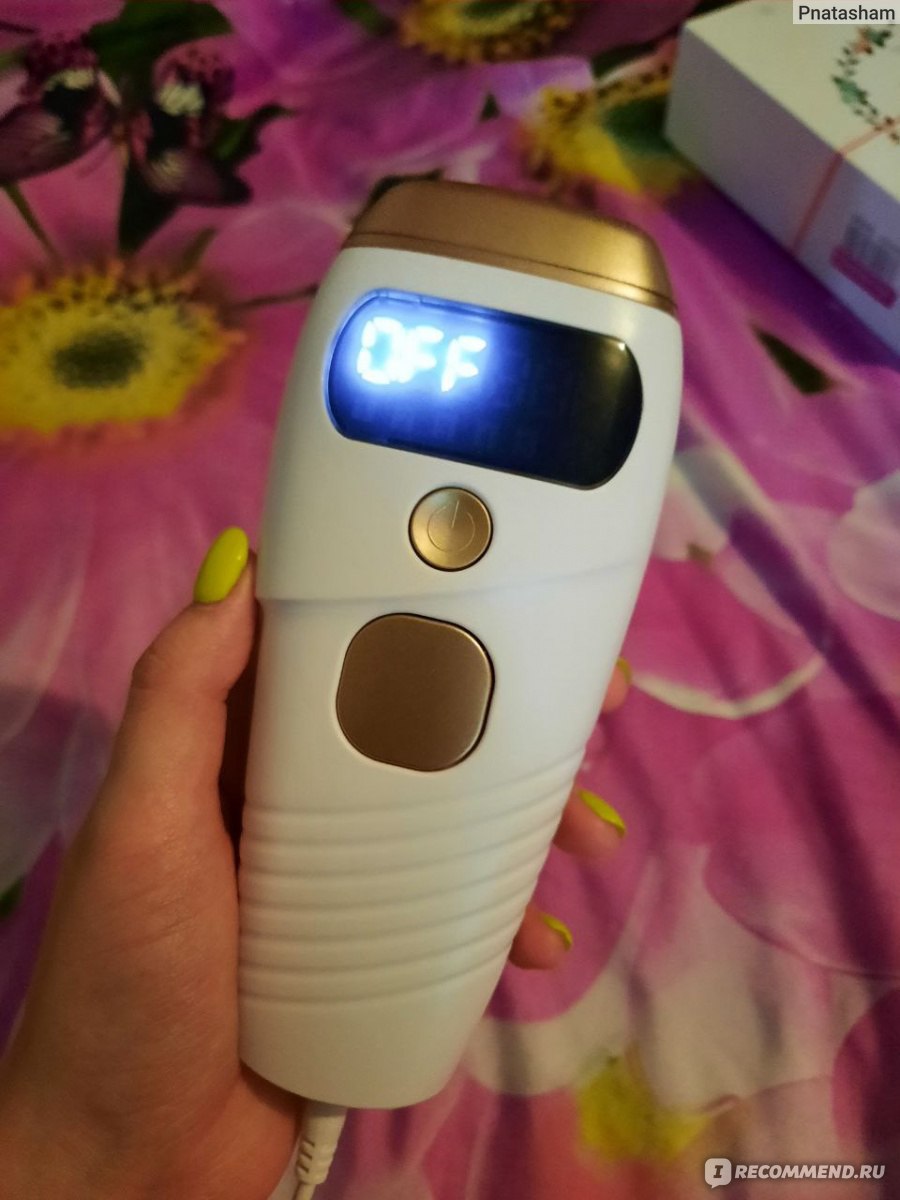
Нажимаем на кнопку..
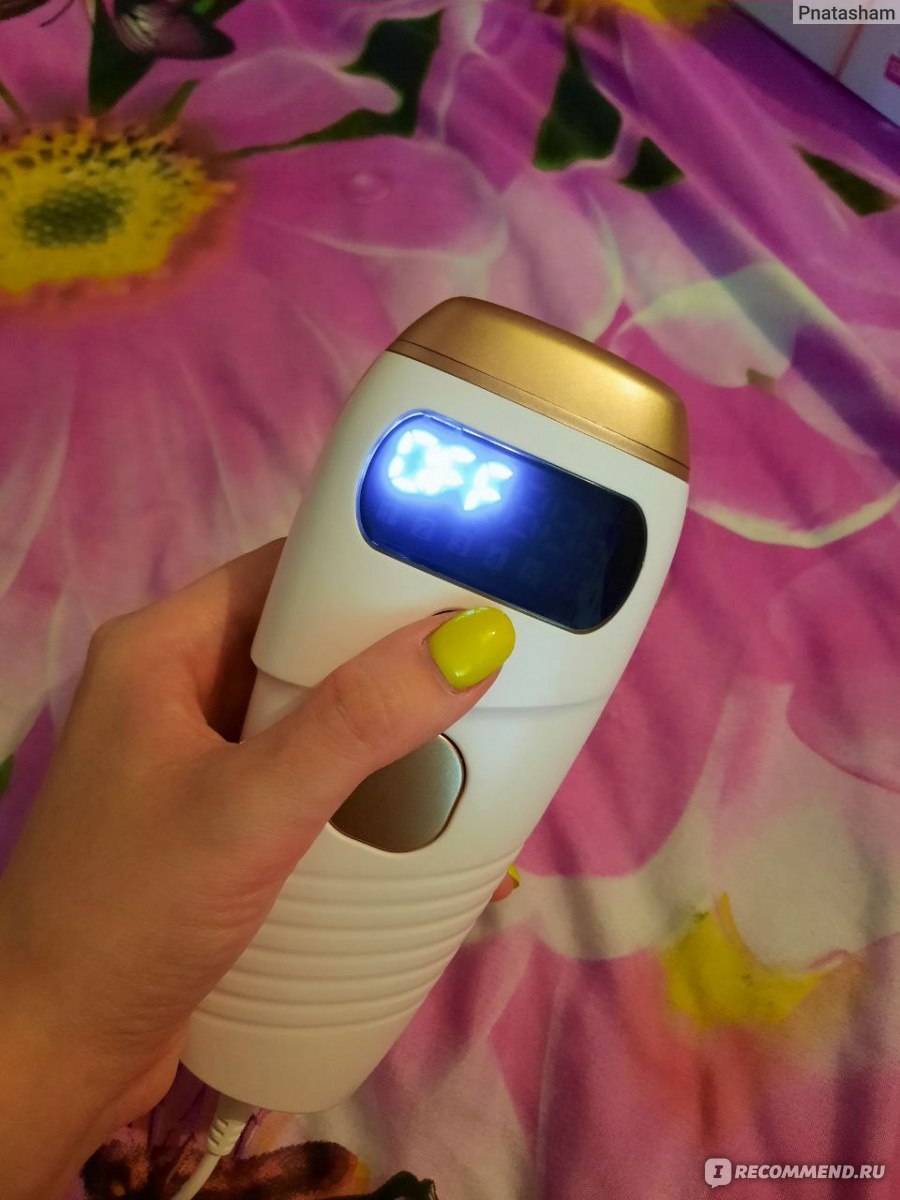
И получаем первую мощность.
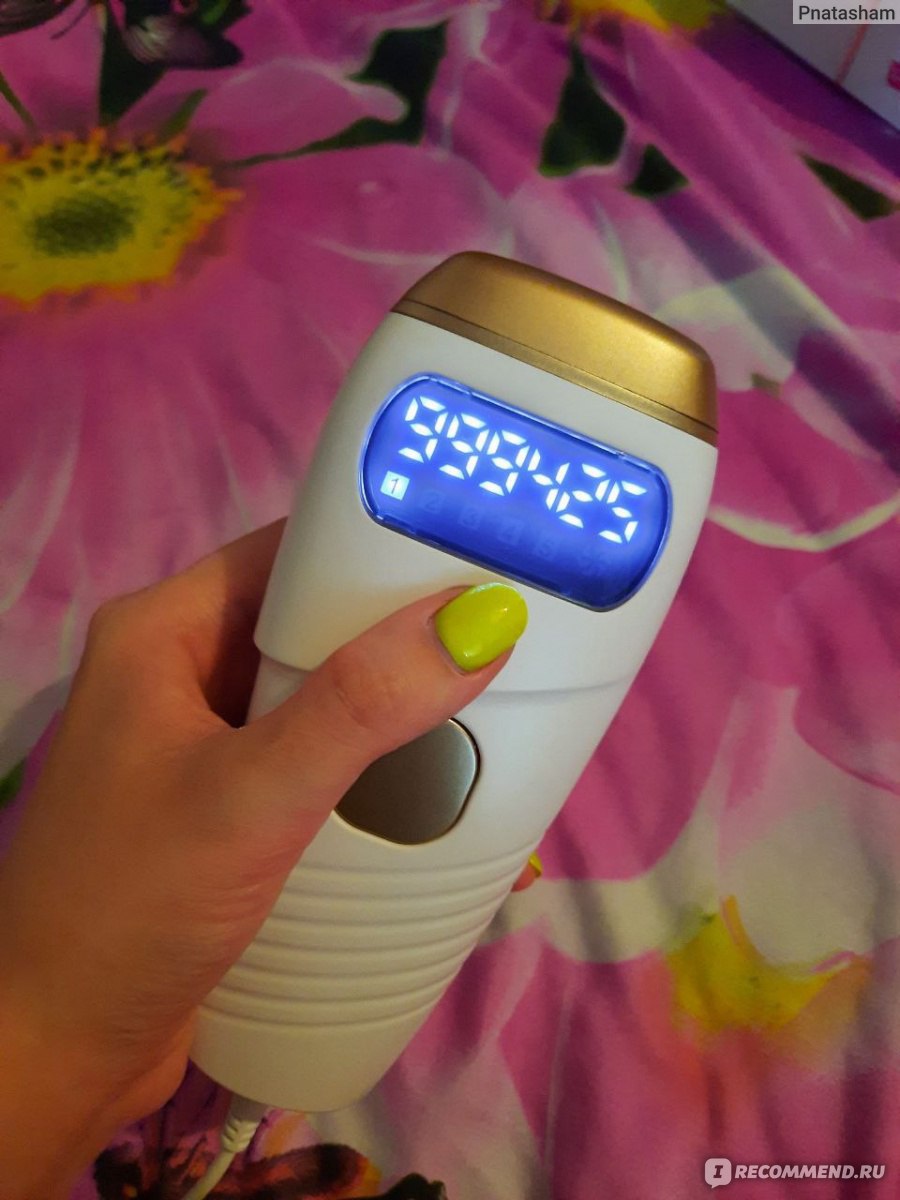
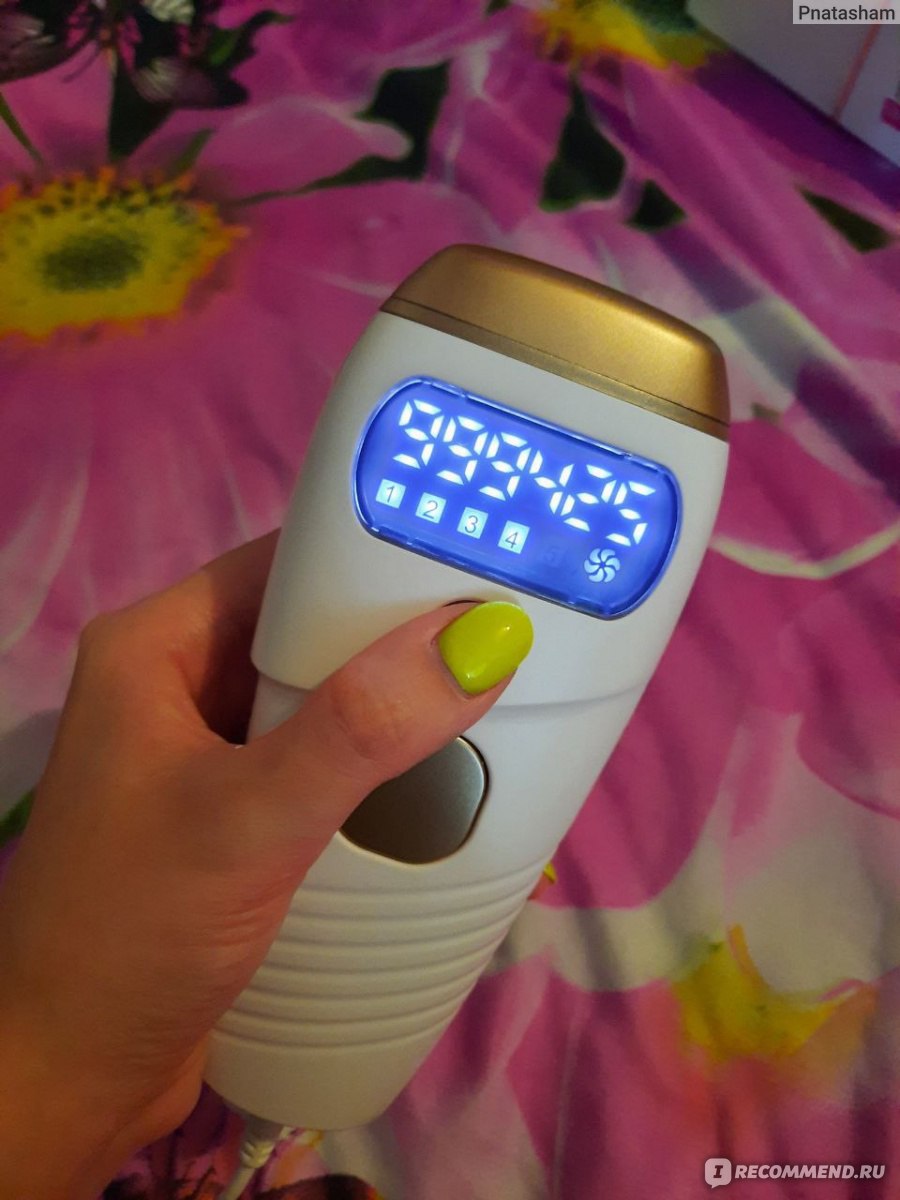
Авто режима в нём нет, поэтому выбираем уровень мощности сами, нажатием на кнопку.
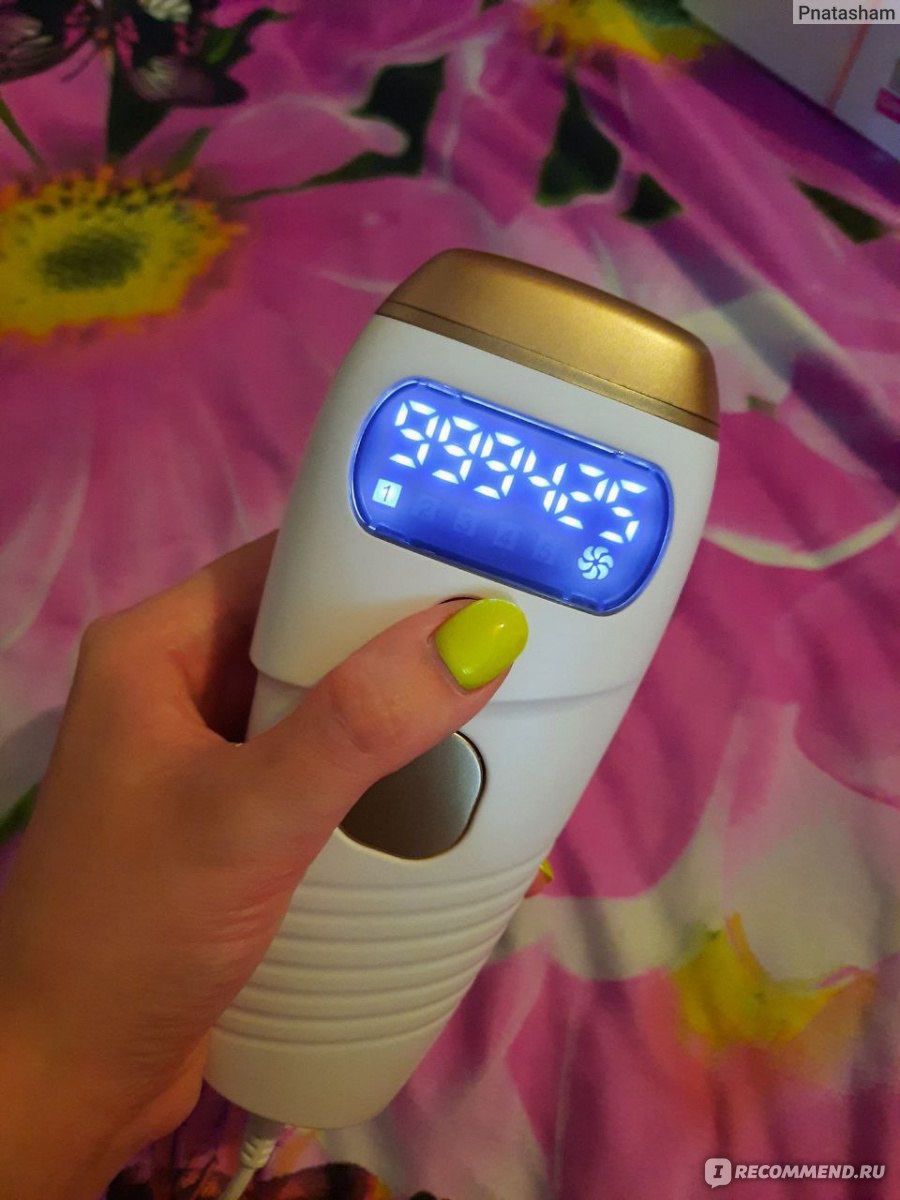
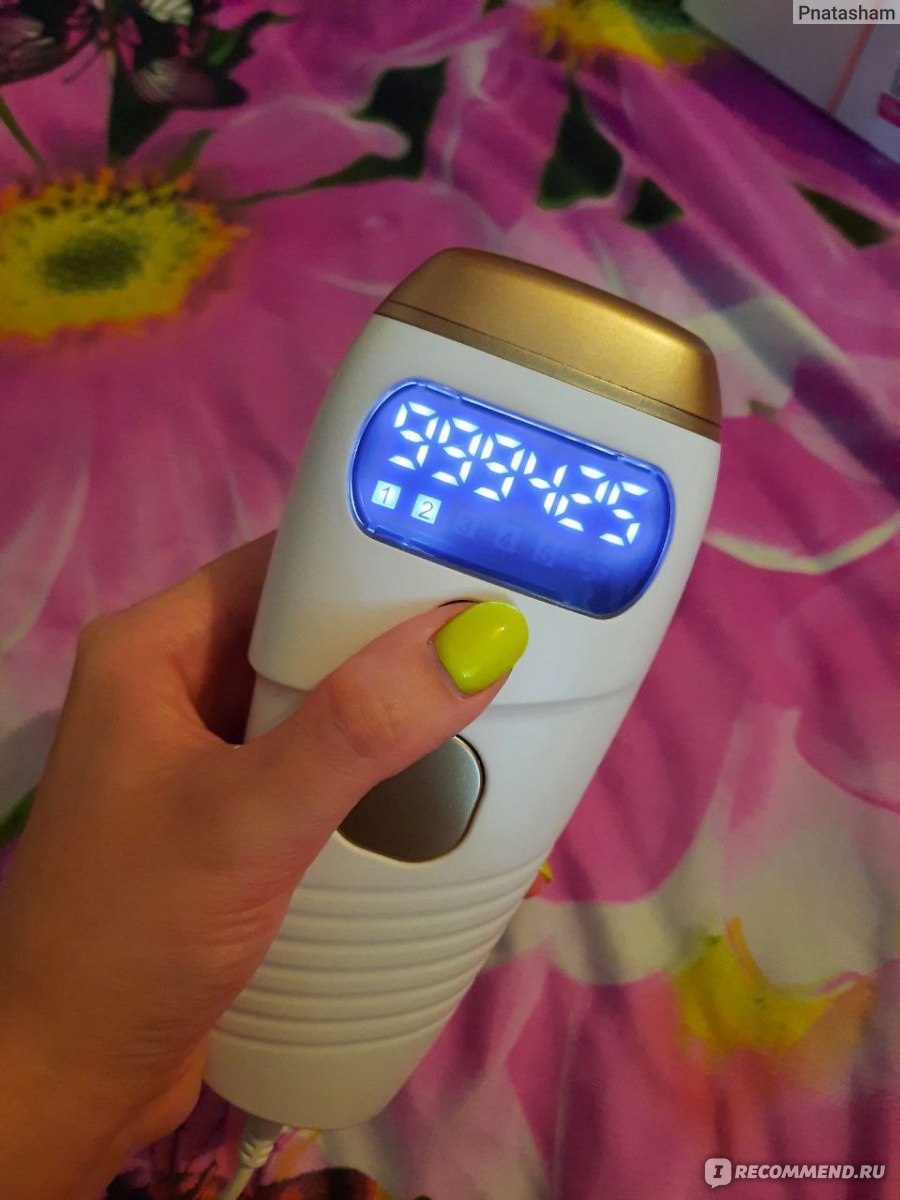
Точно также и уменьшать мощность.
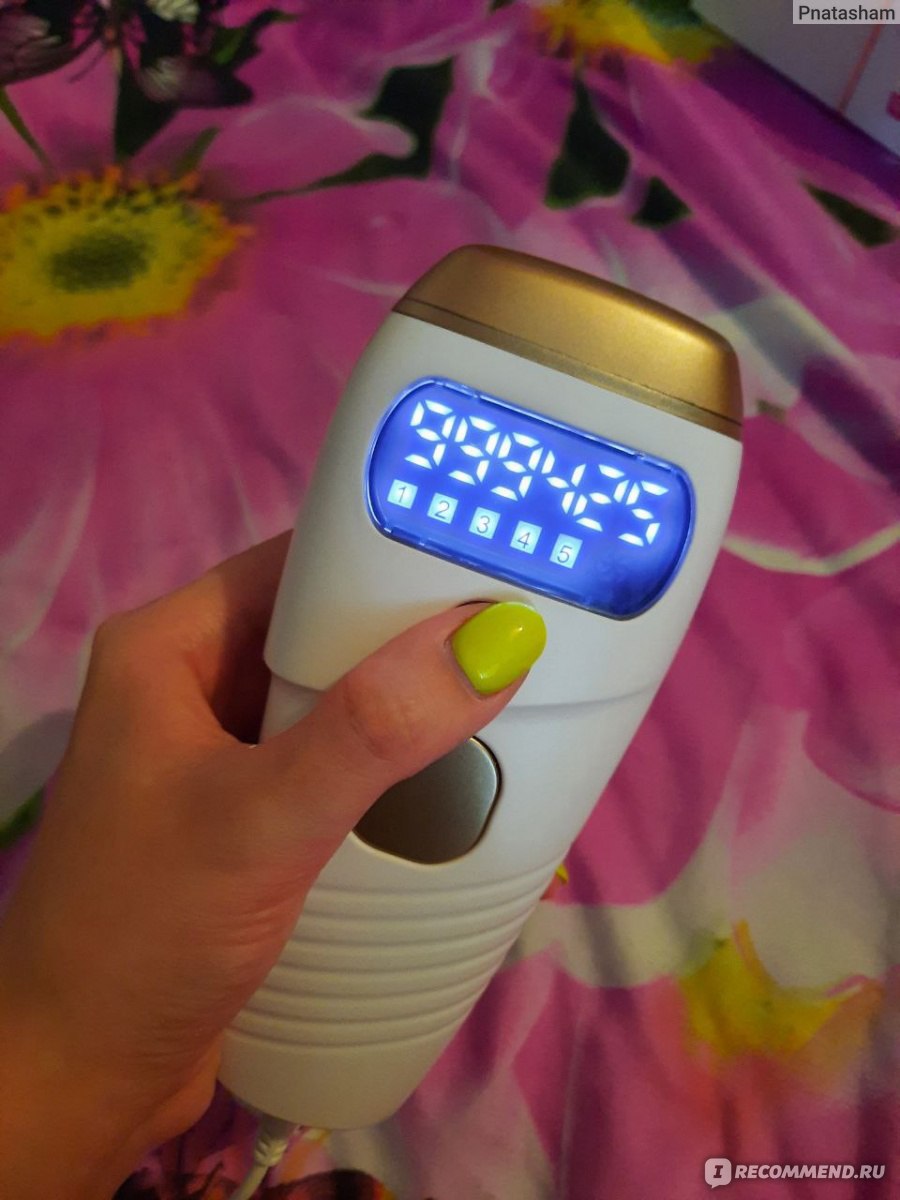
И последняя, на которой я и проводила каждую процедуру.
Пользовалась я этим фотоэпилятором два месяца по инструкции, которая была в коробке.
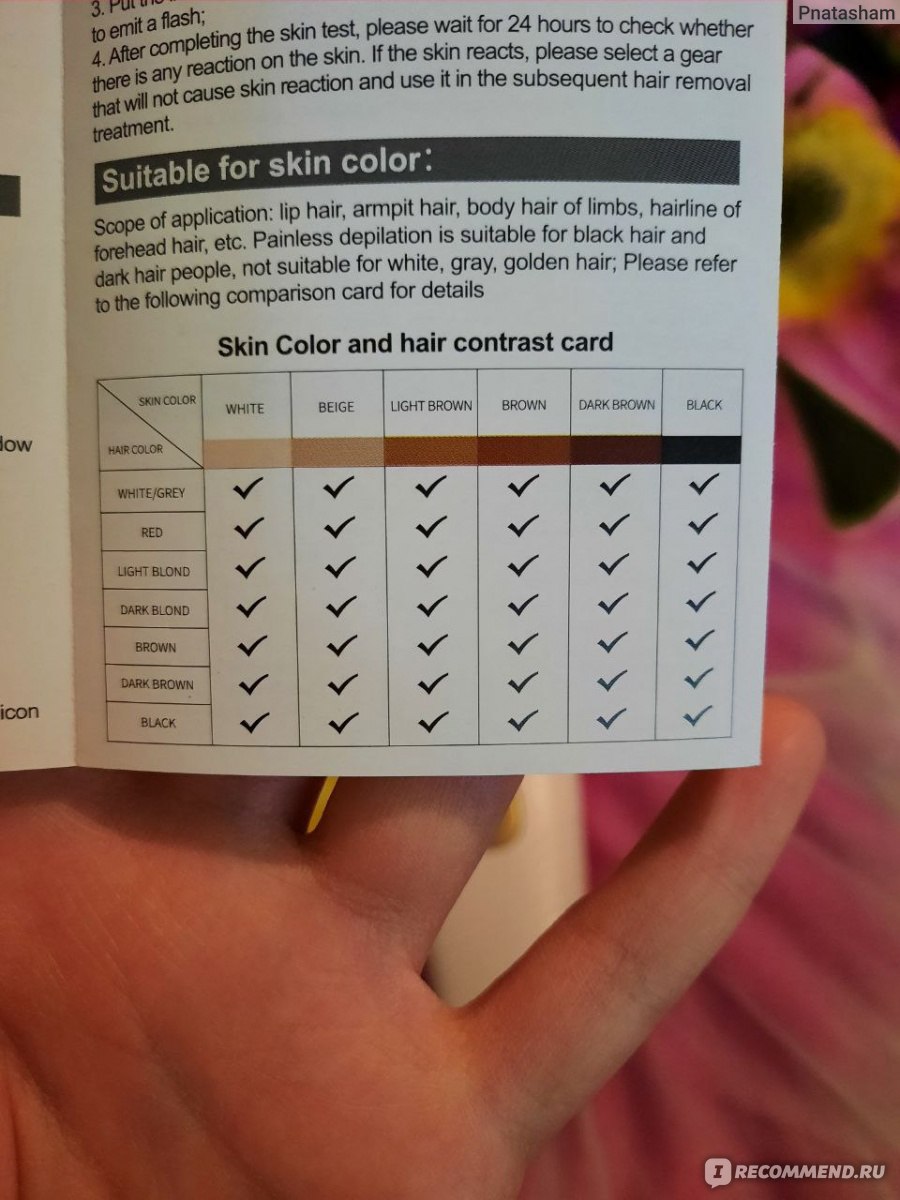
Кожа у меня незагорелая, а волосы темно-коричневые или чёрные.
Всегда на самой большой мощности использовала, было тепло от него и ни разу не было больно, не пекло.
Использовала на ногах и в зоне бикини.
Первый результат я заметила спустя 3 недели. Волосы в зоне лобка стали очень медленно расти у меня, но не перестали расти совсем. ( А так хотелось. ) На ногах же маленькими островками рост волос замедлялся, да и сами волосы становились тоньше, как после обычной эпиляции.
Спустя же 2 месяца волосы не перестали расти вовсе, стали только медленнее расти и тоньше и то эффект длится, пока пользуешься эпилятором этим.
В принципе, учитывая стоимость фотоэпилятора, то вполне неплохой результат, но хотелось бы, конечно, чтобы волосы совсем перестали расти, а не кратковременное замедление роста.
Многие покупатели фотоэпиляторов считают, что пользование фотоэпилятором в домашних условиях является довольно простым и не нуждается в специальном обзоре или инструкциях.
Мы считаем, что IPL технология и фотоэпиляторы на ее основе требуют такого же особого подхода как и профессиональные салонные устройства. На некоторые серьезные моменты мало кто обращает внимание, вот о них мы и расскажем в статье.
Если для работы с профессиональным салонным фотоэпилятором требуется пройти обучение и иметь соответствующий сертификат, то для работы с домашним фотоэпилятором необходимо только внимательно изучить прилагаемую инструкцию, руководство пользователя, в которых могут быть особенности в использовании той или иной модели фотоэпилятора (бренда, сочетание технологий и т.д.)
Но есть и общие рекомендации, которые подойдут для начала работы с любым домашним фотоэпилятором.
Рекомендации для любого фотоэпилятора
В первую очередь необходимо убедиться, что у вас нет противопоказаний для проведения фотоэпиляции. Инструкция по эксплуатации фотоэпилятора содержит исчерпывающий перечень противопоказаний, найдите этот раздел и внимательно прочитайте.
Однозначными противопоказаниями к применению являются онкологические заболевания; заболевания кожи (экзема, атипичный дермотит и тд.);повреждения кожи: рубцы, порезы, шрамы — так как волна воздействует именно на кожу, ее глубокие слои.
При наличии других заболеваний мы советуем проконсультироваться со специалистами. Но необходимо иметь ввиду, что сама световая волна как таковая безопасна. Она не воздействует на внутренние органы, поэтому не может влиять на их состояние.
Но, к примеру, при нестабильном гормональном фоне, неважно чем он вызван: неправильной работой щитовидной железы или беременностью, менструацией, эффективность процедуры так же будет нестабильной. Поэтому не советуют делать процедуры во время беременности, менструации, а также детям до 16 лет по этой же причине. При наличии некоторых гормональных заболеваний процедуру в ряде случаев проводить можно, но все-таки лучше проконсультироваться с эндокринологом.
Запретом к фотоэпиялции может быть не только наличие заболевания, но и состояния человека перед процедурой.
Запрещается проводить процедуру :
- в состоянии алкогольного опьянения;
- при применении сильнодействующих антибиотиков;
- при применении препаратов увеличивающих фоточувствительность;
- во время приема антикоагулянтных препаратов и их производных;
- при приеме болеутоляющих лекарств;
- при искусственном загаре (во избежание неправильного выбора мощности устройства).
Правильная подготовка к процедуре
Итак, вы убедились, что проводить фотоэпиляцию вам можно. Теперь поговорим о том, как правильно к ней подготовиться.
Перед процедурой необходимо удалить волосы бритвой или триммером. Можно сделать это сразу до процедуры, можно за 1-2 дня, но важно, чтобы длина волоса была не больше 1-1,5 мм. Иначе при воздействии волны на волосок он обуглиться и прилипнет к поверхности лампы, что в итоге приведет к ее негодности, так как такие загрязнения невозможно удалить.

Кроме того, если волос имеет большую длину, воздействие от световой волны просто могут не дойти до фолликула, соответственно не произойдет его тепловая обработка и уничтожение. При этом удалять волосы перед процедурой воском или иными подобными способами нельзя, во-первых, увеличится чувствительность кожи, во-вторых, волос является проводником к фолликулу.
Исключение составляют волосы на лице. Многие женщины боятся сбривать волосы на лице, ожидая их более усиленного роста и утолщения. Поэтому допускается удаление волос на лице иными способами.
—
Перед использованием домашнего фотоэпилятора кожа должна быть чистой и сухой. Категорически запрещается применение каких-либо кремов и гелей для фотоэпиляции.
В отличие от салонных фотоэпиляторов, которым необходим для процедуры специальный гель. Домашние фотоэпиляторы последних поколений проводят световую волну без геля. Наоборот, использование геля может снизить эффективность процедуры или даже привести к повреждению поверхности лампы.

Итак, процедура подготовки завершена. Переходим к самой процедуре.
Приступаем к процедуре IPL фотоэпиляции
— Большинство фотоэпиляторов работают по следующему принципу: подключается аппарат к сети, включается, активируется, производится вспышка.
Модель Perfect Smooth IPL активируется, к примеру, путем прижимания аппарата тыльной стороной, на которой расположен датчик определения типа кожи, к участку кожи.
У Perfect Smooth JOY напротив, сенсор для определения типа кожи и активации встроен в фотоэпилятор спереди, а датчик выведен через ламповую насадку.
— Устанавливаем мощность фотоэпиялтора перед процедурой. Обычно выбор мощности происходит путем нажатия кнопки включения.
Начинать процедуру следует с минимальной мощности, а уже после нескольких процедур можно ее увеличить до средней. Переходить к уровням мощности выше средней не рекомендуется при использовании фотоэпилятора первый раз, а также на особо чувствительных участках: щиколотках, зоне бикини, подмышках, лице.
— Если в комплекте идут очки, то они обязательно одеваются. Некоторые модели фотоэпиляторов, например Perfect Smooth Flash и Perfect Smooth IPL, имеют встроенный фильтр для защиты глаз и специальные резиночки по краям лампы, которые препятствуют попаданию света в глаза.
— После установки уровня мощности можно приступать к вспышкам.
Фотоэпилятор плотно прижимается к коже, загораются лампочки готовности к вспышке, обычно они зеленые и находятся на видимой поверхности фотоэпилятора (с торца устройства, на экране и т.д.), затем нажимается кнопка активации. Если все сделано правильно — происходит вспышка. Далее фотоэпилятор перемещается на соседний участок с перехлестом в 30-50% от предыдущего «контактного пятна».
Необходимо отметить, что некоторые модели фотоэпиляторов существенно облегчают процесс удаления волос.
1) Имеют скользящий режим «Glide mode», при котором фиксация кнопки приводит к последующим вспышкам, как например Perfect Smooth JOY. Или имеют автоматический режим вспышек, который уже при правильном выставлении угла производят вспышку, без нажатия кнопок, как например Perfect Smooth Flash.
2) Имеют дополнительные лампы для разных частей тела (лица, бикини, подмышек и тд.). Pefect Smooth JOY имеет дополнительные 2 сменные насадки со специальными фильтрами для лица и бикини.
— После проведения процедуры можно использовать любые средства, которые вы применяете обычно после удаления волос или для ухода за кожей. В случае возникновения неприятных ощущений, можно нанести на кожу средства, содержащие пантенол, или любые другие, успокаивающие кожу с алоэ, но ни в коем случае не применять спиртосодержую косметику, она вызовет раздражение и болезненные ощущения.
В течение 2 недель до процедуры и после процедуры нельзя загорать, так как при загаре в коже накапливается меланин, его избыточное содержание может привести к ожогам.
Выходя на солнце, необходимо наносить на обработанные участки защитные солнцезащитные средства с Ph не менее 40.
перейти к содержанию
![]()
Удаление волос inFace IPL


ZH-01D особенности:
- 1 миллион эффективных прошивок, приемлемая цена
- Маленький удобный для переноски, большая светоотдача
- Эффективная фокусировка, самоиндукционный свет
- Увеличьте ток, больше энергии
Технические характеристики изделия
| Модель продукта: | Ж-01Д |
| Наименование продукта: | в эпиляции Face IPL |
| Номинальный объемtage: | 12 В– |
| Температура хранения: | 0C-40C |
| Рабочая Температура: | S ° C ~ 35 ° C |
| Эксплуатационная влажность: | 3 0% -85% |
| Размер продукта: | 1487541мм |
| Размер посылки: | 24014871мм |
Приготовление:
- На участках, требующих депиляции, удалите волосы бритвой. (Ниже 1 мм)
(Примечание: не используйте крем для депиляции вместо бритья)
- Очистите кожу, чтобы на ее поверхности не было волос, она была полностью сухой и свободной от жирных веществ (например, на ней не должно быть остатков, таких как ароматическая жидкость, лосьон, парфюм, крем для загара и солнцезащитный крем).
- Убедитесь, что устройство и порт для освещения чистые и аккуратные, не осталось ли на нем волос, пыли, волокон и других загрязняющих веществ. Если да, то тщательно протрите его.
- Обратитесь к таблице интенсивности света, рекомендованной ниже, отрегулируйте интенсивность света в соответствии с цветом вашей кожи и волос на теле и сохраняйте комфортное состояние.

Спектральный эталон измерителя интенсивности света

Примечание:
- Если вы чувствуете боль или дискомфорт, уменьшите интенсивность света;
- Рекомендуемая сила света (1-5) В следующей таблице «X» означает, что этот продукт не подходит для использования.
5. Рекомендуется осветить участки депиляции: ноги, подмышки, руки, пушок на лбу и т. Д.

Примечание:
Пользователи-мужчины: пожалуйста, не используйте этот продукт на лице с бородой или мужскими половыми органами. Не используйте вокруг глаз, около бровей, ноздрей, внутри ушей или ануса.
Женщины, пользующиеся: соски, ареола, малые половые губы, влагалище, не использовать.
Способ использования:
- 1. Подключите адаптер питания и нажмите и удерживайте кнопку, чтобы запустить машину.

- Кратковременно нажмите кнопки «+» и «-», чтобы отрегулировать яркость света; Пожалуйста, выберите подходящий уровень в соответствии с вашей ситуацией. Чем выше уровень, тем лучше эффект. Новичок предлагает начинать с самого низкого уровня.

- Во время работы надевайте защитные солнцезащитные очки, которые прикреплены к подарочной коробке, чтобы защитить ваши глаза.

- Нанесите этот продукт вертикально на кожу, кратковременно нажмите кнопку и начните осветление и депиляцию.

- По умолчанию этот продукт запускается в ручном режиме. Нажмите и удерживайте кнопку «+» или «-», чтобы перейти в автоматический режим (в автоматическом режиме этот продукт может непрерывно светиться и удалять волосы при контакте с кожей с интервалом в 2-3 секунды для каждого освещения) и перемещайте депиляция.

- После депиляции нажмите и удерживайте кнопку, чтобы выключить продукт и отключить адаптер питания.


Документы / Ресурсы
Always here to help you
Register your product and get support at www.philips.com/welcome
SC2004
User manual
5
ENGLISH 6
FRANÇAIS 30
NEDERLANDS 55
6
ENGLISH
Table of contents
Introduction
Benefits
Intense Pulsed Light (IPL) technology for home use
Effective hair regrowth prevention for everyday smoothness
Gentle treatment, even on sensitive body areas
Cordless operation for maximum freedom and flexibility
Long-lasting battery for complete body treatment
No replacement parts needed, no hidden costs
How Philips’ Intense Pulsed Light technology works
Hair growth
Working principle
General description
Important
Danger
Warning
To prevent damage
Caution
Keep the following things in mind to avoid compromising the lifetime of your Philips Lumea:
For whom is Philips Lumea NOT suitable?
Contraindications
Never use the appliance if you are pregnant or breast feeding.
Never use the appliance if you have an unsuitable skin and/or hair colour, i.e.:
Never use the appliance if you suffer from any of the diseases listed below, i.e.:
Never use the appliance if you take any of the medications listed below, i.e.:
Never use the appliance on the following areas:
Never use the appliance on sunburnt, recently tanned
(last 48 hours) or fake-tanned skin:
Electromagnetic fields (EMF)
Charging
Preparing for use
Preparing treatment areas
Setting the light intensity
Recommended light intensities (1-5)
Important
Tanning advice
Using the appliance
First use and skin test
Subsequent use
Guidelines for treatment
Average treatment time
Using the appliance on the legs
Tip: White eye pencil
Using the appliance in the bikini area
Using the appliance on the underarms
How to achieve optimal results
Maintenance phase
Possible side effects and skin reactions
11
11
11
12
19
19
19
19
15
15
16
16
20
20
20
20
21
12
12
12
13
13
14
14
15
10
10
11
11
9
9
9
10
10
8
8
8
9
7
8
8
8
7
7
7
7
ENGLISH
7
After use
Cleaning and maintenance
Storage
Environment
Removing the rechargeable batteries
Guarantee and support
Technical specifications
Troubleshooting
Introduction
Congratulations on your purchase and welcome to Philips! To fully benefit from the support that Philips offers, register your product at www.philips.com/welcome.
Light-based hair removal is one of the most effective methods to treat unwanted body hair with longer-lasting results. It is different from current home hair removal methods because it significantly reduces hair regrowth. Philips has been investigating this method together with leading dermatologists for over 10 years. You can now use this innovative technology comfortably in the privacy of your own home, whenever and wherever you want.
This appliance has been specifically designed and optimised for use by women, but can be used by men as well.
Philips Lumea enables treatment of unwanted hair below the neck, using the tailored attachment.
Philips Lumea is designed for use by one person only.
For more information about Philips Lumea and movies about how to use
Lumea, see www.philips.com/lumea. Check our homepage regularly for updates.
Benefits
This appliance provides the following benefits:
Intense Pulsed Light (IPL) technology for home use
Philips Lumea uses a light-based technology called ‘Intense Pulsed Light’
(IPL). IPL is also used in the professional beauty market for hair removal and has been in use for the last fifteen years. Philips Lumea now brings you this innovative technology for safe and effective use in the comfort of your home.
Effective hair regrowth prevention for everyday smoothness
This method provides you with long-lasting hair regrowth prevention and silky-smooth skin. Our studies have shown a significant hair reduction already after two treatments. Optimal results were generally achieved after four to five treatments. A reduction in hair density is visible from treatment to treatment. How fast the effect becomes visible and how long the results last varies from person to person. For more information, see section ‘How to achieve optimal results’ in chapter ‘Using the appliance’.
Gentle treatment, even on sensitive body areas
Philips Lumea has been developed in close cooperation with leading dermatologists and has been tested by over 2000 women for an effective and gentle treatment, even on the most sensitive body areas.
23
24
25
25
21
22
23
23
8
ENGLISH
Cordless operation for maximum freedom and flexibility
Because the appliance runs on rechargeable batteries, it is portable and can be used anywhere.
Long-lasting battery for complete body treatment
A fully charged battery provides a complete body treatment (underarms, bikini line and lower legs) in one go, without recharging breaks.*
*Based on the average treatment times for each area and the recommended intensities for one user.
No replacement parts needed, no hidden costs
Philips Lumea is equipped with a high-performance lamp which does not require replacement. This lamp can generate over 100,000 flashes and should enable you to continuously maintain results for more than 5 years* while saving money on expensive replacement lamps.
*Based on the average treatment times for each area and the recommended intensities for one user.
How Philips’ Intense Pulsed Light technology works
Hair growth
Hair growth rates differ from person to person, depending on age, metabolism and other factors. However, everyone’s hair normally grows in
3 phases.
1 Growing phase (anagen phase)
The hair grows actively from the root. In this phase the concentration of melanin is highest. Melanin is responsible for the pigmentation of the hair.
Melanin concentration is also the determining factor for the efficacy of this method. Only hairs in the growing phase are susceptible to treatment with light.
2 Degradation phase (catagen phase)
Hair growth stops and the root shrinks before the hair sheds.
3 Resting phase (telogen phase)
The old hair separates from its hair follicle and sheds. The follicle remains at rest until the biological clock tells it to become active again and grow a new hair.
Working principle
— The appliance works by heating up the hair and root beneath the skin.
The melanin in the hair and hair root absorbs the released light pulses.
The darker the colour of the hair, the more light can be absorbed. This process stimulates the hair to go into the resting phase.
— In between treatments, hair sheds naturally and regrowth is inhibited.
Hairs can take one or two weeks to shed.
ENGLISH
9
— Optimal hair removal cannot be obtained with a single session, since only hairs in the growing phase are susceptible to treatment with light.
During a treatment, hairs on the treated area are usually in different stages of the hair growth cycle. To effectively treat all hairs you have to repeat the treatment every two weeks for a few times.
An integrated optical filter ensures that no UV light reaches the skin and guarantees that the appliance is safe for the skin.
General description (Fig. 5)
1 Light exit window with integrated UV filter
2 Body attachment (suitable for all body areas below the neck)
3 Metallic frame inside the attachment
4 Safety system (safety ring with contact switches)
5 Flash button
6 Intensity lights (1- 5)
7
%
Intensity increase button
8
^
Intensity decrease button
9 Charging light and battery low indication
10 On/off button
11 Appliance socket
12 ’Ready to flash’ light
13 Air vents
14 Adapter
15 Small plug
Important
Read this user manual carefully before you use the appliance and save it for future reference.
Danger
— Water and electricity are a dangerous combination. Do not use this appliance in wet surroundings (e.g. near a filled bath, a running shower or a filled swimming pool).
— Keep the appliance and the adapter dry.
— If the appliance is broken, do not touch any inner part to avoid electric shock.
— Never insert any objects into the appliance.
Warning
— This appliance is not intended for use by persons (including children) with reduced physical, sensory or mental capabilities, unless they have been given supervision or instruction concerning use of the appliance by a person responsible for their safety.
— Children should be supervised to ensure that they do not play with the appliance.
10
ENGLISH
— The appliance is not intended for children under the age of 15 years.
Teenagers aged between 15 and 18 years can use the appliance with the consent and/or assistance of their parents or the persons who have parental authority over them. Adults from 19 years and older can use the appliance freely.
— Only charge the appliance with the adapter supplied.
— Do not use the appliance or the adapter if it is damaged.
— The adapter contains a transformer. Do not cut off the adapter to replace it with another plug, as this causes a hazardous situation.
— If the adapter is damaged, always have it replaced with one of the original type in order to avoid a hazard.
— Do not use the appliance if the UV filter of the light exit window is broken.
To prevent damage
— Make sure nothing obstructs the air flow through the ventilation slots.
— Never subject the appliance to heavy shocks and do not shake or drop it.
— If you take the appliance from a very cold environment to a very warm environment or vice versa, wait approximately 3 hours before you use it.
— Store the appliance in a dust-free place to prevent it from becoming dusty.
— Never leave the appliance unattended when it is switched on. Always switch off the appliance after use.
— Do not expose the appliance to direct sunlight or UV light for several hours.
— Do not flash against any other surface than the skin. This can cause severe damage to the attachment and/or the light exit window. Only flash when the appliance is in contact with skin.
Caution
— Never use the appliance around the eyes and near the eyebrows to avoid the risk of eye damage.
— Use this appliance only at settings suitable for your skin type. Use at higher settings than those recommended can increase the risk of skin reactions and side effects.
— This appliance is only intended for removing unwanted body hair from areas below the neck. Do not use it for any other purpose.
Keep the following things in mind to avoid compromising the lifetime of your Philips Lumea:
— Do not expose the appliance to temperatures lower than 15°C or higher than 35°C during use.
— The appliance is equipped with a built-in overheat protection. If the appliance overheats, it does not flash. Do not switch off the appliance, but let it cool down for approx. 15 minutes before you continue with your treatment.
— Always return the appliance to a service centre authorised by Philips for examination or repair. Repair by unqualified people could cause an extremely hazardous situation for the user.
— Never use the appliance in any of the cases mentioned in the section
‘Contraindications’.
For whom is Philips Lumea NOT suitable?
Philips Lumea is not designed for everyone. If any of the following is true for you, then this appliance is
not
suitable for you to use!
ENGLISH
11
Contraindications
Never use the appliance if you are pregnant or breast feeding.
Never use the appliance if you have an unsuitable skin and/or hair colour, i.e.:
— If your natural hair colour in the treatment areas is light blond, white, grey or red.
— If you are of skin type VI (you rarely or never get sunburnt and you tan very darkly; your skin colour is brownish black or darker). In this case you run a high risk of developing skin reactions, such as discolourations, strong redness or burns, when you use Philips Lumea. See also chapter
‘Using the appliance’, section ‘Possible side effects and skin reactions’.
Never use the appliance if you suffer from any of the diseases listed below, i.e.:
— If you have a skin disease such as active skin cancer, you have a history of skin cancer or any other localised cancer in the areas to be treated.
— If you have pre-cancerous lesions or multiple atypical moles in the areas to be treated.
— If you have a history of collagen disorder, including a history of keloid scar formation or a history of poor wound healing.
— If you have a history of vascular disorder, such as the presence of varicose veins or vascular ectasia in the areas to be treated.
— If your skin is sensitive to light and easily develops a rash or an allergic reaction.
— If you have infections, eczema, burns, inflammation of hair follicles, open lacerations, abrasions, herpes simplex, wounds or lesions and haematomas in the areas to be treated.
— If you have had surgery in the areas to be treated.
— If you have epilepsy with flashlight sensitivity.
— If you have diabetes, lupus erythematodes, porphyria or congestive heart disease.
— If you have any bleeding disorder.
— If you have a history of immunosuppressive disease (including HIV infection or AIDS).
Never use the appliance if you take any of the medications listed below, i.e.:
— If your skin is currently being treated with or has recently been treated with Alpha-Hydroxy Acids (AHAs), Beta- Hydroxy Acids (BHAs), topical isotretinoin and azelaic acid.
— If you have taken any form of isotretinoin Accutane
®
or Roaccutane
® the last six months.This treatment can make skin more susceptible to
in tears, wounds and irritations.
— If you are on painkillers, which reduce the skin’s sensitivity to heat.
— If you are taking photosensitising agents or medications, check the package insert of your medicine and never use the appliance if it is stated that it can cause photo-allergic reactions, photo-toxic reactions or if you have to avoid sun when taking this medicine.
— If you take anticoagulation medications, including heavy use of aspirin, in a manner which does not allow for a minimum 1-week washout period prior to each treatment.
— If you take immunosuppressive medications.
12
ENGLISH
Never use the appliance on the following areas:
— On the face.
— On nipples, areolas, labia minora, vagina, anus and the inside of the nostrils and ears.
— Men must not use it on the scrotum and face.
— Over or near anything artificial like silicone implants, pacemakers, subcutaneous injection ports (insulin dispenser) or piercings.
— On moles, freckles, large veins, darker pigmented areas, scars, skin anomalies without consulting your doctor. This can result in a burn and a change in skin colour, which makes it potentially harder to identify skin-related diseases (e.g. skin cancer).
— On warts, tattoos or permanent make-up. This can result in a burn and a change in skin colour (hypopigmentation or hyperpigmentation).
— On areas, where you use long-lasting deodorants. This can result in skin reactions. See chapter ‘Using the appliance’, section ‘Possible side effects and skin reactions’.
Never use the appliance on sunburnt, recently tanned (last 48 hours) or fake-tanned skin:
— All types of tanning can influence the safety of the treatment. This applies to exposure to natural sunlight as well as artificial tanning methods, such as tanning lotions, tanning appliances etc. If you are tanned or are planning to tan, see chapter ‘Preparing for use’, section
‘Tanning advice’.
Note: This list is not exhaustive. If you are not sure whether you can use the appliance we advise you to consult a doctor.
Electromagnetic fields (EMF)
This Philips appliance complies with all applicable standards and regulations regarding exposure to electromagnetic fields.
Charging
Fully charge the batteries before you use the appliance for the first time and when the batteries are empty. Fully charging the batteries takes up to 1 hour and 40 minutes.
Charge the appliance when the charging light lights up orange during use to indicate that the battery is low and will run out soon.
Fully charged batteries provide at least 370 flashes at light intensity 5.
Fully charge the appliance every 3 to 4 months, even if you do not use the appliance for a longer time.
Charge the appliance in the following way:
1 Switch off the appliance.
ENGLISH
13
2 Insert the small plug into the appliance and put the adapter in the wall socket.
,
The charging light flashes green to indicate that the appliance is charging.
,
When the batteries are fully charged, the charging light lights up green continuously.
Notes:
— The adapter and the appliance feel warm during charging. This is normal.
— You cannot use the appliance during charging.
— This appliance is equipped with battery-overheat protection and does not charge if the room temperature exceeds 40°C.
Never cover the appliance and adapter during charging.
3 After charging, remove the adapter from the wall socket and pull the small plug out of the appliance.
Preparing for use
For optimal results and greatest effect, prepare the areas on which you intend to use the appliance in the manner described below.
Preparing treatment areas
1 Shave the areas you intend to treat as long as you still experience hair regrowth.
Note: If your last depilation method involved removing hairs by the roots (e.g epilating, waxing etc.), wait until you notice significant hair regrowth before you use Philips Lumea. Do not use depilatory creams instead of shaving.
Please note that treatment on unshaved or improperly shaved areas has a number of undesired effects:
— The light exit window and attachment may become contaminated with stray hairs and dirt. A contaminated light exit window and attachment can reduce the life and efficacy of the appliance. In addition, burns or black spots that appear on the light exit window and attachments due to contamination can cause the treatment to become painful or cause skin reactions like redness and discolouration.
— Hairs on your skin can burn, which can result in an unpleasant smell.
2 Clean your skin and make sure it is hair-free, entirely dry and free from oily substances (e.g. present in cosmetic products like deodorants, lotions, perfumes, tanning creams and sunscreens).
3 Check the appliance, especially the light exit window and attachment, for trapped hair, dust and fibres. If you see any contamination, clean the appliance according to the instructions in chapter ‘Cleaning and maintenance’.
Notes:
— If shaving causes wounds or lesions, your skin may be more sensitive and the light treatment may sometimes feel uncomfortable.
— Once the hairs stop growing back, which usually happens after
4-5 treatments, you no longer have to shave before you use the appliance.
14
ENGLISH
Body hair colour: dark blond/light brown/brown/ dark brown/black white/grey/red/ light blond
4/5 x
Setting the light intensity
Philips Lumea is an appliance developed for consumer use at home and therefore not comparable with professional light-based appliances with respect to pain sensation. The pulses of light delivered by Philips Lumea are gentler than those from professional appliances and therefore you can expect a
convenient
and
effective
treatment.
You have to adjust the light intensity to your skin and body hair colour and to a level you find comfortable.
The recommended light intensities table below helps you to establish the right light intensity
1 Consult the table below to determine which light intensities are most suitable for your skin and body hair colour and to check if this method is suitable for you (if it is not, this is indicated with x in the table).
2 Each body area and possibly even parts of a body area may require a separate appropriate light intensity according to the recommended light intensities table below. The method is more effective at higher intensities, but you should reduce the light intensity if you experience any pain or discomfort.
Note: The required light intensity for different body areas may vary due to different skin colours. For example, the skin of the lower legs can be darker than the skin of the underarms due to more sun exposure.
Persons with darker skin run a higher risk of skin irritation because their skin absorbs more light. Therefore lower intensities are recommended for persons with darker skin.
The light pulse can feel warm or hot on the skin but should never be painful. To prevent skin reactions, see chapter ‘Using the appliance’, section ‘Possible side effects and skin reactions’.
Recommended light intensities (1-5)
In the table below, ‘x’means that the appliance is not suitable for you.
Skin colour and characteristics:
White
(always sunburn, no tanning)
Beige
(easy sunburn, minimal tanning)
Light brown
(sometimes sunburn, good tanning)
4/5 x
4/5 x
Mid brown
(rarely sunburn, fast and good tanning)
3/4 x
Dark brown
(rarely sunburn, very good tanning)
Brownish black and darker (rarely to never sunburn, very dark tanning)
1/2/3 x x x
ENGLISH
15
Important
To check whether Philips Lumea is suitable for you, see section ‘For whom is Philips Lumea not suitable?’.
If your skin has been exposed to natural sunlight or an artificial tanning method, it may be darker than during the previous treatment. Check the table above to determine which settings are suitable for your skin colour.
Tanning advice
Sun exposure before treatment
— If your skin is tanned, perform a skin test (see chapter ‘Using the appliance’, section ‘First use’) on the area to be treated to determine the appropriate light intensity. A failure to do so causes a risk of developing skin reactions after treatment with Philips Lumea.
— Wait at least 48 hours after sunbathing before you use the appliance.
Sunbathing can cause skin to darken (tan) and/or can cause sunburn
(reddening of the skin).
— After these 48 hours, check the skin for any remaining sunburn. Do not use Philips Lumea as long as sunburn persists.
— When the sunburn has disappeared, perform a skin test (see chapter
‘Using the appliance’, section ‘First use’) on the area to be treated to determine the appropriate light intensity.
Sun exposure after treatment
— Wait at least 24 hours after treatment before you expose treated areas to the sun. Even after 24 hours, make sure that the treated skin does not show any redness from the treatment anymore before you expose it to the sun.
— Cover treated areas when you go out into the sun or use a sunblock
(SPF 30+) in the two weeks after treatment.
— Exposing treated areas to sunlight without protection immediately after treatment can increase the risk of adverse side effects and skin reactions. See chapter ‘Using the appliance’, section ‘Possible side effects and skin reactions’.
Tanning with artificial light
— Follow the instructions in ‘Sun exposure before treatment’ and ‘Sun exposure after treatment’ above.
Tanning with creams
— If you have used an artificial tanning lotion, wait until the artificial tan has fully disappeared before you use Philips Lumea.
Note: For more details on unwanted skin reactions, see chapter ‘Using the appliance’, section ‘Possible side effects and skin reactions’.
Using the appliance
Check the recommended light intensities table in chapter ‘Preparing for use’, section ‘Setting the light intensity’ to determine which light intensities are most suitable for your skin and body hair colour. Use the appliance in a
well-lit
room; this reduces the perceived brightness of the flash. Shave the area you intend to treat before you use the appliance (see chapter
‘Preparing for use’, section ‘Preparing treatment areas’).
If the treatment becomes intolerably painful at any point in time, reduce the light intensity setting until the treatment is comfortable again. If you notice skin reactions stronger than slight redness, stop the treatment immediately and read section ‘Possible side effects and skin reactions’ in this chapter.
16
ENGLISH
First use and skin test
1 Attach the body attachment to the appliance.
The body attachment can be used to treat unwanted body hair on all body areas below the neck (for exceptions, see chapter ‘Important’, section
‘Contraindications’).
2 Choose an area close to the area you intend to treat.
3 Press the on/off button to switch on the appliance.
,
The appliance always starts automatically at the lowest setting.
4 Apply one flash at the lowest recommended intensity for your skin type (for instructions on how to release a flash, see steps 6 to 9 of section ‘Subsequent use’ in this chapter).
5 As long as it feels comfortable (not painful), increase the setting by one level within the recommended range for your skin type and apply one flash for each setting. Do not apply more than one flash on the same spot.
6 After the skin test, wait for 24 hours and check your skin for any reaction. If your skin shows reactions, choose the highest setting that did not result in any skin reaction for subsequent use.
When you use the appliance for the first time, we advise you to perform a skin test on the area to be treated to check your skin’s reaction to the treatment and to get accustomed to light-based treatment.
Subsequent use
1 Before every treatment, clean the attachment, the light exit window and the metallic frame inside the attachment of Philips Lumea. For more information see chapter ‘Cleaning and maintenance’.
2 Press the on/off button to switch on the appliance.
Note: It is normal that the appliance and the attachment become warm during use.
ENGLISH
17
3 Start each treatment by selecting the light intensity very carefully, based on your skin’s sensitivity and on how comfortable treatment feels.
Your skin may react differently on different days/occasions for a number of reasons and especially after tanning. See section ‘Possible side effects and skin reactions’ in this chapter for more information.
4 Press the
%
button to increase the intensity. To lower the intensity, press the
^ button.
,
Every time you press the button, the corresponding intensity light starts to flash. This takes a few seconds.
5 Place the appliance at a 90° angle on the skin so that the attachment and the safety ring are in contact with the skin.
6 Press the safety ring fully onto the skin with slight pressure.
Note: The safety ring has contact switches that together are the safety system of the appliance. This safety ring prevents unintentional flashing without skin contact.
,
The ‘ready to flash’ light on the back of the appliance lights up green when all contact switches of the safety ring are in contact with the skin and the device is charged. This may take a few seconds.
Tip: For easier use, stretch the area of skin you want to treat. On areas with softer skin, you may need to exert more pressure on the appliance to push in all contact switches.
18
ENGLISH
7 Press the flash button to release a flash. Now you have 2 options to release the next flash:
A Keep the flash button pressed. The appliance releases one flash after another as long as the safety ring is in full contact with the skin.
Immediately after the appliance has flashed, slide the appliance to the next area. Make sure the safety ring is fully pressed onto the skin.
This ‘Slide & Flash mode’ is especially convenient for treatment of larger areas like the legs.
B Let go of the flash button after each flash. For the next flash, place the appliance on the area right next to the previously flashed area. Make sure the safety ring is fully pressed onto the skin.
This ‘Step & Flash mode’ guarantees a precise treatment of e.g. the knees or ankles.
Note: After a few seconds, the appliance is ready to flash again, so make sure that you move it to the next area immediately after it has flashed.
Do not treat exactly the same area multiple times during one session.
This does not improve the effectiveness of the treatment, but increases the risk of skin reactions.
Note: The visible light produced by the appliance is the reflection of the flash on the skin and is harmless to your eyes. It is not necessary to wear goggles during use.
8 To avoid untreated areas, always make sure there is a slight overlap with the previously treated area when you place the appliance on the skin. The effective light only comes out of the light exit window. Make sure the flashes are produced close to each other.
9 Switch off the appliance after you have finished the treatment.
10 Check the light exit window and the attachment for hairs and dirt and clean the appliance after use (see chapter ‘Cleaning and maintenance’).
Area
Underarms
Bikini line
Entire bikini area
One lower leg
One full leg
ENGLISH
19
Guidelines for treatment
Average treatment time
Approx. treatment time
1 minute per underarm
1 minute per side
4 minutes
8 minutes
14 minutes
Note: The average treatment times above have been observed during research and tests. Individual treatment times may vary from person to person.
Note: Fully charged batteries offer at least 370 flashes at intensity 5. How long you can use the appliance depends on the size of the area to be treated and the intensity setting used.
Using the appliance on the legs
Check the recommended light intensities table in chapter ‘Preparing for use’, section ‘Setting the light intensity’ to see which settings are suitable for your legs.
— You can move the appliance up and down or across the leg, whichever is more convenient to you.
Note: Bony areas like shinbone and ankles are more sensitive than other areas of the body. When you press the attachment hard onto these areas, the skin can be more susceptible to skin reactions, such as skin irritation and redness.
See section ‘Possible side effects and skin reactions’ in this chapter. Press the attachment onto the skin just hard enough to make the ‘ready to flash’ light go on, but not harder.
Tip: The appliance may leave imprints on the skin in the treated
areas. These imprints may show you where you can make the treated areas overlap.
If you use the appliance to treat both your lower and upper legs, you may have to recharge the appliance during the treatment. This is normal. How long you can use the appliance depends on the size of the treatment area and the intensity setting used.
Tip: Many users combine leg treatments with other activities
around the house such as watching TV or listening to music. You can also try this to make the experience more enjoyable and relaxing.
20
ENGLISH
Using the appliance in the bikini area
Check the recommended light intensities table in chapter ‘Preparing for use’, section ‘Setting the light intensity’ to see which settings are suitable for your bikini area.
In principle, Philips Lumea is safe and gentle enough for treatment of the entire bikini area (e.g. for ‘Brazilian’ or ‘Hollywood’ style). Use a lower setting on darker pigmented, more sensitive skin in the bikini area. Do not use the appliance on inner labia, vagina and anus. Men who wish to treat their pubic area must not use the appliance on the scrotum.
Note: For hygienic reasons, always clean the body attachment before you start treating another body area.
Using the appliance on the underarms
Check the recommended light intensities table in chapter ‘Preparing for use’, section ‘Setting the light intensity’ to see which settings are suitable for your underarms.
Make sure you remove any deodorant, perfume, cream or other skin care product from your underarms before treatment.
Tip: To achieve optimal results on your underarms, stand in front of a mirror to get a good view of the area to be treated and the ‘ready to flash’ light. Raise your arm and place your hand in your neck to stretch the skin in the underarm area. In this way the safety ring can be pressed more easily onto the skin, which makes the treatment easier to perform.
Note: The reflected light does not harm your eyes. If the scattered light is unpleasant, close your eyes when you release a flash.
How to achieve optimal results
— It is normal that hairs are still visible after the first few treatments (see chapter ‘Introduction’, section ‘Working principle’ for more information).
— To remove all hairs successfully and prevent the hair follicle from becoming active again, the treatments have to be repeated once every two weeks for the first two months. Your skin should be smooth by then. Please read section ‘Maintenance phase’ to find out how you can keep these results.
Maintenance phase
— To ensure that your skin stays smooth, we advise you to repeat the treatment every 4 to 8 weeks. The time between treatments may vary based on your individual hair regrowth and also across different body areas. If too many hairs grow back between treatments, simply shorten the treatment interval again, but do not treat any area more often than once every two weeks. When you use the appliance more frequently than recommended, you do not increase the effectiveness but you do increase the risk of skin reactions.
ENGLISH
21
Possible side effects and skin reactions
Common skin reactions:
— Your skin may show slight redness and/or may prickle, tingle or feel warm. This reaction is absolutely harmless and disappears quickly.
— A skin reaction similar to sunburn may occur on the treated area for a short while. If this does not disappear within 3 days, we advise you to consult a doctor.
— Dry skin and itching may occur because of the combination of shaving and light treatment. This is harmless and disappears within a few days.
You can cool the area with an ice pack or a wet facecloth. If dryness persists, you can apply a non-scented moisturiser on the treated area
24 hours after the treatment.
Rare side effects:
— Burns, excessive redness and swelling: these reactions occur very rarely.
They are the result of using a light intensity that is too high for your skin colour. If these reactions do not disappear within 3 days, we advise you to consult a doctor. Wait with the next treatment until the skin has healed completely and make sure you use a lower light intensity.
— Skin discolouration: this occurs very rarely. Skin discolouration manifests itself as either a darker patch (hyperpigmentation) or a lighter patch
(hypopigmentation) than the surrounding area. This is the result of using a light intensity that is too high for your skin colour. If the discolouration does not disappear within 2 weeks, we advise you to consult a doctor.
Do not treat discoloured areas until the discolouration has disappeared and your skin has regained its normal skin colour.
— Skin infection and inflammation: This occurs very rarely and may be caused by using the appliance on wounds or cuts that resulted from shaving, on already existing wounds or on ingrown hairs.
— Excessive pain: this can occur during or after treatment if you have used the appliance on unshaved skin, if you use the appliance at a light intensity that is too high for your skin colour, if you flash the same area more than once and if you use the appliance on open wounds, inflammations, infections, tattoos, burns, etc. See chapter ‘Important’, section ‘Contraindications’ for more information.
After use
— Do not apply any perfumed cosmetics to the areas treated immediately after treatment.
— Do not use deodorant immediately after treating the underarms. Wait until any skin redness has disappeared completely.
— See chapter ‘Preparing for use’, section ‘Tanning advice’ for information about sun exposure and artificial tanning.
22
ENGLISH
Cleaning and maintenance
To ensure optimal results and a long life for the appliance, clean the appliance before and after each use and, if necessary, also during the treatment. The appliance loses its effectiveness if you do not clean it properly.
Never clean the appliance or any of its parts under the tap or in the dishwasher.
Never use scouring pads, abrasive cleaning agents or aggressive liquids such as petrol or acetone to clean the appliance.
Never scratch the light exit window or the metallic frame inside the attachments.
Note: Make sure that the contact switches of the safety ring do not get congested with dirt.
Note: Stop using the appliance when it is no longer possible to clean the light exit window or the attachment. For replacement, see chapter ‘Ordering accessories’.
1 Switch off the appliance, unplug it and let it cool down.
Note: The light exit window becomes hot during use. Make sure it has cooled down before you clean it.
2 To remove the attachment, put your fingers in the recesses at the top and bottom and pull gently. The attachment should come off easily.
3 Moisten the soft cloth supplied with the appliance with a few drops of water and use it to clean the following parts:
— the light exit window
— the outside surface of the attachment
— the metallic frame inside the attachment
Note: If water does not clean effectively, use a few drops of high-percentage alcohol to clean the parts mentioned above.
Note: A contaminated light exit window and/or attachment can look like this picture. Make sure you clean the appliance before and after each use and, if necessary, also during the treatment according to the instructions in this section.
Tip: If it is no longer possible to clean the edges of the attachment with the enclosed cleaning cloth, use a cotton bud instead. Make sure that no fluff or fibres stay behind on the attachment or on the light exit window.
4 If necessary, clean the outside of the appliance with the dry soft cleaning cloth supplied with the appliance.
ENGLISH
23
Storage
1 Switch off the appliance, unplug it and let it cool down.
2 Clean the appliance before you store it.
3 Store the appliance in a dust-free and dry place at a temperature between 0°C and 60°C.
Environment
— Do not throw away the appliance with the normal household waste at the end of its life, but hand it in at an official collection point for recycling. By doing this, you help to preserve the environment.
— The built-in rechargeable batteries contain substances that may pollute the environment. Always remove the batteries before you discard and hand in the appliance at an official collection point. Dispose of the batteries at an official collection point for batteries. If you have trouble removing the batteries, you can also take the appliance to a Philips service centre. The staff of this centre will remove the batteries for you and will dispose of them in an environmentally safe way.
Removing the rechargeable batteries
Only remove the rechargeable batteries if they are completely empty.
1 Disconnect the appliance from the adapter.
2 Let the appliance operate until the batteries are completely empty.
Switch on the appliance and release flashes until you can no longer switch on the appliance.
3 Insert an awl or another pointed tool into the bottom cap of the appliance and pry off the bottom cap.
4 Undo the two screws in the bottom of the handle with a screwdriver.
24
ENGLISH
5 Remove the bottom part of the handle and cut the two wires that connect the bottom part to the appliance.
6 Pull the battery connectors off the battery terminals with long nose pliers.
7 Pull the rechargeable batteries out of the appliance with long nose pliers.
8 Cut the two wires one at a time to ensure that no mishaps due to possible residual charge occur.
Guarantee and support
If you need information or support, please visit
www.philips.com/ support
or read the separate worldwide guarantee leaflet.
ENGLISH
25
Technical specifications
Model SC2004
Rated voltage
Rated frequency
Rated input
Protection against electric shock
Protection rating
Operating conditions
Storage conditions
Spectrum of body attachment
Lithium-ion battery
100V-240V
50Hz-60Hz
7.5W
Class II
Q
IP 30 (EN 60529)
Temperature: +15° to +35°C
Relative humidity: 25% to 95%
Temperature: 0° to +60°C
Relative humidity: 5% to 95%
>570nm
2 x 3.7 Volt 1500 mAh
Problem
The appliance does not work.
The appliance suddenly switches off.
The adapter becomes warm during charging.
The charging light does not go on when I put the small plug in the appliance socket.
Troubleshooting
This chapter summarises the most common problems you could encounter with the appliance. If you are unable to solve the problem with the information below, visit www.philips.com/support for a list of frequently asked questions or contact the Consumer Care Centre in your country.
Possible cause
The rechargeable batteries are empty.
The appliance is defective.
The rechargeable batteries are empty.
This is normal.
Solution
Charge the appliance (see chapter ‘Charging’).
Contact the Consumer Care Centre in your country, your Philips dealer or a Philips service centre.
Charge the appliance (see chapter ‘Charging’).
No action required.
You have not put the adapter in the wall socket.
Insert the small plug into the appliance socket and put the adapter in the wall socket.
26
ENGLISH
Problem
I have switched on the appliance but I cannot increase or decrease the light intensity.
The ‘ready to flash’ light does not go on when I place the appliance on the skin.
The ‘ready to flash’ light does not go on when I place the attachment on my skin, but the cooling fan works.
Possible cause
The wall socket is not live.
The adapter is not inserted properly into the wall socket and/or the small plug is not inserted properly into the appliance socket.
The appliance is defective.
The appliance has to be reset.
You have not put the attachment with safety ring properly on the skin.
Solution
Connect another appliance to the wall socket to check if the wall socket is live. If the socket is live but the appliance still does not charge, contact the Consumer
Care Centre in your country, your Philips dealer or a
Philips service centre.
Make sure the adapter is inserted properly into the wall socket and/or the small plug is inserted properly into the appliance socket.
Contact the Consumer Care Centre in your country, your Philips dealer or a Philips service centre.
To reset the appliance, switch off the appliance and then switch it on again. If you still cannot adjust the light intensity, contact the Consumer Care Centre in your country, your Philips dealer or a Philips service centre.
Place the appliance at a 90° angle onto the skin in such a way that all contact switches touch the skin. Then check if the ‘ready to flash’ light is on and press the flash button.
The safety ring is dirty.
The overheat protection has been activated.
If this does not work, place the appliance on a part of your body where it is easy to establish full skin contact, for example on your lower arm.Then check if the ‘ready to flash’ light works. If the ‘ready to flash’ light still does not go on when you place the appliance on the skin, contact the Consumer Care Centre in your country, your Philips dealer or a Philips service centre.
Clean the safety ring carefully. If you are unable to clean the safety ring properly, contact the
Consumer Care Centre in your country, your Philips dealer or a Philips service centre to replace the attachment.
When the overheat protection has been activated, the fan still works. Do not switch off the appliance and let it cool down for approx. 15 minutes before you continue to use it. If the ‘ready to flash’ light still does not go on when you place the appliance on the skin, contact the Consumer Care Centre in your country, your Philips dealer or a Philips service centre.
ENGLISH
27
Problem
The ‘ready to flash’ light is green but the appliance does not produce a flash when I press the flash button.
Possible cause
The appliance needs to be reset.
Solution
To reset the appliance, switch off the appliance and switch it on again. If the ‘ready to flash’ light is green but the appliance still does not produce a flash when you press the flash button, contact the Consumer
Care Centre in your country, your Philips dealer or a
Philips service centre.
No action required.
The appliance becomes warm during use.
The appliance does not show light intensity 1 when I switch it on.
The appliance produces a strange smell.
The skin feels more sensitive than usual during treatment.
This is normal.
The appliance needs to be reset.
The attachment and/or the filter glass is dirty.
You have not shaved the area to be treated properly.
To reset the appliance, switch it off and on again. If the appliance still does not show light intensity 1, contact your Customer Care Centre, your Philips dealer or a
Philips Service Centre.
Clean the attachment carefully. If you are unable to clean the attachment properly, contact the Consumer
Care Centre in your country, your Philips dealer or a
Philips service centre to replace the attachment.
If there are hairs on the area to be treated, these hairs may get burnt when you use the appliance. As a result, you notice a strange smell. Shave the area to be treated properly before you use the appliance. If shaving causes skin irritation, trim hairs as short as possible and use a comfortable setting.
The strange smell disappears after a few flashes.
You stored the appliance in a dusty environment.
The light intensity you use is too high.
Check if you have selected the right light intensity. If necessary, select a lower light intensity.
I experience an unacceptable pain sensation when I use the appliance.
You did not shave the areas to be treated.
The UV filter of the light exit window is broken.
The appliance is defective.
You did not shave the areas to be treated
Shave the areas to be treated before you use the appliance. If shaving causes skin irritation, trim hairs as short as possible and use a comfortable setting.
If the UV filter of the light exit window is broken, do not use the appliance anymore. Contact the
Consumer Care Centre in your country, your Philips dealer or a Philips service centre.
Contact the Consumer Care Centre in your country, your Philips dealer or a Philips service centre.
Shave the areas to be treated before you use the appliance. If shaving causes skin irritation, trim hairs as short as possible and use a comfortable setting.
28
ENGLISH
Problem
The treated areas become red after the treatment.
The skin reaction after the treatment lasts longer than usual.
Possible cause
You treated an area for which the appliance is not intended.
You have used a light intensity which is too high for you.
The appliance is not suitable for your skin colour.
Slight redness is harmless and normal and disappears quickly.
You have used a light intensity which is too high for you.
Solution
You must not use the appliance on your face, inner labia, vagina, anus, nipples, areolas, and inside the nostrils and ears. Men must not use it on their face or scrotum.
Reduce the light intensity to a level that is comfortable for you. See chapter ‘Preparing for use’, section ‘Setting the light intensity’.
Do not use the appliance if you have a very dark skin.
Do not use it either if your body hair is light blond, red, grey or white.
No action required.
Select a lower light intensity the next time. See chapter
‘Preparing for use’, section ‘Setting the light intensity.
The hair-removal results are not satisfactory.
If the skin reaction lasts longer than 3 days, contact your doctor.
Select a higher light intensity the next time.
You have used a light intensity which is too low for you.
You did not make enough overlaps when you used the appliance.
You do not use the appliance as often as recommended.
For proper hair-removal results, you have to make overlaps when you use the appliance. See chapter
‘Using the appliance’, section ‘Subsequent use’, step 9.
To remove all hairs successfully and to prevent the hair root from becoming active again, the treatments have to be repeated once every two weeks for the first two months. To ensure that your skin stays smooth, we advise you to repeat the treatment every four to six weeks. The time between treatments may vary based on your individual hair regrowth and also across different body areas. If too many hairs grow back between treatments, simply shorten the treatment interval again, but do not treat any area more often than once every two weeks. When you use the appliance more frequently than recommended, you do not increase the effectiveness but you do increase the risk of skin reactions.
ENGLISH
29
Problem
Hair starts to grow again in some spots on the treated areas.
Possible cause Solution
The appliance is not suitable for your hair or skin colour.
You did not make enough overlaps when you used the appliance.
Hair starts to grow again as part of the natural cycle of hair growth.
Do not use the appliance if your body hair is light blond, red, grey or white. Do not use the appliance either if you have very dark skin.
For proper hair-removal results, you have to make overlaps when you use the appliance. See chapter
‘Using the appliance’, section ‘Subsequent use’, step 9.
This is normal. It is part of the natural cycle of hair growth that hair starts growing again. The hairs that come back, however, tend to be softer and thinner.
30
FRANÇAIS
Table des matières
Introduction
Avantages
Technologie dite de « lumière intense pulsée » ou IPL pour une utilisation à domicile
Prévention efficace de la repousse des poils pour une douceur incomparable, jour après jour
Une application tout en douceur, même sur les zones sensibles du corps
Fonctionnement sans fil pour une liberté et une flexibilité maximales
Batterie longue durée pour un flashage corps complet
Aucune pièce de rechange nécessaire, aucun coût caché
Quel est le principe de fonctionnement de la technologie de lumière intense pulsée de Philips ?
Cycle de vie du poil
Principes de fonctionnement de l’appareil
31
31
31
31
32
32
32
32
Description générale
Important
Danger
Avertissement
Pour éviter tout dommage :
Attention
Pour assurer une durée de vie optimale à votre appareil
Philips Lumea, tenez compte des considérations suivantes : 35
Quelles sont les personnes auxquelles Philips Lumea NE convient
PAS ?
Contre-indications
35
35
N’utilisez jamais l’appareil si vous êtes enceinte ou si vous allaitez. 35
34
34
34
34
35
32
32
33
33
N’utilisez jamais l’appareil si la couleur de votre peau et/ou de vos poils n’est pas adaptée, à savoir :
N’utilisez jamais l’appareil si vous souffrez d’une des maladies répertoriées ci-dessous :
35
35
N’utilisez jamais l’appareil si vous êtes dans l’un des cas suivants : 36
36 N’utilisez jamais l’appareil sur les zones suivantes :
N’utilisez jamais l’appareil sur des coups de soleil ou sur une peau teintée par un bronzage récent (moins de 48 heures) ou artificiel : 37
Champs électromagnétiques (CEM)
Charge
Avant utilisation
Préparation des zones à flasher
Réglage de l’intensité lumineuse
Intensités lumineuses recommandées (1-5)
Important
Conseils de bronzage
Utilisation de l’appareil
37
37
38
38
Première utilisation et test cutané
Utilisation ultérieure
Recommandations relatives à la séance
Durée moyenne de la séance
Utilisation de l’appareil sur les jambes
Conseil : crayon blanc pour les yeux
40
41
41
44
38
39
39
40
44
44
45
FRANÇAIS
31
Utilisation de l’appareil pour l’épilation du maillot
Utilisation de l’appareil sur les aisselles
Pour des résultats optimaux
Phase d’entretien
Éventuels effets secondaires et réactions cutanées
Après utilisation
Nettoyage et entretien
Rangement
Environnement
Retrait des batteries rechargeables
Garantie et assistance
Spécificités techniques
Dépannage
Introduction
Félicitations pour votre achat et bienvenue dans l’univers Philips ! Pour profiter pleinement de l’assistance Philips, enregistrez votre produit sur le site à l’adresse suivante : www.philips.com/welcome.
L’épilation à lumière pulsée est l’une des méthodes les plus efficaces pour
épiler durablement les poils indésirables. Elle se distingue des méthodes actuelles d’épilation à domicile par sa capacité à réduire considérablement la repousse des poils. Philips s’est investi depuis plus de 10 ans dans la recherche aux côtés de dermatologues de renom. Profitez de cette technologie innovante à domicile.
Cet appareil a été particulièrement conçu et optimisé pour les femmes, mais peut être également utilisé par les hommes.
Grâce à l’accessoire adapté, Philips Lumea permet d’épiler les poils indésirables sur les zones du corps situées en dessous de la nuque.
Philips Lumea a été conçu pour une utilisation individuelle.
Pour en savoir plus sur Philips Lumea et pour visionner des films sur l’utilisation de Lumea, rendez-vous sur www.philips.com/lumea. Consultez régulièrement notre page d’accueil pour découvrir les mises à jour.
Avantages
Cet appareil offre les avantages suivants :
Technologie dite de « lumière intense pulsée » ou IPL pour une utilisation à domicile
Philips Lumea utilise la technologie dite de « lumière intense pulsée » ou IPL, employée depuis quinze ans dans le secteur de l’esthétique professionnelle pour les épilations. Avec Philips Lumea, bénéficiez de cette technologie innovante chez vous, en toute sécurité et avec efficacité.
Prévention efficace de la repousse des poils pour une douceur incomparable, jour après jour
Cette méthode offre une prévention longue durée de la repousse des poils et vous laisse une peau douce comme de la soie. Nos études ont mis en
évidence une diminution considérable des poils après seulement 2 séances.
Les résultats optimaux ont généralement été obtenus après 4 ou
5 séances. La pilosité diminue visiblement de séance en séance. La rapidité d’apparition de cet effet et la durée du résultat dépendent de l’individu.
Pour plus d’informations, reportez-vous à la section « Pour des résultats optimaux » du chapitre « Utilisation de l’appareil ».
46
46
47
48
45
45
45
45
48
49
50
50
51
32
FRANÇAIS
Une application tout en douceur, même sur les zones sensibles du corps
Développé en étroite collaboration avec des dermatologues de renom et testé sur plus de 2 000 femmes, Philips Lumea offre un flashage efficace et doux, même sur les zones plus sensibles.
Fonctionnement sans fil pour une liberté et une flexibilité maximales
L’appareil fonctionne avec une batterie rechargeable : vous pouvez donc l’emporter partout et l’utiliser où que vous soyez.
Batterie longue durée pour un flashage corps complet
Une batterie entièrement chargée permet un flashage complet du corps
(aisselles, maillot et demi-jambes) en une seule opération, sans devoir recharger l’appareil.*
*Sur la base des durées de flashage moyennes pour chaque zone et des intensités recommandées pour un utilisateur.
Aucune pièce de rechange nécessaire, aucun coût caché
Philips Lumea est équipé d’une lampe haute performance qui n’a pas besoin d’être remplacée. Cette lampe peut produire plus de
100 000 flashs : elle vous permettra d’obtenir des résultats continus sur plus de 5 ans* et de réaliser des économies sur le remplacement des lampes.
*Sur la base des durées de flashage moyennes pour chaque zone et des intensités recommandées pour un utilisateur.
Quel est le principe de fonctionnement de la technologie de lumière intense pulsée de Philips ?
Cycle de vie du poil
La vitesse de pousse des poils varie en fonction de l’individu, de son âge et de son métabolisme, entre autres facteurs. Toutefois, la pousse des poils s’effectue normalement en 3 phases.
1 Phase de pousse (la phase anagène)
Le poil pousse à la racine. C’est lors de cette phase que la concentration de mélanine, le pigment responsable de la couleur du poil, est la plus
élevée. La concentration de mélanine est également déterminante pour l’efficacité de cette méthode. Seuls les poils en phase anagène sont réceptifs à l’exposition à la lumière intense pulsée.
2 Phase de dégradation (phase catagène)
Le poil arrête de pousser, la racine passe en phase de repos, puis le poil tombe.
3 Phase de repos (phase télogène)
Le poil mort se détache de son follicule et tombe. Le follicule reste au repos jusqu’à ce que l’horloge biologique la réactive et lui fasse produire un nouveau poil.
FRANÇAIS
33
Principes de fonctionnement de l’appareil
— L’appareil chauffe le poil et la racine sous la peau. La mélanine contenue dans le poil et sa racine absorbe la lumière pulsée émise. Plus le poil est foncé, plus la lumière absorbée est élevée. Ce processus permet au poil de passer en phase de repos.
— Entre les séances, les poils tombent naturellement et la repousse est inhibée. Il peut falloir une ou deux semaines pour que les poils tombent.
— Une épilation optimale nécessite plusieurs séances, car seuls les poils en phase anagène sont réceptifs au flashage à la lumière, alors qu’une zone donnée de la peau contient des poils à différentes phases du cycle de vie. Pour réussir à épiler tous les poils et à empêcher que les racines ne redeviennent actives, vous devez répéter le flashage toutes les 2 semaines.
Un filtre optique intégré protège votre peau des UV, pour une utilisation sans danger.
Description générale (fig. 5)
1 Verre filtrant avec filtre UV intégré
2 Accessoire corps (pour toutes les parties du corps au-dessous du cou)
3 Cadre métallique intégré à l’accessoire
4 Système de sécurité (anneau de sécurité avec interrupteurs de contact)
5 Bouton Flash
6 Voyants d’intensité (1- 5)
7
%
Bouton d’augmentation de l’intensité
8
^
Bouton de diminution de l’intensité
9 Voyant de charge et indication de batterie faible
10 Bouton marche/arrêt
11 Prise de l’appareil
12 Voyant « prêt-à-flasher »
13 Fentes de ventilation
14 Adaptateur
15 Petite fiche
34
FRANÇAIS
Important
Lisez attentivement ce mode d’emploi avant d’utiliser l’appareil et conservez-le pour un usage ultérieur.
Danger
— L’eau et l’électricité ne font pas bon ménage ! N’utilisez jamais l’appareil dans un environnement humide (p. ex. près d’une baignoire remplie d’eau, d’une douche en fonctionnement ou d’une piscine).
— Évitez de mouiller l’appareil et l’adaptateur secteur.
— Si l’appareil est cassé, ne touchez aucun de ses composants internes afin d’éviter tout risque d’électrocution.
— N’introduisez jamais d’objets dans l’appareil.
Avertissement
— Cet appareil n’est pas destiné à être utilisé par des personnes
(notamment des enfants) dont les capacités physiques, sensorielles ou intellectuelles sont réduites, à moins que celles-ci ne soient sous surveillance ou qu’elles n’aient reçu des instructions quant à l’utilisation de l’appareil par une personne responsable de leur sécurité.
— Veillez à ce que les enfants ne puissent pas jouer avec l’appareil.
— Cet appareil n’est pas destiné à être utilisé par des enfants de moins de 15 ans. Les adolescentes de 15 à 18 ans peuvent l’utiliser avec l’autorisation et l’aide de leurs parents ou des personnes qui exercent sur elles l’autorité parentale. Les adultes de plus de 19 ans peuvent utiliser cet appareil en toute liberté.
— Chargez toujours l’appareil à l’aide de l’adaptateur secteur fourni.
— N’utilisez pas l’appareil ou l’adaptateur secteur s’il est endommagé.
— L’adaptateur contient un transformateur. Pour éviter tout accident, n’essayez pas de remplacer la fiche de l’adaptateur secteur.
— Si l’adaptateur secteur est endommagé, il doit toujours être remplacé par un adaptateur secteur de même type pour éviter tout accident.
— N’utilisez pas l’appareil si le filtre UV du verre filtrant est cassé.
Pour éviter tout dommage :
— Veillez à ce que rien n’obstrue le flux d’air à travers les fentes de ventilation.
— Ne soumettez jamais l’appareil à des chocs violents, des secousses ou des chutes.
— Lorsque l’appareil passe d’un environnement très froid à un environnement très chaud, et inversement, attendez environ 3 heures avant de l’utiliser.
— Rangez l’appareil dans un endroit exempt de poussière pour éviter qu’il ne devienne poussiéreux.
— Ne laissez jamais l’appareil branché sans surveillance. Éteignez impérativement l’appareil après utilisation.
— N’exposez pas l’appareil pendant plusieurs heures aux rayons directs du soleil ou à des rayons UV.
— Ne faites pas fonctionner le flash sur d’autres surfaces que votre peau, car vous pourriez endommager l’accessoire et/ou le verre filtrant. Utilisez le flash uniquement lorsque l’appareil est en contact avec la peau.
FRANÇAIS
35
Attention
— N’utilisez jamais l’appareil autour des yeux et près des sourcils afin d’éviter tout risque de lésion oculaire.
— N’utilisez cet appareil qu’avec une intensité adaptée à votre type de peau. Une utilisation avec une intensité supérieure à celle recommandée augmente le risque de réactions cutanées et d’effets secondaires.
— Cet appareil a été conçu uniquement pour épiler les poils indésirables situés en dessous de la nuque. Ne l’utilisez jamais à d’autres fins.
Pour assurer une durée de vie optimale à votre appareil
Philips Lumea, tenez compte des considérations suivantes :
— Utilisez votre appareil à une température comprise entre 15 °C et
35 °C.
— L’appareil est équipé d’une protection anti-surchauffe intégrée. Le flash ne fonctionne pas en cas de surchauffe. N’éteignez pas l’appareil, mais laissez-le refroidir pendant environ 15 minutes avant de reprendre la séance.
— Confiez toujours l’appareil à un Centre Service Agréé Philips pour réparation ou vérification. Toute réparation par une personne non qualifiée peut s’avérer dangereuse pour l’utilisateur.
— N’utilisez jamais l’appareil dans les conditions mentionnées dans la section « Contre-indications ».
Quelles sont les personnes auxquelles Philips Lumea NE convient PAS ?
Philips Lumea n’est pas destiné à tout le monde. Si l’une des conditions ci-dessous s’applique à vous,
n’utilisez pas
cet appareil !
Contre-indications
N’utilisez jamais l’appareil si vous êtes enceinte ou si vous allaitez.
N’utilisez jamais l’appareil si la couleur de votre peau et/ou de vos poils n’est pas adaptée, à savoir :
— Dans les zones d’application, la couleur naturelle de vos poils est blond clair, blanc, gris ou roux.
— Votre peau est de type VI (vous attrapez rarement, voire jamais, des coups de soleil et vous obtenez un bronzage très foncé ; votre peau est brune ou noire). Dans ce cas, vous risquez d’avoir des réactions cutanées (vives rougeurs, brûlures ou altérations de la pigmentation) lorsque vous utilisez Philips Lumea. Voir également le chapitre
« Utilisation de l’appareil », section « Éventuels effets secondaires et réactions cutanées ».
N’utilisez jamais l’appareil si vous souffrez d’une des maladies répertoriées ci-dessous :
— Si vous avez une maladie de peau comme un cancer de la peau actif, si vous avez des antécédents de cancer de la peau ou un autre cancer localisé dans les zones à flasher.
— Si vous avez des lésions précancéreuses ou plusieurs grains de beauté atypiques dans les zones à flasher.
36
FRANÇAIS
— Si vous présentez des antécédents de maladie du collagène, y compris des antécédents de formation de cicatrices chéloïdes ou de cicatrisation difficile.
— Si vous présentez des antécédents de troubles vasculaires, tels que varices ou ectasie vasculaire dans les zones à flasher.
— Si votre peau est sensible à la lumière et développe facilement une irritation ou une réaction allergique.
— Si vous souffrez d’infections, d’eczéma, de brûlures, de follicules enflammées, de lacérations ouvertes, d’abrasions, d’herpès simplex, de plaies ou de lésions, d’hématomes, ou que vous avez subi une intervention chirurgicale sur les zones à flasher.
— Si vous avez subi une intervention chirurgicale sur les zones à flasher.
— Si vous souffrez d’épilepsie avec sensibilité aux flashs.
— Si vous souffrez de diabète, de lupus érythémateux, de porphyrie ou d’une maladie cardiaque congestive.
— Si vous présentez un trouble de la coagulation.
— Si vous avez des antécédents de maladie immunodépressive (y compris infection par le VIH ou le SIDA).
N’utilisez jamais l’appareil si vous êtes dans l’un des cas suivants :
— Si vous suivez ou avez suivi récemment un traitement à base d’acides alpha hydroxylés (AHA), d’acides bêta hydroxylés (BHA), d’isotrétinoïne topique et d’acide azélaïque.
— Si vous avez pris de l’Accutane
®
ou du Roaccutane
®
à l’isotrétinoïne au cours des six derniers mois. Ce traitement rend la peau plus sujette aux déchirures, plaies et irritations.
— Si vous prenez des analgésiques, qui réduisent la sensibilité de votre peau à la chaleur.
— Si vous prenez des médicaments ou produits photosensibilisants, reportez-vous à leur notice, et n’utilisez en aucun cas l’appareil si cette dernière indique des risques de réaction photo-allergique ou phototoxique, ou si elle précise qu’il faut éviter une exposition au soleil.
— Si vous prenez des médicaments anticoagulants, y compris de fortes doses d’aspirine, à un rythme ne permettant pas d’aménager une période d’élimination d’une semaine avant chaque séance.
— Si vous prenez des immunosuppresseurs.
N’utilisez jamais l’appareil sur les zones suivantes :
— Sur le visage.
— Sur les mamelons, les aréoles, les petites lèvres, le vagin, l’anus et l’intérieur des narines et des oreilles.
— Les hommes ne doivent pas l’utiliser sur le scrotum et le visage.
— Au-dessus ou près de produits artificiels tels que des implants en silicone, des stimulateurs cardiaques, des points d’entrée d’injection sous-cutanée (pompe à insuline) ou des piercings.
— Sur les grains de beauté, les taches de rousseur, les veines de taille importante, les zones à la pigmentation plus foncée, les cicatrices et les anomalies cutanées sans consultation préalable avec un médecin, en raison d’un risque de brûlure ou de modification de la pigmentation, qui rendrait difficile le dépistage d’éventuelles maladies de peau telles que le cancer de la peau.
FRANÇAIS
37
— Sur des verrues, des tatouages ou un maquillage permanent en raison du risque de brûlure ou de modification de la pigmentation
(hypopigmentation ou hyperpigmentation).
— Sur les zones où vous utilisez du déodorant longue durée, car cela pourrait entraîner des réactions cutanées. Reportez-vous à la section
« Éventuels effets secondaires et réactions cutanées » du chapitre
« Utilisation de l’appareil ».
N’utilisez jamais l’appareil sur des coups de soleil ou sur une peau teintée par un bronzage récent (moins de 48 heures) ou artificiel :
— Tous les types de bronzage peuvent influer sur la sécurité de la séance, qu’il s’agisse d’une exposition au soleil ou de méthodes de bronzage artificiel telles que crèmes de bronzage, appareils de bronzage, etc. Si vous êtes bronzée ou prévoyez de bronzer, lisez le chapitre « Avant utilisation », section « Conseils de bronzage ».
Remarque : Cette liste n’est pas exhaustive. En cas de doute concernant l’utilisation de l’appareil, veuillez consulter votre médecin.
Champs électromagnétiques (CEM)
Cet appareil Philips est conforme à toutes les normes et à tous les règlements applicables relatifs à l’exposition aux champs
électromagnétiques.
Charge
Chargez entièrement la batterie avant d’utiliser l’appareil pour la première fois et lorsque celle-ci est épuisée. Une charge complète prend jusqu’à environ 1 heure et 40 minutes.
Chargez l’appareil lorsque le voyant de charge s’allume en orange en cours d’utilisation pour indiquer que la batterie est faible et sera bientôt déchargée.
Une batterie entièrement chargée permet d’émettre au moins 370 flashs d’une intensité lumineuse de 5.
Rechargez entièrement l’appareil tous les 3 à 4 mois, même en cas d’inutilisation prolongée.
Pour charger l’appareil, suivez la procédure ci-dessous :
1 Éteignez l’appareil.
2 Insérez la petite fiche dans l’appareil et l’adaptateur secteur dans la prise secteur.
,
Le voyant de charge clignote en vert pour indiquer que l’appareil se charge.
,
Lorsque la batterie est entièrement chargée, le voyant de charge cesse de clignoter et devient vert.
Remarques :
— L’adaptateur et l’appareil chauffent pendant la charge. Ce phénomène est normal.
— Il est impossible d’utiliser l’appareil pendant la charge.
— Cet appareil est équipé d’un dispositif de protection de surchauffe de la batterie et ne se recharge pas si la température ambiante est supérieure à 40 °C.
38
FRANÇAIS
Ne recouvrez jamais l’appareil ou l’adaptateur secteur lors de la charge.
3 Une fois la charge terminée, débranchez l’adaptateur de la prise murale, puis retirez la petite fiche de l’appareil.
Avant utilisation
Pour une efficacité et des résultats optimaux, préparez les zones sur lesquelles vous souhaitez utiliser l’appareil de la manière suivante :
Préparation des zones à flasher
1 Rasez les zones que vous souhaitez flasher tant que vous observez une repousse des poils.
Remarque : Si votre dernière méthode d’épilation consistait à éliminer les poils à la racine (par exemple épilation électrique, à la cire, etc.), attendez la repousse des poils avant d’utiliser Philips Lumea. N’utilisez pas de crèmes dépilatoires.
Sachez que flasher des zones mal ou non rasées entraîne un certain nombre de réactions indésirables :
— Le verre filtrant et l’accessoire peuvent être contaminés par la présence de poils et de saletés. Si le verre filtrant et l’accessoire sont contaminés, cela peut réduire la durée de vie et l’efficacité de l’appareil. En outre, la présence de brûlures/points noirs sur le verre filtrant et l’accessoire peut rendre la séance inconfortable ou entraîner des réactions cutanées telles que rougeurs ou altérations de la pigmentation.
— Les poils présents sur votre peau risquent de brûler et de dégager une odeur désagréable.
2 Nettoyez votre peau et assurez-vous qu’elle est débarrassée de tout poil, parfaitement sèche et exempte de substance grasse (les produits cosmétiques tels que les déodorants, laits, parfums, crèmes de bronzage et crèmes solaires en contiennent).
3 Vérifiez l’appareil. Regardez notamment si des poils, de la poussière et des fibres ne sont pas piégés au niveau du verre filtrant ou de l’accessoire. En cas de salissures, nettoyez l’appareil en suivant les instructions du chapitre « Nettoyage et entretien ».
Remarques :
— Si le rasage cause des plaies ou des lésions, il est possible que votre peau soit extrêmement sensible et la séance désagréable.
— Une fois que les poils ne repoussent plus, ce qui est généralement le cas après 4-5 séances, vous n’avez plus besoin de vous raser avant utilisation.
Réglage de l’intensité lumineuse
Philips Lumea est un appareil (système de contrôle de la repousse des poils) destiné à un usage à domicile qui n’est donc pas comparable aux appareils professionnels qui utilisent une lumière pulsée plus forte, les impulsions lumineuses émises par Philips Lumea sont modérées et permettent une séance
pratique
et
efficace
.
Réglez l’intensité lumineuse en fonction de la couleur de votre peau et de vos poils, tout en recherchant un niveau confortable.
Le tableau ci-dessous indique les intensités lumineuses recommandées afin de vous aider à trouver le niveau qui vous convient.
FRANÇAIS
39
Couleur et caractéristiques de la peau :
Blanc
(coups de soleil
à chaque exposition, aucun bronzage)
1 Consultez le tableau ci-dessous pour déterminer les intensités lumineuses les plus adaptées à la couleur de votre peau et de vos poils, et pour vérifier que cette méthode d’épilation vous convient
(une croix figure dans le tableau lorsque ce n’est pas le cas).
2 Chaque zone du corps et même certaines parties de celle-ci peuvent nécessiter une intensité lumineuse différente, conformément aux valeurs recommandées dans le tableau ci-dessous. La méthode est plus efficace à intensité élevée, mais nous vous invitons à réduire l’intensité lumineuse en cas de douleur ou d’inconfort.
Remarque : L’intensité lumineuse requise pour les différentes parties du corps peut varier en raison de la couleur de la peau. Par exemple, la peau des demi-jambes peut être plus foncée que celle des aisselles en raison d’une plus grande exposition au soleil.
Le risque d’irritation cutanée est plus important pour les personnes à peau foncée car leur peau absorbe plus de lumière. Les faibles intensités sont alors recommandées.
L’impulsion lumineuse peut produire des sensations de chaleur plus ou moins importantes sur la peau, mais ne doit jamais être inconfortable.
Pour éviter les réactions cutanées, reportez-vous au chapitre
« Utilisation de l’appareil », section « Éventuels effets secondaires et réactions cutanées ».
Intensités lumineuses recommandées (1-5)
Dans le tableau ci-dessous, la croix signifie qu’il n’est pas recommandé d’utiliser l’appareil.
Beige
(coups de soleil réguliers, léger bronzage)
Brun clair
(quelques coups de soleil, bon bronzage)
Brun moyen
(rares coups de soleil, bronzage bon et rapide)
Brun foncé
(rares coups de soleil, très bon bronzage)
Brun très foncé, noir
(coups de soleils rares voire inexistants, bronzage très foncé)
Couleur des poils : blond foncé/brun clair/brun/brun foncé/noir blanc/gris/roux/ blond clair
4/5 x
4/5 x
4/5 x
3/4 x
1/2/3 x x x
Important
Pour savoir si Philips Lumea vous convient, consultez la section « Quelles sont les personnes auxquelles Philips Lumea ne convient pas ? ».
Si votre peau a été exposée au soleil ou à une méthode de bronzage artificiel, elle peut être plus foncée que lors de la séance précédente.
Consultez le tableau ci-dessus afin de déterminer le réglage le plus adapté
à la couleur de votre peau.
40
FRANÇAIS
Conseils de bronzage
Exposition au soleil avant la séance
— Si votre peau est bronzée, faites un test (voir le chapitre « Utilisation de l’appareil », section « Première utilisation ») sur la zone à flasher pour déterminer l’intensité lumineuse appropriée. Si vous ne respectez pas cette consigne, vous risquez de développer des réactions cutanées après avoir utilisé Philips Lumea.
— Après un bain de soleil, attendez au moins 48 heures avant d’utiliser l’appareil. Les bains de soleil peuvent rendre la peau plus foncée
(bronzée) et/ou provoquer des coups de soleil (rougeurs).
— Après 48 heures, regardez si votre peau présente toujours des coups de soleil. N’utilisez pas Philips Lumea tant que le coup de soleil persiste.
— Une fois que le coup de soleil a disparu, faites un test (voir le chapitre
« Utilisation de l’appareil », section « Première utilisation ») sur la zone
à flasher pour déterminer l’intensité lumineuse appropriée.
Exposition au soleil après la séance
— Après la séance, attendez au moins 24 heures avant d’exposer les zones flashées au soleil. Même après 24 heures, assurez-vous que la peau ne présente plus de rougeurs dues aux flashs avant de l’exposer au soleil.
— Pendant les deux semaines qui suivent la séance, couvrez les zones flashées quand vous allez au soleil ou utilisez un écran total d’indice
SPF 30+.
— L’exposition au soleil sans protection des zones tout juste flashées peut accroître le risque d’effets secondaires et de réactions cutanées.
Reportez-vous au chapitre « Utilisation de l’appareil », section
« Éventuels effets secondaires et réactions cutanées ».
Bronzage à la lumière artificielle
— Suivez les instructions décrites ci-dessus dans « Exposition au soleil avant la séance » et « Exposition au soleil après la séance ».
Bronzage avec des crèmes
— Si vous avez utilisé une crème de bronzage artificiel, attendez la disparition totale du bronzage artificiel avant d’utiliser Philips Lumea.
Remarque : Pour plus d’informations sur les réactions cutanées indésirables, reportez-vous au chapitre « Utilisation de l’appareil », section « Éventuels effets secondaires et réactions cutanées ».
Utilisation de l’appareil
Reportez-vous au tableau du chapitre « Avant utilisation », section
« Réglage de l’intensité lumineuse », pour connaître les intensités lumineuses les plus adaptées à la couleur de vos poils et à la pigmentation de votre peau. Utilisez l’appareil dans une pièce
bien éclairée
de manière à réduire l’impression lumineuse du flash. Rasez la zone à flasher avant d’utiliser l’appareil (voir le chapitre « Avant utilisation », section
« Préparation des zones à flasher »).
Si, à un moment, Lumea provoque une douleur intolérable, réduisez l’intensité lumineuse jusqu’à ce que l’utilisation du produit redevienne plus confortable. Si vous remarquez des réactions cutanées plus importantes qu’une légère rougeur, arrêtez immédiatement la séance et lisez la section « Éventuels effets secondaires et réactions cutanées », dans le présent chapitre.
FRANÇAIS
41
Première utilisation et test cutané
1 Fixez l’accessoire corps à l’appareil.
L’accessoire corps peut être utilisé pour épiler les poils indésirables sur toutes les parties du corps situées en dessous du cou (pour connaître les exceptions, reportez-vous au chapitre « Important », section « Contreindications »).
2 Choisissez une zone proche de celle que vous allez flasher.
3 Mettez l’appareil en marche en appuyant sur le bouton marche/arrêt.
,
L’appareil se met toujours en marche au réglage le plus bas.
4 Appliquez un flash à l’intensité la plus faible recommandée pour votre type de peau (pour savoir comment émettre un flash, consultez les étapes 6 à 9 de la section « Utilisation ultérieure » du présent chapitre).
5 Tant que l’utilisation de Lumea reste sans douleur, augmentez l’intensité d’un niveau dans la plage recommandée pour votre type de peau et appliquez un flash pour chaque intensité. N’appliquez pas plus d’un flash à un même endroit.
6 Après ce test, attendez 24 heures et vérifiez si votre peau a réagi.
Si elle présente des réactions, lors des utilisations ultérieures, choisissez l’intensité la plus élevée n’ayant pas provoqué de réaction cutanée.
Lors de la première utilisation, nous vous conseillons d’effectuer un test sur la zone à flasher pour voir comment votre peau réagit et pour vous habituer à cette méthode d’épilation.
Utilisation ultérieure
1 Avant chaque séance, nettoyez l’embout, le verre filtrant et le cadre métallique à l’intérieur de l’embout de Philips Lumea. Pour en savoir plus, reportez-vous au chapitre « Nettoyage et entretien ».
2 Mettez l’appareil en marche en appuyant sur le bouton marche/arrêt.
Remarque : Il est normal que l’appareil et l’accessoire chauffent au cours de l’utilisation.
42
FRANÇAIS
3 Commencez chaque séance en sélectionnant très soigneusement l’intensité lumineuse en fonction de la sensibilité de votre peau et de votre sensation de confort.
Pour plusieurs raisons, votre peau peut réagir différemment selon les jours/ occasions, notamment après bronzage. Pour plus d’informations, reportezvous à la section « Éventuels effets secondaires et réactions cutanées », dans le présent chapitre.
4 Appuyez sur le bouton
%
pour augmenter l’intensité, et sur le bouton
^
pour la diminuer.
,
À chaque fois que vous appuyez sur le bouton, le voyant d’intensité correspondant au niveau clignote au bout de quelques secondes.
5 Placez l’appareil perpendiculairement à la peau de sorte que l’accessoire et l’anneau de sécurité soient en contact avec la peau.
6 L’anneau de sécurité doit exercer une légère pression sur la peau, de manière à ce que le contact soit total.
Remarque : L’anneau de sécurité est équipé d’interrupteurs de contact servant de système de sécurité de l’appareil. Il évite tout flash indésirable lorsque l’appareil ne touche pas la peau.
,
Le voyant « Prêt-à-flasher » situé à l’arrière de l’appareil s’allume en vert lorsque tous les interrupteurs de contact de l’anneau de sécurité sont en contact avec la peau et que l’appareil est chargé.
Ceci peut prendre quelques secondes.
Conseil : Pour faciliter l’utilisation, étirez la peau à flasher. Il vous faudra peut-
être exercer une pression plus forte sur les zones moins fermes du corps pour que tous les interrupteurs de contacts s’enfoncent.
FRANÇAIS
43
7 Appuyez sur le bouton du flash pour émettre un flash. Vous avez à présent deux possibilités pour émettre un autre flash :
A Maintenez le bouton du flash enfoncé. L’appareil émet un flash après l’autre tant que l’anneau de sécurité est entièrement en contact avec la peau. Immédiatement après que l’appareil a émis un flash, faites glisser l’appareil jusqu’à la zone suivante. Veillez à presser toute la surface de l’anneau de sécurité sur la peau.
Ce mode « glisser-flasher » est particulièrement adapté au flashage de zones plus grandes comme les jambes.
B Relâchez le bouton du flash après chaque flash. Pour le flash suivant, placez l’appareil sur la zone immédiatement contiguë à la dernière zone flashée. Veillez à presser toute la surface de l’anneau de sécurité sur la peau.
Ce mode « Step & Flash », flashage zone par zone, garantit une épilation précise des genoux ou des chevilles par exemple.
Remarque : Après quelques secondes, l’appareil est prêt à émettre un nouveau flash. Veillez donc à le déplacer immédiatement après le dernier flash.
Ne flashez pas plusieurs fois la même zone au cours d’une même séance.
Cela n’améliore pas l’efficacité de l’épilation, mais augmente le risque de réactions cutanées.
Remarque : La lumière visible produite par l’appareil correspond au flash reflété par la peau, et ne représente aucun danger pour vos yeux. Il n’est pas nécessaire de porter des lunettes de protection pendant l’utilisation.
8 Pour vous assurer que toutes les zones sont flashées, veillez à ce que les zones d’application successives se chevauchent légèrement. Seule la lumière émise par le verre filtrant de sortie de lumière est efficace.
Assurez-vous que les flashs sont rapprochés.
9 À la fin de la séance, mettez l’appareil hors tension.
10 Vérifiez si des poils et de la poussière ne sont pas présents sur le verre filtrant et l’accessoire, et nettoyez l’appareil après utilisation.
Reportez-vous au chapitre « Nettoyage et entretien ».
44
FRANÇAIS
Zone
Aisselles
Maillot
Bikini
Demi-jambe
Jambe entière
Recommandations relatives à la séance
Durée moyenne de la séance
Durée approximative d’une séance
1 minute par aisselle
1 minute par côté
4 minutes
8 minutes
14 minutes
Remarque : Les durées moyennes des séances indiquées ci-dessus ont été observées au cours de tests et d’études. La durée des séances peut varier d’une personne à l’autre.
Remarque : À pleine charge, la batterie permet d’émettre au moins 370 flashs d’une intensité de 5. La capacité d’utilisation de l’appareil dépend de la taille de la zone à flasher et de l’intensité utilisée.
Utilisation de l’appareil sur les jambes
Consultez le tableau du chapitre « Avant utilisation », section « Réglage de l’intensité lumineuse » pour déterminer les intensités lumineuses recommandées pour vos jambes.
— Vous pouvez déplacer l’appareil de haut en bas ou en transversale, selon votre confort.
Remarque : Les zones osseuses telles que le tibia et les chevilles sont plus sensibles que d’autres. Si vous pressez l’accessoire très fort sur ces zones, la peau peut être plus susceptible de développer des réactions cutanées comme des irritations ou des rougeurs. Reportez-vous à la section « Éventuels effets secondaires et réactions cutanées », dans le présent chapitre. Pressez l’accessoire sur la peau suffisamment fort pour que le voyant « Prêt-à-flasher » s’allume, mais pas plus.
Conseil : L’appareil peut laisser des marques sur la peau au
niveau des zones flashées. Ces marques peuvent vous aider à identifier le point de chevauchement des zones flashées.
Si vous utilisez l’appareil sur toute la longueur de vos jambes, vous devrez peut-être le recharger au cours de l’opération. Ceci est normal. La capacité d’utilisation de l’appareil dépend de la taille de la zone à flasher et de l’intensité utilisée.
Conseil : De nombreux utilisateurs combinent l’épilation des
jambes à d’autres activités : par exemple regarder la télévision ou écouter de la musique. Essayez, vous aussi : l’expérience sera plus agréable et reposante.
FRANÇAIS
45
Utilisation de l’appareil pour l’épilation du maillot
Consultez le tableau du chapitre « Avant utilisation », section « Réglage de l’intensité lumineuse » pour déterminer les intensités lumineuses recommandées pour le maillot.
En principe, Philips Lumea a été conçu pour flasher entièrement la zone du maillot (style « Brésilien » ou « Hollywood », par exemple) en douceur et en toute sécurité. Utilisez un réglage plus bas sur la peau plus sombre de la zone du maillot. N’utilisez pas l’appareil sur les lèvres intérieures, le vagin et l’anus. Les hommes qui souhaitent épiler leur zone pubienne ne doivent pas utiliser l’appareil sur le scrotum.
Remarque : Pour des raisons d’hygiène, nettoyez toujours l’accessoire corps avant de commencer à flasher une autre partie du corps.
Utilisation de l’appareil sur les aisselles
Consultez le tableau du chapitre « Avant utilisation », section « Réglage de l’intensité lumineuse » pour déterminer les intensités lumineuses recommandées pour vos aisselles.
Veillez à éliminer soigneusement toute trace de déodorant, parfum, crème ou autre produit d’hygiène de vos aisselles avant de vous flasher.
Conseil : Pour des résultats optimaux, tenez-vous face à un miroir de façon à obtenir une bonne visibilité de la zone à flasher et à bien distinguer le voyant
« Prêt-à-flasher ». Levez votre bras et placez votre main au niveau de votre cou pour tendre la peau de l’aisselle. De cette façon, vous pouvez maintenir plus facilement l’anneau de sécurité en contact avec la peau, pour une séance plus aisée.
Remarque : La lumière réfléchie ne représente aucun danger pour vos yeux.
Si elle produit une sensation désagréable, fermez les yeux lorsque vous déclenchez un flash.
Pour des résultats optimaux
— Il est normal que des poils restent visibles après les premières séances.
Pour plus d’informations, reportez-vous au chapitre « Introduction », section « Fonctionnement de l’appareil ».
— Pour éliminer efficacement tous les poils et bloquer la réactivation des follicules pileux, les séances doivent être répétées toutes les deux semaines pendant les deux premiers mois. Vous aurez alors une peau douce. Pour obtenir des astuces qui vous permettront de prolonger ces résultats, reportez-vous à la section « Phase d’entretien ».
Phase d’entretien
— Pour une peau durablement lisse, nous vous recommandons de renouveler les séances toutes les 4 à 8 semaines. La durée entre chaque séance peut varier selon la repousse des poils de chacun et également selon les différentes parties du corps. Si vos poils ont repoussé en abondance entre deux séances, réduisez simplement l’intervalle entre les séances, en veillant toutefois à respecter une fréquence maximale de deux semaines. En choisissant une fréquence supérieure à celle recommandée, vous augmentez le risque de réactions cutanées sans gagner en efficacité.
46
FRANÇAIS
Éventuels effets secondaires et réactions cutanées
Réactions cutanées courantes :
— Des rougeurs et/ou des fourmillements, des picotements ou une sensation de chaleur sur la peau peuvent apparaître. Cette réaction est bénigne et passagère.
— Une réaction cutanée semblable à un coup de soleil peut apparaître momentanément sur la zone flashée. Si elle persiste plus de trois jours, consultez votre médecin.
— L’association du rasage et de l’utilisation de Lumea peut assécher la peau et provoquer des irritations. Cette réaction est sans danger et disparaît en quelques jours. Vous pouvez rafraîchir la zone avec de la glace ou un gant de toilette mouillé. Si la sécheresse persiste, vous pouvez appliquer une lotion hydratante non parfumée sur la zone flashée 24 heures après l’opération.
Effets secondaires rares :
— Brûlures, rougeur excessive et enflure : ces réactions se produisent très rarement. Elles sont provoquées par l’utilisation d’une intensité lumineuse trop élevée pour votre couleur de peau. Si ces réactions persistent plus de trois jours, consultez votre médecin. Attendez que la peau soit entièrement guérie avant de recommencer la séance, et utilisez une intensité lumineuse moins élevée.
— Altération de la pigmentation de la peau : ceci se produit très rarement.
L’altération de la pigmentation de la peau se manifeste par une plaque plus foncée (hyperpigmentation) ou plus claire (hypopigmentation) que la zone qui l’entoure. Elle est provoquée par l’utilisation d’une intensité lumineuse trop élevée pour votre couleur de peau. Si elle persiste plus de 2 semaines, consultez votre médecin. Ne flashez pas les zones atteintes tant que l’altération de la pigmentation n’a pas disparu et que votre peau n’a pas retrouvé sa couleur normale.
— Infection et inflammation cutanées : très rares, elles peuvent être causées par l’utilisation de l’appareil sur des plaies ou des coupures provoquées par le rasage, sur des plaies existantes ou sur des poils incarnés.
— Douleur excessive : celle-ci peut apparaître pendant ou après la séance si vous avez utilisé l’appareil sur une peau non rasée, à une intensité lumineuse trop élevée pour votre couleur de peau, si vous flashez plusieurs fois sur la même zone et si vous utilisez l’appareil sur des plaies ouvertes, inflammations, infections, tatouages, brûlures, etc. Pour plus d’informations, reportez-vous au chapitre « Important », section
« Contre-indications ».
Après utilisation
— N’appliquez pas de produits cosmétiques parfumés sur les zones tout juste flashées.
— N’utilisez pas de déodorant immédiatement après avoir flashé les aisselles. Attendez que les rougeurs aient totalement disparu.
— Pour obtenir des informations sur l’exposition au soleil et le bronzage artificiel, reportez-vous au chapitre « Avant utilisation », section
« Conseils de bronzage ».
FRANÇAIS
47
Nettoyage et entretien
Pour garantir des résultats optimaux et une longue durée de fonctionnement, nettoyez l’appareil avant et après chaque utilisation et, si nécessaire, pendant la séance. L’appareil perd son efficacité si vous ne le nettoyez pas correctement.
Ne nettoyez jamais l’appareil ou ses composants sous le robinet ou au lave-vaisselle.
N’utilisez jamais d’éponges à récurer, de produits abrasifs ou de détergents agressifs tels que l’essence ou l’acétone pour nettoyer l’appareil.
Ne rayez jamais le verre filtrant ou la surface métallique à l’intérieur des accessoires.
Remarque : Veillez à ce que de la crasse ne bloque pas les interrupteurs de contact sur l’anneau de sécurité.
Remarque : Arrêtez d’utiliser l’appareil lorsqu’il n’est plus possible de nettoyer le verre filtrant ou l’accessoire. Pour en savoir plus sur le remplacement, reportez-vous au chapitre « Commande d’accessoires ».
1 Éteignez l’appareil, débranchez-le et laissez-le refroidir.
Remarque : Le verre filtrant chauffe pendant l’utilisation. Assurez-vous qu’il a refroidi avant de le nettoyer.
2 Pour retirer l’accessoire, placez vos doigts dans les renfoncements situés en haut et en bas de l’appareil, puis tirez doucement.
L’accessoire devrait se retirer facilement.
3 À l’aide du tissu de nettoyage fourni avec l’appareil, humidifié de quelques gouttes d’eau, nettoyez les pièces suivantes :
— Le verre filtrant
— La surface extérieure de l’embout
— Le cadre métallique à l’intérieur de l’embout
Remarque : Si l’eau n’est pas assez efficace, nettoyez les pièces mentionnées ci-dessus avec quelques gouttes d’alcool fort.
Remarque : Un verre filtrant et/ou un accessoire sales peuvent ressembler
à cette image. N’oubliez pas de nettoyer l’appareil avant et après chaque utilisation et, si nécessaire, pendant la séance, en suivant les instructions de cette section.
48
FRANÇAIS
Conseil : Si vous ne pouvez plus nettoyer les bords de l’embout à l’aide du chiffon fourni, utilisez un coton-tige. Veillez à débarrasser l’embout ou le verre filtrant de toute peluche ou fibre.
4 Si nécessaire, nettoyez l’extérieur de l’appareil à l’aide du tissu de nettoyage fourni avec l’appareil.
Rangement
1 Éteignez l’appareil, débranchez-le et laissez-le refroidir.
2 Nettoyez l’appareil avant de le ranger.
3 Rangez l’appareil dans un lieu sec et exempt de poussière, à une température comprise entre 0°C et 60°C.
Environnement
— Lorsqu’il ne fonctionnera plus, ne jetez pas l’appareil avec les ordures ménagères, mais déposez-le à un endroit assigné à cet effet, où il pourra être recyclé. Vous contribuerez ainsi à la protection de l’environnement.
— La batterie rechargeable intégrée contient des substances qui peuvent nuire à l’environnement. Veillez à toujours retirer la batterie avant de mettre l’appareil au rebut ou de le déposer à un endroit assigné à cet effet. Déposez la batterie usagée à un endroit assigné à cet effet.
Si vous n’arrivez pas à les retirer de l’appareil, vous pouvez apporter ce dernier dans un Centre Service Agréé Philips qui prendra toute l’opération en charge pour préserver l’environnement.
FRANÇAIS
49
Retrait des batteries rechargeables
Ne retirez la batterie que lorsqu’elle est complètement déchargée.
1 Débranchez l’appareil de l’adaptateur.
2 Laissez l’appareil fonctionner jusqu’à ce que la batterie soit complètement vide. Allumez l’appareil et émettez des flashs jusqu’à ce que vous ne puissiez plus allumer l’appareil.
3 Insérez un poinçon ou autre outil pointu dans le couvercle de l’appareil pour le détacher.
4 Dévissez les deux vis situées en bas du manche à l’aide d’un tournevis.
5 Retirez la partie inférieure de la poignée et coupez les deux fils connectés à la partie inférieure de l’appareil.
6 À l’aide d’une pince à bec long, tirez sur les connecteurs de la batterie pour les détacher des bornes de la batterie.
50
FRANÇAIS
7 Utilisez cette pince pour retirer la batterie rechargeable de l’appareil.
8 Coupez les deux fils l’un après l’autre pour éviter tout accident dû à une charge résiduelle éventuelle.
Conditions de stockage
Spectre de l’accessoire
Batterie lithium-ion
Garantie et assistance
Si vous avez besoin d’une assistance ou d’informations supplémentaires, consultez le site Web
www.philips.com/support
ou lisez le dépliant séparé sur la garantie internationale.
Spécificités techniques
Modèle SC2004
Tension nominale
Fréquence nominale
Entrée nominale
Protection contre les électrocutions
Niveau de protection
Conditions de fonctionnement
100-240 V
50-60 Hz
7,5 W
Classe II
Q
IP 30 (EN 60529)
Température : +15 °C à +35 °C
Taux d’humidité relative : 25 à 95 %
Température : 0 à +60°C
Humidité relative : 5 % à 95 %
> 570 nm
2 x 3,7 V ; 1 500 mAh
FRANÇAIS
51
Dépannage
Cette rubrique présente les problèmes les plus courants que vous pouvez rencontrer avec votre appareil. Si vous ne parvenez pas à résoudre le problème à l’aide des informations ci-dessous, rendez-vous sur www.
philips.com/support pour consulter les questions fréquemment posées, ou contactez le Service Consommateurs de votre pays.
Problème
L’appareil ne fonctionne pas.
L’appareil s’éteint sans prévenir.
Cause possible
Les batteries rechargeables sont vides.
L’appareil est défectueux.
La batterie rechargeable est vide.
Ce phénomène est normal.
Solution
Rechargez l’appareil (voir le chapitre « Charge »).
Contactez le Service Consommateurs de votre pays, votre revendeur Philips ou un Centre Service Agréé Philips.
Rechargez l’appareil (voir le chapitre « Charge »).
Aucune action n’est requise.
L’adaptateur secteur chauffe au cours de la charge.
Le voyant de charge ne s’allume pas lorsque je branche la petite fiche sur la prise de l’appareil.
Vous n’avez pas branché l’adaptateur sur la prise secteur.
Insérez la petite fiche dans la prise de l’appareil et branchez l’adaptateur sur la prise secteur.
L’appareil est allumé, mais je ne parviens pas à augmenter ou à diminuer l’intensité lumineuse.
La prise n’est pas alimentée.
L’adaptateur n’est pas branché correctement sur la prise secteur et/ ou la petite fiche n’est pas insérée correctement dans la prise de l’appareil.
L’appareil est défectueux.
L’appareil doit être réinitialisé.
Branchez un autre appareil sur la prise secteur pour vérifier qu’elle est alimentée. Si la prise est alimentée mais que l’appareil ne se charge toujours pas, contactez le Service Consommateurs Philips de votre pays, votre revendeur Philips ou un Centre Service Agréé Philips.
Assurez-vous que l’adaptateur est branché correctement sur la prise secteur et/ou que la petite fiche est insérée correctement dans la prise de l’appareil.
Contactez le Service Consommateurs de votre pays, votre revendeur Philips ou un Centre Service Agréé Philips.
Pour réinitialiser l’appareil, éteignez-le, puis rallumez-le. Si vous ne parvenez toujours pas à régler l’intensité lumineuse, contactez le Service Consommateurs Philips de votre pays, votre revendeur Philips ou un Centre Service Agréé Philips.
52
FRANÇAIS
Problème
Le voyant « prêt-
à-flasher » ne s’allume pas lorsque je place l’appareil sur ma peau.
Cause possible
L’accessoire équipé de l’anneau de sécurité n’est pas correctement placé sur la peau.
Solution
Placez l’appareil perpendiculairement à la peau, de manière
à ce que tous les interrupteurs de contact touchent la peau, puis vérifiez que le voyant « prêt-à-flasher » est allumé et appuyez sur le bouton du flash.
L’anneau de sécurité est sale.
Le voyant « Prêt-
à-flasher » ne s’allume pas lorsque je place l’embout sur ma peau, mais le ventilateur fonctionne.
Le voyant « prêt-
à-flasher » est vert mais l’appareil n’émet pas de flash lorsque j’appuie sur le bouton du flash.
L’appareil devient chaud en cours d’utilisation.
L’appareil n’indique pas l’intensité lumineuse 1 lorsque je l’allume.
L’appareil produit une odeur étrange.
La protection antisurchauffe a été activée.
L’appareil doit être réinitialisé.
Ce phénomène est normal.
L’appareil doit être réinitialisé.
L’accessoire et/ou le verre filtrant est sale.
Si le problème n’est pas résolu, placez l’appareil sur une zone de votre corps où il est facile d’établir un bon contact, par exemple sur votre avant-bras, puis vérifiez que le voyant « prêt-à-flasher » est allumé. Si ce n’est pas le cas alors que l’appareil touche votre peau, contactez le Service Consommateurs Philips de votre pays, votre revendeur Philips ou un Centre Service Agréé Philips.
Nettoyez soigneusement l’anneau de sécurité.
Si vous ne parvenez pas à le faire, contactez le
Service Consommateurs Philips de votre pays, votre revendeur Philips ou un Centre Service Agréé Philips pour remplacer l’accessoire.
Lorsque la protection anti-surchauffe a été activée, le ventilateur continue à fonctionner. N’éteignez pas l’appareil et laissez-le refroidir pendant environ 15 minutes avant de reprendre l’utilisation. Si le voyant « prêt-à-flasher » ne s’allume pas lorsque vous placez l’appareil sur votre peau, contactez le Service Consommateurs Philips de votre pays, votre revendeur Philips ou un Centre Service Agréé Philips.
Pour réinitialiser l’appareil, éteignez-le, puis rallumez-le. Si le voyant « prêt-à-flasher » est vert, mais que l’appareil n’émet toujours pas de flash lorsque vous appuyez sur le bouton du flash, contactez le Service Consommateurs Philips de votre pays, votre revendeur Philips ou un
Centre Service Agréé Philips.
Aucune action n’est requise.
Pour réinitialiser l’appareil, éteignez-le, puis rallumez-le. Si l’appareil n’indique toujours pas l’intensité lumineuse 1, contactez votre Service Consommateurs Philips, votre revendeur Philips ou un Centre Service Agréé Philips.
Nettoyez soigneusement l’accessoire. Si vous ne parvenez pas à le faire, contactez le Service Consommateurs Philips de votre pays, votre revendeur Philips ou un
Centre Service Agréé Philips pour remplacer l’accessoire.
FRANÇAIS
53
Problème
La peau est plus sensible que d’habitude pendant la séance.
Je ressens une douleur importante lorsque j’utilise l’appareil.
Cause possible
Vous n’avez pas correctement rasé la zone à flasher.
Solution
Si la zone à flasher contient des poils, ceux-ci peuvent brûler au passage de l’appareil, ce qui produit une odeur étrange.
Rasez correctement la zone à flasher avant d’utiliser l’appareil.
Si le rasage irrite votre peau, tondez les poils aussi court que possible et utilisez une intensité qui vous convient.
L’odeur étrange se dissipera au bout de quelques flashs.
Vous avez rangé l’appareil dans un lieu poussiéreux.
L’intensité lumineuse que vous utilisez est trop élevée.
Vous n’avez pas rasé les zones à flasher.
Le filtre UV du verre filtrant est cassé.
L’appareil est défectueux.
Vous n’avez pas rasé les zones à flasher.
Vérifiez que vous avez sélectionné la bonne intensité lumineuse. Si nécessaire, diminuez l’intensité.
Rasez les zones à flasher avant d’utiliser l’appareil. Si le rasage irrite votre peau, tondez les poils aussi court que possible et utilisez une intensité qui vous convient.
Si le filtre UV du verre filtrant est cassé, arrêtez d’utiliser l’appareil. Contactez le Service Consommateurs Philips de votre pays, votre revendeur Philips ou un
Centre Service Agréé Philips.
Contactez le Service Consommateurs de votre pays, votre revendeur Philips ou un Centre Service Agréé Philips.
Rasez les zones à flasher avant d’utiliser l’appareil. Si le rasage irrite votre peau, tondez les poils aussi court que possible et utilisez une intensité qui vous convient.
Des rougeurs apparaissent sur les zones venant d’être flashées.
Vous avez flashé une zone pour laquelle l’appareil n’est pas conçu.
Vous avez utilisé une intensité lumineuse trop
élevée.
L’appareil ne convient pas à votre couleur de peau.
Il est normal d’observer de légères rougeurs ; celles-ci disparaissent rapidement.
L’appareil ne doit pas être utilisé sur le visage, les petites lèvres, le vagin, l’anus, les mamelons, les aréoles et à l’intérieur des narines et des oreilles. Les hommes ne doivent pas l’utiliser sur le visage ou le scrotum.
Réduisez l’intensité lumineuse à un niveau que vous trouvez confortable. Reportez-vous au chapitre « Avant utilisation », section « Réglage de l’intensité lumineuse ».
N’utilisez pas l’appareil si votre peau est très foncée. Ne l’utilisez pas non plus si vos poils sont blond clair, roux, gris ou blancs.
Aucune action n’est requise.
54
FRANÇAIS
Problème
La réaction cutanée suite à la séance dure plus longtemps qu’en temps normal.
Cause possible
Vous avez utilisé une intensité lumineuse trop
élevée.
Solution
Sélectionnez une intensité lumineuse moins élevée la prochaine fois. Reportez-vous au chapitre « Avant utilisation », section « Réglage de l’intensité lumineuse ».
L’épilation n’est pas satisfaisante.
Les poils commencent à repousser sur certains points des zones flashées.
Vous avez utilisé une intensité lumineuse trop basse.
Vous n’avez pas ménagé des chevauchements suffisants lorsque vous avez utilisé l’appareil.
Vous n’utilisez pas l’appareil aussi souvent que nous le recommandons.
Si la réaction cutanée persiste plus de 3 jours, contactez votre médecin.
Sélectionnez une intensité lumineuse plus importante la prochaine fois.
Pour épiler correctement les poils, vous devez passer l’appareil de manière à ce que les zones flashées se chevauchent. Reportez-vous au chapitre « Utilisation de l’appareil », section « Utilisation ultérieure », étape 9.
L’appareil ne convient pas à votre couleur de peau ou de poils.
Vous n’avez pas ménagé des chevauchements suffisants lorsque vous avez utilisé l’appareil.
Les poils repoussent dans le cadre de leur cycle de vie normal.
Pour réussir à épiler tous les poils et prévenir la réactivation des racines, les séances doivent être répétées toutes les deux semaines pendant les deux premiers mois. Pour une peau durablement douce, nous vous recommandons de renouveler les séances toutes les quatre à six semaines. La durée entre chaque séance peut varier selon la repousse des poils de chacun et également selon les différentes parties du corps. Si vos poils ont repoussé en abondance entre deux séances, réduisez simplement l’intervalle entre les séances, en veillant toutefois à respecter une fréquence maximale de deux semaines. En choisissant une fréquence supérieure à celle recommandée, vous augmentez le risque de réactions cutanées sans gagner en efficacité.
N’utilisez pas l’appareil si vos poils sont blond clair, roux, gris ou blancs. N’utilisez pas cet appareil non plus si votre peau est très foncée.
Pour épiler correctement les poils, vous devez passer l’appareil de manière à ce que les zones flashées se chevauchent. Reportez-vous au chapitre « Utilisation de l’appareil », section « Utilisation ultérieure », étape 9.
La repousse fait partie du cycle de vie normal des poils.
Toutefois, les poils qui repoussent sont généralement plus fins et doux.
NEDERLANDS
55
Inhoudsopgave
Introductie
Voordelen
Intense Pulsed Light-technologie (IPL) voor thuisgebruik
Effectieve teruggroeipreventie voor dagelijkse gladheid
Zachte behandeling, ook op gevoelige delen van het lichaam
Snoerloze werking voor maximale vrijheid en flexibiliteit
Accu die lang mee gaat voor een volledige behandeling van het lichaam
Geen vervangingsonderdelen nodig, geen onverwachte kosten
Hoe werkt de Intense Pulsed Light-technologie van Philips?
Haargroei
Werkingsprincipe
Algemene beschrijving
Belangrijk
Gevaar
Waarschuwing
Ga als volgt te werk om schade te voorkomen
Let op
Houd de volgende zaken in de gaten om te voorkomen dat de levensduur van uw Philips Lumea wordt verkort:
Voor wie is Philips Lumea NIET geschikt?
Contra-indicaties
Gebruik het apparaat nooit als u zwanger bent of borstvoeding geeft.
Gebruik het apparaat nooit als u een ongeschikte huid en/of haarkleur hebt, d.w.z.:
Gebruik het apparaat nooit als u aan de hieronder genoemde aandoeningen lijdt:
Gebruik het apparaat nooit als u een van de hieronder genoemde medicaties gebruikt:
Gebruik het apparaat nooit op de volgende gebieden:
Gebruik het apparaat nooit op door de zon verbrande, onlangs gebruinde (afgelopen 48 uur) of kunstmatig gebruinde huid:
Elektromagnetische velden (EMV)
Opladen
Klaarmaken voor gebruik
Behandelgebieden voorbehandelen
De lichtintensiteit instellen
Aanbevolen lichtintensiteit (1-5)
Belangrijk
Bruiningsadvies
Het apparaat gebruiken
Eerste gebruik en huidtest
Verder gebruik
Richtlijnen voor behandeling
Gemiddelde behandelingstijd
Het apparaat op uw benen gebruiken
Tip: wit oogpotlood
Het apparaat gebruiken op de bikinilijn
Het apparaat op uw oksels gebruiken
Optimale resultaten behalen
60
60
60
60
60
60
61
61
69
69
69
69
65
65
66
66
63
63
64
64
62
62
62
62
70
70
70
56
56
56
56
57
57
57
58
58
59
57
57
57
57
59
59
60
56
NEDERLANDS
Onderhoudfase
Mogelijke bijwerkingen en huidreacties
Na gebruik
Reiniging en onderhoud
Opbergen
Milieu
De accu’s verwijderen
Garantie en ondersteuning
Technische specificaties
Problemen oplossen
Introductie
Gefeliciteerd met uw aankoop en welkom bij Philips! Als u volledig wilt profiteren van de ondersteuning die Philips biedt, registreer uw product dan op www.philips.com/welcome.
Ontharen met behulp van licht is een van de doeltreffendste methoden om ongewenst lichaamshaar met langdurig resultaat te behandelen. Deze methode verschilt van bestaande thuisontharingsmethoden omdat het de terugkeer van haargroei aanzienlijk vermindert. Philips heeft deze methode samen met toonaangevende dermatologen meer dan 10 jaar onderzocht.
U kunt deze innovatieve technologie nu op aangename wijze toepassen in de privacy van uw eigen huis, waar en wanneer u dat wilt.
Dit apparaat is speciaal ontworpen en geoptimaliseerd voor gebruik door vrouwen, maar kan ook door mannen worden gebruikt.
Philips Lumea maakt met het speciale opzetstuk behandeling van ongewenst haar onder de hals mogelijk.
Philips Lumea is ontwikkeld voor gebruik door één persoon.
Ga voor meer informatie over Philips Lumea en films over het gebruik van
Lumea naar www.philips.com/lumea. Bezoek onze website regelmatig voor het laatste nieuws.
Voordelen
Dit apparaat biedt de volgende voordelen:
Intense Pulsed Light-technologie (IPL) voor thuisgebruik
Philips Lumea gebruikt een op licht gebaseerde technologie die
‘Intense Pulsed Light’ (IPL) heet. IPL wordt ook in de professionele schoonheidsverzorgingsmarkt gebruikt om haar te verwijderen en wordt al vijftien jaar toegepast. Philips Lumea maakt deze innovatieve technologie beschikbaar voor veilig en effectief gebruik in uw comfortabele thuisomgeving.
Effectieve teruggroeipreventie voor dagelijkse gladheid
Deze methode biedt u langdurige teruggroeipreventie en een zijdezachte huid. Uit onze onderzoeken is gebleken dat de hoeveelheid haar al na twee behandelingen aanzienlijk afneemt. Een optimaal resultaat werd meestal bereikt na vier tot vijf behandelingen. Na elke behandeling is een afname van de haardichtheid waarneembaar. Hoe snel het effect zichtbaar wordt en hoe lang het resultaat aanhoudt, varieert per persoon. Zie voor meer informatie ‘Optimale resultaten behalen’ in hoofdstuk ‘Het apparaat gebruiken’.
73
73
74
75
71
71
72
72
75
75
NEDERLANDS
57
Zachte behandeling, ook op gevoelige delen van het lichaam
Philips Lumea is in nauwe samenwerking met toonaangevende dermatologen ontwikkeld en is door meer dan 2000 vrouwen getest om een effectieve en zachte behandeling te bieden, ook op de gevoeligste delen van het lichaam.
Snoerloze werking voor maximale vrijheid en flexibiliteit
Omdat het apparaat op accu’s werkt, is het draagbaar en kan het overal worden gebruikt.
Accu die lang mee gaat voor een volledige behandeling van het lichaam
Een volledig opgeladen accu voor een volledige behandeling van het lichaam (oksels, bikinilijn en onderbenen) in één keer, zonder te hoeven opladen.*
*Gebaseerd op gemiddelde behandeltijden voor elk gebied en de aanbevolen intensiteiten voor één gebruiker.
Geen vervangingsonderdelen nodig, geen onverwachte kosten
Philips Lumea is uitgerust met een lamp voor hoge prestaties die niet hoeft te worden vervangen. Deze lamp kan meer dan 100.000 keer flitsen.
Zo kunt u meer dan 5 jaar* lang resultaten boeken en tegelijkertijd geld besparen op dure vervangingslampen.
*Gebaseerd op gemiddelde behandeltijden voor elk gebied en de aanbevolen intensiteiten voor één gebruiker.
Hoe werkt de Intense Pulsed Light-technologie van Philips?
Haargroei
De haargroeisnelheid varieert per persoon en is afhankelijk van leeftijd, stofwisseling en andere factoren. Niettemin groeit bij iedereen doorgaans het haar in 3 fasen.
1 Groeifase (anagene fase)
Het haar groeit actief vanaf de wortel. In deze fase is de concentratie melanine het hoogst. Melanine is verantwoordelijk voor de pigmentatie van het haar. Melanineconcentratie is ook de bepalende factor voor de doeltreffendheid van deze methode. Alleen haren in de groeifase zijn gevoelig voor behandeling met licht.
2 Degradatiefase (catagene fase)
De haargroei stopt en de wortel slinkt voordat de haar uitvalt.
3 Rustfase (telogene fase)
De oude haar raakt los van zijn haarzakje en valt uit. Het haarzakje blijft in rust tot de biologische klok aangeeft dat het opnieuw actief moet worden en een nieuwe haar moet produceren.
Werkingsprincipe
— Het apparaat werkt door haren en haarwortels onder de huid te verhitten. Het melanine in de haar en de bijbehorende haarwortel absorbeert de vrijgekomen lichtpulsen. Hoe donkerder de haarkleur, hoe meer licht kan worden geabsorbeerd. Dit proces stimuleert de haar om eerder de rustfase in te gaan.
58
NEDERLANDS
— Tussen de behandelingen in vallen de haren op natuurlijke wijze uit en wordt de haargroei geremd. Het kan een of twee weken duren voordat de haren uitvallen.
— In één sessie kan het haar niet op optimale wijze worden verwijderd, omdat alleen haren in de groeifase gevoelig zijn voor behandeling met licht. Tijdens een behandeling bevinden haren op het behandelingsgebied zich gewoonlijk in verschillende fasen van de haargroeicyclus. Om alle haren doeltreffend te behandelen, moet u de behandeling met tussenpozen van twee weken enkele keren herhalen.
Een geïntegreerd optisch filter zorgt ervoor dat er geen UV-licht op de huid komt en dat het apparaat veilig is voor de huid.
Algemene beschrijving (fig. 5)
1 Lichtvenster met geïntegreerd UV-filter
2 Lichaamsopzetstuk (geschikt voor alle lichaamsdelen onder de hals)
3 Metalen lijst in het opzetstuk
4 Veiligheidssysteem (veiligheidsring met contactschakelaars)
5 Flitsknop
6 Intensiteitslampjes (1-5)
7
%
Knop voor verhogen van intensiteit
8
^
Knop voor verlagen van intensiteit
9 Oplaadlampje met ‘bijna leeg’-indicatie
10 Aan/uit-schakelaar
11 Apparaataansluiting
12 ’Klaar om te flitsen’-lampje
13 Ventilatieopeningen
14 Adapter
15 Kleine stekker
Belangrijk
Lees deze gebruiksaanwijzing zorgvuldig door voordat u het apparaat gaat gebruiken. Bewaar de gebruiksaanwijzing om deze zo nodig later te kunnen raadplegen.
NEDERLANDS
59
Gevaar
— Water en elektriciteit vormen een gevaarlijke combinatie. Gebruik dit apparaat daarom niet in een vochtige omgeving (bijv. in de buurt van een gevuld bad, een werkende douche of een gevuld zwembad).
— Houd het apparaat en de adapter droog.
— Raak als het apparaat kapot is geen delen binnenin aan om een elektrische schok te vermijden.
— Steek nooit voorwerpen in het apparaat.
Waarschuwing
— Dit apparaat is niet bedoeld voor gebruik door personen (waaronder kinderen) met verminderde lichamelijke, zintuiglijke of geestelijke vermogens, tenzij iemand die verantwoordelijk is voor hun veiligheid toezicht op hen houdt of hen heeft uitgelegd hoe het apparaat dient te worden gebruikt.
— Houd toezicht op jonge kinderen om te voorkomen dat ze met het apparaat gaan spelen.
— Het apparaat is niet bedoeld voor kinderen jonger dan 15 jaar.
Tieners tussen de 15 en 18 jaar kunnen het apparaat gebruiken met toestemming en/of hulp van de ouders of personen die ouderlijke zeggenschap over hen hebben. Volwassenen van 19 jaar en ouder kunnen het apparaat zonder beperkingen gebruiken.
— Laad het apparaat alleen op met de bijgeleverde adapter.
— Gebruik het apparaat en de adapter niet als deze beschadigd zijn.
— De adapter bevat een transformator. Knip de adapter niet af om deze te vervangen door een andere stekker, aangezien dit een gevaarlijke situatie oplevert.
— Als de adapter beschadigd is, moet u deze altijd laten vervangen door een adapter van het oorspronkelijke type om gevaar te voorkomen.
— Gebruik het apparaat niet als het UV-filter van het lichtvenster gebroken is.
Ga als volgt te werk om schade te voorkomen
— Zorg dat de luchtstroom via de ventilatieopeningen niet wordt belemmerd.
— Stel het apparaat nooit bloot aan zware schokken, schud het niet en laat het niet vallen.
— Als u het apparaat van een zeer koude naar een zeer warme omgeving verplaatst, of omgekeerd, moet u ongeveer 3 uur wachten voordat u het in gebruik neemt.
— Bewaar het apparaat op een stofvrije plaats om te voorkomen dat het apparaat stoffig wordt.
— Laat het apparaat niet onbeheerd achter wanneer het ingeschakeld is.
Schakel het apparaat na gebruik altijd uit.
— Stel het apparaat niet gedurende meerdere uren bloot aan rechtstreeks zonlicht of UV-licht.
— Flits niet op andere oppervlakken dan de huid. Dit kan ernstige schade aan het opzetstuk en/of het lichtvenster veroorzaken. Flits alleen wanneer het apparaat in contact met de huid is.
60
NEDERLANDS
Let op
— Gebruik het apparaat nooit rond de ogen en nabij de wenkbrauwen om het risico van oogletsel te vermijden.
— Gebruik het apparaat alleen op de standen die geschikt zijn voor uw huidtype. Als u hogere standen gebruikt dan wordt aanbevolen, kan het risico op huidreacties en bijwerkingen toenemen.
— Dit apparaat is uitsluitend bedoeld voor het verwijderen van ongewenst lichaamshaar onder de hals. Gebruik het niet voor andere doeleinden.
Houd de volgende zaken in de gaten om te voorkomen dat de levensduur van uw Philips Lumea wordt verkort:
— Stel het apparaat tijdens het gebruik niet bloot aan een temperatuur lager dan 15°C of hoger dan 35°C.
— Het apparaat is voorzien van een ingebouwde oververhittingsbeveiliging. Als het apparaat oververhit is, flitst het niet.
Schakel het apparaat niet uit maar laat het ongeveer 15 minuten afkoelen voordat u doorgaat met de behandeling.
— Breng het apparaat altijd naar een door Philips geautoriseerd servicecentrum voor onderzoek of reparatie. Reparatie door een onbevoegd persoon kan zeer gevaarlijke situaties opleveren voor de gebruiker.
— Gebruik het apparaat nooit in de gevallen die zijn vermeld in ‘Contraindicaties’.
Voor wie is Philips Lumea NIET geschikt?
Philips Lumea is niet voor iedereen geschikt. Als een van de onderstaande punten op u van toepassing is, dan is dit apparaat
niet
geschikt voor u!
Contra-indicaties
Gebruik het apparaat nooit als u zwanger bent of borstvoeding geeft.
Gebruik het apparaat nooit als u een ongeschikte huid en/of haarkleur hebt, d.w.z.:
— Als de natuurlijke kleur van het haar in het te behandelen gebied lichtblond, wit, grijs of rood is.
— Als u huidtype VI hebt (u verbrandt zelden of nooit en u wordt zeer bruin; uw huidskleur is zeer donkerbruin of donkerder). In dit geval loopt u een groot risico om huidreacties zoals verkleuringen, roodheid of brandwonden te ontwikkelen als u Philips Lumea gebruikt. Zie ook
‘Mogelijke bijwerkingen en huidreacties’ in hoofdstuk ‘Het apparaat gebruiken’.
Gebruik het apparaat nooit als u aan de hieronder genoemde aandoeningen lijdt:
— Als u een huidaandoening hebt zoals een actieve vorm van huidkanker, of als u in het verleden huidkanker of een andere vorm van kanker hebt gehad in de te behandelen gebieden.
— Als u precancereuze laesies of meerdere atypische moedervlekken hebt in de te behandelen gebieden.
— Als u in het verleden bent behandeld voor een collageenaandoening, bijvoorbeeld de vorming van een keloïdlitteken of slecht genezende wonden.
NEDERLANDS
61
— Als u in het verleden bent behandeld voor een vasculaire aandoening, bijvoorbeeld de aanwezigheid van spataderen of vasculaire ectasie in de gebieden die worden behandeld.
— Als uw huid gevoelig is voor licht en u snel uitslag of een allergische reactie krijgt.
— Als u infecties, eczeem, brandwonden, ontstoken haarzakjes, snijwonden, schaafwonden, herpes simplex, wonden of laesies en hematomen hebt in de te behandelen gebieden.
— Als u geopereerd bent in de te behandelen gebieden.
— Als u lijdt aan epilepsie met overgevoeligheid voor lichtflitsen.
— Als u lijdt aan diabetes, lupus erythematodes, porphyria of een congestieve hartaandoening.
— Als u aan een bloedingsstoornis lijdt.
— Als u in het verleden voor immuniteitsaandoeningen bent behandeld
(waaronder HIV-infectie of aids).
Gebruik het apparaat nooit als u een van de hieronder genoemde medicaties gebruikt:
— Als uw huid momenteel wordt behandeld met of onlangs is behandeld met alfa-hydroxyzuren (AHA’s), bèta-hydroxyzuren (BHA’s), op de huid aangebrachte isotretinoïne en azelaïnezuur.
— Als u tijdens de afgelopen zes maanden een vorm van isotretinoïne
Accutane
®
of Roaccutance
®
hebt ingenomen. Deze behandeling kan de gevoeligheid van de huid voor scheuren, wondjes en irritaties verhogen.
— Als u pijnstillers inneemt die de gevoeligheid van de huid voor warmte verminderen.
— Als u middelen of medicijnen gebruikt die de lichtgevoeligheid verhogen.
Lees in dat geval de bijsluiter en gebruik het apparaat niet als er staat dat het medicijn fotoallergische of fototoxische reacties kan veroorzaken of dat u zonlicht moet vermijden wanneer u het medicijn gebruikt.
— Als u antistollingsmiddelen gebruikt (bijvoorbeeld hoge doses aspirine), op zodanige wijze dat een uitwasperiode van 1 week voorafgaand aan elke behandeling niet mogelijk is.
— Als u immunosuppressieve medicatie neemt.
Gebruik het apparaat nooit op de volgende gebieden:
— Op het gezicht.
— Op tepels, tepelhoven, binnenste schaamlippen, vagina, anus en de binnenkant van de neusgaten en oren.
— Mannen moeten het apparaat niet op het scrotum en het gezicht gebruiken.
— Op of nabij kunstmatige dingen zoals siliconenimplantaten, pacemakers, onderhuidse injectieopeningen (insulinepomp) of piercings.
— Op moedervlekken, sproeten, grote aderen, gebieden met donkerder pigment, littekens, huidafwijkingen zonder uw huisarts te raadplegen.
Dit kan leiden tot verbrandingen en verandering van de huidskleur, waardoor het mogelijk lastiger wordt huidgerelateerde ziekten te ontdekken (bijv. huidkanker).
— Op wratten, tatoeages of permanente make-up. Dit kan leiden tot verbrandingen en verandering van de huidskleur (hypopigmentatie of hyperpigmentatie).
— Op gebieden waar u langwerkende deodorants gebruikt. Dit kan in huidreacties resulteren. Zie ‘Mogelijke bijwerkingen en huidreacties’ in hoofdstuk ‘Het apparaat gebruiken’.
62
NEDERLANDS
Gebruik het apparaat nooit op door de zon verbrande, onlangs gebruinde (afgelopen 48 uur) of kunstmatig gebruinde huid:
— Alle bruiningsmethoden kunnen de veiligheid van de behandeling beïnvloeden. Dit geldt zowel voor blootstelling aan zonlicht als voor kunstmatige bruiningsmethoden zoals bruiningslotions, bruiningsapparaten, enz. Raadpleeg ‘Bruiningsadvies’ in hoofdstuk
‘Klaarmaken voor gebruik’ als u gebruind bent of van plan bent te bruinen.
Opmerking: Deze lijst is niet volledig. Als u niet zeker bent of u het apparaat kunt gebruiken, raden wij u aan een arts te raadplegen.
Elektromagnetische velden (EMV)
Dit Philips-apparaat voldoet aan alle toepasbare richtlijnen en voorschriften met betrekking tot blootstelling aan elektromagnetische velden.
Opladen
Laad de accu’s volledig op voordat u het apparaat voor de eerste keer gebruikt en wanneer de accu’s leeg zijn. Het duurt maximaal 1 uur en
40 minuten om de accu’s volledig op te laden.
Laad het apparaat volledig op wanneer het oplaadlampje oranje begint te branden tijdens het gebruik. De accu is dan bijna leeg.
Volledig opgeladen accu’s geven ten minste 370 flitsen op lichtintensiteit 5.
Laad het apparaat om de 3 tot 4 maanden op, zelfs als u het apparaat langere tijd niet gebruikt.
U kunt het apparaat op de volgende manier opladen:
1 Schakel het apparaat uit.
2 Steek de kleine stekker in het apparaat en steek de adapter in het stopcontact.
,
Het oplaadlampje knippert groen om aan te geven dat het apparaat wordt opgeladen.
,
Als de accu’s volledig zijn opgeladen, brandt het oplaadlampje continu groen.
Opmerkingen:
— De adapter en het apparaat voelen warm aan tijdens het opladen.
Dit is normaal.
— U kunt het apparaat niet gebruiken tijdens het opladen.
— Dit apparaat is voorzien van een oververhittingsbeveiliging voor de accu’s. Deze beveiliging zorgt ervoor dat het apparaat niet oplaadt bij een kamertemperatuur boven 40°C.
Bedek het apparaat en de adapter nooit tijdens het opladen.
3 Haal de adapter na het opladen uit het stopcontact en trek de kleine stekker uit het apparaat.
Klaarmaken voor gebruik
Voor optimale resultaten en de meeste uitwerking moet u de gebieden waarop u het apparaat wilt gebruiken op de hieronder beschreven wijze voorbereiden.
NEDERLANDS
63
Behandelgebieden voorbehandelen
1 Scheer de gebieden die u wilt behandelen zolang het haar nog steeds teruggroeit.
Opmerking: Als uw laatste ontharingsmethode bestond uit het met wortel en al verwijderen van haren (d.w.z. epileren, waxen enz.), wacht dan tot u een duidelijk zichtbare terugkeer van haargroei waarneemt voordat u Philips
Lumea gebruikt. Gebruik geen ontharingscrèmes in plaats van te scheren.
Let op: behandeling op ongeschoren of niet goed geschoren gebieden heeft een aantal ongewenste effecten:
— Het lichtvenster en het opzetstuk kunnen vervuild raken met verdwaalde haren en stof. Een vuil lichtvenster en opzetstuk kunnen de effectieve levensduur van het apparaat verkorten. Bovendien kunnen brandplekken of donkere vlekken op het lichtvenster en het opzetstuk als gevolg van vuil ertoe leiden dat de behandeling pijnlijk wordt of huidreacties zoals roodheid en verkleuring ontstaan.
— De haren op uw huid kunnen verbranden, wat een onaangename geur kan veroorzaken.
2 Maak uw huid schoon en zorg dat deze haarvrij, volledig droog en vrij van vettige substanties is (die bijvoorbeeld aanwezig kunnen zijn in cosmetische producten zoals deodorant, lotion, parfum, bruiningscrème en zonnebrandcrème).
3 Controleer het apparaat en met name het lichtvenster en het opzetstuk op de aanwezigheid van haren, vuil of vezels. Als u vuil ziet, moet u het apparaat schoonmaken volgens de instructies in hoofdstuk ‘Schoonmaken en onderhoud’.
Opmerkingen:
— Als scheren wondjes of schrammen veroorzaakt, kan uw huid gevoelig zijn waardoor de lichtbehandeling soms onaangenaam kan aanvoelen.
— Wanneer de haren niet meer teruggroeien, wat doorgaans na
4-5 behandelingen het geval is, hoeft u zich niet meer te scheren voor het gebruik van het apparaat.
De lichtintensiteit instellen
Philips Lumea is bedoeld voor consumentengebruik thuis en is niet vergelijkbaar met professionele op licht gebaseerde apparaten wat betreft pijnbeleving. De lichtpulsen van Philips Lumea zijn zachter dan die van professionele apparaten en daarom kunt u een
handige
en
doeltreffende
behandeling verwachten.
U moet de lichtintensiteit op uw huidskleur en de kleur van uw lichaamsharen instellen en een niveau kiezen dat u prettig vindt.
Aan de hand van onderstaande tabel met aanbevolen lichtintensiteiten kunt u vaststellen wat de juiste lichtintensiteit voor u is
1 Raadpleeg de volgende tabel om vast te stellen welke lichtintensiteiten het geschiktst zijn voor uw huidskleur en de kleur van uw lichaamsharen en om te controleren of deze methode geschikt voor u is (als dat niet het geval is, staat er een x in de tabel).
2 Voor ieder lichaamsgebied en misschien zelfs ieder deel van een lichaamsgebied kan een andere geschikte lichtintensiteit nodig zijn volgens de tabel met aanbevolen lichtintensiteiten hieronder. De methode is doeltreffender bij hogere intensiteiten, maar u moet de lichtintensiteit verlagen als u pijn of ongemak ervaart.
64
NEDERLANDS
Huidskleur en
-kenmerken:
Wit (altijd verbranden, geen bruining)
Opmerking: De vereiste lichtintensiteit voor verschillende lichaamsdelen hangt af van het verschil in huidskleur. De huid van de onderbenen kan bijvoorbeeld donkerder zijn dan de huid van de oksels vanwege een grotere blootstelling aan de zon.
Mensen met een donkerdere huid hebben meer kans op huidirritatie, omdat hun huid meer licht absorbeert. Daarom wordt er een lagere lichtintensiteit aanbevolen voor mensen met een donkerdere huid.
De lichtpuls kan warm of heet aanvoelen op de huid, maar mag nooit pijnlijk zijn. Raadpleeg voor het voorkomen van huidreacties ‘Mogelijke bijwerkingen en huidreacties’ in hoofdstuk ‘Het apparaat gebruiken’.
Aanbevolen lichtintensiteit (1-5)
In onderstaande tabel betekent ‘x’dat het apparaat niet geschikt voor u is.
Beige (makkelijk verbranden, minimale bruining)
Lichtbruin
(verbrandt soms, goede bruining)
Gemiddeld bruin (zelden verbranden, snelle en goede bruining)
Donkerbruin
(zelden verbranden, zeer goede bruining) of nooit verbranden, zeer donkere bruining)
Zeer donkerbruin en donkerder
(zelden
Kleur van lichaamsharen: donkerblond/ lichtbruin/bruin/ donkerbruin/ zwart wit/grijs/rood/ lichtblond
4/5 x
4/5 x
4/5 x
3/4 x
1/2/3 x x x
Belangrijk
Zie ‘Voor wie is Philips Lumea niet geschikt?’ om te controleren of Philips
Lumea geschikt voor u is.
Als uw huid aan natuurlijk zonlicht of een kunstmatige bruiningsmethode is blootgesteld, kan deze donkerder zijn dan tijdens de vorige behandeling.
Controleer de tabel hierboven om vast te stellen welke standen geschikt zijn voor uw huidskleur.
NEDERLANDS
65
Bruiningsadvies
Blootstelling aan de zon voorafgaand aan de behandeling
— Als uw huid gebruind is, voer dan een huidtest uit (zie ‘Eerste gebruik’ in hoofdstuk ‘Het apparaat gebruiken’) op het te behandelen gebied om de juiste lichtintensiteit te bepalen. Als u dit niet doet, loopt u het risico huidreacties te krijgen na behandeling met Philips Lumea.
— Wacht na het zonnen ten minste 48 uur voordat u het apparaat gebruikt. Zonnen kan de huid donkerder maken (bruinen) en/of verbranden (rood worden van de huid).
— Controleer de huid op nog aanwezige zonnebrand na deze 48 uur.
Gebruik Philips Lumea niet zolang de zonnebrand nog niet verdwenen is.
— Voer een huidtest uit als de zonnebrand is verdwenen (zie ‘Eerste gebruik’ in hoofdstuk ‘Het apparaat gebruiken’) op het te behandelen deel van de huid om de juiste lichtintensiteit te bepalen.
Blootstelling aan de zon na de behandeling
— Wacht ten minste 24 uur na de behandeling voordat u de behandelde delen van de huid aan de zon blootstelt. De behandelde huid mag zelfs na 24 uur niet rood zijn als u de huid blootstelt aan de zon.
— Bedek behandelde gebieden wanneer u in de zon gaat of gebruik een sunblock (beschermingsfactor 30 +) gedurende twee weken na behandeling.
— Blootstelling van behandelde gebieden aan zonlicht zonder bescherming direct na de behandeling kan het risico van ongunstige bijwerkingen en huidreacties vergroten. Zie ‘Mogelijke bijwerkingen en huidreacties’ in hoofdstuk ‘Het apparaat gebruiken’.
Bruining met kunstlicht
— Volg de instructies in ‘Blootstelling aan de zon voorafgaand aan de behandeling’ en ‘Blootstelling aan de zon na de behandeling’ hierboven.
Bruining met bruiningscrèmes
— Als u kunstmatige bruiningslotion hebt gebruikt, wacht dan met het gebruik van de Philips Lumea tot de kunstmatige bruining volledig verdwenen is.
Opmerking: Zie voor meer bijzonderheden over ongewenste huidreacties
‘Mogelijke bijwerkingen en huidreacties’ in hoofdstuk ‘Het apparaat gebruiken.
Het apparaat gebruiken
Controleer de tabel met aanbevolen lichtintensiteiten in ‘De lichtintensiteit instellen’ in hoofdstuk ‘Klaarmaken voor gebruik’ om vast te stellen welke lichtintensiteit het meest geschikt is voor de kleur van uw huid en lichaamshaar. Gebruik het apparaat in een
goed verlichte
kamer; dit vermindert de waargenomen helderheid van de flitsen. Scheer het gebied dat u wilt behandelen voordat u het apparaat gebruikt (zie
‘Behandelgebieden voorbehandelen’ in hoofdstuk ‘Klaarmaken voor gebruik’).
Als de behandeling op enig moment onverdraaglijk pijnlijk wordt, verlaag dan de lichtintensiteitsstand tot de behandeling weer aangenaam aanvoelt. Stop de behandeling onmiddellijk als u huidreacties waarneemt die erger zijn dan een beetje roodheid en lees ‘Mogelijke bijwerkingen en huidreacties’ in dit hoofdstuk.
66
NEDERLANDS
Eerste gebruik en huidtest
1 Bevestig het lichaamsopzetstuk op het apparaat.
Het lichaamsopzetstuk kan worden gebruikt om ongewenst lichaamshaar op alle lichaamsdelen onder de hals te behandelen (zie voor uitzonderingen ‘Contra-indicaties’ in hoofdstuk ‘Belangrijk’).
2 Kies een gebied dicht bij het gebied dat u wilt behandelen.
3 Druk op de aan/uitknop om het apparaat in te schakelen.
,
Het apparaat begint altijd automatisch op de laagste stand.
4 Pas één flits toe op de laagste aanbevolen intensiteit voor uw huidtype. (Instructies over het afgeven van een flits vindt u in stap 6 t/m 9 van ‘Verder gebruik’ in dit hoofdstuk.)
5 Verhoog de intensiteit steeds een stand binnen het aanbevolen bereik voor uw huidtype en geef op iedere stand een flits af zolang dit aangenaam (niet pijnlijk) aanvoelt. Geef niet meer dan één flits op dezelfde plek af.
6 Wacht na de huidtest 24 uur en controleer uw huid op reacties. Als uw huid reacties vertoont, kies dan de hoogste stand die niet tot huidreacties heeft geleid voor volgende gebruikssessies.
We adviseren u een huidtest uit te voeren op het gebied dat u wilt behandelen als u het apparaat voor het eerst gebruikt. Zo stelt u vast hoe uw huid reageert op de behandeling en u raakt gewend aan de behandeling op basis van licht.
Verder gebruik
1 Reinig vóór iedere behandeling het opzetstuk, het lichtvenster en de metalen lijst aan de binnenkant van het opzetstuk van Philips Lumea.
Zie voor meer informatie hoofdstuk ‘Schoonmaken en onderhoud’.
2 Druk op de aan/uitknop om het apparaat in te schakelen.
Opmerking: Het is normaal dat het apparaat en het opzetstuk warm worden tijdens gebruik.
NEDERLANDS
67
3 Begin iedere behandeling met het zeer zorgvuldig kiezen van de lichtintensiteit op basis van de gevoeligheid van uw huid en wat u op dat moment als aangenaam ervaart.
Uw huid kan om uiteenlopende redenen op verschillende dagen/ momenten verschillend reageren, vooral na een bruiningssessie. Zie
‘Mogelijke bijwerkingen en huidreacties’ in dit hoofdstuk voor meer informatie.
4 Druk op de knop
%
om de intensiteit verhogen. Druk op de knop
^ om de intensiteit te verlagen.
,
Elke keer dat u op de knop drukt, begint het bijbehorende intensiteitslampje te knipperen. Dit duurt enige seconden.
5 Plaats het apparaat loodrecht op de huid zodat het opzetstuk en de veiligheidsring in contact zijn met de huid.
6 Druk de veiligheidsring met enige druk volledig op de huid.
Opmerking: De veiligheidsring beschikt over contactschakelaars die gezamenlijk het veiligheidssysteem van het apparaat vormen. Deze veiligheidsring voorkomt dat het apparaat onopzettelijk flitst terwijl er geen contact met de huid is.
,
Het ‘klaar om te flitsen’-lampje op de achterzijde van het apparaat brandt groen wanneer alle contactschakelaars van de veiligheidsring in contact met de huid zijn en het apparaat is opgeladen. Dit kan enkele seconden duren.
Tip: Het apparaat is gemakkelijker te gebruiken wanneer u het stuk huid dat u wilt behandelen, strak trekt. Op gebieden met een zachtere huid moet u mogelijk meer druk uitoefenen op het apparaat om te zorgen dat alle contactschakelaars naar binnen worden gedrukt.
68
NEDERLANDS
7 Druk op de flitsknop om een flits af te geven. U hebt nu 2 opties om de volgende flits af te geven:
A Houd de flitsknop ingedrukt. Het apparaat geeft de ene flits na de andere af zolang de veiligheidsring volledig in contact is met de huid.
Verplaats het apparaat naar het volgende gebied direct nadat het apparaat heeft geflitst. Zorg ervoor dat de veiligheidsring volledig op de huid is gedrukt.
Deze ‘Verplaats- & flitsmodus’ is vooral handig bij een behandeling van grotere gebieden zoals de benen.
B Laat na elke flits de flitsknop los. Plaats voor de volgende flits het apparaat op het gebied precies naast het vorige geflitste gebied. Zorg ervoor dat de veiligheidsring volledig op de huid is gedrukt.
Deze ‘Stap- & flitsmodus’ zorgt voor een nauwkeurige behandeling van bijv. de knieën of enkels.
Opmerking: Na enkele seconden is het apparaat klaar om opnieuw te flitsen.
Zorg er dus voor dat u het apparaat naar het volgende gebied verplaatst direct nadat het heeft geflitst.
Behandel precies hetzelfde gebied niet meerdere keren tijdens één sessie. Dit verbetert de doeltreffendheid van de behandeling niet, en vergroot het risico van huidreacties.
Opmerking: Het zichtbare licht dat door het apparaat wordt geproduceerd, is de weerkaatsing van de flits op uw huid en is onschadelijk voor uw ogen. U hoeft geen beschermbril te dragen tijdens het gebruik.
8 Zorg dat er wat overlap met een vorig behandeld gebied is wanneer u het apparaat op de huid plaatst om te voorkomen dat bepaalde gebieden niet worden behandeld. Het effectieve licht komt alleen uit het lichtvenster. Zorg dat er steeds wordt geflitst op gebieden die dicht bij elkaar liggen.
9 Schakel het apparaat uit nadat u de behandeling hebt voltooid.
10 Controleer of er haren of vuil op het lichtvenster of het opzetstuk zitten en maak het apparaat schoon na gebruik. Zie hoofdstuk
‘Schoonmaken en onderhoud’.
Gebied
Oksels
Bikinilijn
Gehele bikinilijn
Eén onderbeen
Eén geheel been
NEDERLANDS
69
Richtlijnen voor behandeling
Gemiddelde behandelingstijd
Geschatte behandelingstijd
1 minuut per oksel
1 minuut per kant
4 minuten
8 minuten
14 minuten
Opmerking: De gemiddelde behandelingstijden hierboven zijn vastgesteld tijdens onderzoek en tests. De individuele behandelingstijden kunnen per persoon variëren.
Opmerking: Volledig opgeladen accu’s zijn goed voor ten minste 370 flitsen op intensiteit 5. Hoe lang u het apparaat kunt gebruiken, hangt af van de grootte van het te behandelen gebied en de intensiteit van de gebruikte stand.
Het apparaat op uw benen gebruiken
Raadpleeg de tabel met aanbevolen lichtintensiteiten in ‘De lichtintensiteit instellen’ in hoofdstuk ‘Klaarmaken voor gebruik’ om te zien welke standen geschikt zijn voor uw benen.
— U kunt het apparaat op en neer of heen en weer over het been bewegen, om het even wat u handiger vindt.
Opmerking: Doordat het bot er dicht onder de huid ligt, zijn de scheenbenen en de enkels gevoeliger dan andere delen van het lichaam. Als u het opzetstuk hard op deze delen drukt, kan de huid gevoeliger zijn voor huidreacties zoals irritatie en roodheid. Zie ‘Mogelijke bijwerkingen en huidreacties’ in dit hoofdstuk. Druk het opzetstuk net hard genoeg op de huid om het ‘klaar om te flitsen’-lampje te laten branden, maar druk niet harder.
Tip: Het apparaat kan afdrukken op de huid van de behandelde
gebieden achterlaten. Deze afdrukken laten u zien waar u de behandelde gebieden kunt laten overlappen.
Als u het apparaat gebruikt om zowel uw bovenbenen als onderbenen te behandelen, moet u het apparaat wellicht tijdens de behandeling opnieuw opladen. Dit is normaal. De gebruiksduur van het apparaat is afhankelijk van de grootte van het te behandelen gebied en de gebruikte lichtintensiteitsstand.
Tip: Veel gebruikers combineren de behandeling van de benen
met andere activiteiten in huis, zoals TV-kijken of naar muziek luisteren. U kunt dit ook proberen voor een aangenamere en meer ontspannen ervaring.
70
NEDERLANDS
Het apparaat gebruiken op de bikinilijn
Raadpleeg de tabel met aanbevolen lichtintensiteiten in ‘De lichtintensiteit instellen’ in hoofdstuk ‘Klaarmaken voor gebruik’ om te zien welke standen geschikt zijn voor uw bikinilijn.
In principe is Philips Lumea veilig en zacht genoeg voor behandeling van de volledige bikinizone (bijv. Braziliaanse of Hollywood-stijl). Gebruik een lagere stand op donkerder gekleurde, meer gevoelige huid in de bikinizone.
Gebruik het apparaat niet op de binnenste schaamlippen, vagina en anus.
Mannen die hun schaamstreek willen behandelen, moeten het apparaat niet op het scrotum gebruiken.
Opmerking: Reinig om hygiënische redenen altijd het lichaamsopzetstuk voordat u een ander lichaamsdeel gaat behandelen.
Het apparaat op uw oksels gebruiken
Raadpleeg de tabel met aanbevolen lichtintensiteiten in ‘De lichtintensiteit instellen’ in hoofdstuk ‘Klaarmaken voor gebruik’ om te zien welke standen geschikt zijn voor uw oksels.
Zorg ervoor dat u deodorant, parfum, crèmes of andere huidverzorgingsproducten van uw oksels verwijdert vóór de behandeling.
Tip: Ga voor optimale resultaten op uw oksels voor een spiegel staan om goed zicht te hebben op het te behandelen gebied en het ‘klaar om te flitsen’lampje. Houd uw arm omhoog en plaats uw hand in uw nek om de huid van uw oksel strak te trekken. Op deze manier kan de veiligheidsring gemakkelijker op de huid worden gedrukt, waardoor de behandeling gemakkelijker is uit te voeren.
Opmerking: Het weerspiegelde licht veroorzaakt geen schade aan uw ogen. Als het verstrooide licht onaangenaam is, sluit dan uw ogen wanneer u een flits afgeeft.
Optimale resultaten behalen
— Het is normaal dat er na de eerste behandelingen nog haartjes zichtbaar zijn. Zie ‘Werkingsprincipe’ in hoofdstuk ‘Belangrijk’ voor meer informatie.
— Om alle haren te verwijderen en te voorkomen dat de haarzakjes weer actief worden, moeten de behandelingen gedurende twee maanden om de twee weken worden herhaald. Uw huid behoort daarna glad te zijn. Lees ‘Onderhoudfase’ om te zien hoe u deze resultaten kunt behouden.
NEDERLANDS
71
Onderhoudfase
— Om ervoor te zorgen dat uw huid glad blijft, raden wij u aan de behandeling elke 4 tot 8 weken te herhalen. De tijd tussen behandelingen kan variëren, afhankelijk van uw individuele haargroei en ook per lichaamsdeel. Als tussen de behandelingen te veel haren teruggroeien, verkort dan gewoon de tijd tussen de behandelingen.
Voer de behandeling echter niet vaker dan eens in de twee weken uit op hetzelfde gebied. Wanneer u het apparaat vaker dan aanbevolen gebruikt, neemt de doeltreffendheid niet toe, maar wel het risico van huidreacties.
Mogelijke bijwerkingen en huidreacties
Vaak voorkomende huidreacties:
— Uw huid kan enige roodheid vertonen en/of kan prikken, tintelen of warm aanvoelen. Deze reactie is absoluut onschadelijk en verdwijnt snel.
— Gedurende korte tijd kan een reactie vergelijkbaar met zonnebrand optreden op het behandelde gebied. Raadpleeg uw huisarts als de irritatie na 3 dagen niet verdwenen is.
— De combinatie van scheren en lichtbehandeling kan een droge huid en jeuk veroorzaken. Dit is een onschadelijke reactie die binnen enkele dagen verdwijnt. U kunt ter verkoeling een ijscompres of een nat washandje op het gebied leggen. Als de huid droog blijft, kunt u 24 uur na de behandeling een geurloze vochtinbrengende crème aanbrengen op het behandelde gebied.
Zeldzame bijwerkingen:
— Verbranding, overmatige roodheid en zwelling: deze reacties zijn zeer zeldzaam. Ze zijn het gevolg van het gebruik van een te hoge lichtintensiteit voor uw huidskleur. Raadpleeg uw huisarts als deze reacties niet binnen 3 dagen verdwijnen. Wacht met de volgende behandeling tot de huid volledig is hersteld en gebruik een lagere lichtintensiteit.
— Huidverkleuring: dit komt zelden voor. Huidverkleuring is zichtbaar als een vlek die donkerder (hyperpigmentatie) of lichter (hypopigmentatie) is dan de huid er om heen. Dit is het gevolg van het gebruik van een lichtintensiteit die te hoog is voor uw huidskleur. Raadpleeg uw huisarts als de verkleuring niet binnen 2 weken verdwijnt. Behandel de verkleurde gebieden niet tot de verkleuring is verdwenen en uw huid zijn normale kleur heeft teruggekregen.
— Huidinfectie en ontsteking: dit komt zeer zelden voor en kan worden veroorzaakt door gebruik van het apparaat op wondjes of sneetjes die veroorzaakt zijn door scheren, op al bestaande wondjes of op ingegroeide haren.
— Overmatige pijn: dit kan voorkomen tijdens of na de behandeling als u het apparaat hebt gebruikt op ongeschoren huid, als u het apparaat gebruikt op een te hoge lichtintensiteit voor uw huidskleur, als u meerdere malen een flits afgeeft op hetzelfde gebied en als u het apparaat gebruikt op open wonden, ontstekingen, infecties, tatoeages, brandwonden, enz. Zie ‘Contra-indicaties’ in hoofdstuk ‘Belangrijk’ voor meer informatie.
72
NEDERLANDS
Na gebruik
— Gebruik geen geparfumeerde schoonheidsmiddelen op de behandelde gebieden onmiddellijk na de behandeling.
— Gebruik geen deodorant onmiddellijk na behandeling van de oksels.
Wacht tot eventuele roodheid van de huid volledig is verdwenen.
— Raadpleeg ‘Bruiningsadvies’ in hoofdstuk ‘Klaarmaken voor gebruik’ voor informatie over blootstelling aan de zon en kunstmatige bruining.
Reiniging en onderhoud
Het apparaat gaat het langst mee en levert de beste resultaten als u het voor en na elke behandeling en indien nodig ook tijdens de behandeling schoonmaakt. Het apparaat verliest zijn doeltreffendheid als u het niet goed schoonmaakt.
Maak het apparaat en de onderdelen nooit schoon onder de kraan of in de vaatwasmachine.
Gebruik nooit schuursponzen, schurende schoonmaakmiddelen of agressieve vloeistoffen zoals benzine of aceton om het apparaat schoon te maken.
Maak geen krassen op het lichtvenster of de metalen lijst in de opzetstukken.
Opmerking: Zorg dat de contactschakelaars van de veiligheidsring niet verstopt raken met vuil.
Opmerking: Gebruik het apparaat niet meer wanneer het lichtvenster of het opzetstuk niet meer kan worden gereinigd. Zie hoofdstuk ‘Accessoires bestellen’ als u onderdelen wilt vervangen.
1 Schakel het apparaat uit, haal de stekker uit het stopcontact en laat het apparaat afkoelen.
Opmerking: Het lichtvenster wordt heet tijdens het gebruik. Zorg dat het is afgekoeld voordat u het schoonmaakt.
2 Als u het opzetstuk wilt verwijderen, plaatst u uw vingers in de uitsparingen boven- en onderaan en trekt u voorzichtig. Het opzetstuk moet gemakkelijk loslaten.
3 Bevochtig het zachte doekje dat bij het apparaat is geleverd met wat druppels water en gebruik het voor het schoonmaken van de volgende onderdelen:
— het lichtvenster
— het buitenoppervlak van het opzetstuk
— de metalen lijst in het opzetstuk
Opmerking: Als water niet doeltreffend reinigt, gebruik dan een paar druppels alcohol met een hoog percentage om de hierboven genoemde onderdelen schoon te maken.
Opmerking: Een vervuild lichtvenster en/of opzetstuk kan eruitzien zoals op deze afbeelding. Maak het apparaat voor en na ieder gebruik schoon en indien nodig ook tijdens het gebruik, volgens de instructies in dit deel van de gebruiksaanwijzing.
NEDERLANDS
73
Tip: Als het niet meer mogelijk is de randen van het opzetstuk met het bijgevoegde reinigingsdoekje schoon te maken, gebruik dan in plaats daarvan een wattenstaafje. Controleer of er geen pluisjes of vezels op het opzetstuk of op het lichtvenster achterblijven.
4 Maak indien nodig de buitenkant van het apparaat schoon met het droge zachte reinigingsdoekje dat bij het apparaat is geleverd.
Opbergen
1 Schakel het apparaat uit, haal de stekker uit het stopcontact en laat het apparaat afkoelen.
2 Maak het apparaat schoon voordat u het opbergt.
3 Bewaar het apparaat op een stofvrije en droge plaats bij een temperatuur tussen 0 °C en 60 °C.
Milieu
— Gooi het apparaat aan het einde van zijn levensduur niet weg met het normale huisvuil, maar lever het in op een door de overheid aangewezen inzamelpunt om het te laten recyclen. Op die manier levert u een bijdrage aan een schonere leefomgeving.
— De ingebouwde accu’s bevatten stoffen die schadelijk kunnen zijn voor het milieu. Verwijder de accu’s altijd voordat u het apparaat afdankt en inlevert op een door de overheid aangewezen inzamelpunt. Lever de accu’s in op een officieel inzamelpunt voor batterijen. Als u problemen ondervindt bij het verwijderen van de accu’s, kunt u met het apparaat ook naar een Philips-servicecentrum gaan. Medewerkers van dit centrum verwijderen dan de accu’s voor u en zorgen ervoor dat deze op milieuvriendelijke wijze worden verwerkt.
De accu’s verwijderen
Verwijder de accu’s alleen als ze helemaal leeg zijn.
1 Ontkoppel het apparaat van de adapter.
2 Laat het apparaat lopen totdat de accu’s helemaal leeg zijn. Schakel het apparaat in en geef flitsen af totdat u het apparaat niet langer kunt inschakelen.
3 Duw een priem of een ander puntig gereedschap in het afdekplaatje aan de onderkant van het apparaat en verwijder het afdekplaatje.
74
NEDERLANDS
4 Draai de twee schroeven aan de onderzijde van het handvat los met een schroevendraaier.
5 Verwijder het onderste gedeelte van het handvat en knip de twee draden door die het onderste gedeelte van het apparaat verbinden.
6 Haal de accustekkers met een tang los van de accuaansluitingen.
7 Haal de accu’s met een tang uit het apparaat.
NEDERLANDS
75
8 Snijd de twee draden een voor een door om ongelukjes door mogelijke restlading te voorkomen.
Opbergomstandigheden
Spectrum van lichaamsopzetstuk
Lithium Ion-batterij
Garantie en ondersteuning
Als u informatie of ondersteuning nodig hebt, bezoek dan
www.philips.com/support
of lees het ‘worldwide guarantee’-vouwblad.
Technische specificaties
Model SC2004
Gemiddeld voltage
Nominale frequentie
Gemiddeld ingangsvermogen
Bescherming tegen elektrische schokken
Beschermingsklasse
Voorwaarden voor een goede werking
100V-240V
50Hz-60Hz
7,5 W
Klasse II
Q
IP 30 (EN 60529)
Temperatuur: +15 °C tot +35 °C
Relatieve vochtigheid: 25% tot 95%
Temperatuur: 0° tot +60°C
Relatieve vochtigheid: 5% tot 95%
> 570 nm
2 x 3,7 volt 1500 mAh
Problemen oplossen
Dit hoofdstuk behandelt in het kort de problemen die u kunt tegenkomen tijdens het gebruik van het apparaat. Als u het probleem niet kunt oplossen met de informatie hieronder, ga dan naar www.philips.com/support voor een lijst met veelgestelde vragen of neem contact op met het Consumer
Care Centre in uw land.
76
NEDERLANDS
Probleem
Het apparaat werkt niet.
Mogelijke oorzaak
De accu’s zijn leeg.
Oplossing
Laad het apparaat op (zie hoofdstuk ‘Opladen’).
Het apparaat gaat plotseling uit.
Tijdens het opladen wordt de adapter warm.
Het oplaadlampje gaat niet branden wanneer ik de kleine stekker in de aansluiting van het apparaat doe.
Het apparaat is defect.
De accu’s zijn leeg.
Dit is normaal.
U hebt de adapter niet op het stopcontact aangesloten.
Neem contact op met het Consumer Care
Centre in uw land, uw Philips-dealer of een
Philips-servicecentrum.
Laad het apparaat op (zie hoofdstuk ‘Opladen’).
U hoeft niets te doen.
Steek de kleine stekker in de aansluiting van het apparaat en steek de adapter in het stopcontact.
Er staat geen spanning op het stopcontact.
Sluit een ander apparaat aan op het stopcontact om te controleren of er stroom op het stopcontact staat. Als er stroom op het stopcontact staat maar het apparaat wordt nog steeds niet opgeladen, neem dan contact op met het Consumer Care Centre in uw land, uw Philipsdealer of een Philips-servicecentrum.
Controleer of de adapter goed in het stopcontact is geplaatst en/of de kleine stekker goed in de aansluiting van het apparaat is geplaatst.
Ik heb het apparaat ingeschakeld maar ik kan de lichtintensiteit niet verhogen of verlagen.
De adapter is niet goed in het stopcontact geplaatst en/of de kleine stekker is niet goed in de aansluiting van het apparaat geplaatst.
Het apparaat is defect.
Het apparaat moet opnieuw worden ingesteld.
Het ‘klaar om te flitsen’-lampje gaat niet branden wanneer ik het apparaat op de huid plaats.
U hebt de veiligheidsring van het opzetstuk niet goed op de huid geplaatst.
Neem contact op met het Consumer Care
Centre in uw land, uw Philips-dealer of een
Philips-servicecentrum.
U kunt het apparaat opnieuw instellen door het achtereenvolgens uit en in te schakelen. Als u de lichtintensiteit nog steeds niet kunt aanpassen, neem dan contact op met het Consumer Care
Centre in uw land, uw Philips-dealer of een
Philips-servicecentrum.
Plaats het apparaat onder een hoek van 90° op de huid zodat alle contactschakelaars de huid raken. Controleer vervolgens of het ‘klaar om te flitsen’-lampje brandt en druk op de flitsknop.
NEDERLANDS
77
Probleem
Het ‘klaar om te flitsen’-lampje gaat niet branden wanneer ik het opzetstuk op de huid plaats, maar de koelventilator draait.
Het ‘klaar om te flitsen’-lampje brandt groen maar het apparaat flitst niet wanneer ik op de flitsknop druk.
Mogelijke oorzaak
De veiligheidsring is vuil.
De oververhittingsbeveiliging is in werking getreden.
Het apparaat moet opnieuw worden ingesteld.
Dit is normaal.
Oplossing
Als dat niet werkt, plaatst u het apparaat op een deel van uw lichaam waar u eenvoudig volledig contact met de huid tot stand kunt brengen.
Controleer vervolgens of het ‘klaar om te flitsen’lampje brandt. Als het ‘klaar om te flitsen’-lampje nog steeds niet gaat branden wanneer u het apparaat op de huid plaatst, neem dan contact op met het Consumer Care Centre in uw land, uw
Philips-dealer of een Philips-servicecentrum.
Maak de veiligheidsring voorzichtig schoon. Als u de veiligheidsring niet goed kunt schoonmaken, neem dan contact op met het Consumer Care
Centre in uw land, uw Philips-dealer of een
Philips-servicecentrum om het opzetstuk te vervangen.
Wanneer de oververhittingsbeveiliging in werking is getreden, blijft de ventilator draaien. Schakel het apparaat niet uit maar laat het ongeveer 15 minuten afkoelen voordat u doorgaat met het gebruik. Als het ‘klaar om te flitsen’-lampje nog steeds niet gaat branden wanneer u het apparaat op de huid plaatst, neem dan contact op met het
Consumer Care Centre in uw land, uw Philipsdealer of een Philips-servicecentrum.
U kunt het apparaat opnieuw instellen door het achtereenvolgens uit en in te schakelen. Als het
‘klaar om te flitsen’-lampje groen brandt, maar het apparaat nog steeds niet flitst wanneer u op de flitsknop drukt, neem dan contact op met het
Consumer Care Centre in uw land, uw Philipsdealer of een Philips-servicecentrum.
U hoeft niets te doen.
Het apparaat wordt warm tijdens gebruik.
Het apparaat geeft niet lichtintensiteit 1 aan wanneer ik het inschakel.
Het apparaat produceert een rare geur.
Het apparaat moet opnieuw worden ingesteld.
Het opzetstuk en/of het filterglas zijn vuil.
Stel het apparaat opnieuw in door het achtereenvolgens uit en in te schakelen. Als het apparaat nog steeds niet lichtintensiteit 1 aangeeft, neem dan contact op met het Consumer Care
Centre in uw land, uw Philips-dealer of een
Philips-servicecentrum.
Maak het opzetstuk voorzichtig schoon. Als u het opzetstuk niet goed kunt schoonmaken, neem dan contact op met het Consumer Care Centre in uw land, uw Philips-dealer of een Philipsservicecentrum om het opzetstuk te vervangen.
78
NEDERLANDS
Probleem Mogelijke oorzaak
U hebt het gebied dat wordt behandeld, niet goed geschoren.
Oplossing
Als er haren aanwezig zijn op het te behandelen gebied, kunnen deze haren verbranden bij het gebruik van het apparaat. Daarom ruikt u een vreemde geur. Scheer het te behandelen gebied voordat u het apparaat gebruikt. Als het scheren huidirritaties veroorzaakt, trim het haar dan zo kort mogelijk en gebruik een stand die aangenaam aanvoelt.
De rare geur verdwijnt na enige flitsen.
U hebt het apparaat in een stoffige omgeving opgeborgen.
De lichtintensiteit die u gebruikt is te hoog.
Controleer of u de juiste lichtintensiteit hebt gekozen. Kies zo nodig een lagere lichtintensiteit.
De huid voelt gevoeliger aan dan normaal tijdens de behandeling.
Bij het gebruik van het apparaat voel ik een onaangename pijnsensatie.
U hebt de gebieden die worden behandeld, niet geschoren.
Het UV-filter in het lichtvenster is gebroken.
Het apparaat is defect.
U hebt de gebieden die worden behandeld, niet geschoren.
U hebt een gebied behandeld waarvoor het apparaat niet is bedoeld.
De lichtintensiteit die u hebt gebruikt is te hoog voor u.
Het apparaat is niet geschikt voor uw huidskleur.
Scheer de te behandelen gebieden altijd voordat u het apparaat gebruikt. Als het scheren huidirritaties veroorzaakt, trim het haar dan zo kort mogelijk en gebruik een stand die aangenaam aanvoelt.
Als het UV-filter in het lichtvenster gebroken is, moet u het apparaat niet meer gebruiken. Neem contact op met het Consumer Care Centre in uw land, uw Philips-dealer of een Philipsservicecentrum.
Neem contact op met het Consumer Care
Centre in uw land, uw Philips-dealer of een
Philips-servicecentrum.
Scheer de te behandelen gebieden altijd voordat u het apparaat gebruikt. Als het scheren huidirritaties veroorzaakt, trim het haar dan zo kort mogelijk en gebruik een stand die aangenaam aanvoelt.
U moet het apparaat niet gebruiken op uw gezicht, binnenste schaamlippen, vagina, anus, tepels, tepelhoven en in de neusgaten en oren.
Mannen moeten het niet gebruiken op hun gezicht of scrotum.
Verminder de lichtintensiteit tot een niveau dat aangenaam voor u is. Zie ‘De lichtintensiteit instellen’ in hoofdstuk ‘Klaarmaken voor gebruik’.
Gebruik het apparaat niet als u een zeer donkere huid hebt. Gebruik het apparaat ook niet als uw lichaamshaar lichtblond, rood, grijs of wit is.
NEDERLANDS
79
Probleem
De behandelde gebieden worden rood na de behandeling.
De huidreactie na de behandeling houdt langer aan dan normaal.
Mogelijke oorzaak
Het is onschadelijk en normaal als de huid enigszins rood is en dit verdwijnt snel.
De lichtintensiteit die u hebt gebruikt is te hoog voor u.
Oplossing
U hoeft niets te doen.
Kies de volgende keer een lagere lichtintensiteit.
Zie ‘De lichtintensiteit instellen’ in hoofdstuk
‘Klaarmaken voor gebruik’.
De ontharingsresultaten voldoen niet aan de verwachtingen.
De lichtintensiteit die u hebt gebruikt is te laag voor u.
Raadpleeg uw huisarts als de huidreactie langer dan 3 dagen aanhoudt.
Kies de volgende keer een hogere lichtintensiteit.
U hebt de behandelde gebieden niet voldoende laten overlappen bij het gebruik van het apparaat.
U hebt het apparaat niet zo vaak als aanbevolen gebruikt.
Het apparaat is niet geschikt voor de kleur van uw haar of huid.
Haar begint weer op bepaalde plekken van de behandelde gebieden te groeien.
U hebt de behandelde gebieden niet voldoende laten overlappen bij het gebruik van het apparaat.
Haar groeit terug als onderdeel van de natuurlijke haargroeicyclus.
Voor goede ontharingsresultaten moet u de behandelde gebieden laten overlappen bij het gebruik van het apparaat. Zie stap 9 van ‘Verder gebruik’ in hoofdstuk ‘Het apparaat gebruiken’.
Om alle haren succesvol te verwijderen en te voorkomen dat de haarwortel weer actief wordt, moeten de behandelingen gedurende de eerste twee maanden om de twee weken worden herhaald. Om ervoor te zorgen dat uw huid glad blijft, raden wij u aan de behandeling elke vier tot zes weken te herhalen. De tijd tussen behandelingen kan variëren, afhankelijk van uw individuele haargroei en het lichaamsdeel.
Als tussen de behandelingen te veel haren teruggroeien, verkort dan de tijd tussen de behandelingen. Voer de behandeling echter niet vaker dan eens in de twee weken uit op hetzelfde gebied. Wanneer u het apparaat vaker dan aanbevolen gebruikt, neemt de doeltreffendheid niet toe, maar wel het risico van huidreacties.
Gebruik het apparaat niet als uw lichaamshaar lichtblond, rood, grijs of wit is. Gebruik het apparaat ook niet als u een zeer donkere huid hebt.
Voor goede ontharingsresultaten moet u de behandelde gebieden laten overlappen bij het gebruik van het apparaat. Zie stap 9 van ‘Verder gebruik’ in hoofdstuk ‘Het apparaat gebruiken’.
Dit is normaal. Het is onderdeel van de natuurlijke haargroeicyclus dat haar teruggroeit. Doorgaans zijn de haren die teruggroeien echter zachter en dunner.
4222.100.1364.3 (01/2018)
Инструкция по использованию домашнего фотоэпилятора
Рекомендации о том, как правильно пользоваться фотоэпилятором в домашних условиях, полезно знать еще до его покупки. При грамотном подходе можно добиться эффективного результата. Все аспекты эксплуатации сводятся к трем основным факторам: подготовка к процедуре, периодичность эпиляции, последующие мероприятия. Важным моментом являются противопоказания к применению, некоторые из них носят временный характер, но есть жесткие ограничения.
Преимущества и недостатки домашней фотоэпиляции
Существует множество способов убрать лишние волоски с тела. И каждый обладает своими достоинствами и недостатками, в том числе и фотоэпиляция. Сначала рассмотрим ее плюсы.
- Это неинвазивная и нетравматичная процедура, без прямого контакта с кожей. Вероятность получить какое-то заражение нулевая.
- Проблемы вросших волос здесь не бывает, так как волосы в том же месте повторно не растут (фолликул убирается полностью).
Во время процедуры воздействие идет только на те волоски, которые есть на поверхности. Однако в коже есть фолликулы в неактивной форме, которые потом вырастут в волоски. Чтобы полностью избавиться от растительности, процедуру надо повторить. Радует, что, несмотря на это обстоятельство, результат будет заметен почти сразу.

Фотоэпилятор воздействует только на волоски в фазе роста
Есть у фотоэпиляции и свои слабые места. Выбирая для себя способ удаления волосков, надо знать и недостатки процедуры.
- Для 100% результата необходимо сделать несколько процедур.
- Приборы для домашнего использования маломощные, поэтому могут оставлять даже видимые волоски. Требуется большее число проходов, чем в салоне.
- Противопоказанием к фотоэпиляции является высокая чувствительность кожи.
- Волоски на лице появляются из-за системных проблем в организме, чаще гормональных. Поэтому после удаления даже перспективными методами они могут вновь появиться. Частить с фотоэпиляцией нельзя, она может навредить тонкой, чувствительной коже лица, поэтому в какой-то момент придется выбрать другой метод.
- Метод фотоэпиляции тем эффективнее, чем грубее и темнее волосы. На седых, светлых (без меланина) волосах она работает плохо.
- У нетерпимых к боли девушек процедура может вызывать неприятные ощущения. Перед первой фотоэпиляцией необходимо провести тест на чувствительность.
- Есть данные, что излучения от прибора может негативно влиять на новообразования, перерождая их из доброкачественных в онкологические.

На очень светлых волосах фотоэпиляция будет малоэффективна
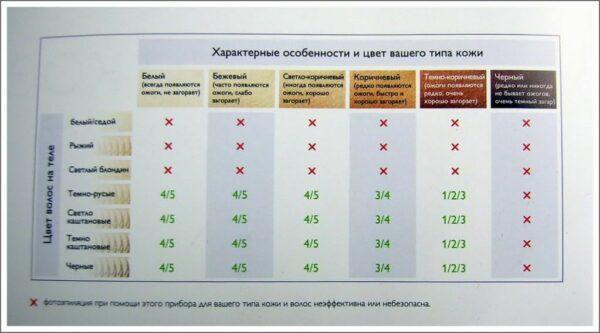
По каким параметрам выбирать домашний фотоэпилятор
Если нет причин отказаться именно от этого метода эпиляции, ее можно проводить дома. Это удобно и в конечном счете недорого. Прибор для домашней фотоэпиляции внешне похож на дорожный фен. Емкости аккумулятора хватает на 150 вспышек излучателя. Выбирая прибор в магазине, стоит обратить внимание на следующие характеристики.
- Мощность. Для максимального эффекта нужен прибор на 5-10Дж/кв.см. Деликатное воздействие на организм возможно при 3-5 Дж/кв.см. кожи.
- Площадь единовременного воздействия (обычно 1-6 кв.см.)
- Частота импульсов света. Нормальной скоростью считается 0,5 имп./сек.
- Ресурс работы лампы. Для домашнего прибора достаточным будет 200 тысяч импульсов.
- УФ-фильтр. Его силу показывает специальный индикатор.
- Качество самого прибора. Устройство, предназначенное для воздействия на организм, лучше покупать от проверенного производителя.
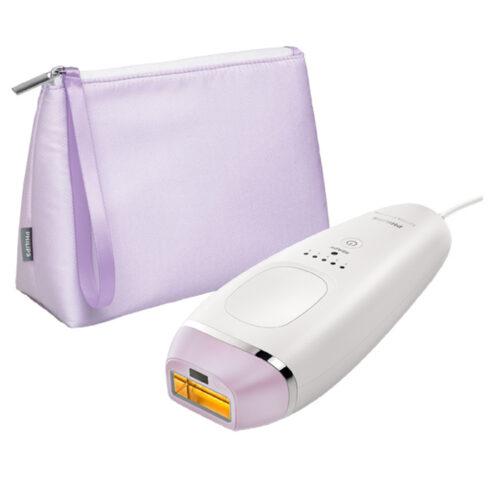
Компактный домашний фотоэпилятор Philips
Важно! Для проведения процедуры нужны дополнительные аксессуары: защитные очки, обезболивающий гель и антисептик.
С чего начинается эпиляция
С каждым фотоэпилятором всегда идет инструкция по эксплуатации или видео-обзор, если такового нет, информацию можно найти на официальном сайте продавца. Требования по подготовке к эпиляции разнятся, в зависимости от конкретной модели. Одни производители рекомендуют предварительно удалить отросшие волосы обычным станком, а другие – отрастить до 3 – 4 мм.
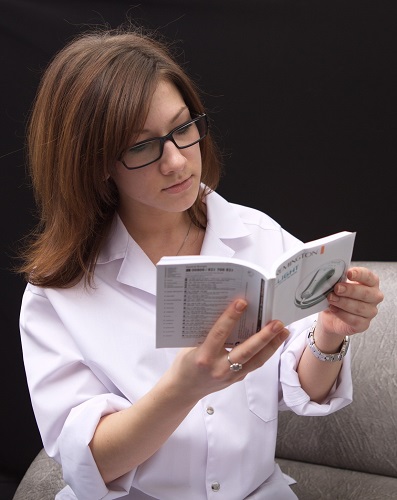
За две недели до первого сеанса нужно отказаться от загара, автозагара и солярия, а также прекратить прием антибиотиков. Полный цикл состоит из нескольких процедур, их количество варьируется от 5 до 10. В течение 6 – 7 недель до первой эпиляции не стоит пользоваться воском, электрическим эпилятором или делать сахарную эпиляцию, в противном случае, процедура не принесет результатов.
Прежде чем приступить к сеансу, специалисты советуют сделать пробную вспышку на коже. Такие манипуляции продиктованы мерами безопасности: всегда есть риск, что кожа будет слишком чувствительна к фотолампам. Если негативных реакций не последовало, значит, разрешено использовать фотоэпилятор дальше.
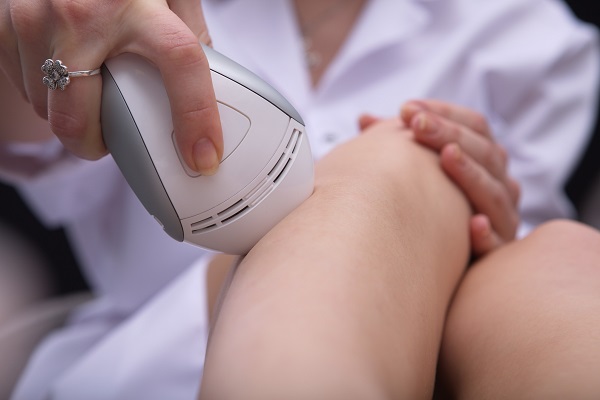
Настройки эпилятора
Перед тем, как пользоваться фотоэпилятором, нужно установить оптимальную мощность вспышки. Специалисты советуют начинать пользоваться с минимальной ступени, также стоит ознакомиться с рекомендациями производителя — они должны быть указаны в руководстве пользователя.
Если вы раньше не обращались к подобным услугам, проще всего начинать с области подмышек. С одной стороны нужно сделать несколько вспышек на первой ступени мощности, если неприятные ощущения отсутствуют, с другой стороны повторить процедуру на второй ступени.
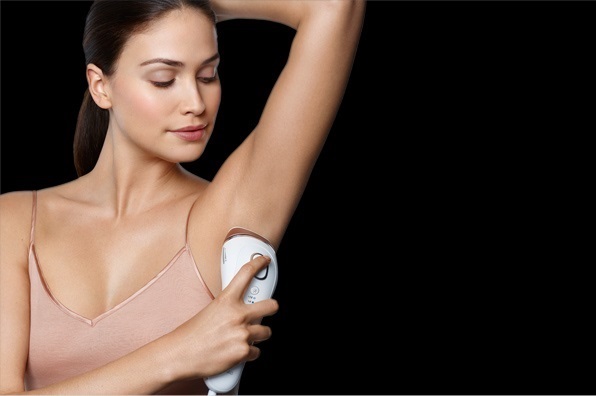
Важно знать! Если во время сеанса в зоне воздействия пользователь вообще ничего не чувствует, значит, мощность слишком низкая и результата не будет. Явные болевые ощущения терпеть запрещено – это свидетельствует о том, что мощность слишком высока.
В процессе пользования легко определить, какие настройки необходимы для эффективного результата. Существуют модели, где уровень мощности определяется автоматически специальным датчиком — в этом случае задача упрощается.
Подготовка кожи и первый сеанс
Перед использованием необходимо подготовить кожу, как перед салонной процедурой, для этого ее очищают и обрабатывают любым неабразивным пилингом или скрабом. В домашних условиях подойдет мед, пюре из помидор или готовое средство из магазина. Длинные волосы и щетину удаляют бритвенным станком. В некоторых случаях после депиляции нужно дождаться, пока волоски отрастут до 2 – 4 мм. Не стоит пренебрегать правилами, указанными в инструкции по применению — это влияет на эффективность процедуры.
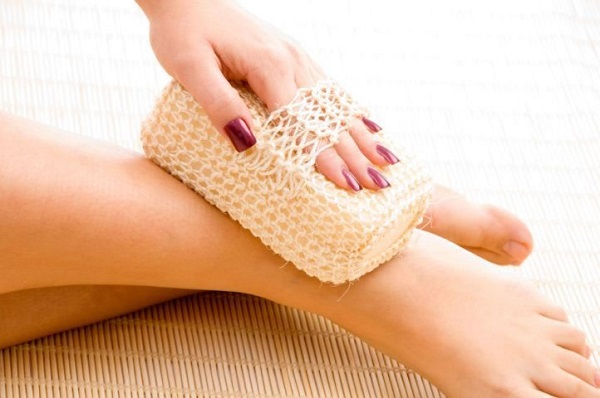
Окно фотоэпилятора должно быть чистым, комплектация многих устройств содержит специальную салфетку. Также практически все современные модели оснащены датчиком касания. Когда аппарат приложен правильно, он подает звуковой, световой или вибрационный сигнал.
После вспышки эпилятор также сигнализирует о том, что его можно убрать. Специалисты рекомендуют перемещать устройство по горизонтальной линии и не воздействовать на одну зону дважды за процедуру. Опытные владельцы, напротив, советуют обрабатывать участки кожи «внахлест». Если по инструкции необходимо использование геля – его нужно наносить, это повысит комфорт и безопасность эпиляции. При обработке больших участков рекомендуется перейти в скользящий режим, если он предусмотрен.
Сколько времени уходит на эпиляцию:
- ноги – от 20 до 30 минут;
- зона бикини – 15-20 минут;
- зона глубокого бикини – 20 минут;
- подмышечные впадины – 15 минут.
Уход за кожей
После сеанса эпиляции, в большинстве случаев, нужно использовать успокаивающий крем или гель. Возможны небольшие покраснения, а чтобы избежать раздражения, косметологи рекомендуют воздержаться от сауны, горячей ванны и беречь обработанные зоны от всех видов загара.
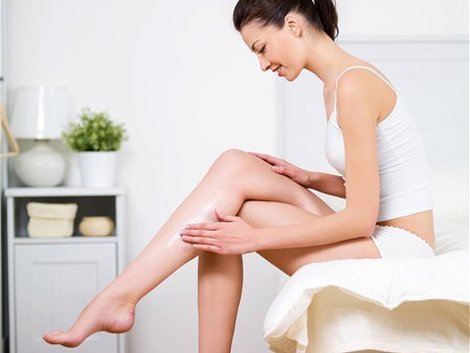
Явных болевых ощущений или жжения быть не должно. Чувствительная кожа может реагировать на процедуру, но не испытывать дискомфорт. Если есть сомнения по поводу состояния кожи, стоит обратиться к врачу за консультацией. Чаще всего, если после эпиляции беспокоит зуд или жжение, достаточно в следующий раз снизить мощность.
Аллергические реакции на фотовспышку встречаются, но крайне редко.
Периодичность процедур
Так как эпилятор убирает только видимые волоски, процедуру придется повторить несколько раз для достижения лучшего результата. Безопасные интервалы прописаны ниже.
- В среднем между процедурами должно быть 5-8 нед.
- Участки с более темными волосками (руки и ноги) можно облучать 1 раз в 2 месяца.
- Интимные зоны (бикини, подмышки) следует обрабатывать 1 раз в полтора месяца.
- Усики с лица убираются раз в месяц.
- Периодичность использования фотоэпилятора лучше подобрать вместе со специалистом, индивидуально. Следует помнить: чем темнее волоски, тем они медленнее уходят.
Как скоро ждать результата
Под действием излучения умирает только луковица, сам волосок остается на поверхности. Он со временем (в течение 10-14 дней) отпадает. В целом, объем волос уменьшается двое за 3-4 сеанса. При расчете периодичности процедур надо помнить, что излучение работает только с теми волосками, которые на поверхности.
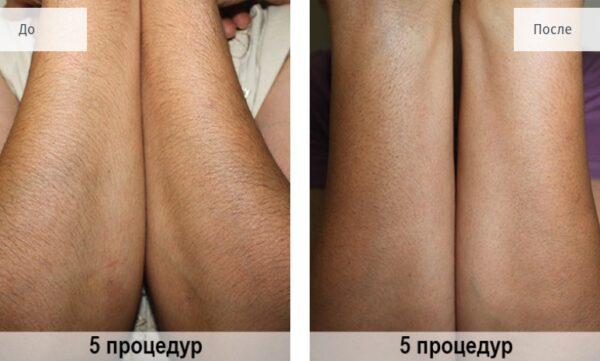
Уже за 5 процедур можно добиться значительного снижения роста волос
Особенности проведения процедуры
Фотоэпиляция имеет ряд ограничений и нюансов:
- метод подходит девушкам старше 16-17 лет;
- волоски, растущие из родинок, трогать нельзя, можно получить сильные ожоги, плюс последствия в долгосрочной перспективе могут быть непредсказуемыми;
- нельзя воздействовать на поврежденную кожу;
- во время менструации медицинских ограничений на процедуру нет, однако она может оказаться чуть более болезненной, чем обычно;
- в теплое время года фотоэпиляцию можно делать не позже, чем за 2 недели до загара;
- если кожа склона к появлению растяжек, фотоэпиляция нежелательна;
- излучение прибора не влияет на лимфоузлы в зоне воздействия (в частности, на подмышках).
При соблюдении всех правил и рекомендаций фотоэпиляция не вредит здоровью и вполне комфортна.