![]() Download Article
Download Article
![]() Download Article
Download Article
With enough LEGOs and the right pieces, if you can imagine a design, you can usually build it! But getting from a bunch of loose LEGOs to a cool finished model can be difficult without some guidance. If your goal is to build a truck with your LEGOs, all you need is the right parts and attention to detail. Before long, you’ll have a cool LEGO truck of your own.
-

1
Create the frame of your truck. Take your small car base piece and attach a 4 x 12 long piece to the back four raised studs of your base.[1]
This will form the bed and front cabin of your truck. -
2
Add cabin features to the lowered section of your base. The recessed area of your small car base is where the cabin of your vehicle will be and where you LEGO driver will sit. Put the steering wheel and the seat in the dropped-down area.[2]
Advertisement
-
3
Create the windshield of your LEGO vehicle. Start by taking both your square windows and stacking them, one on top of the other. Then attach these in front of the steering wheel to complete your windshield.
-
4
Fasten fenders to the front of your car.[3]
Your fenders, sometimes called a rounded mudguard, should be half circles attached to a flat piece or brick. Connect your fenders in front of the windshield, so the half circles point downward on either sides of the front of your truck.


Advertisement
-
1
Add clear orange pieces to your front end piece. Your front end piece, also called the license plate holder, should have two studs on top and a contoured front stretching four studs wide and two studs tall. On the recessed studs on the rightmost and leftmost side of your front end add your 1 x 1 clear orange pieces.
-
2
Sandwich your clear orange pieces with a 2 x 4 plate. Your clear orange pieces should have mad the contoured front of your front end even, which will allow you to put on a flat 2 x 4 piece on top of it.
- Now the orange pieces should be sandwiched between the 2x 4 plate the the front end piece.
-
3
Include lights on the front of your truck.[4]
The clear, sloped, red 1 x 1 piece will be attached to the top left and right sides of your front end, in line with the orange transparent pieces you installed earlier. Place the sloped sides of these pieces to face off to each side of the truck. -
4
Plate the very front of your front end. You should add the flat, smooth 1 x 2 piece between the sloped clear pieces. Then, below this, put the 1 x 2 flat piece with a middle circular stud directly below.
-
5
Attach your front end to the front of your truck. The front-most part of your base that you have already attached fenders to will be the landing zone for your front end. Attach your front end to the free two studs at the very front of your base.
-
6
Connect your hood and air intake to your front end. The hood piece should fit evenly, covering all free studs on the top of your front end. On top of the hood should be two free studs. On these, you should attach the 1 x 2 air intake piece.


Advertisement
-
1
Install doors and walls of the bed of your truck.[5]
The 1 x 1 circular attachment piece of your doors will have to go on the free stud closest to the front of your car to either side of the truck cabin. Then:- Use 1 x 8 and 1 x 4 pieces evenly to the outside of your 4 x 12 truck bed piece to make you truck bed walls.
- Leave one row of studs at the very back of your 4 x 12 truck bed piece for the hitch and license plate.
-
2
Create your rear end. Much like you did with the front end, you will use your license plate holder piece to create the back of your truck. On the left and right recessed studs on the top four-across row of your rear end, add red sloped pieces, slopes facing outward. Between these, attach your license plate.
-
3
Add rear accents to your rear end. This includes a flat, yellow 1 x 4 piece with black diagonal slashes on it. This will be your read bumper. Attach it so that it stretches across the bottom of your license plate holder piece.
-
4
Attach your rear end to your truck. On the free four studs at the very back of your 4 x 12 truck bed piece, connect your rear end. Make sure the edges meet with the walls of the bed of your truck and the rear end piece is firmly fastened.


Advertisement
-
1
Roof the cabin of your truck and the front-most part of the bed.[6]
Your flat, 4 x 4 piece should completely cover the top of the cabin of your vehicle. Then, stretching across the gap made by the 2 x 8 pieces:- Attach two 2 x 4 blocks, on on top the other, so that both are flat against the back wall of your cabin.
- Attach two 1 x 4 pieces behind the 2 x 4 blocks.
- This should create an flat surface that is level with the roof of your cabin.
-
2
Add a unifying roof piece and a sloped window for effect.[7]
To join your cabin and bed together firmly, you should connect both by attaching your 4 x 8 piece to the top. A single row of studs should hang free the hood/window area of your truck.- Attach your sloped window atop the 4 x 8 on the front-most studs.
-
3
Fasten your hood cover and railings for the bed. The hood cover should go in the front-center of the 4 x 8 piece for the most realistic effect. Use 1 x 8 smooth pieces on the top of the walls of the bed of your truck.
- Leave two free studs on the walls of the bed of your truck closest to the cabin.


Advertisement
-
1
Construct your front wheels.[8]
On a 2 x 4 axle piece, first attach a 2 x 2 block. On top of this block, add a 2 x 2 flat piece, and atop that add a 2 x 2 spinning piece. This will allow the front wheels of your car can turn left and right. Now you can press your wheels onto the circular axles on the outside of the 2 x 4 axle piece. -
2
Attach the wheel assembly of your car to the front end.[9]
Make sure the studs of your spinning piece is lined up like a normal block to make sure its studs attach to the bottom of your front end. Then:- Attach the wheel assembly so the wheels stick out under the half circles of the fenders.
-
3
Construct your rear wheel assembly with half axles. You’re going to need to fashion two 2 x 2 half axles into a single piece to give the rear wheels of your truck more width. Use a 2 x 2 piece attached to the underside of the two half axles to create one 2 x 4 axle.
-
4
Give your rear wheels enough clearance from the bed of the truck.[10]
You can do this by first adding a 2 x 4 block to the top of your rear axle. Then on the 2 x 4 block, add two 2 x 2 pieces, or a single 2 x 4 piece, so that all piece form flat sides. -
5
Attach your rear tire assembly and add wheels to the axles.[11]
Now you can attach your rear wheel assembly toward the back of your truck. Then push your wheels onto the rear axle to finish the assembly.- Attach your wheels so the back edge of your connecting block is beneath the fourth stud from the rear of the bed of your truck.
- You might also experiment with rear wheel placement to find what looks best for you.
- Do not attach your wheel assembly to the very back of the underside of the bed of your truck; you will need some space to attach the hitch of your truck.


Advertisement
-
1
Create a hitch for the rear of your truck. Your hitch begins with a 2 x 6 flat piece. Take this 2 x 6 and add to the back-most two studs a 1 x 2 hitch piece. The hitch piece should have a round, upward facing part, which is the hitch.
-
2
Link your hitch by pressing its studs into the underside of the bed. You should allow your hitch to stick out from the back of your truck about three studs. This will make your truck hitch look more realistic.
-
3
Close off the empty space between the bed and cabin. The bed of your truck closest to the cabin still has a slight gap. Close this off to complete the bed of your truck. Do this by attaching two 1 x 2 pieces on top of each other. Then:
- Attach your 1 x 2 pieces between the walls of the bed of your truck closest to the cabin.
-
4
Make a step for your cabin.[12]
Take your 2 x 4 sloped piece and on top of it add a flat 2 x 4 piece so that the rear four studs of your flat piece hang off the back of your sloped piece. Then put a 1 x 1 piece with a circular stud on the side on the rear corner of your 2 x 4 flat where it attaches to the sloped piece.- The 1 x 1 piece with a circular side stud is where your LEGO truck can be filled up with fuel.
-
5
Add your cabin step and a driver. The free hanging back four studs of your flat 2 x 4 piece should be pressed into the bottom of your car base beneath the driver’s side door. Then, open the door and put a LEGO figurine inside. It’s time to go truckin’!


Advertisement
Ask a Question
200 characters left
Include your email address to get a message when this question is answered.
Submit
Advertisement
Thanks for submitting a tip for review!
-
Be careful you don’t lose any pieces while constructing your LEGO truck. Small pieces can be especially painful when stepped on.
Advertisement
Things You’ll Need
- 1 x 1 block (1)
- 1 x 1 orange clear flat piece (2)
- 1 x 1 red clear slope (2)
- 1 x 1 with circular center hole (1)
- 1 x 1 yellow clear slope (2)
- 1 x 2 block (3)
- 1 x 2 flat smooth with circular knob on top (1)
- 1 x 2 flat smooth with license plate sticker (1)
- 1 x 2 with grille (1)
- 1 x 3 x 4 doors (different sides; 2)
- 1 x 4 block (6)
- 1 x 4 flat smooth (1)
- 1 x 4 square window (medium size; 2)
- 1 x 8 (4)
- 1 x 8 flat smooth (2)
- 2 x 2 air intake cover (1)
- 2 x 2 block (4)
- 2 x 2 flat (2)
- 2 x 2 hood cover (1)
- 2 x 2 one sided axles (for back tires; 2)
- 2 x 2 spinning piece (1)
- 2 x 2 tire axle (1)
- 2 x 4 blocks (3)
- 2 x 4 flat (2)
- 2 x 4 ramp (1)
- 2 x 6 flat (1)
- 4 x 12 flat (1)
- 4 x 4 flat block (1)
- 4 x 4 hood (1)
- 4 x 8 flat (1)
- Hitch (1)
- License plate holder (2)
- Seat (1)
- Small car base (1)
- Steering wheel (1)
- Tires and rims (4 each)
- Wheel fender (2)
References
About This Article
Thanks to all authors for creating a page that has been read 45,453 times.
Did this article help you?
Get all the best how-tos!
Sign up for wikiHow’s weekly email newsletter
Subscribe
You’re all set!

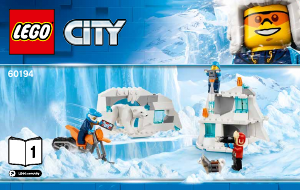
Требуются инструкции по сборке из вашего набора ЛЕГО set 60194 City Грузовик ледовой разведки? Ниже вы можете просмотреть и загрузить бесплатно инструкции по сборке в формате PDF. Кроме того, приведены часто задаваемые вопросы, рейтинг изделия и отзывы пользователей, что позволит оптимально использовать ваше изделие. Если это не то руководство, которое вы искали, – свяжитесь с нами.
Ваше устройство неисправно, и в руководстве отсутствует решение? Перейдите в Repair Café для получения бесплатных ремонтных услуг.
Руководство

Рейтинг
Сообщите нам, что вы думаете о ЛЕГО set 60194 City Грузовик ледовой разведки, оставив оценку продукта. Хотите поделиться вашими впечатлениями от данного изделия или задать вопрос? Вы можете оставить комментарий в нижней части страницы.
Довольны ли вы данным изделием ЛЕГО?
Да Нет
18 голоса
Часто задаваемые вопросы
Наша служба поддержки выполняет поиск полезной информации по изделиям и отвечает на часто задаваемые вопросы. Если вы заметили неточность в наших часто задаваемых вопросах, сообщите нам об этом с помощью нашей контактной формы.
В наборе нет одного элемента Lego, где можно заказать запасной? Проверенный
В компании Lego работает служба, где можно заказать отдельные элементы или куда можно обратиться в случае нехватки элементов в наборе. Дополнительную информацию см. на веб-сайте.
Это было полезно (4178)
Как предотвратить изменение цвета игрушек Lego? Проверенный
Цвет пластиковых игрушек Lego меняется по двум главным причинам: длительное воздействие солнечного света или сигаретного дыма. Постарайтесь минимизировать воздействие этих факторов на ваши игрушки Playmobil.
Это было полезно (1407)
Как лучше всего чистить детали конструктора Lego? Проверенный
Lego советуют чистить детали вручную с помощью воды (не выше 40°C) и щадящего чистящего средства. Никогда не мойте детали Lego в посудомоечной или стиральной машине. Оставьте детали сушиться на воздухе. Очищайте электрические детали исключительно сухой тканью.
Это было полезно (1295)
Каждый раз после сборки нового набора Lego у меня остается несколько маленьких деталей. Я забыл(-а) ими воспользоваться? Проверенный
Нет, во многих наборах Lego есть запасные детали для мелких элементов.
Это было полезно (1052)
Как лучше всего наносить наклейки на детали Lego? Проверенный
Чтобы наклейки можно было переклеить, рекомендуется обработать место нанесения наклейки средством для очистки стекол. После размещения наклейки дайте ей высохнуть, чтобы она держалась на месте.
Это было полезно (933)
Где я могу найти список деталей моего набора Lego? Проверенный
Многие современные инструкции Lego включают список деталей в конце буклета. В случае нескольких буклетов список можно найти в середине PDF-файла.
Это было полезно (895)
Можно ли использовать детали Lego и Duplo вместе? Проверенный
Да, детали Lego и Duplo совместимы. Детали Lego устанавливаются на детали Duplo с полыми шипами. Детали Duplo лучше всего устанавливаются на более крупные детали Lego, на мелких деталях они могут держаться хуже.
Это было полезно (817)
С какого возраста можно играть с Lego? Проверенный
Большинство наборов Lego предназначены для детей от 4 лет, поскольку содержат мелкие детали. Специальная серия Duplo предназначена для детей от 1,5 лет. Возрастные ограничения всегда указываются на коробке.
Это было полезно (801)
City LEGO Instructions Set Number 7733 — Truck and Forklift

![]()
![]()
Set Number:
LEGO 7733
![]()
Set Theme: City
![]()
Set Name:
Truck and Forklift
![]()
Year:
2008
![]()
View LEGO Instructions
7733 Truck and Forklift

Thanks so much for taking the time to have this site. We lost the books to one of my sons sets and finding this site was a life saver, at least in my 4 year old sons mind. Thanks Again!!! 
Peter

![]()
![]()
Set Number:
LEGO 7733
![]()
Set Theme: City
![]()
Set Name:
Truck and Forklift
![]()
Year:
2008
![]()
View LEGO Instructions
7733 Truck and Forklift
Thanks so much for taking the time to have this site. We lost the books to one of my sons sets and finding this site was a life saver, at least in my 4 year old sons mind. Thanks Again!!!
Peter
![]()
![]()
Set Number:
LEGO 7733
![]()
Set Theme: City
![]()
Set Name:
Truck and Forklift
![]()
Year:
2008
![]()
View LEGO Instructions
7733 Truck and Forklift
Thanks so much for taking the time to have this site. We lost the books to one of my sons sets and finding this site was a life saver, at least in my 4 year old sons mind. Thanks Again!!!
Peter

View LEGO Instructions
7733 Truck and Forklift
Thanks so much for taking the time to have this site. We lost the books to one of my sons sets and finding this site was a life saver, at least in my 4 year old sons mind. Thanks Again!!!
Peter
Kid Creations
The Emmet Mobile
Name: Gabriel
Age: 9
View Kid Creations
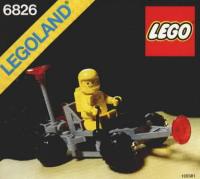
Instructions
Set number: 6826
Crater Crawler
View Crater Crawler
Follow us:
- YouTube
Данная инструкция на русском языке предназначена для конструктора Lego
60194 Arctic Scout Truck (Грузовик ледовой разведки), описывает принцип работы и основные моменты эксплуатации устройства.
Производитель настойчиво рекомендует перед включением конструктора Lego
внимательно изучить настоящую инструкцию.
Инструкция для конструктора Lego
представлена в формате PDF. Все современные браузеры уже поддерживают данный формат и сложностей с открытием файла возникнуть не должно.
Но если открыть инструкцию все же не удается, то необходимо установить на компьютер программу для чтения PDF файлов, например, Acrobat Reader. Если у вас возникли сложности с открытием инструкции на смартфоне под управлением Android, нужно установить, например, Adobe Acrobat Reader.

Лего 7760
Скачать

Схема сборки военной машины из лего
Скачать

Конструктор лего БРИК военный грузовик инструкция
Скачать

Лего Классик схема машинка
Скачать

Простые машинки из лего
Скачать

Инструкция лего Полицейская машина с прицепом
Скачать

Лего машинка 7737 схема сборки
Скачать

LEGO схема грузовика
Скачать

Конструктор Brick конструктор 811 база
Скачать

Brick конструктор «полицейский джип» (114 деталей), 040222.
Скачать

Конструктор БРИК 809
Скачать

Лего КАМАЗ фура Феррари
Скачать

Лего КАМАЗ инструкция
Скачать

Лего мини Купер 40109 инструкция
Скачать

Лего схемы сборки грузовик
Скачать

Лего дизель 2т116
Скачать

Легкая машинка из лего
Скачать

Схема сборки лего техника машины
Скачать

Лего машинка схема сборки
Скачать

LEGO 6693
Скачать

Лего поезд 7720
Скачать

Лего железная дорога 12 v 7760
Скачать

LEGO creator 4838
Скачать

Лего Грузовики Исузу
Скачать

Конструктор LEGO Racers 30032 Dune Buggy
Скачать

КАМАЗ 55102 из лего
Скачать

LEGO схема грузовика
Скачать

LEGO 1029
Скачать

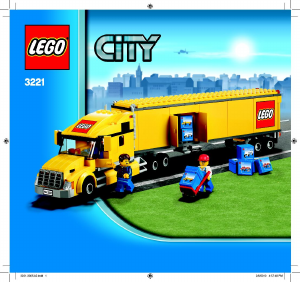
Лего Сити фура инструкция
Скачать

Лего машинка 7737 схема сборки
Скачать

Инструкция по лего БРИК грузовик военный
Скачать

Scuderia Ferrari Truck LEGO 8654 instruction
Скачать

Военная машина из лего инструкция
Скачать

LEGO System 6340
Скачать

Лего Сити 7725
Скачать

LEGO схема грузовика 10698
Скачать

Лего БРИК танк 0278
Скачать

LEGO City 60020
Скачать

Инструкция Sluban m38
Скачать

Лего схемы сборки грузовик
Скачать

Лего полицейский фургон 7034
Скачать

7820 Лего
Скачать

Лего КАМАЗ инструкция
Скачать

Лего 7818
Скачать

Лего поезд грузовой 4512
Скачать

Лего Сити 7733
Скачать

Инструкция по сборке машинки из лего
Скачать

Скачать

Скачать