PostgreSQL (also known as Postgres) is an object-relational database system that has the features of traditional commercial database systems with enhancements to be found in next-generation database management systems (DBMS).
Installation
To install PostgreSQL, run the following command in the command prompt:
sudo apt install postgresql
The database service is automatically configured with viable defaults, but can be customised based on your specific needs.
Configuration
PostgreSQL supports multiple client authentication methods. In Ubuntu, peer is the default authentication method used for local connections, while scram-sha-256 is the default for host connections (this used to be md5 until Ubuntu 21.10). Please refer to the PostgreSQL Administrator’s Guide if you would like to configure alternatives like Kerberos.
The following discussion assumes that you wish to enable TCP/IP connections and use the MD5 method for client authentication. PostgreSQL configuration files are stored in the /etc/postgresql/<version>/main directory. For example, if you install PostgreSQL 14, the configuration files are stored in the /etc/postgresql/14/main directory.
Tip:
To configure IDENT authentication, add entries to the/etc/postgresql/*/main/pg_ident.conffile. There are detailed comments in the file to guide you.
By default only connections from the local system are allowed, to enable all other computers to connect to your PostgreSQL server, edit the file /etc/postgresql/*/main/postgresql.conf. Locate the line: #listen_addresses = ‘localhost’ and change it to *:
listen_addresses = '*'
Note:
‘*’ will allow all available IP interfaces (IPv4 and IPv6), to only listen for IPv4 set ‘0.0.0.0’ while ‘::’ allows listening for all IPv6 addresses.
For details on other parameters, refer to the configuration file or to the PostgreSQL documentation for information on how they can be edited.
Now that we can connect to our PostgreSQL server, the next step is to set a password for the postgres user. Run the following command at a terminal prompt to connect to the default PostgreSQL template database:
sudo -u postgres psql template1
The above command connects to PostgreSQL database template1 as user postgres. Once you connect to the PostgreSQL server, you will be at an SQL prompt. You can run the following SQL command at the psql prompt to configure the password for the user postgres.
ALTER USER postgres with encrypted password 'your_password';
After configuring the password, edit the file /etc/postgresql/*/main/pg_hba.conf to use scram-sha-256 authentication with the postgres user, allowed for the template1 database, from any system in the local network (which in the example is 192.168.122.1/24) :
hostssl template1 postgres 192.168.122.1/24 scram-sha-256
Note:
The config statement ‘hostssl’ used here will reject tcp connections that would not use ssl. Postgresql in Ubuntu has the ssl feature built in and configured by default, so it works right away. On your postgresql server this uses the certificate created by ‘ssl-cert’ package which is great, but for production use you should consider updating that with a proper certificate from a recognized CA.
Finally, you should restart the PostgreSQL service to initialise the new configuration. From a terminal prompt enter the following to restart PostgreSQL:
sudo systemctl restart postgresql.service
Warning:
The above configuration is not complete by any means. Please refer to the PostgreSQL Administrator’s Guide to configure more parameters.
You can test server connections from other machines by using the PostgreSQL client as follows, replacing the domain name with your actual server domain name or IP address:
sudo apt install postgresql-client
psql --host your-servers-dns-or-ip --username postgres --password --dbname template1
Streaming replication
PostgreSQL has a nice feature called Streaming Replication which provides the capability to continuously ship and apply the Write-Ahead Log (WAL) XLOG records to some number of standby servers in order to keep them current. Here is presented a very basic and simple way to replicate a PostgreSQL server (main) to a standby server.
First, create a replication user in the main server to be used from the standby server:
sudo -u postgres createuser --replication -P -e replicator
Let’s configure the main server to turn on the streaming replication. Open the file /etc/postgresql/*/main/postgresql.conf and make sure you have the following lines:
listen_addresses = '*'
wal_level = replica
Also edit the file /etc/postgresql/*/main/pg_hba.conf to add an extra line to allow the standby server connection for replication (that is a special keyword) using the replicator user:
host replication replicator <IP address of the standby> scram-sha-256
Restart the service to apply changes:
sudo systemctl restart postgresql
Now, in the standby server, let’s stop the PostgreSQL service:
sudo systemctl stop postgresql
Edit the /etc/postgresql/*/main/postgresql.conf to set up hot standby:
hot_standby = on
Back up the current state of the main server (those commands are still issued on the standby system):
sudo su - postgres
# backup the current content of the standby server (update the version of your postgres accordingly)
cp -R /var/lib/postgresql/14/main /var/lib/postgresql/14/main_bak
# remove all the files in the data directory
rm -rf /var/lib/postgresql/14/main/*
pg_basebackup -h <IP address of the main server> -D /var/lib/postgresql/14/main -U replicator -P -v -R
After the above this will have done a full single pass copying the content of the main database onto the local system being the standby. In the pg_basebackup command the flags represent the following:
-
-h: The hostname or IP address of the main server -
-D: The data directory -
-U: The user to be used in the operation -
-P: Turns on progress reporting -
-v: Enables verbose mode -
-R: Creates astandby.signalfile and appends connection settings topostgresql.auto.conf
Finally, let’s start the PostgreSQL service on standby server:
sudo systemctl start postgresql
To make sure it is working, go to the main server and run the following command:
sudo -u postgres psql -c "select * from pg_stat_replication;"
As mentioned, this is a very simple introduction, there are way more great details in the upstream documentation about the configuration of replication as well as further High Availability, Load Balancing, and Replication.
To test the replication you can now create a test database in the main server and check if it is replicated in the standby server:
sudo -u postgres createdb test # on the main server
sudo -u postgres psql -c "l" # on the standby server
You need to be able to see the test database, that was created on the main server, in the standby server.
Backups
PostgreSQL databases should be backed up regularly. Refer to the PostgreSQL Administrator’s Guide for different approaches.
Resources
-
As mentioned above, the PostgreSQL Administrator’s Guide is an excellent resource. The guide is also available in the
postgresql-docpackage. Execute the following in a terminal to install the package:sudo apt install postgresql-doc
This package provides further man pages on postgresql ‘dblink’ and ‘server programming interface’ as well as the html guide that you’d find upstream. To view the guide enter xdg-open /usr/share/doc/postgresql-doc-*/html/index.html or point your browser at it.
-
For general SQL information see the O’Reilly books Getting Started with SQL: A Hands-On Approach for Beginners by Thomas Nield as an entry point and SQL in a Nutshell as a quick reference.
-
Also, see the PostgreSQL Ubuntu Wiki page for more information.
Реляционные системы управления базами данных (РСУБД) — это ключевой компонент многих веб-сайтов и приложений. Они обеспечивают структурированный способ хранения данных и организацию доступа к информации. PostgreSQL- это объектно-реляционная система управления базами данных, которая все больше и больше вытесняет MySQL и производственных серверов.
Её преимущество в множестве дополнительных функций и улучшений, таких как надежная передача данных и параллелизация без блокировок чтения. Вы можете использовать эту СУБД с различными языками программирования, а её синтаксис запросов PL/pgSQL очень похож на MySQL от Oracle. В этой статье мы рассмотрим, как выполняется установка PostgreSQL в Ubuntu 20.04 из официальных репозиториев и репозитория PostgreSQL (PPA) а так же, как выполнить первоначальную настройку и подготовку к работе c данной СУБД.
1. Установка из официальных репозиториев
Это очень популярная СУБД, потому программа присутствует в официальных репозиториях. Для установки выполните следующие команды. Сначала обновите списки пакетов:
sudo apt update
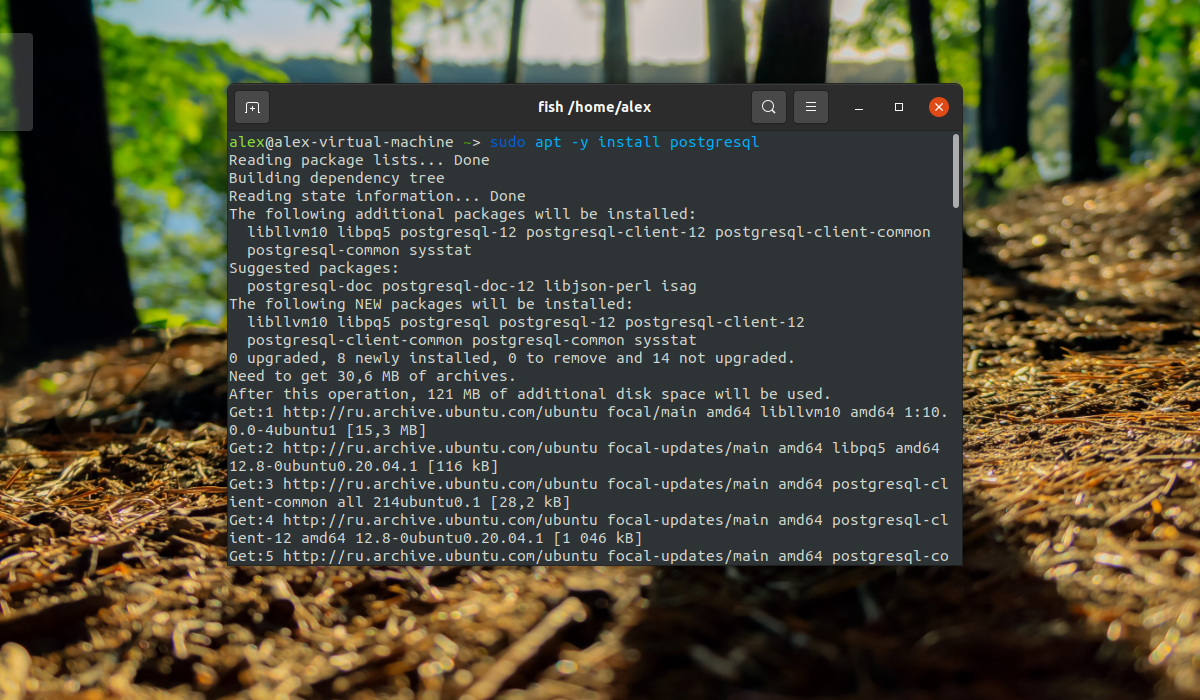
Установите СУБД PostgreSQL:
sudo apt -y install postgresql
2. Установка из официальных репозиториев PostgreSQL
Если есть необходимость в получение самой последней версии, то необходимо добавить в систему официальный PPA от разработчиков PostgreSQL. Для этого выполните следующие команды:
sudo sh -c 'echo "deb http://apt.postgresql.org/pub/repos/apt $(lsb_release -cs)-pgdg main" > /etc/apt/sources.list.d/pgdg.list'
wget --quiet -O - https://www.postgresql.org/media/keys/ACCC4CF8.asc | sudo apt-key add -
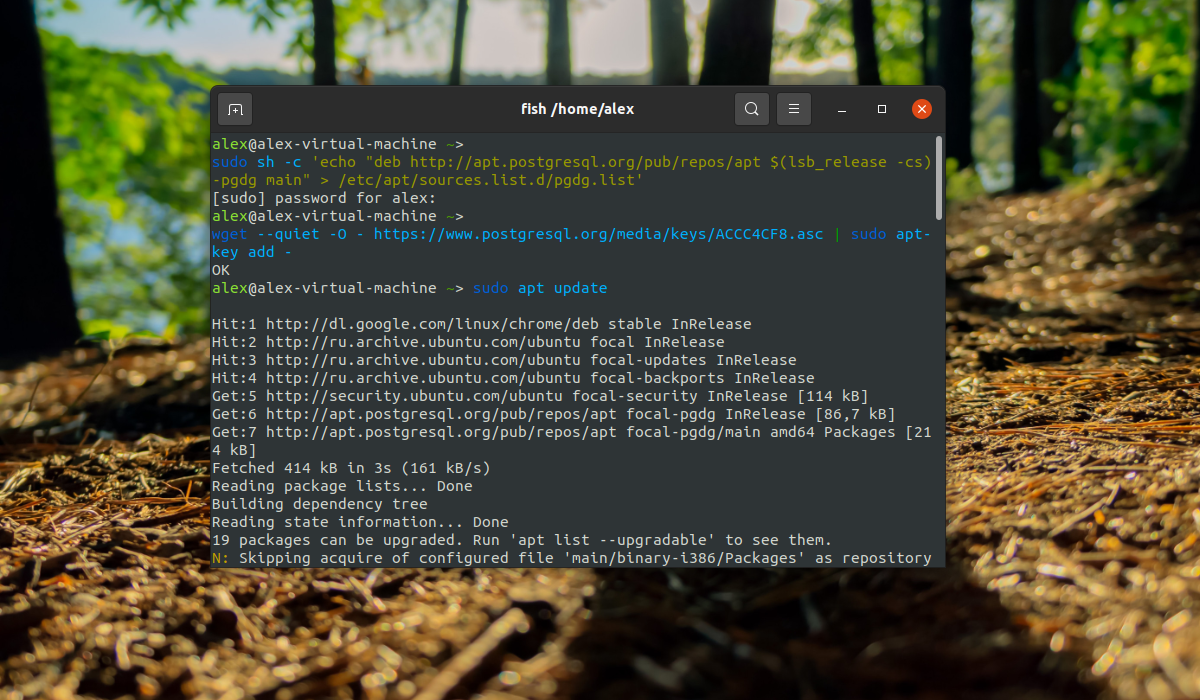
Далее обновите списки пакетов, чтобы получить самую новую доступную версию:
sudo apt update
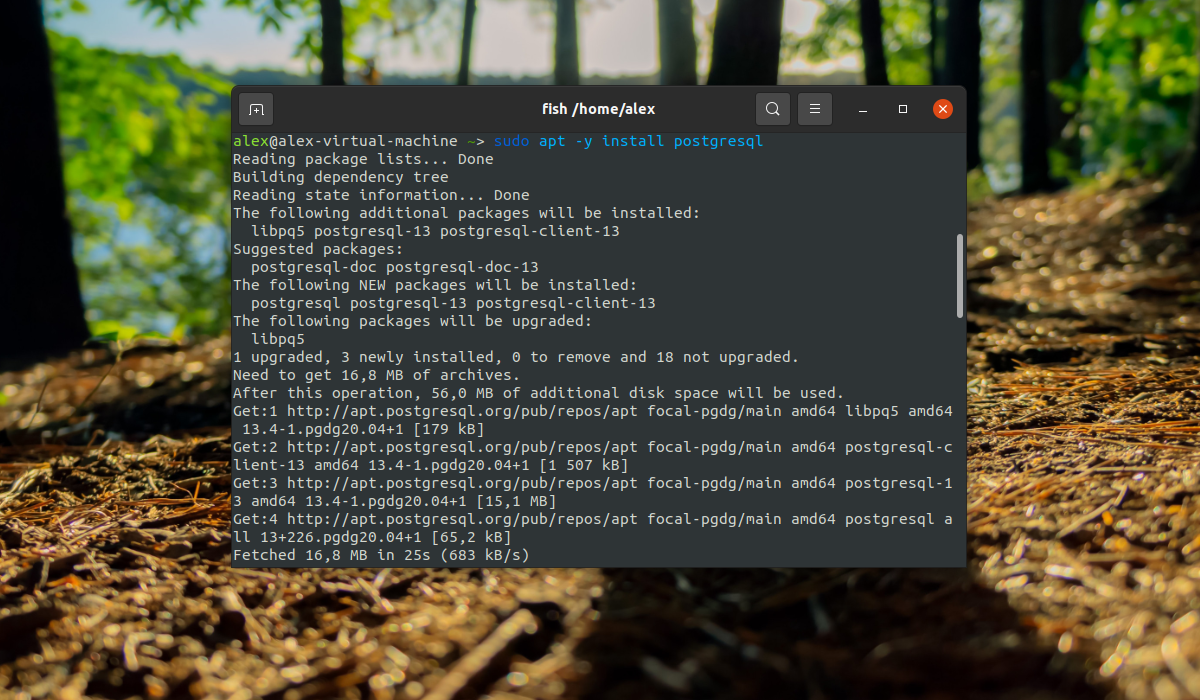
Установка PostgreSQL из PPA или официальных репозиториев выглядит одинаково:
sudo apt -y install postgresql
Настройка PostgreSQL в Ubuntu 20.04
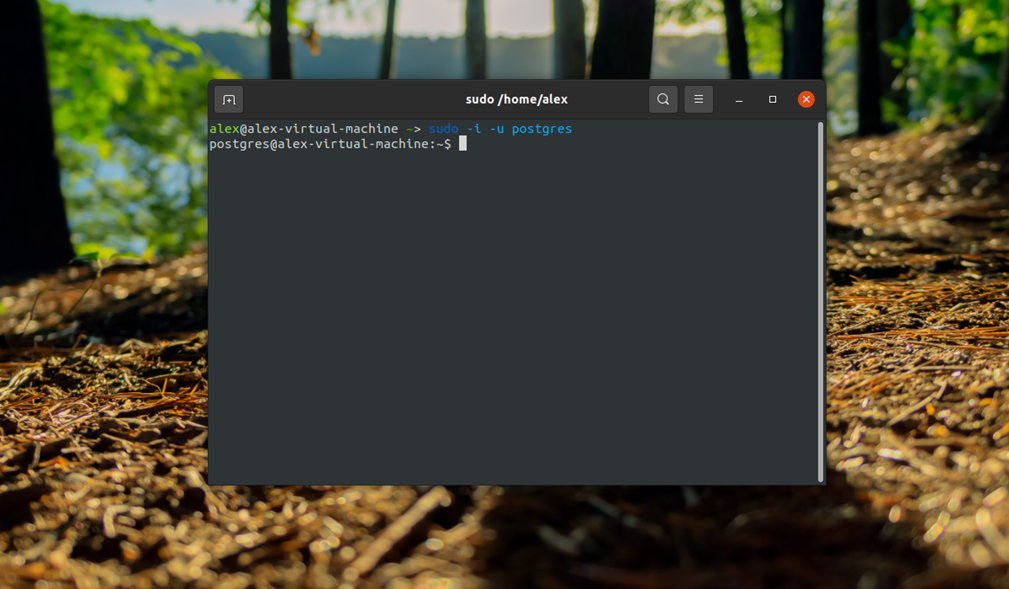
После установки СУБД откройте терминал и переключитесь на пользователя postgres с помощью команды:
sudo -i -u postgres
Эта учетная запись создается во время установки программы и на данный момент вы можете получить доступ к системе баз данных только с помощью нее. По умолчанию PostgreSQL использует концепцию ролей для аутентификации и авторизации.
Это очень похоже на учетные записи Unix, но программа не различает пользователей и групп, есть только роли. Сразу после установки PostgreSQL пытается связать свои роли с системными учетными записями, если для имени системной учетной записи существует роль, то пользователь может войти в консоль управления и выполнять позволенные ему действия. Таким образом, после переключения на пользователя postgres вы можете войти в консоль управления:
psql
И посмотреть информацию о соединении:
conninfo
Чтобы выйти наберите:
q
Теперь рассмотрим, как создать другие роли и базы данных.
Создание роли postgresql
Вы уже можете полноценно работать с базой данных с помощью учетной записи postgres, но давайте создадим дополнительную роль. Учетная запись postgres является администратором, поэтому имеет доступ к функциям управления. Для создания пользователя выполните команду:
createuser --interactive
Скрипт задаст лишь два вопроса, имя новой роли и нужно ли делать ее суперпользователем.
Создание базы данных
Точно также как имена ролей сопоставляются с системными пользователями, имя базы данных будет подбираться по имени пользователя. Например, если мы создали пользователя alex, то по умолчанию система попытается получить доступ к базе данных alex. Мы можем ее очень просто создать:
createdb alex
Дальше, чтобы подключиться к этой базе данных нам нужно войти от имени одноименного пользователя:
sudo su - alex
Заходим в консоль и смотрим информацию о подключении:
psql
conninfo
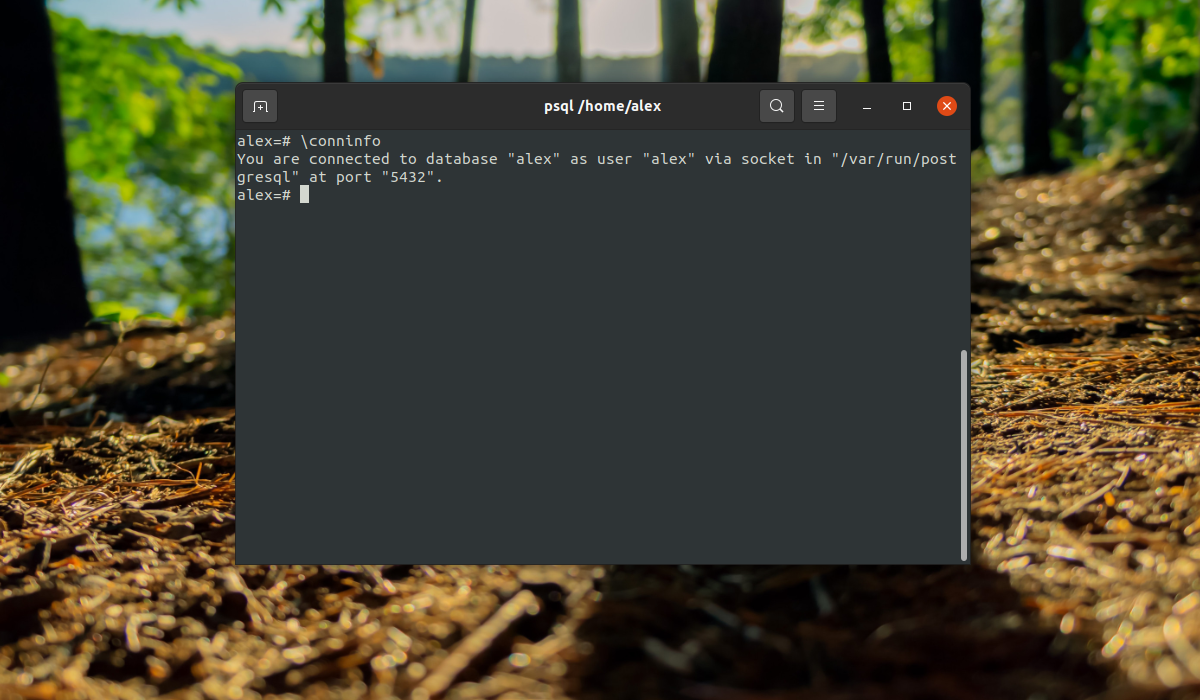
Все верно сработало. Мы подключились с помощью роли alex к базе alex. Если нужно указать другую базу данных, вы можете сделать это с помощью опции -d, например:
psql -d postgres
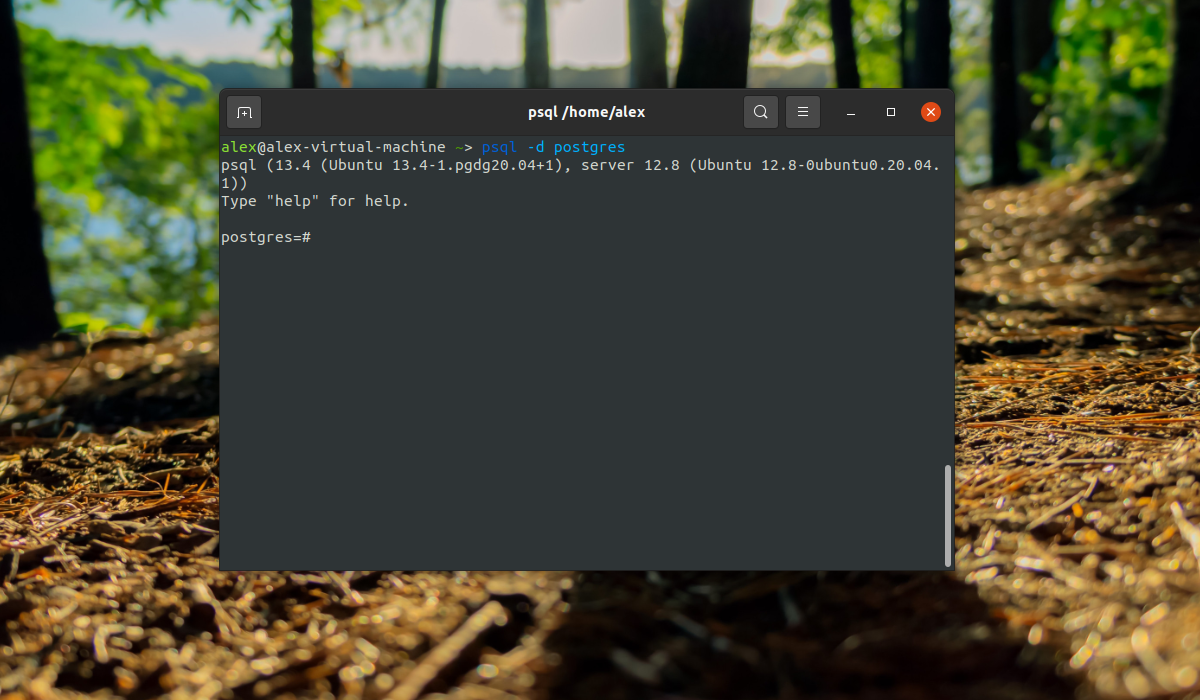
Все сработало верно, при условии, что все компоненты были настроены как описано выше.
Создание таблиц
Теперь, когда вы знаете, как подключится к базе данных PostgreSQL, давайте рассмотрим, как выполняются основные задачи. Сначала разберем создание таблиц для хранения некоторых данных. Для создания таблицы PostgreSQLиспользуется такой синтаксис:
CREATE TABLE имя_таблицы (имя_колонки1 тип_колонки (длина) ограничения, имя_колонки2 тип_колонки (длина), имя_колонки3 тип_колонки (длина));
Как видите, сначала мы задаем имя таблицы, затем описываем каждый столбец. Столбец должен иметь имя, тип и размер, также можно задать ограничения для данных, которые там будут содержаться. Например:
CREATE TABLE playground (equip_id serial PRIMARY KEY, type varchar (50) NOT NULL, color varchar (25) NOT NULL, location varchar(25) check (location in ('north', 'south', 'west', 'east', 'northeast', 'southeast', 'southwest', 'northwest')), install_date date );
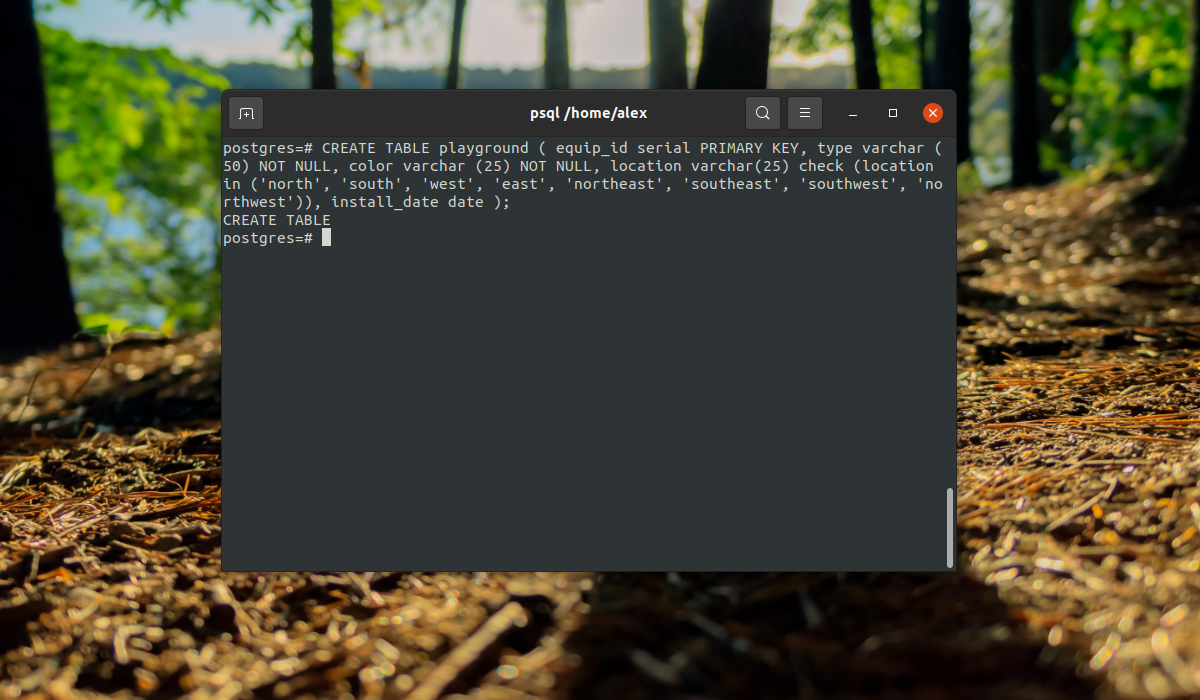
Мы создали таблицу детской площадки для описания оборудования, которое на ней есть. Сначала идет идентификатор equip_id, который имеет тип serial, это значит, что его значение будет автоматически увеличиваться, ключ primary key значит, что значения должны быть уникальны.
Следующие колонки — обычные строки, для них мы задаем длину поля, они не могут быть пустыми (NOT NULL). Следующий столбец тоже строка, но она может содержать только одно из указанных значений, последний столбец — дата создания.
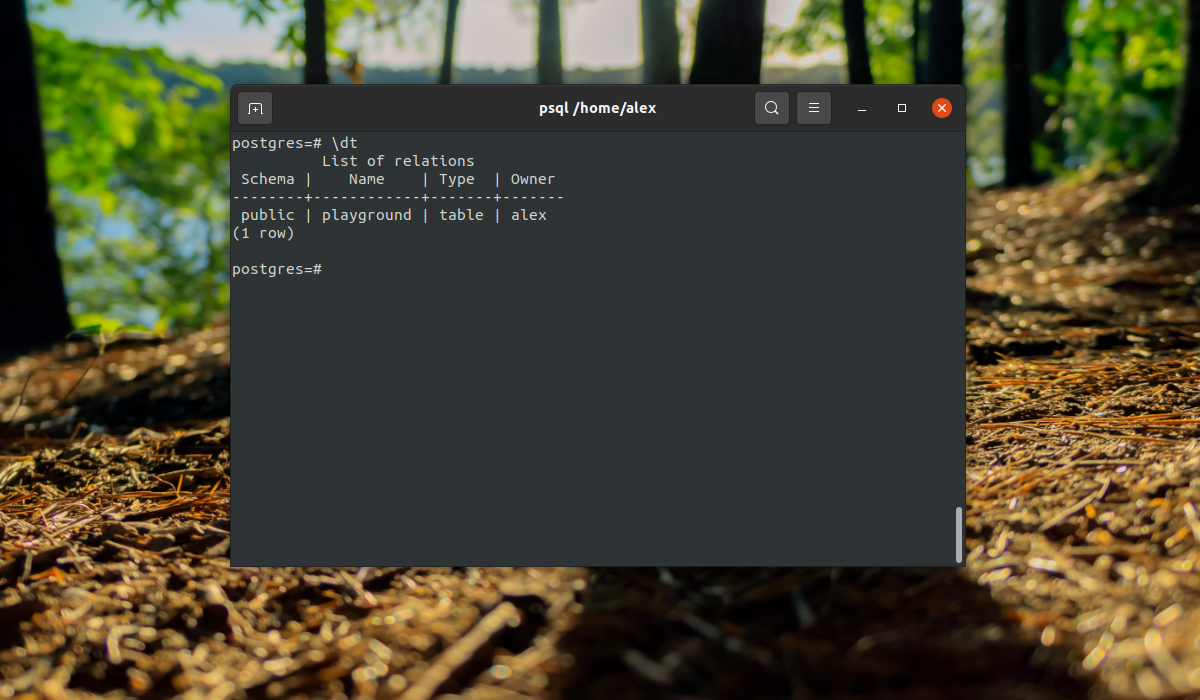
Вы можете вывести все таблицы, выполнив команду:
d
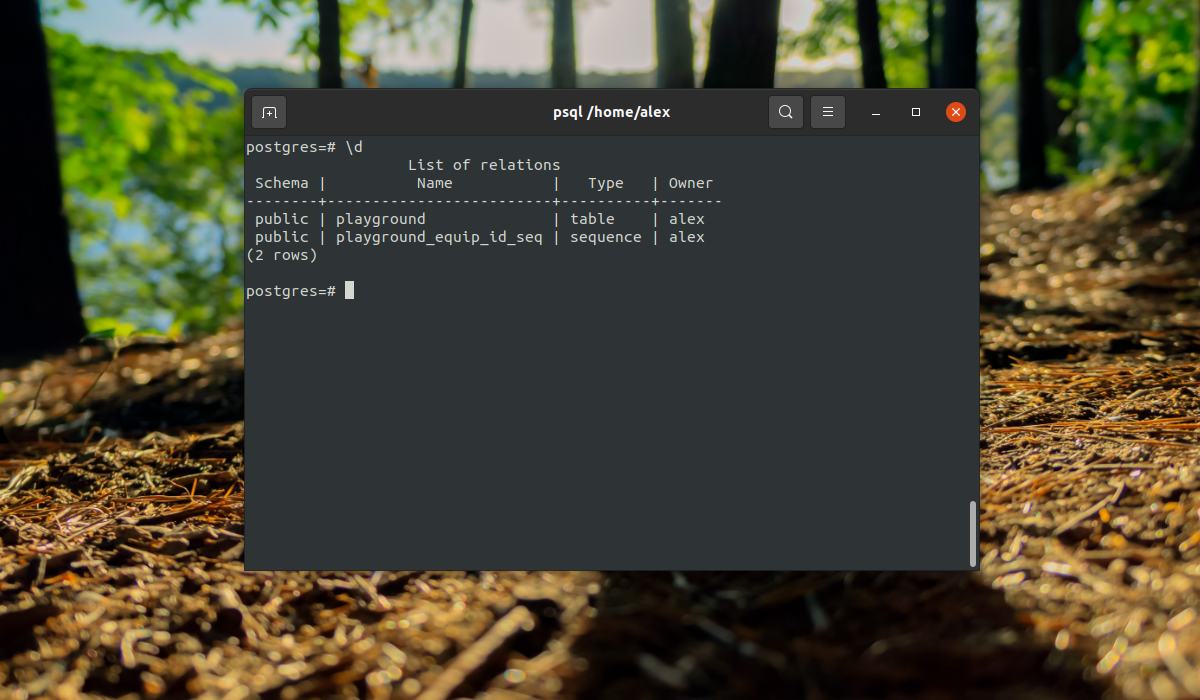
Здесь мы видим, что кроме нашей таблицы, существует еще одна переменная -playground_equip_id_seq. В ней содержится последнее значение этого поля. Если нужно вывести только таблицы, выполните:
dt
Выводы
Теперь установка Postgresql в Ubuntu 20.04 завершена, и вы прошли краткий экскурс в синтаксис PgSQL, который очень похож на привычный нам MySQL, но имеет некоторые отличия. Если у вас остались вопросы, спрашивайте в комментариях!
Обнаружили ошибку в тексте? Сообщите мне об этом. Выделите текст с ошибкой и нажмите Ctrl+Enter.
-
Configuration
The first step of the installation procedure is to configure the source tree for your system and choose the options you would like. This is done by running the
configurescript. For a default installation simply enter:./configureThis script will run a number of tests to determine values for various system dependent variables and detect any quirks of your operating system, and finally will create several files in the build tree to record what it found.
You can also run
configurein a directory outside the source tree, and then build there, if you want to keep the build directory separate from the original source files. This procedure is called a VPATH build. Here’s how:mkdir build_dircd build_dir/path/to/source/tree/configure [options go here]makeThe default configuration will build the server and utilities, as well as all client applications and interfaces that require only a C compiler. All files will be installed under
/usr/local/pgsqlby default.You can customize the build and installation process by supplying one or more command line options to
configure. Typically you would customize the install location, or the set of optional features that are built.configurehas a large number of options, which are described in Section 17.4.1.Also,
configureresponds to certain environment variables, as described in Section 17.4.2. These provide additional ways to customize the configuration. -
Build
To start the build, type either of:
makemake all(Remember to use GNU make.) The build will take a few minutes depending on your hardware.
If you want to build everything that can be built, including the documentation (HTML and man pages), and the additional modules (
contrib), type instead:make worldIf you want to build everything that can be built, including the additional modules (
contrib), but without the documentation, type instead:make world-binIf you want to invoke the build from another makefile rather than manually, you must unset
MAKELEVELor set it to zero, for instance like this:build-postgresql: $(MAKE) -C postgresql MAKELEVEL=0 allFailure to do that can lead to strange error messages, typically about missing header files.
-
Regression Tests
If you want to test the newly built server before you install it, you can run the regression tests at this point. The regression tests are a test suite to verify that PostgreSQL runs on your machine in the way the developers expected it to. Type:
make check(This won’t work as root; do it as an unprivileged user.) See Chapter 33 for detailed information about interpreting the test results. You can repeat this test at any later time by issuing the same command.
-
Installing the Files
Note
If you are upgrading an existing system be sure to read Section 19.6, which has instructions about upgrading a cluster.
To install PostgreSQL enter:
make installThis will install files into the directories that were specified in Step 1. Make sure that you have appropriate permissions to write into that area. Normally you need to do this step as root. Alternatively, you can create the target directories in advance and arrange for appropriate permissions to be granted.
To install the documentation (HTML and man pages), enter:
make install-docsIf you built the world above, type instead:
make install-worldThis also installs the documentation.
If you built the world without the documentation above, type instead:
make install-world-binYou can use
make install-stripinstead ofmake installto strip the executable files and libraries as they are installed. This will save some space. If you built with debugging support, stripping will effectively remove the debugging support, so it should only be done if debugging is no longer needed.install-striptries to do a reasonable job saving space, but it does not have perfect knowledge of how to strip every unneeded byte from an executable file, so if you want to save all the disk space you possibly can, you will have to do manual work.The standard installation provides all the header files needed for client application development as well as for server-side program development, such as custom functions or data types written in C.
Client-only installation: If you want to install only the client applications and interface libraries, then you can use these commands:
make -C src/bin installmake -C src/include installmake -C src/interfaces installmake -C doc installsrc/binhas a few binaries for server-only use, but they are small.
Uninstallation: To undo the installation use the command make uninstall. However, this will not remove any created directories.
Cleaning: After the installation you can free disk space by removing the built files from the source tree with the command make clean. This will preserve the files made by the configure program, so that you can rebuild everything with make later on. To reset the source tree to the state in which it was distributed, use make distclean. If you are going to build for several platforms within the same source tree you must do this and re-configure for each platform. (Alternatively, use a separate build tree for each platform, so that the source tree remains unmodified.)
If you perform a build and then discover that your configure options were wrong, or if you change anything that configure investigates (for example, software upgrades), then it’s a good idea to do make distclean before reconfiguring and rebuilding. Without this, your changes in configuration choices might not propagate everywhere they need to.
17.4.1. configure Options
configure‘s command line options are explained below. This list is not exhaustive (use ./configure --help to get one that is). The options not covered here are meant for advanced use-cases such as cross-compilation, and are documented in the standard Autoconf documentation.
17.4.1.1. Installation Locations
These options control where make install will put the files. The --prefix option is sufficient for most cases. If you have special needs, you can customize the installation subdirectories with the other options described in this section. Beware however that changing the relative locations of the different subdirectories may render the installation non-relocatable, meaning you won’t be able to move it after installation. (The man and doc locations are not affected by this restriction.) For relocatable installs, you might want to use the --disable-rpath option described later.
--prefix=PREFIX-
Install all files under the directory
PREFIXinstead of/usr/local/pgsql. The actual files will be installed into various subdirectories; no files will ever be installed directly into thePREFIXdirectory. --exec-prefix=EXEC-PREFIX-
You can install architecture-dependent files under a different prefix,
EXEC-PREFIX, than whatPREFIXwas set to. This can be useful to share architecture-independent files between hosts. If you omit this, thenEXEC-PREFIXis set equal toPREFIXand both architecture-dependent and independent files will be installed under the same tree, which is probably what you want. --bindir=DIRECTORY-
Specifies the directory for executable programs. The default is
EXEC-PREFIX/bin/usr/local/pgsql/bin. --sysconfdir=DIRECTORY-
Sets the directory for various configuration files,
PREFIX/etc --libdir=DIRECTORY-
Sets the location to install libraries and dynamically loadable modules. The default is
EXEC-PREFIX/lib --includedir=DIRECTORY-
Sets the directory for installing C and C++ header files. The default is
PREFIX/include --datarootdir=DIRECTORY-
Sets the root directory for various types of read-only data files. This only sets the default for some of the following options. The default is
PREFIX/share --datadir=DIRECTORY-
Sets the directory for read-only data files used by the installed programs. The default is
DATAROOTDIR --localedir=DIRECTORY-
Sets the directory for installing locale data, in particular message translation catalog files. The default is
DATAROOTDIR/locale --mandir=DIRECTORY-
The man pages that come with PostgreSQL will be installed under this directory, in their respective
mansubdirectories. The default isxDATAROOTDIR/man --docdir=DIRECTORY-
Sets the root directory for installing documentation files, except “man” pages. This only sets the default for the following options. The default value for this option is
DATAROOTDIR/doc/postgresql --htmldir=DIRECTORY-
The HTML-formatted documentation for PostgreSQL will be installed under this directory. The default is
DATAROOTDIR
Note
Care has been taken to make it possible to install PostgreSQL into shared installation locations (such as /usr/local/include) without interfering with the namespace of the rest of the system. First, the string “/postgresql” is automatically appended to datadir, sysconfdir, and docdir, unless the fully expanded directory name already contains the string “postgres” or “pgsql”. For example, if you choose /usr/local as prefix, the documentation will be installed in /usr/local/doc/postgresql, but if the prefix is /opt/postgres, then it will be in /opt/postgres/doc. The public C header files of the client interfaces are installed into includedir and are namespace-clean. The internal header files and the server header files are installed into private directories under includedir. See the documentation of each interface for information about how to access its header files. Finally, a private subdirectory will also be created, if appropriate, under libdir for dynamically loadable modules.
17.4.1.2. PostgreSQL Features
The options described in this section enable building of various PostgreSQL features that are not built by default. Most of these are non-default only because they require additional software, as described in Section 17.2.
--enable-nls[=LANGUAGES]-
Enables Native Language Support (NLS), that is, the ability to display a program’s messages in a language other than English.
LANGUAGESis an optional space-separated list of codes of the languages that you want supported, for example--enable-nls='de fr'. (The intersection between your list and the set of actually provided translations will be computed automatically.) If you do not specify a list, then all available translations are installed.To use this option, you will need an implementation of the Gettext API.
--with-perl-
Build the PL/Perl server-side language.
--with-python-
Build the PL/Python server-side language.
--with-tcl-
Build the PL/Tcl server-side language.
--with-tclconfig=DIRECTORY-
Tcl installs the file
tclConfig.sh, which contains configuration information needed to build modules interfacing to Tcl. This file is normally found automatically at a well-known location, but if you want to use a different version of Tcl you can specify the directory in which to look fortclConfig.sh. --with-icu-
Build with support for the ICU library, enabling use of ICU collation features (see Section 24.2). This requires the ICU4C package to be installed. The minimum required version of ICU4C is currently 4.2.
By default, pkg-config will be used to find the required compilation options. This is supported for ICU4C version 4.6 and later. For older versions, or if pkg-config is not available, the variables
ICU_CFLAGSandICU_LIBScan be specified toconfigure, like in this example:./configure ... --with-icu ICU_CFLAGS='-I/some/where/include' ICU_LIBS='-L/some/where/lib -licui18n -licuuc -licudata'
(If ICU4C is in the default search path for the compiler, then you still need to specify nonempty strings in order to avoid use of pkg-config, for example,
ICU_CFLAGS=' '.) --with-llvm-
Build with support for LLVM based JIT compilation (see Chapter 32). This requires the LLVM library to be installed. The minimum required version of LLVM is currently 3.9.
llvm-configwill be used to find the required compilation options.llvm-config, and thenllvm-config-$major-$minorfor all supported versions, will be searched for in yourPATH. If that would not yield the desired program, useLLVM_CONFIGto specify a path to the correctllvm-config. For example./configure ... --with-llvm LLVM_CONFIG='/path/to/llvm/bin/llvm-config'
LLVM support requires a compatible
clangcompiler (specified, if necessary, using theCLANGenvironment variable), and a working C++ compiler (specified, if necessary, using theCXXenvironment variable). --with-lz4-
Build with LZ4 compression support.
--with-zstd-
Build with Zstandard compression support.
--with-ssl=LIBRARY-
Build with support for SSL (encrypted) connections. The only
LIBRARYsupported isopenssl. This requires the OpenSSL package to be installed.configurewill check for the required header files and libraries to make sure that your OpenSSL installation is sufficient before proceeding. --with-openssl-
Obsolete equivalent of
--with-ssl=openssl. --with-gssapi-
Build with support for GSSAPI authentication. On many systems, the GSSAPI system (usually a part of the Kerberos installation) is not installed in a location that is searched by default (e.g.,
/usr/include,/usr/lib), so you must use the options--with-includesand--with-librariesin addition to this option.configurewill check for the required header files and libraries to make sure that your GSSAPI installation is sufficient before proceeding. --with-ldap-
Build with LDAP support for authentication and connection parameter lookup (see Section 34.18 and Section 21.10 for more information). On Unix, this requires the OpenLDAP package to be installed. On Windows, the default WinLDAP library is used.
configurewill check for the required header files and libraries to make sure that your OpenLDAP installation is sufficient before proceeding. --with-pam-
Build with PAM (Pluggable Authentication Modules) support.
--with-bsd-auth-
Build with BSD Authentication support. (The BSD Authentication framework is currently only available on OpenBSD.)
--with-systemd-
Build with support for systemd service notifications. This improves integration if the server is started under systemd but has no impact otherwise; see Section 19.3 for more information. libsystemd and the associated header files need to be installed to use this option.
--with-bonjour-
Build with support for Bonjour automatic service discovery. This requires Bonjour support in your operating system. Recommended on macOS.
--with-uuid=LIBRARY-
Build the uuid-ossp module (which provides functions to generate UUIDs), using the specified UUID library.
LIBRARYmust be one of:-
bsdto use the UUID functions found in FreeBSD and some other BSD-derived systems -
e2fsto use the UUID library created by thee2fsprogsproject; this library is present in most Linux systems and in macOS, and can be obtained for other platforms as well -
osspto use the OSSP UUID library
-
--with-ossp-uuid-
Obsolete equivalent of
--with-uuid=ossp. --with-libxml-
Build with libxml2, enabling SQL/XML support. Libxml2 version 2.6.23 or later is required for this feature.
To detect the required compiler and linker options, PostgreSQL will query
pkg-config, if that is installed and knows about libxml2. Otherwise the programxml2-config, which is installed by libxml2, will be used if it is found. Use ofpkg-configis preferred, because it can deal with multi-architecture installations better.To use a libxml2 installation that is in an unusual location, you can set
pkg-config-related environment variables (see its documentation), or set the environment variableXML2_CONFIGto point to thexml2-configprogram belonging to the libxml2 installation, or set the variablesXML2_CFLAGSandXML2_LIBS. (Ifpkg-configis installed, then to override its idea of where libxml2 is you must either setXML2_CONFIGor set bothXML2_CFLAGSandXML2_LIBSto nonempty strings.) --with-libxslt-
Build with libxslt, enabling the xml2 module to perform XSL transformations of XML.
--with-libxmlmust be specified as well.
17.4.1.3. Anti-Features
The options described in this section allow disabling certain PostgreSQL features that are built by default, but which might need to be turned off if the required software or system features are not available. Using these options is not recommended unless really necessary.
--without-readline-
Prevents use of the Readline library (and libedit as well). This option disables command-line editing and history in psql.
--with-libedit-preferred-
Favors the use of the BSD-licensed libedit library rather than GPL-licensed Readline. This option is significant only if you have both libraries installed; the default in that case is to use Readline.
--without-zlib-
Prevents use of the Zlib library. This disables support for compressed archives in pg_dump and pg_restore.
--disable-spinlocks-
Allow the build to succeed even if PostgreSQL has no CPU spinlock support for the platform. The lack of spinlock support will result in very poor performance; therefore, this option should only be used if the build aborts and informs you that the platform lacks spinlock support. If this option is required to build PostgreSQL on your platform, please report the problem to the PostgreSQL developers.
--disable-atomics-
Disable use of CPU atomic operations. This option does nothing on platforms that lack such operations. On platforms that do have them, this will result in poor performance. This option is only useful for debugging or making performance comparisons.
--disable-thread-safety-
Disable the thread-safety of client libraries. This prevents concurrent threads in libpq and ECPG programs from safely controlling their private connection handles. Use this only on platforms with deficient threading support.
17.4.1.4. Build Process Details
--with-includes=DIRECTORIES-
DIRECTORIESis a colon-separated list of directories that will be added to the list the compiler searches for header files. If you have optional packages (such as GNU Readline) installed in a non-standard location, you have to use this option and probably also the corresponding--with-librariesoption.Example:
--with-includes=/opt/gnu/include:/usr/sup/include. --with-libraries=DIRECTORIES-
DIRECTORIESis a colon-separated list of directories to search for libraries. You will probably have to use this option (and the corresponding--with-includesoption) if you have packages installed in non-standard locations.Example:
--with-libraries=/opt/gnu/lib:/usr/sup/lib. --with-system-tzdata=DIRECTORY-
PostgreSQL includes its own time zone database, which it requires for date and time operations. This time zone database is in fact compatible with the IANA time zone database provided by many operating systems such as FreeBSD, Linux, and Solaris, so it would be redundant to install it again. When this option is used, the system-supplied time zone database in
DIRECTORYis used instead of the one included in the PostgreSQL source distribution.DIRECTORYmust be specified as an absolute path./usr/share/zoneinfois a likely directory on some operating systems. Note that the installation routine will not detect mismatching or erroneous time zone data. If you use this option, you are advised to run the regression tests to verify that the time zone data you have pointed to works correctly with PostgreSQL.This option is mainly aimed at binary package distributors who know their target operating system well. The main advantage of using this option is that the PostgreSQL package won’t need to be upgraded whenever any of the many local daylight-saving time rules change. Another advantage is that PostgreSQL can be cross-compiled more straightforwardly if the time zone database files do not need to be built during the installation.
--with-extra-version=STRING-
Append
STRINGto the PostgreSQL version number. You can use this, for example, to mark binaries built from unreleased Git snapshots or containing custom patches with an extra version string, such as agit describeidentifier or a distribution package release number. --disable-rpath-
Do not mark PostgreSQL‘s executables to indicate that they should search for shared libraries in the installation’s library directory (see
--libdir). On most platforms, this marking uses an absolute path to the library directory, so that it will be unhelpful if you relocate the installation later. However, you will then need to provide some other way for the executables to find the shared libraries. Typically this requires configuring the operating system’s dynamic linker to search the library directory; see Section 17.5.1 for more detail.
17.4.1.5. Miscellaneous
It’s fairly common, particularly for test builds, to adjust the default port number with --with-pgport. The other options in this section are recommended only for advanced users.
--with-pgport=NUMBER-
Set
NUMBERas the default port number for server and clients. The default is 5432. The port can always be changed later on, but if you specify it here then both server and clients will have the same default compiled in, which can be very convenient. Usually the only good reason to select a non-default value is if you intend to run multiple PostgreSQL servers on the same machine. --with-krb-srvnam=NAME-
The default name of the Kerberos service principal used by GSSAPI.
postgresis the default. There’s usually no reason to change this unless you are building for a Windows environment, in which case it must be set to upper casePOSTGRES. --with-segsize=SEGSIZE-
Set the segment size, in gigabytes. Large tables are divided into multiple operating-system files, each of size equal to the segment size. This avoids problems with file size limits that exist on many platforms. The default segment size, 1 gigabyte, is safe on all supported platforms. If your operating system has “largefile” support (which most do, nowadays), you can use a larger segment size. This can be helpful to reduce the number of file descriptors consumed when working with very large tables. But be careful not to select a value larger than is supported by your platform and the file systems you intend to use. Other tools you might wish to use, such as tar, could also set limits on the usable file size. It is recommended, though not absolutely required, that this value be a power of 2. Note that changing this value breaks on-disk database compatibility, meaning you cannot use
pg_upgradeto upgrade to a build with a different segment size. --with-blocksize=BLOCKSIZE-
Set the block size, in kilobytes. This is the unit of storage and I/O within tables. The default, 8 kilobytes, is suitable for most situations; but other values may be useful in special cases. The value must be a power of 2 between 1 and 32 (kilobytes). Note that changing this value breaks on-disk database compatibility, meaning you cannot use
pg_upgradeto upgrade to a build with a different block size. --with-wal-blocksize=BLOCKSIZE-
Set the WAL block size, in kilobytes. This is the unit of storage and I/O within the WAL log. The default, 8 kilobytes, is suitable for most situations; but other values may be useful in special cases. The value must be a power of 2 between 1 and 64 (kilobytes). Note that changing this value breaks on-disk database compatibility, meaning you cannot use
pg_upgradeto upgrade to a build with a different WAL block size.
17.4.1.6. Developer Options
Most of the options in this section are only of interest for developing or debugging PostgreSQL. They are not recommended for production builds, except for --enable-debug, which can be useful to enable detailed bug reports in the unlucky event that you encounter a bug. On platforms supporting DTrace, --enable-dtrace may also be reasonable to use in production.
When building an installation that will be used to develop code inside the server, it is recommended to use at least the options --enable-debug and --enable-cassert.
--enable-debug-
Compiles all programs and libraries with debugging symbols. This means that you can run the programs in a debugger to analyze problems. This enlarges the size of the installed executables considerably, and on non-GCC compilers it usually also disables compiler optimization, causing slowdowns. However, having the symbols available is extremely helpful for dealing with any problems that might arise. Currently, this option is recommended for production installations only if you use GCC. But you should always have it on if you are doing development work or running a beta version.
--enable-cassert-
Enables assertion checks in the server, which test for many “cannot happen” conditions. This is invaluable for code development purposes, but the tests can slow down the server significantly. Also, having the tests turned on won’t necessarily enhance the stability of your server! The assertion checks are not categorized for severity, and so what might be a relatively harmless bug will still lead to server restarts if it triggers an assertion failure. This option is not recommended for production use, but you should have it on for development work or when running a beta version.
--enable-tap-tests-
Enable tests using the Perl TAP tools. This requires a Perl installation and the Perl module
IPC::Run. See Section 33.4 for more information. --enable-depend-
Enables automatic dependency tracking. With this option, the makefiles are set up so that all affected object files will be rebuilt when any header file is changed. This is useful if you are doing development work, but is just wasted overhead if you intend only to compile once and install. At present, this option only works with GCC.
--enable-coverage-
If using GCC, all programs and libraries are compiled with code coverage testing instrumentation. When run, they generate files in the build directory with code coverage metrics. See Section 33.5 for more information. This option is for use only with GCC and when doing development work.
--enable-profiling-
If using GCC, all programs and libraries are compiled so they can be profiled. On backend exit, a subdirectory will be created that contains the
gmon.outfile containing profile data. This option is for use only with GCC and when doing development work. --enable-dtrace-
Compiles PostgreSQL with support for the dynamic tracing tool DTrace. See Section 28.5 for more information.
To point to the
dtraceprogram, the environment variableDTRACEcan be set. This will often be necessary becausedtraceis typically installed under/usr/sbin, which might not be in yourPATH.Extra command-line options for the
dtraceprogram can be specified in the environment variableDTRACEFLAGS. On Solaris, to include DTrace support in a 64-bit binary, you must specifyDTRACEFLAGS="-64". For example, using the GCC compiler:./configure CC='gcc -m64' --enable-dtrace DTRACEFLAGS='-64' ...
Using Sun’s compiler:
./configure CC='/opt/SUNWspro/bin/cc -xtarget=native64' --enable-dtrace DTRACEFLAGS='-64' ...
17.4.2. configure Environment Variables
In addition to the ordinary command-line options described above, configure responds to a number of environment variables. You can specify environment variables on the configure command line, for example:
./configure CC=/opt/bin/gcc CFLAGS='-O2 -pipe'
In this usage an environment variable is little different from a command-line option. You can also set such variables beforehand:
export CC=/opt/bin/gccexport CFLAGS='-O2 -pipe'./configure
This usage can be convenient because many programs’ configuration scripts respond to these variables in similar ways.
The most commonly used of these environment variables are CC and CFLAGS. If you prefer a C compiler different from the one configure picks, you can set the variable CC to the program of your choice. By default, configure will pick gcc if available, else the platform’s default (usually cc). Similarly, you can override the default compiler flags if needed with the CFLAGS variable.
Here is a list of the significant variables that can be set in this manner:
BISON-
Bison program
CC-
C compiler
CFLAGS-
options to pass to the C compiler
CLANG-
path to
clangprogram used to process source code for inlining when compiling with--with-llvm CPP-
C preprocessor
CPPFLAGS-
options to pass to the C preprocessor
CXX-
C++ compiler
CXXFLAGS-
options to pass to the C++ compiler
DTRACE-
location of the
dtraceprogram DTRACEFLAGS-
options to pass to the
dtraceprogram FLEX-
Flex program
LDFLAGS-
options to use when linking either executables or shared libraries
LDFLAGS_EX-
additional options for linking executables only
LDFLAGS_SL-
additional options for linking shared libraries only
LLVM_CONFIG-
llvm-configprogram used to locate the LLVM installation MSGFMT-
msgfmtprogram for native language support PERL-
Perl interpreter program. This will be used to determine the dependencies for building PL/Perl. The default is
perl. PYTHON-
Python interpreter program. This will be used to determine the dependencies for building PL/Python. If this is not set, the following are probed in this order:
python3 python. TCLSH-
Tcl interpreter program. This will be used to determine the dependencies for building PL/Tcl. If this is not set, the following are probed in this order:
tclsh tcl tclsh8.6 tclsh86 tclsh8.5 tclsh85 tclsh8.4 tclsh84. XML2_CONFIG-
xml2-configprogram used to locate the libxml2 installation
Sometimes it is useful to add compiler flags after-the-fact to the set that were chosen by configure. An important example is that gcc‘s -Werror option cannot be included in the CFLAGS passed to configure, because it will break many of configure‘s built-in tests. To add such flags, include them in the COPT environment variable while running make. The contents of COPT are added to both the CFLAGS and LDFLAGS options set up by configure. For example, you could do
make COPT='-Werror'
or
export COPT='-Werror'make
Note
If using GCC, it is best to build with an optimization level of at least -O1, because using no optimization (-O0) disables some important compiler warnings (such as the use of uninitialized variables). However, non-zero optimization levels can complicate debugging because stepping through compiled code will usually not match up one-to-one with source code lines. If you get confused while trying to debug optimized code, recompile the specific files of interest with -O0. An easy way to do this is by passing an option to make: make PROFILE=-O0 file.o.
The COPT and PROFILE environment variables are actually handled identically by the PostgreSQL makefiles. Which to use is a matter of preference, but a common habit among developers is to use PROFILE for one-time flag adjustments, while COPT might be kept set all the time.
Введение: краткое описание PostgreSQL
PostgreSQL (Postgres) — одна из популярных СУБД для проектов различных уровней: от стартапа до высоконагруженной системы. Она имеет большой набор функций, помогающий разработчикам и администраторам в разработке приложений, защите целостности данных и их управлении. PostgreSQL стандартизирована, надежна и способна осуществлять параллельность операций без блокировки при чтении. Она универсальна, подходит под любую операционную систему. В числе преимуществ также можно выделить:
- расширяемость (можно определять свои типы данных, создавать пользовательские функции);
- возможность индексирования географических объектов и присутствие расширения PostGIS;
- наследование (концепция ООП, считающая, что абстрактный тип данных способен наследовать данные и набор функций уже существующего типа, способствуя переиспользованию компонентов ПО;
- масштабируемая система встроенных языков программирования;
- устойчивые и надежные функции репликаций и транзакций.
Поскольку PostgreSQL продукт open-source, ее функции можно расширять и дополнять. Для дополнения функций можно воспользоваться одним из следующих языков:
- процедурный язык PL/pgSQL, встроенный язык, аналогичный PL/SQL, который используется в СУБД Oracle;
- классические языки C, C++, Java (с модулем PL/Java);
- скриптовые языки PL/v8 (JS), PL/Scheme, PL/Tcl, PL/sh, PL/Ruby, PL/Python, PL/PHP, PL/Perl, PL/LOLCODE, PL/Lua;
- Статистический язык R (используя модуль PL/R).
PostgreSQL поддерживает следующие объекты БД: B-дерево, хеш, GiST, BRIN, Bloom.
У PostgreSQL большой список поддерживаемых данных: численные типы, символьные типы, двоичные типы, «дата/время», булев тип, геометрические примитивы и т.д.
PostgreSQL позволяет нескольким пользователям работать одновременно с БД благодаря механизму MVCC (Multiversion Concurrency Control). За счет этого исключается необходимость блокировок чтения.
В этой инструкции мы развернем PostgreSQL на виртуальной машине. Рассмотрим базовые функции сервиса: генерацию роли, базы данных и таблицы, работу с консолью с добавленной ролью и удаление СУБД на виртуальной машине.
Требования к серверу
СУБД развернем на виртуальной машине Ubuntu 20.04, аккаунтом без root прав с sudo и брандмауэром.
Создание виртуальной машины (сервера)
При написании этой инструкции мы воспользуемся «Облачной платформой Selectel», на которой сконфигурируем сервер с нужной нам операционной системой.
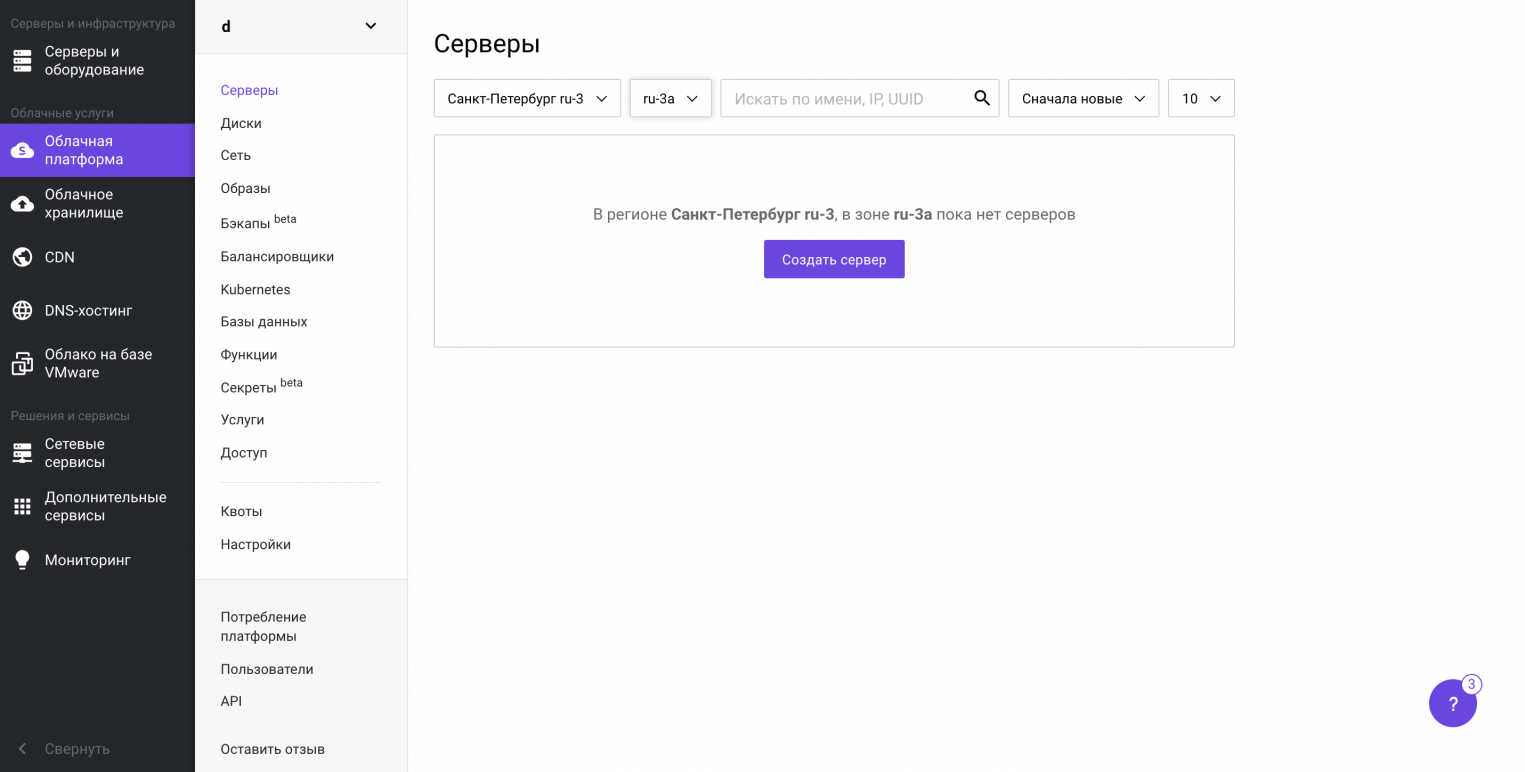
На странице «Облачная платформа» перейдем в раздел «Серверы» и нажмем «Создать сервер».
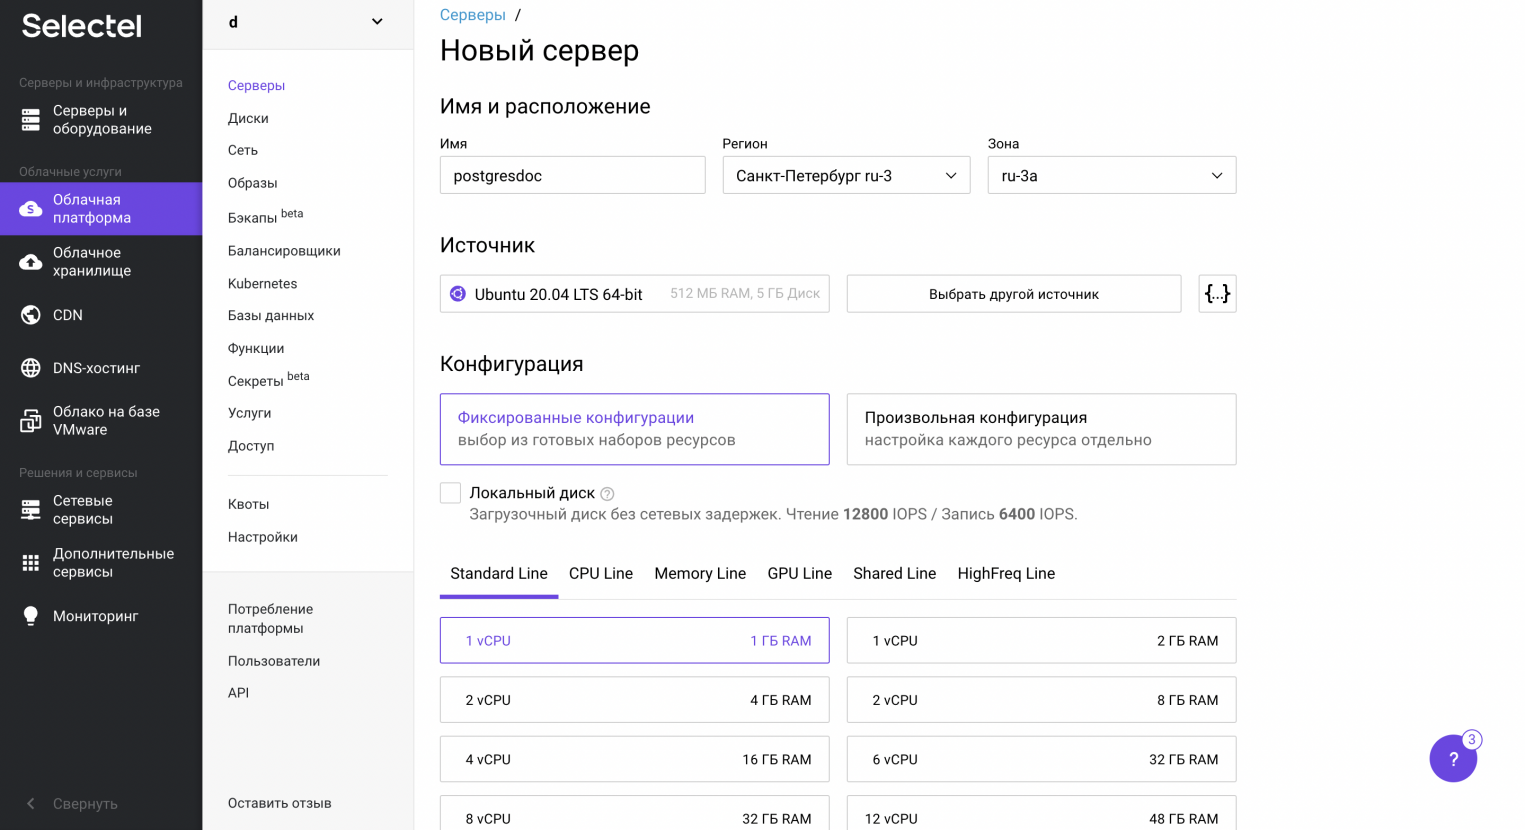
Имя серверу присваивается в поле «Имя». Назовем машину postgresdoc.
В поле «Источник» из выпадающего списка выберем Ubuntu 20.04.
Проскроллим экран вниз и в поле «Сеть» в выпадающем списке укажем «Плавающий IP-адрес» для входа на сервер с других устройств.
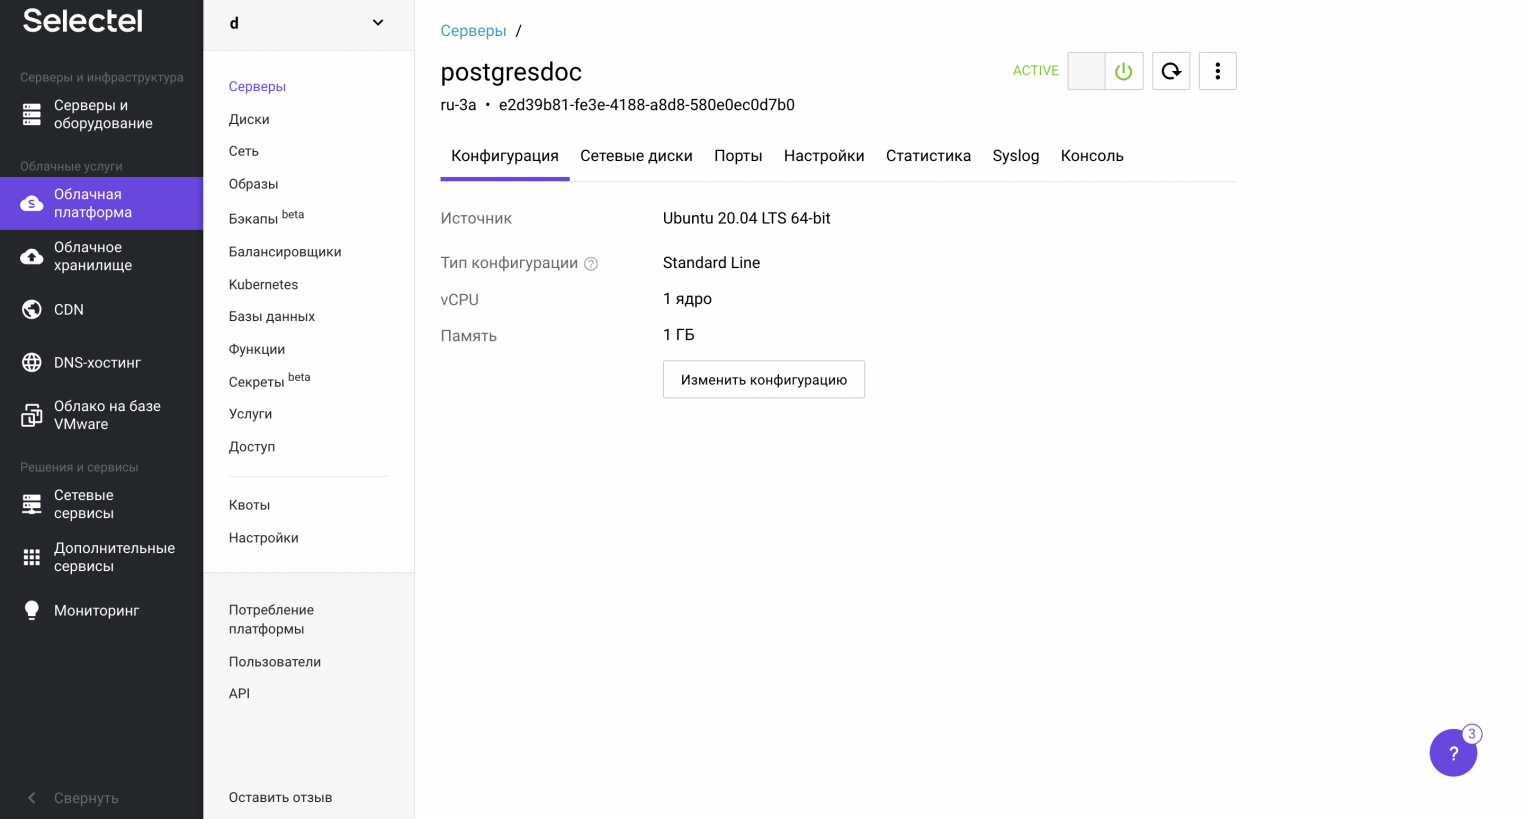
Минимальные настройки готовы, нажмем кнопку «Создать» — наша виртуальная машина готова и отображается в списке на вкладке «Серверы».
Мы собрали сервер с характеристиками:
- Ubuntu 20.04 LTS 64-bit;
- ядро: 1vCPU;
- память 1ГБ RAM;
- память 5 ГБ HDD.
Как самостоятельно сконфигурировать сервер, развернуто написано в базе знаний.
Первичная настройка
До развертывания PostgreSQL настроим сервер: перейдем к нему по SSH и настроим брандмауэр с утилитой UFW.
Подключение по SSH
В терминале локальной машины введем:
$ ssh root@server_ip
server_ip — значение IP-адреса сервера, находится в разделе «Порты».
Для аутентификации потребуется пароль root-пользователя, его можно увидеть в разделе «Консоль».
Настройка брандмауэра
Чтобы сервер позволял подключаться пользователям по SSH, разберемся с брандмауэром.
На сервер мы подключились под root-пользователем и прежде чем настраивать, переключимся на аккаунт без root-прав с sudo.
Обновим пакеты:
$ sudo apt update
Для брандмауэра скачиваем утилиту UFW:
$ sudo apt install ufw
Список профилей UFW можно вывести, написав:
$ sudo ufw app list
OpenSSH будет отображаться в списке:
    Available applications:
  OpenSSH
Разрешаем воспользоваться подключением по SSH:
$ sudo ufw allow OpenSSH
И стартуем брандмауэр:
$ sudo ufw enable
Проверим статус брандмауэра и список подключений OpenSSH:
$ sudo ufw status
Система даст ответ:
    Status: active

To                         Action      From
--                         ------      ----
OpenSSH                    ALLOW       Anywhere
OpenSSH (v6)               ALLOW       Anywhere (v6)
Займемся непосредственно развертыванием PostgreSQL.
Установка PostgreSQL на Ubuntu
В репозиториях Ubuntu уже включена PostgreSQL. Развертывание выполняется командой apt.
До загрузки PostgreSQL обновляем списки пакетов:
$ sudo apt update
Загрузим PostgreSQL с утилитой -contrib:
$ sudo apt install postgresql postgresql-contrib
Загрузятся драйверы PostgreSQL последней версии и развернутся необходимые компоненты на виртуальной машине с Ubuntu.
Запускаем сервис:
$ sudo systemctl start postgresql.service
Проверка статуса сервиса:
$ sudo systemctl status postgresql.service
Сервис развернули, разберемся в работе аккаунта postgres.
Работа с аккаунтом PostgreSQL
PostgreSQL применяет термин «Роль». Практически это тот же аккаунт в Ubuntu. При запуске СУБД роли сервиса привязываются к одноименным аккаунтам в Unix-системах. Другими словами, при наличии роли в PostgreSQL, войти в СУБД можно с аккаунтом Ubuntu. При запуске СУБД генерируется аккаунт postgres, привязываемый к роли PostgreSQL.
Вариант 1
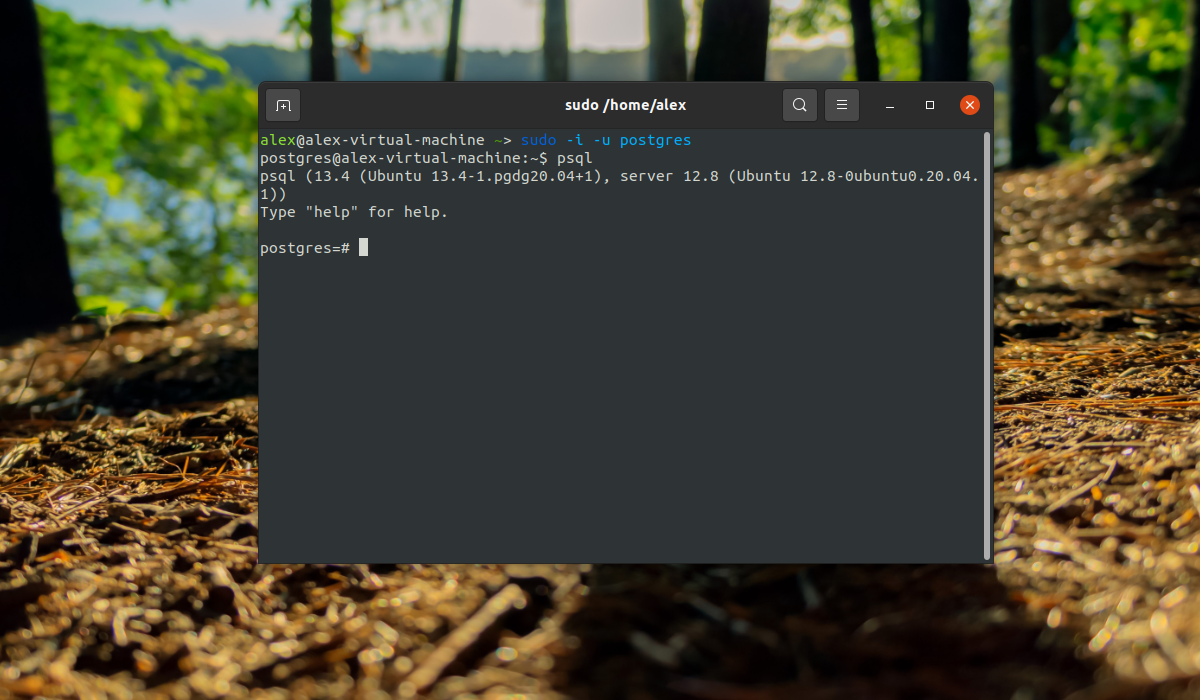
Войдем в аккаунт:
$ sudo -i -u postgres
После ввода команды видим подтверждение о переходе в аккаунт:
postgres@postgresdoc:~$
Откроем консоль Postgres:
$ psql
Консоль открыта, что подтверждается записью в начале строки:
postgres=#
Работа в СУБД ведется из консоли.
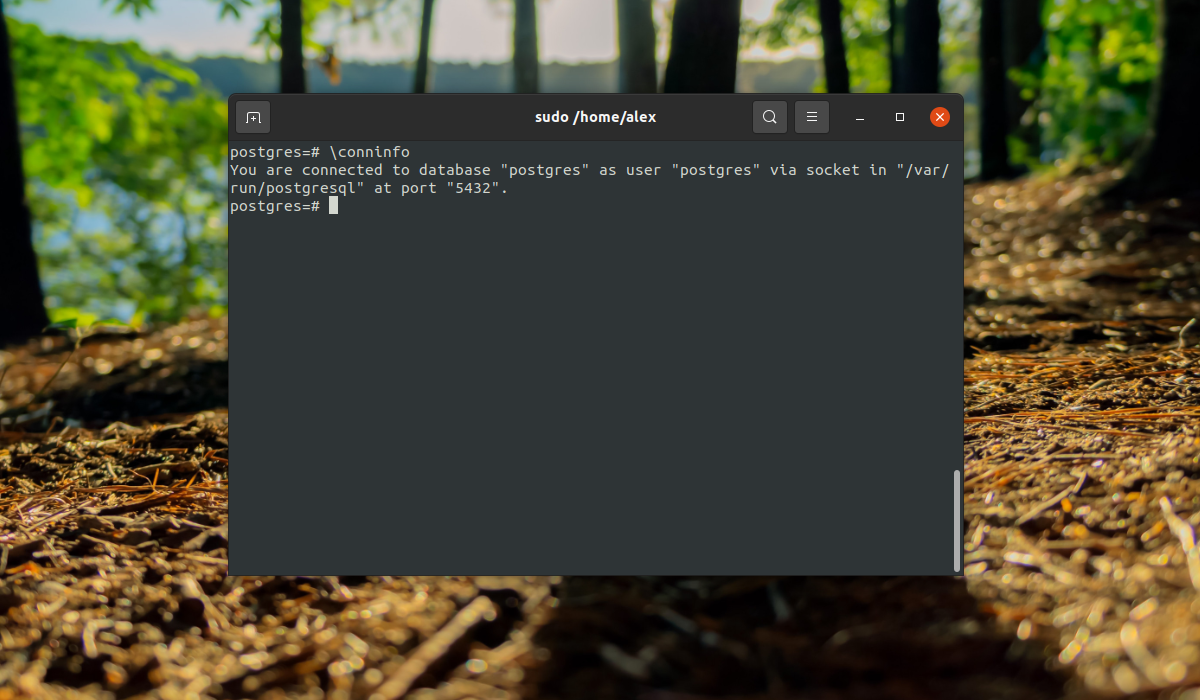
Узнать статус подключения:
postgres=# conninfo
Возврат в аккаунт:
postgres=# q
Вариант 2
Войдем в аккаунт postgres с sudo. Если сейчас находимся в аккаунте postgres, нужно выйти, набрав exit. В этом варианте перейдем в аккаунт postgres с sudo:
$ sudo -u postgres psql
Возврат в аккаунт:
postgres=# q
Создание роли
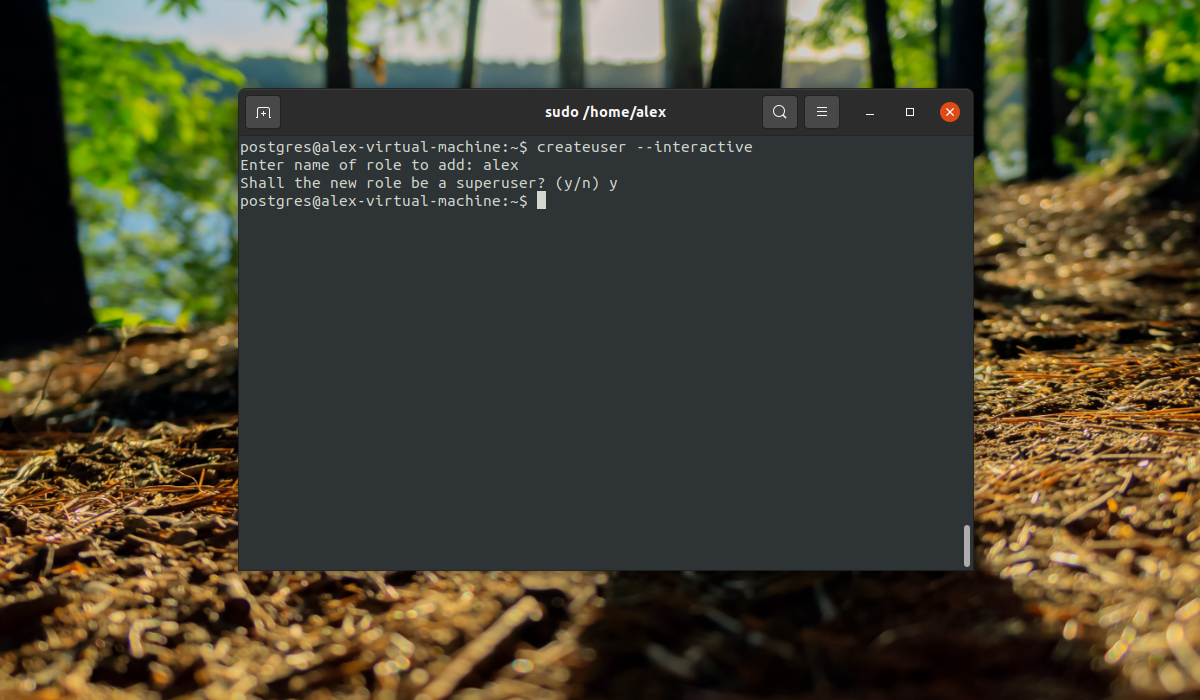
Аккаунт postgres обладает правами администратора. Напишем createuser, эта команда сообщает, что мы добавляем новую роль. Чтобы указать имя роли и выдать суперюзера, применим флаг —interactive.
Запись будет такой:
postgres@postgresdoc:~$ createuser --interactive
Вариант работы без переходов между аккаунтами:
$ sudo -u postgres createuser --interactive
Вводим имя, выдаем суперюзера:
    Enter name of role to add: tester
Shall the new role be a superuser? (y/n) y
Посмотреть другие ключи настроек:
postgres@postgresdoc:~$ man createuser
Роль создана, поднимаем БД.
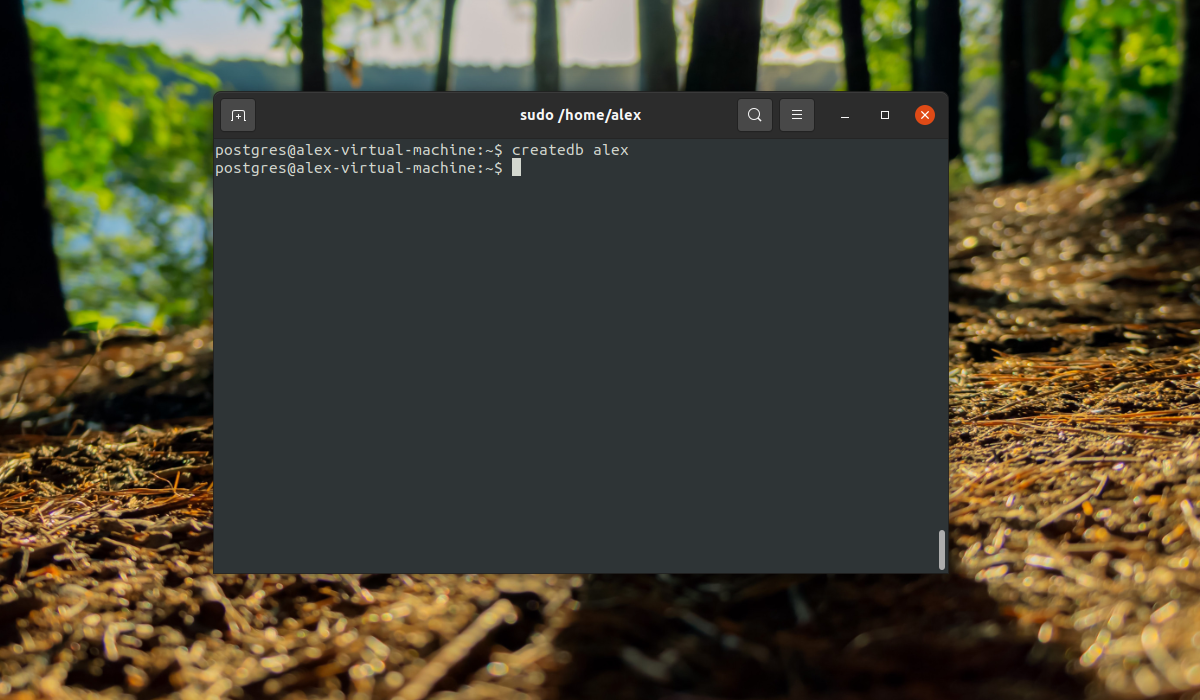
Создание базы данных
Любому созданному аккаунту привязывается база данных с идентичным именем, то есть наш созданный tester начнет подключаться к базе данных tester.
Командой createdb добавим БД (поднимем новую базу PostgreSQL на Ubuntu), назвав ее tester:
postgres@postgresdoc:~$ createdb tester
Вариант работы без переходов между аккаунтами:
$ sudo -u postgres createdb tester
Переход в командную строку PostgreSQL с новой ролью
Работа в консоли PostgreSQL подразумевает наличие аккаунта Ubuntu с именем БД в Postgres.
Добавим аккаунт Ubuntu, используя adduser (предварительно выйдя из аккаунта postgres), назвав аналогично новой роли:
$ sudo adduser tester
Добавив аккаунт tester, переключаемся на него и подключаемся к консоли:
    $ sudo -i -u tester
$ psql
второй вариант:
$ sudo -u tester psql
Переключиться на другую БД:
$ psql -d postgres
Проверка статуса:
tester=# conninfo
Увидим:
You are connected to database " tester " as user " tester " via socket in "/var/run/postgresql" at port "5432".
Проверку желательно выполнять для разных пользователей с разными БД.
Создание таблицы с данными
Команда создания имеет вид:
    CREATE TABLE table_name (
	column_name1 col_type (field_length) column_constraints,
	column_name2 col_type (field_length),
	column_name3 col_type (field_length)
);
Создавая таблицу, указываем ее имя, столбцы, их типы, ограничения размеров полей. В качестве непосредственного примера добавим таблицу комплекта сноубордиста:
    tester=# CREATE TABLE snowboarder (
	equip_id serial PRIMARY KEY,
	title varchar (50) NOT NULL,
	company varchar (25) NOT NULL,
	size varchar (25) check (size in ('XS', 'S', 'M', 'L', 'XL', 'XXL'))
);
СУБД выводит информацию:
CREATE TABLE
- Equip_id — столбец с идентификатором типа serial и автоинкрементом. Ему присвоили свойство primary key, указывающее на использование не нулевых показателей.
- Title и company указывают наименование и фирму-производителя единицы комплекта.
- Size хранит размеры наименований комплекта, предлагая выбор одного из предложенных размеров.
Посмотреть таблицу:
tester=# d
Вывод:
    List of relations
Schema |                  Name                 |   Type      | Owner
-----------+-------------------------------------+--------------+--------
public    | snowboarder                        |  table        | tester
public    | snowboarder_equip_id_seq | sequence | tester
(2 rows)
Создана таблица с переменной snowboarder_equip_id_seq, тип данных sequence. Переменная указывает на номера последовательности и генерируется автоматически.
Вывести таблицу без переменной:
tester=# dt
Вывод:
    List of relations
Schema |                  Name                 |   Type      | Owner
-----------+-------------------------------------+-------------+---------
public    | snowboarder                        |  table       | tester
(1 rows)
Работа с данными таблицы
Таблица есть, остается ее наполнить.
Добавление данных в таблицу
Состав комплекта нашего сноубордиста: snowboard (сноуборд), binding (крепления), boots (ботинки). Вызовем таблицу, где укажем столбцы и их значения. Добавим 3 строки:
    tester=# INSERT INTO snowboarder (title, company, size) VALUES ('snowboard', 'burton', 'XL');
tester=# INSERT INTO snowboarder (title, company, size) VALUES ('binding', 'burton', 'XL');
tester=# INSERT INTO snowboarder (title, company, size) VALUES ('boots', 'burton', 'XL');
Пишем внимательно, избегая ошибок. Неверно использовать кавычки в названиях столбцов. Кавычки указываются в значениях столбцов. Значение столбца equip_id генерируется самостоятельно во время создания строки.
После добавления каждой строки СУБД подтверждает операцию:
INSERT 0 1
Вывод данных
Выведем таблицу с новыми данными:
tester=# SELECT * FROM snowboarder;
Увидим в ответ:
    equip_id   |  title	   | company | size
--------------+----------------+-------------+------
   	1   | snowboard  | burton      | XL
   	2   | binding        | burton      | XL
   	3   | boots 	   | burton      | XL
(3 rows)
Видим, что все поля заполнены значениями, прописанными нами, и в equip_id отображается нумерация строк.
Удаление данных
Удалить строку:
tester=# DELETE FROM snowboarder WHERE title = 'binding';
СУБД подтвердит удаление строки:
DELETE 1
Проверим удаление:
tester=# SELECT * FROM snowboarder;
Увидим в ответ:
    equip_id   |  title	   | company | size
--------------+----------------+-------------+------
   	1   | snowboard  | burton      | XL
   	3   | boots 	   | burton      | XL
(2 rows)
Строка binding удалена.
Изменение данных
Иногда записи таблицы приходится менять. Для изменения записи указывают тип и устанавливают новое значение. Выберем boots и изменим компанию на blackfire:
tester=# UPDATE snowboarder SET company = 'blackfire' WHERE title = 'boots';
СУБД подтвердит обновление строки:
UPDATE 1
Проверим:
tester=# SELECT * FROM snowboarder;
СУБД даст ответ:
    equip_id   |  title	   | company     | size
--------------+----------------+----------------+------
   	1   | snowboard  | burton         | XL
   	3   | boots 	   | blackfire      | XL
(2 rows)
Фирма-производитель ботинок изменилась на blackfire.
Работа со столбцами
Таблицы можно редактировать, меняя состав столбцов.
Добавление столбца
Введем столбец с отображением стоимости:
tester=# ALTER TABLE snowboarder ADD price varchar (25);
СУБД подтвердит добавление:
ALTER TABLE
Выведя таблицу, увидим пустой добавленный столбец, так как добавили его без указания данных. Как его заполнить данными, описано выше.
tester=# SELECT * FROM snowboarder;
СУБД даст ответ:
    equip_id   |  title             | company     | size | price
--------------+----------------+----------------+------+-------
   	1   | snowboard  | burton         | XL   |
   	3   | boots 	   | blackfire      | XL   |
(2 rows)
Удаление столбца
Удалить столбец из таблицы:
tester=# ALTER TABLE snowboarder DROP price;
Команда удалит столбец price и значения внутри него.
СУБД подтвердит удаление столбца:
ALTER TABLE
Удаление таблицы
Удаляется таблица командой:
tester=# DROP TABLE snowboarder;
СУБД подтвердит операцию:
DROP TABLE
Введя команду dt, увидим сообщение от СУБД:
Did not find any relations.
Установка phppgadmin
Утилита PhpPgAdmin доступна в репозитории по дефолту в Ubuntu 20.04. Устанавливаем утилиту PhpPgAdmin под пользователем Ubuntu:
$ sudo apt-get install phppgadmin
Когда утилита установится, переходим в файл конфигурации phppgadmin.conf в директории /etc/apache2/conf-available и закомментируем строку Require local. Пропишем строку Allow From all. Такие изменения в файле конфигурации позволят подключаться к серверу как с локальной машины, так и с других устройств.

Перезагрузим Apache:
$ sudo systemctl restart apache2
Удаление PostgreSQL
Перед удалением PostgreSQL и очисткой сервера от следов сервиса удостоверимся, что СУБД остановлена.
В аккаунте Ubuntu напишем, что хотим узнать:
$ ps -Cpostgres
Если СУБД остановлена, ответ на команду не должен показать никаких результатов. В ином случае, обслуживание нужно остановить. Остановить PostgreSQL:
$ sudo systemctl stop postgresql

Далее укажем:
$ sudo apt-get --purge remove postgresql*
PostgreSQL удалена на нашей виртуальной машине.
После удаления пропишем команды:
    $ sudo rm -r /etc/postgresql/
$ sudo rm -r /var/lib/postgresql/
$ sudo userdel -r postgres
$ sudo groupdel postgres
Заключение
В этой инструкции мы развернули PostgreSQL на сервере Ubuntu 20.04.
Рассмотрели базовые функции по работе в СУБД:
- добавили роль, БД, таблицу;
- внесли в нее нужные нам значения;
- удалили таблицу и саму PostgreSQL.
Поскольку СУБД обладает множеством возможностей, рассчитанных на новых пользователей, со временем понадобятся и более продвинутые функции хранения и обработки данных. Все функции PostgreSQL можно изучить на странице официальной англоязычной версии документации.
Стоит отметить, что у PostgreSQL большое сообщество пользователей, а открытый исходный код СУБД способствует тому, что при новых релизах новые ошибки выявляются, быстро исправляются, и успешно осуществляется тестирование.

В данном руководстве мы ознакомимся с установкой PostgreSQL 12, реляционной объекто-ориентированной системой управления базами данных (СУБД). А также, мы проинсталлируем pgAdmin4, инструментарий для работы с сервером баз данных PostgreSQL. Итак, наш мануал – о том, как установить PostgreSQL и pgAdmin4 в Ubuntu 20.04.
Все работы на нашем сервере мы будем производить под учётной записью, имеющей привилегии sudo. Также, на нашем сервере установлен и настроен брандмауэр UFW.
Установка PostgreSQL
Поскольку PostgreSQL устанавливается из стандартных репозиториев Ubuntu, для запуска установки подключитесь к вашему серверу под учётной записью, входящей в группу sudo, и наберите в командной строке:
$ sudo apt update
$ sudo apt install postgresql
При установке пакета инсталлятор создаст новый PostgreSQL-кластер. Данный кластер представляет из себя коллекцию баз данных, которая управляется одним сервером. Также, установщик создаст рабочие директории для PostgreSQL. Данные, необходимые для работы PostgreSQL, будут находится в каталоге /var/lib/postgresql/12/main, а файлы конфигурации – в каталоге /etc/postgresql/12/main.
После завершения установки вы можете убедиться, что служба PostgreSQL активна. Для чего в командной строке наберите:
$ sudo systemctl is-active postgresql
Также, посмотрите, включена ли служба:
$ sudo systemctl is-enabled postgresql
И наконец, вы можете увидеть статус службы PostgreSQL:
$ sudo systemctl status postgresql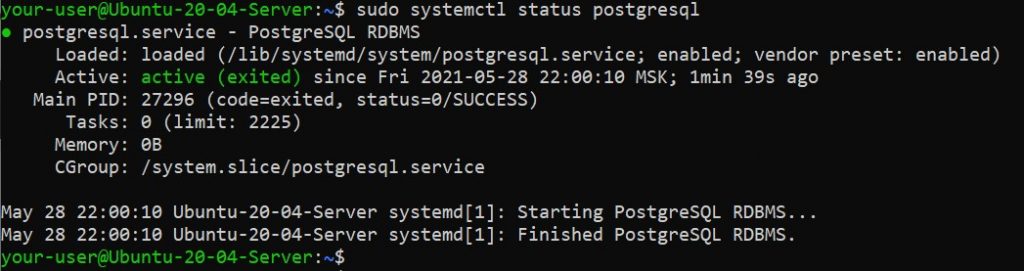
После чего, убедитесь, что PostgreSQL-сервер готов принимать подключения от клиентов:
$ sudo pg_isready
Создание базы данных в PostgreSQL
Чтобы создать новую базу данных, вы должны получить доступ к программной оболочке PostgreSQL. Во-первых, подключитесь к системе с помощью учётной записи postgres:
$ sudo su - postgresПодключившись, выполните команду psql:
$ psql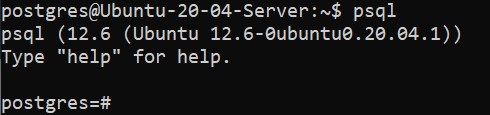
Если вы видите приглашение ко вводу команд postgres=#, значит вы находитесь в оболочке СУБД PostgreSQL. И значит, можно приступать к созданию базы данных. Первая команда добавит в PostgreSQL пользователя bob (на своём сервере вы можете использовать свои имена пользователей и баз данных):
# CREATE USER bob WITH PASSWORD 'P@$$w0rd';
Как вы понимаете, P@$$w0rd – это пароль для входа под учётной записью bob. В своём примере вы, конечно, можете использовать другой пароль.
Следующая команда создаст базу данных, которую мы назовём, например, bobdb:
# CREATE DATABASE bobdb;
Теперь, назначьте своему пользователю все права сразу на вашу базу данных. В нашем примере это будет выглядеть так:
# GRANT ALL PRIVILEGES ON DATABASE bobdb to bob;
Чтобы покинуть оболочку, наберите:
# qИ теперь, можно отключить от системы пользователя postgres:
$ exit
Настройка клиентской аутентификации PostgreSQL
СУБД PostgreSQL использует клиентскую аутентификацию для того, чтобы решать, какая учётная запись к какой базе данных и с какого хоста может подключаться. Это определяется настройками конфигурационного файла клиентской аутентификации. В Ubuntu таким файлом является файл pg_hba.conf. Он располагается в директории /etc/postgresql/12/main/.
Откройте этот файл для редактирования, например, с помощью текстового редактора nano:
$ cd /etc/postgresql/12/main
$ sudo nano pg_hba.conf
PostgreSQL использует много типов методов клиентской аутентификации, таких как peer, ident, password или md5. Тип md5 является наиболее безопасным и рекомендуемым по причине того, что он требует от клиента использовать для аутентификации пароли с двойным md5-хешированием. Поэтому нам остаётся лишь убедиться, что в строках ниже указан именно метод md5:

Если вы произвели в конфигурационном файле какие-либо изменения, не забудьте сохранить их при закрытии файла. В nano для этого необходимо нажать Ctrl X, затем Y и Enter. После чего, перезапустите службу:
$ sudo systemctl restart postgresqlУстановка pgAdmin4
Пакет pgAdmin4 не доступен для установки из официальных репозиториев Ubuntu. Поэтому мы будем устанавливать его из репозитория pgAdmin4 APT. Для этого сначала необходимо установить данный репозиторий.
Добавьте публичный ключ для репозитория и создайте его конфигурационный файл. Для чего наберите следующие команды:
$ curl https://www.pgadmin.org/static/packages_pgadmin_org.pub | sudo apt-key add
$ sudo sh -c 'echo "deb https://ftp.postgresql.org/pub/pgadmin/pgadmin4/apt/$(lsb_release -cs) pgadmin4 main" > /etc/apt/sources.list.d/pgadmin4.list && apt update'
Затем запустите установку pgAdmin4:
$ sudo apt install pgadmin4Данной командой вы установили набор необходимых пакетов включая веб-сервер Apache2. После завершения инсталляции запустите скрипт для установки веб-компонентов. Данный скрипт должен был установиться вместе с пакетом pgdmin4. Во время своей работы скрипт попросит вас ввести адрес электронной почты. В нашем примере мы будем использовать mailofbob@mail.ru, вместо которого вам необходимо ввести свой. Также, скрипт потребует установить пароль, который необходимо ввести дважды. Учтите, что эти E-mail и пароль вы будете в дальнейшем использовать для подключения к веб-интерфейсу pgAdmin4.
$ sudo /usr/pgadmin4/bin/setup-web.sh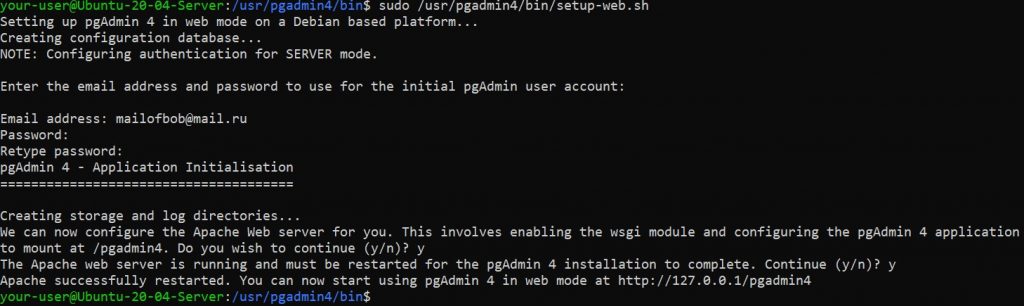
В процессе установки скрипт перезапустит службу Apache2 для того, чтобы вступили в силу произведённые изменения.
После того, как скрипт закончит свою работу, вам нужно будет добавить разрешение для Apache2 на доступ через брандмауэр. Чтобы сделать это, наберите:
$ sudo ufw allow 'Apache'Запустите брандмауэр:
$ sudo ufw enable
Убедитесь, что служба Apache2 включена в список разрешённых на брандмауэре вашего сервера:
$ sudo ufw status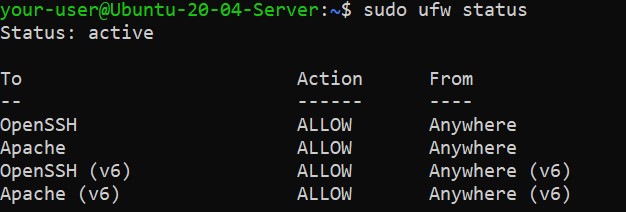
Настройка доступа через веб-интерфейс
Чтобы получить доступ к веб-интерфейсу pgAdmin4, откройте браузер и введите адрес в строке навигации:
http://Your-Server-IP-address/pgadmin4где, Your-Server-IP-address – IP-адрес вашего VPS.
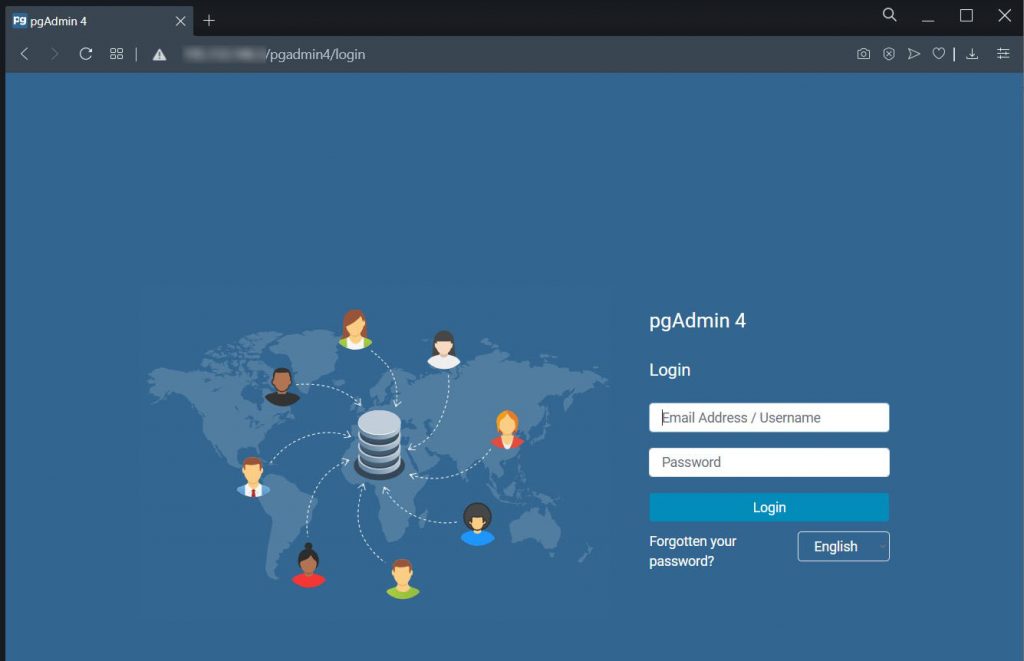
После этого вы увидите страницу для подключения к pgAdmin4. Для входа используйте адрес электронной почты и пароль, который вы вводили при работе скрипта setup-web.sh:
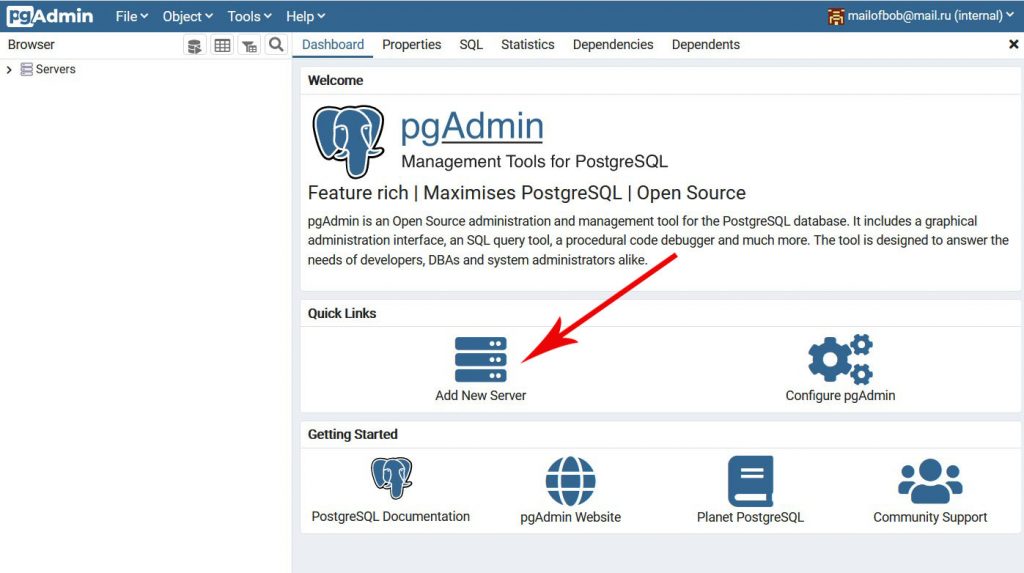
В случае успешной авторизации, вы попадёте на панель веб-приложения pgAdmin4. Там, вы можете подключиться к своему серверу PostgreSQL, нажав на ярлык Add New Server:
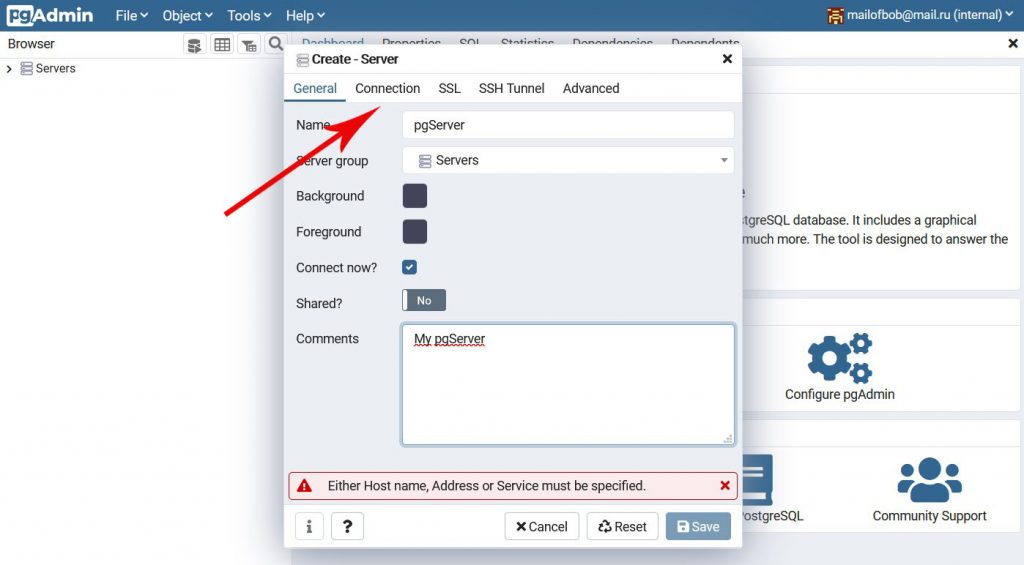
Далее, заполните данные нового сервера на закладке General и перейдите на закладку Connection:
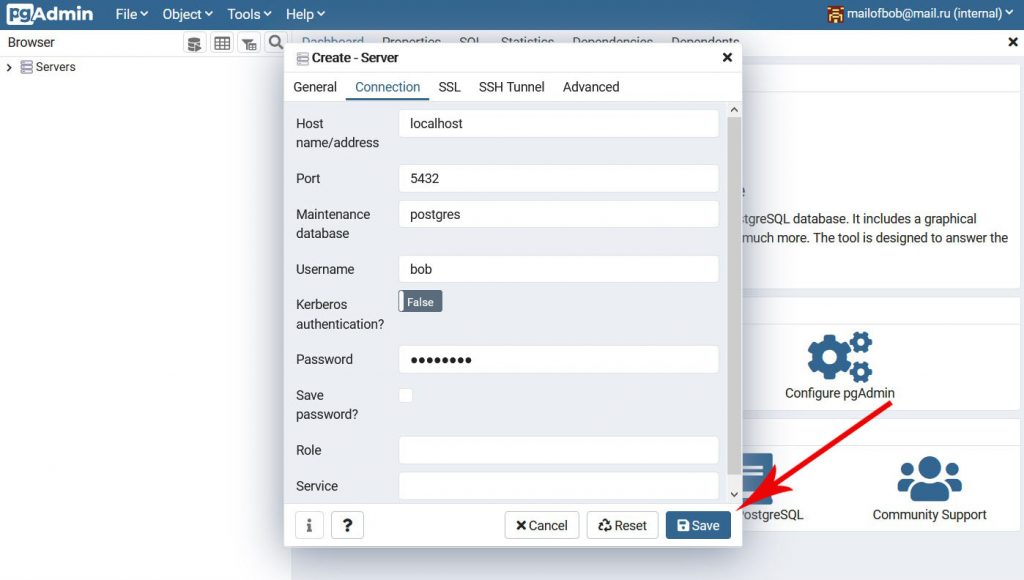
Теперь, заполните данные, необходимые для подключения к серверу. В строке Host name/address введите localhost, в строке Port можно оставить номер порта по умолчанию – 5432. В строке Maintenance database оставьте значение postgres. А вот, в строках Username и Password вы должны указать имя пользователя и его пароль, которые вы ранее добавили в PostgreSQL. В нашем примере это был пользователь bob с паролем P@$$w0rd. Вам, разумеется, необходимо использовать данные своей учётной записи PostgreSQL. Когда всё будет готово, нажмите Save.
Если введённые учётные данные корректны, вы попадёте в панель управления pgAdmin4. Здесь, вы даже можете найти ту базу данных, которую вы создавали при настройке PostgreSQL. В нашем примере это была база данных bobdb.
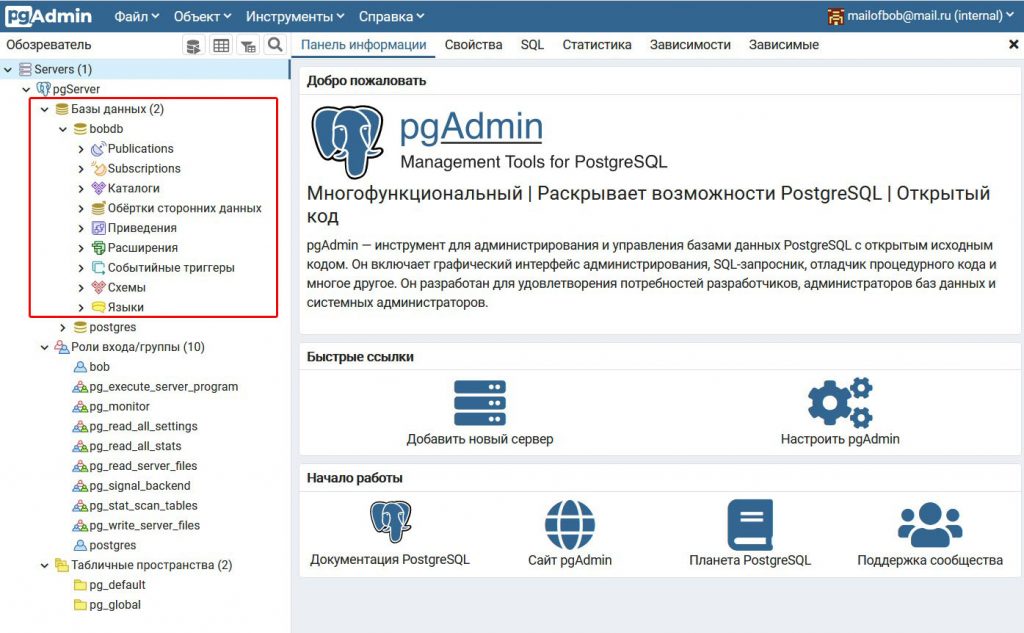
Таким образом, мы установили СУБД PostgreSQL, создали там учётную запись, базу данных и добавили созданному пользователю набор полномочий по отношению к созданной базе. После чего, мы подключились к СУБД PostgreSQL при помощи веб-интерфейса pgAdmin4. Основой всего нам послужил виртуальный выделенный сервер (VPS), работающий под управлением операционной системы Ubuntu 20.04.