
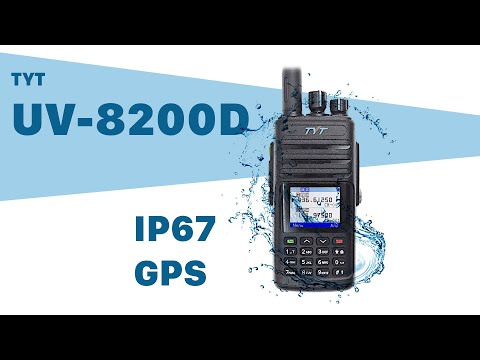
TYT TH-UV8000D — профессиональный двухдиапазонный портативный трансивер с выходной мощностью до 10 Вт.
К важным преимуществам рации следует отнести возможность удаленного управления (отключение/блокировка), скрамблер в «базовой» версии, высокую стабильность частоты и режим междиапазонного репитера.
Радиостанция комплектуется двумя антеннами (высотой 170 мм и 380 мм), последняя — для работы на максимальной вых. мощности.
ОСОБЕННОСТИ TYT TH-UV8000D:
- Симплексный и полудуплексный режимы работы
- Стабильность частоты 2.5 ppm
- Прием-передача ANI-кодов, MSK, DTMF и тонального сигнала 1750 Hz
- Шаг синтезатора 2.5 kHz
- Режим междиапазонного репитера
- Работа с тональными сигналами (в том числе сканирование CTCSS/DCS)
- Сканирование и мониторинг 2 диапазонов (Dual Watch, Dual Standby)
- Функция удаленного отключения / блокирования рации
Инструкция для TYT TH-UV8000D (на русском языке).
Софт для программирования TYT TH-UV8000D.
ТЕХНИЧЕСКИЕ ХАРАКТЕРИСТИКИ TYT TH-UV8000D |
|
| Частотный диапазон | 400-520 MHz (Rx/Tx) 220-260 MHz (Rx/Tx) 136-174 MHz (Rx/Tx) 65-108 MHz (FM-radio) |
| Количество каналов | 2*128 + 25 (FM-радио) |
| Количество частотных кодировок | 50 CTCSS + 104 DCS |
| Шаг частотной сетки | 2.5 / 5 / 6.25 / 10 / 12.5 / 25 / 37.5 / 50 / 100 kHz |
| Волновое сопротивление | 50 Ом |
| Стабильность частоты | 0.00025 % (2.5 ppm) |
| Питание | Литий-ионный аккумулятор (7.4 В / 3600 mAh) |
| Потребление | 2.4 A (Tx 10 Вт) 1.8 A (Tx 5 Вт) |
| Габариты | 134 x 59 x 37 мм (без антенны и клипсы) |
| Вес | 230 г (примерно) |
| Начало продаж | 2017 г |
ПЕРЕДАТЧИК |
|
| Выходная мощность | 5 / 10 Вт |
| Тип модуляции | 11KØF3E (полоса 12.5 kHz) 16KØF3E (полоса 25 kHz) |
| Максимальная девиация частоты | 2.5 kHz (полоса 12.5 kHz) 5 kHz (полоса 25 kHz) |
| Девиация CTCSS/DCS | 0.4 kHz ± 0.1 kHz (полоса 12.5 kHz) 0.55 kHz ± 0.15 kHz (полоса 25 kHz) |
| Уровень внеполосных излучений | < -60 dB (полоса 12.5 kHz) < -65 dB (полоса 25 kHz) |
| Паразитные излучения | < 7 μV |
| Характеристика предыскажений | 6 dB |
ПРИЕМНИК |
|
| Чувствительность (S/N 12 dB) | -122 dB |
| Избирательность | > 60 dB (полоса 12.5 kHz) > 65 dB (полоса 25 kHz) |
| Интермодуляция | > 55 dB (полоса 12.5 kHz) > 60 dB (полоса 25 kHz) |
| Выходная мощность НЧ | 0.5 Вт |
| КНИ | < 10% |
Комплектация: рация TYT TH-UV8000D, аккумулятор, зарядное устройство с блоком питания, две антенны (170 мм и 380 мм), клипса. Страна производства КНР .
Производитель: TYT
Код Товара: TH-UV8000D


Краткое описание
TYT TH-UV8000D портативная двухдиапазонная радиостанция с выходноймощностью 10W !, супермощным аккумулятором 3600 мАч! и впечатляющимнабором функций …Читать далее…
Краткие характеристики
Дальность связи максимальная, Км — 12
Диапазон частот, МГц — VHF 136-174 / UHF 400-520
Мощность передатчика, не более Вт — 5/10
Тип модуляции — FM
Шаг изменения частоты, кГц — 100/50/37.5/25/12.5/10/6.25/5.0/2.5/0.5
Комплект поставки — Рация — 1шт, Гарнитура — 1шт, Антенна — 2шт, Аккумулятор — 1шт, Зарядное устройство — 1шт, Клипса на пояс — 1шт, Инструкция на английском языке — 1шт. Инструкция на Русском языке доступна онлайн.
Смотреть все характеристики
Доступные варианты
Дополнительно хочу:
Запрограммировать LPD/PMR каналы (бесплатно)

Доставка от 2 дней, БЕСПЛАТНО от 10 тыс.р!
Все варианты и сроки доставки доступны в начале оформления заказа.

Безопасная удобная оплата!
Через СБП, любой банковской картой или от юр. лица, предоставляются все документы.
![]()
Нам доверяют!
Отзывы сотен довольных покупателей на Яндекс Маркет и на нашем сайте.
- Описание
- Характеристики
- Отзывов (3)
- Вопрос — ответ (22)
- Инструкции и программы
Рация TYT TH-UV8000D, с гарнитурой
Двухдиапазонная радиостанция TYT TH-UV8000D – устройство портативного типа, привлекающее внимание пользователей отменными характеристиками и эксклюзивной комплектацией. И основные из них – выходная мощность 10 W и наличие встроенной системы кросс-бэнд репитера, наличие в комплекте всего необходимого для работы в любых условиях.
За счёт встроенной клавиатуры упрощается доступ к имеющимся функциям. При этом нужную частоту можно вводить вручную. Благодаря универсальной системе меню обладатели рации могут активировать функцию VOX и другие, как с помощью персонального компьютера, так и без него.
Мощный аккумулятор ёмкостью 3 600 мАч обеспечивает долгое время работы устройства без подзарядки. Это особенно важно для спасателей и представителей смежных профессий, которым приходится выполнять сложные задачи без доступа к электричеству.
Обратите внимание на скруглённые углы корпуса. Такой дизайн делает рацию более удобной: она хорошо ложится в ладонь и не выскальзывает, сам корпус изготавливается из ударопрочного пластика. При правильной эксплуатации изделие прослужит долгие годы.
Теги: рации,TYT,рации тит,ТУТ 8000,титька,рации купить,рации с доставкой,рации с доставкой по России,TYT TH-UV8000D,TYT TH-UV8000D,Рации TYT TH-UV8000D,ТИТ 8000
Need a manual for your TYT TH-UV8000D Walkie-talkie? Below you can view and download the PDF manual for free. There are also frequently asked questions, a product rating and feedback from users to enable you to optimally use your product. If this is not the manual you want, please contact us.
Is your product defective and the manual offers no solution? Go to a Repair Café for free repair services.
Manual

Rating
Let us know what you think about the TYT TH-UV8000D Walkie-talkie by leaving a product rating. Want to share your experiences with this product or ask a question? Please leave a comment at the bottom of the page.
Are you satisfied with this TYT product?
Yes No
18 votes


 TO CUSTOMERS
Thank you very much for using our two way radio.
This radio of modern design is reasonable structure
with stable functions. It is designed to meet different
customers’ need for high quality with easy operation
and perfect capablity. We believe you are pleased
with its nice shape and excellent performance.
This manual is suitable for using the model
of TH-UV8000D.
Welcome to use 7¥7- two-way radio
http://www.tyt888.com
Main Functions
Dual band, dual display, dual standby
01
02
04
07
08
13
18
27
35
46
47
48
Contents
Using tips
Unpacking and checking equipments
Battery
Antenna
Installing and Uninstalling of supplied accessories
Getting familiar
Working mode
Detailed Function Descriptions
Basic Operations
Optional Accessories
Trouble shooting guide
Specifications
Warranty card
Using tips
Unpacking and checking equipments
http://www.tyt888.com
Using tips
Please read the following brief instructions, non-compliance with these rules may cause
danger or violate the law.
®» Obey the local government regulation before using this radio, improper use may violate
the law and be punished.
® Turn off the radio before entering flammable or explosive areas.
® Do not charge or change the battery in flammable or explosive areas.
® Turn off the radio before getting close to the blasting zone or detonator areas.
® Do not use radio whose antenna is damaged, touching of damaged antenna will cause
heat injury.
® Do not attempt to open the radio; the maintenance work should be done by technical
expert only.
® To avoid troubles caused by electromagnetic interference or electromagnetic
compatibility, please turn off the radio in places where have the banner "Do not use
wireless equipment”, such as hospital and other healthcare places.
® In the car with an airbag, do not put the radio within the scope of the airbag deployment.
® Do not store the radio under the direct sunshine or in hot areas.
®» When you transmit with the radio, do keep away from its antenna for 5cm at least.
m If the radio appears smelly or smoke, please shut off its power immediately and contact
with your local dealer.
®» Do not transmit too long, for the radio may heat and hurt the user.
01!
Unpacking and checking equipments
Carefully unpack the radio. We recommend you check the items listed in the following
table before discarding the package. If any item is missing or has been damaged during
shipment, please contact us immediately.
Supplied accessories:
ИА
= (5),
Antenna (1) Li-ion battery (1) Belt Clip (1) Charger (1)
NEANENTERARN
TYT Selance £ Technology Electron Фа. Lid.
TYT
Charger Verification (1) User's Manual (1)
Adapter (1)
Note: The antenna frequency range please refers to the annular label at the bottom of antenna.
Battery
Antenna
Installing and Uninstalling of supplied accessories
http://www. .tyt888.com
Battery
Please use 7¥7 designated battery; other batteries can cause explosion and hurt people.
Notice: 1. Please do not short-circuit the battery terminals or expose of in fire. Do not dissemble
the battery by yourself.
2. Charge the battery between temperature 0'C and 45°C. The battery can not be fully
charged beyond this temperature range.
3. Please turn off the power when you charge the radio with battery. Transmit with the
radio in charge will affect its correct charge.
4. Do not unplug the power or battery when it is charged.
5. The operating time becomes short even the battery is fully charged, the battery is
exhausted, please replace battery.
6. Please do not charge when the battery or the radio is wet. Please dry it with a cloth
before charging to avoid any danger.
Warning: When the conductive metals such as jewelery, key or decorative chains touch the
battery terminals, all the batteries are likely to cause damage to the items or personal
injury. These conductive metals may form a short circuit and generates much heat.
Do deal with any battery carefully, especially when put it into pocket, wallet or other
metallic containers.
I 104
Charging operations:
Charge the battery as follows:
1) Power off
2) Insert the DC adaptor plug in the DC jack on the back of charger
3) Insert the AC adaptor plug in the AC power output socket
4) Insert the battery or radio with battery vertically in a charger, to check whether the
battery and charger terminal is in normal contact.
5) Make sure the battery and charger terminal is in good contact, when the charging
indicator light turns red, it starts charging.
Note: 1. Before inserting the battery, it is abnormal if the charging indicator blinks
2. To change the battery for charging, please wait until the indicator is stable.
3. When the battery is well inserted, the indicator turns red and the charging is on the
process, if the indicator blinks, then the battery is damaged or the temperature is too
high or too low.
Self-testing
When the charger powers up, if the orange indicator lights for one second and then goes
out, entering the standby mode, the charger passes the self-testing and can charge the
battery. If the orange indicator blinks constantly, the charger fails to pass the self-testing,
and can not charge the battery.
Normal charging indicator
When charging the battery, if the indicator light turns red, the battery is on the normal
charge; if the red indicator light blinks constantly, the battery capacity is too low, and is on
the trickling charge, and after the battery capacity reaches a certain level, it will switch to
the normal charge.
Note: Trickling charge does not exceed 30 minutes, if the red indicator light blinks after 30
minutes, it means the charger can not charge battery, please check whether the battery
or the charger has been damaged.
Charging precautions:
1) The battery is not fully charged in factory, please charge before using it.
2) Charge and discharge the battery for two or three times, the battery capacity will reach
the best condition. When the battery capacity is low, please charge or change the battery.
3) The battery lasts shortly even if it is fully charged, the battery is exhausted, please
contact your local dealer to buy a new authentic TYT battery.
Antenna
® Short thick antenna is suitable for short-distance communication, while long thin antenna
will offer you a better communication effect. Wearing the radio in your waist will not make
you feel uncomfortable.
® The communication range will be shortened in bad weather or among the trees, please
prepare in advance to avoid any inconvenience of your communication and security.
071
Installing and uninstalling of the accessories
Installing/Removing the battery
1) Align the two grooves of battery and the guide rail on the back of aluminum shell,
ensuring full contact and in parallel, then push the battery up to the radio base along
the rail on the back of aluminum shell, until the battery latch locks up. (picture 1)
2) To remove the battery, please make sure the radio is closed, push the battery latch
down, and make sure the radio and battery is on the releasing state, and then push
the battery out from the radio. (picture 2)
(picture 1) (picture 2)
Installing and removing the antenna
1) Align the threaded end of antenna and the threaded hole at the top of radio, rotate the
antenna clockwise until it is tight. (picture 3)
2) To remove the antenna, rotate it counter-clockwise until the antenna spirals out.
(picture 4)
(picture 3) (picture 4)
Installing/removing the belt clip
1) Align the two holes of belt clip and the two holes of the radio, fix them with the supplied
M2.5x5 screw. (picture 5)
2) Loosen the screw set to remove the belt clip (picture 6)
(picture 5)
(picture 6)
110
Installing external headset
Reveal (do not remove) the mic/speaker jack cover (picture 7), insert the headset into the
mic/speaker jack (picture 8).
Note: Using the external headset will affect the water-tightness performance of radio.
(picture 7)
(picture 8)
Getting familiar
http://www.tyt888.com
nme
Getting familiar
131
Antenna
connect the supplied antenna here.
Speaker
the internal speaker
is located here.
Microphone
sound input
s_ 94 =
468. 288
154. E
FM Transceiver tw-uvsooon
sock FIA Те
Long press this key can lock
or unlock the keypad under
standby mode.
Channel Knob
Using to adjusting the
channel and frequency
Power/Volume Knob
this control toggle the transceiver's
power on/off and adjust the volume
level.
y) LED indicator light
indicator light turns red
a
when transmit, turns green
when receive.
It blinks red when the battery
capacity is low, and blinks green
when scanning.
U/V
this key can be used to
shift the band A/B, and
exited the Function Menu.
#T-R
Short press this key under standby
mode can shift the VFO Mode and
MR mode, long press this key can
exchange of RX frequency and TX
frequency
PTT
press it to transmit and
release it to receive after
your transmission is completed.
Belt clip
You can clip the radio in the
belt and is easy to take.
Mic/speaker jack/
MONI
Press and hold this key
disables the noise squelching
action ,allowing you to hear
very weak signals near the
back-ground noise level.
programming port
Used to connect headset or
external programming cable.
Programmable via PC
programming software.
Li-ion battery
For charging the radio.
14
LCD DISPLAY ECO COC
You will see various icons shown on the screen when power on. The following table can q Squelch active
help you identify icons’ meaning which display on LCD. Q Beep tone active
= Receive calling ID or MSG
Де ceo BLEND q г eos 5 Scrambler active
pes # ES +
me | KE In Battery power indicator
CT Set CTCSS tone
ECC ко | code
Yanll Operating band signal & power meter ome DTMF signaling active
L Low TX power active A Operating A band indicator
D Dual watch/standby active У Operating B band indicator
$ RX power save active 25 Frequency mantissa indicator
VOX VOX active ss Channel number/Menu items number indicator
+— Repeater shift direction 4 Busy channel indicator
R Reverses the transmit and receive frequency active * Channel scanned available under CH mode
N Narrow band mode active
Él Keypad lock active
19! 116
Working mode
http://www.tyt888.com
Working mode
Frequency Mode(VFO)
Under this mode, you can use key to change the frequency, then press or 64, or
the channel knob or input the frequency by keypad directly and store channel.
Frequency Channel (MR) Mode
When you have stored a memory channel at least and under VFO mode, press ET? key to
enter MR mode.
The frequency will be indicated on the display and the channel No. will be indicated at the
right side. If the transceiver display name option is ON and the channel name edited, it will
show the name of the channel.
Channel Mode(CH)
When you have stored a memory channel at least, it can work in CH mode, Channel NO,
will be indicated on the display. Press EJ? , then turn on the radio, it will enter CH mode,
Press EXP, then turn on the radio, it will exit CH mode.
MM“.
SET MENU MODE
LS LCD Display Available Values Description of Function
SCAN Frequency/Channel Scan
02 | TX.SEL EDIT / BUSY Priority Transmit
03 | VOX 1-8 VOX Level Setting
04 | POWER LOW / HIGH High/Low TX Power
05 | SQL 0-9 SQL level setting
06 | D.WAIT ON / OFF Dual Wait/Standby
07 | LED ON / AUTO / OFF LED Display mode
08 | LIGHT COLOR1 / COLOR2 / COLORS | Background Light Color
09 | BEEP ON / OFF Keypad Beeper Setting
10 | ANI ON / OFF Automatic Number Identity
11 Turn ON/OFF Repeater frequency setting
12 | ID 0-9 ID
13 | РТТ BOT/EOT/BOTH/OFF Code
14 | TOT OFF/30/60/......7360 Transmitter Time-Out Timer
15 | BCLO OFF / WAVE / CALL OFF / WAVE / CALL
191
LS LCD Display Available Values Description of Function
VOX.SW ON / OFF VOX Switch ON/OFF
17 | ROGER ON / OFF Transmit Over Beeper
18 | DW ON / OFF Dual Watch/Monitor
19 | RX.SAV ON / OFF Receive Saver
20 | SCAN.S TO/CO/SE Scan Mode
21 AUTOLK ON / OFF Auto Keypad Lock
22 | VOICE ON / OFF Voice Prompt
23 | TALK ON/OFF End-tone elimination
24 | OPNSET OFF / DC / MSG Power-on Display
25 | VIL / Battery Power Voltage
26 | MSGSET -1A, @ Power-on Message
27 | DIS.NM ON/OFF Display channel name
28 | CHNAME -1A, Q Channel Name Editing
29 | C-CDC OFF / 67.0 / DO23N TX/RX Tone coder
30 | R-CDC OFF / 67.0 / D023N RX Tone coder
31 | T-CDC OFF / 67.0 / DO23N TX Tone coder
Car LCD Display Available Values Description of Function SHORTCUS MENU OPERATION
+/-/ OFF Shift Direction Item Item Enter Screen Select Parameter Confirm Return
| No. Na it
33 | OFFSET 0.000-99.995MH Repeater Shift 1) no SE у =. ory parameter Explanation Standby
. “VV. Z Frequency a=" A E Press [es] or [Ex] = В = Г
(Under VFO mode) /Channel т Pl ad ng -
scan
34 | STEP 2.5К / 5К / 6.25К /... / 25К VFO Step 2) Prioriy © (G+ EX ap [Fry a | оф 24 Бот ках |» o»
i 0 selec ? 5
35 | NW WIDE/NARROW Select Channel Spacing Transmit EDIT avalable values
3) VOX level mp
36 | SEEK 67.0 ; CTCSS Scanning ) > evel ( + ЕЮ) в Сы a > (oleh | |vox1evel: 1-9 |" IE mp
selling 4 available values
37 | SEEK DO23N | / DCS Scannin 4) TX mb 7 “cu № [Pr r ;
sor 7 EA 999 (5155) fre [POS
Menu Operation 5) Sal level (y mi E 5 a» БеЗ sat level: 0-9 ” a y
setting 5 vailable valu
1) Under standby mode, press EA to enter menu setting, LCD displays "MENU" 6) Dual as, x —
ual wait/ + sal Press| es ] =. =. fr
2) Press 3 ог Ва ‚ ог го!а!е the channel knob to select the desired menu item, LCD display Standby 7 Tour E a EE Nor > a
available values
current setting of selected item. я =) ab +
| | 7) =D & @+ aa этот a + men | (on auro or ” a +
3) Press EB to enter and then press E or E to select the desired setting. oP ay AUTO avaiable values
mode
4) Press 7) to exit and return to the standby mode.
8) Background CS” GB + EXD [одет ©) > ER [0 LF
light color COLOR1 available values
9) Кеураа Y a+ EY > Eo» ea — a y
eeper OH available values
10) Automatic (37 | F + a = = Tal < =) mb 2 e (Pess[esjo + i Г
Number @ PAP EEE) yor [POD
Identity
211 122
Item
No.
11) Repeater (7
12) ID
13) PTT ID y
14) Transmitter(37
15) Busy
16) VOX
17) Transmit y
18) Monitor y
19) Receive (y
20) Scan
Lk
Вов? [29 В ФЕ
Yul q =
= | ily nl
| F a mle ETT Io 8 % Г Ga МЕ
a: re
a OFF
k
| ore / 30... / 270s | yp
r
| (OFFWAVEJCALL
JE
+
Yai
wow, sy > ED №
OFF
++
ww
+
y
== |
DH
EP
A
©
wr
JE
ed Se у № A
Item Item Enter Screen Select Parameter Confirm
No. Name item Display parameter Explanation
21) Auto + Ya | wih (Pp =
o 7 E O am Bp PSE | ом логе =
eypa OFF available values
lock
22) Voice + Eg Tall Press Es or ä
) y a Eo ^ VOICE” 2 " (2) vb E o seee ON / OFF »
prompt OH valable values
23) End-tone + ED yl ЭГ 7 ий (Ртезс [ез | ог [20 '
) de y a ED MP STALK Е El F |rotate a de or ON / OFF Lk
elimination to change the frequenc
24) Power-on CP G-+ a mb 2 «№ (Press [es jor
“opm, ET | 1 Fr toselect | |OFF/DC/MSG >
display œ OFF (es values
25) Battery y G+ en mb п Ga np oi Show current =
u oltacı en Fa BU available values | | Voltage
voltage
26) MSG + ED yy al. ui (Press [es] or [eajo
) . y a ea " “MSG. SET | El F rotate e a knob] | *LOCK/#T-R/U/V =}
setting to change the frequenc
27) Displa + = Tai = | ni fii (Press [es] or [ea jor =.
) play y a "> “DIS. HI” ” a Ч ое i a oot ON/OFF CF
the name to change the frequenc
28) Channel | y + ED pp" pil (Press [es] or [ea jor mb
о > CHNAME” > a > ¥ rotate i om knob|| LOCKAT-RUN | F
Name to change the frequenc
29) TX/RX (> Ga -+ ED Tal SE Qe Pesiesjo =
* C-CDC 2 Spr Fr toselect | |OFF/QT/DCS |"
one 03 23% 1 = values
coder
30) RX tone (> G- ED A ms G np Press [ ey ]or =
“FE coc » @losiect | |OFF/QT/DCS |*
coder o 23% 1 =i values
Return
Standby
=> C2
= со
= со
=} со
124
Item Item Enter Screen Select Parameter Confirm Return
No. Name item Display parameter Explanation Standby
31) TX tone æ о + ED mu Ta Nro 1 ee > (+ ula Press| lor
t t
coder 254. 1 Llao Values
32) Shift y GO + ED me I a inp Press [ Ey ] ог
direction en OFF ak values
33) Repeater + EXD pb 7 um [Press [@s | or [3 Jo
Shift va ED я “OFFSET => @ 7 ea = 0.000-99.9975MHz
to change the frequenc ji
в ел
OFF / QT /DCS
=
34) VFO ste e [Fi E |
) p y 3+ = Ep ^ STEP, = a I =
available values
35) Wide/ + ED Tul : Press [ &3 ] or
Narrow va Eo as Na 3 >” [E |9 es
available values
band
36) CTCSS + ED =+ Es
scan y Ga o =r Es a x > a № i = |
available values
Yui
DS © E: Ma E fe
scan К
10K...100K
Detailed Function Descriptions
+
EERE
JE.
Ч
El
++
Wide/Narrow
Basic Operations
Press [ @ ] key to
start scan
$ E > С)
Press [ @@ ] key to
available values start scan
>
>
==
|
|
e
http://www.tyt888.com
DETAILED FUNCTION DESCRIPTIONS
1) Scan & Scan Mode setting (SCAN&SCANS---MENU 1&20)
Functions: under VFO/MR/CH mode, TH-UV8000D allows you to scan the entire current
operating band and memory channels.
Enter Menu 1“ and press [ @@ ] key to start scanning.
When you have started scanning, press [ 1/[ ] key to change direction. And it
will halt on a signal it encounters, press PTT key to stop scanning; Press MONI key to
stop scanning temporarily; Press [ @ ] key again to exit the scanning function.
Scanning operation is basically the same in each of the above modes. Before you begin,
take a moment to select the way in which you would like the scanner to halt on a signal.
Enter Menu 20“ to set scan mode. Default: TO.
Three options for the scan mode are available under VFO mode:
TO: In this mode, the scanner will halt on a signal it encounters, and will hold there for
some time. If you do not take action to disable the scanner within the time period,
the scanner will resume even if the stations are still active.
CO: In this mode, the scanner will halt on a signal it encounters, and will hold there if
the stations are still active. And after the carrier has dropped, the scanner will
resume.
SE: In this mode, the scanner will halt on a signal it encounter, it will not restart
automatically; you must manually re-initiate scanning if you wish to resume.
211
2) Priority Transmit (TX.SEL---MENU 2)
Functions: TH-UV8000D allows you to transmit on the sub band even if you are working
on the operating band.
Enter Menu 2" to select priority transmit band. Default: EDIT.
EDIT: It will transmit on the operating band.
BUSY: It will transmit on the band last talking used.
3) VOX Level & VOX Switch (VOX&VOX.SW---MENU 3&16)
Functions: the VOX function provides automatic transmit/receive switching based on
voice input to the microphone. With the VOX switch ON, you do not need to
press PTT switch in order to transmit, and it is not necessary to use a VOX
headset in order to utilize VOX operation.
Enter Menu 16“ to set VOX switch. Default: OFF.
When the VOX is activated, the “VOX” icon will appear on the display.
Enter Menu 3" to set VOX level. It has 9 grades.
The higher level is, the more sensitive will be.
TH-UV8000D provides for adjustment of “Hang-Time” of the VOX (the transmit-receive
delay after the cessation of speech) via program software.
Default: 2s.
4) TX Power setting (POW---MENU 4)
Functions: you can select high/low TX power according to your talking environment
and need. When you store memories, you can store High and Low power
128
settings separately in each memory.
Enter Menu 4" to set TX power.
High: 10W
Low: 5W, when you select Low power, the “L' icon will appear on the display.
5) Squelch Adjustment (SQL---MENU 5)
Functions: TH-UV8000D’s Squelch system allows you to mute the background noise
when no signal is being received. Not only does the Squelch system “stan-
dby” operation more pleasant, it also significantly reduces battery current
consumption.
Enter Menu 5“ to set SQL level. Default: 5.
6) Dual Wait/Standby (D.WAIT---MENU 6)
Functions: TH-UV8000D Rallows you to receive the sub band signal even if you are working
on the operating band. It could monitor the signal under both master and
sub band at the same time.
Enter Menu 6“ to set Dual Wait. Default: ON.
7) LED Display Mode (LED---MENU 7)
Function: select the LED/Keypad Lamp mode.
Enter Menu 7t to select LED display mode. Default: AUTO.
ON: LED display lights all the time.
AUTO: llluminates the LED when any key is pressed and after 3s the light is off.
291
OFF: Disable the LED lamp.
8) Background Light Color (LIGHT---MENU 8)
Functions: choose LED background light color.
Enter Menu 8" to select background light color. Default: Default1.
1: Purple.
2: Orange.
3: Blue.
9) Keypad Beeper setting (BEEP---MENU 9)
Functions: enable/disable the keypad beeper.
Enter Menu 9" to set keypad beeper. Default: ON.
10) Automatic Number Identity (ANI---MENU 10)
Functions: sending ID code when TH-UV8000D transmits, the others can receive it directly
on the display if they also have ANI function.
Enter Menu 10" to set ANI. Default: OFF.
11) Repeater frequency setting
Enter Menu 11“ to turn on/off the setting.
12 ) ID setting
Enter Menu 12th to set the ID number.
13) PTT ID setting
Enter Menu 13th to set the PTT ID 130
14) Transmitter Time-Out Timer (TOT---MENU 14)
Functions: the TOT feature provides a safety switch which limits transmission to a
pre-programmed value. This will promote battery conservation by not
allowing you to make excessively-long transmissions, and in the event of
a stuck PTT switch it can prevent interference to other users as well as
battery depletion.
Enter Menu 14" to set TOT. Default: OFF.
15) Busy Channel Lock-Out (BCLO---MENU 15)
Functions: the BCLO feature prevents the radio’s transmitter from being activated if a
signal strong enough to break through the “noise” squelch is present. On a
frequency where stations using different CTCSS or DCS codes may be
active, BCLO prevents you from disrupting their communications
accidentally (because your radio may be muted by its own tone decoder).
Enter Menu 15“ to set BCLO. Default: OFF.
OFF: Disable BCLO feature.
WAVE: the radio’s PTT will be prevented only if the frequency is busy used.
CALL: the radio’s PTT will be prevented only the frequency and tone coder is the same.
16) VOX Switch
Enter Menu 16* to switch on /off the Vox function.
31!
17) Transmit Over Beeper (ROGER---MENU 17)
Functions: sending a beeper to inform the receiver TX is over.
Enter Menu 17“ to set ROGER. Default: OFF.
18) Dual Watch/Monitor (DW---MENU 18)
Functions: Dual Watch feature makes TH-UV8000D can monitor the calling signal when
FM radio is on and you won't miss any calling.
Enter Menu 18" to set DW. Default: OFF.
19) Receive Saver (RX.SAV---MENU 19)
Functions: this feature significantly reduces quiescent battery drain, and you may not
receive the full data burst.
Enter Menu 19" to set RX.SAV. Default: OFF.
20) Scan Mode Setting
Enter Menu 20" to set the scan mode.
21) Auto Keypad Lock (AUTOLK---MENU 21)
Functions: in order to prevent accidental frequency change or inadvertent transmission,
various aspects of the TH-UV8000D’s keys and switches may be locked out.
Enter Menu 21“ to set AUTOLK. Default: OFF.
When you switch AUTOLK ON, the keypad will be locked automatically if there is no key
operation for 5 second.
If the radio is locked, press [ €Æ3 ] key to unlock it. Also you can lock it using [ “3 ] key
132
by manual.
22) Voice Prompt (VOICE---MENU 22)
Functions: enable/disable voice prompt.
Enter Menu 22“ to set VOICE.
23) End-tone elimination
Enter Menu 23" to switch on/off the tail elimination function
24) Power-on Display setting (OPN.SET&VLT&MSG.SET---MENU 24&25&26)
Functions: choose power-on display mode and edit power-on message
Enter Menu 24" to set OPN.SET. Default: OFF.
OFF: display model version
DC: battery power voltage
MSG: power-on message
Enter Menu 25% to check battery voltage.
Enter Menu 26" to edit power-on message, also you can edit it directly by
25) Display the name (DIS.NM&CH.NAME)
Functions: switch channel name display mode ON/OFF and edit channel name under
MR/CH mode .
26) Tone coder & Tone Search Scanning & Tone calling (C-CDC& R-CDC&
T-CDC
Function 1: CTCSS/DCS Operation
331
Operation: Press (4 + EE ED to enter the CTCSS setting, Press to confirm, then
press €F to enter 32nd Menu.
OFF: Disable the CTCSS/DCS.
67.0: the CTCSS number.
D023N: DCS number.
Many repeater systems require that a very-low-frequency audio tone be superimposed
on your FM carrier in order to activate the repeater. This helps prevent false activation
of the repeater by radar or spurious signals from other transmitters.
Enter Menu 29/30/31" to set TX&RX Tone coder/ RX Tone coder/ TX Tone coder.
If the Tone scan feature does not detect a tone or code, it will continue to scan
indefinitely. When this happens, it may be that the other station is not sending any tone.
You can press PTT key to halt the scan at any time.
You also can press MONI key during Tone scanning to listen to the (muted) signal from
the other station. When you release the MONI key, Tone scanning will resume.
Tone Scanning works either in the VFO or MR modes.
27) Offset frequency and direction setting(S-D&OFFSET--MENU 32 & 33)
Functions: Under VFO mode, you can set the offset frequency and direction to connect
with repeater.
Enter Menu 32nd to set offset direction.
Default: OFF
Enter Menu 33rd to set offset frequency.
134
Available values: 0.000-99.995MHz
28) VFO Step setting (STEP---MENU 34)
Functions: setting of the synthesizer steps
Enter Menu 34t to set VFO step.
Available Values: 0.5/2.5/5/6.2510/12.5/25/37.5/50/100K.
Basic Operations
Turning the Radio On/Off
Rotate the Radio On-Off/Volume Control knob clockwise/counter-clockwise until a click is
heard to turn the radio on/off.
Adjusting the Volume
After turning the radio on, rotate the Radio On-Off/Volume Control knob clockwise to incre-
ase the volume, or counter-clockwise to decrease the volume.
Channel Knob
After turning on the radio, rotate the channel knob clockwise or counter-clockwise to adjust
the step frequency.
PTT
PTT: press it to transmit and release it to receive after your transmission is completed.
Locking/Unlocking the Keypad
When the keypad is not in use, you can lock the keypad to prevent accidental keypad ope-
ration. Three methods are available for you to lock
or unlock the keypad:
1. Through T3 key
Short press TY key for 2s to lock or unlock the keypad.
136
Reverse the frequency
Under standby mode, long press EJ? to turn on this function, "R" will displayed at the top
of LCD when you turn on this function. At this time, radio's transmitting frequency is its rec-
eiving one, and its receiving frequency is its transmitting one. If it is been set the CTCSS/
DCS, the code will also been exchanged.
MONI
MONI: Press and hold this key disables the noise squelching action ,allowing you to hear
very weak signals near the back-ground noise level.
FM radio
Under standby mode, press 668 +MONI, you can input the frequency of radio or press,then
1 to search the FM, it will stop when the FM found, if you want to continue to search the FM,
press EB then 1. can turn off the radio by pressing the PTT, press UB +MONI, can exit the
FM radio function.
Tone Calling(1750Tone)
To access a repeater, press and hold in "call" key for the amount of the time specified by
the repeater. The transmitter will automatically be activated, and a 1750Hz audio tone will
be superimposed on the carrier. Once access to the repeater has been gained, you may
release "Call" key and use PTT for activating the transmission.
371
Emergency Alarm
Under standby mode, press GB+CALL, to activate this function, until you press PTT, it will
exit.
Remote Stun/Kill and Activated
If you want to use this function, please program signaling via programming software:
Remote Stun
DTMF >Decode>-Stun Type->TX Inhibit->Stun Code
Remote Kill
DTMF >Decode->Stun Type->TX/RX Inhibit->Stun Code
A, To input stun code of radio you want to stun/kill.
B, Remote Activated: to input stun code+ to activate the stunned/killed radio.
eg. Stun code of À is 12345678, and if you want to remote kill A, please re
use the same frequency of B, press and hold on PTT, key input 123456 | 45,
78, A will be killed and if you want to activate A, please key input 12345
678+# to activate it.
C, you also can press E + (77, then key input 12345678, press PTT, FTE
radio will be killed and then key input 12345678+# to activateit. | TT
Channel Name storage and delete
e Channel Storage
Under VFO mode, input desired frequency by keypad directly, press GB, then press ED ,
the digits blink at the right top of the LCD, press number to input desired channel directly or
press or or the channel knob to choose desired one, then press for storage.
Note: After you input desired channel number, if it is blinks, it means that this channel is
already occupied, you can choose another one.
e.g. to store the frequency:450.325MHz to the channel 05, the step are as follows
1) under VFO mode, input 4-5-0-3-2-5
2) press EA + EBD , press or the step dial to choose number .5
3) press @Z to confirm.
e Channel delete
1) Under MR or CH mode, press to turn on the radio, LCD displays "DEL?" and channel
number blinks at the right top of LCD.
2) Press or or input channel number you want to delete, then press {ff} to confirm
3) After delete, it will skip into next channel, if you want to delete it, repeat above operation.
FM RADIO FUNCTION
1) On/off radio receiver
Under standby mode, press @B+MONI to open FM radio function, LCD display "76.00M",
press +МОМ! to exit DFM radio function.
391
Note: Under FM radio mode, if receiving the signal, the radio will be out of FM mode, after
5s, it will back to FM mode when the signals disappear.
2) FM Radio storage
It is the same as the channel storage.
Or you can storage the channel by software.
3) FM radio channel delete
Under FM memory mode, turn off the radio, press (77 key to turn on the radio, you will
see "DEL" in the screen and the channel number blinks, press OR to choose the
channel number you want to delete, press UB to confirm. Repeater this operation, you
can delete all memory channel, 25 in maximum.
DTMF Encoding
1. Press PTT and hold one, then key input DTMF code to send DTMF DTMF
signaling, release PTT to pause, after 2S, it will exit.
2. When transmitting part transmits with self ID, and receiving part decodes this ID. It will
save this ID automatically.
eg: ID for receiving one is 123 and for transmitting one is 456, press {fof transmitting one
and then press (3, LCD will display CALL , then press PTT to send ID code,
when receiving one receives this signaling and decodes successfully, it will save this ID
3. Press EA, then press 77, if radio has saved last calling ID, it will
Г. ГВ
display this ID, if no, it is none, then key input DTMF code, 16 digits ТА
in maximum, then press PTT to send this ID.
Note:
1. when key input code, press MONI to delete last digit, short press CALL to be back to
standby mode.
2. in MR mode or CH mode, long press CALL to get ID of respective channel of others.
3. when key input code, if you end it as #*, the code will be changed into XX#123, self ID is
123,eq,if input 78945#* self ID is 123, you can call the radios with ID as 78945, whose LCD
will display DTMF, if you want to check self ID, please press ED, then press 7 , LCD will
display ID.
DTMF selective call
1. Signal call
Code of calling part is 456(Radio A), and called one is 123(Radio B), press GB , then press
and key input 1,2,3,#,*, then press PTT to call radio B.
After sending, LCD of radio B will display DTMF; CELL
Press UB, then press PM LCD of radio A will display] “+=
Note:
if radio A transmit 1,2,3 or 1,2,3,# or 1,2,3,#,X,X, radio B also can receive and decode.
41!
2. Group call
Code of calling one is 456, press UB , then press E, then key input 1,1,A,%, press PTT to
transmit, the actual transmitting code is 1,1,A,#,4,5,6.
Key input by sequence
The radios you can call
11A#* or 11A#456 110*119(10 pcs)
15A#* or 15A#456 150*159(10 pcs)
1AA#* or 1AA#456 100*199(100 pcs)
5AA#* or 5AA#456 500*599(100 pcs)
ААА#* ог ААА# 456 000*999(1000 pcs)
CTCSS/DCS
CTCSS
1 67.0 11 94.8 21 131.8 31 171.3 41 203.5
2 69.3 12 97.4 22 136.5 32 173.8 42 | 206.5
3 71.9 13 100.0 23 141.3 33 177.3 43 | 210.7
4 74.4 14 103.5 24 146.2 34 179.9 44 | 2181
5 77.0 15 107.2 25 151.4 35 183.5 45 | 225.7
6 79.7 16 110.9 26 156.7 36 186.2 46 | 229.1
7 82.5 17 114.8 27 159.8 37 189.9 47 | 233.6
8 85.4 18 118.8 28 162.2 38 192.8 48 | 241.8
9 88.5 19 123.0 29 162.5 39 196.6 49 | 250.3
10 91.5 20 127.3 30 167.9 40 199.5 50 | 254.1
DCS
1 | 017 | 18 | 073 | 35 | 165 | 52 | 261 | 69 | 356 | 86 | 464 | 103 | 632
2 | 023 | 19 | 074 | 36 | 172 | 53 | 2603 | 70 | 364 | 87 | 465 | 104 | 645
3 | 025) 20 | 114 37 | 174 | 54 | 265 | 71 | 365 | 88 | 466 | 105 | 654
4 | 026 | 21 | 115 | 38 | 205 | 55 | 266 | 72 | 371 | 89 | 503 | 106 | 662
5 | 031 | 22 | 116 | 39 | 212| 56 | 271 | 73 | 411 | 90 | 506 | 107 | 664
6 | 032 | 23 | 122 | 40 | 217 | 57 | 274 | 74 | 412 | 91 | 516 | 108 | 703
7 |036 | 24 | 125 | 41 | 223 | 58 | 305 | 75 | 413 | 92 | 523 | 109 | 712
8 | 043! 25 | 131 | 42 | 225 | 59 | 306 | 76 | 423 | 93 | 526 | 110 | 723
9 | 047 | 26 | 132 | 43 | 226 | 60 | 311 | 77 | 425 | 94 | 532 | 111 | 731
10 | 050 | 27 | 134 | 44 | 243 | 61 | 315 | 78 | 431 | 95 | 534 | 112 | 732
11 | 051 | 28 | 135 | 45 | 244 | 62 | 325 | 79 | 432 | 96 | 546 | 113 | 734
12 | 053 | 29 | 143 | 46 | 245 | 63 | 331 | 80 | 445 | 97 | 565 | 114 | 743
13 | 054 | 30 | 145 | 47 | 246 | 64 | 332 | 81 | 446 | 98 | 606 | 115 | 754
14 | 055 | 31 | 152 | 48 | 251 | 65 | 343 | 82 | 452 | 99 | 612 | 116 | 765
15 | 065 | 32 | 155 | 49 | 252 | 66 | 345 | 83 | 454 | 100 | 624
16 | 071 | 33 | 156 | 50 | 254 | 67 | 346 | 84 | 455 | 101 | 627
17 | 072 | 34 | 162 | 51 | 255 | 68 | 351 | 85 | 462 | 102 | 631
Optional Accessories
Vehicle Charger Speaker
Optional Accessories
Trouble shooting guide
Specifications
Clone Cable Program Cable Elliminator Software CD
http://www.tyt888.com
Trouble shooting guide
No Electrical Source
® The battery has been exhausted.
Replace or recharge the battery.
® The battery is installed incorrectly.
Remove it and install again.
The operating time becomes short, even
the battery is fully charged.
e Replace the battery.
Not able to communicate with the
transceivers of the same group.
e Confirm the QT/DQT is the same.
e The distance is outside of range.
The voice of another group can be heard.
® Change all QT/DQT of the group.
Specifications
General
Frequency range
Frequency Stability
Operating voltage
136-174MHz/220-260MHz
220-260MHz/400-520MHz
136-174MHz/400-520MHz
+ 2.5PPm
DC 7.2V (Rechargeable Li-ion battery)
Other radios can not receive the TX
signals or receive signals in a low
volume.
e Switch the volume knob to the highest
level
e The microphone may be damaged,
send it to the local dealer for check.
Noise is always heard.
e The distance is outside of range.
Turn on the radio in nearer range and
try again.
471
Channel No 128*2
Antenna High gain antenna
Antenna impedance 500
Mode of operation Simplex or semi-duplex
Battery capacity 3600mMAR
Receiver
RF Sensitivity -122dBm (12dB SINAD)
Audio power >0.5W
Audio distortion <10%
Blocking > 85dB
Intermediation >60dB 5 >55dB
Selectivity >65dB >60dB
Spurious rejection > 65dB
Transmitter
Output power
<10W >5W
Modulation mode
16КФЕЗЕ / 11КФЕЗЕ
Maximum deviation
<5KHz / <2.5KHz
Adjacent Ch. power
<-65dB/ <-60dB
Spurious radiation
<7 UW
Pre-emphasis characteristics
6dB
Current
<2.8A(10W) <1.8A(5W)
CTCSS/DCS deviation
0.55KHz + 0.15KHz 0.4KHz + 0.1KHz
Intermediation sensitivity
8-12mV
Intermediation distortion
<5%
Note: Specifications will be revised without notice due to technical improvement. Thank you.
TYT
Note:
1.
This warranty card is only
applicable to two-way radio
of the above-listed model
and serial number.
. The warranty card is an
important document for the
end-user to enjoy warranty
service, please keep it well.
. The warranty card shall be
filed and chopped by the
dealer, or it is invalid.
Warranty card
Customer's name:
Thank you for buying TYT two-way radios, we
will do our best to provide you with a stable,
clear and efficient wireless communication
services. In order for you to enjoy a better
quality warranty service, please focus on the
following information: J
The products warranty period begins from the purchasing date,
if product failure under normal use within warranty period
occurs, according to the contents of this warranty, (the radio
is guaranteed for 12 months, accessories 6 months), please
carry the warranty card originals and purchase invoice to TYT
designated authorized warranty repair station for warranty
service.
The following situations occur during warranty period will be
implemented in paid service:
(1) Failure to produce the warranty card
(2) The card has altered traces or inconsistent with the product
(3) Defect or damage caused by abnormal or non-normal use
(4) Defect or damage caused by misuse, accident, water or
negligence
(5) Defect or damage caused by improper testing, operation,
maintenance, installation, disassembly or adjustment
(6) Defect or damage caused by unauthorized repair or
disassembly
(7) Defect or damage caused by force majeure
(8) Wear and tear under normal use
When you are in need of repair, please send the radio, warranty
card and purchase invoice together by post or take directly
to TYT designated authorized service stations, shipping costs
should be borne by the user.
Maintenance record
Carry-in date
Completion
date
Fault
description
Maintenance
staff numbers
Maintenance
personnel No.
Signature
This warranty card to be kept by the user, no replenishment if
lost
Производитель: TYT
Код Товара: TH-UV8000D
Краткое описание
TYT TH-UV8000D портативная двухдиапазонная радиостанция с выходноймощностью 10W !, супермощным аккумулятором 3600 мАч! и впечатляющимнабором функций …Читать далее…
Краткие характеристики
Дальность связи максимальная, Км — 12
Диапазон частот, МГц — VHF 136-174 / UHF 400-520
Мощность передатчика, не более Вт — 5/10
Тип модуляции — FM
Шаг изменения частоты, кГц — 100/50/37.5/25/12.5/10/6.25/5.0/2.5/0.5
Комплект поставки — Рация — 1шт, Гарнитура — 1шт, Антенна — 2шт, Аккумулятор — 1шт, Зарядное устройство — 1шт, Клипса на пояс — 1шт, Инструкция на английском языке — 1шт. Инструкция на Русском языке доступна онлайн.
Смотреть все характеристики
Доступные варианты
Дополнительно хочу:
Запрограммировать LPD/PMR каналы (бесплатно)
Доставка от 2 дней, БЕСПЛАТНО от 10 тыс.р!
Все варианты и сроки доставки доступны в начале оформления заказа.
Безопасная удобная оплата!
Через СБП, любой банковской картой или от юр. лица, предоставляются все документы.
![]()
Нам доверяют!
Отзывы сотен довольных покупателей на Яндекс Маркет и на нашем сайте.
- Описание
- Характеристики
- Отзывов (2)
- Вопрос — ответ (21)
- Инструкции и программы
Рация TYT TH-UV8000D, с гарнитурой
Двухдиапазонная радиостанция TYT TH-UV8000D – устройство портативного типа, привлекающее внимание пользователей отменными характеристиками и эксклюзивной комплектацией. И основные из них – выходная мощность 10 W и наличие встроенной системы кросс-бэнд репитера, наличие в комплекте всего необходимого для работы в любых условиях.
За счёт встроенной клавиатуры упрощается доступ к имеющимся функциям. При этом нужную частоту можно вводить вручную. Благодаря универсальной системе меню обладатели рации могут активировать функцию VOX и другие, как с помощью персонального компьютера, так и без него.
Мощный аккумулятор ёмкостью 3 600 мАч обеспечивает долгое время работы устройства без подзарядки. Это особенно важно для спасателей и представителей смежных профессий, которым приходится выполнять сложные задачи без доступа к электричеству.
Обратите внимание на скруглённые углы корпуса. Такой дизайн делает рацию более удобной: она хорошо ложится в ладонь и не выскальзывает, сам корпус изготавливается из ударопрочного пластика. При правильной эксплуатации изделие прослужит долгие годы.
Теги: рации,TYT,рации тит,ТУТ 8000,титька,рации купить,рации с доставкой,рации с доставкой по России,TYT TH-UV8000D,TYT TH-UV8000D,Рации TYT TH-UV8000D,ТИТ 8000
TYT TH-UV8000D — профессиональный двухдиапазонный портативный трансивер с выходной мощностью до 10 Вт.
К важным преимуществам рации следует отнести возможность удаленного управления (отключение/блокировка), скрамблер в «базовой» версии, высокую стабильность частоты и режим междиапазонного репитера.
Радиостанция комплектуется двумя антеннами (высотой 170 мм и 380 мм), последняя — для работы на максимальной вых. мощности.
- Симплексный и полудуплексный режимы работы
- Стабильность частоты 2.5 ppm
- Прием-передача ANI-кодов, MSK, DTMF и тонального сигнала 1750 Hz
- Шаг синтезатора 2.5 kHz
- Режим междиапазонного репитера
- Работа с тональными сигналами (в том числе сканирование CTCSS/DCS)
- Сканирование и мониторинг 2 диапазонов (Dual Watch, Dual Standby)
- Функция удаленного отключения / блокирования рации
Инструкция для TYT TH-UV8000D (на русском языке).
Софт для программирования TYT TH-UV8000D.
ТЕХНИЧЕСКИЕ ХАРАКТЕРИСТИКИ TYT TH-UV8000D |
|
| Частотный диапазон | 400-520 MHz (Rx/Tx) 220-260 MHz (Rx/Tx) 136-174 MHz (Rx/Tx) 65-108 MHz (FM-radio) |
| Количество каналов | 2*128 + 25 (FM-радио) |
| Количество частотных кодировок | 50 CTCSS + 104 DCS |
| Шаг частотной сетки | 2.5 / 5 / 6.25 / 10 / 12.5 / 25 / 37.5 / 50 / 100 kHz |
| Волновое сопротивление | 50 Ом |
| Стабильность частоты | 0.00025 % (2.5 ppm) |
| Питание | Литий-ионный аккумулятор (7.4 В / 3600 mAh) |
| Потребление | 2.4 A (Tx 10 Вт) 1.8 A (Tx 5 Вт) |
| Габариты | 134 x 59 x 37 мм (без антенны и клипсы) |
| Вес | 230 г (примерно) |
| Начало продаж | 2017 г |
ПЕРЕДАТЧИК |
|
| Выходная мощность | 5 / 10 Вт |
| Тип модуляции | 11KØF3E (полоса 12.5 kHz) 16KØF3E (полоса 25 kHz) |
| Максимальная девиация частоты | 2.5 kHz (полоса 12.5 kHz) 5 kHz (полоса 25 kHz) |
| Девиация CTCSS/DCS | 0.4 kHz ± 0.1 kHz (полоса 12.5 kHz) 0.55 kHz ± 0.15 kHz (полоса 25 kHz) |
| Уровень внеполосных излучений | < -60 dB (полоса 12.5 kHz) < -65 dB (полоса 25 kHz) |
| Паразитные излучения | < 7 μV |
| Характеристика предыскажений | 6 dB |
ПРИЕМНИК |
|
| Чувствительность (S/N 12 dB) | -122 dB |
| Избирательность | > 60 dB (полоса 12.5 kHz) > 65 dB (полоса 25 kHz) |
| Интермодуляция | > 55 dB (полоса 12.5 kHz) > 60 dB (полоса 25 kHz) |
| Выходная мощность НЧ | 0.5 Вт |
| КНИ | < 10% |
Комплектация: рация TYT TH-UV8000D, аккумулятор, зарядное устройство с блоком питания, две антенны (170 мм и 380 мм), клипса. Страна производства КНР .
Сопутствующие Товары

Цвет
Черный (Baofeng UV-5R)
Зеленый (Baofeng UV-5R)+200.00 р.
Красный (Baofeng UV-5R)+200.00 р.
Синий (Baofeng UV-5R)+200.00 р.
Желтый (Baofeng UV-5R)+200.00 р.
Дополнительно хочу:
Запрограммировать LPD/PMR каналы (бесплатно)
1890.00 р.

Цвет
Черный (Baofeng UV-82)
Зеленый (Baofeng UV-82)+200.00 р.
Синий (Baofeng UV-82)+200.00 р.
Дополнительно хочу:
Запрограммировать LPD/PMR каналы (бесплатно)
1750.00 р.

Дополнительно хочу:
Запрограммировать LPD/PMR каналы (бесплатно)
Тип аккумулятора
Без разъема micro-USB (BF-888S)
С разъемом micro-USB (BF-888S)+100.00 р.
890.00 р.

Дополнительно хочу:
Запрограммировать LPD/PMR каналы (бесплатно)
2590.00 р.
Похожие статьи
 для раций")
Программое обеспечение (софт) для раций
Программное обеспечение (софт) для настройки и программирования раций Baofeng, TYT, WLN, Quansheng, Baojie можно скачать по следующим ссылкам:Характеристики, отзывы, цены на рации Baofeng и рации друг..
103491
19.10.2018
Драйверы
Драйверы для программаторов и раций BaofengДрайверы и программы с диска, идущего в комплекте с программаторами BaofengДрайверы и программы с диска для универсального программатора 6 в 1Драйвер програм..
49252
19.10.2018
![]()
UV Series

TH-UV8000E
Manuals & Software
Here you will find user manuals, device drivers and softwares for a wide range of our products.
MD Series

MD-380
Manuals & Software
Here you will find user manuals, device drivers and softwares for a wide range of our products.

MD-380G
Manuals & Software
Here you will find user manuals, device drivers and softwares for a wide range of our products.

MD-390
Manuals & Software
Here you will find user manuals, device drivers and softwares for a wide range of our products.

MD-390G
Manuals & Software
Here you will find user manuals, device drivers and softwares for a wide range of our products.

MD-680
Manuals & Software
Here you will find user manuals, device drivers and softwares for a wide range of our products.

MD-UV380G
Manuals & Software
Here you will find user manuals, device drivers and softwares for a wide range of our products.

MD-680D
Manuals & Software
Here you will find user manuals, device drivers and softwares for a wide range of our products.
Mobile Car Radio

TH-9800
Manuals & Software
Here you will find user manuals, device drivers and softwares for a wide range of our products.

TH-9000D
Manuals & Software
Here you will find user manuals, device drivers and softwares for a wide range of our products.

MD-9600
Manuals & Software
Here you will find user manuals, device drivers and softwares for a wide range of our products.
Рация TYT TH-UV8000D мощность 10 Ватт + усиленная антенна и аккумулятор 3600 мАч. РЕКОМЕНДОВАНО.Подробнее

О функциях рации TYT TH UV99, сравнение с TYT TH UV8000D, возможности работы в сложных условияхПодробнее

TYT TH UV8000d — как активировать репитер и прочие наблюденияПодробнее

Радиостанция TYT TH-UV98. Полный обзорищеПодробнее

TYT TH-UV8000D || HOW TO RESET TYT TH-UV8000D (FULL VIDEO TUTORIAL 2022)Подробнее

Радиостанция TYT TH-UV8200. Полный обзорПодробнее

Радиостанция TYT TH-UV8200d. Стоит ли покупать в 2022 году?Подробнее
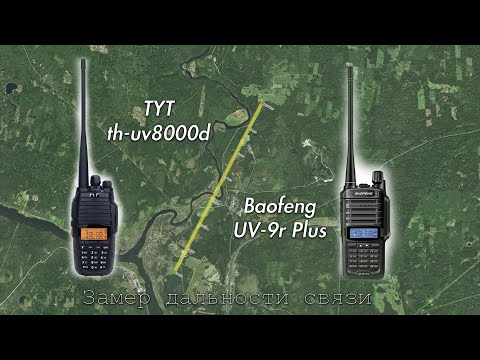
Тест дальности связи раций Baofeng UV-9R PLUS и TYT TH-UV8000DПодробнее
Рация tyt th-uv8000d приятно удивилаПодробнее

Обзор радиостанции портативной Tyt uv-88Подробнее
Рации для охоты, популярные модели, сравнение в лесу.Подробнее

Сохранение каналов на радиостанцию Baofeng. Kenwood. TYTПодробнее

Радиостанция TYT TH-9800 . Настройка 15 канала АМ CBПодробнее

TYT TH-350. Радиостанция на три диапазонаПодробнее

Демонстрируем кроссбендовый репитер на примере TYT TH-UV8000dПодробнее
