Стоит ли покупать?
Устаревшая модель прошлого десятилетия. Благодаря наличию боковой щётки вертолёту уборка вдоль плинтусов и в углах значительно улучшилась по сравнению с прошлой моделью этой линейки. Ёмкость пылесборника 1 литр: заполняется за 4-5 дней. Улучшенное строение щёток способствует более тщательному сбору шерсти, волос и пыли.
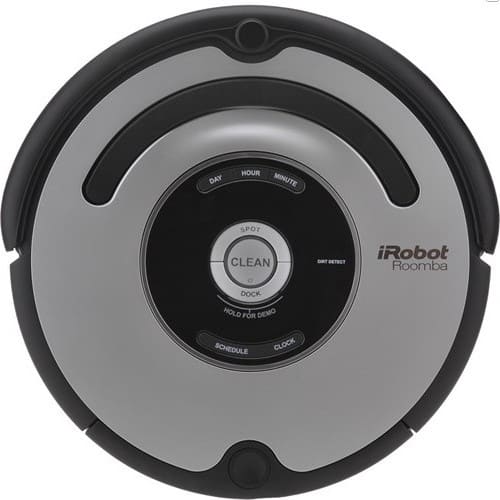
Робот оснащён возможностью распознавания более загрязненных участков (Dirt Detect), которые он убирает тщательнее. Режим Spot Clean — локальная уборка, что позволит убрать небольшой участок, например рассыпанную крупу.
Время, за которое робот пылесос Roomba 561 полностью заряжается, составляет 3 часа. Это долго в соотношении с уборкой. На полной зарядке пылесос проработает 90 минут. Для управления роботом предусмотрен пульт ДУ, но в комплекте его нет, требуется приобретать дополнительно.
Устройство оснащено ещё 2 функциями: антипутаница и лёгкое касание. Не запутывается на коврах с высоким вором и не бьётся о мебель и стены. Датчики высоты предотвратят падения Roomba 561 c лестниц, подиумов и других высотных мест.
Технические характеристики
Дисплей
нет
Система навигации
камера
Тип уборки
сухая
Габариты (ВхШхГ)
9x35x35 см
Индикатор заполнения пылесборника
нет
Ограничитель зоны уборки
виртуальная стена
Время зарядки
3 ч
Картография
есть
Дистанционное управление
нет
Объем пылесборника
1 л
Функции
уборка по расписанию, защита от падений, сенсор препятствий
Цвет
серебристый
Турбощётка
нет
Фильтр тонкой очистки
НЕРА
Режимы работы
вдоль стен, зигзаг
Боковые щетки
2 шт
Инструкция
По ссылке ниже можно скачать руководство по эксплуатации робота-пылесоса. Подробная инструкция поможет вам понять, как происходит управление прибором и какой уход со стороны пользователя ему требуется.
Скачать инструкцию для iRobot Roomba 561 (4,68 mb)
Видео
Для большей наглядности посмотрите небольшой видеообзор модели. Из него вы узнаете об остальных особенностях, достоинствах и недостатках робота-пылесоса.
Ваш email не будет опубликован.
Краткое содержание страницы № 1
500/600 Series Owner’s Manual
Краткое содержание страницы № 2
P.S. Don’t miss out on your exclusive benefits! Register your Roomba online right now at www.irobot.com/register.
Краткое содержание страницы № 3
Dear iRobot Roomba Owner, Thank you for purchasing an iRobot Roomba vacuum cleaning robot. You’ve joined the millions of people who clean with robots — the smarter way to get it done. Please take a few moments to read this manual and get acquainted with your Roomba, to get the best performance from your robot. If you have any questions, visit our website at www.irobot.com for more information. Register your robot to instantly activate your warranty and enjoy these exclusive benefits:
Краткое содержание страницы № 4
Important Tips Before using Roomba the first time, you need to activate Roomba by removing the battery pull tab. Charge Roomba overnight before first time use. Remove battery pull tab Turning Roomba on and off • To turn Roomba ON, press CLEAN once. You will hear a beep and the CLEAN button will light. • To start a cleaning cycle, press CLEAN again. Roomba will start a cleaning cycle. • To pause Roomba, press CLEAN while Roomba is cleaning. • To resume the cleaning cycle, press CLEAN
Краткое содержание страницы № 5
Table of Contents iRobot Roomba Anatomy ………………………………………6 Cleaning Pattern …………………………………………………..7 Cleaning Modes ……………………………………………………8 Cleaning System …………………………………………………..9 Cleaning Bins ……………………………………………………..10 Battery Storage and Charging ……………………….. 11-12 Optional Accessories …………….
Краткое содержание страницы № 6
iRobot Roomba Anatomy Infrared Sensor Faceplate Bin Release Button Power Supply Socket Bin Buttons and Lights (Models 500 — 549) (Models 550 and above) Scheduling SPOT Button SPOT Button Troubleshooting Interface Troubleshooting Light Light ™ ™ Dirt Detect Dirt Detect CLEAN/Power CLEAN/Power SPOT/DOCK Button DOCK Button (models 550-599) Button Button (varies by model) MAX Button (models 600+) Bottom View Brush Bearings Cliff Sensor Contact Points Flexible Openings for Home Base Brus
Краткое содержание страницы № 7
Cleaning Pattern Roomba is a robot that cleans floors differently than the way most people clean their floors. Roomba uses its robot intelligence to efficiently clean the whole floor, under and around furniture and along walls. Roomba calculates the optimal cleaning path as it cleans and determines when to use its various cleaning behaviors: Spiraling: Roomba uses a spiral motion to clean a concentrated area. Wall Following: Roomba uses this technique to clean the full perimeter of t
Краткое содержание страницы № 8
Cleaning Modes Roomba will clean based on the cleaning mode you select. Roomba has three cleaning modes. Clean Mode (all models) Roomba automatically calculates the room size and adjusts its cleaning time appropriately. Spot Mode (all models) Roomba will spiral approximately three feet in diameter and then spiral back to where it started, intensely cleaning a localized area. Scheduled Cleaning Mode (Models 550 and above) When a future cleaning time is programmed, Roomba enters Schedule
Краткое содержание страницы № 9
Cleaning System Roomba features a patented three-stage cleaning system. Filter Two counter- Powerful vacuum picks up the Side brush 1 2 3 rotating brushes remaining fine particles, dirt, and sweeps along scoop up dirt, hair. The filter traps dust and edge of walls and hair, and debris small particles. into corners. into the bin. Floor Surfaces Roomba works on wood, carpet, tile, vinyl, and linoleum, and adjusts automatically to different floor types. Roomba automatica
Краткое содержание страницы № 10
Cleaning Bins Roomba is compatible with three interchangeable cleaning bins. TM Aero-Vac or Original Vacuum Cleaning Bin The Aero-Vac or Original vacuum cleaning bin should be used for everyday cleaning. The dual action, counter-rotating brushes pick up debris, while the vacuum sucks up the dirt and dust. High-Capacity Sweeper Bin (optional accessory for all models) The high-capacity sweeper bin can hold more debris than the vacuum cleaning bin. Use this bin when cleaning larger-than-usua
Краткое содержание страницы № 11
Battery Storage and Charging Roomba is powered by a rechargeable battery. Roomba’s battery can last for hundreds of cleaning cycles if cared for properly. Battery Life To extend the battery life, iRobot recommends always storing Roomba plugged in. For more details on how to maintain Roomba’s battery life, visit www.irobot.com/support. TIP: Recharge Roomba as soon as possible. Waiting several days to recharge Roomba can damage the battery. TIP: For storage of f the power supply, remove
Краткое содержание страницы № 12
Charging Roomba Charge Roomba in one of two ways: Or Using the Home Base Using the Power Supply Only TIP: When Roomba is on the Home Base, always make sur e that the Home Base power light is on. Charging Lights Roomba uses the CLEAN button light to indicate that it is charging. Use this chart to determine the status of the battery. CLEAN button light Battery status Solid red Battery empty Amber pulse Charging Solid green Fully charged Quick amber pulse 16-hour refresh charge CLEAN/Power Bu
Краткое содержание страницы № 13
® Virtual Wall (optional accessory for selected models) Virtual Walls create an invisible barrier that Roomba will not cross. This invisible barrier can be used to confine Roomba to a particular room or area, and prevent it from getting too close to electrical or computer cords, delicate objects on the floor, etc. The Virtual Walls can be set to block an opening up to seven feet long. Note that the width of the Virtual Wall’s beam also increases as its length increases, creating a c
Краткое содержание страницы № 14
® Virtual Wall (continued) Compact Manual Virtual Wall A Manual Virtual Wall must be turned on by hand at the beginning of the cleaning cycle to activate the barrier. A Manual Virtual Wall and its power light will shut off after 135 minutes. When battery levels are low, the Virtual Wall power light will blink slowly to indicate that it needs new batteries. TIP: Point the arrows on top of the Virtual Wall towards the opening you would like to block. Compact Auto Virtual Wall When an A
Краткое содержание страницы № 15
0-3” 0-1.5m 4-7” 1.5-3m 3m+ 8”+ Lighthouse Virtual Wall Distance ® ™ Virtual Wall Lighthouses (optional accessory for selected models) Virtual Wall Lighthouses turn on and off automatically as Roomba is turned on and off. When they are on, a light illuminates on the top of the Virtual Wall Lighthouse. A Virtual Wall Lighthouse can be used in two modes, either in Lighthouse mode or Virtual Wall mode, set by the Mode Selector. Power Light Mode Selector Two “C” Alkaline Range Selector Bat
Краткое содержание страницы № 16
® ™ Virtual Wall Lighthouses (continued) In Lighthouse mode, place the Virtual Wall Lighthouse in the doorway between two rooms with the iRobot logo facing forward. Place Lighthouse in the center of the door frame Virtual Wall Mode In Virtual Wall mode, the Lighthouse creates an invisible barrier that Roomba will not cross. It automatically turns off when Roomba turns off. In Virtual Wall mode, place the Virtual Wall Lighthouse in the center of the door frame. It blocks an opening up t
Краткое содержание страницы № 17
® Home Base (optional accessory for selected models) Always keep the Home base plugged in. Original Home Base When Roomba is on the Home Base, the power and docked lights are green to indicate Roomba is charging. Compact Home Base When the Home Base is plugged in, the power light blinks to indicate that it is connected to the power source. When Roomba connects to the Home Base, the power light is solid to indicate that Roomba successfully connected to the Home Base. When Roomba is cha
Краткое содержание страницы № 18
Wireless Command Center (optional accessory for selected models) The Wireless Command Center lets you conveniently control Roomba’s functions. You can use it to turn Roomba on and off, schedule Roomba to clean, and steer Roomba around your room. Troubleshooting Light … Battery . . . Indicator Roomba spirals approximately three feet in diameter and then spirals SPOT back to where it started, intensely cleaning a local area. CLEAN Roomba automatically calculates the room size and adj
Краткое содержание страницы № 19
Remote Control (optional accessory for selected models) Directional SPOT Buttons Button . . . Button CLEAN/Power Button The Remote Control lets you conveniently control Roomba’s functions. You can use it to turn Roomba on and off and steer it around your room without bending down. It also gives you remote access to these commands: SPOT Roomba spirals approximately three feet in diameter and then spirals back to where it started, intensely cleaning a local area. Roomba automatical
Краткое содержание страницы № 20
Scheduling Roomba (Models 550 and above) Setting the Time You must set the time before scheduling Roomba to clean. 1 Press and hold CLOCK. While holding CLOCK, use the DAY, HOUR, 2 and MINUTE buttons to set the correct time. 3 Release CLOCK. Roomba will beep to indicate that the time has been set. Setting a Schedule You can schedule Roomba to clean once per day, up to seven times per week. You must set the time before setting a schedule. To set a schedule: 1 Press and hold SCHEDUL

PDF инструкция · 19 страниц(ы) английский
инструкцияiRobot Roomba 561

500/600 Series Owner’s Manual
Посмотреть инструкция для iRobot Roomba 561 бесплатно. Руководство относится к категории пылесосы, 1 человек(а) дали ему среднюю оценку 9.8. Руководство доступно на следующих языках: английский. У вас есть вопрос о iRobot Roomba 561 или вам нужна помощь? Задайте свой вопрос здесь
Главная
Не можете найти ответ на свой вопрос в руководстве? Вы можете найти ответ на свой вопрос ниже, в разделе часто задаваемых вопросов о iRobot Roomba 561.
Мой пылесос iRobot не всасывает как раньше. В чем может быть проблема?
Как часто следует проверять фильтр?
Что делать при появлении от пылесоса неприятного запаха?
С какой частотой необходимо пылесосить помещения?
Инструкция iRobot Roomba 561 доступно в русский?
Не нашли свой вопрос? Задайте свой вопрос здесь
Если у вас отсутствует техническая возможность для скачивания Инструкция по эксплуатации для iRobot Roomba 561
вы можете прочесть документ прямо на нашем сайте или
Скачать iRobot Roomba 561 Инструкция по эксплуатации

- 1
- 2
- 3
- 4
- 5
- 6
- 7
- 8
- 9
- 10
- 11
- 12
- 13
- 14
- 15
- 16
- 17
- 18
- 19
- 20
- 21
- 22
- 23
- 24
- 25
- 26
- 27
- 28
- 29
- 30
- 31
- 32
- 33
- 34
- 35
- 36
- 37
