- Manuals
- Brands
- Janome Manuals
- Sewing Machine
- 5812
- Instruction manual
-
Contents
-
Table of Contents
-
Troubleshooting
-
Bookmarks
Quick Links
Janome 5812 Instruction Manual
Janome 5812
Instruction Manual
www.toews.com
5812 Owners Manual/ User Guide
Related Manuals for Janome 5812
Summary of Contents for Janome 5812
-
Page 1
Janome 5812 Instruction Manual Janome 5812 Instruction Manual www.toews.com 5812 Owners Manual/ User Guide… -
Page 2
The design and specifications are subject to change without a prior notice. Please note that on disposal, this product must be safely recycled in accordance with relevant National legislation relating to electrical/electronic products. If in doubt please contact your retailer for guidance. (European Union only) www.toews.com 5812 Owners Manual/ User Guide… -
Page 3: Table Of Contents
4-step Buttonhole …………21 Corded Buttonhole …………22 SECTION VI. DECORATIVE STITCHES Satin Stitching …………..23 Monogramming …………… 23 Applique …………….24 Pin Tucking …………..24 Lace Work …………… 25 Shell Stitch …………..25 www.toews.com 5812 Owners Manual/ User Guide…
-
Page 4: Section I. Names Of Parts
@3 Carrying handle @4 Handwheel @5 Power switch @6 Machine socket @7 Drop feed dogs lever @8 Free-arm @9 Presser foot lifter NOTE: Sewing machine design and specifications are subject to change without prior notice. www.toews.com 5812 Owners Manual/ User Guide…
-
Page 5: Standard Accessories
Seam ripper t t t t t r r r r r y y y y y o Screwdriver o o o o o u u u u u i i i i i www.toews.com 5812 Owners Manual/ User Guide…
-
Page 6: Section Ii. Getting Ready To Sew Connecting Machine To Power Supply
Do not modify the plug in any way. The foot controller Model YC-482J or TJC-150 is used with this sewing machine (USA market only). www.toews.com 5812 Owners Manual/ User Guide…
-
Page 7: Presser Foot Lifter
Slot r Accessory storage Free-arm Sewing Free-arm sewing is used for stitching sleeves, waistbands, pant legs or any other tubular garments. It is also useful for darning socks or mending knees or elbows. www.toews.com 5812 Owners Manual/ User Guide…
-
Page 8: Changing The Needle
Match the hole in the foot holder with the threaded hole in the presser bar. Fit the setscrew into the hole. Tighten the screw by turning it clockwise with a screwdriver. q Setscrew w Foot holder e Hole r Threaded hole www.toews.com 5812 Owners Manual/ User Guide…
-
Page 9: Selecting Needle And Fabric
16 (100) Double Faced Wool, Heavy Coating, Fake Fur, Heavy Drapery Fabrics 16 (100) Leather, Suede Wedge Point Leather 18 (110) Universal Canvas, Duck, Upholstery Fabrics 11 (75) Topstitching for Special Finish Topstitching 14 (90) www.toews.com 5812 Owners Manual/ User Guide…
-
Page 10: Bobbin Winding
Push the hook cover plate release button q to the right and remove the cover plate. q Hook cover plate release button w Hook cover plate x Lift out the bobbin. e Bobbin www.toews.com 5812 Owners Manual/ User Guide…
-
Page 11: Winding The Bobbin
Remove the bobbin from the bobbin winder spindle. NOTE: The machine will not sew until the spindle has been returned to the left. www.toews.com 5812 Owners Manual/ User Guide…
-
Page 12: Inserting The Bobbin
Pull out about 6˝ (15.0 cm) of thread. v Attach the hook cover plate. Check the threading by referring to the diagram r shown on the hook cover plate. 1/8 3/8 5/8 www.toews.com 5812 Owners Manual/ User Guide…
-
Page 13: Threading The Machine
Turn the handwheel slowly toward you one complete turn. Bring the bobbin thread up by pulling the needle thread as illustrated. q Needle thread w Bobbin thread c Pull 4˝ (10 cm) of both threads back and under the presser foot. www.toews.com 5812 Owners Manual/ User Guide…
-
Page 14: Adjust The Needle Thread Tension For A Straight Stitch
Wrong side (Bottom side) of fabric The needle thread shows through on the wrong side of the fabric, and the stitch feels bumpy. Turn the dial to a higher tension setting number to tighten the needle thread tension. www.toews.com 5812 Owners Manual/ User Guide…
-
Page 15: Adjust The Needle Thread Tension For A Zigzag Stitch
• Tension is too loose q Right side (Top side) of fabric w Wrong side (Bottom side) of fabric The corner of each zigzag pulls together on the wrong side of the fabric. www.toews.com 5812 Owners Manual/ User Guide…
-
Page 16: Stitch Pattern Selector Dial
To raise the feed dogs, push the lever in the direction of the arrow, as illustrated, and turn the handwheel toward you. Feed dogs must be up for normal sewing. www.toews.com 5812 Owners Manual/ User Guide…
-
Page 17: Section Iii. Straight Stitch Sewing Straight Stitch
2. Lower the needle by turning the hand wheel counterclockwise. 3. Raise the presser foot and turn the fabric counterclockwise 90°. 4. Lower the presser foot, and begin stitching in the new www.toews.com 5812 Owners Manual/ User Guide direction.
-
Page 18: Zipper Sewing
Sew in reverse a few stitches to lock. y, set needle Set the stitch pattern selector dial to thread tension to 0, and sew basting stitch t the entire length of the zipper sewing. www.toews.com 5812 Owners Manual/ User Guide…
-
Page 19
At end of seam, sew in reverse a few stitches to lock. Once both sides of zipper are sewn, use seam ripper to open the basting stitch. www.toews.com 5812 Owners Manual/ User Guide… -
Page 20: Section Iv. Zigzag Stitch Sewing Basic Zigzag
Start overcasting with the rightmost needle position about 1/8˝ (0.3 cm) from the row edge of a seam. The right tip of the stitch should just clear the seam edge. www.toews.com 5812 Owners Manual/ User Guide…
-
Page 21: Bar Tacking
4. Press the foot control and sew about 10 stitches. 5. Sew the other row of holes (if applicable) using the steps above. Trim excess threads from both sides of the fabric. www.toews.com 5812 Owners Manual/ User Guide…
-
Page 22: Section V. Utility Stitches
Place your fabric to allow a 5/8˝ (1.5 cm) seam. Trim excess close to stitching. Be careful not to cut the stitches. • Mending Position the tear under the needle so that the stitch catches both sides. www.toews.com 5812 Owners Manual/ User Guide…
-
Page 23: 4-Step Buttonhole
Place a piece of paper under the fabric when you make a buttonhole on the edge of a thick fabric. This prevents the fabric edge from being trapped into the feed dog window. q Piece of paper www.toews.com 5812 Owners Manual/ User Guide…
-
Page 24: Corded Buttonhole
The sewing sequence is the same as the 4-step buttonhole. c Pull the left end of the filler cord to tighten it and cut the excess tails. To cut the buttonhole opening, refer to the instructions on page 54. www.toews.com 5812 Owners Manual/ User Guide…
-
Page 25: Section Vi. Decorative Stitches Satin Stitching
Zigzag foot: A Attach a piece of stabilizer on the wrong side (Bottom side) of the fabric. Draw letters on the fabric with tailor’s chalk. Form each pattern with satin stitch, adjusting stitch width. www.toews.com 5812 Owners Manual/ User Guide…
-
Page 26: Applique
Lower the foot and turn the screw to align the guide on the foot with the folded edge. Sew slowly while guiding the folded edge along the guide. Open the fabric and iron press the tucks. q Screw w Guide e Folded edge www.toews.com 5812 Owners Manual/ User Guide…
-
Page 27: Lace Work
If you sew rows of shell stitches, space the rows at least 5/8˝ (1.5 cm) apart. You can also sew shell stitches on knits or soft silky woven fabrics, in any direction. www.toews.com 5812 Owners Manual/ User Guide…
-
Page 28: Section Vii. Stretch Stitches Straight Stretch
Needle thread tension: 2 – 5 r Presser foot: Zigzag foot: A Sew on stretch fabrics in any area that you might use a zigzag stitch. This stitch is used as a decorative topstitch as well. www.toews.com 5812 Owners Manual/ User Guide…
-
Page 29: Overcast Stretch Stitching
It is also great for sewing spandex swim wear. Place the fabric under the presser foot [A] so that the stitches are made over the raw edge. www.toews.com 5812 Owners Manual/ User Guide…
-
Page 30: Smocking
(bottom threads) to distribute the gathers evenly and secure the threads. Sew the smocking stitches between the gathered rows. Cut the knots and remove the straight stitches by pulling the bobbin threads out. www.toews.com 5812 Owners Manual/ User Guide…
-
Page 31: Section Viii. Care Of Your Machine
Clean the feed dogs and hook area with a brush. e Feed dogs b Wipe the hook race with a soft, dry cloth. r Hook race NOTE: You may also use a vacuum cleaner. www.toews.com 5812 Owners Manual/ User Guide…
-
Page 32: Replacing The Bobbin Holder
Remove the needle plate in order to remove the tangled threads. CAUTION: Do not apply oil to the bobbin holder or hook area, as oil may degrade the bobbin holder. www.toews.com 5812 Owners Manual/ User Guide…
-
Page 33: Troubleshooting
Page 5 Patterns are distorted. 1. The stitch is not balanced. Page 14 1. The feed dog is packed with lint. Page 29 Noisy operation 2. Lint has collected in the bobbin holder. Page 29 www.toews.com 5812 Owners Manual/ User Guide…
-
Page 34
Janome 5812 Instruction Manual www.toews.com 5812 Owners Manual/ User Guide… -
Page 35
Janome 5812 Instruction Manual www.toews.com 5812 Owners Manual/ User Guide… -
Page 36
Janome 5812 Instruction Manual 508-800-122 (EN) www.toews.com 5812 Owners Manual/ User Guide…
На чтение 3 мин. Опубликовано 15.12.2019
В давние времена на пошив одного платья уходили месяцы работы. Несколько мастериц вручную сшивали все элементы будущего наряда, а затем кропотливо вышивали на нем различные узоры. Готовое изделие женщины бережно носили практически всю жизнь.

В современном мире любую одежду можно купить в обычном магазине. Тысячи фабрик ежегодно выпускают свою продукцию, ориентируясь на модные тенденции текущего сезона. Но не всегда из предложенного изобилия вещей можно выбрать именно ту модель, которая идеально сочетает в себе стиль, качество и размер. В этом случае можно воспользоваться дорогостоящими услугами ателье по пошиву одежды или приобрести хорошую швейную машину в швейном магазине Lapka и стать самому себе модельером.
Содержание
- Janome 5812
- Настройка режима работы
- Достоинства
- Недостатки
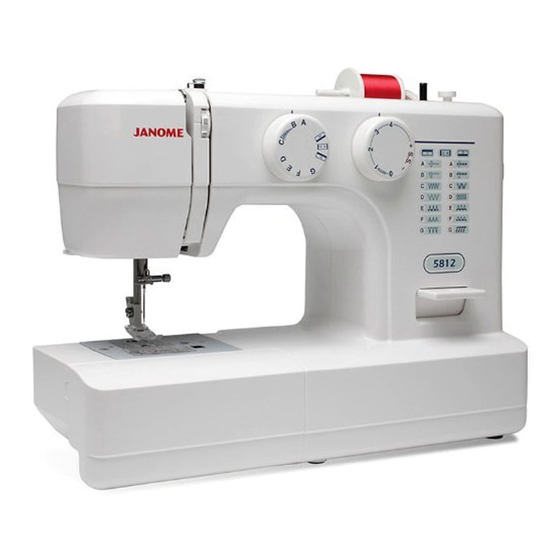
Janome 5812
Швейная машина Janome 5812 made in Taiwan заметно выделяется среди подобных моделей по цене и набору технических возможностей. При небольшой стоимости она наделена следующими основными функциями:
- 12 вариантов строчки;
- вшивание молнии;
- обметывание петель для пуговиц;
- потайной шов;
- обработка всех типов тканей, в т. ч. эластичных материалов.
Как приятное дополнение к основному арсеналу в Janome 5812 предусмотрены такие «мелочи», как:
- подсветка над механизмом иглы;
- реверс;
- «обрезатель» нити;
- устройство для намотки нити на шпульку;
- съемный рукав.
Управление машинкой осуществляется через ножную педаль. Во время перерыва в процессе шитья Janome 5812 можно отключить от электрической сети, нажав на кнопку, расположенную на торце швейной машины.
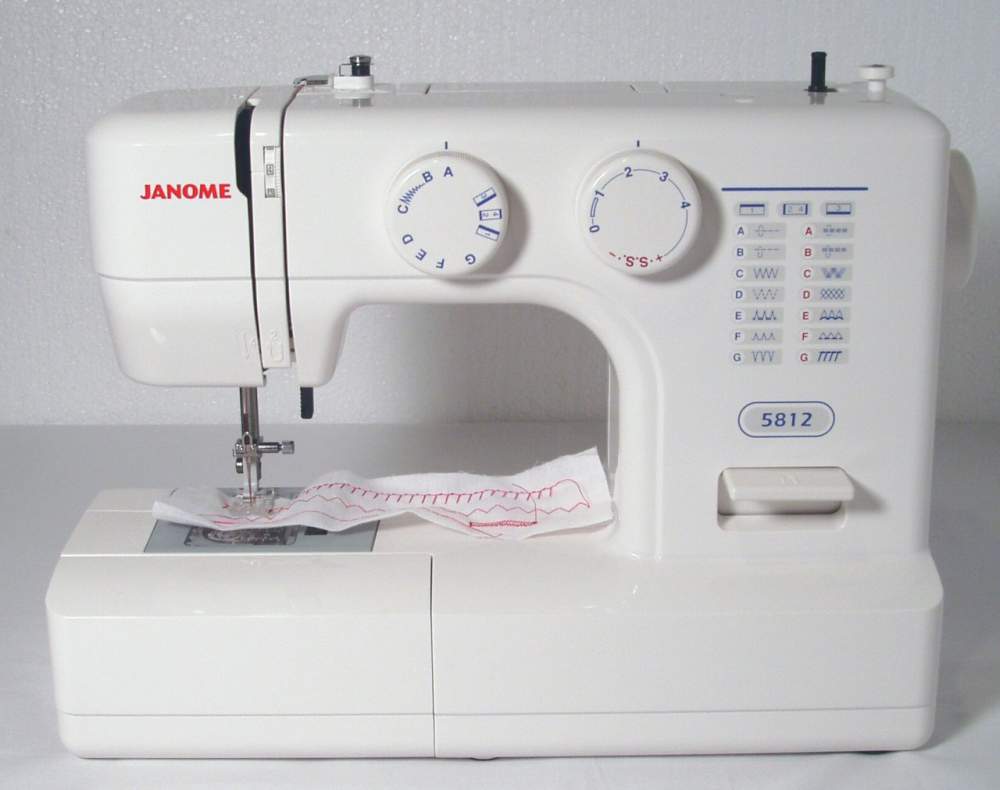
Настройка режима работы
Настроить необходимый режим работы Janome 5812 очень просто. На передней панели швейной машины расположены два небольших прямоугольных окошка, под каждым из которых вмонтирован свой рычажок. При повороте первого ролика на вышерасположенном табло появляется знак, соответствующий виду строчки. При вращении второго — цифра, отвечающая за размер стежка. Для удобства пользователей на корпусе Janome 5812 нанесена схема соответствия типа строчки и цифры, которую надо выставить в таблоидном окошке.
После установки режима операции остается только проверить на соответствие друг другу ткани и номера используемой иглы, и заправить нить. В инструкции к Janome 5812 представлены подробные таблицы, где наглядно показаны правильные комбинации сочетаний материала, размера иглы и номера нитки.
Достоинства
Помимо вышеуказанных технических возможностей Janome 5812 в список достоинств этой швейной машины можно добавить такие параметры, как:
- практически бесшумный мотор;
- небольшой вес;
- устойчивая станина;
- плавная регулировка ножной педали.
Также приятными нюансами при выборе этой модели можно считать следующие факторы:
- расположение шпульки в непосредственной близости от механизма подъема и опускания иглы, что исключает необходимость снятия рукава перед заправкой нижней нити;
- наличие функции зигзагообразной строчки, позволяющей обметывать края материала вместо оверлока;
- присутствие режима обработки трикотажа, что весьма актуально при пошиве детских вещей;
- вместительное пространство внутри съемного рукава для хранения швейных приспособлений.
Недостатки
У Janome 5812 есть небольшие недостатки. Но их можно отнести просто к особенностям конструкции:
- отсутствие механического нитевдевателя;
- пластмассовая прижимная лапка.
Janome 5812 — это идеальное сочетание цены и качества. Невысокая стоимость делает ее доступной для любой категории покупателей. А качество этой швейной машины позволяет с легкостью пошить одежду из любого материала.
Посмотреть инструкция для Janome HF5812 бесплатно. Руководство относится к категории швейные машины, 1 человек(а) дали ему среднюю оценку 7.7. Руководство доступно на следующих языках: английский. У вас есть вопрос о Janome HF5812 или вам нужна помощь? Задайте свой вопрос здесь
Не можете найти ответ на свой вопрос в руководстве? Вы можете найти ответ на свой вопрос ниже, в разделе часто задаваемых вопросов о Janome HF5812.
Какой размер иглы лучше всего использовать?
Какой срок службы у швейной иглы?
Что может повредить иглу при шитье?
Инструкция Janome HF5812 доступно в русский?
Не нашли свой вопрос? Задайте свой вопрос здесь
-
Janome HF5812 — page 1
Instruction Book …
-
Janome HF5812 — page 2
IMPORT ANT SAFETY INSTRUCTIONS This appliance is not intended for use by persons (including children) with reduced physical, sensory or mental capabilities, or lack of experience and knowledge, unless they have been given supervision or instruction concerning use of the appliance by a person responsible for their safety . Children should be supervi …
-
Janome HF5812 — page 3
1 T ABLE OF CONTENTS SECTION I. NAMES OF P ARTS Names of Parts ……………………………………………………….. 2 Standard Accessories ………………………………………………. 3 SECTION II. GETTING READY T O SEW Connecting Machine to Power Supply ………………………… 4 Before Using Y our Sewing Machine …. …
-
Janome HF5812 — page 4
2 Names of Parts q Bobbin winder stopper w Bobbin winder spindle e Spool pin (page
 r Bobbin winding tension disc t Thread guide y Thread take-up lever u Face plate i Thread cutter o Needle plate !0 Extension table (Accessory storage) !1 Hook cover plate !2 Hook cover plate release button !3 Thread tension dial !4 Reverse stitch control !5 Stitch …
 -
Janome HF5812 — page 5
3 Standard Accessories w w w w w q q q q q e e e e e r r r r r t t t t t y y y y y u u u u u i i i i i o o o o o q Bobbins w Needles e Blind stitch foot: G r Zipper foot: E t Sliding buttonhole foot y Spool holder (Lrage) u Spool holder (small) i Seam ripper o Screwdriver …
-
Janome HF5812 — page 6
4 For Y our Safety * While in operation, always keep your eyes on the sewing area. Do not touch any moving parts such as the thread take-up lever , handwheel or needle. * Always turn of f the power switch and unplug from the power supply: — When leaving the machine unattended. — When attaching or removing any parts. — When cleaning the machine. * D …
-
Janome HF5812 — page 7
5 Extension T able The extension table provides an extended sewing area and can be easily removed for free arm sewing. The accessories can be stored in the table. • Detaching the table Pull the table away from the machine, as illustrated. • Attaching the table Push the extension table, inserting the tab into the slot until the table snaps into …
-
Janome HF5812 — page 8
6 Changing the Needle q Needle clamp screw w Needle clamp e Flat side r Gap z Turn of f the power switch. Raise the needle to its highest position by turning the handwheel counterclockwise, toward you, and lowering the presser foot. Loosen the needle clamp screw q by turning it counterclockwise. Remove the needle from the needle clamp w . x Insert …
-
Janome HF5812 — page 9
7 Selecting Needle and Fabric For general sewing, use needle sizes 1 1 or 14. A fine thread and needle should be used for sewing lightweight fabrics, so the fabric will not be marred. Heavy fabrics require a needle large enough to pierce the fabric without fraying the needle thread. Use the blue needle (optional) to eliminate skipped stitches when …
-
Janome HF5812 — page 10
8 Bobbin Winding Setting the spool pin Insert the spool pin into the hole as shown. q Spool pin w Hole Setting the spool Place a spool of thread on the spool pin with the thread coming off the back of spool as illustrated. A : Press the large spool holder q firmly against the spool of thread. q Large spool holder B : For a small spool, use the smal …
-
Janome HF5812 — page 11
9 n Start the machine again. When the bobbin is fully wound, it will stop automatically . Stop the machine and return the bobbin winder spindle to its original position by moving it to the left, and cut the thread with a pair of scissors. Remove the bobbin from the bobbin winder spindle. Winding the bobbin z Hold the thread with both hands and pass …
-
Janome HF5812 — page 12
10 x Guide the thread into notch w on the front side of the bobbin holder . Draw the thread to the left, sliding it between the tension spring blades. c Continue to draw the thread lightly until the thread slips into notch e . Pull out about 6 ˝ (15.0 cm) of thread. v Attach the hook cover plate. Check the threading by referring to the diagram r s …
-
Janome HF5812 — page 13
11 Threading the Machine * Raise the thread take-up lever to its highest position by turning the handwheel counterclockwise. * Raise the presser foot lifter . * Place a spool on the spool pin, with the thread coming off the back of spool (refer to page 18). z Draw the end of the thread around the upper thread guide. x While holding the thread near …
-
Janome HF5812 — page 14
12 Adjust the Needle Thread T ension for a Straight Stitch • Correct tension q Needle thread (T op thread) w Bobbin thread (Bottom thread) e T o loosen r T o tighten The ideal straight stitch has threads locked between two layers of fabric, as illustrated (magnified to show detail). If you look at the top and bottom of a seam, look to see that th …
-
Janome HF5812 — page 15
13 Adjust the Needle Thread T ension for a Zigzag Stitch For an ideal zigzag stitch, the bobbin thread does not show on the right side (T op side) of the fabric, and the needle thread shows slightly on the wrong side (Bottom side) of the fabric. See the illustrations for the correct appearance. T o match this appearance, adjust the needle tension. …
-
Janome HF5812 — page 16
14 Stitch Pattern Selector Dial Raise the needle and presser foot. T urn the pattern selec- tor dial to set the symbol corresponding to the desired pattern at the setting mark. q Setting mark Stitch Length Control Dial T urn the stitch length control dial to set the desired stitch length at the setting mark. The higher the number , the longer the s …
-
Janome HF5812 — page 17
15 SECTION III. STRAIGHT STITCH SEWING Straight Stitch Machine setting q Stitch selector: A or B w Stitch length: 1.5 – 4 e Needle thread tension: 2 – 6 r Presser foot: Zigzag foot: A • Starting to sew Raise the presser foot and position the fabric next to a seam guide line on the needle plate (5/8 ˝ (1.6 cm) is most common). Lower the needl …
-
Janome HF5812 — page 18
16 Zipper Sewing Machine setting q Stitch selector: w Needle thread tension: 2 – 6 e Presser foot: Zipper foot: E • T o snap on the zipper foot q Slit w Pin e T o sew left side r T o sew right side Fit the pin on the zipper foot into the slit on the foot holder . * T o sew the left side of the zipper , attach zipper foot on the right-hand side …
-
Janome HF5812 — page 19
17 • T o sew q 1/8 ˝ (0.4cm) fabric margin w Zipper teeth e Zipper tape z Attach zipper foot on right-side of pin. Fold back the upper layer seam allowance. Fold back the lower layer seam allowance to leave a 1/8″ (0.4 cm) margin of fabric q . Place zipper teeth next to margin edge and pin margin to zipper tape. Align zipper foot with margi …
-
Janome HF5812 — page 20
18 SECTION IV . ZIGZAG STITCH SEWING The zigzag stitch is one of the most common and versatile stitches. It can be a utility stitch for button sewing, buttonhole making, hemming, overcasting, mending and darning. It can also be used to decorate with trims, appliques and cut work or as a decorative stitch. Basic Zigzag Machine setting q Stitch selec …
-
Janome HF5812 — page 21
19 Button Sewing Machine setting q Stitch selector: B – C w Stitch length: Any e Needle thread tension: 3 – 7 r Presser foot: Zigzag foot A t Feed dog: Dropped 1. Drop the feed dogs. Place the button below the zigzag foot, making sure to align the holes with the horizontal slot in the foot. Lower the presser foot to hold the button in place. 2. …
-
Janome HF5812 — page 22
20 SECTION V . UTILITY STITCHES Blind Hem Stitch Machine setting q Stitch selector: E or F w Stitch length: 2 – 3 e Needle thread tension: 2 – 6 r Presser foot: Blind hem stitch foot: G • T o sew t When the needle comes to the left y When the needle comes to the right u Guide i Folded edge There is a sliding guide screw on the blind hem foot …
-
Janome HF5812 — page 23
21 • T o sew z Set the pattern selector dial at “ ”. Carefully mark buttonhole length on fabric. Place the fabric under the foot with the buttonhole marking running toward you. Draw both the needle and bobbin thread to the left. Move the slider toward you so that the top mark w on the lider meets the start mark q . q Start mark w T op mark e …
-
Janome HF5812 — page 24
22 Corded Buttonhole Machine setting q Stitch selector: w Stitch length: e Needle thread tension: 1 – 5 r Presser foot: Sliding buttonhole foot z With the buttonhole foot raised, hook the filler cord on the spur at the back of the foot. Bring the ends toward you under the foot, clearing the front end. Hook the filler cord into the forks on the fr …
-
Janome HF5812 — page 25
23 Satin Stitching Machine setting q Stitch selector: C w Stitch length: 0.5 – 1 e Needle thread tension: 1 – 4 r Presser foot : Zigzag foot: A The satin stitch is often used to decorate and to overcast the raw edge on blankets, linens, tablecloths, napkins, etc. It is also attractive in applique. Once your machine is set up to stitch, test sti …
-
Janome HF5812 — page 26
24 Baste applique pieces on the fabric, or fuse the applique pieces with iron-on fabric joiner . Stitch around the applique making sure the needle falls along the raw edge of the applique. Applique Machine setting q Stitch selector: B – C w Stitch length: 0.5 – 1 e Needle thread tension: 1 – 4 r Presser foot: Zigzag foot: A Pin Tucking Machin …
-
Janome HF5812 — page 27
25 Lace adds a fanciful, feminine touch to blouses and lingerie. T able linens and pillows become more elegant when trimmed with lace. Fold the raw edge of the fabric at least 5/8 ˝ (1.5 cm). Place lace underneath and topstitch with blind hem stitch. T rim excess fabric close to stitching. Lace Work Machine setting q Stitch selector: E w Stitch le …
-
Janome HF5812 — page 28
26 Rick-rack Stretch Machine setting q Stitch selector: C w Stitch length: S.S. e Needle thread tension: 2 – 5 r Presser foot: Zigzag foot: A SECTION VII. STRETCH STITCHES Use it to reinforce areas such as crotch and armhole seams as well as to eliminate puckering on knits and stretch fabrics. Also, use when constructing items requir- ing extra s …
-
Janome HF5812 — page 29
27 Serging Machine setting q Stitch selector: G w Stitch length: S.S. e Needle thread tension: 3 – 7 r Presser foot: Zigzag foot A This stitch is ideal for 1/4 ˝ (0.6 cm) seams on knits or on medium to heavy weight woven fabrics where you want a narrow seam. It is also great for sewing spandex swim wear . Place the fabric under the presser foot …
-
Janome HF5812 — page 30
28 Smocking Machine setting q Stitch selector: D w Stitch length: S.S. e Needle thread tension: 2 – 6 r Presser foot: Zigzag foot: A • T o sew q Wrong side (Bottom side) of fabric w Knotted edge Smocking is a delicate decorative treatment used on children’s clothes or women’ s blouses. Choose a soft and lightweight fabric such as batiste, g …
-
Janome HF5812 — page 31
29 SECTION VII. CARE OF YOUR MACHINE Replacing the Light Bulb NOTE: * Unplug the machine. * Do not dismantle the machine other than as explained in this section. * Do not store the machine in a high-humidity area, near a heat radiator , or in direct sunlight. * Clean the outside of the machine with a soft cloth and mild soap. Remove the screw. Remo …
-
Janome HF5812 — page 32
30 Replacing the Bobbin Holder z Insert the bobbin holder into the hook race. x Make sure the knob of the bobbin holder fits next to the stopper on the race. q Knob w Stopper c Replace the bobbin. Attach the needle plate. Tighten the screw firmly with the screwdriver. e Screw CAUTION: Do not pull the fabric or turn the handwheel when threads or fab …
-
Janome HF5812 — page 33
31 Condition Cause Reference The needle breaks. Skipped stitches Seam puckering The cloth is not fed smoothly . The needle thread breaks. The bobbin thread breaks. 1. The needle thread is not threaded properly . 2. The needle thread tension is too tight. 3. The needle is bent or blunt. 4. The needle is incorrectly inserted. 5. The needle thread and …
-
Janome HF5812 — page 34
…
-
Janome HF5812 — page 35
…
-
Janome HF5812 — page 36
508-800-122 (EN) …
 r Bobbin winding tension disc t Thread guide y Thread take-up lever u Face plate i Thread cutter o Needle plate !0 Extension table (Accessory storage) !1 Hook cover plate !2 Hook cover plate release button !3 Thread tension dial !4 Reverse stitch control !5 Stitch …