Посмотреть инструкция для Janome Memory Craft 3000 бесплатно. Руководство относится к категории швейные машины, 1 человек(а) дали ему среднюю оценку 8.5. Руководство доступно на следующих языках: -. У вас есть вопрос о Janome Memory Craft 3000 или вам нужна помощь? Задайте свой вопрос здесь
Главная
Не можете найти ответ на свой вопрос в руководстве? Вы можете найти ответ на свой вопрос ниже, в разделе часто задаваемых вопросов о Janome Memory Craft 3000.
Какой размер иглы лучше всего использовать?
Какой срок службы у швейной иглы?
Что может повредить иглу при шитье?
Инструкция Janome Memory Craft 3000 доступно в русский?
Не нашли свой вопрос? Задайте свой вопрос здесь
- Manuals
- Brands
- Janome Manuals
- Sewing Machine
- Memory Craft 3000
- Service manual
-
Contents
-
Table of Contents
-
Bookmarks
Quick Links
********* SERVICE MANUAL **********
Related Manuals for Janome Memory Craft 3000
Summary of Contents for Janome Memory Craft 3000
-
Page 1
********* SERVICE MANUAL **********… -
Page 2: Table Of Contents
CONTENTS Top cover & face plate attaching and removing ………………1 Base & bed cover attaching and removing ……………….. 2 Belt cover attaching and removing ………………….3 Front panel attaching and removing …………………. 4 To adjust the presser bar height ………………….5 To adjust the needle drop ……………………
-
Page 3: Top Cover & Face Plate Attaching And Removing
Top cover & face plate attaching and removing TOP COVER (Y) (TO REMOVE) 1. Remove 3 screws (A & B) and top cover. (TO ATTACH) 2. Attached the top cover with 3 screws (A and B). FACEPLATE (Z) (TO REMOVE) 3.
-
Page 4: Base & Bed Cover Attaching And Removing
Base & bed cover attaching and removing BASE (Y) (TO REMOVE) 1. Remove 6 screws (A) and base. (TO ATTACH) 2. Attach the base with 6 screws (A). BED COVER (Z) (TO REMOVE) 3. Move the drop lever to the left, then remove 2 screws (B). 4.
-
Page 5: Belt Cover Attaching And Removing
Belt cover attaching and removing (TO REMOVE) 1. Remove 2 screws (A) and belt cover (Y), then pull out. (TO ATTACH) 2. Attach the belt cover (Y) with 2 screws (A).
-
Page 6: Front Panel Attaching And Removing
Front panel attaching and removing (TO REMOVE) 1. Remove the top cover, belt cover and bed cover (See pages 1, 2 and 3). 2. Remove screw A and loose screws (B, C, D, E, F and G). 3. Pull out connectors (H) and remove the front panel. (TO ATTACH) 4.
-
Page 7: To Adjust The Presser Bar Height
To adjust the presser bar height The standard presser bar height is 6.0 mm between the bottom surface of the foot (A) and needle plate(B) when the presser bar (C) lifter is lifted. 1. Open the face plate. 2. Raise the presser foot, loosen the presser bar bracket screw (D) and adjust the height to 6.0 mm.
-
Page 8: To Adjust The Needle Drop
To adjust the needle drop When you select the pattern 01 (straight stitch on center needle position), the needle drop should be in the center position of the needle hole in the needle plate. When the needle swings in maximum zigzag width, the distance between both edges of the needle hole on the needle plate and the needle drop position should be equal as shown below (*** C ***).
-
Page 9: To Adjust The Needle Bar Height
To adjust the needle bar height The standard distance between the upper edge of the needle eye (A) and the tip of shook should be in the range of 1.6 to 2.0 mm when the tip of hook meets the right side of the needle (B) in ascending travel of needle from its left and lowest position.
-
Page 10: To Adjust Hook Timing
To adjust the hook timing When the straight stitch at left needle position is selected, the amount of ascending travel of the needle bar from its lowest position (A) to the position where the tip of the rotary hook ex- actly meets the right side of the needle (B) should be 3.25 to 3.55 mm.
-
Page 11: To Adjust The Clearance Between The Needle And The Hook
To adjust the clearance between the needle and the hook The clearance between needle and hook should be — 0.10 to + 0.05 mm (G). If not, make an adjustment as follows: 1. Remove the needle plate and bobbin holder. 2.
-
Page 12: To Adjust The Backlash Of Hook Drive Gear And Lower Shaft Gear
To adjust the backlash of hook drive gear and lower shaft gear The backlash of gears should be smooth and should be less than 0.8 mm when the tip of hook (E) is within the width of the feed dog (C) as shown below. 1.
-
Page 13: To Adjust The Feed Dog Height
To adjust the feed dog height When pressure adjusting lever (C) is at “3” and the presser foot (D) is lowered, the highest position of the feed dog (E) should be 0.80 to 0.90 mm (H) from the surface of the needle plate (F).
-
Page 14: To Adjust The Upper Shaft Shield Plate Position
To adjust the upper shaft shield plate position When the machine is set for zigzag stitching, the needle should start to swing 6.3 mm to 7.5 mm (G) above the surface of the needle plate (C). 1. Remove top cover. 2.
-
Page 15: To Adjust The Upper Thread Tension
To adjust the upper thread tension The upper thread tension should be 65 g — 95 g when pulling the thread (cotton thread size 50) in direction C with setting the tension dial at” 3 (Make sure the foot is lowered.) 1.
-
Page 16: To Adjust The Stretch Feed Balance
To adjust the stretch feed balance When the triple straight stitch is sewn with the feed balancing dial (C) at the standard setting mark (G, the forward feed (A) and reverse feed (B) should be same length. 1. Set the triple straight stitch and the feed balancing dial at standard setting mark (G). 2.
-
Page 17: To Replace And Adjust The Threader Plate
To replace and adjust the threader plate If the needle threader plate is broken or bent, replace it as follows: (TO REPLACE) 1. Turn the balance wheel toward you until the needle bar reaches its highest position and lower the needle threader knob (D) as far as it will go. 2.
-
Page 18: To Adjust The Buttonhole Lever
To adjust the buttonhole lever A) Buttonhole lever guide 1. Attach the automatic buttonhole foot (R). 2. Loosen the set screw (A) and leave the clearance of 2.9mm (I) between the spring holder and slider (B) by moving the buttonhole lever guide (K). In this condition, the buttonhole lever (E) should touch the spring holder (C) slightly.
-
Page 19: Board A Attaching And Removing
Board A attaching and removing (TO REMOVE) 1. Remove the front cover unit. 2. Pull out 8 connectors from the Board A. 3. Remove 4 screws (B) and Board A. (TO ATTACH) 3. Follow the above procedure in reverse. D: Upper shaft sensor H: Feed stepping motor E: Buttonhole sensor Driving motor…
-
Page 20: Board C Attaching And Removing
Board C attaching and removing (TO REMOVE) 1. Remove the front panel unit (See page 4). 2. Loosen screws (H, I & J), and remove screws L and M. 3. Remove the rear cover (W). 4. Pull out the 4 connectors (O, P, Q & R) and remove screws N. O: Transformer (primary) P: Machine socket Q: Transformer (secondary)
-
Page 21: Board C And Fuse Attaching And Removing
Board C and fuse attaching and removing (TO REMOVE) 1. Remove the rear cover. 2. Remove 3 screws (A) and Board C (See page 18). 3. Remove 3 screws (B) and remove case cover (G). 4. Replace fuse or Board C. (TO ATTACH) 5.
-
Page 22: Dc Motor Unit Attaching And Removing
Driving motor unit attaching and removing (TO REMOVE) Remove the front panel unit (See page 4). Remove the machine socket unit (See page 22). (No need to pull out the connectors) Cut the cord binder (H) and pull out the motor connector (C) from Board A. Remove the screw (A) and the cord guide (D).
-
Page 23: Transformer Unit Attaching And Removing
Transformer unit attaching and removing (TO REMOVE) 1. Remove the front panel unit (See page 4). 2. Remove the Board A and C (See page 17) and machine socket unit (See page 20). 3. Pull out the connectors (A & B) for the transformer (F) from the Board C. 4.
-
Page 24: Machine Socket Unit Attaching And Removing
Machine socket unit attaching and removing (TO REMOVE) Remove the front panel unit, Board C and base unit. Cut off the cord binder (B) and pull out the connectors (D & E) from Boards A and C. Remove 2 screws (H) and machine socket unit (F). (TO ATTACH) Attach the machine socket unit (F) with 2 screws (H).
-
Page 25: Buttonhole Lever Attaching And Removing
Buttonhole lever attaching and removing (TO REMOVE) Remove set screw (A) and BH shield plate (B). Remove the snap ring (C). Pull the buttonhole lever (D) toward you, and remove it. (TO ATTACH) Insert the shaft into the holes of the buttonhole lever (D) , and attached the buttonhole lever with the snap ring.
-
Page 26: Board K Attaching And Removing
Boards F and K attaching and removing Board K (TO REMOVE) Remove the front panel unit (See page 4). Remove the 9 screws (A). Pull out the connector (B) from board K and remove Board K. (TO ATTACH) Follow the above procedure in reverse. BOARD F (TO REMOVE) Remove the front panel unit (See page 4).
-
Page 27: Buttonhole Sensor Attaching And Removing
Buttonhole sensor attaching and removing (TO REMOVE) 1. Remove the front panel (See page 4). 2. Remove screw (A) and remove the buttonhole sensor unit (B) from the sensor set plate (C). 3. Pull out the connector (D) of buttonhole sensor unit from the Board K. 4.
-
Page 28: Wiring Diagram
Wiring diagram The connectors of the electrical components should be connected to the respective positions shown in the figure below. Upper shaft sensor H Lamp socket buttonhole sensor Board K Machine socket (secondary circuit) J Transformer primary cord Zigzag stepping motor K Machine socket (primary) Feed stepping motor L Transformer (secondary)
-
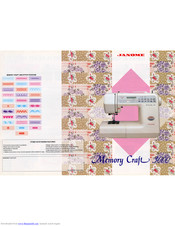
Page 29: Multiple Language Function
Multiple language function The display language can be changed if necessary, as illustrated bellow. Remove the top cover unit. Move the dip switches with the tail of the lint brush A: English B: Deutsch (German) C: Espanol (Spanish) D: Nederlands (Dutch) E: Francais (French) F: Italiano (Italian) G: Portuguese…
-
Page 30: Diagnosis Chart (No.1)
MEMORY CRAFT 3000 Diagnosis Chart [CHECK OPERATION] If nothing happens on the machine when turned on the power switch is, turn off the power switch and do following: 1. Check all wire connections and recheck. 2. Replace the machine socket and recheck.
-
Page 31: Diagnosis Chart (No. 2)
DIAGNOSIS CHART FOR MC3000 Step Test operation Defect condition & remedy Correct condition (01) step Turn on the power switch If the machine does not go to Test I. LCD shows [840 Test mode]. LCD, LED while pressing Reverse stitch mode, replace the following parts 2.
- Manuals
- Brands
- Janome Manuals
- Sewing Machine
- Memory Craft 3000
Manuals and User Guides for Janome Memory Craft 3000. We have 3 Janome Memory Craft 3000 manuals available for free PDF download: Instruction Book, Service Manual, Quick Manual

Janome Memory Craft 3000 Instruction Book (43 pages)
Sewing Machine
Brand: Janome
|
Category: Sewing Machine
|
Size: 1.95 MB
Table of Contents
-
Important Safety Instructions
2
-
Table of Contents
3
-
Name of Parts
4
-
Extension Table (Accessory Storage Box)
5
-
Getting Ready to Sew
6
-
Connecting Machine to Power Supply
6
-
Controlling Sewing Speed
6
-
Main Function of Keys
7
-
Winding the Bobbin
9
-
Set the Spool
9
-
Removing the Bobbin
9
-
Inserting the Bobbin
10
-
Threading the Machine
11
-
Needle Threader
12
-
Drawing up the Bobbin Thread
13
-
Basic Sewing
14
-
Straight Stitching
14
-
Starting to Sew
14
-
Changing Sewing Direction
14
-
Adjusting Stitch Length Manually
15
-
Variable Needle Position
15
-
Variation of Straight Stitching
16
-
Straight Stitch
16
-
Locking Stitch
16
-
Lock-A-Matic
16
-
Adjust the Top Thread Tension
17
-
Choose the Correct Tension
17
-
Tension Is too Tight
17
-
Tension Is too Loose
17
-
When Sewing Heavy Fabrics
18
-
Pressure Adjusting Lever
18
-
To Raise or Drop the Feed Dog
18
-
Seal Allowance Lines
18
-
Changing Needles
19
-
To Remove and Attach Presser Foot
19
-
To Remove and Attach the Foot Holder
19
-
Choose Your Needle and Thread
20
-
Zigzag Stitch
21
-
Manual Stitch Width and Length
21
-
Utility Stitching
22
-
Overcasting
22
-
Sensor Buttonhole
23
-
Buttonhole Variations
23
-
Rounded and Keyhole Buttonholes
26
-
Adjust the Stitch Width and Density
26
-
Automatic Buttonhole (BH1)
27
-
Corded Buttonhole
28
-
Sew a Button
29
-
Zipper Sewing
30
-
To Snap on the Zipper Foot
30
-
Fabric Preparation
30
-
Blind Stitch Hemming
32
-
Changing Needle Position
32
-
Rolled Hem
33
-
Decorative Stitching
34
-
Shell Stitch
34
-
Patchwork
34
-
Smocking
34
-
Decorative Stitch
35
-
Scallop Hems
35
-
Applique
35
-
Cording
36
-
Cross Stitch
36
-
Quilting
37
-
Adjusting Pattern Balance
38
-
Program Decorative Stitch Patterns
39
-
One Cycle Stitching
39
-
Combining Patterns
39
-
Care of Your Machine
40
-
Cleaning the Hook Race and Feed Dog
40
-
Replacing the Bobbin Holder
40
-
Troubleshooting
41
Advertisement
Janome Memory Craft 3000 Service Manual (31 pages)
Brand: Janome
|
Category: Sewing Machine
|
Size: 0.67 MB
Table of Contents
-
Table of Contents
2
-
Top Cover & Face Plate Attaching and Removing
3
-
Base & Bed Cover Attaching and Removing
4
-
Belt Cover Attaching and Removing
5
-
Front Panel Attaching and Removing
6
-
To Adjust the Presser Bar Height
7
-
To Adjust the Needle Drop
8
-
To Adjust the Needle Bar Height
9
-
To Adjust Hook Timing
10
-
To Adjust the Clearance between the Needle and the Hook
11
-
To Adjust the Backlash of Hook Drive Gear and Lower Shaft Gear
12
-
To Adjust the Feed Dog Height
13
-
To Adjust the Upper Shaft Shield Plate Position
14
-
To Adjust the Upper Thread Tension
15
-
To Adjust the Stretch Feed Balance
16
-
To Replace and Adjust the Threader Plate
17
-
To Adjust the Buttonhole Lever
18
-
Board a Attaching and Removing
19
-
Board C Attaching and Removing
20
-
Board C and Fuse Attaching and Removing
21
-
DC Motor Unit Attaching and Removing
22
-
Transformer Unit Attaching and Removing
23
-
Machine Socket Unit Attaching and Removing
24
-
Buttonhole Lever Attaching and Removing
25
-
Board K Attaching and Removing
26
-
Buttonhole Sensor Attaching and Removing
27
-
Wiring Diagram
28
-
Multiple Language Function
29
-
Diagnosis Chart (NO.1)
30
-
Diagnosis Chart (NO. 2)
31
Janome Memory Craft 3000 Quick Manual (2 pages)
Brand: Janome
|
Category: Sewing Machine
|
Size: 1.1 MB
Advertisement
Advertisement
Related Products
-
Janome Memory Craft 3500
-
Janome MEMORY CRAFT 4900 QC
-
Janome MEMORY CRAFT 9500
-
Janome MEMORY CRAFT 9700
-
Janome Horizon Memory craft 7700 QCP
-
Janome Memory Craft 6500
-
Janome memory craft 8000
-
Janome memory craft 7500
-
Janome memory craft 5700
-
Janome Memory Craft 5000
Janome Categories
Sewing Machine
Robotics
Software
Sewing Machine Accessories
Industrial Equipment
More Janome Manuals
Швейная машина Janome Memory Craft 3000 — инструкция пользователя по применению, эксплуатации и установке на русском языке. Мы надеемся, она поможет вам решить возникшие у вас вопросы при эксплуатации техники.
Вы можете скачать инструкцию к Janome Memory Craft 3000 по ссылке ниже, если не хотите ждать загрузки. Если остались вопросы, задайте их в комментариях после инструкции.
«Загружаем инструкцию», означает, что нужно подождать пока файл загрузится и можно будет его читать онлайн. Некоторые инструкции очень большие и время их появления зависит от вашей скорости интернета.
Полезные видео
Характеристики
Остались вопросы?
Не нашли свой ответ в руководстве или возникли другие проблемы? Задайте свой вопрос в форме ниже с подробным описанием вашей ситуации, чтобы другие люди и специалисты смогли дать на него ответ. Если вы знаете как решить проблему другого человека, пожалуйста, подскажите ему


Часто задаваемые вопросы

Как посмотреть инструкцию к Janome Memory Craft 3000?
Необходимо подождать полной загрузки инструкции в сером окне на данной странице или скачать кликнув по специальной кнопке.
Руководство на русском языке?
Все наши руководства представлены на русском языке или схематично, поэтому вы без труда сможете разобраться с вашей моделью
Как можно распечатать инструкцию?
Скачайте ее по специальной кнопке над формой чтения на ваше устройства и отправьте на печать.
Перейти к контенту
Швейные машинки JANOME

- Размер инструкции: 15.88 Мб
- Формат файла: pdf
Если вы потеряли инструкцию от швейной машинки JANOME Memory Craft 3000, можете скачать файл для просмотра на компьютере или печати.
Инструкция для швейной машинки JANOME Memory Craft 3000 на русском языке. В руководстве описаны возможности и полезные функции, а также правила эксплуатации. Перед использованием внимательно ознакомьтесь с инструкцией.
Чтобы не читать всю инструкцию вы можете выполнить поиск по содержимому внутри инструкции и быстро найти необходимую информацию. Рекомендации по использованию помогут увеличить срок службы швейной машинки JANOME Memory Craft 3000. Если у вас появилась проблема, то найдите раздел с описанием неисправностей и способами их решения. В нем указаны типичные поломки и способы их решения.