Сегодня вы узнаете как делать мокапы для фигма с помощью плагина «Artboard studio». У плагина есть множество бесплатных мокапов: телефонов (айфонов и телефонов на андроид), планшетов, компьютеров (ноутбуков, макбуков), бутылок, книг, визиток, упаковок и т.д.
Смотрите видео, либо воспользуйтесь текстовой версией инструкции ниже.
Мокапы для фигма. Как установить плагин с мокапами?
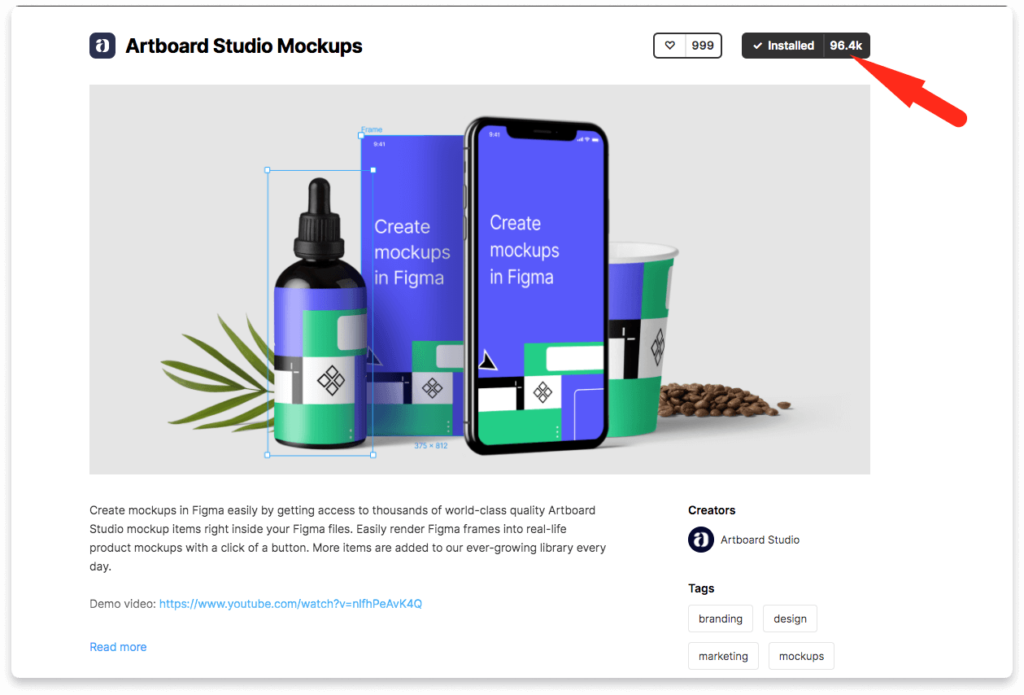
Чтобы установить плагин с мокапами в фигма перейдите по ссылке и нажмите на кнопку сверху «Install».
Активация плагина «Artboard Studio Mockups» в Figma
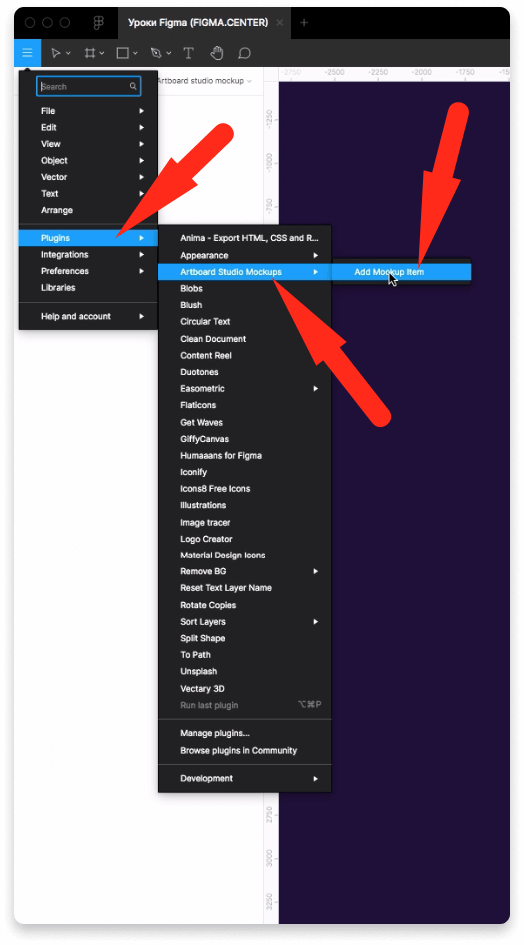
Чтобы активировать плагин в Figma нажмите на меню слева и наведите на надпись «Plagins» далтее выберите «Artboard Studio Mockups» «Add Mockup Item».
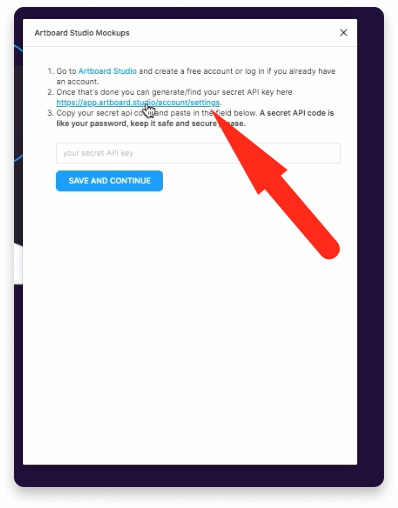
В появившемся всплывающем окне нажмите на ссылку, как показано на скриншоте выше.
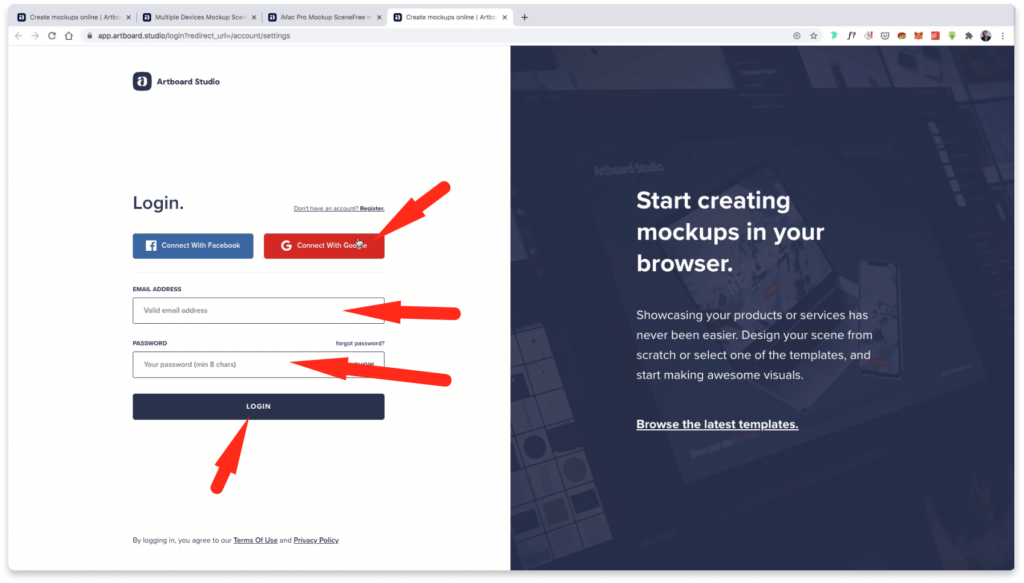
Вас перенаправит на сайт сервиса artboard.studio, где вам необходимо будет зарегистрироваться. На первом шаге нужно ввести email и пароль, либо войти с помощью Facebook или Google.

На втором шаге регистрации вам предложат заполнить небольшую анкету. Здесь можно указывать любые данные из списка. Это не на что не влияет.
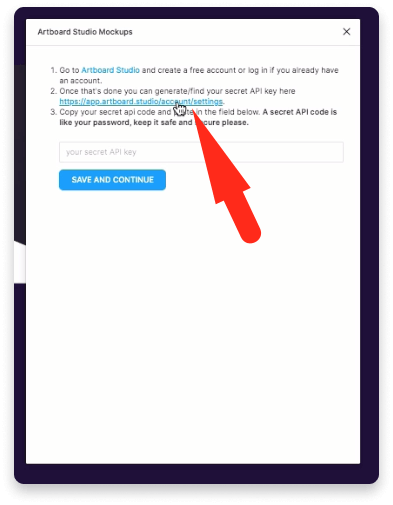
После регистрации снова нажмите на ссылку, которая есть в плагине «Artboard Studio» в Figma.
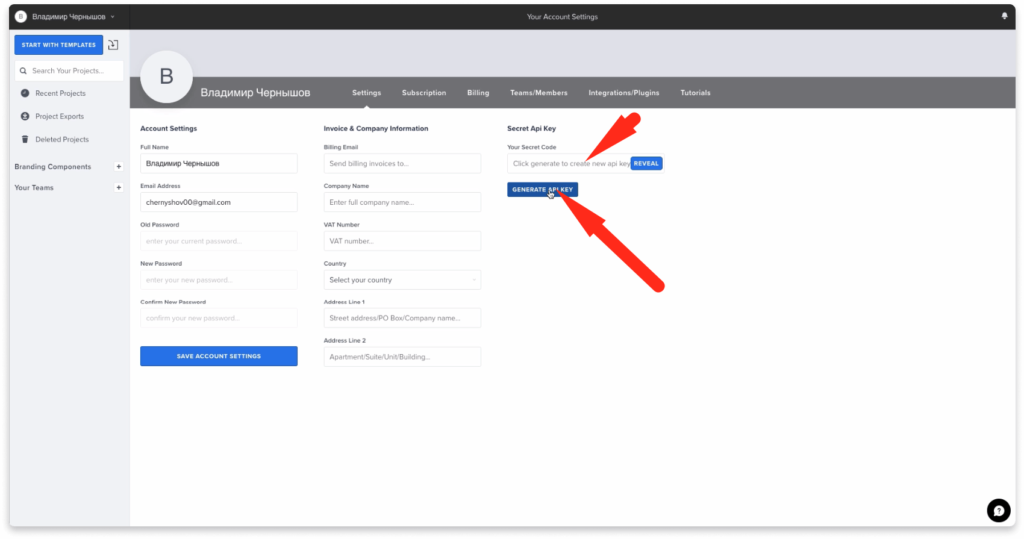
Вас перенаправит на страницу, где вы сможете сгенерировать Api Key. Для этого нажмите на синею кнопку справой стороны. Затем скопируйте появившийся ключ.
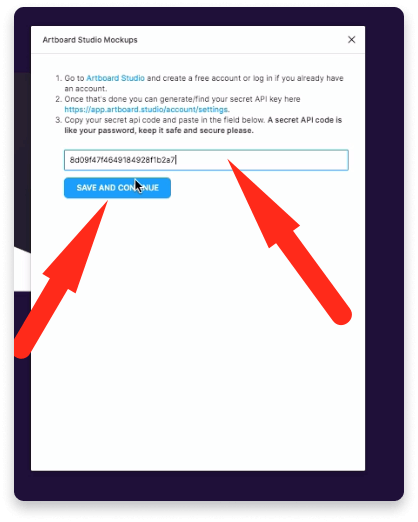
Вставьте Api key в окно плагина в фигме и нажмите на кнопку «Save and continue».
Мокапы для Figma. Как пользоваться плагином.
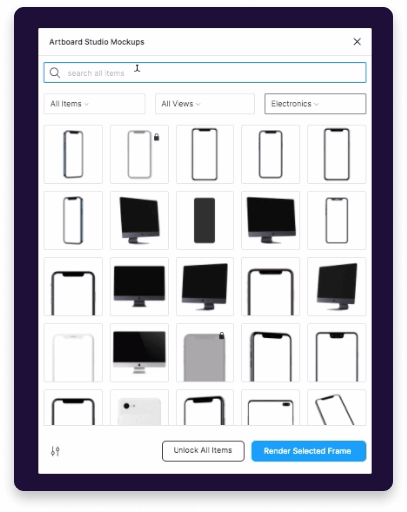
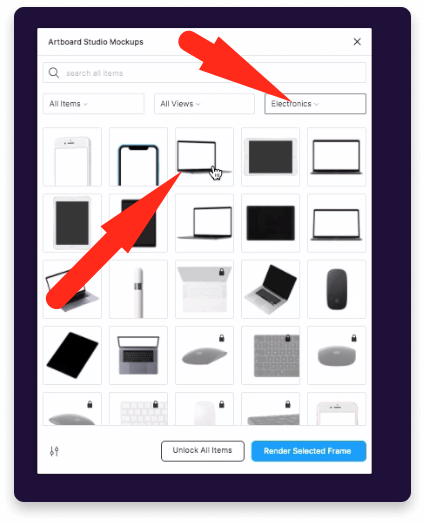
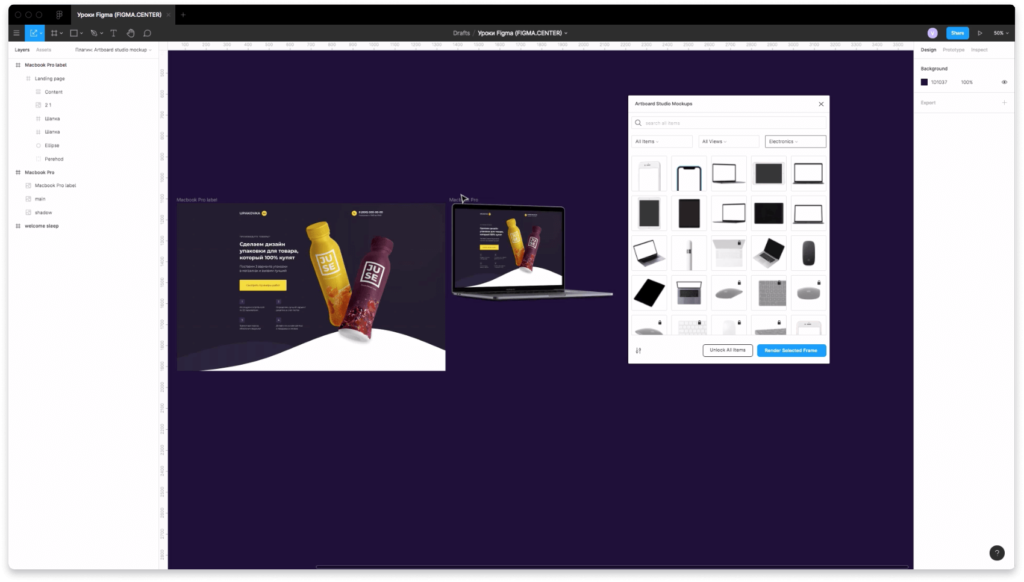
Пользоваться мокапами в фигме очень просто. Для этого запустите плагин Artboard Studio и выберите понравившийся вам мокап из представленного списка.
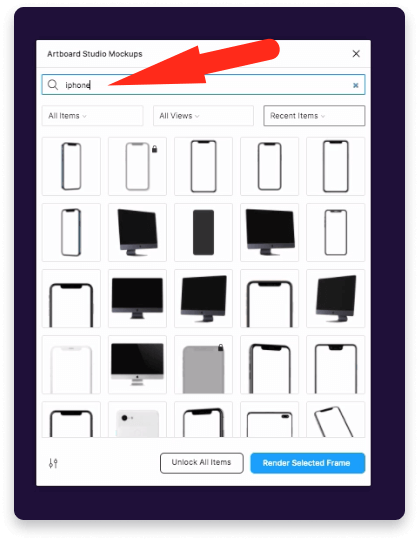
Вы можете производить поиск мокапов с помощью верхней строки поиска. Если хотите вставить мокап телефона, то введите «Iphone» или другую марку. Введите в окно поиска «laptop», если хотите найти мокап ноутбука. Аналогично можно искать мокапы книги, визитки, макбука, упаковки и т.д.
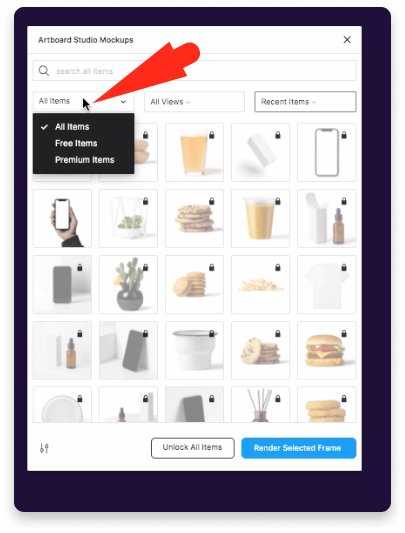
Если нажмёте на выпадающий список с надписью «All items», то появится возможность выбрать бесплатные мокапы «Free items» или платные «Premium items».

Можно сортировать мокапы если развернуть список, который есть по центру.
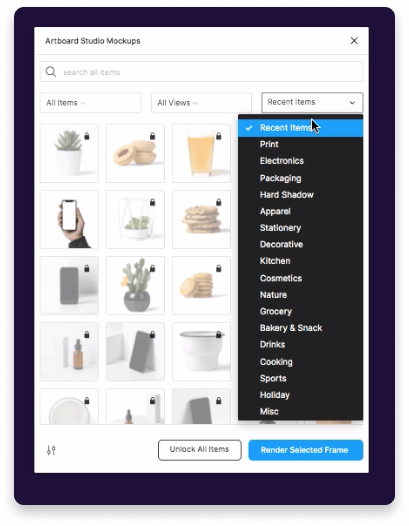
Чтобы отображалась определенная категория мокапов, разверните выпадающий список справа. Тут есть множество категорий, которые вы можете использовать в своих проектах.
Как вставить мокап в фигме с помощью плагина
Чтобы вставить мокап в фигме с помощью плагина Artboard Studio Mockups, выберите нужный мокап из списка. Для примера выберу ноутбук.
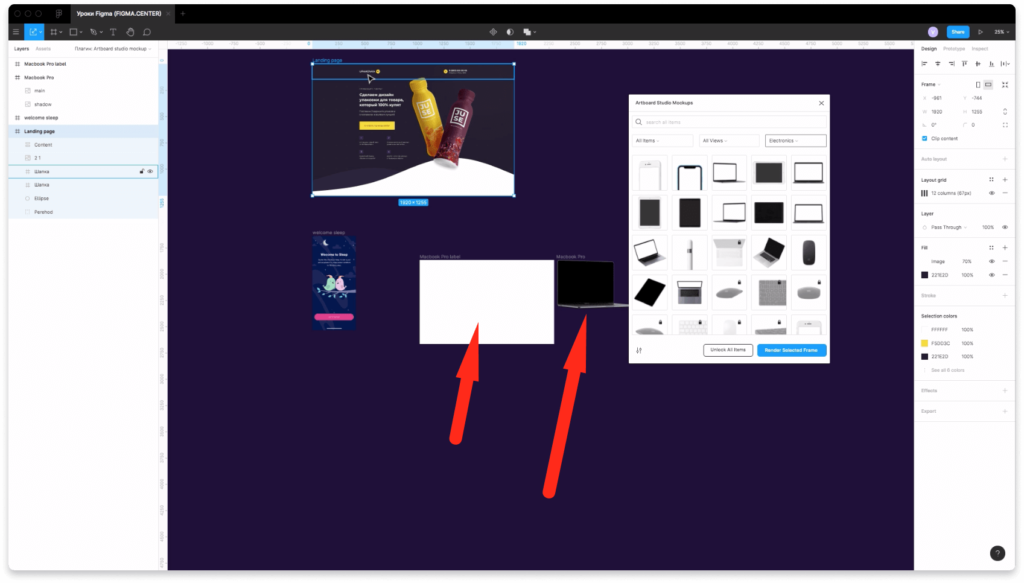
При вставке мокапа в ваш проект в Figma, у вас появится 2 элемента: ноутбук и фрейм куда необходимо вставить ваш дизйан.
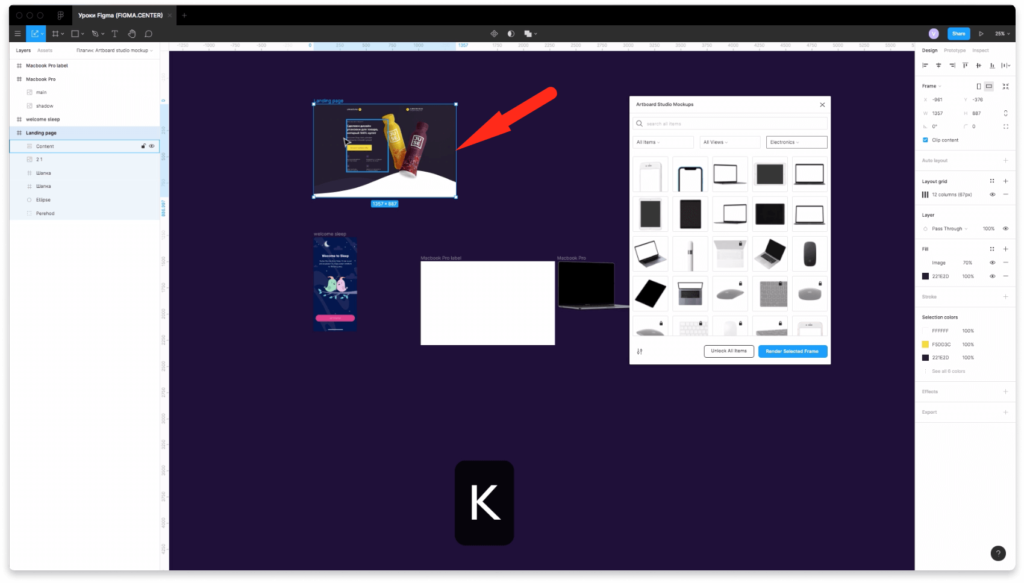
Если ваш дизайн больше фрейма, который появился, то уменьшите размер дизайна с помощью клавиши «K».
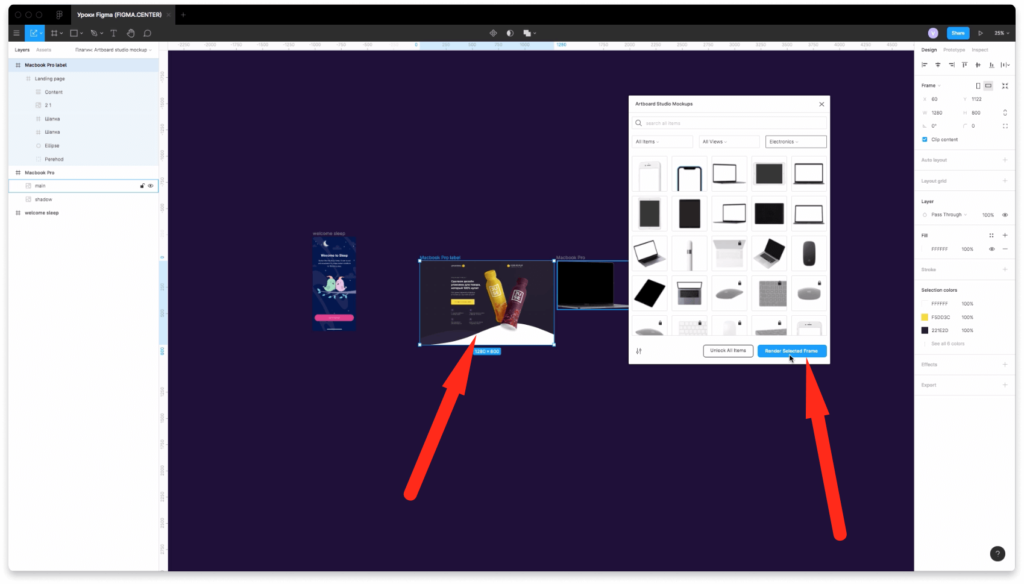
Вставьте ваш дизайн в фрейм, как показано на скриншоте выше. Выберите фрейм и нажмите на кнопку «Render selected frame» в плагине.
Ву-а-ля! Вы ставили свой дизайн макет в мокап ноутбука.
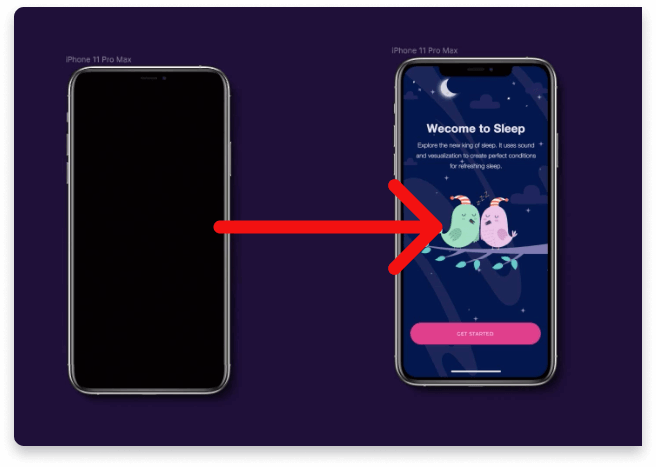
Аналогичную операцию можно проделать для айфона и вставить ваш дизайн в мокап телефона.
Заключение
Итак, вы этом видео вы узнали как использовать мокапы для фигма. Теперь вы будете во всеоружии и сможете прокачать ваш дизайн.
P.S. Получите бонусные материалы по быстрому созданию дизайна Landing Page в Figma, то по этой ссылке.
Автор статьи: Владимир Чернышов
P.P.S. Проект и автор не связан с компанией Figma (Not affiliated with Figma).
Для создания макетов в Figma нужно в первую очередь определиться с целями дизайна. Необходимо понимать, что именно мы хотим показать и какие элементы должны быть на этих макетах. Затем следует определиться с форматами изображений, которые будут использоваться в работе, и с размерами макетов. Это упростит работу и поможет сохранить единый стиль дизайна.
В Figma есть несколько способов реализовать создание макетов. Один из них – это использовать уже созданные элементы и готовые блоки для создания своих макетов. Также можно использовать инструменты для создания макетов с нуля. Например, возможность создания векторных объектов или рисование кистью.
Важной составляющей создания макетов является выбор цветовой гаммы. При выборе палитры необходимо определиться с тонами цветов, которые будут присутствовать на макете. Также важно учитывать контрастность и читабельность шрифтов на заднем фоне.
После того, как макет будет создан, следует протестировать его на различных устройствах и разрешениях, чтобы убедиться, что он выглядит корректно на каждом из них. Окончательные настройки и корректировки могут быть внесены после тестирования.
Figma предоставляет множество инструментов для редактирования и тонкой настройки макетов. Например, выравнивание и группирование элементов, изменение размеров и вращение объектов, редактирование текста и шрифтов, использование градиентов и теней и многое другое.

Изометрический мокап с помощью плагина в фигме
МОКАПЫ ДЛЯ FIGMA: ARTBOARD STUDIO. Обзор плагина — Уроки фигма на русском
Создаем мокап в фигме — 4 минуты урок
КАК СДЕЛАТЬ АНИМАЦИЮ В ФИГМЕ ЗА 10 МИНУТ — АНИМАЦИЯ В ФИГМЕ — #ПИЖАМАTV
Как сделать дизайн карточки товара на Wildberries. Урок в Figma
Мокапы для фигмы и новые плагины для фигмы! figma.community
Лучшие плагины Figma для создания Mokup
Дизайн мобильного приложения для заказа еды в Figma (2022)
МОКАПЫ БЕЗ СКАЧИВАНИЯ ФОТОШОПА — КАК РАБОТАТЬ С МОКАПАМИ — MOCKUPS — КАК ДЕЛАТЬ И ЧТО ТАКОЕ МОКАПЫ
На чтение 5 мин Просмотров 1.1к. Опубликовано 30.01.2021

5 января 2020 г. · чтение за 5 минут

Эта статья представляет собой письменное объяснение, основанное на моем опыте использования плагина Artboard Studio для создания макетов экранов, разработанных с помощью Figma.
Что такое макет?
В производстве и дизайне макет – это масштабная или полноразмерная модель дизайна или устройства, используемого для обучения, демонстрации, оценки дизайна, продвижения или других целей. -Wikipedia
Я занимаюсь проектированием интерфейсов около года, плюс с помощью Figma, но как я преобразовал свои экраны в макеты?…
Чтобы добиться этого , Я загрузил различные размеры экрана в формате SVG или создал векторы в соответствии с размером экрана, над которым я работаю. Это сработало нормально, но потребовало много времени.
Обнаружение/использование плагина Artboard
Несколько дней до конца 2019 года при чтении некоторых статей на носителе , Я наткнулся на эту статью, которая познакомила меня с плагином. Хотя в конце статьи был скринкаст, я его не смотрел. Это потому, что я предпочитал читать статьи просмотру клипов. На этот раз видео стало более важным после того, как я попытался работать с плагинами, но не достиг своей цели.
Посмотрев ролик, я смог понять, как использовать плагин, который Я сделал это, и на этот раз все прошло успешно. Но все же помня о коллегах-дизайнерах, которые используют Figma для своих дизайнов и могут иметь те же предпочтения, что и я, я решил написать шаги, предпринятые для создания макетов ваших экранов с помощью плагина Artboard studio.
Шаги, которые помогут вам пройти
Я резюмировал процесс достижения этого в 5 шагов. Под каждым шагом прикреплены изображения для демонстрации графических представлений и добавления в качестве дополнительного руководства.
- Сначала перейдите в меню плагинов Figma и найдите макеты студии Artboard, нажмите install в правом верхнем углу экрана, чтобы установить плагин. Или установите его здесь

2. Перейдите в свой проект figma, щелкните правой кнопкой мыши и выберите плагины или перейдите в гамбургер-меню в верхнем левом углу экрана, переместите курсор на плагины, наведите курсор на плагины макетов Artboard и выберите «Добавить макеты».


Снимки экрана, показывающие, когда ключ API был создан на странице настроек учетной записи и после того, как он был скопирован и вставлен соответственно
4. При нажатии кнопки «Сохранить и продолжить» появляется всплывающее окно со списком макетов студии Artboard. Выберите любой из элементов во всплывающем окне, которые вы хотите использовать для своей презентации макета.


Кроме того, в плагине макета Artboard есть другие категории элементов, например: упаковка, канцелярские товары и т. д. Это означает, что вы может создавать любой тип макета внутри figma.


Например, выберите категорию упаковки и выберите любой предмет; скажем, первый элемент (бутылка) … Этот элемент имеет 3 разных кадра, которые представляют 3 разных слоя выбранного элемента.
Это также означает, что любые изменения, внесенные в каждый кадр, будут отображаться на элемент после нажатия кнопки рендеринга.

“Designers, take your mockups to the next level: Learn how to create visually stunning mockups with Figma.”
Table of contents
In this article, we will walk through the following points:
- What is a mockup?
- Why is a mockup important?
- Three phases for building a website interface
- The mockup structure
- Choosing a mockup tool
- Steps to build a mockup in Figma
- Tip: Figma Plugins to create responsive mockups
What is a mockup?
A website mockup is a visual representation of a website’s layout, design, and content. It is typically created using design software such as Figma or Sketch and is used to showcase the website’s design to stakeholders and clients, as well as to plan and organize the website’s development.
A mockup is not a functional website, but it allows designers, developers, and clients to get a sense of how the final website will look and feel and helps them to identify and solve any design problems before the website is built.
Why is a mockup important?
Now that we understand what a mockup is, let’s examine why it is important to create high-quality mockups.
Reason 1: Clients or stakeholders
Before a design is approved by a client or a company’s stakeholders, we need to show a mockup or prototype to demonstrate the results of our work. Typically, this presentation highlights the visual aspect of the website, as well as the primary tasks users will be able to do with the newly designed website. This is usually done in a meeting where a presentation is given to explain the entire design process, leading up to the final concept, which is a visual representation of the website.
Reason 2: Prototyping and user testing
A prototype can be a mockup brought to life by adding interactions, animations, and basic functionality to the static layout. It can be used for usability testing to gather feedback and make improvements before the final website is built. A prototype can be created with the same tools used to create mockups or with specialized prototyping software such as Adobe XD, Figma, or InVision.
A prototype is important for many reasons. The foremost reason is to showcase the website to developers, clients, and stakeholders, from which we can gather feedback. This feedback can be used to make improvements to the website or to validate the concept before moving on to the development stage of the process.
The second benefit of creating prototypes is to use them for usability testing. By checking with potential users, we can identify any usability issues with the concept. It’s better to find any issues with a prototype than with a fully built website because catching usability issues early can save a significant amount of time and money for the company in the long run.
Overall, a prototype is an essential step in the design process to ensure the creation of a high-quality and user-friendly final website.
Reason 3: Developers handoff
A mockup is the closest visual representation of a real website, which helps the architects of the ecosystem understand how to build it. Frontend developers need to know exactly what to bring to life, and having a detailed mockup will help them with the closest experience. Providing a prototype will also help backend developers understand the interactions they need to build through the website.
Think of a website as an ecosystem that has a visual aspect built by frontend engineers that connect some parts of the website to endpoints built by backend engineers. These connections make the website complete the actions taken by users.
Three phases for building a website interface
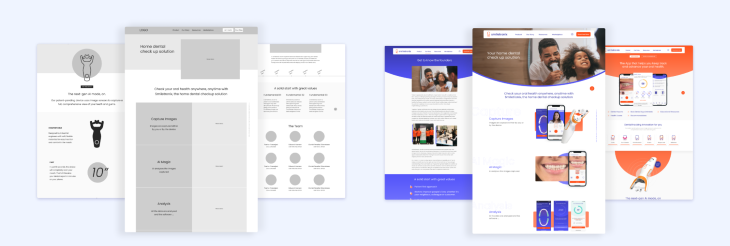
When it comes to the visual representation of a website, there are three important steps to take in the process. First, we need to create the skeleton of the website, a concept that we call a wireframe. Second, we need to put skin to our skeleton, a concept that we call a mockup. Finally, we give life to this body with a concept we name prototypes.
- A wireframe is a low-fidelity representation of the content and layout, showing the placement of elements such as text, buttons, or images. Wireframes help to organize and visualize the website’s structure, navigation, and the organization of the content. Lastly, it is important to build them with usability in mind
- A mockup, as we explained above, is a high-fidelity representation of the content and layout with details, meaning we add elements such as styles and components and all the content needed, such as images or text
- A prototype showcases the functionality of the mockup. Using the high-fidelity visuals of the website, we add hotspots to create interactive components to generate a sense of interaction between the different screens of the website. Here is where users can experience and interact with the product
The mockup structure
A website mockup is built on an artboard, a working area for creating and editing digital artwork. This artboard can be fictionally divided and structured with a layout and a grid.
A layout is the distribution of elements such as text, images, or buttons on an artboard. A layout can be responsive, meaning that all these elements change dynamically based on the size of the screen. A grid is a smaller division, a collection of vertical and horizontal lines used to structure all elements with consistent spacing.
Now we have an artboard that is divided by a layout and a grid to help us place elements across its borders. The elements we can place on it are the following:
- Text: written words, characters, or symbols formatted in multiple ways, such as font size or height, color, alignment, and so on
- Images and other media: imagery, gifs, or videos are typical elements found on a website mockup
- Components: a standardized UI element repeated across the artboards multiple times. There are smaller and simple components such as a button or more complex such as a card with an image, text, and a button
To all these elements (text, images, and components) we can apply styles, such as colors, icons, and effects. Styles allow consistency, helping users navigate easily across the website.
In summary, when choosing a mockup tool, it is important to consider the following factors:
- All-in-one capability to handle the different visual stages of website creation (wireframing, mockup, and prototyping)
- The ability to centralize and document styles and components in a design system library
- Real-time collaboration capabilities for remote work and multiple stakeholders
- Ease of development handoff, including access to code and assets for building the final website
Figma as a mockup tool
One tool that meets these criteria is Figma, a browser or desktop cloud-based software, vector graphics editor, and prototyping tool that allows for real-time collaboration and version control.
Figma is an all-in-one tool for creating wireframes, mockups, and prototypes with the help of design system libraries. It also includes a design system library for creating and managing styles and components. Figma offers a free version for up to three files, a free version for students and teachers, and different plans for individuals and organizations.
Steps to build a mockup in Figma
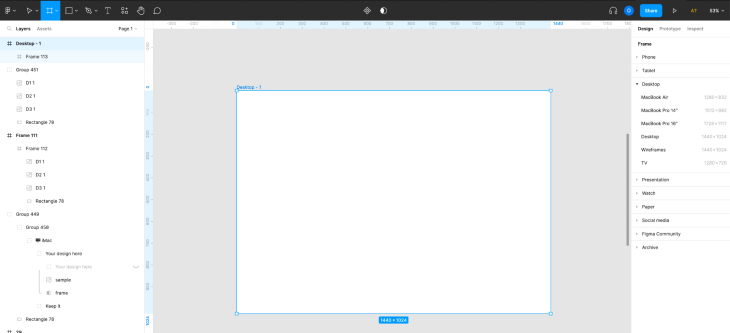
1. Create an artboard
Create a new design file in Figma and navigate to the top left tools panel where you will find a hashtag symbol. Click on it, and a list of artboards will appear on the right panel. As an alternative, press the A key on your keyboard to reveal the same panel.
This is the Frame section, where you will find multiple artboards to choose from such as phone, tablet, and desktop, but you can also find options such as smart watch and social media.
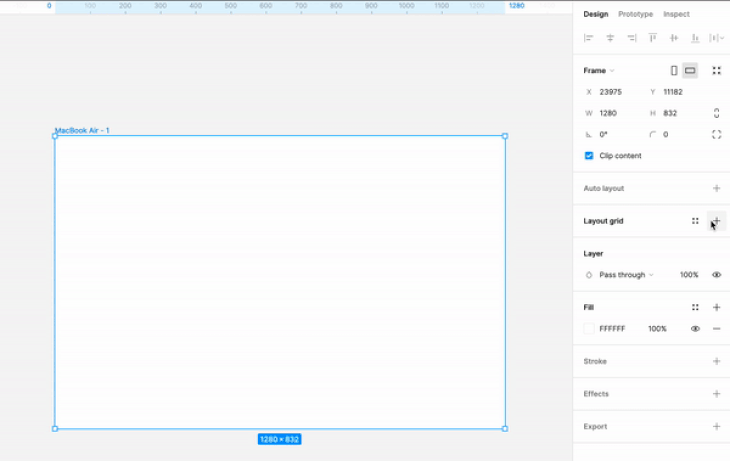
Unfold the Desktop section to reveal multiple options, including the most common sizes of 1280×832 and 1440×1024.
If you prefer to create an artboard with a different size, you can click and drag the mouse to freely create one. Note that you can also customize the size of the artboard even after creating or selecting one.
To create a responsive website, you will need to create a mockup for each of the breakpoints of your layout. Typically, designers have four different layouts: one for phones, another for tablets, and two for small and large desktops.
2. Apply the grid and the layout
To use the Layout Grid feature in Figma, select the artboard and press the plus button on the left-hand panel tool. After pressing the button, a standardized layout will be applied to the artboard.
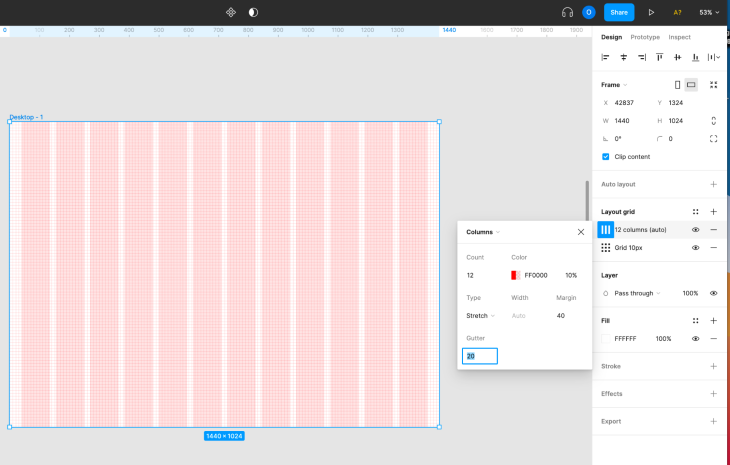
To customize it, click the multiple squares button and a settings panel will appear. On the top, you have a dropdown where you can select whether you want a grid or a vertical or horizontal layout.
Here are some recommendations for creating grids and layouts:
The grid
The 8px grid system is widely recognized as the most popular, as it makes it simpler and more consistent to adjust designs. All elements on the web page align to an 8px square baseline grid for various devices such as mobile, tablet, and desktop.
Sizing and spacing of elements on the web page should be in increments of 8px; this includes any defined height or width, margin, or padding. Alternatively, you can use a 4px grid.
The layout
A layout consists of multiple columns separated by spaces called gutters. The outer edges of the layout are referred to as layout margins.
The structure of the layout is composed of content blocks, such as the header, navigation, and footer. These blocks of content can span multiple columns and adjust in size with the grid. Ideally, use 12 columns for desktop and 4 columns for mobile.
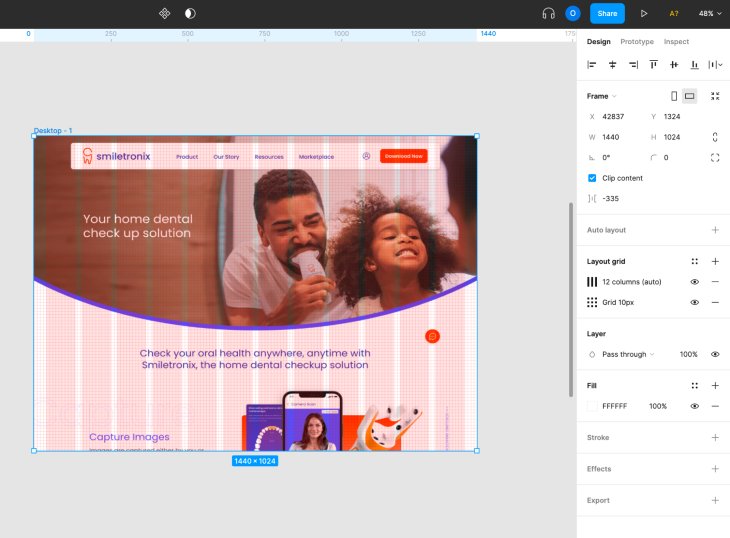
3. Add elements to the artboard
As you already have a wireframe, it’s time to use it as a reference to create the new website mockup. Some designers prefer to build the wireframe by replacing components one by one on the same artboard, while others prefer to do it in a new artboard. The choice is yours.
There are different options to approach this:
- If you don’t have a design system: In this case, you will need to put your design capabilities to work and spend time transforming the elements you created in the wireframe to high-fidelity components. For example, imagine you created a wireframe card to sell a trip; that component was made with a rectangle and inside has an image, a button, text, and a couple of icons. At this stage, you will need to beautify the component and later add styles to it
- If you have a design system: In this case, everything will be much easier. You just need to replace the elements from the wireframe with new components from your design system and finally add style to texts and other elements
4. Next steps
Now that you have a beautiful website in front of you, you are ready for the next steps.
If you are building a responsive website, remember to create the artboards for the other screen sizes. You will just need to reorganize the components across the columns to fit the new screen size.
Have in mind to prepare the assets for development, meaning you need to have images or icons ready to be exported, usually in the form of SVG or PDF.
Finally, remember that now is the time to create prototypes to turn your website into a lively place full of interactions.
Tip: Figma Plugins to create responsive mockups
Here’s a brief explanation of Breakpoints and Responsively, two Figma plugins for creating responsive mockups:
- Breakpoints: Breakpoints is a Figma plugin that allows you to easily manage and organize breakpoints for your design. You can create custom breakpoints for specific devices or screen sizes and then easily switch between them to preview how your design will look on different screens. With Breakpoints, you can also set constraints and properties for each breakpoint to ensure that your design remains consistent across all devices
- Responsively: Responsively is a Figma plugin that helps you quickly create responsive designs. It provides a simple interface that allows you to adjust the width and height of a frame and then see the changes in real-time on a preview screen. Responsively also has a set of predefined breakpoints that you can use to create a responsive design with just a few clicks. Additionally, you can use the plugin’s built-in constraints and properties to make sure your design stays consistent as you adjust it for different screens
Both of these plugins can be very useful for creating responsive designs in Figma, and the choice between them may depend on your personal preferences and the specific needs of your project.
To sum up
The process of creating a website can be broken down into three distinct steps: wireframing, mockup creation, and prototyping.
By mapping out the user experience with a wireframe, you can establish a clear structure and layout for the website. Next, by creating a visually appealing mockup, you can refine the design and add polish styles to the overall look and feel. Finally, by prototyping the website, you can test and refine the functionality.
Now that you have learned the basic process of creating a mockup from scratch, you can put that knowledge into practice by opening Figma and experimenting with building your first website. Keep in mind that creating a website involves a lot of trial and error, so don’t be discouraged if things don’t turn out exactly as you planned. Instead, take it as an opportunity to learn and improve your skills. And remember, building a website should be fun, so enjoy the process!
LogRocket: Analytics that give you UX insights without the need for interviews

LogRocket lets you replay users’ product experiences to visualize struggle, see issues affecting adoption, and combine qualitative and quantitative data so you can create amazing digital experiences.
See how design choices, interactions, and issues affect your users — try LogRocket today.
05 Сен 2022
40466
0
Выбрала отменные мокап-плагины для Figma, которые помогут наглядно и красиво презентовать проект клиентам и команде
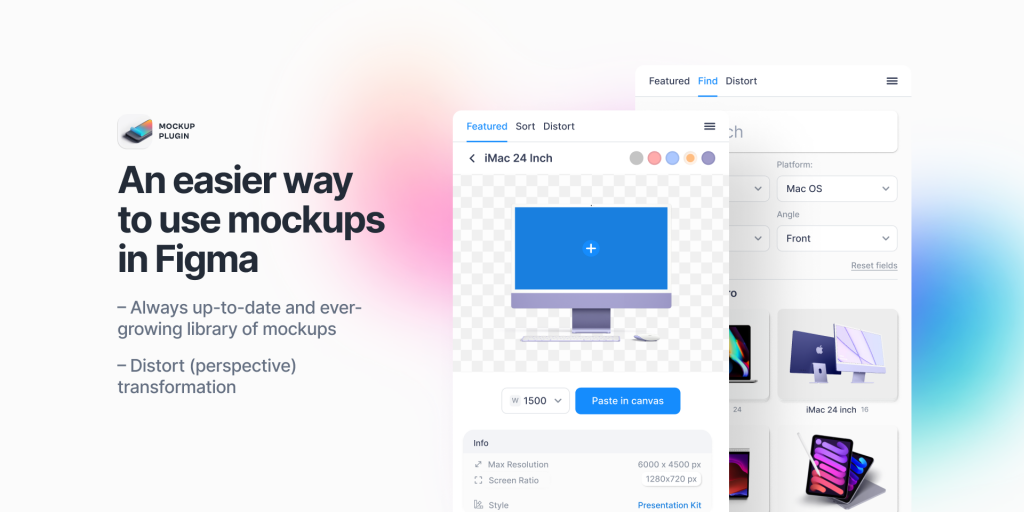
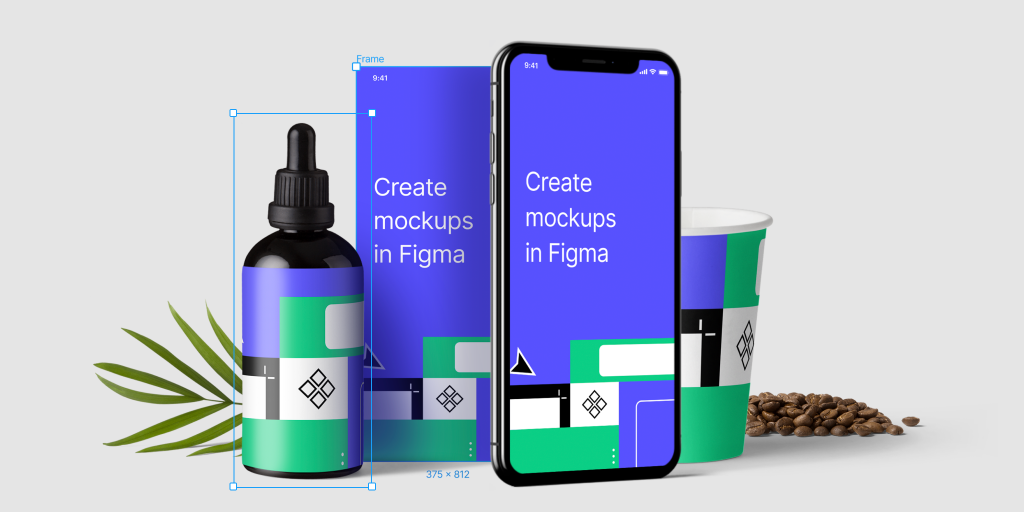
Mockup — плагин для поиска, редактирования и вставки качественных и популярных мокапов из библиотеки LS Graphics. Также позволяет создавать перспективное искажение для выбранного шейпа. Мокапы бесплатны для личных и коммерческих проектов
Angle Mockups — подставляет макет в 3D-мокапы: под нужным углом и в перспективе. Создатели записали краткую инструкцию по использованию плагина

Artboard Studio Mockups — доступ к библиотеке из +5300 мокапов: телефонов, планшетов, компьютеров, бутылок, книг, визиток, упаковок и т.д. В бесплатной версии можно использовать ограниченное число мокапов, расширенный пакет стоит 12 $ в месяц
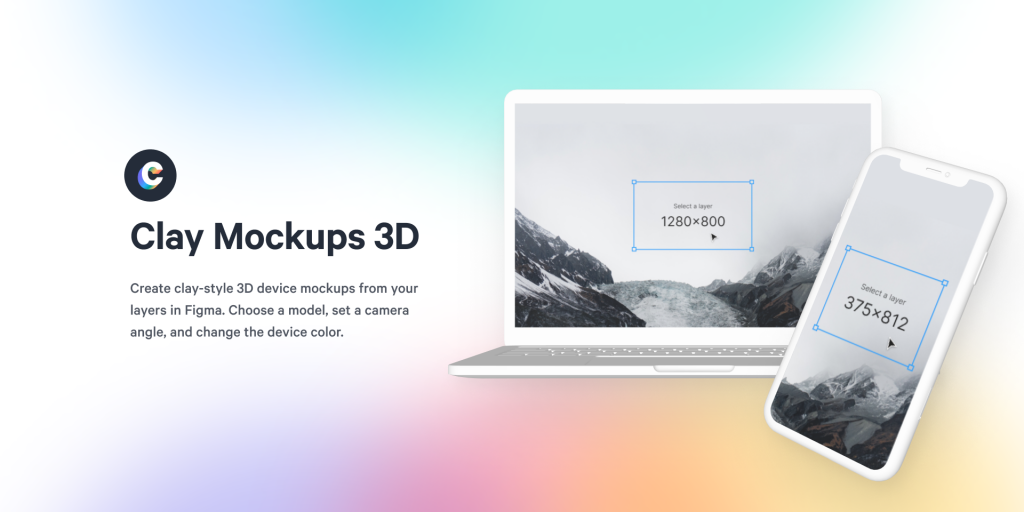
Clay Mockups 3D — позволяет вставлять фреймы в мокапы девайсов, в том числе в модели для iPhone, Pixel 4 и Macbook Pro. Можно настроить цвет, угол камеры и модель устройства
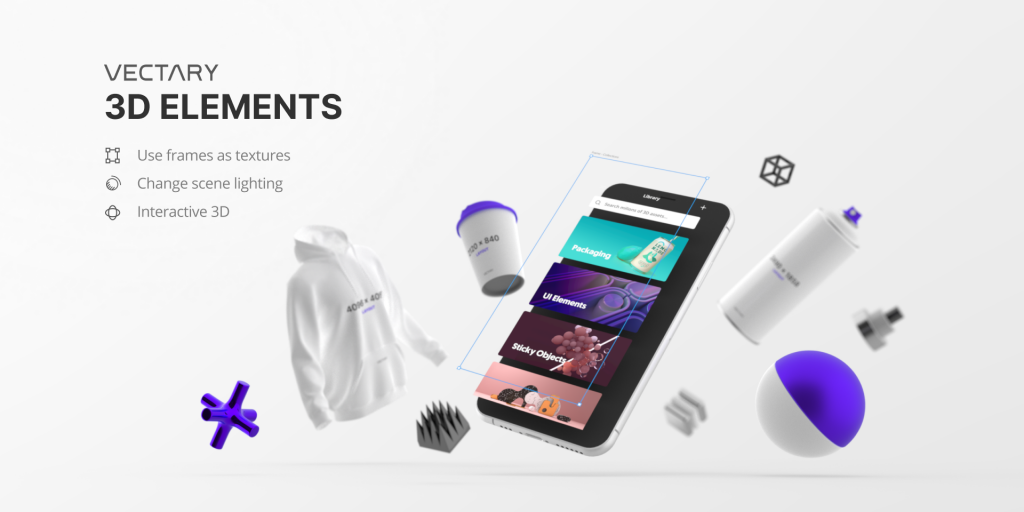
Vectary 3D Elements — легко добавляет недостающее третье измерение в 2D-проекты
All Hands Mockup Generator — добавляет мокапы девайсов в руке

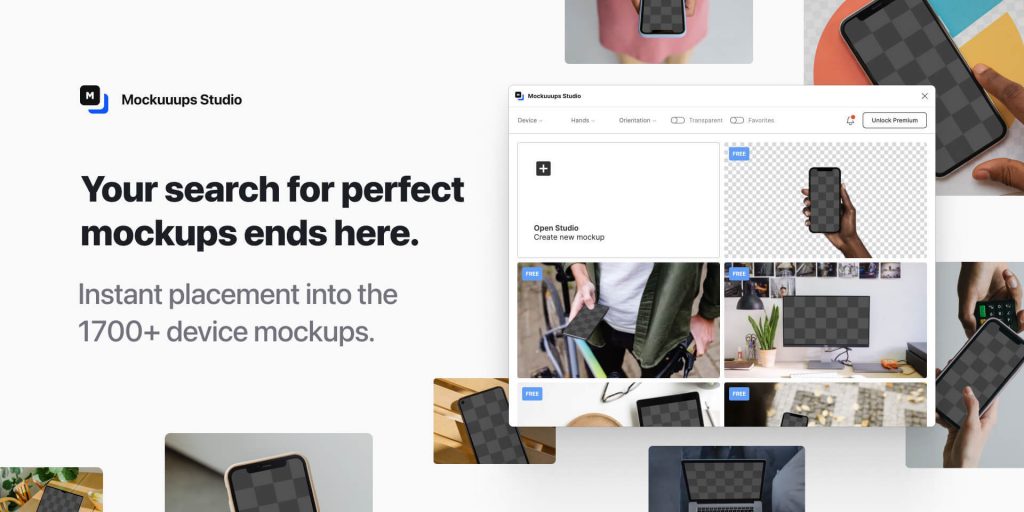
Mockuuups Studio — содержит более 1700 мокапов девайсов. Бесплатный для личного и коммерческого использования
BrandBird — быстро превращает любое изображение в пост в социальных сетях

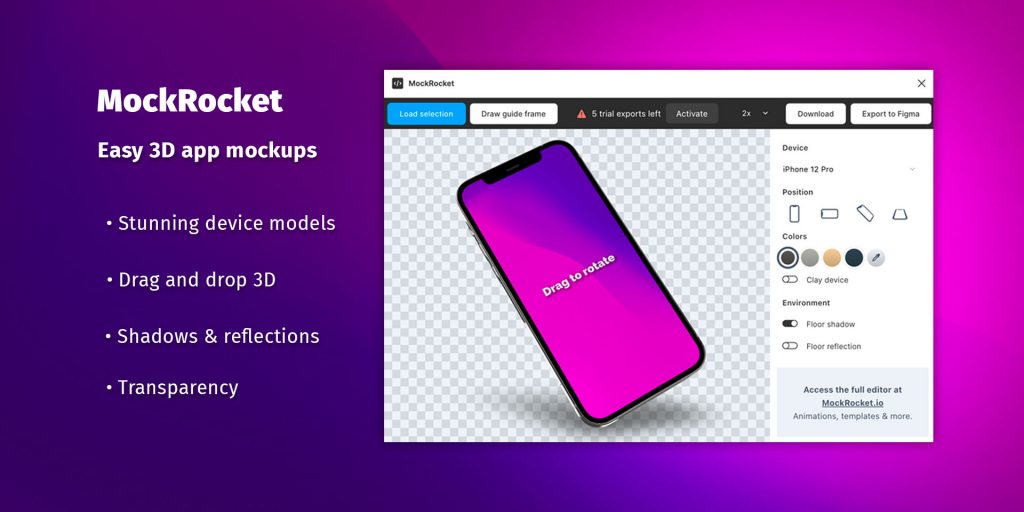
MockRocket – 3D Mockups — создает 3D-мокапы последних моделей iPhone, MacBook, iMac и других. Есть настройка теней, цветов, отражений и прозрачного фона
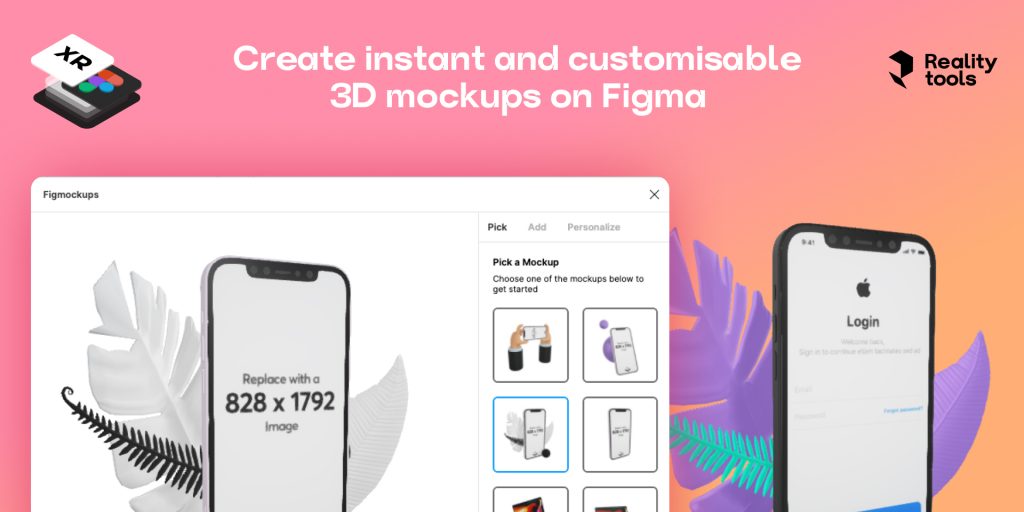
Figmockups — позволяет создавать и настраивать красивые 3D-мокапы для любых интерфейсов и презентаций
Display by WeScreen — помогает отображать проекты на различных мобильных устройствах