-
Contents
-
Table of Contents
-
Bookmarks
Quick Links
Related Manuals for Konnwei KW590
Summary of Contents for Konnwei KW590
-
Page 1
KW590… -
Page 2: Table Of Contents
Table of Contents Safety Precautions and Warnings ………………1 General Information ………………….2 On-Board Diagnostics(OBD) II …………….2 Diagnostic Trouble Codes (DTCs) …………..2 Location of the Data Link Connector (DLC)…………3 OBDII Readiness Monitors …………….4 OBD II Monitor Readiness Status …………..5 OBOII Definitions …………………
-
Page 3: Safety Precautions And Warnings
Safety Precautions and Warnings To prevent personal injury or damage to vehicles and/or the scan tool , read this instruction manual first and observe the following safety precautions at a minimum whenever working on a vehicle: • Always perform automotive testing in a safe environment. •…
-
Page 4: General Information
2. General Information 2.1 On-Board Diagnostics(OBD)II The first generation of On-Board Diagnostics (called OBD i) was developed by the California Air Resources Board (ARB) and implemented in 1988 to monitor some of the emission control components on vehicles, As technology evolved and the desire to improve the On-Board Diagnostic system increased, a new generation of On-Board Diagnostic system was developed, This second generation of On-Board Diagnostic regulations is called»…
-
Page 6: Location Of The Data Link Connector (Dlc)
Identifying specific malfunctioning section of the systems Code Type Sub-systems Generic (SAE): l=Fuel and Air Metering P0,P2,P34^P39 2=Fuel and Air Metering B0.B3 3=Igmtion System or Engine Misfire CO, C3 4=Auxiliary Emission Controls U0,U3 5=Vehicle Speed Control and Idle Controls Manufacturer specific: PI, P30-P33 6=Computer Output Circuits B1,B2…
-
Page 8: Obdii Readiness Monitors
2.4 OBDII Readiness Monitors An important part of a vehicle’ s OBD II system is the Readiness Monitors, which are indicators used to find out if all of the emissions components have been evaluated by the OBD II system. They are running periodic tests on specific systems and components to ensure that they are performing within allowable limits.
-
Page 9: Obdii Monitor Readiness Status
Catalyst Evaporative System 02 Sensor Heater Secondary air Heated Catalyst A/C system 2.5 OBDII Monitor Readiness Status OBDII systems must indicate whether or not the vehicle * s PCM,s monitor system has completed testing on each component. Components that have been tested will be reported as “Ready”,or “Complete” , meaning they have been tested by the OBD II system.
-
Page 10
exceed federal standards. If the MIL illuminates with a steady light, it indicates that a problem has been detected and the vehicle should be serviced as soon as possible. Under certain conditions, the dashboard light will blink or flash. This indicates a severe problem and flashing is intended to discourage vehicle operation. -
Page 11: Using The Scan Tool
3. Using the Scan Tool 3.1 Tool Description 1) GREEN LED — Indicates that engine systems are running normally (The number of monitors on the vehicle which are active and performing their diagnostic testing is in the allowed limit, and no DTCs are present).
-
Page 12
2) YELLOW LED Indicates there is a possible problem. A “pending” DTC is present and/or some of the vehicle’s emission monitors have not run their diagnostic testings 3) RED LED — Indicates there is a problem in one or more of the 〇… -
Page 13: Specifl Cations
Specifications Display: Back lit, 128 x 64 pixel display with contrast adjustment Operating Temperature: 0 to 60^(32 to 140 F° ) Storage Temperature:-20 to 701 (-4 to 158 F° ) External Power: 8.0 to 18.0 V power provided via vehicle battery Dimensions: Length Width…
-
Page 14
1) From Main Menu, use UP/DOWN scroll button to select DTC Lookup and press ENTER button. • The number “x/x” to the right indicates total number of items under this menu and sequence of highlighted item. • The»?» to the right indicates help in formation available.Press HELP button to view help information for selected item.. -
Page 15
5) To enter another DTC, press ESC button to return to previous screen. 6) To exit to Main Menu, press ESC button. -
Page 16: Product Setup
3.7 Product Setup The scan tool allows you to make the following adjustments and settings: Language:Selects the desired language. Contrast adjustment: Adjusts the contrast of the LCD display. Unit of measure:Sets the unit of measure to English or Metric. Auto Power-OW:Sets automatic power-off Limits. Beep Set:Tums on/off beep.
-
Page 17
Langusge Setup English is the default langupge. From System Setup menu, use UP/DOWN scroll button to select Language, and press ENTER button. Use UP/DOWN scroll button to select the desired language and press NETER button to save your selection and return to previous menu. Contrast Adjustment From System Setup menu, use UP/DOWN scroll button to select Contrast, and press ENTER button. -
Page 18
From Contrast menu, use UP/DOWN scroll button to increase or decrease contrast. Press ENTER button to save your settings and return to previous menu. Unit of Measurement Metric is the default measurement unit. From System Setup menu, use UP/DOWN scroll button to select Unit of Measure and press ENTER button. -
Page 19
Beep Set The default setting is Beep On. 1) From System Setup menu, use UP/DOWN scroll button to select Beep Set and press ENTER button. From Beep Set menu, use UP/DOWN scroll button to select Beep ON or Beep OFF to turn on/off the beep. 3) Press ENTER button to save your selection and return to previous menu. -
Page 20
Tool Self -test Self-test, and press ENTER button. 2) Select Display Test from Tool Self-test menu and press ENTER button. Press ENTER button again to start test. Look for missing spots in the solid black characters. When completed, press ESC button to return. -
Page 21
B. Keyboard Test The Keyboard Test function verifies if the keys are functioning properly. 1) Use UP/DOWN scroll button to select Keyboard Test from the Tool Self-test menu, and then press ENTER button. Press any key to start test. When you press a key, the key name should be observed on the display. -
Page 22: Tool Information
Information and press ENTER button. 2) View tool information on screen. 3.9 Vehicle Coverage The KONNWEI KW 590 OBDII/EOBD Scanner is specially designed to work with all OBD II compliant vehicles, including those equipped with the next-generation protocol ——Control Area Network (CAN). It is…
-
Page 23
check the Vehicle Emissions Control Information (VECI) Label which is located under the hood or by the radiator of most vehicles. If the vehicle is OBD II compliant, the label will designate “OBD II Certified” • Additionally, Government regulations mandate that all OBD II compliant vehicles must have a “common”… -
Page 24: Review Data
If the scan tool won’t power up or operates incorrectly in any other way, you need to do the following to check up: • Check if the scan tool’s OBDII connector is securely connected to the vehicle’s DLC; • Check if the DLC pins are bent or broken. Clean the DLC pins if necessary.
-
Page 25
Module Present data containing module ID and protocol type can be reviewed. 3) Review selected data on screen. • If there is no data stored for selected item, a «Not Supported or Stor ed No Data!» message shows on the screen. -
Page 26: Obdii Diagnostics
5. OBDII Diagnostics When more than one vehicle control module is detected by the scan tool, you will be prompted to select the module where the data may be retrieved. The most often to be selected are the Power train Control Module [PCM] and Transmission Control Module [TCM].
-
Page 27
• If the «LINKING ERROR» message does not go away, then there Erase previously stored data to save data from this test? might be problems for the scan tool to communicate with the vehicle. Contact your local distributor or the manufacturers customer service department for assistance. -
Page 28: Reading Codes
• Use UP/DOWN scroll button to select a module and press ENTER button. 5.1 Reading Codes ♦ Reading Codes can be done with the key on enging off (KOEO) or with the key on engine running (KOER) ♦ Stored Codes are also known as «hard codes» or «permanent codes». These codes cause the control module to illuminate the malfunction indicator lamp (MIL) when emission-related fault occurs.
-
Page 29
• If there are no Diagnostic Trouble Codes present, the display indicates «No(pending) codes are stored in the module!» Wait a few seconds or press any key to return to Diagnostic Menu. 3) View DTCs and their definitions on screen. •… -
Page 30: Erasing Codes
• If the manufacturer for your vehicle is not listed, use UP/DO WN scroll button to select Other and press ENTER button. 5.2 Erasing Codes CAUTION: Erasing the Diagnostic Trouble Codes may allow the scan tool to delets not only the codes from the vehicle’s on-board computer, but also Freeze Frame» data and manufacturer specific enhanced data.
-
Page 31
• If you do not want to proceed with erasing codes, press ESC button or use UP/DOWN scroll button to select NO to exit. A message of «Command Can celled!» show ups. Wait a few seconds or press any key to return to Diagnostic Menu. Press ENTER button to confirm. -
Page 32
5.3 Live Data Viewing Data The View Data function allows viewing of live or real time PID data of vehicle’s computer module(S). 1) To view live data, use UP/DOWN scroll button to select Live Data from Diagnostic Menu and press ENTER button. ) Wait a few seconds while the scan tool validates the PID MAP. -
Page 33
5) View live PIDs on the screen. Use UP/DOWN scroll button for more PIDs if an UP or DOWN arrow appears on the screen. • The number «x» to the right of the screen indicates sequence of highlighted item. • If you want to view full name of the highlighted PID, press Help button. -
Page 34
Unit of Measure Complete Data Set Observe on-screen instructions. 9) use UP/DOWN scroll button to move up and down. Selected parameters are marked with solid squares. 6/84 ■ DTC CNT □ DTCFRZF ■ FUELSYS1 ■ FUELSYS2 □ LOAD PCT(%) • The number «x»… -
Page 35
10) Press ESC button to view selected PIDs on screen. Recording Complete Data Set 11) Use ESC button to return to View Data menu and/or return to Live Data menu. Recording Data The Record Data function allows recrding vehicle modules’ Parameter Identification (FID) data to help diagnose intermittent vehicle problems. -
Page 36
To record complete set of live data, use UP/DOWN scroll button to select Complete Data Set from Record Data menu and press ENTER button. Use UP/DOWN scroll button to select a trigger mode and press ENTER button. 4) Use UP/DOWN scroll button to select a memory location and press ENTER button. -
Page 37
Recording Complete Data Set prompting to overwrite old recording displays. • If you wish to proceed with overwriting the old recording, press ENTER button; if you do not wish to overwrite it, use UP/DOWN button to select NO or press ESC button to pick another memory location Observe on-screen instructions. -
Page 38
♦ Drive till a DTC is detected when DTC Trigger is selected, If no DTCs are detected, press ESC to exit recording. • The number «x/x…» to the upper right corner of the screen indicates the maximum frames that can be recorded and the number of recorded frames. -
Page 39
Deselect To record customized data, use UP/DOWN scroll button to select Custom Data Set from Record Data menu and press ENTER button. 9) Observe on-screen instructions. Wait a few seconds or press any key to continue. 10) Use ENTER button select/deselect data parameters, Selected parameters are marked with solid squares. -
Page 40
Recording Custom Data Set Deselect all selected PIDs? If you decide to deselect these items, press ENTER; if you decide not to, press ESC button, or use UP/DOWN button to select NO ■ DTC CNT 會 □ FUELSYS1 ■ FUELSYS2 ■… -
Page 41
• The asterisk (*) icon on the screen indicates that there is a previous recording in the memory location. • If you select a location marked with an asterisk (*) icon, a message prompting to overwrite old recording is displayed. •… -
Page 42
15) The scan tool keep recording PID data until user presses ESC button, the selected memory location is full, or it completes recording, A message prompting to playback data shows on the screen. • If you wish to playback recorded data, press ENTER button; if you do not wish to playback, press ECS button, or use UP/DOWN button to select NO and press ENTER button to return to Record Data menu. -
Page 43
• You are also allowed to playback recorded data immediately after recording. 2) Use UP/DOWN button to select the memory location marked with an asterisk (*) icon. • If there is no recording in selected location, a message “Not Supported or Stored No Data”… -
Page 44: Viewing Freeze Frame Data
5.4 Viewing Freeze Frame Data 1) To view freeze frame data, use UP/DOWN scroll button to select View Freeze Frame from Diagnostic Menu and press ENTER button. Wait a few seconds while the scan tool validates the PID MAP. If retrieved in formation covers more than open screen, then a down arrow will appear.
-
Page 45: Retrieving I/M Readiness Status
If you want to view full name of a PID, use UP/DOWN scroll button to select the PID, and press HELP button. 5) Wait a few seconds of press any button to return to previous screen. 5.5 Retrieving I/M Readiness Status I/M Readiness function is used to check the operations of the Emission System on OBD2 compliant vehicles.
-
Page 46
If the vehicle supports both types of tests, then both types will be shown on the screen for selection. Use UP/DOWN scroll button, as necessary, to view the status of the MIL light («ON» or «OFF») and the following monitors: •… -
Page 47: Monitor Test
5) Press ESC button to return to Diagnostic Menu. 5.6 02 Monitor Test OBD2 regulations set by SAE require that relevant vehicles monitor and test the oxygen (02) sensors to identify problems related to fuel efficiency and vehicle emissions. These tests are not on-demand tests and they are done automatically when engine operating conditions are within specified limits.
-
Page 48: On-Board Monitor Test
View test results of selected 02 sensor. Use UP/DOWN scroll button to view more screens of data if an DOWN icon displays. Press ESC button to return to the previous menus. 5.7 On-Board Monitor Test The On-Board Monitor Test is useful after servicing of after erasing a vehicle’s control module memory.
-
Page 49
Use UP/DOWN scroll button to select On-Board Mon. Test from Diagnostic Menu and press ENTER button. Wait a few seconds while the scan tool validates the PID MAP. From On-Board Mon. Test menu, use UP/DOWN scroll button to select a test to view and press ENTER button. If the vehicle under test does not support the mode, an advisory message will be displayed on the screen. -
Page 50: Component Test
Use UP/DOWN scroll button to select the desired monitor from On-Board Mon. Test menu and press ENTER button. View test data on screen. . For CAN-equipped vehicles, test results displayed can be as below: Press ESC buttion to return to the previous menus. 5.8 Component Test The Component Test function allows iuitiating a leak test for the vehicle’s EVAP system.
-
Page 51: Viewing Vehicle Information
From Component Test menu, use UP/DOWN scroll button to select the test to be initiated. If the test has been initiated by the vehicle, a confirmation message will be displayed on the screen. • Some vehicles do not allow scan tools to control vehicle systems or components.
-
Page 52
Performance Tracking on 2000 and newer vehicles that support Mode 9. 1) Use UP/DOWN scroll button to select Vehicle Info, from the Diagnostic Menu and press ENTER button. 2) An advisory message comes up to remind you. Wait a few seconds or press any key to continue. -
Page 53: Modules Present
5.10 Modules Present The Modules Present function allows viewing of the module IDs and communication protocols for OBD2 modules in the vehicle. 1) Use UP/DOWN scroll button to select Modules Present from Diagnostic Menu and press ENTER button. 2) View modules present with their IDs and communication protocols.
-
Page 54: Led And Audio
6 LED and AUDIO 6.1 LED Interpretation GREEN LED — Indicates that engine systems are “OK” and operating normally (the number of Monitors supported by the vehicle which have run and performed their self-diagnostic testing is in the allowed limit. MIL is off). There are no stored and pending DTCs.
-
Page 56: Print Data
LED light Audio Tone Beep Interval Green LED Two long beeps 5 seconds Yellow short,long,short beep 5 seconds Red LED Four short beeps 5 seconds pres After you have read the information, ESC to exit Hie other buttons are disabled to prevent misoperation. 7* Print Data The Print Data fonction allows printing out diagnostic data recorded by the scan tool or customized test reports.
-
Page 58: Update Mode
Use the scroll button to select from in the scan tool, UP/DOWN Print Data Main Menu and press the OK button. (Figure 5.2) Figure 5.2 Use the DP/DOWN scroll button to select the desired item to print from Print Data menu.
-
Page 59
computer and Release it after the scan tool displays a message “ Update Mode”; Open the uplink software, click “Check update” button, will download the upgrade file from internet then update to scan tool. Wait for few minutes until update succeed 沖… -
Page 60: Service Procedures
9. Service Procedures If you have any questions, please contact your local store, distributor or visit our website www.itoscanner.com If it becomes necessary to return the scan tool for repair, contact your local distributor for more information.
- Page 1
KW590… -
Page 2: Table Of Contents
Table of Contents Safety Precautions and Warnings ………………1 General Information ………………….2 On-Board Diagnostics(OBD) II …………….2 Diagnostic Trouble Codes (DTCs) …………..2 Location of the Data Link Connector (DLC)…………3 OBDII Readiness Monitors …………….4 OBD II Monitor Readiness Status …………..5 OBOII Definitions …………………
-
Page 3: Safety Precautions And Warnings
Safety Precautions and Warnings To prevent personal injury or damage to vehicles and/or the scan tool , read this instruction manual first and observe the following safety precautions at a minimum whenever working on a vehicle: • Always perform automotive testing in a safe environment. •…
-
Page 4: General Information
2. General Information 2.1 On-Board Diagnostics(OBD)II The first generation of On-Board Diagnostics (called OBD i) was developed by the California Air Resources Board (ARB) and implemented in 1988 to monitor some of the emission control components on vehicles, As technology evolved and the desire to improve the On-Board Diagnostic system increased, a new generation of On-Board Diagnostic system was developed, This second generation of On-Board Diagnostic regulations is called»…
-
Page 6: Location Of The Data Link Connector (Dlc)
Identifying specific malfunctioning section of the systems Code Type Sub-systems Generic (SAE): l=Fuel and Air Metering P0,P2,P34^P39 2=Fuel and Air Metering B0.B3 3=Igmtion System or Engine Misfire CO, C3 4=Auxiliary Emission Controls U0,U3 5=Vehicle Speed Control and Idle Controls Manufacturer specific: PI, P30-P33 6=Computer Output Circuits B1,B2…
-
Page 8: Obdii Readiness Monitors
2.4 OBDII Readiness Monitors An important part of a vehicle’ s OBD II system is the Readiness Monitors, which are indicators used to find out if all of the emissions components have been evaluated by the OBD II system. They are running periodic tests on specific systems and components to ensure that they are performing within allowable limits.
-
Page 9: Obdii Monitor Readiness Status
Catalyst Evaporative System 02 Sensor Heater Secondary air Heated Catalyst A/C system 2.5 OBDII Monitor Readiness Status OBDII systems must indicate whether or not the vehicle * s PCM,s monitor system has completed testing on each component. Components that have been tested will be reported as “Ready”,or “Complete” , meaning they have been tested by the OBD II system.
- Page 10
exceed federal standards. If the MIL illuminates with a steady light, it indicates that a problem has been detected and the vehicle should be serviced as soon as possible. Under certain conditions, the dashboard light will blink or flash. This indicates a severe problem and flashing is intended to discourage vehicle operation. -
Page 11: Using The Scan Tool
3. Using the Scan Tool 3.1 Tool Description 1) GREEN LED — Indicates that engine systems are running normally (The number of monitors on the vehicle which are active and performing their diagnostic testing is in the allowed limit, and no DTCs are present).
- Page 12
2) YELLOW LED Indicates there is a possible problem. A “pending” DTC is present and/or some of the vehicle’s emission monitors have not run their diagnostic testings 3) RED LED — Indicates there is a problem in one or more of the 〇… -
Page 13: Specifl Cations
Specifications Display: Back lit, 128 x 64 pixel display with contrast adjustment Operating Temperature: 0 to 60^(32 to 140 F° ) Storage Temperature:-20 to 701 (-4 to 158 F° ) External Power: 8.0 to 18.0 V power provided via vehicle battery Dimensions: Length Width…
- Page 14
1) From Main Menu, use UP/DOWN scroll button to select DTC Lookup and press ENTER button. • The number “x/x” to the right indicates total number of items under this menu and sequence of highlighted item. • The»?» to the right indicates help in formation available.Press HELP button to view help information for selected item.. - Page 15
5) To enter another DTC, press ESC button to return to previous screen. 6) To exit to Main Menu, press ESC button. -
Page 16: Product Setup
3.7 Product Setup The scan tool allows you to make the following adjustments and settings: Language:Selects the desired language. Contrast adjustment: Adjusts the contrast of the LCD display. Unit of measure:Sets the unit of measure to English or Metric. Auto Power-OW:Sets automatic power-off Limits. Beep Set:Tums on/off beep.
- Page 17
Langusge Setup English is the default langupge. From System Setup menu, use UP/DOWN scroll button to select Language, and press ENTER button. Use UP/DOWN scroll button to select the desired language and press NETER button to save your selection and return to previous menu. Contrast Adjustment From System Setup menu, use UP/DOWN scroll button to select Contrast, and press ENTER button. - Page 18
From Contrast menu, use UP/DOWN scroll button to increase or decrease contrast. Press ENTER button to save your settings and return to previous menu. Unit of Measurement Metric is the default measurement unit. From System Setup menu, use UP/DOWN scroll button to select Unit of Measure and press ENTER button. - Page 19
Beep Set The default setting is Beep On. 1) From System Setup menu, use UP/DOWN scroll button to select Beep Set and press ENTER button. From Beep Set menu, use UP/DOWN scroll button to select Beep ON or Beep OFF to turn on/off the beep. 3) Press ENTER button to save your selection and return to previous menu. - Page 20
Tool Self -test Self-test, and press ENTER button. 2) Select Display Test from Tool Self-test menu and press ENTER button. Press ENTER button again to start test. Look for missing spots in the solid black characters. When completed, press ESC button to return. - Page 21
B. Keyboard Test The Keyboard Test function verifies if the keys are functioning properly. 1) Use UP/DOWN scroll button to select Keyboard Test from the Tool Self-test menu, and then press ENTER button. Press any key to start test. When you press a key, the key name should be observed on the display. -
Page 22: Tool Information
Information and press ENTER button. 2) View tool information on screen. 3.9 Vehicle Coverage The KONNWEI KW 590 OBDII/EOBD Scanner is specially designed to work with all OBD II compliant vehicles, including those equipped with the next-generation protocol ——Control Area Network (CAN). It is…
- Page 23
check the Vehicle Emissions Control Information (VECI) Label which is located under the hood or by the radiator of most vehicles. If the vehicle is OBD II compliant, the label will designate “OBD II Certified” • Additionally, Government regulations mandate that all OBD II compliant vehicles must have a “common”… -
Page 24: Review Data
If the scan tool won’t power up or operates incorrectly in any other way, you need to do the following to check up: • Check if the scan tool’s OBDII connector is securely connected to the vehicle’s DLC; • Check if the DLC pins are bent or broken. Clean the DLC pins if necessary.
- Page 25
Module Present data containing module ID and protocol type can be reviewed. 3) Review selected data on screen. • If there is no data stored for selected item, a «Not Supported or Stor ed No Data!» message shows on the screen. -
Page 26: Obdii Diagnostics
5. OBDII Diagnostics When more than one vehicle control module is detected by the scan tool, you will be prompted to select the module where the data may be retrieved. The most often to be selected are the Power train Control Module [PCM] and Transmission Control Module [TCM].
- Page 27
• If the «LINKING ERROR» message does not go away, then there Erase previously stored data to save data from this test? might be problems for the scan tool to communicate with the vehicle. Contact your local distributor or the manufacturers customer service department for assistance. -
Page 28: Reading Codes
• Use UP/DOWN scroll button to select a module and press ENTER button. 5.1 Reading Codes ♦ Reading Codes can be done with the key on enging off (KOEO) or with the key on engine running (KOER) ♦ Stored Codes are also known as «hard codes» or «permanent codes». These codes cause the control module to illuminate the malfunction indicator lamp (MIL) when emission-related fault occurs.
- Page 29
• If there are no Diagnostic Trouble Codes present, the display indicates «No(pending) codes are stored in the module!» Wait a few seconds or press any key to return to Diagnostic Menu. 3) View DTCs and their definitions on screen. •… -
Page 30: Erasing Codes
• If the manufacturer for your vehicle is not listed, use UP/DO WN scroll button to select Other and press ENTER button. 5.2 Erasing Codes CAUTION: Erasing the Diagnostic Trouble Codes may allow the scan tool to delets not only the codes from the vehicle’s on-board computer, but also Freeze Frame» data and manufacturer specific enhanced data.
- Page 31
• If you do not want to proceed with erasing codes, press ESC button or use UP/DOWN scroll button to select NO to exit. A message of «Command Can celled!» show ups. Wait a few seconds or press any key to return to Diagnostic Menu. Press ENTER button to confirm. - Page 32
5.3 Live Data Viewing Data The View Data function allows viewing of live or real time PID data of vehicle’s computer module(S). 1) To view live data, use UP/DOWN scroll button to select Live Data from Diagnostic Menu and press ENTER button. ) Wait a few seconds while the scan tool validates the PID MAP. - Page 33
5) View live PIDs on the screen. Use UP/DOWN scroll button for more PIDs if an UP or DOWN arrow appears on the screen. • The number «x» to the right of the screen indicates sequence of highlighted item. • If you want to view full name of the highlighted PID, press Help button. - Page 34
Unit of Measure Complete Data Set Observe on-screen instructions. 9) use UP/DOWN scroll button to move up and down. Selected parameters are marked with solid squares. 6/84 ■ DTC CNT □ DTCFRZF ■ FUELSYS1 ■ FUELSYS2 □ LOAD PCT(%) • The number «x»… - Page 35
10) Press ESC button to view selected PIDs on screen. Recording Complete Data Set 11) Use ESC button to return to View Data menu and/or return to Live Data menu. Recording Data The Record Data function allows recrding vehicle modules’ Parameter Identification (FID) data to help diagnose intermittent vehicle problems. - Page 36
To record complete set of live data, use UP/DOWN scroll button to select Complete Data Set from Record Data menu and press ENTER button. Use UP/DOWN scroll button to select a trigger mode and press ENTER button. 4) Use UP/DOWN scroll button to select a memory location and press ENTER button. - Page 37
Recording Complete Data Set prompting to overwrite old recording displays. • If you wish to proceed with overwriting the old recording, press ENTER button; if you do not wish to overwrite it, use UP/DOWN button to select NO or press ESC button to pick another memory location Observe on-screen instructions. - Page 38
♦ Drive till a DTC is detected when DTC Trigger is selected, If no DTCs are detected, press ESC to exit recording. • The number «x/x…» to the upper right corner of the screen indicates the maximum frames that can be recorded and the number of recorded frames. - Page 39
Deselect To record customized data, use UP/DOWN scroll button to select Custom Data Set from Record Data menu and press ENTER button. 9) Observe on-screen instructions. Wait a few seconds or press any key to continue. 10) Use ENTER button select/deselect data parameters, Selected parameters are marked with solid squares. - Page 40
Recording Custom Data Set Deselect all selected PIDs? If you decide to deselect these items, press ENTER; if you decide not to, press ESC button, or use UP/DOWN button to select NO ■ DTC CNT 會 □ FUELSYS1 ■ FUELSYS2 ■… - Page 41
• The asterisk (*) icon on the screen indicates that there is a previous recording in the memory location. • If you select a location marked with an asterisk (*) icon, a message prompting to overwrite old recording is displayed. •… - Page 42
15) The scan tool keep recording PID data until user presses ESC button, the selected memory location is full, or it completes recording, A message prompting to playback data shows on the screen. • If you wish to playback recorded data, press ENTER button; if you do not wish to playback, press ECS button, or use UP/DOWN button to select NO and press ENTER button to return to Record Data menu. - Page 43
• You are also allowed to playback recorded data immediately after recording. 2) Use UP/DOWN button to select the memory location marked with an asterisk (*) icon. • If there is no recording in selected location, a message “Not Supported or Stored No Data”… -
Page 44: Viewing Freeze Frame Data
5.4 Viewing Freeze Frame Data 1) To view freeze frame data, use UP/DOWN scroll button to select View Freeze Frame from Diagnostic Menu and press ENTER button. Wait a few seconds while the scan tool validates the PID MAP. If retrieved in formation covers more than open screen, then a down arrow will appear.
-
Page 45: Retrieving I/M Readiness Status
If you want to view full name of a PID, use UP/DOWN scroll button to select the PID, and press HELP button. 5) Wait a few seconds of press any button to return to previous screen. 5.5 Retrieving I/M Readiness Status I/M Readiness function is used to check the operations of the Emission System on OBD2 compliant vehicles.
- Page 46
If the vehicle supports both types of tests, then both types will be shown on the screen for selection. Use UP/DOWN scroll button, as necessary, to view the status of the MIL light («ON» or «OFF») and the following monitors: •… -
Page 47: Monitor Test
5) Press ESC button to return to Diagnostic Menu. 5.6 02 Monitor Test OBD2 regulations set by SAE require that relevant vehicles monitor and test the oxygen (02) sensors to identify problems related to fuel efficiency and vehicle emissions. These tests are not on-demand tests and they are done automatically when engine operating conditions are within specified limits.
-
Page 48: On-Board Monitor Test
View test results of selected 02 sensor. Use UP/DOWN scroll button to view more screens of data if an DOWN icon displays. Press ESC button to return to the previous menus. 5.7 On-Board Monitor Test The On-Board Monitor Test is useful after servicing of after erasing a vehicle’s control module memory.
- Page 49
Use UP/DOWN scroll button to select On-Board Mon. Test from Diagnostic Menu and press ENTER button. Wait a few seconds while the scan tool validates the PID MAP. From On-Board Mon. Test menu, use UP/DOWN scroll button to select a test to view and press ENTER button. If the vehicle under test does not support the mode, an advisory message will be displayed on the screen. -
Page 50: Component Test
Use UP/DOWN scroll button to select the desired monitor from On-Board Mon. Test menu and press ENTER button. View test data on screen. . For CAN-equipped vehicles, test results displayed can be as below: Press ESC buttion to return to the previous menus. 5.8 Component Test The Component Test function allows iuitiating a leak test for the vehicle’s EVAP system.
-
Page 51: Viewing Vehicle Information
From Component Test menu, use UP/DOWN scroll button to select the test to be initiated. If the test has been initiated by the vehicle, a confirmation message will be displayed on the screen. • Some vehicles do not allow scan tools to control vehicle systems or components.
- Page 52
Performance Tracking on 2000 and newer vehicles that support Mode 9. 1) Use UP/DOWN scroll button to select Vehicle Info, from the Diagnostic Menu and press ENTER button. 2) An advisory message comes up to remind you. Wait a few seconds or press any key to continue. -
Page 53: Modules Present
5.10 Modules Present The Modules Present function allows viewing of the module IDs and communication protocols for OBD2 modules in the vehicle. 1) Use UP/DOWN scroll button to select Modules Present from Diagnostic Menu and press ENTER button. 2) View modules present with their IDs and communication protocols.
-
Page 54: Led And Audio
6 LED and AUDIO 6.1 LED Interpretation GREEN LED — Indicates that engine systems are “OK” and operating normally (the number of Monitors supported by the vehicle which have run and performed their self-diagnostic testing is in the allowed limit. MIL is off). There are no stored and pending DTCs.
-
Page 56: Print Data
LED light Audio Tone Beep Interval Green LED Two long beeps 5 seconds Yellow short,long,short beep 5 seconds Red LED Four short beeps 5 seconds pres After you have read the information, ESC to exit Hie other buttons are disabled to prevent misoperation. 7* Print Data The Print Data fonction allows printing out diagnostic data recorded by the scan tool or customized test reports.
-
Page 58: Update Mode
Use the scroll button to select from in the scan tool, UP/DOWN Print Data Main Menu and press the OK button. (Figure 5.2) Figure 5.2 Use the DP/DOWN scroll button to select the desired item to print from Print Data menu.
- Page 59
computer and Release it after the scan tool displays a message “ Update Mode”; Open the uplink software, click “Check update” button, will download the upgrade file from internet then update to scan tool. Wait for few minutes until update succeed 沖… -
Page 60: Service Procedures
9. Service Procedures If you have any questions, please contact your local store, distributor or visit our website www.itoscanner.com If it becomes necessary to return the scan tool for repair, contact your local distributor for more information.
Изображения служат только для ознакомления,
см. техническую документацию
Добавить в корзину 1 шт.
на сумму 6 050 руб.
Номенклатурный номер: 9000676019
Артикул: Автосканер Konnwei KW 590
PartNumber: 3128
Бренд / Производитель: Вымпел
Описание
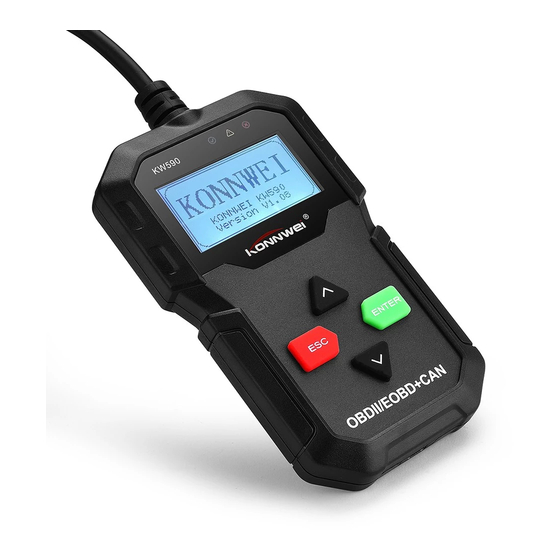
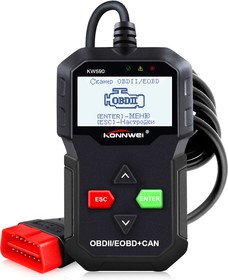
Универсальный автосканер KONNWEI KW 590 используется для мониторинга, чтения и удаления кодов ошибок двигателя.
Особенности
— Меню на русском языке!
— Монохромный ЖК дисплей.
— Языки (русский, английский, немецкий, французский).
— Совместим со всеми автомобилями произведенными с 1996 года и поддерживающими протоколы диагностики (OBD II и CAN)
— Оснащен уникальной запатентованной системой One-click I/M Readiness Key для быстрой диагностики
— Имеет яркую цветную светодиодную индикацию и встроенный динамик для визуального и звукового оповещения
— Быстро считывает диагностические коды неисправностей (ДКН)
— С его помощью можно сбросить индикаторы ошибки и удалить ДКН
— Считывает общие (P0, P2, P3 и U0), специфичные для производителя (P1, P3 и U1) коды неисправностей и ожидающие подтверждения коды
— Получает расширенные результаты тестирования OBD II для специальных систем диагностики
— Записывает и воспроизводит данные Freeze frame (стоп-кадр)
— Считывает потоковые данные ДКН в реальном времени
— Имеет поддержку нового расширенного списка датчиков (дополнение к SAE J1979)
— Данные могут быть представлены в виде графиков
— Считывает, сохраняет и воспроизводит данные датчиков автомобиля
— Рекомендации по устранению неисправностей, полученные с помощью сканера позволят техническим специалистам быстрее справиться с основной причиной возникновения ошибки, сэкономив время диагностики и ремонта
— Резервное копирование данных памяти ЭБУ для их анализа вне транспортного средства
— Считывает информацию о транспортном средстве (VIN, CIN и CVN номера)
— Печать данных через ПК
— Возможность обновления прошивки через интернет, при подключении к ПК
Технические характеристики
— Дисплей: Монохромный ЖК экран (128х64 точек)
— Рабочая температура: от 0 до 60 ℃
— Температура хранения: от -20 до 70 ℃
— Напряжение питания: от 8 до 18 В (от колодки OBDII)
— Поддерживаемые протоколы: J1859-41.6, J1850-10.4, ISO9141, KWP2000 (ISO 14230) и CAN (ISO 11898)
Комплектация
1 х Автосканер KONNWEI KW 590
1 х Кабель USB — mini USB
1 х Руководство пользователя
Технические параметры
| Тип устройства | Диагностический сканер | |
| Тип подключения | Проводное | |
| Разъем подключения | колодка OBD II | |
| Интерпретация | Вывод информации на дисплей | |
| Протоколы связи | CAN(J-2284), ISO14230/9141, J1850PWM/VPW | |
| Вес, г | 365 | |
Техническая документация
Сроки доставки
Доставка в регион Курск
| Магазин «ЧИП и ДИП» | 17 июля1 | бесплатно |
| Курьер | 14 июля1 | 416 руб.2 |
| ПВЗ Boxberry | 13 июля1 | 99 руб.3 |
| ПВЗ Л-Пост | 14 июля1 | 99 руб.3 |
| ПВЗ СДЭК | 14 июля1 | 99 руб.3 |
| ПВЗ 5Post | 17 июля1 | 99 руб.2 |
| ПВЗ Яндекс Доставка | 20 июля1 | 99 руб.2 |
| ТК DPD | 13 июля1 | 584 руб.2 |
| ТК «Деловые линии» | 14 июля1 | 843 руб.2 |
| Почта России | 24 июля1 | 286 руб.2 |
Цена и наличие в магазинах
| ул. Карла Маркса, 68, ТЦ «Мега Гринн», 1 этаж | нет в наличии |
Розничная цена: 6 050 руб.
1 250 руб.
8 руб.
4 280 руб.
950 руб.
31 990 руб.
Автомобильный диагностический сканер KONNWEI KW590 OBD2 для Авто OBD 2 автомобильный

2020 новейший OBD2 сканер автомобильный диагностический сканер KONNWEI KW590 бесплатное обновление автомобильный диагностический инструмент лучше, чем ELM327 автоматический сканер

Описание товара
KW590 Введение:
Новый сканер KONNWE KW590 OBD2 имеет уникальные запатентованные кнопки логической навигации, экран с TFT подсветкой и встроенный динамик. KONNWE KW590-это действительно конечная простота и доступная цена, позволяющая пользователям проверять ремонт, дорожное испытание, состояние проверки, состояние мониторинга выбросов и решать проблемы с системами двигателя и возможностями привода. Диагностические функции автомобиля KW590 намного выше и полностью превосходят другие модели, такие как AD310 или NT201, по гораздо более доступной цене. Кроме того, KW590 поддерживает одно нажатие обновления и печать диагностических отчетов с ПК.

Есть ли у вас такие проблемы с транспортными средствами

Топ 6 причин для покупки KONNWE KW590
1. Функция KONNWEI KW590 гораздо лучше, чем AD310/OM123/NT201, И он может поддерживать диагностическую функцию OBDII 10 режимов, в то время как другой инструмент сканирования работает только для 5-6 функций s в соответствии с их диагностическим меню.
2. Встроенная память, она может хранить диагностические данные, замораживать кадр и коды неисправностей. Поддержка воспроизведения, вы можете просмотреть сохраненные данные, когда вы находитесь дома с питанием от ПК через порт USB.
3. Поддержка бессрочного обновления. Полностью совместим с официальной версией WINDOWS XP- WIN10.
4. Поддержка печати диагностического отчета через компьютер.
5. С дополнительной небольшой плюшевой сумкой, легко хранить и держать ваш сканирующий инструмент аккуратным в гараже!
6. Чип, используемый в KW590, работает гораздо быстрее, более стабильно и надежно. Скорость считывания кодов или данных в режиме реального времени в 2 -3 раза быстрее, чем у одного и того же инструмента сканирования!
7. Поддержка нескольких языков: английский/французский/испанский/голландский/немецкий/русский/португальский


KONNWEI KW590 функции и особенности:
1. Имеет уникальный дизайн логической nativation клавиатуры. (зеленый означает GO, и красный означает выход)
2. Яркие цветные светодиоды и встроенный динамик обеспечивают визуальную и звуковую индикацию для проверки готовности
3. Извлечение общих (P0, P2, P3 и U0), кодов конкретного производителя (P1, P3 и U1) и ожидаемых кодов
4. Легко определяет причину неисправности индикатор светильник (MIL)
5. Выключает светильник индикатора неисправности (MIL), очищает коды и сброс мониторов
6. Отображает определения DTC на tft-экране без онлайн-проверки.
7. Просмотр данных о замораживании кадра, хранящихся в автомобильной компьютерной плате.
8. Отображает мониторинг и состояние готовности I/M (связанные с выбросами).
9. Считывает данные в реальном времени PCM и отображает как в текстовом режиме, так и в графическом режиме.
10. Извлечение информации о транспортном средстве (VIN, CIN и CVN)
11. Многоязычное меню и определения DTC, полная поддержка русского языка.
12. Чрезвычайно прост в использовании и очень надежен.
13. Сервис бесплатного обновления Life time с помощью одного нажатия, инструмент сканирования автоматически обновится без worring.
14. Поддержка печати диагностического отчета через ПК.
15. Поддержка 10 режимов diagnsotics, включая испытание датчика O2, тест EVAP и тест компонентов.
16. Бесплатный подарок нейлоновой сумки для удобного хранения и аккуратного сканирования.


Автопроизводители KONNWE KW590
Американский производитель автомобилей: Работает на автомобиле obd2 с 1996 года по настоящее время,
Подходит для Chrysler, подходит для Ford, подходит для GM, подходит для Jeep
Европейский автомобиль включает русский автомобиль): Работает на автомобиле obd2 с 2003 года по настоящее время,
Подходит для Alfa Romeo, подходит для SAAB, подходит для Acura, подходит для Opel, подходит для Audi, подходит для сиденья, подходит для Peugeot, подходит для Renault
Подходит для Bentley, подходит для Skoda, подходит для Daewoo, подходит для Benz, подходит для Daihatsu, подходит для Land Rover
Подходит для BMW, подходит для Vauxhall, подходит для Citroen, подходит для Volvo, подходит для Fiat, подходит для VW, подходит для Ford, подходит для Jaguar
Азиатский автомобиль: Работает на автомобиле obd2 с 2007 года по настоящее время,
Подходит для KIA, подходит для Isuzu, подходит для Honda, подходит для Mitsubishi, подходит для Hyundai, подходит для Dacia, подходит для Lexus, подходит для Mazda
Подходит для Nissan, подходит для Subaru, подходит для Suzuki, подходит для Toyota
Ssangyong все модели не поддерживаются.
Если вы хотите узнать, является ли ваш автомобиль стандартным автомобилем OBDII или нет (подходит для ELM327), пожалуйста, оставьте нам сообщение в этом формате: «Audi, a4, 2002, 2L», мы ответим вам в течение 12 часов.

Спецификация KONNWE KW590
Дисплей: с подсветкой m 128*64 пикселей дисплей с регулировкой контрастности
Рабочая температура: от 0 до 60 градусов Цельсия (от 32 до 140 градусов по Фаренгейту)
Температура хранения: от-20 до 70 градусов Цельсия (от-4 до 158 градусов по Фаренгейту)
Мощность: от 8 до 18 в обеспечивается через транспортное средство
Externel Мощность: 8,0 до 18,0 V Мощность отправки обеспечиваются с помощью аккумулятора транспортного средства
Размеры: 127 мм (5in ) x 78 мм (3,07 ») x 20 мм (0,79»)
Вес: 0,4 кг
Как печатать диагностический отчет?
Функция печати даты позволяет печатать диагностическую дату, записанную сканирующим инструментом или индивидуальные отчеты об испытаниях
1. Загрузка инструмента обновления с нашего сайта: www.itoscanner. Com или наш официальный сайт.
2. Подключите сканер к компьютеру с помощью кабеля USB
3. Запуск программы обновления uplink на вашем компьютере.
4. Используйте кнопку вверх/вниз, чтобы выбрать дату печати из главного меню в инструменте сканирования и нажмите кнопку Ok
Как обновить KONNWE KW590?
1. Удерживайте любую кнопку сканера до тех пор, пока кабель usb не подключен к ПК, вы увидите экран ниже.
Примечание: При установке отключите антивирусное программное обеспечение, в противном случае оно не сможет правильно установить драйвер
2. Загрузите и установите инструмент обновления с нашего официального сайта:
Http://www.itoscanner.com/
3. Кнопка обновления одним нажатием, Дождитесь завершения процесса обновления, сканер KW680 будет готов к работе! Мы будем обновлять до последней версии перед отправкой, как правило, нет необходимости обновлять в течение длительного времени.

Дисплей программного обеспечения

Фотографии товара


Упаковочный лист:
1 * OBD2 сканер KONNWE KW590
1 * Руководство пользователя на английском языке
1 * кабель OBD2
1 * USB кабель
1 * Бесплатная плюшевая сумка


Автосканер Konnwei KW590 позволяет самостоятельно проводить диагностику электронных систем автомобиля, устранять неисправности и ошибки в ЭБУ при их наличии. Поддерживает протоколы CAN (J-2284), ISO 14230, ISO 9141, J 1850 PWM, J 1850 VPW, что делает сканер совместимым с большинством популярных моделей авто. Оснащен матричным монохромным экраном, на который выводится полученная информация. Прибор выполнен в черном пластиковом корпусе, в качестве элементов управления выступают кнопки на передней панели. Имеет простой и понятный интерфейс на русском и английском языках, достаточно прост в использовании. Поставляется в практичном чехле, в комплектацию также входит USB адаптер.
Подключение прибора
Как использовать:
- Выключить двигатель;
- Присоединить кабель (идет в комплекте) к гнезду прикуривателя и контроллеру;
- Включить зажигание и приступить к сканированию.
Чтение кодов
В случае выявления неисправностей сработает звуковой сигнал. Свечение индикатора вызывают только ошибки в системных кодах. Тестер определяет и удаляет стандартную кодировку РО, Р2, U1 и ошибки от производителя Р1, Р3.
Подходит для все автомобилей США, Европы и Азии, выпущеных после 1996
Поддерживаемые протоколы:
J1859-41.6, J1850-10.4, ISO9141, KWP2000 (ISO 14230) и CAN (ISO 11898)
Поддержка автопроизводителей:
— Американские автомобили: Работает на автомобиле obd2 с 1996 года по настоящее время
Chrysler, Ford, GM, Jeep
— Европейские марки автомобилей: Работает на автомобиле obd2 с 2001 года по настоящее время
Alfa Romeo, SAAB, Acura, Opel, Audi, сиденья, Peugeot, Renault
Bentley, Skoda, Daewoo, Benz, Daihatsu, Land Rover
BMW, Vauxhall, Citroen, Volvo, Fiat, VW, Ford, Jaguar
— Азиатские автомобили: Работает на автомобиле obd2 с 2008 года по настоящее время
KIA, Isuzu, Honda, Mitsubishi, Hyundai, Dacia, Lexus, Mazda
Nissan, Subaru, Suzuki, Toyota