перейти к содержанию
![]()
![]()
 Светодиодная световая полимеризация
Техническое обслуживание и очистка
Полимеризационная лампа VALO представляет собой герметичный блок с твердой поверхностью и устойчивой к царапинам стеклянной линзой. После каждого использования смочите марлю или мягкую ткань одобренным дезинфицирующим средством для поверхностей и протрите поверхность и линзу. Регулярно проверяйте линзу на наличие отвержденных стоматологических смол. При необходимости используйте неалмазный стоматологический инструмент, чтобы аккуратно удалить прилипшую смолу.
Барьерная втулка помогает предотвратить перекрестное загрязнение и предотвращает прилипание стоматологического композитного материала к поверхности линзы и корпуса зонда.
 ПРЕДУПРЕЖДЕНИЯ О БЕЗОПАСНОСТИ ПРОДУКТА:
- ЗАПРЕЩАЕТСЯ автоклавировать аккумуляторы, зарядное устройство, адаптер питания или фотополимеризационную лампу VALO.
- НЕ вставляйте пальцы, инструменты или другие предметы в батарейный отсек фонаря VALO.
- НЕ ПЫТАЙТЕСЬ чистить золотые контакты, любую часть батарейного отсека, батареи или зарядное устройство. Позвоните в службу поддержки клиентов Ultradent, если есть сомнения.
- НЕ погружайте VALO light в какие-либо ультразвуковые ванны, дезинфицирующие средства, чистящие растворы или любые жидкости.
- ЗАПРЕЩАЕТСЯ протирать фотополимеризационную лампу VALO едкими или абразивными чистящими средствами. См. списки допустимых чистящих средств ниже.
- ПРЕДОСТЕРЕЖЕНИЕ: Статическое электричество. Это устройство может быть восприимчиво к сильным магнитным или статическим электрическим полям, которые могут нарушить программирование. Если вы подозреваете, что это произошло, немедленно отключите питание или извлеките батареи.
Сохраните эту карточку для справки и записей.
ДОПУСТИМЫЕ ОЧИСТИТЕЛИ:
- Изопропиловый спирт
- Чистящие средства на основе этилового спирта
- Lysol ®* Дезинфицирующий спрей марки III
- Концентрат Lysol ®* (только на спиртовой основе)
НЕПРИЕМЛЕМЫЕ ЧИСТЯЩИЕ СРЕДСТВА — НЕ ИСПОЛЬЗУЙТЕ:
- CaviCide 1™* раствор или салфетки†
- Продукты CaviCide™* (не отбеливающие)†
- Сильное щелочное моющее средство любого типа, включая мыло для рук и средство для мытья посуды.
- Чистящие средства на основе отбеливателя (например, Clorox™* или Sterilox™*)
- Чистящие средства на основе перекиси водорода
- Абразивные чистящие средства (например, Comet Cleanser™*)
- Очистители на основе ацетона или углеводорода
- МЭК (метилэтилкетон)
- Бирекс р®*
- Глутеральдегид
- Чистящие средства на основе хлорида четвертичного аммония
*Не является зарегистрированным товарным знаком Ultradent Products, Inc. †Дезинфицирующее средство CaviCide® больше не рекомендуется в качестве чистящего средства для полимеризационных ламп VALO™, поскольку оно может вызвать обесцвечивание и коррозию корпуса зонда.
Зарядка и замена батарей
Полимеризационная лампа VALO поставляется с 4 перезаряжаемыми литий-железо-фосфатными батареями.
Как заряжать аккумуляторы:
- Перед использованием проверьте аккумуляторы и зарядные устройства на наличие коррозии, ржавчины или повреждений.
- Включите зарядное устройство в электрическую розетку.
- Вставьте аккумуляторы в зарядное устройство так, чтобы положительный (+) конец был направлен в сторону световых индикаторов на зарядном устройстве.
- Зеленые индикаторы означают, что батареи готовы к использованию.
- Батареи заряжаются за 1-3 часа. Оставьте аккумуляторы в зарядном устройстве до тех пор, пока они не будут готовы к использованию.
Как заменить/вставить батарейки:
- Снимите заднюю крышку, повернув против часовой стрелки на четверть оборота.
- Удалите батарейки.
- Сначала вставьте новые батарейки положительной (+) стороной.
- Снова установите заднюю крышку, совместив и слегка надавив, одновременно поворачивая ее по часовой стрелке.
Крышка щелкнет, когда будет полностью прикреплена. - Аппарат готов к работе.

Авторизованные альтернативные батареи
Неперезаряжаемые, первичные батареи
- Tenergy Propel Photo Lithium: (безопасен, долговечен, рекомендуется)
- Titanium Innovations CR123A: (безопасный, долговечный, рекомендуется)
- Энерджайзер® * 123
- Duracell® * Ультра CR123A
- SureFire® * SF123A
- Panasonic® * CR123A
![]() ПРЕДУПРЕЖДЕНИЕ – ОСТОРОЖНО
ПРЕДУПРЕЖДЕНИЕ – ОСТОРОЖНО
- ЗАПРЕЩАЕТСЯ смешивать перезаряжаемые батареи с неперезаряжаемыми батареями.
- НЕ пытайтесь заряжать неперезаряжаемые батареи.
- Используйте только безопасные перезаряжаемые литий-железо-фосфатные батареи или неперезаряжаемые батареи.
- НЕ храните аккумуляторы при температуре выше 60°C или под прямыми солнечными лучами.
- ЗАПРЕЩАЕТСЯ автоклавировать аккумуляторы, зарядное устройство, адаптер переменного тока или фонарь VALO.
- НЕ допускайте попадания влаги на аккумуляторы или зарядное устройство и не заряжайте их вблизи легковоспламеняющихся материалов.
 http://qr.w69b.com/g/nzCv4AHxm
Есть вопросы по устранению неполадок?
Отсканируйте, чтобы отправить на ultradent.com. Выберите свой свет и прокрутите до раздела часто задаваемых вопросов. Если у вас остались вопросы, обращайтесь в ремонт оборудования по телефону 801.553.4574.
800.552.5512 | УЛЬТРАДЕНТ.COM
© 2021 Ultradent Products, Inc. Все права защищены.
1008290АР02 032621
Документы / Ресурсы
Рекомендации
CURING LIGHT LED.G USER’S MANUAL
Content
1. Introduction———————————————————1
2. Principle and usage————————————————1
3. Structure and components——————————————1
4. Technical specifications———————————————1
5. Install and uninstall way——————————————2
6. Operation————————————————————3
7. Precaution————————————————————4
8. Contraindication—————————————————4
9. Maintenance———————————————————4
10. After service———————————————————5
11.Troubleshooting—————————————————5
12. Packing List———————————————————6
13. Storage and transportation—————————————6
14. Environmental protection—————————————6
15. Manufacturer’s right———————————————6
16. For technical data, please contact——————————7
17. Symbol instruction————————————————7
18. Declaration of conformity—————————————9
19. Statement———————————————————12
1. Introduction
Guilin Woodpecker Medical Instrument Co., Ltd. is a hightech enterprise in researching, developing, and producing dental equipment, and has a perfect quality assurance system, main products including ultrasonic scaler, curing light, micro motor, apex locator and ultrasurgery etc.
2. Principle and usage
2.1 LED.G adopts the principle of ray radiation to solidify the light-sensitive resin by shooting at it in a short time.
2.2 This product is used to restore teeth and solidify material for whitening teeth.
3. Structure and components
LED.G (dental) is composed mainly of high power LED, optical fiber and main unit. (Picture 1)
4. Technical specifications
4.1 Power supply: 24V~ 50Hz/60Hz
4.2 Applied part: optical fiber
4.3 Light source:
Blue light
Wave length: 420nm-480nm
1
Light intensity: 1000mW/cm
2
~1200mW/cm
2
4.4 Working condition:
Environment temperature: 5℃ to 40℃
Relative humidity: ≤80%
Atmosphere pressure: 70kPa to 106kPa
4.5 Dimensions: 26mm×25mm×260mm
4.6 Net weight: 135g
4.7 Consumption power: ≤8W
4.8 Protection type against electrical shock: classⅡ
4.9 Protection against electrical shock: type B
4.10 Protection against harmful ingress of water or particular matter: ordinary equipment (IPX0)
4.11 Safety in the presence of flammable anesthetic mixture with air, oxygen or nitrous oxide: not suitable under this condition.
4.12 Intermittent operation instrument: after work 200 seconds, stop 20 seconds, and then work 20 seconds, stop 20 seconds, work in the rule as above circularly.
5. Install and uninstall way
5.1 Connect the LED power supply line with the power (24V~) of dental unit. Tight the nylon thread to the fixation of the dental unit, then it will be available for operation.
Notice:When installing the LED, be sure the power is cut off.
2
The two power wire should be a little longer than the nylon thread to keep the power wire safe.
5.2 Take off the red cap from the optical fiber and insert the metal part into the front of the built-in LED.G (Make sure to screw the fiber to the end by rotation).
5.3 Install the light hood as showed in picture 1.
5.4 Uninstall the LED, just reverse the procedure above.
Picture 1
6. Operation
You can choose one of three operation modes by pressing the mode switch button on the curing light.
6.1 Full power: the blue light radiates in full power.
3
6.2 Ramping: The blue light power increases stronger continually, after five seconds reaches to the highest power.
6.3 Pulse: The blue light works on the pulse condition. During the operation, aim blue solidification. The working time of all modes is ten seconds.
7. Precaution
7.1 During operation the light should be aimed straightly on the resin, to ensure solidification effectively.
7.2 Avoid aiming light at eyes directly.
①
WARNING: If the curing light works for 40s continously,
the temperature of the top of optical fiber may reach 56℃.
②
WARNING: Do not modify this equipment without authorization of the manufacturer.
8. Contraindication
The heart disease patients, pregnant women and children should be cautious to use this equipment.
9. Maintenance
9.1 Only the optical fiber can be autoclaved under high temperature and pressure.
4
9.2 After operation each time, please shut off the power source and clean the optical fiber.
10. After service
From the date this equipment has been sold, base on the warranty card, we will repair this equipment free of charge if it has quality problems, please refer to the warranty card for the warranty period for units and parts.
11. Troubleshooting
Faulty
Non-indication
Non-act.
Light intensity insufficient.
Possible cause
1. The LED is not connected well with the power.
2. The power is off.
1. Optical fiber isn’t inserted well to the bottom.
2. The optical fiber has cracked.
Solution
1. Check the connection of the LED and the power.
2. Make sure the power is on.
1. Install the optical fiber well.
2. Change the optical fiber.
3. Remove the resin.
3. There is resin remain on the surface of the optical fiber.
If all the above solutions have been completed, the machine still can not work normally. Please contact our special repair shop or us.
5
12. Packing List
The components of the equipment are listed in the packing list.
13. Storage and transportation
13.1 This equipment should be handled carefully, kept away from shaking point, installed or stored at shadowy, dry, cool and ventilated places.
13.2 Don’t store it together with articles that are combustible, poisonous, caustic and explosive.
13.3 This equipment should be stored in the environment where the relative humidity is ≤ 80%, the atmosphere pressure is 70kPa to 106kPa and the temperature is -10℃ to +55℃.
13.4 Excess impact or shake should be avoided during transportation.
13.5 Don’t mix it with dangerous articles during transportation.
13.6 Keep it away from sun or snow or rain during transportation.
14. Environmental protection
There is not any harmful element in our product. It can be disposed according to the local laws.
15. Manufacturer’s right
We reserve the rights to change the design of the equipment, the
6
technique, fittings, the instruction manual and the content of the original packing list at any time without notice. If there are some differences between blueprint and real equipment, take the real equipment as the norm.
16. For technical data, please contact
17. Symbol instruction
Trademark
Type B applied part
Ordinary equipment
Consult the accompanying documents
Date of manufacture
Manufacturer
7
Used indoor only
Screw inside/ outside
Class Ⅱ equipment
Appliance compliance WEEE directive
Recovery
Atmospheric pressure for storage
Temperature limitation
Humidity limitation
Keep dry
Handle with care
CE marked product
FDA marked product
8
Authorised Representative in the EUROPEAN
COMMUNITY
Got the quality management system certification and CE certification issued by TüV Rheinland
18. Declaration of conformity
18.1 Product conforms to the following standards:
EN 60601-1:2006
EN 60601-1-2:2007
EN 61000-3-2:2006
EN 1041:2008
EN ISO 14971:2009
EN ISO 7405:2008
EN 61000-3-3:2008
EN 60601-1-4:1996
EN 60825-1:2007
EN 980:2008
EN ISO 17664:2004
EN ISO 17665-1:2006
EN ISO 10993-1:2009
EN ISO 10993-5:2009
ISO 9687:1993 EN ISO 10993-10:2010
18.2 EMC — Declaration of conformity
9
10
11
The device has been tested and homologated in accordance with EN
60601-1-2 for EMC. This does not guarantee in any way that this device will not be effected by electromagnetic interference Avoid using the device in high electromagnetic environment.
19. Statement
All rights of modifying the product are reserved to the manufacturer without further notice. The pictures are only for reference. The final interpretation rights belong to GUILIN WOODPECKER MEDICAL
INSTRUMENT CO., LTD. The industrial design, inner structure, etc, have claimed for several patents by WOODPECKER, any copy or fake product must take legal responsibilities.
12
ZMN/WI-04-557 2.3 Edition
-
Contents
-
Table of Contents
-
Troubleshooting
-
Bookmarks
Quick Links
CuringPen
LED Curing Light USER MANUAL
Changzhou Sifary Medical Technology Co.
Related Manuals for Eighteeth CuringPen
Summary of Contents for Eighteeth CuringPen
-
Page 1
CuringPen LED Curing Light USER MANUAL Changzhou Sifary Medical Technology Co. -
Page 3: Table Of Contents
3. Before Use………………. 7 3.1 Scope of application …………7 3.2 Contraindications …………. 7 4. Setting up the CuringPen …………8 4.1 Install the light source head ……….. 8 4.2 Install the disposable sleeve ………. 8 4.3 Install the protective light shield ……..8 4.4 Charging ……………..
-
Page 4: Scope Of Curingpen
Błąd! Użyj karty Narzędzia główne, aby zastosować 标题 1 do tekstu, który ma się tutaj pojawić. Błąd! Użyj karty Narzędzia główn e, aby zastosować 标题 1 do tekstu, który ma się tutaj pojawić. 1.Scope of CuringPen 1.1 Parts Identification ○ Light source head ○…
-
Page 5: Components And Accessories
Błąd! Użyj karty Narzędzia główne, aby zastosować 标题 1 do tekstu, który ma się tutaj pojawić. Błąd! Użyj karty Narzędzia główn e, aby zastosować 标题 1 do tekstu, który ma się tutaj pojawić. 1.2 Components and accessories Handpiece (1pcs) Light source head(1pcs) ORDER CODE:6551003 ORDER CODE:6551001 Disposable sleeve(100pcs)…
-
Page 6: Symbols Used
Błąd! Użyj karty Narzędzia główne, aby zastosować 标题 1 do tekstu, który ma się tutaj pojawić. Błąd! Użyj karty Narzędzia główn e, aby zastosować 标题 1 do tekstu, który ma się tutaj pojawić. 2. Symbols Used If the instructions are not followed properly, Warning operation may lead to hazards for the product or the user/patient.
-
Page 7: Before Use
Błąd! Użyj karty Narzędzia główne, aby zastosować 标题 1 do tekstu, który ma się tutaj pojawić. Błąd! Użyj karty Narzędzia główn e, aby zastosować 标题 1 do tekstu, który ma się tutaj pojawić. 3. Before Use 3.1 Scope of application Suitable for the purpose of curing dental resins and composites or detecting caries.
-
Page 8: Setting Up The Curingpen
标题 1 do tekstu, który ma się tutaj pojawić. Błąd! Użyj karty Narzędzia główne, aby zastosować 标 题 1 do tekstu, który ma się tutaj pojawić. 4. Setting up the CuringPen 4.1 Install the light source 4.3 Install the protective head…
-
Page 9
Błąd! Użyj karty Narzędzia główne, aby zastosować 标题 1 do tekstu, który ma się tutaj pojawić. Błąd! Użyj karty Narzędzia główne, aby zastosować 标 题 1 do tekstu, który ma się tutaj pojawić. Page 9 / 30… -
Page 10: Charging
Błąd! Użyj karty Narzędzia główne, aby zastosować 标题 1 do tekstu, który ma się tutaj pojawić. Błąd! Użyj karty Narzędzia główne, aby zastosować 标 题 1 do tekstu, który ma się tutaj pojawić. 4.4 Charging Put the handpiece all the way into the charge base, the charge Plug the USB of adapter into the state will show on the screen.
-
Page 11: Use Interface
Błąd! Użyj karty Narzędzia główne, aby zastosować 标题 1 do tekstu, który ma się tutaj pojawić. Błąd! Użyj karty Narzędzia główne, aby zastosować 标 题 1 do tekstu, który ma się tutaj pojawić. 5.Use Interface 5.1 Panel key ○ main switch ○…
-
Page 12: Setting
Błąd! Użyj karty Narzędzia główne, aby zastosować 标题 1 do tekstu, który ma się tutaj pojawić. Błąd! Użyj karty Narzędzia główne, aby zastosować 标 题 1 do tekstu, który ma się tutaj pojawić. 6.Setting 6.1 Selecting memory Memory Change There are 6 built-in memory programs, namely 1500mW/cm²…
-
Page 13: Advanced Setting
Błąd! Użyj karty Narzędzia główne, aby zastosować 标题 1 do tekstu, który ma się tutaj pojawić. Błąd! Użyj karty Narzędzia główne, aby zastosować 标 题 1 do tekstu, który ma się tutaj pojawić. 6.2 Advanced setting During power off state, holding down press “S”…
-
Page 14: Operation
Błąd! Użyj karty Narzędzia główne, aby zastosować 标题 1 do tekstu, który ma się tutaj pojawić. Błąd! Użyj karty Narzędzia główne, aby zastosować 标 题 1 do tekstu, który ma się tutaj pojawić. 7.Operation 7.1 Charge Displays the present remaining amount of the battery.
-
Page 15: Handpiece Operation
Błąd! Użyj karty Narzędzia główne, aby zastosować 标题 1 do tekstu, który ma się tutaj pojawić. Błąd! Użyj karty Narzędzia główne, aby zastosować 标 题 1 do tekstu, który ma się tutaj pojawić. 7.2 Handpiece operation After the handpiece main unit is turned on, press to start the light intensity output, and the…
-
Page 16
Błąd! Użyj karty Narzędzia główne, aby zastosować 标题 1 do tekstu, który ma się tutaj pojawić. Błąd! Użyj karty Narzędzia główne, aby zastosować 标 题 1 do tekstu, który ma się tutaj pojawić. composites to avoid improper exposure. ⚫ The disposable protective cover and protective light shield are highly… -
Page 17: Operation Mode
Błąd! Użyj karty Narzędzia główne, aby zastosować 标题 1 do tekstu, który ma się tutaj pojawić. Błąd! Użyj karty Narzędzia główne, aby zastosować 标 题 1 do tekstu, który ma się tutaj pojawić. 7.3 Operation mode Standard mode In these three modes, the light intensity can be set to 2300mW/cm², 1500mW/cm²…
-
Page 18
Błąd! Użyj karty Narzędzia główne, aby zastosować 标题 1 do tekstu, który ma się tutaj pojawić. Błąd! Użyj karty Narzędzia główne, aby zastosować 标 题 1 do tekstu, który ma się tutaj pojawić. Wavelength: 385nm-515nm When pressed,the output light intensity is 1000mW/cm and flashes once every 1 second, prompting the sound every 5 seconds. -
Page 19: Maintenance
Błąd! Użyj karty Narzędzia główne, aby zastosować 标题 1 do tekstu, który ma się tutaj pojawić. Błąd! Użyj karty Narzędzia główne, aby zastosować 标 题 1 do tekstu, który ma się tutaj pojawić. 8.Maintenance Disinfection components handpiece Light source head Adapter Charging base Protective light shield…
-
Page 20: Error Warning
Błąd! Użyj karty Narzędzia główne, aby zastosować 标题 1 do tekstu, który ma się tutaj pojawić. Błąd! Użyj karty Narzędzia główne, aby zastosować 标 题 1 do tekstu, który ma się tutaj pojawić. 9.Error Warning The battery is too low. Charge it Low Battery immediately Blue LED broken, contact your…
-
Page 21: Troubleshooting
Błąd! Użyj karty Narzędzia główne, aby zastosować 标题 1 do tekstu, który ma się tutaj pojawić. Błąd! Użyj karty Narzędzia główne, aby zastosować 标 题 1 do tekstu, który ma się tutaj pojawić. 10.Troubleshooting When trouble is found, check the following points before contacting your distributor.
-
Page 22
Błąd! Użyj karty Narzędzia główne, aby zastosować 标题 1 do tekstu, który ma się tutaj pojawić. Błąd! Użyj karty Narzędzia główne, aby zastosować 标 题 1 do tekstu, który ma się tutaj pojawić. Page 22 / 30… -
Page 23: Technical Data
Użyj karty Narzędzia główne, aby zastosować 标 题 1 do tekstu, który ma się tutaj pojawić. 11.Technical Data Changzhou Sifary Medical Manufacturer Technology Co.,Ltd Model CuringPen Dimensions 22cm x 11cmx 8cm±1cm ± Weight 730g Lithium ion battery: 3.7V, Power supply 1600mAh, ±10%…
-
Page 24: Emc Tables
Guidance and manufacturer’s declaration – electromagnetic emissions The CuringPen is intended for use in the electromagnetic environment specified below. The customer or the user of the CuringPen should assure that it is used in such an environment Electromagnetic Emissions test…
-
Page 25
Błąd! Użyj karty Narzędzia główne, aby zastosować 标题 1 do tekstu, który ma się tutaj pojawić. Błąd! Użyj karty Narzędzia główne, aby zastosować 标 题 1 do tekstu, który ma się tutaj pojawić. should be at least 30 %. ±2kV ±2kV Electrical fast Mains power… -
Page 26
Guidance and manufacturer’s declaration – electromagnetic immunity The CuringPen is intended for use in the electromagnetic environment specified below. The customer or the user of the CuringPen should assure that it is used in such an environment. Electromagneti IEC 60601 test… -
Page 27
When they are used in close proximity to medical equipment and/or systems, the medical equipment and/or systems’ basic safety and essential performance may be affected. The CuringPen has been tested with the immunity test level in the below table and meet the related requirements of IEC 60601-1-2:2014. -
Page 28
Błąd! Użyj karty Narzędzia główne, aby zastosować 标题 1 do tekstu, który ma się tutaj pojawić. Błąd! Użyj karty Narzędzia główne, aby zastosować 标 题 1 do tekstu, który ma się tutaj pojawić. TETRA 800, iDEN Pulse 820, modulati CDMA 850, 18Hz Band 5… -
Page 29: Statement
Statement 13.Statement Service Life The service life of CuringPen series products is 3 years. Disposal The package should be recycled. Metal parts of the device are disposed as scrap metal. Synthetic materials, electrical components, and printed circuit boards are disposed as electrical scrap. The lithium batteries are disposed as special refuse.
-
Page 30
Błąd! Użyj karty Narzędzia główne, aby zastosować 标题 1 do tekstu, który ma się tutaj pojawić. Błąd! Użyj karty Narzędzia główne, aby zastosować 标题 1 do tekstu, który ma się tutaj pojawić. Changzhou Sifary Medcial Technology Co., Ltd Add: NO.99, Qingyang Road, Xuejia County, Xinbei District, Changzhou City, 213000 Jiangsu, China Tel: +86-0519-85962691 Fax: +86-0519-85962691…
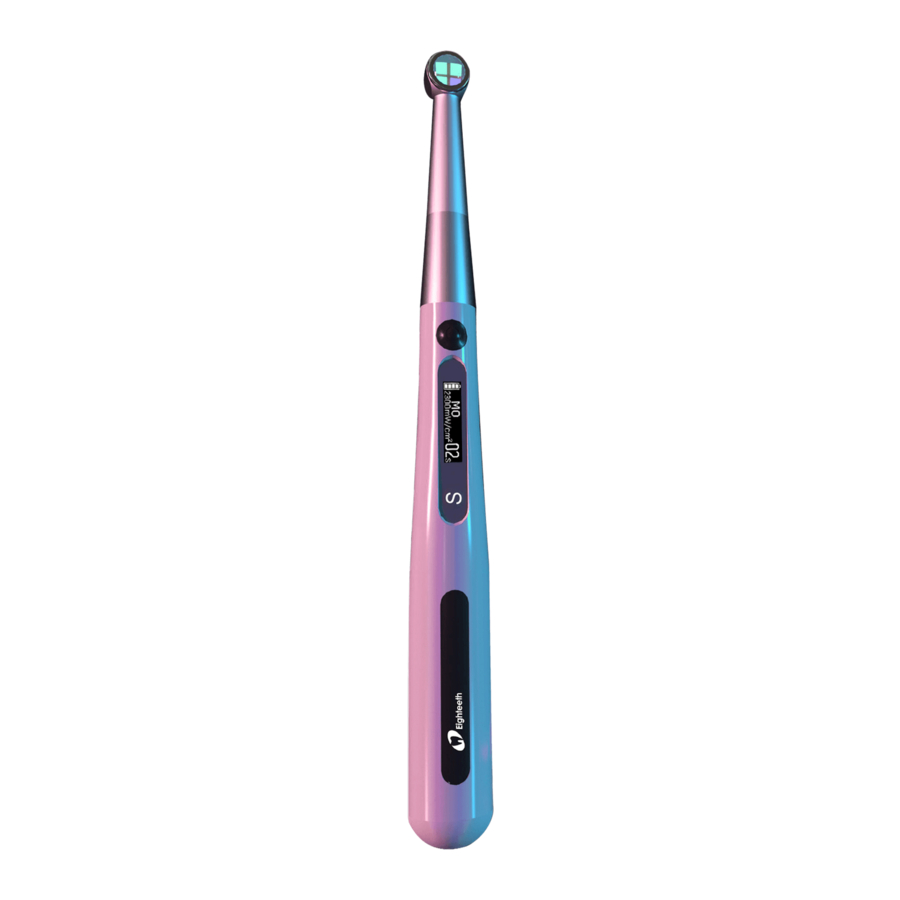
LED curing light-лампа светового отверждения беспроводная. Маленькая, легкая, компактная по мощности и эргономике не уступает мировым известным аналогам, по цене доступна, находится в эконом сегменте. Мощность светового потока – более 1600 мВ/см, длина волны – 420-480 нм. Лампа имеет 4 режима полимеризации от 10 до 40 секунд. Имеет следующие режимы: плавный старт, импульс, обычный режим.
LED curing light-лампа светового отверждения беспроводная. Маленькая, легкая, компактная по мощности и эргономике не уступает мировым известным аналогам, по цене доступна, находится в эконом сегменте. Мощность светового потока – 1200-1300 мВ/см, длина волны – 420-480 нм. Лампа имеет 4 режима полимеризации от 10 до 40 секунд. Имеет следующие режимы: плавный старт, импульс, обычный режим. Лампа имеет цифровой дисплей, который помогает контролировать процесс полимеризации.
Стоматологическая полимеризационная лампаLED имеет большую дополнительную комплектацию, она не нагревается и не требует охлаждения.
Полимеризационная лампа имеет мощный аккумулятор, обеспечивающим не менее 420 циклов полимеризации при 10 секундном режиме. Лампа фотополимерризационная легко разбирается, дезинфицируется, световод имеет специальные вкладки, которые герметично удерживают светодиод в посадочном месте. Со временем, мощность ламы не пропадает, не уменьшается, в отличие от других аналогов. Лампа имеет в комплекте дополнительный светодиод, запасной аккумулятор (батарейка).
Лампа имеет синий свет.
Комплектация лампы может быть и без дополнительных аксессуаров.
Варианты цвета корпуса: черный, серебряный, красный, голубой, зеленый.
Комплектность :
лампа-1шт,
световод-1 шт,
зарядное утсройство-1 шт,
батарейка-1шт,
руководство по эксплуатации-1 шт.
| Вес: | примерно 1 кг |
| Страна производства: | Корея |
| Товар | |
| Страна производитель | Корея |
-
Contents
-
Table of Contents
-
Bookmarks
Quick Links
Compact Pen-Style, LED Curing Light
Kompakte LED-Polymerisationslampe im „Pen-Style»
Lampe LED à photopolymériser. Format stylo compact
Lampada fotopolimerizzatrice a LED compatta a forma di
penna
Lámpara LED de polimerización compacta tipo bolígrafo
Компактная светодиодная полимеризационная лампа
в форме ручки
Related Manuals for DENTSPLY SMARTLITE FOCUS
Summary of Contents for DENTSPLY SMARTLITE FOCUS
-
Page 1
Compact Pen-Style, LED Curing Light Kompakte LED-Polymerisationslampe im „Pen-Style“ Lampe LED à photopolymériser. Format stylo compact Lampada fotopolimerizzatrice a LED compatta a forma di penna Lámpara LED de polimerización compacta tipo bolígrafo Компактная светодиодная полимеризационная лампа в форме ручки… -
Page 2
SmartLite FOCUS curing light ® Back to previous view… -
Page 3
SmartLite FOCUS curing light – operation at a glance ® Back to previous view Back to previous view… -
Page 4
SmartLite FOCUS curing light – operation at a glance ® Back to previous view Back to previous view… -
Page 5
Instructions for Use _____________________________________________ Gebrauchsanweisung ___________________________________________ 14 Mode d’emploi _________________________________________________ 26 Istruzioni per l’uso ______________________________________________ 38 Instrucciones de uso _____________________________________________ 50 Инструкция по применению ____________________________________ 62… -
Page 6: Table Of Contents
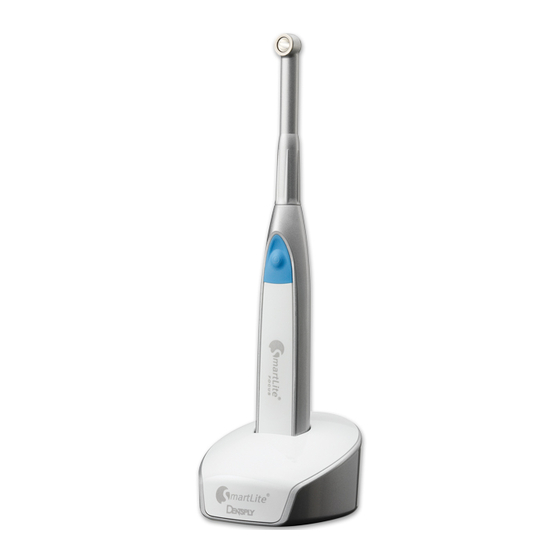
Instructions for Use English Compact Pen-Style, LED Curing Light CAUTION: For dental use only. USA: Rx only. Content Page Product description ……………….. 2 Safety notes …………………. 4 Step-by-step instructions ……………… 6 Hygiene …………………… 7 Maintenance ………………….. 9 Reorder information, technical data, warranty terms ……… 10 Product description The SmartLite FOCUS curing light is a cordless pen-style, LED light polymerization…
-
Page 7
1.1 SmartLite FOCUS curing light – operation at a glance ® 1.1.1 ON/OFF key • Starts or disrupts the 20-second curing cycle. 1.1.2 Battery light • Permanently green : (only indicated when SmartLite FOCUS curing light ® handpiece is inserted into the charging base ): SmartLite FOCUS curing light ®… -
Page 8: Safety Notes
Safety notes Be aware of the following general safety notes and the special safety notes in other chapters of these Instructions for Use. Safety alert symbol. • This is the safety alert symbol. It is used to alert you to potential personal injury hazards.
-
Page 9
Do not cure the same tooth surface for more than 20 seconds at a time. If required, polymerize at intermitting intervals of 20 seconds each. For technical details (on electromagnetic emissions and electromagnetic immunity) see: www.dentsply.eu – chapter: IFU/MSDS. -
Page 10: Step-By-Step Instructions
20 seconds, repeat activation by pressing the ON/OFF key after the end of each 20-second curing cycle (see also [2.2 Precautions]). 6. Curing times for a range of DENTSPLY materials are outlined in the Curing Guide provided. When using other products, please refer to respective product’s in-…
-
Page 11: Hygiene
Hygiene 4.1 SmartLite Sleeves ® The use of the SmartLite Sleeves (see ) is a mandatory precautionary Procedure C ® measure against gross contamination, but does not substitute reprocessing of the SmartLite FOCUS curing light. ® 1. Remove SmartLite Sleeves immediately after use (see Figure C5 ®…
-
Page 12
5. Thoroughly wipe device using a single use cloth soaked with a bactericidal, viru- cidal, fungicidal alcohol-based instrument disinfectant solution approved according to local regulations and use according to instrument disinfectant manufacturer’s instructions for use. Pay special attention to device seams and insertions. Item can be reprocessed for up to 6,000 times. -
Page 13: Maintenance
Maintenance 5.1 Light output control 1. Make sure that the LED aperture is clean and scratch-free, otherwise light output will be reduced and may be insufficient for proper curing of the material. 2. Regular control of light efficiency is recommended (e.g. by using CureRite ™…
-
Page 14: Reorder Information, Technical Data, Warranty Terms
Reorder information, technical data, warranty terms 6.1 Accessories Accessory Reorder no. SmartLite FOCUS Battery Pack 644.50.021 ® SmartLite Sleeves 644.50.030 ® SmartLite FOCUS Shields 644.50.040 ® SmartLite FOCUS Power Connector incl. Adapters 644.50.050 ® SmartLite FOCUS Refill (Curing Light and Battery Pack) 644.50.060 ®…
-
Page 15
Transport: Ambient temperature: Between -10 °C and +50 °C (14 °F and 122 °F) Relative humidity: Between 30% and 80% (non-condensing) Atmospheric pressure: Between 500 hPa and 1060 hPa Battery performance: • Low self discharge technology results in a long operating life. • Battery is pre-charged and ready to use upon purchase. -
Page 16
This warranty becomes void if repairs are undertaken by unauthorized persons. This warranty extends to every country where this device is supplied by DENTSPLY or its appointed distributor and where no import restrictions or legal regulations hinder or prevent service being given under warranty. -
Page 17
Gebrauchsanweisung Deutsch Kompakte LED-Polymerisationslampe im „Pen-Style“ Warnhinweis: Nur für den zahnmedizinischen Gebrauch. Inhaltsverzeichnis Seite Produktbeschreibung ……………….. 14 Sicherheitshinweise ……………….. 16 Arbeitsanleitung Schritt für Schritt ……………. 18 Hygiene …………………… 19 Wartung …………………… 21 Bestellinformation, Technische Daten, Garantiebedingungen …… 22 Produktbeschreibung Die SmartLite FOCUS Polymerisationslampe ist ein kabelloses LED-Lichtpolymerisa- ®… -
Page 18
1.1 SmartLite FOCUS Polymerisationslampe – Bedienung auf einen Blick ® 1.1.1 EIN/AUS Taste • Startet oder unterbricht die 20-sekündige Aushärtungsphase. 1.1.2 Ladezustands-Anzeige • Grünes Dauerlicht : (nur sichtbar, wenn das Handstück der SmartLite FO- ® CUS Polymerisationslampe in der Ladestation steht ). -
Page 19: Sicherheitshinweise
Sicherheitshinweise Bitte beachten Sie die folgenden allgemeinen Sicherheitshinweise und die speziellen Sicherheitshinweise in anderen Abschnitten dieser Gebrauchsanweisung. Sicherheitssymbol. • Dies ist das Sicherheitssymbol. Es weist auf die Gefahr von Perso- nenschäden hin. • Um Verletzungen zu vermeiden, alle Sicherheitshinweise, die diesem Symbol folgen, unbedingt beachten! 2.1 Warnhinweise Die SmartLite…
-
Page 20
Schädigung führen. Dieselbe Zahnoberfläche darf nicht länger als jeweils 20 Sekunden am Stück lichtgehärtet werden. Bei Bedarf in intermittierenden Intervallen von jeweils 20 Sekunden polymerisieren. Für technische Details (zu elektromagnetischen Emissionen und elektromagnetischer Störfestigkeit) siehe: www.dentsply.eu — Kapitel: IFU/MSDS. -
Page 21: Arbeitsanleitung Schritt Für Schritt
Vorgang durch Drücken der EIN/AUS-Taste nach dem Ende jedes 20-Sekunden-Intervalls (siehe auch [2.2 Vorsichtsmaßnahmen]). 6. Die Aushärtungszeiten für verschiedene DENTSPLY-Materialien sind im bereitge- stellten „Material Curing Guide“ angegeben. Wenn andere Produkte verwendet wer- den, ist die entsprechende Gebrauchsanweisung zu beachten.
-
Page 22: Hygiene
Hygiene 4.1 SmartLite Sleeves (Schutzhüllen) ® Die Verwendung der SmartLite Sleeves (siehe ) ist als Vorsichtsmaß- Arbeitsschritt C ® nahme gegen grobe Verunreinigungen vorgeschrieben, ersetzt jedoch nicht die Aufbe- reitung der SmartLite FOCUS Polymerisationslampe. ® 1. Die SmartLite Sleeves sofort nach Gebrauch entfernen (siehe Abb.
-
Page 23
4. Wenn das Gerät sichtbar verunreinigt ist, das Gerät mit einem Instrumentenreiniger reinigen, der mit der verwendeten Instrumentendesinfektionslösung kompatibel ist. Nach der Reinigung das Gerät mit einem mit Wasser befeuchteten Tuch abwischen, um den Instrumentenreiniger zu entfernen, und das Gerät mit einem sauberen, fus- selfreien Einmaltuch trocknen. -
Page 24: Wartung
Wartung 5.1 Kontrolle der Lichtleistung 1. Stellen Sie sicher, dass das Lichtaustrittsfenster des Lichtkopfes sauber und kratzfrei ist. Eine daraus resultierende Verminderung der Lichtleistung würde die einwandfreie Durchhärtung der Materialien einschränken. 2. Eine regelmäßige Kontrolle der Lichtleistung wird empfohlen (z. B. Verwendung des CureRite Messgerätes).
-
Page 25: Bestellinformation, Technische Daten, Garantiebedingungen
Bestellinformation, Technische Daten, Garantiebedingungen 6.1 Zubehöre Zubehör Bestellnr. SmartLite FOCUS Akku 644.50.021 ® SmartLite Sleeves 644.50.030 ® SmartLite FOCUS Shields 644.50.040 ® SmartLite FOCUS Netzstecker inkl. Adapter 644.50.050 ® SmartLite FOCUS Refill (Polymerisationslampe und Akku) 644.50.060 ® SmartLite FOCUS Ladestation 644.50.070 ®…
-
Page 26
Transportbedingungen: Umgebungstemperatur: Zwischen -10 °C und +50 °C Relative Luftfeuchtigkeit: Zwischen 30% und 80% (nicht-kondensierend) Atmosphärischer Druck: Zwischen 500 hPa und 1060 hPa Akku: • Lange Betriebsdauer aufgrund der geringen Selbstentladung. • Der Akku ist bereits vorgeladen und kann nach dem Erwerb sofort eingesetzt werden. •… -
Page 27
Diese Garantie verliert ihre Gültigkeit, wenn Reparaturen oder sonstige Eingriffe von Personen durchgeführt wurden, die nicht autorisiert sind. Die Garantie gilt in jedem Land, in dem die Lampe durch DENTSPLY oder einen Händ- ler ausgeliefert wird und in dem keine Import-Beschränkungen oder Gesetze den von der Garantie verlangten Service be- oder verhindern. -
Page 28
Mode d’emploi Français Lampe LED à photopolymériser. Format stylo compact Avertissement : Réservé à l’usage dentaire. Table des matières Page Description du produit ……………….. 26 Consignes de sécurité ……………….. 28 Instructions étape-par-étape …………….. 30 Hygiène …………………… 31 Entretien …………………… 33 Références produit, données techniques, conditions de garantie ….. -
Page 29
1.1 Lampe à photopolymériser SmartLite FOCUS : fonctionnement en un coup ® d’œil 1.1.1 Touche ON/OFF • Active ou interrompt le cycle d’exposition de 20 secondes. 1.1.2 Batterie. Témoin de fonctionnement. • Voyant vert permanent : (uniquement si la pièce à main de la lampe à pho- topolymériser SmartLite FOCUS est insérée dans la base de chargement : la… -
Page 30: Consignes De Sécurité
Consignes de sécurité Veuillez prendre connaissance des consignes générales de sécurité ainsi que des consignes particulières de sécurité qui figurent dans d’autres chapitres du présent mode d’emploi. Symbole de sécurité. • Il s’agit du symbole de sécurité. Il est utilisé pour vous alerter sur les risques potentiels de blessure.
-
Page 31
Ne pas exposer la même surface dentaire plus de 20 secondes à la fois. Si nécessaire, polymériser à intervalles intermittents de 20 secondes chacun. Les détails techniques (sur les émissions électromagnétiques et l’immunité électromagnétique) sont disponibles sur : www.dentsply.eu – chapitre: IFU/MSDS. -
Page 32: Instructions Étape-Par-Étape
ON/OFF après la fin du cycle de 20 secondes précédent (cf. également [2.2 Précautions d’emploi]). 6. Les temps de photopolymérisation de différents matériaux DENTSPLY sont dispo- nibles dans le Guide de Photopolymérisation fourni. En cas d’utilisation d’autres…
-
Page 33: Hygiène
Hygiène 4.1 Manchons SmartLite ® Le recours aux manchons SmartLite (cf. ) est une mesure de précaution Procédure C ® obligatoire visant à prévenir toute contamination grave, mais ne se substitue pas à la stérilisation de la lampe à photopolymériser SmartLite FOCUS.
-
Page 34
4. En cas de contamination évidente de l’appareil, le nettoyer au moyen d’un déter- gent pour instruments compatible avec la solution désinfectante pour instruments utilisée. Après nettoyage, essuyer l’appareil à l’aide d’un chiffon imbibé d’eau pour éliminer le détergent pour instruments et sécher l’appareil au moyen d’un chiffon propre, non pelucheux et jetable. -
Page 35: Entretien
Entretien 5.1 Contrôle du rayonnement 1. S’assurer que l’extrémité de l’embout LED soit propre et sans rayure. Dans le cas contraire, l’intensité du rayon lumineux pourrait être réduite et la polymérisation du matériau insuffisante. 2. Un contrôle récurrent de l’efficacité du rayonnement est recommandé (en utilisant le testeur CureRite par exemple).
-
Page 36: Références Produit, Données Techniques, Conditions De Garantie
Références produit, données techniques, conditions de garantie 6.1 Accessoires Accessoire Référence Batterie SmartLite FOCUS 644.50.021 ® Manchons SmartLite 644.50.030 ® Protections oculaires SmartLite FOCUS 644.50.040 ® Connecteur d’alimentation et adaptateurs SmartLite FOCUS 644.50.050 ® SmartLite FOCUS (lampe à photopolymériser et batterie) 644.50.060 ®…
-
Page 37
Transport : Température ambiante : Entre -10 °C et +50 °C Humidité relative : Entre 30% et 80% (sans condensation) Pression atmosphérique : Entre 500 hPa et 1060 hPa Batterie — Performances : • La technologie de faible autodéchargement offre une longue durée de fonctionnement. -
Page 38
La garantie est annulée de plein droit en cas de réparation ou d’intervention par toute personne non agréée. Cette garantie s’étend à chaque pays où cet appareil est fourni par DENTSPLY ou par ses distributeurs agréés et dans lequel il n’existe pas de restrictions d’importation ou d’obstacles légaux ou d’interdictions de services fournis sous garantie. -
Page 39
Istruzioni per l’uso Italiano Lampada fotopolimerizzatrice a LED compatta a forma di penna Attenzione: Esclusivamente per uso odontoiatrico. Contenuti Pagina Descrizione del prodotto ……………… 38 Note di sicurezza ………………… 40 Istruzioni step-by-step ……………….. 42 Igiene …………………… 43 Manutenzione…………………. 45 Informazioni per il riordino, dati tecnici, termini della garanzia …… 46 Descrizione del prodotto La lampada SmartLite FOCUS è… -
Page 40
1.1 Lampada fotopolimerizzatrice SmartLite FOCUS – Panoramica generale ® 1.1.1 Tasto ON/OFF • Avvia o interrompe il ciclo di polimerizzazione di 20 secondi. 1.1.2 Display della batteria • Verde permanente : (si accende solo quando il manipolo della lampada SmartLite FOCUS è… -
Page 41
Note di sicurezza Leggere attentamente le seguenti note di sicurezza generali e le altre note di sicurezza specifica contenute in queste istruzioni d’uso. Allarme per la sicurezza. • Questo è il simbolo che allerta sulla sicurezza. E’ utilizzato per indica- re all’utilizzatore potenziali pericoli per l’incolumità… -
Page 42
Non irradiare la stessa superficie dentaria per più di 20 secondi alla volta. Se neces- sario, polimerizzare a intervalli intermittenti di 20 secondi ciascuno. Per I dettagli tecnici (sulle emissioni elettromagnetiche e le immunità elettromagnetiche) consultare il sito: www.dentsply.eu ai capitoli IFU/MSDS. -
Page 43
ON/OFF dopo la fine di ogni ciclo di 20 secondi (vedere anche [2.2 Precauzioni]). 6. I tempi di polimerizzazione di alcuni materiali DENTSPLY sono indicati nella guida (Curing Guide) allegata. Quando si utilizzano altri prodotti, consultare le istruzioni… -
Page 44
Igiene 4.1 Guaine SmartLite ® L’utilizzo delle guaine SmartLite (vedere ) è una misura precauzionale Procedura C ® obbligatoria contro la contaminazione grossolana, ma non sostituisce la pulizia e la disinfezione della lampada SmartLite FOCUS. ® 1. Rimuovere le guaine SmartLite immediatamente dopo l’uso (vedere Figura C5 ®… -
Page 45
5. Disinfettare tutto il dispositivo servendosi di un panno monouso imbevuto di so- luzione disinfettante per strumenti battericida, virucida, fungicida a base di alcool approvata secondo le normative locali, attenendosi alle istruzioni per l’uso del fab- bricante del disinfettante. Prestare particolare attenzione ai punti di giuntura e di inserimento del dispositivo. -
Page 46
Manutenzione 5.1 Controllo dell’intensità luminosa emessa 1. Assicurarsi che l’apertura della lampada sia pulita e priva di graffiature, altrimenti l’emissione di luce può essere ridotta ed essere insufficiente per una polimerizzazio- ne adeguata del materiale. 2. Si raccomanda il controllo regolare dell’efficienza luminosa (per esempio usando lo strumento per il controllo dell’intensità… -
Page 47
Informazioni per il riordino, dati tecnici, termini della garanzia 6.1 Accessori Accessorio N° d’ordine Batteria SmartLite FOCUS 644.50.021 ® Guaine SmartLite 644.50.030 ® Schermi ottici SmartLite FOCUS 644.50.040 ® Spina di alimentazione SmartLite FOCUS con adattatori 644.50.050 ® Ricambio SmartLite FOCUS ®… -
Page 48
Trasporto: Temperatura ambiente: Tra -10 °C e +50 °C Umidità relativa: Tra 30% e 80% (non-condensazione) Pressione atmosferica: Tra 500 hPa e 1060 hPa Prestazione della batteria: • Tecnologia di bassa autoscarica che consente una lunga vita operativa. • La batteria è precaricata e pronta all’uso al momento dell’acquisto. -
Page 49
6.4 Condizioni di garanzia DENTSPLY concede una garanzia di 2 anni su tutti i componenti della lampada Smart- Lite FOCUS ad eccezione della batteria. La batteria è coperta da una garanzia di ® 1 anno. La garanzia decorre dalla data d’acquisto. Durante il periodo di garanzia, DENTSPLY coprirà… -
Page 50
Instrucciones de uso Español Lámpara LED de polimerización compacta tipo bolígrafo Advertencia: Solo para uso dental. Contenido Página Descripción del producto ……………… 50 Notas de seguridad ……………….. 52 Instrucciones paso a paso ……………… 54 Higiene …………………… 55 Mantenimiento …………………. 57 Información para pedidos, datos técnicos y términos de garantía …. -
Page 51
1.1 Lámpara de polimerización SmartLite FOCUS – Guía rápida de manejo ® 1.1.1 Tecla ON/OFF • Activa o detiene el ciclo de polimerización de 20 segundos. 1.1.2 Luz de la batería • Verde continuamente : (Sólo aparece cuando la pieza de mano de la lámpara de polimerización SmartLite FOCUS está… -
Page 52: Notas De Seguridad
Notas de seguridad Preste atención a las siguientes normas de seguridad y las que encontrará en otro capítulo de estas Indicaciones de Uso. Símbolo de Alerta de Seguridad. • Este es el símbolo de alerta de seguridad. Se utiliza para avisarle de potenciales riesgos de daño personal.
-
Page 53
No polimerice una superficie dental durante más de 20 segundos seguidos. En caso necesario, polimerice en intervalos intermitentes de 20 segundos cada uno. Para detalles técnicos (emisiones electromagnéticas e inmunidad electromagnética) véase: www.dentsply.eu – capítulo: IFU/MSDS. -
Page 54: Instrucciones Paso A Paso
ON/OFF al final de los 20 segundos de cada ciclo de polimeriza- ción (véase también [2.2 Precauciones]). 6. El tiempo de curado para el rango de materiales DENTSPLY está indicado en la Guía de Curado adjuntada. Si utiliza otros productos consulte las correspondientes…
-
Page 55: Higiene
Higiene 4.1 Fundas SmartLite Sleeves ® El uso de las fundas SmartLite Sleeves (véase el ) es una medida Procedimientos C ® preventiva obligatoria para evitar la contaminación gruesa, pero su uso no sustituye al reprocesamiento de la lámpara de polimerización SmartLite FOCUS.
-
Page 56
5. Frote bien el dispositivo con un paño desechable empapado con una solución desinfectante para instrumentos a base de alcohol bactericida, virucida y fungi- cida aprobada conforme a la normativa local; utilice la solución conforme a las instrucciones de uso del fabricante. Ponga especial atención en la limpieza de las juntas y las inserciones del dispositivo. -
Page 57: Mantenimiento
Mantenimiento 5.1 Control de salida de luz 1. Asegúrese de que la superficie del LED esté limpia y libre de arañazos, de otro modo la salida de luz se verá reducida y puede ser insuficiente para la correcta polimerización del material. 2.
-
Page 58: Información Para Pedidos, Datos Técnicos Y Términos De Garantía
Información para pedidos, datos técnicos y términos de garantía 6.1 Accesorios Accesorio Referencia no. Bloque de la batería SmartLite FOCUS 644.50.021 ® Fundas SmartLite Sleeves 644.50.030 ® Pantalla protectora SmartLite FOCUS Shields 644.50.040 ® Conector de alimentación SmartLite FOCUS incl. adaptadores 644.50.050 ®…
-
Page 59
Transporte: Temperatura ambiente: Entre -10 °C y +50 °C Humedad relativa: Entre 30% y 80% (sin condensación) Presión atmosférica: Entre 500 hPa y 1060 hPa Funcionamiento de la batería: • La tecnología de baja autodescarga se traduce en una larga operatividad. • La batería está precargada y lista para su uso después de la compra. -
Page 60
La garantía comienza a partir de la fecha de compra. Durante el período de garantía DENTSPLY eliminará sin cargo cualquier posible defecto de funcionamiento que surja como resultado de fallos en el material o envíos por reparación o intercambio de piezas o intercambio de la unidad… -
Page 61: Описание Продукта
Инструкция по применению Русский Компактная светодиодная полимеризационная лампа в форме ручки Предостережение: Применяется исключительно в стоматологии. Содержание Страница Описание продукта ……………….. 62 указания по безопасности ………………. 64 Пошаговая инструкция к применению ………….. 66 Г игиена …………………… 67 Уход …………………….. 69 Техническая информация, период гарантии ………… 70 1 Описание продукта SmartLite® FOCUS это светодиодная лампа полимеризационная лампа без про- водов, в…
-
Page 62
1.1 Полимеризационная лампа SmartLite® FOCUS – общее описание 1.1.1 Клавиша вКл/выКл (ON/OFF) • Начало или прерывание 20-секундного цикла отверждения. 1.1.2 Световая индикация на батарее • Постоянный зеленый : (появляется только тогда, полимеризационная лампа SmartLite® FOCUS установлена в зарядном устройстве ): полимери- зационная лампа SmartLite® FOCUS полностью заряжена. • Мигающий зеленый : (появляется только тогда, когда полимеризацион- ная… -
Page 63: Указания По Безопасности
2 Указания по безопасности Следует сознательно выполнять приведенные ниже указания по общей безопас- ности и специальные указания по безопасности, приведенные в других главах данной Инструкции к применению. Обозначение опасности. • Это символ, обозначающий опасность. Он используется, чтобы предупредить вас о потенциальных рисках для здоровья. •…
-
Page 64
и мягким тканям, может привести к тяжелому повреждению. Не выполняете отверждение одной и той же поверхности зуба более 20 секунд подряд. При необходимости выполняйте полимеризацию с перерывами и интервалами по 20 секунд каждый. Техническую информацию (электромагнитные излучения и электромагнитная помехоустойчи- вость) см. на веб-сайте www.dentsply.eu – глава IFU/MSDS. -
Page 65: Пошаговая Инструкция К Применению
активируйте устройство нажатием кнопки ВКЛ/ВЫКЛ после окончания каж- дого 20-секундного цикла полимеризации (см. также [2.2 Меры предосторож- ности]). 6. Время отверждения для диапазона линейки материалов DENTSPLY указано в предоставленном руководстве по полимеризации. При использовании других продуктов см. соответствующие инструкции по применению продукта.
-
Page 66: Г Игиена
4 Г игиена 4.1 Рукава SmartLite® Использование рукавов SmartLite® (см. ) является обязательной Процедура C мерой предосторожности против сильного загрязнения, однако это не заменяет процедуру обработки полимеризационной лампы SmartLite® FOCUS. 1. Сразу после использования снимите рукава SmartLite® (см. рис. C5 Перекрестное заражение. Инфекция. 1. Рукава SmartLite® предназначены только для однократного применения.
-
Page 67
4. Если при визуальном осмотре устройство выглядит загрязненным, очистите его с использованием очищающего средства, совместимого с раствором для дезинфекции инструмента. После очистки протрите устройство мягкой тка- нью, смоченной в воде, чтобы удалить остатки чистящего средства, затем вы- сушите его чистой безворсовой тканью однократного применения. 5. -
Page 68: Уход
5 Уход 5.1 Контроль мощности исходящего светового пучка 1. Убедитесь, что апертура световода чистая и без царапин, в противном случае исходящий световой пучок может ослабевать, и быть недостаточным для над- лежащего засвечивания материала. 2. Рекомендуется контролировать мощность исходящего светового пучка (напри- мер, с помощью тестирующего прибора CureRite ™…
-
Page 69: Техническая Информация, Период Гарантии
6 Техническая информация, период гарантии 6.1 Аксессуары (принадлежности) Аксессуары Номер заказа Блок аккумуляторной батареи SmartLite® FOCUS 644.50.021 Рукава SmartLite® 644.50.030 Экраны SmartLite® FOCUS 644.50.040 Разъем питания SmartLite® FOCUS, вкл. переходники 644.50.050 Запасной комплект SmartLite® FOCUS (светоотверждающая лампа и блок батареи) 644.50.060 Зарядное устройство SmartLite® FOCUS 644.50.070 6.2 Номер партии (серии) Наконечник…
-
Page 70
Хранение: Температура окружающей среды: От -10 °C до +35 °C Относительная влажность: От 30% до 80% (не конденсируемая) Транспортировка: Температура окружающей среды: От -10 °C до +50 °C Относительная влажность: От 30% до 80% (не конденсируемая) Атмосферное давление: От 500 гПа до 1060 гПа Характеристика… -
Page 71
зование электроприбора. Г арантийные обязательства снимаются, если прибор ремонтируется нелицензи- рованным техническим персоналом. Г арантийные обязательства действуют в любой стране, куда фирма DENTSPLY или ее дистрибьюторы поставляют прибор, и где нет ограничений или юриди- ческих нормативов, препятствующих или предотвращающих предоставлению… -
Page 72
Manufactured by DENTSPLY D GmbH De-Trey-Str. 1 78467 Konstanz GErMaNY www.dentsply.de…