Откройте для себя руководство пользователя GDR 18V-210 C Аккумуляторный ударный гайковерт от Bosch. Получите подробные технические характеристики, меры предосторожности и инструкции по техническому обслуживанию для обеспечения оптимальной производительности. Заряжайте аккумулятор правильно и легко меняйте инструменты. Обеспечьте безопасную рабочую среду с этим электроинструментом немецкого производства. Полную информацию и инструкции см. в руководстве пользователя.
Узнайте, как безопасно и эффективно использовать профессиональный аккумуляторный ударный гайковерт Bosch GDS 18V-400, из этой информации о продукте и инструкции по эксплуатации. Благодаря максимальному крутящему моменту 400 Нм и аккумулятору на 18 В этот инструмент идеально подходит для любой работы. Кроме того, функция PowerLight обеспечивает подсветку в условиях низкой освещенности. Рекомендуется для использования при температуре от 0 до +35 градусов Цельсия.
Узнайте больше о аккумуляторном ударном гайковерте Bosch GDS 18V-1000 и его четырех моделях в этом руководстве пользователя. Изготовленный компанией Robert Bosch Power Tools GmbH в Германии, этот ключ имеет крутящий момент до 1050 Нм и предназначен для профессионального использования. Следуйте инструкциям по технике безопасности и используйте только совместимые литий-ионные аккумуляторы Bosch 18 В.
Аккумуляторный ударный гайковерт GDS 250-LI — это надежный и высокопроизводительный инструмент, разработанный Robert Bosch Power Tools GmbH. В данном руководстве пользователя содержатся подробные инструкции по эффективному и безопасному использованию изделия. Узнайте, как легко затягивать и ослаблять болты с помощью этого мощного и универсального ударного гайковерта.
Узнайте об аккумуляторном ударном гайковерте DEWALT моделей DCF921 и DCF922. Это руководство пользователя содержит технические данные, типы аккумуляторов и правила техники безопасности. Выберите надежного партнера для ваших электроинструментов с DEWALT.
Узнайте, как безопасно эксплуатировать и обслуживать аккумуляторный ударный гайковерт HILTI SIW 2A12 с помощью этих подробных инструкций по эксплуатации. Благодаря технологии NFC и литий-ионному аккумулятору этот инструмент профессионального уровня имеет номинальную скорость до 2,100 об/мин. Следуйте инструкциям уполномоченного и обученного персонала, чтобы обеспечить оптимальное использование.
Откройте для себя серию аккумуляторных ударных гайковертов SSW 18 LTX от Metabo. Каждая модель имеет уникальные характеристики крутящего момента, скорости и веса. Соблюдайте меры предосторожности и инструкции по использованию, приведенные в руководстве пользователя, чтобы максимально увеличить производительность вашего инструмента. Загрузите руководство прямо сейчас.
В этом руководстве пользователя содержатся технические данные, рабочие советы и важная информация по технике безопасности для аккумуляторных ударных гайковертов M12 BIW12, M12 BIW14 и M12 BIW38. Руководство, доступное на нескольких языках, включает графические разделы для описания операций и текстовый раздел с описаниями символов.
В этом руководстве пользователя содержатся важные инструкции по технике безопасности, технические данные и инструкции по использованию аккумуляторных ударных гайковертов Milwaukee, включая M12 BIW12, M12 BIW14 и M12 BIW38. Это руководство, доступное на нескольких языках, также содержит описание символов. Всегда обращайтесь к руководству перед использованием продукта.
Это руководство пользователя содержит инструкции и технические данные для аккумуляторного ударного гайковерта DEWALT DCF85M XR Li-ION и его различных переводов. Узнайте о технических характеристиках продукта, в том числе о типе аккумулятора, максимальном крутящем моменте и весе. Идеально подходит для профессионалов, которым нужен надежный электроинструмент.
В набор аккумуляторного инструмента Lithium Electric Tool входит 4 крайне полезных для многих мастеров устройств и требующиеся для их применения изделия.
Предлагаемый комплект агрегатов включает дрель-шуруповёрт, перфоратор, гайковерт, болгарка, два аккумулятора 288V, зарядку и кейс, предназначенный для удобной перевозки агрегатов и для их хранения.
Профессиональные инструменты надежные, долговечные, износостойкие, эффективные, обладают высоким КПД, долгое время работают на одном заряде аккумулятора, способны выдержать значительные нагрузки.
Характеристики:
Напряжение: 288V
Емкость аккумулятора: 1.5 Ач
Тип аккумулятора: Li-Ion
Наличие аккумуляторов: 2 шт.
Материал: Пластик
Размер болгарки:9 x 31.5 x 7 см
Размер шуруповерта: 15.5 x 20 x 5 см
Размер гайковерта: 15 x 21 x 6.5 см
Размер перфоратора: 30 x 21 x 8 см
Размер кейса: 53 x 38 x 13 см
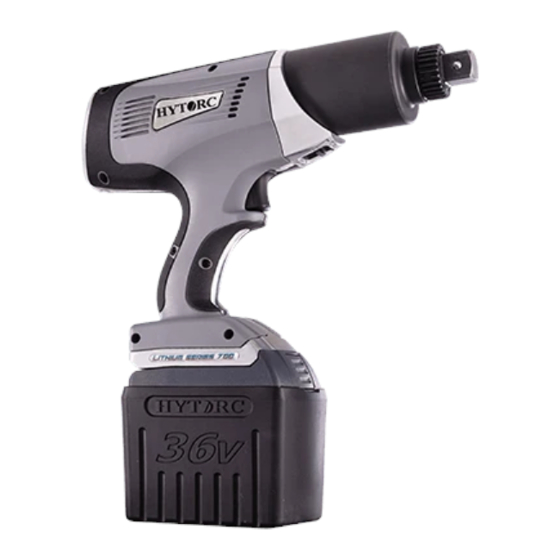
Серия электрических гайковертов LITHIUM GUN — это идеальное решение для портативной и удобной работы с любым типом крепежа. Благодаря первой в мире 36-вольтовой аккумуляторной батарее, применяемой в электроинструменте, он готов к интенсивному использованию в сложных условиях. Легкая конструкция и двойная скорость делают их подходящим для эксплуатации в любых сферах промышленности.
Надежность
Данная серия была разработана с нуля, с применением материалы аэрокосмического класса, чтобы обеспечить компактный дизайн в совокупности с невероятной прочностью. Металлическая рама, вырезанная из высокотвёрдого алюминиевого сплава, защищает инструмент от повреждений при использовании на производствах с повышенной опасностью. 36-вольтовая батарея дает вам возможность отвинчивать корродированные (прикипевшие) болтовые соединения.
Двойная скорость
С помощью простого переключателя осуществляется переход из режима высокой скорости вращения в режим точной окончательной затяжки, по выставленному моменту, устраняя необходимость в нескольких системах при работе. Высокоточные детали передаточного механизма обеспечивают постоянную мощность без вибрации и шума, в отличие от ударных гайковертов. Регулировка мощности осуществляется через цифровую панель, находящуюся на обратной стороне ключа. Требуемые значения можно ввести в ft-lbs или Нм, с последующим доворотом крепежа на нужный угол. При срабатывании триггера по достижению ключом нужного крутящий момент, инструмент остановится, а затем довернет гайку или болт до запрограммированного угла. По завершению, свет на цифровой панели станет зеленым, и раздастся короткий звуковой сигнал.
Момент и угол
Электрогайковерт LITHIUM работает со всеми аксессуарами HYTORC, которые позволяют не только дополнительно обезопасить труд оператора, но и увеличить скорости и точности при любом виде монтажа и демонтажа.
Область применения
— Нефтехимическая
— Энергетическая
— Пищевая
— Машиностроительная
— Строительная
Уточнить стоимость
-
Contents
-
Table of Contents
-
Bookmarks
Quick Links
LITHIUM SERIES® Electric Torque Tool
(BTM and BTM-DOC Models)
Operations Manual
333 Route 17 N.
Mahwah, NJ 07430
USA
800-FOR-HYTORC
(800-367-4986)
201-512-9500
Firmware Version 1.26
hytorc.com
Related Manuals for Hytorc LITHIUM Series
Summary of Contents for Hytorc LITHIUM Series
-
Page 1
LITHIUM SERIES® Electric Torque Tool (BTM and BTM-DOC Models) Operations Manual Firmware Version 1.26 333 Route 17 N. 800-FOR-HYTORC hytorc.com Mahwah, NJ 07430 (800-367-4986) 201-512-9500… -
Page 3
BTM-3000-DOC Notice. The information contained in this document is subject to change without notice. HYTORC makes no warranty of any kind with regard to this material, including but not limited to, the implied warranties of merchantability and fitness for a particular purpose. HYTORC shall not be liable for errors contained herein or for incidental or consequential damages in connection with the furnishing, performance, or use of this material. -
Page 4
ABOUT THIS DOCUMENT (CONT’D.) Warranty. The LITHIUM SERIES® Tool has a one-year limited warranty. Every tool is tested before leaving the factory and is warranted to be free from defects in workmanship and materials. HYTORC will repair or replace, without charge, any tool which, upon examination, proves to be defective in workmanship or materials for one (1) year after the date of purchase. -
Page 5: Table Of Contents
7. NAVIGATING THE MENUS 8. SHORTCUTS 9. BOLTING WITH CONVENTIONAL REACTION ARM 10. BOLTING WITH THE HYTORC WASHER 11. BOLTING WITH THE HYTORC NUT 12. ADDENDUM FOR BTM-DOC MODELS ONLY (IMPORTANT) CHANGELOG LITHIUM SERIES® Electric Torque Tool (BTM and BTM-DOC Models) Operations Manual…
-
Page 6: General Safety Information
1 . G E NE R A L SA FE T Y INFOR M ATION WARNING! Read all safety warnings designated by the symbol and all instructions. Save all warnings and instructions for future reference. The term “power tool” in the warnings refers to your mains-operated (corded) power tool or battery-operated (cordless) power tool.
-
Page 7
• Never service damaged battery packs. Service of battery packs should only be performed by the manufacturer or authorized service providers. LITHIUM SERIES® Electric Torque Tool (BTM and BTM-DOC Models) Operations Manual… -
Page 8
Do not use a battery pack or charger that has received a sharp blow, has been dropped or has been run over or damaged in any way (i.e. pierced with a nail, hit with a hammer, stepped on). Damaged battery packs should be returned to an authorized HYTORC service center for recycling. -
Page 9
• These chargers are not intended for any uses other than batteries supplied with LITHIUM SERIES Tools as described in this manual. Any other uses may result in risk of fire, electric shock or electrocution. -
Page 10: Service
HYTORC • All warranty repairs are free of all charges including return-freight HELP If you require any further assistance, please call your local HYTORC Representative or 1-800-FOR-HYTORC (1-800-367-4986). Please visit us at HYTORC.com. FOLLOW US ONLINE…
-
Page 11: Tool Description
• Ergonomic lightweight hand-held design with pistol-grip and trigger activation. • Portable tool powered by rechargeable extended-life 36V lithium ion battery. • Standard square-drive with dual-reaction spline. • Integrated data acquisition and export capability. LITHIUM SERIES® Electric Torque Tool (BTM and BTM-DOC Models) Operations Manual…
-
Page 12: Care And Handling
ENVIRONMENTAL CONSIDERATIONS The LITHIUM SERIES Tool is a rugged industrial tool with an electric motor and electronic control. The following environmental considerations will help maintain reliable tool operation. Pictured above, keep cooling vents clear (1), and secure the tool per local practice (2) to protect from dropping.
-
Page 13: Charge, Test And Install Battery
5 . CH A RGE , TE S T & IN S TA L L BAT TE RY CHARGE THE BATTERY • The LITHIUM SERIES® II Tool is supplied with the HYTORC Battery Charger (Model: A000791) and two long-life HYTORC 36-volt batteries (Model: P002036-1) •…
-
Page 14
(C O N T ’ D . ) TEST THE BATTERY The Lithium-Ion battery has a long run life and will power the tool at full speed until the battery is depleted, so there is no gradual drop in power during use •… -
Page 15: Operating The Control Panel
• Screen Features; Torque, Angle, Release, Direction, Battery Status, Fastener Type, Data Record Indicator • Push and hold center button to cycle; TORQUE, ANGLE and RELEASE • Hold 2 Left Buttons to display main and sub-menu options LITHIUM SERIES® Electric Torque Tool (BTM and BTM-DOC Models) Operations Manual…
-
Page 16
(C O N T ’ D . ) TOGGLE TORQUE, ANGLE & RELEASE The tool provides simple access to set Torque, Angle and Release by toggling the center button. • Press and hold the center button for approximately 3 seconds and release it to access the Angle screen. •… -
Page 17
• Release Angle is typically set to less than 10 degrees (1-to-3 degrees for HYTORC Washer, or 3-to-7 degrees for reaction arms) so that nut is not loosened. -
Page 18
(C O N T ’ D . ) LOOSEN MODE Directional Switch From the Home Screen, press the middle button to alternate between Torque and Loosen mode. If no angle is set, the maximum rated torque will be applied in the loosen direction. -
Page 19
“0 + 0” to “99 + 359”. Press and hold the center button for approximately 3 seconds and release it to access the Loosen Release screen. A release is required in some applications. LITHIUM SERIES® Electric Torque Tool (BTM and BTM-DOC Models) Operations Manual… -
Page 20: Navigating The Menus
7. N AV IG ATIN G THE ME N U S MAIN MENU AND SUB-MENUS The Main Menu provides Operations, Job Data, System, Admin and the Exit and Power Off options. Press and hold the left and center buttons simultaneously for approximately three seconds, to display the Main Menu.
-
Page 21
NOTE: When HYTORC WASHER is selected, the safety feature requiring a push of the button before operation is disabled. Tool should never be used with a reaction arm in this setting. LITHIUM SERIES® Electric Torque Tool (BTM and BTM-DOC Models) Operations Manual… -
Page 22
(C O N T ’ D . ) (OPERATION MENU continued from previous page) BACKUP ANGLE ANGLE MODE SPEED TORQUE CHECK The Backup Angle will turn the fastener Provides capability to turn the fastener When enabled, applies torque at through a specified angle range (0-10 slowly during Angle operation for a slower speed to achieve greater degrees) in the direction opposite to the… -
Page 23
JOB SELECT MODE. NUMBER are now displayed on the home screen. NOTE: Wrong code returns user to previous screen. No limit on number of attempts. See administrator for correct code. LITHIUM SERIES® Electric Torque Tool (BTM and BTM-DOC Models) Operations Manual… -
Page 24
(C O N T ’ D . ) DATA HISTORY Provides a summary of jobs and events Press the buttons hi to scroll through Connect a standard USB cable currently being saved in memory. the job numbers to select the data between the PC (Type A) to the tool set you want to download. -
Page 25
(C O N T ’ D . ) CONNECT USB CABLE SAMPLE EXCEL FILE LITHIUM SERIES® Electric Torque Tool (BTM and BTM-DOC Models) Operations Manual… -
Page 26
(C O N T ’ D . ) JOB PROFILES SUB-MENU The Job Profiles sub-menu allows access to Job Profile parameters. • The green bar highlights the current position • Press left button (i) to scroll down, right button (h) to scroll up •… -
Page 27
• Press the center button (g) to select and display a sub-menu NOTE: BATTERY SETUP, CALIBRATE GUN, FORMAT NVRAM and DIAGNOSTIC options are not intended for field use, these are only accessed by HYTORC authorized service personnel. Displays Firmware (FW) and Hardware… -
Page 28
(C O N T ’ D . ) SYSTEM MENU / SETUP DEVICE SUB MENU The Setup Device Sub-menu contains device-level settings. • The green bar highlights the current position • Press left button (i) to scroll down, right button (h) to scroll up •… -
Page 29
The GENERAL level password is assigned by an administrator to provide security for setting torque limits, setting the clock and putting the tool in lockout mode. LITHIUM SERIES® Electric Torque Tool (BTM and BTM-DOC Models) Operations Manual… -
Page 30
(C O N T ’ D . ) ENTER GENERAL ENTER GENERAL LOCKOUT MODE CLOCK This allows the administrator to Set the time and date by entering restrict user access to certain appropriate numerical values. functions and settings by enabling one of three modes: Press up button h increases the value and down button i to decrease the… -
Page 31
Press g to save the upper torque limit – screen flashes torque limit – screen flashes “Saving setting” and then “Saving setting” and then displays the upper torque exits to ADMIN menu. limit screen. LITHIUM SERIES® Electric Torque Tool (BTM and BTM-DOC Models) Operations Manual… -
Page 32: Shortcuts
8 . S HOR TCU T S MAIN MENU SHORTCUT CALIBRATION SHORTCUT JOB PROFILES SHORTCUT…
-
Page 33: Bolting With Conventional Reaction Arm
• Challenge the reaction arm to make sure it is firmly secured. • Never modify a reaction arm as this may lead to personal injury or damage to the tool. LITHIUM SERIES® Electric Torque Tool (BTM and BTM-DOC Models) Operations Manual…
-
Page 34
• Output units may be displayed in lb-ft, N-m, kgf-m or %. (See output unit settings under the ADMIN menu) • The direction arrow and rotating nut icon reflect the direction associated with the specific fastener type. (The fastener type may be set under the Operation – Fastener Type menu: Right-Hand, Left-Hand, HYTORC NUT and HYTORC Washer). -
Page 35
• Should torque be applied without a release angle the tool may lock onto the nut. If this happens set the tool to Loosen to free the tool and repeat the operation. LITHIUM SERIES® Electric Torque Tool (BTM and BTM-DOC Models) Operations Manual… -
Page 36
(C O N T ’ D . ) CONVENTIONAL TORQUE LOOSENING • The Tool provides the maximum torque capacity in reverse providing a powerful breakout capability. • Press the center button to toggle to the loosen mode. • When using conventional torque install a back wrench to keep the back nut from turning. •… -
Page 37: Bolting With The Hytorc Washer
• Tighten the thumb screw to secure the Driver. • Challenge the driver to make sure it is securely attached. LITHIUM SERIES® Electric Torque Tool (BTM and BTM-DOC Models) Operations Manual…
-
Page 38
Set the speed switch back to Torque. • Position the tool over the nut and HYTORC Reaction Washer. • Pull the trigger to apply torque until the tool reaches the desired torque and stops. -
Page 39
• Press the center button to toggle to the Loosen mode. • Position the driver over the nut and HYTORC reaction washer and hold the trigger and begin applying torque. • During operation the status light turns amber. If the operation is successful the status light will turn green, if unsuccessful the status light will turn red •… -
Page 40: Bolting With The Hytorc Nut
11 . BOLTIN G WITH THE H Y TORC N U T INSTALL THE HYTORC NUT DRIVER • The Tool is easily configured for tightening HYTORC Nuts. • Identify the appropriate size HYTORC Nut Driver • Slide the nut driver over the square drive and spline while aligning the set screw with the flat on the spline.
-
Page 41
(C O N T ’ D . ) TIGHTENING THE HYTORC NUT NOTE: The HYTORC Nut inner sleeve is tightened in a counter clockwise direction (left hand threads). • Power on the tool, adjust tool settings and set the fastener type to HYTORC Nut. -
Page 42
• It may be necessary to install a back wrench to keep the back nut from turning. • When loosening HYTORC Nuts position the driver and hold the trigger until the HYTORC Nut is loose. • The status light turns amber during operation. If the operation is successful, the status light will turn green, if unsuccessful the status light will turn red. -
Page 43: Addendum For Btm-Doc Models Only (Important)
THE CHARGING/FAULT LED INDICATOR OPERATES AS FOLLOWS: OPERATIONAL STATUS LED INDICATOR Power Off Power On / Standby Charging Flashing Green Full Charged Solid Green Fault or Charge Pending Solid Red LITHIUM SERIES® Electric Torque Tool (BTM and BTM-DOC Models) Operations Manual…
-
Page 44: Changelog
04/16/2018 — Addendum that pertains to an update regarding the Charging/Fault/LED Indicator, page 37. 07/09/2019 — Back cover updated. For future-proofing all global locations have been removed from the back cover in favor of our HYTORC universe map. 09/04/2019 — FCC statement updated.
-
Page 48
HYTORC WORLD HEADQUARTERS 333 Route 17 North, Mahwah, NJ 07430 • +201-512-9500 • 800-FOR-HYTORC THE HYTORC UNIVERSE IS MADE UP OF OVER 1,000 TRAINED BOLTING SPECIALISTS TO SUPPORT YOUR BOLTING NEEDS IN OVER 100 COUNTRIES. Locate your nearest HYTORC representative: H Y TO R C .CO M/ WO R LD…

Cordless Impact Driver/Wrench
Akku-Schlagschrauber
¢Ú··ÓÔηÙÛ¿‚È‰Ô ª·Ù·Ú›·˜/∫ÏÂȉ›
Bezprzewodowa wkrętarka udarowa
Akkus ütvecsavarozó/Csavarkulcs
Rázový utahovák/Klíč
Akülü darbeli vidalama/anahtar
Mașină de înșurubat cu impact cu acumulator
Akumulatorski udarni vijačnik
ìÀapÌêÈ aÍÍyÏyÎÓÚopÌêÈ åypÔoÇepÚ
Read through carefully and understand these instructions before use.
Diese Anleitung vor Benutzung des Werkzeugs sorgfältig durchlesen und verstehen.
¢È·‚¿ÛÙ ÚÔÛÂÎÙÈο Î·È Î·Ù·ÓÔ‹ÛÂÙ ·˘Ù¤˜ ÙȘ Ô‰ËÁ›Â˜ ÚÈÓ ÙË ¯Ú‹ÛË.
Przed użytkowaniem należy dokładnie przeczytać niniejszą instrukcję i zrozumieć jej treść.
Használat előtt olvassa el figyelmesen a használati utasítást.
Před použitím si pečlivě přečtěte tento návod a ujistěte se, že mu dobře rozumíte.
Aleti kullanmadan önce bu kılavuzu iyice okuyun ve talimatları anlayın.
Înainte de utilizare, citiţi cu atenţie și înţelegeţi prezentele instrucţiuni.
Pred uporabo natančno preberite in razumite ta navodila.
BÌËÏaÚeÎëÌo ÔpoäÚËÚe ÀaÌÌyï ËÌcÚpyÍáËï Ôo íÍcÔÎyaÚaáËË ÔpeÊÀe äeÏ ÔoÎëÁoÇaÚëcÓ ËÌcÚpyÏeÌÚoÏ.
Handling instructions
Bedienungsanleitung
√‰ËÁ›Â˜ ¯ÂÈÚÈÛÌÔ‡
Instrukcja obsługi
Kezelési utasítás
Návod k obsluze
Kullanım talimatları
Instrucţiuni de utilizare
Navodila za rokovanje
àÌcÚpyÍáËÓ Ôo íÍcÔÎyaÚaáËË
WH 14DBDL
•
WH 18DBDL
WR 14DBDL
•
WR 18DBDL
WH18DBDL
WR18DBDL
001CoverF_WH14DBDL_EE
6/18/10, 14:22
3