-
Contents
-
Table of Contents
-
Troubleshooting
-
Bookmarks
Quick Links
Axiom 25-49-61
Advanced Semi-Weighted USB MIDI Controller
User Guide
Related Manuals for M-Audio AXIOM 25-49-61
Summary of Contents for M-Audio AXIOM 25-49-61
-
Page 1: User Guide
Axiom 25-49-61 Advanced Semi-Weighted USB MIDI Controller User Guide…
-
Page 2: Table Of Contents
Table of Contents Introduction …………..5 What’s in the Box? .
-
Page 3
Introduction… -
Page 4: Introduction
Axiom Line User Guide Introduction Congratulations on the purchase of your M-Audio Axiom MIDI controller keyboard. Your new keyboard provides extensive control of virtual instruments, DAWs, hardware synthesizers, samplers and any other MIDI-compatible device. The eight fully assignable pads give you the ability to trigger samples and loops separately from the keyboard in real-time. The eight fully assignable endless rotary encoders allow for instant control of your software’s features and can pick up just where you left off.
-
Page 5: Section 1: Getting Started
Section 1: Getting Started 1.1 Axiom Keyboards Overview 1.1.1 Top Panel Overview 1.1.2 Back Panel Overview 1.1.3 Control Definitions These controls are referred by name throughout this manual. LCD display Numeric Keypad (Axiom 49/61 15: MIDI OUT port only) Sliders (Axiom 49/61 only) 16: MIDI IN port Octave buttons Encoders…
-
Page 6: Setup
(Windows 98, Me, NT or 2000 not supported) M-Audio suggests you also check the minimum system requirements for your software, as they may be greater than the above. USB hubs are not supported. M-Audio suggests that you connect directly to one of your computer’s built in USB ports.
-
Page 7: Power Supply
1.5 Power Supply If you are using your Axiom with a computer via its USB port, there is no need for an external power supply. Your Axiom will draw its power from the computer. However, if you are intending to use your Axiom without connecting to a computer’s USB port, then you will need to use an external power supply.
-
Page 8
Axiom Line User Guide Advanced A number of advanced functions on the Axiom 25 are accessed from the keyboard itself. These functions are listed above the keys on the front panel of the unit. To use any one of these functions, first press the Advanced button. The button will light indicating that the keyboard is now in Advanced Function mode. -
Page 9: The Keyboard
2.1 The Keyboard When you play the keyboard, MIDI note messages are sent. These messages are read by your computer software or external MIDI gear and used to generate sound accordingly. 2.1.1 Velocity Curve Every time you press a key, a MIDI note message is sent with a velocity value between 0 and 127; this value specifies how hard you pressed the key.
-
Page 10: Midi Channel
Axiom Line User Guide 2.1.3 Transpose The Octave buttons can also be used to transpose your keyboard. Some players like to play in a particular key like C or F, for example. Transpose lets you change the pitch you are controlling and continue to play in the key that is most comfortable for you. It is possible to transpose up or down by as much as 12 MIDI notes (or semitones).
-
Page 11: Program And Bank Changes
2.3 Program and Bank Changes Program messages (commonly referred to as program changes) are used to select different instrument sounds in a MIDI device. Program messages cover a range of 128 instruments. These instruments are accessed by sending program numbers 0 to 127. Some MIDI devices have more than 128 instruments.
-
Page 12: Midi Controller Messages
Axiom Line User Guide 2.4 MIDI Controller Messages There are 128 MIDI controller messages that are used for controlling the MIDI-adjustable parameters in your software or on your external MIDI gear. Examples of these controllable parameters include volume, pan, expression, reverb, chorus and portamento. Each of the controls on your Axiom keyboard is able to send any of the 128 standard MIDI controller messages to control such parameters.
-
Page 13
2.4.2 Programming the Controls on Your Axiom When programming a physical controller on your Axiom, the controller that was last used will be the first one selected for programming. To select a different physical controller for programming, use one of the following two methods: Method 1: 25-, 49- and 61-note versions: Move the physical controller you wish to program, or press the assignable button or pad. -
Page 14: Section 3: Advanced Features
-/+ buttons as you power up the keyboard. Important Note: When you perform this reset, all of the factory presets are lost. To restore the factory presets, please use the Enigma software, available as a free download at www.m-audio.com. Section 3: Advanced Features In section 2 we saw how to use the keyboard, send program and bank changes, and assign MIDI controllers to the various controls on your Axiom.
-
Page 15
3.1.1 Limiting the Range of Controllers It is possible to limit the range of the sliders, aftertouch strip, expression pedal or encoders on your Axiom. This is achieved using the extra data parameters for the controller as follows: 49- and 61-note versions: Set the physical controller to transmit a MIDI controller message as described in section 2.4.2. -
Page 16: Recollection And Storage Of Your Control Setups
Axiom Line User Guide 3.2 Recollection and Storage of Your Control Setups Once you have programmed the controls of your Axiom, you can store your setup into one of the 20 memory locations the Axiom offers. The 20 locations are accessed using the Store and Recall buttons. Use the Store button to write your control setups to a memory location.
-
Page 17
Memory Dump feature which sends a MIDI SysEx dump to the connected device. You can record the SysEx data to a MIDI track on a sequencer, or we recommend using M-Audio’s Enigma software to store and manage you Axiom controller presets. -
Page 18: How To Avoid Jumping Parameters
Axiom Line User Guide 3.2.3 Device ID On the 49- and 61-note versions, you can define the device ID of your specific Axiom keyboard when sending a SysEx memory dump. The device ID is used to distinguish between any number of connected Axiom keyboards, if you own more than one. The 25-note version does not have a device ID feature and so the device ID remains hard coded at 127.
-
Page 19: The Rotary Encoders
3.4 The Rotary Encoders As mentioned in section 2 it is possible to assign the rotary encoders to any MIDI controller message listed in Appendix C. When the encoders are assigned to MIDI controllers, they work in the same way as the sliders on the Axiom 49 and 61—when the minimum or maximum limit is reached, no more data is sent until you turn the dial the other way.
-
Page 20: Pressure Pads
Axiom Line User Guide 3.4.1 Acceleration Curves There are three acceleration curves (C1-3) which define the relationship between how fast you turn the endless encoder and the value increment/decrement that is sent out. It is also possible to turn the acceleration curve OFF so that regardless of how quickly or slowly you turn the dial, the value will only increment/decrement by 1 per step.
-
Page 21
25-note version: Select the pad as described in section 2. < Press the Advanced button. < Press the Ctrl Assign key. < The LCD display will flash the currently assigned controller for the pad. < Enter 147 for Note on/off (press/release), or 148 for note on/off toggle <… -
Page 22
Axiom Line User Guide The LCD display will flash the currently assigned note for the pad. < Enter the note number you want the pad to transmit using the numeric keypad. < Press the Enter key to confirm. < Press the Advanced button again. <… -
Page 23: Controlling Several Devices At The Same Time
25-note version: Press the Advanced button. < Press the Curve key twice. < The LCD will show “Pd” on the small 2-digit display as well as the currently selected velocity curve on the < 3-digit display. The current curve is preceded by a C if a curve is selected, or ‘F’ if a fixed velocity* is selected. Enter the new curve number using the numeric data entry keys or use the -/+ keys to step through the <…
-
Page 24
Axiom Line User Guide 3.6.1 Zones The Zone feature on your Axiom is used to control several different sound devices at the same time. In doing so, you can create splits, layers, harmony effects and more. For example, you can split the keyboard on your Axiom so your left hand plays a bass sound and your right hand plays a piano sound. -
Page 25
3.6.4 Zone Range The Zone Range defines the upper and lower limits of the keys contained in a zone. To set the range of a zone: Press the Zone Range button. The LED in the Zone/Group button lights to indicate that Zone/Group mode is <… -
Page 26
Axiom Line User Guide 3.6.7 Individual Channel Assignments of Controls Every physical controller on your Axiom can be assigned to its own individual channel, allowing you to control several instruments at the same time. It is also possible to tie a physical controller to a zone or to the Global Channel. To assign the transmit channel for a control: 49- and 61-note versions: Select the physical controller as described in section 2.4.2. -
Page 27: Group A Controls
3.7 Group A Controls Note: For information on Group A memory recall, please review section 3.2.1. The term “Group A controls” refers to the pitch bend wheel, modulation wheel, aftertouch, sustain pedal and expression pedal. Each of these controls differs from other controls on your Axiom because these can be programmed to be active or inactive in each zone independently.
-
Page 28: Example Of Control Functionality
Axiom Line User Guide 3.8 Example of Control Functionality 3.8.1 Setting Toggle Values for the Buttons The assignable buttons and the pedals can each be assigned to toggle between two MIDI controller message values. You may for example want to send out value 15 when you first press the button followed by value 74 when you press the button for a second time.
-
Page 29
3.8.2 Assigning MMC Messages to a Button MIDI Machine Control messages are used by some devices and software to control transport functions such as Stop, Play and Record. The Transport controls on your Axiom keyboard can be setup to send MMC messages, however it is important to note, that not all MIDI devices or software applications respond to MMC messages. -
Page 30
Axiom Line User Guide 3.8.3 Assigning RPN/NRPN Messages to a Fader or Encoder Many of today’s synthesizers and music applications can receive and process RPN and NRPN MIDI messages to allow control of an array of useful settings and features. However, RPN/NRPN messages are different from most other MIDI data as they consist of two or more MIDI messages that have to be sent in sequence. -
Page 31: Section 4: Usage Examples
Section 4: Usage Examples 4.1 MIDI Out from USB Function MIDI Out from USB can be used to switch the source of the MIDI data seen at the MIDI Out port of your Axiom. On initial power up, MIDI Out from USB mode is off. This means that as you play your Axiom, MIDI data will be sent to the MIDI Out port.
-
Page 32: Recording Your Performance On A Sequencer
Axiom Line User Guide To control MIDI out from USB mode: 49- and 61-note versions: Press Data 2 and Data 3 together to change the MIDI Out setting to MIDI Out from USB. < You will see a MIDI plug symbol appear on the LCD display. <…
-
Page 33: Controlling A Sound Module From The Computer
4.3 Controlling a Sound Module from the Computer By turning on MIDI Out from USB mode (section 4.1), the data coming into the Axiom from the computer will go directly out of the MIDI Out port and trigger the sounds in the external sound module. This means that your Axiom is effectively acting as a USB to MIDI interface.
-
Page 34: Rpn/Nrpns Explained
If you are still having trouble with any of the features on the Axiom, please consult the following Troubleshooting Guide, which answers some frequently asked questions. If you are still not able to find the answer you are looking for, please feel free to contact M-Audio technical support for further assistance.
-
Page 35: Section 6: Troubleshooting
ASIO driver if available. For more information on latency reduction please consult the knowledgebase at http://www.m-audio.com. < If you feel that you may need to upgrade your soundcard, please visit http://www.m-audio.com. < Section 6: Troubleshooting…
-
Page 36: Section 7: Contact
Sales e-mail: ….. . . sales@m-audio.com e-mail: ….info@m-audio.de tel: .
-
Page 37: Section 8: Technical Info
Section 9: Warranty Terms and Registration Warranty Terms M-Audio warrants products to be free from defects in materials and workmanship, under normal use and provided that the product is owned by the original, registered user. Visit www.m-audio.com/warranty for terms and limitations applying to your specific product.
-
Page 38: Section 10: Appendices
Axiom Line User Guide Section 10: Appendices Appendix A — MIDI IMPLEMENTATION CHART Function Transmitted Received Remarks Basic :Default 1-16 Channel:Changed 1-16 :Default ——— Mode :Messages :Altered ********* Note 0-127 Number:True Voice ********* Velocity: Note ON : Note OFF Aftertouch : Keys :Ch’s Pitch Bend…
-
Page 39: Appendix B — Useful Midi Data Tables
Appendix B – Useful MIDI Data Tables B1 — General MIDI Instruments – Program Change Numbers Piano Bass Reed Synth Effects 0 Acoustic Grand Piano 32 Acoustic Bass 64 Soprano Sax 96 SFX Rain 1 Bright Acoustic Piano 33 Fingered Bass 65 Alto Sax 97 SFX Soundtrack 2 Electric grand Piano…
-
Page 40
Axiom Line User Guide B2 — General MIDI Note Numbers Octave Note Numbers B3 — Roland GS And Yamaha XG NRPN Messages NRPN NRPN Data Data CC99 CC98 CC06 CC38 08 00-7F (-64 — 0 — +63) Vibrato Rate (relative change) 09 00-7F (-64 — 0 — +63) Vibrato Depth (relative change) 0A 00-7F… -
Page 41
B4 — GM2 Reverb Types Small Room Medium Room Large Room Medium Hall Large Hall Plate B5 — GM2 Chorus Types Chorus 1 Chorus 2 Chorus 3 Chorus 4 FB Chorus Flanger B4 – General MIDI Drums – Note assignments MIDI Note Drum Sound MIDI Note… -
Page 42
Axiom Line User Guide Appendix C — General MIDI Controller Numbers (MIDI CC’s) Bank Select Gen Purpose 2 LSB Non-Reg Param LSB Modulation Gen Purpose 3 LSB Non-Reg Param MSB Breath Control Gen Purpose 4 LSB Reg Param LSB Controller 3 Controller 52 Reg Param MSB Foot Control… -
Page 43: Appendix D — Assignable Controller Numbers To Linear Controllers
Appendix D – Assignable Controller Numbers to Linear Controllers This table applies to the following controls on your Axiom: Sliders < Aftertouch strip < Pitch bend wheel < Modulation wheel < Expression pedal < MIDI CC Description Data 1 Data 2 Data 3 0-119 Standard MIDI CC’s…
-
Page 44
Axiom Line User Guide Appendix E – Assignable Controller Numbers to Non-Linear Controllers This table applies to the following controls on your Axiom: Assignable buttons (Axiom 49/61 only) < Transport controls < Sustain pedal < MIDI CC Description Data 1 Data 2 Data 3 0-119… -
Page 45: Appendix F — Assignable Controller Numbers To Rotary Encoders
Appendix F – Assignable Controller Numbers to Rotary Encoders This table only applies to the Rotary encoders on your Axiom MIDI CC Description Data 1 Data 2 Data 3 0-119 Standard MIDI CC’s 120-127 Channel Mode Messages Pitch Bend Sensitivity Channel Fine Tune Channel Coarse Tune Channel Pressure…
-
Page 46: Appendix G — Assignable Controller Numbers To Pressure Pads
Axiom Line User Guide Appendix G – Assignable Controller Numbers to Pressure Pads This table only applies to the pressure Pads on your Axiom MIDI CC Description Data 1 Data 2 Data 3 0-119 Standard MIDI CC’s 120-127 Channel Mode Messages Pitch Bend Range Channel Fine Tune Channel Coarse Tune…
-
Page 47: Appendix H — Hexadecimal Conversion Chart
Appendix H — Hexadecimal Conversion Chart Hexadecimal value Decimal value Hexadecimal value Decimal value Hexadecimal value Decimal value Section 10: Appendices…
-
Page 48: Appendix I — Factory Presets
Axiom Line User Guide Appendix I – Factory Presets Your M-Audio Axiom keyboard comes with 20 preset setups which allow you to use the keyboard controller with supported software right out of the box. See section 3.2 for instructions on how to load a factory preset.
-
Page 49
Preset 5: Way Out Ware TimewARP 2600 To use this preset: Click on the TimewARP 2600 logo. < Select Load MIDI map. < Select the default map and click OK. < The trigger pads are assigned to send controller data in this preset. The pads on the left will control the filter cut-off and resonance. -
Page 50
© 2006 Avid Technology, Inc. All rights reserved. Product features, specifications, system requirements and availability are subject to change without notice. Avid and M-Audio are either trademarks or registered trademarks of Avid Technology, Inc. All other trademarks contained herein are the property of their…
USER MANUAL ENGLISH ( 2 – 12 ) MANUAL DEL USUARIO ESPAÑOL ( 13 – 23 ) MANUEL D’UTILISATION FRANÇAIS ( 24 – 34 ) GUIDA PER L’USO ITALIANO ( 35 – 45 ) BENUTZERHANDBUCH DEUTSCH ( 46 – 56 )
USER GUIDE (ENGLISH) Box Contents Axiom AIR 49 USB cable Pro Tools Express DVD User Guide iLok 2 Safety & Warranty Manual Support For complete system requirements, compatibility information, and product registration, visit the support section of the M-Audio website: m-audio.com/support.
Setup Scenario 1 Computer Sustain Pedal Expression Pedal USB MIDI IN MIDI OUT R L R L VOL Monitors USB Audio Interface Setup Scenario 2 Computer Headphones Setup Scenario 3 Computer Monitors External Rack Synth USB Mixer 3
General Overview 3 2 4 5 1 This is a broad overview of Axiom AIR 49’s controls, divided into sections: 1. 2. 3. 4. 5. Performance Controls: The keyboard is pressure- and velocity-sensitive, allowing for a comfortable and natural-feeling performance. Access the entire 88-note range by using the
4. Knobs: You can use these eight knobs to send standard MIDI messages or to take control of mixing or plug-in parameters in HyperControl Mode, depending on the setting of the adjacent Mode buttons. • MIDI Mode (MIDI Bank button): The knobs will send MIDI messages as assigned or according to the
8. Main Control Panel: A. LCD: This screen displays useful information, such as the current assignment and setting of the most recently moved physical control. D B B. Edit Button: This button puts Axiom AIR in Edit Mode, A allowing you to use its keyboard’s special functions to E C create or edit
Performance Settings This section explains settings that change the functions of Axiom AIR’s keyboard and trigger pads. IMPORTANT: When this manual refers to a «key,» this means a key on the keyboard with a label printed above it (e.g., «PAD Learn,» «PAD Roll,» etc.) as opposed to a button
Assigning MIDI Messages to the Controls Editing Axiom AIR’s MIDI configuration all starts with the Edit button. Press it to enter Edit Mode. It will flash to indicate it is in Edit Mode. To exit Edit Mode, press it a second time. To assign a specific MIDI message to a physical control: 1. Press the
Keyboard Trigger Pads 1 (Low): Low sensitivity 2 (Low Normal): Slightly more sensitive than Low 3 (Normal): Default sensitivity 4 (Normal High): Slightly more sensitive than Normal 5 (High): Highest exponential curve 6 (Linear): True to velocity 7 (Low Range): Velocity limited to lowest third of
MIDI Panic When you trigger a MIDI Panic message, it sends an «All Notes Off» message on all channels and through all outputs. This is useful when a connected hardware or software synthesizer has a stuck Note On. To send a MIDI Panic message: 1. Press the Edit button. 2. Press the MIDI Panic key on
HyperControl Rather than assigning parameters one by one, activating Axiom AIR’s HyperControl Mode automatically maps its controls to many of the most frequently used DAW features. This section is a general outline of HyperControl Mode’s features. Keep in mind that features, control behaviors, and
Other Controls Directional Buttons The Directional buttons can be used to control certain supported software features. Press the HyperControl button next to the Directional buttons to enable this function. Trigger Pads The trigger pads can be used to trigger drum or instrument sounds mapped by your
GUÍA DEL USUARIO (ESPAÑOL) Contenido de la caja Axiom AIR 49 DVD de Pro Tools Express iLok 2 Cable USB Guía del usuario Manual sobre la seguridad y garantía Soporte Para obtener información sobre los requisitos completos de sistema, la compatibilidad y el registro del producto, visite
Escenario de instalación 1 Pedal de sostenido Pedal de expresión Computadora USB MIDI IN MIDI OUT R L R L VOL Monitores Interfaz de audio USB Escenario de instalación 2 Computadora Auriculares Escenario de instalación 3 Computadora Monitores Rack de sincronismo externo Mezclador USB 14
Vista general 3 2 4 5 1 Ésta es una vista general de los controles del Axiom AIR 49, divididos en secciones: 1. 2. 3. 4. 5. Controles de interpretación: El teclado es sensible a la presión y la velocidad, permitiendo una interpretación cómoda y con sensación natural. Acceda a la gama completa de 88
4. Perillas: Puede usar estas ocho perillas para enviar mensajes MIDI estándar o tomar control de los parámetros de mezcla o plug-in en modo HyperControl, en función de la configuración de los botones de modo adyacentes. • Modo MIDI (botón MIDI BANK): Las perillas envían mensajes MIDI según estén
8. Panel de control principal: A. LCD: Esta pantalla muestra información útil, tal como la asignación y el ajuste actuales del control físico movido más recientemente. D B B. Botón EDIT (Edición): Con este botón se coloca el Axiom AIR en modo de edición, que le permite usar las funciones A
Ajustes de interpretación En esta sección se explican los ajustes que cambian las funciones del teclado y los pads de disparo del Axiom AIR. IMPORTANTE: Cuando este manual se refiere a una «tecla», significa una tecla del teclado con un rótulo impreso en la misma (por ej., «PAD LEARN», «PAD ROLL,»
Cómo asignar mensajes MIDI a los controles La edición de la configuración MIDI del Axiom AIR comienza con el botón EDIT. Púlselo para entrar al modo de edición. Destellará para indicar que está en modo de edición. Para salir del modo de edición, pulse el botón una segunda vez. Para asignar un
Teclado Pads de disparo 1 (Baja): Baja sensibilidad 2 (Normal baja): Ligeramente más sensible que la baja 3 (Normal): Sensibilidad predeterminada 4 (Alta normal): Ligeramente más sensible que la normal 5 (Alta): La curva exponencial más alta 6 (Lineal): Velocidad verdadera 7 (Rango bajo): Velocidad
MIDI PANIC (Pánico MIDI) Cuando usted dispara un mensaje MIDI Panic (Pánico MIDI), se envía un mensaje «All Notes Off» (Desactivar todas las notas) en todos los canales y por todas las salidas. Esto es útil cuando un sintetizador de hardware o software conectado tiene una nota activada atascada.
HyperControl En lugar de asignar los parámetros uno por uno, al activarse el modo HyperControl de Axiom AIR, se mapean automáticamente sus controles a muchas de las características de uso más frecuente de la DAW. Esta sección brinda un bosquejo general de las características del modo HyperControl.
Otros controles Botones direccionales Los botones direccionales se pueden usar para controlar ciertas características de software soportadas. Pulse el botón de HyperControl contiguo a los botones direccionales para habilitar esta función. Pads de disparo Los pads de disparo se pueden usar para
GUIDE D’UTILISATION (FRANÇAIS) Contenu de la boîte Axiom AIR 49 DVD Pro Tools Express iLok 2 Câble USB Guide d’utilisation Consignes de sécurité et informations concernant la garantie Assistance Pour tous les renseignements concernant la configuration système minimale requise, la
Scénario d’installation no 1 Ordinateur Pédale de maintien Pédale d’expression USB MIDI IN MIDI OUT R L R L VOL Moniteurs Interface audio USB Scénario d’installation no 2 Ordinateur Casque d’écoute Scénario d’installation no 3 Ordinateur Moniteurs Synthétiseur fixe externe Console de mixage USB 25
Vue d’ensemble 3 2 4 5 1 Ceci est une vue d’ensemble générale des différentes sections des commandes du Axiom AIR : 1. 2. 3. 4. 5. Commandes de jeu : Le clavier est sensible à la pression et à la dynamique offrant un jeu confortable et une sensation réaliste. Utilisez les touches Octave afin
4. Boutons : Ces huit boutons de commande permettent d’envoyer des messages MIDI standards, de faire un mixage ou de modifier les paramètres du plugiciel en mode HyperControl, selon le réglage des touches Mode adjacentes. • Mode MIDI (Touche MIDI Bank) : Les boutons permettent d’envoyer des
8. Commandes principales : A. Écran ACL : Cet écran affiche des informations pratiques, comme l’affectation et les réglages actuels de la dernière commande modifiée. B. Touche Edit : Cette touche permet d’accéder au mode de modification de l’Axiom AIR afin d’utiliser les fonctions évoluées du
Configurations des commandes de jeu Cette section explique les paramètres qui modifient les fonctions du clavier et des pads du Axiom AIR. IMPORTANT : Lorsque « touche du clavier » est mentionnée, ceci se réfère aux touches du clavier qui sont identifiées (p. ex., « PAD Learn », « PAD Roll », etc.)
Affectation des messages MIDI aux commandes Les modifications de la configuration MIDI de l’Axiom AIR se font à l’aide de la touche Edit. Appuyez sur la touche Edit pour accéder au mode Edit. La touche clignote afin d’indiquer que vous êtes en mode Edit. Appuyez de nouveau sur la touche afin de
Clavier Pads 1 (Low): Faible sensibilité 2 (Low Normal): Sensibilité légèrement plus élevée que faible 3 (Normal): Sensibilité par défaut 4 (Normal High): Sensibilité légèrement plus élevée que normale 5 (High): Courbe exponentielle la plus élevée 6 (Linear): Vitesse réelle 7 (Low Range):Vitesse
Message de panique MIDI Lorsque vous déclenchez un message de panique MIDI, il envoie un message « All Notes Off » (extinction des notes) sur tous les canaux et vers toutes les sorties. Ceci est très utile lorsqu’un synthétiseur matériel ou logiciel est coincé sur une note. Envoyer un message de
HyperControl Acitiver le mode HyperControl du Axiom AIR permet de faire le mappage automatique des fonctions les plus fréquemment utilisées des DAW (DAW) plutôt que de faire la configuration des paramètres un à un. Cette section procure un survol général des fonctions du mode HyperControl.
Autres commandes Touches de déplacement Les touches de déplacement peuvent être utilisées afin de commander certaines fonctions logicielles prises en charge. Appuyez sur la touche HyperControl adjacente aux touches de déplacement afin d’activer cette fonction. Pads Les pads peuvent être utilisés
GUIDA PER L’USO (ITALIANO) Contenuti della confezione Axiom AIR 49 DVD Pro Tools Express iLok 2 Cavo USB Guida per l’uso Istruzioni di sicurezza e garanzia Assistenza Per maggiori informazioni in merito ai requisiti di sistema completi, informazioni in merito alla compatibilità e alla
Configurazione — Scenario 1 Computer Pedale sustain Pedale di espressione USB MIDI IN MIDI OUT R L R L VOL Monitor USB Audio Interfaccia Configurazione — Scenario 2 Computer Cuffie Configurazione — Scenario 3 Computer Monitor Esterno Sint rack Mixer USB 36
Panoramica generale 3 2 4 5 1 Questa è un’ampia panoramica dei comandi dell’Axiom AIR 49, divisa in sezioni: 1. 2. 3. 4. 5. Comandi prestazioni: la tastiera è sensibile alla pressione e alla velocità e consente esibizioni comode e dalla sensazione naturale. Accedere all’intera gamma delle 88 note
4. Manopole: si possono utilizzare queste otto manopole per inviare messaggi MIDI standard o per assumere il controllo di parametri di mixaggio o di plug-in in modalità HyperControl, a seconda della configurazione dei tasti modalità adiacenti. • Modalità MIDI (tasto MIDI Bank): le manopole inviano
8. Pannello comandi principale: A. LCD: questo schermo mostra informazioni utili, quali l’assegnazione corrente e l’impostazione dei comandi fisici spostati più di recente. B. Tasto Edit: questo tasto mette l’Axiom AIR in modalità Edit, consentendo di utilizzare le funzioni speciali della sua
Impostazioni prestazioni In questo paragrafo vengono descritte le impostazioni che modificano le funzioni della tastiera e dei pad trigger dell’Axiom AIR. IMPORTANTE: quando questo manuale fa riferimento a un «tasto» intende un tasto della tastiera con un’etichetta stampata al di sopra di esso (ad
Assegnazione di messaggi MIDI ai comandi Modificando la configurazione MIDI dell’Axiom AIR tutto inizia con il tasto Edit. Premerlo per entrare in modalità Edit. Lampeggerà per indicare che ci si trova in modalità Edit. Per uscire dalla modalità Edit, premerlo una seconda volta. Per assegnare un
Tastiera Pad trigger 1 (Low) (basso): sensibilità bassa 2 (Low Normal) (basso normale): leggermente più sensibile di Low 3 (Normal) (normale): sensibilità predefinita 4 (Normal High) (normale alto): leggermente più sensibile di Normal 5 (High) (alto): curva esponenziale massima 6 (Linear)
MIDI Panic Quando si attiva un messaggio MIDI Panic, invia un messaggio «All Notes Off» su tutti i canali e attraverso tutte le uscite. Ciò è utile quando un sintetizzatore hardware o software collegato ha una nota On bloccata. Per inviare un messaggio MIDI Panic: 1. Premere il pulsante Edit. 2.
HyperControl Anziché assegnare i parametri uno a uno, attivando la modalità HyperControl dell’Axiom AIR, questo mapperà automaticamente i suoi comandi su molte delle funzioni dei DAW (workstation audio digitale) utilizzate più di frequente. Questo paragrafo è una descrizione generale delle funzioni
Altri comandi Tasti direzionali I tasti direzionali possono essere utilizzati per controllare determinate funzioni software supportate. Premere il tasto HyperControl accanto ai tasti direzionali per abilitare questa funzione. Pad trigger I pad trigger possono essere utilizzati per attivare suoni di
BENUTZERHANDBUCH (DEUTSCH) Lieferumfang Axiom AIR 49 Pro Tools Express DVD iLok 2 USB-Kabel Benutzerhandbuch Sicherheitshinweise und Garantieinformationen Kundendienst Für die vollständigen Systemanforderungen, Kompatibilitätsinformationen und für die Produktregistrierung besuchen Sie
Setup-Szenario 1 Computer Sustain-Pedal Expression-Pedal USB MIDI IN MIDI OUT R L R L VOL Monitore USB AudioSchnittstelle Setup-Szenario 2 Computer Kopfhörer Setup-Szenario 3 Monitore Computer Externer Rack-Synthesizer USB-Mixer 47
Allgemeiner Überblick 3 2 4 5 1 Dies ist ein Überblick über die Bedienelemente des Axiom AIR 49, gegliedert in Abschnitte: 1. 2. 3. 4. 5. Performance-Controls: Das Keyboard ist druck- und anschlagdynamisch, was Ihrem Spiel einen natürlicheren Klang und ein besseres Spielgefühl verleiht. Greifen Sie
4. Drehregler: Sie können diese acht Regler verwenden, um Standard-MIDI-Nachrichten zu senden oder Mixing und Plug-In-Parameter im HyperControl-Modus zu steuern, je nach Einstellung der benachbarten Modus-Tasten. • MIDI-Modus (MIDI-Bank Taste): Die Regler senden MIDI-Nachrichten je nach Zuweisung
8. Hauptbedienfeld: A. LCD: Dieses Display zeigt nützliche Informationen, wie z. B. die aktuelle Zuweisung und Einstellung des zuletzt betätigten physischen Bedienelements. B. Bearbeiten-Taste: Diese Taste versetzt Ihr Axiom AIR in den Bearbeitungsmodus, damit Sie die Spezialfunktionen des
Performance-Einstellungen Dieser Abschnitt beschreibt Einstellungen, die die Keyboard- und Trigger-Pad-Funktionen Ihres Axiom AIR verändern. WICHTIG: Wenn dieses Handbuch nur auf eine «Taste» verweist, handelt es sich um eine Taste auf der Keyboard-Klaviatur mit darüber aufgedruckter Beschriftung
Zuweisen von MIDI-Meldungen an Bedienelemente Das Bearbeiten der Axiom AIR MIDI-Konfiguration beginnt mit der Bearbeiten-Taste. Drücken Sie diese, um in den Bearbeitungsmodus zu wechseln. Sie blinkt, um anzuzeigen, dass der Bearbeitungsmodus ausgewählt ist. Um den Bearbeitungsmodus zu verlassen,
Keyboard: Trigger-Pads: 1 (Low): Niedrige Empfindlichkeit 2 (Low Normal): Etwas empfindlicher als die niedrige Empfindlichkeit 3 (Normal): Standard-Empfindlichkeit 4 (Normal High): Etwas empfindlicher als die StandardEmpfindlichkeit 5 (High): Höchste exponentielle Kurve 6 (Linear):
MIDI-Panik Wenn Sie eine MIDI-Panikmeldung auslösen, wird eine Notendeaktivierungsmeldung an alle Kanäle und über alle Ausgänge gesendet. Dies ist nützlich, wenn eine angeschlossene Hardware oder ein Software-Synthesizer bei einer Note «hängenbleibt». So senden Sie eine MIDI-Panikmeldung: 1.
HyperControl Anstatt jeden Parameter einzeln zuzuweisen, aktiviert der HyperControl-Modus Ihres Axiom AIR die automatische Zuordnung der Regler für viele häufig verwendete DAW Software-Features. Dieser Abschnitt ist ein allgemeiner Überblick über die HyperControl-Modus-Funktionen. Denken Sie daran,
Andere Bedienelemente Richtungstasten: Die Richtungstasten können verwendet werden, um bestimmte, unterstützte Software-Funktionen zu steuern. Drücken Sie die HyperControl-Taste neben den Richtungstasten, um diese Funktion zu aktivieren. Trigger-Pads: Die Trigger-Pads können verwendet werden, um
Appendix MIDI Mode: Messages and Sub-Parameters Modulation Wheel, Faders, Expression Pedal Available MIDI Message Types: RPN and NRPN Sub-Parameters: Parameter MIDI Message Display MIDI CC RPN NRPN Control Disable * 0 – 127 128 129 — MIDI CC -> RPN Define -> NRPN Define -> Control OFF Value Range
Fader Buttons, Sustain Pedal Available MIDI Message Types: Program Change Sub-Parameters: Parameter MIDI Message Display Sub-Parameter Value Range Display MIDI CC RPN NRPN Program Change 0 – 127 128 129 MIDI CC -> RPN Define -> NRPN Define -> 130 Prg.Change -> LSB MSB Program Number MIDI Channel 0
Specifications Keys: 49, velocity-sensitive Octaves: 10 total (3 in either direction) Drum Trigger Pads: 12, velocity- and pressure-sensitive Rotary Knob Controls: 8 Velocity Curves: 10 for keyboard, 10 for trigger pads Transport Control Buttons: Loop, Rewind, Fast Forward, Stop, Play, Record
m-audio.com MANUAL VERSION 1.0
Содержание
- Обзор MIDI-клавиатуры M-Audio Axiom PRO 49
- Технические характеристики
- Комплектация
- Установка и подключение
- Управление
- Как подключить axiom 49 к компьютеру
- Как подключить axiom 49 к компьютеру
- Инструкция для M-Audio Axiom AIR 49
- Оглавление инструкции
Обзор MIDI-клавиатуры M-Audio Axiom PRO 49
MIDI-клавиатура M-Audio Axiom PRO 49 в коробке
Линейка продуктов Axiom PRO является более продвинутой версией линейки Oxygen, один из представителей которой, M-Audio Oxygen 25, был рассмотрен нами ранее. Миди-клавиатуры Axiom PRO более функциональны и рассчитаны на более требовательных музыкантов.
Технические характеристики
Комплектация
В комплект поставки M-Audio PRO Axiom 49, помимо самой миди-клавиатуры, включены USB-шнур, диски с драйверами (под PC и Mac) и программой Ableton Live Lite 7, а также краткое руководство пользователя.
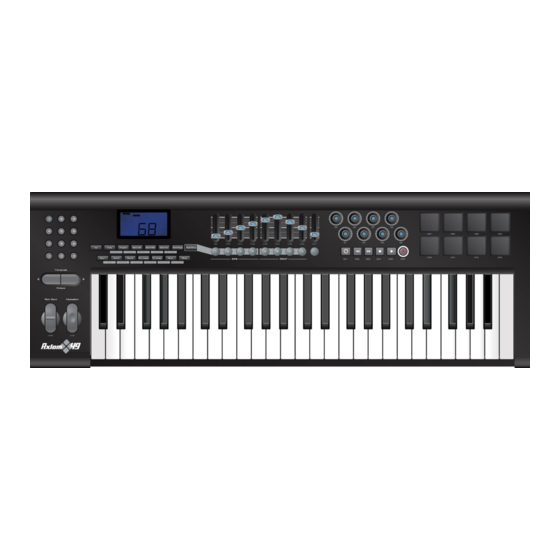
MIDI-клавиатура M-Audio Axiom PRO 49
USB-шнур, краткое руководство пользователя и диски из комплекта M-Audio Axiom PRO 49
Установка и подключение
Клавиатура распознается автоматически при подключении к компьютеру, однако для более стабильной работы рекомендуется поставить драйвера с прилагаемого диска (самую свежую версию драйверов можно скачать с официального сайта www.m-audio.com).
Вся коммутация осуществляется у Axiom PRO 49 на задней панели.
MIDI-клавиатура M-Audio Axiom PRO 49, вид сзади
Здесь расположены входы для педалей, стандартные 5-пиновые MIDI вход и выход, USB-порт, а также гнездо адаптера (сам адаптер опционален и в комплект поставки не входит). При подключении к компьютеру клавиатура может питаться через USB-порт, при этом не рекомендуется использовать переходники и удлинители.
Axiom PRO 49 может работать в двух режимах — Hosted и Standalone, т.е. как с подключением к компьютеру, так и без него.
Диаграмма коммутации Axiom PRO 49 в режиме Hosted
Диаграмма коммутации Axiom PRO 49 в режиме Hosted
Диаграмма коммутации Axiom PRO 49 в режиме Standalone
Диаграмма коммутации Axiom PRO 49 в режиме Standalone
Управление
Рассмотрим всё богатство предоставляемых Axiom PRO 49 возможностей управления. Клавиатура работает в 2 режимах — Perfomance и Edit, «исполнение» и «редактирование» соответственно.
Информация о используемых на данный момент контроллерах, загруженных пресетах и т.п. в краткой форме выводится на LCD экран разрешением 128х64. Расположенные под экраном кнопки предназначены для «редакторской» работы и позволяют регулировать все настройки интерфейса.
LCD-экран и кнопки редактирования
Правее экрана расположены 9 фэйдеров с кнопкой под каждым. Они предназначены для работы с виртуальными микшерами и номинально назначаются на первые 8 каналов + мастер. Кнопка под мастер-каналом переключает остальные кнопки под фейдерами между режимами Rec, Solo и Mute. Таким образом, пользователь получает оперативный доступ к виртуальном микшеру секвенсера. Стоит отметить, что ползунки ходят достаточно плавно, но не свободно, для их перемещения требуется некоторое усилие.
Секция фейдеров M-Audio Axiom PRO 49
Справа от фейдеров расположены 9 «бесконечных» ручек управления. «Бесконечные» означает, что у них нет какого-либо фиксированного положения и любое текущее может быть номинально определено как минимальное или как максимальное значение параметра.
Под ними расположена транспортная панель. Мы встречали подобное на клавиатурах Oxygen, и здесь смысл остается тот же — пользователь может включать проигрывание, запись или перемотку трека, не отходя от клавиатуры и не переключаясь на работу непосредственно с секвенсером.
«Бесконечные» поворотные контроллеры и транспортная панель
Еще правее расположены 8 квадратных резиновых «пэдов», предназначенных для работы с перкуссивными звуками. Номинально они, разумеется, привязаны к определенным нотам, однако играть на них партию ударных или перкуссионных инструментов значительно удобнее, чем на фортепианной клавиатуре. При этом «пэды» чувствительны к силе нажатия и передают динамику исполнения.
Резиновые пэды для работы с перкуссивными (ударными) сэмплами
Оставшаяся часть интерфейса расположена с левой стороны. Это кнопки с цифрами, 2 кнопки переключения октав и стандартные колёса Pitch и Modulation.
Цифровая клавиатура M-Audio Axiom PRO 49
Колеса Pitch Bend и Modulation, а также кнопки переключения октав
От разбора интерфейса перейдём к собственно работе с ним. Говоря об клавиатурах Axiom PRO, нельзя обойти вниманием технологию HyperControl. Номинально все действия с Axiom PRO 49 создают различные MIDI-сообщения, которые специфичны и разными секвенсерами могут распознаваться по разному. Чтобы, к примеру, перемещение первого фейдера воспринималось как изменение параметра на первом канале виртуального микшера, нужно поставить прилагаемые к Axiom PRO 49 драйвера HyperControl, которые для каждого секвенсера свои. После установки все контроллеры Axiom PRO 49 автоматически «привязываются» к соответствующим функциям секвенсера.
В режиме Edit возможно отстроить многие нюансы работы с Axiom PRO 49. Так, например, можно выбрать метод передачи Velocity, что будет влиять на динамику исполнения. Зависимость от силы нажатия может изменяться линейно или по пяти другим алгоритмам, а может быть нулевой, т.е. будут передаваться только стабильные ноты с Velocity 64, 100 или 127. Помимо этого, можно переназначать функции у контроллеров, делить клавиатуру на различные зоны и т.п. У Axiom PRO 49 очень детальная и гибкая система настройки, радующая своей функциональностью.
Мы пробовали работать на Axiom PRO 49 c Logic Pro. Очень понравилось то, что практически любой параметр трека можно изменять при помощи контроллеров. Так, например, при помощи поворотных «бесконечных» ручек можно управлять в реальном времени параметрами эквалайзера, находящегося в цепи обработки. Подобных возможностей масса и они могут пригодиться уже не только в аранжировке, но и в сведении трека.
Источник
Как подключить axiom 49 к компьютеру
Вроде очень хорошая подробная документация, плюс в приложениях много справочного материала по MIDI-управлению. Правда на английском.
Всем привет! Мне досталась от бывшего соседа эта клавиатура (но axiom 61) вместе с кабелем питания.
С электронной музыкой знакома не особенно, но примерно что-то как-то понимаю. Во многом могу разобраться самостоятельно, но мне бы упростило задачу, если бы я знала.
1) Для начала, насколько я поняла, надо скачать драйвера с сайта компании в разделе Drivers, Legacy.
По поиску там получается Driver Updates и Software Updates. В чем разница?
Извиняюсь за наивные вопросы, я совершенный чайник, но давно хотела научиться, а раз клавиатура досталась даром. то, наверное, самое время.
к сожалению, не особенно знаю,что такое host.
в целом,я разбираюсь в таких вещах быстро, но если на первых порах мне кто-то покажет что и как и на каком принципе функционирует.
надо бы, наверное, найти кого-то поблизости и попросить дать пару уроков, что ли.
Простое выключение/включение клавиатуры не приведет ее в «начальное состояние». Проще всего воспользоваться программой Enigma (либо на диске, идущем в комплекте с клавиатурой, либо скачать с сайта производителя клавиатуры http://www.m-audio.com/support/downl. ma-ver-1.2.exe).
Впрочем, можно понадеяться, что предыдущий владелец ничего не настраивал под себя и пропустить этот шаг. Но если что-то со следующим шагом не заработает сразу, то сначала надо смотреть настройки самой клавиатуры, а не ковырять программы звукосинтеза.
Источник
Как подключить axiom 49 к компьютеру

Как назначить кнопки транспорта в FL Studio
Если вы хотите настроить аксиом контролировать транспортные функции в FL это довольно легко, и не нужно устанавливать Enigm’у, я имею в виду что можно вручную это все настроить.
1. Нажмите кнопку на Axiom’e которую вы хотите настроить, это её выберет. Например кнопку Record. (Круглая кнопка, в середине красный кружок)
4. Нажмите кнопку data 2 и введите цифру на что вы хотите её назначить. Например если вы хотите чтобы кнопка Record выполняла функцию кнопки Play нажмите Data 2, а затем введите значение 02. В нашем же случае мы хотим чтобы кнопка Record выполняла свои фунции и поэтомо нажимаем Data2, а затем вводим значение 06.
Для каждый кнопки нужно повторять все пункты.
01 stop
02 play
04 forward
05 rewind
06 record


Источник
Инструкция для M-Audio Axiom AIR 49

MANUAL DEL USUARIO
Оглавление инструкции
USER MANUAL ENGLISH ( 2 – 12 ) MANUAL DEL USUARIO ESPAÑOL ( 13 – 23 ) MANUEL D’UTILISATION FRANÇAIS ( 24 – 34 ) GUIDA PER L’USO ITALIANO ( 35 – 45 ) BENUTZERHANDBUCH DEUTSCH ( 46 – 56 )
USER GUIDE (ENGLISH) Box Contents Axiom AIR 49 USB cable Pro Tools Express DVD User Guide iLok 2 Safety & Warranty Manual Support For complete system requirements, compatibility information, and product registration, visit the support section of the M-Audio website: m-audio.com/support.
Setup Scenario 1 Computer Sustain Pedal Expression Pedal USB MIDI IN MIDI OUT R L R L VOL Monitors USB Audio Interface Setup Scenario 2 Computer Headphones Setup Scenario 3 Computer Monitors External Rack Synth USB Mixer 3
General Overview 3 2 4 5 1 This is a broad overview of Axiom AIR 49’s controls, divided into sections: 1. 2. 3. 4. 5. Performance Controls: The keyboard is pressure- and velocity-sensitive, allowing for a comfortable and natural-feeling performance. Access the entire 88-note range by using the
4. Knobs: You can use these eight knobs to send standard MIDI messages or to take control of mixing or plug-in parameters in HyperControl Mode, depending on the setting of the adjacent Mode buttons. • MIDI Mode (MIDI Bank button): The knobs will send MIDI messages as assigned or according to the
8. Main Control Panel: A. LCD: This screen displays useful information, such as the current assignment and setting of the most recently moved physical control. D B B. Edit Button: This button puts Axiom AIR in Edit Mode, A allowing you to use its keyboard’s special functions to E C create or edit
Performance Settings This section explains settings that change the functions of Axiom AIR’s keyboard and trigger pads. IMPORTANT: When this manual refers to a «key,» this means a key on the keyboard with a label printed above it (e.g., «PAD Learn,» «PAD Roll,» etc.) as opposed to a button
Assigning MIDI Messages to the Controls Editing Axiom AIR’s MIDI configuration all starts with the Edit button. Press it to enter Edit Mode. It will flash to indicate it is in Edit Mode. To exit Edit Mode, press it a second time. To assign a specific MIDI message to a physical control: 1. Press the
Keyboard Trigger Pads 1 (Low): Low sensitivity 2 (Low Normal): Slightly more sensitive than Low 3 (Normal): Default sensitivity 4 (Normal High): Slightly more sensitive than Normal 5 (High): Highest exponential curve 6 (Linear): True to velocity 7 (Low Range): Velocity limited to lowest third of
MIDI Panic When you trigger a MIDI Panic message, it sends an «All Notes Off» message on all channels and through all outputs. This is useful when a connected hardware or software synthesizer has a stuck Note On. To send a MIDI Panic message: 1. Press the Edit button. 2. Press the MIDI Panic key on
HyperControl Rather than assigning parameters one by one, activating Axiom AIR’s HyperControl Mode automatically maps its controls to many of the most frequently used DAW features. This section is a general outline of HyperControl Mode’s features. Keep in mind that features, control behaviors, and
Other Controls Directional Buttons The Directional buttons can be used to control certain supported software features. Press the HyperControl button next to the Directional buttons to enable this function. Trigger Pads The trigger pads can be used to trigger drum or instrument sounds mapped by your
GUÍA DEL USUARIO (ESPAÑOL) Contenido de la caja Axiom AIR 49 DVD de Pro Tools Express iLok 2 Cable USB Guía del usuario Manual sobre la seguridad y garantía Soporte Para obtener información sobre los requisitos completos de sistema, la compatibilidad y el registro del producto, visite
Escenario de instalación 1 Pedal de sostenido Pedal de expresión Computadora USB MIDI IN MIDI OUT R L R L VOL Monitores Interfaz de audio USB Escenario de instalación 2 Computadora Auriculares Escenario de instalación 3 Computadora Monitores Rack de sincronismo externo Mezclador USB 14
Vista general 3 2 4 5 1 Ésta es una vista general de los controles del Axiom AIR 49, divididos en secciones: 1. 2. 3. 4. 5. Controles de interpretación: El teclado es sensible a la presión y la velocidad, permitiendo una interpretación cómoda y con sensación natural. Acceda a la gama completa de 88
4. Perillas: Puede usar estas ocho perillas para enviar mensajes MIDI estándar o tomar control de los parámetros de mezcla o plug-in en modo HyperControl, en función de la configuración de los botones de modo adyacentes. • Modo MIDI (botón MIDI BANK): Las perillas envían mensajes MIDI según estén
8. Panel de control principal: A. LCD: Esta pantalla muestra información útil, tal como la asignación y el ajuste actuales del control físico movido más recientemente. D B B. Botón EDIT (Edición): Con este botón se coloca el Axiom AIR en modo de edición, que le permite usar las funciones A
Ajustes de interpretación En esta sección se explican los ajustes que cambian las funciones del teclado y los pads de disparo del Axiom AIR. IMPORTANTE: Cuando este manual se refiere a una «tecla», significa una tecla del teclado con un rótulo impreso en la misma (por ej., «PAD LEARN», «PAD ROLL,»
Cómo asignar mensajes MIDI a los controles La edición de la configuración MIDI del Axiom AIR comienza con el botón EDIT. Púlselo para entrar al modo de edición. Destellará para indicar que está en modo de edición. Para salir del modo de edición, pulse el botón una segunda vez. Para asignar un
Teclado Pads de disparo 1 (Baja): Baja sensibilidad 2 (Normal baja): Ligeramente más sensible que la baja 3 (Normal): Sensibilidad predeterminada 4 (Alta normal): Ligeramente más sensible que la normal 5 (Alta): La curva exponencial más alta 6 (Lineal): Velocidad verdadera 7 (Rango bajo): Velocidad
MIDI PANIC (Pánico MIDI) Cuando usted dispara un mensaje MIDI Panic (Pánico MIDI), se envía un mensaje «All Notes Off» (Desactivar todas las notas) en todos los canales y por todas las salidas. Esto es útil cuando un sintetizador de hardware o software conectado tiene una nota activada atascada.
HyperControl En lugar de asignar los parámetros uno por uno, al activarse el modo HyperControl de Axiom AIR, se mapean automáticamente sus controles a muchas de las características de uso más frecuente de la DAW. Esta sección brinda un bosquejo general de las características del modo HyperControl.
Otros controles Botones direccionales Los botones direccionales se pueden usar para controlar ciertas características de software soportadas. Pulse el botón de HyperControl contiguo a los botones direccionales para habilitar esta función. Pads de disparo Los pads de disparo se pueden usar para
GUIDE D’UTILISATION (FRANÇAIS) Contenu de la boîte Axiom AIR 49 DVD Pro Tools Express iLok 2 Câble USB Guide d’utilisation Consignes de sécurité et informations concernant la garantie Assistance Pour tous les renseignements concernant la configuration système minimale requise, la
Scénario d’installation no 1 Ordinateur Pédale de maintien Pédale d’expression USB MIDI IN MIDI OUT R L R L VOL Moniteurs Interface audio USB Scénario d’installation no 2 Ordinateur Casque d’écoute Scénario d’installation no 3 Ordinateur Moniteurs Synthétiseur fixe externe Console de mixage USB 25
Vue d’ensemble 3 2 4 5 1 Ceci est une vue d’ensemble générale des différentes sections des commandes du Axiom AIR : 1. 2. 3. 4. 5. Commandes de jeu : Le clavier est sensible à la pression et à la dynamique offrant un jeu confortable et une sensation réaliste. Utilisez les touches Octave afin
4. Boutons : Ces huit boutons de commande permettent d’envoyer des messages MIDI standards, de faire un mixage ou de modifier les paramètres du plugiciel en mode HyperControl, selon le réglage des touches Mode adjacentes. • Mode MIDI (Touche MIDI Bank) : Les boutons permettent d’envoyer des
8. Commandes principales : A. Écran ACL : Cet écran affiche des informations pratiques, comme l’affectation et les réglages actuels de la dernière commande modifiée. B. Touche Edit : Cette touche permet d’accéder au mode de modification de l’Axiom AIR afin d’utiliser les fonctions évoluées du
Configurations des commandes de jeu Cette section explique les paramètres qui modifient les fonctions du clavier et des pads du Axiom AIR. IMPORTANT : Lorsque « touche du clavier » est mentionnée, ceci se réfère aux touches du clavier qui sont identifiées (p. ex., « PAD Learn », « PAD Roll », etc.)
Affectation des messages MIDI aux commandes Les modifications de la configuration MIDI de l’Axiom AIR se font à l’aide de la touche Edit. Appuyez sur la touche Edit pour accéder au mode Edit. La touche clignote afin d’indiquer que vous êtes en mode Edit. Appuyez de nouveau sur la touche afin de
Clavier Pads 1 (Low): Faible sensibilité 2 (Low Normal): Sensibilité légèrement plus élevée que faible 3 (Normal): Sensibilité par défaut 4 (Normal High): Sensibilité légèrement plus élevée que normale 5 (High): Courbe exponentielle la plus élevée 6 (Linear): Vitesse réelle 7 (Low Range):Vitesse
Message de panique MIDI Lorsque vous déclenchez un message de panique MIDI, il envoie un message « All Notes Off » (extinction des notes) sur tous les canaux et vers toutes les sorties. Ceci est très utile lorsqu’un synthétiseur matériel ou logiciel est coincé sur une note. Envoyer un message de
HyperControl Acitiver le mode HyperControl du Axiom AIR permet de faire le mappage automatique des fonctions les plus fréquemment utilisées des DAW (DAW) plutôt que de faire la configuration des paramètres un à un. Cette section procure un survol général des fonctions du mode HyperControl.
Autres commandes Touches de déplacement Les touches de déplacement peuvent être utilisées afin de commander certaines fonctions logicielles prises en charge. Appuyez sur la touche HyperControl adjacente aux touches de déplacement afin d’activer cette fonction. Pads Les pads peuvent être utilisés
GUIDA PER L’USO (ITALIANO) Contenuti della confezione Axiom AIR 49 DVD Pro Tools Express iLok 2 Cavo USB Guida per l’uso Istruzioni di sicurezza e garanzia Assistenza Per maggiori informazioni in merito ai requisiti di sistema completi, informazioni in merito alla compatibilità e alla
Panoramica generale 3 2 4 5 1 Questa è un’ampia panoramica dei comandi dell’Axiom AIR 49, divisa in sezioni: 1. 2. 3. 4. 5. Comandi prestazioni: la tastiera è sensibile alla pressione e alla velocità e consente esibizioni comode e dalla sensazione naturale. Accedere all’intera gamma delle 88 note
4. Manopole: si possono utilizzare queste otto manopole per inviare messaggi MIDI standard o per assumere il controllo di parametri di mixaggio o di plug-in in modalità HyperControl, a seconda della configurazione dei tasti modalità adiacenti. • Modalità MIDI (tasto MIDI Bank): le manopole inviano
8. Pannello comandi principale: A. LCD: questo schermo mostra informazioni utili, quali l’assegnazione corrente e l’impostazione dei comandi fisici spostati più di recente. B. Tasto Edit: questo tasto mette l’Axiom AIR in modalità Edit, consentendo di utilizzare le funzioni speciali della sua
Impostazioni prestazioni In questo paragrafo vengono descritte le impostazioni che modificano le funzioni della tastiera e dei pad trigger dell’Axiom AIR. IMPORTANTE: quando questo manuale fa riferimento a un «tasto» intende un tasto della tastiera con un’etichetta stampata al di sopra di esso (ad
Assegnazione di messaggi MIDI ai comandi Modificando la configurazione MIDI dell’Axiom AIR tutto inizia con il tasto Edit. Premerlo per entrare in modalità Edit. Lampeggerà per indicare che ci si trova in modalità Edit. Per uscire dalla modalità Edit, premerlo una seconda volta. Per assegnare un
Tastiera Pad trigger 1 (Low) (basso): sensibilità bassa 2 (Low Normal) (basso normale): leggermente più sensibile di Low 3 (Normal) (normale): sensibilità predefinita 4 (Normal High) (normale alto): leggermente più sensibile di Normal 5 (High) (alto): curva esponenziale massima 6 (Linear)
MIDI Panic Quando si attiva un messaggio MIDI Panic, invia un messaggio «All Notes Off» su tutti i canali e attraverso tutte le uscite. Ciò è utile quando un sintetizzatore hardware o software collegato ha una nota On bloccata. Per inviare un messaggio MIDI Panic: 1. Premere il pulsante Edit. 2.
HyperControl Anziché assegnare i parametri uno a uno, attivando la modalità HyperControl dell’Axiom AIR, questo mapperà automaticamente i suoi comandi su molte delle funzioni dei DAW (workstation audio digitale) utilizzate più di frequente. Questo paragrafo è una descrizione generale delle funzioni
Altri comandi Tasti direzionali I tasti direzionali possono essere utilizzati per controllare determinate funzioni software supportate. Premere il tasto HyperControl accanto ai tasti direzionali per abilitare questa funzione. Pad trigger I pad trigger possono essere utilizzati per attivare suoni di
BENUTZERHANDBUCH (DEUTSCH) Lieferumfang Axiom AIR 49 Pro Tools Express DVD iLok 2 USB-Kabel Benutzerhandbuch Sicherheitshinweise und Garantieinformationen Kundendienst Für die vollständigen Systemanforderungen, Kompatibilitätsinformationen und für die Produktregistrierung besuchen Sie
Setup-Szenario 1 Computer Sustain-Pedal Expression-Pedal USB MIDI IN MIDI OUT R L R L VOL Monitore USB AudioSchnittstelle Setup-Szenario 2 Computer Kopfhörer Setup-Szenario 3 Monitore Computer Externer Rack-Synthesizer USB-Mixer 47
Allgemeiner Überblick 3 2 4 5 1 Dies ist ein Überblick über die Bedienelemente des Axiom AIR 49, gegliedert in Abschnitte: 1. 2. 3. 4. 5. Performance-Controls: Das Keyboard ist druck- und anschlagdynamisch, was Ihrem Spiel einen natürlicheren Klang und ein besseres Spielgefühl verleiht. Greifen Sie
4. Drehregler: Sie können diese acht Regler verwenden, um Standard-MIDI-Nachrichten zu senden oder Mixing und Plug-In-Parameter im HyperControl-Modus zu steuern, je nach Einstellung der benachbarten Modus-Tasten. • MIDI-Modus (MIDI-Bank Taste): Die Regler senden MIDI-Nachrichten je nach Zuweisung
8. Hauptbedienfeld: A. LCD: Dieses Display zeigt nützliche Informationen, wie z. B. die aktuelle Zuweisung und Einstellung des zuletzt betätigten physischen Bedienelements. B. Bearbeiten-Taste: Diese Taste versetzt Ihr Axiom AIR in den Bearbeitungsmodus, damit Sie die Spezialfunktionen des
Performance-Einstellungen Dieser Abschnitt beschreibt Einstellungen, die die Keyboard- und Trigger-Pad-Funktionen Ihres Axiom AIR verändern. WICHTIG: Wenn dieses Handbuch nur auf eine «Taste» verweist, handelt es sich um eine Taste auf der Keyboard-Klaviatur mit darüber aufgedruckter Beschriftung
Zuweisen von MIDI-Meldungen an Bedienelemente Das Bearbeiten der Axiom AIR MIDI-Konfiguration beginnt mit der Bearbeiten-Taste. Drücken Sie diese, um in den Bearbeitungsmodus zu wechseln. Sie blinkt, um anzuzeigen, dass der Bearbeitungsmodus ausgewählt ist. Um den Bearbeitungsmodus zu verlassen,
Keyboard: Trigger-Pads: 1 (Low): Niedrige Empfindlichkeit 2 (Low Normal): Etwas empfindlicher als die niedrige Empfindlichkeit 3 (Normal): Standard-Empfindlichkeit 4 (Normal High): Etwas empfindlicher als die StandardEmpfindlichkeit 5 (High): Höchste exponentielle Kurve 6 (Linear):
MIDI-Panik Wenn Sie eine MIDI-Panikmeldung auslösen, wird eine Notendeaktivierungsmeldung an alle Kanäle und über alle Ausgänge gesendet. Dies ist nützlich, wenn eine angeschlossene Hardware oder ein Software-Synthesizer bei einer Note «hängenbleibt». So senden Sie eine MIDI-Panikmeldung: 1.
HyperControl Anstatt jeden Parameter einzeln zuzuweisen, aktiviert der HyperControl-Modus Ihres Axiom AIR die automatische Zuordnung der Regler für viele häufig verwendete DAW Software-Features. Dieser Abschnitt ist ein allgemeiner Überblick über die HyperControl-Modus-Funktionen. Denken Sie daran,
Andere Bedienelemente Richtungstasten: Die Richtungstasten können verwendet werden, um bestimmte, unterstützte Software-Funktionen zu steuern. Drücken Sie die HyperControl-Taste neben den Richtungstasten, um diese Funktion zu aktivieren. Trigger-Pads: Die Trigger-Pads können verwendet werden, um
Specifications Keys: 49, velocity-sensitive Octaves: 10 total (3 in either direction) Drum Trigger Pads: 12, velocity- and pressure-sensitive Rotary Knob Controls: 8 Velocity Curves: 10 for keyboard, 10 for trigger pads Transport Control Buttons: Loop, Rewind, Fast Forward, Stop, Play, Record
Источник