Пост проплачен, но абсолютно объективен.
Кратко: по сравнению с предыдущим термометром, я доволен как слон.
Как и многим здесь, мне поступило предложение поучаствовать в программе iTry, в результате чего я выбрал несколько товаров на сумму $15, кстати изначально я хотел получить вот такой микрофон, но мне сказали что на складе его нет, и позднее он вообще пропал из ассортимента EverBuying. Поэтому, вспомнив свой не очень удачный термометр, я выбрал взамен микрофона этот товар.
Посылка была доставлена в рекордно быстрые сроки — 23 дня, обычно до моего города от китайцев посылки идут дней 40. Правда всей прелести этой скорости я не оценил, т.к. как раз был в отъезде, и посылка провалялась на почте еще 10 дней в ожидании пока я её заберу.
Трек
Номер: RC051819559HK
20.06.2012 Вылетело из Гонконга в страну назначения
29.06.2012 16:30 Импорт САМАРА PI-2
30.06.2012 11:06 Передано таможне САМАРА PI-2
30.06.2012 11:09 Выпущено таможней САМАРА PI-2
30.06.2012 15:56 Покинуло место международного обмена САМАРА PI-2
1.07.2012 5:41 Прибыло в сортировочный центр САМАРА МСЦ УОПО
1.07.2012 11:30 Покинуло сортировочный центр САМАРА МСЦ УОПО
2.07.2012 10:12 Прибыло в сортировочный центр МОСКВА-КАЗАНСКИЙ ВОКЗАЛ ПЖДП ЦЕХ-3
2.07.2012 12:39 Покинуло сортировочный центр МОСКВА-КАЗАНСКИЙ ВОКЗАЛ ПЖДП ЦЕХ-3
2.07.2012 16:00 Прибыло в сортировочный центр МОСКВА-ПАВЕЛЕЦКИЙ ВОКЗАЛ ПЖДП ЦЕХ- 1
2.07.2012 19:45 Покинуло сортировочный центр МОСКВА-ПАВЕЛЕЦКИЙ ВОКЗАЛ ПЖДП ЦЕХ- 1
4.07.2012 11:11 Прибыло в сортировочный центр РОСТОВ-НА-ДОНУ МСЦ УОПО
4.07.2012 11:32 Покинуло сортировочный центр РОСТОВ-НА-ДОНУ МСЦ УОПО
5.07.2012 Покинуло сортировочный центр РОСТОВ-НА-ДОНУ МСЦ ЦОПК
6.07.2012 Покинуло сортировочный центр ТАГАНРОГ ПОЧТАМТ
16.07.2012 Вручение адресату ТАГАНРОГ
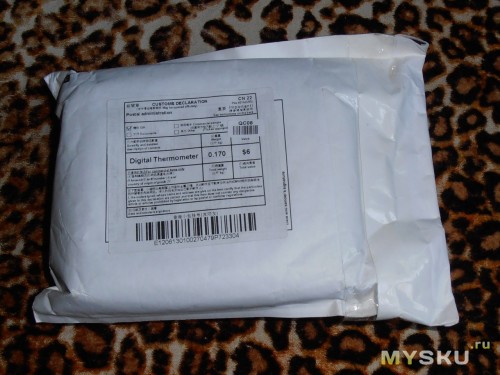
Итак, пакет, заклеен скотчем, вероятно вскрывали на таможне:
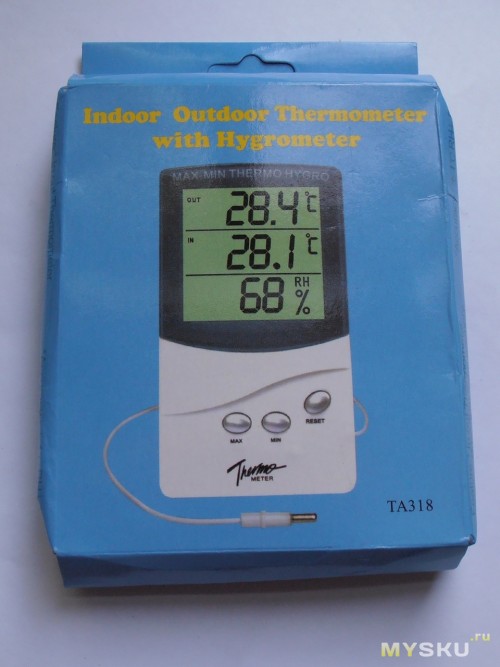
Коробочка с термометром:
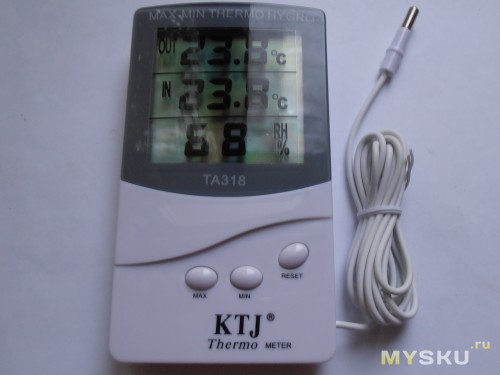
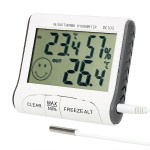
Термометр с наклейкой на дисплее:
Тестовое измерение рядом с предыдущим термометром:
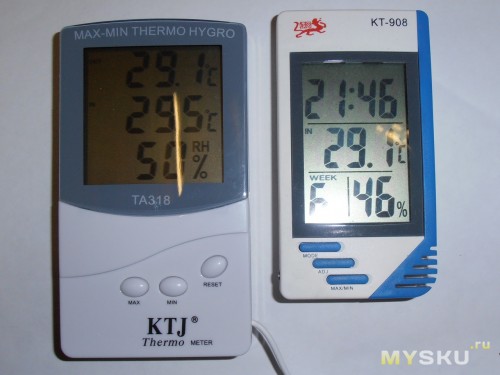
Как видно, сам он показывает разную температуру на двух своих датчиках, хоть и находятся они на расстоянии 10см друг от друга, но разница всего 0.4 градуса, я считаю это в пределах погрешности. Показания температуры совпадают с проверенным временем вторым термометром, а вот показания влажности немного отличаются, кто из них больше прав сказать не могу, т.к. сравнить более не с чем.
Как и предыдущий, этот термометр умеет стоять:
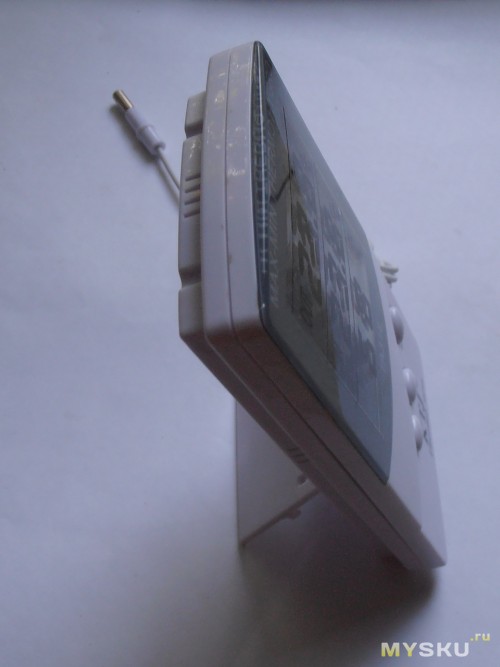
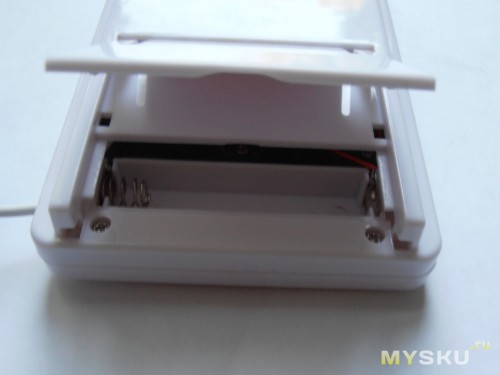
Под подставкой находится отсек с крышкой для батарейки ААА:
Как видно на предыдущих фотографиях, спереди имеется 3 кнопки: MIN, MAX и RESET. Первые две вводят девайс в режим отображения минимальной и максимальной температур соответственно. Зачем это надо непонятно, но я не сразу понял как это работает, думал что термометр врёт, оказалось всё просто: при первом нажатии на экране загорается соответствующая надпись и далее термометр постоянно показывает минимально/максимально зарегистрированную температуру, при повторном нажатии надпись на экране пропадает и он возвращается в нормальный режим отображения текущей температуры. Важно: если нажать только один раз, то спустя время он НЕ вернется в нормальный режим до повторного нажатия, что собственно и ввело меня в заблуждение относительно точности прибора. Третья кнопка стирает из памяти минимальную и максимальную температуры.
Сзади имеется «ухо» для гвоздя и тумблер F/C, правда надпись перепутана относительно положений тумблера, но это не принципиально важно.

Внешний датчик несъемный, в отличие от первого термометра.
Итого: я доволен. В отличие от первого термометра, этот сразу отображает обе температуры и влажность, как я сразу и хотел.
Из минусов: перепутанная надпись F/C, большой размер корпуса при относительно небольшом размере экрана, но это дело вкуса.
P.S. На али можно найти такой же дешевле на пару баксов.
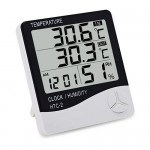
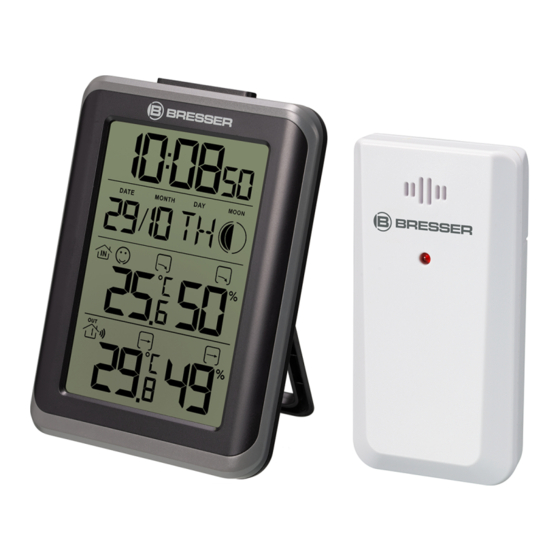
Домашняя мини-метеостанция TA218A с термометром. гигрометром, датой, временем и выносным датчиком для использования в террариуме, инкубаторе, бане, сауне, парнике, квартире и т.д. Устройство измеряет не только температуру, но и окружающую влажность воздуха. Модель TA218A отличается от других цифровых термометров такого типа тем, что имеет выносной датчик на шнуре длиной 1,5 метра, который можно поместить в любое помещение, оставаясь при этом снаружи. Великолепно подходит всем, кто заботится о своем комфорте и комфорте своих близким.
 Особенности метеостанции TA218A с выносным датчиком:
- Встроенный термометр (измерение температуры)
- Встроенный гигрометр (измерение влажности)
- Запоминание значений максимальной и минимальной температуры и влажности
- Отображение даты и времени
- Встроенный будильник
- Большие, легко читаемые цифры на дисплее
- Выносной датчик для измерения температуры и влажности, например, в инкубаторе, террариуме, теплице
- Возможность расположения на столе или крепления на стене
- Качественная сборка
Технические характеристики метеостанции TA218A:
- Дисплей: ЖК
- Единицы измерения: °C или °F
- Диапазон измерения температуры: 0-50°C
- Погрешность измерений температуры: ±1 градус
- Диапазон измерений влажности: 10% RH ~ 95% RH
- Погрешность измерений влажности: ±5%
- Формат времени: 12/24 ч.
- Длина провода датчика: 1,5 метра
- Питание: 1 x AAA, 1.5V (в комплект не входит)
- Размер: 12.1 x 9.7 x 2.4 см.
- Размер дисплея: 8 x 6,8 см.
- Вес: 154 гр.

Купить термометр с датчиком влажности можно в нашем интернет-магазине «El-Up» по цене намного ниже, чем в других магазинах! Модель TA218A поставляется напрямую от производителя и имеет качественную заводскую сборку. Для того, чтобы сделать заказ, положите выбранный товар в корзину (нажмите кнопку «купить» — заказ отправится в корзину (правый верхний угол)). Перейдите в нее и введите основные данные по доставке/самовывозу, или позвоните нам в рабочее время по тел. +7 (495) 998-05-94, +7 (916) 111-55-49 и наши менеджеры помогут оформить заказ по телефону. Информация, представленная на нашем сайте, носит исключительно справочный характер и не является публичной офертой. Обратите внимание, что из-за индивидуальных настроек Вашего монитора реальный цвет товара может отличаться от того, который Вы видите на экране своего компьютера. Также производитель оставляет за собой право изменять комплектацию и характеристики товара без предварительного уведомления торгующих организаций, при этом функциональные и качественные показатели товара не ухудшаются.
Мини-инструкция:
Кнопка TIME: настройка времени, переключение форматов даты/времени.
Нажмите и удерживайте в течение двух секунд кнопку TIME, чтобы войти в меню настроек времени, далее кнопка TIME используется для перехода по меню настроек, выбранный пункт начинает мигать.Кнопка UP: настройка параметров.
Нажмите и удерживайте кнопку TIME в течение двух секунд для входа в меню настроек, выберете необходимый раздел для настройки, нажмите клавишу UP для установки необходимого значения параметра.Кнопка MAX/MIN: отображение максимальной/минимальной температуры или влажности и удаление записи максимальной/минимальной температуры или влажности.
В нормальном состоянии нажмите кнопку MAX/MIN для отображения максимальной/минимальной температуры или влажности, для перехода между режимами отображения ничего нажимать не нужно, переход осуществится автоматически через 8 секунд. Для удаления записи максимальной/минимальной температуры или влажности вo время отображения записи, которую нужно удалить, зажмите кнопку MAX/MIN на две секунды, запись удалится, a устройство вернется в обычный режим отображения.Переключатель C/F: переключение формата отображения температуры между C и F.
С этим товаром также смотрят:
500 р.
650 р.
450 р.
580 р.
490 р.
490 р.
Отзывы:
Нет отзывов
Отставить отзыв
Написать отзыв
Автор:
Текст отзыва:
Внимание: HTML не поддерживается! Используйте обычный текст.
Оценка: Плохо
Хорошо
Введите код с картинки:

- Manuals
- Brands
- Bresser Manuals
- Weather Station
- MyClimate Thermo-Hygro
- Instruction manual
-
Contents
-
Table of Contents
-
Bookmarks
Available languages
-
EN
-
DE
Quick Links
Wetterstation · Weather Station ·
MyClimate Thermo-Hygro
DE
Bedienungsanleitung
EN
Instruction manual
Related Manuals for Bresser MyClimate Thermo-Hygro
Summary of Contents for Bresser MyClimate Thermo-Hygro
-
Page 1
Wetterstation · Weather Station · MyClimate Thermo-Hygro Bedienungsanleitung Instruction manual… -
Page 2
Desidera ricevere informazioni esaustive su questo prodotto in una lingua specifica? Venga a visitare il nostro sito Web al seguente link (codice QR Code) per conoscere le versioni disponibili. Art.No.: 7000012: Art.No.: 7000013: www.bresser.de/P7000012000000 www.bresser.de/P7000013 GARANTIE · WARRANTY · GARANTÍA · GARANZIA www.bresser.de/warranty_terms… -
Page 3: Table Of Contents
Inhaltsverzeichnis 1 Impressum ………………………… 4 2 Gültigkeitshinweis………………………. 4 3 Eigenschaften ………………………… 4 4 Zu dieser Anleitung ………………………. 5 5 Teileübersicht und Lieferumfang…………………… 6 6 Displayanzeigen ……………………….. 8 7 Vor der Inbetriebnahme …………………….. 9 8 Stromversorgung herstellen ……………………. 9 9 Manuelle Zeiteinstellung…………………….. 9 10 Weckrufeinstellung ………………………. 10 11 Schlummerfunktion………………………. 10 12 Mondphasen ………………………… 10 13 Anschluss von Funksensoren …………………… 10 14 Temperaturanzeige………………………. 11 15 MAX/MIN Wetterdaten …………………….. 11…
-
Page 4: Impressum
„Garantie“ und „Service“ in dieser Dokumentation. Wir bitten um Verständnis, dass direkt an die Her- steller-Anschrift gerichtete Anfragen oder Einsendungen nicht bearbeitet werden können. Irrtümer und technische Änderungen vorbehalten. © 2020 Bresser GmbH Alle Rechte vorbehalten. Die Reproduktion dieser Dokumentation – auch auszugsweise – in irgendeiner Form (z.B. Fotokopie, Druck, etc.) sowie die Verwendung und Verbreitung mittels elektronischer Systeme (z.B.
-
Page 5: Zu Dieser Anleitung
4 Zu dieser Anleitung HINWEIS Diese Bedienungsanleitung ist als Teil des Gerätes zu betrachten! Lesen Sie vor der Benutzung des Geräts aufmerksam die Sicherheitshinweise und die Bedienungsan- leitung. Bewahren Sie diese Bedienungsanleitung für die erneute Verwendung zu einem späteren Zeitpunkt auf.
-
Page 6: Teileübersicht Und Lieferumfang
5 Teileübersicht und Lieferumfang DATE MONTH MOON Abb. 1: Alle Teile der Basisstation (oben) und des Funksensors (unten) 1 SNZ/LIGHT-Taste (Schlummerfunktion / Dis- 2 Display (Basisstation) playhelligkeit einstellen) 3 Vorrichtung für Wandmontage 4 SET-Taste (Grundeinstellungen) 5 UP-Taste (Wert erhöhen), DOWN-Taste (Wert 6 CH-Taste (Kanalwahl) verringern) 7 ALARM-Taste…
-
Page 7
Lieferumfang: Art.Nr.: 7000012: Wetterstation (A), Thermo-/Hygrosensor (B) (1 Stück) Außerdem erforderlich (nicht im Lieferumfang enthalten): Station: 2 Stck. Micro-Batterien (1.5V, Typ AAA) Sensor: 2 Stck. Micro-Batterien (1.5V, Typ AAA) Art.Nr.: 7000013: Wetterstation (A) (2 Stück), Thermo-/Hygrosensor (B) (3 Stück) Außerdem erforderlich (nicht im Lieferumfang enthalten): Station (schwarz): 2 Stck. -
Page 8: Displayanzeigen
6 Displayanzeigen DATE MONTH MOON 1 Aktuelle Uhrzeit 2 Datum, Tag und Monat 3 Komfortindikator (Klima) 4 Innenraum-Infosymbol 5 Innentemperatur und Luftfeuchtigkeit 6 Symbol Außenbereich mit Kanalanzeige 7 Batteriestandanzeige 8 Außentemperatur und Luftfeuchtigkeit 9 Symbol für aktiven Weckruf 10 Alarmunterbrechung (Schlummern) aktiv 11 Mondphase 12 Trendpfeile Innenbereich 13 Trendpfeile Außenbereich…
-
Page 9: Vor Der Inbetriebnahme
7 Vor der Inbetriebnahme HINWEIS Vermeidung von Verbindungsstörungen! Um Verbindungsstörungen zwischen den Geräten zu vermeiden, sind die folgenden Punkte bei der In- betriebnahme zu beachten. 1. Basisgerät (Empfänger) und Sensor (Sender) so nah wie möglich nebeneinander stellen/legen. 2. Stromversorgung für das Basisgerät herstellen und warten bis die Innentemperatur angezeigt wird. 3.
-
Page 10: Weckrufeinstellung
6. SET-Taste abschließend drücken, um Einstellungen zu speichern und den Einstellungsmodus zu verlassen. 10 Weckrufeinstellung 1. ALARM-Taste ca. 3 Sekunden drücken um in den Weckzeiteinstellungsmodus zu gelangen. 2. Die einzustellenden Ziffern blinken. 3. UP- oder DOWN-Taste drücken, um den Wert zu verändern. 4.
-
Page 11: Temperaturanzeige
1. Batteriefachabdeckung des Funksensors entfernen. 2. Kanalwahl-Schalter auf den gewünschten Kanal einstellen (CH1, CH2 oder CH3). 3. Batteriefachabdeckung wieder aufsetzen. 4. HINWEIS! Jeder angeschlossene Funksensor muss auf einen anderen Kanal eingestellt wer- den. Ist nur ein Funksensor angeschlossen, sollte dieser auf CH1 eingestellt werden. 5.
-
Page 12: Eg-Konformitätserklärung
17 EG-Konformitätserklärung Hiermit erklärt Bresser GmbH, dass der Funkanlagentyp mit Artikelnummer 7000012000000 7000013 der Richtlinie 2014/53/EU entspricht. Der vollständige Text der EG-Konformitätserklärung ist unter der folgenden Internetadresse verfügbar: www.bresser.de/download/7000012000000 7000013/CE/7000012000000 7000013_CE.pdf 18 Entsorgung Entsorgen Sie die Verpackungsmaterialien sortenrein. Informationen zur ordnungsgemäßen Entsorgung erhalten Sie beim kommunalen Entsorgungsdienstleister oder Umweltamt.
-
Page 13
Contents 1 Imprint (German) ………………………. 14 2 Validity note ………………………… 14 3 Features…………………………… 14 4 About this Instruction Manual…………………… 15 5 Parts overview and scope of delivery …………………. 15 6 Screen display ………………………… 17 7 Before starting operation…………………….. 18 8 Setting up power supply…………………….. 18 9 Manual time setting ………………………. 18 10 Alarm setting………………………… 19 11 Snooze function………………………. 19 12 Moon phases………………………… 19… -
Page 14: Imprint (German)
Errors and technical changes excepted. © 2019 Bresser GmbH All rights reserved. The reproduction of this documentation — even in extracts — in any form (e.g. photocopy, print, etc.) as well as the use and distribution by means of electronic systems (e.g.
-
Page 15: About This Instruction Manual
4 About this Instruction Manual NOTICE These operating instructions are to be considered a component of the device. Read the safety instructions and the operating manual carefully before using this device. Keep this manual in a safe place for future reference. When the device is sold or given to someone else, the instruction manual must be provided to the new owner/user of the product.
-
Page 16
1 SNZ/LIGHT button (set snooze function / dis- 2 Display (base station) play brightness) 3 Wall mount fixture 4 SET button (basic settings) 5 UP button (increase value), DOWN button (de- 6 CH button (channel selection) crease value) 7 ALARM button 8 Stand 9 Battery compartment 10 Battery compartment cover… -
Page 17: Screen Display
6 Screen display DATE MONTH MOON 1 Current time 2 Date, day and month 3 Comfort indicator (climate) 4 Indoor info icon 5 Temperature and humidity 6 Outdoor sensor info icon 7 Low battery indicator 8 Temperature and humidity 9 Symbol for enabled alarm 10 Alarm interruption (snooze) activated 11 Moon phase 12 Trend arrows indoor…
-
Page 18: Before Starting Operation
7 Before starting operation NOTICE Avoid connectivity disruptions! To avoid connectivity disruptions between the devices, consider the following points before starting operation. 1. Place base station (receiver) and remote sensor (sender) together as close as possible. 2. Set up power supply for the base station and wait until the indoor temperature is displayed. 3.
-
Page 19: Alarm Setting
10 Alarm setting 1. Press and hold ALARM button for approx. 3 seconds to enter the alarm time setting mode. 2. Digits to be set are flashing. 3. Press UP or DOWN button to change the value. 4. Press ALARM button to confirm and continue to the next setting. 5.
-
Page 20: Temperature Display
47 g (without batteries) 70 g (with batteries) 17 EC Declaration of Conformity Hereby, Bresser GmbH declares that the equipment type with item number 7000012000000 7000013 : is in compliance with Directive: 2014/30/EU. The full text of the EU declaration of conform- ity is available at the following internet address: www.bresser.de/download/7000012000000…
-
Page 21: Disposal
18 Disposal Dispose of the packaging materials properly, according to their type, such as paper or card- board. Contact your local waste-disposal service or environmental authority for information on the proper disposal. Do not dispose of electronic devices in the household garbage! As per Directive 2012/19/EC of the European Parliament on waste electrical and electronic equipment and its adaptation into German law, used electronic devices must be collected separately and recycled in an environmentally friendly manner.
-
Page 24
(de preferencia por e-mail: service@bresseruk.com e-mail). Telephone*: +44 1342 837 098 BRESSER UK Ltd e-mail: servicio.iberia@bresser-iberia. Suite G3, Eden House Enterprise Way Teléfono*: +34 91 67972 69 Edenbridge, Kent TN8 6HF…

30
LCD
Display
keys
Battery
compartment
Stand
Hanging hole
SET key
keys
MA 10006 — Starter Set
Gateway + MA 10410
Instruction Manual
APP DOWNLOAD
Download the MOBILE-ALERTS app from «Apple App Store» or «Google Play».
CONNECT THE GATEWAY
Connect gateway to power supply using the supplied AC adapter. Connect included LAN
cable with gateway and your router. After about 10 seconds, the gateway is in operation. The
LED will turn static green.
If no DHCP server is available in your network, you can configure the gateway in the app
under the
point “Settings” manually.
Important: The Gateway
should always be put into operation before starting the
sensors!
FEATURES
The Weather Station
•
DCF Radio controlled time with manual setting option
•
Time reception ON/OFF setting
•
Weekday, date and month display (year only in setting mode)
•
Time zone option (-2h to +5h)
•
Daylight saving time (DST) setting
•
Alarm setting
•
Temperature display in degree Celsius (°C)
•
Indoor temperature display with MIN/MAX recordings
•
Outdoor temperature display with MIN/MAX recordings with time and date received
•
All MIN/MAX recordings can be reset
•
Indoor and outdoor humidity display in RH%
•
Weather forecast with weather tendency indicator
•
Relative air pressure history for the past 12 hours
•
LCD contrast setting
•
Low battery indicator
•
Table standing or wall mounting
Thermo-Hygro Transmitter
•
Remote transmission of outdoor temperature and humidity to weather
station by 868MHz
•
Wall mounting case
•
Mounting at a sheltered place. Avoid direct rain and sunshine
SETTING UP
Note: This weather station receives only one outdoor transmitter.
1. First, insert the batteries in the transmitter (see “How to install and replace batteries
in the thermo-hygro transmitter” above).
2. Within 30 seconds of powering up the transmitter, insert batteries in the weather station
(see “How to install and replace batteries in the weather station” above). Once the
batteries are in place, all segments of the LCD will light up briefly and a short signal
tone will sound. Then the indoor temperature, humidity and the time as 0:00 will be
displayed. If these information are not displayed on the LCD after 60 seconds, remove
the batteries and wait for at least 60 seconds before reinserting them. Once the indoor
data is displayed user may proceed to the next step.
3. After the batteries are inserted, the weather station will start receiving data signal from
the transmitter. The outdoor temperature and humidity data should then be displayed
on the weather station. If this does not happen after 2 minutes, the batteries will need
to be removed from both units and reset from step 1.
4. In order to ensure successful 868 MHz transmission, the distance between the weather
station and the transmitter should be within 100 meters (see notes on “Positioning”
and “868 MHz Reception”).
5. Once the outdoor data reception test period is completed, the DCF tower icon in the
clock display will start flashing in the upper left corner. This indicates that the clock has
detected that there is a radio signal present and is trying to receive it. When the time
code is received, the DCF tower becomes permanently lit and the time will be
displayed.
TO INSTALL AND REPLACE BATTERIES IN THE WEATHER STATION
The weather station uses 3 x AAA, IEC LR3,
1.5V batteries. To install and replace the
batteries, please follow the steps below:
1. Insert finger or other solid object in the
space at the bottom center of the
battery compartment and lift up to
remove the cover.
2. Insert batteries observing the correct
polarity (see marking).
3. Replace compartment cover.
TO INSTALL AND REPLACE BATTERIES IN THE THERMO-HYGRO
TRANSMITTER
The outdoor thermo-hygro transmitter uses 2 x AA, IEC LR6, 1.5V batteries. To install and
replace the batteries, please follow the steps below:
1. Remove the battery cover by pushing the battery cover upwards with
your thumb.
2. Insert the batteries, observing the correct polarity (see battery
compartment marking).
3.
Replace the battery cover on the unit.
Note:
In the event of changing batteries in any of the units, all units need to be reset
by following the setting up procedures. This is due to a random security code assigned by the
transmitter at start-up. This code must be received and stored by the weather station in the
first 3 minutes of power being supplied to the transmitter.
ADD DEVICE TO MOBILE-ALERTS SYSTEM
(MOBILE ALERTS gateway needed, sold separately)
Open the app, dashboard is displayed. Tap «Add new sensor» and scan the QR code on the
back of the MA 10410. Then set a name for the sensor. To set a name, select the transmitter
and then tap on the left area of the pencil icon in the upper right.
Note:
Only the data for indoor, outdoor temperature and indoor, outdoor humidity are transmitted to
Mobile-Alerts.
DCF RADIO CONTROLLED TIME
The time base for the radio controlled time is a Cesium Atomic Clock operated by the
Physikalisch Technische Bundesanstalt Braunschweig which has a time deviation of less than
one second in one million years. The time is coded and transmitted from Mainflingen near
Frankfurt via frequency signal DCF-77 (77.5 kHz) and has a transmitting range of
approximately 1,500 km. Your radio-controlled weather station receives this signal and
converts it to show the precise time in summer or wintertime.
The quality of the reception depends greatly on the geographic location. In normal cases,
there should be no reception problems within a 1,500 km radius of Frankfurt.
DCF reception is done twice daily at 02:00 and 03:00 am. If the reception is not successful at
03:00 am, then the next reception takes place the next hour and so on until 06:00am, or until
the reception is successful. If the reception is not successful at 06:00 am, then the next
attempt will take place the next day at 02:00 am.
If the tower icon flashes, but does not set the time or the DCF tower does not appear at all,
then please take note of the following:
•
Recommended distance to any interfering sources like computer monitors or TV sets is
a minimum of 1.5 — 2 meters.
•
Within ferro-concrete rooms (basements, superstructures), the received signal is
naturally weakened. In extreme cases, please place the unit close to a window and/ or
point its front or back towards the Frankfurt transmitter.
•
During nighttime, the atmospheric disturbances are usually less severe and reception is
possible in most cases. A single daily reception is adequate to keep the accuracy
deviation below 1 second.
FUNCTION KEYS:
Weather station:
The weather station has 4 easy to use function keys:
SET key
•
Press and hold for 2 seconds to enter manual setting modes: LCD contrast, time zone,
time reception ON/OFF, DST ON/OFF, manual time setting and calendar
•
To stop the alarm sound
+ key
•
To increase/change values in setting modes
•
Toggle between time / date / humidity / seconds display
•
To stop the alarm sound
MIN/MAX key
•
To toggle between the indoor and outdoor MIN/MAX temperature
•
To decrease/change values in setting modes
•
Press and hold for 3 seconds to reset ALL indoor/outdoor minimum/maximum
temperature recordings to current readings
•
To stop the alarm sound
ALARM key
•
To activate/deactivate the alarm and display alarm time
•
Press and hold for 2 seconds to enter the alarm setting mode
•
To stop the alarm sound
•
To exit the manual setting mode
LCD SCREEN
The LCD screen is split into 3 sections displaying the information for time/calendar, indoor
data, weather forecast and air pressure history, and outdoor data.
* When the signal is successfully received by the weather station, the outdoor transmission
icon will be switched on. (If not successful, the icon will not be shown on LCD). The user can
then easily see whether the last reception was successful (icon on) or not (icon off).
MANUAL SETTINGS
The following settings can be changed when pressing and holding the SET key:
•
LCD contrast setting
•
Time zone setting
•
Time reception ON/OFF setting
•
Daylight saving time (DST) ON/OFF setting
•
Manual time setting
•
Calendar setting
LCD CONTRAST SETTING
The LCD contrast can be set within 8 levels, from LCD 0 to LCD 7 (Default is LCD 4):
1. The LCD contrast level starts flashing.
2. Use the + or MIN/MAX key to select the level of contrast desired.
3. Confirm with the SET key and enter the Time Zone Setting.
TIME ZONE SETTING:
The time zone default of the weather station is “0”. To set a different time zone:
1. The current time zone value starts flashing.
2. Use the + or MIN/MAX key to set the time zone. The range runs from -2h to +5h hours
in 1-hour intervals.
3. Confirm with the SET key and enter the Time Reception ON/OFF Setting.
TIME RECEPTION ON/OFF SETTING
In area where reception of the DCF-77 time signal is not possible, the DCF-77 time reception
function can be turned OFF. The clock will then work as a normal quartz clock. (Default
setting is “1” = ON).
1. The digit “1” will start flashing on the LCD.
2. Use the + or MIN/MAX key to turn OFF (“0” = OFF) the time reception function.
3. Confirm with the SET key and enter the Daylight Saving Time (DST) ON/OFF
Setting.
Note:
•
If the Time Reception function is turned OFF manually, the clock will not attempt any
reception of the DCF time as long as the Time Reception OFF function is activated.
•
The time reception “ “ and the “DCF” icons will not be displayed on the LCD.
DAYLIGHT SAVING TIME (DST) ON/OFF SETTING
The daylight saving time (DST) function can be set ON/OFF. Default setting is “1” = ON:
1. The digit “1” will start flashing on the LCD.
2. Use the + or MIN/MAX key to turn OFF (“0” = OFF) the daylight saving function.
3. Confirm with the SET key and enter the Manual Time setting.
Important:
This function is only significant if the time reception setting is turned OFF “0”.
•
Daylight saving time setting “1” (ON): the clock calculates DST automatically in
normal quartz mode. DST begins on the last Sunday of March and ends on the last
Sunday of October.
•
Daylight saving time setting “0” (OFF): DST feature is OFF and the clock will not
change time automatically.
If the time reception setting is turned ON “1”, please set the daylight saving time “1”
(ON): the time change will be updated by the DCF-77 signal (as long as a proper reception is
possible).
In case of daylight saving time setting “0” (OFF): the time will be transmitted by the DCF-77
signal, but the clock calculates automatically a “no-DST time”.
MANUAL TIME SETTING:
In case the weather station cannot detect the DCF-signal (for example due to disturbances,
transmitting distance, etc.), the time can be manually set. The clock will then work as a
normal quartz clock.
1. The hour digit will start flashing.
2. Use the + or MIN/MAX key to set the hour. Keep holding the key allows the digit to
advance faster.
3. Press again the SET key to set the minutes. The minute digits start flashing.
4. Use the + or MIN/MAX key to set the minutes. Keep holding the key allows the digit to
advance faster
5. Confirm with the SET key and enter the Calendar setting.
Note:
•
The unit will still try and receive the signal despite it being manually set. When it does
receive the signal, it will change the manually set time into the received time. During
reception attempts the DCF tower icon will flash. If reception has been unsuccessful,
then the DCF tower icon will not appear but reception will still be attempted the
following day.
•
The time reception “ “ and the “DCF” icons will not be displayed on the LCD after
manual time setting.
CALENDAR SETTING
1.
The year digits will start flashing. The range runs from 2011 to 2025 (default is 2011).
2.
Use the + or MIN/MAX key to set the year. Keep holding the key allows the value to
advance faster.
3.
Press the SET key to confirm and enter the month setting mode.
4.
The month digit will be flashing. Use the + or MIN/MAX key to set the month. Keep
holding the key allows the value to advance faster.
5.
Press the SET key to enter date setting.
6.
The date digit will be flashing. Use the + or MIN/MAX key to set the date. Keep holding
the key allows the value to advance faster.
7.
Confirm with the SET key and exit the manual setting.
Note:
The weekday is automatically displayed above the time in short form (from Monday to
Sunday): MO / TU / WE / TH / FR / SA / SU.
TO EXIT THE MANUAL SETTING MODE
To exit the manual setting mode anytime during the manual setting, press the ALARM key.
The mode will return to normal time display.
ALARM SETTING
To set the alarm:
1. Press and hold ALARM key for 3 seconds until the alarm time shown.
2. The hour digit will be flashing. Use the + or MIN/MAX key to adjust the hour. Keep
holding the key allows the value to advance faster.
3. Use the ALARM key again, and the minute digits will be flashing. Press + or MIN/MAX
key to set the minute. Keep holding the key allows the value to advance faster.
4. Press the ALARM key to confirm the setting.
Note:
To activate/deactivate the alarm function, press the ALARM key once. The display of the
alarm icon represents that the alarm is «ON».
The duration of alarm sounding is 2 minutes. Press any key will stop the alarm sound.
WEATHER FORECASTING ICONS:
The weather icons in the second section of LCD can be displayed in any of the following
combinations:
For every sudden or significant change in the air pressure, the weather icons will update
accordingly to represent the change in weather. If the icons do not change, then it means
either the air pressure has not changed or the change has been too slow for the weather
station to register. However, if the icon displayed is a sun or raining cloud, there will be no
change of icon if the weather gets any better (with sunny icon) or worse (with rainy icon) since
the icons are already at their extremes.
The icons displayed forecasts the weather in terms of getting better or worse and not
necessarily sunny or rainy as each icon indicates. For example, if the current weather is
cloudy and the rainy icon is displayed, it does not mean that the product is faulty because it is
not raining. It simply means that the air pressure has dropped and the weather is expected to
get worse but not necessarily rainy.
Note:
After setting up, readings for weather forecasts should be disregarded for the next 12-24
hours. This will allow sufficient time for the weather station to collect air pressure data at a
constant altitude and therefore result in a more accurate forecast.
Common to weather forecasting, absolute accuracy cannot be guaranteed. The weather
forecasting feature is estimated to have an accuracy level of about 75% due to the varying
areas the weather station has been designed for use. In areas that experience sudden
changes in weather (for example from sunny to rain), the weather station will be more
accurate compared to use in areas where the weather is stagnant most of the time (for
example mostly sunny).
If the weather station is moved to another location significantly higher or lower than its initial
standing point (for example from the ground floor to the upper floors of a house), discard the
weather forecast for the next 12-24 hours. By doing this, the weather station will not mistake
the new location as being a possible change in air-pressure when really it is due to the slight
change of altitude.
The weather forecast and tendency are not transmitted to MOBILE ALERTS! They can
only be read on the display.
WEATHER TENDENCY INDICATOR
The weather tendency indicators (located on the left side of the weather icons) are working
together with the weather icons. When the indicator points upwards, it means that the air-
pressure is increasing and the weather is expected to improve, but when indicator points
downwards, the air-pressure is dropping and the weather is expected to become worse.
Taking this into account, one can see how the weather has changed and is expected to
change. For example, if the indicator is pointing downwards together with cloud and sun
icons, then the last noticeable change in the weather was when it was sunny (the sun icon
only). Therefore, the next change in the weather will be cloud with rain icons since the
indicator is pointing downwards.
Note:
Once the weather tendency indicator has registered a change in air pressure, it will remain
permanently visualized on the LCD.
Flashing
Alarm time (flashing)
Sunny
Cloudy with sunny intervals
Rainy
Weekday
Year
Date. Month.
Alarm indicator (ON)
Flashing
Hour flashing
Minutes flashing
+ key
MIN/MAX
ALARM key
Flashing
Flashing
Indoor humidity
display in RH%
(weather station)
forecast icon
Air pressure history
bar graph
Outdoor data signal
reception indicator *
Low battery indicator
(outdoor transmitter)
MIN/MAX outdoor
temperature display
Weekday
Time
Alarm icon
Outdoor humidity
display in RH%

Артикул: 327
Наличие: В наличии
Купить в 1 клик
Выносной зонд для измерения влажности и температуры воздуха
- Описание
- Отзывы (0)
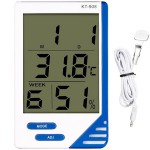
Термометр влагомер часы с выносным датчиком влажности особенно подходит для измерения уровня влажности и температуры в террариумах, инкубаторах и холодильных установках
Вы можете использовать этот прибор для контроля температуры в помещении и вне помещения. Кроме того, это все-в-одном гигрометр показывает уровень относительной влажности. Он также может быть использован как часы с функцией будильника.
Переключатель: Дата / время / недель
Градусы по Цельсию / по Фаренгейту
Формат времени 12/24 часовой
Память максимальной / минимальной температуры и влажности
Модель с 1,5-метровым зондом температуры и влажности
Календарь: 1 января 2000 ~ 31 декабря 2049
Термометр с цифровым ЖК-Экраном — большой,четкий дисплей, легко читается
Батарея: 1.5V AAA
Температура: 0 ~ 50 градусов
Экран /Разрешение: 0,1 градусов
Погрешность: + / -1 градусов
Диапазон влажности: 10% RH ~ 95% RH
Точность: 60% + / -5% RH
Вес: 210 гр.
Размер: 17,8 * 11,5 * 2,6 см
1: кнопка TIME — установка времени, переключатель отображения времени/даты. Нажмите и удерживайте кнопку TIME в течение 2 секунд, чтобы войти в режим установки времени. Затем кнопка TIME будет последовательно переводить устройство в следующие режимы установки: 12/24-часовая система, секунды, часы, минуты, год, месяц, день.
2: кнопка UP — «перемотка» вперед. Нажмите на 2 секунды кнопку TIME для перехода в режим настройки. Затем нажимайте кнопку UP до установки нужных значений.
3: кнопка MAX/MIN: отображение показаний максимальной (или минимальной) температуры или влажности, записанных в обычном состоянии. При нажатии кнопки MAX/MIN на экране показывается наибольшее или наименьшее значение измеренной температуры или влажности. Для перехода из режима MAX или MIN к отображению текущей температуры или влажности никаких кнопок нажимать не нужно, через 8 секунд режим сменится автоматически. Удаление показаний температуры и влажности, записанных в режиме MAX или MIN. Если в режиме MAX или MIN нажать и удерживать кнопку MAX/MIN более 2 секунд, то записанные значения максимальной и минимальной температуры и влажности стираются и устройство переходит в основной режим.
4: кнопка °C/°F: Переключатель отображения в градусах по Цельсию либо Фаренгейту.
Закрепите устройство на стене или положите на стол. Для питания прибора используются батарейки AAA на 1,5 В. Если текст становится нечетким, пора сменить батарейку. Не забудьте об охране окружающей среды.