- Manuals
- Brands
- MSI Manuals
- Motherboard
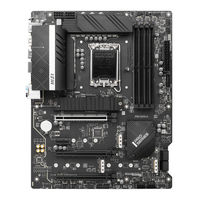
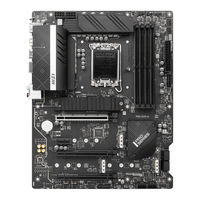
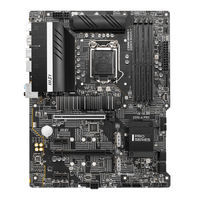
- PRO Z690-A WIFI DDR4
Manuals and User Guides for MSI PRO Z690-A WIFI DDR4. We have 3 MSI PRO Z690-A WIFI DDR4 manuals available for free PDF download: Manual, User Manual
MSI PRO Z690-A WIFI DDR4 Manual (249 pages)
Brand: MSI
|
Category: Motherboard
|
Size: 9.02 MB
Table of Contents
-
English
1
-
Table of Contents
1
-
Safety Information
3
-
Specifications
4
-
Rear I/O Panel
10
-
LAN Port LED Status Table
11
-
Audio Ports Configuration
11
-
Overview of Components
12
-
CPU Socket
13
-
DIMM Slots
14
-
PCI_E1~4: Pcie Expansion Slots
15
-
JFP1, JFP2: Front Panel Connectors
16
-
SATA1~6: SATA 6Gb/S Connectors
17
-
JAUD1: Front Audio Connector
17
-
M2_1~4: M.2 Slot (Key M)
18
-
ATX_PWR1, CPU_PWR1~2: Power Connectors
19
-
JUSB3~4: USB 3.2 Gen 1 5Gbps Connector
20
-
JUSB1~2: USB 2.0 Connectors
20
-
JUSB5: USB 3.2 Gen 2 Type-C Connector
21
-
JTBT1: Thunderbolt Add-On Card Connector
21
-
CPU_FAN1, PUMP_FAN1, SYS_FAN1~6: Fan Connectors
22
-
JTPM1: TPM Module Connector
22
-
JCI1: Chassis Intrusion Connector
23
-
JDASH1: Tuning Controller Connector
23
-
JRAINBOW1~2: Addressable RGB LED Connectors
24
-
JBAT1: Clear CMOS (Reset BIOS) Jumper
24
-
JRGB1: RGB LED Connector
25
-
EZ Debug LED
25
-
Installing OS, Drivers & MSI Center
26
-
Installing Windows® 10
26
-
Installing Drivers
26
-
MSI Center
26
-
Uefi Bios
27
-
BIOS User Guide
28
-
BIOS Setup
28
-
Entering BIOS Setup
28
-
Resetting BIOS
29
-
Updating BIOS
29
-
-
조선말/한국어
31
-
안전 지침
33
-
후면 I/O 패널
40
-
Lan 포트 Led 상태 표시
41
-
오디오 포트 구성 도표
41
-
구성품 개요
42
-
Cpu 소켓
43
-
DIMM 슬롯
44
-
PCI_E1~4: Pcie 확장 슬롯
45
-
Jfp1, Jfp2: 전면 패널 커넥터
46
-
SATA1~6: SATA 6Gb/S 커넥터
47
-
M2_1~4: M.2 슬롯 (Key M)
48
-
Atx_Pwr1, Cpu_Pwr1~2: 전원 커넥터
49
-
Jusb1~2: Usb 2.0 커넥터
50
-
JUSB3~4: USB 3.2 Gen 1 5Gbps 커넥터
50
-
Jtbt1: 썬더볼트 추가 카드 커넥터
51
-
JUSB5: USB 3.2 Gen 2 Type-C 커넥터
51
-
Cpu_Fan1, Pump_Fan1, Sys_Fan1~6: 팬 커넥터
52
-
Jtpm1: Tpm 모듈 커넥터
52
-
Jci1: 섀시 침입 커넥터
53
-
Jdash1: 튜닝 컨트롤러 커넥터
53
-
JBAT1: CMOS (Reset BIOS) 클리어 점퍼
54
-
Jrainbow1~2: 주소 지정 가능한 Rgb Led 커넥터
54
-
Ez 디버그 Led
55
-
Jrgb1: Rgb Led 커넥터
55
-
Msi 센터
56
-
Os, 드라이버 & 유틸리티 설치하기
56
-
Windows® 10설치하기
56
-
드라이버 설치하기
56
-
Uefi Bios
57
-
Bios (바이오스) 설정
58
-
Bios 설정
58
-
Bios 리셋
59
-
Bios(바이오스) 업데이트
59
-
-
Français
61
-
Informations de Sécurité
63
-
Spécifications
64
-
Panneau Arrière Entrée/Sortie
71
-
Configuration des Ports Audio
72
-
Tableau Explicatif de L’état de la LED du Port LAN
72
-
Vue D’ensemble des Composants
73
-
Socket Processeur
74
-
Slots DIMM
75
-
PCI_E1~4 : Slots D’extension Pcie
76
-
JFP1, JFP2 : Connecteurs de Panneau Avant
77
-
SATA1~6 : Connecteurs SATA 6 Gb/S
78
-
M2_1~4 : Slots M.2 (Touche M)
79
-
ATX_PWR1, CPU_PWR1~2 : Connecteurs D’alimentation
80
-
JUSB1~2 : Connecteurs USB 2.0
81
-
JUSB3~4 : Connecteurs USB 3.2 Gen 1 5 Gb/S
81
-
JTBT1 : Connecteur de Carte Additionnelle Thunderbolt
82
-
JUSB5 : Connecteur USB 3.2 Gen 2 Type-C
82
-
CPU_FAN1, PUMP_FAN1, SYS_FAN1~6 : Connecteurs de Ventilateur
83
-
JTPM1 : Connecteur de Module TPM
83
-
JCI1 : Connecteur Intrusion Châssis
84
-
JDASH1 : Connecteur du Contrôleur de Réglages
84
-
JBAT1 : Cavalier Clear CMOS (Réinitialiser Le BIOS)
85
-
JRAINBOW1~2 : Connecteurs LED RGB Adressables
85
-
EZ Debug LED
86
-
JRGB1 : Connecteur LED RGB
86
-
Installer Les Pilotes
87
-
Installer OS, Pilotes Et MSI Center
87
-
Installer Windows® 10
87
-
MSI Center
88
-
Uefi Bios
89
-
Configuration du BIOS
90
-
Entrer Dans la Configuration du BIOS
90
-
Guide D’utilisation du BIOS
90
-
Mettre Le BIOS À Jour
91
-
Réinitialiser Le BIOS
91
-
-
Deutsch
93
-
Sicherheitshinweis
95
-
Spezifikationen
96
-
Rückseite E/A
103
-
Konfiguration der Audioanschlüsse
104
-
LAN Port LED Zustandstabelle
104
-
Übersicht der Komponenten
105
-
CPU Sockel
106
-
DIMM Steckplätze
107
-
PCI_E1~4: Pcie Erweiterungssteckplätze
108
-
JFP1, JFP2: Frontpanel-Anschlüsse
109
-
SATA1~6: SATA 6Gb/S Anschlüsse
110
-
M2_1~4: M.2 Steckplatz (Key M)
111
-
ATX_PWR1, CPU_PWR1~2: Stromanschlüsse
112
-
JUSB1~2: USB 2.0 Anschlüsse
113
-
JUSB3~4: USB 3.2 Gen 1 5Gbit/S Anschluss
113
-
JTBT1: Anschluss für Thunderbolt-Erweiterungskarte
114
-
JUSB5: USB 3.2 Gen 2 Typ-C Anschluss
114
-
CPU_FAN1, PUMP_FAN1, SYS_FAN1~6: Stromanschlüsse für Lüfter
115
-
JTPM1: TPM Anschluss
115
-
JCI1: Gehäusekontaktanschluss
116
-
JDASH1: Tuning Controller-Anschluss
116
-
JBAT1: Clear CMOS Steckbrücke (Reset BIOS)
117
-
JRAINBOW1~2: Adressierbarer RGB-LED-Streifen Anschlüsse
117
-
Ez Debug Led
118
-
JRGB1: RGB LED Anschluss
118
-
Installation von OS, Treibern & MSI Center
119
-
Installation von Treibern
119
-
Installation von Windows® 10
119
-
MSI Center
120
-
Uefi Bios
121
-
BIOS Setup
122
-
BIOS-Benutzerhandbuch
122
-
Öffnen des BIOS Setups
122
-
Aktualisierung des BIOS
123
-
Reset des BIOS
123
-
-
Русский
125
-
Безопасное Использование Продукции
127
-
Технические Характеристики
128
-
Задняя Панель Портов Ввода/ Вывода
134
-
Конфигурация Портов Аудио
135
-
Таблица Состояний Индикатора Порта LAN
135
-
Компоненты Материнской Платы
137
-
Процессорный Сокет
137
-
Слоты DIMM
138
-
PCI_E1~4: Слоты Расширения Pcie
139
-
JFP1, JFP2: Разъемы Передней Панели
140
-
SATA1~6: Разъемы SATA 6Гб/С
141
-
M2_1~4: Разъемы M.2 (Ключ M)
142
-
ATX_PWR1, CPU_PWR1~2: Разъемы Питания
143
-
JUSB1~2: Разъемы USB 2.0
144
-
JUSB3~4: Разъем USB 3.2 Gen 1 5Гб/С
144
-
JTBT1: Разъем Для Установки Карты Расширения Thunderbolt
145
-
JUSB5: Разъем USB 3.2 Gen 2 Type-C
145
-
CPU_FAN1, PUMP_FAN1, SYS_FAN1~6: Разъемы Вентиляторов
146
-
JTPM1: Разъем Модуля ТРМ
146
-
JCI1: Разъем Датчика Открытия Корпуса
147
-
JDASH1: Разъем Контроллера Настройки
147
-
JBAT1: Джампер Очистки Данных CMOS (Сброс BIOS)
148
-
JRAINBOW1~2: Разъемы Адресных RGB LED
148
-
JRGB1: Разъем RGB LED
149
-
Индикаторы Отладки EZ
149
-
MSI Center
150
-
Установка Windows® 10
150
-
Установка Драйверов
150
-
Установка ОС, Драйверов И MSI Center
150
-
Uefi Bios
151
-
Вход В Настройки BIOS
152
-
Инструкции По Настройке BIOS
152
-
Настройка BIOS
152
-
Обновление BIOS
153
-
Сброс BIOS
153
-
-
汉语
155
-
安全信息
157
-
后置 I/O 面板
164
-
Lan 端口 Led 状态表
165
-
音频端口配置
165
-
组件概述
166
-
Cpu 底座
167
-
DIMM 插槽
168
-
PCI_E1~4: Pcie 扩展插槽
169
-
Jfp1, Jfp2: 前置面板接口
170
-
SATA1~6: SATA 6Gb/S 接口
171
-
M2_1~4: M.2 接口 (M 键)
172
-
Atx_Pwr1, Cpu_Pwr1~2: 电源接口
173
-
Jusb1~2: Usb 2.0 接口
174
-
JUSB3~4: USB 3.2 Gen 1 5Gbps 接口
174
-
JTBT1: Thunderbolt 附加卡接口
175
-
JUSB5: USB 3.2 Gen 2 Type-C 接口
175
-
Cpu_Fan1, Pump_Fan1, Sys_Fan1~6: 风扇接口
176
-
Jtpm1: Tpm 模组接口
176
-
Jci1: 机箱入侵检测接口
177
-
Jdash1: 调试控制器接口
177
-
Jbat1: 清除 Cmos (重启 Bios) 跳线
178
-
Jrainbow1~2: 寻址 Rgb Led 接口
178
-
Jrgb1: Rgb Led 接口
179
-
简易侦错 Led 灯
179
-
MSI Center
180
-
安装操作系统, 驱动程序和 MSI Center
180
-
安装驱动
180
-
Uefi Bios
181
-
Bios 用户指南
182
-
Bios 设置
182
-
进入 Bios 设置
182
-
更新 Bios
183
-
重启 Bios
183
-
-
漢語
185
-
背板 I/O
194
-
網路連接埠 Led 燈狀態表
195
-
音效連接埠設置
195
-
元件總覽
196
-
Cpu 腳座
197
-
記憶體插槽
198
-
PCI_E1~4: Pcie 擴充插槽
199
-
Jfp1, Jfp2: 系統面板接頭
200
-
Jaud1: 前置音效插孔
201
-
M2_1~4: M.2 插槽 (M 鍵)
202
-
Jci1: 機殼開啟接頭
207
-
Jdash1: 調試控制器接頭
207
-
Jbat1: 清除 Cmos (重置 Bios) 功能跳線
208
-
Jrainbow1~2: 可定址 Rgb Led 接頭
208
-
Jrgb1: Rgb Led 接頭
209
-
除錯 Led 指示燈
209
-
MSI Center
210
-
安裝操作系統 、 驅動程式和 MSI Center
210
-
安裝驅動程式
210
-
Uefi Bios
211
-
Bios 使用者指南
212
-
進入 Bios 設定
212
-
更新 Bios
213
-
重設 Bios
213
-
-
日本語
215
-
安全に関する注意事項
217
-
リアI/Oパネル
224
-
LanポートLed状態表
225
-
オーディオポートの配置
225
-
コンポーネントの概要
226
-
Cpuソケット
227
-
DIMMスロット
228
-
PCI_E1~4: Pcie拡張スロット
229
-
Jfp1、 Jfp2: フロントパネルコネクター
230
-
M2_1~4: M.2スロット (Key M)
232
-
Atx_Pwr1、 Cpu_Pwr1~2: 電源コネクター
233
-
Jusb1~2: Usb 2.0コネクター
234
-
JUSB3~4: USB 3.2 Gen 1 5Gbps コネクター
234
-
JTBT1: Thunderbolt追加カードコネクター
235
-
JUSB5: USB 3.2 Gen 2 Type-Cコネクター
235
-
Cpu_Fan1、 Pump_Fan1、 Sys_Fan1~6: ファンコネクター
236
-
Jtpm1: Tpmモジュールコネクター
236
-
Jci1: ケース開放スイッチコネクター
237
-
Jdash1: チューニングコントローラーコネクター
237
-
Jbat1: クリアCmos (Biosリセット) ジャンパ
238
-
Jrainbow1~2: 追加のRgb Ledコネクター
238
-
EZ Debug LED
239
-
Jrgb1: Rgb Ledコネクター
239
-
MSI Center
240
-
OS、 ドライバーおよびMSI Centerのインストール
240
-
Windows® 10のインストール
240
-
Uefi Bios
241
-
Biosの設定
242
-
Biosセットアップ画面の起動
242
-
Biosユーザーズガイド
242
-
Biosのアップデート方法
243
-
Biosのリセット
243
-
Advertisement
MSI PRO Z690-A WIFI DDR4 Manual (249 pages)
Brand: MSI
|
Category: Motherboard
|
Size: 9.12 MB
Table of Contents
-
Table of Contents
1
-
Safety Information
3
-
Specifications
4
-
Rear I/O Panel
10
-
LAN Port LED Status Table
11
-
Audio Ports Configuration
11
-
Overview of Components
12
-
CPU Socket
13
-
DIMM Slots
14
-
PCI_E1~4: Pcie Expansion Slots
15
-
JFP1, JFP2: Front Panel Connectors
16
-
SATA1~6: SATA 6Gb/S Connectors
17
-
JAUD1: Front Audio Connector
17
-
M2_1~4: M.2 Slot (Key M)
18
-
ATX_PWR1, CPU_PWR1~2: Power Connectors
19
-
JUSB1~2: USB 2.0 Connectors
20
-
JUSB3~4: USB 3.2 Gen 1 5Gbps Connector
20
-
JUSB5: USB 3.2 Gen 2 Type-C Connector
21
-
JTBT1: Thunderbolt Add-On Card Connector
21
-
CPU_FAN1, PUMP_FAN1, SYS_FAN1~6: Fan Connectors
22
-
JTPM1: TPM Module Connector
22
-
JCI1: Chassis Intrusion Connector
23
-
JDASH1: Tuning Controller Connector
23
-
JBAT1: Clear CMOS (Reset BIOS) Jumper
24
-
JRAINBOW1~2: Addressable RGB LED Connectors
24
-
JRGB1: RGB LED Connector
25
-
EZ Debug LED
25
-
Installing OS, Drivers & MSI Center
26
-
Installing Windows 10/ Windows 11
26
-
Installing Drivers
26
-
MSI Center
26
-
Uefi Bios
27
-
BIOS Setup
28
-
Entering BIOS Setup
28
-
BIOS User Guide
28
-
Resetting BIOS
29
-
Updating BIOS
29
-
안전 지침
33
-
후면 I/O 패널
40
-
Lan 포트 Led 상태 표시
41
-
오디오 포트 구성 도표
41
-
구성품 개요
42
-
Cpu 소켓
43
-
DIMM 슬롯
44
-
PCI_E1~4: Pcie 확장 슬롯
45
-
Jfp1, Jfp2: 전면 패널 커넥터
46
-
SATA1~6: SATA 6Gb/S 커넥터
47
-
M2_1~4: M.2 슬롯 (Key M)
48
-
Atx_Pwr1, Cpu_Pwr1~2: 전원 커넥터
49
-
Jusb1~2: Usb 2.0 커넥터
50
-
JUSB3~4: USB 3.2 Gen 1 5Gbps 커넥터
50
-
JUSB5: USB 3.2 Gen 2 Type-C 커넥터
51
-
Jtbt1: 썬더볼트 추가 카드 커넥터
51
-
Cpu_Fan1, Pump_Fan1, Sys_Fan1~6: 팬 커넥터
52
-
Jtpm1: Tpm 모듈 커넥터
52
-
Jci1: 섀시 침입 커넥터
53
-
Jdash1: 튜닝 컨트롤러 커넥터
53
-
JBAT1: CMOS (Reset BIOS) 클리어 점퍼
54
-
Jrainbow1~2: 주소 지정 가능한 Rgb Led 커넥터
54
-
Jrgb1: Rgb Led 커넥터
55
-
Ez 디버그 Led
55
-
Os, 드라이버 & Msi 센터 설치하기
56
-
Windows 10/ Windows 11 설치하기
56
-
드라이버 설치하기
56
-
Msi 센터
56
-
Uefi Bios
57
-
Bios (바이오스) 설정
58
-
Bios 설정
58
-
Bios 리셋
59
-
Bios(바이오스) 업데이트
59
-
Informations De Sécurité
63
-
Spécifications
64
-
Panneau Arrière Entrée/Sortie
70
-
Tableau Explicatif De L’état De La LED Du Port LAN
71
-
Configuration Des Ports Audio
71
-
Vue D’ensemble Des Composants
72
-
Socket Processeur
73
-
Slots DIMM
74
-
PCI_E1~4 : Slots D’extension Pcie
75
-
JFP1, JFP2 : Connecteurs De Panneau Avant
76
-
SATA1~6 : Connecteurs SATA 6 Gb/S
77
-
M2_1~4 : Slots M.2 (Touche M)
78
-
ATX_PWR1, CPU_PWR1~2 : Connecteurs D’alimentation
79
-
JUSB1~2 : Connecteurs USB 2.0
80
-
JUSB3~4 : Connecteurs USB 3.2 Gen 1 5 Gb/S
80
-
JUSB5 : Connecteur USB 3.2 Gen 2 Type-C
81
-
JTBT1 : Connecteur De Carte Additionnelle Thunderbolt
81
-
CPU_FAN1, PUMP_FAN1, SYS_FAN1~6 : Connecteurs De Ventilateur
82
-
JTPM1: Connecteur De Module TPM
82
-
JCI1 : Connecteur Intrusion Châssis
83
-
JDASH1 : Connecteur Du Contrôleur De Réglages
83
-
JBAT1 : Cavalier Clear CMOS (Réinitialiser Le BIOS)
84
-
JRAINBOW1~2 : Connecteurs LED RGB Adressables
84
-
JRGB1 : Connecteur LED RGB
85
-
EZ Debug LED
85
-
Installer OS, Pilotes Et MSI Center
86
-
Installer Windows 10/Windows 11
86
-
Installer Les Pilotes
86
-
MSI Center
87
-
Uefi Bios
88
-
Configuration Du BIOS
89
-
Entrer Dans La Configuration Du BIOS
89
-
Guide D’utilisation Du BIOS
89
-
Réinitialiser Le BIOS
90
-
Mettre Le BIOS À Jour
90
-
Sicherheitshinweis
95
-
Spezifikationen
96
-
Rückseite E/A
102
-
LAN Port LED Zustandstabelle
103
-
Konfiguration Der Audioanschlüsse
103
-
Übersicht Der Komponenten
104
-
CPU Sockel
105
-
DIMM Steckplätze
106
-
PCI_E1~4: Pcie Erweiterungssteckplätze
107
-
JFP1, JFP2: Frontpanel-Anschlüsse
108
-
SATA1~6: SATA 6Gb/S Anschlüsse
109
-
M2_1~4: M.2 Steckplatz (Key M)
110
-
ATX_PWR1, CPU_PWR1~2: Stromanschlüsse
111
-
JUSB1~2: USB 2.0 Anschlüsse
112
-
JUSB3~4: USB 3.2 Gen 1 5Gbit/S Anschluss
112
-
JUSB5: USB 3.2 Gen 2 Typ-C Anschluss
113
-
JTBT1: Anschluss Für Thunderbolt-Erweiterungskarte
113
-
CPU_FAN1, PUMP_FAN1, SYS_FAN1~6: Stromanschlüsse Für Lüfter
114
-
JTPM1: TPM Anschluss
114
-
JCI1: Gehäusekontaktanschluss
115
-
JDASH1: Tuning Controller-Anschluss
115
-
JBAT1: Clear CMOS Steckbrücke (Reset BIOS)
116
-
JRAINBOW1~2: Adressierbarer RGB-LED-Streifen Anschlüsse
116
-
JRGB1: RGB LED Anschluss
117
-
Ez Debug Led
117
-
Installation Von OS, Treibern & MSI Center
118
-
Installation Von Windows 10/ Windows 11
118
-
Installation Von Treibern
118
-
MSI Center
119
-
Uefi Bios
120
-
BIOS Setup
121
-
Öffnen Des BIOS Setups
121
-
BIOS-Benutzerhandbuch
121
-
Reset Des BIOS
122
-
Aktualisierung Des BIOS
122
-
Безопасное Использование Продукции
127
-
Технические Характеристики
128
-
Задняя Панель Портов Ввода/ Вывода
134
-
Таблица Состояний Индикатора Порта LAN
135
-
Конфигурация Портов Аудио
135
-
Компоненты Материнской Платы
137
-
Процессорный Сокет
137
-
Слоты DIMM
138
-
PCI_E1~4: Слоты Расширения Pcie
139
-
JFP1, JFP2: Разъемы Передней Панели
140
-
SATA1~6: Разъемы SATA 6Гб/С
141
-
M2_1~4: Разъемы M.2 (Ключ M)
142
-
ATX_PWR1, CPU_PWR1~2: Разъемы Питания
143
-
JUSB1~2: Разъемы USB 2.0
144
-
JUSB3~4: Разъемы USB 3.2 Gen 1 5Гб/С
144
-
JUSB5: Разъем USB 3.2 Gen 2 Type-C
145
-
JTBT1: Разъем Для Установки Карты Расширения Thunderbolt
145
-
CPU_FAN1, PUMP_FAN1, SYS_FAN1~6: Разъемы Вентиляторов
146
-
JTPM1: Разъем Модуля ТРМ
146
-
JCI1: Разъем Датчика Открытия Корпуса
147
-
JDASH1: Разъем Контроллера Настройки
147
-
JBAT1: Джампер Очистки Данных CMOS (Сброс BIOS)
148
-
JRAINBOW1~2: Разъемы Адресных RGB LED
148
-
JRGB1: Разъем RGB LED
149
-
Индикаторы Отладки EZ
149
-
Установка ОС, Драйверов И MSI Center
150
-
Установка Windows 10/ Windows 11
150
-
Установка Драйверов
150
-
MSI Center
150
-
Uefi Bios
151
-
Настройка BIOS
152
-
Вход В Настройки BIOS
152
-
Инструкции По Настройке BIOS
152
-
Сброс BIOS
153
-
Обновление BIOS
153
-
安全信息
157
-
后置 I/O 面板
164
-
Lan 端口 Led 状态表
165
-
音频端口配置
165
-
组件概述
166
-
Cpu 底座
167
-
DIMM 插槽
168
-
PCI_E1~4: Pcie 扩展插槽
169
-
Jfp1, Jfp2: 前置面板接口
170
-
SATA1~6: SATA 6Gb/S 接口
171
-
M2_1~4: M.2 接口 (M 键)
172
-
Atx_Pwr1, Cpu_Pwr1~2: 电源接口
173
-
Jusb1~2: Usb 2.0 接口
174
-
JUSB3~4: USB 3.2 Gen 1 5Gbps 接口
174
-
JUSB5: USB 3.2 Gen 2 Type-C 接口
175
-
JTBT1: Thunderbolt 附加卡接口
175
-
Cpu_Fan1, Pump_Fan1, Sys_Fan1~6: 风扇接口
176
-
Jtpm1: Tpm 模组接口
176
-
Jci1: 机箱入侵检测接口
177
-
Jdash1: 调试控制器接口
177
-
Jbat1: 清除 Cmos (重启 Bios) 跳线
178
-
Jrainbow1~2: 寻址 Rgb Led 接口
178
-
Jrgb1: Rgb Led 接口
179
-
简易侦错 Led 灯
179
-
安装操作系统, 驱动程序和 MSI Center
180
-
安装 Windows 10/ Windows 11
180
-
安装驱动
180
-
MSI Center
180
-
Uefi Bios
181
-
Bios 设置
182
-
进入 Bios 设置
182
-
Bios 用户指南
182
-
重启 Bios
183
-
更新 Bios
183
-
背板 I/O
194
-
網路連接埠 Led 燈狀態表
195
-
音效連接埠設置
195
-
元件總覽
196
-
Cpu 腳座
197
-
記憶體插槽
198
-
PCI_E1~4: Pcie 擴充插槽
199
-
Jfp1, Jfp2: 系統面板接頭
200
-
SATA1~6: SATA 6Gb/S 插孔
201
-
M2_1~4: M.2 插槽 (M 鍵)
202
-
Atx_Pwr1 , Cpu_Pwr1~2: 電源接頭
203
-
Jusb1~2: Usb 2.0 接頭
204
-
JUSB3~4: USB 3.2 Gen 1 5Gbps 接頭
204
-
JUSB5: USB 3.2 Gen 2 Type-C 接頭
205
-
JTBT1: Thunderbolt 擴充卡接頭
205
-
Cpu_Fan1, Pump_Fan1, Sys_Fan1~6: 風扇電源接頭
206
-
Jtpm1: Tpm 模組接頭
206
-
Jci1: 機殼開啟接頭
207
-
Jdash1: 調試控制器接頭
207
-
Jbat1: 清除 Cmos (重置 Bios) 功能跳線
208
-
Jrainbow1~2: 可定址 Rgb Led 接頭
208
-
Jrgb1: Rgb Led 接頭
209
-
除錯 Led 指示燈
209
-
安裝操作系統 、 驅動程式和 MSI Center
210
-
安裝驅動程式
210
-
MSI Center
210
-
Uefi Bios
211
-
進入 Bios 設定
212
-
Bios 使用者指南
212
-
重設 Bios
213
-
更新 Bios
213
-
安全に関する注意事項
217
-
リアI/Oパネル
224
-
LanポートLed状態表
225
-
オーディオポートの配置
225
-
コンポーネントの概要
226
-
Cpuソケット
227
-
DIMMスロット
228
-
PCI_E1~4: Pcie拡張スロット
229
-
Jfp1、 Jfp2: フロントパネルコネクター
230
-
M2_1~4: M.2スロット (Key M)
232
-
JTBT1: Thunderbolt追加カードコネクター
235
-
Jtpm1: Tpmモジュールコネクター
236
-
Jci1: ケース開放スイッチコネクター
237
-
Jdash1: チューニングコントローラーコネクター
237
-
Jbat1: クリアCmos (Biosリセット) ジャンパ
238
-
Jrainbow1~2: 追加のRgb Ledコネクター
238
-
Jrgb1: Rgb Ledコネクター
239
-
EZ Debug LED
239
-
OS、 ドライバーおよびMSI Centerのインストール
240
-
Windows 10/ Windows 11のインストール
240
-
ドライバーのインストール
240
-
MSI Center
240
-
Uefi Bios
241
-
Biosの設定
242
-
Biosセットアップ画面の起動
242
-
Biosユーザーズガイド
242
-
Biosのリセット
243
-
Biosのアップデート方法
243
MSI PRO Z690-A WIFI DDR4 User Manual (229 pages)
Brand: MSI
|
Category: Motherboard
|
Size: 6.97 MB
Table of Contents
-
Table of Contents
1
-
Safety Information
3
-
Specifications
4
-
Rear I/O Panel
10
-
LAN Port LED Status Table
10
-
Audio Ports Configuration
10
-
Overview of Components
11
-
CPU Socket
12
-
DIMM Slots
13
-
PCI_E1~4: Pcie Expansion Slots
14
-
JFP1, JFP2: Front Panel Connectors
15
-
JAUD1: Front Audio Connector
15
-
SATA1~6: SATA 6Gb/S Connectors
16
-
M2_1~3: M.2 Slot (Key M)
16
-
ATX_PWR1, CPU_PWR1~2, PCIE_PWR1: Power Connectors
17
-
JUSB1~2: USB 2.0 Connectors
18
-
JUSB3~4: USB 3.2 Gen 1 5Gbps Connector
18
-
JUSB1: USB 3.2 Gen 2 Type-C Connector
19
-
JTBT1: Thunderbolt Add-On Card Connector
19
-
CPU_FAN1, PUMP_FAN1, SYS_FAN1~6: Fan Connectors
20
-
JTPM1: TPM Module Connector
20
-
JCI1: Chassis Intrusion Connector
21
-
JCOM1: Serial Port Connector
21
-
JDASH1: Tuning Controller Connector
21
-
JBAT1: Clear CMOS (Reset BIOS) Jumper
22
-
JRAINBOW1~2: Addressable RGB LED Connectors
22
-
JRGB1: RGB LED Connector
23
-
EZ Debug LED
23
-
Installing OS, Drivers & MSI Center
24
-
Installing Windows® 10
24
-
Installing Drivers
24
-
MSI Center
24
-
Uefi Bios
25
-
BIOS Setup
26
-
Entering BIOS Setup
26
-
BIOS User Guide
26
-
Resetting BIOS
27
-
Updating BIOS
27
-
안전 지침
31
-
후면 I/O 패널
38
-
Lan 포트 Led 상태 표시
38
-
오디오 포트 구성 도표
38
-
구성품 개요
39
-
Cpu 소켓
40
-
DIMM 슬롯
41
-
PCI_E1~4: Pcie 확장 슬롯
42
-
Jfp1, Jfp2: 전면 패널 커넥터
43
-
Jaud1: 전면 오디오 커넥터
43
-
SATA1~6: SATA 6Gb/S 커넥터
44
-
M2_1~3: M.2 슬롯 (Key M)
44
-
Atx_Pwr1, Cpu_Pwr1~2, Pcie_Pwr1: 전원 커넥터
45
-
Jusb1~2: Usb 2.0 커넥터
46
-
JUSB3~4: USB 3.2 Gen 1 5Gbps 커넥터
46
-
JUSB1: USB 3.2 Gen 2 C타입 커넥터
47
-
Jtbt1: 썬더볼트 추가 카드 커넥터
47
-
Cpu_Fan1, Pump_Fan1, Sys_Fan1~6: 팬 커넥터
48
-
Jtpm1: Tpm 모듈 커넥터
48
-
Jci1: 섀시 침입 커넥터
49
-
Jcom1: 시리얼 포트 커넥터
49
-
Jdash1: 튜닝 컨트롤러 커넥터
49
-
JBAT1: CMOS (Reset BIOS) 클리어 점퍼
50
-
Jrainbow1~2: 주소 지정 가능한 Rgb Led 커넥터
50
-
Jrgb1: Rgb Led 커넥터
51
-
Ez 디버그 Led
51
-
Os, 드라이버 & 유틸리티 설치하기
52
-
Windows 10설치하기
52
-
드라이버 설치하기
52
-
Msi 센터
52
-
Uefi Bios
53
-
Bios (바이오스) 설정
54
-
Bios 설정
54
-
Bios 사용자 가이드
54
-
Bios 리셋
55
-
Bios(바이오스) 업데이트
55
-
Informations De Sécurité
59
-
Spécifications
60
-
Panneau Arrière Entrée / Sortie
66
-
Tableau Explicatif De L’état De La LED Du Port LAN
66
-
Configuration Des Ports Audio
66
-
Vue D’ensemble Des Composants
67
-
Socket Processeur
68
-
Slots DIMM
69
-
PCI_E1~4 : Slots D’extension Pcie
70
-
JFP1, JFP2 : Connecteurs De Panneau Avant
71
-
JAUD1 : Connecteur Audio Avant
71
-
SATA1~6 : Connecteurs SATA 6 Gb/S
72
-
M2_1~3 : Slots M.2 (Touche M)
72
-
ATX_PWR1, CPU_PWR1~2, PCIE_PWR1 : Connecteurs D’alimentation
73
-
JUSB1~2 : Connecteurs USB 2.0
74
-
JUSB3~4 : Connecteurs USB 3.2 Gen 1 5 Gb/S
74
-
JUSB1 : Connecteur USB 3.2 Gen 2 Type-C
75
-
JTBT1 : Connecteur De Carte Additionnelle Thunderbolt
75
-
CPU_FAN1, PUMP_FAN1, SYS_FAN1~6 : Connecteurs De Ventilateur
76
-
JTPM1 : Connecteur De Module TPM
76
-
JCI1 : Connecteur Intrusion Châssis
77
-
JCOM1 : Connecteur De Port Série
77
-
JDASH1 : Connecteur Du Contrôleur De Réglages
77
-
JBAT1 : Cavalier Clear CMOS (Réinitialiser Le BIOS)
78
-
JRAINBOW1~2 : Connecteurs LED RGB Adressables
78
-
JRGB1 : Connecteur LED RGB
79
-
EZ Debug LED
79
-
Installer OS, Pilotes Et MSI Center
79
-
Installer Windows® 10
79
-
Installer Les Pilotes
80
-
MSI Center
80
-
Uefi Bios
81
-
Configuration Du BIOS
82
-
Entrer Dans L’interface Setup Du BIOS
82
-
Guide D’utilisation Du BIOS
82
-
Réinitialiser Le BIOS
83
-
Mettre Le BIOS À Jour
83
-
Sicherheitshinweis
87
-
Spezifikationen
88
-
Rückseite E/A
94
-
LAN Port LED Zustandstabelle
94
-
Konfiguration Der Audioanschlüsse
94
-
Übersicht Der Komponenten
95
-
CPU Sockel
96
-
DIMM-Steckplätze
97
-
PCI_E1~4: Pcie Erweiterungssteckplätze
98
-
JFP1, JFP2: Frontpanel-Anschlüsse
99
-
JAUD1: Audioanschluss Des Frontpanels
99
-
SATA1~6: SATA 6Gb/S Anschlüsse
100
-
M2_1~3: M.2 Steckplätze (Key M)
100
-
ATX_PWR1, CPU_PWR1~2, PCIE_PWR1: Stromanschlüsse
101
-
JUSB1~2: USB 2.0 Anschlüsse
102
-
JUSB3~4: USB 3.2 Gen 1 5Gbit/S Anschlüsse
102
-
JUSB1: USB 3.2 Gen 2 Typ-C Anschluss
103
-
JTBT1: Anschluss Für Thunderbolt-Erweiterungskarte
103
-
CPU_FAN1, PUMP_FAN1, SYS_FAN1~6: Stromanschlüsse Für Lüfter
104
-
JTPM1: TPM Anschluss
104
-
JCI1: Gehäusekontaktanschluss
105
-
JCOM1: Serieller Anschluss
105
-
JDASH1: Tuning Controller-Anschluss
105
-
JBAT1: Clear CMOS Steckbrücke (Reset BIOS)
106
-
JRAINBOW1~2: Adressierbare RGB LED Anschlüsse
106
-
JRGB1: RGB LED Anschluss
107
-
EZ Debug LED
107
-
Installation Von OS, Treibern & MSI Center
108
-
Installation Von Windows® 10
108
-
Installation Von Treibern
108
-
MSI Center
108
-
Uefi Bios
109
-
BIOS Setup
110
-
Öffnen Des BIOS Setups
110
-
BIOS-Benutzerhandbuch
110
-
Reset Des BIOS
111
-
Aktualisierung Des BIOS
111
-
Безопасное Использование Продукции
115
-
Технические Характеристики
116
-
Задняя Панель Портов Ввода/ Вывода
122
-
Таблица Состояний Индикатора Порта LAN
122
-
Конфигурация Портов Аудио
122
-
Компоненты Материнской Платы
123
-
Процессорный Сокет
124
-
Слоты DIMM
125
-
PCI_E1~4: Слоты Расширения Pcie
126
-
JFP1, JFP2: Разъемы Передней Панели
127
-
JAUD1: Разъем Аудио Передней Панели
127
-
SATA1~6: Разъемы SATA 6Гб/С
128
-
M2_1~3: Разъемы M.2 (Ключ M)
128
-
ATX_PWR1, CPU_PWR1~2, PCIE_PWR1: Разъемы Питания
129
-
JUSB1~2: Разъемы USB 2.0
130
-
JUSB3~4: Разъемы USB 3.2 Gen 1 5Гб/С
130
-
JUSB1: Разъем USB 3.2 Gen 2 Type-C
131
-
JTBT1: Разъем Для Установки Карты Расширения Thunderbolt
131
-
CPU_FAN1, PUMP_FAN1, SYS_FAN1~6: Разъемы Вентиляторов
132
-
JTPM1: Разъем Модуля ТРМ
132
-
JCI1: Разъем Датчика Открытия Корпуса
133
-
JCOM1: Разъем Последовательного Порта
133
-
JDASH1: Разъем Контроллера Настройки
133
-
JBAT1: Джампер Очистки Данных CMOS (Сброс BIOS)
134
-
JRAINBOW1~2: Разъемы Адресных RGB LED
134
-
JRGB1: Разъем RGB LED
135
-
Индикаторы Отладки EZ
135
-
Установка ОС, Драйверов И MSI Center
136
-
Установка Windows® 10
136
-
Установка Драйверов
136
-
MSI Center
136
-
Uefi Bios
137
-
Настройка BIOS
138
-
Вход В Настройки BIOS
138
-
Инструкции По Настройке BIOS
138
-
Сброс BIOS
139
-
Обновление BIOS
139
-
安全信息
143
-
后置 I/O 面板
150
-
Lan 端口 Led 状态表
150
-
音频端口配置
150
-
组件概述
151
-
Cpu 底座
152
-
DIMM 插槽
153
-
PCI_E1~4: Pcie 扩展插槽
154
-
Jfp1, Jfp2: 前置面板接口
155
-
Jaud1: 前置音频接口
155
-
SATA1~6: SATA 6Gb/S 接口
156
-
M2_1~3: M.2 接口 (M 键)
156
-
Atx_Pwr1, Cpu_Pwr1~2, Pcie_Pwr1: 电源接口
157
-
Jusb1~2: Usb 2.0 接口
158
-
JUSB3~4: USB 3.2 Gen 1 5Gbps 接口
158
-
JUSB1: USB 3.2 Gen 2 Type-C 接口
159
-
JTBT1: Thunderbolt 附加卡接口
159
-
Cpu_Fan1, Pump_Fan1, Sys_Fan1~6: 风扇接口
160
-
Jtpm1: Tpm 模组接口
160
-
Jci1: 机箱入侵检测接口
161
-
Jcom1: 串行端头接口
161
-
Jdash1: 调试控制器接口
161
-
Jbat1: 清除 Cmos (重启 Bios) 跳线
162
-
Jrainbow1~2: 寻址 Rgb Led 接口
162
-
Jrgb1: Rgb Led 接口
163
-
简易侦错 Led 灯
163
-
安装操作系统, 驱动程序和 MSI Center
164
-
安装驱动
164
-
MSI Center
164
-
Uefi Bios
165
-
Bios 设置
166
-
进入 Bios 设置
166
-
Bios 用户指南
166
-
重启 Bios
167
-
更新 Bios
167
-
背板 I/O
178
-
網路連接埠 Led 燈狀態表
178
-
音效連接埠設置
178
-
元件總覽
179
-
Cpu 腳座
180
-
記憶體插槽
181
-
PCI_E1~4: Pcie 擴充插槽
182
-
SATA1~6: SATA 6Gb/S 插孔
184
-
M2_1~3: M.2 插槽 (M 鍵)
184
-
Jci1: 機殼開啟接頭
189
-
Jcom1: 序列埠接頭
189
-
Jdash1: 調試控制器接頭
189
-
Jbat1: 清除 Cmos (重置 Bios) 功能跳線
190
-
Jrainbow1~2: 可定址 Rgb Led 接頭
190
-
Jrgb1: Rgb Led 接頭
191
-
除錯 Led 指示燈
191
-
安裝操作系統、驅動程式和 MSI Center
192
-
安裝驅動程式
192
-
MSI Center
192
-
Uefi Bios
193
-
Bios 設定
194
-
進入 Bios 設定
194
-
Bios 使用者指南
194
-
重設 Bios
195
-
更新 Bios
195
-
安全に関する注意事項
199
-
パッケージの内容
206
-
LanポートLed状態表
206
-
オーディオポートの配置
206
-
コンポーネントの概要
207
-
Cpuソケット
208
-
DIMMスロット
209
-
PCI_E1~4: Pcie拡張スロット
210
-
SATA1~6: SATA 6Gb/Sコネクター
212
-
M2_1~3: M.2スロット (Key M)
212
-
Atx_Pwr1、Cpu_Pwr1~2、Pcie_Pwr1: 電源コネクター
213
-
Jusb1~2: Usb 2.0コネクター
214
-
JUSB3~4: USB 3.2 Gen 1 5Gbpsコネクター
214
-
JUSB1: USB 3.2 Gen 2 Type-Cコネクター
215
-
JTBT1: Thunderbolt追加カードコネクター
215
-
Cpu_Fan1、Pump_Fan1、Sys_Fan1~6: ファンコネクタ ー
216
-
Jtpm1: Tpmモジュールコネクター
216
-
Jci1: ケース開放スイッチコネクター
217
-
Jcom1: シリアルポートコネクター
217
-
Jdash1: チューニングコントローラーコネクター
217
-
Jbat1: クリアCmos (Biosリセット) ジャンパ
218
-
Jrainbow1~2: 追加のRgb Ledコネクター
218
-
Jrgb1: Rgb Ledコネクター
219
-
EZ Debug LED
219
-
OS、 ドライバーおよびMSI Centerのインストール
220
-
Windows® 10のインストール
220
-
MSI Center
220
-
Uefi Bios
221
-
Biosの設定
222
-
Biosセットアップ画面の起動
222
-
Biosユーザーズガイド
222
-
Biosのリセット
223
-
Biosのアップデート方法
223
Advertisement
Advertisement
Related Products
-
MSI PRO Z690-A DDR4
-
MSI PRO Z690-A PRO
-
MSI PRO Z790-P WIFI DDR4
-
MSI PRO Z790-P DDR4
-
MSI PRO Z790-A WIFI
-
MSI PRO Z690-P WIFI
-
MSI PRO B660M-B DDR4
-
MSI PRO B760M-A WIFI DDR4
-
MSI PRO B650-P WIFI
-
MSI PRO B760M-P DDR4
MSI Categories
Motherboard
![]()
Laptop
Video Card
![]()
Desktop
![]()
Monitor
More MSI Manuals
- Home
- Brands
- MSI Manuals
- Motherboard
- PRO Z690-A WIFI DDR4
|
|
Related Devices:
|
Types of Manuals:
The main types of MSI PRO Z690-A WIFI DDR4 instructions:
- User guide — rules of useing and characteristics
- Service manual — repair, diagnostics, maintenance
- Operation manual — description of the main functions of equipment
Motherboard User Guides by MSI:
Similar to MSI PRO Z690-A WIFI DDR4 Manuals, User Guides and Instructions:
-
Biostar TF8200 A2 PLUS — BIOS
TF8200 A2+ Setup Manual FCC Information and Copyright This equipment has been tested and found to comply with the limits of a Class B digital device, pursuant to Part 15 of the FCC Rules. These limits are designed to provide reasonable protection against harmful interference in a residential installation. This equip …
TF8200 A2 PLUS — BIOS Other, 65
-
Cypress CY3269N
CY3269N LIGHTING STARTER DEMONSTRATION KITQUICK START GUIDERemove the CY3269N kit from the package.Insert the 9-V battery into the battery holder.Press firmly in place.Tap the color gamut to view different colors from the RGB LED. Adjust the brightness using the slider available to the right of the gamut.View the outpu …
CY3269N Motherboard, 2
-
Gan Systems GS65011-EVBEZ
GS65011-EVBEZ EZDriveTM Open Loop Boost Evaluation Board User’s Guide _____________________________________________________________________________________________________________________ GSWPT-EVBEZ Rev190621 © 2019 GaN Systems Inc. www.gansystems.com 1 Please refer to the Evaluation Bo …
GS65011-EVBEZ Motherboard, 18
-
Motorola HLD9675C
C31NUNOTES:1. UNLESS OTHERWtSE INDICATED. RESISTOR VALUES ARE IN OHMS. CAPACITOR VALUES ARE IN PICOFARADS, INDUCTOR VALUES ARE IN MICROHENRIES.2. NON — POLARIZEO CAPACITORS ARE CHIP-TYPE UNLESS OTHERWISE INDICATED.3. POLARIZEO CAPACITORS ARE CHIP— TANTALUM TYPE UNLESS OTHERWISE INDICATE …
HLD9675C Motherboard, 2
View a manual of the MSI Pro Z690-A Wifi DDR4 below. All manuals on ManualsCat.com can be viewed completely free of charge. By using the ‘Select a language’ button, you can choose the language of the manual you want to view.
Page: 1
1
Contents
Contents
Safety Information………………………………………………………………………………..3
Specifications.
………………………………………………………………………………………4
Rear I/O Panel……………………………………………………………………………………10
LAN Port LED Status Table……………………………………………………………………………11
Audio Ports Configuration……………………………………………………………………………..11
Overview of Components…………………………………………………………………….12
CPU Socket………………………………………………………………………………………………….13
DIMM Slots………………………………………………………………………………………………….14
DIMM Slots………………………………………………………………………………………………….14
PCI_E1~4: PCIe Expansion Slots…………………………………………………………………….15
JFP1, JFP2: Front Panel Connectors………………………………………………………………16
SATA1~6: SATA 6Gb/s Connectors………………………………………………………………….17
JAUD1: Front Audio Connector………………………………………………………………………17
M2_1~4: M.2 Slot (Key M)………………………………………………………………………………18
ATX_PWR1, CPU_PWR1~2: Power Connectors………………………………………………..19
JUSB1~2: USB 2.0 Connectors……………………………………………………………………….20
JUSB3~4: USB 3.2 Gen 1 5Gbps Connector……………………………………………………..20
JUSB5: USB 3.2 Gen 2 Type-C Connector………………………………………………………..21
JTBT1: Thunderbolt Add-on Card Connector…………………………………………………..21
CPU_FAN1, PUMP_FAN1, SYS_FAN1~6: Fan Connectors…………………………………22
JTPM1: TPM Module Connector……………………………………………………………………..22
JCI1: Chassis Intrusion Connector………………………………………………………………….23
JDASH1: Tuning controller Connector…………………………………………………………….23
JBAT1: Clear CMOS (Reset BIOS) Jumper……………………………………………………….24
JRAINBOW1~2: Addressable RGB LED connectors………………………………………….24
JRGB1: RGB LED connector…………………………………………………………………………..25
EZ Debug LED………………………………………………………………………………………………25
Installing OS, Drivers & MSI Center………………………………………………………26
Installing Windows® 10………………………………………………………………………………….26
Installing Drivers………………………………………………………………………………………….26
MSI Center…………………………………………………………………………………………………..26
Thank you for purchasing the MSI® PRO Z690-A WIFI DDR4/
PRO Z690-A DDR4 motherboard. This User Guide gives
information about board layout, component overview, BIOS
setup and software installation.
Page: 2
3
Safety Information
Safety Information
∙
∙ The components included in this package are prone to damage from electrostatic
discharge (ESD). Please adhere to the following instructions to ensure successful
computer assembly.
∙
∙ Ensure that all components are securely connected. Loose connections may cause
the computer to not recognize a component or fail to start.
∙
∙ Hold the motherboard by the edges to avoid touching sensitive components.
∙
∙ It is recommended to wear an electrostatic discharge (ESD) wrist strap when
handling the motherboard to prevent electrostatic damage. If an ESD wrist strap is
not available, discharge yourself of static electricity by touching another metal object
before handling the motherboard.
∙
∙ Store the motherboard in an electrostatic shielding container or on an anti-static
pad whenever the motherboard is not installed.
∙
∙ Before turning on the computer, ensure that there are no loose screws or metal
components on the motherboard or anywhere within the computer case.
∙
∙ Do not boot the computer before installation is completed. This could cause
permanent damage to the components as well as injury to the user.
∙
∙ If you need help during any installation step, please consult a certified computer
technician.
∙
∙ Always turn off the power supply and unplug the power cord from the power outlet
before installing or removing any computer component.
∙
∙ Keep this user guide for future reference.
∙
∙ Keep this motherboard away from humidity.
∙
∙ Make sure that your electrical outlet provides the same voltage as is indicated on
the PSU, before connecting the PSU to the electrical outlet.
∙
∙ Place the power cord such a way that people can not step on it. Do not place
anything over the power cord.
∙
∙ All cautions and warnings on the motherboard should be noted.
∙
∙ If any of the following situations arises, get the motherboard checked by service
personnel:
▪
▪ Liquid has penetrated into the computer.
▪
▪ The motherboard has been exposed to moisture.
▪
▪ The motherboard does not work well or you can not get it work according to
user guide.
▪
▪ The motherboard has been dropped and damaged.
▪
▪ The motherboard has obvious sign of breakage.
∙
∙ Do not leave this motherboard in an environment above 60°C (140°F), it may
damage the motherboard.
Page: 3
4 Specifications
Specifications
CPU
∙
∙ Supports 12th Gen Intel® Core™ Processors
∙
∙ Processor socket LGA1700
* Please go to msi.com to get the newest support status as
new processors are released.
Chipset Intel®Z690 chipset
Memory
∙
∙ 4x DDR4 memory slots, support up to 128GB*
∙
∙ Supports 2133/ 2666/ 3200 MHz (by JEDEC & POR)
∙
∙ Max overclocking frequency:
▪
▪ 1DPC 1R Max speed up to 5200+ MHz
▪
▪ 1DPC 2R Max speed up to 4800+ MHz
▪
▪ 2DPC 1R Max speed up to 4400+ MHz
▪
▪ 2DPC 2R Max speed up to 4000+ MHz
∙
∙ Supports Dual-Channel mode
∙
∙ Supports non-ECC, un-buffered memory
∙
∙ Supports Intel® Extreme Memory Profile (XMP)
*Please refer msi.com for more information on compatible
memory
Expansion Slots
∙
∙ 3x PCIe x16 slots
▪
▪ PCI_E1 (From CPU)
▫
▫ Support PCIe 5.0 x16
▪
▪ PCI_E3 & PCI_E4 (From Z690 chipset)
▫
▫ Support PCIe 3.0 x4 & 3.0 x1
∙
∙ 1x PCIe 3.0 x1 slot (Fom Z690 chipset)
Audio
Realtek® ALC897/ ALC892 Codec
∙
∙ 7.1-Channel High Definition Audio
Multi-GPU ∙
∙ Supports AMD CrossFire™ Technology
Onboard
Graphics
∙
∙ 1x HDMI 2.1 with HDR port, supports a maximum resolution
of 4K 60Hz */
**
∙
∙ 1x DisplayPort 1.4 port, supports a maximum resolution of
4K 60Hz */
**
* Available only on processors featuring integrated graphics.
** Graphics specifications may vary depending on the CPU
installed.
Continued on next page
Page: 4
5
Specifications
Continued from previous page
LAN 1x Intel® I225V 2.5Gbps LAN controller
Wireless LAN &
Bluetooth®
Intel® Wi-Fi 6 (Only for PRO Z690-A WIFI DDR4)
∙
∙ The Wireless module is pre-installed in the M.2 (Key-E) slot
∙
∙ Supports MU-MIMO TX/RX, 2.4GHz/ 5GHz (160MHz) up to
2.4Gbps
∙
∙ Supports 802.11 a/ b/ g/ n/ ac/ ax
∙
∙ Supports Bluetooth® 5.2
Storage
∙
∙ 6x SATA 6Gb/s ports (From Z690 chipset)
∙
∙ 4x M.2 slots (Key M)
▪
▪ M2_1 slot (From CPU)
▫
▫ Supports PCIe 4.0 x4
▫
▫ Supports 2242/ 2260/ 2280/ 22110 storage devices
▪
▪ M2_2 slot (From Z690 chipset)
▫
▫ Supports PCIe 4.0 x4
▫
▫ Supports 2242/ 2260/ 2280 storage devices
▪
▪ M2_3 slot (From Z690 chipset)
▫
▫ Supports PCIe 3.0×4
▫
▫ Supports SATA 6Gb/s
▫
▫ Supports 2242/ 2260/ 2280 storage devices
▪
▪ M2_4 slot (From Z690 chipset)
▫
▫ Supports PCIe 4.0×4
▫
▫ Supports SATA 6Gb/s
▫
▫ Supports 2242/ 2260/ 2280 storage devices
▪
▪ Intel® Optane™ Memory Ready for M.2 slots that are
from Z690 Chipset
∙
∙ Support Intel® Smart Response Technology for Intel Core™
processors
RAID
∙
∙ Supports RAID 0, RAID 1, RAID 5 and RAID 10 for SATA
storage devices
∙
∙ Supports RAID 0 , RAID 1 and RAID 5 for M.2 NVMe storage
devices
Continued on next page
Page: 5
6 Specifications
Continued from previous page
USB
∙
∙ Intel® Z690 Chipset
▪
▪ 1x USB 3.2 Gen 2×2 20Gbps Type-C port on the back
panel
▪
▪ 2x USB 3.2 Gen 2 10Gbps ports (1 Type-C internal
connector and 1 Type-A port on the back panel)
▪
▪ 6x USB 3.2 Gen 1 5Gbps ports (2 Type-A ports on the
back panel, and 4 ports are available through the internal
USB connectors)
▪
▪ 4x USB 2.0 Type-A ports on the back panel
∙
∙ USB Hub GL850G
▪
▪ 4x USB 2.0 ports are available through the internal USB
connectors
Internal
Connectors
∙
∙ 1x 24-pin ATX main power connector
∙
∙ 2x 8-pin ATX 12V power connector
∙
∙ 6x SATA 6Gb/s connectors
∙
∙ 4x M.2 slots (M-Key)
∙
∙ 1x USB 3.2 Gen 2 10Gbps Type-C port
∙
∙ 2x USB 3.2 Gen 1 5Gbps connectors (supports additional 4
USB 3.2 Gen 1 5Gbps ports)
∙
∙ 2x USB 2.0 connectors (supports additional 4 USB 2.0 ports)
∙
∙ 1x 4-pin CPU fan connector
∙
∙ 1x 4-pin water-pump fan connector
∙
∙ 6x 4-pin system fan connectors
∙
∙ 1x Front panel audio connector
∙
∙ 2x System panel connectors
∙
∙ 1x Chassis Intrusion connector
∙
∙ 1x Clear CMOS jumper
∙
∙ 1x TPM module connector
∙
∙ 1x Tuning controller connector
∙
∙ 1x TBT connector (Supports RTD3)
LED Features
∙
∙ 1x 4-pin RGB LED connector
∙
∙ 2x 3-pin RAINBOW LED connectors
∙
∙ 4x EZ Debug LED
Continued on next page
Page: 6
7
Specifications
Continued from previous page
Back Panel
Connectors
∙
∙ 1x Flash BIOS Button
∙
∙ 1x PS/2 keyboard/ mouse combo port
∙
∙ 4x USB 2.0 Type-A ports
∙
∙ 1x DisplayPort
∙
∙ 1x HDMI 2.1 port
∙
∙ 1x LAN (RJ45) port
∙
∙ 2x USB 3.2 Gen 1 5Gbps Type-A ports
∙
∙ 1x USB 3.2 Gen 2 10Gbps Type-A port
∙
∙ 1x USB 3.2 Gen 2×2 20Gbps Type-C port
∙
∙ 2x Wi-Fi Antenna connectors (Only for PRO Z690-A WIFI
DDR4)
∙
∙ 6x audio jacks
I/O Controller NUVOTON NCT6687D-W Controller Chip
Hardware
Monitor
∙
∙ CPU/ System/ Chipset temperature detection
∙
∙ CPU/ System/ Pump fan speed detection
∙
∙ CPU/ System/ Pump fan speed control
Form Factor
∙
∙ ATX Form Factor
∙
∙ 12 in. x 9.6 in. (30.5 cm x 24.4 cm)
BIOS Features
∙
∙ 1x 256 Mb flash
∙
∙ UEFI AMI BIOS
∙
∙ ACPI 6.4, SMBIOS 3.4
∙
∙ Multi-language
Software
∙
∙ Drivers
∙
∙ MSI Center
∙
∙ Intel® Extreme Tuning Utility
∙
∙ CPU-Z MSI GAMING
∙
∙ Google Chrome™, Google Toolbar, Google Drive
∙
∙ Norton™ Internet Security Solution
Continued on next page
Page: 7
8 Specifications
Continued from previous page
MSI Center
Features
∙
∙ Mystic Light
∙
∙ LAN Manager
∙
∙ User Scenario
∙
∙ Hardware Monitor
∙
∙ Frozr AI Cooling
∙
∙ True Color
∙
∙ Live Update
∙
∙ Speed Up
∙
∙ Super Charger
Special
Features
∙
∙ Audio
▪
▪ Audio Boost
∙
∙ Network
▪
▪ 2.5G LAN
▪
▪ LAN Manager
▪
▪ Intel WiFi (Only for PRO Z690-A WIFI DDR4)
∙
∙ Cooling
▪
▪ M.2 Shield Frozr
▪
▪ Pump Fan
▪
▪ Smart Fan Control
∙
∙ LED
▪
▪ Mystic Light Extension (RAINBOW/RGB)
▪
▪ Mystic Light SYNC
▪
▪ EZ LED Control
▪
▪ EZ DEBUG LED
Continued on next page
Page: 8
9
Specifications
Continued from previous page
Special
Features
∙
∙ Performance
▪
▪ Multi GPU-CrossFire Technology
▪
▪ DDR4 Boost
▪
▪ Core Boost
▪
▪ USB 3.2 Gen 2×2 20G
▪
▪ USB 3.2 Gen 2 10G
▪
▪ USB with Type A+C
▪
▪ Front USB Type-C
∙
∙ Protection
▪
▪ PCI-E Steel Armor
∙
∙ Experience
▪
▪ MSI Center
▪
▪ Frozr AI Cooling
▪
▪ Click BIOS 5
▪
▪ Flash BIOS Button
Page: 9
10 Rear I/O Panel
Rear I/O Panel
USB 3.2 Gen 1
5Gbps Type-A
Flash BIOS Button
PS/2 Combo port
2.5 Gbps LAN
DisplayPort
USB 2.0 Type-A
USB 2.0 Type-A Audio Ports
USB 3.2 Gen 2×2
20Gbps Type-C
USB 3.2 Gen 2
10Gbps Type-A
Flash BIOS
Port
USB 3.2 Gen 1
5Gbps Type-A
Flash BIOS Button
PS/2 Combo port
2.5 Gbps LAN
DisplayPort
USB 2.0 Type-A
USB 2.0 Type-A Audio Ports
USB 3.2 Gen 2×2
20Gbps Type-C
USB 3.2 Gen 2
10Gbps Type-A
Flash BIOS
Port
Wi-Fi Antenna connectors
PRO Z690-A WIFI DDR4
PRO Z690-A DDR4
Page: 10
11
Rear I/O Panel
Link/ Activity LED
Status Description
Off No link
Yellow Linked
Blinking Data activity
Speed LED
Status Description
Off 10 Mbps connection
Green 100/ 1000 Mbps connection
Orange 2.5 Gbps connection
LAN Port LED Status Table
Audio Ports Configuration
Audio Ports
Channel
2 4 6 8
Line-Out/ Front Specker Out
Line-In ● ● ● ●
Rear Speaker Out ● ● ●
Center/ Subwoofer Out ● ●
Side Speaker Out ●
Mic In
(●: connected, Blank: empty)
Page: 11
12 Overview of Components
Overview of Components
* Distance from the center of the CPU to the nearest DIMM slot.
SATA6
SATA5
M2_4
SYS_FAN4
JFP2
JTPM1
JRGB1
SATA▼1▲2
SATA▼3▲4
JCI1
M2_3
M2_2
M2_1
SYS_FAN6 JUSB4
JUSB5
JUSB3
JUSB1
JUSB2
JTBT1
SYS_FAN5
JSMB1
CPU_FAN1
PUMP_FAN1
SYS_FAN1
SYS_FAN3
SYS_FAN2
PCI_E1
PCI_E2
PCI_E3
JBAT1
PCI_E4
JDASH1
Processor Socket
CPU_PWR1
CPU_PWR2
JRAINBOW2
JAUD1
JRAINBOW1
JFP1
ATX_PWR1
DIMMA2
DIMMA1
DIMMB2
DIMMB1
50.98mm*
(For PRO Z690-A
WIFI DDR4)
Page: 12
13
Overview of Components
CPU Socket
Please install the CPU into the CPU socket as shown below.
⚠
⚠Important
∙
∙ Always unplug the power cord from the power outlet before installing or removing
the CPU.
∙
∙ Please retain the CPU protective cap after installing the processor. MSI will deal
with Return Merchandise Authorization (RMA) requests if only the motherboard
comes with the protective cap on the CPU socket.
∙
∙ When installing a CPU, always remember to install a CPU heatsink. A CPU heatsink
is necessary to prevent overheating and maintain system stability.
∙
∙ Confirm that the CPU heatsink has formed a tight seal with the CPU before booting
your system.
∙
∙ Overheating can seriously damage the CPU and motherboard. Always make sure
the cooling fans work properly to protect the CPU from overheating. Be sure to apply
an even layer of thermal paste (or thermal tape) between the CPU and the heatsink to
enhance heat dissipation.
∙
∙ Whenever the CPU is not installed, always protect the CPU socket pins by covering
the socket with the plastic cap.
∙
∙ If you purchased a separate CPU and heatsink/ cooler, Please refer to the docu-
mentation in the heatsink/ cooler package for more details about installation.
1
4
6
5
7
8
9
3
2
Page: 13
14 Overview of Components
DIMM Slots
Please install the memory module into the DIMM slot as shown below.
DIMMB2
DIMMA2 DIMMA2
DIMM Slots
Please install the memory module into the DIMM slot as shown below.
1
1
2
3
3
2
Memory module installation recommendation
DIMMB2
DIMMB1
DIMMA2
DIMMA1
Page: 14
15
Overview of Components
⚠
⚠Important
∙
∙ Always insert memory modules in the DIMMA2 slot first.
∙
∙ To ensure system stability for Dual channel mode, memory modules must be of the
same type, number and density.
∙
∙ Some memory modules may operate at a lower frequency than the marked value
when overclocking due to the memory frequency operates dependent on its Serial
Presence Detect (SPD). Go to BIOS and find the DRAM Frequency to set the memory
frequency if you want to operate the memory at the marked or at a higher frequency.
∙
∙ It is recommended to use a more efficient memory cooling system for full DIMMs
installation or overclocking.
∙
∙ The stability and compatibility of installed memory module depend on installed
CPU and devices when overclocking.
∙
∙ Please refer msi.com for more information on compatible memory.
PCI_E1~4: PCIe Expansion Slots
⚠
⚠Important
∙
∙ When adding or removing expansion cards, always turn off the power supply and
unplug the power supply power cable from the power outlet. Read the expansion
card’s documentation to check for any necessary additional hardware or software
changes.
∙
∙ If you install a large and heavy graphics card, you need to use a tool such as MSI
Gaming Series Graphics Card Bolster to support its weight to prevent deformation
of the slot.
∙
∙ For a single PCIe x16 expansion card installation with optimum performance, using
the PCI_E1 slot is recommended.
PCI_E1: PCIe 5.0 x16 (From CPU)
PCI_E3: PCIe 3.0 x4 (From Z690 chipset)
PCI_E4: PCIe 3.0 x1 (From Z690 chipset)
PCI_E2: PCIe 3.0 x1 (From Z690 chipset)
Page: 15
16 Overview of Components
JFP1, JFP2: Front Panel Connectors
These connectors connect to the switches and LEDs on the front panel.
1
2 10
9
+
+
+
—
—
—
—
+
Power LED
HDD LED Reset Switch
Reserved
Power Switch
1 HDD LED + 2 Power LED +
3 HDD LED — 4 Power LED —
5 Reset Switch 6 Power Switch
7 Reset Switch 8 Power Switch
9 Reserved 10 No Pin
JFP2 1
+
+
—
—
Speaker
Buzzer 1 Speaker — 2 Buzzer +
3 Buzzer — 4 Speaker +
HDD
LED
RESET
SW
HDD LED
HDD LED —
HDD LED +
POWER LED —
POWER LED +
POWER LED
J
F
P
1
Page: 16
17
Overview of Components
JAUD1: Front Audio Connector
This connector allow you to connect audio jacks on the front panel.
1
2 10
9
1 MIC L 2 Ground
3 MIC R 4 NC
5 Head Phone R 6 MIC Detection
7 SENSE_SEND 8 No Pin
9 Head Phone L 10 Head Phone Detection
SATA1~6: SATA 6Gb/s Connectors
These connectors are SATA 6Gb/s interface ports. Each connector can connect to one
SATA device.
SATA1
SATA3
SATA2
SATA6
SATA5
SATA4
⚠
⚠Important
∙
∙ Please do not fold the SATA cable at a 90-degree angle. Data loss may result
during transmission otherwise.
∙
∙ SATA cables have identical plugs on either sides of the cable. However, it is
recommended that the flat connector be connected to the motherboard for space
saving purposes.
Page: 17
18 Overview of Components
30º
30º
M2_1~4: M.2 Slot (Key M)
Please install the M.2 solid-state drive (SSD) into the M.2 slot as shown below.
1
3
Standoff
Supplied
M.2 screw
30º
30º
2
3
2
1
(Optional)
Page: 18
19
Overview of Components
ATX_PWR1, CPU_PWR1~2: Power Connectors
These connectors allow you to connect an ATX power supply.
⚠
⚠Important
Make sure that all the power cables are securely connected to a proper ATX power
supply to ensure stable operation of the motherboard.
24
13
1
12
ATX_PWR1
1 +3.3V 13 +3.3V
2 +3.3V 14 -12V
3 Ground 15 Ground
4 +5V 16 PS-ON#
5 Ground 17 Ground
6 +5V 18 Ground
7 Ground 19 Ground
8 PWR OK 20 Res
9 5VSB 21 +5V
10 +12V 22 +5V
11 +12V 23 +5V
12 +3.3V 24 Ground
5
4 1
8
CPU_PWR1~2
1 Ground 5 +12V
2 Ground 6 +12V
3 Ground 7 +12V
4 Ground 8 +12V
Page: 19
20 Overview of Components
JUSB3~4: USB 3.2 Gen 1 5Gbps Connector
This connector allows you to connect USB 3.2 Gen 1 5Gbps ports on the front panel.
1
10 11
20
1 Power 11 USB2.0+
2 USB3_RX_DN 12 USB2.0-
3 USB3_RX_DP 13 Ground
4 Ground 14 USB3_TX_C_DP
5 USB3_TX_C_DN 15 USB3_TX_C_DN
6 USB3_TX_C_DP 16 Ground
7 Ground 17 USB3_RX_DP
8 USB2.0- 18 USB3_RX_DN
9 USB2.0+ 19 Power
10 Ground 20 No Pin
⚠
⚠Important
Note that the Power and Ground pins must be connected correctly to avoid possible
damage.
JUSB1~2: USB 2.0 Connectors
These connectors allow you to connect USB 2.0 ports on the front panel.
⚠
⚠Important
∙
∙ Note that the VCC and Ground pins must be connected correctly to avoid possible
damage.
∙
∙ In order to recharge your iPad,iPhone and iPod through USB ports, please install
MSI Center utility.
1
2 10
9
1 VCC 2 VCC
3 USB0- 4 USB1-
5 USB0+ 6 USB1+
7 Ground 8 Ground
9 No Pin 10 NC
Page: 20
21
Overview of Components
JUSB5: USB 3.2 Gen 2 Type-C Connector
This connector allows you to connect USB 3.2 Gen 2 10 Gbps Type-C connector on
the front panel. The connector possesses a foolproof design. When you connect the
cable, be sure to connect it with the corresponding orientation.
JUSB5
USB Type-C Cable
USB Type-C port on the
front panel
JTBT1: Thunderbolt Add-on Card Connector
This connector allows you to connect the add-on Thunderbolt I/O card.
1
2 16
15
1 TBT_Force_PWR 2 TBT_S0IX_Entry_REQ
3 TBT_CIO_Plug_Event# 4 TBT_S0IX_Entry_ACK
5 SLP_S3#_TBT 6 TBT_PSON_Override_N
7 SLP_S5#_TBT 8 Net Name
9 Ground 10 SMBCLK_VSB
11 DG_PEWake 12 SMBDATA_VSB
13 TBT_RTD3_PWR_EN 14 Ground
15 TBT_Card_DET_R# 16 PD_IRQ#
Page: 21
22 Overview of Components
1
2 12
11
1 SPI Power 2 SPI Chip Select
3
Master In Slave Out
(SPI Data)
4
Master Out Slave In
(SPI Data)
5 Reserved 6 SPI Clock
7 Ground 8 SPI Reset
9 Reserved 10 No Pin
11 Reserved 12 Interrupt Request
JTPM1: TPM Module Connector
This connector is for TPM (Trusted Platform Module). Please refer to the TPM
security platform manual for more details and usages.
CPU_FAN1, PUMP_FAN1, SYS_FAN1~6: Fan Connectors
Fan connectors can be classified as PWM (Pulse Width Modulation) Mode or DC
Mode. PWM Mode fan connectors provide constant 12V output and adjust fan speed
with speed control signal. DC Mode fan connectors control fan speed by changing
voltage.
⚠
⚠Important
You can adjust fan speed in BIOS > HARDWARE MONITOR.
1
PWM Mode pin definition
1 Ground 2 +12V
3 Sense 4 Speed Control Signal
Connector Default fan mode Max. current Max. power
CPU_FAN1 PWM mode 2A 24W
PUMP_FAN1 PWM mode 3A 36W
SYS_FAN1~6 DC mode 1A 12W
1
DC Mode pin definition
1 Ground 2 Voltage Control
3 Sense 4 NC
Page: 22
23
Overview of Components
JCI1: Chassis Intrusion Connector
This connector allows you to connect the chassis intrusion switch cable.
Normal
(default)
Trigger the chassis
intrusion event
Using chassis intrusion detector
1. Connect the JCI1 connector to the chassis intrusion switch/ sensor on the
chassis.
2. Close the chassis cover.
3. Go to BIOS > SETTINGS > Security > Chassis Intrusion Configuration.
4. Set Chassis Intrusion to Enabled.
5. Press F10 to save and exit and then press the Enter key to select Yes.
6. Once the chassis cover is opened again, a warning message will be displayed on
screen when the computer is turned on.
Resetting the chassis intrusion warning
1. Go to BIOS > SETTINGS > Security > Chassis Intrusion Configuration.
2. Set Chassis Intrusion to Reset.
3. Press F10 to save and exit and then press the Enter key to select Yes.
JDASH1: Tuning controller Connector
This connector is used to connect an optional Tuning Controller module.
1
2 6
5
1 No pin 2 NC
3 MCU_SMB_SCL_M 4 MCU_SMB_SDA_M
5 VCC5 6 Ground
Page: 23
24 Overview of Components
JBAT1: Clear CMOS (Reset BIOS) Jumper
There is CMOS memory onboard that is external powered from a battery located on
the motherboard to save system configuration data. If you want to clear the system
configuration, set the jumpers to clear the CMOS memory.
Keep Data
(default)
Clear CMOS/
Reset BIOS
Resetting BIOS to default values
1. Power off the computer and unplug the power cord.
2. Use a jumper cap to short JBAT1 for about 5-10 seconds.
3. Remove the jumper cap from JBAT1.
4. Plug the power cord and power on the computer.
JRAINBOW1~2: Addressable RGB LED connectors
The JRAINBOW connectors allow you to connect the WS2812B Individually
Addressable RGB LED strips 5V.
⚠
⚠CAUTION
Do not connect the wrong type of LED strips. The JRGB connector and the JRAINBOW
connector provide different voltages, and connecting the 5V LED strip to the JRGB
connector will result in damage to the LED strip.
⚠
⚠Important
∙
∙ The JRAINBOW connector supports up to 75 LEDs WS2812B Individually Address-
able RGB LED strips (5V/Data/Ground) with the maximum power rating of 3A (5V). In
the case of 20% brightness, the connector supports up to 200 LEDs.
∙
∙ Always turn off the power supply and unplug the power cord from the power outlet
before installing or removing the RGB LED strip.
∙
∙ Please use MSI’s software to control the extended LED strip.
1 1 +5V 2 Data
3 No Pin 4 Ground
Page: 24
25
Overview of Components
EZ Debug LED
These LEDs indicate the status of the motherboard.
CPU — indicates CPU is not detected or fail.
DRAM — indicates DRAM is not detected or fail.
VGA — indicates GPU is not detected or fail.
BOOT — indicates booting device is not detected or fail.
JRGB1: RGB LED connector
The JRGB connector allows you to connect the 5050 RGB LED strips 12V.
⚠
⚠Important
∙
∙ The JRGB connector supports up to 2 meters continuous 5050 RGB LED strips
(12V/G/R/B) with the maximum power rating of 3A (12V).
∙
∙ Always turn off the power supply and unplug the power cord from the power outlet
before installing or removing the RGB LED strip.
∙
∙ Please use MSI’s software to control the extended LED strip.
1 1 +12V 2 G
3 R 4 B
Page: 25
26 Installing OS, Drivers & MSI Center
Installing OS, Drivers & MSI Center
Please download and update the latest utilities and drivers at www.msi.com
Installing Windows® 10
1. Power on the computer.
2. Insert the Windows® 10 installation disc/USB into your computer.
3. Press the Restart button on the computer case.
4. Press F11 key during the computer POST (Power-On Self Test) to get into Boot
Menu.
5. Select the Windows® 10 installation disc/USB from the Boot Menu.
6. Press any key when screen shows Press any key to boot from CD or DVD…
message.
7. Follow the instructions on the screen to install Windows® 10.
Installing Drivers
1. Start up your computer in Windows® 10.
2. Insert MSI® Drive disc/ USB Driver into the optical drive/ USB port.
3. Click the Select to choose what happens with this disc pop-up notification,
then select Run DVDSetup.exe to open the installer. If you turn off the AutoPlay
feature from the Windows Control Panel, you can still manually execute the
DVDSetup.exe from the root path of the MSI Drive disc.
4. The installer will find and list all necessary drivers in the Drivers/Software tab.
5. Click the Install button in the lower-right corner of the window.
6. The drivers installation will then be in progress, after it has finished it will prompt
you to restart.
7. Click OK button to finish.
8. Restart your computer.
MSI Center
MSI Center is an application that helps you easily optimize game settings and
smoothly use content creation softwares. It also allows you to control and
synchronize LED light effects on PCs and other MSI products. With MSI Center, you
can customize ideal modes, monitor system performance, and adjust fan speed.
MSI Center User Guide
If you would like to know more information about MSI Center, please
refer to
http://download.msi.com/manual/mb/MSICENTER.pdf
or scan the QR code to access.
⚠
⚠Important
Functions may vary depending on the product you have.
Page: 26
27
UEFI BIOS
UEFI BIOS
MSI UEFI BIOS is compatible with UEFI (Unified Extensible Firmware Interface)
architecture. UEFI has many new functions and advantages that traditional BIOS
cannot achieve, and it will completely replace BIOS in the future. The MSI UEFI
BIOS uses UEFI as the default boot mode to take full advantage of the new chipset’s
capabilities.
⚠
⚠Important
The term BIOS in this user guide refers to UEFI BIOS unless otherwise noted.
UEFI advantages
∙
∙ Fast booting — UEFI can directly boot the operating system and save the BIOS self-
test process. And also eliminates the time to switch to CSM mode during POST.
∙
∙ Supports for hard drive partitions larger than 2 TB.
∙
∙ Supports more than 4 primary partitions with a GUID Partition Table (GPT).
∙
∙ Supports unlimited number of partitions.
∙
∙ Supports full capabilities of new devices — new devices may not provide backward
compatibility.
∙
∙ Supports secure startup — UEFI can check the validity of the operating system to
ensure that no malware tampers with the startup process.
Incompatible UEFI cases
∙
∙ 32-bit Windows operating system — this motherboard supports only 64-bit Windows
10/ Windows 11 operating system.
∙
∙ Older graphics card — the system will detect your graphics card. When display a
warning message There is no GOP (Graphics Output protocol) support detected in
this graphics card.
⚠
⚠Important
We recommend that you to replace with a GOP/UEFI compatible graphics card or
using integrated graphics from CPU for having normal function.
How to check the BIOS mode?
1. Power on your computer.
2. Press Delete key, when the Press DEL key to enter Setup Menu, F11 to enter
Boot Menu message appears on the screen during the boot process.
3. After entering the BIOS, you can check the BIOS Mode at the top of the screen.
BIOS Mode: UEFI
Page: 27
28 UEFI BIOS
BIOS Setup
The default settings offer the optimal performance for system stability in normal
conditions. You should always keep the default settings to avoid possible system
damage or failure booting unless you are familiar with BIOS.
⚠
⚠Important
∙
∙ BIOS items are continuously update for better system performance. Therefore, the
description may be slightly different from the latest BIOS and should be for reference
only. You could also refer to the HELP information panel for BIOS item description.
∙
∙ The BIOS screens, options and settings will vary depending on your system.
Entering BIOS Setup
Press Delete key, when the Press DEL key to enter Setup Menu, F11 to enter Boot
Menu message appears on the screen during the boot process.
Function key
F1: General Help
F2: Add/ Remove a favorite item
F3: Enter Favorites menu
F4: Enter CPU Specifications menu
F5: Enter Memory-Z menu
F6: Load optimized defaults
F7: Switch between Advanced mode and EZ mode
F8: Load Overclocking Profile
F9: Save Overclocking Profile
F10: Save Change and Reset*
F12: Take a screenshot and save it to USB flash drive (FAT/ FAT32 format only).
Ctrl+F: Enter Search page
* When you press F10, a confirmation window appears and it provides the
modification information. Select between Yes or No to confirm your choice.
BIOS User Guide
If you’d like to know more instructions on setting up the BIOS,
please refer to
http://download.msi.com/manual/mb/Intel600BIOS.pdf
or scan the QR code to access.
Page: 28
29
UEFI BIOS
Resetting BIOS
You might need to restore the default BIOS setting to solve certain problems. There
are several ways to reset BIOS:
∙
∙ Go to BIOS and press F6 to load optimized defaults.
∙
∙ Short the Clear CMOS jumper on the motherboard.
⚠
⚠Important
Be sure the computer is off before clearing CMOS data. Please refer to the Clear
CMOS jumper section for resetting BIOS.
Updating BIOS
Updating BIOS with M-FLASH
Before updating:
Please download the latest BIOS file that matches your motherboard model from MSI
website. And then save the BIOS file into the USB flash drive.
Updating BIOS:
1. Insert the USB flash drive that contains the update file into the USB port.
2. Please refer the following methods to enter flash mode.
▪
▪ Reboot and press Ctrl + F5 key during POST and click on Yes to reboot the
system.
▪
▪ Reboot and press Del key during POST to enter BIOS. Click the M-FLASH
button and click on Yes to reboot the system.
3. Select a BIOS file to perform the BIOS update process.
4. When prompted click on Yes to start recovering BIOS.
5. After the flashing process is 100% completed, the system will reboot
automatically.
Page: 29
30 UEFI BIOS
Updating the BIOS with MSI Center
Before updating:
∙
∙ Make sure the LAN driver is already installed and the internet connection is set
properly.
∙
∙ Please close all other application software before updating the BIOS.
To update BIOS:
1. Install and launch MSI Center and go to Support page.
2. Select Live Update and click on Advance button.
3. Select the BIOS file and click on Install button.
4. The installation reminder will appear, then click the Install button on it.
5. The system will automatically restart to update BIOS.
6. After the flashing process is 100% completed, the system will restart
automatically.
Updating BIOS with Flash BIOS Button
1. Please download the latest BIOS file that matches your motherboard model from
the MSI® website.
2. Rename the BIOS file to MSI.ROM, and save it to the root of your USB flash drive.
3. Connect the power supply to CPU_PWR1 and ATX_PWR1. (No need to install
CPU and memory.)
4. Plug the USB flash drive that contains the MSI.ROM file into the Flash BIOS Port
on the rear I/O panel.
5. Press the Flash BIOS Button to flash BIOS, and the LED starts flashing.
6. The LED will be turned off when the process is completed.
Page: 30
10 후면 I/O 패널
후면 I/O 패널
USB 3.2 Gen 1
5Gbps Type-A
플래쉬 BIOS 버튼
PS/2 콤보 포트
2.5 Gbps LAN
디스플레이포트
USB 2.0 Type-A
USB 2.0 Type-A 오디오 포트
USB 3.2 Gen 2×2
20Gbps Type-C
USB 3.2 Gen 2
10Gbps Type-A
플래쉬 BIOS
포트
Wi-Fi 안테나 커넥터
PRO Z690-A WIFI DDR4
USB 3.2 Gen 1
5Gbps Type-A
플래쉬 BIOS 버튼
PS/2 콤보 포트
2.5 Gbps LAN
디스플레이포트
USB 2.0 Type-A
USB 2.0 Type-A 오디오 포트
USB 3.2 Gen 2×2
20Gbps Type-C
USB 3.2 Gen 2
10Gbps Type-A
플래쉬 BIOS
포트
PRO Z690-A DDR4
Page: 31
21
구성품 개요
JUSB5: USB 3.2 Gen 2 Type-C 커넥터
이 커넥터를 사용하여 전면 패널의 USB 3.2 Gen 2 10 Gbps Type-C 커넥터를 연결할 수
있습니다. 이 커넥터는 풀 프루프(foolproof )로 작동하도록 디자인되었으며 케이블 연결시
정확한 방향으로 연결하시기 바랍니다.
JUSB5
USB Type-C 케이블
전면 패널 USB Type-C
포트
JTBT1: 썬더볼트 추가 카드 커넥터
이 커넥터를 사용하여 선택에 따라 추가 썬더볼트 I/O 카드와 연결할 수 있습니다.
1
2 16
15
1 TBT_Force_PWR 2 TBT_S0IX_Entry_REQ
3 TBT_CIO_Plug_Event# 4 TBT_S0IX_Entry_ACK
5 SLP_S3#_TBT 6 TBT_PSON_Override_N
7 SLP_S5#_TBT 8 Net Name
9 Ground 10 SMBCLK_VSB
11 DG_PEWake 12 SMBDATA_VSB
13 TBT_RTD3_PWR_EN 14 Ground
15 TBT_Card_DET_R# 12 PD_IRQ#
Page: 32
22 구성품 개요
1
2 12
11
1 SPI Power 2 SPI Chip Select
3
Master In Slave Out
(SPI Data)
4
Master Out Slave In
(SPI Data)
5 Reserved 6 SPI Clock
7 Ground 8 SPI Reset
9 Reserved 10 No Pin
11 Reserved 12 Interrupt Request
JTPM1: TPM 모듈 커넥터
이 커넥터는 TPM (Trusted Platform Module) 모듈에 연결됩니다. 자세한 내용과
사용방법은 TPM 보안 플랫폼 설명서를 참조하세요.
CPU_FAN1, PUMP_FAN1, SYS_FAN1~6: 팬 커넥터
팬 커넥터는 PWM (Pulse Width Modulation) 모드와 DC 모드로 분류될 수 있습니다. PWM
모드 팬 커넥터는 12V의 일정한 출력을 제공하고 속도 제어 신호에 따라 팬의 회전 속도를
조정합니다. DC 모드 팬 커넥터는 전압의 변화에 따라 팬의 회전 속도를 제어합니다.
⚠
⚠중요사항
BIOS > HARDWARE MONITOR(하드웨어 모니터)로 이동하여 팬 속도를 조정할 수
있습니다.
1
PWM 모드 핀 정의
1 Ground 2 +12V
3 Sense 4 Speed Control Signal
커넥터 기본 팬 모드 최대 전류 최대 전력
CPU_FAN1 PWM 모드 2A 24W
PUMP_FAN1 PWM 모드 3A 36W
SYS_FAN1~6 DC 모드 1A 12W
1
DC 모드 핀 정의
1 Ground 2 Voltage Control
3 Sense 4 NC
Page: 33
11
Panneau arrière Entrée/Sortie
Panneau arrière Entrée/Sortie
USB 3.2 Gen 1
5 Gb/s Type-A
Bouton Flash BIOS
Port combo PS/2
2,5 Gb/s LAN
DisplayPort
USB 2.0 Type-A
USB 2.0 Type-A Ports audio
USB 3.2 Gen 2×2
20 Gb/s Type-C
USB 3.2 Gen 2
10 Gb/s Type-A
Port Flash
BIOS
USB 3.2 Gen 1
5 Gb/s Type-A
Bouton Flash BIOS
Port combo PS/2
2,5 Gb/s LAN
DisplayPort
USB 2.0 Type-A
USB 2.0 Type-A Ports audio
USB 3.2 Gen 2×2
20 Gb/s Type-C
USB 3.2 Gen 2
10 Gb/s Type-A
Port Flash
BIOS
Connecteurs d’antenne Wi-Fi
PRO Z690-A WIFI DDR4
PRO Z690-A DDR4
Page: 34
17
Vue d’ensemble des composants
JFP1, JFP2 : Connecteurs de panneau avant
Ces connecteurs se lient aux interrupteurs et indicateurs LED du panneau avant.
1
2 10
9
+
+
+
—
—
—
—
+
Power LED
HDD LED Reset Switch
Reserved
Power Switch
1 HDD LED + 2 Power LED +
3 HDD LED — 4 Power LED —
5 Reset Switch 6 Power Switch
7 Reset Switch 8 Power Switch
9 Reserved 10 No Pin
JFP2 1
+
+
—
—
Speaker
Buzzer 1 Speaker — 2 Buzzer +
3 Buzzer — 4 Speaker +
HDD
LED
RESET
SW
HDD LED
HDD LED —
HDD LED +
POWER LED —
POWER LED +
POWER LED
J
F
P
1
Page: 35
10 后置 I/O 面板
后置 I/O 面板
USB 3.2 Gen 1
5Gbps Type-A
更新 BIOS 按钮
PS/2 组合端口
2.5 Gbps LAN
DisplayPort
端口
USB 2.0 Type-A
USB 2.0 Type-A 音频端口
USB 3.2 Gen 2×2
20Gbps Type-C
USB 3.2 Gen 2
10Gbps Type-A
更新 BIOS
端口
USB 3.2 Gen 1
5Gbps Type-A
更新 BIOS 按钮
PS/2 组合端口 2.5 Gbps LAN
DisplayPort
端口
USB 2.0 Type-A
USB 2.0 Type-A 音频端口
USB 3.2 Gen 2×2
20Gbps Type-C
USB 3.2 Gen 2
10Gbps Type-A
更新 BIOS
端口
Wi-Fi 天线接口
PRO Z690-A WIFI DDR4
PRO Z690-A DDR4
Page: 36
17
组件概述
JAUD1: 前置音频接口
此接口允许您连接前置面板上音频插孔。
1
2 10
9
1 MIC L 2 Ground
3 MIC R 4 NC
5 Head Phone R 6 MIC Detection
7 SENSE_SEND 8 No Pin
9 Head Phone L 10 Head Phone Detection
SATA1~6: SATA 6Gb/s 接口
这些接口是串行 SATA 6Gb/s 介面接口。
每个接口可以连接一个串行 SATA 设备。
SATA1
SATA3
SATA2
SATA6
SATA5
SATA4
⚠
⚠注意
∙
∙ 请勿将串行 SATA 数据线对折成 90 度。
否则,
传输过程中可能会出现数据丢失。
∙
∙ SATA 数据线的两端有相同的插口,
然而,
为了节省空间建议连接扁平接口端在主板
上。
Page: 37
20 组件概述
JUSB3~4: USB 3.2 Gen 1 5Gbps 接口
此接口允许您在前置面板上来连接 USB 3.2 Gen 1 5Gbps 端口。
1
10 11
20
1 Power 11 USB2.0+
2 USB3_RX_DN 12 USB2.0-
3 USB3_RX_DP 13 Ground
4 Ground 14 USB3_TX_C_DP
5 USB3_TX_C_DN 15 USB3_TX_C_DN
6 USB3_TX_C_DP 16 Ground
7 Ground 17 USB3_RX_DP
8 USB2.0- 18 USB3_RX_DN
9 USB2.0+ 19 Power
10 Ground 20 No Pin
⚠
⚠注意
请注意,
电源和接地针脚必须正确连接以避免可能的损坏。
JUSB1~2: USB 2.0 接口
这些接口允许您在前置面板上来连接 USB 2.0 端口。
⚠
⚠注意
∙
∙ 请注意,
VCC 和接地针脚必须正确连接以避免可能的损坏。
∙
∙ 为了将您的 iPad,
iPhone 和 iPod 通过 USB 端口进行充电,
请安装 MSI Center 实用
程序。
1
2 10
9
1 VCC 2 VCC
3 USB0- 4 USB1-
5 USB0+ 6 USB1+
7 Ground 8 Ground
9 No Pin 10 NC
Page: 38
21
组件概述
JUSB5: USB 3.2 Gen 2 Type-C 接口
此接口允许您在前置面板上来连接 USB 3.2 Gen 2 10 Gbps Type-C 接口。
该接口具有防
呆设计。
当您连接电缆时,
请务必将其与相应的方向连接。
JUSB5
USB Type-C 电缆
前置面板上的 USB
Type-C 端口
JTBT1: Thunderbolt 附加卡接口
此接口允许您连接附加的 Thunderbolt I/O 卡。
1
2 16
15
1 TBT_Force_PWR 2 TBT_S0IX_Entry_REQ
3 TBT_CIO_Plug_Event# 4 TBT_S0IX_Entry_ACK
5 SLP_S3#_TBT 6 TBT_PSON_Override_N
7 SLP_S5#_TBT 8 Net Name
9 Ground 10 SMBCLK_VSB
11 DG_PEWake 12 SMBDATA_VSB
13 TBT_RTD3_PWR_EN 14 Ground
15 TBT_Card_DET_R# 16 PD_IRQ#
Page: 39
22 组件概述
1
2 12
11
1 SPI Power 2 SPI Chip Select
3
Master In Slave Out
(SPI Data)
4
Master Out Slave In
(SPI Data)
5 Reserved 6 SPI Clock
7 Ground 8 SPI Reset
9 Reserved 10 No Pin
11 Reserved 12 Interrupt Request
JTPM1: TPM 模组接口
此接口是用来连接 TPM (安全平台模组)。
请参考 TPM 安全平台手册以获得更多细节和
用法。
CPU_FAN1, PUMP_FAN1, SYS_FAN1~6: 风扇接口
风扇接口可分为 PWM (脉冲宽度调制) 模式和 DC 模式。
PWM 模式风扇接口使用速率
控制信号提供恒定的 12V 输出和调节风扇速率。
DC 模式风扇接口通过改变电压控制风
扇速率。
⚠
⚠注意
您可以 在 BIOS > HARDWARE MONITOR 中调整风扇速率。
1
PWM 模式针脚定义
1 Ground 2 +12V
3 Sense 4 Speed Control Signal
接口 默认风扇模式 最大电流 最大功率
CPU_FAN1 PWM 模式 2A 24W
PUMP_FAN1 PWM 模式 3A 36W
SYS_FAN1~6 DC 模式 1A 12W
1
DC 模式针脚定义
1 Ground 2 Voltage Control
3 Sense 4 NC
Page: 40
23
组件概述
JCI1: 机箱入侵检测接口
此接口可用来连接机箱入侵检测开关线。
正常 (默认) 启用机箱入侵检测
使用机箱入侵检测器
1. JCI1 接口连接机箱上的机箱入侵检测开关和传感器。
2. 关闭机箱盖。
3. 转到 BIOS > SETTINGS > Security > Chassis Intrusion Configuration。
4. 设置 Chassis Intrusion 为 Enabled。
5. 按 F10 保存并退出,
然后按 Enter 键选择 Yes。
6. 当计算机开启时,
一旦打开机箱盖,
将会在屏幕上显示一个警告信息。
重设机箱入侵检测警告
1. 转到 BIOS > SETTINGS > Security > Chassis Intrusion Configuration。
2. 设置 Chassis Intrusion 为 Reset。
3. 按 F10 保存并退出,
然后按 Enter 键选择 Yes。
JDASH1: 调试控制器接口
此接口用于连接可选的调试控制器模块。
1
2 6
5
1 No pin 2 NC
3 MCU_SMB_SCL_M 4 MCU_SMB_SDA_M
5 VCC5 6 Ground
Page: 41
27
UEFI BIOS
UEFI BIOS
MSI UEFI BIOS 与 UEFI (Unified Extensible Firmware Interface) 体系结构兼容。
UEFI
具有传统 BIOS 无法实现的许多新功能和优势,
未来将完全取代 BIOS。
MSI UEFI BIOS
使用 UEFI 作为默认引导模式,
充分利用新芯片组的功能。
⚠
⚠注意
除非另有说明,
否则本用户指南中的术语 BIOS 指 UEFI BIOS。
UEFI 优势
∙
∙ 快速启动 — UEFI 可直接启动操作系统,
并保存 BIOS 自检过程。
同时还消除了在 POST
期间切换到 CSM 模式的时间。
∙
∙ 支持大于 2 TB 的硬盘分区。
∙
∙ 通过 GUID 分区表 (GPT) 支持 4 个以上的主分区。
∙
∙ 支持无限数量的分区。
∙
∙ 支持新设备的全部功能 — 新设备可能不提供向后兼容性。
∙
∙ 支持安全启动 — UEFI 可检查操作系统的有效性,
以确保没有恶意软件篡改启动过程。
不兼容的 UEFI 情况
∙
∙ 32位 Windows 操作系统 — 此主板仅支持 64位 Windows10 操作系统。
∙
∙ 较旧的显卡 — 系统将检测您的显卡。
当显示警告消息时 There is no GOP (Graphics
Output protocol) support detected in this graphics card,
在此显卡中未检测到 GOP
(Graphics Output protocol) 支持。
⚠
⚠注意
我们建议您替换为兼容 GOP / UEFI 的显卡,
或使用 CPU 的板载显卡以使其具有正常
功能。
如何检查 BIOS 模式?
1. 启动计算机电源。
2. 在开机程序中,
当屏幕上出现 Press DEL key to enter Setup Menu, F11 to enter
Boot Menu 信息,
按下 Delete 键。
3. 进入 BIOS 后,
您可以在屏幕顶部检查 BIOS 模式。
BIOS 模式: UEFI
Page: 42
7
規格
承上頁
背板接頭
∙
∙ 1 個更新 BIOS 按鈕
∙
∙ 1 個 PS/2 鍵盤/ 滑鼠複合連接埠
∙
∙ 4 個 USB 2.0 Type-A 連接埠
∙
∙ 1 個 DisplayPort 連接埠
∙
∙ 1 個 HDMI 2.1 連接埠
∙
∙ 1 個 LAN (RJ45) 連接埠
∙
∙ 2 個 USB 3.2 Gen 1 5Gbps Type-A 連接埠
∙
∙ 1 個 USB 3.2 Gen 2 10Gbps Type-A 連接埠
∙
∙ 1 個 USB 3.2 Gen 2×2 20Gbps Type-C 連接埠
∙
∙ 2 個 Wi-Fi 天線接頭 (僅 PRO Z690-A WIFI DDR4 配置)
∙
∙ 6 個音效接頭
I/O 控制器 NUVOTON NCT6687D-W 控制晶片
硬體監控
∙
∙ CPU/系統/晶片組溫度偵測
∙
∙ CPU/系統/水冷風扇速度偵測
∙
∙ CPU/系統/水冷風扇速度控制
尺寸
∙
∙ ATX
∙
∙ 12 x 9.6 英吋 (30.5 x 24.4 公分)
BIOS 功能
∙
∙ 1 個 256 Mb flash
∙
∙ UEFI AMI BIOS
∙
∙ ACPI 6.4
、
SMBIOS 3.4
∙
∙ 多國語
軟體
∙
∙ 驅動程式
∙
∙ MSI Center
∙
∙ Intel® Extreme Tuning Utility
∙
∙ CPU-Z MSI GAMING
∙
∙ Google Chrome™
、
Google 工具列
、
Google 雲端硬碟
∙
∙ Norton™ Internet Security Solution
接下頁
Page: 43
8 規格
承上頁
MSI Center 特色
∙
∙ Mystic Light
∙
∙ 網路頻寬管理軟體
∙
∙ User Scenario
∙
∙ 硬體監控
∙
∙ Frozr AI Cooling
∙
∙ True Color
∙
∙ Live Update
∙
∙ Speed Up
∙
∙ Super Charger
專屬特色
∙
∙ 音效
▪
▪ 音皇技術
∙
∙ 網路
▪
▪ 2.5G 網路連接埠
▪
▪ 網路頻寬管理軟體
▪
▪ Intel WiFi (僅 PRO Z690-A WIFI DDR4 配置)
∙
∙ 散熱
▪
▪ M.2 Shield Frozr
▪
▪ 水冷風扇
▪
▪ 智慧風扇控制
∙
∙ LED 燈
▪
▪ 炫彩效果延伸接頭 (RAINBOW/RGB)
▪
▪ 炫彩效果同步技術
▪
▪ EZ LED 指示燈控制
▪
▪ 除錯 LED 指示燈
接下頁
Page: 44
9
規格
承上頁
專屬特色
∙
∙ 效能
▪
▪ 多顯示卡-CrossFire 技術
▪
▪ DDR4 加速引擎
▪
▪ 核心加速引擎
▪
▪ USB 3.2 Gen 2×2 20G
▪
▪ USB 3.2 Gen 2 10G
▪
▪ USB Type A+C 連接埠
▪
▪ 前置 USB Type-C
∙
∙ 保護
▪
▪ PCI-E 鋼鐵裝甲
∙
∙ 體驗
▪
▪ MSI Center
▪
▪ Frozr AI Cooling
▪
▪ 第五代圖形化 BIOS
▪
▪ 更新 BIOS 按鈕
Page: 45
10 背板 I/O
背板 I/O
USB 3.2 Gen 1
5Gbps Type-A
更新 BIOS 按鈕
PS/2 復合連接埠
2.5 Gbps 網路連接埠
DisplayPort
USB 2.0 Type-A
USB 2.0 Type-A 音效連接埠
USB 3.2 Gen 2×2
20Gbps Type-C
USB 3.2 Gen 2
10Gbps Type-A
更新 BIOS
連接埠
USB 3.2 Gen 1
5Gbps Type-A
更新 BIOS 按鈕
PS/2 復合連接埠 2.5 Gbps 網路連接埠
DisplayPort
USB 2.0 Type-A
USB 2.0 Type-A 音效連接埠
USB 3.2 Gen 2×2
20Gbps Type-C
USB 3.2 Gen 2
10Gbps Type-A
更新 BIOS
連接埠
Wi-Fi 天線接頭
PRO Z690-A WIFI DDR4
PRO Z690-A DDR4
Page: 46
17
元件總覽
JAUD1: 前置音效插孔
本插孔用於連接前面板的音訊插孔
。
1
2 10
9
1 MIC L 2 Ground
3 MIC R 4 NC
5 Head Phone R 6 MIC Detection
7 SENSE_SEND 8 No Pin
9 Head Phone L 10 Head Phone Detection
SATA1~6: SATA 6Gb/s 插孔
這些插孔是 SATA 6Gb/s 介面連接埠
。
每個插孔皆可連接一個 SATA 裝置
。
SATA1
SATA3
SATA2
SATA6
SATA5
SATA4
⚠
⚠重要
∙
∙ SATA 排線不可摺疊超過 90 度
,
以免傳輸資料時產生錯誤
。
∙
∙ SATA 排線兩端接頭外觀相似
,
建議將平頭端接到主機板
,
以節省空間
。
Page: 47
21
元件總覽
JUSB5: USB 3.2 Gen 2 Type-C 接頭
這個接頭可供連接前面板上的 USB 3.2 Gen 2 10 Gbps Type-C 接頭
。
這個接頭具有防呆
設計
。
請務必以相應的方向連接線纜
。
JUSB5
USB Type-C 線纜
前面板上的 USB Type-C
連接埠
JTBT1: Thunderbolt 擴充卡接頭
此接頭用於連接 Thunderbolt I/O 擴充卡
。
1
2 16
15
1 TBT_Force_PWR 2 TBT_S0IX_Entry_REQ
3 TBT_CIO_Plug_Event# 4 TBT_S0IX_Entry_ACK
5 SLP_S3#_TBT 6 TBT_PSON_Override_N
7 SLP_S5#_TBT 8 Net Name
9 Ground 10 SMBCLK_VSB
11 DG_PEWake 12 SMBDATA_VSB
13 TBT_RTD3_PWR_EN 14 Ground
15 TBT_Card_DET_R# 16 PD_IRQ#
Page: 48
22 元件總覽
1
2 12
11
1 SPI Power 2 SPI Chip Select
3
Master In Slave Out
(SPI Data)
4
Master Out Slave In
(SPI Data)
5 Reserved 6 SPI Clock
7 Ground 8 SPI Reset
9 Reserved 10 No Pin
11 Reserved 12 Interrupt Request
JTPM1: TPM 模組接頭
此接頭用於連接可信賴平台模組 (TPM)
。
請參閱 TPM 安全平台手冊瞭解更多詳情
。
CPU_FAN1, PUMP_FAN1, SYS_FAN1~6: 風扇電源接頭
風扇電源接頭可分為脈寬調變 (PWM) 模式和 DC 模式
。
PWM 模式風扇插孔提供恆定
12V 輸出
,
並可透過速度控制訊號調整風扇速度
。
DC 模式插孔會變更電壓
,
藉此控制風
扇速度
。
⚠
⚠重要
您可以在 BIOS > HARDWARE MONITOR 中調整風扇速度
。
1
PWM 模式針腳定義
1 Ground 2 +12V
3 Sense 4 Speed Control Signal
接頭 預設風扇模式 最大電流 最大功率
CPU_FAN1 PWM 模式 2A 24W
PUMP_FAN1 PWM 模式 3A 36W
SYS_FAN1~6 DC 模式 1A 12W
1
DC 模式針腳定義
1 Ground 2 Voltage Control
3 Sense 4 NC
Page: 49
23
元件總覽
JCI1: 機殼開啟接頭
此接頭可連接機殼開啟開關排線
。
一般 (預設值) 觸動機殼開啟事件
使用機殼開啟偵測器
1. 連接 JCI1 插孔和機殼上的機殼開啟開關/感測器
。
2. 關閉機殼蓋
。
3. 前往 BIOS > SETTINGS > Security > Chassis Intrusion Configuration.
4. 將 Chassis Intrusion 設定為 Enabled
。
5. 按下 F10 儲存並離開
,
然後按 Enter 鍵選擇 Yes
。
6. 之後若機殼蓋再次被開啟
,
電腦啟動後畫面上即會顯示警告訊息
。
重設機殼開啟警告
1. 前往 BIOS > SETTINGS > Security > Chassis Intrusion Configuration.
2. 將Chassis Intrusion 設定為 Reset
。
3. 按下 F10 儲存並離開
,
然後按下 Enter 鍵選擇 Yes
。
JDASH1: 調試控制器接頭
此接頭可連接選擇性調試控制器模組
。
1
2 6
5
1 No pin 2 NC
3 MCU_SMB_SCL_M 4 MCU_SMB_SDA_M
5 VCC5 6 Ground
Page: 50
8 仕様
前のページから続く
MSI Centerの
機能
∙
∙ Mystic Light
∙
∙ LAN Manager
∙
∙ User Scenario
∙
∙ Hardware Monitor
∙
∙ Frozr AI Cooling
∙
∙ True Color
∙
∙ Live Update
∙
∙ Speed Up
∙
∙ Super Charger
MSI独自の機能
∙
∙ オーディオ
▪
▪ Audio Boost
∙
∙ ネッ
トワーク
▪
▪ 2.5G LAN
▪
▪ LAN Manager
▪
▪ Intel WiFi (PRO Z690-A WIFI DDR4のみの場合)
∙
∙ 冷却
▪
▪ M.2 Shield Frozr
▪
▪ ポンプファン
▪
▪ スマートファンコン
トロール
∙
∙ LED
▪
▪ Mystic Light拡張 (RAINBOW/RGB)
▪
▪ Mystic Light SYNC
▪
▪ EZ LEDコン
トロール
▪
▪ EZ DEBUG LED
次のページから続く