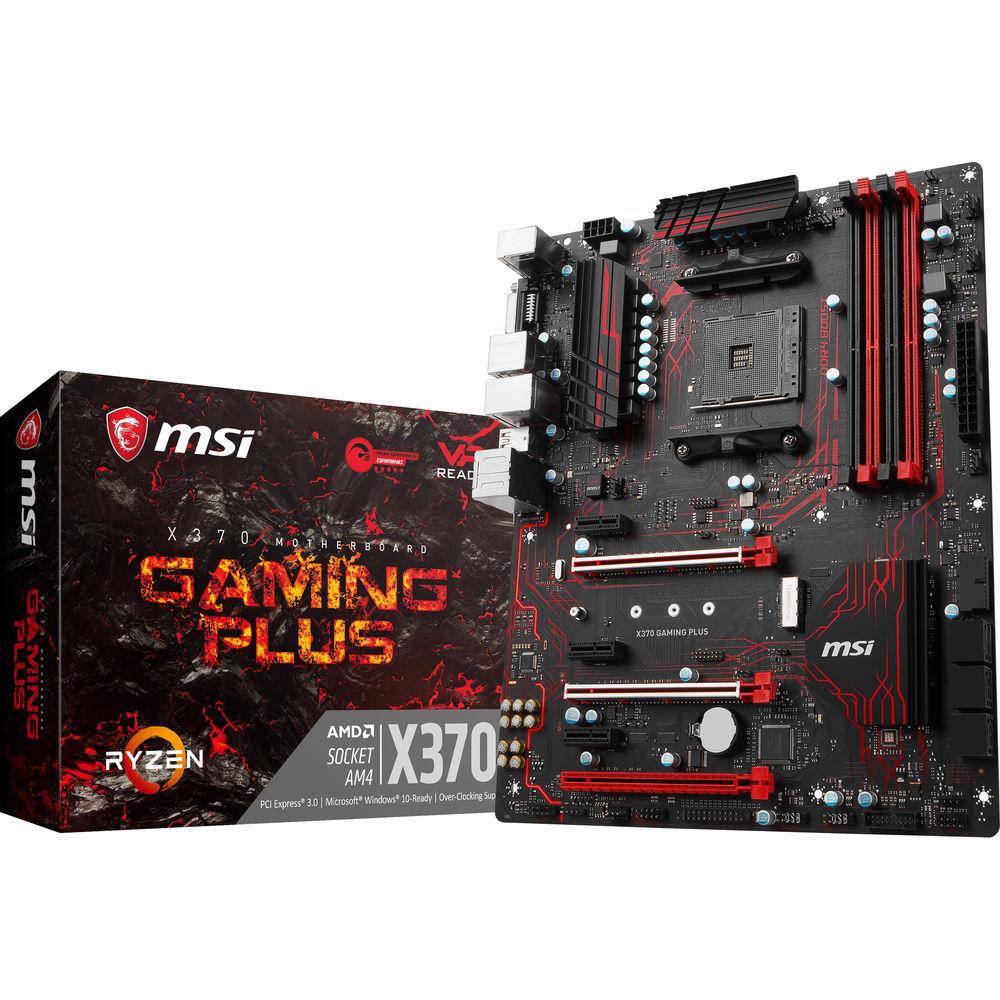
Инструкции и Руководства для MSI X370 GAMING PLUS.
Мы нашли 23
инструкции доступные для бесплатного скачивания:
Installation manual, quick guide, Инструкция по применению, Руководство пользователя, Спецификация
MSI X370 GAMING PLUS motherboard Benutzerhandbuch
Бренд:
MSI
Категория:
Motherboards
Размер:
3 MB
Страниц:
158
Язык(и):
Немецкий, Английский, Французский, Русский
Оглавление
-
13
Safety Information
-
14
Specifications
-
19
Rear I/O Panel
-
19
LAN Port LED Status Table
-
19
Audio Ports Configuration
-
20
Realtek HD Audio Manager
-
22
Overview of Components
-
23
CPU Socket
-
24
DIMM Slots
-
25
PCI_E1~6: PCIe Expansion Slots
-
28
M2_1: M.2 Slot (Key M)
-
29
SATA1~6: SATA 6Gb/s Connectors
-
30
CPU_PWR1, ATX_PWR1: Power Connectors
-
31
JUSB1~2: USB 2.0 Connectors
-
31
JUSB3~4: USB 3.1 Gen1 Connectors
-
32
CPU_FAN1, PUMP_FAN1, SYS_FAN1~4: Fan Connectors
-
33
JAUD1: Front Audio Connector
-
33
JCI1: Chassis Intrusion Connector
-
34
JFP1, JFP2: Front Panel Connectors
-
34
JTPM1: TPM Module Connector
-
35
JBAT1: Clear CMOS (Reset BIOS) Jumper
-
35
JLPT1: Parallel Port Connector
-
36
JCOM1: Serial Port Connector
-
36
JLED1: RGB LED connector
-
37
Onboard LEDs
-
37
EZ Debug LED
-
37
DIMM LEDs
-
37
GPU LED
-
37
PCIe x16 slot LEDs
-
38
BIOS Setup
-
38
Entering BIOS Setup
-
39
Resetting BIOS
-
39
Updating BIOS
-
40
EZ Mode
-
42
Advanced Mode
-
43
OC Menu
-
46
Software Description
-
46
Installing Windows® 7 64-bit/ Windows®10 64-bit
-
46
Installing Drivers
-
46
Installing Utilities
-
49
Sicherheitshinweis
-
50
Spezifikationen
-
55
Rückseite E/A
-
55
LAN Port LED Zustandstabelle
-
55
Konfiguration der Audioanschlüsse
-
56
Realtek HD Audio Manager
-
58
Übersicht der Komponenten
-
59
CPU Sockel
-
60
DIMM Steckplätze
-
61
PCI_E1~6: PCIe Erweiterungssteckplätze
-
64
M2_1: M.2 Steckplatz (Key M)
-
65
SATA1~6: SATA 6Gb/s Anschlüsse
-
66
CPU_PWR1, ATX_PWR1: Stromanschlüsse
-
67
JUSB1~2: USB 2.0 Anschlüsse
-
67
JUSB3~4: USB 3.1 Gen1 Anschlüsse
-
68
CPU_FAN1, PUMP_FAN1, SYS_FAN1~4: Stromanschlüsse für Lüfter
-
69
JAUD1: Audioanschluss des Frontpanels
-
69
JCI1: Gehäusekontaktanschluss
-
70
JFP1, JFP2: Frontpanel-Anschlüsse
-
70
JTPM1: TPM Anschluss
-
71
JBAT1: Clear CMOS Steckbrücke (Reset des BIOS)
-
71
JLPT1: Parallele Schnittstelle
-
72
JCOM1: Serieller Anschluss
-
72
JLED1: RGB LED Anschluss
-
73
Onboard-LEDs
-
73
EZ Debug LED
-
73
DIMM LEDs
-
73
GPU LED
-
73
PCIe x16 Steckplatz LEDs
-
74
BIOS-Setup
-
74
Öffnen des BIOS Setups
-
75
Reset des BIOS
-
75
Aktualisierung des BIOS
-
76
EZ Modus
-
78
Erweiterter Modus
-
79
OC Menü
-
82
Softwarebeschreibung
-
82
Installation von Windows® 7 64-Bit/ Windows®10 64-Bit
-
82
Installation von Treibern
-
82
Installation von Utilities
-
85
Informations de sécurité
-
86
Spécifications
-
91
Panneau arrière Entrée/ Sortie
-
91
Tableau explicatif de l’état de la LED du port LAN
-
91
Configuration des ports audio
-
92
Realtek HD Audio Manager
-
94
Vue d’ensemble des composants
-
95
Socket processeur
-
96
Slots DIMM
-
97
PCI_E1~6: Slots d’extension PCIe
-
100
M2_1: Slot M.2 (Touche M)
-
101
SATA1~6: Connecteurs SATA 6 Gb/s
-
102
CPU_PWR1, ATX_PWR1: Connecteurs d’alimentation
-
103
JUSB1~2: Connecteurs USB 2.0
-
103
JUSB3~4: Connecteurs USB 3.1 Gen1
-
104
CPU_FAN1, PUMP_FAN1, SYS_FAN1~4: Connecteurs pour ventilateurs
-
105
JAUD1: Connecteur audio avant
-
105
JCI1: Connecteur intrusion châssis
-
106
JFP1, JFP2: Connecteurs de panneau avant
-
106
JTPM1: Connecteur de module TPM
-
107
JBAT1: Cavalier Clear CMOS (Réinitialisation BIOS)
-
107
JLPT1: Connecteur de port parallèle
-
108
JCOM1: Connecteur de port série
-
108
JLED1: Connecteur LED RGB
-
109
Indicateurs LED embarqués
-
109
EZ Debug LED
-
109
Indicateurs LED des barrettes DIMM
-
109
Indicateur LED du GPU
-
109
Indicateurs LED du slot PCIe x16
-
110
Configuration du BIOS
-
110
Entrer dans l’interface Setup du BIOS
-
111
Réinitialiser le BIOS
-
111
Mettre le BIOS à jour
-
112
EZ Mode (mode simplifié)
-
114
Advanced Mode (mode avancé)
-
115
OC Menu (menu overclocking)
-
118
Informations sur les logiciels
-
118
Installer Windows® 7 64-bit/ Windows®10 64-bit
-
118
Installer les pilotes
-
118
Installer les utilitaires
-
121
Безопасное использование продукции
-
122
Технические характеристики
-
127
Задняя панель портов ввода/ вывода
-
127
Таблица состояний индикатора порта LAN
-
127
Конфигурация портов Аудио
-
128
Менеджер Realtek HD Audio
-
130
Компоненты материнской платы
-
131
Процессорный сокет
-
132
Слоты DIMM
-
133
PCI_E1~6: Слоты расширения PCIe
-
136
M2_1: Разъем M.2 (Ключ M)
-
137
SATA1~6: Разъемы SATA 6 Гб/с
-
138
CPU_PWR1, ATX_PWR1: Разъемы питания
-
139
JUSB1~2: Разъемы USB 2.0
-
139
JUSB3~4: Разъемы USB 3.1 Gen1
-
140
CPU_FAN1, PUMP_FAN1, SYS_FAN1~4: Разъемы вентиляторов
-
141
JAUD1: Разъем аудио передней панели
-
141
JCI1: Разъем датчика открытия корпуса
-
142
JFP1, JFP2: Разъемы передней панели
-
142
JTPM1: Разъем модуля TPM
-
143
JBAT1: Джампер очистки данных CMOS (Сброс BIOS)
-
143
JLPT1: Разъем параллельного порта
-
144
JCOM1: Разъем последовательного порта
-
144
JLED1: Разъем RGB LED
-
145
Встроенные индикаторы
-
145
Индикаторы отладки EZ
-
145
Индикаторы DIMM
-
145
Индикатор GPU
-
145
Индикаторы слота PCIe x16
-
146
Настройка BIOS
-
146
Вход в настройки BIOS
-
147
Сброс BIOS
-
147
Обновление BIOS
-
148
Режим EZ
-
150
Режим разгона
-
151
Меню OC
-
154
Описание программного обеспечения
-
154
Установка Windows® 7 64-бит/ Windows® 10 64-бит
-
154
Установка драйверов
-
154
Установка утилит
Открыть в новой вкладке
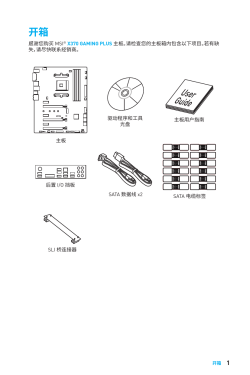
MSI X370 GAMING PLUS motherboard 用户手册
Бренд:
MSI
Размер:
3 MB
Страниц:
86
Язык(и):
zh
Оглавление
-
1
开箱
-
2
安全信息
-
3
快速安装
-
3
准备工具和组件
-
4
安装处理器
-
5
安装 DDR4 内存
-
6
连接前置面板接头
-
7
安装主板
-
8
安装 SATA 设备
-
9
安装显卡
-
10
连接外围设备
-
11
连接电源接口
-
12
开机
-
15
规格
-
20
结构图
-
21
后置 I/O 面板
-
21
LAN 端口 LED 状态表
-
21
音频端口配置
-
22
Realtek 高清晰音频管理软件
-
24
组件概述
-
26
CPU 底座
-
27
DIMM 插槽
-
28
PCI_E1~6: PCIe 扩展插槽
-
31
M2_1: M.2 接口 (M Key)
-
32
SATA1~6: SATA 6Gb/s 接口
-
33
CPU_PWR1, ATX_PWR1: 电源接口
-
34
JUSB1~2: USB 2.0 接口
-
34
JUSB3~4: USB 3.1 Gen1 接口
-
35
CPU_FAN1, PUMP_FAN1, SYS_FAN1~4: 风扇接口
-
36
JAUD1: 前置音频接口
-
36
JCI1: 机箱入侵检测接口
-
37
JFP1, JFP2: 前置面板接口
-
37
JTPM1: TPM 模组接口
-
38
JBAT1: 清除 CMOS (重启 BIOS) 跳线
-
38
JLPT1: 并行端头接口
-
39
JCOM1: 串行端头接口
-
39
JLED1: RGB LED 接口
-
40
板载 LED 灯
-
40
简易侦错 LED 灯
-
40
DIMM LED 灯
-
40
GPU LED 灯
-
40
PCIe x16 插槽 LED 灯
-
41
BIOS 设置
-
41
进入 BIOS 设置
-
42
重启 BIOS
-
42
更新 BIOS
-
43
EZ 模式
-
45
高级模式
-
46
设置
-
46
Advanced(高级)
-
51
Boot(启动)
-
52
Security(安全)
-
53
Save & Exit(存储和退出)
-
55
OC
-
58
M-FLASH
-
59
OC 档案
-
60
硬件监测
-
61
软件描述
-
61
安装 Windows® 7 64-bit/ Windows®10 64-bit
-
61
安装驱动
-
61
安装工具
-
62
LIVE UPDATE 6 (LIVE UPDATE 6 更新软件)
-
64
COMMAND CENTER
-
68
GAMING APP
-
73
RAMDISK (虚拟内存盘)
-
74
X-BOOST (一键加速技术)
-
76
MSI SMART TOOL (MSI 智能工具)
-
78
GAMING LAN MANAGER (微星 GAMING 网卡管理软件)
-
80
DRAGON EYE
-
81
SteelSeries Engine 3 (第三代 SteelSeries Engine)
-
83
CPU-Z
-
84
故障排除
-
85
常规事项
Открыть в новой вкладке
MSI X370 GAMING PLUS motherboard User manual
Бренд:
MSI
Категория:
Motherboards
Размер:
7 MB
Страниц:
88
Язык(и):
Английский
Оглавление
-
1
Unpacking
-
2
Safety Information
-
3
Quick Start
-
3
Preparing Tools and Components
-
4
Installing a Processor
-
5
Installing DDR4 memory
-
6
Connecting the Front Panel Header
-
7
Installing the Motherboard
-
8
Installing SATA Drives
-
9
Installing a Graphics Card
-
10
Connecting Peripheral Devices
-
11
Connecting the Power Connectors
-
12
Power On
-
15
Specifications
-
20
Block Diagram
-
21
Rear I/O Panel
-
21
LAN Port LED Status Table
-
21
Audio Ports Configuration
-
22
Realtek HD Audio Manager
-
24
Overview of Components
-
26
CPU Socket
-
27
DIMM Slots
-
28
PCI_E1~6: PCIe Expansion Slots
-
31
M2_1: M.2 Slot (Key M)
-
32
SATA1~6: SATA 6Gb/s Connectors
-
33
CPU_PWR1, ATX_PWR1: Power Connectors
-
34
JUSB1~2: USB 2.0 Connectors
-
34
JUSB3~4: USB 3.1 Gen1 Connectors
-
35
CPU_FAN1, PUMP_FAN1, SYS_FAN1~4: Fan Connectors
-
36
JAUD1: Front Audio Connector
-
36
JCI1: Chassis Intrusion Connector
-
37
JFP1, JFP2: Front Panel Connectors
-
37
JTPM1: TPM Module Connector
-
38
JBAT1: Clear CMOS (Reset BIOS) Jumper
-
38
JLPT1: Parallel Port Connector
-
39
JCOM1: Serial Port Connector
-
39
JLED1: RGB LED connector
-
40
Onboard LEDs
-
40
EZ Debug LED
-
40
DIMM LEDs
-
40
GPU LED
-
40
PCIe x16 slot LEDs
-
41
BIOS Setup
-
41
Entering BIOS Setup
-
42
Resetting BIOS
-
42
Updating BIOS
-
45
Advanced Mode
-
46
SETTINGS
-
46
Advanced
-
51
Boot
-
52
Security
-
53
Save & Exit
-
55
OC
-
58
M-FLASH
-
59
OC PROFILE
-
60
HARDWARE MONITOR
-
61
Software Description
-
61
Installing Windows® 7 64-bit/ Windows®10 64-bit
-
61
Installing Drivers
-
61
Installing Utilities
-
62
LIVE UPDATE 6
-
64
COMMAND CENTER
-
68
GAMING APP
-
73
RAMDISK
-
74
X-BOOST
-
76
MSI SMART TOOL
-
78
GAMING LAN MANAGER
-
80
DRAGON EYE
-
81
SteelSeries Engine 3
-
83
CPU-Z
-
84
Troubleshooting
-
85
Regulatory Notices
Открыть в новой вкладке
Устройство:
MSi X370 GAMING PLUS
Размер: 11,7 MB
Добавлено: 2023-05-15 13:47:27
Количество страниц: 158
Печатать инструкцию
Скачать
Как пользоваться?
Наша цель — обеспечить Вам самый быстрый доступ к руководству по эксплуатации устройства MSi X370 GAMING PLUS. Пользуясь просмотром онлайн Вы можете быстро просмотреть содержание и перейти на страницу, на которой найдете решение своей проблемы с MSi X370 GAMING PLUS.
Для Вашего удобства
Если просмотр руководства MSi X370 GAMING PLUS непосредственно на этой странице для Вас неудобен, Вы можете воспользоваться двумя возможными решениями:
- Полноэкранный просмотр -, Чтобы удобно просматривать инструкцию (без скачивания на компьютер) Вы можете использовать режим полноэкранного просмотра. Чтобы запустить просмотр инструкции MSi X370 GAMING PLUS на полном экране, используйте кнопку Полный экран.
- Скачивание на компьютер — Вы можете также скачать инструкцию MSi X370 GAMING PLUS на свой компьютер и сохранить ее в своем архиве. Если ты все же не хотите занимать место на своем устройстве, Вы всегда можете скачать ее из ManualsBase.
MSi X370 GAMING PLUS Руководство пользователя
Печатная версия
Многие предпочитают читать документы не на экране, а в печатной версии. Опция распечатки инструкции также предусмотрена и Вы можете воспользоваться ею нажав на ссылку, находящуюся выше — Печатать инструкцию. Вам не обязательно печатать всю инструкцию MSi X370 GAMING PLUS а только некоторые страницы. Берегите бумагу.
Резюме
Ниже Вы найдете заявки которые находятся на очередных страницах инструкции для MSi X370 GAMING PLUS. Если Вы хотите быстро просмотреть содержимое страниц, которые находятся на очередных страницах инструкции, Вы воспользоваться ими.
- Manuals
- Brands
- MSI Manuals
- Motherboard
- Z370 GAMING PLUS
- Manual
-
Contents
-
Table of Contents
-
Troubleshooting
-
Bookmarks
Quick Links
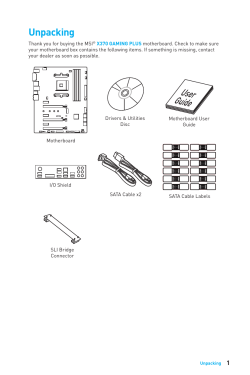
Unpacking
Thank you for buying the MSI
Z370 GAMING PLUS
motherboard. Check to make sure
®
your motherboard box contains the following items. If something is missing, contact
your dealer as soon as possible.
Drivers & Utilities
Motherboard User
Disc
Guide
Motherboard
I/O Shield
SATA Cable x2
1
Unpacking
Related Manuals for MSI Z370 GAMING PLUS
Summary of Contents for MSI Z370 GAMING PLUS
-
Page 1: Unpacking
Unpacking Thank you for buying the MSI Z370 GAMING PLUS motherboard. Check to make sure ® your motherboard box contains the following items. If something is missing, contact your dealer as soon as possible. Drivers & Utilities Motherboard User Disc…
-
Page 2: Safety Information
Safety Information y The components included in this package are prone to damage from electrostatic discharge (ESD). Please adhere to the following instructions to ensure successful computer assembly. y Ensure that all components are securely connected. Loose connections may cause the computer to not recognize a component or fail to start.
-
Page 3: Quick Start
Quick Start Preparing Tools and Components Intel LGA 1151 CPU ® CPU Fan Thermal Paste DDR4 Memory Power Supply Unit Chassis SATA Hard Disk Drive Graphics Card SATA DVD Drive A Package of Screws Phillips Screwdriver Quick Start…
-
Page 4: Installing A Processor
Installing a Processor http://youtu.be/bf5La099urI Quick Start…
-
Page 5: Installing Ddr4 Memory
Installing DDR4 memory http://youtu.be/T03aDrJPyQs DIMMB2 DIMMB2 DIMMB1 DIMMA2 DIMMA2 DIMMA2 DIMMA1 Quick Start…
-
Page 6: Connecting The Front Panel Header
Connecting the Front Panel Header http://youtu.be/DPELIdVNZUI HDD LED + Power LED + HDD LED — Power LED — Reset Switch Power Switch Reset Switch Power Switch JFP1 Reserved No Pin JFP1 HDD LED — HDD LED HDD LED + POWER LED — POWER LED POWER LED + Quick Start…
-
Page 7: Installing The Motherboard
Installing the Motherboard Quick Start…
-
Page 8: Installing Sata Drives
Installing SATA Drives http://youtu.be/RZsMpqxythc Quick Start…
-
Page 9: Installing A Graphics Card
Installing a Graphics Card http://youtu.be/mG0GZpr9w_A Quick Start…
-
Page 10: Connecting Peripheral Devices
Connecting Peripheral Devices Quick Start…
-
Page 11: Connecting The Power Connectors
Connecting the Power Connectors http://youtu.be/gkDYyR_83I4 ATX_PWR1 CPU_PWR1 Quick Start…
-
Page 12: Power On
Power On Quick Start…
-
Page 13: Table Of Contents
Contents Unpacking ………………….1 Safety Information ………………..2 Quick Start ………………….3 Preparing Tools and Components …………….3 Installing a Processor ………………… 4 Installing DDR4 memory ………………5 Connecting the Front Panel Header …………… 6 Installing the Motherboard ………………7 Installing SATA Drives…………………
-
Page 14
LIVE UPDATE 6 …………………. 66 COMMAND CENTER ………………… 68 GAMING APP ………………….72 X-BOOST ………………….. 77 MYSTICLIGHT ………………….79 MSI SMART TOOL ………………..81 RAMDISK………………….. 83 GAMING LAN MANAGER ………………84 DRAGON EYE ………………….86 SteelSeries Engine 3 ……………….. 87 Intel Extreme Tuning Utility ……………. -
Page 15
Using Intel Rapid Storage Technology Option ROM ……….. 95 ® Degraded RAID Array ………………. 98 Intel Optane™ Memory Configuration …………100 ® System Requirements ………………100 Installing the Intel Optane™ memory ………….. 100 ® Removing the Intel Optane™ memory …………. 102 ®… -
Page 16: Specifications
Supports non-ECC UDIMM memory y Supports Intel Extreme Memory Profile (XMP) ® *Please refer to www.msi.com for more information on compatible memory. y 2x PCIe 3.0 x16 slots Expansion Slots y 4x PCIe 3.0 x1 slots y 1x VGA port, supports a maximum resolution of…
-
Page 17
Continued from previous page Intel Z370 Chipset ® RAID y Supports RAID 0, RAID 1, RAID 5 and RAID 10 for SATA storage devices y Intel Z370 Chipset ® ƒ 8x USB 3.1 Gen1 (SuperSpeed USB) ports (4 Type-A ports on the back panel, 4 ports available through the internal USB connectors) ƒ… -
Page 18
Continued from previous page y 1x 24-pin ATX main power connector y 1x 8-pin ATX 12V power connector y 6x SATA 6Gb/s connectors y 2x USB 3.1 Gen1 connectors (supports additional 4 USB 3.1 Gen1 ports) y 2x USB 2.0 connectors (supports additional 4 USB 2.0 ports) y 1x 4-pin CPU fan connector y 1x 4-pin water pump fan connector… -
Page 19
GAMING LAN MANAGER y Open Broadcaster Software y Tridef VR & Smart Cam ® y SteelSeries Engine 3 y WTFast* y CPU-Z MSI GAMING y Intel Extreme Tuning Utility ® y Norton Internet Security Solution ™ y Google Chrome , Google Toolbar, Google Drive ™… -
Page 20
Continued from previous page y Audio ƒ Audio Boost y Network ƒ GAMING LAN with Gaming LAN Manager y Storage ƒ Turbo M.2 y Fan ƒ Pump Fan ƒ Smart Fan Control y LED ƒ Mystic Light ƒ Mystic Light Extension (RGB) ƒ… -
Page 21: Block Diagram
Block Diagram DVI-D DisplayPort 2 Channel DDR4 Memory PCI Express Bus DMI 3.0 PCIe x1 slot PCIe x1 slot 1 x M.2 PCIe x1 slot PCIe x1 slot 6 x SATA 6Gb/s Z370 8 x USB 3.1 Gen1 6 x USB 2.0 LPC Bus NV6795 Realtek…
-
Page 22: Rear I/O Panel
Rear I/O Panel Audio Ports PS/2 Port USB 2.0 DisplayPort USB 3.1 Gen1 USB 3.1 Gen1 DVI-D LAN Port LED Status Table Link/ Activity LED Speed LED Status Description Status Description No link 10 Mbps connection Yellow Linked Green 100 Mbps connection Blinking Data activity Orange…
-
Page 23: Realtek Hd Audio Manager
Realtek HD Audio Manager After installing the Realtek HD Audio driver, the Realtek HD Audio Manager icon will appear in the system tray. Double click on the icon to launch. Device Selection Advanced Settings Jack Status Application Enhancement Connector Main Volume Strings Profiles y Device Selection — allows you to select a audio output source to change the related…
-
Page 24
Audio jacks to headphone and microphone diagram Audio jacks to stereo speakers diagram AUDIO INPUT Audio jacks to 7.1-channel speakers diagram AUDIO INPUT Rear Front Side Center/ Subwoofer Rear I/O Panel… -
Page 25: Overview Of Components
Overview of Components DIMMA1 SYS_FAN4 DIMMA2 CPU_FAN1 DIMMB1 CPU_PWR1 DIMMB2 CPU Socket PUMP_FAN1 SYS_FAN2 EZ Debug LED ATX_PWR1 JUSB3 JBAT1 M2_1 PCI_E1 JUSB4 PCI_E2 SATA▼1▲2 PCI_E3 SATA▼3▲4 PCI_E4 SATA5 PCI_E5 SATA6 JTPM1 PCI_E6 JCI1 JFP1 JAUD1 JFP2 JRGB1 SYS_FAN1 JUSB1 SYS_FAN3 JCOM1 JUSB2…
-
Page 26
Component Contents Port Name Port Type Page CPU_FAN1,SYS_FAN1~4, PUMP_ Fan Connectors FAN1 CPU_PWR1, ATX_PWR1 Power Connectors CPU Socket LGA1151 CPU Socket DIMMA1/ A2/ B1/ B2 DIMM Slots JAUD1 Front Audio Connector JBAT1 Clear CMOS (Reset BIOS) Jumper JCI1 Chassis Intrusion Connector JCOM1 Serial Port Connector JFP1, JFP2… -
Page 27: Cpu Socket
Always unplug the power cord from the power outlet before installing or removing the CPU. Please retain the CPU protective cap after installing the processor. MSI will deal with Return Merchandise Authorization (RMA) requests if only the motherboard comes with the protective cap on the CPU socket.
-
Page 28: Dimm Slots
DIMM Slots DIMMA1 DIMMB1 Channel A Channel B DIMMA2 DIMMB2 Memory module installation recommendation DIMMB2 DIMMB2 DIMMB1 DIMMA2 DIMMA2 DIMMA2 DIMMA1 Important Always insert memory modules in the DIMMA2 slot first. Due to chipset resource usage, the available capacity of memory will be a little less than the amount of installed.
-
Page 29: Pci_E1~6: Pcie Expansion Slots
If you install a large and heavy graphics card, you need to use a tool such as MSI Gaming Series Graphics Card Bolster to support its weight and to prevent deformation of the slot. Overview of Components…
-
Page 30: M2_1: M.2 Slot (Key M)
M2_1: M.2 Slot (Key M) Important Intel Optane Memory Ready. ® Video Demonstration Watch the video to learn how to Install M.2 module. http://youtu.be/JCTFABytrYA Installing M.2 module 1. Remove the screw from the base screw. 2. Remove the base screw. 3.
-
Page 31: Sata1~6: Sata 6Gb/S Connectors
SATA1~6: SATA 6Gb/s Connectors These connectors are SATA 6Gb/s interface ports. Each connector can connect to one SATA device. SATA2 SATA1 SATA4 SATA3 SATA5 SATA6 Important The SATA1 port will be unavailable when an M.2 SATA SSD module has been installed in the M.2 slot.
-
Page 32: Cpu_Pwr1, Atx_Pwr1: Power Connectors
CPU_PWR1, ATX_PWR1: Power Connectors These connectors allow you to connect an ATX power supply. CPU_PWR1 Ground +12V Ground +12V Ground +12V Ground +12V +3.3V +3.3V +3.3V -12V Ground Ground PS-ON# Ground Ground Ground ATX_PWR1 Ground Ground PWR OK 5VSB +12V +12V +3.3V Ground…
-
Page 33: Jusb1~2: Usb 2.0 Connectors
JUSB1~2: USB 2.0 Connectors These connectors allow you to connect USB 2.0 ports on the front panel. USB0- USB1- USB0+ USB1+ Ground Ground No Pin Important Note that the VCC and Ground pins must be connected correctly to avoid possible damage.
-
Page 34: Cpu_Fan1,Sys_Fan1~4, Pump_Fan1: Fan Connectors
CPU_FAN1,SYS_FAN1~4, PUMP_FAN1: Fan Connectors Fan connectors can be classified as PWM (Pulse Width Modulation) Mode or DC Mode. PWM Mode fan connectors provide constant 12V output and adjust fan speed with speed control signal. DC Mode fan connectors control fan speed by changing voltage. When you plug a 3-pin (Non-PWM) fan to a fan connector in PWM mode, the fan speed will always maintain at 100%, which might create a lot of noise.
-
Page 35: Jaud1: Front Audio Connector
JAUD1: Front Audio Connector This connector allows you to connect audio jacks on the front panel. MIC L Ground MIC R Head Phone R MIC Detection SENSE_SEND No Pin Head Phone L Head Phone Detection JCI1: Chassis Intrusion Connector This connector allows you to connect the chassis intrusion switch cable. Normal Trigger the chassis intrusion event…
-
Page 36: Jtpm1: Tpm Module Connector
JTPM1: TPM Module Connector This connector is for TPM (Trusted Platform Module). Please refer to the TPM security platform manual for more details and usages. LPC Clock 3V Standby power LPC Reset 3.3V Power LPC address & data pin0 Serial IRQ LPC address &…
-
Page 37: Jbat1: Clear Cmos (Reset Bios) Jumper
JBAT1: Clear CMOS (Reset BIOS) Jumper There is CMOS memory onboard that is external powered from a battery located on the motherboard to save system configuration data. If you want to clear the system configuration, set the jumper to clear the CMOS memory. Keep Data Clear CMOS/ Reset BIOS…
-
Page 38: Jrgb1: Rgb Led Connector
Always turn off the power supply and unplug the power cord from the power outlet before installing or removing the RGB LED strip. Please use MSI’ s software to control the extended LED strip. PCIe x16 slot LEDs These LED indicate the PCIe x16 slots status.
-
Page 39: Bios Setup
Press Delete key, when the Press DEL key to enter Setup Menu, F11 to enter Boot Menu message appears on the screen during the boot process. y Use MSI FAST BOOT application. Click on GO2BIOS button and choose OK. The system will reboot and enter BIOS setup directly.
-
Page 40: Resetting Bios
Updating BIOS Updating BIOS with M-FLASH Before updating: Please download the latest BIOS file that matches your motherboard model from MSI website. And then save the BIOS file into the USB flash drive. Updating BIOS: 1. Press Del key to enter the BIOS Setup during POST.
-
Page 41: Ez Mode
EZ Mode At EZ mode, it provides the basic system information and allows you to configure the basic setting. To configure the advanced BIOS settings, please enter the Advanced Mode by pressing the Setup Mode switch or F7 function key. XMP switch Setup Mode switch Screenshot…
-
Page 42
y Information display — click on the CPU, Memory, Storage, Fan Info and Help buttons on left side to display related information. y Function buttons — enable or disable the LAN Option ROM, M.2/ Optane Genie, HD audio controller, AHCI, RAID, CPU Fan Fail Warning Control and BIOS Log Review by clicking on their respective button. -
Page 43: Advanced Mode
Advanced Mode Press Setup Mode switch or F7 function key can switch between EZ Mode and Advanced Mode in BIOS setup. XMP switch Setup Mode switch Screenshot Search Language System information GAME BOOST switch Boot device priority bar BIOS menu BIOS menu selection selection…
-
Page 44: Settings
SETTINGS System Status f System Date Sets the system date. Use tab key to switch between date elements. The format is <day> <month> <date> <year>. <day> Day of the week, from Sun to Sat, determined by BIOS. Read-only. <month> The month from Jan. through Dec. <date>…
-
Page 45
fPEG X — Max Link Speed [Auto] Sets PCI Express protocol of PCIe x16 slots for matching different installed devices. [Auto] This item will be configured automatically by BIOS. [Gen1] Enables PCIe Gen1 support only. [Gen2] Enables PCIe Gen2 support only. [Gen3] Enables PCIe Gen3 support only. -
Page 46
fIpv6 PXE Support [Enabled] When Enabled, the system UEFI network stack will support Ipv6 protocol. This item will appear when Network Stack is enabled. [Enabled] Enables the Ipv6 PXE boot support. [Disabled] Disables the Ipv6 PXE boot support. fSATA Mode [AHCI Mode] Sets the operation mode of the onboard SATA controller. -
Page 47
f USB Configuration Sets the onboard USB controller and device function. Press Enter to enter the sub- menu. fUSB Controller [Enabled] Enables or disables all USB controller. fXHCI Hand-off [Diasbled] Enables or disables XHCI hand-off support for the operating system without XHCI hand-off feature. -
Page 48
Disables this function. fMSI Fast Boot [Disabled] MSI Fast Boot is the fastest way to boot the system. It will disable more devices to speed up system boot time which is faster than the boot time of Fast Boot. [Enabled] Enables the MSI Fast Boot function to speed up booting time. -
Page 49
fInternal GOP Configuration Manages the onboard Graphics Output Protocol (GOP). Press Enter to enter the sub-menu. This sub-menu will appear when Windows 10 WHQL Support is enabled. fSecure Boot Sets the Windows secure boot to prevent the unauthorized accessing. Press Enter to enter the sub-menu. -
Page 50: Boot
fResume By Onboard Intel LAN [Disabled] Enables or disables the system wake up by Onboard Intel LAN. [Enabled] Enables the system to be awakened from the power saving modes when activity or input signal of Intel LAN device is detected. [Disabled] Disables this function.
-
Page 51: Security
f Bootup NumLock State [On] Select the keyboard NumLock state upon bootup. f Info Block effect [Unlock] Sets the state of Help information block. [Unlock] Sliding effect. [Lock] Fix the Help information block on the screen. f AUTO CLR_CMOS [Disabled] Enables or disables the CMOS data to be resumed automatically when the booting process hang-up over 5 seconds.
-
Page 52: Save & Exit
Important When selecting the Administrator / User Password items, a password box will appear on the screen. Type the password then press <Enter>. The password typed now will replace any previous set password from CMOS memory. You will be prompted to confirm the password.
-
Page 53: Oc
Important Overclocking your PC manually is only recommended for advanced users. Overclocking is not guaranteed, and if done improperly, it could void your warranty or severely damage your hardware. If you are unfamiliar with overclocking, we advise you to use GAME BOOST function for easy overclocking.
-
Page 54
f CPU Ratio Offset When Running AVX [Auto] Sets a offset value to lower the CPU core ratio. It could be helpful for heat dissipation when running AVX instruction set. If set to Auto, BIOS will configure this setting automatically. This item appears when the installed CPU supports this function. f Ring Ratio [Auto] Sets the ring ratio. -
Page 55
f CPU Base Clock Apply Mode [Auto]* Sets the applying mode for adjusted CPU base clock. [Auto] This setting will be configured automatically by BIOS. [Next Boot] CPU will run the adjusted CPU base clock at next boot. [Immediate] CPU runs the adjusted CPU base clock immediately. [During Boot] CPU will run the adjusted CPU base clock during boot. -
Page 56
f Memory Fast Boot [Auto]* Enables or disables the initiation and training for memory every booting. [Auto] The setting will be configured automatically by BIOS. [Enabled] System will completely keep the archives of first intiation and training for memory. So the memory will not be initialed and trained when booting to accelerate the system booting time. -
Page 57
fCPU GT Over Voltage Protection [Auto] Sets the voltage limit for CPU GT over-voltage protection. If set to Auto, BIOS will configure this setting automatically. Higher voltage provides less protection and may damage the system. fCPU GT Under Voltage Protection [Auto] Sets the voltage limit for CPU GT under-voltage protection. -
Page 58
f CPU Memory Changed Detect [Enabled]* Enables or disables the system to issue a warning message during boot when the CPU or memory has been replaced. [Enabled] The system will issue a warning message during boot and then you have to load the default settings for new devices. -
Page 59
fIntel Virtualization Tech [Enabled] Enables or disables Intel Virtualization technology. [Enabled] Enables Intel Virtualization technology and allows a platform to run multiple operating systems in independent partitions. The system can function as multiple systems virtually. [Disabled] Disables this function. fIntel VT-D Tech [Disabled] Enables or disables Intel VT-D (Intel Virtualization for Directed I/O) technology. -
Page 60
fPackage C State limit [Auto] This item allows you to select a CPU C-state level for power-saving when system is idle. The options of C-state depend on the installed CPU. This item appears when Intel C-State is enabled. fCFG Lock [Enabled] Lock or un-lock the MSR 0xE2[15], CFG lock bit. -
Page 61: M-Flash
M-FLASH provides the way to update BIOS with a USB flash drive. Please down-load the latest BIOS file that matches your motherboard model from MSI website, save the BIOS file into your USB flash drive. And then follow the steps below to update BIOS.
-
Page 62: Oc Profile
OC PROFILE f Overclocking Profile 1/ 2/ 3/ 4/ 5/ 6 Overclocking Profile 1/ 2/ 3/ 4/ 5/ 6 management. Press <Enter> to enter the sub- menu. fSet Name for Overclocking Profile 1/ 2/ 3/ 4/ 5/ 6 Name the current overclocking profile. fSave Overclocking Profile 1/ 2/ 3/ 4/ 5/ 6 Save the current overclocking profile.
-
Page 63: Hardware Monitor
HARDWARE MONITOR Temperature & Speed Fan Manage Setting Buttons Voltage display f Temperature & Speed Shows the current CPU temperature, system temperature and fans’ speeds. f Fan Manage ƒ PWM — allows you to select the PWM mode for fan operation. ƒ…
-
Page 64: Software Description
Software Description Please download and update the latest utilities and drivers at www.msi.com Installing Windows ® 1. Power on the computer. 2. Insert the Windows 10 disc into your optical drive. ® 3. Press the Restart button on the computer case.
-
Page 65: App Manager
Motherboard Information — shows the model name of motherboard. y Total Install/ Update — click on this tab to update/ install all the applications. Important Please note that, once you uninstall the APP MANAGER, all the MSI applications and software will be uninstalled simultaneously. Software Description…
-
Page 66: Live Update 6
LIVE UPDATE 6 LIVE UPDATE 6 is an application for the MSI system to scan and download the latest ® drivers, BIOS and utilities. With LIVE UPDATE 6, you don’ t need to search the drivers on websites, and don’ t need to know the models of motherboard and graphics cards.
-
Page 67: Total Installer
1. Select the Live Update tab. 2. Choose Automatic scan, system will automatically scan all the items and search for the latest update files. Or you can choose Manual scan and select the items you wish to scan. 3. Click the Scan button at the bottom. It may take several moments to complete the process.
-
Page 68: Command Center
COMMAND CENTER COMMAND CENTER is an user-friendly software and exclusively developed by MSI, helping users to adjust system settings and monitor status under OS. With the help of COMMAND CENTER, making it possible to achieve easier and efficient monitoring process and adjustments than that under BIOS. In addition, the COMMAND CENTER can be a server for mobile remote control application.
-
Page 69
CPU Fan CPU Fan control panel provides Smart mode and Manual Mode. You can switch the control mode by clicking the Smart Mode and Manual Mode buttons on the top of the CPU Fan control panel. y Manual Mode — allows you to manually control the CPU fan speed by percentage. -
Page 70
GAME BOOST GAME BOOST provides a specified CPU frequency for overclocking the CPU. Option Buttons — Advanced When click the Advanced button, The Voltage, Fan and DRAM icons will appear. y Voltage — allows you to adjust advanced voltage values of CPU and chipset. y Fan — allows you to control the system fans speed. -
Page 71
7. Find the IP address on the SoftAP Management Setting area, and enter the IP address on your MSI COMMAND CENTER APP to link your system. ® 8. Press Refresh on the MSI COMMAND CENTER APP to verify that monitoring and ® OC functions are working properly. -
Page 72: Gaming App
3. Connect your android device and motherboard to the same local area network. 4. Run MSI GAMING APP APP on your android device. ® 5. Press the Remote Control Setting icon on the MSI GAMING APP APP to find the ® paired device Name you set in the Remote Control Setting panel.
-
Page 73
OSD Setting Panel Use the OSD setting panel to specify information within on-screen display (OSD). y Apply Button — applies above settings to OSD. Eye Rest Eye Rest allows you to optimize the display on your monitor. y EyeRest — reduces blue-light of your LED backlit screen, in order to protect your eyes. -
Page 74
VR Ready It will optimize the performance of your system to ensure everything is VR Ready. VR ON/ OFF Applications y VR ON/ OFF -enables or disables VR settings. y Applications — appears when you turn on the VR support. It allows you to close some applications to optimize the system for better VR experience. -
Page 75
ƒ Login Keys — provides hotkey login function. ƒ MSI Smart Keys — allows you to define hotkeys for MSI Smart Keys. y Hotkey Manager — allows you to create, edit and delete hotkeys. y Current Hotkeys — shows all existing hotkeys. -
Page 76
Mouse Master Mouse Master provides mouse macro function. You can also use it to change DPI of your mouse. DPI Setting Delay Time Default Button Macro Hot Key DPI Hot Key Mouse Action Action List Test Area Edit Buttons Clear Button Load Button Save Button y Delay Time — allows you to apply a delay time in mouse macro. -
Page 77: X-Boost
X-BOOST The MSI X-BOOST allows you to select the system performance mode to meet your current system environment or support faster storage access speed for your external storage or memory cards. Easy In Easy page, you can select one system performance mode to meet the current system environment.
-
Page 78
OPTANE BOOST — supports faster access speed of Intel Optane memory (require a reboot). Important Please note that you can only select one mode at a time from Easy or Advance page as MSI X-BOOST function. The improved transfer rate/ access speed will vary with the USB/ storage device. Software Description… -
Page 79: Mysticlight
MYSTICLIGHT MYSTICLIGHT is an application allows you to control LED lights of MSI products. Main Screen The Main screen is used to configure what devices need to be synchronized and LED light effect options. Sync Devices ON/ OFF All LED…
-
Page 80
Motherboard Screen The motherboard screen is used to configure the LED light effect of the motherboard. Sync All Return Button Motherboard ON/ OFF All LED Name Profile Live Preview LED Area Light Effect Apply Button Options Save Button Note: The motherboard picture and name may vary according to different models. y Return Button — returns to the main screen. -
Page 81: Msi Smart Tool
MSI SMART TOOL MSI SMART TOOL is a convenient tool that can help you to create your Windows installation USB flash drive with USB 3.0 drivers, and it can also create a software RAID. Main menu After installing and activating MSI SMART TOOL, it will display a main menu for you to choose Win7 Smart Tool or Software RAID.
-
Page 82
SOFTWARE RAID This utility allows you to create a software RAID in Windows system. To create a software RAID: 1. Use checkboxs to select the disks you want included in your RAID. 2. Choose Speed Up or Backup for RAID type. y Speed Up = RAID0 y Backup = RAID1 3. -
Page 83: Ramdisk
RAMDISK RAMDISK creates a virtual RAM drive using the available memory in your computer, the performance of the RAMDISK is faster than an SSD and hard drive. RAMDISK allows you to store any temporary information on it. Furthermore, using the RAMDISK will extend your SSD’…
-
Page 84: Gaming Lan Manager
GAMING LAN MANAGER GAMING LAN MANAGER is an utility for traffic shaping for the Windows 10. It can keep your internet fast during heavy upload/ download and improve your ping for online games. If your motherboard has a Wi-Fi module, GAMING LAN MANAGER provides virtual access point function for traffic shaping for your mobile devices.
-
Page 85
Speed Testing The speed testing is used to optimize bandwidth usage. To test the Upload and Down- load speed, please follow the steps below: 1. Click the Network Test block in GAMING LAN MANAGER. 2. Click Test Network Speed button. The test takes several minutes to test your network speed. -
Page 86: Dragon Eye
DRAGON EYE DRAGON EYE allows you to watch game guides, tutorials, live match or tournament stream while gaming. In game, you can use hotkeys to control/adjust the settings of DRAGON EYE. Size Settings Position Settings On / Off Switch Help Transparency Settings Video List Hotkeys Information…
-
Page 87: Steelseries Engine 3
SteelSeries Engine 3 SteelSeries Engine 3 is a unified platform built to support all of SteelSeries products. It can deploy your saved device settings automatically when switching between your favorite games or applications. After installation the SteelSeries Engine background processes will start and the interface will open automatically.
-
Page 88
Configuring Your Devices You can custom configurations for SteelSeries devices in their Configuration Windows. The top left displays the name of the configuration you are viewing, the body features widgets for customizing various functions of the device, and at the bottom are Save/ Revert buttons, a Live Preview toggle, and a button to open/close the collapsible Configuration List Panel. -
Page 89: Intel ® Extreme Tuning Utility
Intel Extreme Tuning Utility ® Intel Extreme Tuning Utility (Intel XTU) is a simple overclocking software for you to ® tune, test and monitor your system. Tuning Controls Views Settings Help System Navigation Table System System Monitors Graphs y Views Settings Help ƒ…
-
Page 90: Cpu-Z
CPU-Z CPU-Z is an utility that gathers information on some of the main devices of your system. y CPU Tab — shows processor name, code name, package, specification, instructions sets, core speed and cache levels. y Caches Tab — shows extended information related to the cache capabilities. y Mainboard Tab — shows motherboard manufacturer, model name, chipset, BIOS version and graphic interface.
-
Page 91: Tridef Vr
TriDef VR With TriDef VR you can play your favorite PC games on a huge 3D screen inside your virtual reality headset. It is compatible with the Oculus Rift and HTC Vive. After installation, please ensure that your VR headset is set up and working correctly, then double-click TriDef VR Games on the Desktop, or from: Start >…
-
Page 92
Games Tab The first tab you’ ll see on the main window is the Games tab. As mentioned, apps or games launched from the desktop will appear in 2D on the virtual screen. However, if you launch a supported game from the Games tab, it will be displayed on the virtual screen in stereoscopic 3D! The first time you launch TriDef VR, the application will scan your PC and automatically add supported games to the list. -
Page 93
Settings Popup Look at the Settings item for 1 second to display the Settings popup. This popup window appears in front of the virtual screen. Use your mouse to adjust the slider values. y Screen Settings — adjust the virtual screen’ s size, distance and curvature. y Game Settings — adjust 3D settings for that game. -
Page 94: Tridef Smartcam
TriDef SmartCam Use TriDef SmartCam to replace or SmartBlur your background in video chat applications or to remove your background in XSplit. Just select TriDef SmartCam wherever you see a list of cameras or choose your webcam application. The following description uses XSplit Gamecaster for an example. TriDef SmartCam for XSplit Gamecaster After installation TriDef SmartCam is integrated into XSplit Gamecaster version 2.5 and newer.
-
Page 95: Raid Configuration
RAID Configuration Below are the different types of a RAID. RAID 0 breaks the data into blocks which are written to separate hard drives. Spreading the hard drive I/O load across independent channels greatly improves I/O performance. RAID 1 provides data redundancy by mirroring data between the hard drives and provides enhanced read performance.
-
Page 96
Creating s RAID Volume 1. Select option Create RAID Volume and press Enter key. The following screen appears. CREATE VOLUME MENU Name : Volume0 RAID Level : RAID1(Mirror) Disks : Select Disks Strip Size : N / A Capacity : XXX.X GB Sync : N / A… -
Page 97
Removing a RAID Volume Here you can delete the RAID volume, but please be noted that all data on RAID drives will be lost. Important If your system currently boots to RAID and you delete the RAID volume in the IRST Option ROM, your system will become unbootable. -
Page 98: Degraded Raid Array
Important You will lose all data on the RAID drives and any internal RAID structures when you perform this operation. Possible reasons to Reset Disks to Non-RAID could include issues such as incompatible RAID configurations or a failed volume or failed disk. Recovery Volume Options Select option Recovery Volume Options from the main menu screen and press Enter to change recovery volume mode.
-
Page 99: Failed Hard Drive Member
2. Reconnect the hard drive. 3. Reboot to Windows ; the rebuild will occur automatically. ® Failed Hard Drive Member 1. Power off. 2. Replace the failed hard drive with a new one that is of equal or greater capacity. 3.
-
Page 100: Intel ® Optane™ Memory Configuration
Optane™ memory can accelerate the Windows 10 64bit operating system. This ® section describes how to install and remove the Intel Optane™ memory. ® System Requirements y Intel Optane™ memory ready MSI motherboards ® ® y Supported 7th Gen, or later, Intel Core™ — i Processor ®…
-
Page 101
5. Enable Intel Optane™ Memory. ® ˜ Enable Intel Optane™ Memory via the Intel Optane™ memory application ® ® (auto-launches upon reboot). ˜ Click Yes in the dialog. ˜ Reboot System. WARNING Once you enable Intel Optane™ memory, in order to prevent seriously damage your ®… -
Page 102: Removing The Intel ® Optane™ Memory
Removing the Intel Optane™ memory ® If you no longer want to use Intel Optane™ memory, you have to disable the Intel ® ® Optane™ memory before removing the Intel Optane™ memory module to avoid ® operating system damage. Please follow the steps below to remove the Intel Optane™…
-
Page 103: Troubleshooting
® Optane Memory and switch BIOS setting from RAID/ Optane mode back to AHCI mode, that may cause operating system damage. MSI has developed a software assistance for this problem. You can disable Intel Optane™ Memory and switch back to AHCI ®…
-
Page 104: Troubleshooting
Troubleshooting Lost BIOS password Before sending the motherboard for RMA repair, try to go over troubleshooting y Clear the CMOS, but that will cause guide first to see if your got similar you to lose all customized settings in the symptoms as mentioned below.
-
Page 105: Regulatory Notices
EMC Directive 2014/30/EU; RoHS Directive 2011/65/EU. Compliance with these directives is assessed using applicable European Harmonized Standards. The point of contact for regulatory matters is MSI, MSI-NL Eindhoven 5706 5692 ER Son. B급 기기 (가정용 방송통신기자재) 이 기기는 가정용(B급) 전자파적합기기로서 주…
-
Page 106
MSI will comply with the product take entregar a una empresa autorizada para la recogida de back requirements at the end of life of MSI-branded estos residuos. -
Page 107
MSI si adeguerà a tale Direttiva ritirando tutti i prodotti marchiati MSI che sono stati venduti all’interno dell’Unione Europea alla fine del loro ciclo di vita. -
Page 108
Alternatively, please try the following help resources for further guidance. y Visit the MSI website for technical guide, BIOS updates, driver updates, and other information: http://www.msi.com y Register your product at: http://register.msi.com…
User Manual for MSI X370 Gaming Plus AM4 ATX MotherboardClick to enlarge the picture Contents of the user manual for the MSI X370 Gaming Plus AM4 ATX
|
||||||||||||||||||||||||||||||||||||||||||||||||||||||||||||||||||||||||||||||||||||||||||||||||||||||||||||||||||||||||||||||||||||||||||||||||||||||||
|
User manual for the MSI X370 Gaming Plus AM4 ATX contain basic instructions that need to be followed during installation and operation. Before starting your appliance, the user manual should be read through carefully. Follow all the safety instructions and warnings, and be guided by the given recommendations. User manual is an integral part of any MSI product, and if it is sold or transferred, they should be handed over jointly with the product. Following the instructions for use is an essential prerequisite for protecting health and property during use, as well as recognition of liability on the part of the manufacturer for possible defects should you make a warranty claim. Download an official MSI user manual in which you will find instructions on how to install, use, maintain and service your product. And do not forget – unsuitable use of a MSI product will considerably shorten its lifespan! |
||||||||||||||||||||||||||||||||||||||||||||||||||||||||||||||||||||||||||||||||||||||||||||||||||||||||||||||||||||||||||||||||||||||||||||||||||||||||
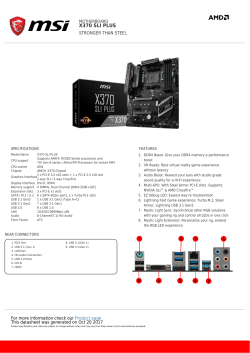
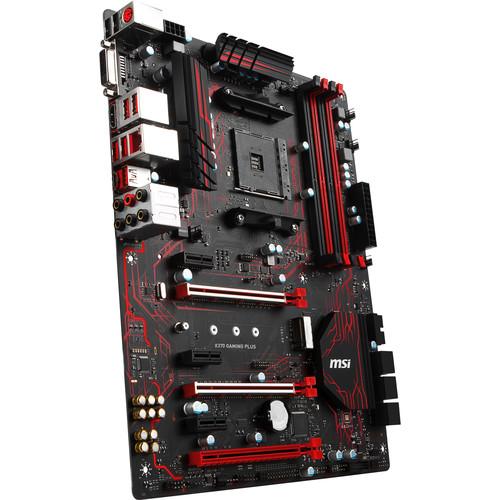
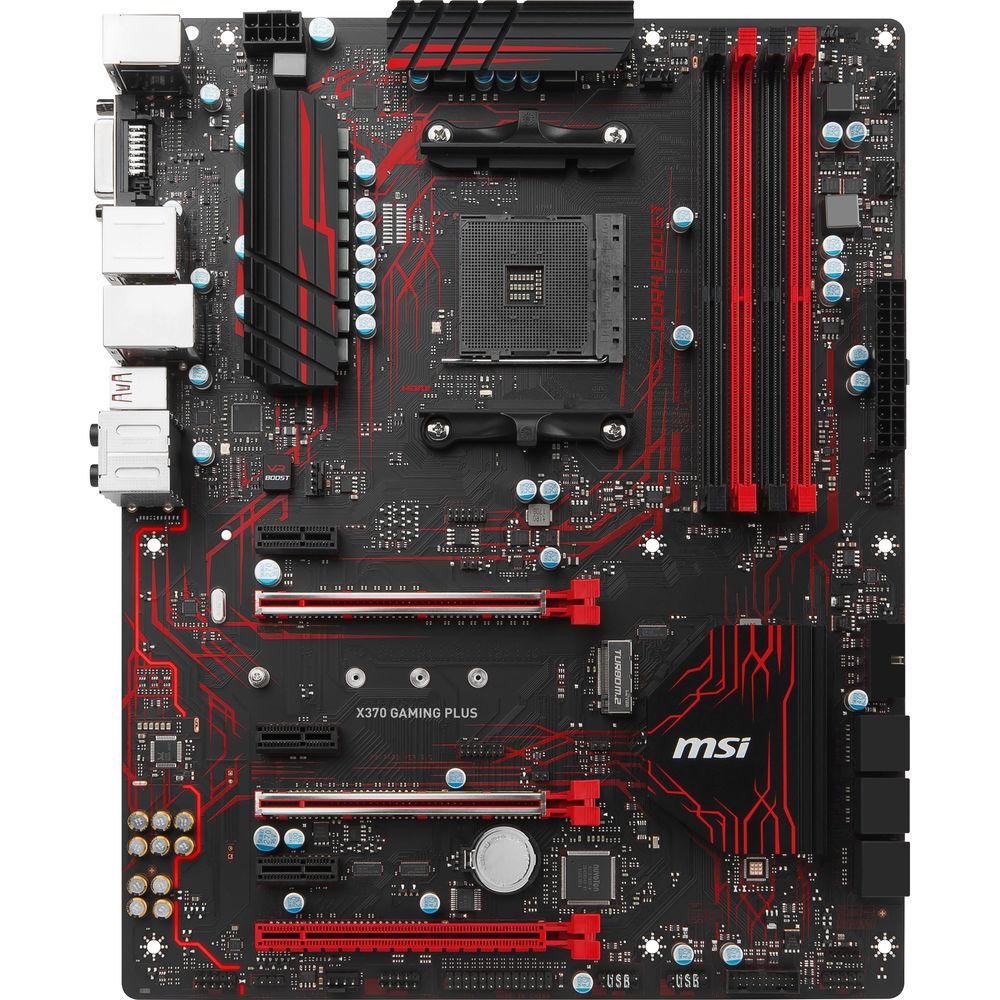
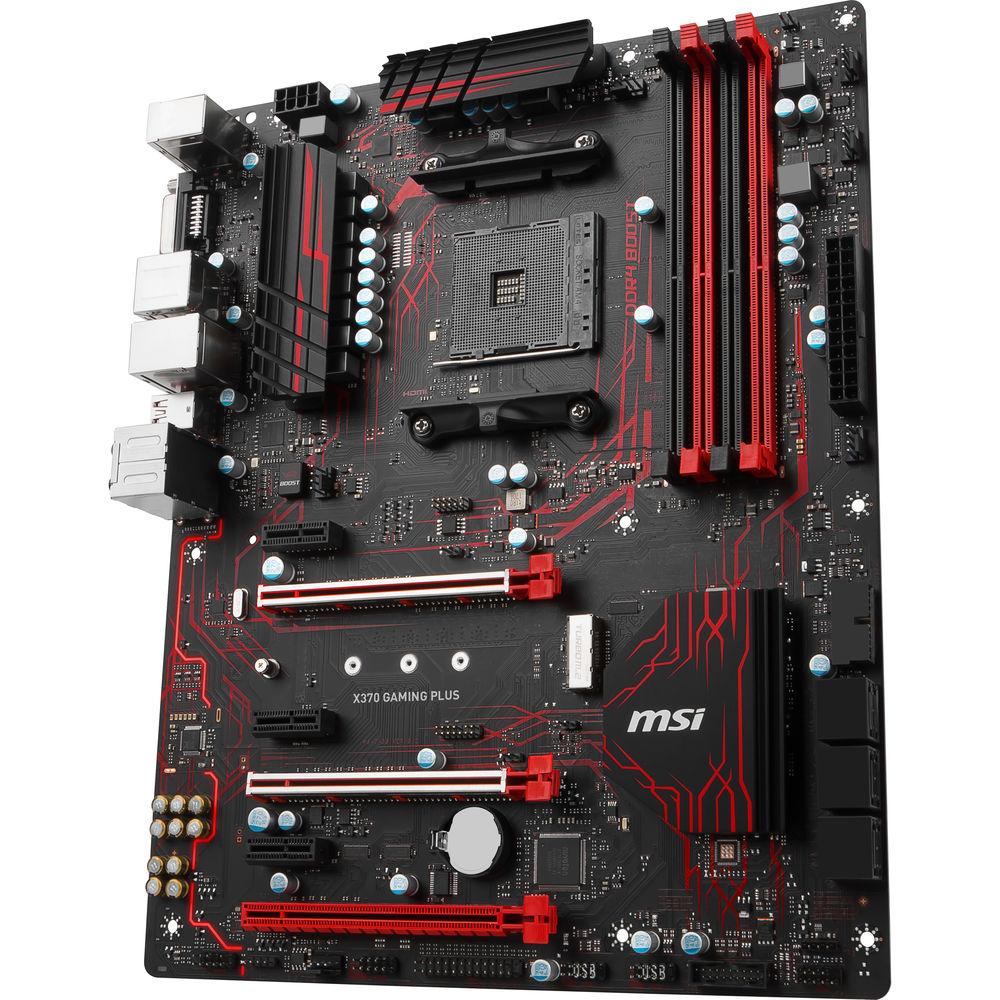
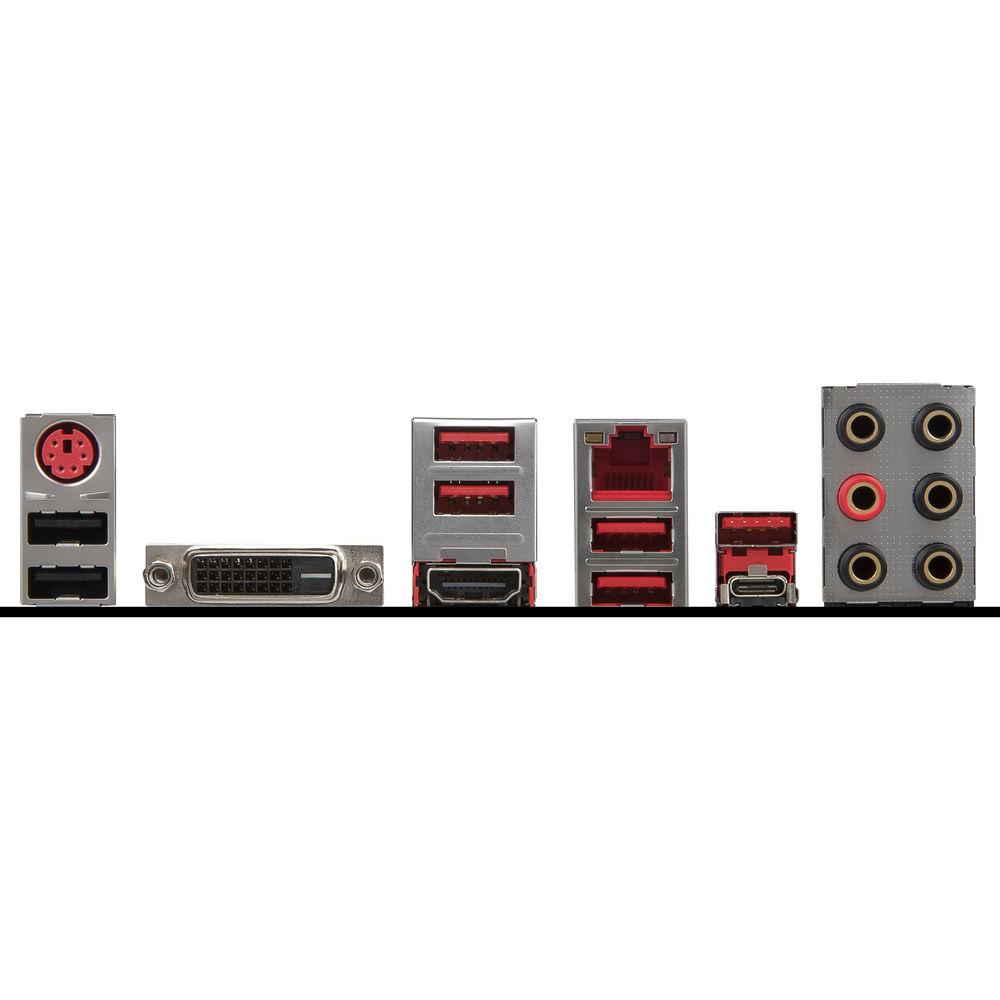
Product descriptionThe MSI X370 Gaming Plus ATX Motherboard features an AMD X370 chipset and AM4 socket to support AMD’s RYZEN as well as 7th-generation versions of A-series and Athlon processors. This motherboard is designed for gaming and other uses by offering two PCIe 3.0 x16 slots, letting you install multiple graphics cards and link them with NVIDIA SLI or AMD Crossfire technology. For memory support, it comes outfitted with four DDR4 memory slots and six SATA connectors as well as one M.2 slot, which is compatible with ultra-fast NVMe SSDs. Aside from memory, it is equipped with Mystic Light Sync that allows you to install your LED lighting strips and other LED gear without the need for an optional LED controller. The X370 Gaming Plus motherboard offers HDMI and DVI-D outputs for delivering up to 2560 x 1600 resolution utilizing an APU from AMD. For USB connections, it provides two USB 2.0 and four USB 3.0 ports as well as two USB 3.1 ports with 10 Gb/s speeds. In addition, one of these USB 3.1 ports sports a USB Type-C interface that enables you to connect with a USB-C cable the first try. Other notable connections include one Gigabit Ethernet port, one PS/2 combo port, and six audio jacks, which are powered by a Realtek ALC892 processor. There is also one PCIe 2.0 x16 slot and three PCIe 2.0 x1 slots to grant your system with additional capabilities, such as installing user-supplied 802.11 Wi-Fi and FireWire cards.
UPC: 824142145272 In the Box MSI X370 Gaming Plus AM4 ATX Motherboard User Manual PDF 7.1mb Table of Contents |
||||||||||||||||||||||||||||||||||||||||||||||||||||||||||||||||||||||||||||||||||||||||||||||||||||||||||||||||||||||||||||||||||||||||||||||||||||||||
Upload User Manual Have you got an user manual for the MSI X370 Gaming Plus AM4 ATX Motherboard in electronic form? Please send it to us and help us expand our library of instruction manuals. To upload the product manual, we first need to check and make sure you are not a robot. After that, your «Submit Link» or «Upload File» will appear. 
Contents of the user manual for the MSI X370 Gaming Plus AM4 ATX
|
||||||||||||||||||||||||||||||||||||||||||||||||||||||||||||||||||||||||||||||||||||||||||||||||||||||||||||||||||||||||||||||||||||||||||||||||||||||||
|
User manual for the MSI X370 Gaming Plus AM4 ATX contain basic instructions that need to be followed during installation and operation. Before starting your appliance, the user manual should be read through carefully. Follow all the safety instructions and warnings, and be guided by the given recommendations. User manual is an integral part of any MSI product, and if it is sold or transferred, they should be handed over jointly with the product. Following the instructions for use is an essential prerequisite for protecting health and property during use, as well as recognition of liability on the part of the manufacturer for possible defects should you make a warranty claim. Download an official MSI user manual in which you will find instructions on how to install, use, maintain and service your product. And do not forget – unsuitable use of a MSI product will considerably shorten its lifespan! |
||||||||||||||||||||||||||||||||||||||||||||||||||||||||||||||||||||||||||||||||||||||||||||||||||||||||||||||||||||||||||||||||||||||||||||||||||||||||
Product descriptionThe MSI X370 Gaming Plus ATX Motherboard features an AMD X370 chipset and AM4 socket to support AMD’s RYZEN as well as 7th-generation versions of A-series and Athlon processors. This motherboard is designed for gaming and other uses by offering two PCIe 3.0 x16 slots, letting you install multiple graphics cards and link them with NVIDIA SLI or AMD Crossfire technology. For memory support, it comes outfitted with four DDR4 memory slots and six SATA connectors as well as one M.2 slot, which is compatible with ultra-fast NVMe SSDs. Aside from memory, it is equipped with Mystic Light Sync that allows you to install your LED lighting strips and other LED gear without the need for an optional LED controller. The X370 Gaming Plus motherboard offers HDMI and DVI-D outputs for delivering up to 2560 x 1600 resolution utilizing an APU from AMD. For USB connections, it provides two USB 2.0 and four USB 3.0 ports as well as two USB 3.1 ports with 10 Gb/s speeds. In addition, one of these USB 3.1 ports sports a USB Type-C interface that enables you to connect with a USB-C cable the first try. Other notable connections include one Gigabit Ethernet port, one PS/2 combo port, and six audio jacks, which are powered by a Realtek ALC892 processor. There is also one PCIe 2.0 x16 slot and three PCIe 2.0 x1 slots to grant your system with additional capabilities, such as installing user-supplied 802.11 Wi-Fi and FireWire cards.
UPC: 824142145272 In the Box MSI X370 Gaming Plus AM4 ATX Motherboard User Manual PDF 7.1mb Table of Contents |
||||||||||||||||||||||||||||||||||||||||||||||||||||||||||||||||||||||||||||||||||||||||||||||||||||||||||||||||||||||||||||||||||||||||||||||||||||||||
Upload User Manual Have you got an user manual for the MSI X370 Gaming Plus AM4 ATX Motherboard in electronic form? Please send it to us and help us expand our library of instruction manuals. To upload the product manual, we first need to check and make sure you are not a robot. After that, your «Submit Link» or «Upload File» will appear.   Please enter here the link to the user manual of this product:
Enter here the file with the user manual of this product from your computer/phone: 0%
Technical parametersMSI X370 GAMING PLUS Specs
Rating60% users recommend this product to others. And what about you? Please enter here the link to the user manual of this product:
Enter here the file with the user manual of this product from your computer/phone: 0%
Technical parametersMSI X370 GAMING PLUS Specs
Rating60% users recommend this product to others. And what about you? This product has already been rated by 92 owners. Add your rating and experience with the product. Discussion Ask our technicians if you have a problem with your settings, The discussion is empty — enter the first post Post a new topic / query / comment: Items marked with * are required. Your name *: E-mail : Subject *: Message *: Your email address will not be displayed. Do not forget to fill it in if you want to receive a reply to your enquiry/contribution. |
| Request for user manual |
|
You can’t find the operation manual you are looking for? Let us know and we will try to add the missing manual:
I’m looking for a manual / Request for manual Current requests for instruction manuals: Epson -Expression 12000XL… User manual for Toyo-View 8×10 810MII Field View Camera… I just ordered this tv and it didn’t come with instructions. I need some assistance figuring out all of the capabilities. But I love it so far! I j… CyberPowerPC — Gamer Xtreme Gaming Desktop — Intel Core i7-10700F — 16GB Memory — NVIDIA GeForce RTX 2060 SUPER — 1TB HDD + 500GB SSD — Black… Riviera pocket quadcopter 2.4ghz… |
| Discussion |
|
Latest contributions to the discussion:
Password — Change Foot bedal fsb 106a RCF 8003 The Manual to repair Bulbs & batteries Can I use the pom gear power2go 10400 in a foreign country? Thanks, |
-
Contents
-
Table of Contents
-
Troubleshooting
-
Bookmarks
Quick Links
Unpacking
Thank you for buying the MSI
H370 GAMING PLUS/ B360 GAMING PLUS
®
motherboard. Check to make sure your motherboard box contains the following items.
If something is missing, contact your dealer as soon as possible.
Drivers & Utilities
Motherboard User
Disc
Guide
Motherboard
I/O Shield
M.2 Screw x1
SATA Cable x2
Case Badge
1
Unpacking
Troubleshooting


