- Manuals
- Brands
- Native Instruments Manuals
- Telephone
- Maschine
- Getting started
-
Contents
-
Table of Contents
-
Troubleshooting
-
Bookmarks
Quick Links
Related Manuals for Native Instruments MASCHINE
Summary of Contents for Native Instruments MASCHINE
-
Page 1
GETTING STARTED… -
Page 2
The information in this document is subject to change without notice and does not represent a commitment on the part of Native Instruments GmbH. The software described by this docu- ment is subject to a License Agreement and may not be copied to other media. No part of this… -
Page 3
6725 Sunset Boulevard 5th Floor Los Angeles, CA 90028 www.native-instruments.com NATIVE INSTRUMENTS K.K. YO Building 3F Jingumae 6-7-15, Shibuya-ku, Tokyo 150-0001 Japan www.native-instruments.co.jp NATIVE INSTRUMENTS UK Limited 18 Phipp Street London EC2A 4NU www.native-instruments.co.uk © NATIVE INSTRUMENTS GmbH, 2017. All rights reserved. -
Page 4: Table Of Contents
1.1.7 In This Document ………………….. 13 1.1.8 Document Conventions ………………..14 Labeling on your MASCHINE Controller ………………17 First Steps …………………… 19 Loading a Drum Kit from the Factory Library …………….20 Playing with the Pads ……………………. 25 Recording Your First Pattern ………………….. 26 Playing with Your Pattern ………………….
-
Page 5
Loading a Plug-in Instrument for the Bass …………….. 70 5.3.1 Browsing the MASSIVE Presets ……………… 70 5.3.2 Using Keyboard Mode ………………..74 5.3.3 Adjusting the Base Key of the Pads on Your Controller ……….77 MASCHINE — Getting Started — 5… -
Page 6
Building Up a Beat in Step Mode ………………..102 7.1.1 Using Step Mode ………………….102 7.1.2 Adjusting the Pattern Length in Step Mode …………… 103 7.1.3 Recording Modulation in Step Mode …………….104 7.1.4 A Few Notes on Step Mode ………………104 MASCHINE — Getting Started — 6… -
Page 7
9.2.1.2 Adjusting the Length of a Section Using the Controller ……125 9.2.2 Duplicating and Removing Sections …………….126 Selecting a Loop Range ………………….128 Save Your Work! ……………………. 129 To Sum Up… ……………………..130 MASCHINE — Getting Started — 7… -
Page 8
11.2.2 Arrangement ………………….157 11.3 MASCHINE Hardware Overview ………………..160 11.3.1 Hardware Overview of the MASCHINE MK2 Controller ……….160 11.3.1.1 CONTROL Section ………………162 11.3.1.2 MASTER Section ………………164 11.3.1.3 GROUPS Section ………………165 11.3.1.4 TRANSPORT Section ……………….166 11.3.1.5 PADS Section …………………168… -
Page 9
Pattern Editor ………………….180 12 Troubleshooting ………………….182 12.1 Knowledge Base ……………………. 182 12.2 Technical Support ……………………182 12.3 Registration Support ……………………183 12.4 User Forum ……………………..183 13 Glossary ……………………184 Index ……………………192 MASCHINE — Getting Started — 9… -
Page 10: Welcome To Maschine
You can sample your own material, slice loops and rearrange them easily turning your ideas into full productions. However, MASCHINE is a lot more than an ordinary drum machine or sampler: It comes with an 8-gigabyte Library programmed and created by well-known artists and a sophisticated, yet easy to use tag-based Browser to give you instant access to the sounds you are looking for.
-
Page 11: Documentation Overview
1.1.1 MASCHINE Getting Started Guide This document provides a practical approach to MASCHINE via a set of tutorials covering easy and more advanced tasks in order to help you familiarize yourself with MASCHINE. 1.1.2 MASCHINE Manual The MASCHINE Manual provides you with a comprehensive description of all MASCHINE soft- ware and hardware features.
-
Page 12: Maschine Hardware Control Reference
MIDI controller to pilot any oth- er MIDI-capable application or device. This is made possible by the Controller Editor software, an application that allows you to precisely define all MIDI assignments for your MASCHINE controller. The Controller Editor was installed during the MASCHINE installation procedure.
-
Page 13: In This Document
1.1.7 In This Document What you are reading now is the MASCHINE Getting Started. This document consists of a set of tutorials that will guide you through common workflows in MASCHINE. Please follow these tutorials in the described order. You will learn a little something in each of them which will be essential later on.
-
Page 14: Document Conventions
MASCHINE software. It gives you a good overview of the main concepts and features of MASCHINE, along with lists of hardware shortcuts for various tasks. You can use it as a quick reminder before you dive into the MASCHINE Manual.
-
Page 15
Whenever you see this formatting applied, you will find the same text appearing somewhere on the screen. ▪ Text appearing on labels of the MASCHINE controller is printed in orange. Whenever you see this formatting applied, you will find the same text on the controller. -
Page 16
Instruments website. Unlabeled Buttons and Knobs on the Controller The buttons and knobs above and below the displays on your MASCHINE MK2 controller do not have labels (all other elements on the controller do). The unlabeled buttons and knobs on the MASCHINE MK2 controller. -
Page 17: Labeling On Your Maschine Controller
Labeling on your MASCHINE Controller Labeling on your MASCHINE Controller Since its initial release the labels of the MASCHINE MK2 controller have been revised. The instructions in this document will only refer to the 2nd generation controller labels. If you have a first generation MASCHINE MK2 controller, please use the table below to reference the equivalent labels of the first and second generation controllers.
-
Page 18
Labeling on your MASCHINE Controller Label changes since first generation MASCHINE MK2 If you have the original MASCHINE MK1 controller please download the relevant docu- mentation for that controller from the Native Instruments website. MASCHINE — Getting Started — 18… -
Page 19: First Steps
New or by using the shortcut [Ctrl] + [N] ([Cmd] + [N] on Mac OS X). First you will learn how to load a drum kit using the MASCHINE software and then use your hardware controller to carry out the same procedure.
-
Page 20: Loading A Drum Kit From The Factory Library
First you will choose a complete drum kit from the huge factory library included with MA- SCHINE, and load it using the MASCHINE Browser. The Browser is your tool for finding, tag- ging and categorizing all types of objects used in MASCHINE.
-
Page 21
Loading a Drum Kit from the Factory Library Click the Group icon to get a list of all available drum kits in the Library: In the Content selector to the right, click the icon to select only Native Instruments factory content: MASCHINE — Getting Started — 21… -
Page 22
Loading a Drum Kit from the Factory Library In the TYPES filter, select the Kits. The Browser will then display only kits in the Result list. Select the Urban Kit sub-type tag below to further refine your search. MASCHINE — Getting Started — 22… -
Page 23
In the left display, you now are presented with a selection of choices. Press Button 1 or 2 above the displays to select GROUPS. Now you can browse Groups only on the right display. MASCHINE — Getting Started — 23… -
Page 24
Browser (the button is unlit). ► That’s it! You just loaded a drum kit into a Group slot of MASCHINE. It is now ready to be played from the pads, as you will see in the next section. -
Page 25: Playing With The Pads
As you can see, MASCHINE communicates in both directions: The commands you give via the pads and buttons control the software, but the software also communicates information back to you via the display and the LEDs.
-
Page 26: Recording Your First Pattern
You now hear the metronome indicating each beat, the first beat of each bar being indi- cated by a different note. Play along to the metronome to get a feel for the tempo. MASCHINE — Getting Started — 26…
-
Page 27
Quick Edits on Your Pattern At any time, you can undo your last action by pressing SHIFT + pad — whether you are cur- rently recording or not. You can redo it by pressing SHIFT + pad 2. MASCHINE — Getting Started — 27… -
Page 28: Playing With Your Pattern
First Steps Playing with Your Pattern The undo and redo commands are global in MASCHINE: Almost any action in MA- SCHINE can be undone/redone! At any time, you can enrich your Pattern by activating PLAY again, and playing the pads. This way, you can progressively build up a complex Pattern step by step.
-
Page 29
You can also activate audio mute for Sounds to mute both events and audio — see the beginning of this section for more information. 2.4.1.2 Solo and Mute Sounds using the MASCHINE Controller Press PLAY to start the sequencer. -
Page 30: Using Note Repeat
You just need to hold a pad and its Sound/note will be steadily repeated until you release the pad. ▪ When using Note Repeat all pads will be both velocity and pressure sensitive, allowing for expressive drum rolls or dynamic basslines. MASCHINE — Getting Started — 30…
-
Page 31: Save Your Work
Before you get to adding new ele- ments and editing your pattern, you should save your work right away. Saving your Work in the MASCHINE Software Click File. MASCHINE — Getting Started — 31…
-
Page 32: To Sum Up
On your computer keyboard, type a name (e.g., “My First Project”) in the field and press [Enter] to confirm. Your Project with its new Pattern is now saved on your hard disk. Should you close MASCHINE or open another Project, you will still be able to open this Project later.
-
Page 33: Building Your Own Drum Kit
Opening Your Project If for any reason your tutorial Project is not currently open in MASCHINE (e.g., you opened an- other Project in the meantime), you first need to open it again. You can do this with the con- troller or in the software, for example using the MASCHINE Browser.
-
Page 34
Available both on your controller and in the software, the Browser will be the preferred way to open a project when working on your controller. Here you will use a nice feature of MASCHINE: Each file you created and saved in MASCHINE is automatically put in “User” content. Hence, you will select the User icon in the Content selector to quickly find your tutorial Project again. -
Page 35
In the result list below, you now have one unique Project left — your “My First Project”: Double-click this unique entry to load the Project in MASCHINE. Of course, if you have already created other Projects in MASCHINE, they will also ap- pear in the result list along with your tutorial Project. -
Page 36: Customizing Your Drum Kit
That’s it! Now you can continue to work on your tutorial Project. You will note that every action you did on the controller is directly mirrored in the Browser of the MASCHINE software. This is true in both directions! Customizing Your Drum Kit You might want to replace one or more drums from the Group “EK-TL A Kit”…
-
Page 37
Click the Sound slot containing the “Snare Ektl A 2” that you want to replace: The Sound slot gets highlighted to indicate that it is selected. Click the Browser button in the top row to show the Browser within the MASCHINE win- dow (the button becomes highlighted): MASCHINE — Getting Started — 37… -
Page 38
You can also drag and drop it on the Sound slot. You can also mix both search methods: You can simultaneously select specific Banks (and Types, Subtypes…) and type the desired search query in the Search field. MASCHINE — Getting Started — 38… -
Page 39
Check that Button 4 above the displays is not fully lit and that the USER label under- neath is not highlighted — if necessary, press Button 4 to disable it. This will select only Native Instruments factory content. Press the right Page button to change the filter from PRODUCT to TYPES. -
Page 40
(the one triggered by pad 6). To help you decide which sample would fit best, MASCHINE offers you an additional, conven- ient help: Autoload. This allows you to replace the selected Sound on the fly with the Sound currently selected in the Browser’s result list while your Pattern is playing. -
Page 41: Loading A Drumsynth
3.2.2 Loading a Drumsynth In this section you will learn you how to load Drumsynths in MASCHINE using the Plug-in List. The Plug-in List Before you load a Drumsynth, have a quick look at the Control area in the software: Select the Group “EK-TL A…
-
Page 42
“EK-TL A Kit,” the first slot of the Plug-in List is the Sampler — the MASCHINE internal sampler. The Sampler is the sound source of each of these Sounds. In MASCHINE, Plug-in slots are available at three different levels of your Project: ▪… -
Page 43
At the far left of the Control area, click the small Plug-in icon to display the Plug-ins. This displays the Plug-in List on the left of the Control area: The Plug-in List in this instance contains Sampler. MASCHINE — Getting Started — 43… -
Page 44
The Plug-in menu opens and displays a list of all available effects. In this menu, click the Drumsynth submenu to display the Drumsynths. Click the Kick entry to load it into the Plug-in List. MASCHINE — Getting Started — 44… -
Page 45: Loading A Drumsynth Into A Plug-In List On The Hardware
INSTR. and then turn Knob 2 until the VEN- field is set to INTERNAL. The right display shows you the available MASCHINE instruments. Turn Knob 5 to select KICK, and press Button 8 to load it. Press SHIFT BROWSE again to leave the Plug-in menu.
-
Page 46: Adjusting Volume, Swing And Tempo
Header, at the top of the window. Use the Master Volume slider in the Header to adjust the overall volume of MASCHINE. You can also use Mix view to adjust your Sound and Group levels. Mix view gives you quick access to the level and routing settings of all your Sounds, Groups, and the Mas- ter.
-
Page 47
To adjust the Tempo (Beats Per Minute) value of your Project, click the value, hold ► the mouse button and drag vertically. 3.2.3.2 Adjusting Volume, Tune and Swing using the MASCHINE STUDIO Controller Adjusting Volume Press the VOLUME button at the left of the Control encoder. -
Page 48: Changing The Color Of A Group Or Sound
3.2.4 Changing the Color of a Group or Sound MASCHINE allows you to change the color of each Group or Sound. It can be very useful to see at a glance to identify certain groups or sounds. MASCHINE — Getting Started — 48…
-
Page 49
Right-click ([Cmd] + click on Mac OS X) on the desired Sound slots or Group, select Col- ► or in the context menu, and select the desired color according to the type of percussion in that Sound slot. Here is an example of how you could colour sounds: MASCHINE — Getting Started — 49… -
Page 50: Moving Your Sounds And Groups
You can exchange the position of your Sounds and Groups at any time. This can be done in the MASCHINE software only. It can be helpful to organize your Sounds or Groups more conven- iently. Notably, this allows you to move your Sounds to other pads, and create a Group that is easier to play from the pads.
-
Page 51: Save Your Work
Save Your Work! Again, it is recommended to regularly save your work. You can then open another Project or close MASCHINE and take a break. Your tutorial Project will be recalled as is the next time you open it. To save your work in the MASCHINE Software:…
-
Page 52: To Sum Up
Browser. ▪ Replace one of the Sounds from the original Group with a Drumsynth. ▪ Adjust the overall volume of MASCHINE along with the individual volume levels of your Groups and Sounds using your controller. ▪ Adjust the overall Swing of your song, both on your controller and in the software.
-
Page 53: Creating Beats
▪ Double your Pattern and fine-tune it. ▪ Add a second Pattern for breaks. Even though you have only dealt with drum kits until now, MASCHINE is much more than a rhythm box. Indeed, it also does a great job with melodic instruments! For those who can’t wait: Please be patient, you will add a bass line in the next tutorial.
-
Page 54: Your Pattern In The Software
Pad view (in the picture above, the Pattern slot 1). A Pattern contains the events (the notes) that plays Sounds from the current Group. More typically this is known as a se- quence. MASCHINE — Getting Started — 54…
-
Page 55: Doubling The Pattern
You don’t hear any difference yet, since both halves are exactly identical. Check that the CONTROL button at the top left corner of your controller is lit — if not, press it to enter Control mode. MASCHINE — Getting Started — 55…
-
Page 56: Quantizing The Rhythm
It takes a little practice to be very precise when playing the pads. Sometimes (especially if you’re new to MASCHINE) your timing may be slightly off and this will be evident when you record your Pattern. MASCHINE has a solution for this! It’s called quantization.
-
Page 57
Please refer to the Manual for more information. 4.1.3.1 Quantizing the Rhythm in the MASCHINE Software Zooming In Your Pattern To check this, zoom on specific parts of your Pattern in the software. Go to the bottom of the… -
Page 58
Fine-tuning your First Pattern A detailed view of your live recorded Pattern: The first two kicks are late, the third one is in advance. MASCHINE provides you with a powerful quantization feature that allows you to correct this to the desired extent. -
Page 59: Adding A Second Pattern
Now you can create another Pattern that you can use as a break in your song. This will intro- duce a few more tasks and features of MASCHINE, namely the selection of Patterns, the Pat- tern Length, and the Count-in.
-
Page 60: Adjusting The Pattern Length
If you reduce the Pattern Length so that some events are not included in the Pat- tern anymore, these events have not been deleted: They stay at their location — if you extend your Pattern again, you can include them again. MASCHINE — Getting Started — 60…
-
Page 61
Adding a Second Pattern 4.2.2.1 Adjusting Pattern Length in the MASCHINE Software In the software, you can change the Pattern Length in two ways: In the timeline of the Pattern Editor, click the right limit of the Pattern (indicated by a ►… -
Page 62: Recording A New Pattern Using The Count-In
To stop the sequencer, press PLAY to disable it. The Count-in notably allows you to prepare yourself and e.g. get the downbeat on time! You can change the Count-in Preferences > General > Default Metronome Settings. MASCHINE — Getting Started — 62…
-
Page 63: Switching Patterns
4.2.4.1 Switching Patterns in the MASCHINE Software Click the Play button in the Header at the very top of the MASCHINE window to start the sequencer (the Play button must be lit). Click Pattern slot alternatively and listen how both Patterns fit together.
-
Page 64: Save Your Work
Save Your Work! Again, it is recommended to regularly save your work. You can then open another Project or close MASCHINE and take a break. Your tutorial Project will be recalled as is the next time you open it. To save your work in the MASCHINE Software: Press [Ctrl] + [S] ([Cmd] + [S] on Mac OS X) to save your Project.
-
Page 65: To Sum Up
▪ Use the Count-in for recording. ▪ Edit Patterns in the software. Once you feel comfortable with these few tasks, proceed with the next tutorial, where you will add a bass line to your song! MASCHINE — Getting Started — 65…
-
Page 66: Adding A Bass Line
Adding a Bass Line Adding a Bass Line MASCHINE is not only about rhythm. It is also a full-featured sequencing environment and, as such, lets you create melodic parts as well. As an example, you will add a bass line to your song.
-
Page 67: Selecting Another Group
Group and its Patterns. In MASCHINE it is possible to have more than one Group bank! In this tutorial you will only be working with Group bank 1. Each Group bank contains 8 groups, and when a new bank is created the groups in each bank will be labeled sequentially;…
-
Page 68: Renaming And Coloring The Group
↑2.1, Loading a Drum Kit from the Factory Library), the slot automatically took the name of the loaded Group (“EK-TL A Kit”). Here you will manually rename the Group B1 to help keep your Project well organized. MASCHINE — Getting Started — 68…
-
Page 69
Adding a Bass Line Renaming and Coloring the Group This feature is only available from the MASCHINE software. To rename a Group: Double-click the Group name. The Group name becomes highlighted. Type a new name (e.g., “Bass”), then press [Enter] on your computer keyboard to con- firm. -
Page 70: Loading A Plug-In Instrument For The Bass
New colors for both Groups. Loading a Plug-in Instrument for the Bass In addition to using the internal sounds of MASCHINE, you may also use 32-bit and 64-bit VST/AU plug-ins from Native Instruments and third-party manufacturers. This notably allows you to make use of your favorite synthesizer and effect plug-ins!
-
Page 71
Show the Browser if it is currently hidden (reminder: click the magnifying glass in the MASCHINE Header). At the very top of the Browser, select the keyboard icon from the File Type selector. Select the NI icon from the Content selector MASCHINE — Getting Started — 71… -
Page 72
Adding a Bass Line Loading a Plug-in Instrument for the Bass In the Product selector click the drop-down arrow. and select Massive. MASCHINE — Getting Started — 72… -
Page 73
Browse mode yet: You will learn some useful features for choosing your bass in the next two sections. 5.3.1.2 Loading a Plug-in Instrument using the Controller On your controller, do the following: MASCHINE — Getting Started — 73… -
Page 74: Using Keyboard Mode
Since you are not browsing Samples, you don’t have the Prehear feature at your disposal to choose a nice bass preset. Instead, you can make use of the Autoload feature (see ↑3.2.1, Se- lecting another Snare Sample for more information). MASCHINE — Getting Started — 74…
-
Page 75
This is not ideal for choosing a preset — not to mention for recording a bass line. Hence, for melodic instruments like your bass, MASCHINE provides another pad mode called Keyboard mode, in which the pads play different notes of the same Sound. Now switch to Keyboard mode. -
Page 76
As long as the Keyboard mode is active, the PAD MODE button is half lit to remind you it is switched on. Other pad modes are also available. For a detailed description of all pad modes, please refer to the Manual. MASCHINE — Getting Started — 76… -
Page 77: Adjusting The Base Key Of The Pads On Your Controller
Once you have found a bass to your liking, deactivate BROWSE to leave the Browser. ► In this example you don’t need to specifically load the selected Sound, since it is already load- ed via the Autoload function. MASCHINE — Getting Started — 77…
-
Page 78: Recording A Bass Line
+ pad 2, and in the software by clicking on the Pattern slot in the Pattern Editor. Record a second Pattern. Again, don’t hesitate to reuse the various Pattern recording/edit- ing tasks that you have already learned. MASCHINE — Getting Started — 78…
-
Page 79: Loading An Additional Bass Sound
Sound and to record bass lines with that Sound in the same Patterns 1 and 2 as you did for the first bass. For example, try with the Sound “Ad Voca” as a second bass! MASCHINE — Getting Started — 79…
-
Page 80: Accessing The Plug-In Parameters
Accessing the Plug-in Parameters Once installed, MASSIVE is fully integrated into MASCHINE. Not only does this mean that its factory presets are available in the MASCHINE Browser, but also that the MASSIVE parameters themselves are available from within MASCHINE. Here, you will discover another area of the MASCHINE software’s user interface: the Control area.
-
Page 81
In the Plug-in List below, click Massive to select it. The Control area now displays the parameters of your bass Sound “Analovue.” You can → check this by looking in the left part of the Control area: MASCHINE — Getting Started — 81… -
Page 82
On each page, you can click and drag the knobs to adjust the corresponding parameters. Example As an example, adjust the amplification level of the second oscillator in your “Analovue” pre- set. Do the following: MASCHINE — Getting Started — 82… -
Page 83
Press the Page buttons (showing two arrows) at the left of the displays to switch to anoth- er page of parameters. Example As an example, adjust the amplification level of the second oscillator in the “Analovue” preset. Do the following: MASCHINE — Getting Started — 83… -
Page 84: Save Your Work
Save Your Work! Again, it is recommended to regularly save your work. You can then open another Project or close MASCHINE and take a break. Your tutorial Project will be recalled as is the next time you open it. To save your work in the MASCHINE Software: Press [Ctrl] + [S] ([Cmd] + [S] on Mac OS X) to save your Project.
-
Page 85
Adding a Bass Line To Sum Up… Once you feel comfortable with these few tasks, proceed with the next tutorial, where you will add effects to your Sounds and Groups. MASCHINE — Getting Started — 85… -
Page 86: Applying Effects
Now that you have created a few Patterns, you can spice them up with some effects. MASCHINE provides a healthy selection of effects (FX) that can be loaded in the form of Plug- ins. Each Sound, each Group and the Master can have an unlimited number of insert effects loaded in their Plug-ins slots.
-
Page 87: Loading Effects
The Control area showing some MASSIVE plug-in parameters for your bass Sound. To the left of the Control area, you can load an Internal, Native Instruments or External Effect Plug-in into the Plug-in List. The Plug-in List allows you to load as many Plug-ins into its slots as you want.
-
Page 88: Loading An Effect Into A Plug-In List
For this, you will use one of the Internal Plug-in effects included with MASCHINE: the Saturator. In MASCHINE, there are two different ways to load Plug-ins into the Plug-in List: ▪ Using the Browser: You have already used the Browser to load Projects, Groups, Samples, and Plug-ins.
-
Page 89
Applying Effects Loading Effects 6.1.2.1 Loading an Effect into a Plug-in List in the Software In the top part of the MASCHINE window, click the Group Bass to select it. In the Control area below, click the SOUND tab to select the Sound level, since you want to apply the saturation to a Sound. -
Page 90
This displays the Plug-in List on the left of the Control area: The Plug-in List in this instance contains Massive. Click the “+” icon below to open the Plug-in menu. The Plug-in menu opens and displays a list of all available effects. MASCHINE — Getting Started — 90… -
Page 91
→ If you have VST/AU effect plug-ins installed you may also load them from the menu by selecting the Native Instruments (for Native Instruments products) or External (for third- party products) submenu at the top of the list. If you wish to load a Plug-in at the Group level, just follow the same procedure except at… -
Page 92
SHIFT, you access the Plug-in menu instead! Turn Knob 1 until the VENDOR field is set to INTERNAL. ⇨ The right display shows you the available MASCHINE effects. Turn Knob 5 to select SATURATOR, and press Button 8 to load it. 10. Press SHIFT BROWSE again to leave the effect selection. -
Page 93: Playing With Effects
This way, you can directly hear how your settings affect the sound! 6.2.1.1 Adjusting the Effect Parameters in the MASCHINE Software In the Control area, you can quickly adjust each parameter with the mouse: MASCHINE — Getting Started — 93…
-
Page 94: Practice Makes Perfect
Similarly, adjust the other parameter values by turning the corresponding Knobs. 6.2.2 Practice Makes Perfect! Don’t hesitate to practice with loading effects in different places of the tutorial Project and ad- justing their parameters. For example: MASCHINE — Getting Started — 94…
-
Page 95: Bypassing Effects
Delay for example. Bypassing effects is also a great tool when playing live! 6.2.3.1 Bypassing Effects in the MASCHINE Software At the top left of the Control area, click the tab of the level (either SOUND, GROUP MASTER) where you want to bypass the effect.
-
Page 96
It’s also possible to bypass effects directly from the Mix view. When in Mix view click the small square at the left of the effect name in the Plug-in List. Click again to reactivate the effect. For detailed information on Mix view and using effects, please refer the Maschine Man- ual. -
Page 97: Modulating Effect Parameters
Button 5 to reactive the effect. Modulating Effect Parameters One of the really cool features of MASCHINE is the ability to modulate parameters from the Control area in a very easy way — both from the controller and in the software. Modulating a parameter means recording an offset to its value over time in order for these changes to be played back again automatically in your song.
-
Page 98
If you want to discard the modulation you just recorded and try again, do the following: Press and hold ERASE, and turn the same Knob 1–8 to delete the modulation of the cor- ► responding parameter. MASCHINE — Getting Started — 98… -
Page 99: Editing Modulation
Save Your Work! Again, it is recommended to regularly save your work. You can then open another Project or close MASCHINE and take a break. Your tutorial Project will be recalled as is the next time you open it. To save your work in the MASCHINE Software: Press [Ctrl] + [S] ([Cmd] + [S] on Mac OS X) to save your Project.
-
Page 100: To Sum Up
▪ How to bypass Plug-in slots. ▪ How to automate Plug-in parameters. Once you feel comfortable with these few tasks, proceed with the next tutorial, where you will discover another great way for creating beats: the step sequencer. MASCHINE — Getting Started — 100…
-
Page 101: Creating Beats With The Step Sequencer
If you have any doubts about these tasks, please refer to the previous tutorials before proceed- ing! In case your tutorial Project “My First Project” is not open, please open it now: Open the tutorial Project “My First Project.” ► MASCHINE — Getting Started — 101…
-
Page 102: Building Up A Beat In Step Mode
CONTROL button lights up. For now, stay in Step mode — to learn a few more things about this mode — so press STEP MODE again if needed (STEP MODE must be lit). MASCHINE — Getting Started — 102…
-
Page 103: Adjusting The Pattern Length In Step Mode
If you decided to create a pattern more than one bar long, you can use Buttons 7 and 8 above the right display to switch between each bar or alternatively press Button 5 FOL- and MASCHINE will automatically follow the pattern and display the steps on the pads accordingly. 7.1.2…
-
Page 104: Recording Modulation In Step Mode
Step mode, then switch to Control mode and record live-played ornaments to add a human touch to your Pattern. Or you could record a natural Pattern in Control mode and correct the essential hits in Step mode. MASCHINE — Getting Started — 104…
-
Page 105: Adjusting The Step Grid
Pattern. 7.2.1 Adjusting the Step Grid in the MASCHINE Software In the Pattern Editor the Step Grid is represented by vertical lines on each step and each beat: The Step Grid with the default resolution (1/16th note).
-
Page 106
Page buttons to display the previous/next sixteen steps of your Pattern. 7.2.2 Adjusting the Step Grid using your Controller On your controller, to change the Step Grid resolution, do the following: Press and hold the GRID button. MASCHINE — Getting Started — 106… -
Page 107: Save Your Work
Save Your Work! Again, it is recommended to regularly save your work. You can then open another Project or close MASCHINE and take a break. Your tutorial Project will be recalled as is the next time you open it. To save your work in the MASCHINE Software: Press [Ctrl] + [S] ([Cmd] + [S] on Mac OS X) to save your Project.
-
Page 108: Creating Scenes
▪ Create Scenes by combining together the Patterns we created in the previous tutorials. ▪ Become familiar with Scene handling and prepare them for the Arranger. ▪ Discover various MASCHINE tools for performing live. Prerequisites It is assumed here that you have followed the previous tutorials. In particular, you already know how to manipulate Groups (↑5.1, Selecting another…
-
Page 109: Assigning Patterns To Scenes
Pattern Editor. By repeating this for each Group you want to use in the selected Scene, you quickly compose your Scene. It is recommend that you create Scenes while the sequencer is playing: MASCHINE — Getting Started — 109…
-
Page 110
Patterns for a number of Scenes, and then go on filling Scenes one by one for the other more melodic Groups. 8.2.1 Creating other Scenes in the MASCHINE Software In the software, do the following: In Ideas view, click the button to the right of the first Scene. -
Page 111
+ Button 2 to enter Ideas view. Press and hold the SCENE button. The pads now represent available Scenes. For the moment only pad is lit: This indicates that Scene slot 1 is selected and all other slots are empty. MASCHINE — Getting Started — 111… -
Page 112: Managing Scenes
Now that we have created a few Scenes of interest, we want to organize them to make it easier to arrange them into a song when we add them later to the Arranger. For this, the Ideas view provides you with many editing facilities. Let’s introduce the most important ones. MASCHINE — Getting Started — 112…
-
Page 113: Renaming And Coloring Scene Slots
Manual for more information on this. 8.3.2 Duplicating and Deleting Scenes MASCHINE offers you various editing tools for your Scenes and Scene slots. Here are some ex- amples using your controller and a few more using the MASCHINE software. 8.3.2.1…
-
Page 114
The content of Scene slot 2 is deleted and all other Scenes are moved one Scene to the → left. 8.3.2.2 Duplicating and Deleting Scenes using the Controller To duplicate or delete a Scene using your controller: MASCHINE — Getting Started — 114… -
Page 115: Playing Live
↑9, Creating an Arrangement. If you are preparing a track for a live performance, you will probably want to trigger different Scenes using the pads. To help with this MASCHINE provides a few very useful tools. 8.4.1 Jumping to Other Scenes…
-
Page 116
Scene or from the beginning of the next Scene. The former (default setting) ensures that the global groove of your track is not interrupted! 8.4.1.1 Jumping to Other Scenes in the MASCHINE Software In the Arranger, you will find the SYNC menu and the Retrigger check box in the header: The SYNC and Retrigger controls. -
Page 117: To Sum Up
▪ Rename, color, duplicate, and delete Scenes slots. Once you feel comfortable with these few tasks, proceed with the next chapter, where you can quickly assign your Scenes to Sections to create an arrangement. MASCHINE — Getting Started — 117…
-
Page 118: Save Your Work
Save Your Work! Again, it is recommended to regularly save your work. You can then open another Project or close MASCHINE and take a break. Your tutorial Project will be recalled as is the next time you open it. To save your work in the MASCHINE Software: Press [Ctrl] + [S] ([Cmd] + [S] on Mac OS X) to save your Project.
-
Page 119: Creating An Arrangement
Accessing Arranger View Creating an Arrangement The chapter explains how to arrange your song using MASCHINE. If you followed the previous tutorials you will have created a few Patterns for the drum kit Group and bass Group and added them to Scenes using the Ideas view. To create a structured arrangement it is necessary to add Scenes to Sections in the Arranger view.
-
Page 120
Click the Arrangement view toggle button. ► The Arranger view is located in the top right part of the MASCHINE window and is where you organize your Sections in order to build up a song. The Arranger is empty when you open it for the first time, but it provides you with unlimited Section slots. -
Page 121: Creating Your First Section
► A new empty Section is created. → To create a new Section in the Arranger view using your controller: Press NAVIGATE + Button 3 ARRANGER to access the Arranger view. MASCHINE — Getting Started — 121…
-
Page 122: Assigning A Scene To A Section
To assign a Scene to a Section in the Arranger view using your controller: Press NAVIGATE + Button 3 ARRANGER to access the Arranger view. Press SCENE then turn knob 2 to select the Scene you want to assign to the Section. MASCHINE — Getting Started — 122…
-
Page 123: Managing Sections
Section (the last repetition might be shortened). These repetitions are automati- cally generated and cannot be edited. They reference the same Pattern placed at the be- ginning of the Section. Repetitions of a Pattern are indicated by darker blocks in the Ar- MASCHINE — Getting Started — 123…
-
Page 124: Adjusting The Length Of A Section Using The Software
To lengthen a Section: Click and drag the end marker of the Section to the right. ► The Scene will be repeated if the adjustment is longer than the referenced Pattern. → To shorten a Section: MASCHINE — Getting Started — 124…
-
Page 125: Adjusting The Length Of A Section Using The Controller
Adjusting the Length of a Section Using the Controller To adjust the length of a Section using your hardware controller: Press NAVIGATE + Button 3 ARRANGER to access Arranger view (if you are not already in the Arranger view). MASCHINE — Getting Started — 125…
-
Page 126: Duplicating And Removing Sections
The Section length is adjusted accordingly. → 9.2.2 Duplicating and Removing Sections MASCHINE offers you various editing tools for Section slots. Here are some examples using your controller and a few more using the MASCHINE software. 9.2.2.1 Duplicating and Removing Sections in the MASCHINE Software…
-
Page 127
A new Section slot is inserted right after Section slot 3 with the same properties and con- tent (Scene). The existing Section slots are shifted one slot to the right to make way for the new entry. Note that the duplicate slot is automatically selected. MASCHINE — Getting Started — 127… -
Page 128: Selecting A Loop Range
+ the desired pad on your controller (see Adding other Sections). A single selected Section is always looping automatically. But MASCHINE also allows you to select several consecutive Sections and play them one after the other in a loop. Here’s how to select the desired range of Sections.
-
Page 129: Save Your Work
Save Your Work! Again, it is recommended to regularly save your work. You can then open another Project or close MASCHINE and take a break. Your tutorial Project will be recalled as is the next time you open it. To save your work in the MASCHINE Software: Press [Ctrl] + [S] ([Cmd] + [S] on Mac OS X) to save your Project.
-
Page 130: To Sum Up
▪ Adjust the behavior of the sequencer when jumping between Sections or loop ranges. Once you feel comfortable with these few tasks, proceed with the next chapter, where we will quickly introduce a few other powerful features of MASCHINE. MASCHINE — Getting Started — 130…
-
Page 131: Using Advanced Features
▪ Advanced routing ▪ Sampling ▪ Mix view For detailed information on these features please refer to the MASCHINE Manual. 10.1 Changing the Sound, Group, and Master Channel Properties In a previous tutorial, we learned how to adjust the Volume and Swing of the Project — see section ↑3.2.3, Adjusting Volume, Swing and Tempo…
-
Page 132: Creating Custom Sets Of Parameters With The Macro Controls
On the other hand, the same parameter can be the destination of more than one Mac- ro Control. To know which parameters you can assign to a Macro Control, consider this single rule: MASCHINE — Getting Started — 132…
-
Page 133: Assigning Macro Controls
Opening the Pages Pane in the Assignment Area First of all, you need to open the Pages pane of the Assignment area for Macro properties: Select the Macro properties of the desired channel (Sound, Group, or Master). MASCHINE — Getting Started — 133…
-
Page 134
Pages tab can be clicked only for Native Instruments or External Plug-ins and for Macro properties. For all other Plug-ins and properties, parameters and Parameter pages are not editable, and the Pages tab is grayed out and inactive. -
Page 135
Target selector below (6). (5) Parameter Label fields: Double-click these fields to enter custom labels for your parameters (press [Enter] to confirm). These labels will be mirrored everywhere in MASCHINE for the cor- responding parameters. -
Page 136
Master you will see the Groups subcategory listing all Groups of your Project, and if you are editing the Macros of a Group you will see the Sounds subcategory listing all Sounds in that Group. MASCHINE — Getting Started — 136… -
Page 137: Using Other Sound Sources
In this section we will quickly show you how to set this up. This will allow us to introduce the powerful routing facilities provided by MASCHINE. We will exclusively use the software, but most of these tasks can be done from your con- troller as well.
-
Page 138: Using Sounds And Groups As Sound Source
The menu opens and lets you choose a Plug-in for loading. In this menu, select any effect, e.g., FM. The FM effect is loaded. Now click the Group Bass in the Arranger to select it. MASCHINE — Getting Started — 138…
-
Page 139
Control area to select the Group level and display the parame- ters for the Group “Bass” that we just selected. Click the Channel icon. Click the Output icon to select the Output properties of that Group. 10. Click the parameter page. MASCHINE — Getting Started — 139… -
Page 140
In fact, we have just set up a send effect in MASCHINE. As we selected an effect plug-in in the first Plug-in slot of Group C, MASCHINE automatically made this Sound available as an output for all other Sounds and Groups of your Project. By choosing this Sound in the 1’s… -
Page 141: Using An External Sound Source
Inputs button. You then see the list of MASCHINE input ports on the left. By clicking on the fields on the right, you can assign MASCHINE input ports to the physical audio inputs available on your audio interface.
-
Page 142
Using Advanced Features Using Other Sound Sources Assign at least Maschine In 1 L Maschine In 1 R to any pair of inputs on your audio interface. MASCHINE — Getting Started — 142… -
Page 143
→ knob of the Input selector. MASCHINE provides you with four separate stereo inputs for using four distinct external stereo signals within your Project. For example you could try the following: ▪ Load effects in the Plug-in menu to process the signal of your turntable. -
Page 144: Sampling
Now let’s look at another great feature of MASCHINE: its sampling facilities. MASCHINE al- lows you to record internal or external audio signals using your audio interface to create loops, single hits or instruments, in fact sampling has many uses within MASCHINE. For instance you could: ▪…
-
Page 145
You can record Sam- ples from an internal signal (select Internal from the drop-down menu) or from one of the external inputs (select the Ext. Ster. or Ext. Mono from the drop-down menu). In this case MASCHINE — Getting Started — 145… -
Page 146
Project tempo. Since we want to record a drum loop from the EK-TL A Kit, we select Sync. After selecting Sync, the LENGTH menu is displayed to the right. Click 1 Bar in the menu: MASCHINE — Getting Started — 146… -
Page 147: Editing, Slicing And Mapping Your Sample
Manual for more information. 10.3.2 Editing, Slicing and Mapping Your Sample MASCHINE provides you with many features to make an efficient use of your recorded Sample. These features are found in the other three tabs of the Sample Editor: ▪ The…
-
Page 148: The Mix View
10.4 The Mix View The Mix view is the other main view of MASCHINE. Instead of focusing on the time-dependent aspects of your Project, it gives you quick access to the level and routing settings of all your Sounds, Groups, and the Master. In addition, it provides you with an intuitive interface for ad- justing the parameters of all your Plug-ins.
-
Page 149
The Mix view with Group B1 selected. Switching between Arrange View and Mix View You can switch the MASCHINE software at any time between the Arrange and Mix view: The Mix view button. To switch between Arrange View and Mix View in the MASCHINE software:… -
Page 150
To switch between Arrange View and Mix View on the controller: Press SHIFT NAVIGATE to switch between the Arrange view and the Mix view in the ► MASCHINE software. For detailed in information on the Mix view, please refer to the Manual MASCHINE — Getting Started — 150… -
Page 151: Quick Reference
(↑11.1, Using Your MASCHINE Controller). ▪ An overview of a MASCHINE Project and a description of both its structure and content (↑11.2, MASCHINE Project Overview). ▪ A basic reference of your hardware controller, naming and quickly describing each of its control elements (↑11.3, MASCHINE Hardware Overview…
-
Page 152
The buttons that are required to be held are in the middle column of your controller (left of the pads) along with the NOTE REPEAT, GRID, AUTO WRITE, buttons: Each of these buttons needs to be pressed in order to use the corresponding mode. MASCHINE — Getting Started — 152… -
Page 153: Controlling The Software Views From Your Controller
You can unpin any mode by pressing the mode button and Button 1. 11.1.2 Controlling the Software Views from Your Controller Your controller provides you with numerous shortcuts to modify the display in the MASCHINE software window without having to touch your mouse. To control the software views using the controller:…
-
Page 154
Press pad Scroll Arranger left (Arranger view only) Press pad Scroll Arranger right (Arranger view Press pad only) Zoom in Arranger (Arranger view only) Press pad Zoom out Arranger (Arranger view only) Press pad MASCHINE — Getting Started — 154… -
Page 155: Maschine Project Overview
The following section will explain these two aspects in detail. 11.2.1 Sound Content The sound content aspect of a MASCHINE Project includes all the instruments and effects contained in your Project file, and how these are structured. MASCHINE — Getting Started — 155…
-
Page 156
Quick Reference MASCHINE Project Overview The sound content aspect of a MASCHINE Project with Arranger view selected. ▪ Groups (1) are available in Banks. Each Bank contains eight Groups (A-H) and each Group contains sixteen Sound slots (1–16) (2). Each Sound slot can be filled with samples or plug-ins. -
Page 157: Arrangement
11.2.2 Arrangement The MASCHINE Project is about building patterns, and putting those patterns into a loop or a song structure. In MASCHINE process of creating ideas is separated from the process of ar- rangement to provide a more flexible and creative approach. To reflect this the Arrangement area is split into two views: Ideas view and Arranger view which you can easily switch between using your controller.
-
Page 158
Quick Reference MASCHINE Project Overview The Ideas view of a MASCHINE Project optimized for creating Patterns and building Scenes. The workflow of creating ideas in MASCHINE is as follows: ▪ You load samples or plug-ins into the Sound slots (7) of the selected Group (2). -
Page 159
The Arranger view of a MASCHINE Project. The workflow of creating an arrangement in MASCHINE is as follows: ▪ Create Sections on the Timeline of the Arranger (1). ▪ Assign each Scene to a Section (2). -
Page 160: Maschine Hardware Overview
▪ Change the position of a Section by dragging the Sections slot. 11.3 MASCHINE Hardware Overview 11.3.1 Hardware Overview of the MASCHINE MK2 Controller This section quickly describes the areas and control elements on your hardware controller. MASCHINE — Getting Started — 160…
-
Page 161
Quick Reference MASCHINE Hardware Overview Overview of the MASCHINE hardware controller. (1) CONTROL section: Use this multi-purpose section to access to all parameters of the mode currently selected on your controller. There are also dedicated buttons to access the Browser, Step mode and the Sample Editor. -
Page 162: 11.3.1.1 Control Section
In this mode, the pads represent the Sounds of the selected Group. At the same time, Control mode provides instant access to all Sound, Group and Master parame- ters via the eight Buttons and eight Knobs above and under the displays. You can also use the MASCHINE — Getting Started — 162…
-
Page 163
SHIFT + CONTROL. This mode will enable you to use MASCHINE as a MIDI controller (for more information on this, please refer to the Controller Editor Manual). (2) STEP button: As a complement to Control mode, Step mode doubles as a full-featured step sequencer. -
Page 164: Master Section
(8) Buttons 1–8: About one fourth of the hardware is occupied by the multi-functional control area, which forms the core of MASCHINE’s mouse-free workflow. The eight Buttons above the displays dynamically adapt their function to the currently active environment, allowing direct access to the most important sub-sections and functions.
-
Page 165: Groups Section
NOTE REPEAT + Button 1 to pin/unpin the Note Repeat mode. See ↑11.1.1, Controller Modes and Mode Pinning for more informa- tion. 11.3.1.3 GROUPS Section This section gives an overview of the GROUPS section. MASCHINE — Getting Started — 165…
-
Page 166: 11.3.1.4 Transport Section
A–H to select a Group Bank. For more information on Group Banks please refer to the Manual. 11.3.1.4 TRANSPORT Section This section gives an overview of the TRANSPORT section. Overview of the TRANSPORT section. MASCHINE — Getting Started — 166…
-
Page 167
Pattern Length before recording any events. (8) PLAY button: Press the PLAY button to activate playback. Press PLAY a second time to stop playback. Press SHIFT PLAY to turn the metronome on/off. MASCHINE — Getting Started — 167… -
Page 168: Pads Section
All the following buttons can be pinned: Simply press the desired button + Button 1 (above the left display) to pin/unpin the corresponding mode. See ↑11.1.1, Controller Modes and Mode Pinning for more information. MASCHINE — Getting Started — 168…
-
Page 169
Sound — this is especially useful for building up dynamic grooves. ▪ In Fixed Velocities mode, each pad represents one Sound of the Group and all Sounds have the same fixed velocity, whatever pressure you apply on the pads. MASCHINE — Getting Started — 169… -
Page 170
(9) Pads 1–16: Besides playing and selecting your Sounds, the pads have many functions de- pending on the controller mode that is currently active. In addition, when used in combination with SHIFT, the pads trigger various commands: ▪ Press SHIFT + pad to undo/redo your last action. MASCHINE — Getting Started — 170… -
Page 171: Maschine Software Overview
MASCHINE Software Overview The MASCHINE software. (1) Header: The Header contains the main controls for the MASCHINE software including the Display area, the Transport controls, and the Master Volume slider. You can also use this area to toggle the Browser, toggle the Mixer view, connect to your hardware controller and monitor the CPU usage of your computer.
-
Page 172: Header
The Header. (1) MASCHINE menu: Click the MASCHINE menu to access the software menus. This menu is particularly useful in Full screen mode and when MASCHINE is used as a plug-in in a host ap- plication. (2) Browser button: Use the Browser button to toggle the Browser. The Browser is your tool for managing, finding, tagging and categorizing Projects, Groups, Sounds, Instruments, Effects and Samples.
-
Page 173
(9) Audio Engine button: Click the Audio Engine button to disable the entire sound processing of MASCHINE. (10) NI logo: The NI logo and MASCHINE logo open the About screen which displays the ver- sion number and edition of your MASCHINE software. -
Page 174: Browser
Browser 10 11 The Browser. (1) LIBRARY tab: Use the LIBRARY tab to access your computer’s hard drives via MASCHINE’s selectors and filters. (2) FILES tab: Use the FILES tab to access your computer’s hard drives. MASCHINE — Getting Started — 174…
-
Page 175
(potentially overwriting previous routings in the selected Group). When the +ROUT- button is off, any audio and MIDI routings saved in the Group will not be loaded, thus pre- serving any existing routings in the active Group. MASCHINE — Getting Started — 175… -
Page 176: Arranger
(11) Tag Editor: The Tag Editor allows you to edit Tags applied to files and add Tags to new files from the Bank, Types, and Modes and view Properties. Only Types and Modes Properties can be edited in the User content. The NI (Native Instruments) content is read only. You can show/hide it by clicking the EDIT button at the bottom right.
-
Page 177
A1, and right-click on the letter to solo the Group. Using your mouse you can also right-click ([control] + right-click on Mac OS X) on the name of a Group to access the many options avail- able to manage them. MASCHINE — Getting Started — 177… -
Page 178
Section along with the Scene’s Patterns stacked vertically for each Group in the Project. The Patterns seen here are the same as those seen when viewing the same Scene in the Ideas view. MASCHINE — Getting Started — 178… -
Page 179: Control Area
Sound/Group or Master channel in the Parameter area. (3) MASTER tab: Click the MASTER tab to control sound at the main outputs of MASCHINE (in- cluding all Groups and Sounds). (4) GROUP tab: Click the GROUP tab to gain access to Plug-ins and Channel properties of the Group loaded in the selected Group slot (A–H).
-
Page 180: Pattern Editor
(4) Audition button: Click this button to audition a Sound when it is selected from the Sound slots (6). (5) Sound properties icon: Click this icon to quickly access the Key, Choke, and Link settings for the selected Sound. MASCHINE — Getting Started — 180…
-
Page 181
Arrow or Paint icons to toggle the Paint mode on/off. (14) Control Lane button: The Control Lane button allows you to show/hide the Control Lane (12). For a detailed explanation of each section please refer to the MASCHINE Software Man- ual. MASCHINE — Getting Started — 181… -
Page 182: Troubleshooting
Knowledge Base Troubleshooting If you are experiencing problems related to your Native Instruments product that the supplied documentation does not cover, there are several ways of getting help. Before getting help please make sure you have downloaded the latest MASCHINE soft- ware from Native Access.
-
Page 183: Registration Support
12.4 User Forum In the Native Instruments User Forum, you can discuss product features directly with other users and with experts moderating the forum. Please be aware that the Technical Support team does not participate in the forum. If you’re encountering an issue that can’t be solved by other users, contact Native Instruments’…
-
Page 184: Glossary
If you have any doubts about the meaning of a word, this is the place to check! Arranger The Arranger is the big area located in the upper part of the MASCHINE window, right under the Header. Arranger View The Arranger view allows you to combine Sections (references to Scenes), and arrange them into a song on the Timeline.
-
Page 185
Controls, etc. Control Lane Located at the bottom of the Pattern Editor in the MASCHINE window, the Control Lane shows and lets you edit the recorded automation in form of automation points for each automated pa- rameter. You can add, remove, or manipulate existing automation points as well as add new parameters to automate. -
Page 186
These Scenes can then be added to Sections in the Arranger view to create a larger musical structure. Insert Effect An insert effect is an effect directly inserted in the signal path of the audio to be processed. MASCHINE — Getting Started — 186… -
Page 187
Macro Controls can be assigned to MIDI CCs to be controlled by an external MIDI controller or application. Last but not least, if you use MASCHINE as a plug-in in a host, Macro Controls are available for modulation in your host too. -
Page 188
Keyboard view gets automatically enabled in the software, and inversely. Parameter Pages The Parameter pages constitute the biggest part of the Control area in the MASCHINE window. They contain the adjustable Plug-in parameters and Channel properties of the selected Sound/ Group or those of the Master. -
Page 189
Glossary Plug-in A Plug-in is an instrument or effect unit, either Internal or External (by Native Instruments or a third-party manufacturer), that can be loaded into a Plug-in slot to produce or alter sound. When a Plug-in is loaded into a Plug-in slot, the Plug-in appears in the Plug-in List in the left part of the Control area. -
Page 190
The steps are then played back as a musical sequence. MASCHINE has its own sequencing abilities: you can record and play single Patterns as well as arrange Patterns into Scenes and Scenes into full songs. -
Page 191
By repeating the process Sound by Sound you build up the whole Pattern. Swing The Swing parameter allows you to shift some of the events in your Pattern to create a shuf- fling effect. MASCHINE — Getting Started — 191… -
Page 192: Index
Project [36] Audition [38] load a Sample [36] Autoload load a Sound [184] load an effect [87] definition [70] [36] MASSIVE presets replacing Sounds with Bussing point [184] [138] creating send effects MASCHINE — Getting Started — 192…
-
Page 193
[80] adjusting parameters DUPLICATE button [170] definition [185] Duplication CONTROL button [162] [55] Pattern Length Control encoder [165] Control Lane definition [185] [99] editing modulation Control mode definition [185] [25] pads CONTROL section [162] MASCHINE — Getting Started — 193… -
Page 194
Macro properties [132] Event [28] muting and soloing [186] definition [28] soloing [63] editing with the Pattern Editor GROUP tab [179] External sound source [141] Group view [180] [186] definition Groups [178] GROUPS section [165] MASCHINE — Getting Started — 194… -
Page 195
Scenes [177] [33] a Project Input Channel [141] a Sample [36] Insert effect [186] [36] a Sound [87] an effect [42] [88] into a Plug-in List Locking controller modes [151] Loop range [128] MASCHINE — Getting Started — 195… -
Page 196
Sample [36] Mode pinning [151] [36] a Sound Modulation [98] [87] an effect [187] definition Overview [98] deleting [160] hardware controller editing in the software [99] [155] structure of a Project [97] recording MASCHINE — Getting Started — 196… -
Page 197
Product selector [175] definition [188] Project [63] editing [189] definition [26] recording [33] load a PATTERN button [169] overview and structure [155] Pattern Editor [172] Properties [188] definition [132] Macro editing events [63] MASCHINE — Getting Started — 197… -
Page 198
[111] selecting (hardware) [31] Note Repeat [110] selecting (software) RESTART button [167] [116] transitions Retriggering Scenes [116] SCENE button [111] [169] Routing [137] Scene Sync [116] Search field [175] Search results [38] updating Section MASCHINE — Getting Started — 198… -
Page 199
Text search [175] [36] load a Transport controls [173] Macro properties [132] TRANSPORT section [162] [166] [28] muting and soloing Troubleshooting [182] [137] routing [28] soloing Sound slot [28] number SOUND tab [179] MASCHINE — Getting Started — 199… -
Page 200
Index [189] definition [70] load plug-in instruments Velocity pads [25] Volume [173] Waveform [147] Volume adjusting [46] Sound, Group, and overall Zoom [57] VOLUME button [164] VST/AU MASCHINE — Getting Started — 200…
This manual is also suitable for:
Maschine
Посмотреть инструкция для Native Instruments Maschine+ бесплатно. Руководство относится к категории драм-машины, 2 человек(а) дали ему среднюю оценку 8.9. Руководство доступно на следующих языках: английский. У вас есть вопрос о Native Instruments Maschine+ или вам нужна помощь? Задайте свой вопрос здесь
Не можете найти ответ на свой вопрос в руководстве? Вы можете найти ответ на свой вопрос ниже, в разделе часто задаваемых вопросов о Native Instruments Maschine+.
Инструкция Native Instruments Maschine+ доступно в русский?
Не нашли свой вопрос? Задайте свой вопрос здесь
КатегорииМузыка
Долгое время однозначным лидером на рынке автономных грувбоксов и компактных музыкальных станций оставалась компания AKAI. Остальные производители чаще предлагали контроллеры, требующие обязательного подключения к компьютеру. Поэтому обзор Maschine Plus в 2021 году, выпущенный Native Instruments в 2020-м, заинтересует любителей продакшена без использования компа.
Когда устройство только поступило в продажу прошлой осенью, его ругали за общую сырость прошивки и отсутствие стабильности в работе. Перегруз CPU, регулярные зависания и прочие технические проблемы делали невозможным комфортную работу и живые импровизации. Теперь же, когда выпущено множество обновлений софта, к вашим услугам поистине универсальный комбайн.
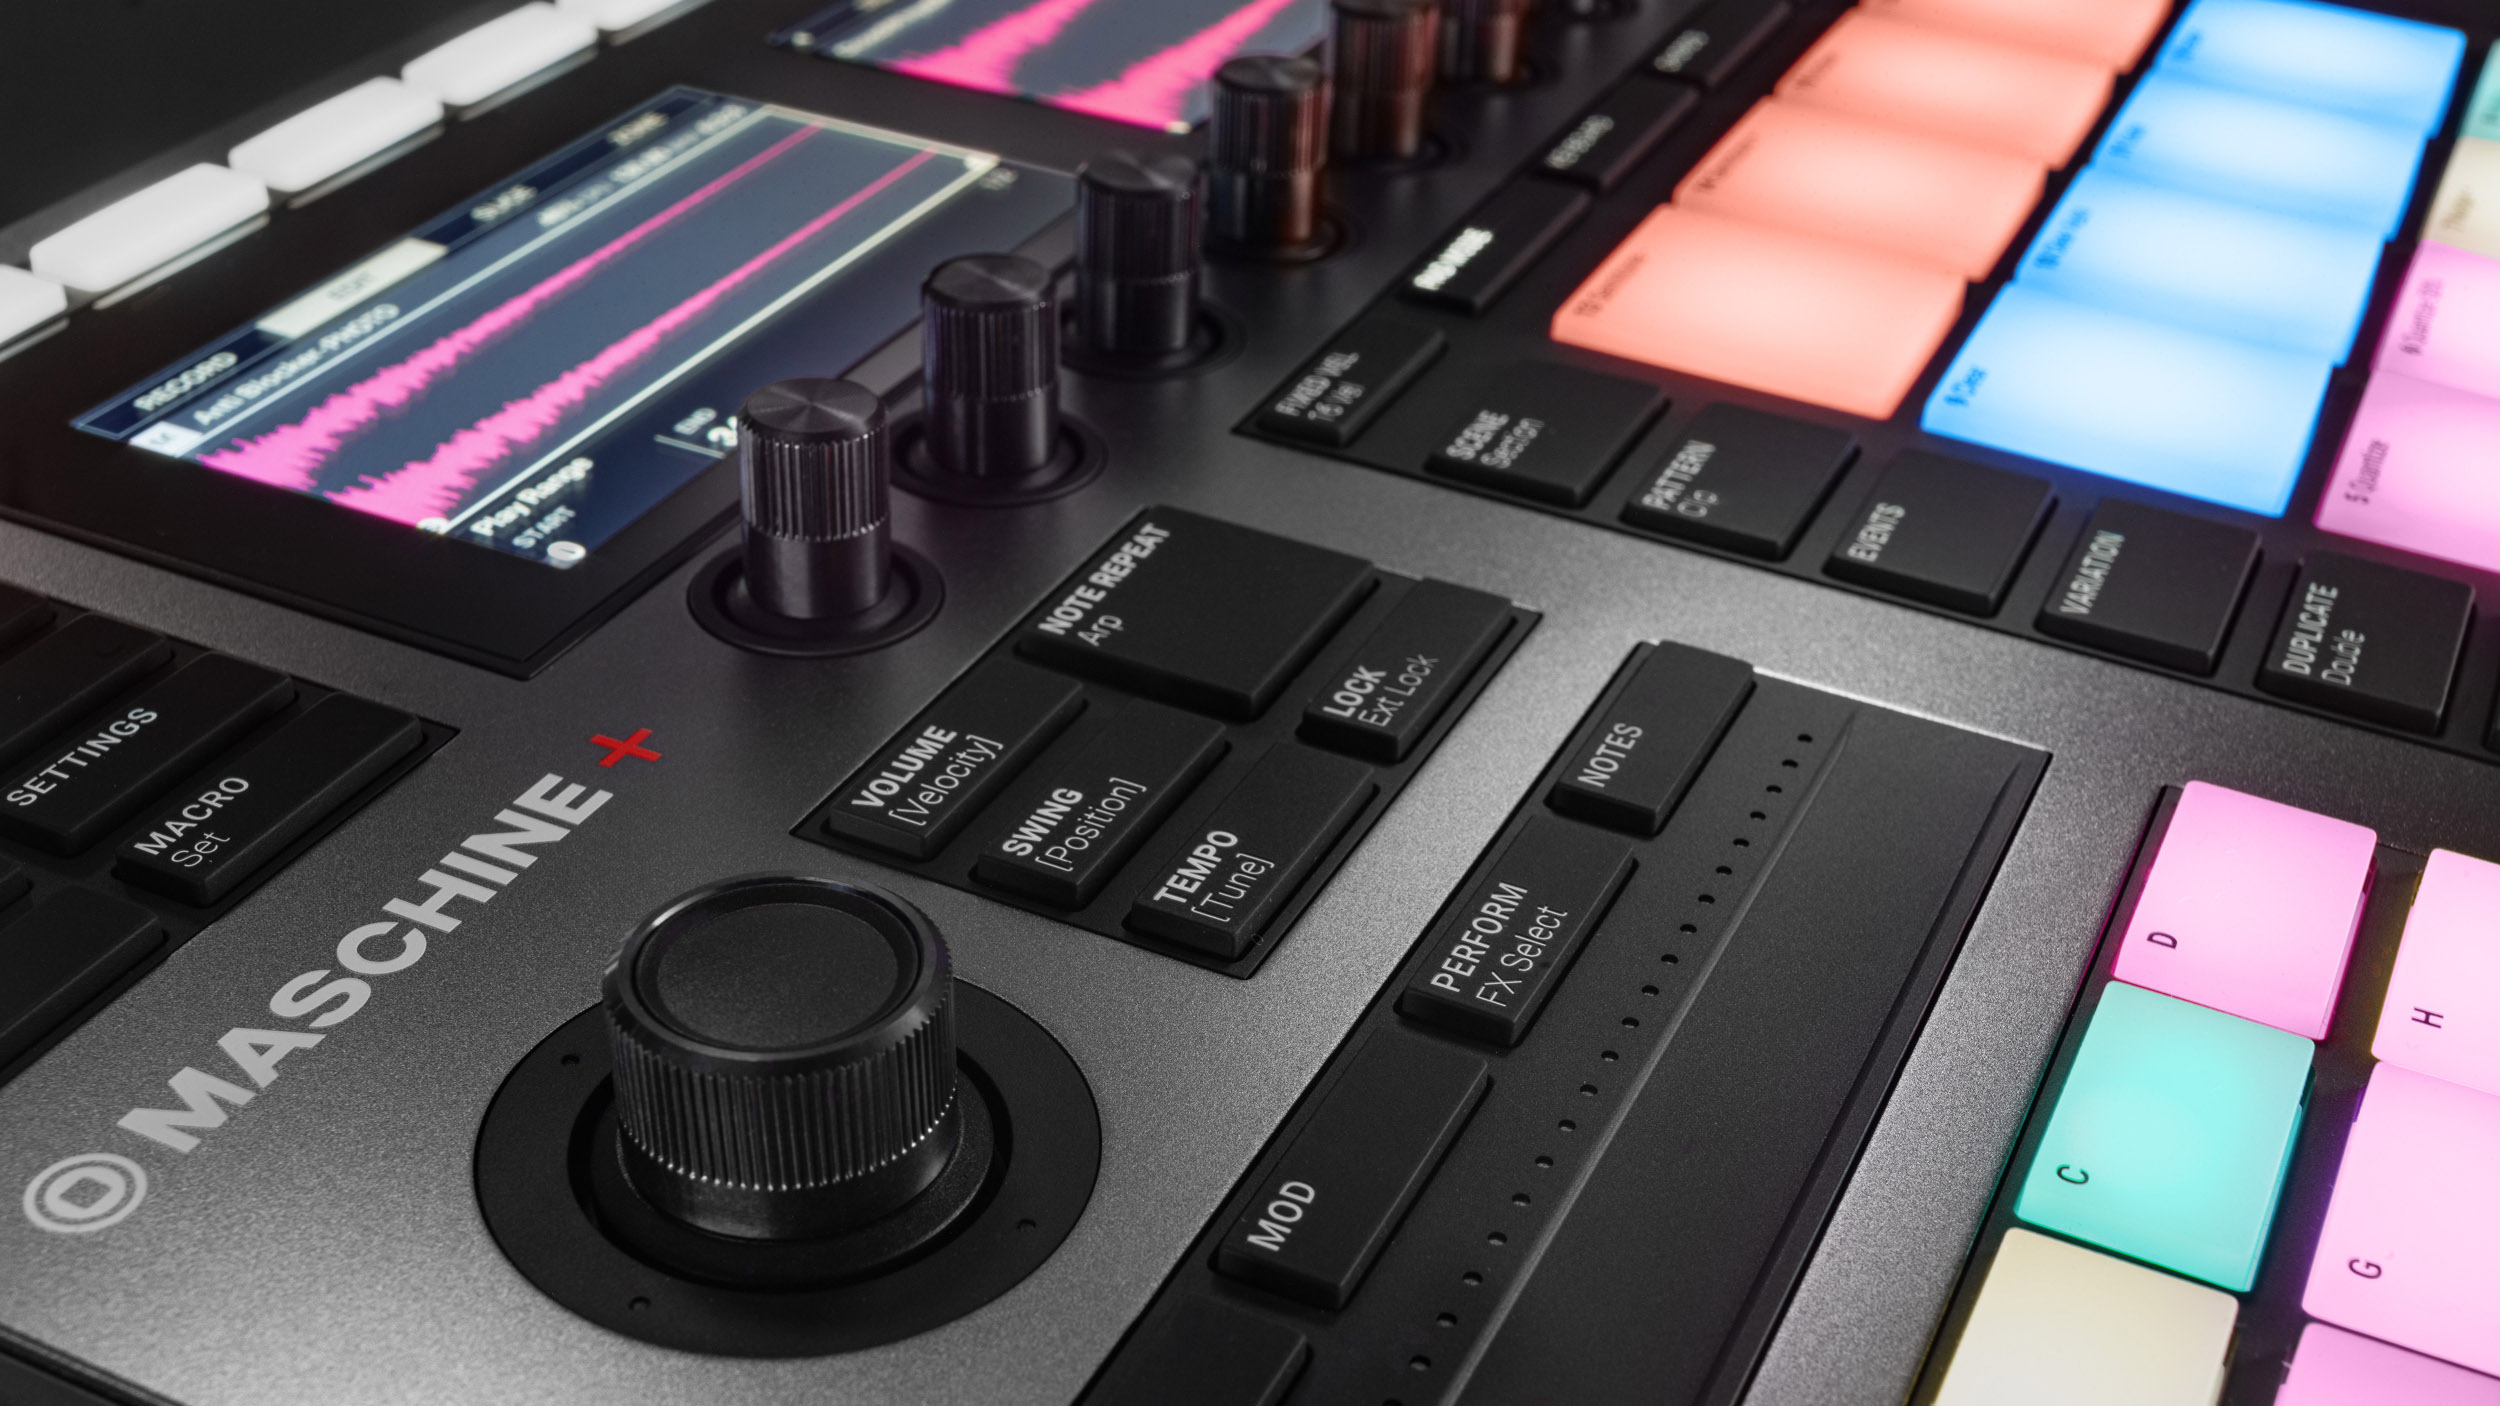
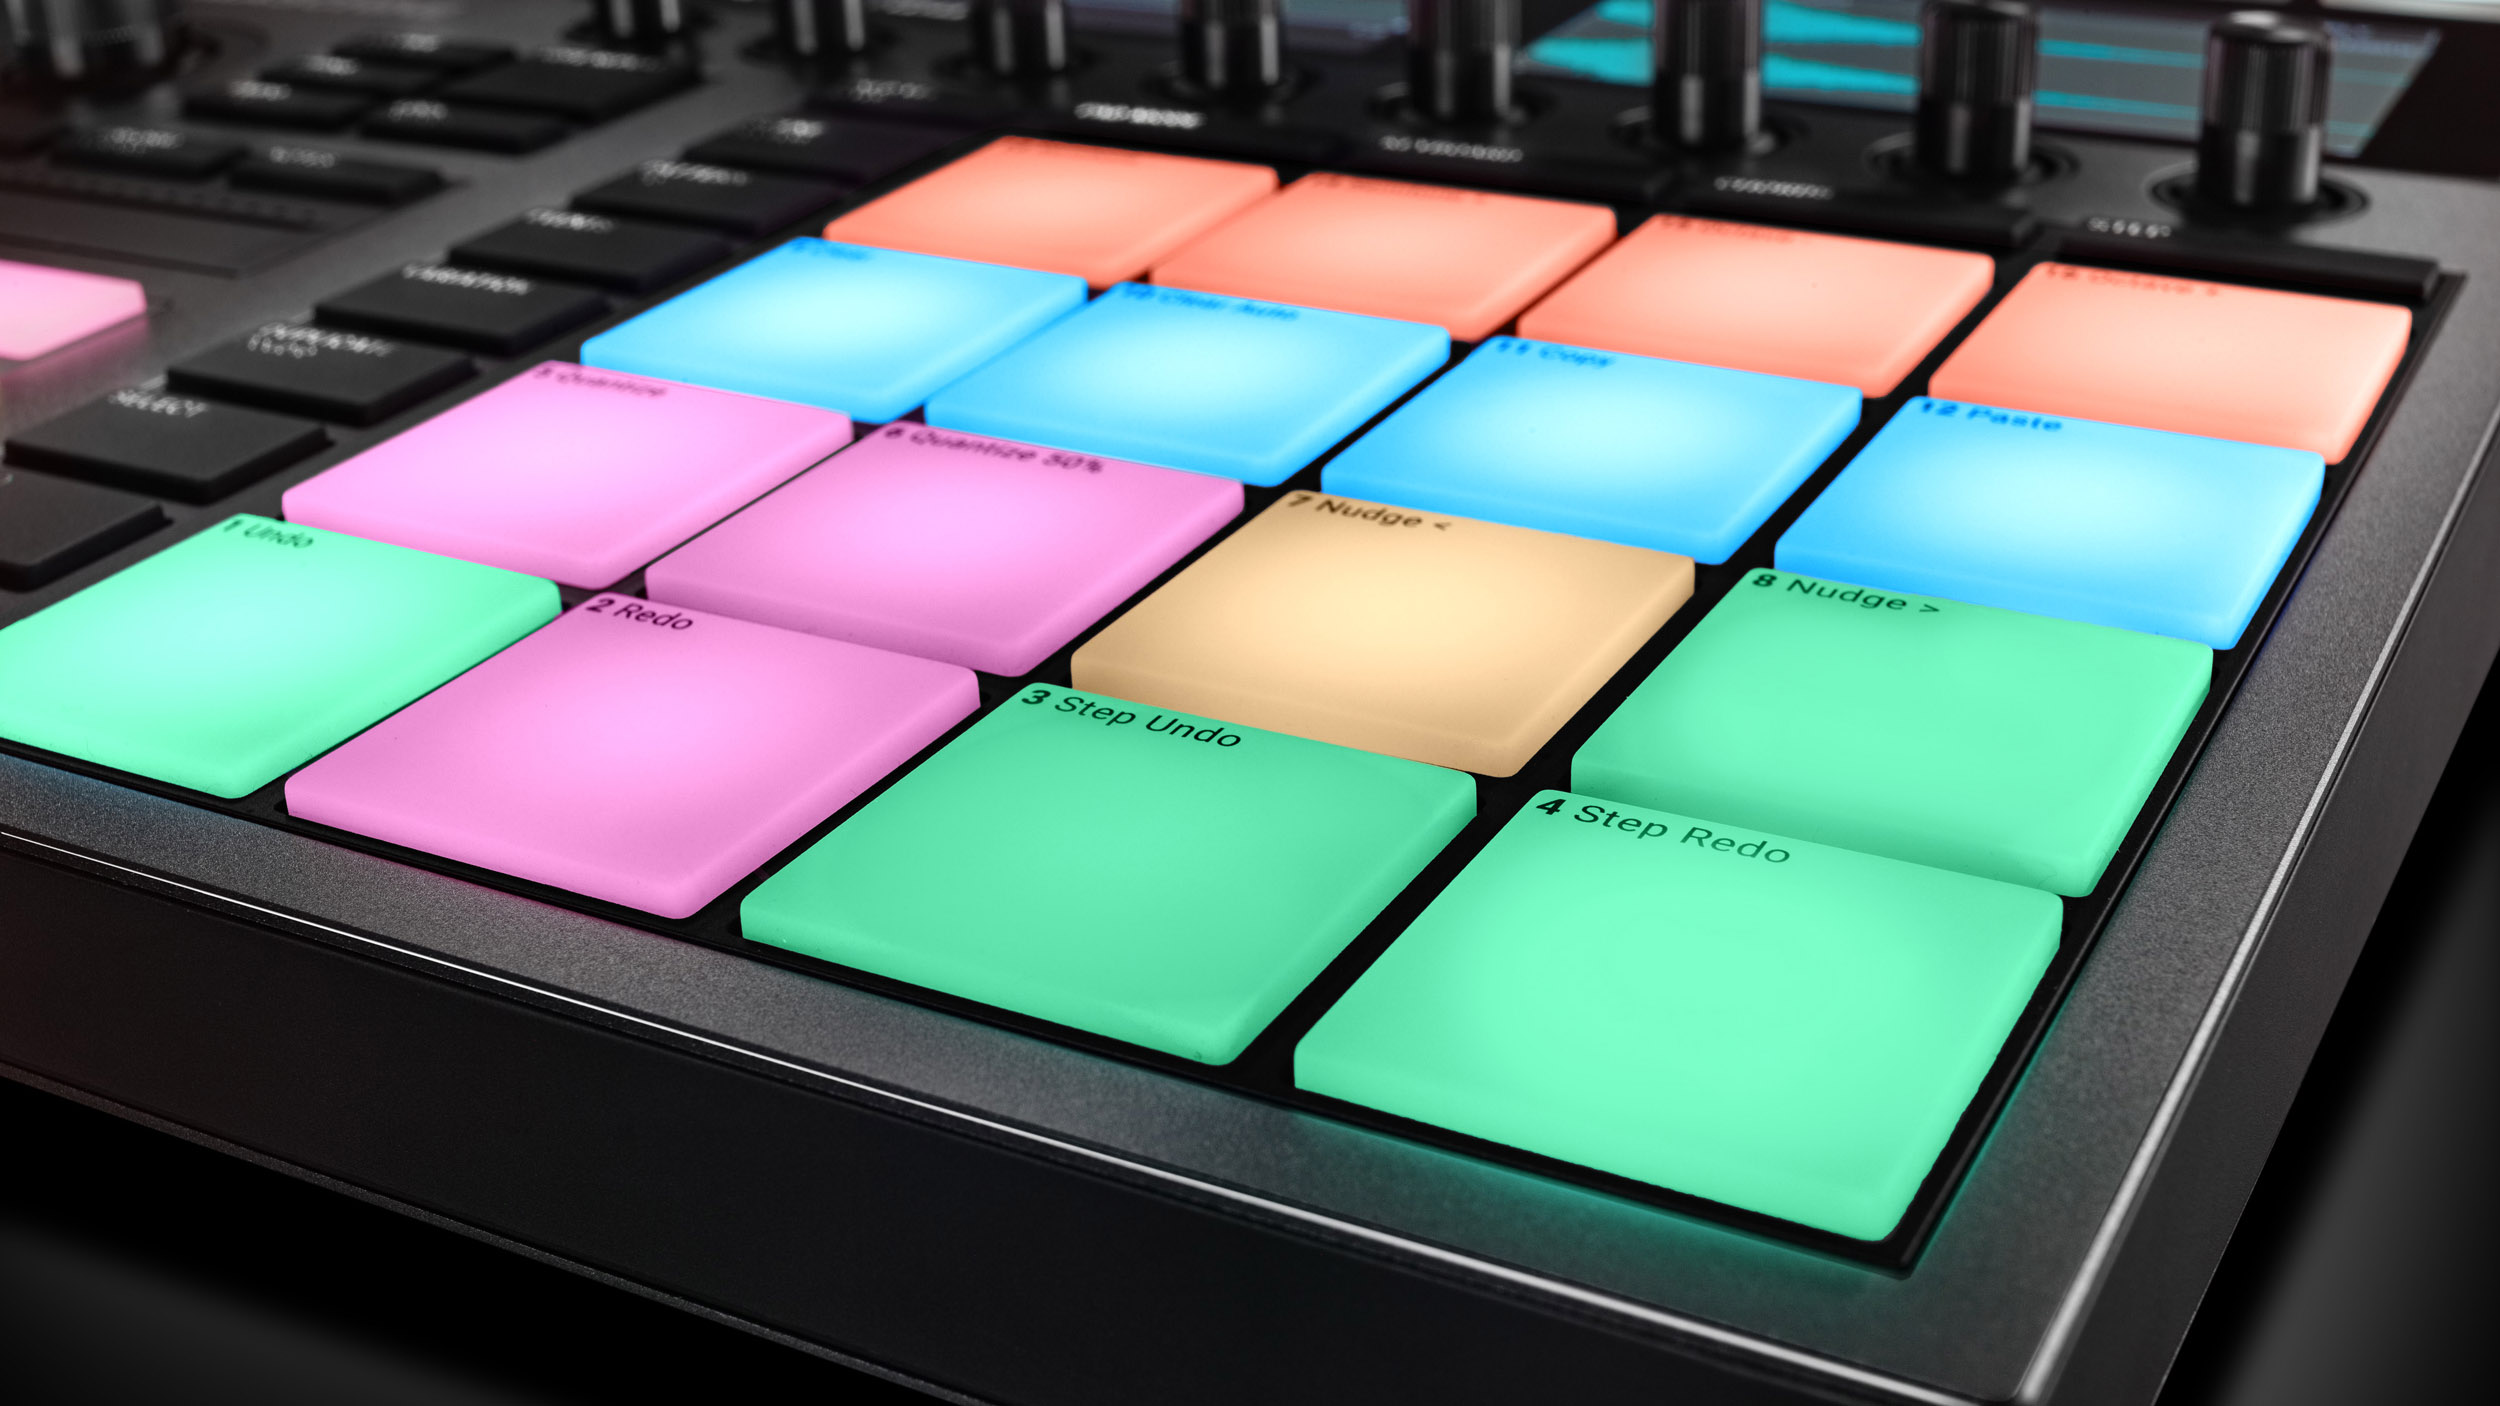
Дизайн копирует контроллер MK3, но пэды стали более качественными и рассчитанными на десятки миллионов нажатий. Экосистема и программная среда полностью идентичная. Если сравнивать с AKAI, местный интерфейс мне нравится значительно больше. Здесь есть и удобный Song Mode для расстановки элементов аранжировки по временной шкале, знакомый по DAW.

Если у вас есть мощный компьютер и речь исключительно о домашнем продакшене (без вылазок на природу или уличных Live-выступлений), большого смысла в девайсе не вижу. Проще взять фирменный MIDI-контроллер от Native Instruments, поскольку он предлагает колоссальные возможности. Производительность в этом случае ограничивается исключительно вашим «железом».
В остальном получаем интересное решение, способное работать и от внешнего банка питания (при правильном подборе вольтажа и прочих параметров). Если же подрубать к ПК или Маку по USB, увидим тот самый контроль. Получается 2 в 1 для любителей универсализации и стандартизации. В наличии два больших LCD-экрана без сенсорного ввода, но ручек предостаточно для управления большинством из доступных параметров. Включая регулировку звука на синтезаторах.
Работает девайс на 4-ядерном Intel Atom, в наличии четыре гигабайта ОЗУ (в 2 раза больше, чем у MPC One). На практике это до 10 синтов Massive (зависит от их сложности) и разнообразные эффекты.
Общее число генераторов звука – 9, встроенных пресетов достаточно для любых стилей, поддерживается импорт собственных. Хватит ли для полной аранжировки? Вполне, а если набросать в папку на SD-карту (поддерживаются Flash-карты до 1 TB ёмкостью) множество сэмплов, получаем широкие возможности для организации живых выступлений.

Саунд выводится в 44 кГц при 24 битах, звучание очень качественное. Рекомендую отслеживать процент загруженности CPU: если он выше 80 %, возникает повод облегчить проект. В противном случае порой возникает неприятное потрескивание, свидетельствующее о перегрузке.
Изначально подарочных библиотек вполне достаточно для написания музыкальных произведений сразу из коробки. Не забудьте подключиться по Wi-Fi для инсталляции свежих апдейтов и регистрации на сайте.
По итогу имеем многомерный сэмплер с микшером, Drum-машинку, синтезатор, устройство для управления внешними синтами, поддержку Jam-контроллера для лайвов, удобный редактор нот и т. д.
Главный недостаток – высокая стоимость в районе 1400 $, поэтому назвать гаджет доступным для новичков нельзя. Пользовались? Мнением поделитесь в комментариях.
Подписывайтесь на наши каналы в Яндекс.Дзене и на YouTube! Копирование текстов с сайта GameNewsBlog.ru запрещено. Комментарии закрыты ввиду невозможности их модерации.

GNB-Gamer
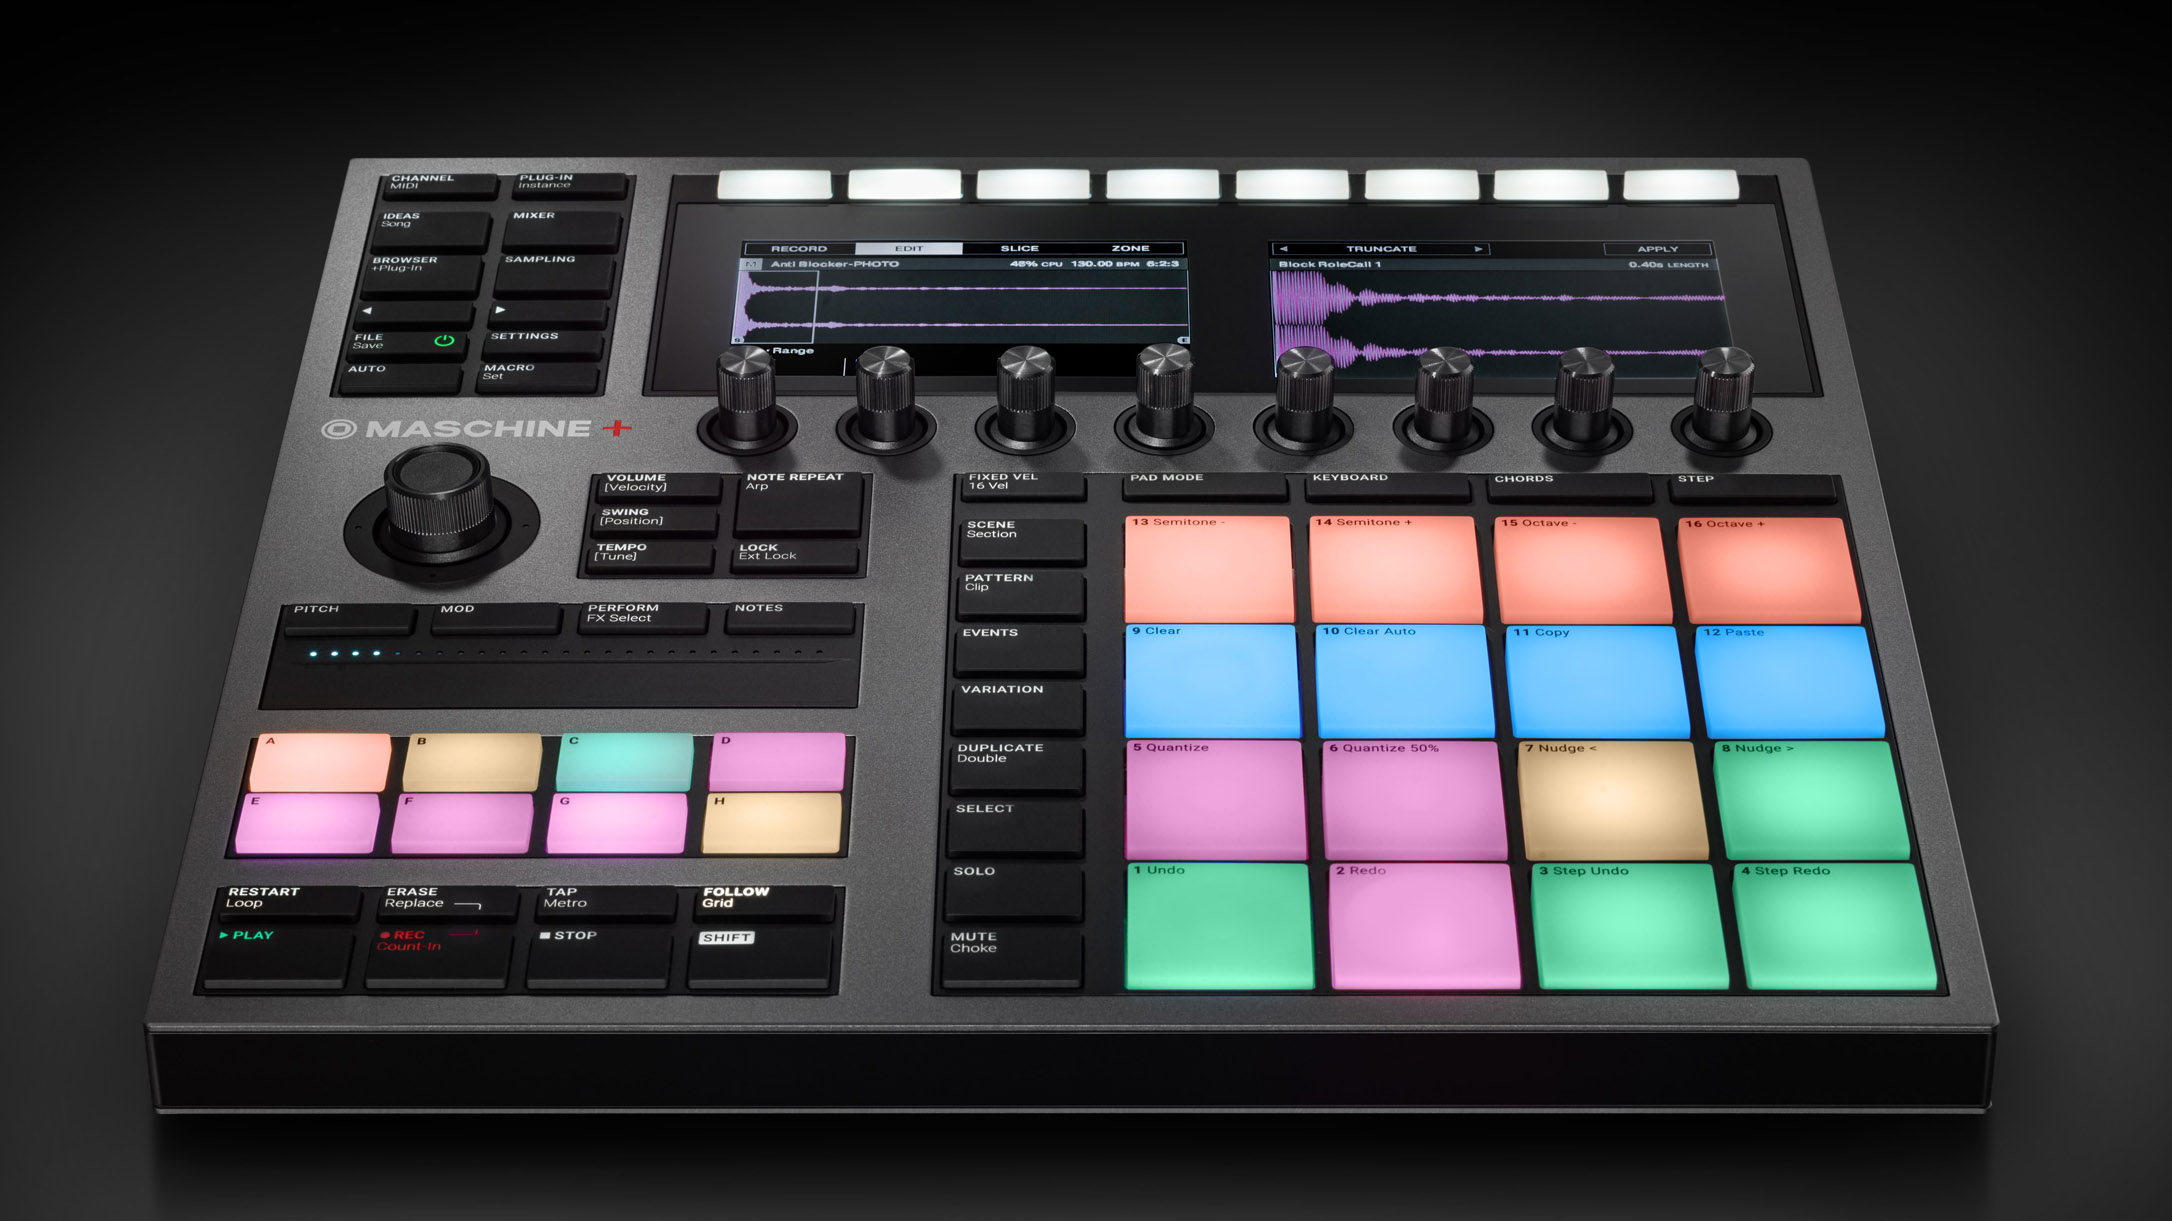
Слухи о выпуске новой версии контроллера Native Instruments Maschine ходили давно — первые упоминания независимого от компьютера контроллера появились ещё в 2014 году. С новой силой тема разогрелась в свете обновления линейки Akai MPC, в рамках которого японский производитель сделал упор на работу собственного грувбокса без привязки к какому-либо оборудованию. Native Instruments молчала до последнего, но молчание не могло быть вечным — на прошлой неделе компания представила новый контроллер Native Instruments Maschine+.
Новый Maschine ждали давно, однако только сейчас компания показала обновлённый контроллер и рассказала о его возможностях. Опубликованный демонстрационный ролик показал внешний вид грувбокса, рассказал о сохранении лучших элементов старых моделей и раскрыл ряд нововведений.
С точки зрения дизайна изменилось не так много: внешне NI Maschine+ практически точная копия Maschine MkIII. Самое заметное отличие в дизайне — материал корпуса. Чтобы подчеркнуть независимость устройства от компьютера и намекнуть на возможность использования в самых разнообразных ситуациях, корпус модели изготавливается из анодированного алюминия.
Основные изменения в сравнении с предшественниками произошли внутри корпуса. Грувбокс оснащается четырёхъядерным процессором Intel Atom, 4 ГБ оперативной памяти и хранилищем на 32 ГБ. По словам Native Instruments, производительности начинки хватит на ближайшие несколько лет. Учитывая частоту обновления модельного ряда грувбоксов,
Входы, выходы и интерфейсы для подключения расположились на задней стороне корпуса. Вход микрофона предложит больший запас гейна в сравнении с предшествующими моделями. К грувбоксу теперь можно подключить два USB-устройства, которые будут работать независимо. К примеру, Maschine+ можно соединить с MIDI-клавиатурой и аудиоинтерфейсом, чтобы получить практически полноценную «карманную» студию звукозаписи.