Данная лицензия не предназначена для продажи этого Руководства и Вы не становитесь владельцем этого Руководства после приобретения любого продукта, загрузки и/или использования. Nikon сохраняет за собой право владения данным Руководством и, следовательно, всеми копиями и все соответствующие права, относящиеся к интеллектуальной собственности, и сохраняет за собой все права, которые явно не предоставлены Вам в рамках данного Соглашения. Данное Соглашение представляет собой полное и эксклюзивное соглашение, устное и письменное, между Вами и Nikon.
1. РУКОВОДСТВО
Руководство предназначено для клиентов, которые приобрели наши продукты. Мы можем не иметь возможности ответить на запрос физических лиц, которые не приобрели наши продукты. Пожалуйста, имейте в виду, что данное руководство и контактная информация, указанные здесь, могут быть изменены без уведомления.
Данное Руководство защищено Законом об авторском праве Японии и международными законами об авторском праве и международными договорами. Вам необходимо воспроизвести на каждой копии уведомление об авторском праве Nikon и любую другую информацию о праве собственности, которые присутствовали на оригинале.
2. ОГРАНИЧЕНИЯ
Кроме случаев, когда в данном Соглашении указано иное, нельзя делать или передавать копии данного Руководства другим или передавать в электронной форме Руководство с одного компьютера на другой по сети. НЕЛЬЗЯ ИЗМЕНЯТЬ ИЛИ УДАЛЯТЬ ЛЮБЫЕ УВЕДОМЛЕНИЯ ОБ АВТОРСКОМ ПРАВЕ, ТОРГОВОЙ МАРКЕ ИЛИ ДРУГИЕ ЗАЩИТНЫЕ УВЕДОМЛЕНИЯ, СОДЕРЖАЩИЕСЯ В ДАННОМ РУКОВОДСТВЕ. НЕЛЬЗЯ ПРИСВАИВАТЬ ИЛИ ИНЫМ ОБРАЗОМ ИЗБАВЛЯТЬСЯ, МОДИФИЦИРОВАТЬ, НАСТРАИВАТЬ, ПЕРЕВОДИТЬ, АРЕНДОВАТЬ, БРАТЬ В НАЕМ, ЗАНИМАТЬ, ПЕРЕПРОДАВАТЬ, РАСПРОСТРАНЯТЬ, ПЕРЕДАВАТЬ ПО СЕТИ ИЛИ СОЗДАВАТЬ ИЛИ ИМЕТЬ СОЗДАННЫЕ ПРОИЗВОДСТВЕННЫЕ РАБОТЫ, ОСНОВАННЫЕ НА ДАННОМ РУКОВОДСТВЕ ИЛИ ЛЮБОЙ ЧАСТИ ТАКОВОГО.
3. ОГРАНИЧЕННАЯ ГАРАНТИЯ И ОТКАЗ
В НАИБОЛЬШЕЙ СТЕПЕНИ, РАЗРЕШЕННОЙ В СИЛУ ДЕЙСТВУЮЩЕГО ЗАКОНОДАТЕЛЬСТВА, ДАННОЕ РУКОВОДСТВО ПРЕДОСТАВЛЕНО НА ОСНОВЕ ПРИНЦИПА «КАК ЕСТЬ», БЕЗ ГАРАНТИИ В ЛЮБОЙ ФОРМЕ, И КОМПАНИЯ NIKON, ЕЕ СОТРУДНИКИ, РАСПРОСТРАНИТЕЛИ, ДИЛЕРЫ И АГЕНТЫ ПРЯМО НЕ ПРИЗНАЮТ ЛЮБУЮ ГАРАНТИЮ В ЛЮБОЙ ФОРМЕ, ВЫРАЖЕННУЮ ИЛИ ПОДРАЗУМЕВАЕМУЮ, ВКЛЮЧАЯ, НО НЕ ОГРАНИЧИВАЯСЬ, ЛЮБОЙ ПОДРАЗУМЕВАЕМОЙ ГАРАНТИЕЙ ПРИГОДНОСТИ ДЛЯ ТОРГОВЛИ, ПРИГОДНОСТИ ДЛЯ ОПРЕДЕЛЕННОГО НАЗНАЧЕНИЯ ИЛИ ОТСУТСТВИЯ НАРУШЕНИЙ. В НАИБОЛЬШЕЙ СТЕПЕНИ, РАЗРЕШЕННОЙ В СИЛУ ДЕЙСТВУЮЩЕГО ЗАКОНОДАТЕЛЬСТВА, КОМПАНИЯ NIKON, ЕЕ СОТРУДНИКИ, РАСПРОСТРАНИТЕЛИ, ДИЛЕРЫ И АГЕНТЫ НЕ ГАРАНТИРУЮТ ИСПОЛНЕНИЕ ИЛИ РЕЗУЛЬТАТЫ, КОТОРЫЕ ВЫ МОЖЕТЕ ПОЛУЧИТЬ ИЗ ДАННОГО РУКОВОДСТВА, ИЛИ ЧТО ДАННОЕ РУКОВОДСТВО БУДЕТ СООТВЕТСТВОВАТЬ ВАШИМ ТРЕБОВАНИЯМ ИЛИ ЧТО РАБОТА РУКОВОДСТВА БУДЕТ БЕСПЕРЕБОЙНОЙ, БЕЗОШИБОЧНОЙ ИЛИ НЕ БУДЕТ СОДЕРЖАТЬ ВИРУСОВ. В НАИБОЛЬШЕЙ СТЕПЕНИ, РАЗРЕШЕННОЙ В СИЛУ ДЕЙСТВУЮЩЕГО ЗАКОНОДАТЕЛЬСТВА, НИ КОМПАНИЯ NIKON, НИ ЕЕ СОТРУДНИКИ, РАСПРОСТРАНИТЕЛИ, ДИЛЕРЫ И АГЕНТЫ НЕ ДОЛЖНЫ НЕСТИ ПЕРЕД ВАМИ ОТВЕТСТВЕННОСТЬ ЗА ЛЮБЫЕ КОСВЕННЫЕ, ПОСЛЕДУЮЩИЕ ИЛИ НЕПРЕДНАМЕРЕННЫЕ УБЫТКИ, ПОТЕРИ ИЛИ ИЗДЕРЖКИ ЛЮБОГО ТИПА, БУДЬ ТО ПОТЕРЯ ПРИБЫЛИ, ПЕРЕРЫВ В ДЕЯТЕЛЬНОСТИ ИЛИ ИНЫМ СПОСОБОМ ВОЗНИКАЮЩИЙ ИЛИ ЯВЛЯЮЩИЙСЯ СЛЕДСТВИЕМ ДАННОГО РУКОВОДСТВА, ВЫЗВАННЫЙ КАКИМ-ЛИБО СПОСОБОМ, ДАЖЕ ЕСЛИ КОМПАНИЯ NIKON, ЕЕ СОТРУДНИКИ, РАСПРОСТРАНИТЕЛИ, ДИЛЕРЫ ИЛИ АГЕНТЫ УВЕДОМЛЕНЫ О ВОЗМОЖНОСТИ ВОЗНИКНОВЕНИЯ ТАКИХ УБЫТКОВ, ПОТЕРЬ ИЛИ ИЗДЕРЖЕК. ЭТОТ ОТКАЗ СОСТАВЛЯЕТ СУЩЕСТВЕННУЮ ЧАСТЬ ДАННОГО СОГЛАШЕНИЯ, И НЕИСПОЛЬЗОВАНИЕ ДАННОГО РУКОВОДСТВА УПОЛНОМОЧЕНО, КРОМЕ СЛУЧАЕВ В РАМКАХ ДАННОГО ОТКАЗА.
4. ОБЩИЕ СВЕДЕНИЯ
Данное соглашение регулируется и должно истолковываться в соответствии с законами Японии независимо от его принципов коллизионного права. В случае возникновения спора в рамках или в связи с данным соглашением Вы, таким образом, даете согласие на персональную юрисдикцию Японии и отказываетесь от любого возражения, что такая дискуссия вызывает затруднение. Далее Вы соглашаетесь на получение судебных извещений в любом действии, возникающем из данного Соглашения по обычной почте или другими коммерчески оправданными способами доставки расписки в получении. Если любое положение данного Соглашения должно быть определено недействительным по какой-либо причине, то оставшиеся положения не должны быть признаны недействительными и должны остаться в силе без изменений. Данное Соглашение устанавливает в дальнейшем целое соглашение и понимание между Вами и компанией Nikon, и замещает собой и заменяет любые другие соглашения, относящиеся к сути дела данного Соглашения. Неуспех любой стороны в настаивании на строгом исполнении любого правила или положения данного соглашения, или выполнение любой опции, права или защиты прав, содержащихся в данном документе, не должны толковаться в качестве отказа от любого применения такого правила, положения, опции, права или защиты прав в будущем, и такое правило, положение, опция, право или защита прав должны продолжиться и сохранить полную юридическую силу и действие. Заголовки разделов данного Соглашения вставлены только для удобства и не должны составлять часть данного документа или влиять каким-либо образом на значение или толкование данного Соглашения. Кроме случаев, когда иначе явно указано в данном документе, положения раздела 3 и раздела 4 вместе с любыми положениями, которые с помощью своих прямо выраженных условий относятся к периодам после прекращения срока действия данного Соглашения, должны оставаться в силе после прекращения действия данного Соглашения по какой-либо причине.
Руководства для продуктов Nikon/ 2018/02/15/ Вер. 2.0.0

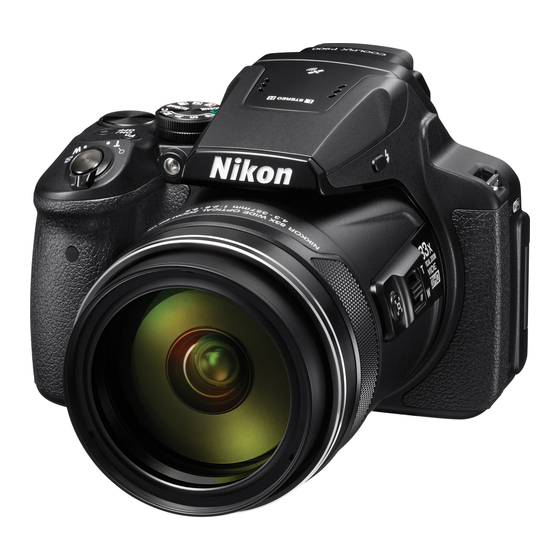
Данная инструкция на русском языке предназначена для фотокамеры
Nikon Coolpix P900, описывает принцип работы и основные моменты эксплуатации устройства.
Производитель настойчиво рекомендует перед включением фотокамеры
внимательно изучить настоящую инструкцию.
Инструкция для фотокамеры
представлена в формате PDF. Все современные браузеры уже поддерживают данный формат и сложностей с открытием файла возникнуть не должно.
Но если открыть инструкцию все же не удается, то необходимо установить на компьютер программу для чтения PDF файлов, например, Acrobat Reader. Если у вас возникли сложности с открытием инструкции на смартфоне под управлением Android, нужно установить, например, Adobe Acrobat Reader.
Комментарии (0)
Комментарии про другие Фотокамеры
Другие Фотокамеры Nikon
-
Инструкции по эксплуатации
28
Языки:

Nikon COOLPIX P900 инструкция по эксплуатации
(242 страницы)
- Языки:Русский
-
Тип:
PDF -
Размер:
20.19 MB -
Описание:
Цифровой фотоаппарат
Просмотр

Nikon COOLPIX P900 инструкция по эксплуатации
(242 страницы)
- Языки:Русский
-
Тип:
PDF -
Размер:
20.19 MB -
Описание:
Цифровой фотоаппарат
Просмотр

Nikon COOLPIX P900 инструкция по эксплуатации
(242 страницы)
- Языки:Русский
-
Тип:
PDF -
Размер:
20.24 MB
Просмотр

Nikon COOLPIX P900 инструкция по эксплуатации
(48 страниц)
- Языки:Русский
-
Тип:
PDF -
Размер:
3.97 MB
Просмотр

Nikon COOLPIX P900 инструкция по эксплуатации
(242 страницы)
- Языки:Английский, Тайский
-
Тип:
PDF -
Размер:
18.87 MB
Просмотр

Nikon COOLPIX P900 инструкция по эксплуатации
(240 страниц)
- Языки:Вьетнамский
-
Тип:
PDF -
Размер:
20.24 MB
Просмотр

Nikon COOLPIX P900 инструкция по эксплуатации
(48 страниц)
- Языки:Шведский
-
Тип:
PDF -
Размер:
3.87 MB
Просмотр

Nikon COOLPIX P900 инструкция по эксплуатации
(240 страниц)
- Языки:Шведский
-
Тип:
PDF -
Размер:
19.91 MB
Просмотр

Nikon COOLPIX P900 инструкция по эксплуатации
(242 страницы)
- Языки:Португальский
-
Тип:
PDF -
Размер:
20.06 MB -
Описание:
Brasil
Просмотр

Nikon COOLPIX P900 инструкция по эксплуатации
(48 страниц)
- Языки:Португальский
-
Тип:
PDF -
Размер:
3.92 MB -
Описание:
Brasil
Просмотр

Nikon COOLPIX P900 инструкция по эксплуатации
(240 страниц)
- Языки:Польский
-
Тип:
PDF -
Размер:
20.07 MB
Просмотр

Nikon COOLPIX P900 инструкция по эксплуатации
(240 страниц)
- Языки:Нидерландский
-
Тип:
PDF -
Размер:
19.99 MB
Просмотр

Nikon COOLPIX P900 инструкция по эксплуатации
(48 страниц)
- Языки:Нидерландский
-
Тип:
PDF -
Размер:
3.88 MB
Просмотр

Nikon COOLPIX P900 инструкция по эксплуатации
(240 страниц)
- Языки:Маратхи
-
Тип:
PDF -
Размер:
16.18 MB
Просмотр

Nikon COOLPIX P900 инструкция по эксплуатации
(240 страниц)
- Языки:Хинди
-
Тип:
PDF -
Размер:
20.21 MB
Просмотр

Nikon COOLPIX P900 инструкция по эксплуатации
(242 страницы)
- Языки:Французский
-
Тип:
PDF -
Размер:
20.2 MB
Просмотр

Nikon COOLPIX P900 инструкция по эксплуатации
(240 страниц)
- Языки:Финский
-
Тип:
PDF -
Размер:
19.89 MB
Просмотр

Nikon COOLPIX P900 инструкция по эксплуатации
(240 страниц)
- Языки:Датский
-
Тип:
PDF -
Размер:
19.88 MB
Просмотр

Nikon COOLPIX P900 инструкция по эксплуатации
(48 страниц)
- Языки:Китайский
-
Тип:
PDF -
Размер:
4.39 MB
Просмотр

Nikon COOLPIX P900 инструкция по эксплуатации
(240 страниц)
- Языки:Португальский
-
Тип:
PDF -
Размер:
20.02 MB
Просмотр

Nikon COOLPIX P900 инструкция по эксплуатации
(48 страниц)
- Языки:Португальский
-
Тип:
PDF -
Размер:
3.92 MB -
Описание:
para clientes na África
Просмотр

Nikon COOLPIX P900 инструкция по эксплуатации
(48 страниц)
- Языки:Португальский
-
Тип:
PDF -
Размер:
3.89 MB -
Описание:
para clientes na Europa
Просмотр

Nikon COOLPIX P900 инструкция по эксплуатации
(120 страниц)
- Языки:Японский
-
Тип:
PDF -
Размер:
13.77 MB
Просмотр

Nikon COOLPIX P900 инструкция по эксплуатации
(244 страницы)
- Языки:Японский
-
Тип:
PDF -
Размер:
23.01 MB
Просмотр

Nikon COOLPIX P900 инструкция по эксплуатации
(48 страниц)
- Языки:Итальянский
-
Тип:
PDF -
Размер:
3.88 MB
Просмотр

Nikon COOLPIX P900 инструкция по эксплуатации
(242 страницы)
- Языки:Испанский
-
Тип:
PDF -
Размер:
20.06 MB
Просмотр

Nikon COOLPIX P900 инструкция по эксплуатации
(240 страниц)
- Языки:Чешский
-
Тип:
PDF -
Размер:
20.01 MB
Просмотр

Nikon COOLPIX P900 инструкция по эксплуатации
(240 страниц)
- Языки:Арабский
-
Тип:
PDF -
Размер:
19.98 MB
Просмотр
На NoDevice можно скачать инструкцию по эксплуатации для Nikon COOLPIX P900. Руководство пользователя необходимо для ознакомления с правилами установки и эксплуатации Nikon COOLPIX P900. Инструкции по использованию помогут правильно настроить Nikon COOLPIX P900, исправить ошибки и выявить неполадки.
Требуется руководство для вашей Nikon Coolpix P900 Цифровая камера? Ниже вы можете просмотреть и загрузить бесплатно руководство в формате PDF. Кроме того, приведены часто задаваемые вопросы, рейтинг изделия и отзывы пользователей, что позволит оптимально использовать ваше изделие. Если это не то руководство, которое вы искали, – свяжитесь с нами.
Ваше устройство неисправно, и в руководстве отсутствует решение? Перейдите в Repair Café для получения бесплатных ремонтных услуг.
Руководство

Рейтинг
Сообщите нам, что вы думаете о Nikon Coolpix P900 Цифровая камера, оставив оценку продукта. Хотите поделиться вашими впечатлениями от данного изделия или задать вопрос? Вы можете оставить комментарий в нижней части страницы.
Довольны ли вы данным изделием Nikon?
Да Нет
Будьте первым, кто оценит это изделие
0 голоса
Часто задаваемые вопросы
Наша служба поддержки выполняет поиск полезной информации по изделиям и отвечает на часто задаваемые вопросы. Если вы заметили неточность в наших часто задаваемых вопросах, сообщите нам об этом с помощью нашей контактной формы.
Как предотвратить появление «красных глаз» на фотографиях? Проверенный
Эффект «красных глаз» вызван попаданием слишком большого количества света за слишком короткий промежуток времени в глаза людей на фото. Этот эффект еще сильнее заметен в темноте. Чтобы его предотвратить, можно сделать следующее: не позволяйте людям смотреть прямо в камеру, создайте больше света, подойдите ближе к позирующим, не используйте функцию приближения/удаления.
Это было полезно (190)
Что такое мегапиксель? Проверенный
Мегапиксель (Мп) равен одному миллиону пикселей. Мегапиксели, кроме прочего, используются для обозначения разрешения цифровых фотоаппаратов и видеокамер. Например, фотоаппарат, который выдает снимки размером 1280×960 пикселей, имеет разрешение около 1,3 Мп. На качество снимков влияют различные факторы, но все же можно сказать, что большее количество мегапикселей дает более качественное изображение.
Это было полезно (181)
Нужно ли полностью разряжать литий-ионный аккумулятор перед зарядкой? Проверенный
Нет, не нужно. Это необходимо было делать с аккумуляторами старого образца. Литий-ионные аккумуляторы можно заряжать после использования и останавливать процесс зарядки в любой момент.
Это было полезно (149)
Что означает SD? Проверенный
SD означает Secure Digital. SD-карты являются стандартным носителем информации для многих цифровых фотоаппаратов.
Это было полезно (122)
Аккумулятор в моем устройстве окислился, могу ли я его безопасно использовать? Проверенный
Ja, устройство все еще можно безопасно использовать. Во-первых снимаем оксидизд АКБ. Никогда не используйте для этого голые руки. Затем протрите батарейный отсек ватным тампоном, смоченным уксусом или лимонным соком. Дайте ему высохнуть и вставьте новые батарейки.
Это было полезно (115)
В каких условиях лучше всего длительно хранить литий-ионный аккумулятор? Проверенный
Рекомендуется хранить литий-ионный аккумулятор при температуре от 5 до 45 °C. Прежде чем отправить аккумулятор на хранение, следует также убедиться в том, что он заряжен примерно на 67%.
Это было полезно (109)
В каких условиях литий-ионный аккумулятор функционирует оптимально? Проверенный
Литий-ионный аккумулятор работает оптимально при температуре от 5 до 45 °C. В очень холодную и очень теплую погоду вы можете заметить, что аккумулятор быстрее разряжается. Не рекомендуется заряжать аккумулятор при температурах ниже 5 °C и выше 45 °C.
Это было полезно (100)
- Manuals
- Brands
- Nikon Manuals
- Digital Camera
- Coolpix P900
- Reference manual
-
Contents
-
Table of Contents
-
Troubleshooting
-
Bookmarks
Quick Links
DIGITAL CAMERA
Reference Manual
En
Related Manuals for Nikon Coolpix P900
Summary of Contents for Nikon Coolpix P900
-
Page 1
DIGITAL CAMERA Reference Manual… -
Page 3
Introduction Table of Contents Parts of the Camera Preparing for Shooting Basic Shooting and Playback Operations Shooting Features Functions That Can Be Set with the d (Menu) Button Using Location Data Functions Using the Wi-Fi (Wireless LAN) Function Connecting the Camera to a TV, Printer, or Computer Reference Section Technical Notes and Index… -
Page 4
Introduction Read This First To get the most from this Nikon product, be sure to read “For Your Safety” (Avi-viii), “<Important> Notes About Location Data Functions (GPS/ GLONASS)” (Axi) and “Wi-Fi (Wireless LAN Network)” (Axii), and all other instructions thoroughly and keep them where they will be read by all who use the camera. -
Page 5
Before taking pictures on important occasions (such as at weddings or before taking the camera on a trip), take a test shot to ensure that the camera is functioning normally. Nikon will not be held liable for damages or lost profits that may result from product malfunction. -
Page 6
• Nikon reserves the right to change the specifications of the hardware and software described in these manuals at any time and without prior notice. • Nikon will not be held liable for any damages resulting from the use of this product. -
Page 7
Care should be taken to avoid injury or damage to property when physically destroying data storage devices. For the COOLPIX P900, the log data saved on the memory card is handled in the same way as other data. To erase the log data that is obtained but not stored on the memory card, select Create log ➝… -
Page 8
For Your Safety To prevent damage to your Nikon product or injury to yourself or to others, read the following safety precautions in their entirety before using this equipment. Keep these safety instructions where all those who use the product will read them. -
Page 9
Do not leave the product where it will be exposed to extremely high temperatures, such as in an enclosed automobile or in direct sunlight Failure to observe this precaution could cause damage or fire. Keep the sun out of the frame Keep the sun well out of the frame when shooting backlit subjects. -
Page 10
Use the appropriate power supply (battery, Charging AC Adapter, AC adapter, USB cable) Using a power supply other than those provided or sold by Nikon could result in damage or malfunction. Use appropriate cables… -
Page 11
CAUTIONS Modifications The FCC requires the user to be notified that any changes or modifications made to this device that are not expressly approved by Nikon Corporation may void the user’s authority to operate the equipment. Interface Cables Use the interface cables sold or provided by Nikon for your equipment. Using… -
Page 12
Handling the cord on this product will expose you to lead, a chemical known to the State of California to cause birth defects or other reproductive harm. Wash hands after handling. Nikon Inc., 1300 Walt Whitman Road, Melville, New York 11747-3064, U.S.A. Tel: 631-547-4200… -
Page 13
• The location name information (Points of Interest: POI) of the People’s Republic of China (“China”) and the Republic of Korea are not provided for the COOLPIX P900. bNotes about record location data functions and log recording • Use information measured by the camera as a guideline only. -
Page 14
EU or EFTA can be used anywhere within the EU and EFTA). Nikon does not accept liability for use in other countries. Users who are unsure as to the original country of sale should consult with their local Nikon service center or Nikon-authorized service representative. -
Page 15
Precautions when Using Radio Transmissions Always keep in mind that radio transmission or reception of data is subject to interception by third parties. Note that Nikon is not responsible for data or information leaks that may occur during data transfer. -
Page 16: Table Of Contents
Table of Contents Introduction …………………… ii Read This First ……………………..ii Other Information……………………….ii Information and Precautions ………………….. iii For Your Safety ……………………. vi WARNINGS …………………………vi Notices ……………………….ix <Important> Notes About Location Data Functions (GPS/GLONASS) ….xi Wi-Fi (Wireless LAN Network)………………… xii Parts of the Camera ………………..
-
Page 17
Shooting Features………………..26 A (Auto) Mode ……………………26 Scene Mode (Shooting Suited to Scenes)…………..27 Special Effects Mode (Applying Effects When Shooting)……… 28 j, k, l, m Modes (Setting the Exposure for Shooting) ……… 30 M (User Settings) Mode ………………….34 Saving Settings in M Mode (Save User Settings)………….. -
Page 18
Reference Section ………………..E1 Hints and Notes About the Scene Mode…………..E3 Shooting with Easy Panorama………………..E10 Playback with Easy Panorama………………..E12 Shooting Time-lapse Movies ………………..E13 Default Settings (Flash, Focus mode, Etc.)…………. E15 Focusing……………………..E18 Using Target Finding AF ………………….E18 Using Face Detection …………………… -
Page 19
Connecting the Camera to a Printer (Direct Print)……….E49 Connecting the Camera to a Printer………………E49 Printing Images One at a Time ………………..E50 Printing Multiple Images ………………….E51 Using ViewNX-i (Transferring Images to a Computer) ……..E53 Installing ViewNX-i …………………….. E53 Transferring Images to a Computer ……………… -
Page 20
The Wi-Fi Options Menu………………..E92 Operating the Text Input Keyboard ………………E93 The Location Data Options Menu…………….E94 Location Data Options……………………E94 Updating the A-GPS File………………….E95 Points of Interest (POI) (Recording and Displaying Location Name Information)……………………….E96 Set Clock from Satellite……………………. E97 The Setup Menu …………………. -
Page 21
Technical Notes and Index…………….F1 Caring for the Product …………………. F2 The Camera…………………………. F2 The Battery …………………………F3 The Charging AC Adapter…………………… F4 Memory Cards……………………….F5 Cleaning and Storage………………….F6 Cleaning…………………………F6 Storage ………………………….. F6 Troubleshooting ……………………. F7 Specifications ……………………F16 Approved Memory Cards…………………. -
Page 23: Parts Of The Camera
Parts of the Camera The Camera Body Flash raised 11 N-Mark (NFC antenna)…. E46 Eyelet for camera strap ……. 9 Power switch/power-on lamp Power connector cover (for optional AC adapter)….. E116 (charge lamp) ……11, 14, 18 w (function) button … 45, E120 Shutter-release button …………17, E120 Mode dial ……….
-
Page 24
14 15 12 q (Wi-Fi) button….60, E45 p (snap-back zoom) button ..21 13 c (playback) button …… 22 Side zoom control …….20 f : wide-angle……20 d (menu) button g : telephoto ……20 ………..49, 51, 54, 55, 57 Diopter adjustment control..19 15 l (delete) button …… -
Page 25: The Monitor
The Monitor The information that is displayed in the monitor during shooting and playback changes depending on the camera’s settings and state of use. Switching the Information Displayed in the Monitor (s Button) To switch the information displayed in the monitor during shooting and playback, press the s (display) button.
-
Page 26: For Shooting
For Shooting 1000 1000 1000mm 10 10 10 10 3200 3200 1/250 1/250 F5.6 F5.6 9999 9999 13 Wind noise reduction…….54 Shooting mode……..24 Vibration reduction icon ….57 Flash mode ……….36 Electronic VR icon…….54 Focus mode……….40 15 Exposure indicator ……32 Zoom indicator……20, 41 16 Flash exp.
-
Page 27
60 60 1000 1000 1000mm 10 10 10 10 3200 3200 1/250 1/250 9999 9999 F5.6 F5.6 35 Active D-Lighting……..52 22 Aperture value……..30 Continuous shooting 23 Shutter speed……..30 mode ……….52, E8 24 ISO sensitivity ……..52 37 Backlighting (HDR)….27, E7 Charging AC adapter Noise reduction burst/single connection indicator… -
Page 28
10 10 1/250 1/250 1/250 1/250 F5.6 F5.6 F5.6 F5.6 9999 9999 10 10 10 10 10 10 10 10 1/250 1/250 F5.6 F5.6 F5.6 F5.6 9999 9999 9999 9999 1/250 1/250 F5.6 F5.6 F5.6 F5.6 9999 9999 9999 9999 View/hide histograms Focus area (target finding AF) ………… -
Page 29: For Playback
For Playback 1 2 3 4 5 6 7 9999/9999 9999/9999 9999/9999 9999/9999 9999/9999 1m 0s 1m 0s 1m 0s Demo mode 12 13 0112.JPG 0112.JPG 15/11/2015 15/11/2015 15:30 15:30 19 18 14 Movie options ……..54 Protect icon……….55 15 Easy panorama indicator..E12 Sequence display (when Individual pictures is selected)
-
Page 30
Tone level information display You can check for loss of contrast detail in highlights and shadows from the histogram that is displayed, or the flashing display for each tone level. These provide guidelines when adjusting the image brightness with functions such as exposure compensation. -
Page 31: Preparing For Shooting
Preparing for Shooting How to Attach the Camera Strap and Lens Attach the strap at two places. Lens Cap At times when you are not shooting images, attach the lens cap to the lens to protect it.
-
Page 32: Insert The Battery And Memory Card
Insert the Battery and Memory Card Memory card slot Battery latch • With the battery’s positive and negative terminals oriented correctly, move the orange battery latch (3), and fully insert the battery (4). • Slide the memory card in until it clicks into place (5). •…
-
Page 33: Charge The Battery
Charge the Battery With the battery installed, connect the camera to an electrical outlet. Charging AC Adapter Electrical outlet Power-on lamp (charge lamp) USB cable (included) If a plug adapter* is included with your camera, securely connect it to the Charging AC Adapter.
-
Page 34
Notes About the USB Cable • Do not use a USB cable other than the UC-E21. Using a USB cable other than the UC-E21 could result in overheating, fire or electric shock. • Make sure that the plugs are properly oriented. Do not insert or remove the plugs at an angle when connecting or disconnecting them. -
Page 35: Opening And Adjusting The Angle Of The Monitor
Opening and Adjusting the Angle of the Monitor Changing the orientation of the monitor is useful when shooting with the camera in a high or a low position, or when taking selfies. For normal shooting, fold the monitor against the camera body with the screen facing out (3).
-
Page 36: Turn The Camera On And Set The Display Language, Date, And Time
Turn the Camera On and Set the Display Language, Date, and Time When the camera is turned on for the first time, the language-selection screen and the date and time setting screen for the camera clock are displayed. Press the power switch to turn on the camera.
-
Page 37
Set the date and time, and press Date and time the k button. • Use J K to select a field and then use HI to set the date and time. 15 11 2015 • Select the minute field and press the k button to confirm the setting. -
Page 38: Basic Shooting And Playback Operations
Basic Shooting and Playback Operations Shooting with A (Auto) Mode Rotate the mode dial to A. • The camera is set to A (auto) mode and general shooting can be performed. • Press the s (display) button to switch the information displayed in the monitor during shooting and play back.
-
Page 39
Frame the picture. • Move the zoom control or the side zoom control to change the zoom lens position. • When the subject is lost at the telephoto zoom position, press the p (snap- back zoom) button to temporarily widen the angle of view so that you can frame the subject more easily. -
Page 40: Using The Flash
Notes About Saving Images or Movies The indicator showing the number of exposures remaining or the indicator showing the remaining recording time flashes while images or movies are being saved. Do not open the battery-chamber/memory card slot cover or remove the battery or memory card while an indicator is flashing.
-
Page 41: Switching Between The Monitor And Viewfinder
Switching Between the Monitor and Viewfinder You can use the viewfinder when bright Viewfinder light under the open sky makes it difficult to see the monitor. x button • When you bring your face close to the viewfinder, the eye sensor responds to it and the viewfinder turns on while the monitor turns off (default setting).
-
Page 42: Using The Zoom
Using the Zoom Zoom out Zoom in When you move the zoom control, the zoom lens position changes. • To zoom in: Move toward g • To zoom out: Move toward f • Rotating the zoom control all the way in either direction adjusts the zoom quickly.
-
Page 43: The Shutter-Release Button
Using the Snap-back Zoom When the subject is lost at the telephoto zoom position, press the p (snap-back zoom) button to temporarily widen the angle of view so that you can frame the subject more easily. • While pressing the p button, frame the subject inside the framing border of the shooting screen.
-
Page 44: Play Back Images
Play Back Images Press the c (playback) button to enter playback mode. • If you press and hold down the c button while the camera is turned off, the camera turns on in playback mode. Use the multi selector to select Display the previous image an image to display.
-
Page 45: Delete Images
Delete Images Press the l (delete) button to delete the image currently displayed in the monitor. Use the multi selector HI to select the desired deletion Delete method and press the k button. Current image • To exit without deleting, press the d Erase selected images All images button.
-
Page 46: Changing The Shooting Mode
Changing the Shooting Mode You can change to the following shooting modes by rotating the mode dial. • A (Auto) mode Used for general shooting. • y, X, s, c (Scene) modes Camera settings are optimized according to the scene that you select. — y: Press the d button and select a scene.
-
Page 47: Functions That Can Be Set Using The Multi Selector (For Shooting)
Functions That Can Be Set Using the Multi Selector (for Shooting) When the shooting screen is displayed, you can press the multi selector H (m) J (n) I (p) K (o) to set the functions described below. • m Flash mode When the flash is raised, the flash mode can be set according to shooting conditions.
-
Page 48: Shooting Features
Shooting Features A (Auto) Mode Used for general shooting. • The camera detects the main subject and focuses on it (target finding AF). If a human face is detected, the camera automatically sets focus priority on it. • See “Focusing” (E18) for more information. Functions Available in A (Auto) Mode •…
-
Page 49: Scene Mode (Shooting Suited To Scenes)
Scene Mode (Shooting Suited to Scenes) When a scene is selected, camera settings are automatically optimized for the selected scene. 1, 2 X Night landscape (E3) , s Night portrait 1, 2 (E3), c Landscape (E4) Rotate the mode dial to X, s or c and take pictures.
-
Page 50: Special Effects Mode (Applying Effects When Shooting)
Special Effects Mode (Applying Effects When Shooting) Effects can be applied to images during shooting. Image quality Image size Special effects Special effects Soft Nostalgic sepia Nostalgic sepia Nostalgic sepia High-contrast mono. High-contrast mono. High-contrast mono. High key High key High key Low key Low key…
-
Page 51
Type Description Creates images with an unusual hue by converting a Cross process positive color image into negative or negative color image into positive. * Certain Movie options are not available. • The camera focuses on the area in the center of the frame. The position of the area cannot be moved. -
Page 52: J, K, L, M Modes (Setting The Exposure For Shooting)
j, k, l, m Modes (Setting the Exposure for Shooting) Images can be shot with greater control by setting the shooting menu (A51) items in addition to setting the shutter speed or aperture value manually according to shooting conditions and requirements. •…
-
Page 53
Exposure The procedure for shooting images at the desired brightness (exposure) by adjusting the shutter speed or aperture value is called “determine exposure.” The sense of dynamism and amount of background defocus in images to be shot vary depending on the combinations of shutter speed and aperture value even if the exposure is the same. -
Page 54
j (Programmed auto) Use for automatic control of the exposure by the camera. • Different combinations of shutter speed and aperture value can be selected without changing the exposure by rotating the 25m 0s 25m 0s 25m 0s command dial (“flexible program”). While 1/250 1/250 1/250… -
Page 55
Notes About Shooting • When zooming is performed after the exposure is set, exposure combinations or aperture value may be changed. • When the subject is too dark or too bright, it may not be possible to obtain the appropriate exposure. In such cases, the shutter speed indicator or aperture value indicator flashes when the shutter-release button is pressed halfway (except when the m mode is used). -
Page 56: M (User Settings) Mode
M (User Settings) Mode Setting combinations that are frequently used for shooting (User settings) can be saved in M. Shooting is possible in j (programmed auto), k (shutter- priority auto), l (aperture-priority auto) or m (manual). Rotate the mode dial to M to retrieve the settings saved in Save user settings.
-
Page 57: Saving Settings In M Mode (Save User Settings)
Saving Settings in M Mode (Save User Settings) The frequently used settings for shooting can be changed and saved in M. Rotate the mode dial to one of j, k, l or m shooting mode that you want to save in M mode. •…
-
Page 58: Flash Mode
Flash Mode When the flash is raised, the flash mode can be set according to shooting conditions. Press the m (flash pop-up) button to raise the flash. • When the flash is lowered, flash operation is disabled and S is displayed. Press the multi selector H (m).
-
Page 59
Available Flash Modes Auto The flash fires when necessary, such as in dim lighting. • The flash mode indicator is only displayed immediately after setting in the shooting screen. Auto with red-eye reduction/Red-eye reduction Reduce red-eye in portraits caused by the flash (A37). •… -
Page 60: Self-Timer
Self-timer The camera is equipped with a self-timer that releases the shutter 10 seconds or 2 seconds after you press the shutter-release button. Set Vibration reduction to Off in the setup menu (A57) when using a tripod to stabilize the camera during shooting.
-
Page 61: Smile Timer (Shooting Smiling Faces Automatically)
Press the shutter-release button the rest of the way down. • Countdown starts. The self-timer lamp flashes and then glows steadily about one second before 1/250 1/250 1/250 F5.6 F5.6 F5.6 the shutter is released. • When the shutter is released, the self-timer is set to OFF.
-
Page 62: Focus Mode
Frame the picture and wait for the subject to smile without pressing the shutter-release button. • Point the camera at a human face. • If the camera detects that the face framed by the double border is smiling, the shutter 25m 0s 25m 0s 25m 0s…
-
Page 63
Available Focus Modes Autofocus The camera automatically adjusts the focus according to the distance to the subject. Use when the distance from the subject to the lens is 50 cm (1 ft 8 in.) or more, or 5.0 m (16 ft 5 in.) or more at the maximum telephoto zoom position. -
Page 64: Using Manual Focus
Using Manual Focus Available when the shooting mode is j, k, l, m or M, special effects mode, or Sports, Fireworks show, Bird-watching or Time-lapse movie (night sky, star trails) scene mode. Press the multi Manual focus selector I (p), select E (manual focus), and then press the k button.
-
Page 65
E (Manual Focus) • The digits displayed for the gauge on the right of the monitor in step 2 serve as a guideline for the distance to a subject that is in focus when the gauge is near the center. •… -
Page 66: Exposure Compensation (Adjusting Brightness)
Exposure Compensation (Adjusting Brightness) You can adjust overall image brightness. Press the multi selector K (o). Select a compensation value and Exposure compensation press the k button. + 2 . 0 • To brighten the image, set a positive (+) value.
-
Page 67: Functions That Can Be Set With The Fn (Function) Button
Functions That Can Be Set with the Fn (Function) Button The following functions can be also set by pressing the w (function) button instead of displaying the corresponding menu by pressing the d (menu) button. • This function can be used when the shooting mode is j, k, l, m or M. Image quality (A51) Continuous (A52) Image size (A51)
-
Page 68: Functions That Cannot Be Used Simultaneously When Shooting
Functions That Cannot Be Used Simultaneously When Shooting Some functions cannot be used with other menu settings. Restricted Setting Description function When B (infinity) or Q (infinity) is Focus mode selected, the flash is not available. (A40) Continuous The flash is not available (except for Intvl Flash mode timer shooting).
-
Page 69
Restricted Setting Description function Continuous Continuous and Exposure bracketing (A52)/Exposure are not available simultaneously. bracketing (A52) • When self-timer/remote control is used, a single image is shot even if Self-timer Continuous H, Continuous L, Pre- (A38)/ shooting cache, or BSS has been set. If Remote control Intvl timer shooting is set, shooting (E117) -
Page 70
Restricted Setting Description function When smile timer is selected, the autofocus Smile timer mode operates using the Single AF (A39) Autofocus setting. mode When the focus mode is set to B (infinity), Focus mode the autofocus mode operates using the (A40) Single AF setting. -
Page 71: Functions That Can Be Set With The D (Menu) Button
Functions That Can Be Set with the d (Menu) Button You can set the menus listed below by pressing the d (menu) button. • A, y, X, s, c, u, j, k, l, m, M Shooting menu Available by pressing the d button when the shooting screen is displayed.
-
Page 72
Press the multi selector Shooting menu Image quality Image size • The current menu icon is Picture Control displayed in yellow. Custom Picture Control White balance Metering Menu icons Select a menu icon and Set up Time zone and date press the k button. -
Page 73: The Shooting Menu
The Shooting Menu Enter shooting mode M d button Image quality Image size Picture Control Custom Picture Control White balance Metering Common Options Option Description Allows you to set the image quality (compression Image quality ratio) of images to be saved. •…
-
Page 74
Option Description Allows you to set the method that the camera uses Metering to measure the brightness of the subject. • Default setting: Matrix Allows you to select single or continuous shooting. Continuous • Default setting: Single Allows you to control the camera’s sensitivity to light. •… -
Page 75
Option Description Reset user Allows you to reset the settings saved to mode dial settings When the zoom control is moved, the zoom position (equivalent to focal length/angle of view in 35mm [135] format) is switched to the positions that have Zoom memory been selected by setting the check box to on in this menu option. -
Page 76: The Movie Menu
The Movie Menu Enter shooting mode M d button M e menu icon M k button Movie options Autofocus mode Electronic VR Wind noise reduction Zoom microphone Frame rate Option Description Select the movie type. Select normal speed to record movies at normal Movie options speed, or HS (high speed) to record movies that play in slow or fast motion.
-
Page 77: The Playback Menu
The Playback Menu Press the c button (playback mode) M d button Mark for Wi-Fi upload Quick retouch D-Lighting Skin softening Filter effects Slide show Option Description Allows you to select images in the camera that you Mark for Wi-Fi want to transfer to a smart device in advance before upload transferring them.
-
Page 78: The Image Selection Screen
Option Description Allows you to select whether to display only the key picture for a sequence of images captured continuously or to display the sequence as Sequence display individual images. options • When only the key picture is displayed for a sequence, press the k button to display each image in the sequence.
-
Page 79: The Setup Menu
The Setup Menu Press the d button M z menu icon M k button Time zone and date Slot empty release lock Monitor settings EVF auto toggle Date stamp Vibration reduction Option Description Time zone and date Allows you to set the camera clock. Allows you to set the operation of the shutter Slot empty release E100…
-
Page 80
Option Description Format card E107 Allows you to format the memory card. Allows you to change the camera’s display Language E107 language. Allows you to set whether or not the battery in the Charge by E108 camera is charged when the camera is connected computer to a computer. -
Page 81: Using Location Data Functions
Using Location Data Functions When Record location data in Location data options of the z (location data options) menu (E94) is set to On, the camera starts receiving signals from the positioning satellites. Location data reception can be checked on the shooting screen. •…
-
Page 82: Using The Wi-Fi (Wireless Lan) Function
Using the Wi-Fi (Wireless LAN) Function You can perform the following functions if you install the dedicated software “Wireless Mobile Utility” on your smart device that runs on Android OS or iOS, and connect it to the camera. Take Photos You can save images to a smart device by pressing the shutter-release button of the camera or remotely releasing the camera shutter from the smart device.
-
Page 83: Connecting The Camera To A Tv, Printer, Or Computer
Connecting the Camera to a TV, Printer, or Computer You can enhance your enjoyment of images and movies by connecting the camera to a TV, printer, or computer. Micro-USB connector HDMI micro connector (Type D) Open the connector Insert the plug straight. cover.
-
Page 84
Viewing images on a TV Images and movies captured with the camera can be viewed on a TV. Connection method: Connect a commercially available HDMI cable to the TV’s HDMI input jack. Printing images without using a computer If you connect the camera to a PictBridge-compatible printer, you can print images without using a computer. -
Page 85: Reference Section
Reference Section The Reference Section provides detailed information and hints about using the camera. Shooting Hints and Notes About the Scene Mode……..E3 Default Settings (Flash, Focus mode, Etc.)…….E15 Focusing ………………..E18 The Control Range of the Shutter Speed (j, k, l, m Modes) …………….E22 Playback Playback Zoom………………E23 Thumbnail Playback/Calendar Display……..E24…
-
Page 86
Menu The Shooting Menu (The Common Shooting Options) ..E56 The Shooting Menu (j, k, l or m Mode) ……E58 The Movie Menu …………….E82 The Playback Menu…………….E88 The Wi-Fi Options Menu …………..E92 The Location Data Options Menu ……….E94 The Setup Menu…………….E98 Additional Information Error Messages ……………. -
Page 87: Hints And Notes About The Scene Mode
Hints and Notes About the Scene Mode X Night landscape • Press the d button to select u Hand-held or w Tripod in Night landscape. • u Hand-held (default setting): — Press the shutter-release button all the way to capture a series of images which are combined into a single image and saved.
-
Page 88
c Landscape • Press the d button to select Noise reduction burst or Single shot in Landscape. • Noise reduction burst: This enables you to shoot a sharp landscape with a minimum of noise. — Press the shutter-release button all the way to capture a series of images which are combined into a single image and saved. -
Page 89
y M d Sports • While the shutter-release button is held all the way down, the camera shoots up to about 7 images continuously at a rate of about 7 fps (when image quality is set to Normal and image size is set to i 4608×3456). •… -
Page 90
y M u Food • The focus mode (A40) setting is changed to D (macro close-up) and the camera automatically zooms to the closest position at which it can focus. • You can adjust hue by using the command dial. The hue setting is saved in the camera’s memory even after the camera is turned off. -
Page 91
y M o Backlighting • On the screen displayed when o Backlighting is selected, select On or Off to enable or disable the high dynamic range (HDR) function based on the type of image you want to capture. • Off (default setting): The flash fires to prevent the subject from being hidden in shadow. -
Page 92
y M O Pet portrait • When you point the camera at a dog or cat, the camera detects the pet’s face and focuses on it. By default, the shutter is automatically released when a dog or cat face is detected (pet portrait auto release). •… -
Page 93
y M g Moon • You can adjust hue by using the command dial. The hue setting is saved in the camera’s memory even after the camera is turned off. • Adjust the brightness with exposure compensation (A44) according to shooting conditions such as the waxing and waning of the moon and shooting requirements. -
Page 94: Shooting With Easy Panorama
Shooting with Easy Panorama Rotate the mode dial to y M d button M Easy panorama M k button Select Normal (180°) or Easy panorama Wide (360°) as the shooting range and press the k button. Normal (180°) Wide (360°) •…
-
Page 95
Move the camera in one of the Guide four directions until the guide indicator reaches the end. • When the camera detects which direction it is moving in, shooting begins. • Shooting ends when the camera captures the specified shooting range. •… -
Page 96: Playback With Easy Panorama
Playback with Easy Panorama Switch to playback mode (A22), display an 4/ 4/132 4/132 image captured using easy panorama in full- frame playback mode, and then press the k button to scroll the image in the direction that was used when shooting. •…
-
Page 97: Shooting Time-Lapse Movies
Shooting Time-lapse Movies The camera can automatically capture still images at a specified interval to create time-lapse movies that are approximately 10 seconds long. • When the Frame rate setting of the movie menu is set to 30 fps (30p/ 60p), 300 images are captured and saved with e 1080/30p.
-
Page 98
Stabilize the camera by using a tool such as a tripod. Press the shutter-release button to capture the first image. 25m 0s 25m 0s 25m 0s • Set exposure compensation (A44) before releasing the shutter for the first image. Exposure compensation cannot be changed after the first image is captured. -
Page 99: Default Settings (Flash, Focus Mode, Etc.)
Default Settings (Flash, Focus mode, Etc.) The default settings for each shooting mode are listed below. Flash Focus Exposure Self-timer mode mode compensation (A38) (A36) (A40) (A44) A (auto) u (special effects) j, k, l, m M (user settings) Scene X (night landscape) s (night portrait) c (landscape)
-
Page 100
Flash Focus Exposure Self-timer mode mode compensation (A38) (A36) (A40) (A44) p (easy panorama) O (pet portrait) g (moon) L (bird-watching) A/B/ i (time-lapse movie) Smile timer can also be selected. E (manual focus) cannot be selected. The flash is fixed at W (off) when High ISO monochrome is selected. Cannot be changed. -
Page 101
The Flash Mode Setting The available flash modes differ depending on the shooting mode. y, X, Flash mode s, c U Auto – – – – Auto with red-eye – – – – reduction w w w w Red-eye reduction –… -
Page 102: Focusing
Focusing The focus area varies depending on the shooting mode. Using Target Finding AF In A (auto) mode, or when AF area mode (A52) in j, k, l, m or M mode is set to Target finding AF, the camera focuses in the manner described below when you press the shutter-release button halfway.
-
Page 103: Using Face Detection
Using Face Detection In the following settings, the camera uses face detection to automatically focus on human faces. • s (night portrait), Scene auto selector or Portrait scene mode (A27) • a (smile timer) (A39) 25m 0s 25m 0s 25m 0s •…
-
Page 104: Using Skin Softening
Using Skin Softening When the shutter is released while using one of the shooting modes listed below, the camera detects human faces and processes the image to soften facial skin tones (up to 3 faces). • s (night portrait), Scene auto selector or Portrait scene mode (A27) Skin softening can also be applied to saved images (A55).
-
Page 105: Focus Lock
Focus Lock Use focus lock to capture creative compositions even when the focus area is set to the center of the frame. Position the subject in the center of the frame and press the shutter-release button halfway. • The camera focuses on the 25m 0s 25m 0s 25m 0s…
-
Page 106: The Control Range Of The Shutter Speed (J, K, L, M Modes)
The Control Range of the Shutter Speed (j, k, l, m Modes) The control range of the shutter speed differs depending on the zoom position, aperture, or ISO sensitivity setting. Additionally, the control range changes in the following continuous shooting settings. Setting Control range –1 s (j, k, l modes)
-
Page 107: Playback Zoom
Playback Zoom Moving the zoom control toward g (i playback g (i) zoom) in full-frame playback mode (A22) zooms in on the image. 4/132 4/132 Displayed 0112. JPG area guide 15/11/2015 15:30 15/11/2015 15:30 Full-frame Playback Image is zoomed in. •…
-
Page 108: Thumbnail Playback/Calendar Display
Thumbnail Playback/Calendar Display Moving the zoom control toward f (h thumbnail f (h) playback) in full-frame playback mode (A22) displays images as thumbnails. 4/132 4/132 1/132 1/132 2015 10 10 11 11 12 12 13 13 14 14 15 15 16 16 17 17 18 18…
-
Page 109: Viewing And Deleting Images Captured Continuously (Sequence)
Viewing and Deleting Images Captured Continuously (Sequence) Viewing Images in a Sequence Images captured continuously are saved as a sequence. The first image of a sequence is used as the key 4/132 picture to represent the sequence when displayed in full-frame playback mode or thumbnail playback mode (default setting).
-
Page 110: Deleting Images In A Sequence
Deleting Images in a Sequence When the l (delete) button is pressed for images in a sequence, the images that are deleted vary depending on how the sequences are displayed. • When the key picture is displayed: — Current image: All images in the displayed sequence are deleted.
-
Page 111: Quick Retouch: Enhancing Contrast And Saturation
Quick Retouch: Enhancing Contrast and Saturation Press the c button (playback mode) M Select an image M d button M Quick retouch M k button Use the multi selector HI to select Quick retouch the desired effect level and press the k button.
-
Page 112: Skin Softening: Softening Skin Tones
Skin Softening: Softening Skin Tones Press the c button (playback mode) M Select an image M d button M Skin softening M k button Use the multi selector HI to Skin softening select the desired effect level and press the k button. •…
-
Page 113: Filter Effects: Applying Digital Filter Effects
Filter Effects: Applying Digital Filter Effects Press the c button (playback mode) M Select an image M d button M Filter effects M k button Option Description Blurs the background of human subjects. When no human Soft portrait subjects are detected, keeps the area in the center of the frame in focus and blurs the surrounding area.
-
Page 114: Small Picture: Reducing The Size Of An Image
Use HI to select the color to Selective color keep and press the k button. Preview the result and press the k Preview button. • An edited copy is created. • To exit without saving the copy, press J. Back Save Small Picture: Reducing the Size of an Image Press the c button (playback mode) M Select an image M d button…
-
Page 115: Crop: Creating A Cropped Copy
Crop: Creating a Cropped Copy Move the zoom control to enlarge the image (E23). Adjust the image so that only the portion that you want to keep is displayed, and then press the d (menu) button. • Move the zoom control toward g (i) or f (h) to adjust the magnification rate.
-
Page 116: Recording And Playing Back Movies
Recording and Playing Back Movies Display the shooting screen. • Check the remaining amount of movie recording time. 25m 0s 25m 0s 25m 0s 1/250 1/250 F5.6 F5.6 Remaining movie recording time Press the b (e movie-record) button to start movie recording. •…
-
Page 117
Area Captured in Movies • The area that is captured in a movie varies depending on the Movie options or Electronic VR settings in the movie menu. • Press the s button and display the movie frame (A3) to check the range of a movie in a frame before movie recording. -
Page 118
Notes About Movie Recording Notes About Saving Images or Movies The indicator showing the number of exposures remaining or the indicator showing the remaining recording time flashes while images or movies are being saved. Do not open the battery-chamber/memory card slot cover or remove the battery or memory card while an indicator is flashing. -
Page 119: Capturing Still Images While Recording Movies
Capturing Still Images While Recording Movies If the shutter-release button is pressed all the way while recording a movie, one frame is saved as a still image. Movie recording continues while the still image is being saved. • A still image can be captured when Q is displayed in the monitor.
-
Page 120: Operations During Movie Playback
7m 42s Operations During Movie Playback To adjust the volume, move the zoom control while a movie is playing ( 7m 42s Rotate the multi selector or the command dial to advance or rewind. Volume indicator Playback controls are displayed in the monitor. The operations described below can be performed by using the multi selector JK to select a control and then pressing the k…
-
Page 121: Editing Movies
Editing Movies When editing movies, use a sufficiently charged battery to prevent the camera from turning off during editing. When the battery level indicator is B, movie editing is not possible. Extracting Only the Desired Portion of a Movie The desired portion of a recorded movie can be saved as a separate file. Play back a desired movie and pause at the start point of the portion that you want to extract (E36).
-
Page 122: Saving A Frame From A Movie As A Still Image
Use HI to select m (save) and Save press the k button. • Follow the instructions on the screen to save the movie. 5m 52s 5m 52s 5m 52s Notes About Movie Extracting • A movie that was created by editing cannot be edited again. •…
-
Page 123: Recording The Location Data On The Image
Recording the Location Data on the Image Press the d button M z menu icon M Location data options M k button Set Time zone and date (E98) correctly before using the location data functions. Set Record location data to On. Record location data •…
-
Page 124
Notes About Location Data Functions • Before using the location data functions, read “<Important> Notes About Location Data Functions (GPS/GLONASS)” (Axi). • It takes a few minutes to obtain location data when positioning is performed for the first time or in a situation where positioning cannot be performed for a long period of time, or just after the battery is replaced. -
Page 125
Points of Interest (POI) Information • POI information is location name information for Location name information landmarks (facilities) and other details. (POI information) • When Display POI in Points of interest (POI) (E96) of the location data options menu is set to On, the nearest location name information for the current position is displayed during shooting (only when positioning is being performed). -
Page 126: Recording The Log Of Movement Information
Recording the Log of Movement Information Press the d button M z menu icon M Create log M k button Use the multi selector HI to Create log select , and press the Log interval k button. Start log Log interval End log Select the intervals of log Log interval…
-
Page 127
Notes About Log Recording • If the date and time are not set, the log cannot be recorded. • Use a fully charged battery to prevent the camera from turning off during log recording. When the battery power becomes exhausted, log recording ends. •… -
Page 128: Ending Log To Save It On Memory Cards
Ending Log to Save it on Memory Cards After the obtained log is saved to a memory card by using Save log in the location data options menu, view the log with software that can display log data. Press the d button M z menu icon M Create log M k button When log recording is completed, Create log select End log on the screen, and…
-
Page 129: Connecting To A Smart Device (Wi-Fi)
Connecting to a Smart Device (Wi-Fi) Press the q (Wi-Fi) button on the camera. • The screen shown on the right is displayed. Connect to smart device SSID: • If no connection confirmation is received XXXXXXXXXXXXXXXXXX from the smart device within 3 minutes, the XXXXXXXXXXXXXXXXXX message No access.
-
Page 130
Notes About Shooting • When Wi-Fi is connected, Intvl timer shooting in Continuous cannot be used. • Operations cannot be performed on the camera during remote control operation. The shooting mode is set to A (auto) mode and the focus area is set to the center of the frame, regardless of the camera’s settings. -
Page 131: Preselecting Images In The Camera That You Want To Transfer To A Smart Device
Preselecting Images in the Camera That You Want to Transfer to a Smart Device You can preselect images in the camera that you want to transfer to a smart device. Movies cannot be preselected for transfer. Select images to transfer. You can preselect the images to transfer to a smart device in the following menus: •…
-
Page 132: Connecting The Camera To A Tv (Playback On A Tv)
Connecting the Camera to a TV (Playback on a TV) Turn off the camera and connect it to the TV. • Make sure that the plugs are properly oriented. Do not insert or remove the plugs at an angle when connecting or disconnecting them. HDMI micro connector (Type D) to HDMI jack…
-
Page 133: Connecting The Camera To A Printer (Direct Print)
Connecting the Camera to a Printer (Direct Print) Users of PictBridge-compatible printers can connect the camera directly to the printer and print images without using a computer. Connecting the Camera to a Printer Turn on the printer. Turn off the camera and connect it to the printer using the USB cable.
-
Page 134: Printing Images One At A Time
Printing Images One at a Time Use the multi selector JK to Print selection 15/11/2015 No. 32 [ 32] select the desired image and press the k button. • Move the zoom control toward f (h) to switch to thumbnail playback or g (i) to switch to full-frame playback.
-
Page 135: Printing Multiple Images
Printing Multiple Images When the Print selection screen Print selection 15/11/2015 No. 32 [ 32] is displayed, press the d (menu) button. Use the multi selector HI to Print menu select Paper size and press the k Print selection Print all images button.
-
Page 136
Print selection Select images (up to 99) and the Print selection number of copies (up to 9) of each. • Use the multi selector JK to select images, and use HI to specify the number of copies to be printed. •… -
Page 137: Using Viewnx-I (Transferring Images To A Computer)
To install ViewNX-i, download the latest version of the ViewNX-i installer from the following website and follow the onscreen instructions to complete installation. ViewNX-i: http://nikonimglib.com/nvnxi/ For system requirements and other information, see the Nikon website for your region. Transferring Images to a Computer Prepare a memory card that contains images.
-
Page 138
If a message is displayed prompting you to choose a program, select Nikon Transfer 2. • When using Windows 7 If the dialog shown at right is displayed, follow the steps below to select Nikon Transfer 1 Under Import pictures and videos, click Change program. -
Page 139
After Nikon Transfer 2 starts, click Start Transfer. Start Transfer • Image transfer begins. When image transfer is complete, ViewNX-i starts and the transferred images are displayed. • Consult online help for more information on using ViewNX-i. Terminate the connection. -
Page 140: The Shooting Menu (The Common Shooting Options)
The Shooting Menu (The Common Shooting Options) • See “M (User Settings) Mode” (A34) for information about Save user settings and Reset user settings. Image Quality Enter shooting mode* M d button M shooting mode menu icon M Image quality M k button * The image quality can be set in any shooting mode.
-
Page 141: Image Size
Image Size Enter shooting mode* M d button M shooting mode menu icon M Image size M k button * The image size can be set in any shooting mode. The setting is also applied to other shooting modes (except shooting mode M and Easy panorama scene mode).
-
Page 142: The Shooting Menu (J, K, L Or M Mode)
The Shooting Menu (j, k, l or m Mode) Picture Control (COOLPIX Picture Control) Rotate the mode dial to j, k, l, m or M M d button M j, k, l, m or M menu icon M Picture Control M k button Change the settings for image recording according to the shooting scene or your preferences.
-
Page 143
Customizing Existing COOLPIX Picture Controls: Quick Adjust and Manual Adjust COOLPIX Picture Control can be customized using Quick adjust, which allows for balanced adjustment of sharpness, contrast, saturation and other image editing components, or manual adjust, which allows for detailed adjustment of the components individually. -
Page 144
Types of Quick Adjust and Manual Adjust Option Description Adjusts the sharpness, contrast and saturation levels automatically. Setting to the – side reduces the effect of the selected Quick adjust COOLPIX Picture Control, and setting to the + side emphasizes its effect. •… -
Page 145
Option Description Controls the tint used in monochrome photographs from B&W (black-and-white), Sepia, and Cyanotype (blue-tinted monochrome). Toning Pressing the multi selector I when Sepia or Cyanotype is selected enables you to select a saturation level. Press JK to adjust the saturation. •… -
Page 146: Custom Picture Control (Coolpix Custom Picture Control)
Custom Picture Control (COOLPIX Custom Picture Control) Rotate the mode dial to j, k, l, m or M M d button M j, k, l, m or M menu icon M Custom Picture Control M k button Customize the settings of COOLPIX Picture Control (E59) and register them in Custom 1 or Custom 2 of Picture Control.
-
Page 147: White Balance (Adjusting Hue)
White Balance (Adjusting Hue) Rotate the mode dial to j, k, l, m or M M d button M j, k, l, m or M menu icon M White balance M k button Adjust white balance to suit the light source or weather conditions in order to make the colors in images match what you see with your eyes.
-
Page 148
Color Temperature Color temperature is an objective measure of colors of light sources which are expressed in the unit of absolute temperature (K: Kelvin). Light sources with lower color temperatures appear more reddish, while light sources with higher color temperatures appear more bluish. Blue 3000 4000… -
Page 149
Using Preset Manual Use the procedure below to measure the white balance value under the lighting used during shooting. Place a white or gray reference object under the lighting that will be used during shooting. Use the multi selector HI to White balance Auto (normal) Auto (normal) -
Page 150: Metering
Metering Rotate the mode dial to j, k, l, m or M M d button M j, k, l, m or M menu icon M Metering M k button The process of measuring the brightness of the subject to determine the exposure is known as “metering.
-
Page 151: Continuous Shooting
Continuous Shooting Rotate the mode dial to j, k, l, m or M M d button M j, k, l, m or M menu icon M Continuous M k button Option Description Single One image is captured each time the shutter-release button is pressed.
-
Page 152
Option Description Each time the shutter-release button is pressed all the way, images are captured at a high speed rate. Continuous H: • The frame rate for continuous shooting is about 60 fps 60 fps and the maximum number of continuous shots is 60. •… -
Page 153
Pre-shooting Cache When the shutter-release button is pressed halfway or all the way down, images are saved as described below. Press down halfway Press down all the way Images saved before Images saved by pressing all the way pressing all the way •… -
Page 154
Set the desired interval between Intvl timer shooting each shot. • Use JK to select an item, and use HI to set the time. 00 30 • Press the k button when setting is complete. Edit Press the d (menu) to display the shooting screen. Press the shutter-release button to shoot the first image. -
Page 155: Iso Sensitivity
ISO Sensitivity Rotate the mode dial to j, k, l, m or M M d button M j, k, l, m or M menu icon M ISO sensitivity M k button A higher ISO sensitivity allows darker subjects to be captured. Additionally, even with subjects of similar brightness, pictures can be taken at faster shutter speeds, and blurring caused by camera shake and subject movement can be reduced.
-
Page 156: Exposure Bracketing
Exposure Bracketing Rotate the mode dial to j, k or l M d button M j, k or l menu icon M Exposure bracketing M k button The exposure (brightness) can be changed automatically during continuous shooting. This is effective for shooting when it is difficult to adjust the picture brightness.
-
Page 157: Af Area Mode
AF Area Mode Rotate the mode dial to j, k, l, m or M M d button M j, k, l, m or M menu icon M AF area mode M k button Set how the camera selects the focus area for autofocus. Option Description When the camera detects a…
-
Page 158
Option Description Use this function to take pictures of moving subjects. Register the subject on which Subject the camera focuses. The tracking focus area automatically moves to track the subject. See “Using Subject Tracking” 25m 0s 25m 0s (E75) for more information. 1/250 1/250 F5.6… -
Page 159
Using Subject Tracking Rotate the mode dial to j, k, l, m or M M d button M j, k, l, m or M menu icon M AF area mode M k button M s Subject tracking M k button M d button Register a subject. -
Page 160: Autofocus Mode
Autofocus Mode Rotate the mode dial to j, k, l, m or M M d button M j, k, l, m or M menu icon M Autofocus mode M k button Set how the camera focuses when shooting still images. Option Description The camera focuses only when the shutter-release…
-
Page 161: Noise Reduction Filter
Noise Reduction Filter Rotate the mode dial to j, k, l, m or M M d button M j, k, l, m or M menu icon M Noise reduction filter M k button Set the strength of the noise reduction function that is normally performed when saving images.
-
Page 162: Multiple Exposure
Multiple Exposure Rotate the mode dial to j, k, l, m or M M d button M j, k, l, m or M menu icon M Multiple exposure M k button The camera combines two to three images and saves them as a single image. Option Description Shoots images in multiple exposure mode when set to On.
-
Page 163
Select On, and then press the k Multiple exposure mode button. Press the d (menu) button to display the shooting screen. Press the shutter-release button to shoot the first image. 25m 0s 25m 0s 25m 0s 1/250 1/250 1/250 F5.6 F5.6 F5.6 Press the shutter-release button to… -
Page 164: Zoom Memory
Zoom Memory Rotate the mode dial to j, k, l, m or M M d button M j, k, l, m or M menu icon M Zoom memory M k button Option Description When the zoom control is moved, the zoom position (equivalent to focal length/angle of view in 35mm [135] format) is switched to the positions that have been selected by setting the check box to on in this menu…
-
Page 165: Startup Zoom Position
Startup Zoom Position Rotate the mode dial to j, k, l, m or M M d button M j, k, l, m or M menu icon M Startup zoom position M k button Set the zoom position (equivalent to focal length/angle of view in 35mm [135] format) for when the camera is turned on.
-
Page 166: The Movie Menu
The Movie Menu Movie Options Enter shooting mode M d button M e menu icon M Movie options M k button Select the desired movie option to record. Select normal speed movie options to record at normal speed, or HS movie options (E83) to record in slow or fast motion.
-
Page 167
HS Movie Options Recorded movies are played back in fast or slow motion. See “Playing Back in Slow Motion and Fast Motion” (E84). Image size Option Aspect ratio Description (horizontal to vertical) 1/4-speed slow motion movies 640 × 480 • Max. recording time: HS 480/4×* 7 minutes 15 seconds (playback time: 29 minutes) -
Page 168
Playing Back in Slow Motion and Fast Motion When recording at normal speed: Recording 10 s time Playback 10 s time When recording at h HS 480/4×, or u HS 480/4×: Movies are recorded at 4× normal speed. They are played back in slow motion at 4× slower speed. Recording 10 s time… -
Page 169: Autofocus Mode
Autofocus Mode Enter shooting mode M d button M e menu icon M Autofocus mode M k button Set how the camera focuses when recording movies. Option Description Focus is locked when movie recording starts. Single AF Select this option when the distance between the (default setting) camera and the subject will remain fairly consistent.
-
Page 170: Electronic Vr
Electronic VR Enter shooting mode M d button M e menu icon M Electronic VR M k button Set whether or not to perform electronic VR when recording movies. Option Description Performs electronic VR. • The angle of view (i.e., the area seen in the frame) becomes narrower.
-
Page 171: Zoom Microphone
Zoom Microphone Enter shooting mode M d button M e menu icon M Zoom microphone M k button Option Description In accordance with the angle of view, the camera records sounds over a wide area at the wide-angle zoom position, and records sounds in the limited area at (default setting) the telephoto zoom position.
-
Page 172: The Playback Menu
The Playback Menu See “Editing Images (Still Images)” (E26) for information about image editing functions. Mark for Wi-Fi Upload Press the c button (playback mode) M d button M Mark for Wi-Fi upload M k button Select still images in the camera that you want to transfer to a smart device in advance before transferring them.
-
Page 173: Slide Show
Slide Show Press the c button (playback mode) M d button M Slide show M k button Play back images one by one in an automated “slide show. ” When movie files are played back in the slide show, only the first frame of each movie is displayed. Use the multi selector HI to Slide show select Start and press the k…
-
Page 174: Protect
Protect Press the c button (playback mode) M d button M Protect M k button The camera protects selected images from accidental deletion. Select images to protect or cancel protection from the image selection screen (A56). Note that formatting the memory card permanently deletes all data including protected files ( 107).
-
Page 175: Sequence Display Options
Sequence Display Options Press the c button (playback mode) M d button M Sequence display options M k button Select the method used to display images in the sequence (E25). Option Description Displays each image in a sequence individually. F is Individual pictures displayed on the playback screen.
-
Page 176: The Wi-Fi Options Menu
The Wi-Fi Options Menu Press the d button M q menu icon M k button Configure the Wi-Fi (wireless LAN) settings to connect the camera and a smart device. Option Description Select when wirelessly connecting the camera and a smart Connect to device.
-
Page 177: Operating The Text Input Keyboard
Operating the Text Input Keyboard Character Input for SSID and Password • Use the multi selector HIJK to select Text field alphanumeric characters. Press the k button to SSID enter the selected character in the text field and 2 3 4 6 7 8 9 A B C D E F move the cursor to the next space.
-
Page 178: The Location Data Options Menu
The Location Data Options Menu Location Data Options Press the d button M z menu icon M Location data options M k button Option Description When set to On, signals are received from the positioning Record location data satellites, and positioning starts (E39). •…
-
Page 179: Updating The A-Gps File
Download the latest A-GPS file from the website below, and use it to update the file. http://nikonimglib.com/agps3/ • The A-GPS file for the COOLPIX P900 is only available from the website above. Download the latest A-GPS file to the computer from the website.
-
Page 180: Points Of Interest (Poi) (Recording And Displaying Location Name Information)
Points of Interest (POI) (Recording and Displaying Location Name Information) Press the d button M z menu icon M Points of interest (POI) M k button Configure the POI (points of interest, location name information) settings. Option Description Set whether or not to record the location name information on the images to be shot.
-
Page 181: Set Clock From Satellite
Set Clock from Satellite Press the d button M z menu icon M Set clock from satellite M k button Signals from the positioning satellites are used to set the date and time of the camera’s internal clock. Check the positioning status before setting the clock using this option.
-
Page 182: The Setup Menu
The Setup Menu Time Zone and Date Press the d button M z menu icon M Time zone and date M k button Set the camera clock. Option Description • Select a field: Press the multi Date and time selector JK. •…
-
Page 183
Select w Home time zone or Time zone x Travel destination and press Home time zone the k button. Travel destination • The date and time displayed in the monitor London, Casablanca changes depending on whether the home time zone or travel destination is selected. 15/11/2015 15:30 Press K. -
Page 184: Slot Empty Release Lock
Slot Empty Release Lock Press the d button M z menu icon M Slot empty release lock M k button Set whether or not the shutter can be released when no memory card is inserted in the camera. Option Description Release locked Unless a memory card is inserted in the camera, the shutter (default setting)
-
Page 185: Monitor Settings
Monitor Settings Press the d button M z menu icon M Monitor settings M k button Option Description Set whether or not to display the captured image immediately Image review after shooting. • Default setting: On Adjust the monitor brightness and hue. •…
-
Page 186
Virtual Horizon The virtual horizon for rolling and pitching directions is displayed on the monitor using a built-in tilt sensor. The virtual horizon can be displayed when AF area mode is set to Manual (spot), Manual (normal) or Manual (wide) in j, k, l or m mode, and in some scene modes or special effects modes with the focus area set to the center of the frame. -
Page 187: Evf Auto Toggle (Automatically Switching The Display To The Viewfinder)
EVF Auto Toggle (Automatically Switching the Display to the Viewfinder) Press the d button M z menu icon M EVF auto toggle M k button Option Description When you bring your face close to the viewfinder, the eye sensor responds to it and the display is automatically (default setting) switched from the monitor to viewfinder.
-
Page 188: Vibration Reduction
Notes About Date Stamp • Stamped dates form a permanent part of image data and cannot be deleted. The date and time cannot be stamped on images after they have been captured. • The date and time cannot be stamped in the following situations: — When the scene mode is set to Night landscape (when set to Hand-held), Night portrait (when set to Hand-held), Sports, Museum, Backlighting (when HDR is set to On), Easy panorama, Pet portrait (when set to…
-
Page 189: Af Assist
AF Assist Press the d button M z menu icon M AF assist M k button Option Description The AF-assist illuminator automatically lights up when you press the shutter-release button under dim lighting. The illuminator has a range of about 5.0 m Auto (16 ft) at the maximum wide-angle position and about (default setting)
-
Page 190: Assign Side Zoom Control
Assign Side Zoom Control Press the d button M z menu icon M Assign side zoom control M k button Choose the function to be performed during shooting when the side zoom control is moved. Option Description When shooting, use the side zoom control (A20) to Zoom (default setting) adjust the zoom.
-
Page 191: Auto Off
Auto Off Press the d button M z menu icon M Auto off M k button Set the amount of time that elapses before the camera enters standby mode (A18). You can select 30 s, 1 min (default setting), 5 min, or 30 min. Setting the Auto Off Function The time that passes before the camera enters standby mode is fixed in the following situations:…
-
Page 192: Charge By Computer
Charge by Computer Press the d button M z menu icon M Charge by computer M k button Option Description When the camera is connected to a computer that is running a Auto (A61), the battery inserted into the camera is automatically (default setting) charged using power supplied by the computer.
-
Page 193: Toggle Av/Tv Selection
Toggle Av/Tv Selection Press the d button M z menu icon M Toggle Av/Tv selection M k button Switch the method for setting the flexible program, shutter speed or aperture value when shooting mode is set to j, k, l, m or M. Option Description Do not toggle selection…
-
Page 194: Peaking
Peaking Press the d button M z menu icon M Peaking M k button Option Description When operating E (manual focus), focusing is assisted by highlighting areas that are in focus in white on the image (default setting) displayed in the monitor (A42, 43). Peaking is disabled.
-
Page 195: Error Messages
Error Messages Refer to the table below if an error message is displayed. Display Cause/Solution Battery temperature is elevated. The camera will turn off. The camera turns off automatically. Wait until – the battery has cooled before resuming use. The camera will turn off to prevent overheating.
-
Page 196
Display Cause/Solution File numbering cannot be reset because the sequential number of a folder has reached the Cannot reset file upper limit. E107 numbering. Insert a new memory card or format the memory card. Memory contains no Insert a memory card that contains images. images. -
Page 197
Turn the camera off and reconnect the USB cable. An error occurred in the camera’s internal circuitry. Turn the camera off, remove and reinsert the System error battery, and turn the camera on. If the error persists, contact your retailer or Nikon- authorized service representative. E113… -
Page 198
Display Cause/Solution Printer error: check After solving the problem, select Resume and – press the k button to resume printing.* printer status. Printer error: check Load the specified size of paper, select Resume, – and press the k button to resume printing.* paper. -
Page 199: File Names
File Names Images or movies are assigned file names as follows. File name: DSCN0001.JPG Not shown on the screen of the camera. • DSCN: Original still images, movies, still images created by the movie editing function • SSCN: Small picture copies (1) Identifier •…
-
Page 200: Optional Accessories
Remote Control* ML-L3 Remote Control Filter 67mm screw-on filter (Nikon product) * Setting a longer Auto off time (E107) is recommended when using the remote control function. Availability may vary with country or region. See our website or brochures for the latest information.
-
Page 201: Shooting With Ml-L3 Remote Control
Shooting with ML-L3 Remote Control Use the ML-L3 Remote Control (available separately) (E116) to release the shutter. Set Vibration reduction (E104) in the setup menu to Off when using a tripod to stabilize the camera. Press the multi selector J (n). Select remote control mode and Self-timer press the k button.
-
Page 202
Aim the transmitter at the infrared receiver of the camera (A1) and press the transmission button. • Press the transmission button from a distance of 5 m (16 ft) or less. • In the remote instant shooting mode, once the subject is in focus, the shutter is released. -
Page 203: Principle Functions Of The Controls
Principle Functions of the Controls For Shooting Control Main Function Change the shooting mode. Mode dial Move toward g (i) (telephoto) to zoom in closer to the subject, and move toward f (h) (wide-angle) to zoom out and view a larger area.
-
Page 204
Control Main Function • When the shooting mode is 30, 32 Set the flexible program. • When the shooting mode is 30, 32 Set the shutter speed. Command dial 49, 51, Display and hide the menu. 54, 55, d (menu) button When pressed halfway (i.e., if you stop pressing when you feel resistance slightly): Set focus and exposure. -
Page 205
Control Main Function Play back images. c (playback) button Delete the last image that was saved. l (delete) button For Playback Control Main Function • When the camera is turned off, press and hold this button to turn the camera on in playback mode. -
Page 206
Control Main Function • Display individual images of a sequence in full-frame playback mode. • Scroll an image shot with Easy panorama. • Play back movies. E23, • Switch from thumbnail playback or zoomed image display to full-frame k (apply selection) playback. -
Page 207
Control Main Function Shutter-release button Return to shooting mode. – b (e movie-record) button E123… -
Page 208
E124… -
Page 209: Technical Notes And Index
Technical Notes and Index Caring for the Product……..F2 The Camera…………………F2 The Battery………………..F3 The Charging AC Adapter …………..F4 Memory Cards………………F5 Cleaning and Storage……..F6 Cleaning………………..F6 Storage …………………F6 Troubleshooting……….F7 Specifications……….F16 Approved Memory Cards …………… F20 USER LICENSE AGREEMENT FOR LOCATION NAME DATA ………..F22 Index ……………F28…
-
Page 210: Caring For The Product
Caring for the Product Observe the precautions described below in addition to the warnings in “For Your Safety” (Avi-viii) when using or storing the device. The Camera Do Not Apply Strong Impact to the Camera The product may malfunction if subjected to strong shock or vibration. In addition, do not touch or apply force to the lens or lens cover.
-
Page 211: The Battery
Do not Attach a Commercially Available Step-up Ring, Etc. to the Lens Attaching accessories other than the provided lens cap or the Nikon 67mm screw-on filter could cause a malfunction. The Battery Precautions for Use •…
-
Page 212: The Charging Ac Adapter
Using the Battery When Cold On cold days, the capacity of batteries tends to decrease. If an exhausted battery is used at a low temperature, the camera may not turn on. Keep spare batteries in a warm place and exchange as necessary. Once warmed, a cold battery may recover some of its charge. Battery Terminals Dirt on the battery terminals may prevent the camera from functioning.
-
Page 213: Memory Cards
Memory Cards Precautions for Use • Use only Secure Digital memory cards. See “Approved Memory Cards” (F20) for recommended memory cards. • Be sure to follow the precautions described in the documentation included with the memory card. • Do not put labels or stickers on memory cards. Formatting •…
-
Page 214: Cleaning And Storage
Cleaning and Storage Cleaning Do not use alcohol, thinner, or other volatile chemicals. Avoid touching glass parts with your fingers. Remove dust or lint with a blower (typically a small device with a rubber bulb attached to one end that is pumped to produce a stream of air out the other end). To Lens/ remove fingerprints or other stains that cannot be removed with a viewfinder…
-
Page 215: Troubleshooting
Troubleshooting If the camera fails to function as expected, check the list of common problems below before consulting your retailer or Nikon-authorized service representative. Power, Display, Settings Issues Problem Cause/Solution • Wait for recording to end. • If the problem persists, turn the camera off.
-
Page 216
Problem Cause/Solution The camera may become hot when used for an The camera extended period of time such as to shoot movies, or – becomes hot. when used in a hot environment; this is not a malfunction. • Confirm all connections. •… -
Page 217
Problem Cause/Solution Date not 49, 57 • The current shooting mode does not support Date stamped on stamp. images even • A function that restricts the Date stamp function is when Date enabled. stamp is • The date cannot be stamped on movies. –… -
Page 218
Problem Cause/Solution 24, 25, • The subject is too close. Try shooting using the Scene auto selector or Close-up scene mode, or the macro close-up focus mode. • Incorrect focus mode setting. Check or change the 40, 41 setting. The camera •… -
Page 219
Problem Cause/Solution Off is selected for Shutter sound in Sound settings No sound when in the setup menu. No sound is produced with some 46, 49, the shutter is shooting modes and settings, even when On is released. selected. Off is selected for the AF assist option in the setup AF-assist menu. -
Page 220
Problem Cause/Solution It may take more time to save images in the following situations: • When the noise reduction function is in operation – • When the flash mode is set to V (auto with red-eye reduction/red-eye reduction) • When capturing images in the following scene modes. -
Page 221
• The camera is not recognized by the computer. – connected to a • The computer is not set to start Nikon Transfer 2 – computer. automatically. For more information about Nikon Transfer 2, refer to help information contained in ViewNX-i. -
Page 222
Problem Cause/Solution Images to be printed are not The memory card contains no images. – displayed. The camera cannot be used to select the paper size in the following situations, even when printing from a Cannot select PictBridge-compatible printer. Use the printer to select paper size with the paper size. -
Page 223
Problem Cause/Solution • Check the following items. – — Whether the memory card is inserted — Whether the A-GPS file is stored on the memory card Unable to — Whether the A-GPS file saved on the memory card update the A- is more recent than the A-GPS file saved in the GPS file. -
Page 224: Specifications
Specifications Nikon COOLPIX P900 Digital Camera Type Compact digital camera Number of effective 16.0 million (Image processing may reduce the pixels number of effective pixels.) Image sensor 1/2.3-in. type CMOS; approx. 16.76 million total pixels Lens NIKKOR lens with 83× optical zoom 4.3–357 mm (angle of view equivalent to that of 24–…
-
Page 225
Storage Media SD/SDHC/SDXC memory card File system DCF and Exif 2.3 compliant Still images: JPEG File formats Movies: MOV (Video: H.264/MPEG-4 AVC, Audio: LPCM stereo) • 16 M 4608×3456 • 8 M 3264×2448 • 4 M 2272×1704 • 2 M 1600×1200 •… -
Page 226
Interface Micro-USB connector (Do not use any USB cable other USB connector than the UC-E21.), Hi-Speed USB • Supports Direct Print (PictBridge) HDMI output HDMI micro connector (Type D) connector Wireless LAN Standards IEEE 802.11b/g/n (standard wireless LAN protocol) Range (line of sight) Approx. -
Page 227
Dimensions Approx. 139.5 × 103.2 × 137.4 mm (5.5 × 4.1 × 5.5 in.) (W × H × D) (excluding projections) Approx. 899 g (1 lb 15.8 oz) (including battery and Weight memory card) Operating environment Temperature 0°C–40°C (32°F–104°F) Humidity 85% or less (no condensation) •… -
Page 228: Approved Memory Cards
For Argentina and India: Approx. 76 g (2.7 oz) For Brazil: Approx. 73 g • Nikon will not be held liable for any errors this manual may contain. • The appearance of this product and its specifications are subject to change without notice.
-
Page 229
• The N-Mark is a trademark or registered trademark of NFC Forum, Inc. in the United States and in other countries. • All other trade names mentioned in this manual or the other documentation provided with your Nikon product are trademarks or registered trademarks of their respective holders. AVC Patent Portfolio License… -
Page 230: User License Agreement For Location Name Data
Data, and may not transfer or distribute it in any form, for any purpose, except to the extent permitted by mandatory laws. Restrictions. Except where you have been specifically licensed to do so by Nikon, and without limiting the preceding paragraph, you may not (a) use this Data with any…
-
Page 231
YOUR USE OF OR INABILITY TO USE THIS INFORMATION, ANY DEFECT IN THE INFORMATION, OR THE BREACH OF THESE TERMS OR CONDITIONS, WHETHER IN AN ACTION IN CONTRACT OR TORT OR BASED ON A WARRANTY, EVEN IF NIKON OR ITS LICENSORS HAVE BEEN ADVISED OF THE POSSIBILITY OF SUCH DAMAGES. Some States, Territories and Countries do not allow certain liability exclusions or damages limitations, so to that extent the above may not apply to you. -
Page 232
Government End Users. If the Data supplied by HERE is being acquired by or on behalf of the United States government or any other entity seeking or applying rights similar to those customarily claimed by the United States government, the Data is a “commercial item”… -
Page 233
Notices related to licensed software copyright holders. • Location name data for Japan © 2013 ZENRIN CO., LTD. All rights reserved. This service uses POI data of ZENRIN CO., LTD. “ZENRIN” is a registered trademark of ZENRIN CO., LTD. • Location name data except for Japan ©… -
Page 234
Includes contents of Provincia di Enna, Comune di Torino, Comune di Pisa, Comune di Trapani, Comune di Vicenza, Regione Lombardia, Regione Umbria, licensed under (http://www.dati.gov.it/ iodl/2.0/) and updated by licensee September 1, 2013. Includes content of GeoforUs, licensed in accordance with h ttp://creativecommons.org/licenses/by/ 3.0/legalcode). -
Page 235
Nepal: Copyright Survey Department, Government of Nepal. Sri Lanka: This product incorporates original source digital data obtained from the Survey Department of Sri Lanka 2009 Survey Department of Sri Lanka The data has been used with the permission of the Survey Department of Sri Lanka Israel: … -
Page 236: Index
Index x Monitor button……19 Symbols A Auto mode ……16, 26 n Self-timer/Remote control/Smile y Scene mode……27 timer ……..25, 38, 39 l Aperture-priority auto mode p Focus mode……25, 40 ………….. 30, 32 m Flash mode……. 25, 36 k Shutter-priority auto mode o Exposure compensation …………..
-
Page 237
D-Lighting……55, E27 Black and white copy n …………27, E6 Dynamic Fine Zoom……20 Brightness ……57, E101 BSS……..E6, E68 Easy panorama p ..27, E10 Button sound……E106 Editing movies……. E37 Editing still images…… E26 Calendar display ……E24 Electronic VR…. -
Page 238
Focus lock……… E21 Lens……… F6, F16 Focus mode……..25, 40 Lens cap …………9 Food u ……..27, E6 Li-ion rechargeable battery Format……10, 58, E107 …………10, F19 Format memory cards Location data options ……..10, 58, E107 …….. 49, E39, E94 Frame rate…… -
Page 239
Night landscape mode..27, E3 Quick adjust ……..E60 Night portrait mode… 27, E3 Quick retouch ….. 55, E27 N-Mark……….E46 Noise reduction filter ..52, E77 Ready light……..4, 36 Nostalgic sepia……..28 Rear-curtain sync ……… 37 Number of exposures remaining Rechargeable battery…… -
Page 240
Shutter speed….. 30, E22 Time zone and date ………. 14, 57, E98 Shutter-priority auto mode ………….. 30, 32 Time-lapse movie i ….E13 Shutter-release button Toggle Av/Tv selection ….17, 21, E120, E123 ……….58, E109 Side zoom control ..17, E119 Tone level………… -
Page 241
Zoom …………20 Zoom control ….20, E121 Zoom memory ….53, E80 Zoom microphone..54, E87… -
Page 242
No reproduction in any form of this manual, in whole or in part (except for brief quotation in critical articles or reviews), may be made without written authorization from NIKON CORPORATION. FX5J04(11) 6MN49411-04 © 2015 Nikon Corporation…