- Manuals
- Brands
- Rain Manuals
- Controller
- i-dial
- Instructions manual
-
Contents
-
Table of Contents
-
Bookmarks
Quick Links
Vac
EN. INSTRUCTIONS
N N O V A T I V E I R R I G A T I O N S Y S T E M S
I
Related Manuals for Rain i-dial
Summary of Contents for Rain i-dial
-
Page 1
EN. INSTRUCTIONS N N O V A T I V E I R R I G A T I O N S Y S T E M S… -
Page 2
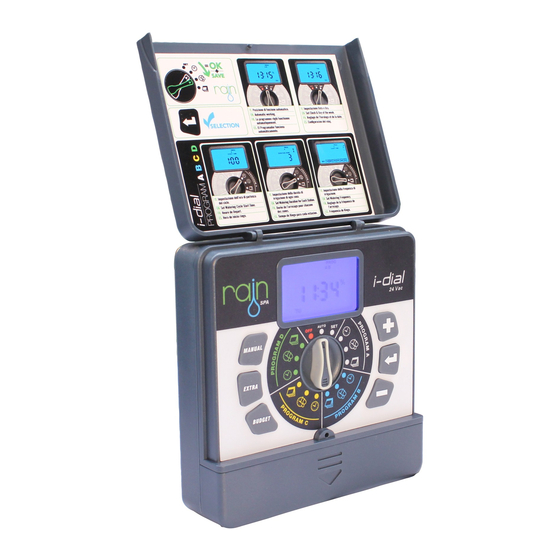
RAIN s.p.a. via Kennedy 38/40 20023 Cerro Maggiore ITALY (MI) DESCRIPTION INDICE The new controller I-DIAL, available in indoor and outdoor version 4-6-8 stations, Pag. 17 is ideal for all residential applications and TECHNICAL FEATURES follows the philosophy to simplicity of programming in 3 RAIN steps: start time, Pag. -
Page 3
• Buffer batteries 2 x 1.5 volt AA alkaline (not • Buffer batteries 2 x 1.5 volt AA alkaline (not included) included) • Output rain sensor programmable per station • Output rain sensor programmable per station • Function OFF • Function OFF •… -
Page 4
• Buffer batteries 2 x 1.5 volt AA alkaline (not • Buffer batteries 2 x 1.5 volt AA alkaline (not included) included) • Output rain sensor programmable per station • Output rain sensor programmable per station • Function OFF • Function OFF •… -
Page 5
THE CONTROLLER indoor 1 2 3 model NEXT START PROG FERTILIZER RAIN DELAY START TIME EVERY DURATION ZONE HOURS outdoor model c c m 1 2 3 4 5 6 7 8 24 vac sensor WARNING The version with the outside transformer… -
Page 6
(budget) Wiring Compartment Giorno 24 vac Cables transformer Input Indica il tempo d’irrigazione sensor Rain sensor input Giorni della settimana Pump control or master valve Output Indica l’intervallo d’irrigazione 1…8 Sector output Indica l’irrigazione manuale in corso The button CLEAR eliminates programming… -
Page 7: Electrical Connections
ELECTRICAL CONNECTIONS Elettrovalvola zona 1 Elettrovalvola zona 2 Elettrovalvola zona 3 Cavo 24 vac Elettrovalvola zona 4 Filo comune Cavo sensore Each 24 VAC electric valve is equipped with two black cables. The fi rst one identifi es the number of the area and it will be connected to one of the outputs numbered in the terminal compartment and the second one is the common cable that will be connected to the Exit C in the terminal compart- ment along with all common cables of all electric valves.
-
Page 8
going to the timer. The other valve wire is to be WIRING THE ELECTRIC VALVES connected to the specifi c station wire that will control that valve • All wires should be joined together using wire nuts, solder, or vinyl tape. For additional protec- tion to waterproof connections a WaterMaster®… -
Page 9: Connecting The Transformer
• Connect the common wire to the terminal labeled “com” CONNECTING THE TRANSFORMER • A rain sensor or other type of micro-switch weather sensor may be connected to the controller. The purpose of the sensor is to stop watering when precipitation is suffi…
-
Page 10: Installing The Batteries
INSTALLING THE BATTERIES CURRENT TIME AND DAY SETTING TIME Remove the battery compart- ment by unscrewing the two screws on the edges. Put two AA (1.5 V) alkaline batteries in the compartment. Replace the battery compart- ment in its place and screw.
-
Page 11
IRRIGATION PLANNING Step 2: Duration setting for each zones (duration zone) The controller I-Dial is equipped with 4 programs (A, B, C, D) completely independent and programmable by following three simple steps. Each program allows a daily start and can be combined PROG with one or more electric valves. -
Page 12: Manual Start
Step 3: watering days setting MANUAL START (watering days) Pressing the MANUAL button you can irrigate without start time setting. This allows you to try the system and I this section it will be possible to choose watering days its functionality or run an extra irrigation in hot days. through the selection of the days of the week or throu- gh an interval irrigation.
-
Page 13
ADDITIONAL FEATURES — BUDGET The function BUDGET allows to modify simultaneously all irrigation times in percentage. You can change the ZONE percentage from a minimum of 10% to a maximum of 200%. EXAMPLE: the controller is programmed to per- manual form a watering cycle at 07:00 AM with irrigation zone times of 10 minutes per zone. -
Page 14
Pump and function SEnS. In these two functions you can set the start of the pump or turn on/off the sensor rain for single zone. EXAMPLE: The garden is composed of four areas here: 3 zones for watering of the lawn with sprinklers connected to a pump and one area for watering of fl… -
Page 15: Problem Solving
The rain sensor • Rain sensor defective • Verify the operation of the does not stop the • Stations have been program- rain sensor and correct cabling system med to keep out the sensor system cablatura dell’impianto • Program again the exclusion…
-
Page 16
(requiring proof of purchase). We reserve the right to inspect the defective part before replacing it. RAIN spa will not be responsible for any costs or accessories or consequential damages, caused by a defect of the product. The responsibility of RAIN spa under this warranty is limited only to the replacement of defective components.
Руководство пользователя системы автоматического полива RainPoint WiFi


Гарантия Описание
Rainpoint предоставляет 1-летнюю ограниченную гарантию на этот продукт в отношении производственных дефектов материалов и изготовления.
Если вы обратитесь к нам для регистрации и активации гарантии, вы можете получить более длительный гарантийный срок.
Нужна помощь?
Эл. почта: service@rainpointus.com
Бесплатная горячая линия США: 1-833-381-5659
Присоединяйтесь к нам, чтобы узнать больше предложений
Вот некоторые новые тестовые продукты, советы и рекомендации, а также много вдохновения, которые помогут нам стать лучшими садоводами.
Facebook: @Rainpointglobal
YouTube: Дождевая точка
WhatsApp: +8615606524176
Узнать больше об этом руководстве и скачать PDF:
Документы / Ресурсы
Рекомендации

Плейлисты продуктов – Rainpoint
Пульт управления AMICO 2+ (Home Irrigation) на 2 зоны (RAIN)
Арт. 200.4044500 Италия
«Amico 2+» простой и удобный таймер.
Его программирование не потребует много времени и сил.
Большой дисплей 3″ позволяет увидеть все данные в одном окне.
Дисплей с подсветкой и большими символами, что позволяет программировать контроллер в течение дня и ночи.
• 1 программа
• Время работы мин/макс: 1/240 минут
• Частота полива: от 1 раза каждые 15 дней, до 4 раз ежедневно
• Индикатор текущего времени
• Индикатор времени старта
• Обратный отсчет времени полива
• Индикатор низкого заряда батареи
Характеристики:
Резьбовое соединение входа ¾ «-1»
Резьбовое соединение выхода ¾ «
Максимальное рабочее давление 8 бар
Максимальный поток 40 л/мин
Соленоид 9 В постоянного тока
Съемный блок управления
Жесткая пластиковая крышка для защиты LCD дисплея
Широкий подсветкой 3 «ЖК-дисплей
Питание от 2 щелочных батареек 1,5 вольт (AA)
![]() Инструкция AMICO 2+
Инструкция AMICO 2+
+7 (495) 532-69-89
info@gazonirrig.ru
Москва, Востряковский пр-д, д.10 Б, стр.1, офис 209
Схема проезда
Главная | Карта сайта | Обратная связь

Уважаемые клиенты!
В связи с невозможностью осуществления прямых поставок поливочного оборудования, наша компания временно не принимает заказы от клиентов.
В случае возобновления поставок работа компании будет восстановлена.
Приносим свои извинения за доставленные неудобства.
+
Table of Contents for Rain SO50:
-
ANWEISUNGEN ZUR EINSTELLUNG DES GETRIEBEVERSENKREGNERS SO50 HINWEIS: Der Regner SO50 ist werkseitig auf einen Kreissektor von 40 ° voreingestellt und mit einer 1.5er Düse bestückt. DÜSENWECHSEL 1. ENTFERNEN DER DÜSENBEFESTIGUNGSSCHRAUBE Entfernen Sie die Düsenbefestigungsschraube mit dem Sechskantschlüsselende (E) des Universalwerkzeugs. Drehen Sie die Schraube entgegen dem Uhrzeigersinn, um sie herauszudrehen,
-
INSTRUÇÕES DE MONTAGEM DE ASPERSORES DO TIPO TURBINA SO50 NOTA: O SO50 vem predefinido de fábrica, com uma configuração de arco de 40°, e inclui um bocal pré-instalado n.º 1.5 SUBSTITUIR O BOCAL 1. REMOÇÃO DO PARAFUSO DE RETENÇÃO DO BOCAL Utilize a chave (A) para remover o parafuso de retenção do bocal, rodando no sentido contrário ao dos ponteiros do relógio para remover e no sentido dos ponteiros do relógio para reinstalar. 2. PUXE PARA CIMA O PORTA-ASPERSO
-
SO50 GEAR DRIVEN SPRINKLER SETTING INSTRUCTIONS NOTE: The SO50 is factory preset with a 40° arc setting, and includes a pre-installed #1.5 nozzle. CHANGING A NOZZLE 1. REMOVING THE NOZZLE RETENTION SCREW Use the K-Key (A) or small flat blade screwdriver to remove the nozzle retention screw (B) by turning counter-clockwise to remove or clockwise to re-install. 2. PULL UP THE RISER Insert the K-Key (A) in the keyhole (C) on the top of the nozzle turre
-
ISTRUZIONI PER LA REGOLAZIONE DELL’IRRIGATORE A TURBINA SO50 N.B. SO50 viene fornito con un’impostazione d’arco di 40° e 1.5 ugelli preinstallati. SOSTITUZIONE DI UN UGELLO 1. RIMOZIONE DELLA VITE DI FISSAGGIO DELL’UGELLO Usare l’estremità (E) a chiave (A) per togliere la vite di fissaggio dell’ugello gi- randola in senso antiorario, e per serrarla nuovamente girandola in senso orario. 2. ESTRAZIONE DELL’ASTA PORTAIRRIGATORE Inserire
-
INSTRUCCIONES DE MONTAJE DEL ASPERSOR DE TURBINA SO50 OBSERVACIÓN: El SO50 viene configurado previamente de fábrica con un ajuste del sector a 40° e incluye la preinstalación de la tobera n.° 1.5. CAMBIO DE LA TOBERA 1. CÓMO QUITAR EL TORNILLO DE SUJECIÓN Utilice el extremo de la llave (A). Para quitar el tornillo de sujeción (B) de la tobera gire en el sentido contrario al de las agujas del reloj, y en el sentido de las agujas del reloj para volverlo a colocar. 2. ELEVACIÓN DE LA TURBINA EMERGENTE Inserte la llave (A) en el
Questions, Opinions and Exploitation Impressions:
You can ask a question, express your opinion or share our experience of Rain SO50 device using right now.