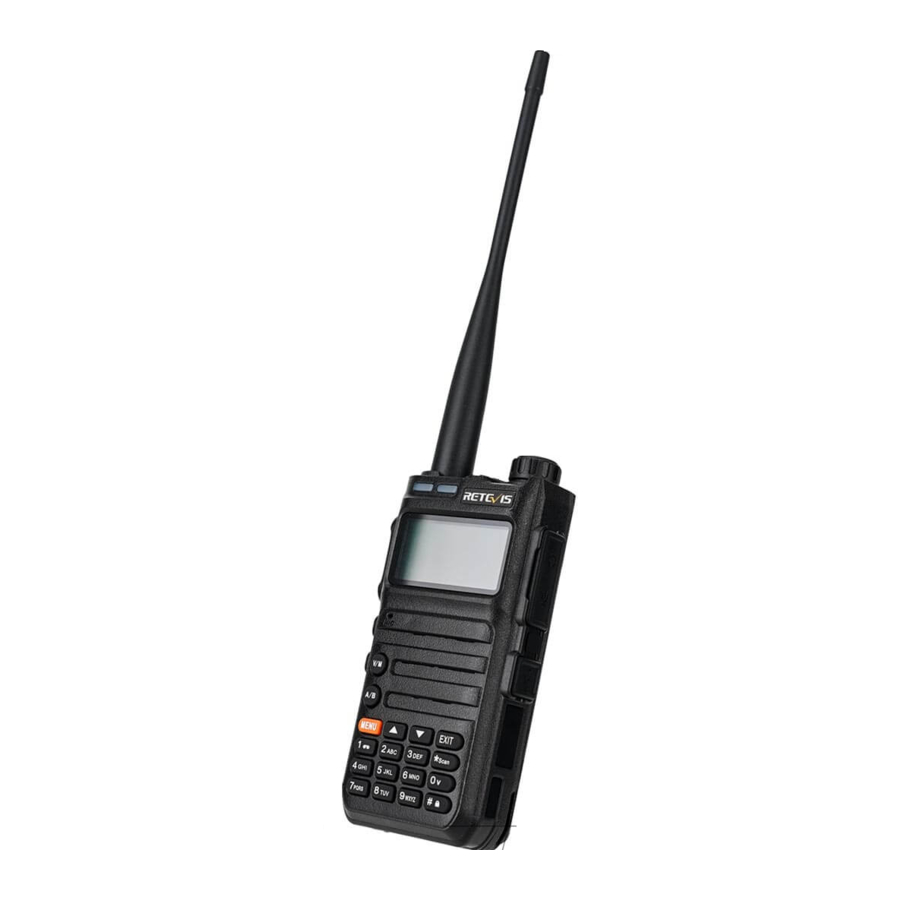
Retevis RA685 — Walkie Talkie Manual
FEATURE
- Frequency range: 144-146MHZ(RX/TX) 430-440MHZ(RX/TX)
- Dual band, Dual Display, Dual Standby, U/V band relay cross-band transmission and reception, convenient for users to set network at any time.
- High, middle, and low power switching to meet the power requirements of users at different distances, more energy-saving and power-saving
- Up to 128 memory channels for programming frequency and other various data
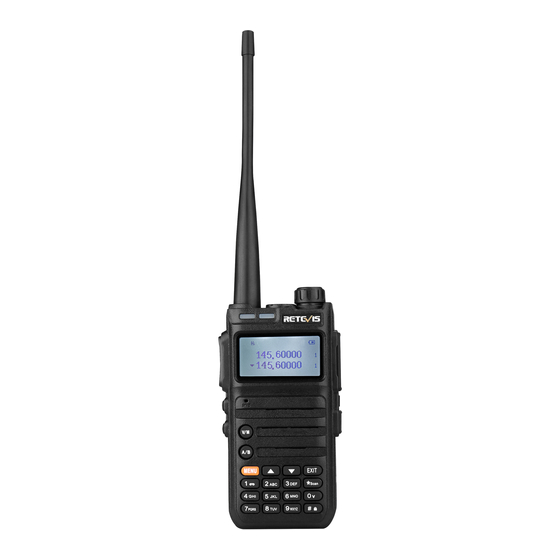
- Multiple display modes such as channel number, frequency, channel frequency, channel name, etc.
- CTCSS/DCS, DTMF signaling, reject redundant calls from other stations
- The tail tone is eliminated to avoid the impact noise from the speaker after the call is over
- VOX voice-activated transmission, no need to press the PTT button to talk normally
- Emergency alarm, ANI identification and other functions through DTMF
- DTMF, CTCSS (60.0 -259.9 HZ), DCS signaling codec function
- 8 step frequency selection (2.5K, 5.0K, 6.25K, 10.0K, 12.5K, 20.0K, 25.0K, 50.0K)
- Automatic power saving function to extend battery life
- SOS emergency alert function
- Computer programming function
- Wide/narrow band (25KHz/12.5KHz) selection function
- Digital FM radio (receiving 65-108MHz)
- Direct selection of keyboard numbers for menu items, the transmit and receive frequency can be manually input
- Strong flashlight lighting function
- Frequency test function, copy the frequency of other devices at any time
- USB charging function, you can use the USB charging cable to charge
- Special CTCSS/DCS (frequency hopping function)
Check the contents of the package
The box contains the following items. If any items are missing or damaged, please contact the dealer where you purchased the product.
| Article | Quantity | Article | Quantity |
| Host | 1 | Charging base | 1 |
| Battery | 1 | Belt clip | 1 |
| Antenna | 1 | Manual | 1 |
| Sling | 1 |
Note: The antenna varies with the frequency band. Please refer to the color ring label at the bottom of the antenna for the antenna frequency band. If the label does not indicate the frequency band, please refer to the specific frequency band on the host label.
Familiar with this machine

Status indication
Status Icons![]()
| No. | Icon | Product Status |
| 1 |  |
Channel strength indicator, the more the number, the stronger the signal |
| 2 |  |
The current transmitting power is high power (the longest communication distance, the largest power consumption); |
 |
The current transmitting power is medium power (more power saving, relatively moderate communication distance); | |
 |
The current transmitting power is low power (the most power saving, relatively close distance) | |
| 3 |  |
When the side tone switch is set to key side tone/key + ID/ID, this symbol appears |
| 4 |  |
This symbol indicates that the current subtone is a digital subtone |
 |
This symbol indicates that the current subtone is an analog subtone | |
| 5 |  |
When this symbol appears in frequency mode, it means that the transmitting frequency is the receiving frequency plus a frequency difference frequency. The frequency difference frequency is set in menu 26 |
 |
When this symbol appears in frequency mode, it means that the transmitting frequency is the receiving frequency minus a frequency difference frequency. The frequency difference frequency is set in menu 26 | |
| 6 |  |
The appearance of this symbol indicates that the dual-band standby is on, and it is in the dual-standby state. It can be watched at the frequency points of the two frequency bands displayed on the screen |
| 7 |  |
The symbol appears when the keyboard is locked; press and hold the [#] key to unlock, and the symbol disappears |
| 8 |  |
Indicates that the voice-activated emission function is activated, and the emission will start when the sound pressure level of the microphone reaches the set value |
| 9 |  |
Receiving and transmitting frequency inversion in frequency mode/channel mode |
| 10 |  |
This symbol appears when the channel is working in narrowband mode |
| 11 |  |
Display the current remaining battery power; the more bars, the more battery power |
| 12 |  |
A/B band pointer, indicating the current working frequency or working channel |
| 13 | Aranbic No. | Digital channel mode, the channel number of the A band |
| 14 | Aranbic No. | Digital In channel mode, the channel number of the B band |
LED indicator light
This machine is equipped with LED indicators to let you easily grasp the current operating status of the machine.
| Indicator status | Native status |
| Steady Red light | Launching |
| Steady green light | Receiving |
Preparation before use
Install the antenna
Install the battery
- Align the battery with the battery mount on the back of the walkie-talkie.
- Press the battery forcefully into the walkie-talkie, and slide the battery up until the lock plate is locked to the correct position. If you need to remove the battery, turn off the walkie-talkie. Press the battery lock to the unlocked position and hold it down, then slide the battery down and away from the battery mount.
Install the belt clip
Align the two screw holes of the belt clip with the screw holes above the battery, install and tighten the screws.
If you need to remove the belt clip, loosen and remove the screws from the belt clip.
Install an external headset/microphone (optional purchase separately)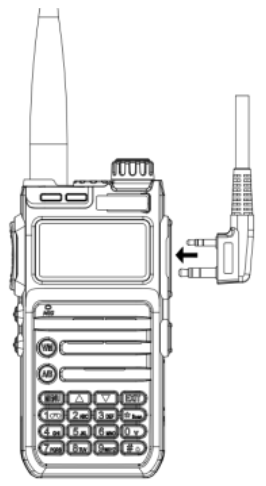
- Open the earphone cover.
- Insert the headphone plug into the headphone jack. When you don’t need to use the earphones, pull out the earphone plug from the earphone hole and put on the earphone cover. When the universal interface is not used, please put on the dust cover.
Attention:
- Please use the charging equipment designated by our company to charge. When charging the whole device, it is recommended to turn off the walkie-talkie first.
- According to the 2016 new requirements of the International Civil Aviation (IATA) «Technical Regulations for the Safe Air Transport of Dangerous Goods», the state of charge of lithium-ion batteries (cells) for air transport shall not exceed 30% of their rated capacity. Therefore, the first time the battery is used with the host, there will be a low battery warning with the voice prompt «please charge». Phenomenon, please charge the battery before use.
- When the battery is charged in the charger, the red light may keep flashing. This is the pre-charging process performed by the charger to protect the battery when the battery power is too low. It is a normal phenomenon. Generally, it can turn to red after 30 seconds. Normal charging state when the light is on.
Walkie-talkie charging
When using the terminal for the first time, a low battery alarm may appear. Please charge the battery before using the terminal, the steps are as follows: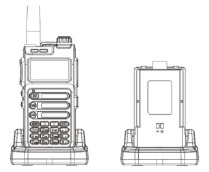
- Insert the power adapter interface into the jack on the back of the charging base.
- Insert the plug of the power adapter into the power outlet.
- Put the battery into the charging cradle.
- Observe the LED indicator of the charging base to understand the current charging status, as shown in the table below.
| The charging indicator light shows | The current charging status |
| Red light flashes | Battery voltage is too low |
| Red light is on | Charging |
| Green light is on | Charging is complete |
Check battery
This function allows you to know the current battery voltage and remaining power.
Long press  key to display the current voltage.
The current battery level is displayed on the upper right of the screen, and the battery icon is as follows:
Basic operation
| Knobs, switches, buttons | Instructions |
| Power/volume switch |
|
| Select channel | The channel is the channel through which the signal is transmitted. After power on, press the [V/M] key to switch to the channel mode, press [/] to select the channel, and the channel number will be displayed on the right side of the screen. If the channel broadcast function is turned on, the intercom will broadcast the current channel mode. |
| PTT button call |
|
| Side Key 1 | The side buttons have two modes: short press and long press, and the following functions can be selected: off, flashlight, alarm, radio, NOAA weather forecast, monitoring, and scan. Off: No function Flashlight function: Short press the [SK1] key to turn on the flashlight function and the flashlight light is always on; short press the [SK1] key again to turn off the flashlight function. If you choose to operate the flashlight function in the menu mode, short press the [SK1] key to turn on the flashlight for the first time, short press the second flashlight to keep flashing, and short press three times to turn off the flashlight. Alarm: SOS emergency alarm function: Short press the [SK1] key to turn on the alarm function. At this time, the green indicator light and the red indicator light flash at the same time. Short press the [SK1] key again to release the alarm. Radio: Short press the [SK1] key to turn on the radio function, and short press the [SK1] key again to turn off the radio. The radio frequency can be entered through the keyboard or tap the «#» key to automatically search for radio stations. In radio mode, press the [EXIT] key to switch between 65-75/76-108MHz frequency band. NOAA weather forecast: Short press the [SK1] key to turn on the NOAA function, and short press the [SK1] key again to turn off the NOAA function. Press the up and down keys to select the channel: 10 channels for selection: see Appendix 1 for details Monitoring function: Short press the [SK1] key to turn on the monitoring function, and release the [SK1] key to cancel the monitoring. Sweep: Short press [SK1] key to turn on the sweep function, and directly measure the frequency of other devices. |
| Side Key 2 | The same side key SK1 has a short press and long press function to choose |
| V/M key | Frequency mode or channel mode switching.
|
| A/B key | A/B upper and lower frequency band switch selection. Press the PTT button to transmit in the frequency band pointed to by the pointer. |
| Keyboard lock and unlock | Manual lock: Long press # key to lock the intercom. Automatic lock: After the automatic keyboard lock is turned on, when there is no operation on the buttons and knobs, the automatic lock will be delayed for 10 seconds. Unlock: Long press the # key to unlock the keyboard. |
Function Description
Menu Settings
You can enter «Menu Settings» through the menu key of the terminal to set some common functions. The specific instructions and operation methods are as follows:
| Menu number display characters | First-level menu | Secondary menu display characters | Description of secondary menu setting |
| 0 | Squelch | 0,…,9 | Squelch level, the lower the level, the easier it is to interfere, the higher the level the worse the sensitivity, the default value is 3. |
| 1 | Step | 2.5KHz | In frequency mode, press  key to change the step value of frequency, the value range is 2.5~50KHz key to change the step value of frequency, the value range is 2.5~50KHz |
| 5.0KHz | |||
| 6.25KHz | |||
| 10.00KHz | |||
| 12.50KHz | |||
| 20.0KHz | |||
| 25.0KHz | |||
| 50.0KHz | |||
| 2 | Tx Power | High | High power |
| Middle | Middle Power | ||
| Low | Low Power | ||
| 3 | Power save | OFF | Turn off power saving mode |
| ON | Turn on power saving mode | ||
| 4 | Vox Level | OFF | Turn off voice control |
| 1,2,… 10 | Start the sound control level intensity, value range | ||
| 5 | Bandwidth | Wide | Wide band working |
| Narrow | Narrow band working | ||
| 6 | Backlight | Bright | Backlight is always on |
| 5Sec, 10Sec,… 60Sec | Automatic backlight delay time, the value range is 5~60 seconds | ||
| 7 | Menu Exit Time | 5Sec, 10Sec,… 60Sec | Menu exit time, the value range is 5~60 seconds |
| 8 | Dual Standby | OFF | OFF |
| ON | ON | ||
| 9 | Beep Prompt | OFF | OFF |
| ON | ON | ||
| 10 | VOICE | OFF | OFF |
| ON | ON | ||
| 11 | Tx over time | OFF | Press and hold the PTT button to keep launching |
| 15,30,…600 | Value range 15~600, step value 15 | ||
| 12 | Rx DCS | OFF | NO DCS |
| D023N,…,D754I | Standard sequence of DCS | ||
| 13 | Rx CTCSS | OFF | NO CTCSS |
| 67.0HZ,…,254.1HZ | Simulate the standard sequence of mute, at the same time, you can directly type standard or non-standard analog mute through the keyboard | ||
| 14 | Tx DCS | OFF | NO DCS |
| D023N,…,D754I | Standard sequence of DCS | ||
| 15 | Tx CTCSS | OFF | NO CTCSS |
| 67.0HZ,…,254.1HZ | Simulate the standard sequence of mute, at the same time, you can directly type standard or non-standard analog mute through the keyboard | ||
| 16 | DTMFST | OFF | OFF |
| DT-ST | DT-ST | ||
| ANI-ST | ANI-ST | ||
| DT+ANI | DT+ANI | ||
| 17 | TONE | 1000hz, 1450hz, 1750hz, 2100hz | Repeater activation audio |
| 18 | S-CODE g | 1,2…,15 | When needed, send out this group of information codes (information codes can only be written by frequency writing software) |
| 19 | Scan Mode | TO | Time Scan |
| CO | Carrier Scan | ||
| SE | Search Scan | ||
| 20 | PTT-ID | OFF | Press PTT to not send ID code |
| BOT | Press PTT to send ID code (ID code is set by frequency writing software) | ||
| EOT | Release PTT to send ID code | ||
| BOTH | ID code is sent when you press and release the PTT button | ||
| 21 | MDF-A | Frequency | In the channel mode of the A segment, the channel displays the frequency |
| Name | In the channel mode of section A, the channel displays the channel name (the specific name is set in the frequency writing software) | ||
| 22 | MDF-B | Frequency | Band B is in channel mode, the channel displays the frequency |
| Name | In the channel mode of section B, the channel displays the channel name (the specific name is set in the frequency writing software) | ||
| 23 | Busy Lockout | OFF | Channel is occupied and allowed to transmit |
| ON | Channel is occupied and transmission is prohibited | ||
| 24 | Key Auto Lock | OFF | Turn off automatic keyboard lock |
| ON | Turn on the keyboard auto-lock function | ||
| 25 | Direction | None | In frequency mode, there is no frequency difference between the transmitting frequency and the receiving frequency |
| Plus | In frequency mode, the transmitting frequency is equal to the receiving frequency plus the frequency difference frequency | ||
| Minus | In frequency mode, the transmitting frequency is equal to the receiving frequency minus the frequency difference frequency | ||
| 26 | Offset | 00.000,…,99.998 | In frequency mode, the difference between the transmitting and receiving frequencies |
| 27 | Key1 sp | OFF | No function |
| LAMP | Turn on the flashlight function | ||
| SOS | Turn on the alarm function | ||
| FM | Turn on the radio function | ||
| NOAA | Enable NOAA weather forecast function | ||
| MONI | Turn on the monitoring function | ||
| Scan | Turn on the sweep function | ||
| 28 | Key1 LP | Same function as side key 1 short press | |
| 29 | Key2 sp | Same function as side key 1 short press | |
| 30 | Key2 LP | Same function as side key 1 short press | |
| 31 | Memory | 1,…,128 | When storing a channel, it is used to indicate the channel number to be stored. If the word CH- is displayed in front of the number, it means that the channel originally has channel parameters |
| 32 | Delete | 1,…,128 | Delete the channel parameters of the specified channel, if there is no CH- in front, it means that the channel has no parameters and the operation is invalid |
| 33 | Alarm Mode | On site | On-site alarm |
| Send sound | Send sound | ||
| Send code | Send code | ||
| 34 | TAIL | OFF | After the PTT is released, the machine does not send a shutdown code, usually when it is relayed through the relay, let it make noise to confirm whether the signal of the machine is relayed |
| ON | After releasing the PTT button, the machine sends a shutdown code to suppress the instantaneous noise of the listener | ||
| 35 | PROGER | OFF | Turn off the call end alert tone |
| ON | Turn on the call end alert tone | ||
| 36 | Language | Chinese | |
| English | |||
| 37 | Reset | VFO | Menu initialization only |
| ALL | Menu and channel initialization | ||
| 38 | SPECIAL DCS | OFF | Close special DCS |
| ON | Open Menu and channel initialization, only with same DCS can communicate |
Common function description
The functions supported by the walkie-talkie are shown in the table below.
| Name | Function description |
| Squelch level adjustment | Squelch level adjustment is to adjust the signal strength required when receiving a signal. The squelch level (0 open to 9 is the highest) is selected by the local environment, and 3 is generally selected. |
| CTCSS/DCS | CTCSS/DCS is used to avoid listening to irrelevant calls of the same frequency. Only when the transmitted CTCSS/DCS matches the received CTCSS/DCS digital, the walkie-talkie can listen to the voice through the speaker. |
| TOT | Timeout prohibition TOT timeout prohibition can limit the single transmission time (the default is 60 seconds) to prevent the communication parties from occupying channel resources for a long time, and to prevent the terminal from being damaged due to overheating. After the duration of pressing the [PTT] key expires, the terminal will automatically terminate the transmission and emit a warning tone. If you need to talk again, please transmit after the preset time. |
| Power saving | When the walkie-talkie has no receiving or transmitting, no button or knob operation reaches the power saving time, it will automatically enter the power saving mode. |
| Low battery warning | It is used to remind the battery to charge in time when the battery power is low. When the battery is too low, transmission will be prohibited. |
| Emergency Alarm | An emergency alarm is when you encounter an emergency, you can ask your companion or the control center for help. |
| SCAN | After scanning is turned on, the terminal will scan according to the scan list. When there is activity on a certain channel, it will stay on the channel to listen, so as to understand the current activity status of related group members. |
| BCL | Busy channel lock BCL can prevent interference from other terminals on the same channel during transmission. When other terminals occupy the current channel, press and hold the [PTT] key, and the terminal will emit a «beep» tone, indicating that it cannot be transmitted. If the current channel is free, press and hold the [PTT] key to start transmission. |
| Power level | The power level refers to the transmit power level of the walkie-talkie, which can be set to high power or low power. High power can increase the signal strength of the current transmitted voice of the terminal, and it can also communicate with the remote terminal. Low power can save power. |
| MONI | Monitoring MONI monitoring is a listening method used to receive more signals or weak signals. It helps to distinguish and listen to the faint sounds in the speakers. |
| Channel broadcast | Channel broadcast is used to indicate the sequence of the current channel. |
| VOX | Voice-activated transmission VOX After turning on the voice-activated, when the voice detected by the microphone meets the transmission conditions, the terminal will automatically transmit the voice, and you can speak directly without pressing the [PTT] key. The voice control gain is used to control the sensitivity of the microphone’s voice control emission, which is configured by the dealer. |
Voice-activated emission (VOX)
After turning on this function, if the user’s speaking volume level reaches the level selected by the walkie-talkie, the walkie-talkie can also start the transmission operation by voice without pressing the [PTT] key. In some work situations, the user can not freely press the [PTT] key to call, then this function can be enabled. Operation method:
- In the standby mode, press the [MENU] key, the voice prompt «menu setting», enter the function menu setting;
- Press [
 ] or [
 ] key to select 4 menu number forward or backward; or directly enter the number 4 to enter 4 menu number;
 - Press the [MENU] key, the voice prompt «Voice-activated emission», press the [
 ] or [] key, select 1~10 (the larger the value, the higher the sensitivity; such as selecting 3)
 - Press the [MENU] key, the voice prompt «OK», save and return to the previous menu.
- Repeat the above operation, select OFF to turn off the voice-activated transmission function. After turning on the voice-activated transmission function, speak into the microphone, and the voice can be sent out; stop speaking, and the transmission will also stop. You can select the VOX sensitivity level according to the quietness of the use environment. If the environment noise is too large, there will be long emission after the VOX function is activated. If the dual-wait function is enabled on this machine, the VOX function is turned off by default, and the VOX function cannot be activated.
Keyboard lock
The keyboard lock function disables the number keys to prevent you from activating a function by mistake. This machine can be set to automatic keyboard lock function, the operation is as follows:
- In the standby mode, press the [MENU] key, the voice prompt «menu setting», enter the function menu setting;
- Press or key to select 24 menu number forward or backward; or directly enter number 2 and 4 to enter 24 menu number;
- Press [MENU] key, press [] or [] key to select ON;
- Press the [MENU] key, the voice prompt «OK», save and return to the previous menu. The automatic keyboard lock function is activated.
- Repeat the above operation, select OFF to turn off the automatic keyboard lock function, and select manual keyboard lock. The operation is as follows:
- In the standby state, long press the «#» key for more than 2s, the keyboard lock function is activated (voice prompt «keyboard lock»);
- Long press the «#» key repeatedly for more than 2s, the keyboard lock function is closed (voice prompt «keyboard unlock»). After the automatic keyboard lock function is turned on, when it is not locked, the numeric keyboard is automatically locked without any keyboard operation for 10 seconds.
Dual Standby
When in dual standby mode, the two-way radio can receive the frequency set by the A or B channel. The operation is as follows:
- In the standby mode, press the [MENU] key, the voice prompt «menu setting», enter the function menu setting;
- Press [] or [] key to select 8 menu number forward or backward; or directly enter the number 8 to enter 8 menu number;
- Press the [MENU] key, the voice prompt «Dual frequency waiting», press [] or [] key, select ON
- Press the [MENU] key, the voice prompt «OK», save and return to the previous menu. The dual-frequency waiting function is turned on.
- Repeat the above operation, select OFF to turn off the dual-frequency standby function. In the menu mode, the dual-frequency standby is temporarily turned off, and after exiting, the dual-frequency standby will be restored.
- Since the dual-standby dual-save mode is in the main and sub-channel scanning state, in the dual-segment dual-save mode, even if the power saving function of the unit is turned on, its power saving function is still invalid, and the standby time of the walkie-talkie will be shortened.
Channel delete
You may want to delete a memory channel due to setting errors or changing other settings. The operation is as follows:
- In the standby mode, press the [MENU] key, the voice prompt «menu setting», enter the function menu setting;
- Press [] or [] key to select 32 menu number forward or backward; or directly enter numbers 3 and 2 to enter 32 menu number;
- Press the [MENU] key, the voice prompt «channel delete»;
- Press [] or [] key to select the channel to be deleted forward or backward.
- If the number prefix displays the character «CH-«, it means that the channel number originally has channel parameters and can be deleted.
- If the number prefix does not display the character «CH-«, it means that the channel number is empty and can be stored directly without deleting it.
- Press the [MENU] key, the voice prompt «OK», delete the stored channel parameters, save and return to the previous menu.
- If the channel is empty, press the [MENU] key to directly return to the previous menu.
Channel storage
The parameters to be included in a complete channel include receiving frequency, transmitting frequency, receiving sub-audio, transmitting sub-audio, transmitting power, channel bandwidth, PTT-ID, busy lock, signaling code, scan addition, channel name, etc. Except for scanning addition and channel name editing through the frequency writing software, other parameters can be set in the frequency mode, and then store them in the designated channel number through the menu 31 Store Channel.
Example: The channel storage parameters are required as follows, and they are stored in the channel number with channel number 001.
- Receiving frequency 440.5 MHZ
- Transmission frequency 4 30.5 MHZ
- Receive mute digital D031N
- Transmit mute digital D031N
- High transmit power
- Channel bandwidth Broadband
The channel name is written in the frequency writing software when needed
Steps:
- Short press [V/M] key to switch to VFO mode, the screen displays
 .
. - In the frequency mode, press the [A/B] key to make the pointer point to A (upstream frequency point)
- Press the number keys 4, 4, 0, 5, 0, 0 in turn to adjust the frequency to 440.500MHZ, and the screen displays .
- Power setting: press
 → (number key 2) →→ [] or [] to select the power (HIGH/MID/LOW) as HIGH→ ,
 - Bandwidth setting: Press → (number key 5) →→ [] or [] to select the channel bandwidth (NARR/WIDE) as WIDE→ ,
- Receive digital tone setting: press → (number keys 1, 2) → [] or [] to select the tone value D031N→ ,
- Transmitting digital sub-tone setting: press → (number keys 1, 4) → → [] or [] to select sub-tone value D031N→,
- PTT-ID button transmission setting: press → (number keys 2, 0) → → [] or [] to select the transmission mode (OFF/BOT/EOT/BOTH) as OFF→ ,
- Channel storage settings for receiving and transmitting the same frequency:
- Press → (number keys 3, 1), the screen displays:

- Press , the voice prompt «storage channel», the screen displays :
- Press or key to select empty channel forward or backward, the screen displays :
- Press , the voice prompts «receive storage», the screen displays : press the voice prompts «storage channel».
- Press , the voice prompt «transmit storage», the screen displays :
- Press EXIT key to return to frequency mode.
- Press
- Channel storage settings for receiving and transmitting different frequencies:
- Press → (number keys 3, 1), the screen displays :
- Press , the voice prompt «storage channel», the screen displays :
- Press the [] or [] key to select the empty channel forward or backward, and the screen displays: .
- Press , the voice prompt «receive storage», the screen displays: ;
- Press EXIT key to return to frequency mode.
- Perform step 3, enter the desired transmit frequency;
- Press → (number keys 3, 1), the screen displays: ,
- Press , the voice prompt «storage channel», the screen displays: ,
- Press , the voice prompt «transmit storage», the screen displays: ;
- Press EXIT key to return to frequency mode.
- Press
 .
. → (number key 2) →
Analog sub-audio (CTCSS)/digital sub-audio (CDCSS)
Analog sub-audio (CTCSS)/digital sub-audio (CDCSS) is mainly used to avoid listening to unrelated calls on the same frequency. If CTCSS/CDCSS is set, within the effective communication range, only calls with the same subtone signaling set in the channel can be received; but if CTCSS/CDCSS signaling is not set, you can listen to the effective communication range All calls on the same channel.
Side tone switch
Key side tone: The machine emits key side tone when sending key side tone
ID code side tone: When sending the ID code, the machine will emit the ID code side tone
Button side tone + ID code side tone: When sending button side tone and ID code side tone, the machine emits the corresponding sound
Note: Button side tone, including number key side tone and TONE tone
USB charging
The walkie-talkie can be directly plugged into the USB charging cable and charging with a power bank.
Frequency measurement function
Press +〖*〗key to enter the frequency measurement mode, press【 】or【
】or【 】key to select U segment or V segment. When a signal is received, if the current frequency has a mute tone, it will be displayed on the screen at the same time, press the key The current frequency can be saved. Or you can select the shortcut operation method by pressing the side button.
Special digital mute
The special digital mute is a mute encryption function, which can prevent other machines from copying the mute of this machine. After this function is turned on, only the same DCS code can talk to each other. The mute encryption function is effective only when the DCS mute code is set. Only the same machines with special digital mute on can talk to each other.
Optional accessories
Please use the accessories specified by our company.
If you use unauthorized accessories without authorization, all consequences caused by this are the responsibility of the user.
Please consult your local dealer for optional accessories of the walkie-talkie.
Main Specifications
| TOTAL | Frequency Range | 144-146MHZ(RX/TX) 430-440MHZ(RX/TX) |
| Channel No. | 16 | |
| Channel Spacing | 25/12.5kHz | |
| Input voltage | 7.4 VDC | |
| Battery (standard configuration) | 1800mAH(Li-Ion) | |
| Battery Life(5-5-90, High power transmission) | About 14 Hours | |
| Current: Standby | ≤65mA | |
| Receive | ≤450 mA | |
| Transmit | ≤1.8 A @high power, 850 mA @ low power | |
| Frequency stability | ±2.5ppm | |
| Operating temperature | -20℃ to +60℃ | |
| Antenna impedance | 50Ω | |
| Walkie-talkie size(With battery, but without antenna) | 121×61×33mm | |
| Walkie-talkie weight(Including antenna and battery) | 223g | |
| TRANMIT PART | Transmit output power | 5W/3W/1W |
| Modulation | 16K0F3E@25KHz, 11K0F3E@12.5KHz | |
| Spurious emission | -36dBm1GHz | |
| FM signal-to-noise ratio | 45dB@25KHz, 40dB @12.5KHz | |
| Audio distortion | ≤5% | |
| Modulation limit | ±5.0 KHz@25 KHz, ±2.5 KHz@12.5 KHz | |
| Adjacent channel power | 70dB @ 25KHz, 60dB @ 12.5KHz | |
| (300-3000Hz) Audio response | +1~3dB | |
| RECEIVE | Receiving sensitivity | 0.25μV (12dB SINAD) |
| Adjacent channel selectivity | ≥60dB@25KHz, ≥55dB@12.5KHz | |
| Intermodulation immunity | ≥60dB@25KHz, ≥55dB@12.5KHz | |
| Conducted spurious emissions | ≤-57dB@25KHz, ≤-57dB @12.5KHz | |
| FM signal-to-noise ratio | ≥45dB@25KHz, ≥40dB @12.5KHz | |
| Audio output power | 1W @16ohms | |
| Audio distortion | ≤5% | |
| Audio response(300-3000Hz) | +1~-3dB |
All specifications are subject to change without notice or responsibility.
Disclaimer
This manual strives for the accuracy and completeness of the content during the compilation process, but the company does not assume any responsibility for possible errors or omissions. Due to the continuous development of technology, the company reserves the right to change product design and specifications without notice. Without the company’s prior written authorization, this manual may not be copied, modified, translated and distributed in any form. The third-party products and content involved in this manual are owned by the third party, and our company does not provide guarantees for their accuracy, validity, timeliness, legality or completeness.

Videos
Retevis RA685 — VHF/UHF FM transceiver Review Video
Documents / Resources
Download manual
Here you can download full pdf version of manual, it may contain additional safety instructions, warranty information, FCC rules, etc.
Download Retevis RA685 — Walkie Talkie Manual
Частотомер
Главная необычность Retevis RA685 — это Частотомер.
Что даёт наличие Частотомера?
Удобство и скорость стыковки с группой случайных радиостанций со случайными частотами.
Зачастую, владельцы радиостанций имеют весма смутное представление на каких частотах работают их балалайки, какие имеют настройки.
Просто, покупают комплект из двух-трёх одинаковых радиостанций и используют магазинные настройки по-умолчанию…
В полевых условиях присоединиться к такой группе почти не реально:
Не известны Частоты, не известны настройки тонального шумоподавления CTCSS/DCS…
Retevis RA685 позволяет отсканировать эти настройки за секунду.
Инструкция
по использованию Частотомера в Retevis RA685:
1. Нажать МЕНЮ, затем *Scan
2. Стрелочками ▲ или ▼ выбрать предполагаемый диапазон UHF (400-520MHz) или VHF (136-174MHz)
3. Приблизить Retevis RA685 к передающей радиостанции (источнику) на расстояние 0,5 – 35 метров.
(Это не описка. У меня стабильно срабатывает на 35 метров, через всё здание, на всю длину коридора (!!!если выключены ВСЕ электроприборы, светильники и т.п.).
Срабатывает и дальше 35 метров, с улицы, но уже не всегда.)
4. На дисплее Retevis RA685 отобразится Частота и CTCSS/DCS код (если используется)
5. Если в этот момент нажать кнопку МЕНЮ, эти настройки сразу пропишутся в память Retevis RA685
* Если RA685 находилась в режиме VFO, новые настройки пропишутся в ячейку VFO
* Если RA685 находилась в Канальном режиме, новые настройки пропишутся в текущий Канал
(поэтому, ещё до включения режима Частотомера, на RA685 необходимо выбрать Канал, куда мы хотим прописать Новые настройки.
Иначе, текущая полезная ячейка (какая нибудь LPD или PMR) будет переписана!)
6. Если текущие показания Частотомера не нужно сохранять, для выхода просто нажмите EXIT
Текущие настройки каналов в Retevis RA685 (частота, порог шумодава, ширина полосы и т.д.) на чувствительность Частотомера, вроде, никак не влияют.
Зато, однозначно, на дальность обнаружения (измерения) сильно влияет наличие фоновых помех (Компьютеры, сотовые, вай-фай, светильники, бытовые приборы и т.п.)
У меня стабильно срабатывает на 35 метров внутри здания (!!!если практически все электроприборы выключены)
В лесу, я уверен, дальность обнаружения (измерения) будет ещё больше.
Проверю когда нибудь…
Примечание:
Радиостанция не является лабораторным измерительным прибором. Потому, глупо ожидать стабильной высочайшей точности измерений.
Частотомер в Retevis RA685 является простым Индикатором без какого либо класса точности.
От экземпляра к экземпляру, кому-то повезёт больше, кому-то меньше)))
Некоторые экземпляры Retevis RA685 покажут абсолютно истинное значение измеряемой частоты. У других, возможна погрешность на величину плюс-минус 1,25 кГц, или даже 2,5 кГц.
(Например: вместо 145.70000 МГц может отобразиться 145.69875 МГц)
У меня измеряет = идеально.
Но на Ютубе я видел ролики, что у кого-то подвирает, слегка.
Внимание!!!
На Передаче,
не следует подносить одну радиостанцию к другой ближе пол-метра !!!
Можно пожечь входные цепи Приёмника.
Очень высокая вероятность!
Видео:
- Open the earphone cover.
- Insert the headphone plug into the headphone jack. When you don’t need to use the earphones, pull out the earphone plug from the earphone hole and put on the earphone cover. When the universal interface is not used, please put on the dust cover.
Attention:
- Please use the charging equipment designated by our company to charge. When charging the whole device, it is recommended to turn off the walkie-talkie first.
- According to the 2016 new requirements of the International Civil Aviation (IATA) «Technical Regulations for the Safe Air Transport of Dangerous Goods», the state of charge of lithium-ion batteries (cells) for air transport shall not exceed 30% of their rated capacity. Therefore, the first time the battery is used with the host, there will be a low battery warning with the voice prompt «please charge». Phenomenon, please charge the battery before use.
- When the battery is charged in the charger, the red light may keep flashing. This is the pre-charging process performed by the charger to protect the battery when the battery power is too low. It is a normal phenomenon. Generally, it can turn to red after 30 seconds. Normal charging state when the light is on.
Walkie-talkie charging
When using the terminal for the first time, a low battery alarm may appear. Please charge the battery before using the terminal, the steps are as follows:
- Insert the power adapter interface into the jack on the back of the charging base.
- Insert the plug of the power adapter into the power outlet.
- Put the battery into the charging cradle.
- Observe the LED indicator of the charging base to understand the current charging status, as shown in the table below.
| The charging indicator light shows | The current charging status |
| Red light flashes | Battery voltage is too low |
| Red light is on | Charging |
| Green light is on | Charging is complete |
Check battery
This function allows you to know the current battery voltage and remaining power.
Long press key to display the current voltage.
The current battery level is displayed on the upper right of the screen, and the battery icon is as follows:
Basic operation
| Knobs, switches, buttons | Instructions |
| Power/volume switch |
|
| Select channel | The channel is the channel through which the signal is transmitted. After power on, press the [V/M] key to switch to the channel mode, press [/] to select the channel, and the channel number will be displayed on the right side of the screen. If the channel broadcast function is turned on, the intercom will broadcast the current channel mode. |
| PTT button call |
|
| Side Key 1 | The side buttons have two modes: short press and long press, and the following functions can be selected: off, flashlight, alarm, radio, NOAA weather forecast, monitoring, and scan. Off: No function Flashlight function: Short press the [SK1] key to turn on the flashlight function and the flashlight light is always on; short press the [SK1] key again to turn off the flashlight function. If you choose to operate the flashlight function in the menu mode, short press the [SK1] key to turn on the flashlight for the first time, short press the second flashlight to keep flashing, and short press three times to turn off the flashlight. Alarm: SOS emergency alarm function: Short press the [SK1] key to turn on the alarm function. At this time, the green indicator light and the red indicator light flash at the same time. Short press the [SK1] key again to release the alarm. Radio: Short press the [SK1] key to turn on the radio function, and short press the [SK1] key again to turn off the radio. The radio frequency can be entered through the keyboard or tap the «#» key to automatically search for radio stations. In radio mode, press the [EXIT] key to switch between 65-75/76-108MHz frequency band. NOAA weather forecast: Short press the [SK1] key to turn on the NOAA function, and short press the [SK1] key again to turn off the NOAA function. Press the up and down keys to select the channel: 10 channels for selection: see Appendix 1 for details Monitoring function: Short press the [SK1] key to turn on the monitoring function, and release the [SK1] key to cancel the monitoring. Sweep: Short press [SK1] key to turn on the sweep function, and directly measure the frequency of other devices. |
| Side Key 2 | The same side key SK1 has a short press and long press function to choose |
| V/M key | Frequency mode or channel mode switching.
|
| A/B key | A/B upper and lower frequency band switch selection. Press the PTT button to transmit in the frequency band pointed to by the pointer. |
| Keyboard lock and unlock | Manual lock: Long press # key to lock the intercom. Automatic lock: After the automatic keyboard lock is turned on, when there is no operation on the buttons and knobs, the automatic lock will be delayed for 10 seconds. Unlock: Long press the # key to unlock the keyboard. |
Function Description
Menu Settings
You can enter «Menu Settings» through the menu key of the terminal to set some common functions. The specific instructions and operation methods are as follows:
| Menu number display characters | First-level menu | Secondary menu display characters | Description of secondary menu setting |
| 0 | Squelch | 0,…,9 | Squelch level, the lower the level, the easier it is to interfere, the higher the level the worse the sensitivity, the default value is 3. |
| 1 | Step | 2.5KHz | In frequency mode, press key to change the step value of frequency, the value range is 2.5~50KHz |
| 5.0KHz | |||
| 6.25KHz | |||
| 10.00KHz | |||
| 12.50KHz | |||
| 20.0KHz | |||
| 25.0KHz | |||
| 50.0KHz | |||
| 2 | Tx Power | High | High power |
| Middle | Middle Power | ||
| Low | Low Power | ||
| 3 | Power save | OFF | Turn off power saving mode |
| ON | Turn on power saving mode | ||
| 4 | Vox Level | OFF | Turn off voice control |
| 1,2,… 10 | Start the sound control level intensity, value range | ||
| 5 | Bandwidth | Wide | Wide band working |
| Narrow | Narrow band working | ||
| 6 | Backlight | Bright | Backlight is always on |
| 5Sec, 10Sec,… 60Sec | Automatic backlight delay time, the value range is 5~60 seconds | ||
| 7 | Menu Exit Time | 5Sec, 10Sec,… 60Sec | Menu exit time, the value range is 5~60 seconds |
| 8 | Dual Standby | OFF | OFF |
| ON | ON | ||
| 9 | Beep Prompt | OFF | OFF |
| ON | ON | ||
| 10 | VOICE | OFF | OFF |
| ON | ON | ||
| 11 | Tx over time | OFF | Press and hold the PTT button to keep launching |
| 15,30,…600 | Value range 15~600, step value 15 | ||
| 12 | Rx DCS | OFF | NO DCS |
| D023N,…,D754I | Standard sequence of DCS | ||
| 13 | Rx CTCSS | OFF | NO CTCSS |
| 67.0HZ,…,254.1HZ | Simulate the standard sequence of mute, at the same time, you can directly type standard or non-standard analog mute through the keyboard | ||
| 14 | Tx DCS | OFF | NO DCS |
| D023N,…,D754I | Standard sequence of DCS | ||
| 15 | Tx CTCSS | OFF | NO CTCSS |
| 67.0HZ,…,254.1HZ | Simulate the standard sequence of mute, at the same time, you can directly type standard or non-standard analog mute through the keyboard | ||
| 16 | DTMFST | OFF | OFF |
| DT-ST | DT-ST | ||
| ANI-ST | ANI-ST | ||
| DT+ANI | DT+ANI | ||
| 17 | TONE | 1000hz, 1450hz, 1750hz, 2100hz | Repeater activation audio |
| 18 | S-CODE g | 1,2…,15 | When needed, send out this group of information codes (information codes can only be written by frequency writing software) |
| 19 | Scan Mode | TO | Time Scan |
| CO | Carrier Scan | ||
| SE | Search Scan | ||
| 20 | PTT-ID | OFF | Press PTT to not send ID code |
| BOT | Press PTT to send ID code (ID code is set by frequency writing software) | ||
| EOT | Release PTT to send ID code | ||
| BOTH | ID code is sent when you press and release the PTT button | ||
| 21 | MDF-A | Frequency | In the channel mode of the A segment, the channel displays the frequency |
| Name | In the channel mode of section A, the channel displays the channel name (the specific name is set in the frequency writing software) | ||
| 22 | MDF-B | Frequency | Band B is in channel mode, the channel displays the frequency |
| Name | In the channel mode of section B, the channel displays the channel name (the specific name is set in the frequency writing software) | ||
| 23 | Busy Lockout | OFF | Channel is occupied and allowed to transmit |
| ON | Channel is occupied and transmission is prohibited | ||
| 24 | Key Auto Lock | OFF | Turn off automatic keyboard lock |
| ON | Turn on the keyboard auto-lock function | ||
| 25 | Direction | None | In frequency mode, there is no frequency difference between the transmitting frequency and the receiving frequency |
| Plus | In frequency mode, the transmitting frequency is equal to the receiving frequency plus the frequency difference frequency | ||
| Minus | In frequency mode, the transmitting frequency is equal to the receiving frequency minus the frequency difference frequency | ||
| 26 | Offset | 00.000,…,99.998 | In frequency mode, the difference between the transmitting and receiving frequencies |
| 27 | Key1 sp | OFF | No function |
| LAMP | Turn on the flashlight function | ||
| SOS | Turn on the alarm function | ||
| FM | Turn on the radio function | ||
| NOAA | Enable NOAA weather forecast function | ||
| MONI | Turn on the monitoring function | ||
| Scan | Turn on the sweep function | ||
| 28 | Key1 LP | Same function as side key 1 short press | |
| 29 | Key2 sp | Same function as side key 1 short press | |
| 30 | Key2 LP | Same function as side key 1 short press | |
| 31 | Memory | 1,…,128 | When storing a channel, it is used to indicate the channel number to be stored. If the word CH- is displayed in front of the number, it means that the channel originally has channel parameters |
| 32 | Delete | 1,…,128 | Delete the channel parameters of the specified channel, if there is no CH- in front, it means that the channel has no parameters and the operation is invalid |
| 33 | Alarm Mode | On site | On-site alarm |
| Send sound | Send sound | ||
| Send code | Send code | ||
| 34 | TAIL | OFF | After the PTT is released, the machine does not send a shutdown code, usually when it is relayed through the relay, let it make noise to confirm whether the signal of the machine is relayed |
| ON | After releasing the PTT button, the machine sends a shutdown code to suppress the instantaneous noise of the listener | ||
| 35 | PROGER | OFF | Turn off the call end alert tone |
| ON | Turn on the call end alert tone | ||
| 36 | Language | Chinese | |
| English | |||
| 37 | Reset | VFO | Menu initialization only |
| ALL | Menu and channel initialization | ||
| 38 | SPECIAL DCS | OFF | Close special DCS |
| ON | Open Menu and channel initialization, only with same DCS can communicate |
Common function description
The functions supported by the walkie-talkie are shown in the table below.
| Name | Function description |
| Squelch level adjustment | Squelch level adjustment is to adjust the signal strength required when receiving a signal. The squelch level (0 open to 9 is the highest) is selected by the local environment, and 3 is generally selected. |
| CTCSS/DCS | CTCSS/DCS is used to avoid listening to irrelevant calls of the same frequency. Only when the transmitted CTCSS/DCS matches the received CTCSS/DCS digital, the walkie-talkie can listen to the voice through the speaker. |
| TOT | Timeout prohibition TOT timeout prohibition can limit the single transmission time (the default is 60 seconds) to prevent the communication parties from occupying channel resources for a long time, and to prevent the terminal from being damaged due to overheating. After the duration of pressing the [PTT] key expires, the terminal will automatically terminate the transmission and emit a warning tone. If you need to talk again, please transmit after the preset time. |
| Power saving | When the walkie-talkie has no receiving or transmitting, no button or knob operation reaches the power saving time, it will automatically enter the power saving mode. |
| Low battery warning | It is used to remind the battery to charge in time when the battery power is low. When the battery is too low, transmission will be prohibited. |
| Emergency Alarm | An emergency alarm is when you encounter an emergency, you can ask your companion or the control center for help. |
| SCAN | After scanning is turned on, the terminal will scan according to the scan list. When there is activity on a certain channel, it will stay on the channel to listen, so as to understand the current activity status of related group members. |
| BCL | Busy channel lock BCL can prevent interference from other terminals on the same channel during transmission. When other terminals occupy the current channel, press and hold the [PTT] key, and the terminal will emit a «beep» tone, indicating that it cannot be transmitted. If the current channel is free, press and hold the [PTT] key to start transmission. |
| Power level | The power level refers to the transmit power level of the walkie-talkie, which can be set to high power or low power. High power can increase the signal strength of the current transmitted voice of the terminal, and it can also communicate with the remote terminal. Low power can save power. |
| MONI | Monitoring MONI monitoring is a listening method used to receive more signals or weak signals. It helps to distinguish and listen to the faint sounds in the speakers. |
| Channel broadcast | Channel broadcast is used to indicate the sequence of the current channel. |
| VOX | Voice-activated transmission VOX After turning on the voice-activated, when the voice detected by the microphone meets the transmission conditions, the terminal will automatically transmit the voice, and you can speak directly without pressing the [PTT] key. The voice control gain is used to control the sensitivity of the microphone’s voice control emission, which is configured by the dealer. |
Voice-activated emission (VOX)
After turning on this function, if the user’s speaking volume level reaches the level selected by the walkie-talkie, the walkie-talkie can also start the transmission operation by voice without pressing the [PTT] key. In some work situations, the user can not freely press the [PTT] key to call, then this function can be enabled. Operation method:
- In the standby mode, press the [MENU] key, the voice prompt «menu setting», enter the function menu setting;
- Press [] or [] key to select 4 menu number forward or backward; or directly enter the number 4 to enter 4 menu number;
- Press the [MENU] key, the voice prompt «Voice-activated emission», press the [] or [] key, select 1~10 (the larger the value, the higher the sensitivity; such as selecting 3)
- Press the [MENU] key, the voice prompt «OK», save and return to the previous menu.
- Repeat the above operation, select OFF to turn off the voice-activated transmission function. After turning on the voice-activated transmission function, speak into the microphone, and the voice can be sent out; stop speaking, and the transmission will also stop. You can select the VOX sensitivity level according to the quietness of the use environment. If the environment noise is too large, there will be long emission after the VOX function is activated. If the dual-wait function is enabled on this machine, the VOX function is turned off by default, and the VOX function cannot be activated.
Keyboard lock
The keyboard lock function disables the number keys to prevent you from activating a function by mistake. This machine can be set to automatic keyboard lock function, the operation is as follows:
- In the standby mode, press the [MENU] key, the voice prompt «menu setting», enter the function menu setting;
- Press or key to select 24 menu number forward or backward; or directly enter number 2 and 4 to enter 24 menu number;
- Press [MENU] key, press [] or [] key to select ON;
- Press the [MENU] key, the voice prompt «OK», save and return to the previous menu. The automatic keyboard lock function is activated.
- Repeat the above operation, select OFF to turn off the automatic keyboard lock function, and select manual keyboard lock. The operation is as follows:
- In the standby state, long press the «#» key for more than 2s, the keyboard lock function is activated (voice prompt «keyboard lock»);
- Long press the «#» key repeatedly for more than 2s, the keyboard lock function is closed (voice prompt «keyboard unlock»). After the automatic keyboard lock function is turned on, when it is not locked, the numeric keyboard is automatically locked without any keyboard operation for 10 seconds.
Dual Standby
When in dual standby mode, the two-way radio can receive the frequency set by the A or B channel. The operation is as follows:
- In the standby mode, press the [MENU] key, the voice prompt «menu setting», enter the function menu setting;
- Press [] or [] key to select 8 menu number forward or backward; or directly enter the number 8 to enter 8 menu number;
- Press the [MENU] key, the voice prompt «Dual frequency waiting», press [] or [] key, select ON
- Press the [MENU] key, the voice prompt «OK», save and return to the previous menu. The dual-frequency waiting function is turned on.
- Repeat the above operation, select OFF to turn off the dual-frequency standby function. In the menu mode, the dual-frequency standby is temporarily turned off, and after exiting, the dual-frequency standby will be restored.
- Since the dual-standby dual-save mode is in the main and sub-channel scanning state, in the dual-segment dual-save mode, even if the power saving function of the unit is turned on, its power saving function is still invalid, and the standby time of the walkie-talkie will be shortened.
Channel delete
You may want to delete a memory channel due to setting errors or changing other settings. The operation is as follows:
- In the standby mode, press the [MENU] key, the voice prompt «menu setting», enter the function menu setting;
- Press [] or [] key to select 32 menu number forward or backward; or directly enter numbers 3 and 2 to enter 32 menu number;
- Press the [MENU] key, the voice prompt «channel delete»;
- Press [] or [] key to select the channel to be deleted forward or backward.
- If the number prefix displays the character «CH-«, it means that the channel number originally has channel parameters and can be deleted.
- If the number prefix does not display the character «CH-«, it means that the channel number is empty and can be stored directly without deleting it.
- Press the [MENU] key, the voice prompt «OK», delete the stored channel parameters, save and return to the previous menu.
- If the channel is empty, press the [MENU] key to directly return to the previous menu.
Channel storage
The parameters to be included in a complete channel include receiving frequency, transmitting frequency, receiving sub-audio, transmitting sub-audio, transmitting power, channel bandwidth, PTT-ID, busy lock, signaling code, scan addition, channel name, etc. Except for scanning addition and channel name editing through the frequency writing software, other parameters can be set in the frequency mode, and then store them in the designated channel number through the menu 31 Store Channel.
Example: The channel storage parameters are required as follows, and they are stored in the channel number with channel number 001.
- Receiving frequency 440.5 MHZ
- Transmission frequency 4 30.5 MHZ
- Receive mute digital D031N
- Transmit mute digital D031N
- High transmit power
- Channel bandwidth Broadband
The channel name is written in the frequency writing software when needed
Steps:
- Short press [V/M] key to switch to VFO mode, the screen displays .
- In the frequency mode, press the [A/B] key to make the pointer point to A (upstream frequency point)
- Press the number keys 4, 4, 0, 5, 0, 0 in turn to adjust the frequency to 440.500MHZ, and the screen displays .
- Power setting: press → (number key 2) →→ [] or [] to select the power (HIGH/MID/LOW) as HIGH→ ,
- Bandwidth setting: Press → (number key 5) →→ [] or [] to select the channel bandwidth (NARR/WIDE) as WIDE→ ,
- Receive digital tone setting: press → (number keys 1, 2) → [] or [] to select the tone value D031N→ ,
- Transmitting digital sub-tone setting: press → (number keys 1, 4) → → [] or [] to select sub-tone value D031N→,
- PTT-ID button transmission setting: press → (number keys 2, 0) → → [] or [] to select the transmission mode (OFF/BOT/EOT/BOTH) as OFF→ ,
- Channel storage settings for receiving and transmitting the same frequency:
- Press → (number keys 3, 1), the screen displays:
- Press , the voice prompt «storage channel», the screen displays :
- Press or key to select empty channel forward or backward, the screen displays :
- Press , the voice prompts «receive storage», the screen displays : press the voice prompts «storage channel».
- Press , the voice prompt «transmit storage», the screen displays :
- Press EXIT key to return to frequency mode.
- Press
- Channel storage settings for receiving and transmitting different frequencies:
- Press → (number keys 3, 1), the screen displays :
- Press , the voice prompt «storage channel», the screen displays :
- Press the [] or [] key to select the empty channel forward or backward, and the screen displays: .
- Press , the voice prompt «receive storage», the screen displays: ;
- Press EXIT key to return to frequency mode.
- Perform step 3, enter the desired transmit frequency;
- Press → (number keys 3, 1), the screen displays: ,
- Press , the voice prompt «storage channel», the screen displays: ,
- Press , the voice prompt «transmit storage», the screen displays: ;
- Press EXIT key to return to frequency mode.
- Press
Analog sub-audio (CTCSS)/digital sub-audio (CDCSS)
Analog sub-audio (CTCSS)/digital sub-audio (CDCSS) is mainly used to avoid listening to unrelated calls on the same frequency. If CTCSS/CDCSS is set, within the effective communication range, only calls with the same subtone signaling set in the channel can be received; but if CTCSS/CDCSS signaling is not set, you can listen to the effective communication range All calls on the same channel.
Side tone switch
Key side tone: The machine emits key side tone when sending key side tone
ID code side tone: When sending the ID code, the machine will emit the ID code side tone
Button side tone + ID code side tone: When sending button side tone and ID code side tone, the machine emits the corresponding sound
Note: Button side tone, including number key side tone and TONE tone
USB charging
The walkie-talkie can be directly plugged into the USB charging cable and charging with a power bank.
Frequency measurement function
Press +〖*〗key to enter the frequency measurement mode, press【】or【】key to select U segment or V segment. When a signal is received, if the current frequency has a mute tone, it will be displayed on the screen at the same time, press the key The current frequency can be saved. Or you can select the shortcut operation method by pressing the side button.
Special digital mute
The special digital mute is a mute encryption function, which can prevent other machines from copying the mute of this machine. After this function is turned on, only the same DCS code can talk to each other. The mute encryption function is effective only when the DCS mute code is set. Only the same machines with special digital mute on can talk to each other.
Optional accessories
Please use the accessories specified by our company.
If you use unauthorized accessories without authorization, all consequences caused by this are the responsibility of the user.
Please consult your local dealer for optional accessories of the walkie-talkie.
Main Specifications
| TOTAL | Frequency Range | 144-146MHZ(RX/TX) 430-440MHZ(RX/TX) |
| Channel No. | 16 | |
| Channel Spacing | 25/12.5kHz | |
| Input voltage | 7.4 VDC | |
| Battery (standard configuration) | 1800mAH(Li-Ion) | |
| Battery Life(5-5-90, High power transmission) | About 14 Hours | |
| Current: Standby | ≤65mA | |
| Receive | ≤450 mA | |
| Transmit | ≤1.8 A @high power, 850 mA @ low power | |
| Frequency stability | ±2.5ppm | |
| Operating temperature | -20℃ to +60℃ | |
| Antenna impedance | 50Ω | |
| Walkie-talkie size(With battery, but without antenna) | 121×61×33mm | |
| Walkie-talkie weight(Including antenna and battery) | 223g | |
| TRANMIT PART | Transmit output power | 5W/3W/1W |
| Modulation | 16K0F3E@25KHz, 11K0F3E@12.5KHz | |
| Spurious emission | -36dBm1GHz | |
| FM signal-to-noise ratio | 45dB@25KHz, 40dB @12.5KHz | |
| Audio distortion | ≤5% | |
| Modulation limit | ±5.0 KHz@25 KHz, ±2.5 KHz@12.5 KHz | |
| Adjacent channel power | 70dB @ 25KHz, 60dB @ 12.5KHz | |
| (300-3000Hz) Audio response | +1~3dB | |
| RECEIVE | Receiving sensitivity | 0.25μV (12dB SINAD) |
| Adjacent channel selectivity | ≥60dB@25KHz, ≥55dB@12.5KHz | |
| Intermodulation immunity | ≥60dB@25KHz, ≥55dB@12.5KHz | |
| Conducted spurious emissions | ≤-57dB@25KHz, ≤-57dB @12.5KHz | |
| FM signal-to-noise ratio | ≥45dB@25KHz, ≥40dB @12.5KHz | |
| Audio output power | 1W @16ohms | |
| Audio distortion | ≤5% | |
| Audio response(300-3000Hz) | +1~-3dB |
All specifications are subject to change without notice or responsibility.
Disclaimer
This manual strives for the accuracy and completeness of the content during the compilation process, but the company does not assume any responsibility for possible errors or omissions. Due to the continuous development of technology, the company reserves the right to change product design and specifications without notice. Without the company’s prior written authorization, this manual may not be copied, modified, translated and distributed in any form. The third-party products and content involved in this manual are owned by the third party, and our company does not provide guarantees for their accuracy, validity, timeliness, legality or completeness.
Videos
Retevis RA685 — VHF/UHF FM transceiver Review Video
Documents / Resources
Download manual
Here you can download full pdf version of manual, it may contain additional safety instructions, warranty information, FCC rules, etc.
Download Retevis RA685 — Walkie Talkie Manual
Частотомер
Главная необычность Retevis RA685 — это Частотомер.
Что даёт наличие Частотомера?
Удобство и скорость стыковки с группой случайных радиостанций со случайными частотами.
Зачастую, владельцы радиостанций имеют весма смутное представление на каких частотах работают их балалайки, какие имеют настройки.
Просто, покупают комплект из двух-трёх одинаковых радиостанций и используют магазинные настройки по-умолчанию…
В полевых условиях присоединиться к такой группе почти не реально:
Не известны Частоты, не известны настройки тонального шумоподавления CTCSS/DCS…
Retevis RA685 позволяет отсканировать эти настройки за секунду.
Инструкция
по использованию Частотомера в Retevis RA685:
1. Нажать МЕНЮ, затем *Scan
2. Стрелочками ▲ или ▼ выбрать предполагаемый диапазон UHF (400-520MHz) или VHF (136-174MHz)
3. Приблизить Retevis RA685 к передающей радиостанции (источнику) на расстояние 0,5 – 35 метров.
(Это не описка. У меня стабильно срабатывает на 35 метров, через всё здание, на всю длину коридора (!!!если выключены ВСЕ электроприборы, светильники и т.п.).
Срабатывает и дальше 35 метров, с улицы, но уже не всегда.)
4. На дисплее Retevis RA685 отобразится Частота и CTCSS/DCS код (если используется)
5. Если в этот момент нажать кнопку МЕНЮ, эти настройки сразу пропишутся в память Retevis RA685
* Если RA685 находилась в режиме VFO, новые настройки пропишутся в ячейку VFO
* Если RA685 находилась в Канальном режиме, новые настройки пропишутся в текущий Канал
(поэтому, ещё до включения режима Частотомера, на RA685 необходимо выбрать Канал, куда мы хотим прописать Новые настройки.
Иначе, текущая полезная ячейка (какая нибудь LPD или PMR) будет переписана!)
6. Если текущие показания Частотомера не нужно сохранять, для выхода просто нажмите EXIT
Текущие настройки каналов в Retevis RA685 (частота, порог шумодава, ширина полосы и т.д.) на чувствительность Частотомера, вроде, никак не влияют.
Зато, однозначно, на дальность обнаружения (измерения) сильно влияет наличие фоновых помех (Компьютеры, сотовые, вай-фай, светильники, бытовые приборы и т.п.)
У меня стабильно срабатывает на 35 метров внутри здания (!!!если практически все электроприборы выключены)
В лесу, я уверен, дальность обнаружения (измерения) будет ещё больше.
Проверю когда нибудь…
Примечание:
Радиостанция не является лабораторным измерительным прибором. Потому, глупо ожидать стабильной высочайшей точности измерений.
Частотомер в Retevis RA685 является простым Индикатором без какого либо класса точности.
От экземпляра к экземпляру, кому-то повезёт больше, кому-то меньше)))
Некоторые экземпляры Retevis RA685 покажут абсолютно истинное значение измеряемой частоты. У других, возможна погрешность на величину плюс-минус 1,25 кГц, или даже 2,5 кГц.
(Например: вместо 145.70000 МГц может отобразиться 145.69875 МГц)
У меня измеряет = идеально.
Но на Ютубе я видел ролики, что у кого-то подвирает, слегка.
Внимание!!!
На Передаче,
не следует подносить одну радиостанцию к другой ближе пол-метра !!!
Можно пожечь входные цепи Приёмника.
Очень высокая вероятность!
Видео:
Пример работы Частотомера в Retevis RA685
Последний раз редактировалось Россиянин 29 июн 2022, 08:57, всего редактировалось 4 раз(а).
- Manuals
- Brands
- Retevis Manuals
- Two-Way Radio
- RA685
- User manual
-
Bookmarks
Quick Links
Related Manuals for Retevis RA685
Summary of Contents for Retevis RA685
-
Page 1
RA685 User’s manual… -
Page 2
EU Importer: Germany Retevis Technology GmbH Address: Uetzenacker 29,38176 wendeburg For downloading further resources: Brochures, Software/Firmware, Manual etc, Pls contact your direct reseller first OR go to website retevis.com and check “support” in the each product link to download it. -
Page 3
Menu FEATURE…………….. Check the contents of the package……..Familiar with this machine…………. Status indication…………..LED indicator light…………..Preparation before use…………Walkie-talkie charging…………Basic operation…………… Function Description………….. Common function description……….Voice-activated emission (VOX)……….Channel storage…………..Analog sub-audio (CTCSS)/digital sub-audio (CDCSS)..Main Specifications…………..DE(16-31) FR(32-47) IT(48-63) -
Page 4
FEATURE 1. Frequency range: 144-146MHZ(RX/TX) 430-440MHZ(RX/TX) 2. Dual band, Dual Display, Dual Standby, U/V band relay cross-band transmission and reception, convenient for users to set network at any time. 3. High, middle, and low power switching to meet the power requirements of users at different distances, more energy-saving and power-saving 4. -
Page 5
Status indication Status Icons Icon Product Status Channel strength indicator, the more the number, the stronger the signal The current transmitting power is high power (the longest communication distance, the largest power consumption); The current transmitting power is medium power (more power saving, relatively moderate communication distance);… -
Page 6
Install the battery 1. Align the battery with the battery mount on the back of the walkie-talkie. 2. Press the battery forcefully into the walkie-talkie, and slide the battery up until the lock plate is locked to the correct position. If you need to remove the battery, turn off the walkie-talkie. -
Page 7
Basic operation Knobs, switches, Instructions buttons Power/volume •Power on/off: Turn the [Power/Volume Switch] knob clockwise to turn on the radio and adjust switch the volume to the maximum. •Turn the [Power/Volume Switch] knob counterclockwise to adjust the volume to the minimum until the radio is turned off. -
Page 8
Side Key 2 The same side key SK1 has a short press and long press function to choose V/M key Frequency mode or channel mode switching. •Frequency mode: Manually enter the frequency. Channel mode: Press [ ▲ / ▼ ]to select a channel. A/B key A/B upper and lower frequency band switch selection. -
Page 9
Tx over time Press and hold the PTT button to keep launching 15,30,…600 Value range 15~600, step value 15 Rx DCS NO DCS D023N,…,D754I Standard sequence of DCS Rx CTCSS NO CTCSS 67.0HZ,…,254.1HZ Simulate the standard sequence of mute, at the same time, you can directly type standard or non-standard analog mute through the keyboard Tx DCS… -
Page 10
Direction Plus In frequency mode, the transmitting frequency is equal to the receiving frequency plus the frequency difference frequency Minus In frequency mode, the transmitting frequency is equal to the receiving frequency minus the frequency difference frequency Offset 00.000,…,99.998 In frequency mode, the difference between the transmitting and receiving frequencies Key1 sp No function… -
Page 11
Common function description The functions supported by the walkie-talkie are shown in the table below. Name Function description Squelch level Squelch level adjustment Squelch level adjustment is to adjust the signal strength required when adjustment receiving a signal. The squelch level (0 open to 9 is the highest) is selected by the local environ- ment, and 3 is generally selected. -
Page 12
Keyboard lock The keyboard lock function disables the number keys to prevent you from activating a function by mistake. This machine can be set to automatic keyboard lock function, the operation is as follows: 1) In the standby mode, press the [MENU] key, the voice prompt «menu setting», enter the function menu setting; 2) Press【▲】or【▼】key to select 24 menu number forward or backward;… -
Page 13
⑥Channel bandwidth Broadband The channel name is written in the frequency writing software when needed Steps: 1. Short press [V/M] key to switch to VFO mode, the screen displays 2. In the frequency mode, press the [A/B] key to make the pointer point to A (upstream frequency point) 3. -
Page 14
USB charging The walkie-talkie can be directly plugged into the USB charging cable and charging with a power bank. Frequency measurement function Press +〖*〗key to enter the frequency measurement mode, press【▲】or【▼】key to select U segment or V segment. When a signal is received, if the current frequency has a mute tone, it will be displayed on the screen at the same time, press the key The current frequency can be saved. -
Page 15
Your Retevis two-way radio has a RF Exposure Product Label. Also, your Retevis user manual, or separate safety booklet includes information and operating instructions required to control your RF exposure and to satisfy compliance requirements. -
Page 16
—Consult the dealer or an experienced radio/TV technician for help. CE Requirements: •(Simple EU declaration of conformity) Shenzhen Retevis Technology Co., Ltd. declares that the radio equipment type is in compliance with the essential requirements and other relevant provisions of RED Directive 2014/53/EU and the ROHS Directive 2011/65/EU and the WEEE Directive 2012/19/EU;… -
Page 17
•When operating in front of the face, worn on the body, always place the radio in a Retevis approved clip, holder, holster, case, or body harness for this product. Using approved body-worn accessories is important because the use of Non-Retevis approved accessories may result in exposure levels, which exceed the IEEE/ICNIRP RF exposure limits. -
Page 18
•The adapter shall be installed near the equipment and shall be easily accessible •This radio meets the RF exposure guidelines when used with the Retevis accessories supplied or designated for the product. Use of other accessories may not ensure compliance with the RF WARNING exposure guidelines and may violate regulations. -
Page 19
FEATURE 1. Frequenzbereich: 144-146MHZ (RX/TX),430-440MHZ (RX/TX). 2. Dual-Band, Dual-Display, Dual-Standby, U/V-Band-Relais-Crossband-Übertragung und -Empfang, bequem für Benutzer, das Netzwerk jederzeit einzustellen. 3. Umschalten mit hoher, mittlerer und niedriger Leistung, um den Strombedarf von Benutzern in unterschiedli- chen Entfernungen zu erfüllen, energiesparender und stromsparender. 4. -
Page 20
Status indication Status Icons Symbol Produktstatus Kanalstärkeanzeige, je höher die Zahl, desto stärker das Signal Die aktuelle Sendeleistung ist eine hohe Leistung (die längste Kommunikationsentfernung, der größte Stromverbrauch); Die aktuelle Sendeleistung ist mittlere Leistung (mehr Energieeinsparung, relativ moderate Kommunikationsentfernung); Die aktuelle Sendeleistung ist gering (die energiesparendste, relativ geringe Entfernung) Wenn der Seitentonschalter auf Tastenseitenton/Taste + ID/ID eingestellt ist, erscheint dieses Symbol Dieses Symbol zeigt an, dass der aktuelle Unterton ein digitaler Unterton ist Dieses Symbol zeigt an, dass der aktuelle Unterton ein analoger Unterton ist… -
Page 21
Installieren Sie die Batterie 1. Richten Sie den Akku an der Akkuhalterung auf der Rückseite des Walkie-Talkies aus. 2. Drücken Sie den Akku kräftig in das Walkie-Talkie und schieben Sie den Akku nach oben, bis die Verriegelung- splatte in der richtigen Position einrastet. Wenn Sie den Akku entfernen müssen, schalten Sie das Walkie-Talkie aus. -
Page 22
Grundbetrieb Knöpfe, Schalter, Anleitung Tasten Netz-/Lautstärk- •Ein-/Ausschalten: Drehen Sie den [Power/Volume Switch]-Knopf im Uhrzeigersinn, um das eschalter Radio einzuschalten und die Lautstärke auf das Maximum einzustellen. •Drehen Sie den [Power/Volume Switch]-Knopf gegen den Uhrzeigersinn, um die Lautstärke auf das Minimum einzustellen, bis das Radio ausgeschaltet wird. •Wenn die Sprachübertragungsfunktion eingeschaltet ist, wird die Startstimme übertragen. -
Page 23
Seitentaste 2 Die gleiche Seitentaste SK1 hat eine Kurz- und Langdruckfunktion zur Auswahl V / M-Taste Frequenzmodus- oder Kanalmodusumschaltung. •Frequenzmodus: Geben Sie die Frequenz manuell ein. Kanalmodus: Drücken Sie [▲/▼], um einen Kanal auszuwählen. A/B-Taste A/B Auswahl des oberen und unteren Frequenzbandes. Drücken Sie die PTT-Taste, um in dem Frequenzband zu senden, auf das der Zeiger zeigt. -
Page 24
STIMME Tx im Laufe der Halten Sie die PTT-Taste gedrückt, um den Start fortzusetzen Zeit 15,30,…600 Wertebereich 15~600, Schrittwert 15 Rx DCS KEIN DCS D023N,…,D754I Standardablauf von DCS Rx CTCSS NO CTCSS 67.0HZ,…,254.1HZ Simulieren Sie die Standardsequenz der Stummschaltung, gleichzeitig können Sie standardmäßige oder nicht standard- mäßige analoge Stummschaltung direkt über die Tastatur eingeben type Tx DCS… -
Page 25
Automatische Deaktivieren Sie die automatische Tastatursperre Schlüsselsperre Schalten Sie die automatische Tastatursperre ein Richtung keiner Im Frequenzmodus besteht kein Frequenzunterschied zwisc- hen der Sendefrequenz und der Empfangsfrequenz Plus Im Frequenzmodus ist die Sendefrequenz gleich der Empfan- gsfrequenz plus der Frequenzdifferenzfrequenz Minus Im Frequenzmodus ist die Sendefrequenz gleich der Empfan- gsfrequenz minus der Frequenzdifferenzfrequenz… -
Page 26
Allgemeine Funktionsbeschreibung Die vom Walkie-Talkie unterstützten Funktionen sind in der folgenden Tabelle aufgeführt. Name Bedienungsanleitung Einstellung Einstellung des Squelch-Pegels Die Einstellung des Squelch-Pegels dient der Einstellung der Signalstärke, die beim Empfang eines Signals erforderlich ist. Der Squelch-Level (0 offen bis 9 ist Rauschsperre der höchste) wird von der lokalen Umgebung ausgewählt, und 3 wird im Allgemeinen ausgewählt. -
Page 27
auszuschalten. Sprechen Sie nach dem Einschalten der sprachaktivierten Übertragungsfunktion in das Mikrofon und die Stimme kann gesendet werden. Hören Sie auf zu sprechen, und die Übertragung wird ebenfalls beendet. Sie können die VOX-Empfindlichkeitsstufe entsprechend der Ruhe der Nutzungsumgebung auswählen. Wenn die Umgebungs- geräusche zu groß… -
Page 28
Kanalspeicherung Zu den Parametern, die in einem vollständigen Kanal enthalten sein müssen, gehören Empfangsfrequenz, Sendefrequenz, Sub-Audio empfangen, Sub-Audio senden, Sendeleistung, Kanalbandbreite, PTT-ID, Besetzt-Sperre, Signalisierungscode, Scan-Addition, Kanalname usw. Außer dem Hinzufügen von Scans und der Bearbeitung des Kanalnamens durch die Software zum Schreiben von Frequenzen können andere Parameter im Frequenzmodus eingestellt und dann über das Menü… -
Page 29
7) Drücken Sie → (Zifferntasten 3, 1), der Bildschirm zeigt: Drücken Sie , die Sprachansage «Speicherkanal», der Bildschirm zeigt: 9) Drücken Sie , die Sprachansage «Speicher übertragen», der Bildschirm zeigt: 10) Drücken Sie die Taste 【EXIT】, um zum Frequenzmodus zurückzukehren. Analoges Subaudio (CTCSS)/digitales Subaudio (CDCSS) Analoges Subaudio (CTCSS)/digitales Subaudio (CDCSS) wird hauptsächlich verwendet, um zu vermeiden, dass nicht verwandte Anrufe auf derselben Frequenz abgehört werden. -
Page 30
Hauptspezifikationen GESAMT Frequenzbereich 144-146MHZ(RX/TX) 430-440MHZ(RX/TX) Kanal Nr. Kanalabstand 25/12.5kHz Eingangsspannung 7.4 VDC Batterie (Standardkonfiguration) 1800mAH(l i-ion) Lebensdauer der Batterie(5-5-90, Hohe Ungefähr 14 Stunden Kraftübertragung) Strom Bereithalten ≤65mA Erhalten ≤450 mA Übertragen ≤1.8 A @hoher Leistung,850 mA @niedriger Leistung Frequenzstabilität ±2.5ppm Betriebstemperatur -20℃… -
Page 31
Kommunikation zwischen zwei oder mehr Benutzern über eine Distanz zu ermöglichen. RF-Energie, die bei unsachgemäßer Verwendung biologische Schäden verursachen kann. Alle Funkgeräte von Retevis sind so konzipiert, hergestellt und getestet, dass sie den von der Regierung festgelegten RF-Grenzwerten entsprechen. Darüber hinaus empfehlen Hersteller den Benutzern von Funksprechgeräten spezifische Betriebsanleitungen. -
Page 32
EU-Konformitätserklärung ist unter folgender Internetadresse verfügbar: www.retevis.com. •Informationen zur Einschränkung Dieses Produkt kann in Ländern und Regionen der EU verwendet werden, darunter: Belgien (BE), Bulgarien (BG), Tschechische Republik (CZ), Dänemark (DK), Deutschland (DE), Estland (EE), Irland (IE), Griechenland (EL), Spanien (ES), Frankreich (FR), Kroatien (HR), Italien (IT), Zypern (CY), Lettland (LV), Litauen (LT), Luxemburg (LU), Ungarn (HU), Malta (MT), Niederlande (NL), Österreich (AT), Polen (PL), Portugal (PT),… -
Page 33
• Wenn Sie vor dem Gesicht arbeiten, das am Körper getragen wird, legen Sie das Funkgerät immer in einen von Retevis zugelassenen Clip, eine Halterung, ein Holster, einen Koffer oder einen Körpergurt für dieses Produkt. Die Verwendung von am Körper getragenem Zubehör ist wichtig, da die Verwendung von nicht von Retevis zugelassenem Zubehör zu Expositionswerten führen kann, die die IEEE / ICNIRP-RF-Expositions-… -
Page 34
Retevis-Zubehör verwendet wird. Die Verwendung von anderem Zubehör kann nicht die Einhaltung der HF-Expositionsrichtlinien gewährleisten und verstößt möglicherweise gegen Vorschriften. WARNING • Eine Liste der von Retevis zugelassenen Zubehörteile für Ihr Funkmodell finden Sie auf der folgenden Website: http://www.Retevis.com… -
Page 35
FEATURE 1. Gamme de fréquences: 144-146MHZ(RX/TX) 430-440MHZ(RX/TX) 2. Double bande, Double Écran , Double veille, U/V bande Relais de transmission et de réception inter-bandes, pratique pour les utilisateurs de configurer le réseau à tout moment 3. Commutation de puissance élevée, moyenne et faible pour répondre aux besoins en énergie des utilisateurs à différentes distances, plus d’économie d’énergie et d’économie d’énergie 4. -
Page 36
Indication d’état Icônes d’état Icônes État du produit Indicateur de force du canal, plus le nombre est élevé, plus le signal est fort La puissance de transmission actuelle est une puissance élevée (la plus longue distance de communication, la plus grande consommation d’énergie); La puissance de transmission actuelle est de puissance moyenne (plus d’économie d’éner- gie, distance de communication relativement modérée);… -
Page 37
Installation de la batterie 1. Alignez la batterie avec le support de batterie à l’arrière du talkie-walkie. 2. Appuyez avec force sur la batterie dans le talkie-walkie et faites glisser la batterie vers le haut jusqu’à ce que la plaque de verrouillage soit verrouillée dans la bonne position. Si vous devez retirer la batterie, éteignez le talkie walkie. -
Page 38
Opération basique Boutons, interru- Instructions pteurs, boutons Interrupteur •Mise sous/hors tension : tournez le bouton [Power/Volume Switch] dans le sens des aiguilles d’alimentation d’une montre pour allumer la radio et régler le volume au maximum. /volume •Tournez le bouton [Power/Volume Switch] dans le sens inverse des aiguilles d’une montre pour régler le volume au minimum jusqu’à… -
Page 39
Touche latérale2 La même touche latérale SK1 a une fonction d’appui court et d’appui long pour choisir V/M bouton Commutation du mode fréquence ou du mode canal. •Mode fréquence : saisissez manuellement la fréquence. Mode canal : Appuyez sur [/] pour sélectionner un canal. A/B bouton Sélection du commutateur de bande de fréquence supérieure et inférieure A/B. -
Page 40
VOICE Tx over time Maintenez la touche PTT enfoncée pour continuer le démarrage 15,30,…600 Plage de valeurs de 15 à 600, valeur d’étape 15 Rx DCS NO DCS D023N,…,D754I Séquence standard de DCS Rx CTCSS NO CTCSS 67.0HZ,…,254.1HZ Simulez la séquence standard de sourdine, en même temps, vous pouvez taper directement la sourdine analogique stand- ard ou non standard via le clavier Tx DCS… -
Page 41
Direction None En mode fréquence, il n’y a pas de différence de fréquence entre la fréquence d’émission et la fréquence de réception Plus En mode fréquence, la fréquence d’émission est égale à la fréq- uence de réception plus la fréquence de différence de fréquence Minus En mode fréquence, la fréquence d’émission est égale à… -
Page 42
Description générale des fonctions Les fonctions supportées par le talkie walkie sont présentées dans le tableau ci-dessous. Description de la fonction Réglage du Réglage du niveau de squelch Le réglage du niveau de squelch sert à ajuster la force du signal niveau de requise lors de la réception d’un signal. -
Page 43
Après avoir activé la fonction de transmission à commande vocale, parlez dans le microphone et la voix peut être envoyée ; arrêtez de parler et la transmission s’arrêtera également. Vous pouvez sélectionner le niveau de sensibilité VOX en fonction du silence de l’environnement d’utilisation. Si le bruit ambiant est trop important, il y aura une longue émission après l’activation de la fonction VOX. -
Page 44
Mémoire de canal Les paramètres à inclure dans un canal complet incluent la fréquence de réception, la fréquence de transmis- sion, la réception de sous-audio, la transmission de sous-audio, la puissance de transmission, la bande passante du canal, PTT-ID, le verrouillage d’occupation, le code de signalisation, l’ajout de balayage, le nom du canal, etc. À… -
Page 45
Appuyez sur ,l’invite vocale «canal de stockage», l’écran affiche: 9) Appuyez sur , l’invite vocale «canal de stockage», l’écran affiche: 10) Appuyez sur【EXIT】pour revenir en mode fréquence. Sous-audio analogique (CTCSS)/sous-audio numérique(CDCSS) Le sous-audio analogique (CTCSS)/le sous-audio numérique (CDCSS) est principalement utilisé pour éviter d’écouter des appels sans rapport sur la même fréquence. -
Page 46
Principales spécifications TOTAL Gamme de fréquences 144-146MHZ(RX/TX) 430-440MHZ(RX/TX) Canal No. Espacement des canaux 25/12.5kHz Tension d’entrée 7.4 VDC Batterie (configuration standard) 1800mAH(Li-Ion) Vie de la batterie(5-5-90, transmission haute puissance) Environ 14 heures Courant Etre prêt ≤65mA Recevoir ≤450 mA Transmettre ≤1.8 A @ haute puissance,850 mA @ faible puissance Stabilité… -
Page 47
étiquette de produit orientant les utilisateurs vers des informations de sensibilisation spécifiques. Votre radio bidirectionnelle Retevis a une étiquette de produit RF Exposure. De plus, votre manuel d’utilisation Retevis ou votre livret de sécurité distinct contient les informations et les instructions d’utilisation nécessaires pour contrôler votre exposition aux RF et satisfaire aux exigences de conformité. -
Page 48
• Informations de restriction Ce produit peut être utilisé dans les pays et régions de l’UE, y compris: Belgique (BE), Bulgarie (BG), République tchèque (CZ), Danemark (DK), Allemagne (DE), Estonie (EE), Irlande (IE), Grèce (EL), Espagne (ES), France (FR), Croatie (HR), Italie (IT), Chypre (CY), Lettonie (LV), Lituanie (LT), Luxembourg (LU), Hongrie (HU), Malte (MT), Pays-Bas (NL), Autriche (AT), Pologne (PL), Portugal (PT), Roumanie (RO), Slovénie (SI), Slovaquie (SK), Finlande (FI), Suède (SE) et États-Unis. -
Page 49
• Lorsque vous travaillez devant le visage, sur le corps, placez toujours la radio dans un clip, un support, un étui, un étui ou un harnais approuvé par Retevis pour ce produit. L’utilisation d’accessoires approuvés pour le port du corps est importante car l’utilisation d’accessoires non approuvés par Retevis peut entraîner des niveaux d’exposition supérieurs aux limites d’exposition RF IEEE / ICNIRP. -
Page 50
Retevis fournis ou conçus pour le produit. L’utilisation d’autres accessoires peut ne pas garantir la conformité avec les consignes d’exposition aux RF et peut enfreindre les réglementations. WARNING • Pour obtenir une liste des accessoires approuvés par Retevis pour votre modèle de radio, visitez le site Web suivant: http://www.Retevis.com… -
Page 51
CARATTERISTICA 1.Gamma di frequenza: 144-146MHZ (RX/TX) 430-440MHZ (RX/TX) 2.Dual band, Dual Display, Dual Standby, trasmissione e ricezione cross-band a banda U/V, comoda per gli utenti per impostare la rete in qualsiasi momento 3.Commutazione ad alta, media e bassa potenza per soddisfare i requisiti di alimentazione degli utenti a diverse distanze, maggiore risparmio energetico e risparmio energetico 4.Fino a 128 canali di memoria per la programmazione della frequenza e altri dati vari 5.Modalità… -
Page 52
Indicazione di stato Icone di stato No. Icona Stato del prodotto Indicatore della potenza del canale, più è il numero, più forte è il segnale L’attuale potenza di trasmissione è ad alta potenza (la distanza di comunicazione più lunga, il maggiore consumo di energia); L’attuale potenza di trasmissione è… -
Page 53
Installare la batteria 1. Allineare la batteria con il vano della batteria sul retro del walkie-talkie. 2. Premere con forza la batteria nel walkie-talkie e far scorrere la batteria verso l’alto finché la piastra di blocco non è bloccata nella posizione corretta. Se è… -
Page 54
Operazione base Manopole, Inte- Istruzioni rruttori, Pulsanti Manopola di •Accensione/Spegnimento: ruotare la manopola [Manopola Power/ Volume] in senso orario accensione per accendere la radio e regolare il volume al massimo. /volume •Ruotare la manopola [Manopola Power/ Volume] in senso antiorario per regolare il volume al minimo finché… -
Page 55
Pulsante A/B Selezione della banda di frequenza superiore e inferiore A/B. Premere il pulsante PTT per trasmettere nella banda di frequenza indicata dal puntatore. Blocco e Sblocco Blocco manuale: premere a lungo il tasto # per bloccare l’interfono. della tastiera Blocco dopo l’attivazione del blocco automatico della tastiera, quando non viene eseguita alcuna automatico:… -
Page 56
Rx CTCSS NESSUN CTCSS 67.0HZ,…,254.1HZ Simula la sequenza standard di mute, allo stesso tempo, puoi digitare direttamente mute analogico standard o non standard tramite la tastiera Tx DCS NESSUN DCS D023N,…,D754I Sequenza standard di DCS Tx CTCSS NESSUN CTCSS 67.0HZ,…,254.1HZ Simula la sequenza standard di mute, allo stesso tempo, puoi digitare direttamente mute analogico standard o non standard tramite la tastiera DTMFST… -
Page 57
Off set 00.000,…,99.998 In modalità frequenza, la differenza di trasmissione e ricezione Pulsante 1 SP Nessuna funzione LAMP Attiva la funzione torcia Attiva la funzione sveglia Attiva la funzione radio NOAA Abilita la funzione del tempo NOAA MONI Attiva la funzione di monitoraggio Scan Attiva la funzione di scansione Pulsante 1 LP… -
Page 58
Descrizione delle funzioni comuni Le funzioni supportate dal walkie-talkie sono riportate nella tabella sottostante. Nome Descrizione della funzione Squelch La regolazione del livello di Squelch serve a regolare la potenza del segnale richiesta quando si riceve un segnale. Il livello di Squelch (da 0 aperto a 9 è il più alto) è selezionato dall’ambiente locale e generalmente è… -
Page 59
5) Ripetere l’operazione sopra, selezionare OFF per disattivare la funzione di trasmissione ad attivazione vocale. Dopo aver attivato la funzione di trasmissione ad attivazione vocale, parlare nel microfono e la voce può essere inviata; smettere di parlare e anche la trasmissione si interromperà. È possibile selezionare il livello di sensibilità VOX in base alla silenziosità… -
Page 60
— Se il canale è vuoto, premere il tasto [MENU] per tornare direttamente al menu precedente. Memoria dei canali I parametri da includere in un canale completo includono frequenza di ricezione, frequenza di trasmissione, ricezione sub-audio, trasmissione sub-audio, potenza di trasmissione, larghezza di banda del canale, ID PTT, blocco occupato, codice di segnalazione, aggiunta scansione, nome canale, ecc. -
Page 61
7) Premere → (tasti numerici 3, 1), lo schermo visualizza: Premere , il messaggio vocale «storage channel (canale di memoria)», lo schermo visualizza: 9) Premere , il messaggio vocale «transmit storage (trasmetti memoria)», lo schermo visualizza: 10) Premere il tasto [EXIT] per tornare alla modalità frequenza. Sub-audio analogico (CTCSS)/sub-audio digitale (CDCSS) Il sub-audio analogico (CTCSS)/il sub-audio digitale (CDCSS) viene utilizzato principalmente per evitare l’ascolto di chiamate non correlate sulla stessa frequenza. -
Page 62
Specifiche principali GENERALE Intervallo di frequenze 144-146MHZ(RX/TX) 430-440MHZ(RX/TX) Numero Canali Spaziatura dei canali 25/12.5kHz Tensione voltaggio 7.4 VDC Batteria (configurazione standard) 1800mAH (Li-Ion) Durata della batteria Circa 14 ore Standby di corrente ≤65mA Ricezione di corrente ≤450mA Trasmissione di corrente ≤1.8A @Alta potenza, 850mA @Bassa potenza Stabilità… -
Page 63
Se usata in modo improprio, l’energia a radiofrequenza può causare danni biologici. Tutti Retevis walkie talkie sono progettate, prodotte e testate per garantire che soddisfino i livelli di esposizione RF stabiliti dal governo. Inoltre, i produttori raccomandano anche istruzioni operative specifiche per gli utenti dei walkie talkie. -
Page 64
• Informazioni sulla restrizione Questo prodotto può essere utilizzato in paesi e regioni dell’UE, tra cui: Belgio (BE), Bulgaria (BG), Repubblica ceca (CZ), Danimarca (DK), Germania (DE), Estonia (EE), Irlanda (IE), Grecia (EL), Spagna (ES), Francia (FR), Croazia (HR), Italia (IT), Cipro (CY), Lettonia (LV), Lituania (LT), Lussemburgo (LU), Ungheria (HU), Malta (MT), Paesi Bassi (NL), Austria (AT), Polonia (PL), Portogallo (PT), Romania (RO), Slovenia (SI), Slovacchia (SK), Finlandia (FI), Svezia (SE) e Regno Unito (UK). -
Page 65
•Quando si lavora davanti al viso, indossato sul corpo, posizionare sempre la radio in una clip, un supporto, una custodia, una custodia o un imbragatura approvati da Retevis per questo prodotto. L’uso di accessori approvati dal corpo approvati è importante poiché l’uso di accessori approvati da Non-Retevis può comportare livelli di esposizione che superano i limiti di esposizione RF IEEE / ICNIRP. -
Page 66
Retevis in dotazione o designati per il prodotto. L’uso di altri accessori potrebbe non garantire la conformità alle linee guida sull’esposizione alle radiofrequenze e potrebbe violare le normative. •Per un elenco degli accessori approvati da Retevis per il proprio modello di radio, visitare il seguente WARNING… -
Page 67
CARACTERÍSTICA 1. Rango de frecuencia: 144-146MHZ(RX/TX) 430-440MHZ(RX/TX) 2. Banda dual, pantalla dual, modo de espera dual, transmisión y recepción de banda cruzada de relé de banda U / V, conveniente para que los usuarios configuren la red en cualquier momento 3. -
Page 68
Indicación de estado Iconos de estado Icono Estado del producto Indicador de fuerza del canal, cuanto mayor sea el número, más fuerte será la señal La potencia de transmisión actual es de alta potencia (la distancia de comunicación más larga, el mayor consumo de energía); La potencia de transmisión actual es de potencia media (más ahorro de energía, distancia de comunicación relativamente moderada);… -
Page 69
2. Apriete la antena en el sentido de las agujas del reloj. Al quitar la antena, gírela en sentido antihorario para quitarla. No agite la unidad con la parte superior de la antena, de lo contrario reducirá el rendimiento de trabajo y la vida útil de la antena de la unidad. Instale la batería 1. -
Page 70
Icono de batería Potencia de la batería Elevado Medio Bajo Insuficiente Operación básica Perillas, interru- Anleitung ptores, botones Interruptor de • Encendido / apagado: Gire la perilla [Interruptor de encendido / volumen] en el sentido de encendido / las agujas del reloj para encender la radio y ajustar el volumen al máximo. volumen •Gire la perilla [Interruptor de encendido / volumen] en sentido antihorario para ajustar el volumen al mínimo hasta que la radio se apague. -
Page 71
para cambiar entre la banda de frecuencia de 65-75 / 76-108MHz. Pronóstico del tiempo NOAA: Presione brevemente la tecla [SK1] para activar la función NOAA, y presione brevemente la tecla [SK1] nuevamente para desactivar la función NOAA. Presione las teclas hacia arriba y hacia abajo para seleccionar el canal: 10 canales para la selección: consulte el Apéndice 1 para obtener más detalles Función de monitorización: presione brevemente la tecla [SK1] para activar la función de monitorización y suelte la tecla [SK1] para cancelar la monitorización. -
Page 72
Tiempo de retardo automático de la retroiluminación, el Iluminar desde el 5Sec,10Sec,… 60Sec rango de valores es de 5 ~ 60 segundos. fondo Tiempo de salida del menú, el rango de valores es de 5 ~ Hora de salida 5Sec,10Sec,… 60Sec 60 segundos. -
Page 73
La banda B está en modo de canal, el canal muestra la Frecuencia frecuencia En el modo de canal de la sección B, el canal muestra el MDF-B nombre nombre del canal (el nombre específico se establece en el software de escritura de frecuencia) El canal está… -
Page 74
Apague el tono de alerta de fin de llamada PROGER Active el tono de alerta de fin de llamada chino Idioma inglés Solo inicialización del menú Reset TODO Inicialización de menú y canal Cerrar DCS especial Menú abierto e inicialización de canal, solo con el mismo DCS ESPECIALES DCS se puede comunicar Descripción de función común… -
Page 75
Emisión activada por voz (VOX) Después de activar esta función, si el nivel de volumen del habla del usuario alcanza el nivel seleccionado por el walkie-talkie, el walkie-talkie también puede iniciar la operación de transmisión por voz sin presionar la tecla [PTT]. -
Page 76
1) En el modo de espera, presione la tecla [MENÚ], el mensaje de voz «configuración del menú», ingrese la configuración del menú de funciones; 2) Presione la tecla [▲] o [▼] para seleccionar 32 números de menú hacia adelante o hacia atrás; o ingrese directamente los números 3 y 2 para ingresar 32 números de menú;… -
Page 77
4) Prensa , las indicaciones de voz «recibir almacenamiento», la pantalla muestra: presione indicaciones de voz «canal de almacenamiento». 5) Prensa , el mensaje de voz «transmitir almacenamiento», la pantalla muestra: 6) Prensa【EXIT】 para volver al modo de frecuencia. 10. Configuración de almacenamiento de canales para recibir y transmitir diferentes frecuencias: 1) Prensa →… -
Page 78
Especificaciones principales Especificaciones principales Rango de frecuencia 144-146MHZ(RX/TX) 430-440MHZ(RX/TX) Canal No. 25/12.5kHz Espaciado de canales 7.4 VDC Voltaje de entrada Batería (configuración estándar) 1800mAH(Li-Ion) Duración de la batería (5-5-90, transmisión de alta potencia) Aproximadamente 14 horas Corriente: Standby ≤65mA Recibir ≤450 mA Transmitir ≤1.8 A @Alto Voltaje,850 mA @ Bajo Voltaje… -
Page 79
Retevis radio de dos vías tiene una etiqueta de producto de exposición a RF. Además, su manual de usuario de Retevis o su folleto de seguridad incluye información e instrucciones de funcionamiento necesarias para controlar su exposición a RF y para cumplir con los requisitos de cumplimiento. -
Page 80
Requisitos CE: • (Declaración de conformidad simple de la UE) Shenzhen Retevis Technology Co., Ltd. declara que el tipo de equipo de radio cumple con los requisitos esenciales y otras disposiciones relevantes de la Directiva RED 2014/53 / UE y la Directiva ROHS 2011/65 / UE y la Directiva WEEE 2012/19 / EU; El texto completo de la declaración de conformidad de la UE está… -
Page 81
Retevis para este producto. El uso de accesorios aprobados para usar en el cuerpo es importante porque el uso de accesorios no aprobados por Retevis puede resultar en niveles de exposición que excedan los límites de exposición a RF de IEEE / ICNIRP. -
Page 82
• El adaptador debe instalarse cerca del equipo y debe ser fácilmente accesible. Accesorios aprobados • Esta radio cumple con las pautas de exposición a RF cuando se usa con los accesorios Retevis suministrados o designados para el producto. El uso de otros accesorios puede no garantizar el cumplimiento de las pautas de exposición a RF y puede infringir las regulaciones. -
Page 83
1.This guarantee card should be kept by the user, no replacement if lost. 2.Most new products carry a two-year manufacturer’s warranty from the date of purchase. Further details, pls read http://www.retevis.com/after-sale/ 3.The user can get warranty and after-sales service as below: Contact the seller where you buy. -
Page 84
Shenzhen Retevis Technology Co.,Ltd. Add: 7/F, 13-C, Zhonghaixin Science&Technology Park, No.12 Ganli 6th Road, Jihua Street, Longgang District, Shenzhen, China Web: www.retevis.com E-mail: kam@retevis.com Facebook: facebook.com/retevis…
 Drücken Sie , die Sprachansage «Speicherkanal», der Bildschirm zeigt: 9) Drücken Sie , die Sprachansage «Speicher übertragen», der Bildschirm zeigt: 10) Drücken Sie die Taste 【EXIT】, um zum Frequenzmodus zurückzukehren. Analoges Subaudio (CTCSS)/digitales Subaudio (CDCSS) Analoges Subaudio (CTCSS)/digitales Subaudio (CDCSS) wird hauptsächlich verwendet, um zu vermeiden, dass nicht verwandte Anrufe auf derselben Frequenz abgehört werden.
 Retevis RA685 — простая двухдиапазонная рация с USB-C зарядкой. В Ютубе о ней неплохие отзывы. Проверил в работе — все заявленные функции работают. Подойдет для работы и отдыха, для профессионального применения, для охоты/рыбалки/туризма и т.д. Есть возможность прошивки частот (Chirp).
Большой плюс — заказывал рации из наличия со склада в РФ (пара дней в постомат). При выборе можно оформить, например, кабель или пару штук одним лотом.
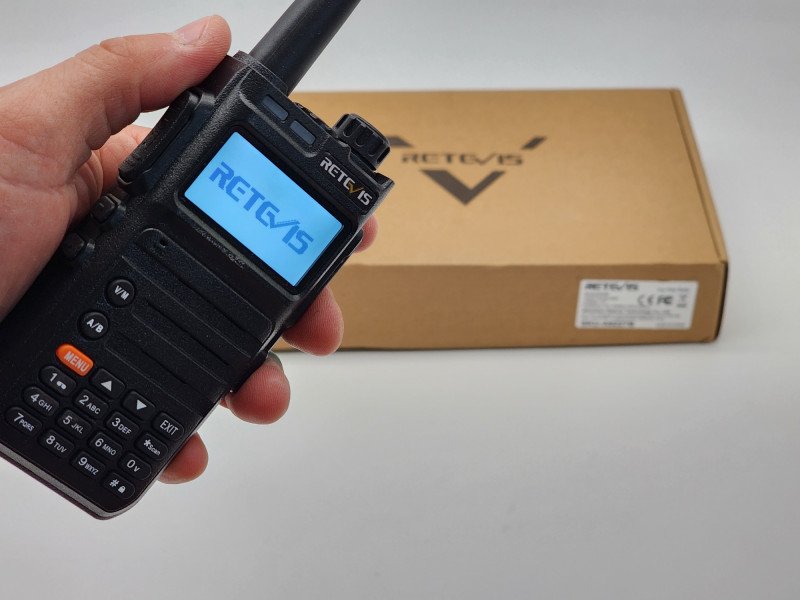 В комплекте с рацией идет подставка-кредл, USB-C кабель, подробное руководство пользователя. Также к самой рации — антенна, батарея, клипса, ремешок.
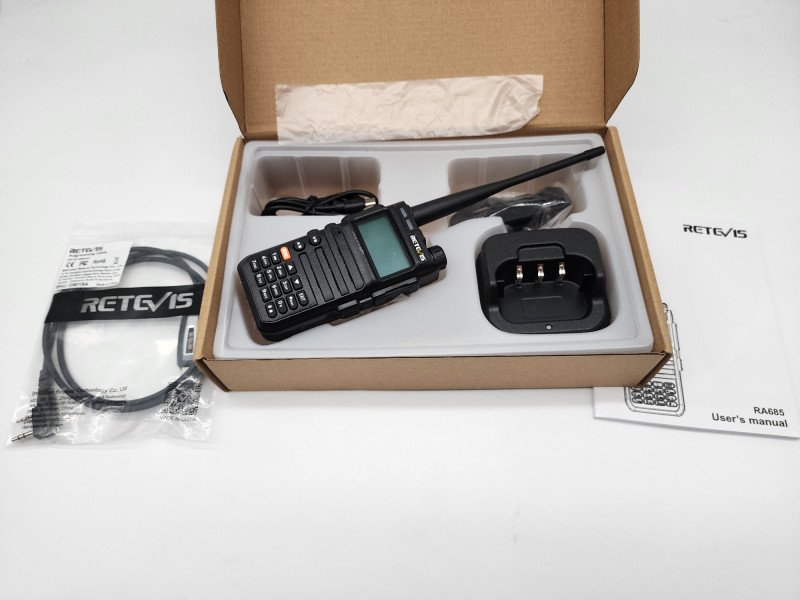 В качестве подготовки к работе собираем рацию — батарейку, антенну, ремешок и клипсу. Рекомендую зарядить до 100% («из коробки» уровень заряда был примерно 70%).
 Кстати, клипсу или ремешок можно и не устанавливать — тут на ваш выбор. Лично мне ремешок не нравится, ставлю только клипсу — удобно цеплять на ремень или в карман.
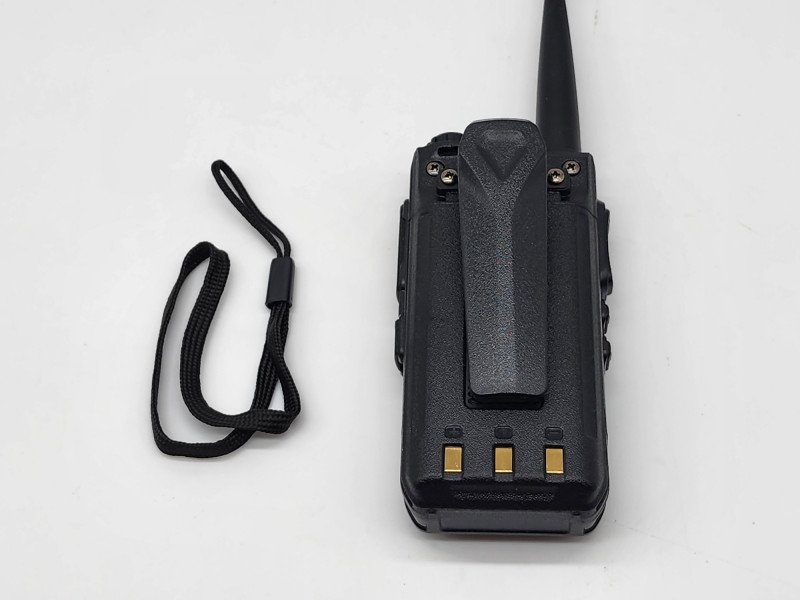 Подставка-кредл имеет USB-C вход, кабель подойдет любой.
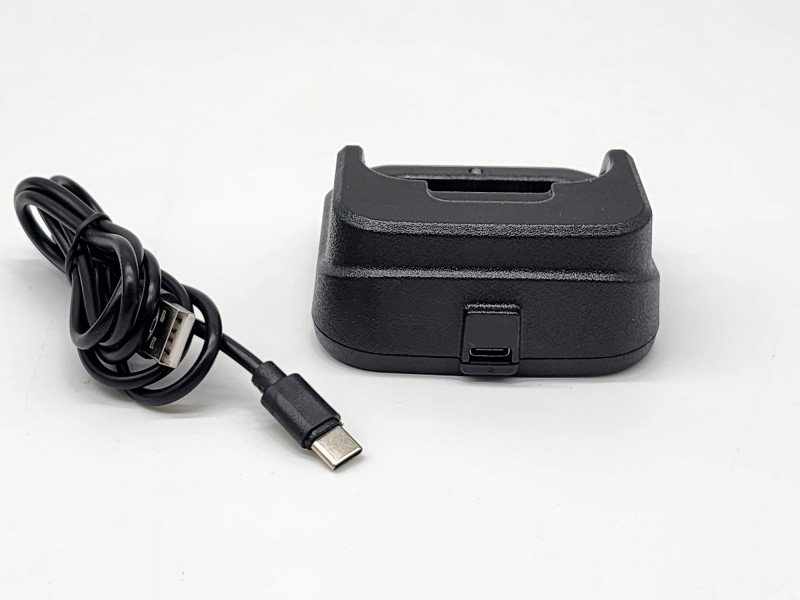 В самой рации имеется также USB-C вход, то есть можно заряжать рацию непосредственно от USB, без подставки. Довольно удобно, удобнее, чем различные оригинальные способы или нестандартные блоки питания.
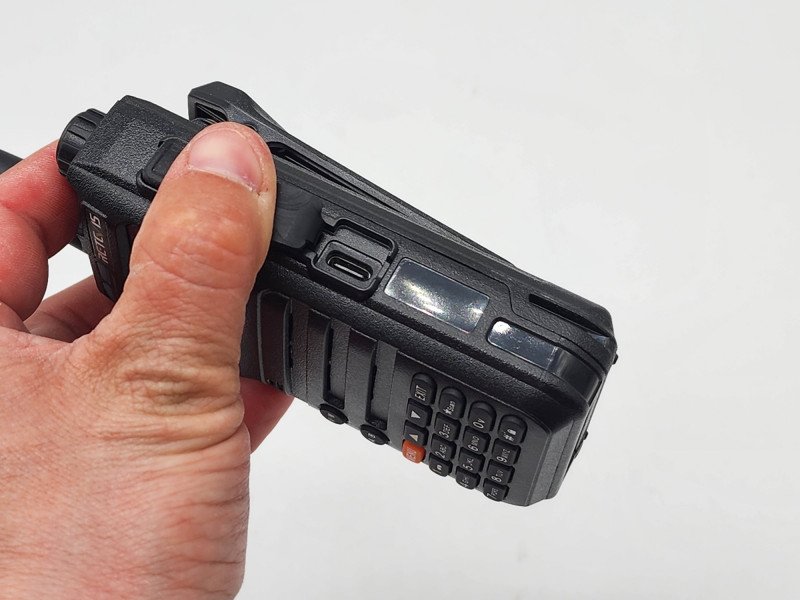 В отличие от большинства старый раций, которые у меня были, Retevis RA685 можно заряжать от павербанка. В ряде случаев серьезно выручает.
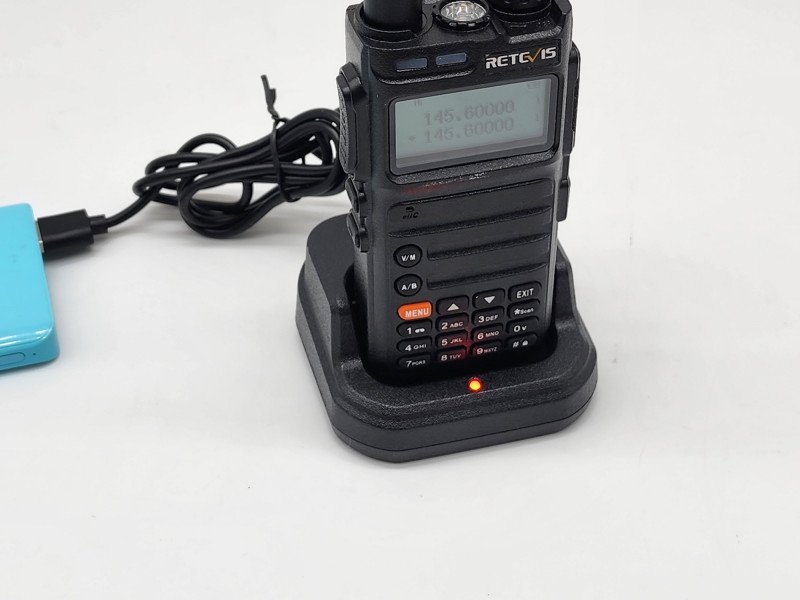 Развесовка удобнее. Более привычный, на мой взгляд, только баофенги, но это всё субъективно.
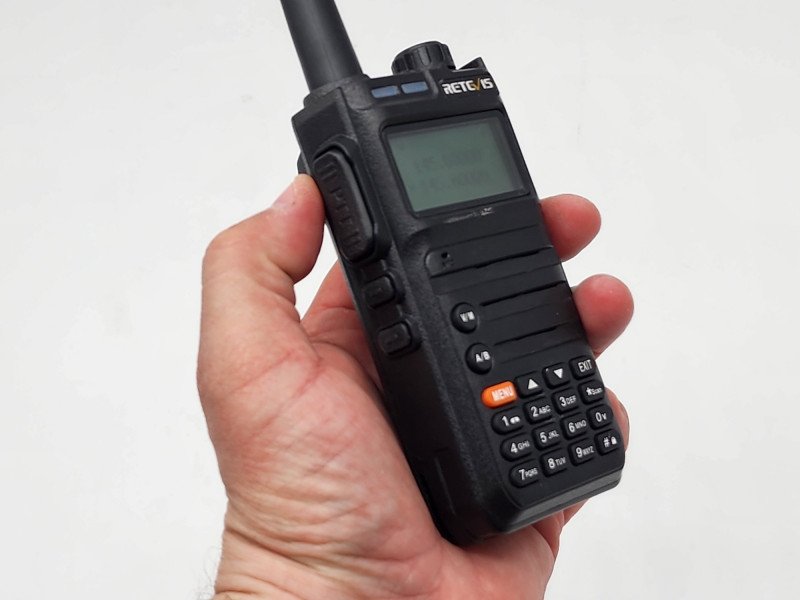 Кабель для прошивки подключается через двойной разъем для гарнитуры. Прошивка через USB-C не предусмотрена.
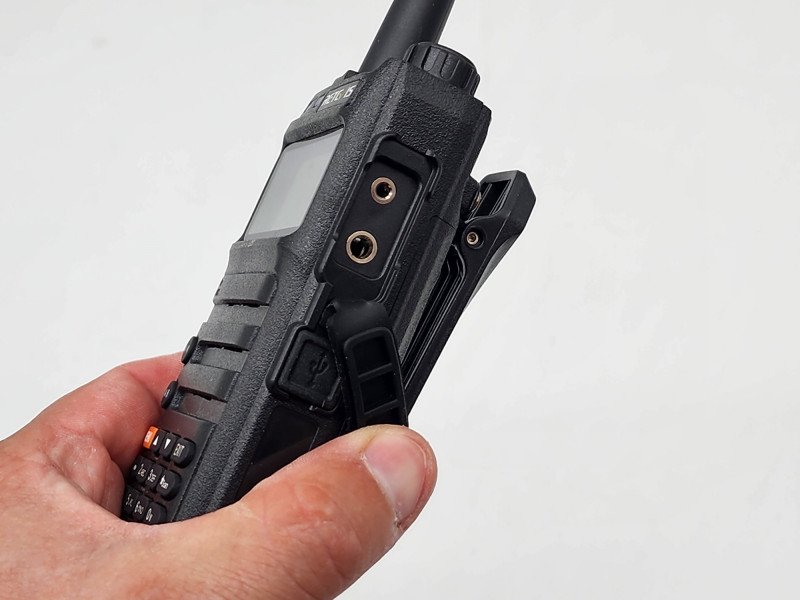 А кабель сам по себе стандартный. Если у вас нет такого кабеля, рекомендую купить в комплекте с рацией. Дает возможность настроить рацию и прошить каналы по необходимости.
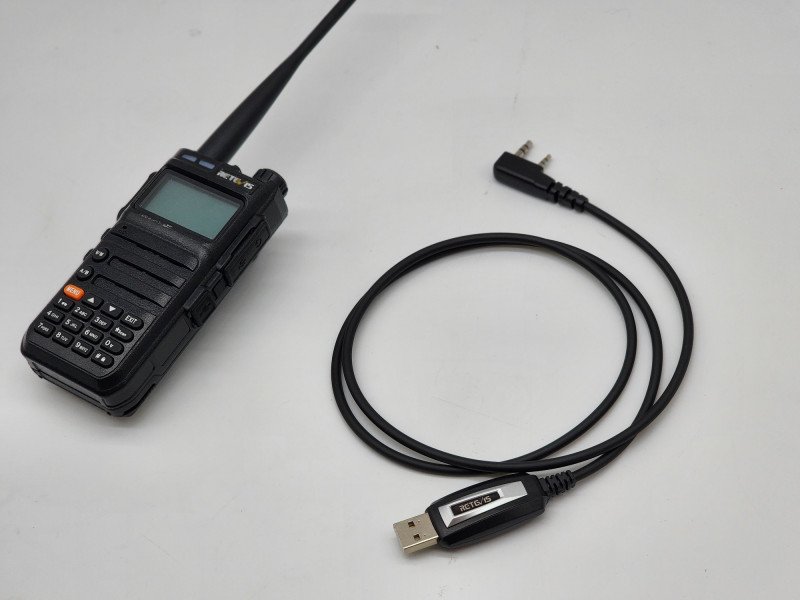 Обратите внимание на широкие возможности по настройке рации. Подробное описание имеется в инструкции
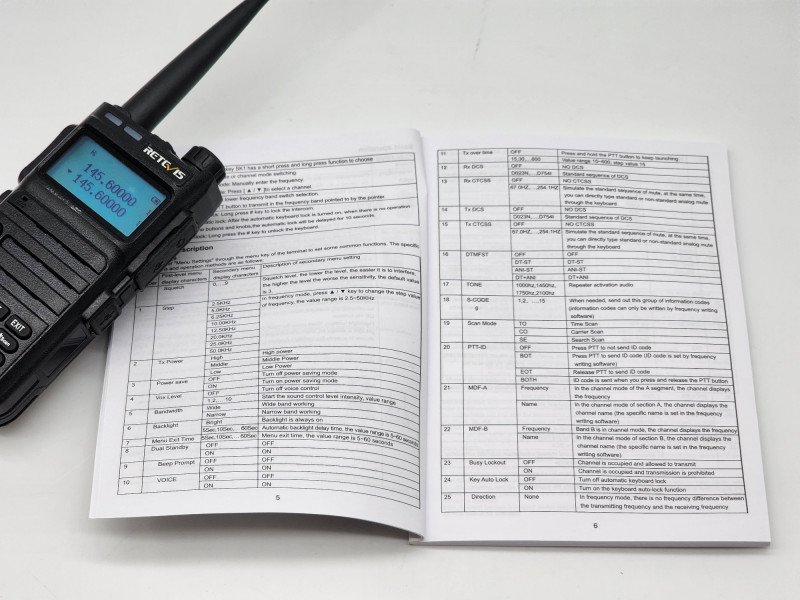
С помощью кабеля и программы CHIRP записал все каналы LPD и PMR диапазона, с завода там были прописаны рандомные частоты (китайская сетка). Для легального использования нужно добавить частоты из сетки разрешенных LPD/PMR. Заодно можно настроить пару раций для работы друг с другом. Подключается стандартно — кабель эмулирует COM-порт, просто выбираем в программе CHIRP свой тип рации (RA685 имеется)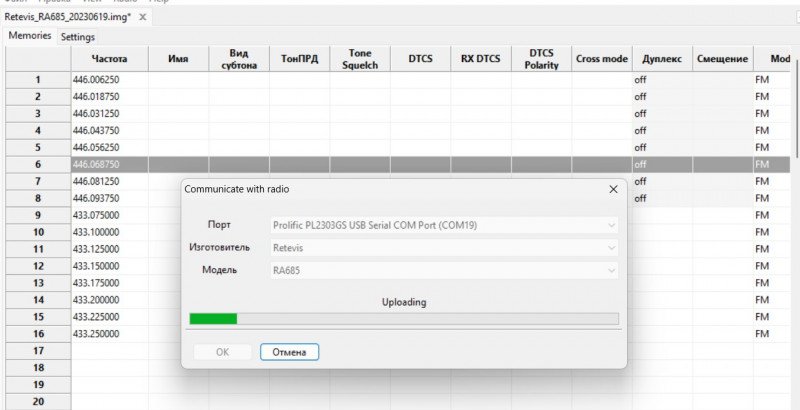 Буквально пару минут настройки и можно пользоваться. Рация довольно неплоха в плане удобства.
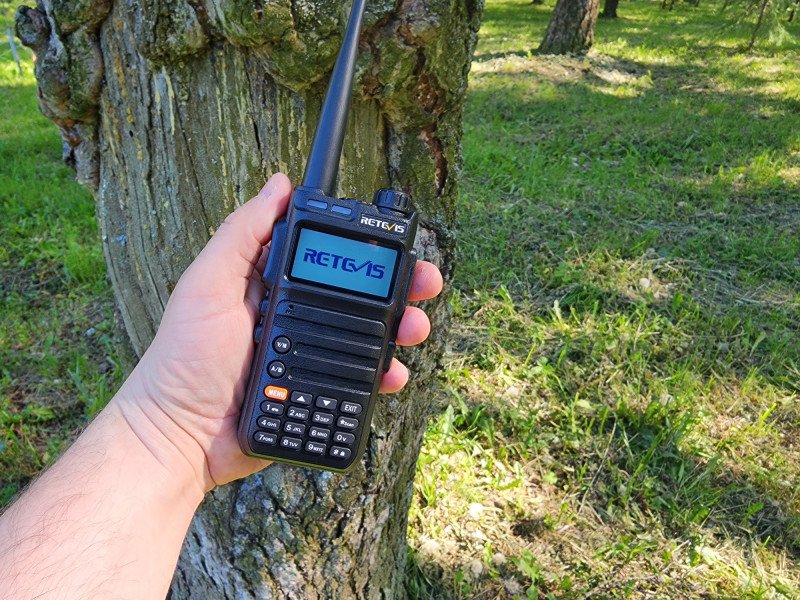 По дальности пробовал на 1 км с аналогичной рацией. Берет уверено 1….1.5 км. В городской застройке ситуация может быть хуже. В чистом поле без помех — может быть лучше.
 Что касается дальности, небольшое замечание. Если планируете «выжать максимум» из рации, то выкидывайте стоковую антенну и покупайте что-то типа Nagoya-771. Провел замер КСВ (SNR) стоковой антенны — 2.5 раза. Все, что больше 2 раз — много. В идеале должно быть около 1.5 (согласованная антенна). Чем ближе к единице значение КСВ, тем лучше. Соответственно, выходная мощность и дальность со стоковой антенной будут хуже, чем потенциально может обеспечить рация.
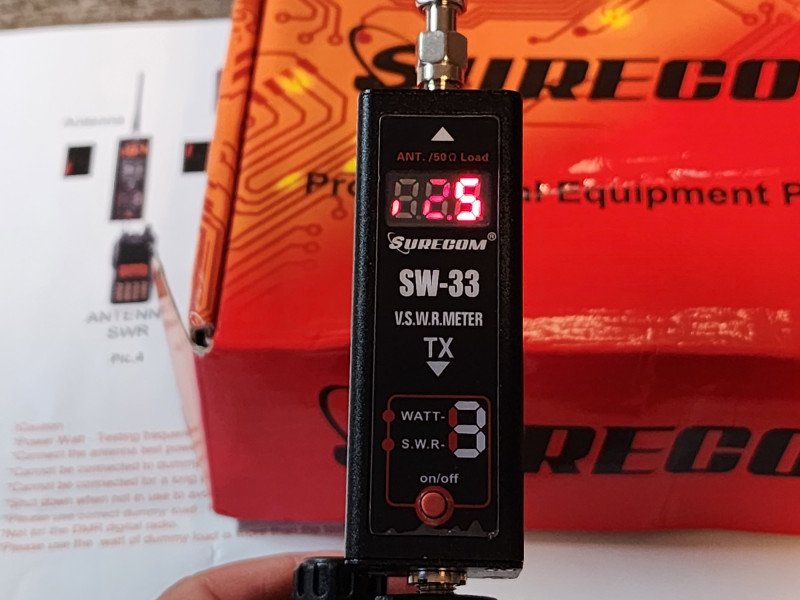 Кстати, заявленные 5 Вт рация выдает спокойно (на фото 5.5 Вт).
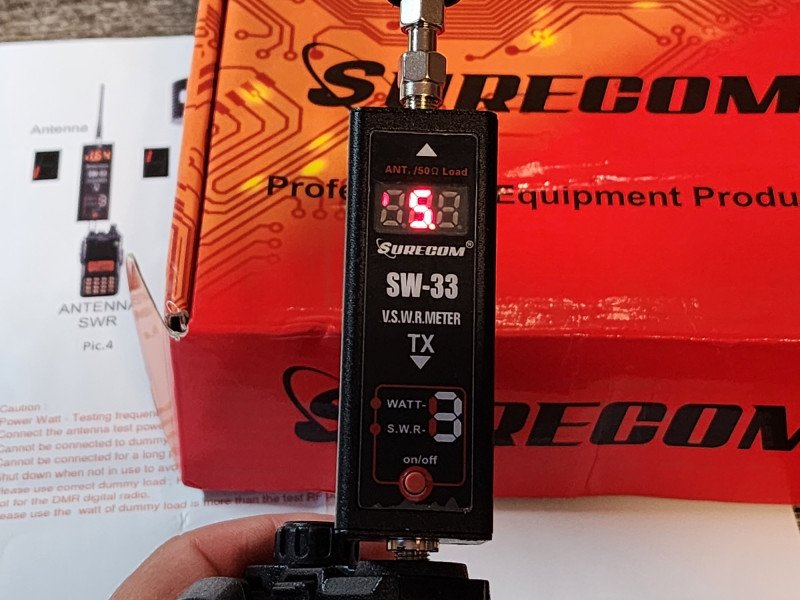 Сравнивал с разными рациями, Retevis RA685 весьма удобная. Но как говорится, на вкус и цвет…
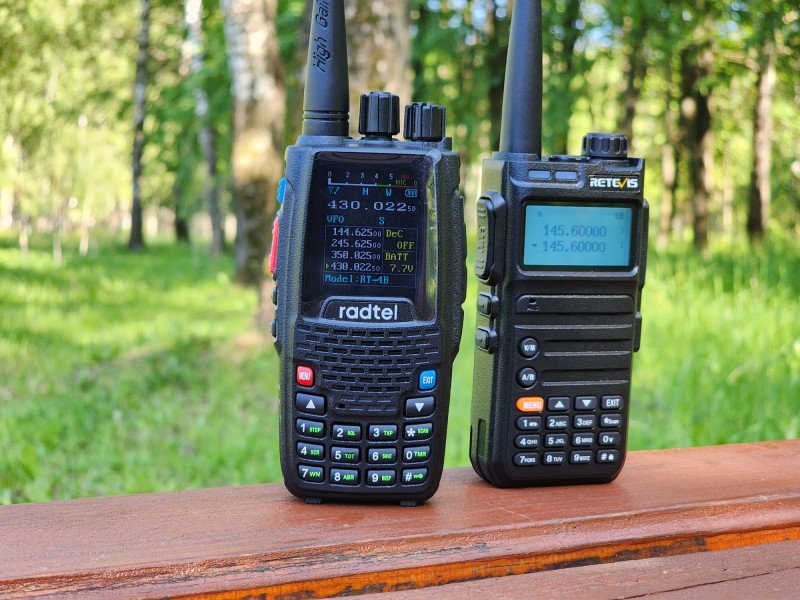 Лично для меня основная масса удобства — возможность зарядки от USB-C и павербанка. А это значит, что можно «подкормить» рацию в пути, например, от автозарядки. Это просто «киллерфича», которой не хватает в баофенгах. Брать или нет — решать вам.
Товар для написания обзора предоставлен магазином. Обзор опубликован в соответствии с п.18 Правил сайта.
Ручная рация RETEVIS RA85 5W Long Range GMRS Руководство пользователя

В ФОКУСЕ
- Диапазон частот: ГМСС
- Двухдиапазонный, двойной дисплей, двойной режим ожидания
- Высокая мощность, средняя мощность, переключение с низкой мощностью для соответствия различному расстоянию разговора, экономия энергии
- До 60 каналов памяти для программирования частоты и других различных данных
- Несколько режимов отображения, таких как номер канала, частота, частота канала, имя канала и т. д.
- Сигнализация CTCSS/DCS, DTMF отклоняет ненужные вызовы от других станций
- Хвостовой тон устранен, чтобы избежать шума из динамика после завершения вызова
- Звук VOX активирован, не нужно нажимать кнопку PTT, чтобы говорить
- Аварийная сигнализация, идентификация ANI и другие функции через DTMF
- DTMF, CTCSS (60.0–259.9 Гц), функция сигнального кодека DCS
- 8-ступенчатый выбор частоты (2.5K, 5.0K, 6.25K, 10.0K, 12.5K, 20.0K, 25.0K, 50.0K)
- Функция автоматического энергосбережения для продления срока службы батареи
- Функция экстренного оповещения SOS
- Цифровое FM-радио (прием 65–108 МГц)
- Функция прямого выбора номера клавиатуры пункта меню, частота передачи и приема могут быть введены вручную
- Функция освещения фонарика
- Функция измерения частоты, копирование частоты других устройств в любое время
- Функция зарядки USB, вы можете использовать зарядный кабель USB для зарядки
Распаковка и проверка оборудования
В коробке находятся следующие предметы. Если какие-либо элементы отсутствуют или повреждены, обратитесь к дилеру, у которого вы приобрели изделие.

Введение в радио

Индикатор состояния
Значок статуса

Светодиодный индикатор

Светодиодные индикаторы этого радио позволяют легко понять, что красный свет долго яркий.
Приготовление
Установка аккумулятора

- Совместите аккумулятор с креплением аккумулятора на задней панели радиостанции.
- С силой вдавите аккумулятор в рацию и сдвиньте аккумулятор вверх, пока стопорная пластина не зафиксируется в правильном положении. Если вам нужно извлечь аккумулятор, выключите радиостанцию. Нажмите на замок аккумулятора в открытое положение и удерживайте его, затем сдвиньте аккумулятор вниз и в сторону от держателя аккумулятора.
Установка зажима для ремня
Совместите два отверстия для винтов зажима для ремня с отверстиями для винтов над аккумулятором, установите и затяните винты. Если вам нужно снять зажим для ремня, ослабьте и выверните винты из зажима для ремня. Установите внешнюю гарнитуру/микрофон (приобретается отдельно).

- Откройте крышку наушников.
- Вставьте штекер наушников в гнездо для наушников. Если вам не нужно использовать наушники, вытащите штекер наушников из отверстия для наушников и наденьте крышку наушников. Если универсальный интерфейс не используется, наденьте пылезащитный чехол. Не трясите радиостанцию верхней частью антенны, иначе это уменьшит рабочие характеристики и срок службы антенны.
Радио Зарядка
Примечание:
- Для зарядки используйте зарядное оборудование, рекомендованное нашей компанией. При зарядке всего устройства сначала выключите радио.
- Согласно новым требованиям Международной гражданской авиации (ИАТА) «Технический регламент безопасной воздушной перевозки опасных грузов» от 2016 г., уровень заряда литий-ионных аккумуляторов (элементов) для воздушного транспорта не должен превышать 30% от его номинального емкость. Таким образом, при первом использовании батареи с хостом появится предупреждение о низком заряде батареи с голосовой подсказкой «Пожалуйста, зарядите». Пожалуйста, зарядите батарею перед использованием.
При первом использовании радиостанции может появиться предупреждение о низком заряде батареи. Пожалуйста, зарядите аккумулятор перед использованием, следуйте инструкциям:
- Вставьте интерфейс адаптера питания в гнездо на задней панели зарядной базы.
- Вставьте вилку адаптера питания в розетку.
- Поместите аккумулятор в зарядную подставку.
- Наблюдайте за светодиодным индикатором зарядной базы, чтобы понять текущий статус зарядки, как показано в таблице ниже.

Проверить заряд батареи
Эта функция позволяет узнать текущий уровень заряда батареи.tagе и оставшаяся мощность. Нажмите и удерживайте} 0 ~ клавишу, чтобы отобразить текущий объемtage.
Текущий уровень заряда батареи отображается в правом верхнем углу экрана, а значки уровня заряда батареи выглядят следующим образом:

Основная операция


Функция Описание
Настройки меню
Вы можете войти в «Настройки меню» с помощью клавиши меню, чтобы установить некоторые общие функции. Конкретные инструкции и методы работы следующие:


Описание основной функции
Функции, поддерживаемые рацией, показаны в таблице ниже.

VOX
нажмите клавишу [PTT] для вызова, затем эта функция может быть включена. Метод работы:
- В режиме ожидания нажмите клавишу [MENU], голосовая подсказка «настройка меню», войдите в настройку меню функций;
- Нажмите клавишу [▲] или [▼], чтобы выбрать 4 номера меню вперед или назад; или напрямую введите номер 4, чтобы ввести 4 номера меню;
- Нажмите клавишу [MENU], появится голосовая подсказка «Голосовое излучение», нажмите клавишу [▲] или [▼], выберите 1–10 (чем больше значение, тем выше чувствительность; например, выберите 3)
- Нажмите клавишу [MENU], голосовая подсказка «ОК», сохраните и вернитесь в предыдущее меню.
- Повторите вышеописанную операцию, выберите OFF, чтобы отключить функцию голосовой передачи.
![]() После включения функции голосовой передачи говорите в микрофон, и голос может быть
После включения функции голосовой передачи говорите в микрофон, и голос может быть
отправлен; прекратите говорить, и передача также прекратится. Вы можете выбрать уровень чувствительности VOX в соответствии с тишиной окружающей среды. Если окружающий шум слишком велик, после активации функции VOX будет происходить длительное излучение.
![]() Если на этом аппарате включен режим двойного ожидания, функция VOX по умолчанию отключена, и функцию VOX нельзя активировать. Функция блокировки клавиатуры Функция блокировки клавиатуры отключает цифровые клавиши, чтобы предотвратить активацию функции по ошибке. Это радио может быть настроено на функцию автоматической блокировки клавиатуры, операция выглядит следующим образом:
Если на этом аппарате включен режим двойного ожидания, функция VOX по умолчанию отключена, и функцию VOX нельзя активировать. Функция блокировки клавиатуры Функция блокировки клавиатуры отключает цифровые клавиши, чтобы предотвратить активацию функции по ошибке. Это радио может быть настроено на функцию автоматической блокировки клавиатуры, операция выглядит следующим образом:
- В режиме ожидания нажмите клавишу [MENU], голосовая подсказка «настройка меню», войдите в настройку меню функций;
- Нажмите клавишу [▲] или [▼], чтобы выбрать номер меню 23 вперед или назад; или напрямую введите цифры 2 и 3, чтобы войти в номер меню 23;
- Нажмите клавишу [MENU], нажмите клавишу [▲] или [▼], чтобы выбрать ON;
- Нажмите клавишу [MENU], голосовая подсказка «ОК», сохраните и вернитесь в предыдущее меню. Активирована функция автоматической блокировки клавиатуры.
- Повторите описанную выше операцию, выберите OFF, чтобы отключить функцию автоматической блокировки клавиатуры, и выберите ручную блокировку клавиатуры. Операция выглядит следующим образом:
(1) В режиме ожидания нажмите и удерживайте клавишу <#> более 2 с, активируется функция блокировки клавиатуры (голосовая подсказка «блокировка клавиатуры»);
(2) Нажмите и удерживайте клавишу <#> несколько раз в течение более 2 секунд, функция блокировки клавиатуры отключается (голосовая подсказка «клавиатура разблокирована»).
![]() После включения функции автоматической блокировки клавиатуры, когда она не заблокирована, цифровая клавиатура автоматически блокируется без каких-либо операций с клавиатурой в течение 10 секунд.
После включения функции автоматической блокировки клавиатуры, когда она не заблокирована, цифровая клавиатура автоматически блокируется без каких-либо операций с клавиатурой в течение 10 секунд.
Двойной режим ожидания
В режиме двойного ожидания рация может принимать частоту, установленную каналом A или B. Операция выглядит следующим образом:
- В режиме ожидания нажмите клавишу [MENU], голосовая подсказка «настройка меню», войдите в настройку меню функций;
- Нажмите клавишу [▲] или [▼], чтобы выбрать номер меню 7 вперед или назад; или напрямую введите номер 7, чтобы ввести номер меню 7;
- Нажмите клавишу [MENU], появится голосовая подсказка «Двойной режим ожидания», нажмите клавишу [▲] или [▼], выберите ВКЛ.
- Нажмите клавишу [MENU], голосовая подсказка «ОК», сохраните и вернитесь в предыдущее меню. Включена функция двухчастотного ожидания.
![]() Повторите описанную выше операцию и выберите OFF, чтобы отключить функцию двухчастотного режима ожидания. В режиме меню двухчастотный режим ожидания временно отключается и восстанавливается после выхода.
Повторите описанную выше операцию и выберите OFF, чтобы отключить функцию двухчастотного режима ожидания. В режиме меню двухчастотный режим ожидания временно отключается и восстанавливается после выхода.![]() Поскольку режим двойного ожидания находится в состоянии сканирования основного и вспомогательного каналов, в режиме двойного ожидания, даже если функция энергосбережения устройства включена, его функция энергосбережения по-прежнему недействительна, и время ожидания рация будет укорочена.
Поскольку режим двойного ожидания находится в состоянии сканирования основного и вспомогательного каналов, в режиме двойного ожидания, даже если функция энергосбережения устройства включена, его функция энергосбережения по-прежнему недействительна, и время ожидания рация будет укорочена.
CTCSS/DCS
CTCSS/DCS в основном используется, чтобы избежать прослушивания несвязанных вызовов на той же частоте. Если установлен CTCSS/DCS, в пределах эффективной дальности связи могут приниматься только вызовы с таким же набором CTCSS/DCS в канале; но если сигнализация CTCSS/DCS не установлена, вы можете прослушивать эффективный диапазон связи Все вызовы на одном канале.
Боковой переключатель тона
Тональный сигнал клавиш: радиостанция издает боковой тональный сигнал при отправке звукового сопровождения клавиш. Звуковой сигнал идентификационного кода: при отправке идентификационного кода радиостанция будет издавать боковой тональный сигнал идентификационного кода. Звуковой сигнал ID-кода, радио издает соответствующий звук.
USB-зарядка
Рацию можно напрямую подключить к USB-кабелю для зарядки и зарядить с помощью внешнего аккумулятора. Функция измерения частоты Нажмите клавишу (MEU)+[*] для входа в режим измерения частоты, нажмите клавишу [▲] или [▼] для выбора сегмента U или сегмента V. Когда сигнал получен, если текущая частота имеет CTCSS/DCS, она будет отображаться на экране одновременно, нажмите клавишу, вы можете сохранить текущую частоту. Или вы можете выбрать метод быстрого доступа, нажав боковую кнопку.
Опции
Пожалуйста, используйте аксессуары, указанные нашей компанией.![]() Если вы используете нелицензионные аксессуары без разрешения, ответственность за все последствия, вызванные этим, лежит на пользователе. Обратитесь к местному дилеру за дополнительными аксессуарами для рации.
Если вы используете нелицензионные аксессуары без разрешения, ответственность за все последствия, вызванные этим, лежит на пользователе. Обратитесь к местному дилеру за дополнительными аксессуарами для рации.
Основные технические характеристики


РУКОВОДСТВО ПО ТЕХНИКЕ БЕЗОПАСНОСТИ ДЛЯ ПЕРЕНОСНЫХ ДВУСТОРОННИХ РАДИОСТАНЦИЙ
![]() Прежде чем использовать эту радиостанцию, прочитайте это руководство, которое содержит важные инструкции по эксплуатации для безопасного использования, а также осведомленности об энергии и контроле соответствия применимым стандартам и нормам.
Прежде чем использовать эту радиостанцию, прочитайте это руководство, которое содержит важные инструкции по эксплуатации для безопасного использования, а также осведомленности об энергии и контроле соответствия применимым стандартам и нормам.
Эта двусторонняя радиосвязь использует электромагнитную энергию в радиочастотном (РЧ) спектре для обеспечения связи между двумя или более пользователями на расстоянии. Радиочастотная энергия, которая при неправильном использовании может вызвать биологические повреждения. Все двусторонние радиостанции Reeves спроектированы, изготовлены и испытаны, чтобы гарантировать, что они соответствуют установленным правительством уровням радиочастотного воздействия. Кроме того, производители также рекомендуют специальные инструкции по эксплуатации для пользователей раций. Эти инструкции важны, потому что они информируют пользователей о воздействии радиочастотной энергии и предоставляют простые процедуры по его контролю. Пожалуйста, обратитесь к следующему webсайты для получения дополнительной информации о том, что такое воздействие радиочастотной энергии и как контролировать свое воздействие, чтобы обеспечить соблюдение установленных пределов воздействия радиочастоты:http://www.who.int/en/ Постановления местных органов власти
Правила местного самоуправления
требует, чтобы пользователи были полностью осведомлены о своем воздействии и могли контролировать его воздействие, чтобы соответствовать профессиональным требованиям. Осведомленность о воздействии может быть повышена за счет использования этикетки продукта, направляющей пользователей к конкретной информации об осведомленности пользователя. Ваша двусторонняя радиостанция Reeves имеет этикетку продукта RF Exposure. Кроме того, ваше руководство пользователя Reeves или отдельный буклет по технике безопасности содержат информацию и инструкции по эксплуатации, необходимые для контроля радиочастотного облучения и соблюдения требований соответствия.
Лицензия на радио
Правительства сохраняют классификацию радиостанций, деловые двусторонние радиостанции работают на радиочастотах, которые регулируются местными отделами управления радио (FCC, ISED, OFCOM, ANFR, BFTK, Bundesnetzagentur…). Для передачи на этих частотах вам необходимо иметь выданную им лицензию. Подробная классификация и использование ваших двух радиостанций, пожалуйста, свяжитесь с отделами управления радио местного самоуправления. Использование данного радиоприемника за пределами страны, в которой оно предназначалось для распространения, регулируется государственными постановлениями и может быть запрещено.
Несанкционированная модификация и настройка
Изменения или модификации, явно не одобренные стороной, ответственной за соблюдение нормативных требований, могут аннулировать полномочия пользователя, предоставленные местными правительственными департаментами управления радиосвязью, на использование данного радиоприемника, и их не следует вносить. Для соответствия соответствующим требованиям регулировка передатчика должна производиться только лицом или под наблюдением лица, имеющего техническую квалификацию для выполнения технического обслуживания и ремонта передатчика в частных наземных подвижных и фиксированных службах, как сертифицировано представителем организации пользователя этих служб. Сервисы. Замена любого компонента передатчика (кристалл, полупроводник и т. Д.), Не разрешенная местными органами управления радиооборудованием и авторизацией оборудования для этого радио, может нарушить правила.
Требования FCC:
Это устройство соответствует части 15 Правил FCC. Эксплуатация возможна при условии, что это устройство не создает вредных помех. (Применимы лицензированные радиостанции); Это устройство соответствует части 15 Правил FCC. Эксплуатация осуществляется при соблюдении следующих двух условий: (Применимы другие устройства)
(1) Это устройство не должно вызывать вредных помех, и
(2) это устройство должно принимать любые помехи, включая помехи, которые могут вызвать сбои в работе.
ПРИМЕЧАНИЕ:
• Это оборудование было протестировано и признано соответствующим ограничениям для цифровых устройств класса B в соответствии с частью 15 Правил FCC. Эти ограничения предназначены для обеспечения разумной защиты от вредных помех при установке в жилых помещениях. Это оборудование генерирует, использует и может излучать радиочастотную энергию и, если оно не установлено и не используется в соответствии с инструкциями, может создавать вредные помехи для радиосвязи. Однако нет гарантии, что помехи не возникнут в конкретной установке. Если это оборудование создает вредные помехи для радио- или телевизионного приема, что можно определить, выключив и включив оборудование, пользователю рекомендуется попытаться устранить помехи одним или несколькими из следующих способов:
-Изменить ориентацию или местоположение приемной антенны.
-Увеличьте расстояние между оборудованием и приемником.
–Подключить оборудование к розетке в цепи, отличной от той, к которой подключен приемник.
— Обратиться за помощью к дилеру или опытному специалисту по радио / телевидению.
Требования CE:
• (Простая декларация соответствия ЕС) Shenzhen Reeves Technology Co., Ltd. заявляет, что тип радиооборудования соответствует основным требованиям и другим соответствующим положениям Директивы RED 2014/53/EU и Директивы ROHS 2011/65/EU. и Директива WEEE 2012/19/ЕС; полный текст декларации о соответствии ЕС доступен по следующему адресу в Интернете: www.retevis.com.
• Информация об ограничениях
Этот продукт можно использовать в странах и регионах ЕС, включая: Бельгию (BE), Болгарию (BG), Чехию (CZ), Данию (DK), Германию (DE), Эстонию (EE), Ирландию (IE), Грецию. (EL), Испания (ES), Франция (FR), Хорватия (HR), Италия (IT), Кипр (CY), Латвия (LV), Литва (LT), Люксембург (LU), Венгрия (HU), Мальта (MT), Нидерланды (NL), Австрия (AT), Польша (PL), Португалия (PT), Румыния (RO), Словения (SI), Словакия (SK), Финляндия (FI), Швеция (SE) и США Королевство (Великобритания). Предупреждающую информацию об ограничении частоты см. на упаковке или в разделе руководства.
![]() Распоряжение
Распоряжение
Символ перечеркнутого мусорного бака на вашем продукте, литературе или упаковке напоминает вам, что в Европейском Союзе все электрические и электронные продукты, батареи и аккумуляторы (аккумуляторные батареи) необходимо сдавать в специально отведенные места сбора в конце их срока службы. Срок службы. Не выбрасывайте эти продукты вместе с несортированными бытовыми отходами. Утилизируйте их в соответствии с местными законами.
Требования IC:
Радиоаппаратура, не подлежащая лицензированию Это устройство содержит не требующие лицензии передатчик (и) / приемник (и), которые соответствуют не требующим лицензирования RSS Канады в области инноваций, науки и экономического развития. Эксплуатация возможна при соблюдении следующих двух условий:
(1) Это устройство не должно вызывать помех.
(2) Это устройство должно принимать любые помехи, включая помехи, которые могут вызвать нежелательную работу устройства.
Информация о радиочастотном воздействии
- ЗАПРЕЩАЕТСЯ использовать радиостанцию без соответствующей антенны, так как это может повредить радиостанцию, а также может привести к превышению пределов воздействия радиочастотного излучения. Подходящей антенной является антенна, поставляемая с этим радиоприемником производителем, или антенна, специально разрешенная производителем для использования с этим радиоприемником, и усиление антенны не должно превышать указанного производителем усиления.
- ЗАПРЕЩАЕТСЯ передавать более 50% общего времени использования радио, более 50% времени может привести к превышению требований соответствия требованиям по радиочастотному излучению.
- Во время передачи ваше радио генерирует радиочастотную энергию, которая может создавать помехи другим устройствам или системам. Чтобы избежать таких помех, выключайте радио в местах, где установлены соответствующие знаки.
- ЗАПРЕЩАЕТСЯ использовать передатчик в местах, чувствительных к электромагнитному излучению, таких как больницы, самолеты и места проведения взрывных работ.
- Портативное устройство, этот передатчик может работать с антенной (антеннами), задокументированной в этой документации, в конфигурациях Push-to-Talk и в нательных конфигурациях. Соблюдение требований к радиочастотному излучению ограничено конкретными конфигурациями зажимов для ремня и аксессуаров, как указано в этой документации, а расстояние между пользователем и устройством или его антенной должно составлять не менее 2.5 см.
- Мобильное устройство, во время работы разделительное расстояние между пользователем и антенной регулируется действующими нормами, это безопасное расстояние обеспечит достаточное расстояние от правильно установленной внешней антенны, чтобы удовлетворить требования к радиочастотному излучению.
- Профессиональное/контролируемое радио, это радио предназначено и классифицируется как «Только для профессионального/контролируемого использования», что означает, что оно должно использоваться только во время работы лицами, осведомленными об опасностях и способах минимизации таких опасностей; НЕ предназначен для использования в общей популяции/неконтролируемой среде.
- Общее население/неконтролируемое радио, это радио предназначено и классифицируется как «общее население/неконтролируемое использование».
Рекомендации по соблюдению и ограничению воздействия радиочастотного излучения и инструкции по эксплуатации Чтобы контролировать воздействие и обеспечить соблюдение пределов воздействия на рабочем месте/в контролируемой среде, всегда соблюдайте следующие процедуры.
Методические рекомендации:
- Инструкции по информированию пользователя должны сопровождать устройство при передаче другим пользователям.
- Не используйте это устройство, если не выполняются описанные здесь эксплуатационные требования.
Инструкция по эксплуатации:
- Передача не более номинального коэффициента заполнения 50% времени. Для передачи (разговора) нажмите кнопку «Нажми и говори» (PTT). Чтобы принимать вызовы (прослушивать), отпустите кнопку PTT. Передача 50% времени или меньше важна, потому что радио генерирует измеримое воздействие радиочастотной энергии только при передаче с точки зрения измерения соответствия стандартам.
- Передавайте только тогда, когда люди, находящиеся вне автомобиля, находятся на расстоянии не менее рекомендуемого минимального бокового расстояния от правильно установленной в соответствии с инструкциями по установке внешней антенны.
- При работе перед лицом, надетой на тело, всегда размещайте радиостанцию в одобренном Reeves зажиме, держателе, кобуре, футляре или нательных ремнях для этого изделия. Важно использовать утвержденные аксессуары для ношения на теле, поскольку использование аксессуаров, не одобренных Reeves, может привести к уровням воздействия, которые превышают пределы воздействия радиочастотного излучения IEEE/ICNIRP.
 Ручной режим
- Держите радиостанцию в вертикальном положении так, чтобы микрофон (и другие части радиостанции, включая антенну) находились на расстоянии не менее 2.5 см (один дюйм) от носа или губ. Антенну следует держать подальше от глаз. Важно держать радиостанцию на правильном расстоянии, так как радиочастотное воздействие уменьшается с увеличением расстояния от антенны.
Телефонный режим
- При совершении или приеме телефонного звонка держите радиоустройство так же, как беспроводной телефон. Говорите прямо в микрофон.
Электромагнитные помехи / совместимость
ПРИМЕЧАНИЕ: Почти каждое электронное устройство восприимчиво к электромагнитным помехам (EMI), если оно неадекватно экранировано, спроектировано или иным образом сконфигурировано для обеспечения электромагнитной совместимости.
Избегайте опасности удушья


http://www.Retevis.com
Гарантия
Номер модели:__________________
Серийный номер:_____________________
Дата покупки:____________________
Дилер: ___________________________
Имя пользователя:________________
Страна:___________________
Почтовый индекс:___________________________________
Телефон:__________________
Телефон:______________________
Адрес:_____________________
Эл. адрес:_____________________
Примечания:
- Этот гарантийный талон должен храниться у пользователя, в случае утери он не подлежит замене.
- На большинство новых продуктов предоставляется двухлетняя гарантия производителя с даты покупки. Более подробная информация, пожалуйста, прочитайте http://www.retevis.com/after-sale/
- Пользователь может получить гарантийное и послепродажное обслуживание, как показано ниже:
• Свяжитесь с продавцом, у которого вы покупаете.
• Изделия, отремонтированные в нашем местном ремонтном центре - Для гарантийного обслуживания вам необходимо предоставить квитанцию о покупке от реального продавца для проверки.
Исключения из гарантийного покрытия:
- К любому продукту, поврежденному случайно.
- В случае неправильного использования продукта или неправильного обращения с ним, а также в результате несанкционированных изменений или ремонта.
- Если серийный номер был изменен, испорчен или удален.
![]()
![]()
Шэньчжэнь Ysair Technology Co., Ltd.
Добавить: 6/F, корпус 6, Интеллектуальный парк Юньли, № 3, Changfa Middle Road, сообщество Янмэй, улица Бантянь, район Лунган, Шэньчжэнь, Китай
Web: www.retevis.com
E-mail: кам@ретевис.com
Facebook: facebook.com/ретевис
