
-
Contents
-
Table of Contents
-
Bookmarks
Quick Links
• CL 30
P.O. Box 16625, Jackson, MS 39236-6625
280 South Perkins St., Ridgeland, MS 39157
e-mail: robocoup@misnet.com — website: www.robotcoupeusa.com — Phone : 1-800-824-1646
Related Manuals for Robot Coupe CL 30
Summary of Contents for Robot Coupe CL 30
-
Page 1
• CL 30 P.O. Box 16625, Jackson, MS 39236-6625 280 South Perkins St., Ridgeland, MS 39157 e-mail: robocoup@misnet.com — website: www.robotcoupeusa.com — Phone : 1-800-824-1646… -
Page 2
W A R N I N G IMPORTANT WARNING KEEP THESE INSTRUCTIONS IN A SAFE PLACE WARNING: In order to limit accidents such as electric shocks, personal injury or fire, and in order to limit material damage due to misuse of the appliance, please read these instructions carefully and follow them strictly. Reading the operating instructions will help you know your appliance and enable you to use the equipment correctly. -
Page 3: Operating Instructions
OPERATING INSTRUCTIONS MANUAL DE INSTRUCCIÓN We reserve the right to alter at any time without notice the technical specifications of this appliance. © All rights reserved for all countries by : ROBOT-COUPE Nos reservamos el derecho de modificar en todo momento y sin previo aviso las características técnicas de este aparato. ©…
-
Page 4: Table Of Contents
SUMMARY WARRANTY USES AND CHOICE OF CUTTING PLATES IMPORTANT WARNING CLEANING INTRODUCTION TO YOUR NEW CL 30 VEGETABLE PREPARATION MACHINE MAINTENANCE SWITCHING ON THE MACHINE • Motor-shaft seal • Advice on electrical connections • Bowl locking bushings ASSEMBLY TECHNICAL SPECIFICATIONS SAFETY •…
-
Page 5
Service Agency of the possibility of scratched, stained, chipped, pitted, dented or warranty coverage and provide a Neither ROBOT COUPE U.S.A., INC. nor its discolored surfaces, blades, knives, attachments copy of the dated sales or delivery affiliated companies or any of its distributors, di- or accessories. -
Page 6: Important Warning
W A R N I N G IMPORTANT WARNING KEEP THESE INSTRUCTIONS IN A SAFE PLACE WARNING: In order to limit accidents such as electric shocks, personal injury or fire, and in order to limit material damage due to misuse of the appliance, please read these instructions carefully and follow them strictly. Reading the operating instructions will help you know your appliance and enable you to use the equipment correctly.
-
Page 7: Introduction To Your New Cl
W A R N I N G gradually discover as you use it. This appliance must be plugged into a The CL 30 has a wide range of cutting plates for thin grounded socket (risk of electrocution). slicing, grating and julienne vegetables. It will also The discharge plate may be removed from the center dice and cut French fries.
-
Page 8: Technical Specifications
• PACKAGING continuous feed attachment. The packaging for the CL 30 has been specially Place the matching slicing designed to prevent damage occurring in transit. plate on the discharge Details of the contents are clearly marked on the plate.
-
Page 9: Weight
/ beet root / zucchini / potato R296 — Fill the hopper with product. Place the CL 30 on a sturdy work surface at a — Apply light pressure to the pusher. carrot / beet root / zucchini / potato…
-
Page 10: Cleaning
W A R N I N G The CL 30 is fitted with a magnetic safety device seal areas. and motor braking system.
-
Page 11
TECHNICAL DATA DATOS TÉCNICOS DONNÉES TECHNIQUES… -
Page 15
P.O. Box 16625, Jackson, MS 39236-6625 280 South Perkins St., Ridgeland, MS 39157 e-mail: robocoup@misnet.com website: www.robotcoupeusa.com Phone : 1-800-824-1646…

Официальный дилер!
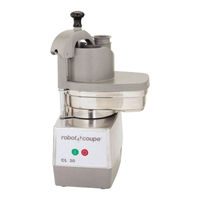
Овощерезка ROBOT COUPE CL30 BISTRO
Габаритные размеры ДхШхВ, мм
345х305х590
Описание товара
Овощерезка ROBOT COUPE CL30 BISTRO используется в ресторане, кафе, пиццерии.
Компактная настольная модель, которую легко чистить и хранить даже на самых маленьких кухнях. Сэкономьте несколько часов ручного труда в день: измельчите, натрите на терке, используйте нарезку волнистыми ломтиками, жюльен, кубиком и брусочками фри.
Рабочие детали, находящиеся в непосредственном контакте с продуктами, быстро снимаются без использования дополнительных инструментов и легко очищаются.
Области применения:
- Нарезка овощей, фруктов, грибов, твердого сыра и колбас для последующего приготовления широкого ассортимента блюд: супов, салатов, гарниров, десертов
Особенности:
- 28 совместимых моделей дисков из нержавеющей стали и алюминия
- Максимальная скорость нарезки — 3,3 кг/мин (зависит от типа используемой воронки, характера нарезаемого продукта, вида нарезки и организации рабочего места)
- Вертикальная загрузка продуктов требует минимальных усилий оператора
- Большой бункер подачи продуктов позволяет загружать большинство продуктов без предварительного разрезания на части
- Увеличение скорости работы благодаря функции «Автопуск», которая позволяет работать без нажимания кнопок «Старт» и «Пуск» — устройство автоматически начинает работу при опускании толкателя
- Боковой выброс продуктов позволяет использовать приёмные ёмкости большого размера (например, GN 1/2-150) и реже забирать нарезанные продукты из ёмкости
- Быстрая очистка оборудования после работы, благодаря съёмной крышке простой формы и рабочему отсеку со скруглёнными углами
- Рабочий отсек и крышка выполнены из ударопрочного ABS пластика
- Усиленный диск-сбрасыватель
- Конструкция двигателя:
- Асинхронный двигатель промышленного изготовления, предназначенный для интенсивной работы
- Обеспечивает увеличенную выходную мощность
- Смонтирован на шарикоподшипниках для бесшумной работы и отсутствия вибрации
- Блок двигателя изготовлен из поликарбоната
- Вал двигателя изготовлен из нержавеющей стали
- Отсутствие изнашивающихся деталей избавляет от необходимости проведения технического обслуживания
Дополнительные характеристики:
- Число порций: 20-80
- Количество скоростей: 1
Комплектация:
- Бункер подачи продуктов с двумя загрузочными воронками:
- D-образная площадью 104 см2 объёмом 1,56 л для крупных продуктов (капуста, сельдерей, салат, томаты)
- Круглая диаметром 58 мм для длинных и нежных продуктов (кабачки, огурцы, морковь, бананы, грибы)
- Режущие диски не входят в комплект поставки
Опции (заказываются отдельно):
- Режущие диски (28 моделей, 2 набора):
- Обычная нарезка (6 моделей):
- Диск-слайсер 27051 (1 мм)
- Диск-слайсер 27555 (2 мм)
- Диск-слайсер 27086 (3 мм)
- Диск-слайсер 27566 (4 мм)
- Диск-слайсер 27087 (5 мм)
- Диск-слайсер 27786 (6 мм)
- Волнистая нарезка (1 модель):
- Диск-волнистые ломтики 27621 (2 мм)
- Тёрка (10 моделей):
- Диск-тёрка для картофеля 27191
- Диск-тёрка для пармезана 27764
- Диск-тёрка для редьки и хрена 27078 (0,7 мм)
- Диск-тёрка для редьки и хрена 27079 (1 мм)
- Диск-тёрка для редьки и хрена 27130 (1,3 мм)
- Диск-тёрка 27148 (1,5 мм)
- Диск-тёрка 27149 (2 мм)
- Диск-тёрка 27150 (3 мм)
- Диск-тёрка 27046 (6 мм)
- Диск-тёрка 27632 (9 мм)
- Соломка (6 моделей):
- Диск-соломка 27599 (2х2 мм)
- Диск-соломка 27080 (2х4 мм)
- Диск-соломка 27081 (2х6 мм)
- Диск-соломка 27047 (4х4 мм)
- Диск-соломка 27610 (6х6 мм)
- Диск-соломка 27048 (8х8 мм)
- Комплекты для кубиков (3 модели):
- Комплект для кубиков 27113 (8х8х8 мм)
- Комплект для кубиков 27114 (10х10х10 мм)
- Комплект для кубиков 27298 (12х12х12 мм)
- Картофель фри (2 модели):
- Комплект для картофеля фри 8х8 мм 27116
- Комплект для картофеля фри 10х10 мм 27117
- Наборы дисков (2 набора):
- Набор из 5 дисков 1946
- Набор из 6 дисков 1945
- Дополнительные аксессуары:
- Диск-сбрасыватель 104921
- Загрузочный лоток в сборе 117079
-
Оплатите заказ любым удобным способом!
-
Более 20 складов самовывоза!
-
Доставим заказ в течении 1-3 рабочих дней!
-
Официальная Гарантия на все товары, представленные на нашем сайте.
Как оплатить? Оплата товара осуществляется любыми удобными для Вас способами.
Для юридических лиц:
- Безналичный расчет
- Наличный расчет в офисе компании
- Оплата банковскими картами: МИР, VISA, MasterCard
- Оплата в лизинг
Для физических лиц:
- Наличный расчет в офисе компании
- Безналичный расчет для физических лиц
- Оплата в кредит
- Оплата банковскими картами: МИР, VISA, MasterCard
- Рассрочка
Как забрать? У нас более 20 точек самовывоза во всех крупных регионах России от Владивостока до Москвы.
На данных складах мы поддерживаем ассортимент самого востребованного оборудования нашими клиентами.
Если какого то оборудования нет на региональном складе в вашем регионе, мы оперативно отправим оборудование через транспортную компанию с центрального склада в Москве. Забрать товар самовывозом можно после оплаты счёта при условии наличия товара на данном складе
Забрать товар можно самовывозом в Москве c пн — пт: 11.00-17.00, Сб: Выходной, Вс: Выходной.
Адрес пункта самовывоза: 140005 Московская обл. г. Люберцы Ул. Смирновская д.30 ЛитЖ (уточнить адрес)
Когда привезут?
Транспортные расходы и время ожидания клиента сведены к минимуму! Оплаченный заказ может быть доставлен в течении 1-3 рабочих дней после оплаты счета собственной службой доставки либо транспортной компанией
*Более подробную информацию о времени и способе доставки в ваш регион уточняйте у менеджера.
Гарантия на оборудование
На все оборудование представленное на нашем сайте распространяется официальная гарантия — 12 месяцев
*на оборудование китайского производства гарантия составляет — 6 месяцев
Овощерезка ROBOT COUPE CL30 BISTRO Характеристики:
| Прочие | ||
| Страна | Франция | |
| Гарантия | 12 месяцев | |
| Статус |
|
|
| Габаритные размеры ДхШхВ, мм | 345х305х590 | |
| Длина, мм | 345 | |
| Ширина, мм | 305 | |
| Высота, мм | 590 | |
| Производитель | ROBOT COUPE | |
| Комплектация | Без дисков | |
| Производительность, max | 50 кг/час | |
| Установка |
|
|
| Вес, кг | 14 | |
| Напряжение питания, В |
|
|
| Подключение |
|
|
| Мощность, кВт | 0.5 | |
| Скорость, об/мин | 500 | |
| Категория | электромеханическое оборудование, овощерезки |
Подходящие запчасти (36)
Показать еще
Похожие товары
Техническая документация
- Manuals
- Brands
- Robot Coupe Manuals
- Food Processor
- CL 30
Manuals and User Guides for Robot Coupe CL 30. We have 3 Robot Coupe CL 30 manuals available for free PDF download: Operating Instructions Manual, Quick Start Manual, Specifications
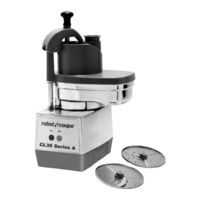
Robot Coupe CL 30 Operating Instructions Manual (15 pages)
Robot Coupe Series «A» Vegetable cutter
Brand: Robot Coupe
|
Category: Food Processor
|
Size: 0.32 MB
Table of Contents
-
Operating Instructions
3
-
Table of Contents
4
-
Important Warning
6
-
Introduction to Your New Cl
7
-
Switching on the Machine
7
-
Advice on Electrical Connections
7
-
Assembly
7
-
Technical Specifications
8
-
Features
8
-
Packaging
8
-
Weight
9
-
Working Height
9
-
Uses and Choice of Cutting Plates
9
-
Cleaning
10
-
Maintenance
10
-
Motor-Shaft Seal
10
-
Bowl Locking Bushings
10
-
Safety
10
Advertisement

Robot Coupe CL 30 Quick Start Manual (13 pages)
Brand: Robot Coupe
|
Category: Kitchen Appliances
|
Size: 0.82 MB
Table of Contents
-
Table of Contents
2
-
Warranty
3
-
Important Warning
4
-
Introduction to Your New Vegetable Preparation Machine Cl
5
-
Switching on the Machine
5
-
Advice on Electrical
5
-
Assembly
5
-
Uses and Choice of Discs
6
-
Cleaning
7
-
Maintenance
7
-
Motor Seal
7
-
Bowl Locating Plates
7
-
Technical Specifications
7
-
Weight
7
-
Working Height
7
-
Noise Level
8
-
Electrical Data
8
-
Safety
8
-
Standards
8
Robot Coupe CL 30 Specifications (2 pages)
All Metal Base Continuous Feed Vegetable Prep Unit
Brand: Robot Coupe
|
Category: Food Processor
|
Size: 0.09 MB
Advertisement
Advertisement
Related Products
-
Robot Coupe CL50 Gourmet
-
Robot Coupe CL52D
-
Robot Coupe CL55
-
Robot Coupe CMP 400 V.V.
-
Robot Coupe CL 51
-
ROBOT COUPE CL 55 e
-
Robot Coupe CL 60 E
-
Robot Coupe CL60
-
Robot Coupe CL 52 Series «D»
-
Robot Coupe CL 40
Robot Coupe Categories
Food Processor
Kitchen Appliances
Mixer
Blender
Commercial Food Equipment
More Robot Coupe Manuals
Prepare 600 servings in 2 1/2
hours or less! 100 servings in
30 minutes.
Vegetable prep function — external ejection designed
for quality,slicing, shredding, grating,
french fry, dicing and julienne cuts.
Accommodates 25 different processing
discs.
• Stainless steel feed
attachment with high impact
plastic lead.
• Two introduction ports. One
for larger products and one
round chute for slender
products.
• Mechanical safety system
and motor brake for user
safety.
• Single phase, fan-cooled, 1
HP motor.
• Large range of 25 stainless
steel processing discs to
choose from including dicing.
• Attachments
easily
removed
for superior sanitation.
• Unit base uses minimal
counter space (15 3/4” x
15”).
• Standard package includes
two processing discs (27577
— 2mm grating and 27566 —
4mm slicing)
• 1 year parts and labor
Robot Coupe U.S.A., Inc.
P.O. Box 16625
Jackson, MS 39236-6625
1-800-824-1646 • (601) 898-8411
FAX: (601) 898-9134
www.robotcoupeusa.com
e-mail: info@robotcoupeusa.com
SPECIFICATIONS ON REVERSE SIDE
“The Inventor & World Leader in Food Processors”
All Metal Base Continuous Feed
Vegetable Prep Unit
CL30A
Commercial Food Processor

OPERATION MANUAL
FOR
MODEL
R302
robot coupe U.S.A., Inc.
P.O. Box 16625, Jackson, MS 39236-6625
280 South Perkins St., Ridgeland, MS 39157
email: [email protected]
website: www.robotcoupeusa.com
1-800-824-1646
R302 Operation Manual
2
R302 Operation Manual
INTRODUCTION
The Robot Coupe commercial food processor performs
a host of culinary feats. It is designed for high speed
and quality vegetable processing. The Robot Coupe
slices, juliennes, and shreds with the continuous feed
attachment, plus it will chop, grind, puree, mix, or knead
using the cutter bowl attachment.
This operators manual is broken down into sections
giving you detailed instructions for assembly and operation of the continuous feed attachment and the cutter bowl attachment. Close attention should be paid to
all instructions in this manual to ensure a long life utilization of your food processor.
This manual should be kept within easy
access to all users for reference, and
should be read completely by all first time
users of the machine.
I.
INTRODUCTION
II.
ASSEMBLY/DISASSEMBLY
INSTRUCTIONS
Maintaining the food processor in good working condition is one of the most important measures to be taken.
Inspect the machine and all parts regularly to make
sure they are in good working condition.
III.
OPERATING INSTRUCTIONS
DO NOT operate a machine that has malfunctioned in any way.
IV.
PREVENTIVE MAINTENANCE
GUIDE
Discard any food processed at the time of
a malfunction and have the machine inspected and
V.
TROUBLE SHOOTING AIDS
VI.
SERVICE AGENCY LISTING
repaired at one of the Robot Coupe Authorized Service Agencies, a list is provided in the back of this
manual. Contact one of these service agencies for all
of your service, parts and accessory requirements.
CAUTION: Your Robot Coupe comes with
a sharp cutting “S” blade and cutting
plates. Always handle with safety in mind.
We suggest that a pair of cut-resistant
gloves be worn when handling the “S”
blade and plates.
Machine Specifications:
The Model R3O2 is equipped with a high speed motor
generating 1/2 Hp which plugs into a standard 120 volt/
60 Hz, 15 amp power outlet. The full load amperage
rating is 7.2 amps. The machine is supplied with a 3
liter stainless steel bowl, with S-blade and clear plastic
cover, a continuous feed attachment, and two cutting
plates. The machine is equipped with push type on/
off/pulse buttons.
3
R302 Operation Manual
II. ASSEMBLY/DISASSEMBLY INSTRUCTIONS
Your Robot Coupe should be placed on a sturdy work surface at a comfortable working height and have a
standard 115 volt power outlet available. Always keep the machine unplugged during assembly and disassembly.
A. CUTTER BOWL ATTACHMENT ASSEMBLY INSTRUCTIONS
4
R302 Operation Manual
B. CONTINUOUS FEED ATTACHMENT ASSEMBLY INSTRUCTIONS
The continuous feed lead serves several functions. Primarily, the lead protects the operator from the cutting
plate. When the lead is fully locked in place, the plate is covered and the unit will be ready for operation.
The continuous feed lead has two feed openings, one large and one small, with matching
pushers. The food is inserted in the chosen opening by removing the pusher with one hand and then
depositing the food into the chute with the other hand. The pusher should then be used to “push” the food
through the opening.
CAUTION: Keep hands out of the feed openings.
The Food Processor is now assembled and ready to perform its desired function. Before continuing the
operation-You should completely read the instructions contained in the rest of this manual.
DISASSEMBLY INSTRUCTIONS: Simply reverse the steps outlined in the assembly instructions with the
power cord unplugged from its wall socket.
5
R302 Operation Manual
III. OPERATING INSTRUCTIONS
THE UNIT SHOULD BE OFF EXCEPT WHEN PROCESSING IS UNDERWAY.
It is recommended that the machine be operated on
a 50% duty cycle. This is easily accomplished since
the preparation time (cleaning, coring, peeling, and
loading) takes longer than the processing time. This
will yield the longest life for your machine.
NOTE: This machine is equipped with manual reset
thermal overload protection. If the machine is overloaded or run too long under heavy load conditions,
the overload will trip. If this occurs, first remove the
bowl and reduce the amount of food being processed.
The reset button is located on the bottom right corner
of the motor base. Press the button in to reset the
overload protector.
4. TO CHOP ONIONS, CELERY, CABBAGE, ETC.
Quarter onions, and cut other vegetables into 2 to 3
inch portions. Place the product into the bowl up to 3/
4 full and pulse the unit until you reach the desired
consistency. CAUTION: If you overfill or allow the
machine to run continually, the product on the top
may not be cut while that on the bottom will be pureed.
5. TO PUREE OR MIX: To puree, make sauces, or
to mix and blend, place the ingredients into the bowl
(do not overfill), turn the unit on, and allow to run continuously.
DO NOT allow the machine to run
unattended.
A. INSTRUCTIONS FOR USE OF THE
CUTTER BOWL
The cutter bowl attachment is used for grinding, pureeing, blending, mixing, of ingredients. With the
power switch off and the bowl and blade secured in
place (per previous instructions) you are now ready
to add product to the bowl. There are two ways to
run your machine. Chopping using a quick start/stop
action with the pulse button, or running continuously
for a fine chop or puree.
1. TO CHOP
To achieve a chopped consistency for vegetables,
meats, cheese, etc., fill the bowl 2/3 to 3/4 full with
portions no larger than 1 to 2 inch square. Press the
pulse button until the desired consistency is reached.
If the motor stalls, reduce the amount of product in
the bowl.
2. TO PUREE OR FINE CHOP: For a fine puree,
emulsification, or fine chop fill the bowl 2/3 to 3/4 full
with portions no larger than 1 to 1 1/2 inches square.
Begin by pulsing the machine to reduce the size then,
press the on button, and allow the machine to run
until the product is finely chopped or pureed. Some
purees may require the addition of a liquid to obtain
the correct consistency.
3. TO CHOP HARD CHEESE: Place uniform 1” to 1
1/2” cubes of chilled cheese up to 1 1/2 pounds into
the bowl and pulse the machine. For powdered
cheese pulse the motor until the cheese is about pea
size then allow the motor to run continuously until you
have a fine powder.
6
R302 Operation Manual
Sharpening the “S” blade
The “S” blade will require sharpening on a periodic basis depending on use. The use of a
dull blade will sometimes give unsatisfactory results. A honing stone is provided with
each machine for this purpose. Follow the directions shown to sharpen the blade, or have
the blades sharpened professionally if you prefer.
1. Put on your cut-resistant gloves
2. Use the robot Coupe stone or any good
sharpening stone.
3. Hold or clamp the blade flat on the edge or
corner of a sturdy table.
4. With the other hand hold the stone at a 30
degree angle against the top bevel of one
blade.
5. Pull the stone into the blade edge moving
from hub to tip, several strokes, until the
blade is sharp.
6. Turn the blade over and rub the stone flat
against the underside of the blade to
remove the feather edge formed at step 5.
7. Repeat the procedure for the other blade.
8. Wash the blade before use.
7
R302 Operation Manual
B: INSTRUCTIONS FOR USE OF THE
CONTINUOUS FEED ATTACHMENT:
The Robot Coupe Food Processor will slice, grate,
shred and julliene. These processes will be performed
in a matter of seconds. Because of the speed of the
process, it is necessary that the operator perform preliminary steps before turning the machine on. Food
preparation, feed chute loading, and availability of a
receptacle for receiving the finished product are some
of the steps to assure positive control of the processing operation.
Food preparation will be required to assure that the
produce will fit a feed chute with the pusher covering
the product. Additionally, according to personal preference, some products may or may not be cored or
peeled. Feed chute selection should be made depending upon the product to be processed. As an
example, good consistency of small round produce
(carrots, cucumbers, etc.) necessitates use of the
small feed chute to allow better operator control. Use
of the larger port for this type of produce may result in
an undesired finished product, e.g., slicing with the
grain. In general, more control of the processing operation can also be obtained by filling the selected
feed chute and placing the pusher in position before
turning the machine on.
Adherence to certain operational techniques will also
enhance the processing operation. For instance, a
consistent pressure with the pusher upon the produce
will yield a consistent output. Application of more pressure will increase the thickness of the product, e.g.,
thicker slice, while reduction in pressure will result in
a finer product. However, do not apply enough pressure to stall or slow the motor. This will cause damage to both the plate and the motor. If no pressure is
applied at all and the produce is permitted to bounce
around, an inconsistent product may result. When
the pusher has settled fully in the feed chute, press
the off switch and re-load the entry port for a repeat
process.
DO NOT remove the continuous feed lead
when the motor is running. Wait until the
motor has come to a full stop.
DO NOT attempt to run frozen products
through the cutting plates.
DO NOT put anything other than food
products in the feed chute.
Wear cut-resistant gloves when handling
the cutting plates.
(1) Slicing Operation: When preparing food to be
sliced, make sure the food will fit into the proper feed
chute. Produce such as carrots, cucumbers, etc.,
should be “squared” at both ends. This will provide a
consistent slice throughout the whole product. With
cabbage, lettuce or any product that has an undesirable core, the core should be removed. Medium
size heads of lettuce or cabbage may be cut into
thirds to fit in the feed chute. It is also suggested that
the rounded half be squared to permit a consistent
cut. The rounded portion can be dropped into the
chute at the end and with no pressure applied, it will
normally be processed uniformly. Larger heads of
cabbage or lettuce may be more effectively processed
if they are cut into fourths. When the preparation has
been accomplished, fill the selected feed chute, place
the pusher in position, turn the machine on and observe the results.
THE UNIT SHOULD BE OFF EXCEPT WHEN PROCESSING IS UNDERWAY. It is recommended that
the machine be operated on a 50% duty cycle. This
is easily accomplished since the preparation time
(cleaning, coring, peeling, and loading) takes longer
than the processing time. This will yield the longest
life for your machine.
8
R302 Operation Manual
(2) Grating Operation: Again, prepare the product
as to allow insertion into the feed chute. Consider
which chute will be used. As an example, placement
of carrots horizontally in the large chute will result in
a long grated product, while vertical insertion in the
smaller chute will result in a short grated product. It
is recommended that chilled cheese be used when
grated cheese is desired, otherwise a gumminess may
result. A fine coating of cornstarch applied to the
cheese before grating will aid in keeping the finished
product separated. A fine coating of cornstarch will
not be visible and is tasteless. Grating cheese is one
of the most trying processes and because the nature
of the product may cause overheating of the motor if
not grated in the recommended manner. It is recommended that a slight pulsating pressure be applied
with the pusher while grating, alternating slight pressure on the pusher—no pressure—continuing in this
manner until the block of cheese is completely grated.
It is recommended that the cheese be prepared to fit
(3) Julienne Operation: Insertion of the product to
be cut must be horizontal if a long stick is to be
achieved, e.g., squash sticks. Vertical insertion will
result in finely chopped products, e.g., chopped celery. A finely chopped onion product may also be
obtained with this operation.
Plate Utilization
The Robot Coupe food processor will perform a variety of functions: slicing, grating, French fry, and
julienne. There are a total of 25 different plates available to perform these functions to meet individual
tastes. The 21 plates consists of:
7 slicing plates
8 grating plates
6 julienne plates
The standard Robot Coupe comes with two (2) plates.
Check your most current price list for the plates which
are included as standard. The number and type of
plates will vary depending upon the use of the machine.
SLICING PLATES
The seven (7) slicing plates range from 1mm (approximately 3/64") to 6.5mm (approximately 1/4"):
Part Number
R291
R212
R210
R292
R211
R293
R270
MM Slicing
1mm
2mm (waved)
2mm
3mm
4mm
5mm
6mm
Inches (Approx.)
1/32 in.
5/64 in.
5/64 in.
1/8 in.
5/32 in.
3/16 in.
1/4 in.
Plate Usage
SLICING PLATES
R291 1/32" - 1mm Slicing Plate
The thinnest slicing plate is the R291. It is used for
paper thin slicing of potatoes for potato chips. This
plate will also slice carrots lengthwise which can be
soaked in cold water to make flower petals for
garnish.
R210 5/64" - 2mm Slicing Plate
The next to the thinnest of the straight slicing plates
is the R210. It provides a wafer thin slice that
makes harder vegetables look best. Carrots,
radishes, celery and potatoes look terrific through
this plate. This is the best plate for shredded
lettuce for tacos and sandwiches. This is also the
plate for cabbage for a German style slaw.
R292 1/8" - 3mm Slicing Plate
This is one of the new thickness of slice available.
By cutting 1/8" thick it gives good shelf life and
maximum yield. Almost any vegetable can be cut
with this plate and gives greater yield than the
standard slicer which comes with the unit.
R211 5/32" - 4mm Slicing Plate
The R211 is the best all purpose slicing plate. For
most vegetables this thickness is best. Cucumbers, mushrooms, zucchini, and celery all cut
beautifully with the R211 while providing a good
shelf life. This is the second most popular plate
requested and comes standard with the unit. Even
soft foods like strawberries, bananas, and green
onion tops slice marvelously.
R293 3/16" - 5mm Slicing Plate
Some foods are more attractive when sliced a bit
thicker and that is the function of the R293. Half
slices of tomato or bell pepper work good as well as
yellow squash and zucchini. Try deep fried thick
slices of potato using the R293 for home fries.
9
R302 Operation Manual
GRATING PLATES
R270 1/4" - 6mm Slicing Plate
For soups and stews an extra thick slice is desirable. Carrots and celery work great this way. Any
food that you want a more generous slice on will
look terrific through the R270. For this reason it is
the third most popular plate .
R212 5/64" - 2mm Waved Slicing Plate
This is a decorative, thin, waved slice. Harder
vegetables will work best with this plate like carrots,
radishes, zucchini and potatoes.
There are eight grating plates available for use with
the Robot Coupe:
Part Number
Metric Inches (Approx.)
R271 Hard Cheese Grating
R294 Extra Fine
.7mm
.02 in
R295 Extra Fine
1mm
1/32 in.
R208 Fine
1.5mm
1/16 in.
R209 Medium
2mm
5/64 in.
R281 Medium Coarse 3mm
1/8 in
R280 Medium Coarse 6mm
1/4 in.
R215 Extra Coarse
9mm
3/8 in.
Plate Usage
GRATING PLATES
R271 Hard Cheese Grating Plate
The R271 is the plate which will make a powder from
hard cheeses. Parmesan and Romano are used most
extensively with this. When potatoes are run through
this plate a batter is produced which is excellent for
potato pancakes.
R294 .02” - .7mm Pulping Plate
The R294 pulping plate was created to grind Chinese
radish into a pulp that is served with sushi. Moreover, it will render any vegetable into a wet pulp or
batter, much the way a vegetable juicer does. This is
ideal for vegetable sauces that are low fat.
R295 1/32”-1mm Pulping Plate
The R295 reacts identically to the R294 but is just
slightly coarser so that not as much juice is extracted.
Use on ginger root (shoga), white radish (dikon), baby
turnips (kabo), or lotus root (renkon).
R208 1/16" - 1.5mm Fine Grating Plate
The R208 is a delicate grate used mostly for cheeses
and carrots. The width of the grate is 1/16" or 1.5mm
It also does an excellent job on bread crumbs and
cold chocolate.
R209 5/64" - 2mm Medium Grating Plate
This is the most ordered plate of this series. While
being used mainly for cheeses and carrots its size, 5/
64" or 2mm, gives maximum yield with excellent shelf
life. Also used on coconuts and potatoes for hash
browns. This is the grating plate that comes standard with the unit.
10
R302 Operation Manual
R281 1/8" - 3mm Medium Coarse Grating
This new size grating plate is good for an extra fine
coleslaw or anything you prefer grated a bit coarser
than the standard R209 medium grating plate. This
plate works wonderfully with cheese, potatoes,
beets, eggs, cabbage or sweet potatoes.
R288 5/32"x 5/32" - 4mm x 4mm Julienne Plate
This is the most popular of the julienne plates. Carrots, yellow squash, and zucchini work best. These
can be sautéed and makes a beautiful garnish for an
entree. Try steaming these too for a healthy and colorful side dish.
R280 1/4" - 6mm Coarse Grating Plate
This in between size of grate has become popular
with salad bars. Cheeses and carrots appear a bit
more generous when grated this way. Also purple
cabbage run trough this plate can add a splash of
color to a salad bowl filled with lettuce.
R297 5/64" x 1/4" - 2mm x 6mm Julienne Plate
This new julienne cut is becoming a very popular presentation on salads. Carrots, zucchini and yellow
squash look especially good this way.
R215 3/8 - 9mm Extra Coarse Grating Plate
The R215 is the widest grating plate. It provides an
extra thick grate of cabbage for slaw and cheeses for
melting. Mozzarella cheese looks terrific through the
R215
JULIENNE PLATES
There are six julienne plates available:
Part Number
R214
R296
R288
R297
R213
R298
Metric
2x2mm
2x4mm
4x4mm
2x6mm
6x6mm
8x8mm
Inches (Approx.)
5/64 x 5/64 in.
5/64 x 5/32 in.
5/32 x 5/32 in.
5/64 x 1/4 in.
1/4 x 1/4 in.
5/16 x 5/16 in.
Plate Usage
JULIENNE PLATES
Products such as squash sticks, chopped celery, and
finely chopped onions are obtainable as well as
julienne celery
DO NOT ATTEMPT TO JULIENNE MEATS
OR CHEESES.
R214 5/64”x 5/64” - 2 x 2mm Julienne Plate
The R214 is an extremely fine julienne which can
dress up a salad. Radishes potatoes and carrots work
best. Try julienne radishes with the R214 for an ultra-fine cut that looks like a top chef worked for hours
preparing.
R296 5/64"x 5/32" - 2mm x 4mm Julienne Plate
This is an interesting flat julienne that gives substance
to a delicate cut. One unique function of this plate is
to duplicate the slaw cut that comes from a buffalo
chopper. Try the R296 with radish, potato,
summersquash, or sweet potato.
R213 1/4"x 1/4” or 6mm x 6mm French Fry Plate
This might as well be called the taco plate. Tomatoes and onions can be quartered and allowed to gravity feed through the lead and are chopped without
damage. Lettuce can be cut for a chopped taco lettuce. Chopped onions through the R213 are great
for hot-dogs also. Every school system should have
this plate. Bell peppers can be chopped like the onions for meatloaf or chili. As a sideline the French fry
plate makes great French fries and is the fifth most
popular plate.
R298 5/16" x 5/16" or 8mm x 8mm Julienne Plate
The 8 x 8mm julienne plate is great for zucchini, onions, and eggplants.
PLATE HOLDER
R255 Plate Rack
Holds nine plates and is ideal to store your Robot
Coupe accessories.
While the standard Robot Coupe comes with two specific plates (R209 and R211 at time of printing), many
user applications may require some of the optional
plates available with the unit. As an example, a typical salad bar might use:
R210 2mm (5/64 in.) Slicing plate
R211 4mm (5/32 in.) Slicing plate
R209 2mm (5/64 in.) Medium Grating plate
The R210 plate could be used to slice cucumbers,
carrots, celery, etc. Good yield with long shelf life.
The R211 plate could be used to provide half slices
of tomatoes, bell peppers, or onions.
The R209 Medium Grating plate would process carrots, cheese, etc.
11
R302 Operation Manual
IV. CLEANING/PREVENTIVE
MAINTENANCE
Cleaning the Blade Assembly
(1) CLEANING: Proper cleaning of the machine is
one of the most important preventive maintenance
measures the user can employ. The high acid content of food can cause harm to the electrical parts
contained within the housing. Although a seal isolates these elements from the outside, food juices
will tend to seep. If food juices are allowed to collect
on the machine over periods of use , erosion of the
seal can occur. It is recommended that the machine
be cleaned after each operational use.
Correct cleaning procedures are required to assure
that damage is not inflicted in the cleaning process.
The motor base assembly contains the motor and
electrical components.
There is a removable cap attached to the top of the
DO NOT IMMERSE THE MOTOR BASE S-blade assembly. This cap should be removed when
cleaning the blade assembly.
ASSEMBLY IN WATER!
CLEANING INSTRUCTIONS
ATTACHMENTS: Remove and disassemble all attachments before cleaning. The bowl and continuous feed attachments should be cleaned per the following instructions or as required by local health department regulations.
The bowl, blade, lid, continuous feed attachment,
continuous feed lead, pushers and plates are dishwasher safe. All of the attachments listed above can
be washed in a dish machine or three tank system
pot sink. Pre-rinse the attachments before washing
to remove any bulk food on the parts. A stiff bristle
brush or power sprayer faucet attachment is effective in knocking the food out of the crevices as a prerinse procedure. The washer should have an industry standard wash, rinse and sanitization cycle. Allow the parts to air dry after sanitizing and before reassembly.
NOTE: The high temperatures of dish machines will tend to shorten the life of the
plastic and rubber parts. Hand washing
using a three pot sink will provide for the
longest life of these parts.
Caution: The blades are sharp. Wear cutresistant gloves when handling the
blade.
The blade cap may be removed by carefully pulling
the cap up away from the blade. It may be helpful to
pull slightly to the side. The cap is held in place by
small plastic clips molded into the cap which snap
into the body of the blade assembly. If the cap is
difficult to remove, you can use a small diameter rod
or screwdriver inserted through the bottom side of
the blade assembly to “knock” out the cap using a
quick sharp impact. Again, use caution when handling the blade.
Cleaning: Clean the blade according to local Health
Department regulations. It may be necessary to pre
wash the blade with a power head sprayer followed
by the use of a small round brush to remove any remaining residue. Typical cleaning instructions may
include the following:
Dishwasher: Clean the blade assembly in a commercial dish machine by removing the blade cap and
placing it flat on a wash tray or in a small parts holder,
it could otherwise be washed out of the rack. The
dish machine should have a standard wash, rinse,
and sanitizing cycle.
Pot Sink: The blade may also be cleaned using the 3
sink method of wash, rinse, and sanitize. Remove
the blade cap and wash each item separately. The
sanitization sink should include a minimum of 200
12
R302 Operation Manual
PPM chlorine solution or other approved sanitizing
agent. The use of a small brush will assist in removing food particles from around the blade and inside
the hub. Allow the parts to air dry laying flat on a
drying tray.
Autoclave: The blade assembly will withstand cleaning in an autoclave system with temperatures less
than 210 degrees C. However, it will reduce the life
of the blade as compared to other sanitizing methods.
Inspect the area on the outside of the bowl and feed
attachment around the handle and magnetic rod to
ensure they are clean. Use a brush on these areas if
necessary.
MOTOR BASE: Cleaning of the motor base assembly must be done with care.
First unplug the unit. A sponging with a cloth lightly
soaked (not dripping) in a mild detergent is acceptable, making sure the water is not permitted to penetrate the shaft seal or around the switches. Clean
around the shaft seal with a small brush, taking care
to remove all food. Do not forget to clean the motor
shaft. Rinse the motor base first using a cloth lightly
dampened (not dripping) with water, then with a sanitizing solution, and dry the machine with a soft cloth
removing all liquids from seal areas.
around the motor shaft. With proper care, and depending on use, the seal should last for a year or
more. However, it can and should be replaced whenever wear or erosion is noted, or minimally once per
year. It is recommended that the seal be replaced by
an authorized repair agency.
Blades should be kept sharp. It is not necessary to
have a razor edge however they will need sharpening periodically. Replacement of the dull blades or
plates is recommended.
(3) CARE: Your Robot Coupe is a piece of kitchen
equipment and like all other kitchen equipment, care
and caution should be used when operating. Although
training requirements are minimal, only responsible
individuals familiar with this operation manual should
be allowed to operate your Robot Coupe.
In general, the best preventive measures that can be
applied are close adherence to the assembly, operation, cleaning, and handling instructions, common
sense and regular maintenance.
(2) PREVENTIVE MAINTENANCE CHECKS
While your Robot Coupe is a ruggedly constructed
machine, overall handling should be accomplished
with a sense of use rather than abuse. Reasonable
care should be exercised. While the machine is reasonably portable, care should be taken not to drop it.
Equally, caution should be exercised in handling all
the parts to assure they are not damaged.
An examination should be made periodically to assure that a seal against food is being maintained
13
R302 Operation Manual
TROUBLE SHOOTING AIDS: The following sections
indicate potential problems and the correct solution
which should be implemented by the user. Problems
which extend beyond these will require an experienced serviceman. A list of the authorized agencies
is supplied.
V. TROUBLE SHOOTING AIDS
A. Unit does not start when assembled correctly
1. Pull plug and try another outlet
2. Make sure bowl lid or continuous feed lead is
in the proper position with the pusher located
over the pusher opening.
B. Bowl or continuous feed lead will not fit flush with
continuous feed attachment
1. Processing plate is not in it’s proper position.
2. Rim of plate should be level with upper edge
of motor base.
have been rubbing together (small pieces of
plastic would be present).
2. If this was the case the processing plate was
not fully seated. Check for food particles
inside stem of processing plate.
3. Replace the plate insuring that it is fully
seated. Make sure there are not food par
ticles on the motor shaft.
4. If noise continues, turn unit OFF and remove
processing plate. Assemble unit without plate
and turn unit ON. If no noise—processing
plate may be bent or warped. Try another
plate. If noise persists, call your local factory
authorized service agency.
G. Cucumbers coming out with torn skins and/or with
seeds knocked out
1. Blade is dull on plate and must be changed.
NOTE: Cucumber condition before process
ing should be considered.
C. Unit stops during processing
1. Turn unit off, and unplug machine
2. Remove continuous feed lead
3. Remove cutting plate
4. Remove product being processed from inside
of machine and continuous feed lead
5. Reassemble unit
H. Carrots are watery after grating
1. Grating grid surface is dull and should be re
placed.
D. If unit does not operate after following above
1. Check outlet for current (Breaker or Fuse)
2. Try unit again
3. Call local authorized service agency.
J. Machine becomes jammed while processing
1. Turn unit OFF, and unplug machine. Remove
continuous feed lead and remove remnants
of product being processed. Put on a pair
of cut-resistant gloves and try and turn plate
manually in a counterclockwise direction.
CAUTION: This may be very hard to do. As
soon as you feel the plate slip, you will be
able to reassemble the unit and continue pro
cessing. If unit jams again, repeat above until
you get the plate to slip. Now, remove and
clean the plate. Before reassembling, make
sure:
a. Motor shaft is clean.
b. Plate is fully seated on motor
shaft.
2. If jamming is too tight to loosen by hand, contact
service agency.
E. Unit starts to spark or smoke
1. Turn unit off, unplug it, call local authorized
service agency.
F. Unit makes grinding noise
1. Turn unit off, disassemble, check continuous
feed lead and processing plate to see if they
I. Cheese forms balls instead of shreds
1. Warm cheese
2. The grating grid is dull and should be replaced
CAUTION: It is advisable to keep the machine unplugged while cleaning or servicing.
14
R302 Operation Manual
VI.
SERVICE INFORMATION /SERVICE AGENCY LIST
Your Robot Coupe has a one year limited warranty against defects in parts and workmanship. Should the
unit require service, check with your distributor to see where local service is available. If not or if you wish
your unit to be serviced at the factory, call for a return merchandise authorization (RMA) number, and upon
receipt of same, ship it PREPAID and insured to our factory address.
USA, Inc. Service Dept.
Phone: 1-800-824-1646
601-898-8411
15
PRICES AND OTHER INFORMATION SUBJECT TO CHANGE WITHOUT NOTICE
MODEL
R302
Indexes
1
2
3
4
5
6
7
8
9
10
11
12
13
14
15
16
17
18
19
20
21
22
23
24
25
26
27
28
29
30
31
32
33
34
35
36
37
38
39
40
41
42
43
44
45
46
47
48
Part #
R118
CL316
R232A
R276A
R30206
R30205
R30204
R302058
R3040UB
RA490
R240
R30257
29357
R30203
R30215
R30216
R237
R3006UB
R237
R222
R278A
CL302
CL502
CL318
R3031N
R30213
R30210
R30213
R30211
R30213
R30212
R30214
R3028SS
R3069U
R3071UA
CL569
CL323
CL324
CL322
CL325
CL326
CL320
CL319
R3069U
R30230.1
R30230
R255
R248
Description
Motor Support Seal
Screw Cover
Screw (Motor - MS)
Louvre (mtl) W/Rivits
Motor Support
On/Off Switch Assy
Data Plate
Spacer, Circuit Board
PC Board
Strain Relief
Cord with Plug
Motor Base Assy
(F) Magnetic Switch Assy, R302
Shaft Ext.
Sleeve,Motor
Motor W/Sleeve
6203 Bearing R2 Top/Btm
Motor (Century)
6203 Bearing R2 Top/Btm
Capacitor F/C Mtr (R2N)
Baffle
Base
Foot
Motor Base Screw
Bowl Lid (New Style)
Cap, Blade
* 'S' Blade (Smooth)
Cap, Blade
* 'S' Blade (Coarse Serrated)
Cap, Blade
* 'S' Blade (Fine Serrated)
* Bowl Kit
Bowl/Stainles Steel
Lckg Bush Set w/Screws
Bowl Rod w/Press Fit Caps
Pusher Knob
Large Pusher Assy.
Small Pusher
Bracket, Large Pusher
Cont. Feed Lead W. Pushers
* Cont. Feed Kit
Discharge Plate Assy.
Cont. Feed Attach.
Lckg Bush Set w/Screws
Juicer Cone
* Juicer Kit
* Plate Rack
Honing Stone
P.O. Box 16625, Jackson, MS 39236-6625
280 South Perkins St., Ridgeland, MS 39157
email: [email protected]
website: www.r
obotcoupeusa.com
www.robotcoupeusa.com
1-800-824-1646
ROBOT COUPE U.S.A., INC. LIMITED WARRANTY
YOUR NEW ROBOT COUPE PRODUCT IS WARRANTED TO THE ORIGINAL PURCHASER
FOR A PERIOD OF ONE YEAR FROM THE DATE OF PURCHASE.
This LIMITED WARRANTY is against defects in the material and/or workmanship, and includes labor for
replacement of defective parts, provided repairs are performed by an authorized service agency (see attached
list). The CUSTOMER must inform the Service Agency of the possibility of warranty coverage and provide a
copy of the dated sales or delivery receipt BEFORE WARRANTY REPAIRS ARE BEGUN. Replacement
parts and accessories are warranted for ninety (90) days from the date of purchase when purchased separately
and will be verified by dated sales receipt OR packing slip which lists that item. All parts or accessories
replaced under warranty must be returned to the Service Agency.
THE FOLLOWING ARE “NOT” COVERED UNDER WARRANTY:
1. Damage caused by abuse, misuse, dropping, or other similar incidental damage caused by or as a result
of failure to follow assembly, operating, cleaning, user maintenance, or storage instructions.
2. Labor to sharpen and/or parts to replace knife assemblies or blades which have become dull,
chipped, or worn due to normal use.
3. Material or labor to renew or repair scratched, stained, chipped, dented or discolored surfaces, blades,
knives, attachments, or accessories.
4. Transportation charges to or from an authorized service agency for repairs of a machine designated as
“CARRY IN SERVICE” (table top models).
5. Labor charges to install or test attachments or accessories (i.e., bowls, cutting plates, blades,
attachments) which are replaced for any reason.
6. Charges to change Direction-of-Rotation of Three Phase electric motors (INSTALLER IS
RESPONSIBLE).
7. SHIPPING DAMAGE IS NOT COVERED BY WARRANTY. Visible and hidden damages are the
responsibility of the freight carrier. The consignee must file a damage claim promptly against the carrier,
or upon discovery in the case of hidden damage.
KEEP ALL ORIGINAL CONTAINERS AND PACKING MATERIALS FOR CARRIER INSPECTION.
Robot Coupe U.S.A., Inc., Robot Coupe S.A. or any of their affiliates, distributors, officers, directors, agents,
employees, or insurers will not be obligated for consequential or other damages, losses, or expenses in
connection with or by reason of the use of or inability to use the machine for any purpose.
THIS WARRANTY IS GIVEN EXPRESSLY AND IN LIEU OF ALL OTHER WARRANTIES,
EXPRESSED OR IMPLIED, FOR MERCHANTABILITY AND FOR FITNESS TOWARD A
PARTICULAR PURPOSE AND CONSTITUTES THE ONLY WARRANTY MADE BY ROBOT COUPE,
U.S.A., Inc.