- Manuals
- Brands
- Roland Manuals
- Synthesizer
- Gaia SH-01
- Owner’s manual
-
Contents
-
Table of Contents
-
Troubleshooting
-
Bookmarks
Quick Links
Related Manuals for Roland GAIA Synthesizer SH-01
Summary of Contents for Roland GAIA Synthesizer SH-01
-
Page 2: Main Features
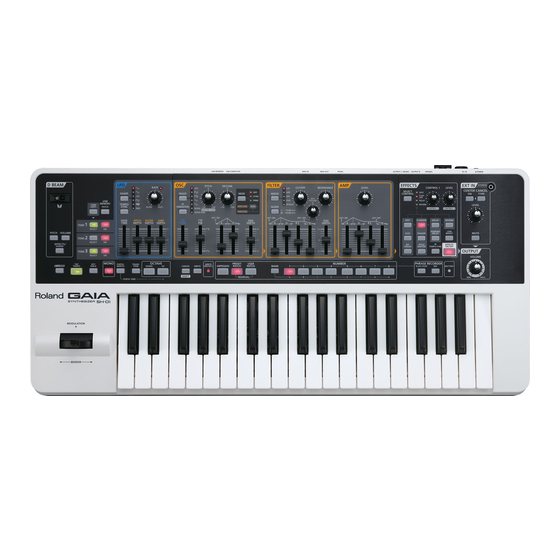
Main Features Able to produce a broad range of sounds with simple operation, the GAIA SH-01 is a compact and light-weight, yet full-fledged virtual analog synthesizer that’s a great choice for live performance or in the studio. Rich sound equivalent to three synthesizers A synthesizer consists of sections such as the OSC (p.
-
Page 3
Copyright © 2010 ROLAND CORPORATION All rights reserved. No part of this publication may be reproduced in any form without the written permission of ROLAND CORPORATION. Roland and GAIA are registered trademarks or trademarks of Roland Corporation in the United States and/… -
Page 4
• When using the unit with a rack or stand recom- an authorized Roland distributor, as listed on the mended by Roland, the rack or stand must be carefully “Information” page when: • The AC adaptor, the power-supply cord, or the plug placed so it is level and sure to remain stable. -
Page 5
Then install new 101c batteries. To avoid inflammation of the skin, make • This (GAIA SH-01) for use only with Roland stand sure that none of the battery discharge gets onto KS-18Z. Use with other stands is capable of resulting in your hands or skin. -
Page 6: Important Notes
This way, you can prevent malfunction and/or damage to speakers the data, and Roland assumes no liability concerning such loss of or other devices. data.
-
Page 7
• Unfortunately, it may be impossible to restore the contents of data that was stored on a computer once it has been lost. Roland Corporation assumes no liability concerning such loss of data. -
Page 8: Table Of Contents
Contents Main Features ……2 Recording Operations (PHRASE RECORDER) ..24 Recording .
-
Page 9
Using the GAIA SH-01 with a Computer or Sound Module ……42 Recording the SH-01’s Sound or Data on a Computer (USB) . -
Page 10: Names Of Things And What They Do
Names of Things and What They Do Top Panel D BEAM (p. 21) EFFECTS (p. 38) Here you can turn the D BEAM function on/off. By moving your hand The GAIA SH-01 has five built-in effects: distortion, flanger, delay, above the D BEAM controller, you can apply a variety of effects. reverb, and low boost.
-
Page 11
[V-LINK] Button (p. 27) [BANK] Button (p. 18) This button turns V-LINK on/off. Use this button in combination with the NUMBER [A]–[H] buttons to switch banks. [TAP TEMPO] Button (p. 23) NUMBER [1]–[8] Buttons (p. 18) You can use this button to set the tempo of the arpeggio or phrase recorder. -
Page 12: Rear Panel
Rear Panel Security Slot ( ) PEDAL http://www.kensington.com/ PEDAL Jack (p. 26) Connect an expression pedal (EV-5; sold separately) or pedal switch (DP series, FS-5U; sold separately) here. [POWER] Switch (p. 15) MIDI Connectors (OUT/IN) (p. 43) This switch turns the power on/off. Connect these when you want to transmit or receive MIDI messages DC IN (AC Adaptor) Connector (p.
-
Page 13: Getting Ready
Getting Ready Connecting the AC Adaptor Installing Batteries Connect the included AC adaptor to the DC IN connector The GAIA SH-01 can operate on eight commercially on the rear panel of the GAIA SH-01. available AA nickel-metal hydride batteries. 1. Press in the tabs of the battery compartment cover on the bottom panel of the GAIA SH-01, and remove the cover.
-
Page 14: Removing The Batteries
Removing the Batteries POWER SAVE MODE If you want to remove the batteries, turn off power to the You can set the GAIA SH-01 so it will automatically enter GAIA SH-01 first; then open the battery compartment power-save mode when a certain length of time has cover, and take out the batteries.
-
Page 15: Turning The Power On/Off
Using headphones 3. Press the [POWER] switch on the rear panel to turn on the power. Connect commercially available headphones to the PHONES jack on the rear panel. * When turning on the power, do not touch the pitch bend/modulation lever located at the left of the * Sound will be output from the OUTPUT jacks even if keyboard.
-
Page 16: How The Gaia Sh-01 Is Organized
How the GAIA SH-01 is Organized Basic Structure Performance Functions Broadly speaking, the GAIA SH-01 consists of a controller The GAIA SH-01 contains a variety of effects, and each can section, a sound generator section, and effects. be adjusted independently. Controller section Arpeggiator (p.
-
Page 17: About Memory
About Memory Temporary memory Memory provides storage locations where patches (p. Temporary area 18) and other settings are stored. There are three types of memory: “temporary memory, ” “rewritable memory, ” and Data for the patch you select via the front panel buttons is “non-rewritable memory.
-
Page 18: Performing
Performing Adjusting the Volume (VOLUME) About Patches The GAIA SH-01 lets you store the sounds that you create. Here’s how to adjust the overall volume of the GAIA SH-01’s sound, which is output from the OUTPUT jacks on A sound you create is called a “patch”; you can use the the rear panel and the PHONES jack.
-
Page 19: Adding Dynamics To The Sound
Preset group/User group/ 2. While holding down the OCTAVE [DOWN/-] button, press a key (C2–C4). USB memory group This specifies the amount of pitch change that will occur NUMBER 1–8 when you move the lever to the left. Adding Dynamics to the Sound The GAIA SH-01’s keyboard allows you to vary the volume Narrow –…
-
Page 20: Shifting The Keyboard’s Pitch Range
Shifting the Keyboard’s Pitch Playing Single Notes (MONO) Range (OCTAVE UP/DOWN) This function is effective when you need to simulate the performance of a solo instrument. You can shift the keyboard’s pitch range in steps of one octave, for a maximum of three octaves upward or downward. 1. Press the [MONO] button so it’s lit;…
-
Page 21: Changing The Pitch Or Volume By Moving Your Hand
Changing the Pitch or Volume by Changing the Pitch (PITCH) Moving Your Hand (D BEAM) 1. Press the [PITCH] button so it’s lit. 2. While playing the keyboard, position your hand By moving your hand above the D BEAM controller located over the D beam controller, then move it up and at the upper left of the keyboard, you can vary the pitch or down.
-
Page 22: Changing The Assigned Parameter
Automatically Playing Arpeggios Changing the Assigned Parameter (EFFECTS/ASSIGN) (ARPEGGIO) 1. Press the [EFFECTS/ASSIGN] button so it’s lit. Press the [ARPEGGIO] button so it’s lit; the arpeggiator will be on. 2. While playing the keyboard, position your hand over the D beam controller, then move it up and down. Parameters assigned on an individual patch basis will change.
-
Page 23: Selecting How The Arpeggio Will Sound
Selecting How the Arpeggio will 4. Press the [CANCEL/SHIFT] button. MEMO Sound There are also other ways to change the way in which the arpeggio is sounded”ARPEGGIO VARIATION” (p. 45). The GAIA SH-01 lets you choose from 64 variations of arpeggio.
-
Page 24: Recording Operations (Phrase Recorder)
Recording Operations 3. Press the [PLAY/STOP] button. (PHRASE RECORDER) You can record your keyboard performance and knob operations, and play them back repeatedly. The recorded performance is called a “phrase. ” You can record up to eight phrases, and each phrase can be up to eight measures long.
-
Page 25: Erasing Recorded Operations
Erasing Recorded Operations Saving the Recorded Phrase While recording a phrase, you can erase unwanted notes The phrase you record will be lost when you switch off the from the recording. GAIA SH-01’s power, or when you select a different phrase. 1. During recording, press the [BANK] button.
-
Page 26: Choosing The Phrase To Play Back
Choosing the phrase to play back Using a Pedal Here’s how to select a phrase that’s saved in internal If you connect a pedal switch (DP series, FS-5U; sold memory or USB memory. separately) or expression pedal (EV-5; sold separately) to the rear panel PEDAL jack, you can use it to control a 1. Hold down the [REC] button.
-
Page 27: Adding Expression To Your Performance
Using V-LINK Adding Expression to Your Performance (EXPRESSION) What is V-LINK? If you connect an expression pedal (EV-5; sold separately), you’ll be able to use the expression pedal to control the V-LINK ( ) is functionality that allows you volume and add expression to your performance. to perform music and video simultaneously.
-
Page 28: Creating Sounds
Creating Sounds Sound-Creating Workflow The following illustration shows the basic workflow for creating sounds on the GAIA SH-01. TONE 3 TONE 2 EFFECTS TONE 1 DISTORTION Distorts the sound FILTER WAVE MODE LEVEL FLANGER Creates the waveform Specifies the bright- Determines the and determines the ness of the sound…
-
Page 29: Cyclic Change (Lfo)
Cyclic Change (LFO) What the buttons do and how they light The OSC, FILTER, and AMP can be modulated at a rate [SELECT] button [ON] button specified by the LFO (p. 36) to create vibrato (by modulating the pitch) or tremolo (by modulating the volume). Select tone 1 Turn tone 1 on/off TONE 1…
-
Page 30: Copying A Tone (Tone Copy)
Making the sound reflect the physical Specifying the Waveform and positions of the knobs and sliders Pitch (OSC) (MANUAL) The Manual function changes the parameter values to match the physical positions of the knobs and sliders, allowing you to edit in a straightforward manner. When you edit a patch to modify its sound, the actual value of each parameter will not necessarily match the physical positions of the knobs and sliders.
-
Page 31
This waveform contains all frequencies. NOISE Tone 1 and tone 2 will sound independently. It is suitable for percussion instrument Noise sounds or sound effects. SYNC (Oscillator sync) Tone 1 will forcibly be reset to the beginning of its This produces a tone similar to seven cycle at the frequency of tone 2, creating a complex sawtooth waves heard simultaneously. -
Page 32: Adjusting The Brightness And Thickness (Filter)
Adjusting the Brightness and [PW] slider Thickness (FILTER) If the [WAVE] button (p. 30) has selected (asymmetrical square wave), you can use this slider to specify the width of the upper portion of the square wave (the pulse width) as a percentage of the entire cycle. • Moving the slider downward will narrow the pulse, making it approach a square wave (pulse width = 50%).
-
Page 33
[MODE] button HPF (High-Pass Filter) This type of filter cuts the frequency range that is below This button selects the type of filter that will be applied to the cutoff frequency, emphasizing the high-frequency the waveform. range. Press the button to make the indicator light for the desired This can be used to create percussion instrument sounds type of filter. -
Page 34
[RESONANCE] knob [KEY FOLLOW] knob Resonance emphasizes the sound in the region of the filter Here’s how you can make the filter cutoff frequency to vary cutoff frequency. according to the key you play. Increasing the resonance setting will increase this em- • Turning the knob toward the right (maximum value is phasis, producing a distinctive sound that is characteristic +100) will make the cutoff frequency rise as you play… -
Page 35: Specifying The Sound’s Attack And Decay (Amp)
Specifying the Sound’s Attack and [A] (Attack time) slider This specifies the time from the moment you press the key Decay (AMP) until the cutoff frequency reaches its highest (or lowest) point. Moving the slider upward will lengthen this time, and moving it downward will shorten the time.
-
Page 36: Modulating The Sound (Lfo)
Modulating the Sound (LFO) [D] (Decay time) slider This specifies the time from when the maximum volume is reached, until it decays to the sustain level. Moving the slider upward will lengthen this time, and moving it downward will shorten the time. [S] (Sustain level) slider This specifies the volume level that will be maintained from when the attack and decay times have elapsed until…
-
Page 37
[TEMPO SYNC] button [AMP DEPTH] slider This button lets you specify the LFO speed as a note value This allows the LFO to modulate the AMP LEVEL (volume), relative to the arpeggio or phrase recorder tempo. producing a tremolo effect. If you press the [TEMPO SYNC] button so it’s lit, and then • Moving the slider upward (“+”… -
Page 38: Adding Power, Spaciousness, And Reverb (Effects)
Adding Power, Spaciousness, and Distortion effects Reverb (EFFECTS) These are effects that distort the sound. They are particularly suitable for lead sounds. [DIST] button This is a guitar amp simulator that reproduces the thick and powerful sound containing numerous overtones that is often heard from electric guitars.
-
Page 39: Saving A Sound You’ve Created (Write)
[TEMPO SYNC] button 2. Press the [BANK] button and a NUMBER [A]–[H] button to specify the save-destination bank. This button synchronizes the delay time to the GAIA SH-01’s tempo, allowing you to easily create effect sounds The BANK button and NUMBER button you pressed will blink.
-
Page 40: Performing With Sound From A
Performing with Sound from a Portable Audio Player You can perform along with sound from a portable audio player, CD player, sampler, or other external device. You can also modify the sound of the external device. Connections Adjusting the Volume 1. Connect your portable audio player or other 1. Switch on the power of the portable audio player device to the GAIA SH-01’s top panel EXT IN jack.
-
Page 41: (Center Cancel)
Eliminating Sound from the Muting the Input Sound (MUTE) Center (CENTER CANCEL) You can mute the sound of the device connected to the EXT IN jack. By using this function, sounds that are localized at the Press the [MUTE] button so it’s lit; the sound will be muted. center (such as vocals) can be eliminated from the sound Press the button again to turn off its illumination;…
-
Page 42: Using The Gaia Sh-01 With A Computer Or
DAW software can play the SH-01’s sound generator section. Connecting the SH-01 to Your Computer For details on operating requirements, refer to the Roland website. NOTE 1. Install the USB driver on your computer. • For some models of computer, the system might not The USB driver is on the included CD-ROM “GAIA SH-01…
-
Page 43: Using The Sh-01 As A Controller Or Sound Module
Using the SH-01 as a Controller or The SH-01’s MIDI channel The SH-01’s MIDI channel is set to “1. ” Sound Module (MIDI) You can change the MIDI channel (RX/TX CHANNEL, p. 52). Using an External Sequencer to Play MIDI (Musical Instrument Digital Interface) is a universal standard for exchanging performance data and other the SH-01’s Sound Generator (MIDI information between electronic musical instruments and…
-
Page 44
Using the SH-01’s Keyboard and Knobs to Play an External MIDI Sound Module (MIDI OUT) You can use the SH-01 as a controller. Use a MIDI cable (sold separately) to connect the SH-01’s rear panel MIDI OUT connector to your MIDI sound module’s MIDI IN connector. -
Page 45: Advanced Operation
Advanced Operation In addition to editing its settings via the panel knobs and sliders, the GAIA SH-01 also allows you to edit the following parameters. Patch Parameters COMMON Parameter Range Explanation Panel operation If this is on, the LFO cycle will be restarted when you Hold down the [CANCEL/SHIFT] button and press the LFO press a key.
-
Page 46
Parameter Range Explanation Panel operation SAW, SQR, PULSE, Press the [WAVE] button a number of times to make your WAVE TRI, SIN, NOISE, Selects the waveform that is the basis of the sound. selection. SUPER SAW There are three variations for each waveform, and each time You can select variations of the currently selected VARIATION you switch the variation, the illumination of the [WAVE] button… -
Page 47
Parameter Range Explanation Panel operation LEVEL 0–127 Specifies the volume of the tone. Turn the AMP [LEVEL] knob. 0–127 Specifies the attack time of the amp envelope. Move the [A] slider. 0–127 Specifies the decay time of the amp envelope. Move the [D] slider. -
Page 48: D Beam Assign Parameters
Parameter Range Explanation Panel operation Specifies the LFO rate. 1. Hold down the [CANCEL/SHIFT] button and move the When TEMPO SYNC is OFF: pitch bend/modulation lever away from yourself. 0–127 RATE 2. Turn the [RATE] knob. When TEMPO SYNC is ON: 16, 12, 8 ( ), 4 ( ), 2 ( ), 1 ( ), 3/4 ( ), 2/3 ( ), 1/2 ( ), 3/8 ( ), 1/3 ( ), 3. Press the [CANCEL/SHIFT] button.
-
Page 49: Effect Parameters
Parameter Range Explanation CUTOFF Modify the cutoff frequency of the filter. (p. 33) RESONANCE Modify the amount of emphasis for the overtones in the region of the cutoff frequency (p. 34). KEY FOLLOW Modify the extent to which the cutoff frequency is affected by the keyboard position (p. 34). ENV-A Modify the attack time of the filter envelope (p.
-
Page 50
Parameter Range Explanation Explanation Panel operation Adjusts the amount of pitch shift in Pitch -12–+12 Turn the [CONTROL 1] knob. semitone steps. Make fine adjustments to the pitch Hold down the [CANCEL/SHIFT] button and turn the [CONTROL Detune 0–50 [cent] shift. -
Page 51: System Parameters
System Parameters Parameter Range Explanation Panel operation Specifies the system tempo. 1. Press the [TAP TEMPO] button four or more times at SYSTEM TEMPO 5–300 This effect can be obtained only when CLOCK quarter-note intervals of the desired tempo. SOURCE (p. 52) is set to “SYSTEM. ” 1. Press the OCTAVE [UP/+] button.
-
Page 52: Midi Parameters
Parameter Range Explanation Panel operation This selects the function that will be controlled by a pedal connected to the PEDAL jack. HOLD: The pedal will operate as a damper pedal. MODULATION: CC01: The pedal will have the same operation as when using the pitch bend/modulation lever to apply MODULATION.
-
Page 53
Parameter Range Explanation Panel operation 1. Hold down the [CANCEL/SHIFT] button and press the [V-LINK] button. 2. Hold down the FILTER [SLOPE] button and press the If this is on, MIDI messages received at the MIDI IN [EFFECTS ON/OFF] button. SOFT THRU OFF, ON connector will be re-transmitted from the MIDI OUT… -
Page 54: Other Parameters
Other Parameters Parameter Range Explanation Panel operation 1. Hold down the [CANCEL/SHIFT] button and press the [V-LINK] button. If this is on, MIDI clock messages (F8) will be 2. Hold down the [PLAY/STOP] button and press the EFFECTS RECORDER SYNC transmitted to an external MIDI device.
-
Page 55: Usb Memory
[CANCEL/SHIFT] button and the [WRITE] button will start blinking. If you wish to cancel the procedure, press the [CANCEL/ * Use USB memory made by Roland. SHIFT] button. 3. Press the [WRITE] button. * Connect USB memory after you’ve powered up the GAIA SH-01.
-
Page 56: Saving User Patches To Usb Memory
Saving User Patches to USB Memory Saving Your Recorded Phrases to USB Memory Here’s how to save all (64) patches from the GAIA SH-01’s user memory to USB memory. Here’s how all (8) phrases in the GAIA SH-01’s user memory 1. Hold down the [CANCEL/SHIFT] button and press can be saved to USB memory.
-
Page 57: Saving All User Data To Usb Memory
Saving All User Data to USB Memory When you execute this operation, all (64) patches from the GAIA SH-01’s user memory, all (8) phrases, as well as the system data, will be saved to USB memory. This operation is called “backing up. ” 1. While holding down the [CANCEL/SHIFT] button, press the [TONE COPY] button and the USB MEMORY [PATCH] button simultaneously.
-
Page 58: Restoring The Factory Settings
Restoring the Factory Settings Here’s how to restore all of the GAIA SH-01’s settings to their factory-set condition. This operation is called “factory reset. ” NOTE All data that you’ve created and saved in the GAIA SH-01’s internal memory will be lost when you execute the factory reset operation.
-
Page 59: Troubleshooting
Troubleshooting If the GAIA SH-01 does not operate as you expect, please check the following points first. Overall Symptom Cause Page Make sure that the GAIA SH-01’s AC adaptor is correctly connected to the outlet and to the Power does not turn on p.
-
Page 60: Problems With Effects
Problems with effects Symptom Cause Page Could the effects be turned off? p. 38 Check the on/off status of each effect in the top panel. Effects not applied p. 38 Are the settings of each effect correct? p. 49 Problems with USB memory Symptom Cause Page…
-
Page 61: Midi Implementation Chart
MIDI Implementation Chart SYNTHESIZER Date : March 1, 2010 Model GAIA SH-01 Version : 1.00 Transmitted Recognized Remarks Function… Basic Default 1–16 1–16 Channel Changed 1–16 1–16 Default Mode 3 Mode 3 Messages Mode Mode 3, 4 (M = 1) Altered ************** Note…
-
Page 62: Main Specifications
Main Specifications GAIA SH-01: Synthesizer Keyboard Keyboard 37 keys (velocity sensitive) Maximum Polyphony 64 voices Virtual analog synthesizer sound generator (Number of part: 1) (Oscillator + Filter + Amp + Envelopes for each section + LFO) x 3 Sound Generator Section PCM sound generator (Number of parts: 15) Preset: 64 Patch Memory…
-
Page 63: Index
Index REVERB MIDI RX REMOTE KEYBOARD . . . 53 REVERB ..39, 50 RX BANK SELECT ..53 A (ATTACK TIME) RECORDER METRONOME SELECT CONTROL ..38 AMP ENV .
-
Page 64: Block Diagram
Block Diagram…
-
Page 65
Information When you need repair service, call your nearest Roland Service Center or authorized Roland distributor in your country as shown below. PHILIPPINES CURACAO URUGUAY POLAND JORDAN AFRICA G.A. Yupangco & Co. Inc. Zeelandia Music Center Inc. Todo Musica S.A. -
Page 66: Declaration Of Conformity
This product contains chemicals known to cause cancer, birth defects and other reproductive harm, including lead. For the USA DECLARATION OF CONFORMITY Compliance Information Statement Model Name : SH-01 Type of Equipment : Synthesizer Keyboard Responsible Party : Roland Corporation U.S. Address : 5100 S. Eastarn Avenue, Los Angeles, CA 90040-2938 Telephone : (323) 890-3700…
-
Page 67
For EU Countries For China…

8
Содержание
Основные возможности . . . . . . . . . . . . . . . . . 2
Описание панелей . . . . . . . . . . . . . . . . . . . . . . 10
Верхняя панель . . . . . . . . . . . . . . . . . . . . . . . . . . . . . . . . . . . . 10
Тыльная панель . . . . . . . . . . . . . . . . . . . . . . . . . . . . . . . . . . . . 12
Подготовка к работе . . . . . . . . . . . . . . . . . . . . 13
Подключение сетевого адаптера . . . . . . . . . . . . . . . . . . . 13
Установка батарей . . . . . . . . . . . . . . . . . . . . . . . . . . . . . . . . . 13
Извлечение батарей . . . . . . . . . . . . . . . . . . . . . . . . . . . . . 14
Индикация разряда батарей
(индикатор BATTERY) . . . . . . . . . . . . . . . . . . . . . . . . . . . . 14
Режим POWER SAVE . . . . . . . . . . . . . . . . . . . . . . . . . . . . . . 14
Включение/отключение питания . . . . . . . . . . . . . . . . . . . 15
Включение питания . . . . . . . . . . . . . . . . . . . . . . . . . . . . . 15
Отключение питания . . . . . . . . . . . . . . . . . . . . . . . . . . . . 15
Архитектура GAIA SH-01 . . . . . . . . . . . . . . . . 16
Структура . . . . . . . . . . . . . . . . . . . . . . . . . . . . . . . . . . . . . . . . . . 16
Функции исполнения . . . . . . . . . . . . . . . . . . . . . . . . . . . . . . 16
Структура памяти . . . . . . . . . . . . . . . . . . . . . . . . . . . . . . . . . . 17
Исполнение. . . . . . . . . . . . . . . . . . . . . . . . . . . . . 18
Установка громкости (VOLUME) . . . . . . . . . . . . . . . . . . . . 18
Выбор звуков . . . . . . . . . . . . . . . . . . . . . . . . . . . . . . . . . . . . . . 18
Понятие патчей . . . . . . . . . . . . . . . . . . . . . . . . . . . . . . . . . . 18
Управление динамикой звука . . . . . . . . . . . . . . . . . . . . . . 19
Управление высотой (BENDER) . . . . . . . . . . . . . . . . . . . . . 19
Управление вибрато (MODULATION) . . . . . . . . . . . . . . . 19
Октавный сдвиг клавиатуры
(OCTAVE UP/DOWN) . . . . . . . . . . . . . . . . . . . . . . . . . . . . . . . . 20
Транспонирование клавиатуры по полутонам
(TRANSPOSE) . . . . . . . . . . . . . . . . . . . . . . . . . . . . . . . . . . . . . . . 20
Игра отдельными нотами (MONO) . . . . . . . . . . . . . . . . . . 20
Плавный переход между нотами
(PORTAMENTO) . . . . . . . . . . . . . . . . . . . . . . . . . . . . . . . . . . . . . 20
Изменение скорости скольжения тона
(Portamento Time). . . . . . . . . . . . . . . . . . . . . . . . . . . . . . . . 20
Управление высотой и громкостью
перемещениями руки (D BEAM) . . . . . . . . . . . . . . . . . . . . 21
Изменение высоты (PITCH) . . . . . . . . . . . . . . . . . . . . . . 21
Изменение громкости для управления
экспрессией (VOLUME) . . . . . . . . . . . . . . . . . . . . . . . . . . 21
Управление назначенным параметром
(EFFECTS/ASSIGN) . . . . . . . . . . . . . . . . . . . . . . . . . . . . . . . . 22
Автоматическое воспроизведение арпеджио
(ARPEGGIO) . . . . . . . . . . . . . . . . . . . . . . . . . . . . . . . . . . . . . . . . . 22
Воспроизведение арпеджио . . . . . . . . . . . . . . . . . . . . 22
Выбор варианта звучания арпеджио . . . . . . . . . . . . 23
Установка темпа (TAP TEMPO) . . . . . . . . . . . . . . . . . . . . . . 23
Рекордер фраз (PHRASE RECORDER) . . . . . . . . . . . . . . . . 24
Запись . . . . . . . . . . . . . . . . . . . . . . . . . . . . . . . . . . . . . . . . . . . 24
Пауза в записи . . . . . . . . . . . . . . . . . . . . . . . . . . . . . . . . . . . 24
Стирание записанных нот . . . . . . . . . . . . . . . . . . . . . . . 25
Выбор типа записываемых или
стираемых данных . . . . . . . . . . . . . . . . . . . . . . . . . . . . . . . 25
Сохранение записанной фразы . . . . . . . . . . . . . . . . . . 25
Выбор воспроизводимой фразы . . . . . . . . . . . . . . . . 26
Запуск/останов воспроизведения фразы . . . . . . . . 26
Использование педали . . . . . . . . . . . . . . . . . . . . . . . . . . . . 26
Удержание нот (HOLD) . . . . . . . . . . . . . . . . . . . . . . . . . . . 26
Управление экспрессией исполнения
(EXPRESSION) . . . . . . . . . . . . . . . . . . . . . . . . . . . . . . . . . . . . 27
Использование V-LINK . . . . . . . . . . . . . . . . . . . . . . . . . . . . . 27
Создание звуков . . . . . . . . . . . . . . . . . . . . . . . . 28
Процесс создания звука. . . . . . . . . . . . . . . . . . . . . . . . . . . . 28
Три элемента звука (OSC, FILTER, AMP) . . . . . . . . . . . 28
Огибающая звука (ENVELOPE) . . . . . . . . . . . . . . . . . . . . 28
Циклические изменения (LFO) . . . . . . . . . . . . . . . . . . . 29
Эффекты (EFFECTS) . . . . . . . . . . . . . . . . . . . . . . . . . . . . . . 29
Тембры (TONE) . . . . . . . . . . . . . . . . . . . . . . . . . . . . . . . . . . . 29
Выбор тембра . . . . . . . . . . . . . . . . . . . . . . . . . . . . . . . . . . . 29
Копирование тембра (TONE COPY) . . . . . . . . . . . . . . 30
Выбор формы волны и высоты (OSC) . . . . . . . . . . . . . . . 30
Управление частотными характеристиками
звука (FILTER) . . . . . . . . . . . . . . . . . . . . . . . . . . . . . . . . . . . . . . . 32
Управление атакой и затуханием звука (AMP) . . . . . . 35
Модуляция звука (LFO) . . . . . . . . . . . . . . . . . . . . . . . . . . . . . 36
Управление эффектами (EFFECTS) . . . . . . . . . . . . . . . . . . 38
Сохранение созданного звука (WRITE) . . . . . . . . . . . . . 39
Исполнение под фонограмму
с портативного аудиоплеера . . . . . . . . . . . . 40
Коммутация . . . . . . . . . . . . . . . . . . . . . . . . . . . . . . . . . . . . . . . . 40
Установка громкости . . . . . . . . . . . . . . . . . . . . . . . . . . . . . . . 40
Ослабление центральной составляющей
(CENTER CANCEL) . . . . . . . . . . . . . . . . . . . . . . . . . . . . . . . . . . . 41
Выбор режима работы функции
Center Cancel (TYPE) . . . . . . . . . . . . . . . . . . . . . . . . . . . . . 41
Мьютирование входа (MUTE) . . . . . . . . . . . . . . . . . . . . . . . 41
Краткое содержание страницы № 1
Краткое содержание страницы № 2
Main Features Able to produce a broad range of sounds with simple operation, the GAIA SH-01 is a compact and light-weight, yet full-fledged virtual analog synthesizer that’s a great choice for live performance or in the studio. Rich sound equivalent to three synthesizers A synthesizer consists of sections such as the OSC (p. 30), FILTER (p. 32), AMP (p. 35), various ENV units (p. 32, p. 34, p. 35), and an LFO (p. 36). The GAIA SH-01 uses a newly developed, dedicated sound generator that provi
Краткое содержание страницы № 3
USB memory for saving user data The USB MEMORY connector allows you to connect USB memory (sold separately) for storing user patches or phrases. This is also a good way to back up your important user data. Saved patches or phrases can be recalled directly from USB memory. It’s also easy to recall a desired patch or phrase from USB memory, and then re-save it to internal memory. USB COMPUTER connector for connecting your computer Since the GAIA SH-01 supports USB MIDI/ AUDIO, you can use DAW
Краткое содержание страницы № 4
About WARNING and CAUTION Notices About the Symbols The symbol alerts the user to important instructions or Used for instructions intended to alert the warnings. The specific meaning of the symbol is user to the risk of death or severe injury determined by the design contained within the triangle. In should the unit be used improperly. the case of the symbol at left, it is used for general cautions, warnings, or alerts to danger. Used for instructions intended to alert
Краткое содержание страницы № 5
WARNING CAUTION 015 106 • Do not force the unit’s power-supply cord to share an • Never climb on top of, nor place heavy objects on the outlet with an unreasonable number of other devices. unit. Be especially careful when using extension cords—the 107c total power used by all devices you have connected • Never handle the AC adaptor or its plugs with wet to the extension cord’s outlet must never exceed the hands when plugging into, or unplugging from, an power rating (wa
Краткое содержание страницы № 6
IMPORTANT NOTES Power Supply Maintenance 301 401a • Do not connect this unit to same electrical outlet that is being used • For everyday cleaning wipe the unit with a soft, dry cloth or one by an electrical appliance that is controlled by an inverter (such as a that has been slightly dampened with water. To remove stubborn refrigerator, washing machine, microwave oven, or air conditioner), dirt, use a cloth impregnated with a mild, non-abrasive detergent. or that contains a motor. Depending
Краткое содержание страницы № 7
Additional Precautions Before Using USB Memory 551 704 • Please be aware that the contents of memory can be irretrievably • Carefully insert the USB memory all the way in—until it is fi rmly in lost as a result of a malfunction, or the improper operation of place. the unit. To protect yourself against the risk of loosing important data, we recommend that you periodically save a backup copy of important data you have stored in the unit’s memory on a computer. 552 • Unfortunately, it may be i
Краткое содержание страницы № 8
Contents Recording Operations (PHRASE RECORDER) . . . . . . . . . . 24 Main Features . . . . . . . . . . . . . . . . . . . . . . . . . . . . 2 Recording . . . . . . . . . . . . . . . . . . . . . . . . . . . . . . . . . . . . . . . . 24 Names of Things and What They Do . . . . . . . 10 Rehearsing . . . . . . . . . . . . . . . . . . . . . . . . . . . . . . . . . . . . . . . 24 Top Panel . . . . . . . . . . . . . . . . . . . . . . . . . . . . . . . . . . . . . . . . . . . 10 Erasing Recorded Operat
Краткое содержание страницы № 9
Using the GAIA SH-01 with a Computer or Sound Module . . . . . . . . . . . . . . . . . . . . . . . . . . . 42 Recording the SH-01’s Sound or Data on a Computer (USB) . . . . . . . . . . . . . . . . . . . . . . . . . . . . . . . . . . . . . . . . . . . . . . . 42 Connecting the SH-01 to Your Computer . . . . . . . . . . 42 Using the SH-01 as a Controller or Sound Module (MIDI) . . . . . . . . . . . . . . . . . . . . . . . . . . . . . . . . . . . . . . . . . . . . . . . 43 MIDI Connectors .
Краткое содержание страницы № 10
Names of Things and What They Do Top Panel 1 4 5 6 7 8 9 2 3 10 11 12 13 14 15 1 8 D BEA M (p. 21) EFFECTS (p. 38) Here you can turn the D BEAM function on/off . By moving your hand The GAIA SH-01 has fi ve built-in eff ects: distortion, fl anger, delay, above the D BEAM controller, you can apply a variety of eff ects. reverb, and low boost. You can make settings independently for each eff ect. 2 9 EXT IN (External Input, p. 40) [TONE COPY] Button (p. 30) Here you can specify how the d
Краткое содержание страницы № 11
10 12 [V-LINK] Button (p. 27) [BANK] Button (p. 18) This button turns V-LINK on/off . Use this button in combination with the NUMBER [A]–[H] buttons to switch banks. [TAP TEMPO] Button (p. 23) NUMBER [1]–[8] Buttons (p. 18) You can use this button to set the tempo of the arpeggio or phrase recorder. Use these buttons to select patches or phrases. [KEY HOLD] Button (p. 22) 13 PHRASE RECORDER (p. 24) This button holds the notes even after you release your fi ngers from the keyboard. [PLA
Краткое содержание страницы № 12
Rear Panel 16 17 18 19 20 21 988 16 19 Security Slot ( ) PED AL http://www.kensington.com/ PEDAL Jack (p. 26) Connect an expression pedal (EV-5; sold separately) or pedal switch 17 (DP series, FS-5U; sold separately) here. [POWER] Switch (p. 15) 20 MIDI Connectors (OUT/IN) (p. 43) This switch turns the power on/off . Connect these when you want to transmit or receive MIDI messages DC IN (AC Adaptor) Connector (p. 13) to or from another MIDI device. Connect the included AC adaptor her
Краткое содержание страницы № 13
Getting Ready Connecting the AC Adaptor Installing B atteries Connect the included AC adaptor to the DC IN connector The GAIA SH-01 can operate on eight commercially on the rear panel of the GAIA SH-01. available AA nickel-metal hydride batteries. 1. Press in the tabs of the battery compartment cover on the bottom panel of the GAIA SH-01, and remove the cover. Cord hook NOTE Indicator • Take care that foreign objects (fl ammable items, coins, Power cord pins, etc.) or liquids (water, jui
Краткое содержание страницы № 14
Removing the Batteries POWER SAVE MODE If you want to remove the batteries, turn off power to the You can set the GAIA SH-01 so it will automatically enter GAIA SH-01 fi rst; then open the battery compartment power-save mode when a certain length of time has cover, and take out the batteries. passed without any operation being performed. To return from power-save mode to normal operation, perform an operation such as turning a knob or playing W hen to Replace the Batteries the keyboard.
Краткое содержание страницы № 15
3. Press the [POWER] switch on the rear panel to turn Using headphones on the power. Connect commercially available headphones to the PHONES jack on the rear panel. * When turning on the power, do not touch the pitch bend/modulation lever located at the left of the * Sound will be output from the OUTPUT jacks even if keyboard. If you turn on the power while touching this headphones are connected. lever, the system may not operate correctly. 4. Switch on power to the connected equipment,
Краткое содержание страницы № 16
How the GAIA SH-01 is Organized Basic Structure Performance Functions Broadly speaking, the GAIA SH-01 consists of a controller The GAIA SH-01 contains a variety of eff ects, and each can section, a sound generator section, and eff ects. be adjusted independently. Controller section Arpeggiator (p. 22) The controller section is what you play. This allows you to produce arpeggios simply by pressing a chord on the keyboard. For example, the performer’s actions, such as “playing the keyboard” ar
Краткое содержание страницы № 17
Temporary memory About Memory Memory provides storage locations where patches (p. T emporary area 18) and other settings are stored. There are three types of memory: “temporary memory,” “rewritable memory,” and Data for the patch you select via the front panel buttons is “non-rewritable memory.” called up to this area. When you play the keyboard or play back the phrase recorder, sounds are produced according to the settings Non-rewritable memory that are in the temporary area. When you
Краткое содержание страницы № 18
Performing About Patches Adjusting the Volume (V OLUME) The GAIA SH-01 lets you store the sounds that you create. Here’s how to adjust the overall volume of the GAIA SH-01’s sound, which is output from the OUTPUT jacks on A sound you create is called a “patch”; you can use the the rear panel and the PHONES jack. buttons to recall a patch and then play it. Turning the knob toward the right will increase the Patches are organized into a “preset group” and a “user volume, and turning it towa
Краткое содержание страницы № 19
BANK A–H 2. While holding down the OCTAVE [DOWN/-] Preset group/User group/ button, press a key (C2–C4). USB memory group This specifi es the amount of pitch change that will occur NUMBER 1–8 when you move the lever to the left. A-1 A-2 A-3 A-4 A-5 A-6 A-7 A-8 B-1 B-2 B-3 B-4 B-5 B-6 B-7 B-8 C-1 C-2 C-3 C-4 C-5 C-6 C-7 C-8 D-1 D-2 D-3 D-4 D-5 D-6 D-7 D-8 E-1 E-2 E-3 E-4 E-5 E-6 E-7 E-8 F-1 F-2 F-3 F-4 F-5 F-6 F-7 F-8 G-1 G-2 G-3 G-4 G-5 G-6 G-7 G-8 H-1 H-2 H-3 H-4 H-5 H-6 H-7 H-8 Adding Dyna
Краткое содержание страницы № 20
Shifting the Keyboard’s Pitch Playing Single Notes (MONO ) This function is eff ective when you need to simulate the Range (OC TAVE UP/DOWN) performance of a solo instrument. You can shift the keyboard’s pitch range in steps of one octave, for a maximum of three octaves upward or downward. 1. Press the [MONO] button so it’s lit; this puts the synth in mono mode. 1. To raise the range, press the OCTAVE [UP/+] Even if you hold down a chord on the keyboard, only a button, and to lower the